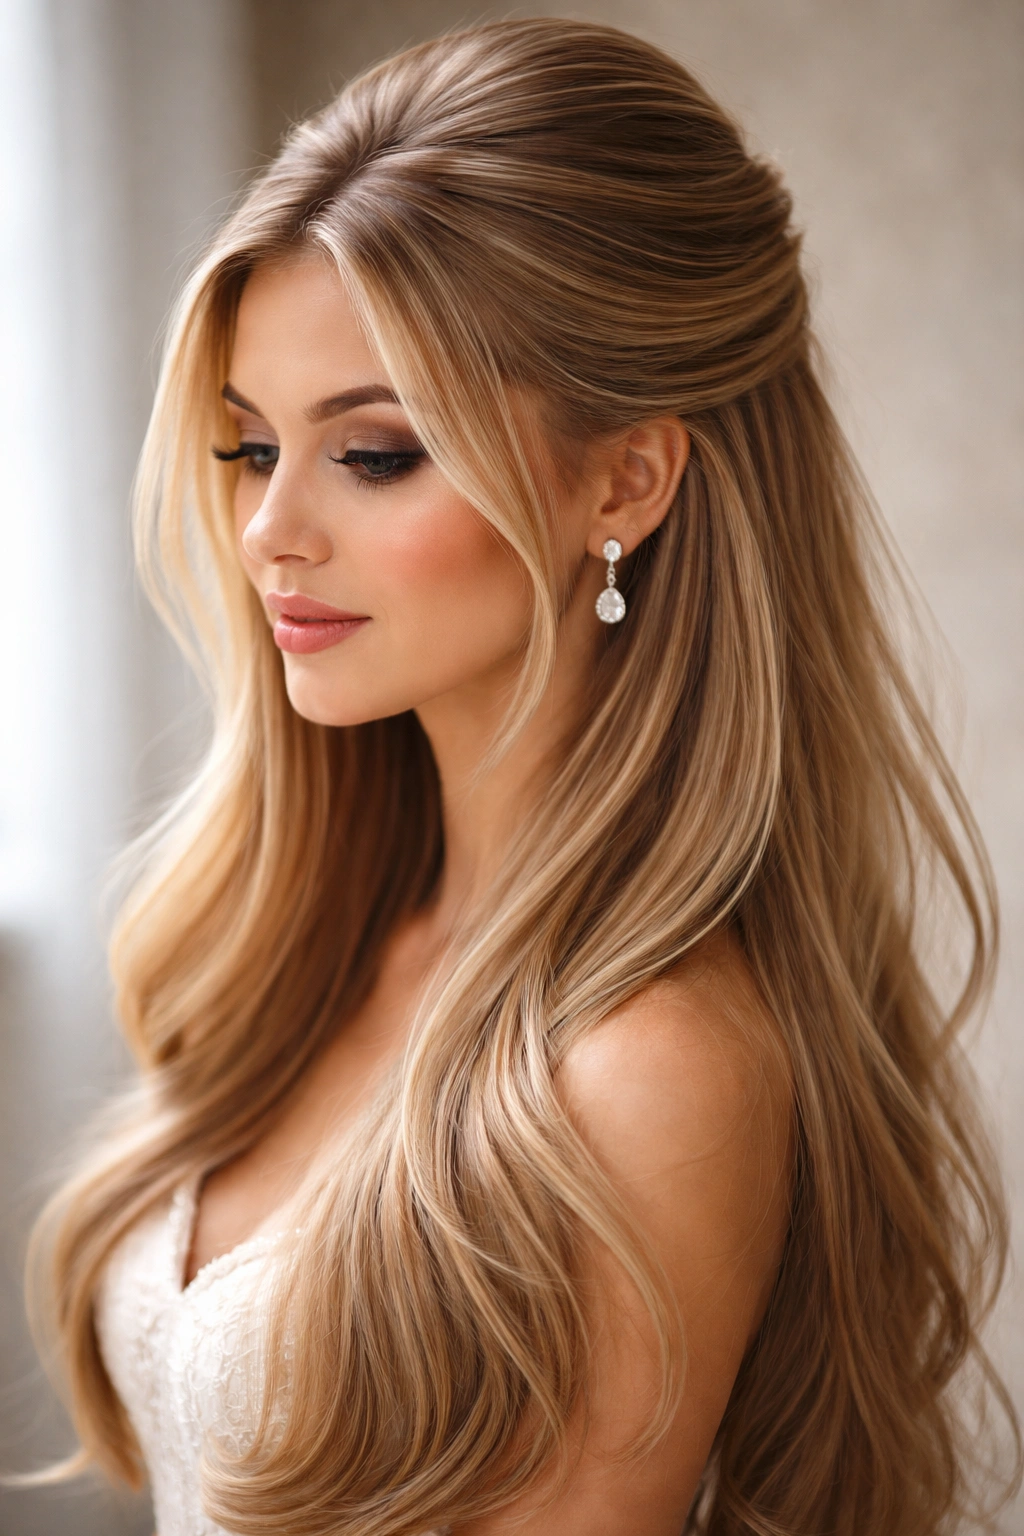
Straight hair is a blessing, right up until you try to pin it back and watch it slide out five minutes later. There is an unmistakable elegance to a smooth, sleek mane, but when you are looking for that perfect wedding hairstyle, the inherent slip of straight strands can feel like a disadvantage. You want a look that lasts through the ceremony, the photos, and the inevitable dance floor humidity without turning into a tangled, falling mess. Half-up, half-down styles are the natural compromise for this dilemma. They offer the security of an updo while keeping the length and softness of a full blowout.
Finding the right style is less about fighting your hair’s natural texture and more about working with it. Straight hair is exceptionally good at showing off shine, clean lines, and intricate detailing. When you tuck, braid, or twist it, the structure remains visible and defined, which is exactly why some of the most sophisticated wedding looks rely on straight, healthy hair. The goal is to build a foundation that gives your stylist—or you—something to grip onto. Without that preparation, even the best hairspray will eventually surrender to the weight of your hair.
Your wedding day is not the moment to experiment with a completely new texture or a style that requires a dozen invisible hair nets. Instead, look for styles that celebrate the sleekness you already have while introducing just enough volume or texture to keep it interesting. Whether you are aiming for a bohemian vibe with loose, face-framing tendrils or a high-fashion, architectural look, the following styles are designed to stay put, look intentional, and complement the natural behavior of straight hair. Let’s look at how to secure these styles and exactly which options work best for your specific hair length and veil needs.
The Secret to Long-Lasting Hold on Straight Hair
The biggest mistake people make with straight hair is assuming it is “clean” enough for an updo right after washing. Freshly washed hair is often too silky and soft, making it difficult for pins and elastics to gain purchase. If you are doing your own hair, wash it the night before. This allows the natural oils to distribute slightly, giving the strands a bit more grip. If your hair is notoriously fine or slippery, use a texturizing powder or a dry shampoo at the roots and through the mid-lengths before you even touch a hair tie.
You also need to think about the physical structure of the style. Straight hair doesn’t have the natural “cushion” that curly hair has, which helps hide bobby pins. For every half-up look you choose, rely on a base that creates friction. This might mean teasing the crown gently or adding a tiny braid that anchors the rest of the style. When you pin, always use a “locking” technique: slide the bobby pin in against the direction of the hair, then flip it over and push it in, effectively catching more hair. This simple adjustment ensures your half-up section doesn’t slowly sag downward over the course of the afternoon.
Essential Tools for Your Wedding Day Prep
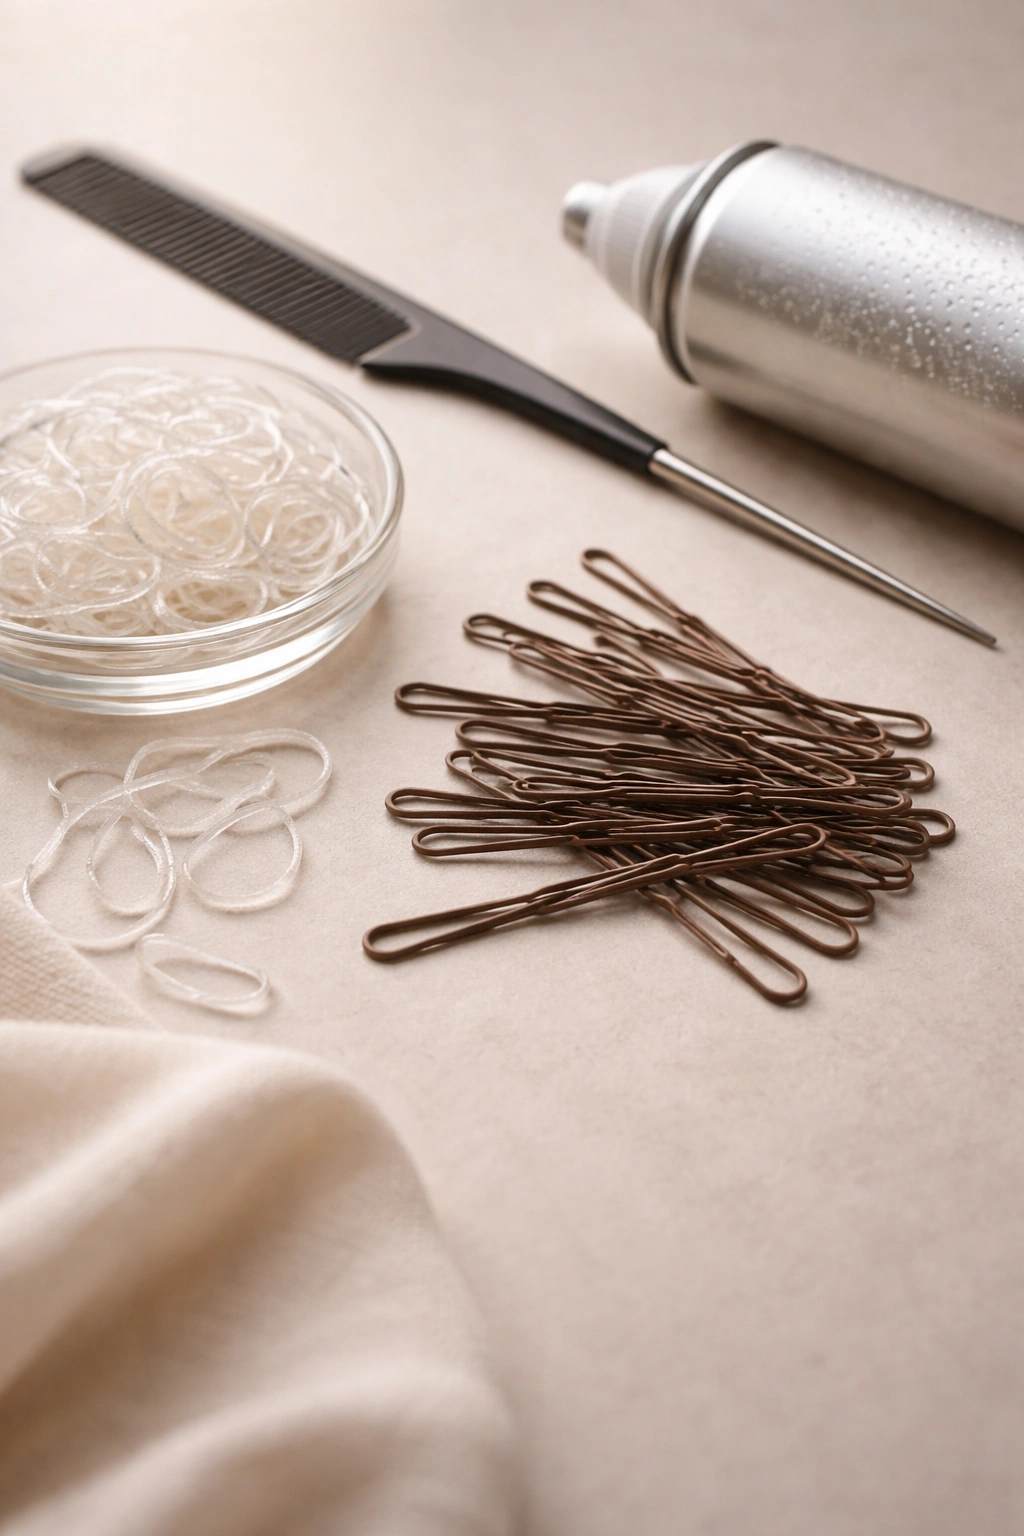
Forget the standard plastic hair ties you grab from the grocery store. For a wedding-day half-up style, you need professional-grade tools that won’t snap or cause a dent in your hair. Clear elastic bands are essential for hidden support, but always double them up for strength. If you are working with thick, straight hair, look for “no-snag” elastics that offer a bit more stretch without losing their shape.
Bobby pins should match your hair color as closely as possible, but don’t buy the generic shiny ones from the pharmacy. Look for matte-finish pins; they grip significantly better and are less likely to slide out of straight hair. A fine-tooth tail comb is non-negotiable for creating sharp, clean parts or for teasing roots with precision. Finally, have a high-quality flexible-hold hairspray on hand. You want something that holds the style but doesn’t leave your hair feeling like a helmet. Spray the product onto your brush or fingers first, then apply it to the hair—this creates a more even distribution and avoids the dreaded “clumpy” spray marks.
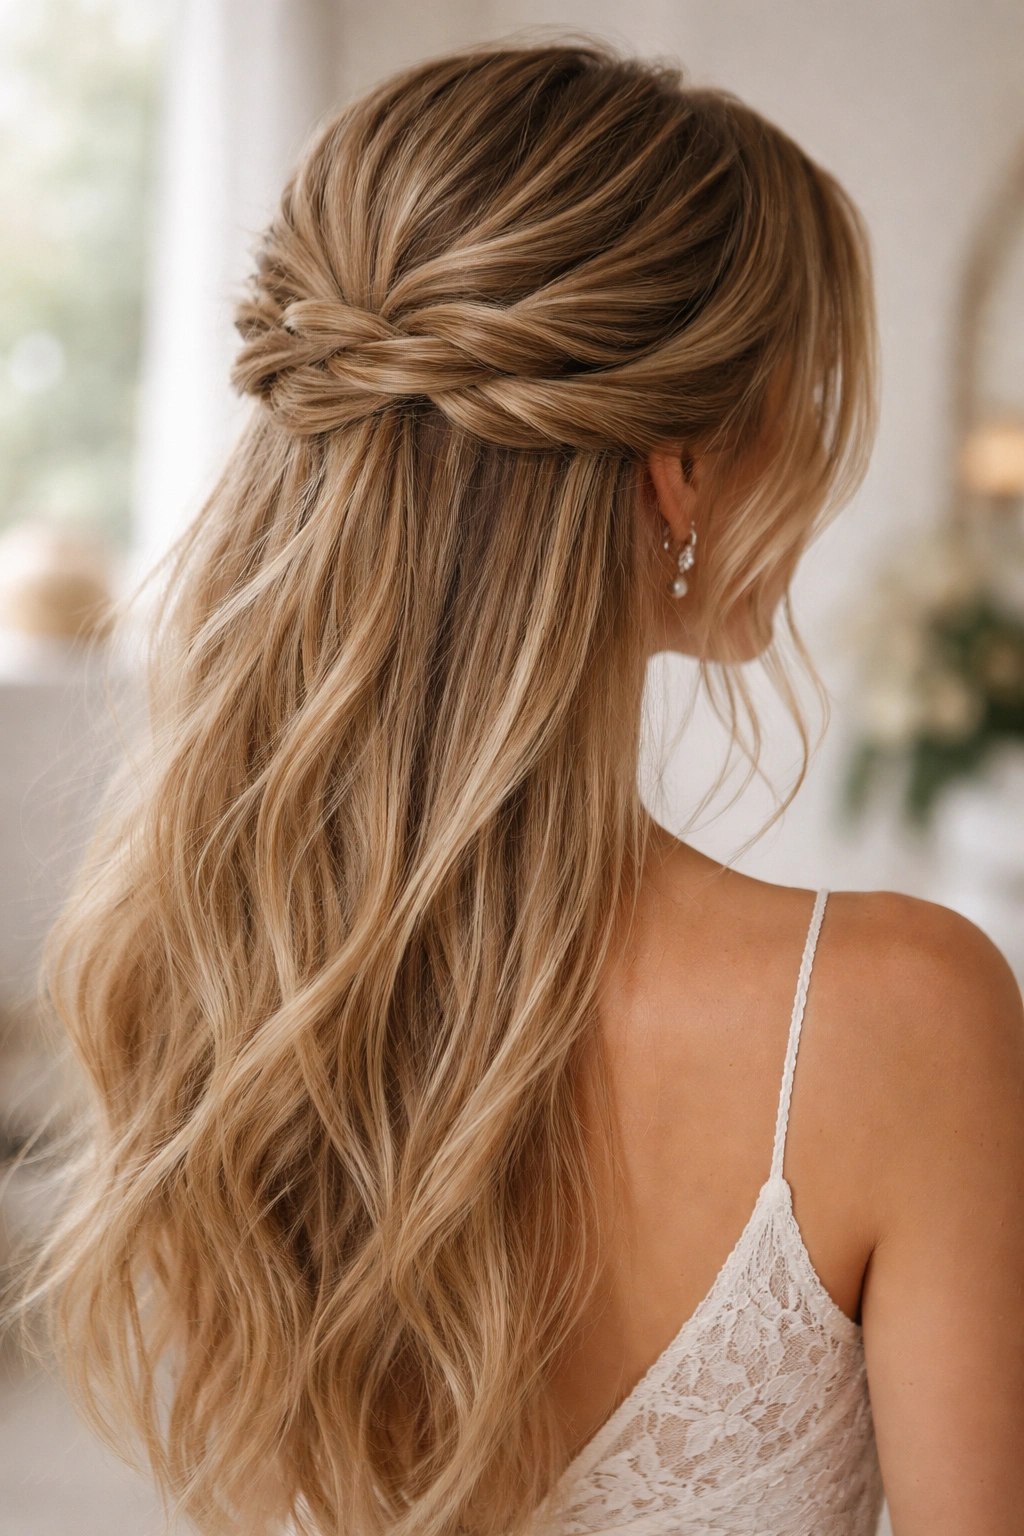
1. Braided Crown
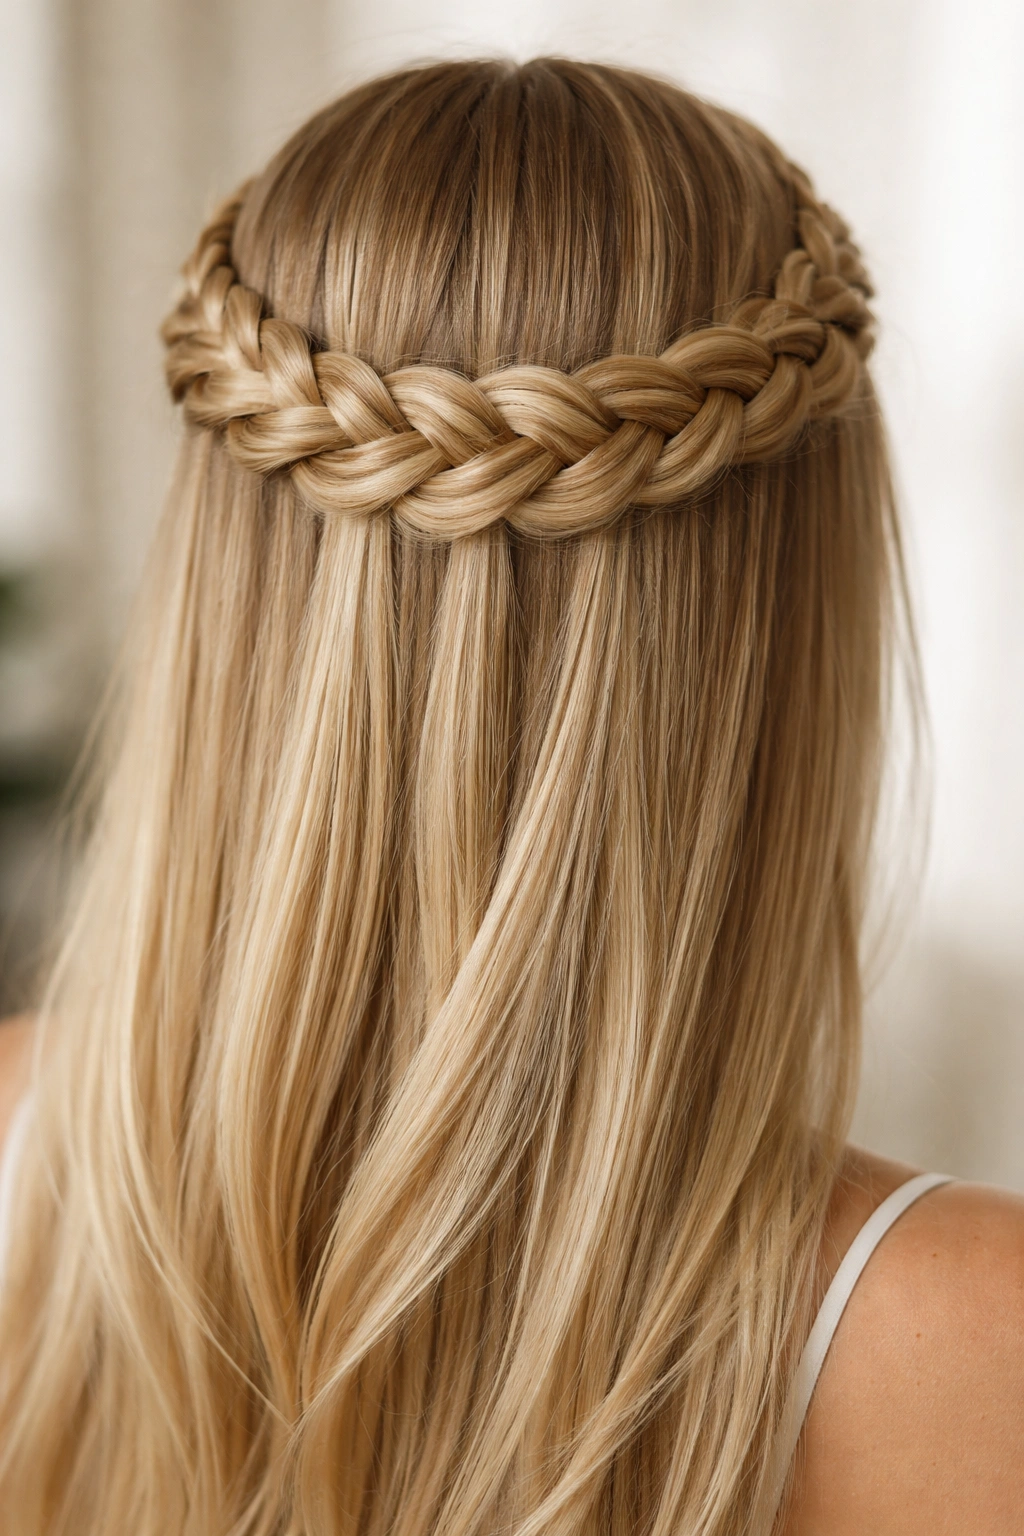
This classic look creates a frame for your face that feels intentional and romantic. The braid acts as an anchor for the rest of your hair, preventing the half-up section from slipping throughout the day. It works best if you create a Dutch braid rather than a traditional French braid; the Dutch braid sits “on top” of the hair, making it pop against a sleek, straight background.
Why It Works for Straight Hair
Straight hair shows the pattern of a braid clearly, meaning you don’t need a messy texture to make the style look intricate. You can pull at the edges of the braid—often called “pancaking”—to give it more width and a slightly softer, fuller appearance without needing a curling iron.
Styling Tip
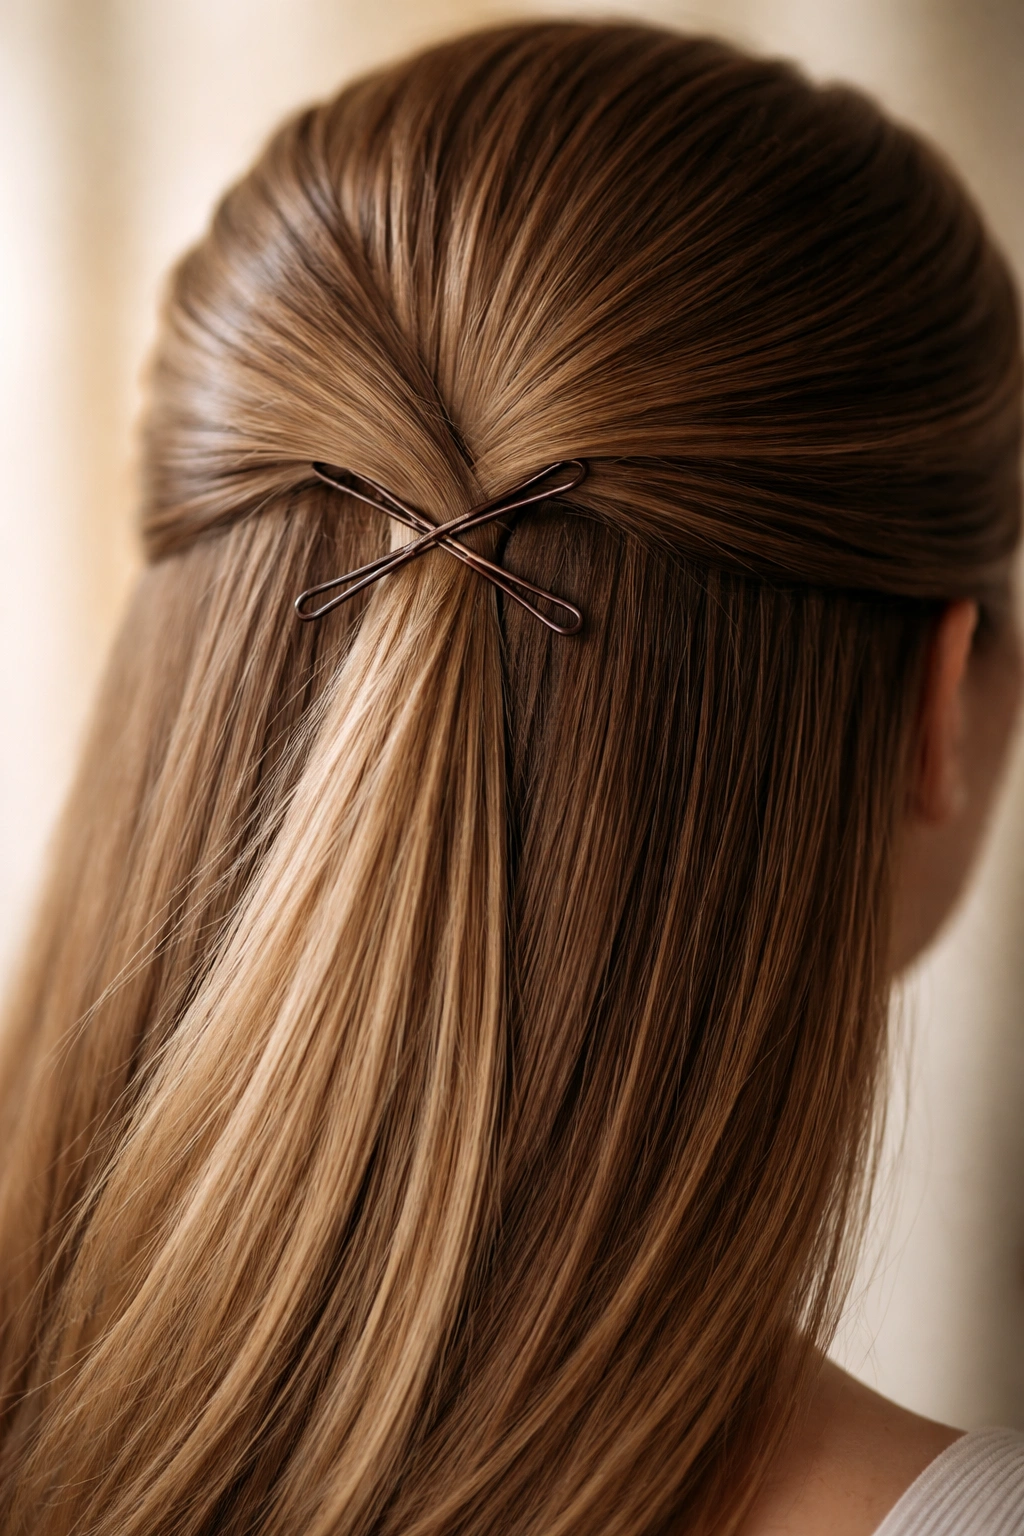
Secure the braid with a small clear elastic, then tuck the end underneath a section of the loose hair and pin it with two bobby pins crossed in an “X” shape. This hides the tail completely, leaving only the beautiful braided crown visible.
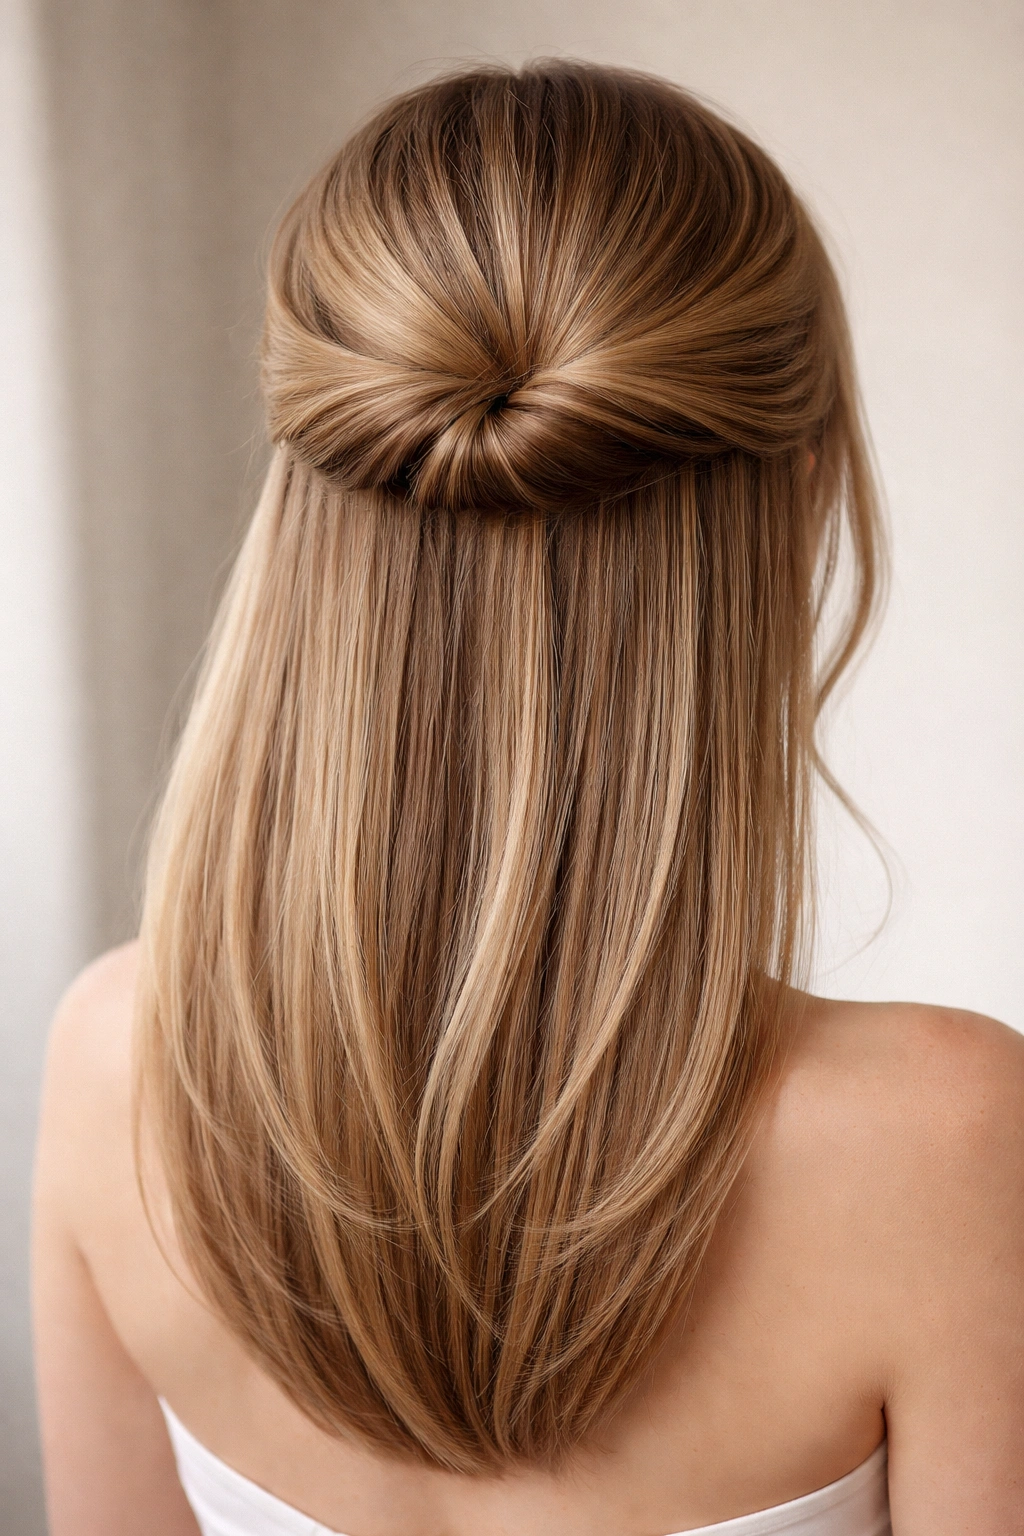
2. Sleek Twisted Knot
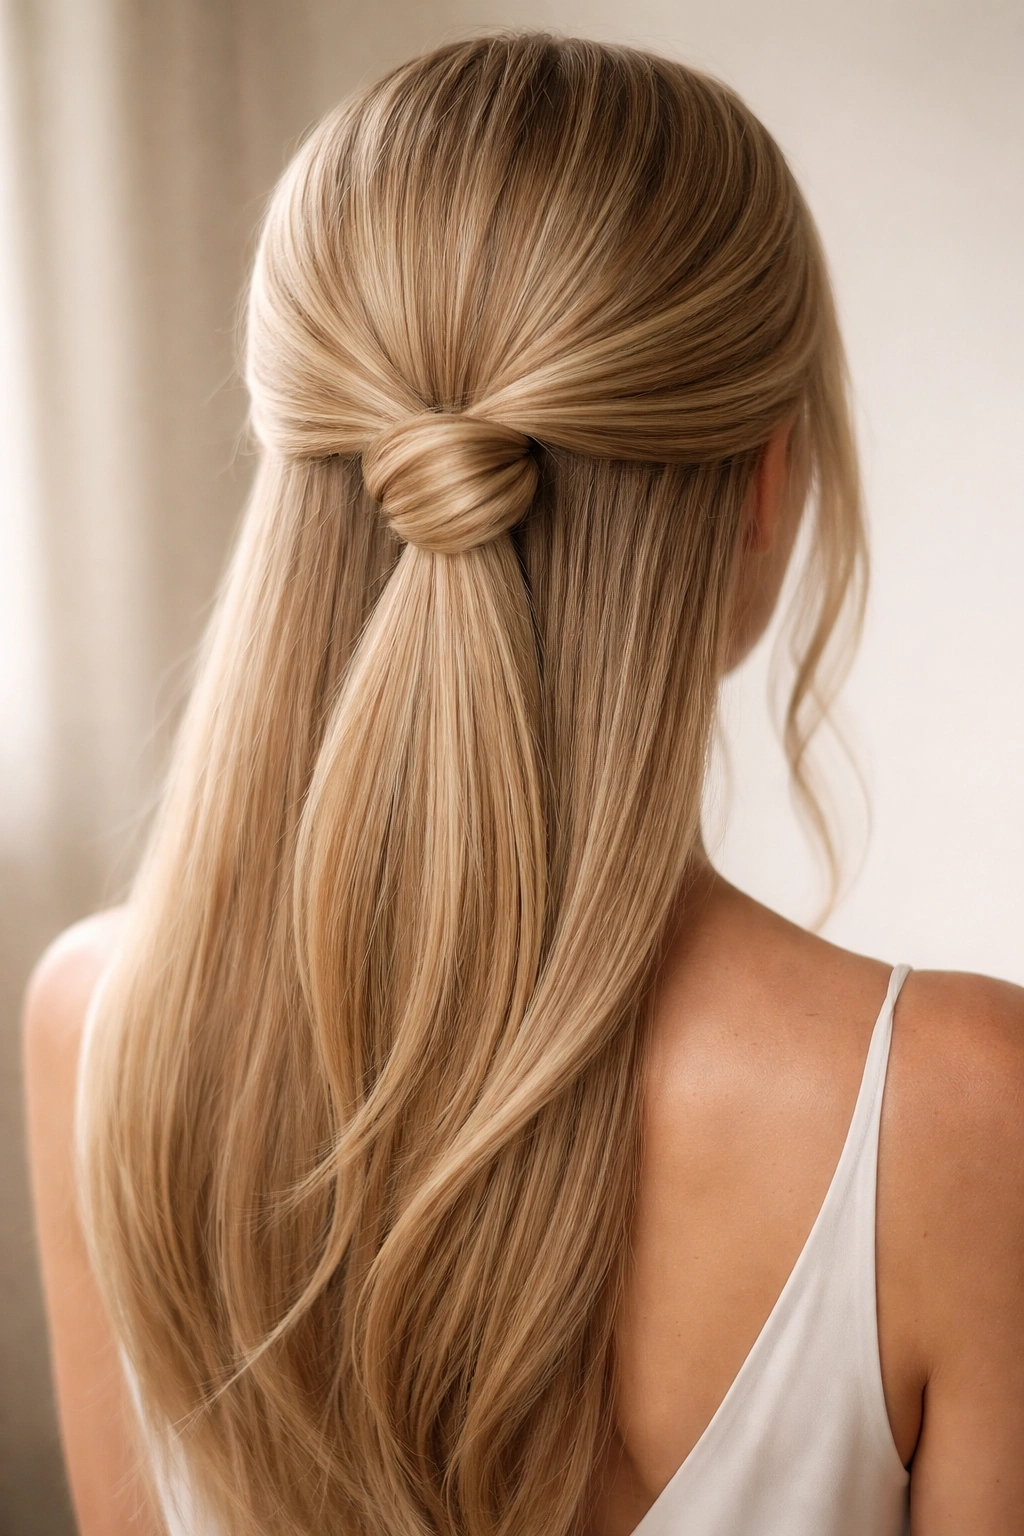
If you want something modern and refined, a twisted knot is the answer. Instead of a messy bun, think of this as a minimalist statement. You gather the two sides of your hair and twist them toward the center, securing them into a tight, circular knot. It mimics the look of a chignon but leaves the bottom half of your hair flowing free.
The Construction
Start by pulling back two sections from your temples. Twist each section tightly before bringing them to the center. Instead of just pinning them, tie the two twisted sections together in a loose overhand knot, then tuck the ends under and pin them securely.
How to Style It
Keep the hair above the knot smooth and tight, but don’t be afraid to let a few wisps fall naturally around your ears. This contrast between the structured knot and the soft, loose hair feels very intentional and high-fashion.
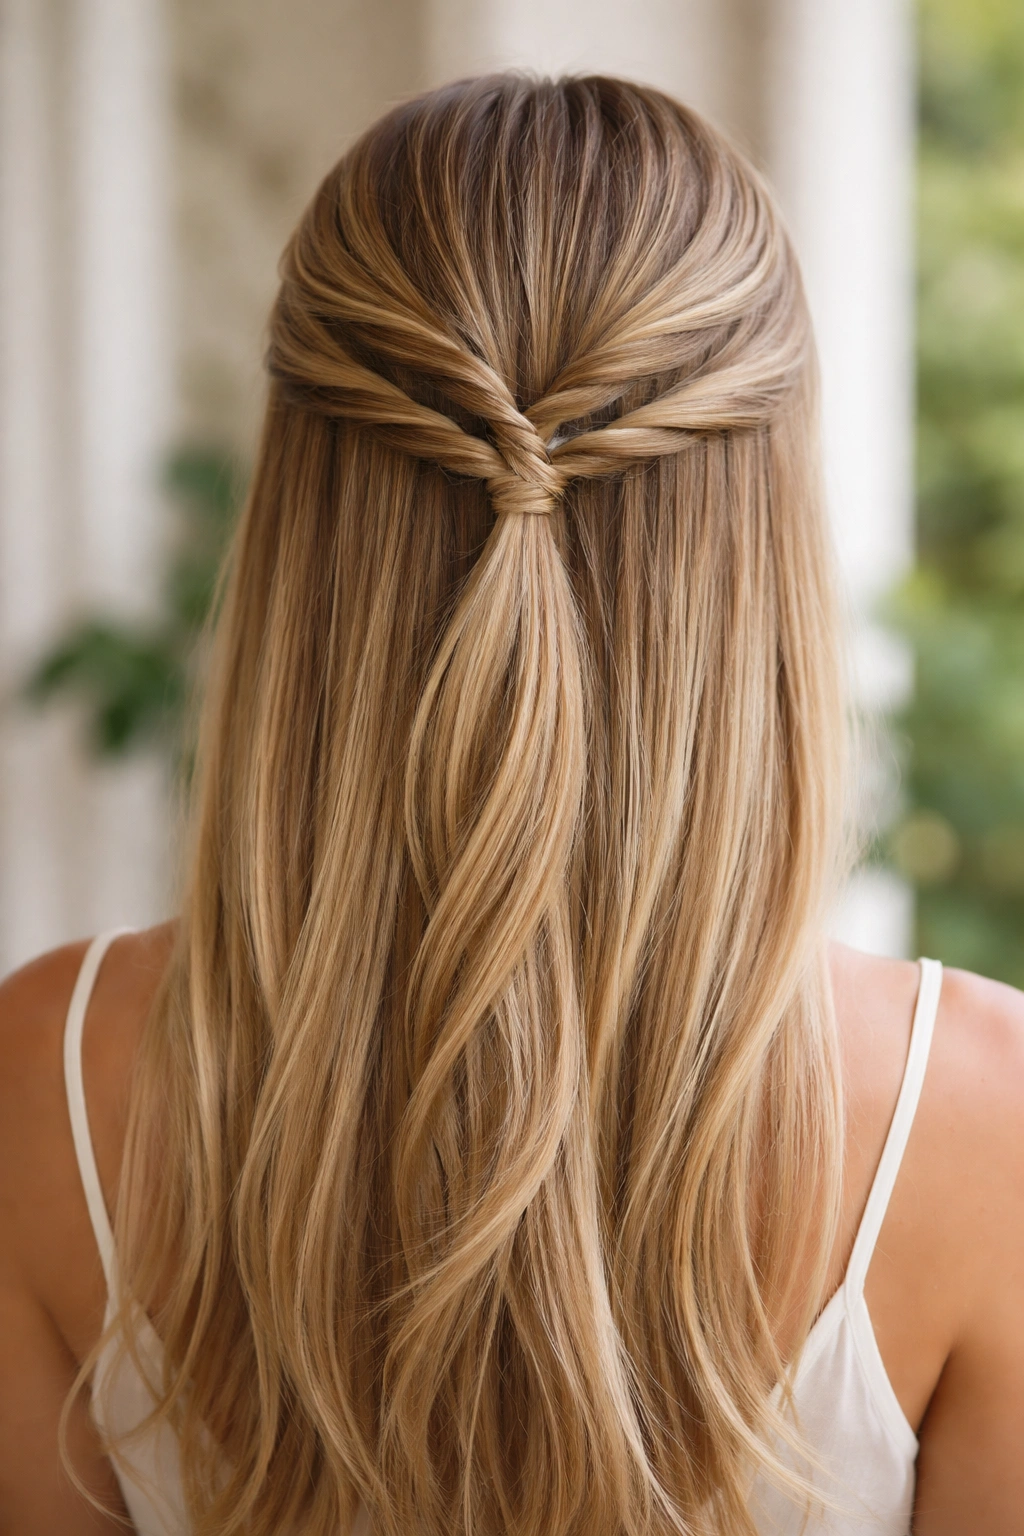
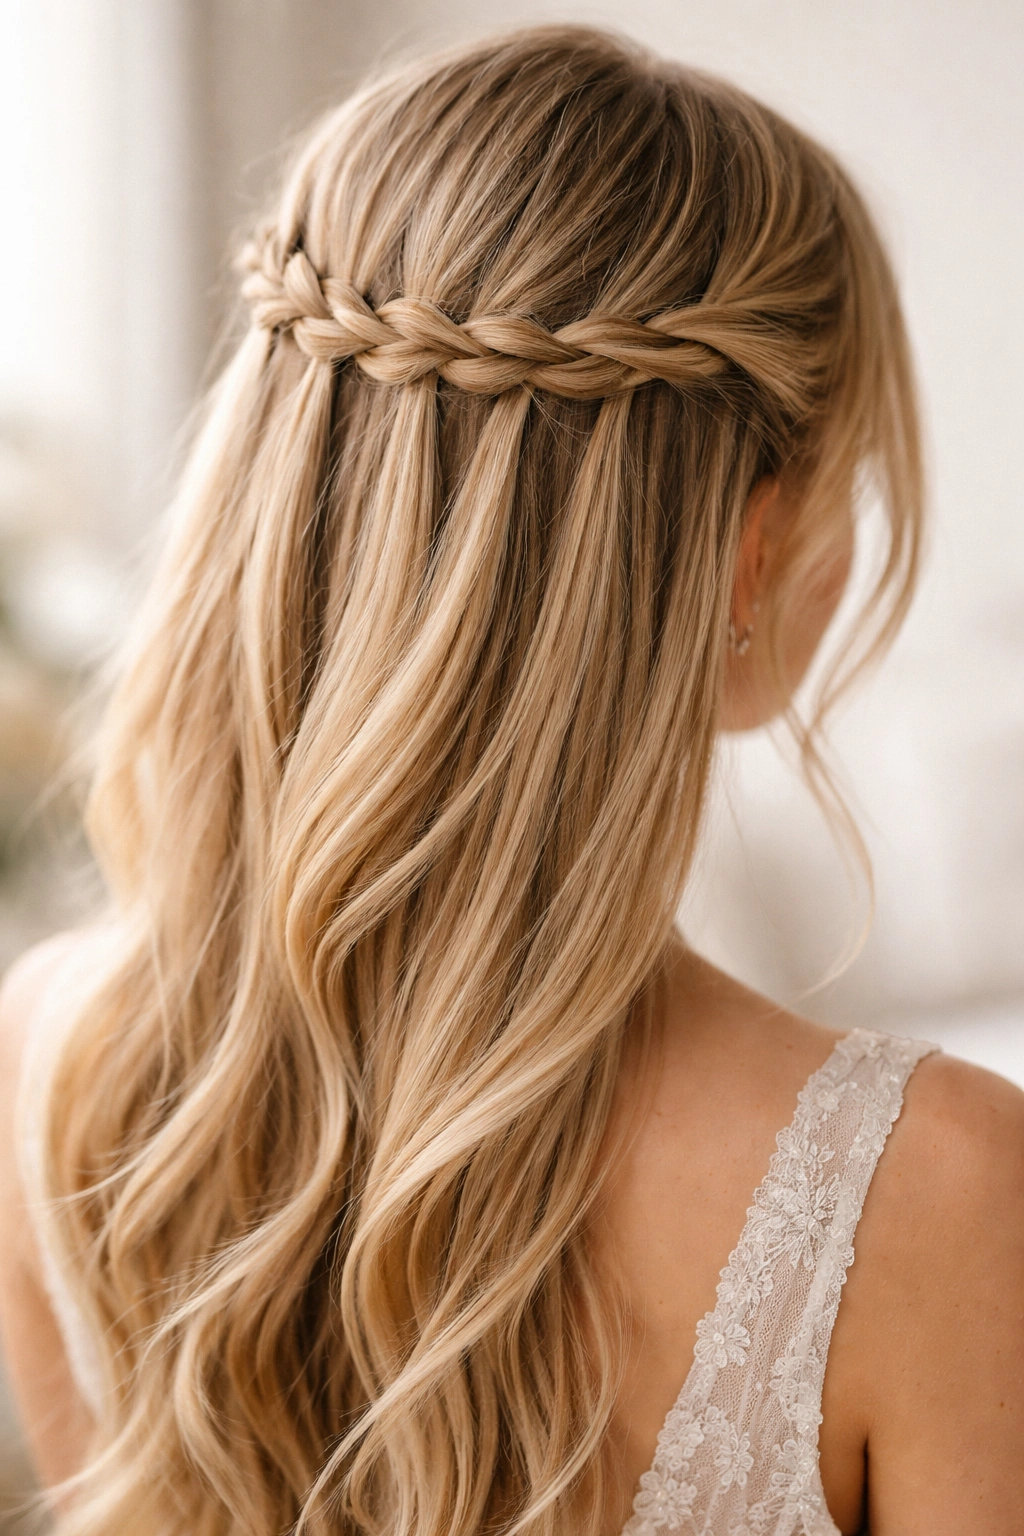
3. Romantic Waterfall Braid
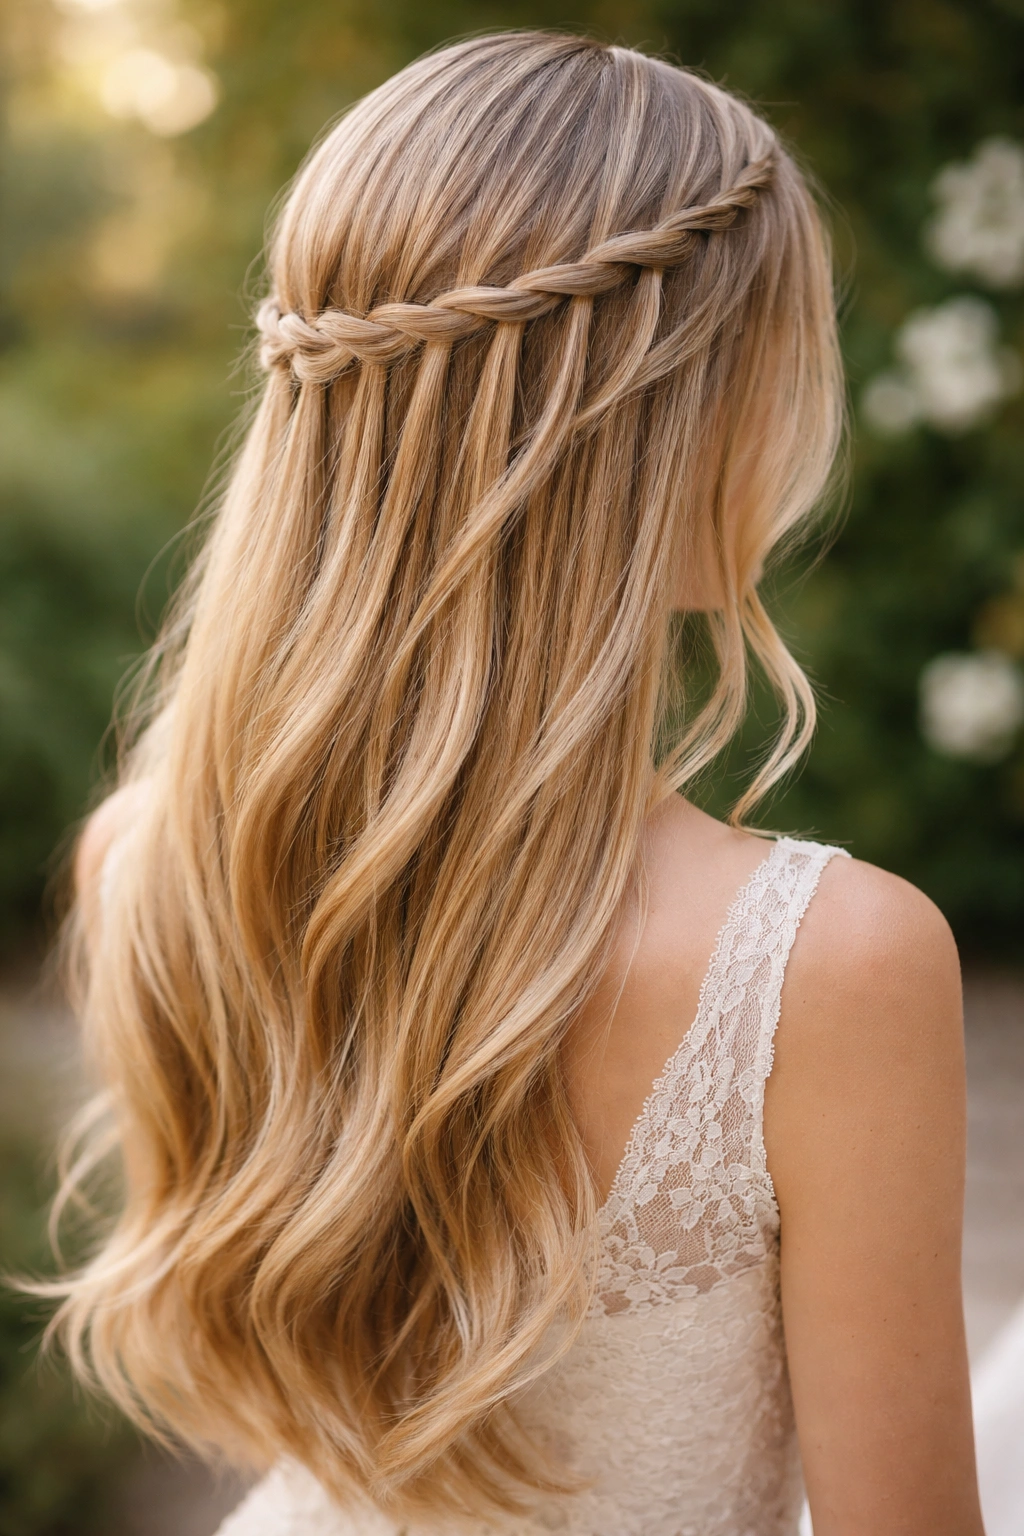
The waterfall braid is arguably the best way to incorporate a braid into straight hair without taking away too much of the length. It leaves most of your hair down while creating a cascading effect across the back of the head. It looks ethereal and soft, making it perfect for an outdoor or garden wedding.
Execution Technique
You pick up a small section of hair at the temple and begin a French braid. With each section you add from the top, you drop the bottom piece of the braid and pick up a new piece from the loose hair below to continue the pattern. This creates that “waterfall” look where individual strands flow downward.
Pro Adjustment
Because straight hair tends to be slippery, the “dropped” strands can look a bit too uniform. Take a moment to gently tug on the bottom of those dropped pieces to ensure they look soft rather than stiffly straight.
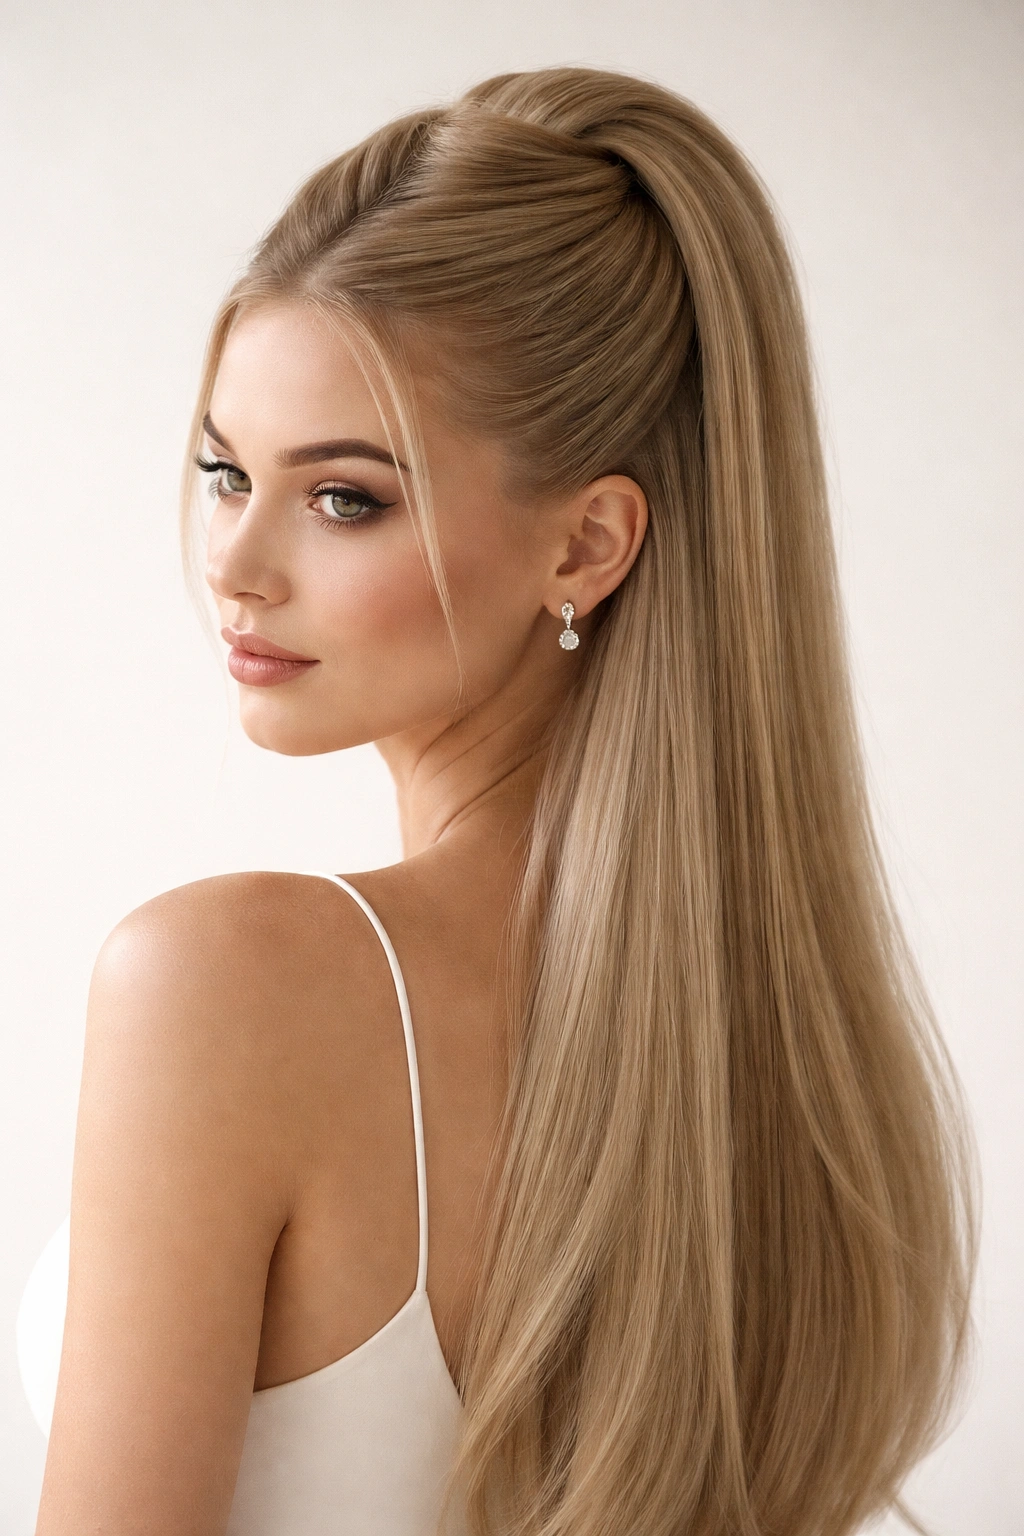
4. High Ponytail with Volume
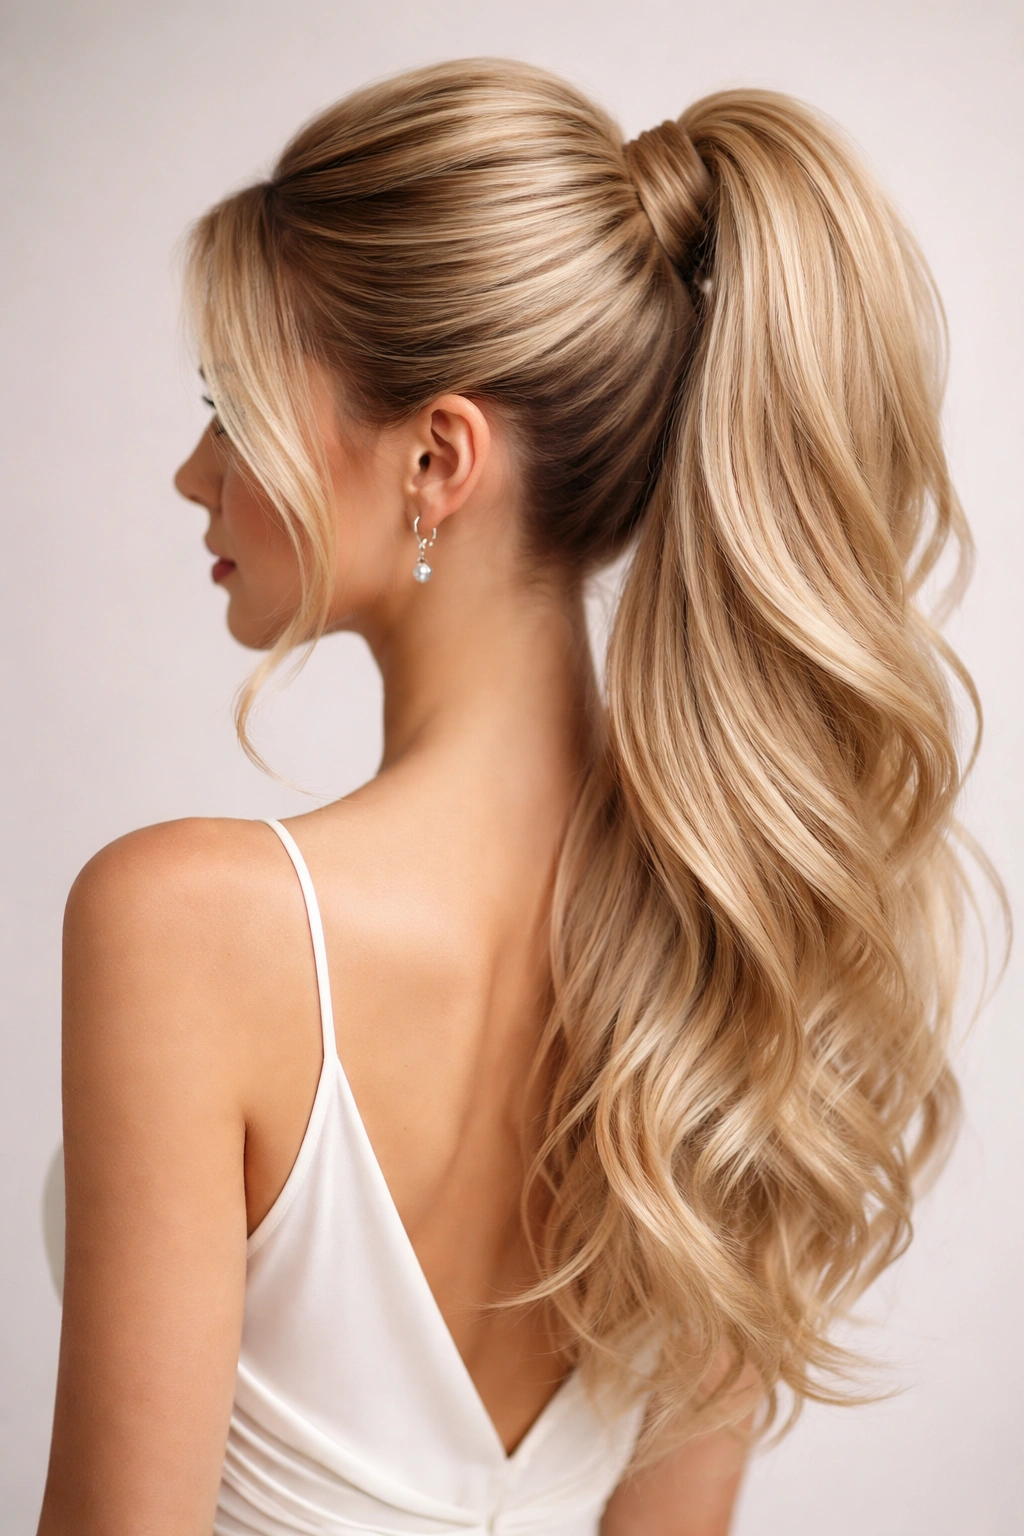
A half-up high ponytail is a bold choice, often associated with a chic, editorial bridal look. It pulls the hair back tight, emphasizing your cheekbones, while the length in the back provides that bridal “wow” factor. It is a very structured, clean look.
The Volume Trick
Straight hair can sometimes look flat when pulled back. Before you secure the ponytail, use a teasing brush at the crown of your head to create a small “bump” of volume. Spray the underside of this teased section with a medium-hold hairspray before smoothing the top layer over it.
The Final Touch
Wrap a small piece of hair around your elastic band to hide it. This tiny detail transforms a casual ponytail into a sophisticated bridal hairstyle that looks intentional and expensive.
5. Classic Bow Accent
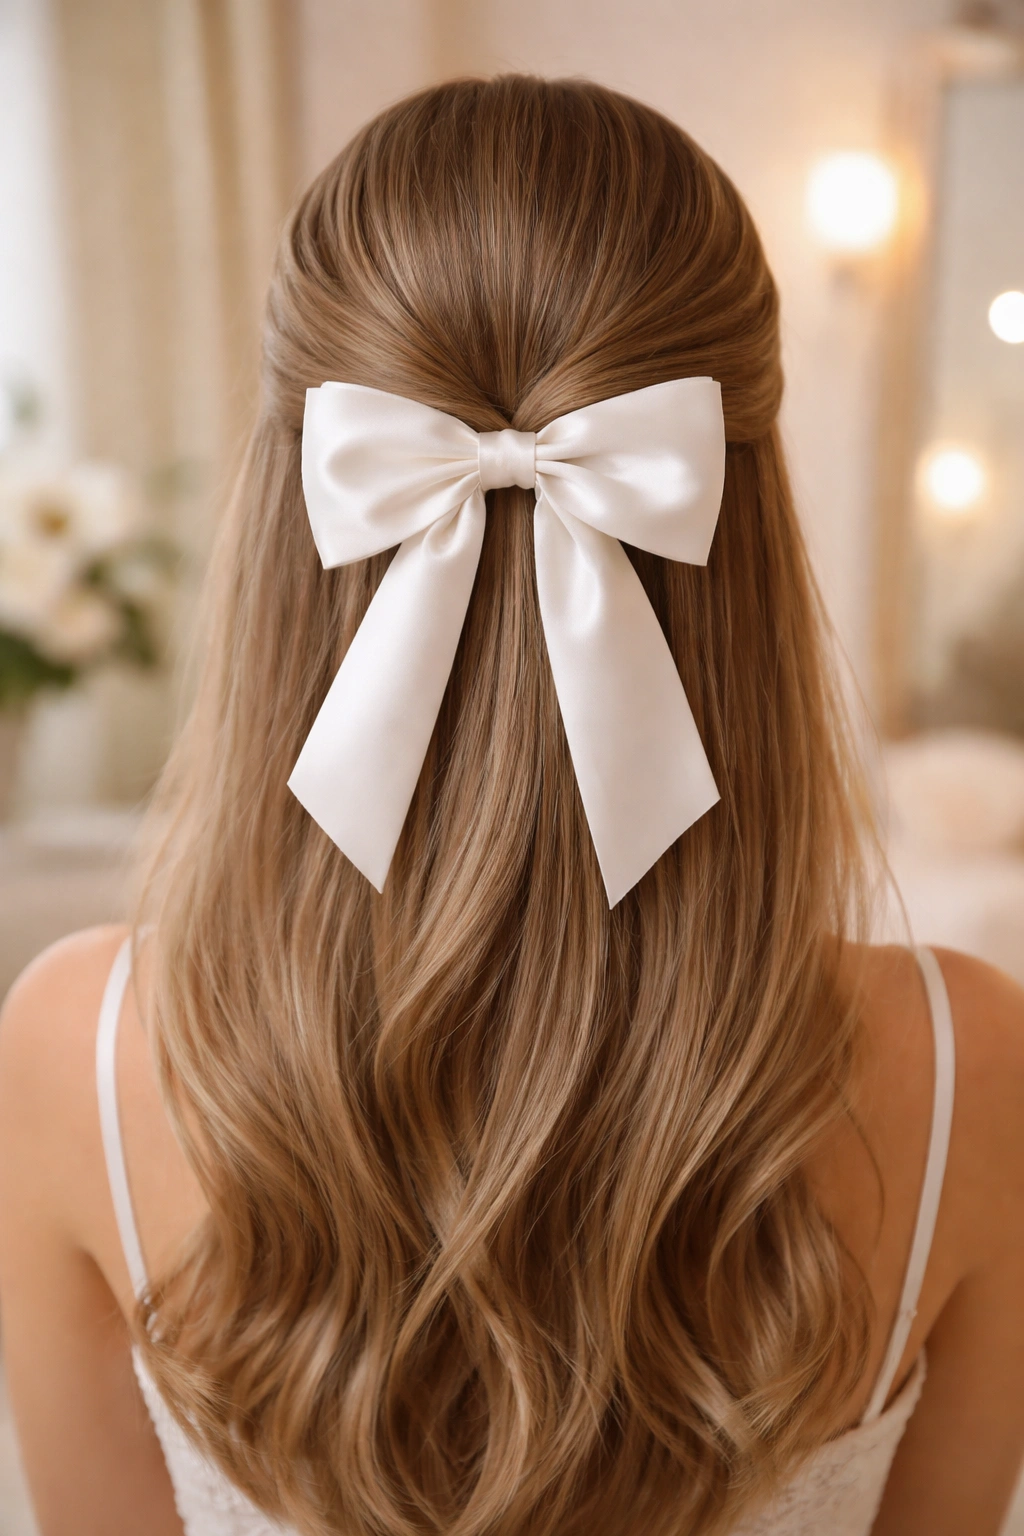
Sometimes you don’t need an intricate braid or a complicated twist; you just need the right accessory. A bow, whether it is silk, velvet, or lace, adds an instant touch of classic femininity. For a wedding, a crisp white or champagne-colored ribbon tied over a simple half-up twist looks timeless.
Choosing Your Material
Velvet bows are excellent for cooler weather weddings or late-autumn dates, as they have a bit of weight to them. Silk or organza bows are lighter and work beautifully for spring or summer ceremonies.
Application Strategy
Do not just tie the bow around a bundle of hair; that will slide out. First, secure your half-up section with an elastic. Then, pin the bow onto the elastic using a long hair pin or a specifically designed bow clip. This ensures the bow stays perfectly centered all night.
6. Bohemian Messy Twist
Even with straight hair, you can achieve a “boho” aesthetic by focusing on asymmetry. Instead of pulling the hair straight back, pull it back in uneven sections and twist them loosely. This style is meant to look a little undone, which takes the pressure off achieving a perfect, symmetrical finish.
Why It Works
The contrast between the sharp, healthy ends of your straight hair and the soft, slightly disheveled twists on top is visually striking. It feels relaxed, approachable, and very modern.
How to Get the Look
Use a sea salt spray or a light texturizing mist on the top half of your hair before you start twisting. This creates the “grit” needed to keep the loose, messy twists in place without them unraveling within the hour.
7. Hollywood Glam Wave
Usually, “Hollywood glam” implies tight, barrel-curled waves. However, you can achieve a variation of this look on straight hair by focusing on a deep side part and a single, dramatic tuck. Pull one side back tightly behind your ear and pin it with a sparkling brooch or a cluster of crystal pins.
Creating the Shape
Let the other side of your hair fall in a smooth, face-framing sweep. This style relies on high shine, so use a lightweight smoothing oil on the lengths of your hair before styling.
Why It’s Great
It is incredibly simple to execute but looks polished and expensive. It keeps hair away from one side of your face, which is perfect if you have statement earrings you want to show off.
8. Jeweled Barrette Pin-back
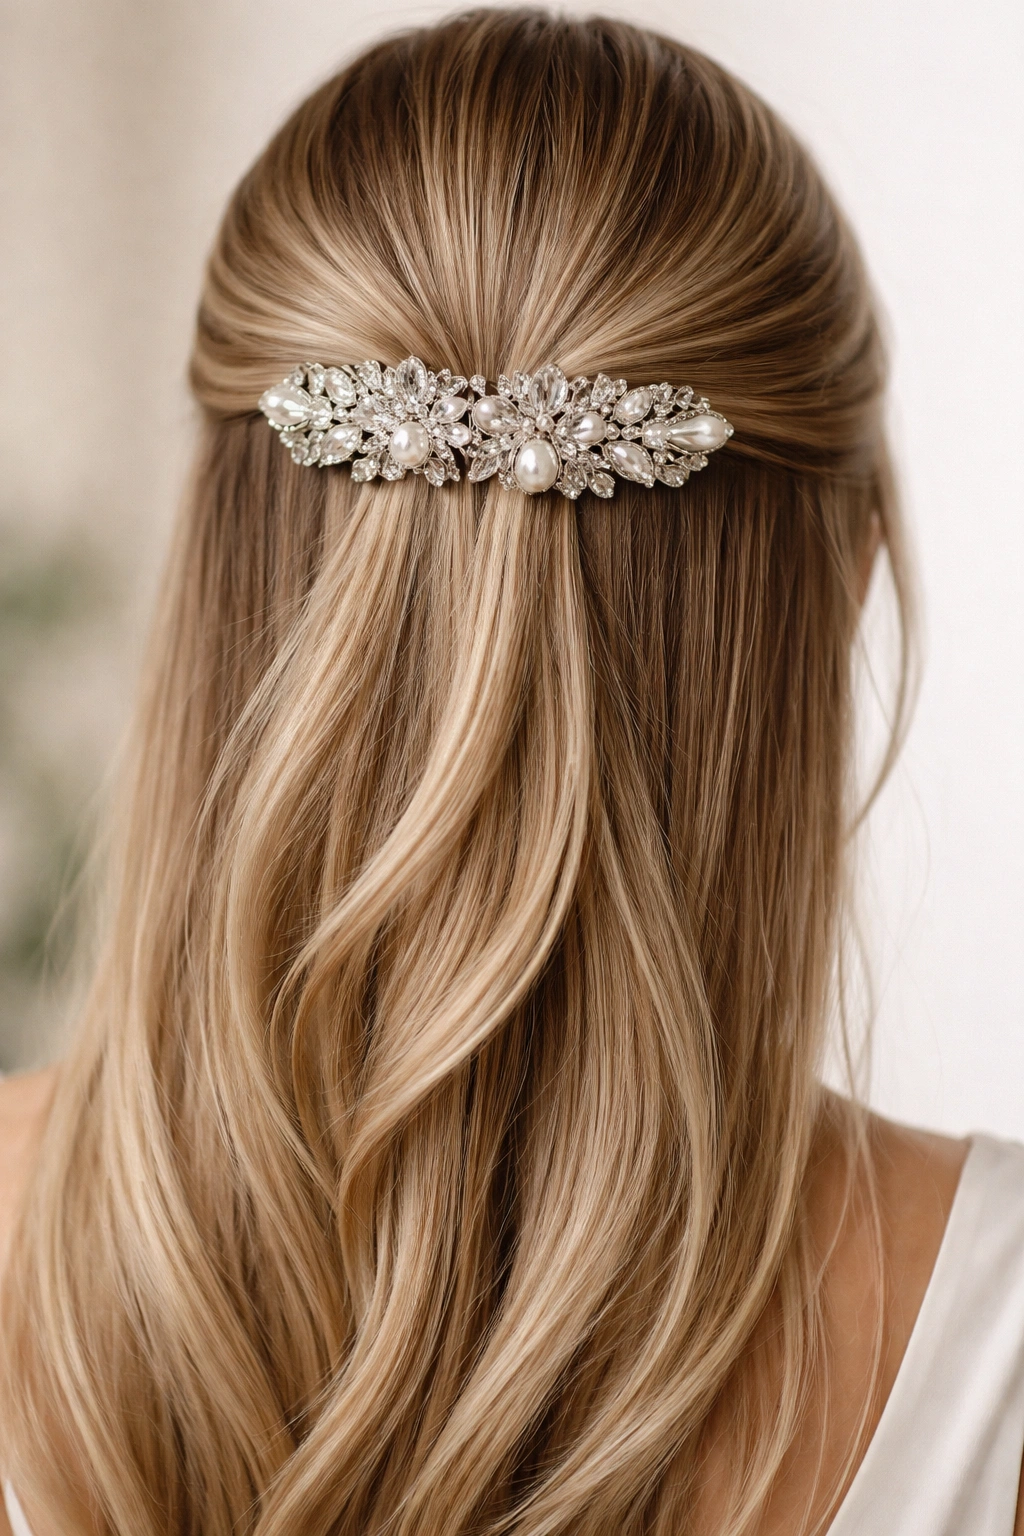
A large, statement barrette can do all the heavy lifting for you. Find a piece that matches your wedding jewelry—perhaps with pearls, crystals, or gold floral motifs—and use it to pin back the top section of your hair. This is the ultimate “low-effort, high-impact” hairstyle.
The Technique
Take the hair from your temples, pull it back to the center of your head, and secure it with the barrette. If you have fine hair, the barrette might slide down. To prevent this, spray the area where you want the barrette to sit with texturizing spray and insert a small, hidden bobby pin in an “X” pattern first, then clip the barrette over it.
The Benefit
This style allows you to wear your hair completely straight, highlighting its length and condition, while still keeping it out of your face for the ceremony.
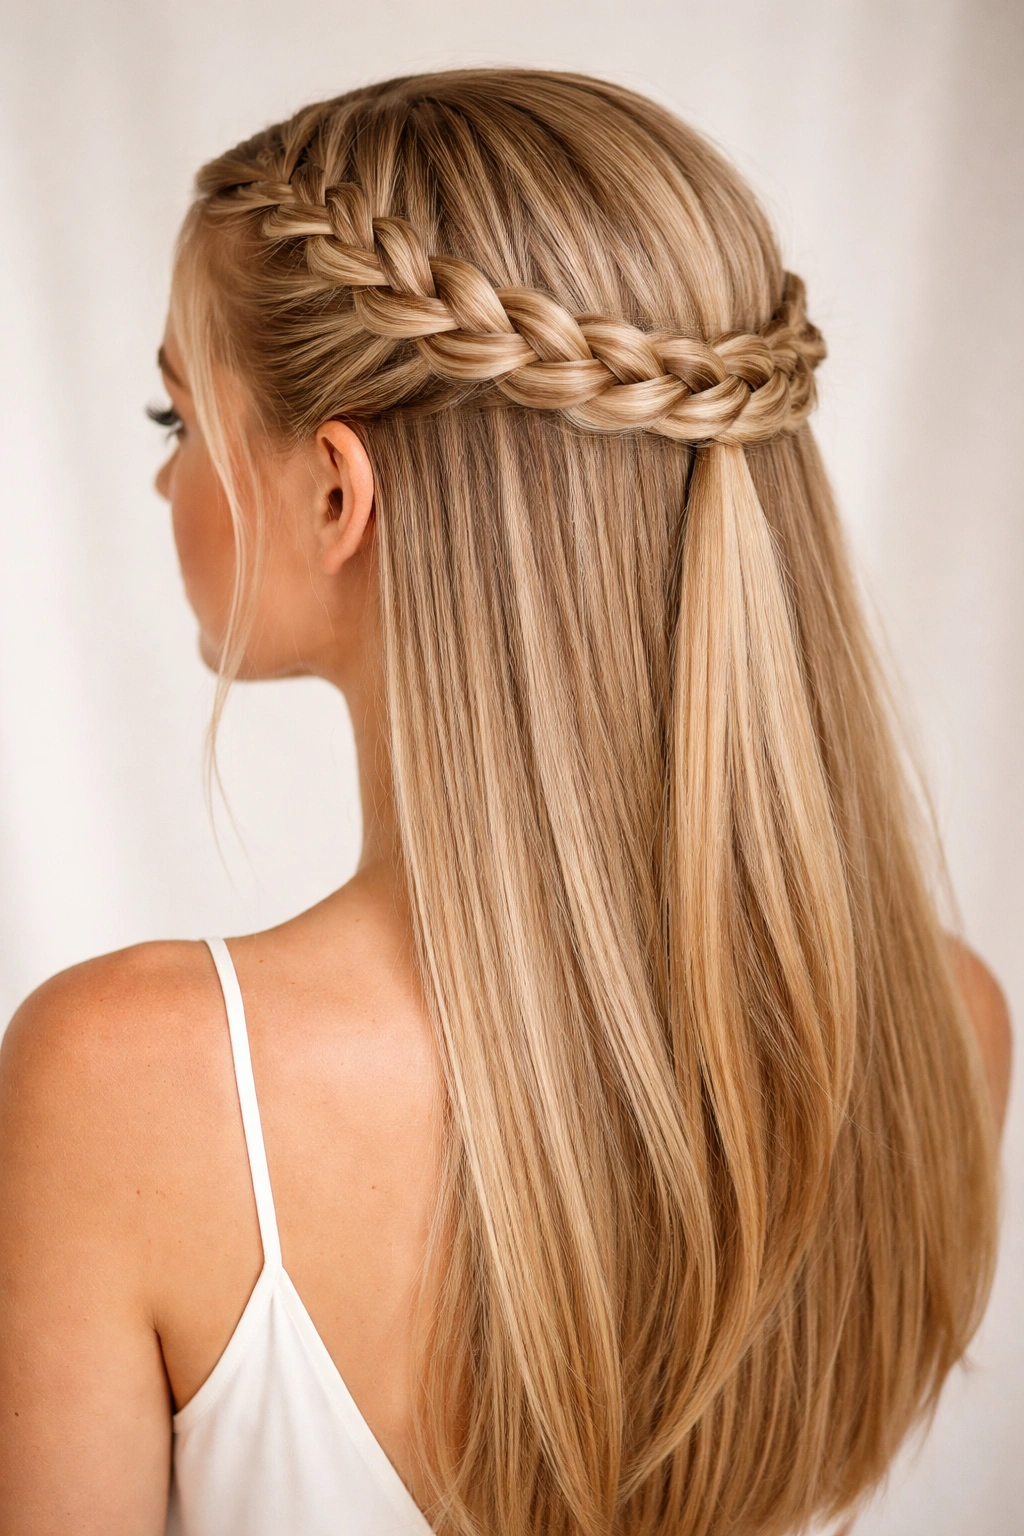
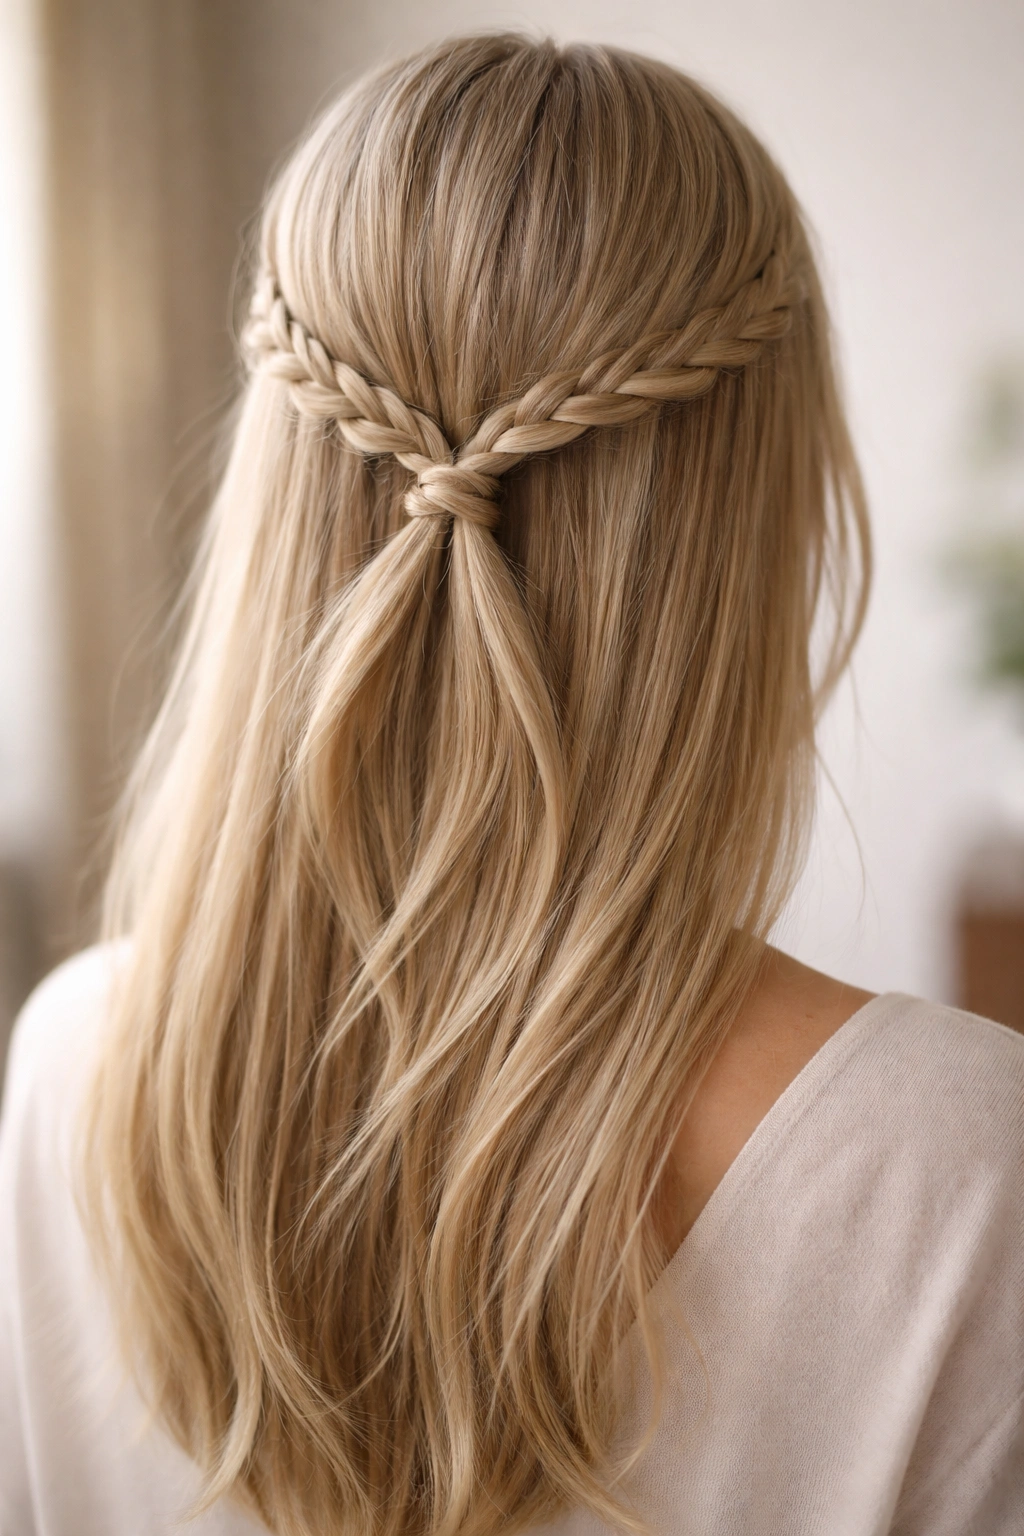
9. Double Braided Headband
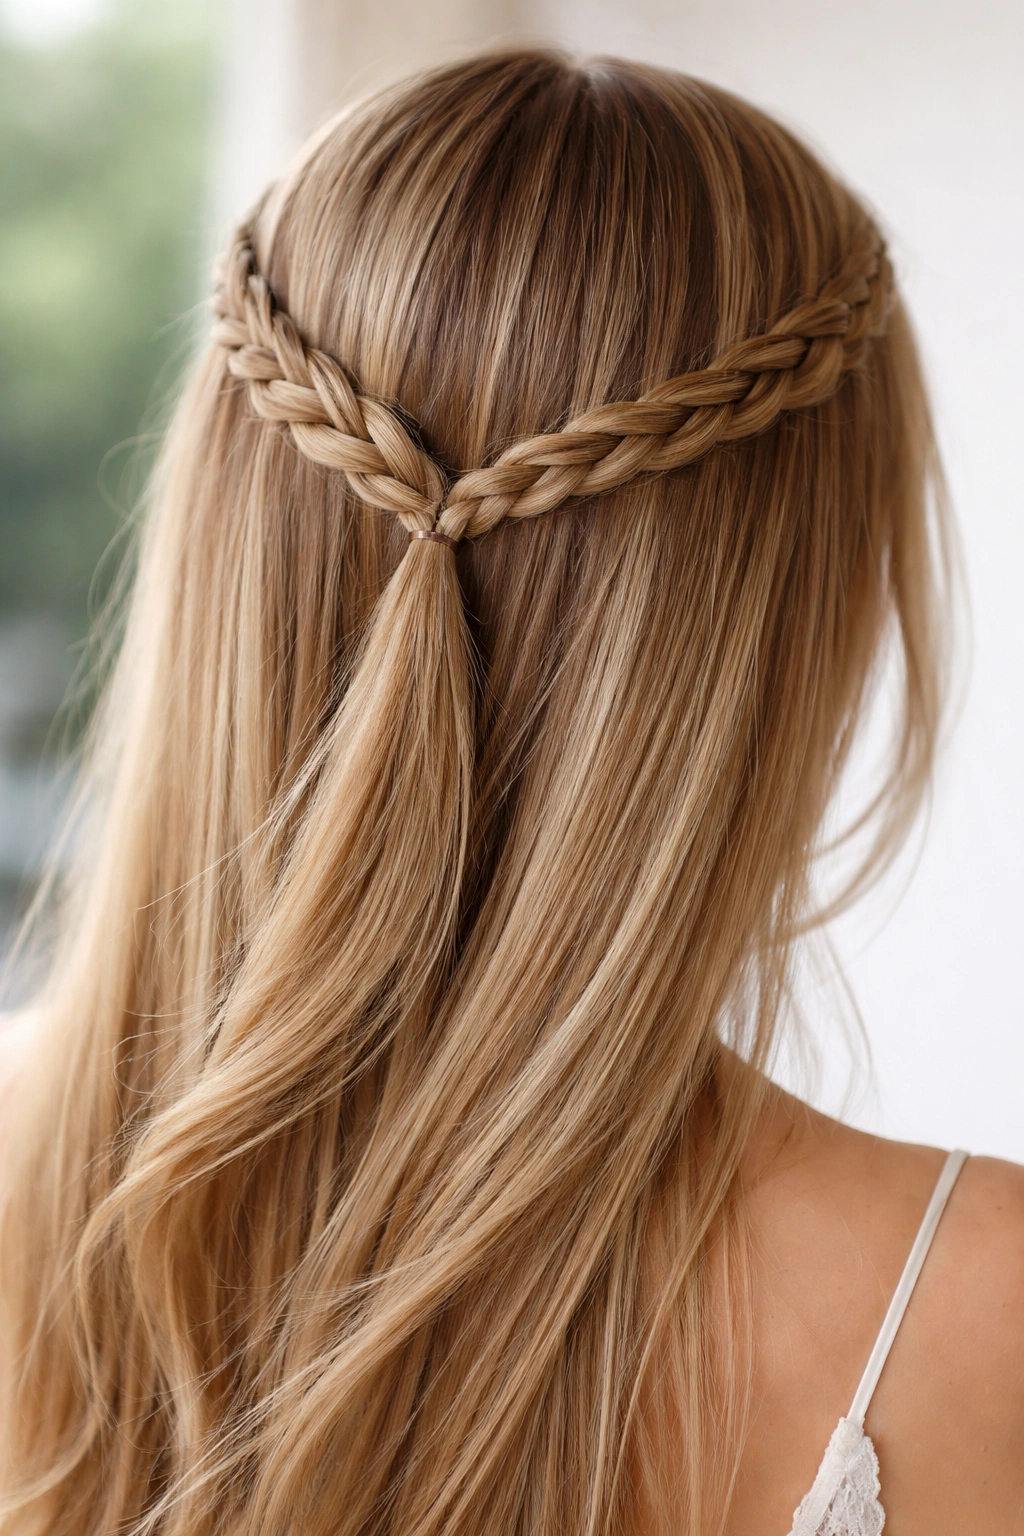
This look creates the illusion of a headband using your own hair. It requires two small braids, one on each side of your part, which are then pulled back and tucked into each other or pinned behind the crown of the head. It is sweet, youthful, and works beautifully with a veil.
The Secret
Don’t braid them too tightly. Straight hair can look very harsh if a braid is pulled tight against the scalp. Give the braids some breathing room by gently pulling at the outer edges before you pin them.
Variations
If your hair is long enough, you can braid all the way to the ends and wrap them around the back of your head like a crown. If it’s shorter, simply pin the two small braids behind your ears and hide the ends under the top layer of loose hair.
10. Minimalist Low Loop
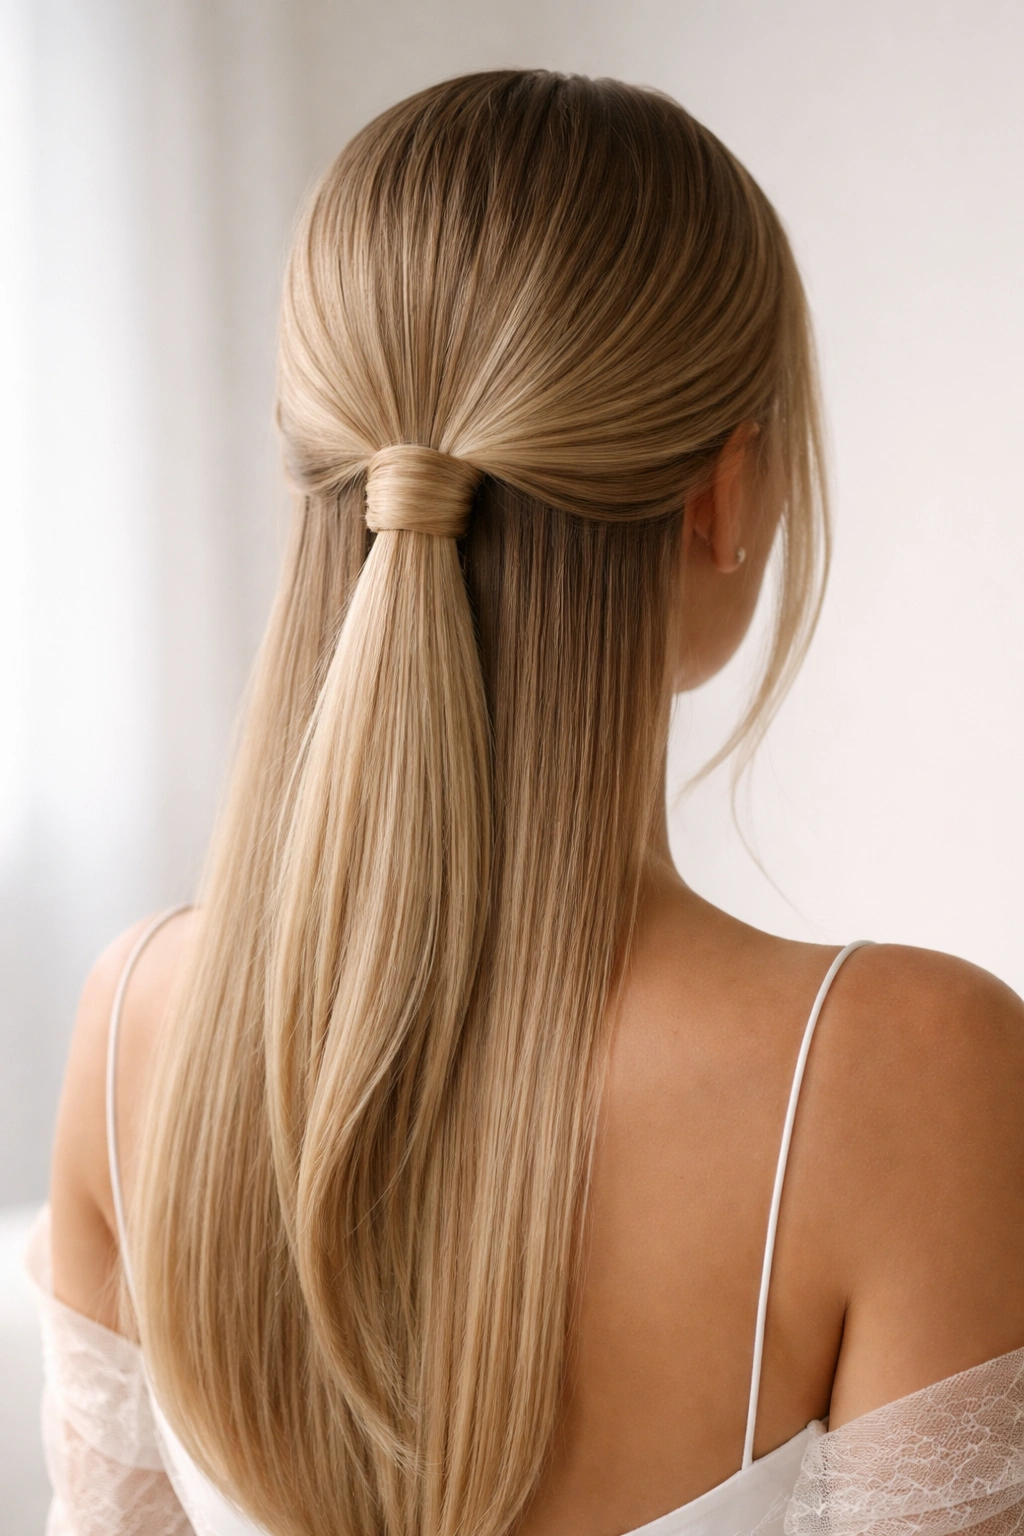
This style is for the modern, minimalist bride who wants something clean. Instead of a twist or a braid, you pull the hair back into a loose loop. It is very architectural and relies on the smoothness of the hair to create its shape.
Construction
Gather your hair into a low half-up ponytail. On the final pull of the elastic, don’t pull your hair all the way through; stop halfway, leaving a loop. Take the loose ends and wrap them around the base of the loop to hide the elastic, then pin them underneath.
Finishing
Use a flat iron to ensure the ends of the hair that are left down are perfectly straight. The sharpness of the ends against the soft, looped section creates a beautiful, balanced aesthetic.
11. Vintage 60s Bump (Beehive)
If you love a retro vibe, a subtle 60s-inspired bouffant is a fantastic choice. It adds significant height and drama, which can be very flattering. It isn’t the giant, stiff beehive of the past, but a softened, modernized version.
The Teasing Process
You need to tease the hair at the crown aggressively. Use a fine-tooth comb to push the hair toward the roots in small, one-inch sections. This creates the “cushion” required for the volume.
Smoothing it Out
Once you have the desired volume, use a smoothing brush to lightly go over the top layer. Do not brush out the tease underneath! You want that structure to hold the shape all day. Pin the hair back behind the ears for a clean, sleek finish.
12. Faux-Bob Half-up
You can create the illusion of a shorter, chic cut while keeping your length. This is a very creative way to style straight hair and feels surprisingly unique. You take the top half of your hair and tuck the ends under, pinning them to create a “bob” shape at the back, while leaving the bottom layers long.
How to Execute
Section off the top half of your hair. Roll the ends inward and pin them against the back of your head, using plenty of bobby pins. The bottom layer of hair remains straight and flows freely.
Why It’s Unique
It adds a layered, dimensional quality to straight hair that usually lacks texture. It feels like you’ve had a major haircut without any of the commitment.
13. Fishtail Braid Center-piece
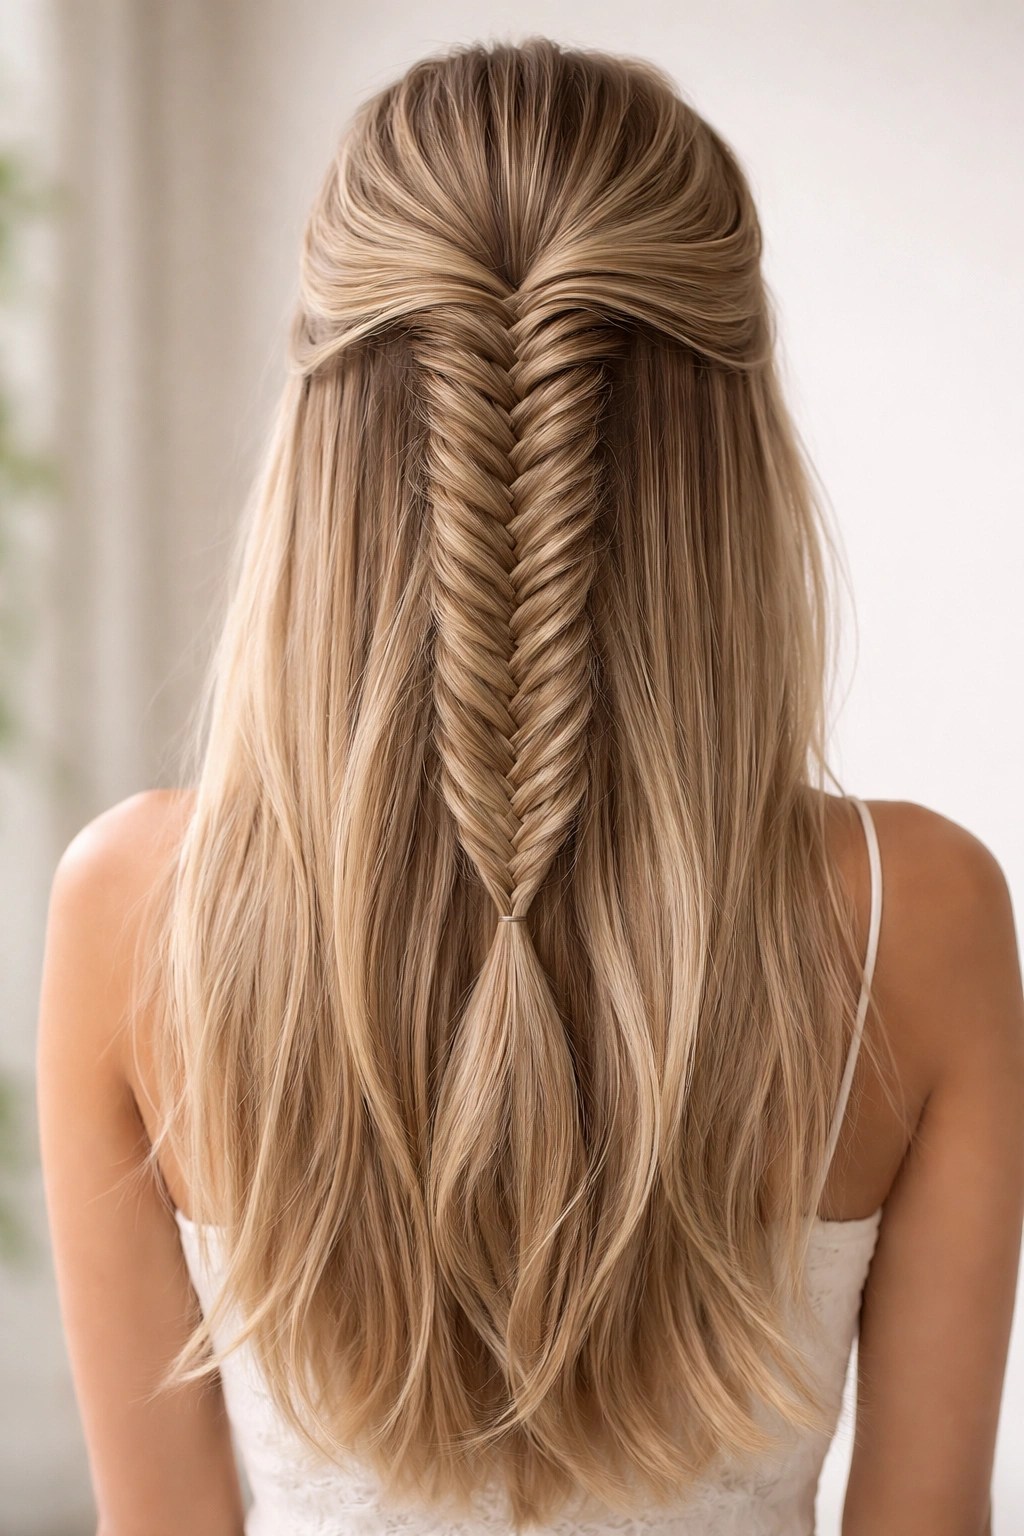
Fishtail braids look incredible on straight hair because the pattern is so precise. A single, thick fishtail braid running down the center of a half-up style is a showstopper. It looks intricate but is actually quite sturdy.
The Skill
Fishtail braiding takes a bit of time, so make sure your stylist is comfortable with it. You want to pull the braid apart slightly once you’ve secured the end; this “fluffs” it up and makes it look like it belongs on a wedding dress.
Texture Tip
Since straight hair can make a fishtail look too perfect, try to use a little bit of texturizing powder on your fingertips as you braid. This gives you extra grip and prevents the strands from sliding out of place as you weave.
14. Floral Crown Accents
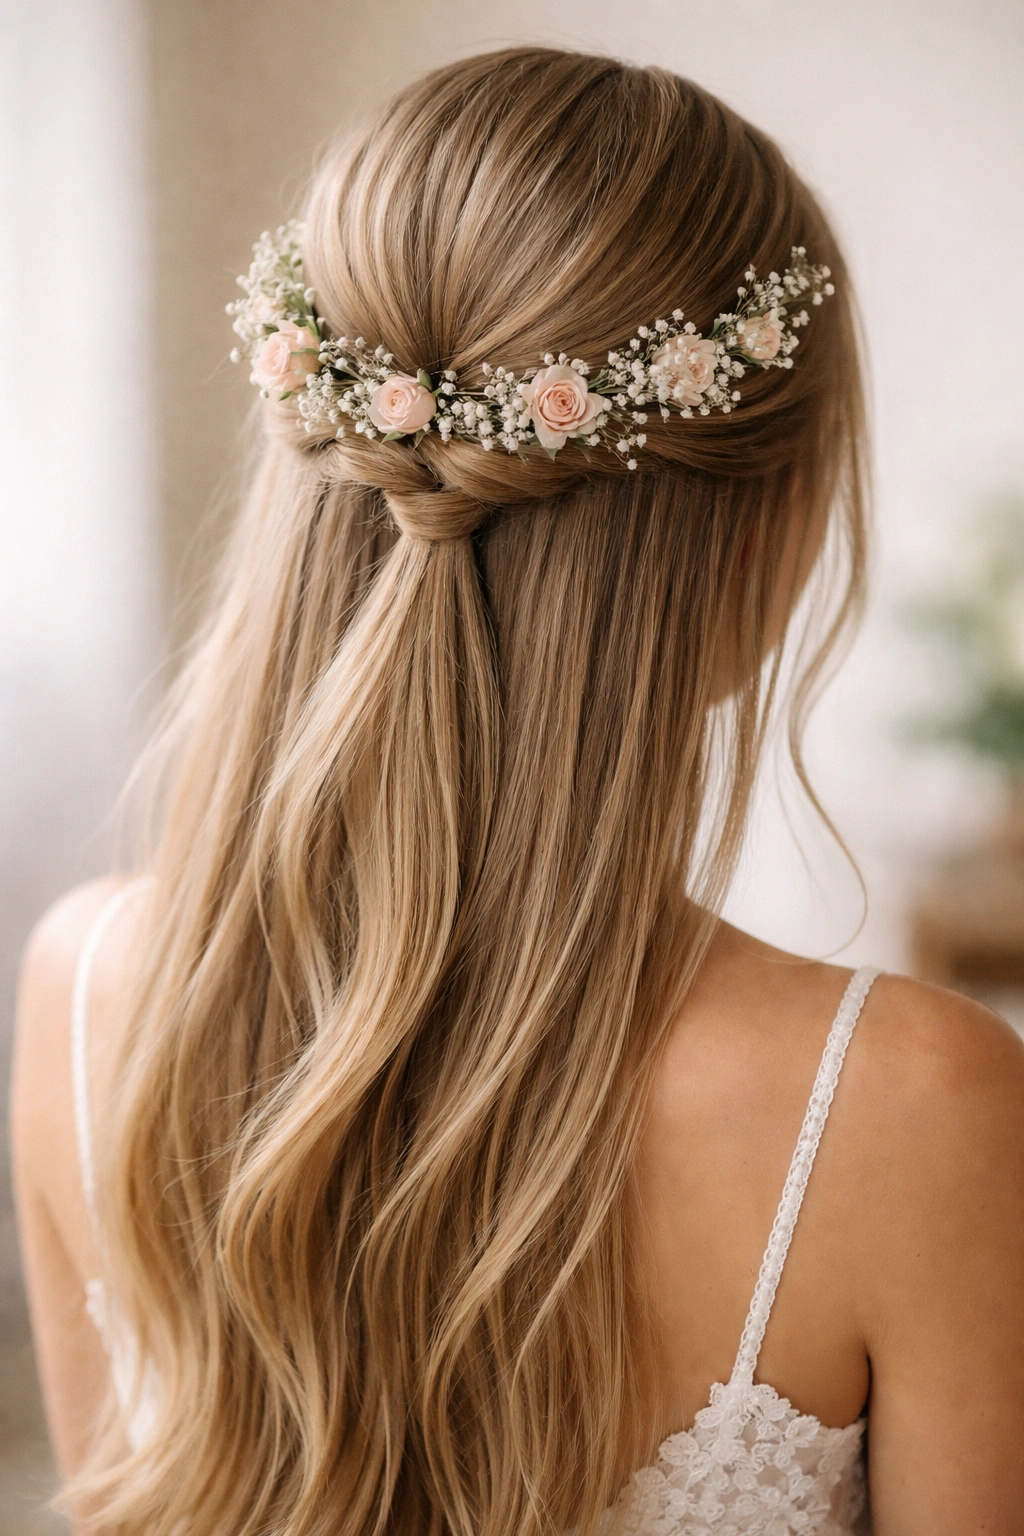
Half-up hairstyles are the perfect canvas for flowers. Whether you are using small sprigs of baby’s breath, delicate wax flowers, or even larger blooms like spray roses, they nestle beautifully into a half-up twist or braid.
Timing
If you are using real flowers, have your florist provide them as close to the ceremony as possible. Keep them in water until the very last second.
Installation
Use florist wire to attach small flowers to bobby pins. This makes it incredibly easy to “screw” the flowers into your hair where you want them, rather than just pinning them on top where they might fall off.
15. Sleek Center Part with Face-Framing
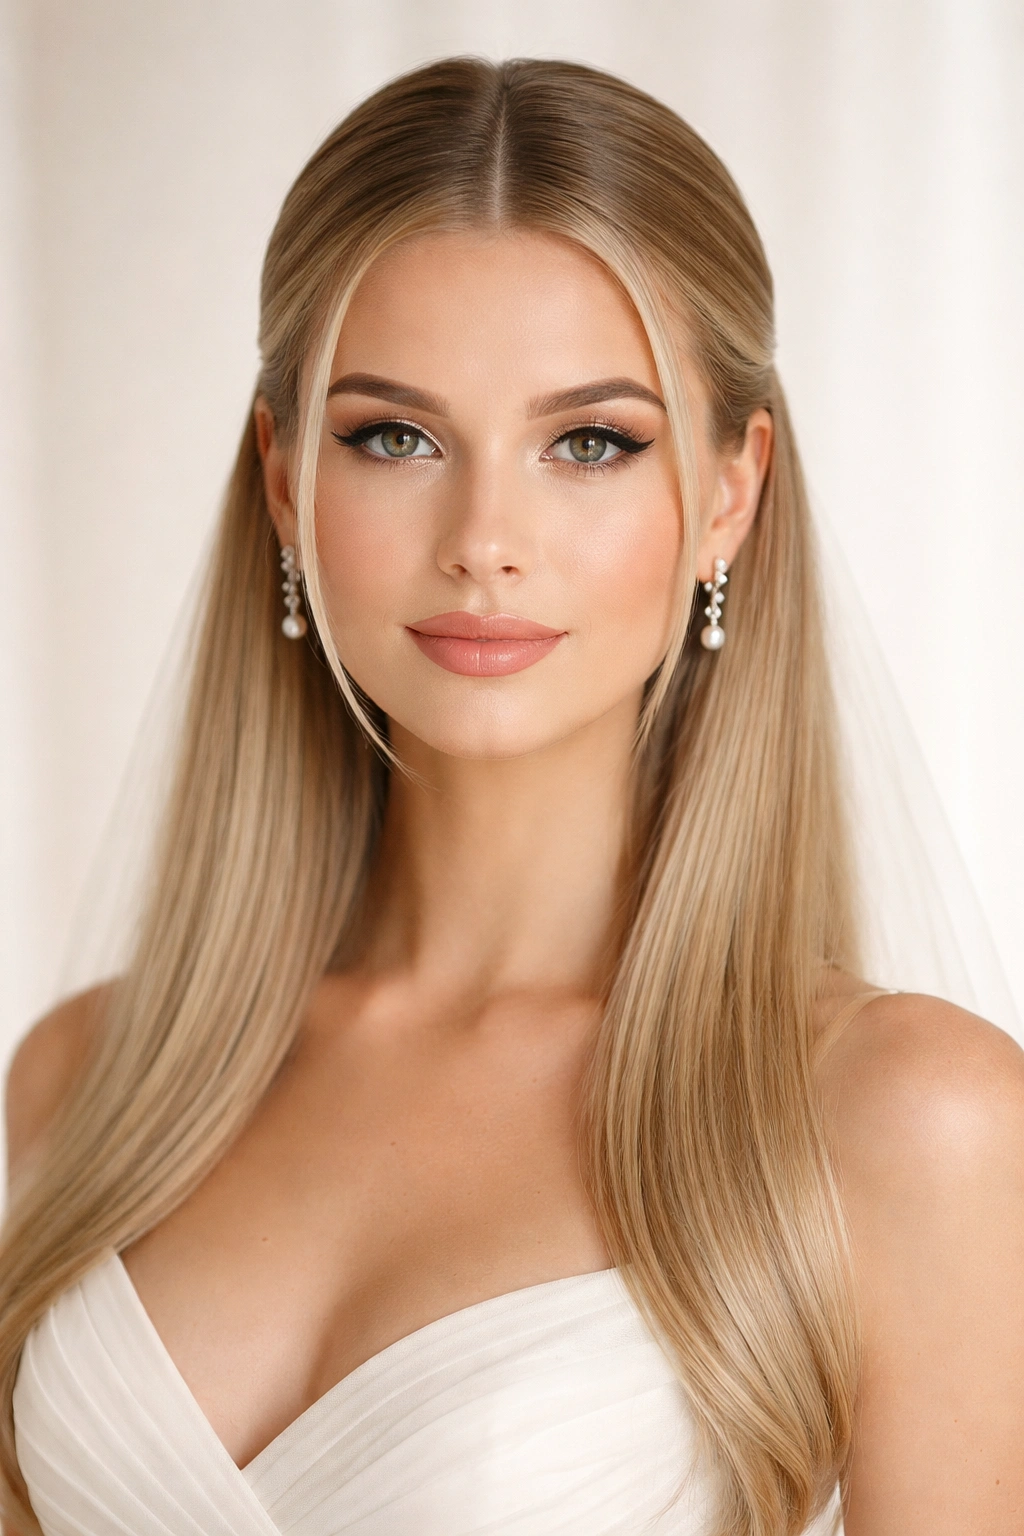
Sometimes, the most elegant choice is the simplest. A sharp, perfect center part with the front sections tucked tightly behind the ears is sophisticated and highlights the face. It’s the “modern minimalist” bridal look.
The Prep
You must use a straightening balm before blow-drying. You want zero frizz. Use a tail comb to ensure the part is perfectly straight and centered; even a slight deviation can make the look feel lopsided.
The Tuck
If you have trouble keeping your hair behind your ears, apply a small dab of styling pomade or clear wax behind your ear before you tuck the hair. This acts as a hidden anchor to keep the hair in place.
16. Pull-through Braid
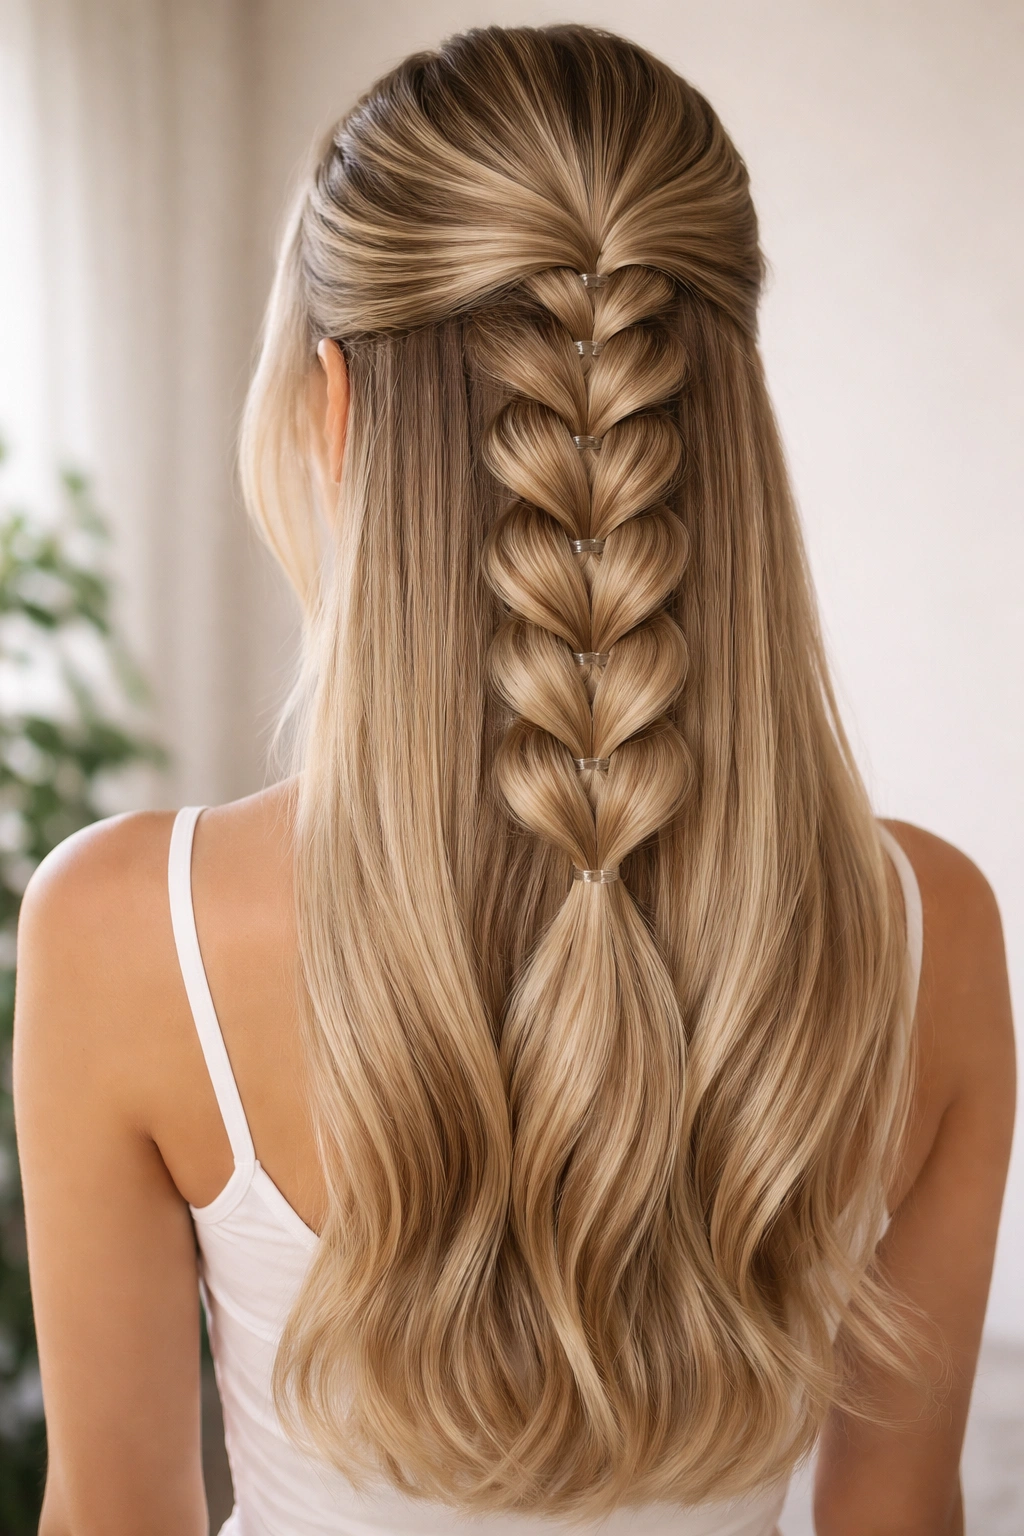
A pull-through braid is a great “cheat” for those who don’t have a lot of volume. It uses clear elastics to create a thick, full-looking braid without the need for complex braiding skills. It creates a stunning, voluminous effect that stays very secure.
The Method
You start by making a small ponytail and splitting it in two. You pull another section through the middle and tie it. You continue this down the line, pulling at the edges of each “section” to make it look full.
Why it Works for Straight Hair
Since it relies on elastics rather than weave-patterns, it’s arguably the most secure half-up style you can choose. It will not budge, regardless of your hair texture.
17. Tucked-under Loop

This is a sophisticated, understated style that mimics a low bun. You pull your hair into a loose, low ponytail, then tuck the ends through the space above the elastic—the “topsy tail” method—and pin the loop against the back of your head.
The Effect
It creates a beautiful, rounded shape that sits perfectly at the nape of the neck or mid-head. It’s elegant, very “Old Money,” and keeps your hair completely out of your face.
Customization
You can add a decorative pin or comb at the center of the loop to elevate it for a wedding ceremony.
18. Side-swept Asymmetry
For a more dramatic bridal look, try a deep side part where all the hair is swept toward one shoulder, and the other side is pinned tightly behind the ear. This highlights your neckline and any jewelry you might be wearing.
The Pinning
Because the hair will naturally want to fall back over your face, use a series of hidden bobby pins behind the ear to create a firm wall of security. You can even use a small, clear braid behind the ear to act as an anchor for the pins.
The Wave
If you want to add a bit of softness to this look, use a large-barrel curling iron to create just a hint of a bend at the very ends of your hair, keeping the roots and mid-lengths sleek.
19. Triple Twist
Three small, separate twists pulled back to the center of your head create an interesting, geometric effect. It’s more visually complex than a single twist and adds some texture to the scalp area.
The Technique
Create three distinct sections at the front of your hair—one at each temple and one in the center above the forehead. Twist each one back individually and secure them together in the center.
Finishing
You can leave the ends of the twists loose to blend with the rest of your hair, or pin them together into a small knot for a tidier look. It is a fantastic option for brides who want something slightly unconventional.
20. Pearl-dotted Sections
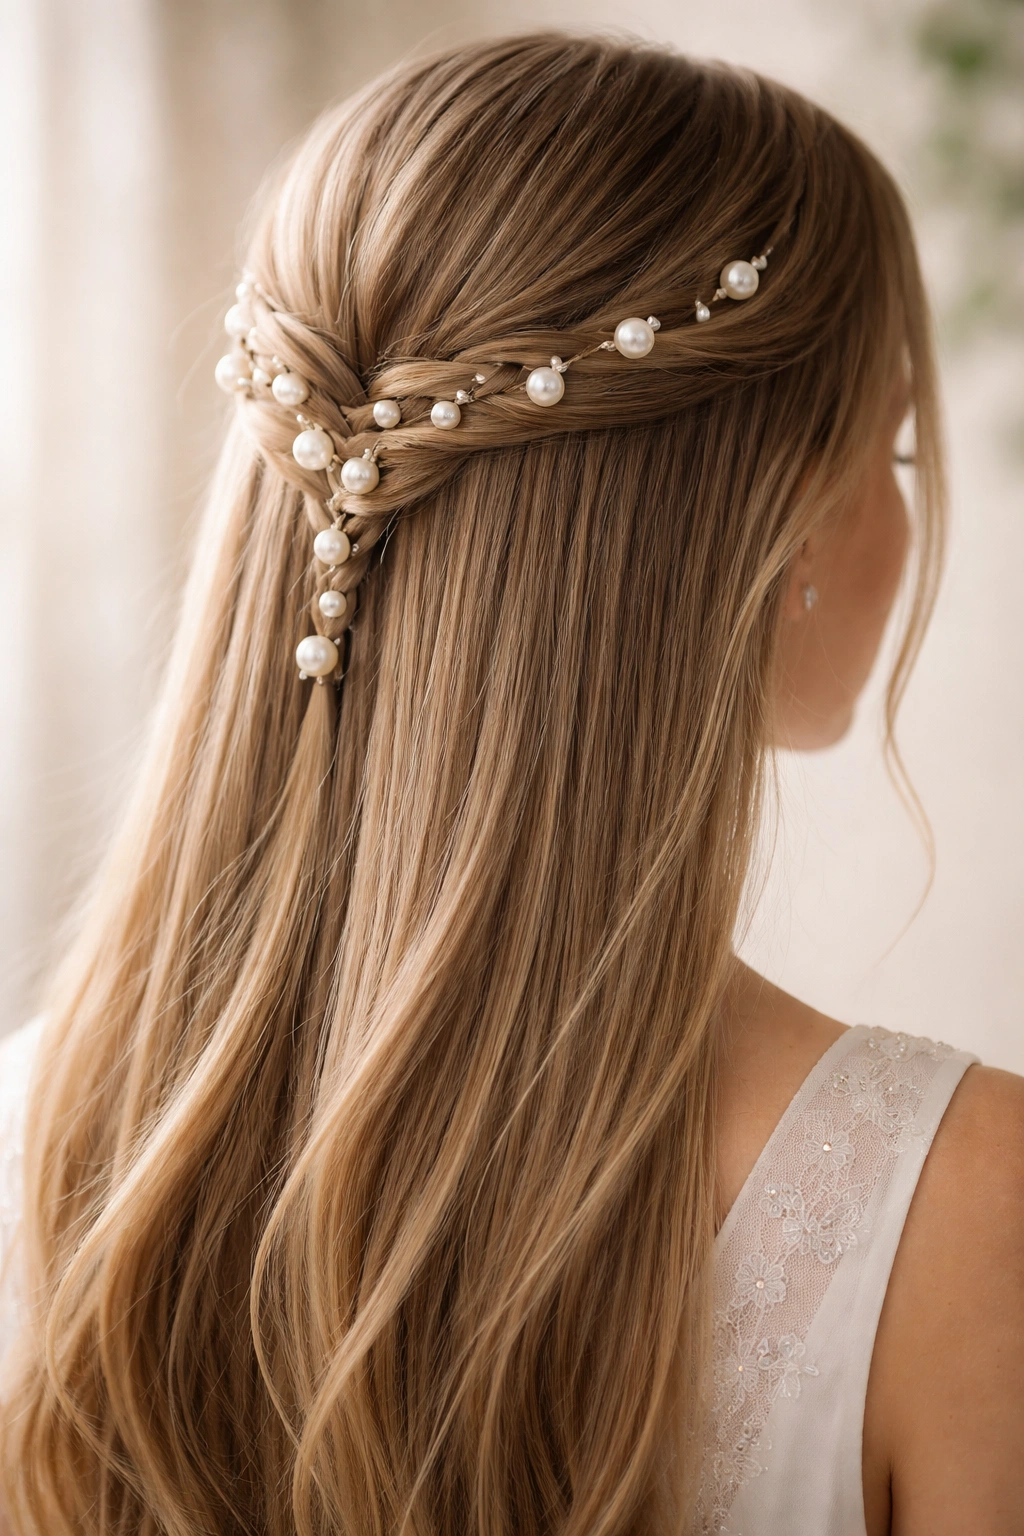
If you are wearing a dress with pearl detailing, why not bring that to your hair? You don’t need a heavy headpiece. Instead, use pearl-headed pins to secure your half-up style.
Strategic Placement
Place the pearls along the length of a braid or twist. It adds a touch of light and texture to the hair. Straight hair acts as a perfect, smooth backdrop for pearls to really shine against.
Pro-Tip
Use “screw-in” pearl pins. They are much more secure than standard pearl-tipped bobby pins and are less likely to slide out of straight hair.
21. Ribbon-tied Half-up
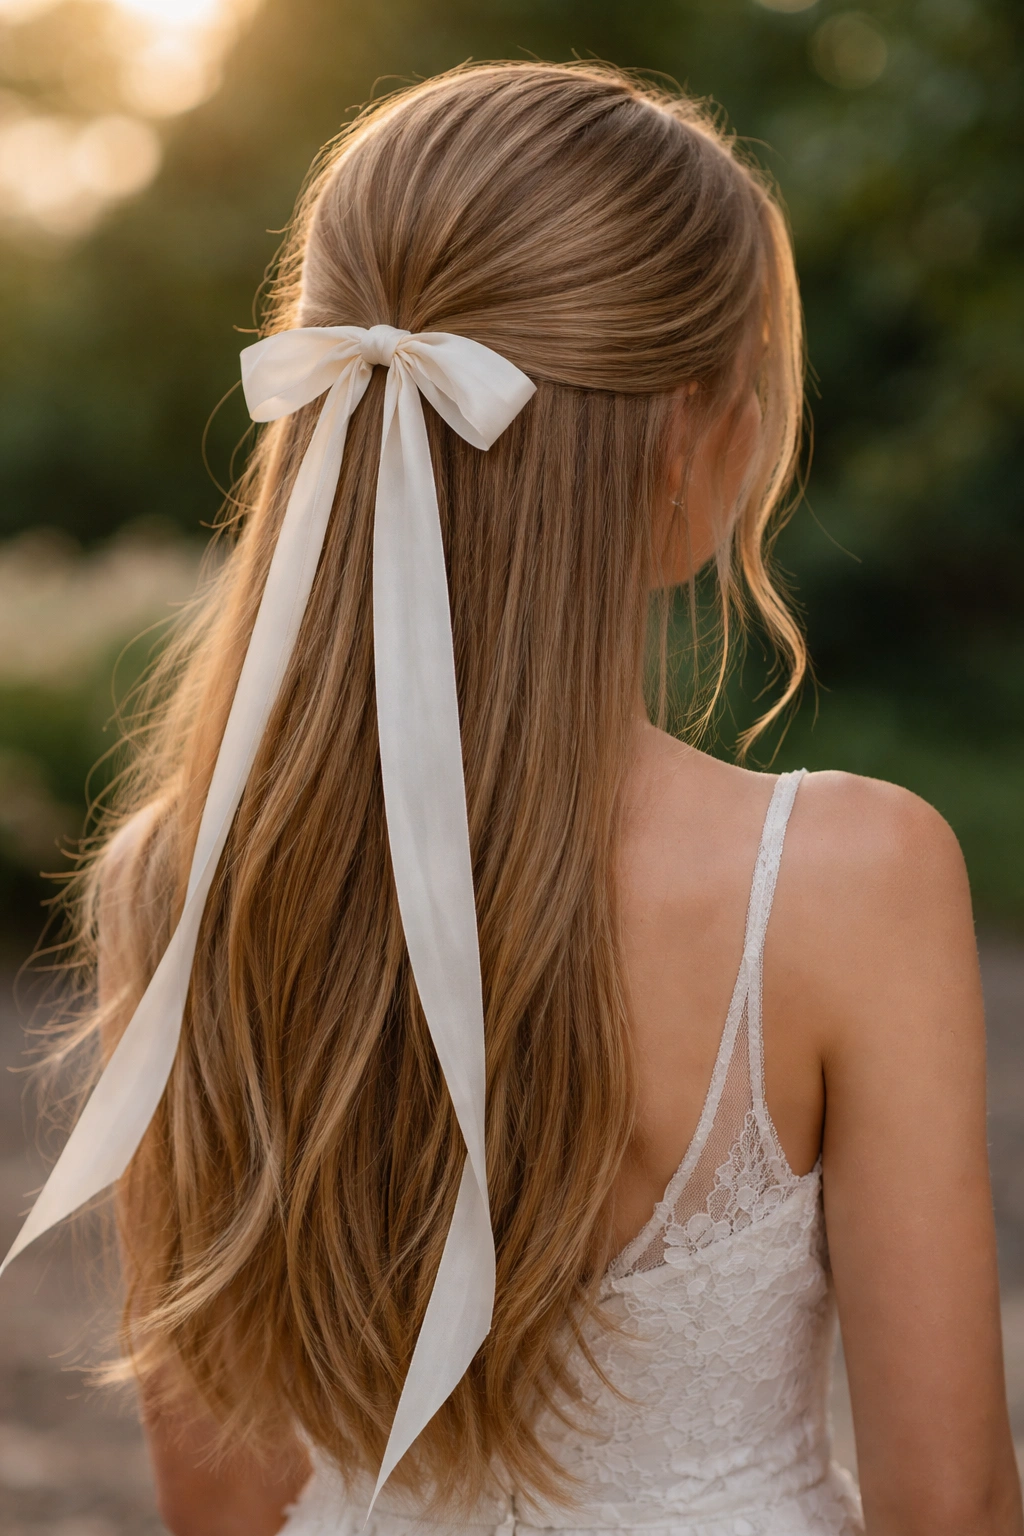
A long, trailing ribbon is a stunning accessory for an outdoor wedding. It adds movement and softness to a half-up style, especially when the breeze catches the ribbon.
The Knot
Tie the ribbon over a basic half-up ponytail. If you want the ribbon to stay long and dramatic, leave it untrimmed and let it cascade down your back alongside your hair.
The Security
Tie the ribbon over a clear elastic. Never rely on the ribbon alone to hold your hair, or it will eventually slip loose. The elastic does the work; the ribbon is purely for show.
22. Knotted Crown
This look creates a textured, knotted effect across the top of the head. It’s essentially a series of small, tied-off sections that mimic a braid but offer a more modern, knotted texture.
Why it Works
Knots tend to be tighter and more secure than braids, making this a great option for an all-day wedding where you want to minimize touch-ups.
The Visual
It looks complex and intentional, drawing the eye toward the face. It’s a wonderful choice if you have a high-necked dress, as it keeps the hair up and away from the neckline.
23. Romantic Volumized Layers
If you want to keep as much hair down as possible, opt for a minimal “half-up” look where you only pin back small sections near your temples. This provides a soft, romantic frame while showcasing the length of your hair.
The Volume
Focus on teasing the hair at the crown. Even with a minimal pull-back, that bit of height at the roots makes the style feel “done” rather than like a casual, everyday look.
The Finish
Ensure the lengths of your hair are perfectly smooth. Use a shine serum or a light hair oil to emphasize the health and luster of your hair.
24. Braided Halo
A full halo braid that encircles the head—with a half-up component—is a labor-intensive but deeply rewarding style. It creates a beautiful silhouette from every angle and is incredibly secure.
The Construction
Start the braid at one temple and weave it around the head, incorporating sections of hair as you go. When you reach the back, you can either tuck the braid into itself or leave a bit of length flowing out from the center for that half-up effect.
The Detail
Because straight hair allows for such clean lines, a halo braid looks exceptionally structured and sophisticated. It doesn’t need to be messy to be beautiful.
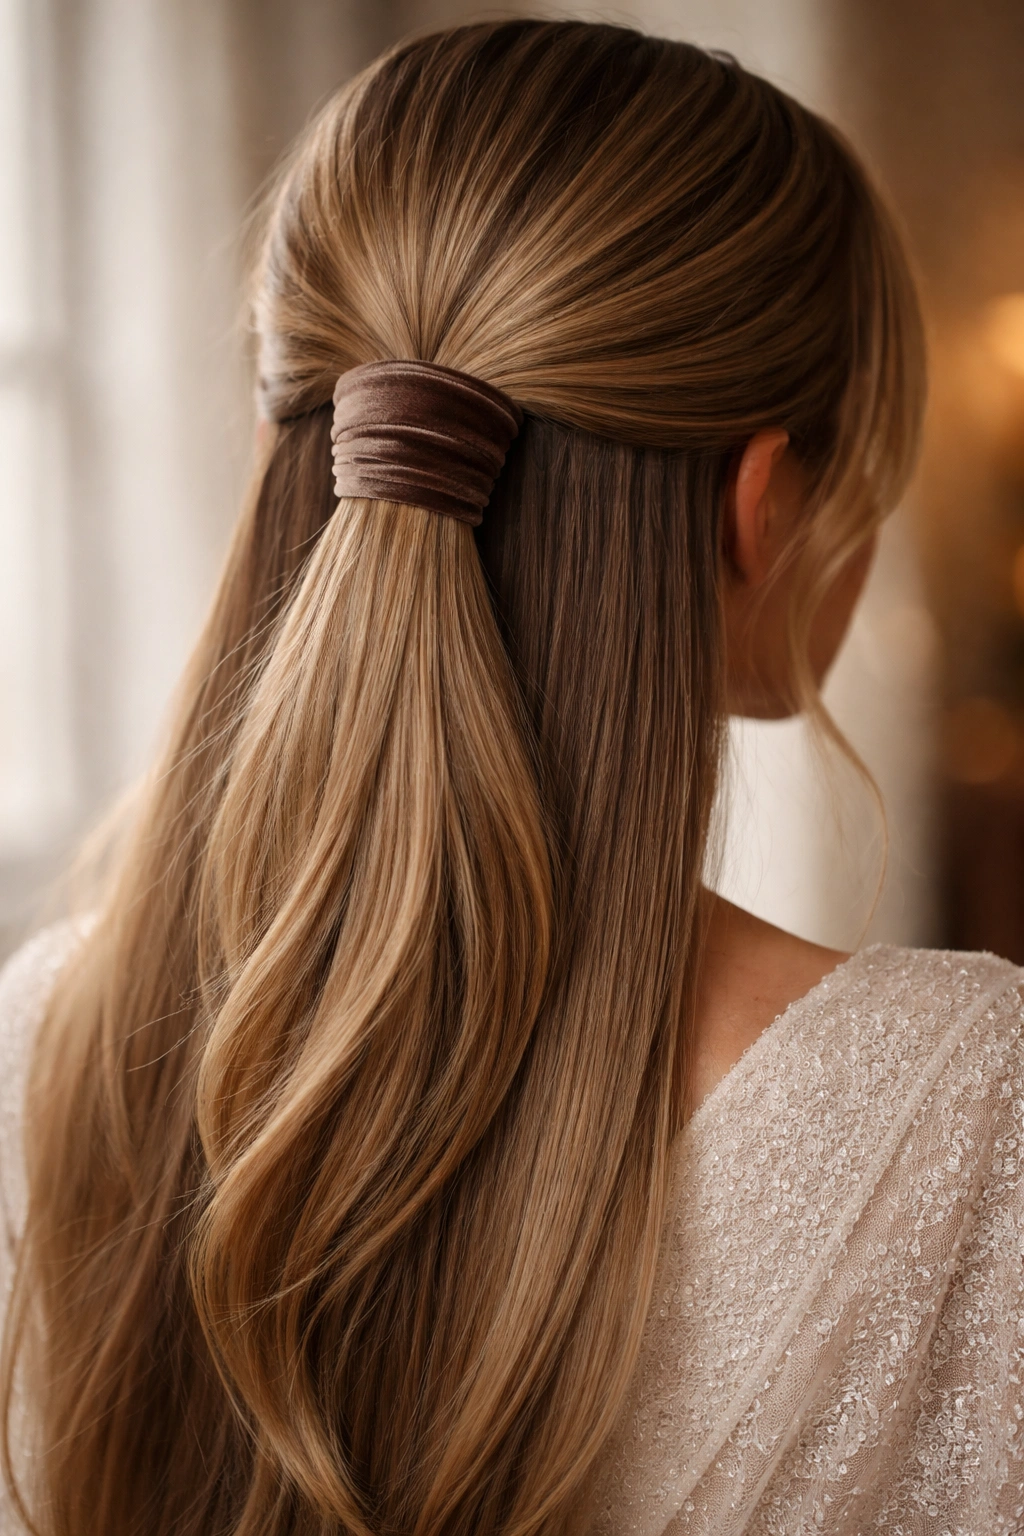
25. Chic Velvet Wrap
For a winter or fall wedding, a velvet wrap around a half-up ponytail is incredibly elegant. It adds a luxurious texture that looks beautiful in photos.
The Execution
Secure a half-up section with an elastic. Then, take a strip of velvet ribbon and wrap it tightly around the elastic, covering it completely. Pin the ends of the ribbon underneath the ponytail.
The Contrast
The soft, matte texture of the velvet against the glossy, straight hair is a sophisticated combination that feels very timely and classic.
26. Structured High-Twist
This is a more formal, structured version of the twist. You pull the hair back into a very high, tight half-up section, then twist that entire section tightly against the scalp before securing it with pins.
Why it Works
It creates a sleek, architectural look that feels very intentional. It’s less “bohemian” and more “high-fashion.” It’s an excellent choice if you have a minimalist, modern wedding dress.
The Anchor
Use a strong hold hairspray on your hands before you twist to ensure the section stays tight and smooth. You don’t want any flyaways with this high-glam style.
27. Minimalist Elastic Hide
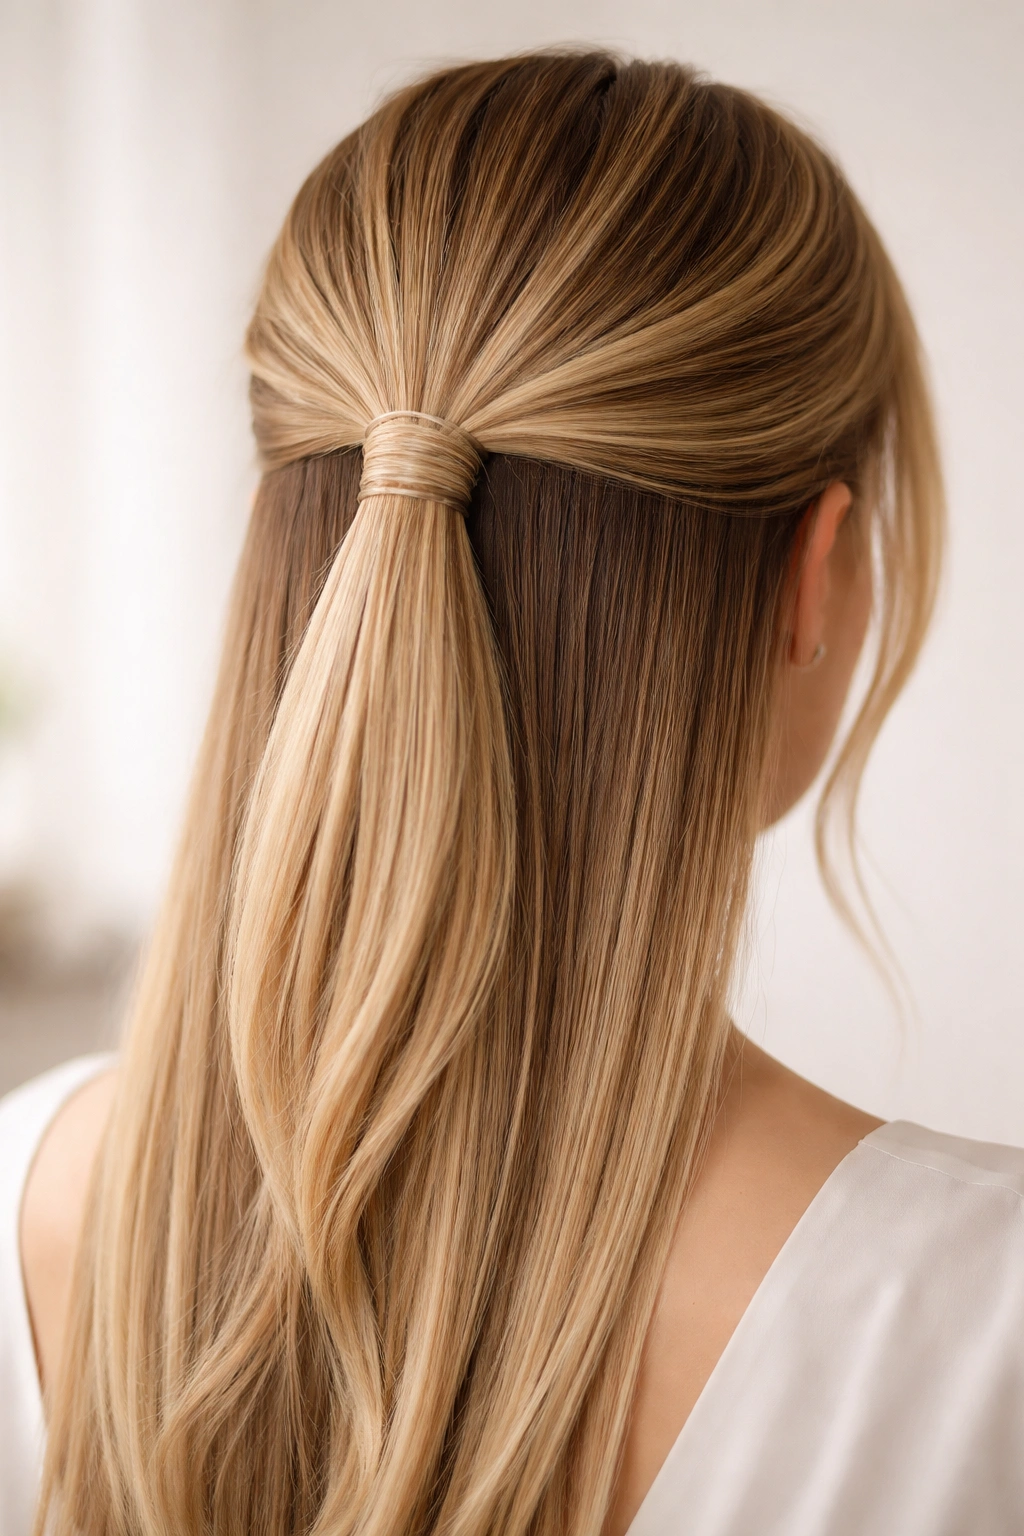
Sometimes the most beautiful part of a style is how clean it looks. If you want a simple half-up ponytail, the “elastic hide” trick is non-negotiable.
The Technique
After securing your half-up section with a clear elastic, take a small strand of hair from the underside of the ponytail. Wrap it around the elastic until it’s completely covered, then tuck the very end into the elastic and secure it with a small bobby pin.
The Result
It looks like your hair is holding itself up. It’s a polished, professional detail that makes a simple style look like it was done by a master stylist.
28. Scandi-Style Braided Loop
This is a Scandinavian-inspired look that involves two small, loose braids that are looped together in the center of the back of the head. It’s soft, slightly messy, and very modern.
The Look
It’s not about perfection; it’s about the “effortless” vibe. The braids are loose, and the loop is relaxed. It works best with a bit of texture spray in the hair to give it that matte, cool-girl finish.
Why It’s Great
It’s a perfect option if you want to keep your hair down but need something to stop it from falling into your face during the ceremony. It’s functional, beautiful, and distinct.
Final Thoughts
The key to navigating any of these styles on straight hair is to stop viewing your hair’s sleekness as a hurdle and start using it as your greatest asset. Straight hair offers a level of precision and polish that other textures simply cannot replicate, and by choosing the right structural techniques—like the hidden bobby pin “X” or the strategic use of texturizing powder—you can wear these styles with complete confidence.
Don’t feel pressured to force your hair into a texture that it doesn’t want to hold. If a style requires heavy curling, be prepared for it to fall flat; instead, choose one of these options that plays to your strengths. Your wedding day hairstyle should make you feel like the most refined version of yourself, not someone struggling to keep a complex masterpiece from unspooling. Trust the preparation, choose a style that speaks to your personal aesthetic, and focus on the day itself. When you aren’t constantly checking the mirror to see if your hair is falling, you’ll be much more present in the moments that actually matter.