Short hair can look softer at a wedding than hair that reaches your ribs. That’s not a consolation prize. It’s a real advantage, especially when you want a style that feels romantic, stays put, and doesn’t spend the whole day sliding out of shape.
Messy half up half down looks for wedding short hair work because they stop trying to force tiny lengths into a giant updo. Instead, they use what short hair does well: movement, texture, and a little lift at the crown. A chin-length bob, a layered lob, even a blunt cut with a few face-framing pieces can be turned into something polished enough for vows and relaxed enough for dancing.
The trick is grip. Short hair needs a different setup than long hair does. Texture spray, a 1-inch curling wand, a few hidden bobby pins, and a light hand with teasing usually do more for short wedding hair than piles of hairspray ever will. If you’ve ever watched a style collapse after the first hug, you already know why that matters.
1. Soft Twisted Crown With Loose Face Pieces
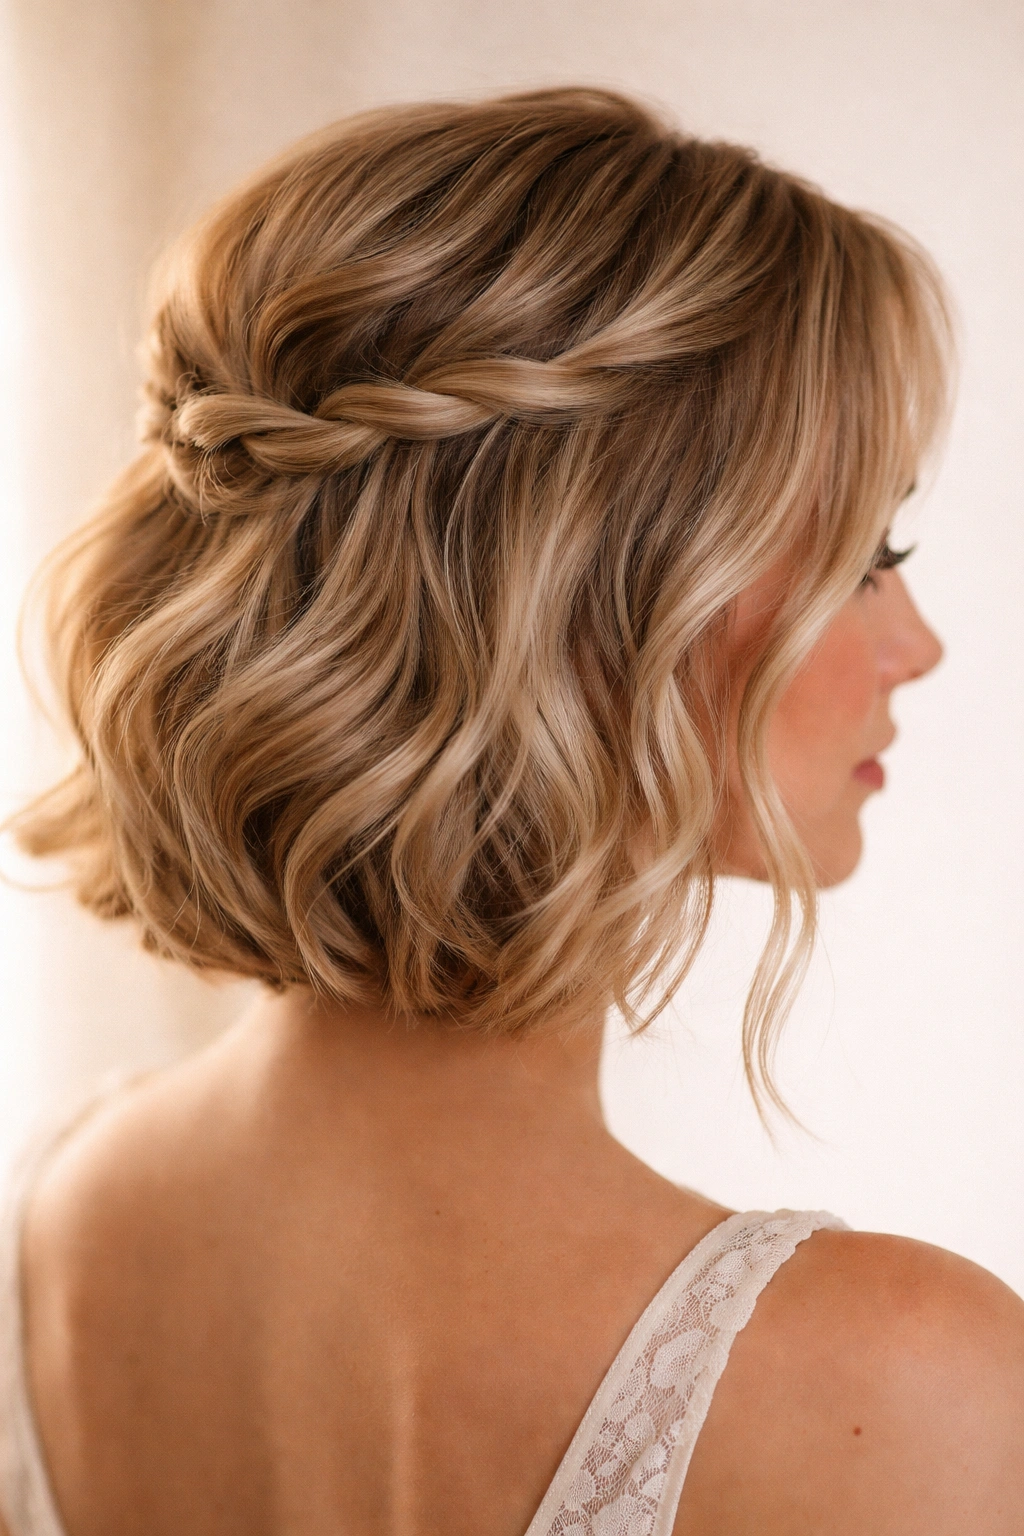
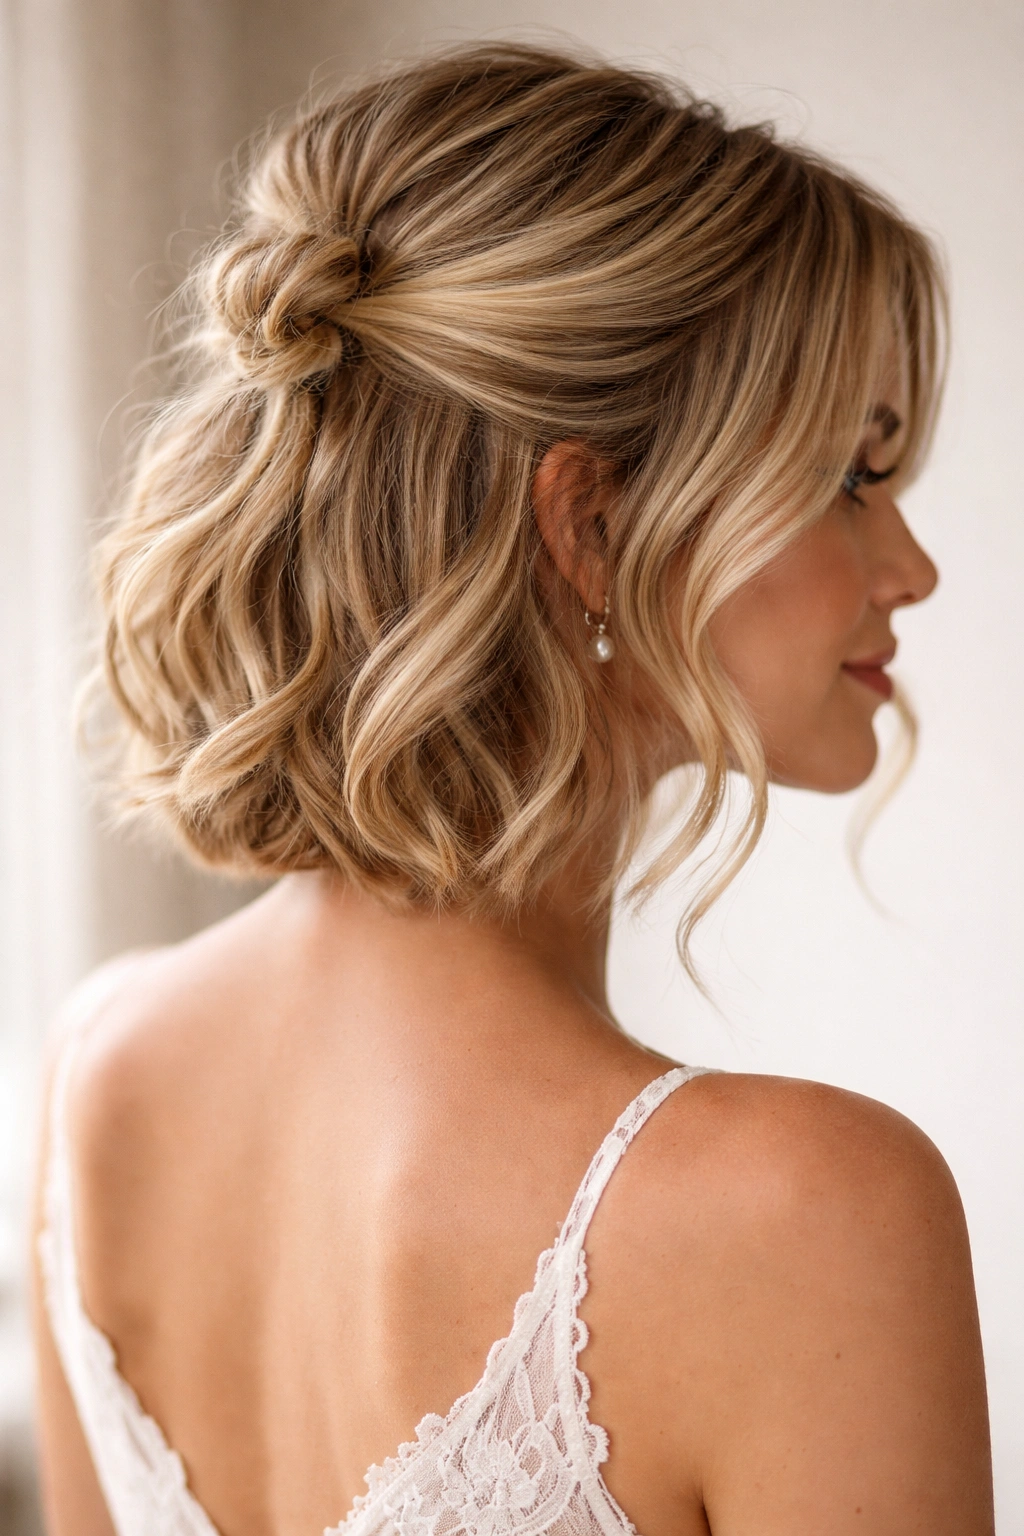
This is the safest choice if you want the top to look styled and the rest to stay soft. A soft twisted crown gives short hair enough shape for a wedding without making it look overworked, and that matters when your length doesn’t leave room for a lot of extra structure.
Start with loose waves or at least a bend through the ends. Then take one-inch sections from each temple, twist them back toward the center, and pin them under the back layer where the twists overlap. Leave two slim face pieces out in front. They should fall near the cheekbone or jaw, not cling to the mouth.
The best part is how forgiving this look is on a bob or lob. If one twist sits a little higher than the other, it still reads as intentional. A small mist of texture spray at the roots helps the pins stay hidden and gives the crown enough grit to hold.
A tiny bit of lift at the crown makes a big difference here. Not a skyscraper. Just enough to stop the style from flattening the moment you step outside.
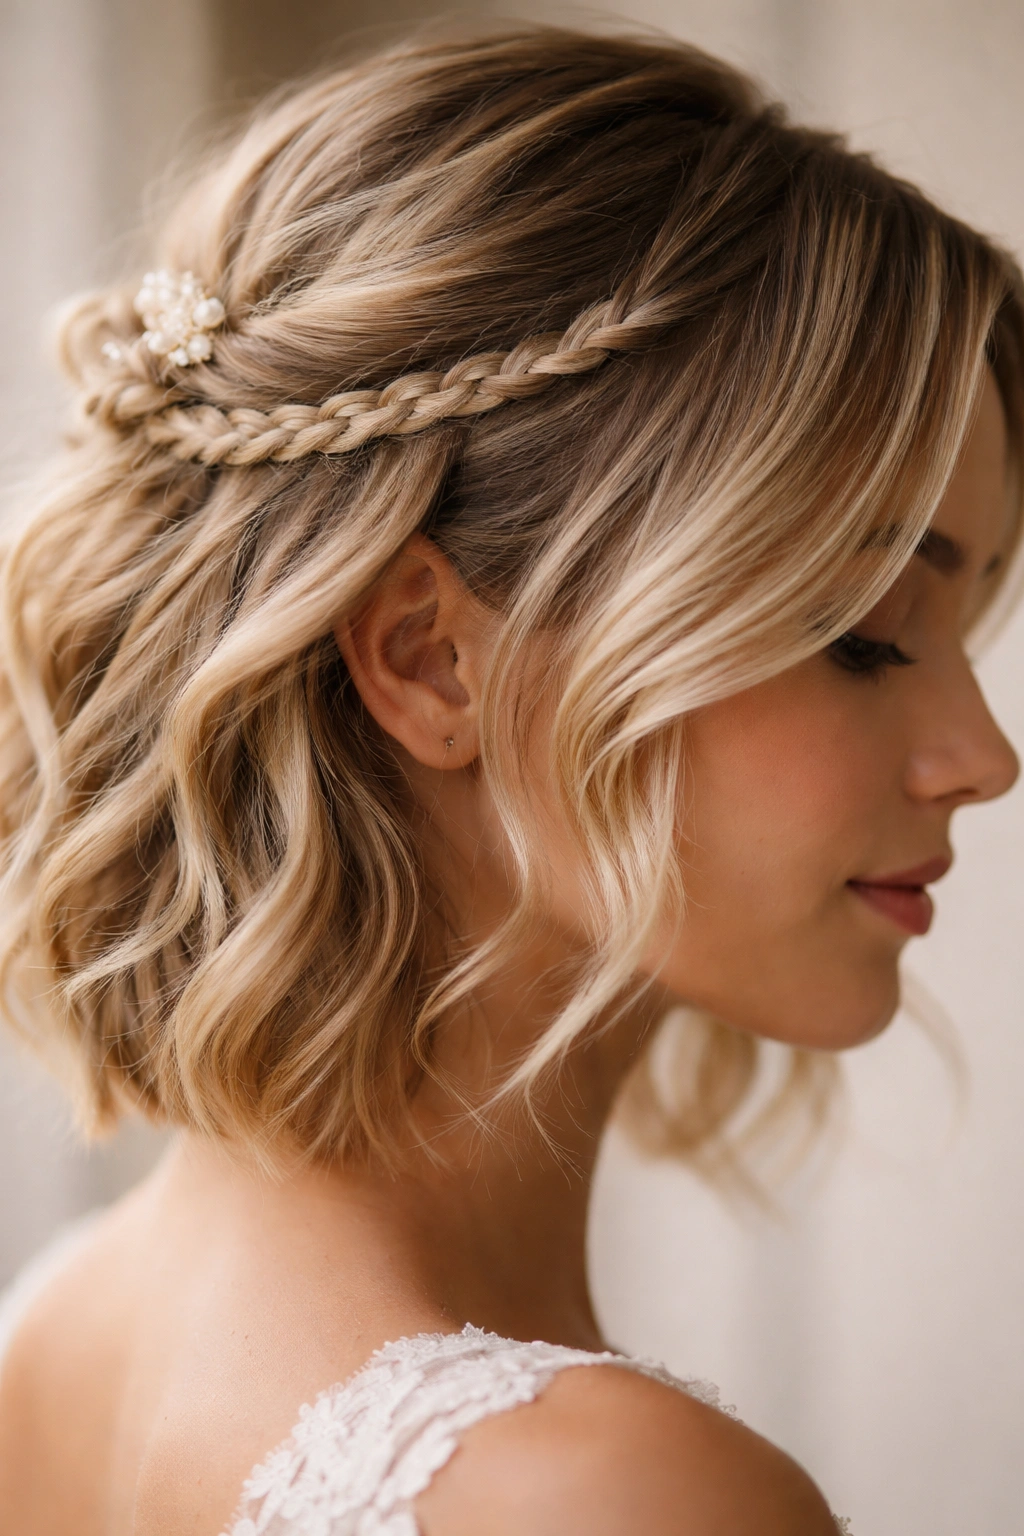
2. Braided Side Lift for a Bob
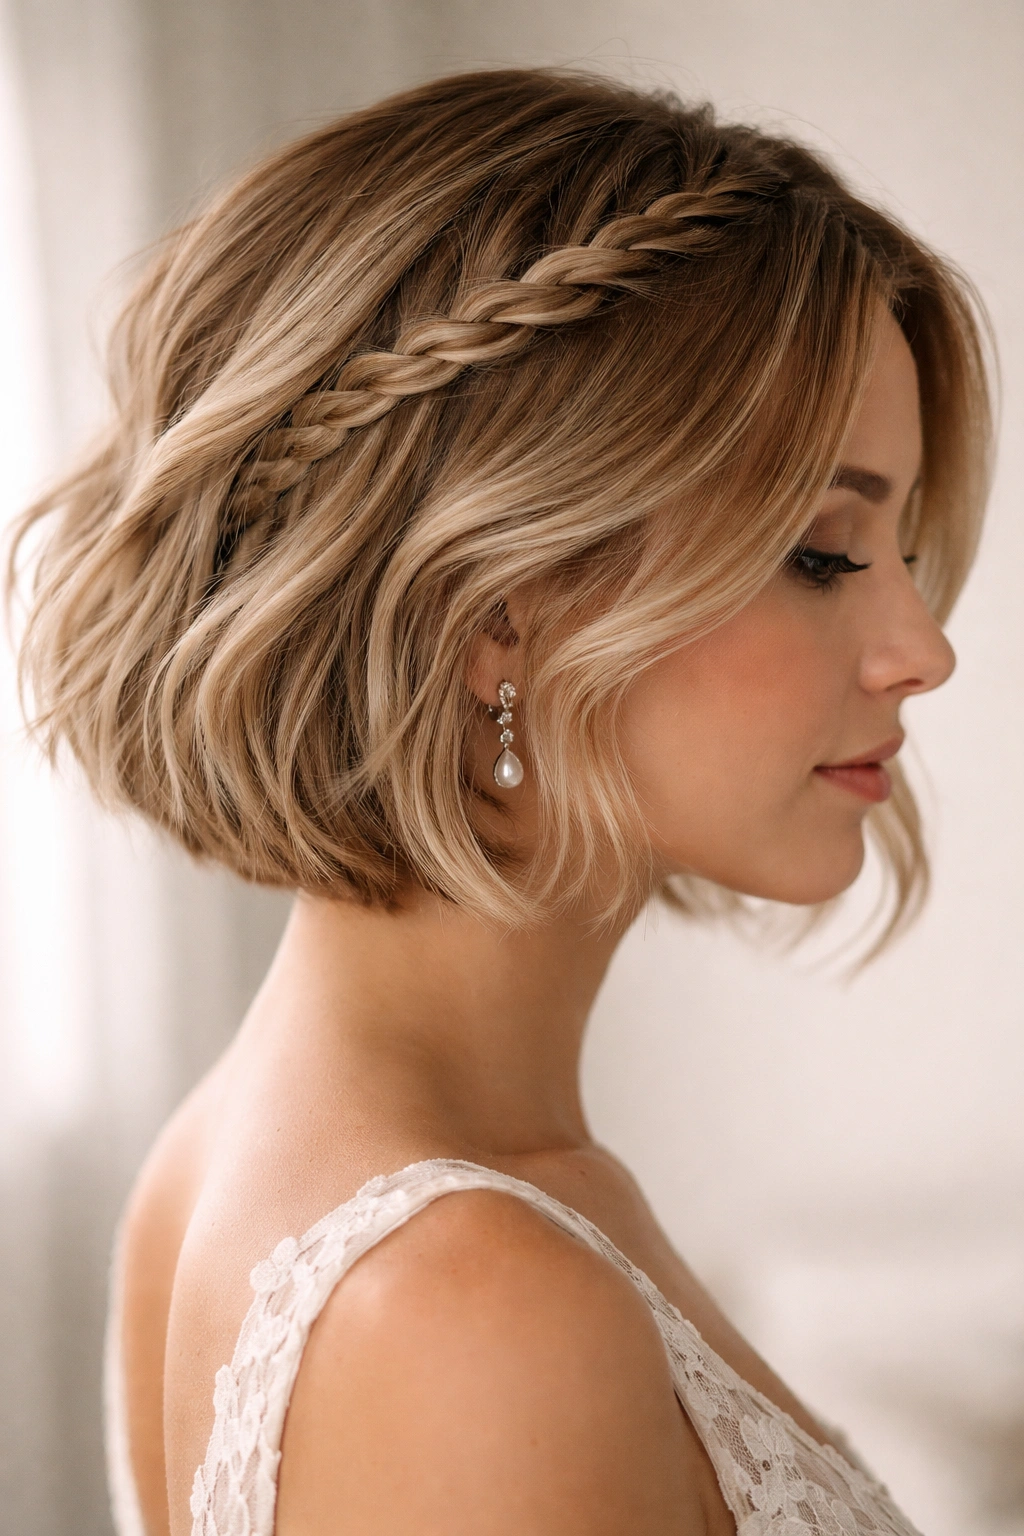
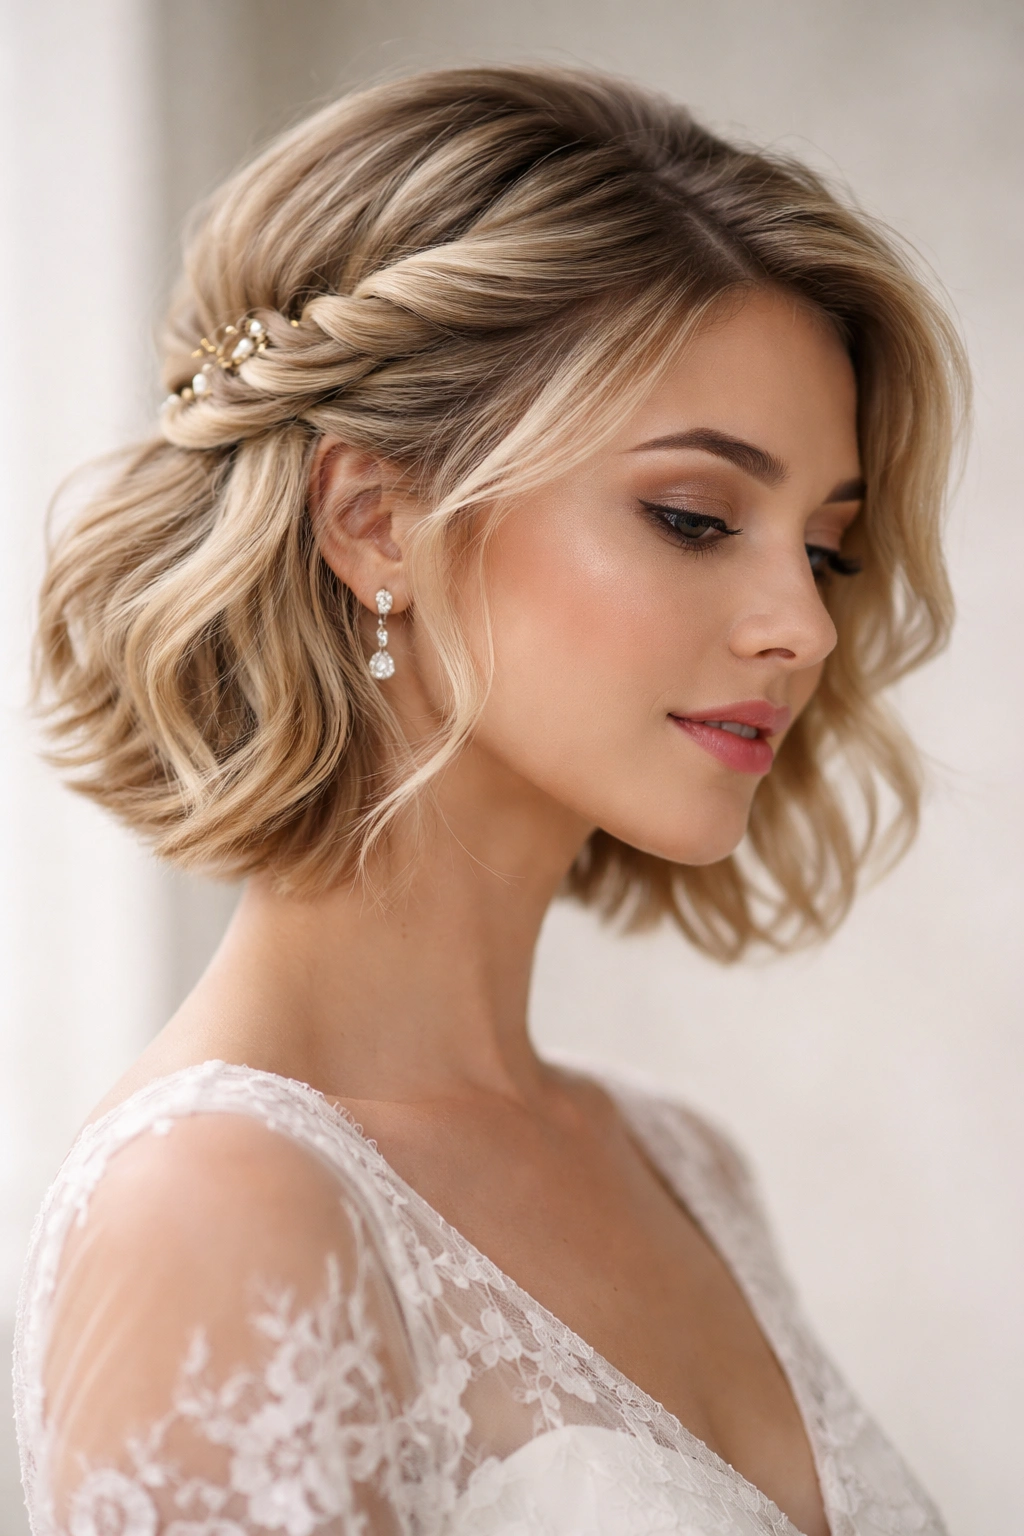
Can a braid even work on short wedding hair? Yes, if you treat it like an accent, not a full crown. The braid should be narrow, tucked in close to the head, and used to pull the eye upward before the rest of the hair falls loose.
Pick one side and braid a small section from the hairline back toward the ear. Stop early. You only need three or four crosses if your hair is chin-length, maybe a little more if it reaches the collarbone. Pin the end just behind the ear, then gently pull at the edges of the braid so it looks fuller.
How to keep the braid from slipping
- Prep with a dry texture mist before you start. Smooth hair slides. Gritty hair behaves.
- Use a small bobby pin at the braid end, then another pin crossed over it.
- If the braid is slippery, rub a pinch of matte paste between your fingers before you braid.
- Finish with a light mist of flexible hairspray from about 10 inches away.
This style works especially well if your dress has one bare shoulder or an asymmetrical neckline. The braid gives you shape on one side and keeps the rest from feeling too plain.
3. Mini Bouffant Half Up With Polished Ends
If the front of your hair collapses every time you smile for a photo, a tiny bouffant fixes the problem fast. It’s one of those old-school ideas that still works because it gives the crown a little height without turning the whole style into a formal helmet.
Tease a 1- to 2-inch section at the crown, then smooth only the top layer over it. Gather the lifted section at the back and pin it into place with two crossed bobby pins. Let the rest of the hair stay sleek or softly waved, especially through the ends. That contrast is what keeps the look modern.
This is a strong option for straight hair that tends to lie flat. It also plays well with short veils and hair combs, because the extra lift gives accessories somewhere to sit. The key is restraint. Too much teasing on short hair makes the top look puffy in the wrong way, and nobody needs that.
A mini bouffant looks best when the ends still move. Hard, frozen ends fight the softness of the crown.
4. Rope-Twist Knot at the Back
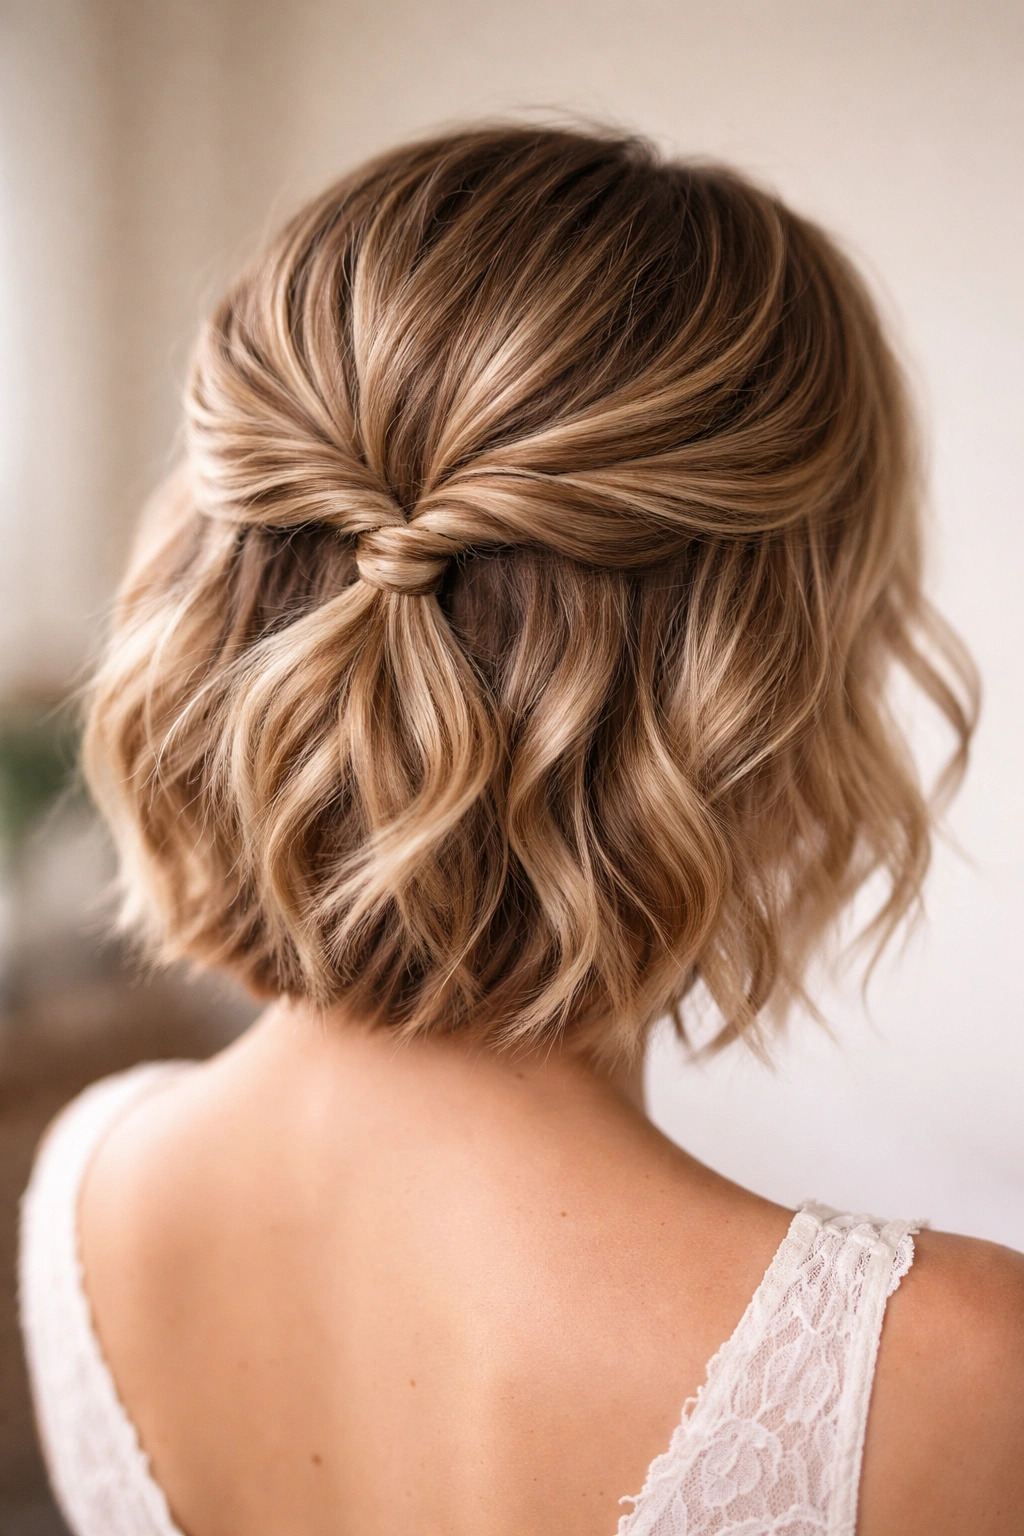
A rope twist gives short hair more structure than a plain twist, and that matters when your layers keep escaping. It looks intricate, but the technique is simple: split a section into two, twist each part in the same direction, then wrap them around each other in the opposite direction. The twist holds itself together better than a loose pin-back.
For wedding hair, use the rope twist only on the top half. Start near the temples, bring both sections toward the center back, and secure them low enough that the rest of the hair can fall over the pins. If your hair is layered, let the shorter ends slip out a little. That softness keeps the style from feeling too neat.
The rope twist has a nice side effect on shorter cuts: it creates the feeling of a small knot without demanding much length. If you’ve got a bob that barely reaches the shoulders, that can be the difference between “cute” and “done on purpose.”
A tiny amount of shine cream on the surface helps, but keep it away from the roots. Too much product there and the twist goes limp before the first toast.
5. Pearl-Pin Scatter on Textured Waves
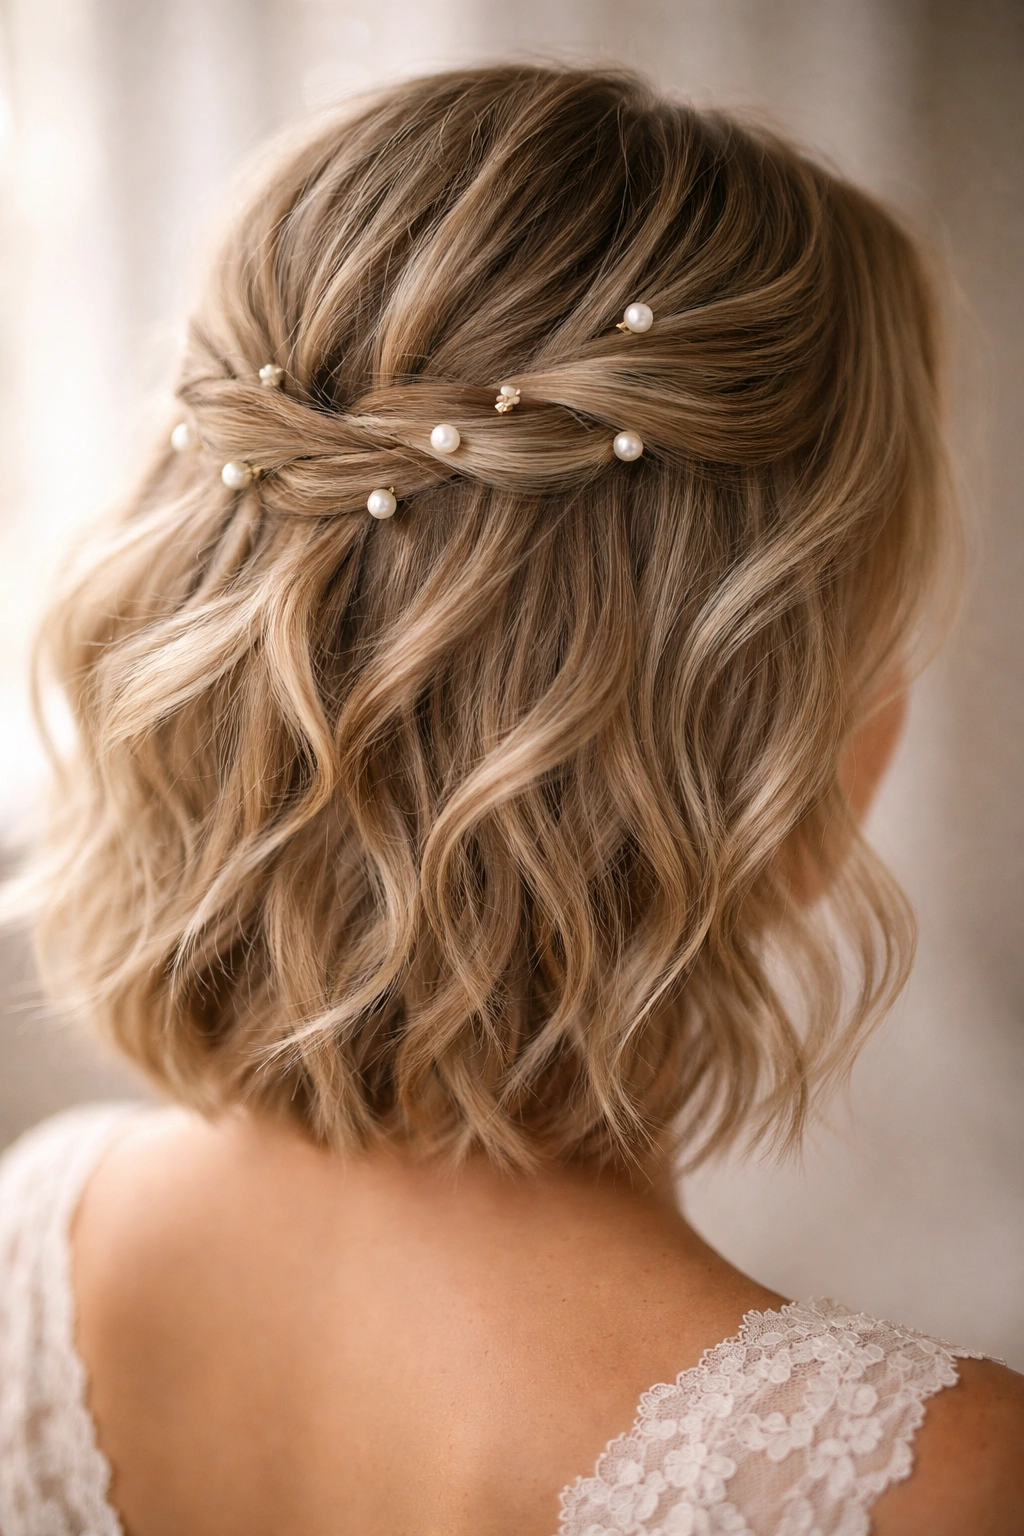
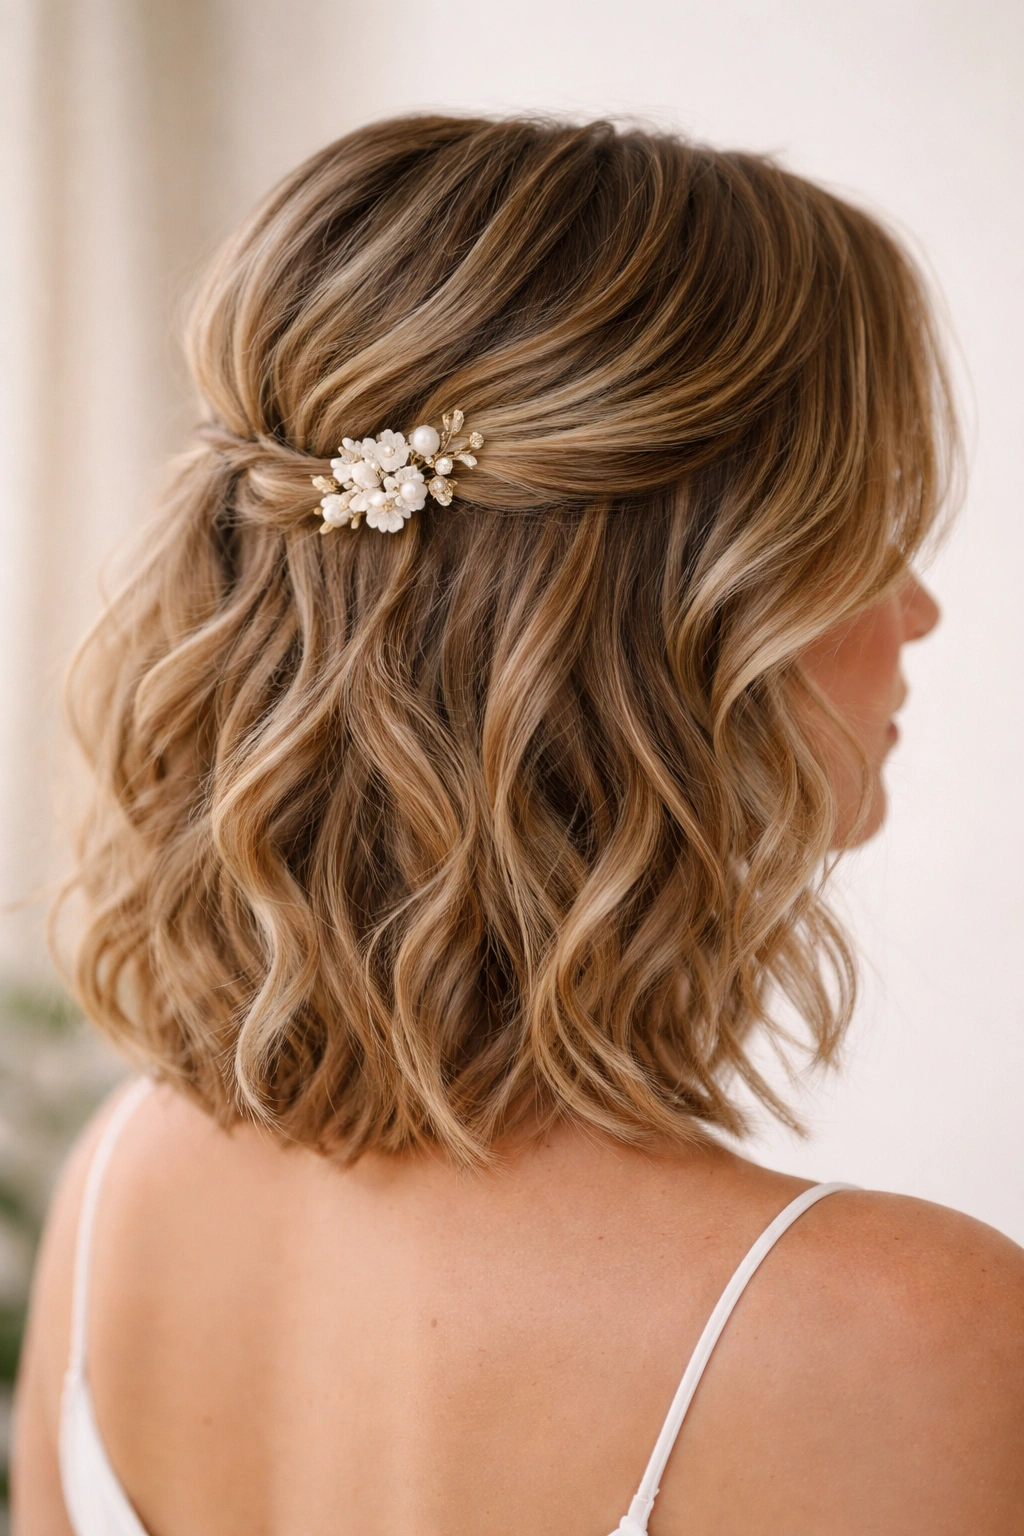
Pearl pins can save a wedding style that feels too plain. Not a whole row. Just a scatter of them tucked into the pinned-back section so the light catches in small flashes instead of one big shiny block.
This look works better than a large accessory when the hair is short because the shape of the cut already does half the visual work. A few soft waves, a half-up twist, and five or seven pearl pins placed unevenly can make the style feel intentional without crowding the head. If the gown is heavily beaded, choose smaller pearls. If the dress is simple, slightly larger pins can carry more of the visual weight.
The nice thing about pearl pins is that they play well with soft movement. You can keep the bottom half airy and a little messy, then let the pins give the upper section a clean finish.
Use matte pins if your hair color is dark and you want the pearls to stand out. If your hair is very light, ivory-toned pins usually blend better than bright white.
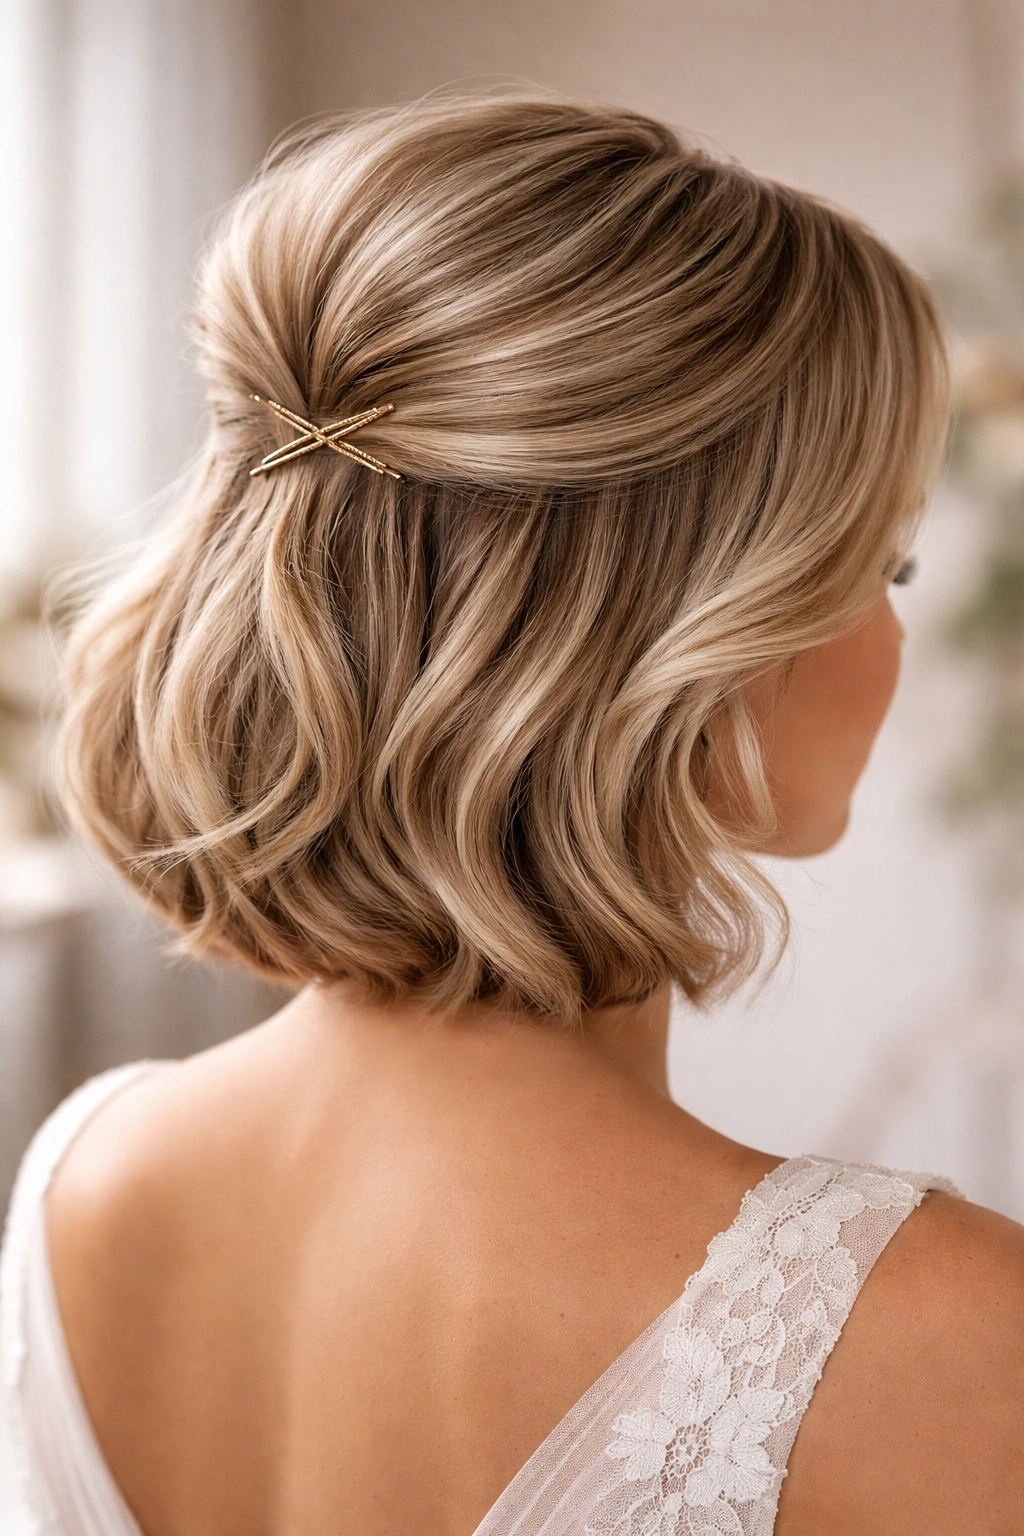
6. Crisscross Pins and Tousled Crown
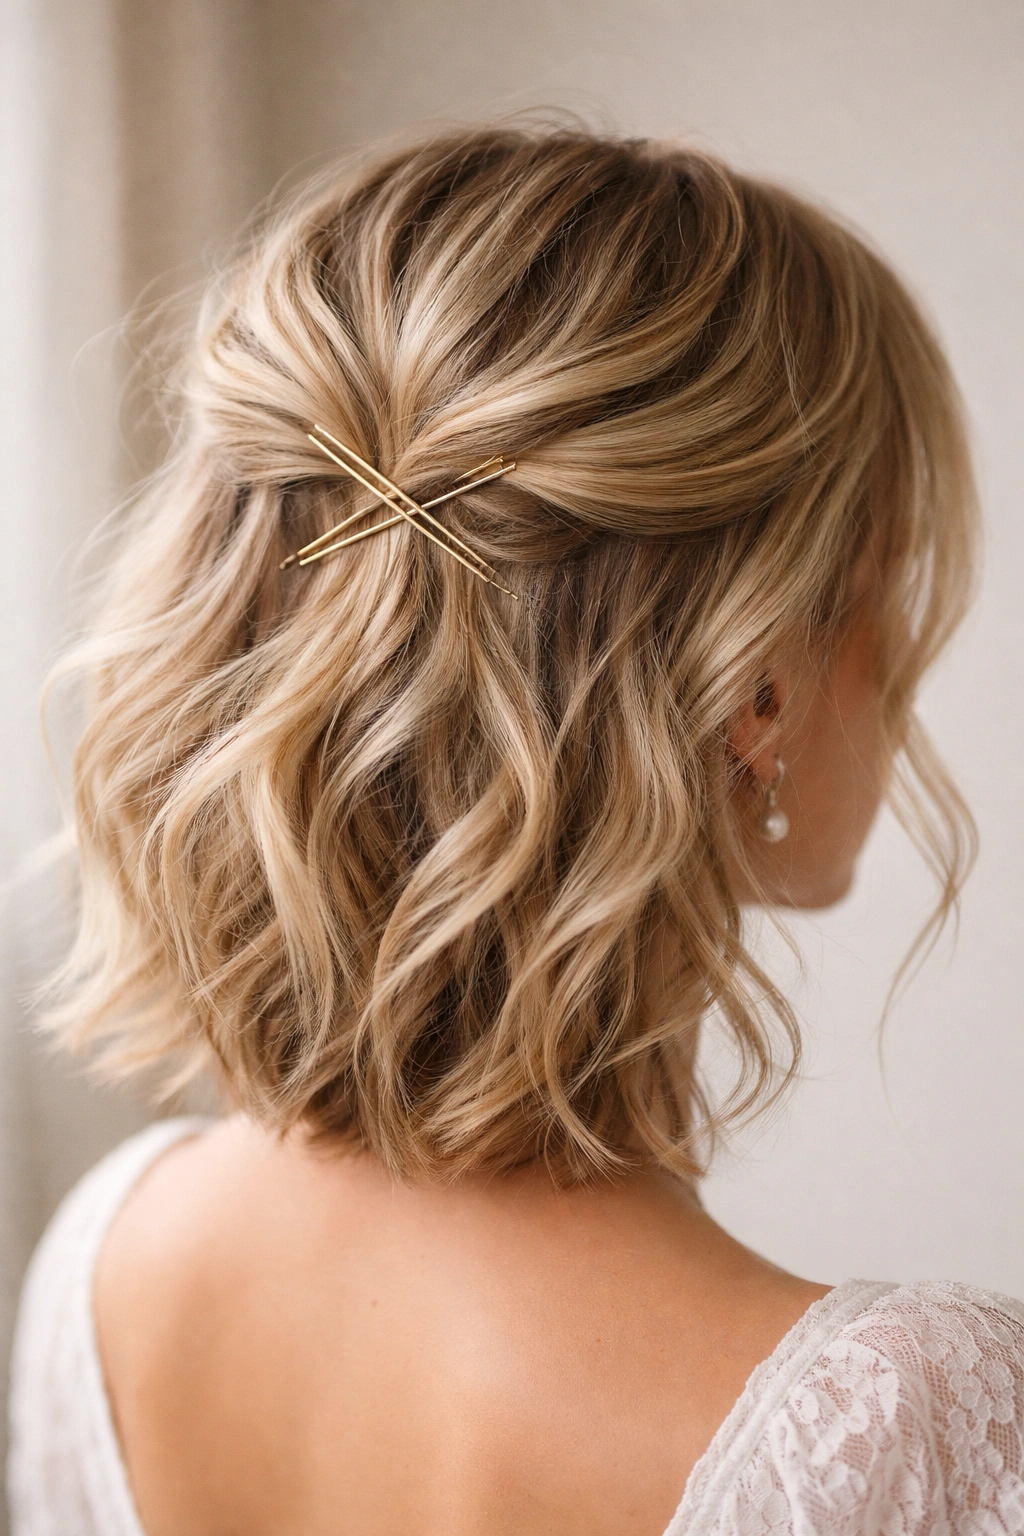
Crisscross pinning sounds fussy until you try it on short hair. Then it starts to make sense. The X-shape grips better than a single straight pin, especially when the hair is layered or freshly washed and trying to slide out of everything.
Take a small section from each side, pull them back loosely, and secure them at the center with two bobby pins crossing over each other. Add another pair slightly lower if your hair is thick or blunt-cut at the ends. The rest of the hair can stay loose and a little airy. That is the point.
Why the X-shape matters
The crossed pins keep tension on both the hair and the scalp. A straight pin can work loose if the hair shifts; crossed pins fight that movement. For short wedding hair, that extra grip is worth the extra ten seconds.
- Best on medium to thick hair
- Better with day-old texture than slippery clean hair
- Easier to hide under waves than a large clip
- Good for brides who want a simple half-up shape with staying power
Spray the pins before inserting them. Sounds small. Helps a lot.
7. Braided Halo With Airy Volume
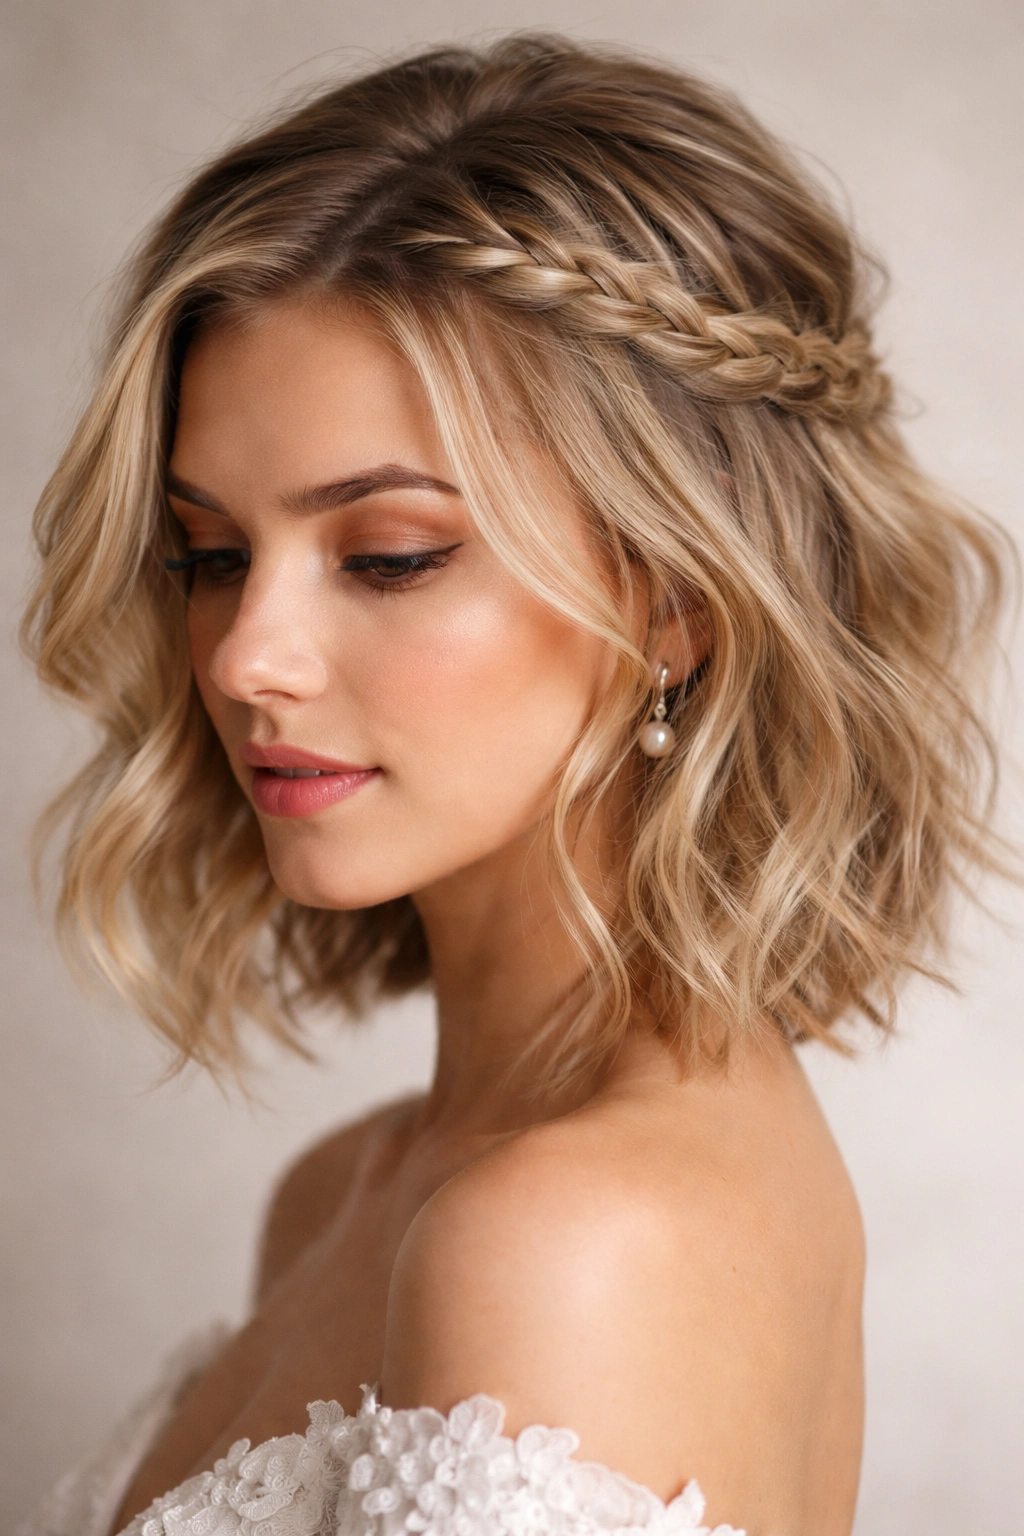
A tiny halo braid can make a lob look longer, which is a nice trick when your hair stops at the collarbone. Don’t build a full ring around the head unless you have enough length for it to sit flat. On short hair, the better move is a partial halo that starts at one temple, crosses the back, and ends near the other side.
Keep the braid loose and a little uneven on purpose. If it’s too tight, the style looks severe. If it’s too loose, it looks unfinished. Somewhere in the middle is where the wedding version lives. Pair it with soft ends, not straight ones. The braid creates the frame; the loose hair gives it warmth.
This one suits textured hair especially well, because natural wave makes the braid feel less stiff. If your hair is straight, curl the lower half first with a 1-inch wand and brush it out gently so the braid and the rest of the hair live in the same texture family.
A little scalp lift at the crown helps the halo sit up instead of flattening into the head.
8. Low Half Pony With Flipped Ends
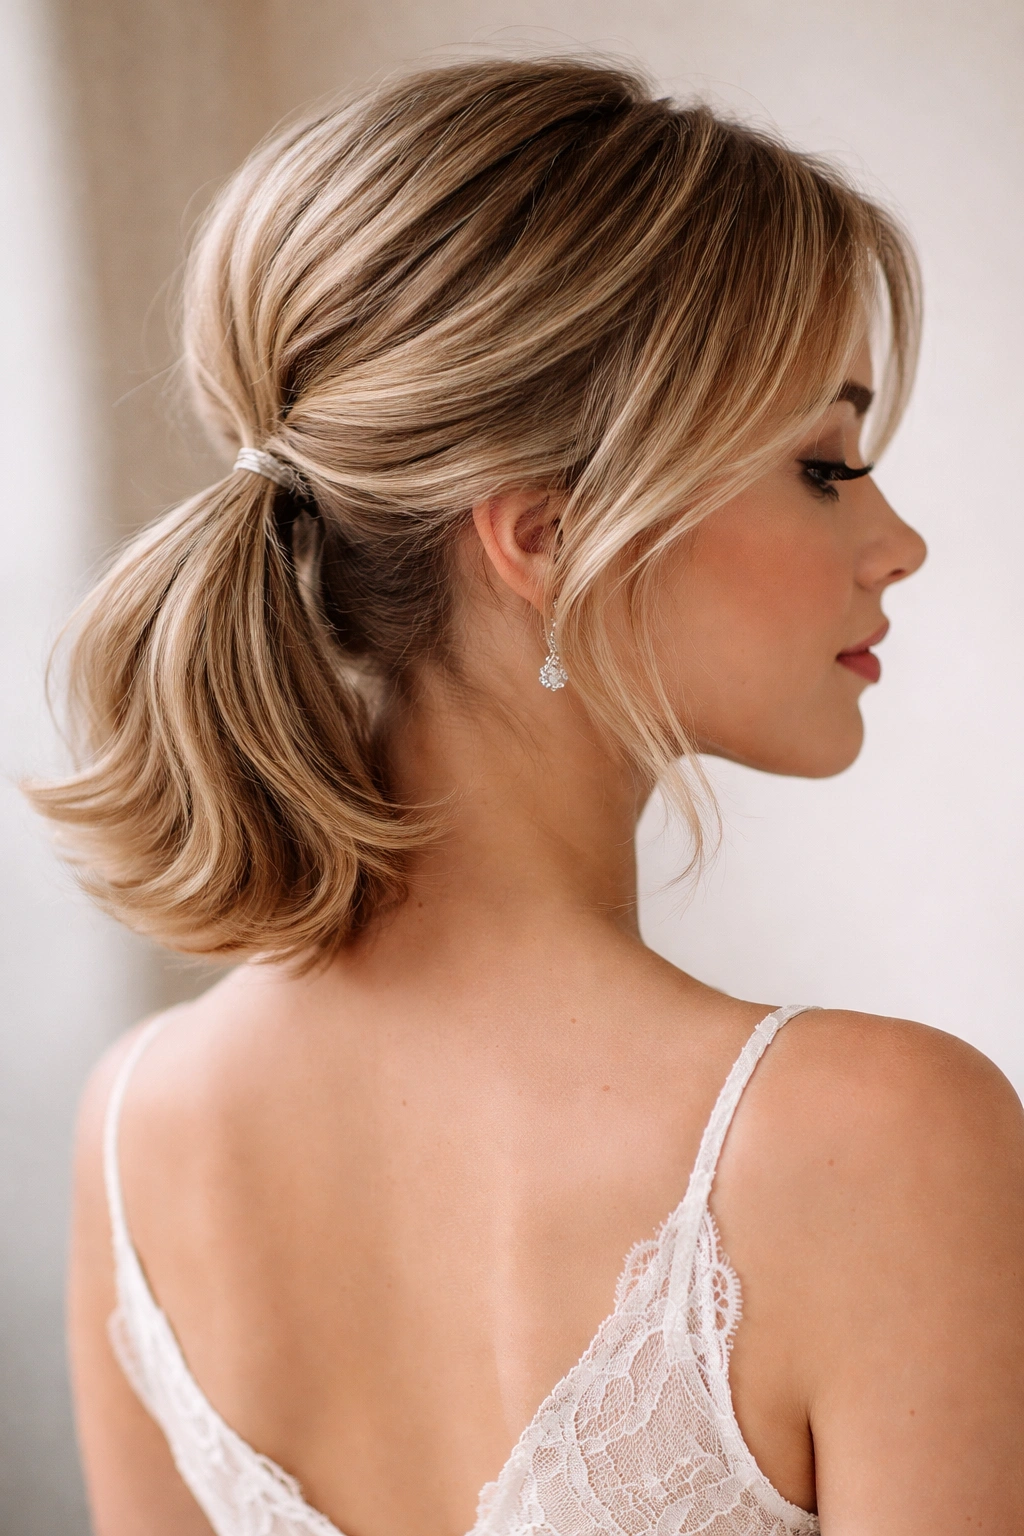
Think of this as the half-up version of a pretty ponytail. It’s tidy enough for a wedding, but the lower half still moves, which keeps short hair from looking boxy. A low half pony works especially well on layered lobs because the hair has enough length to swing, but not so much that it drags the style down.
Gather the top half at the back of the head and secure it with a clear elastic. Then wrap a small strand around the elastic to hide it, pinning the end underneath. If the ends of the loose hair are long enough, flip them out slightly with a flat iron or round brush. That little bend gives the style shape and keeps it from feeling too casual.
The beauty of this look is that it reads clean in photos. From the front, you get softness around the face. From the back, the little ponytail detail keeps the whole thing from disappearing.
Use a strong-hold spray only at the crown and elastic area. Keep the lower lengths touchable.
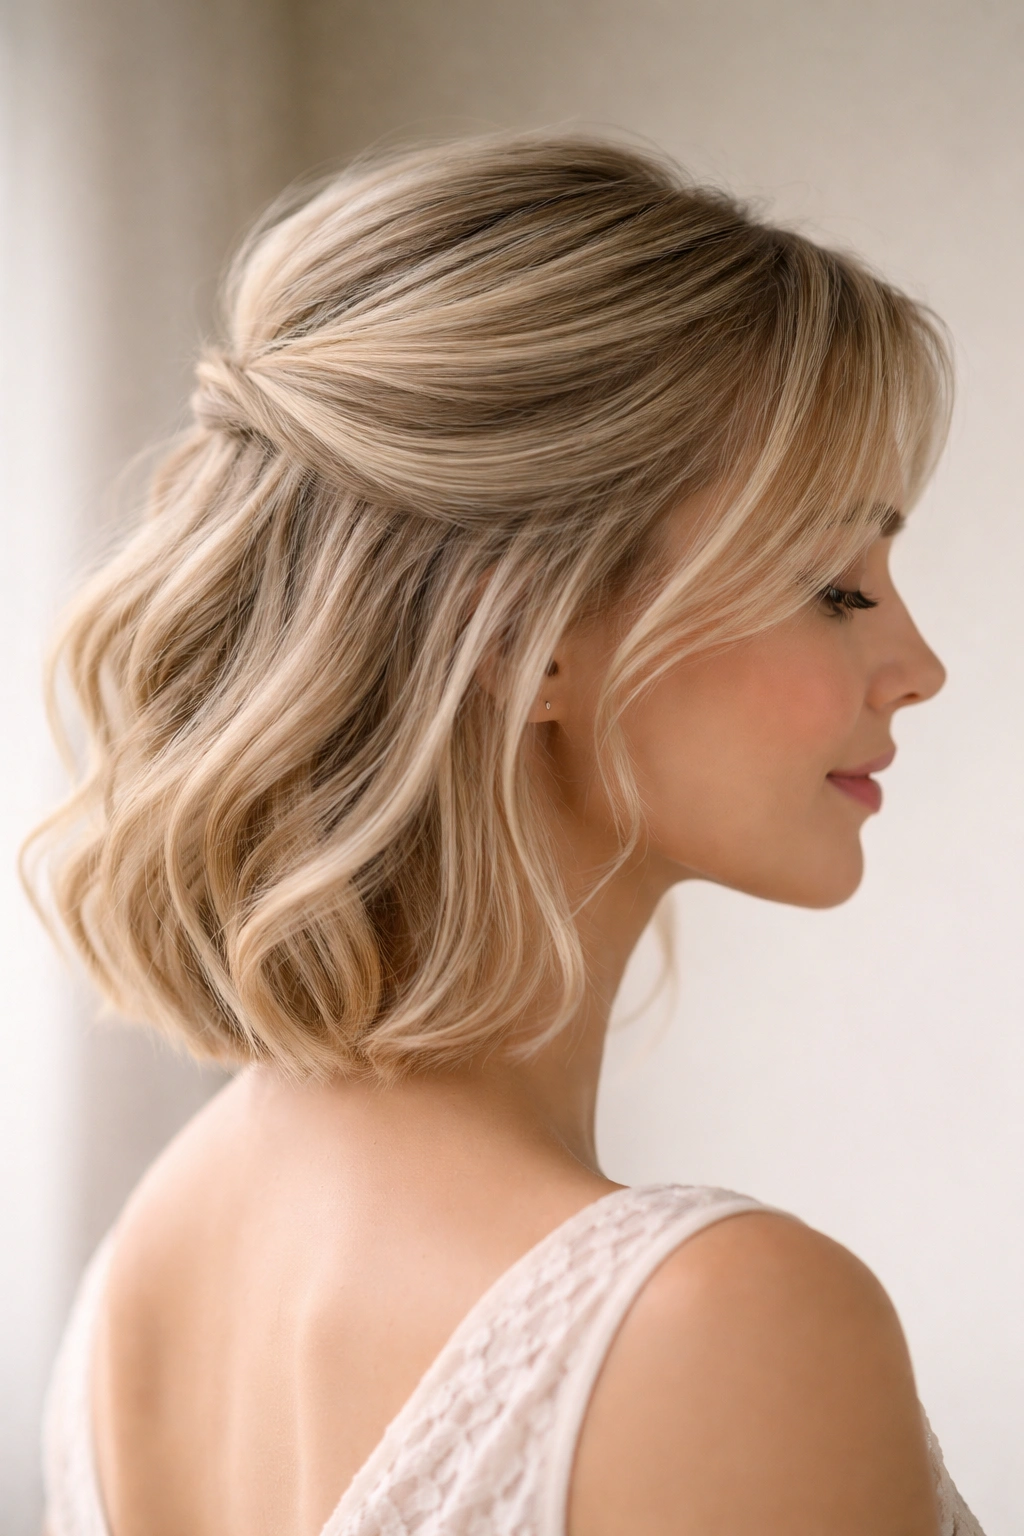
9. Half-Up Knot With Face-Framing Curl
Why does a tiny knot work so well on short hair? Because it reads as deliberate, not forced. A half-up knot gives you a focal point at the back while leaving enough movement around the face to soften everything.
Pull the top half of the hair into a small knot, then pin the base of it flat against the head. The knot should sit low enough to hide the elastic or pins. Leave two face-framing curls out in front, ideally one on each side, and keep them loose rather than spiraled stiff. A soft bend near the jaw is more flattering than a tight ringlet that fights the rest of the style.
This is a good pick when you want the hair to feel relaxed but not undone. It sits somewhere between a casual half-up and a formal bun, which is exactly why it works for weddings.
And yes, it can look a little messy. That’s the point. The mess should come from texture, not from pieces falling out because the style was never pinned well enough.
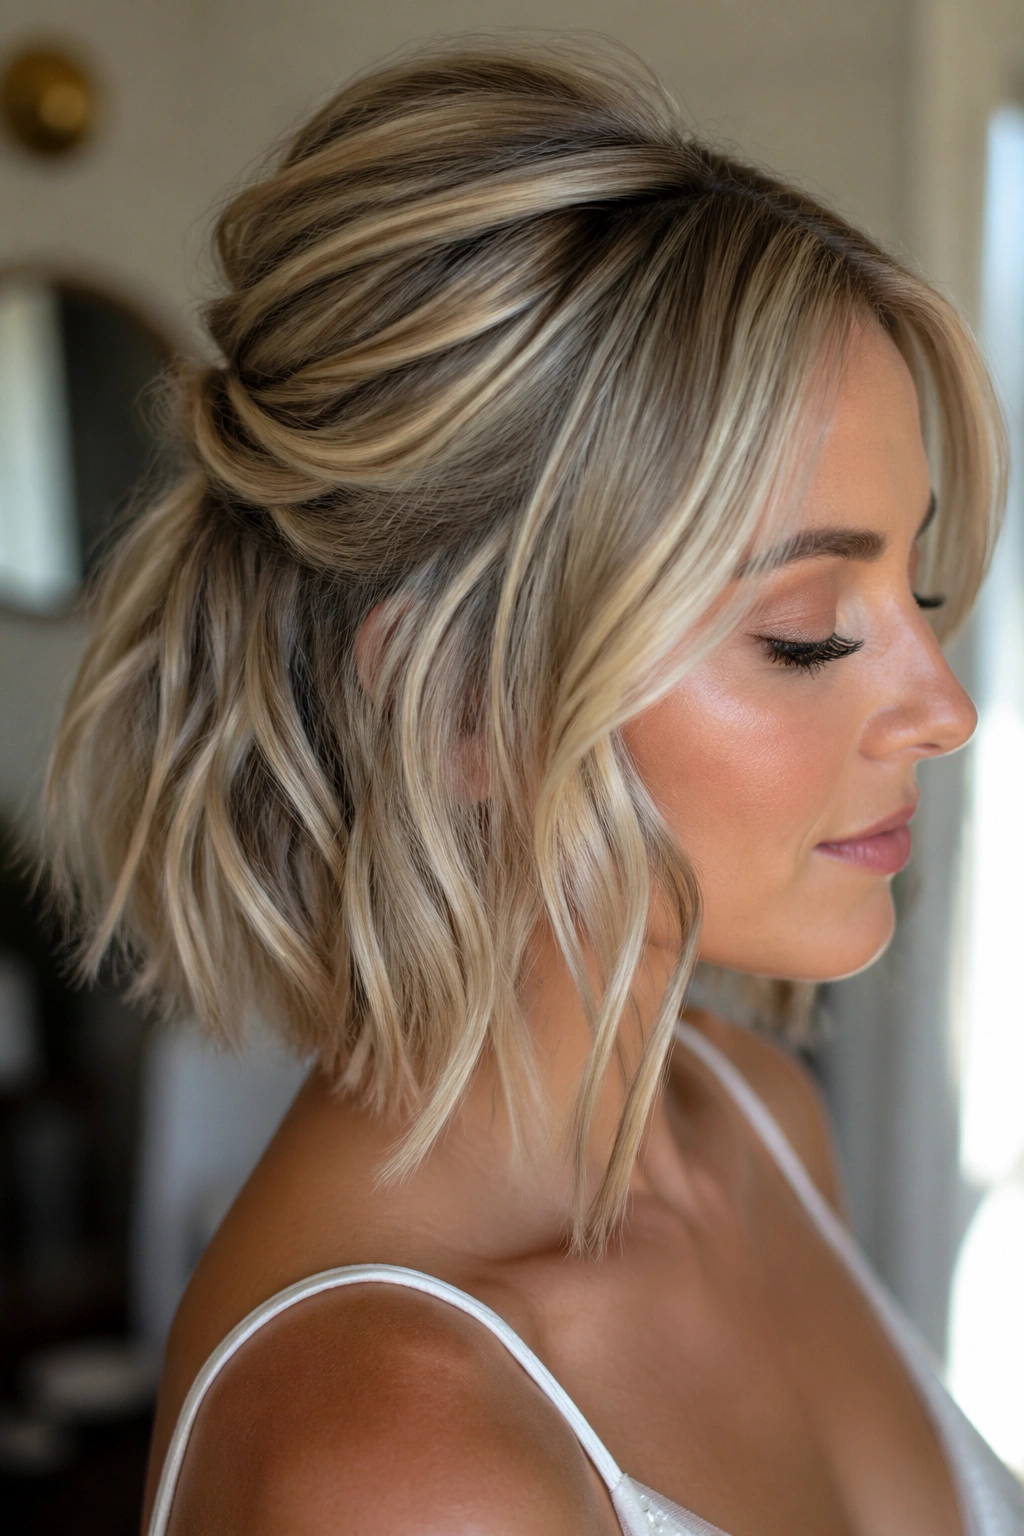
10. Side-Swept Twist for a Deep Part
A side-swept twist gives one shoulder more drama, and that makes it a smart match for one-shoulder gowns or dresses with a high neckline. The deep part changes the balance of the whole style right away. Suddenly the hair feels styled with intent, even if the actual technique is small.
Start with a deep side part above the arch of one eyebrow. Take the heavier side, twist it back along the hairline, and pin it behind the ear or just above the nape. Leave the other side looser and softer so the asymmetry feels balanced rather than lopsided. On short hair, that contrast matters a lot.
This style is especially useful if your haircut has long layers that want to separate. The twist pulls those layers into one clean line and lets the rest fall freely. It also frames earrings well, which sounds like a small thing until you see the photos.
If the hair on the twist side keeps slipping, add a touch of powder at the roots before you start. The grip helps more than extra pins do.
11. Floral Clip Accent on Wavy Lob
One small flower cluster can do more than a whole bouquet of pins. The right floral accent makes short wedding hair feel finished in a single move, especially when the hair itself is already softly waved.
Choose one focal point, usually where the half-up section meets the loose lengths. Pin a small floral clip there so it sits a little off-center rather than directly in the middle of the head. That placement looks more relaxed and keeps the style from turning bridal-catalog stiff. Fresh flowers work if they’re secured well, but silk flowers often survive better if the wedding involves heat, movement, or a long day of wear.
What works on short hair
- A cluster about the size of two thumbs is enough
- Lightweight clips hold better than heavy combs
- White, blush, and muted green tend to read clean in photos
- One bloom often beats three
Keep the rest of the hair simple. If the floral piece is detailed, the hair should stay quiet. Too many competing elements make short styles look crowded.
12. Velvet Bow and Messy Volume
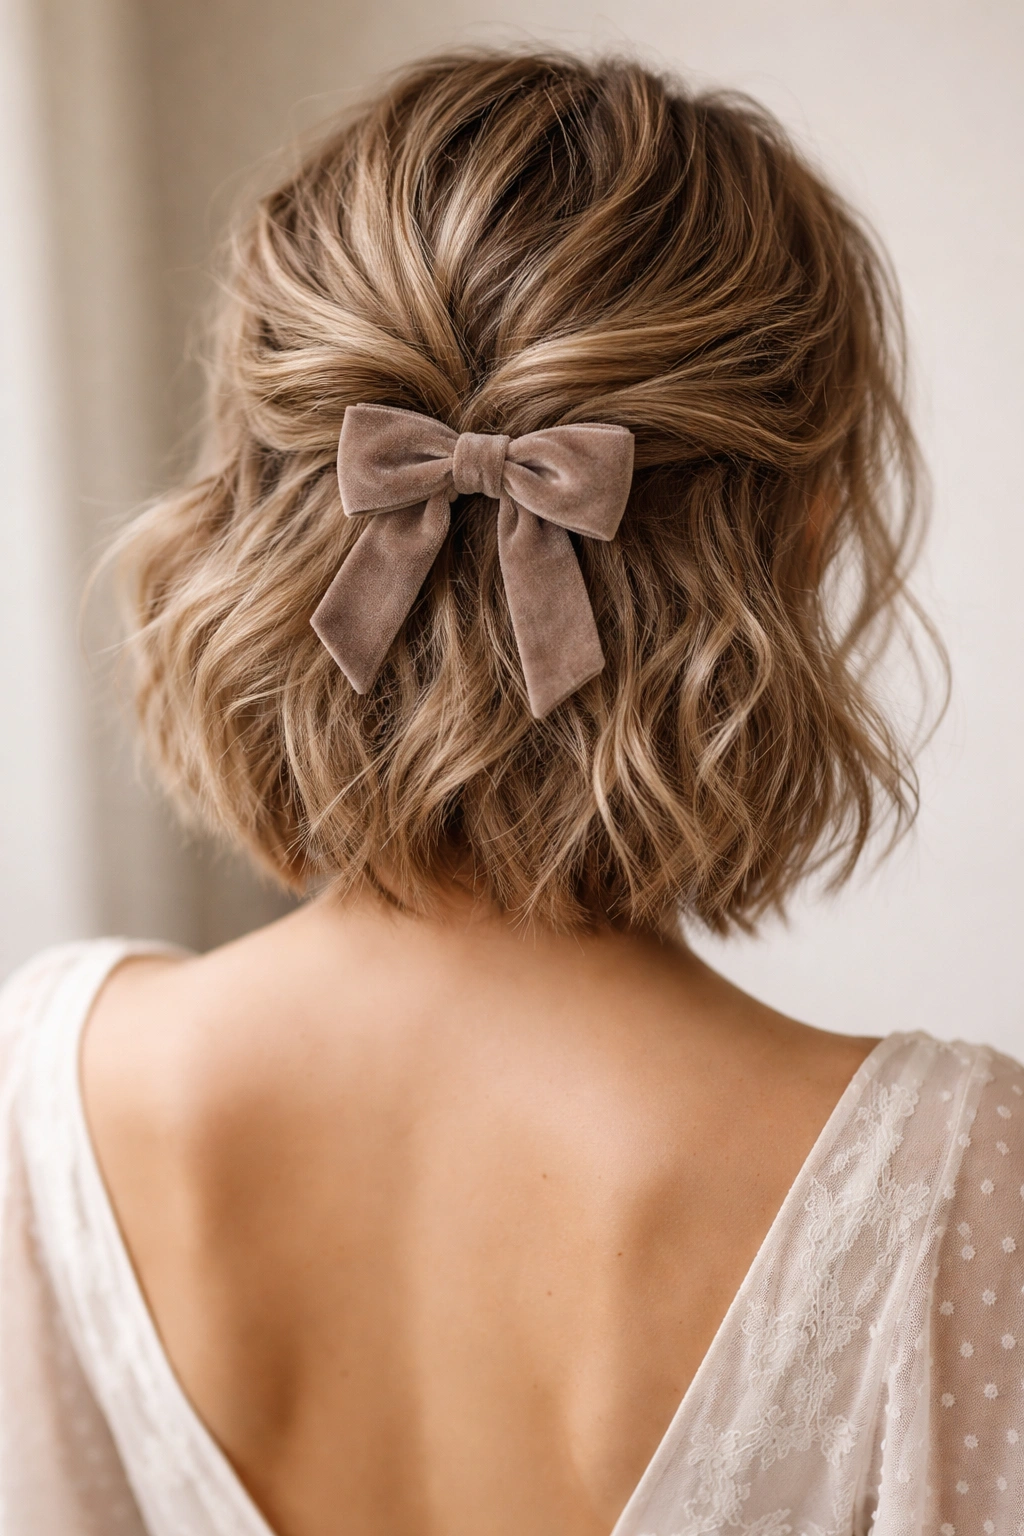
A narrow velvet bow can rescue a half-up style that feels too plain. It adds shape at the back without asking the hair to do more than it should. On short hair, that’s a blessing.
Tie or pin the bow just below the half-up section, where it can hide the elastic or the ends of a twist. Velvet works better than satin here because it has a little grip and doesn’t slide as easily. Keep the bow modest in size, around 1.5 to 2 inches wide for most short cuts. Anything larger can start to swallow the hairstyle instead of finishing it.
This look has a quieter, more formal feel than pearl pins or flowers. It suits minimal dresses, satin slips, and gowns with a very clean neckline. If the outfit is already busy, skip the bow. If the outfit is spare, the bow gives the hair a point of focus without making it feel precious.
A little bend in the loose ends keeps the style from becoming too neat. The point is softness, not ribbon-choked perfection.
13. Micro-Braid Detail Across the Temple
Can a tiny braid carry a wedding style? On short hair, yes — because it adds texture where the rest of the cut may not have enough length to build a bigger shape. Think of it as a detail line, not a full braid statement.
Take a thin section from the temple, braid it tightly for a couple of inches, then pin it back into the half-up section or tuck it behind the ear. The braid should be narrow enough that it blends into the rest of the style instead of shouting for attention. On layered hair, this is especially useful because the braid can control shorter pieces that otherwise escape.
How to use it
- Start the braid on hair that has a little product in it
- Keep the braid narrow, about a pencil’s width
- Stop braiding before the hair gets too short to stay neat
- Pin the end under a wave or twist, not on top of it
This works well when your hair texture is stubborn and won’t hold a big curl. The braid gives structure even if the rest of the style stays relaxed.
14. Soft Roll-Back for Fine Hair
Fine hair often looks best when it’s rolled rather than teased. Teasing can give height, sure, but it can also make the top look fuzzy and thin at the same time. A soft roll-back avoids that problem and still gives the half-up shape a little lift.
Take the top section, smooth it lightly with your fingers, and roll it back toward the crown before pinning it flat. The roll should be gentle, almost like folding the hair over itself instead of stacking it. Leave the lower half loose and lightly waved so the contrast feels soft.
This style works well if your hair is short, fine, and just long enough to tuck into a pin. It’s also a smart choice when you don’t want visible teasing or bulky volume at the roots. The rolled shape looks neat from the side and keeps the top section from collapsing.
A light mist of flexible spray before and after pinning usually does the trick. Heavy spray makes fine hair go limp. That’s one of those annoying truths nobody likes, but there it is.
15. Bubble Half Pony for Layered Hair
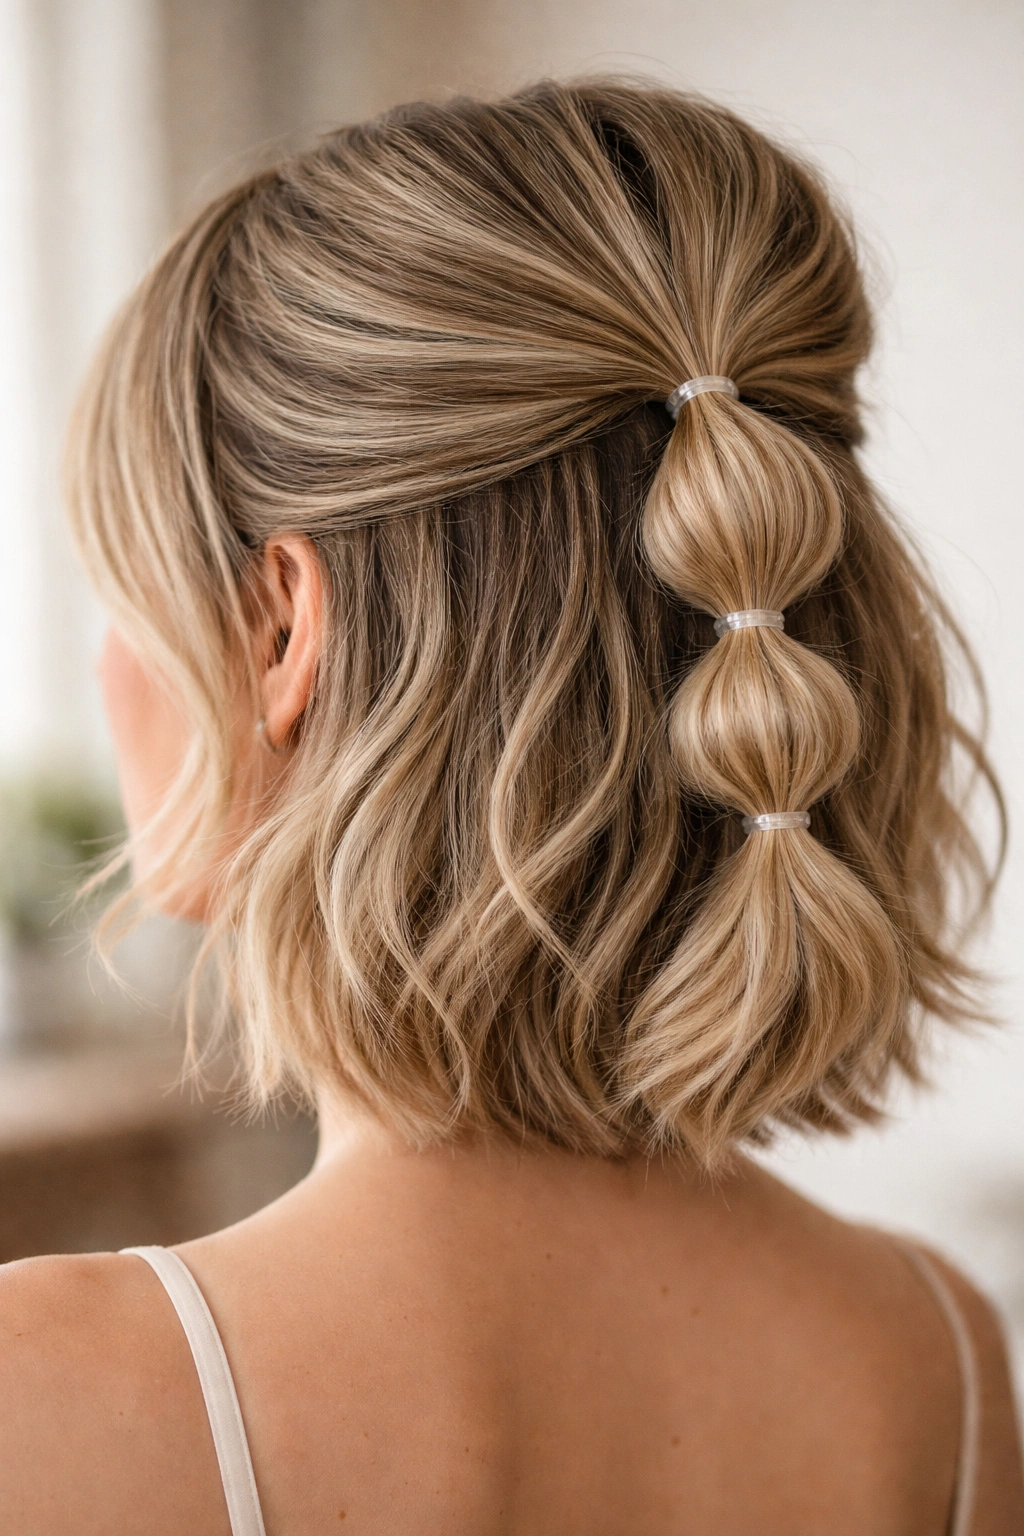
Bubble styles can look playful, but on short hair they can also read surprisingly polished. The key is keeping the bubbles small and controlled so the whole thing doesn’t veer into costume territory.
Start with a half pony secured at the back. Add a clear elastic every 1 to 1.5 inches down the loose tail, then gently pull at each section to puff it into a rounded bubble. If your hair is very short, you may only get two bubbles, and that’s fine. Two done well beats five squeezed out of not-quite-enough length.
This style is one of my favorites for layered hair because the layers actually help. They create a slightly undone texture inside each bubble, which makes the look softer and more wedding-friendly. It also photographs well from the side, where the little round sections catch the eye.
Keep the crown smooth enough that the bubbles stay the star. If the top is too messy, the whole thing loses shape fast.
16. Veil-Friendly Pinned Back Sections
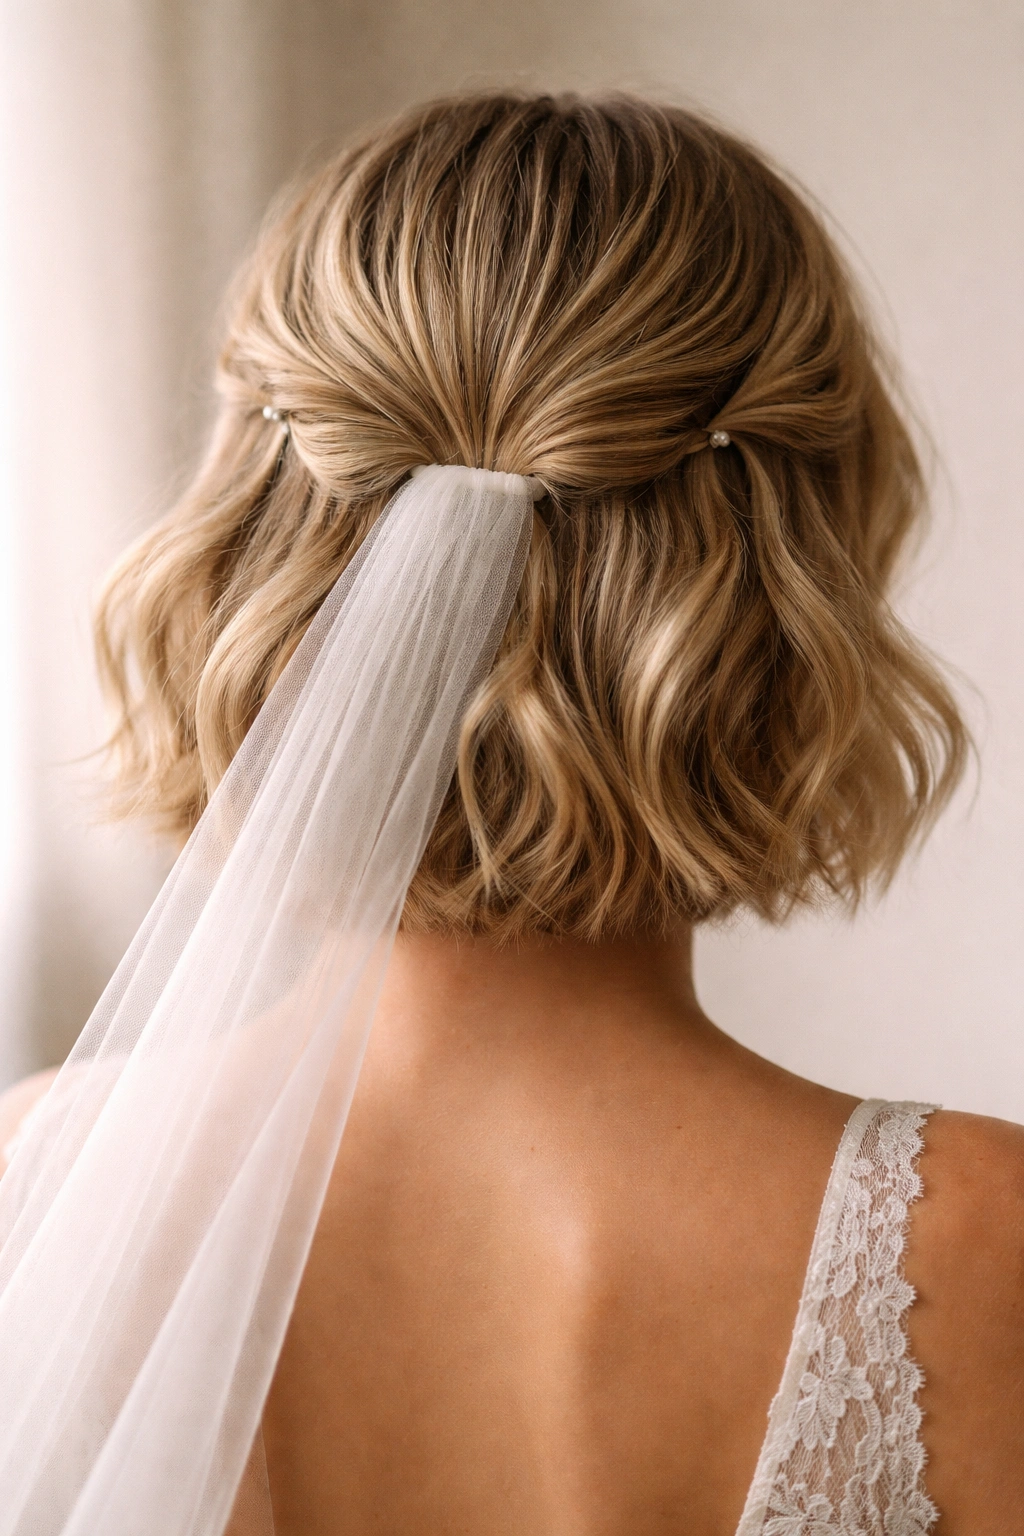
A veil and a big half-up style can fight each other. That’s the problem. The easy fix is to keep the pinned-back sections low and flat so the veil comb can nest above or below them without pulling everything loose.
Use two small sections from either side of the face, pin them back close to the head, and leave the center back mostly open. The veil comb can then sit where it needs to sit without competing with a large knot, braid, or puff. If the veil is heavy, place it after the pins are secure and ask someone to support the base while it’s set.
This is the style for brides who want the veil to stay the main event. The hair still looks done, but it doesn’t steal attention from the fabric or the dress.
Unlike fuller half-up looks, this one stays calm at the crown. That’s useful if your hair is short and you don’t want a bulky shape under tulle.
17. Textured Crown Lift With Hidden Pins
If short hair keeps falling flat, give the crown a little lift and hide the pins under the top layer. That’s the whole idea here, and it’s one of the most reliable ways to make a messy half up half down style feel finished on a wedding day.
Backcomb a 2-inch rectangle at the crown, smooth the top layer over it, then pin the lifted section from underneath so the support disappears. Leave the rest of the hair in soft bends or brushed-out waves. The look should feel airy, not stiff. You want movement when you turn your head, not a shell.
This is the version that works when you want the short hair to look intentional from every angle. It suits blunt bobs, layered lobs, and anything in between. It also handles accessories well, because the lifted crown gives clips, pins, or small flowers a place to rest without sliding.
One final thing. Short hair usually looks best when the style has one clear idea. Twist, braid, bow, pearl pin, or lifted crown. Pick one main move and let the rest stay soft. That’s what keeps the whole thing from turning crowded.
If the wedding look needs to last through dancing, hugs, and a long dinner, keep the structure hidden and the texture visible. That combination does the work without looking like it tried too hard.