Pin curl half up half down looks for curly hair work because they respect the shape that is already there. You keep the crown under control, leave the length free, and still get movement, bounce, and a little drama up top.
That balance is harder than it sounds. Smooth the roots too much and the whole style goes limp. Leave everything loose and the top starts to puff, split, or sag in the wrong places. A good half-up style on curly hair is about shape, not force.
The nicest versions usually lean on small, crossed bobby pins, sections that stay narrow, and a light touch with hold products. I’m talking about pinning the hair where it naturally wants to fold, not dragging it into submission. That’s the difference between a style that lasts and one that looks tired after the first hour.
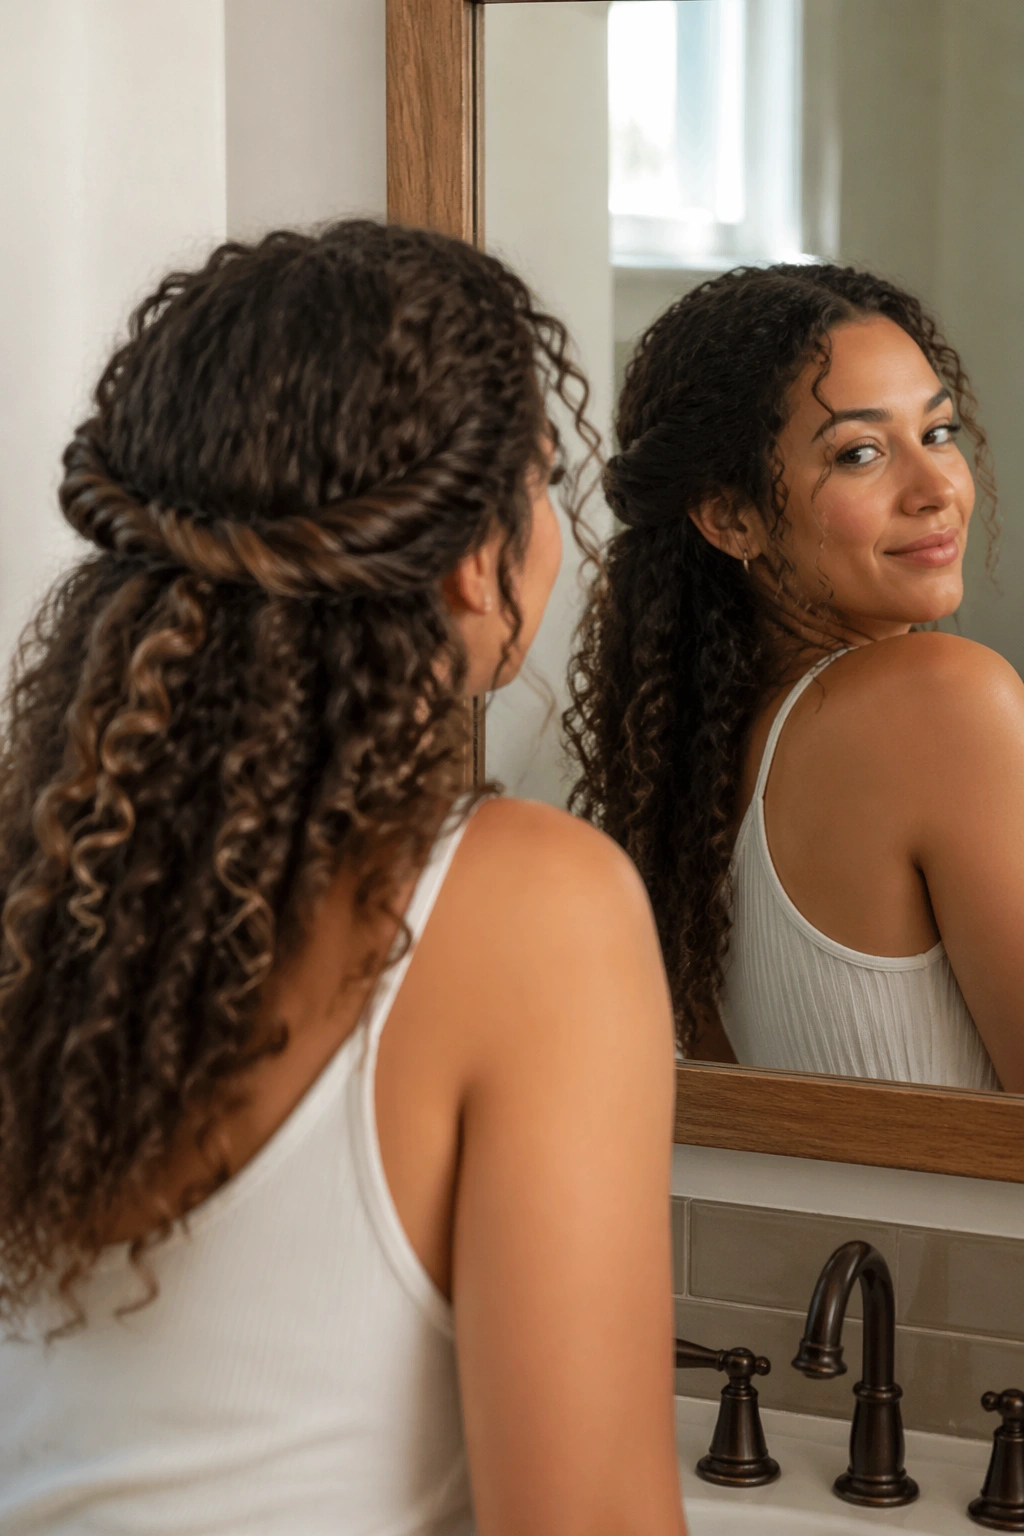
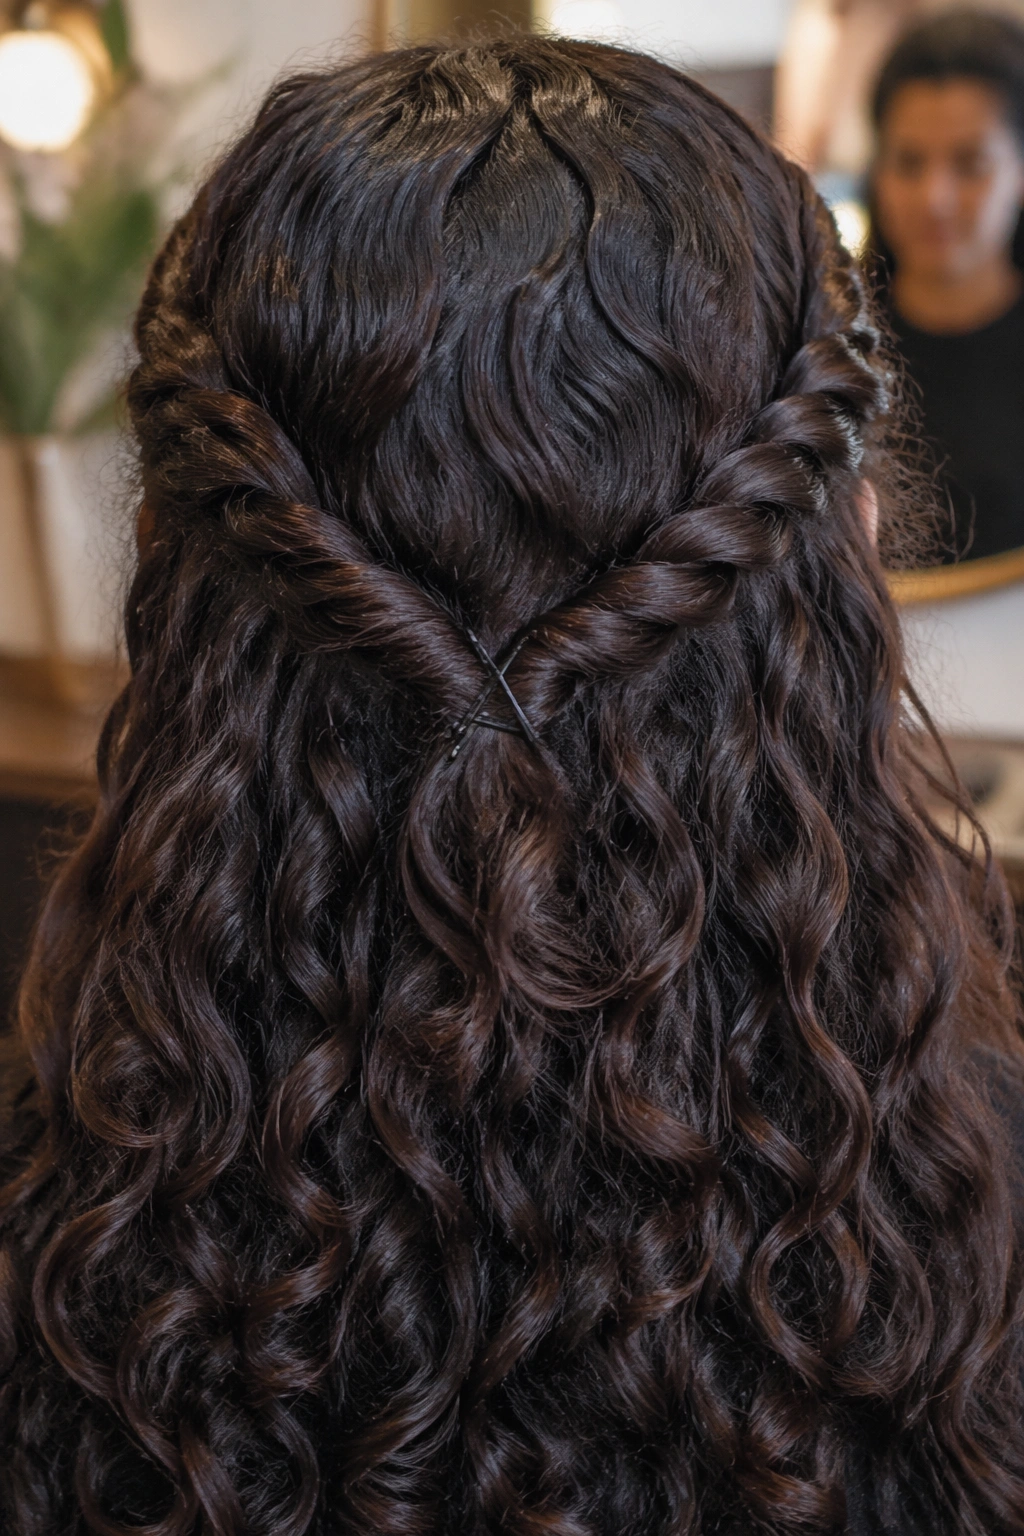
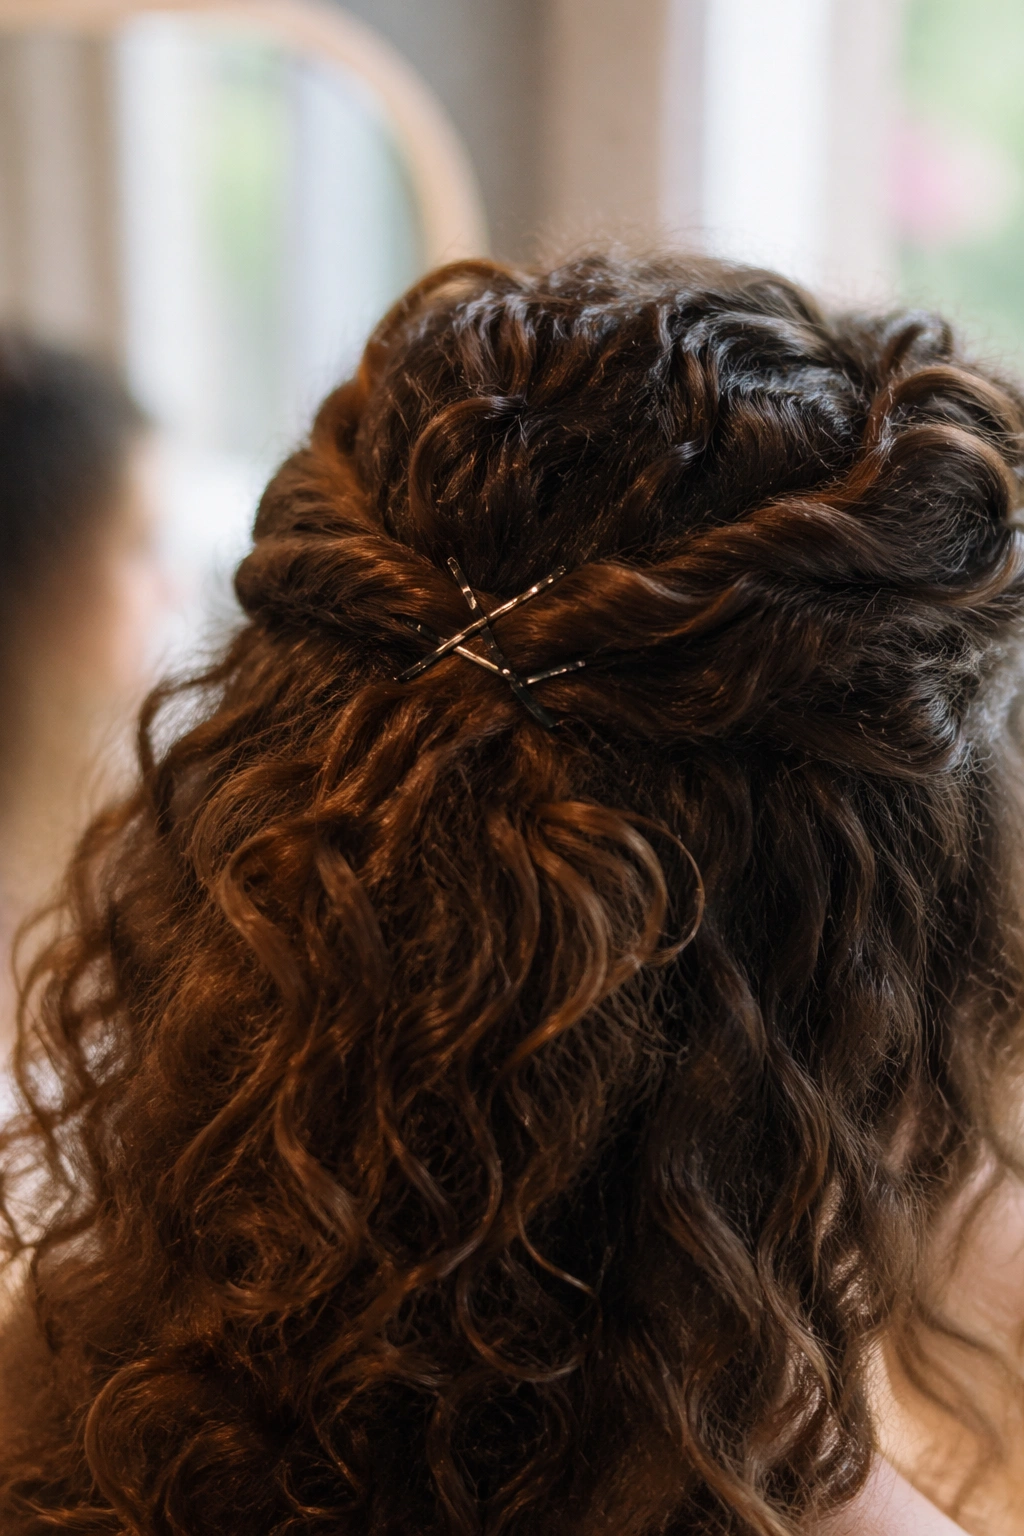
1. Classic Twisted Crown Lift
This is the one I reach for when I want curly hair to look finished without looking overworked. Two small sections from the front are twisted back toward the crown, pinned where they meet, and left to spill into the rest of the curls below. Simple. Clean. Hard to mess up.
Why this shape works
The center of the head gets a little lift, which keeps the style from sitting flat against the scalp. That matters more on curly hair than people think, because curls can be gorgeous and still collapse at the crown if the top is left alone.
What I like here is the balance. The front gets structure, the sides stay soft, and the back keeps all its volume. It works on loose curls, springy ringlets, and tighter coils that have enough length to twist without pulling.
- Use two sections about 1 to 1.5 inches wide from each temple.
- Twist them back once or twice, not all the way to the ends.
- Secure with two crossed bobby pins for better grip.
- Leave the lower curls untouched so the style keeps movement.
Best tip: pin the twist where the head starts to curve, not at the very top. That tiny shift gives the crown lift without making the style look stiff.
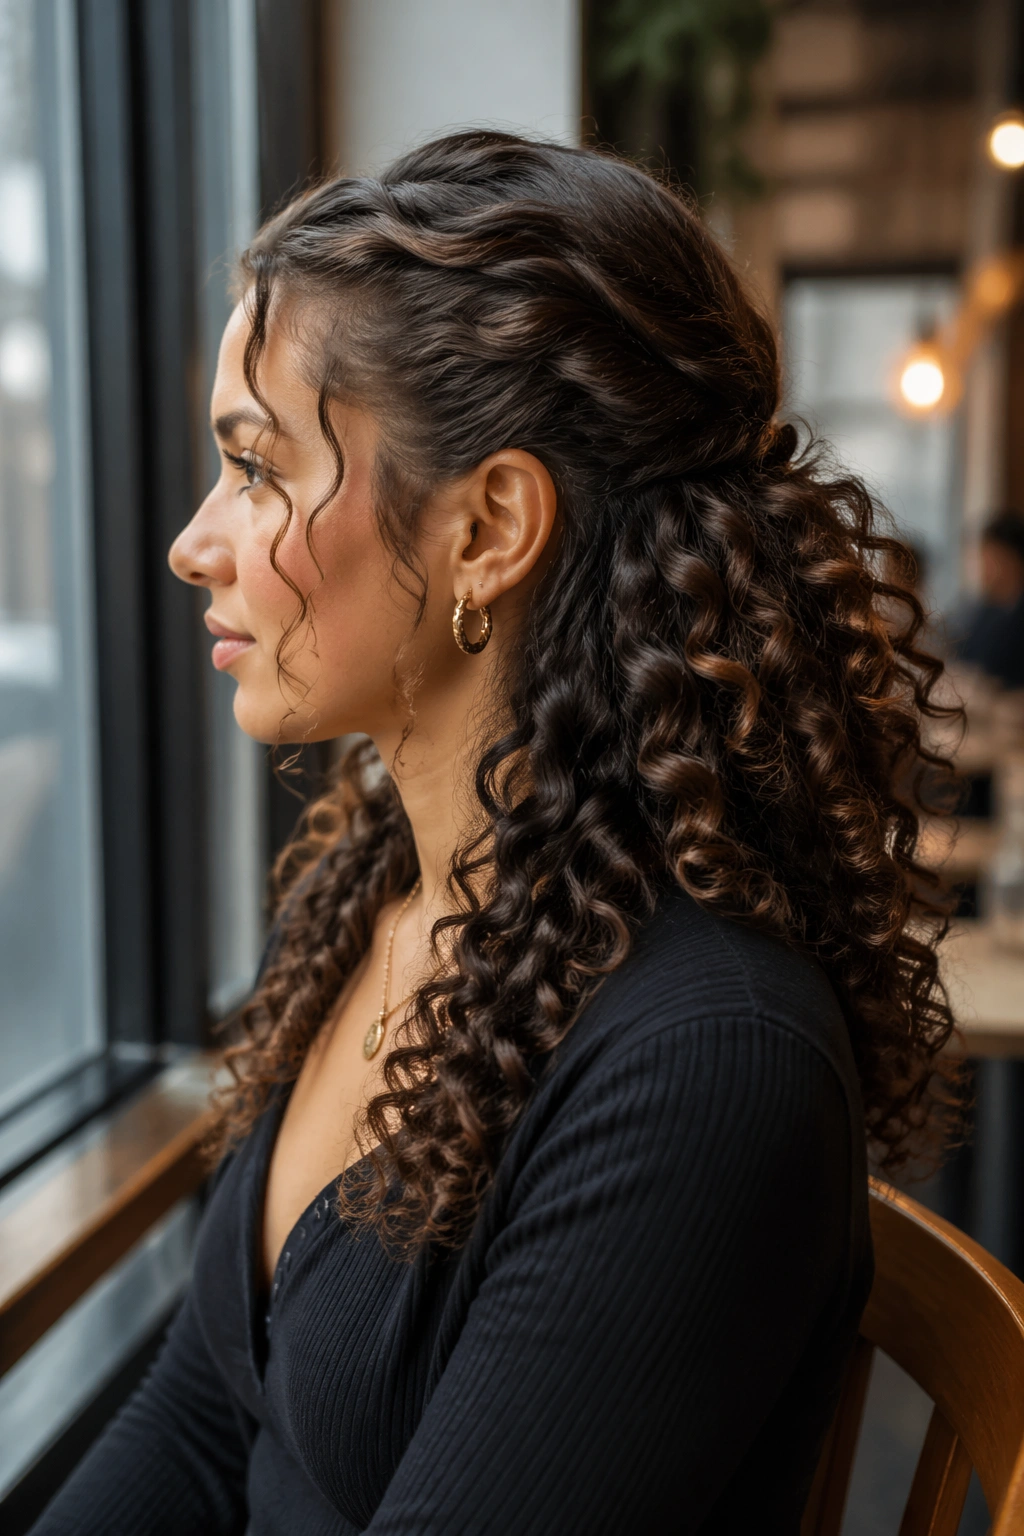
2. Deep Side-Sweep with Pinned Volume

A deep side-sweep changes the whole mood in one move. One side is pinned back softly, the other side stays heavy and loose, and the curl pattern falls in a way that feels a little older, a little dressier, and a lot more interesting than a straight-down shape.
The trick is not to flatten the pinned side too much. You want the hair to hug the head, not stick to it like paste. If your curls are fine, keep the section small and let the natural texture create the body. If they’re thick, take a wider section and pin it in two places so it doesn’t drift.
This style flatters round and heart-shaped faces because the deep part creates length. It also helps when one side of your hair has more bend than the other, which happens more often than people admit. Curly hair has a memory of its own.
I like this look best with a single statement earring. The pinned side opens the face just enough, and the loose side keeps the style from feeling too neat. It’s one of those half-up curly hairstyles that looks like you spent longer on it than you did.
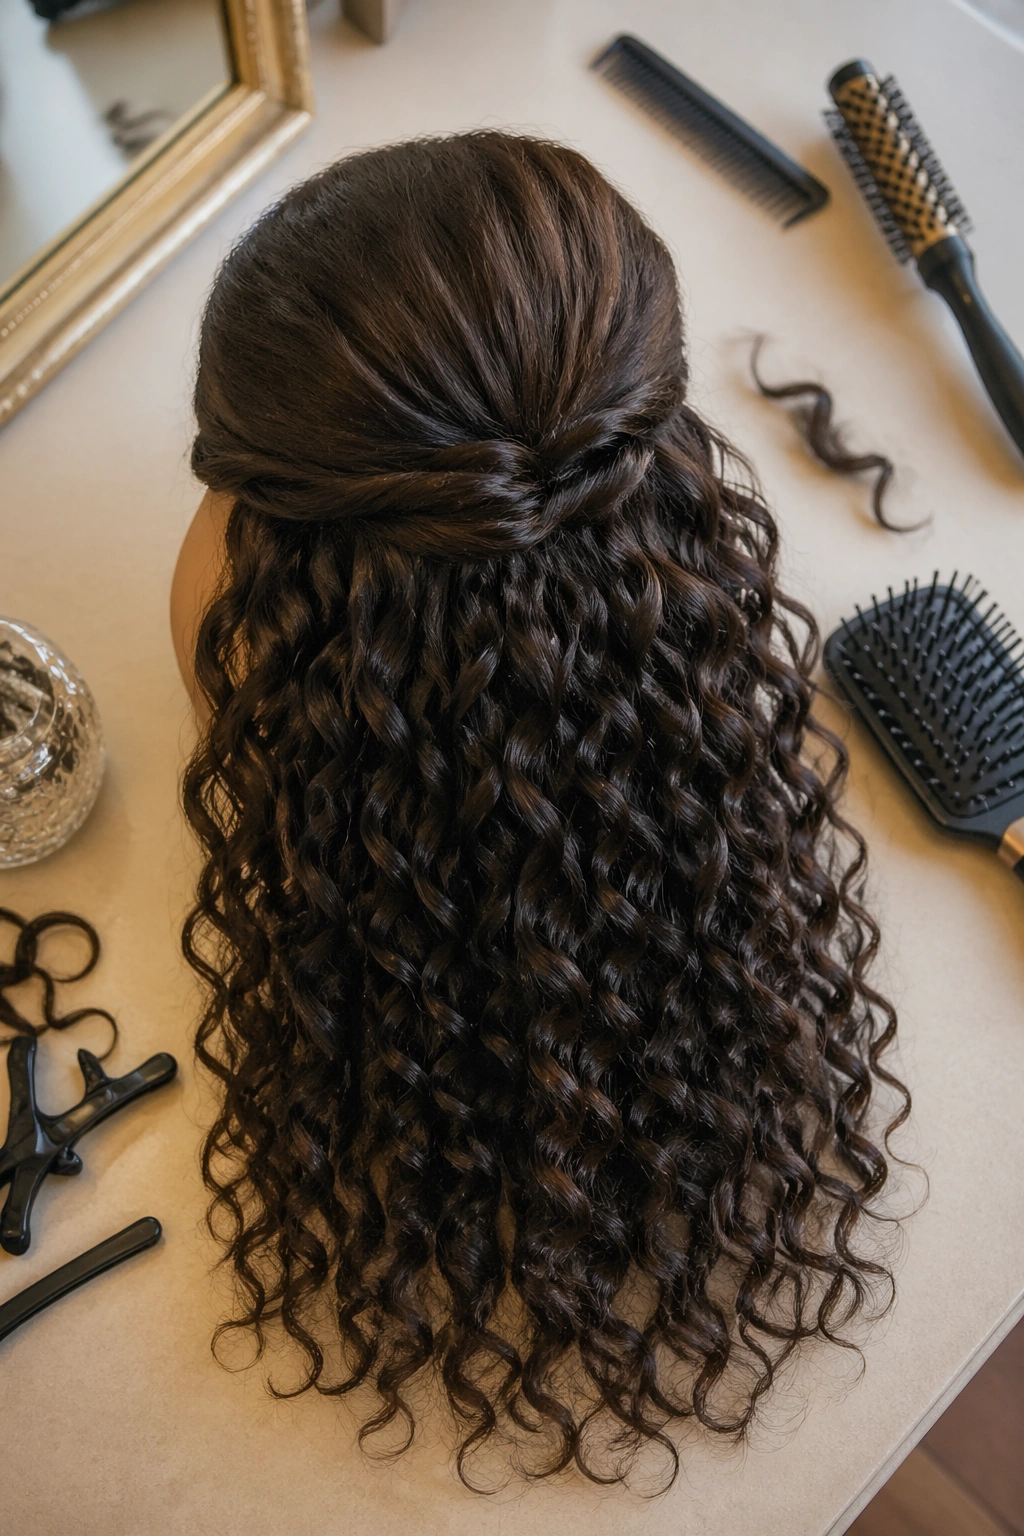
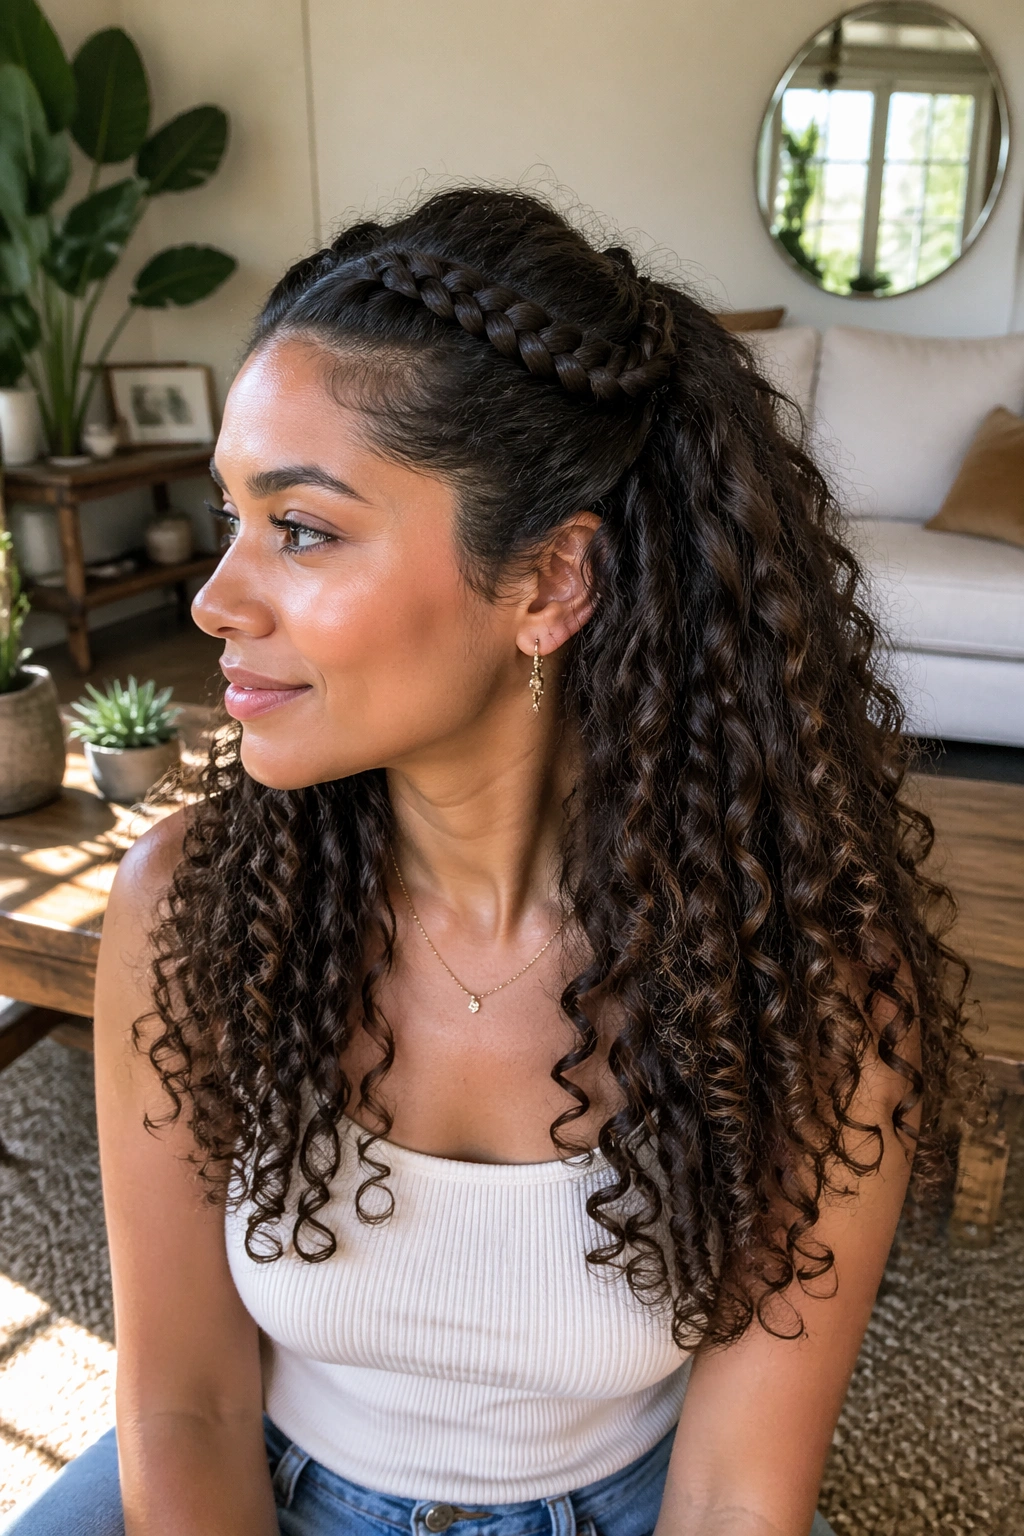
3. Twisted Halo Half-Up
Can a half-up style feel soft and tidy at the same time? Yes, and this is the proof. A twisted halo half-up wraps the front sections back along the hairline, then pins them so the twists follow the curve of the head instead of sitting straight across it.
How to build the halo
Start with a clean middle part or a side part, whichever your curls already prefer. Take a section from just above the temple, twist it backward, and tuck the twist under a small section near the crown. Repeat on the other side, keeping the tension even so the halo looks balanced.
The nice thing about this style is that it frames the face without dropping hair into your eyes. It works well on medium-length curly hair and longer lengths, especially when the curls are dense enough to support the shape without a lot of teasing.
A few details make it better:
- Keep the twists loose enough to show texture.
- Hide the pins under the twist line so they do not poke through.
- Let the ends of the twists blend into the free curls below.
- Use a light mist of flexible-hold spray only on the front sections.
Watch for this: if you pull the twists too tight, the halo loses its softness fast. Curly hair likes room.
4. Mini Bouffant with Free-Flowing Ends
If your curls go flat at the front, this one can save the whole look. A mini bouffant gives the crown a little lift, then the rest of the curls cascade down like you planned it that way all along. It has a retro feel, but not the kind that looks like a costume.
The best version starts with a lifted front section that is gently backcombed at the root, then smoothed on top so you do not see the teasing. No need to go wild. A little height at the crown is enough. Too much and the style tips into helmet territory, which is a hard no from me.
What makes it useful is how forgiving it is. If your roots are a bit oily, the texture actually helps. If your curls are freshly washed and slippery, a touch of dry shampoo at the crown adds grip.
- Backcomb only the root area, about 1 inch deep.
- Smooth the top layer with a brush or fingertips.
- Pin the lifted section behind the crown with two pins in an X.
- Leave the length loose for contrast.
Best for: fine curls, medium curls, and anyone who wants a little more shape on top without losing the rest of the hair.
5. Face-Framing Ribbon Curls
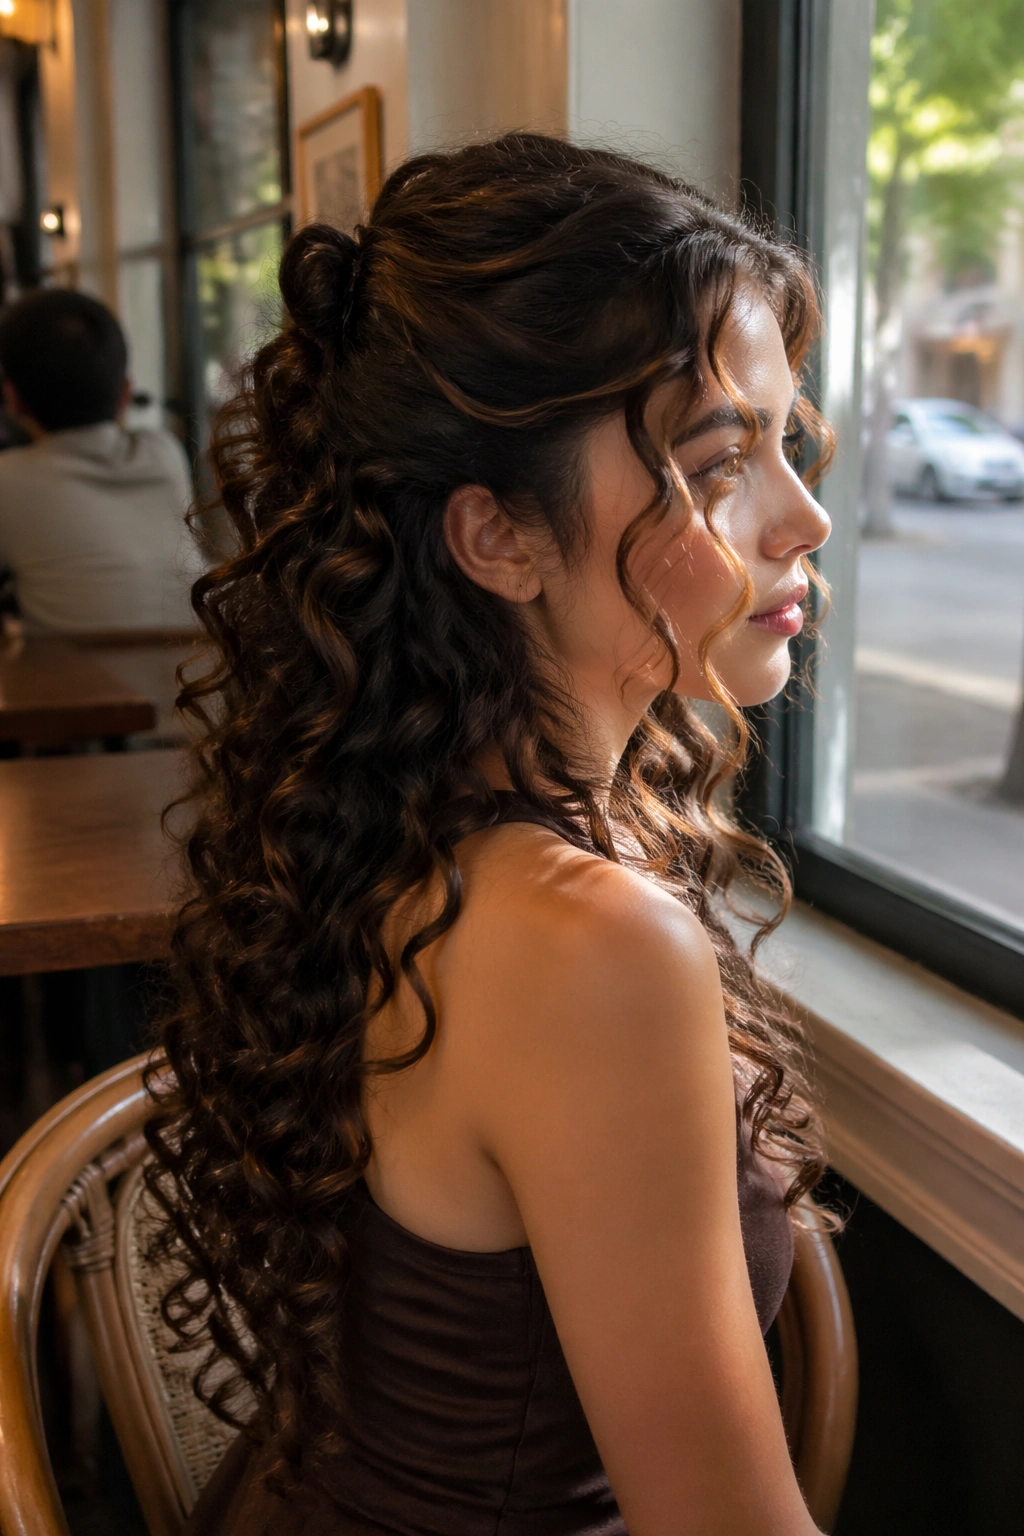
This one is all about restraint, and I mean that in a good way. You pin back only the center or upper middle section, then leave a pair of front curls loose so they fall like ribbons along the cheeks. It is soft, flattering, and a little romantic without trying too hard.
The look depends on contrast. The pinned back section creates order, while the front pieces stay free enough to move when you turn your head. If your curls are tighter, choose two spirals near the front and let them keep their shape. If they’re looser, gently finger-coil the pieces so they stay defined after you pin the rest back.
I like this style on days when I want the hair to frame the face instead of competing with it. It suits oval faces, but it also works well if you want to soften a sharper jawline or keep bangs from taking over the whole look.
A single decorative pin near one temple can be enough. No need to line the head with accessories unless that is your thing. Sometimes one detail does the job better than five.
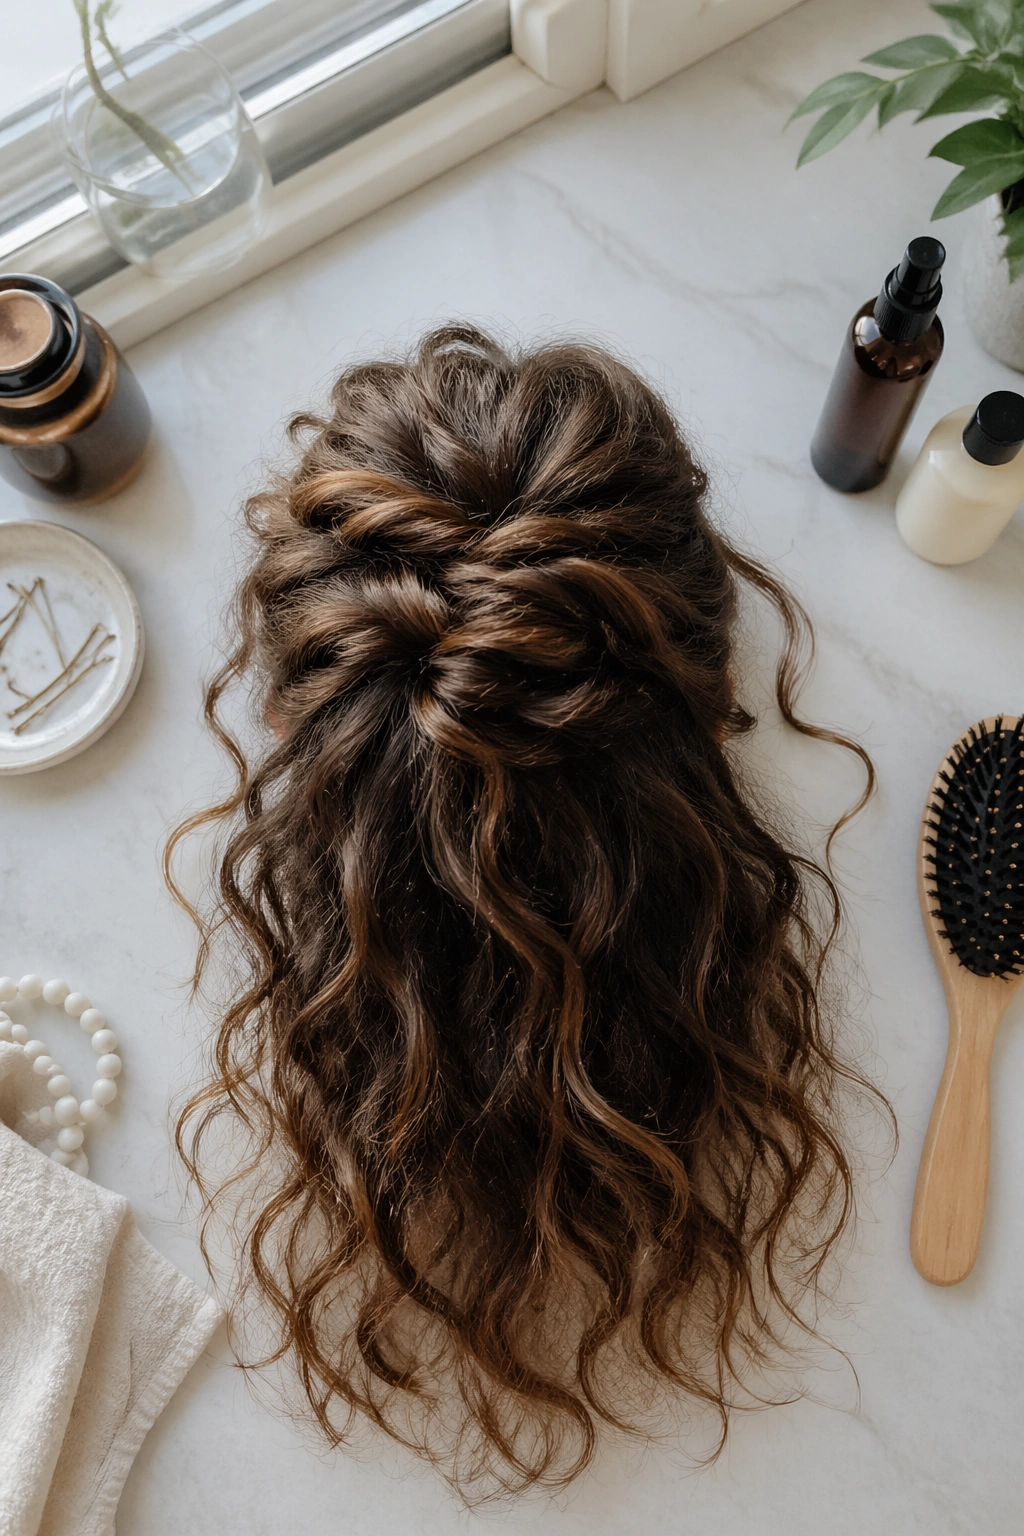
6. Low Sculpted Knot with Loose Length
Unlike a high half-bun, this version sits lower and feels calmer. The pinned section gathers just above the nape or a little higher, folds into a soft knot, and leaves the rest of the curls to spill underneath. It’s controlled, but not severe.
This is one of my favorites for thick curly hair because it takes weight out of the top without making the profile taller. That matters if you’re dealing with a lot of density or if you simply don’t want more height on your head. Some days, less is more. Not every half-up style needs to shout.
The knot itself does not need to be perfect. In fact, a slightly loose wrap looks better because the curl texture keeps it from reading as flat or overdone. Use a few pins underneath the knot, then add one through the center if the hair feels heavy.
Who it suits best: long curls, dense coils, and anyone who wants a style that stays put through a long day without looking pinned down.
7. Barrettes Placed in a Curved Row
A row of barrettes can turn a basic half-up shape into something a little sharper. Instead of one large clip at the back, you place three small barrettes in a curved line along the crown, following the shape of the head. It looks deliberate, not fussy.
What I love here is the geometry. Curly hair is already full of movement, so a clean line of clips creates contrast. The clips can be metallic, matte black, pearl-topped, or color-matched to the outfit. If the hair is very thick, anchor the section with a hidden bobby pin first, then add the barrettes on top.
This style works especially well on shoulder-length curls because there is enough hair to show the pattern, but not so much that the clips disappear. If the clips are sliding, the section was probably too smooth. Add a touch of texture spray or pin the base more firmly.
- Use 3 small barrettes rather than one heavy one.
- Space them about 1 inch apart.
- Keep the curve slightly arched.
- Let the bottom curls stay loose and full.
One honest note: the line has to follow the head shape. A crooked barrette row looks accidental fast.
8. Braided Front Anchor
What do you do when your front layers refuse to behave? Braid them into the style on purpose. A braided front anchor pulls one or both sides back into a small braid, then pins the braid into the half-up section so it becomes part of the design instead of a stray fix.
Where to place the braid
Start the braid near the temple if you want a sleeker look, or a little farther back if you want more volume around the face. A three-strand braid feels classic. A rope twist feels softer and a touch quicker. Either way, the braid gives the half-up section a stronger line and keeps short layers from slipping loose.
I like this on growing-out bangs, especially when the front pieces are at that awkward length where they are long enough to fall but too short to tuck neatly. The braid solves that without making the rest of the hair feel too styled.
It also gives the curls below a nice contrast. The top has pattern and control; the bottom keeps all the spring. That split is what makes the look work.
9. Retro Pompadour Half-Up
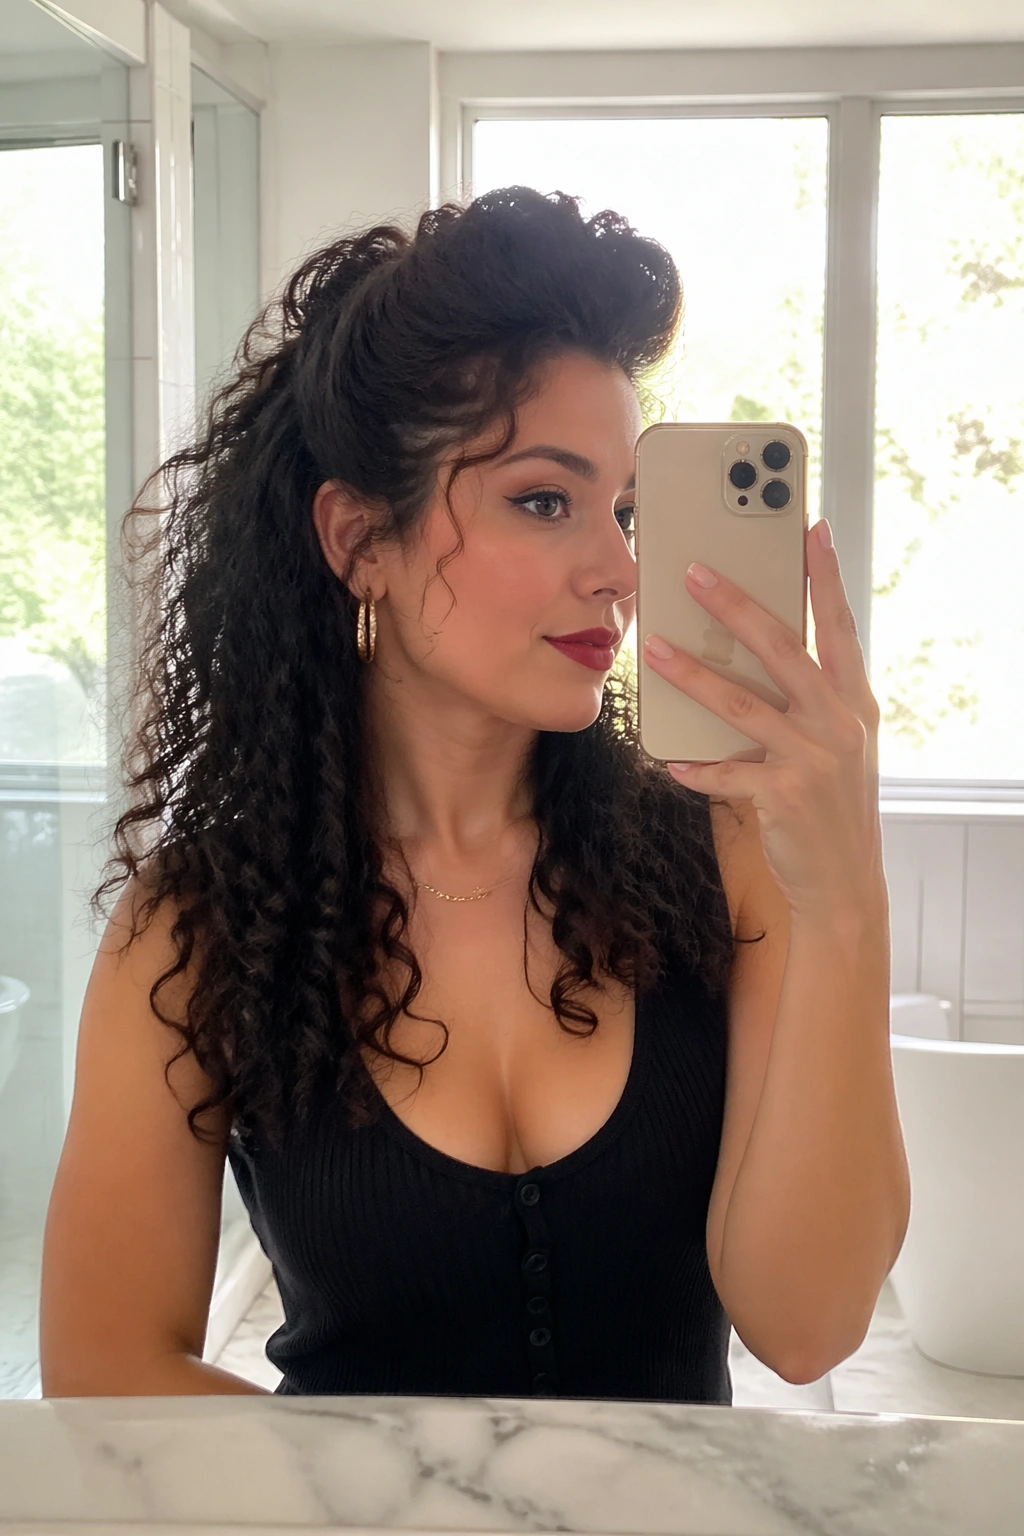
If the front of your hair keeps collapsing, a pompadour-style lift is the fix I reach for. The crown gets built up a little higher than in a standard half-up, then pinned back so the shape holds while the curls below stay loose and full.
This look has attitude. Not loud attitude. More like the kind of polish that says you paid attention to the mirror. It flatters curly hair because the texture helps the lift stay from looking flat or overly smooth.
A pompadour half-up is especially good if your curls tend to lie close to the head at the roots but get bigger through the mid-lengths. The extra height fills that gap and makes the whole silhouette feel more even.
- Lift the front with your fingers before pinning.
- Use a small bit of mousse at the roots for grip.
- Pin underneath the lifted section, not across the top.
- Keep the rest of the curls defined and separate.
Pro tip: dry the crown in the opposite direction for a minute or two before styling. That tiny bit of root memory helps the lift stay up.
10. Loose Tendril Half-Up
Some styles look better when they’re allowed to breathe. This is one of them. The top section gets pinned back loosely, but a few tendrils are left around the temples and jawline so the whole style feels soft, lived-in, and a little bit dreamy.
I reach for this when the curls themselves are the main event. If your curl pattern is strong, why hide it? A looser half-up lets the definition show around the face while still giving the crown some shape. It also softens a strong hairline or a square jaw without making the style feel overly sweet.
The front tendrils should be intentional, not accidental. Pick the curls that already want to fall forward, define them with your fingers, and keep the rest pinned away from the eyes. If you have shorter layers, let them join the tendrils instead of fighting them.
This look is one of the easiest to wear with a simple dress, a clean neckline, or even a plain tee. The hair brings enough shape on its own. No extras needed.
11. Center-Part Twistback with Clean Lines
A center part changes the whole energy of a half-up style. Instead of leaning romantic or soft, this version feels crisp and balanced. Two mirrored twistbacks run from the front to the crown, then disappear into the free curls below.
It works because curly hair already has texture, so the clean part gives the eye something to rest on. The style feels neat at the top and loose at the bottom, which is a nice contrast when you want structure without turning the hair into a stiff updo.
This is the one I’d point to if you wear bold earrings, glasses, or a strong neckline. The symmetry leaves room for the rest of the outfit. It also helps if your curls are uneven on both sides; the center part creates a visual reset.
Best for: anyone who likes order, symmetry, and a more graphic finish.
A flat brush or the side of a comb can help keep the part clean, but do not chase perfection. A slightly imperfect line often looks better once the curls settle around it.
12. Side-Swept Mini Buns at the Crown
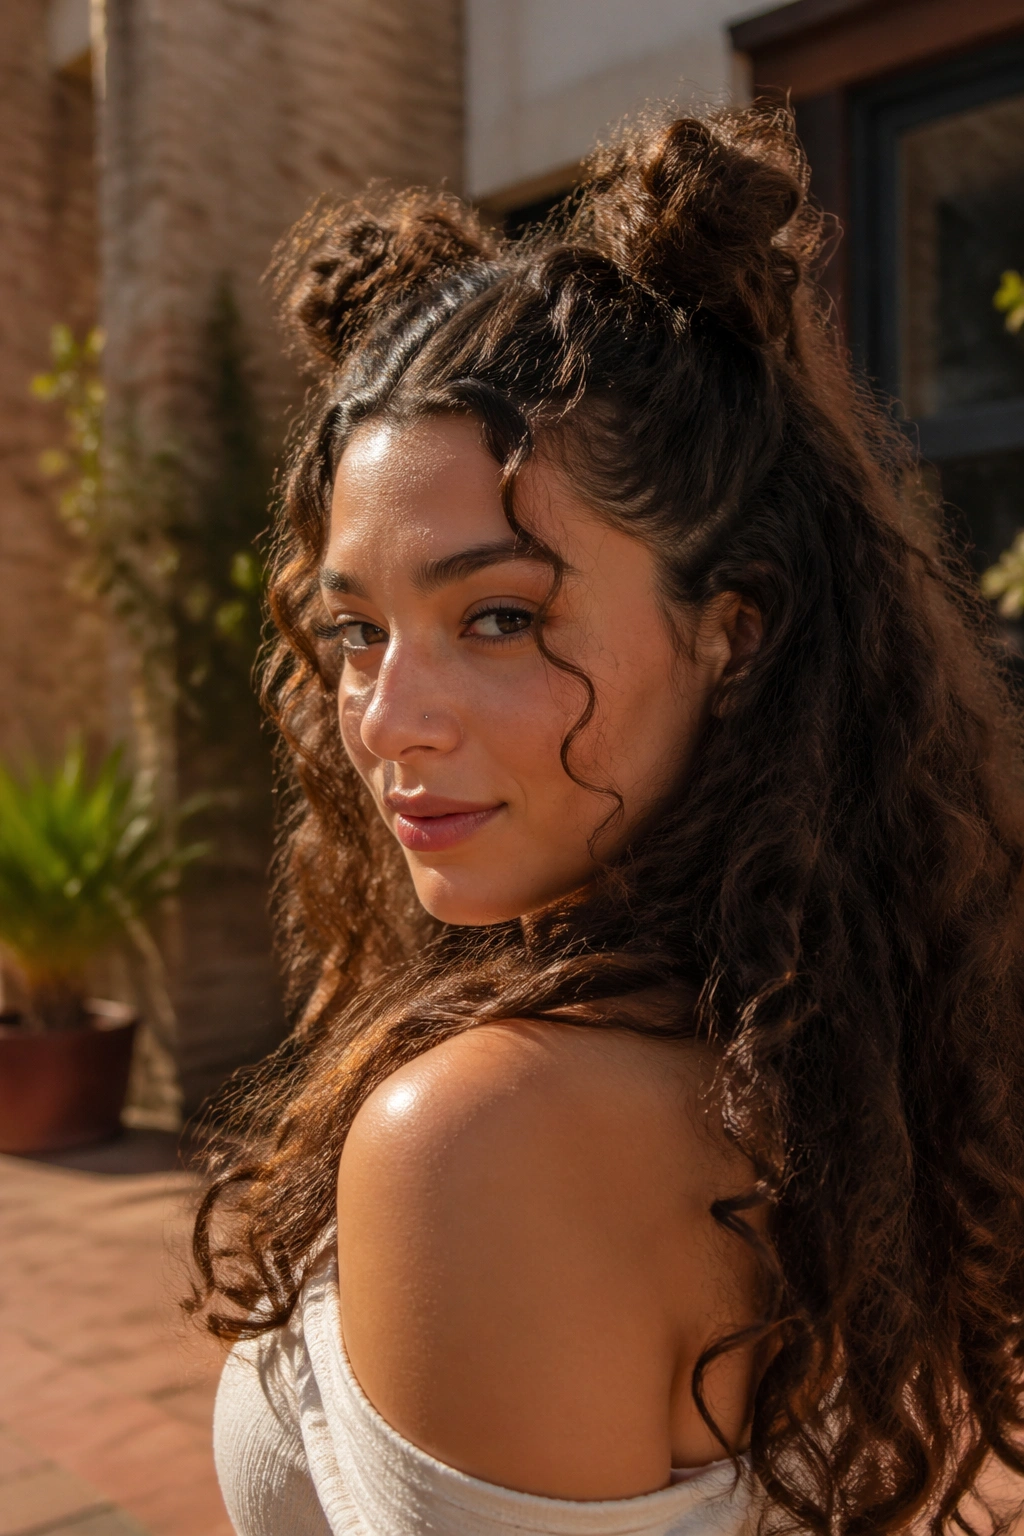
Two small buns can look playful, but only if they sit in the right place. Place them high enough on the crown, keep them small and loose, and let the bottom half of the curls stay down. The result reads modern, not childish.
This style is useful when you want the top pinned securely but still want a little lift on both sides. It can also help distribute weight if your curls are thick and heavy. One bun on each side takes stress off a single anchor point, which means less slipping and fewer pin adjustments.
I like it most on second-day curls. The texture holds the buns better, and the length below stays fluffy instead of stretching out. If you want a softer finish, leave a few face-framing curls out around the temples.
- Form each mini bun with a 2-inch section.
- Wrap loosely so the curl pattern still shows.
- Pin each bun from underneath.
- Keep the buns matched in size, but not mirror-perfect.
Small warning: if the buns are too low, the style loses its shape fast. Height is what keeps this one fresh.
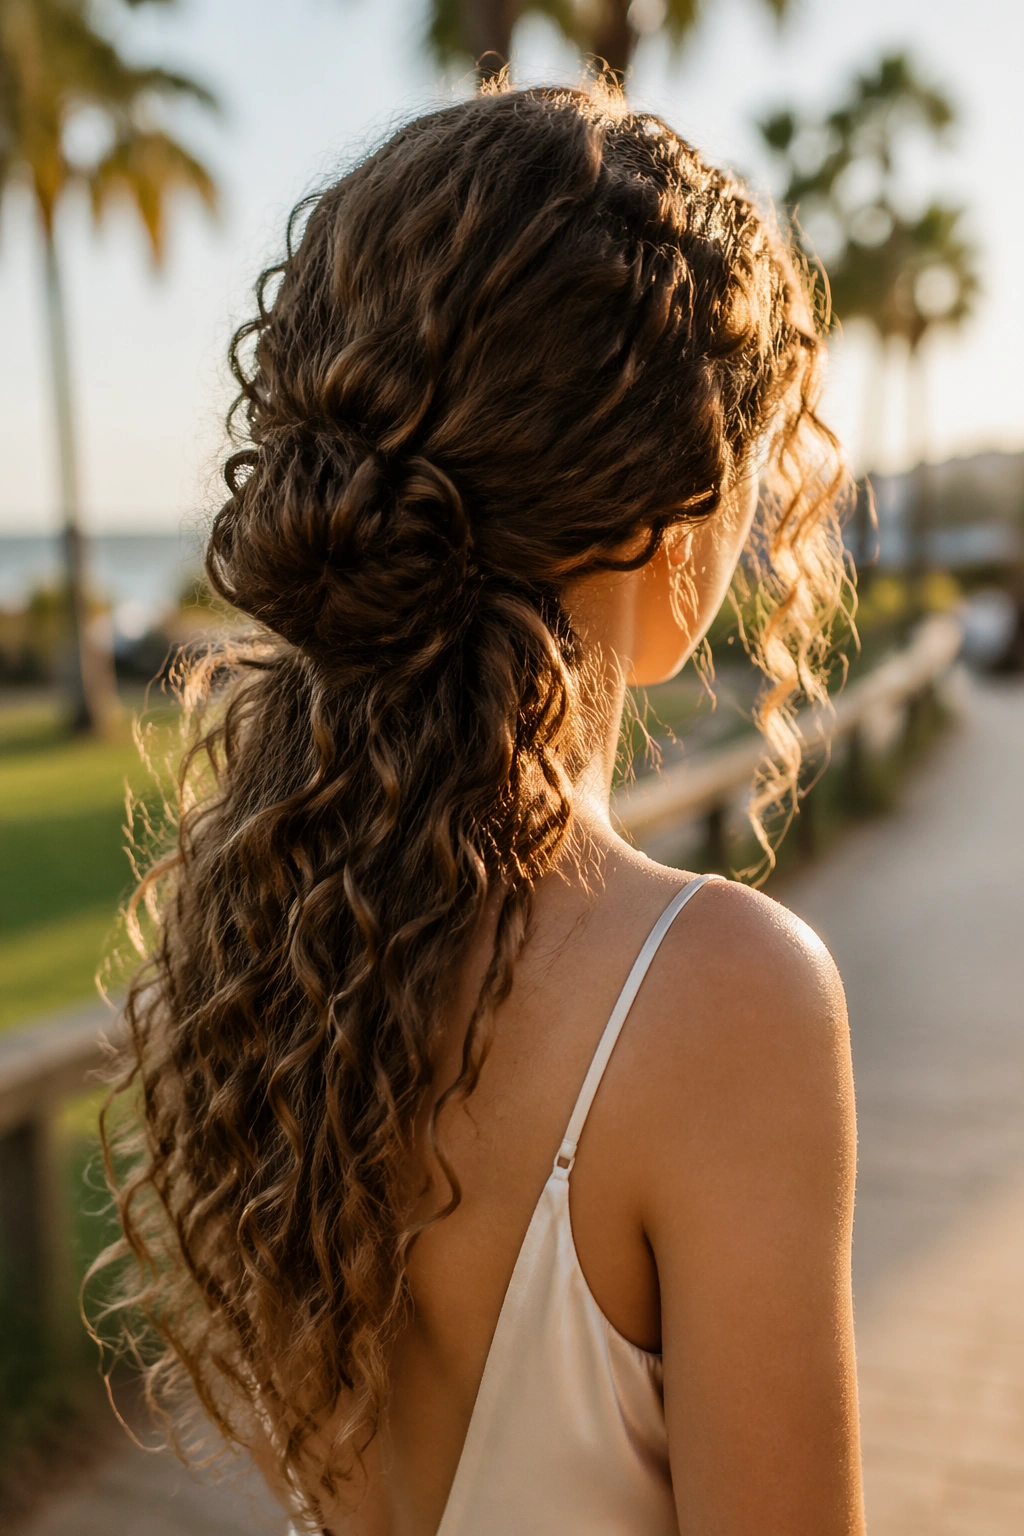
13. Low V-Shape Pin Back
This is one of those styles that seems simple until you see how much shape it gives the head. The hair from both temples is drawn back into a low V at the center, then pinned there so the line points downward before the curls fall free.
Why does that matter? Because the V shape creates a little frame at the back of the head and draws the eye down through the length of the hair. It can make shoulder-length curls look longer and longer curls look fuller at the ends. Nice trick. Useful one too.
Why the V shape flatters curly hair
The angled line breaks up width at the sides without flattening the crown. That makes it a good option if your hair gets big around the temples or if you want the face to look a little more open.
It also works well with layered curls because the shorter front pieces are already trying to move backward. You’re guiding the pattern, not forcing it.
A tiny accessory at the center point of the V can be enough. A plain pin works. A jeweled one works. Even a matte black pin can look sharp if the rest of the style is clean.
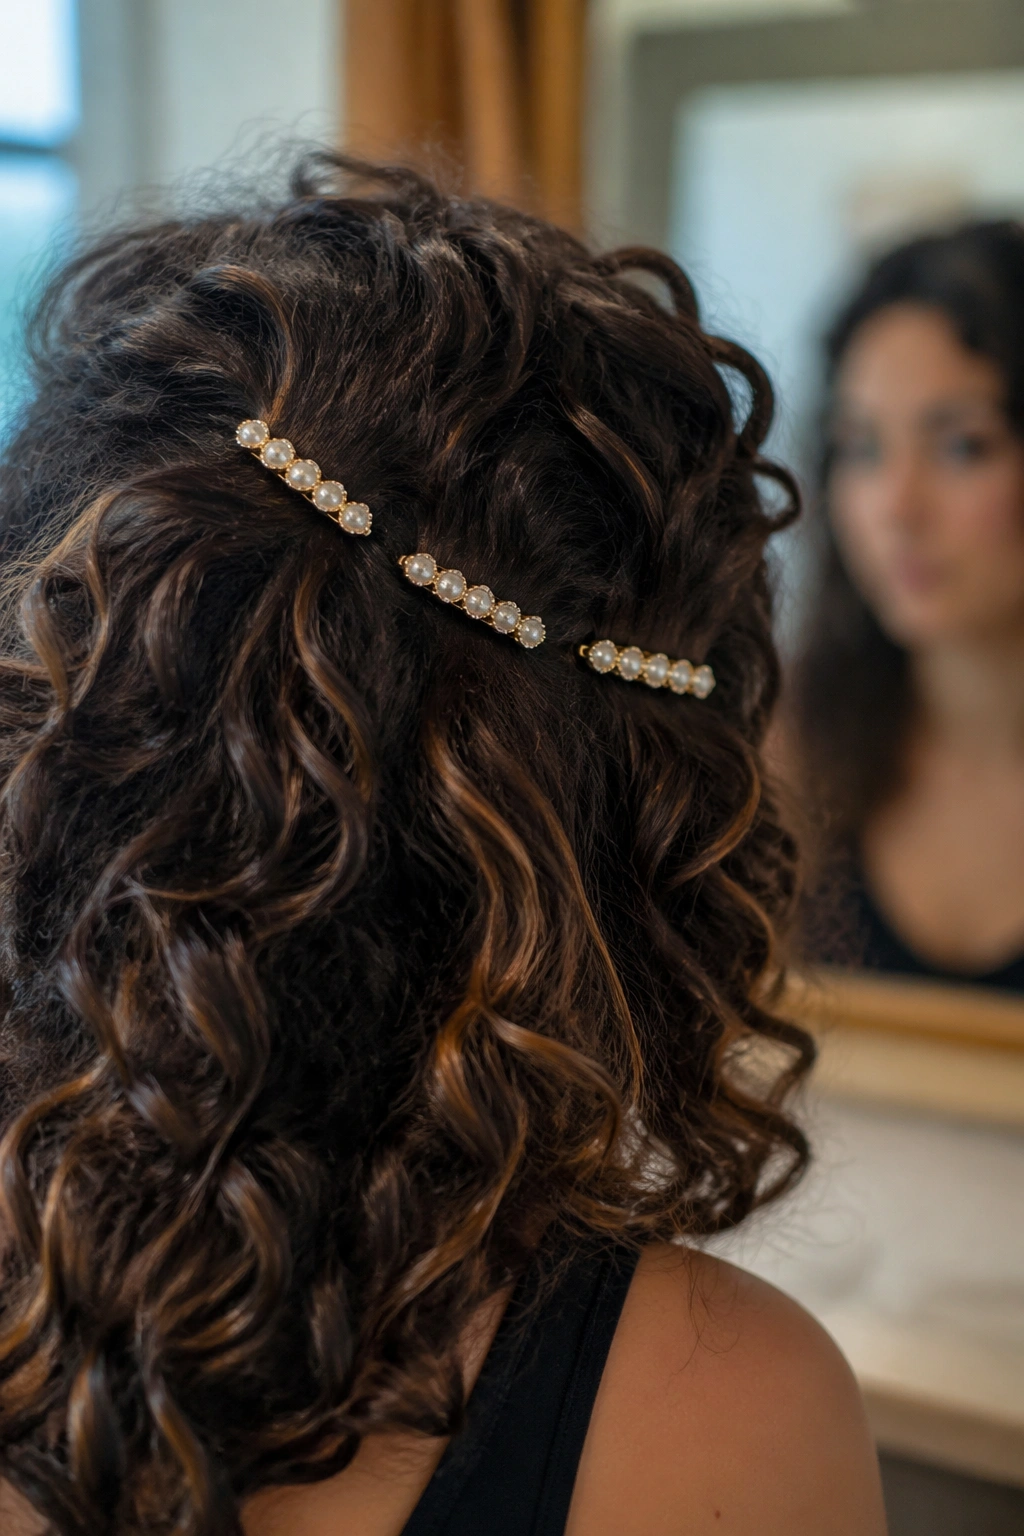
14. Pearl-Pin Half-Up with Soft Volume
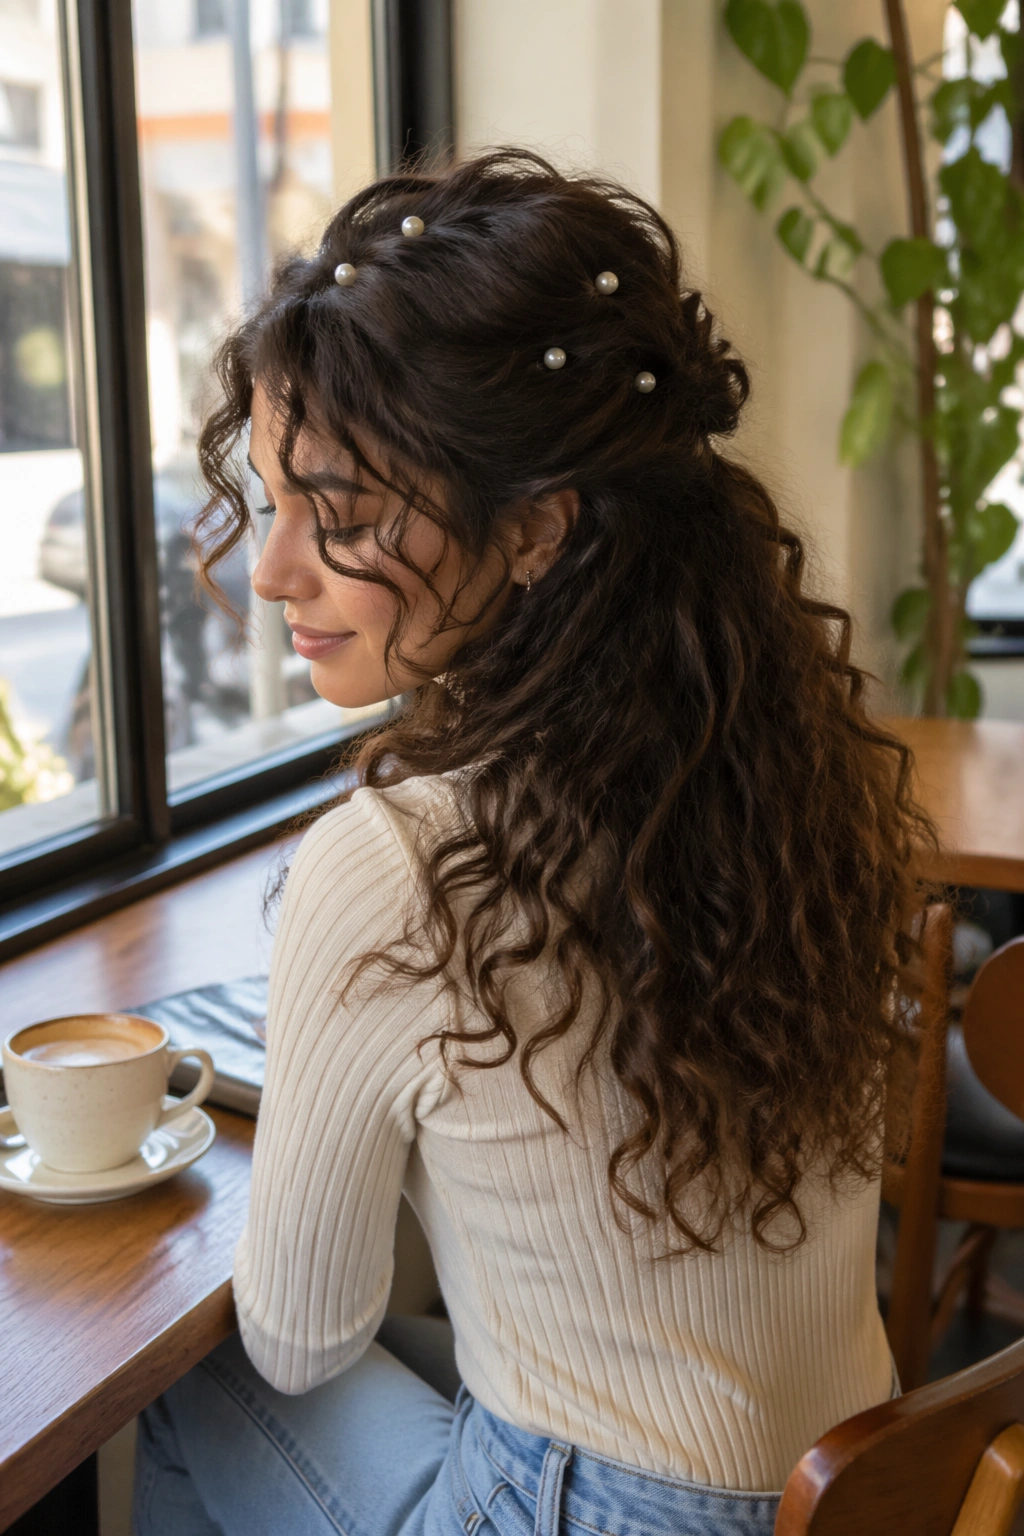
If you want the pins to be part of the outfit, this is the style to choose. The hair is pinned back in a loose half-up shape, then finished with pearl pins or decorative clips spaced across the top section. The accessory becomes the point, not an afterthought.
This look does a lot with a small amount of effort. Pearl pins soften the texture of curly hair, which can be useful when the curls themselves already bring plenty of movement. The contrast is neat: texture below, shine above.
Keep the number of pins reasonable. Three to five usually does the job. Any more and the top starts to feel crowded. I also like mixing sizes, with one slightly larger pin in the center and smaller pins on the sides. That keeps the line from looking too stiff.
- Place the first pin at the center back of the pinned section.
- Angle the next pins slightly upward toward the crown.
- Keep each pin close to the scalp so the style feels anchored.
- Let the lower curls stay full and glossy.
Best use: weddings, dinners, photos, or any day when a plain bobby pin feels too plain.
15. Soft Rolled Front Sections with Free Curls
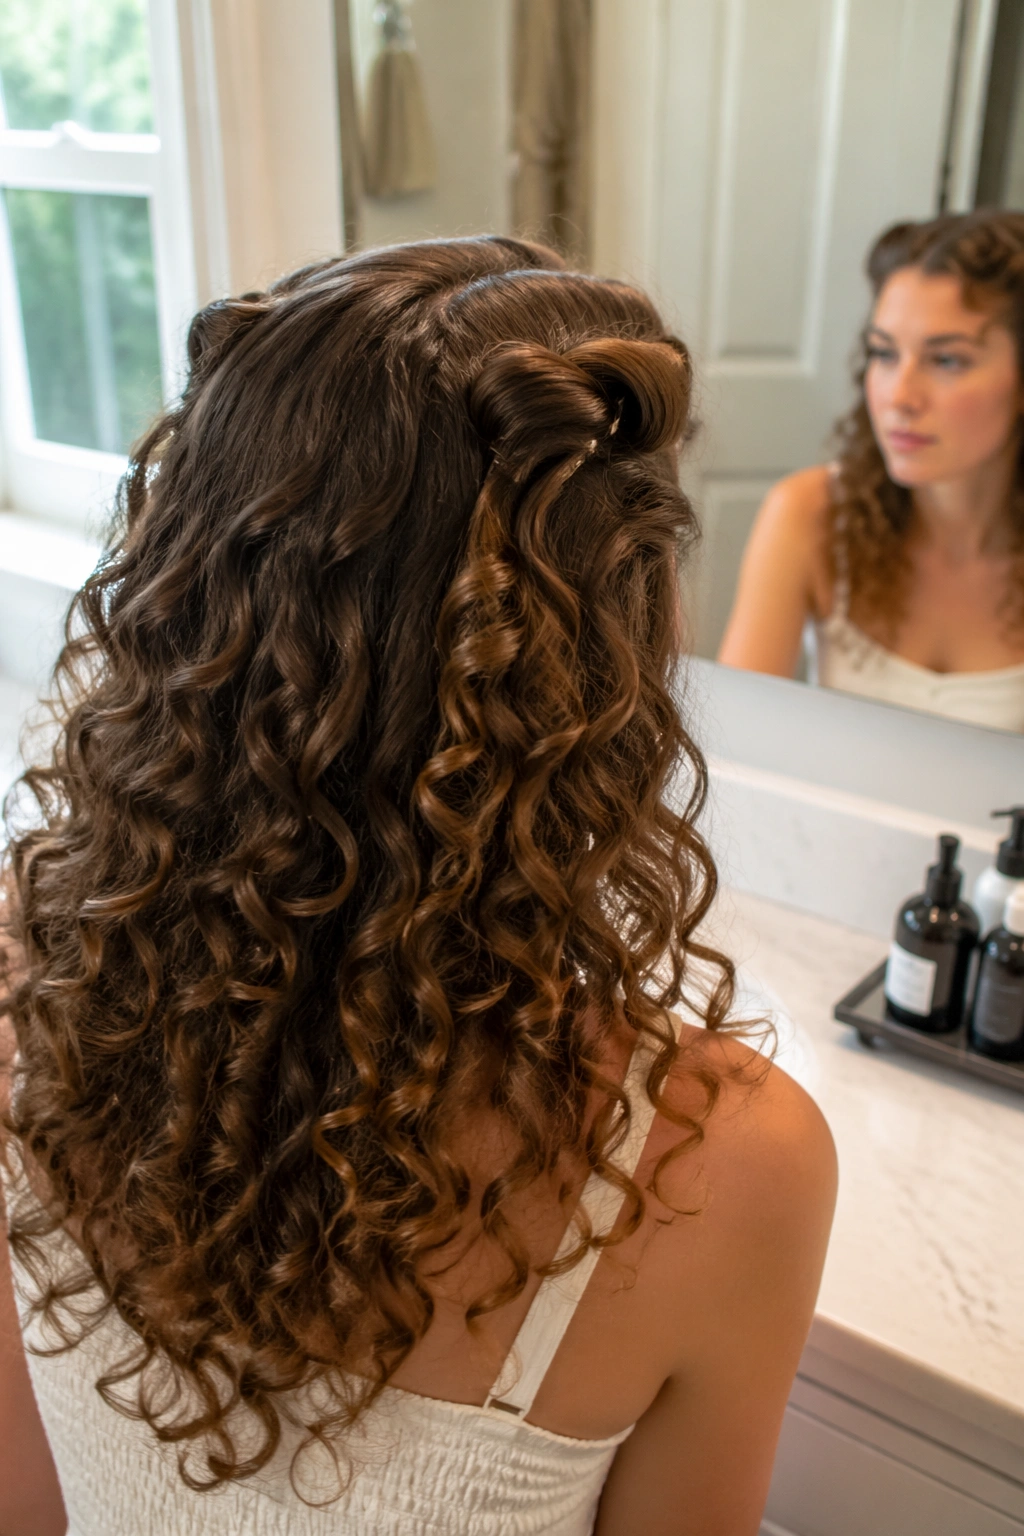
This last one leans into the actual pin curl idea more directly. The front sections are rolled back around two fingers or a narrow section of hair, then pinned flat so they hold a soft wave at the top while the rest of the curls hang loose underneath.
I love this look for curly hair because it feels a little vintage without going full costume. The rolled front pieces give the crown shape and direction, and the loose length below keeps it from feeling too neat. There’s a nice tension there. Controlled up top, lively underneath.
It works especially well when the hair has some length past the shoulders. The rolls need enough hair to show, and the curls below need enough length to balance them out. If your hair is shorter, the effect can still work, but the rolls need to stay small.
A firm pin matters here. So does placement. Pin each roll where it naturally wants to fold, usually just above the temple or slightly behind it. If the rolls sit too far forward, they can crowd the face. Too far back, and you lose the point of the style.
Final Thoughts
The nicest pin curl half up half down looks for curly hair do one thing well: they let the curl pattern stay alive while giving the crown enough shape to hold the style together. That balance is why these looks age well, photograph well, and survive a long day better than styles that try to smooth everything into submission.
If your hair is thick, start with styles that use a low knot, a V-shape pin back, or a braided anchor. If your hair is finer, the mini bouffant, the barrette row, and the twisted crown lift usually give more presence up top without demanding a lot of hair. Pick the shape first, then choose the pins. That order matters more than people think.
And if a style looks a little too neat in the mirror, pull one curl loose near the temple and let the lower half move more freely. Curly hair usually looks best when it keeps a little softness around the edges.