Game day hairstyles for curly hair live or die on one simple test: can they survive wind, shouting, sweat, and one too many times reaching for a snack?
Curly hair has its own opinions, and honestly, that’s half the fun. The smartest styles don’t try to bully the curls into stiffness. They give the hair a shape, keep it out of your face, and leave enough movement so it still looks like curls, not a helmet.
That usually means a little lift at the crown, some control around the hairline, and a plan for frizz before it turns into a mess. A tight elastic in the wrong place can flatten a whole head of curls. A softer hold, a few pins, and the right parting can make the same hair look polished for hours.
Some of the styles below are fast. Some take a few more minutes. All of them work with curly texture instead of fighting it, which is the whole point.
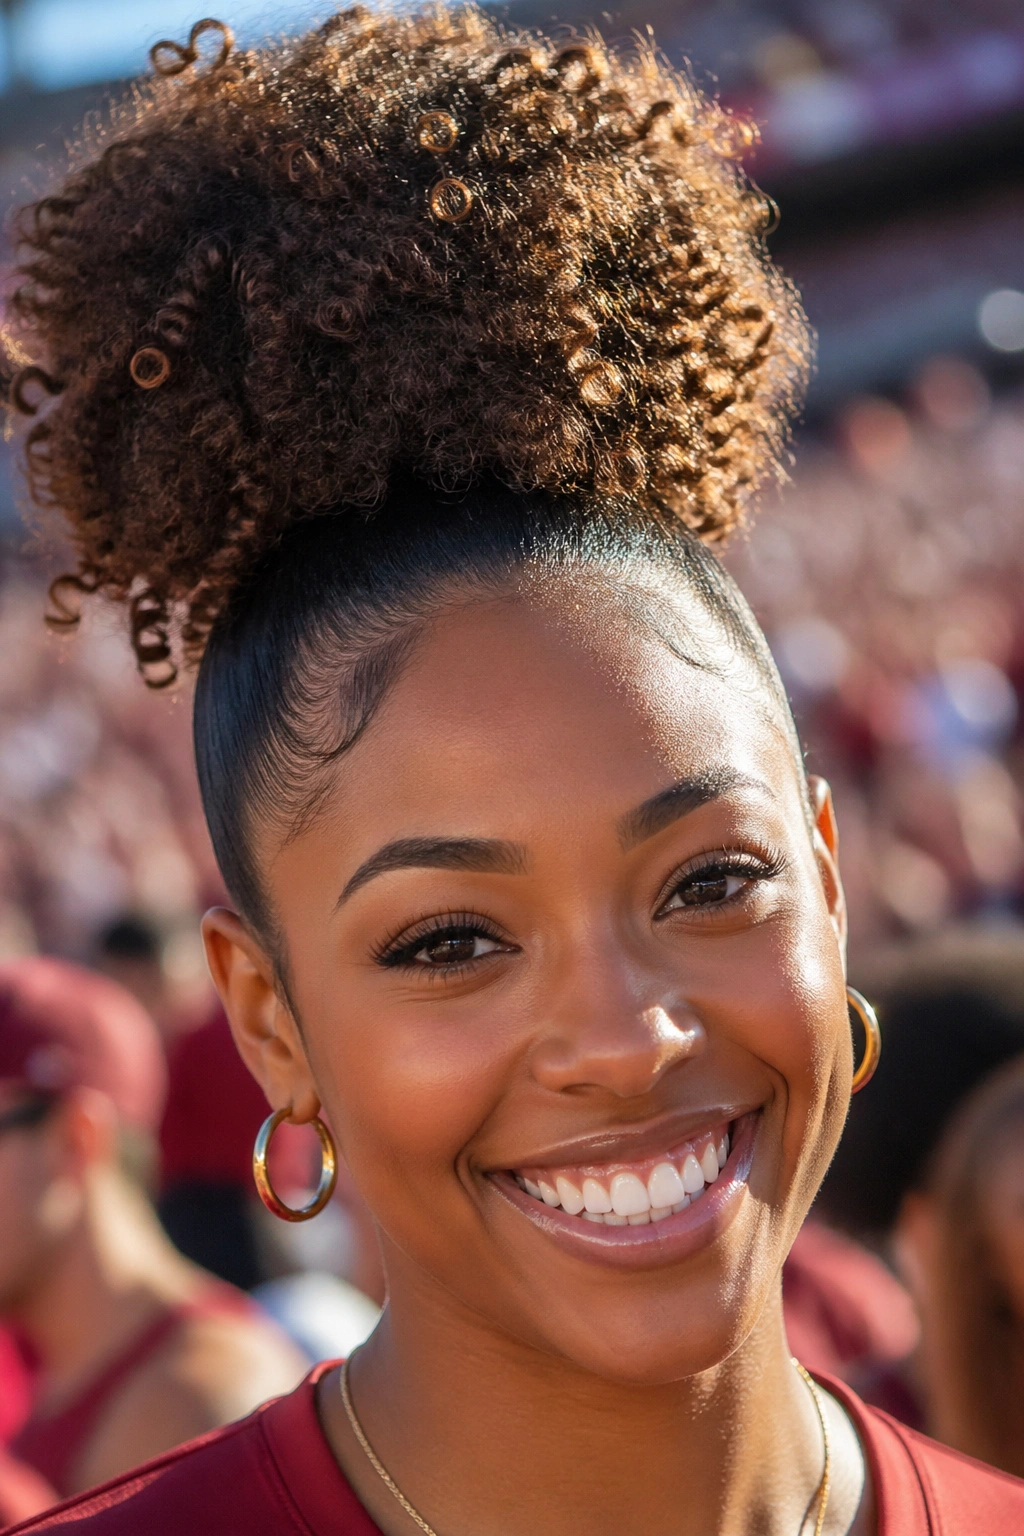
1. High Puff With a Clean Hairline
The high puff is the fastest way to make curls look deliberate, not rushed.
Why It Works
A high puff puts the volume where it belongs: up top, where curly hair already wants to live. It clears the neck, keeps the ends contained, and makes even second-day curls look lively instead of tired. That’s a nice trick when you want a style that reads clean from the stands but still has personality.
A little control at the edges changes everything. Smooth the hairline with a small amount of gel or edge control, then leave the puff itself soft and full. If you slick down every inch, the style starts looking stiff. If you leave everything loose, it can fall apart before halftime.
Quick Details That Matter
- Works best on medium to long curly hair, but shorter curls can fake it with a half puff.
- Use a stretchy satin scrunchie or a strong coil tie so the base doesn’t snap or slip.
- A light mist of water at the crown helps if the top looks too dry to gather.
- If your hair is thick, anchor it once with a small elastic first, then add the scrunchie over it.
The shape should sit high, not back. Too low and it loses the drama. Too high and it can tilt awkwardly, which is a tiny detail until you see it in the mirror.
Pro tip: flip your head upside down for the first gather, then smooth only the top layer with your hands. That keeps the puff round instead of lopsided.
2. Pineapple Ponytail With a Satin Scrunchie
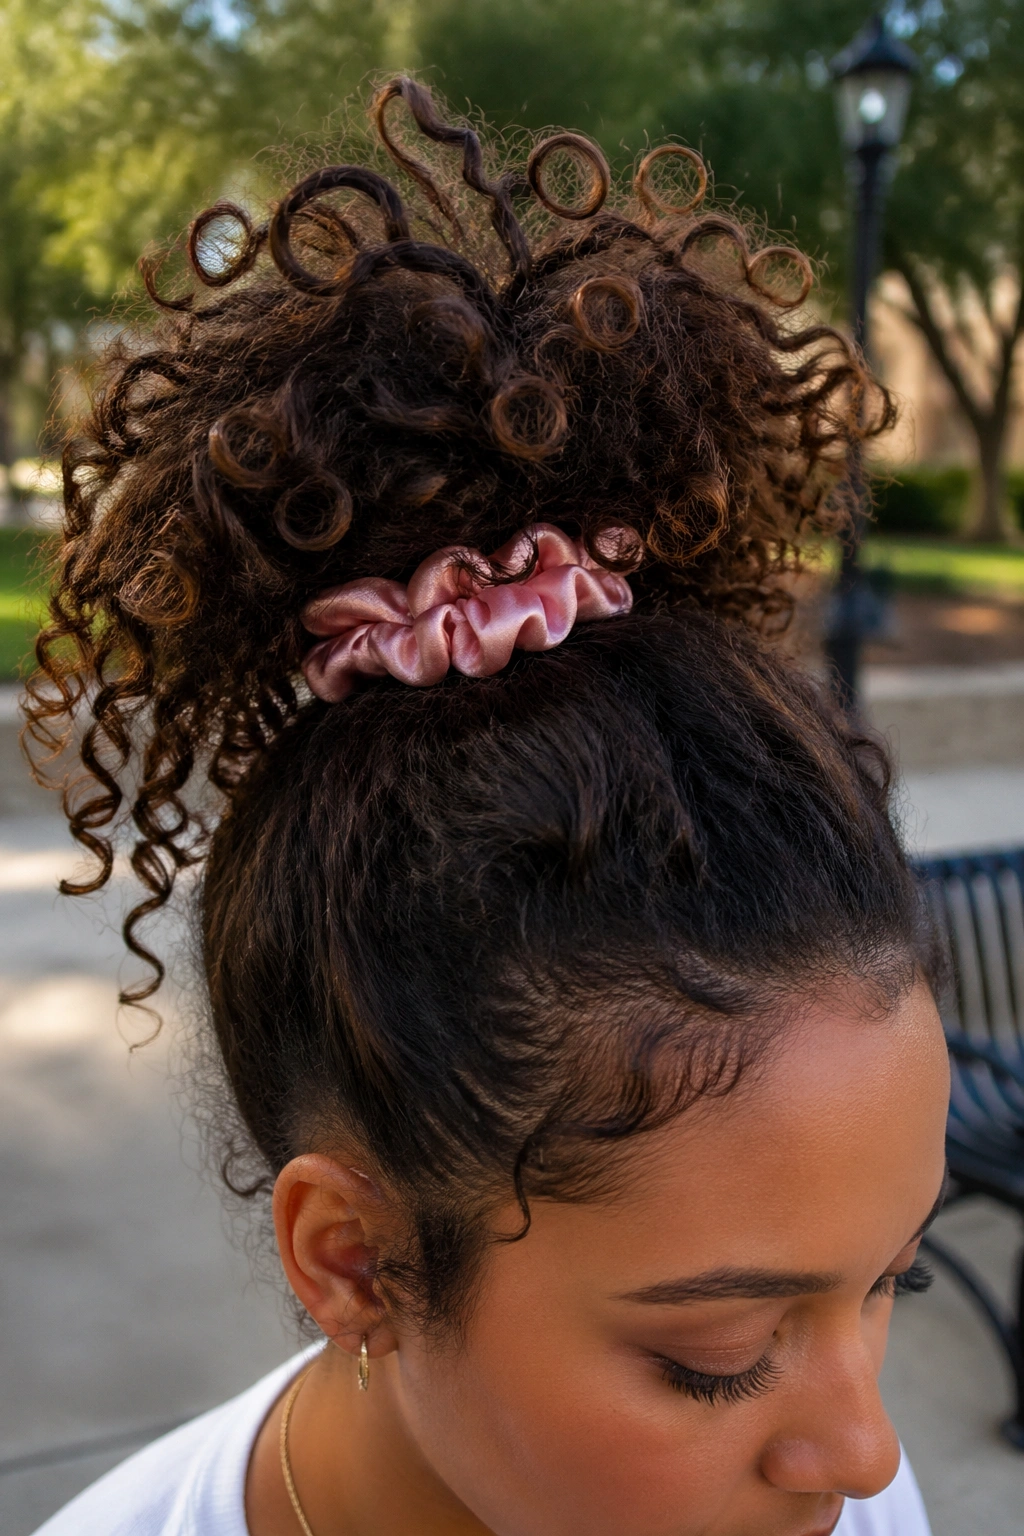
Need something that protects your curl pattern and still looks neat? The pineapple ponytail does that better than most quick styles.
This is basically a high, loose ponytail that lets the curls pile up at the top of the head instead of getting crushed. It’s especially good when you want your length visible and your curls untouched. The trick is not to drag the hair tight. Pull it just enough to hold, then stop.
I like this one for early games and long afternoons because it keeps the front from frizzing into my eyes. The curls on top stay bouncy, and the ends keep their shape instead of rubbing against collars or jacket hoods. If your hair is shoulder length or shorter, the pineapple turns into a half-up version, which still works fine.
The scrunchie matters more than people think. A satin or silk-covered elastic cuts down on that ugly crease you get from regular ties. If a single curl at the front keeps falling loose, leave it. A little asymmetry looks better than a too-tight fix.
One small thing: if your curls are especially dry, refresh them with a water-and-leave-in mix before gathering. Not soaking wet. Just damp enough to wake up the shape.
3. Half-Up Space Buns With Loose Curls
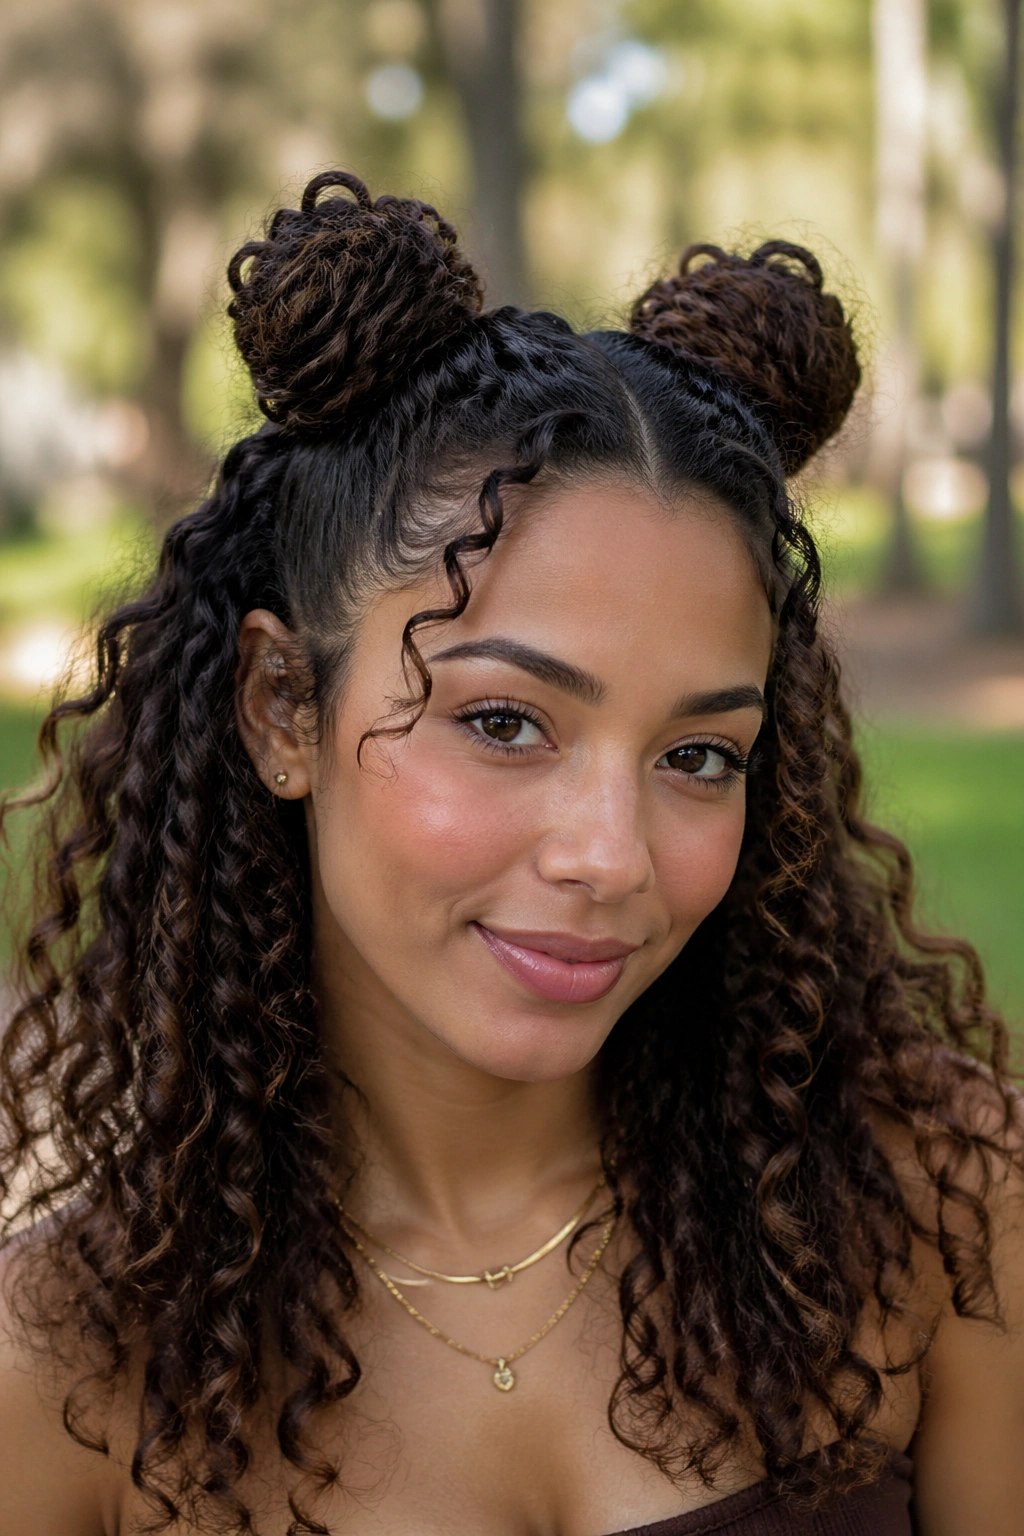
Your neck wants air, but your curls want room. Half-up space buns handle both.
The Parting Matters
Start with a clean part from temple to temple, then separate the top section only. Twist that top half into two small buns, one on each side of the crown, and leave the rest loose. That balance is what makes the style work. Too much hair in the buns and the bottom looks limp. Too little and the buns disappear.
This style is playful, but it is also practical. The top section stays out of your face, which helps if you’re moving around, cheering, or sitting through a game that lasts longer than planned. The loose curls underneath keep the style from feeling too cute or too teeny.
How to Keep the Buns From Shrinking
- Use two small elastics to secure the buns before pinning.
- Twist the buns only once or twice; don’t wring the curls tight.
- Keep the buns slightly forward, near the top corners of your head, so they’re visible.
- Leave a few curls out around the temples if your hairline tends to puff up.
This one can go wrong when the buns are too neat. Seriously. A tiny bit of mess works in its favor. You want them round and soft, not clipped down like little buttons.
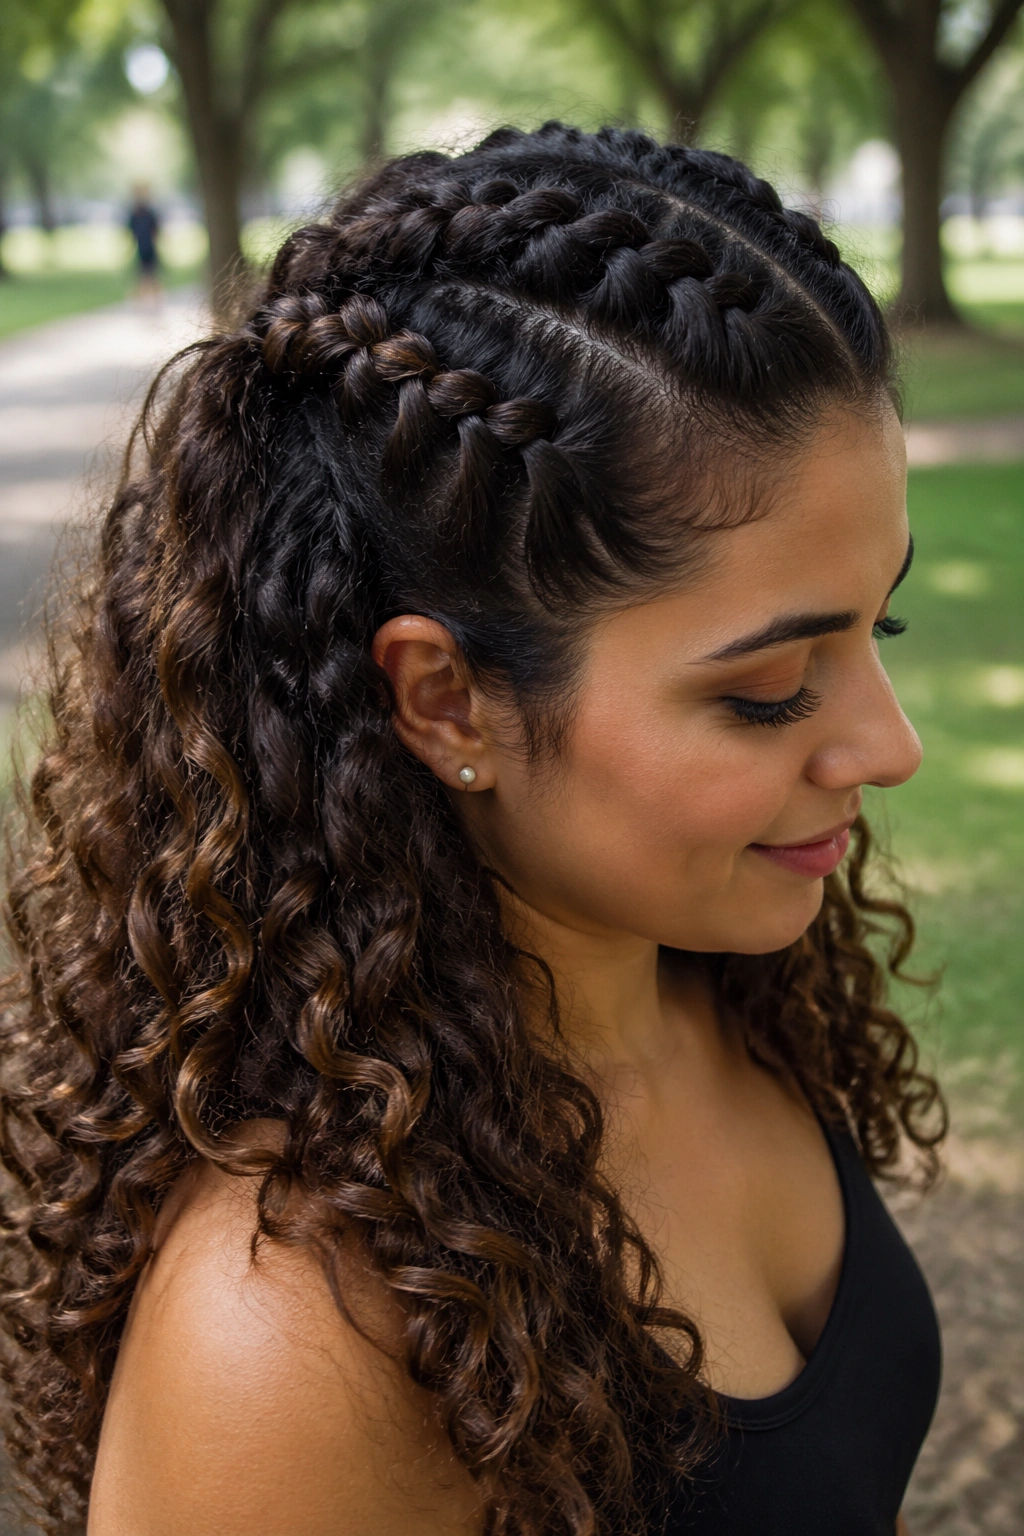
4. Braided Crown That Stays Put
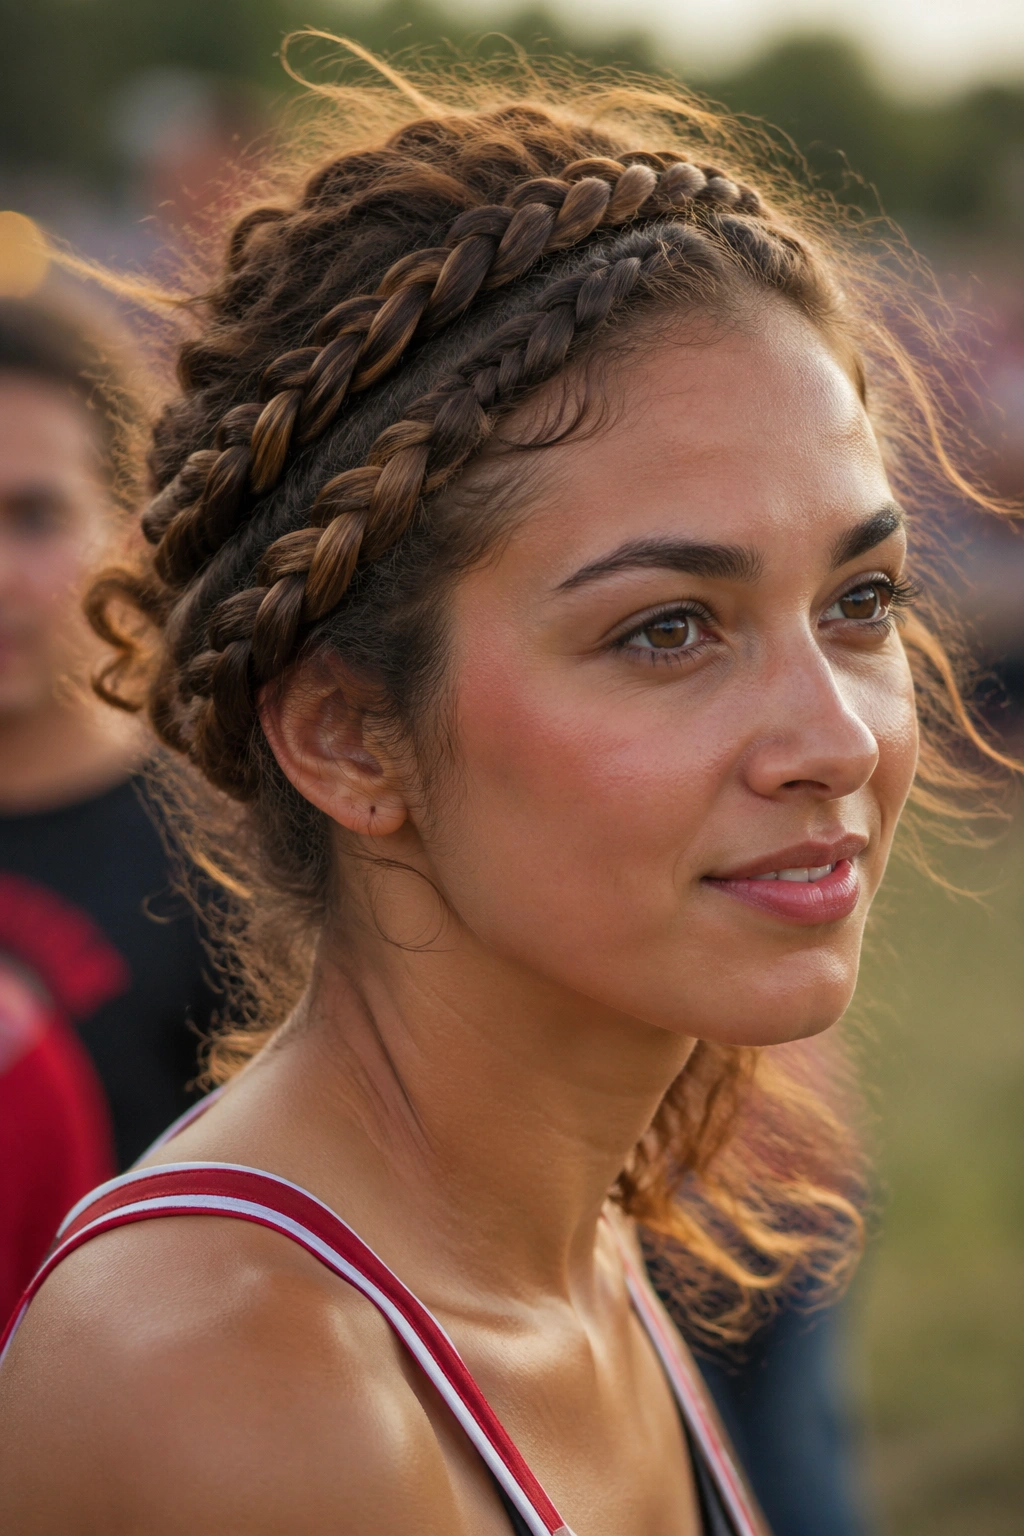
Perfect braids are overrated here.
A braided crown is one of those styles that looks more complicated than it really is. Two loose braids, one on each side, get wrapped across the top of the head and pinned into place. That gives you a built-in frame around the face and keeps the front sections from wandering all over the place.
This works especially well when the weather has opinions of its own. Wind, humidity, a crowded outdoor seat, a damp field-side breeze—braids hold their shape better than loose sections do. The braid itself does not have to be tiny or perfect. In fact, a slightly loose braid looks better with curly hair because it blends into the texture instead of fighting it.
What Makes It Hold Better
- Braid from just above the ear and keep the tension even.
- Pin the ends under the braid line so they disappear into the rest of the hair.
- Use bobby pins in an X pattern where the braids meet.
- Smooth only the front hairline if needed; leave the rest soft.
If you have layers, don’t panic when a few pieces slip out. That’s normal. Those stray curls often make the crown look more natural, not less. I’d rather see a braid with a little life in it than one that looks glued to the skull.
5. Low Curly Bun With Face-Framing Pieces
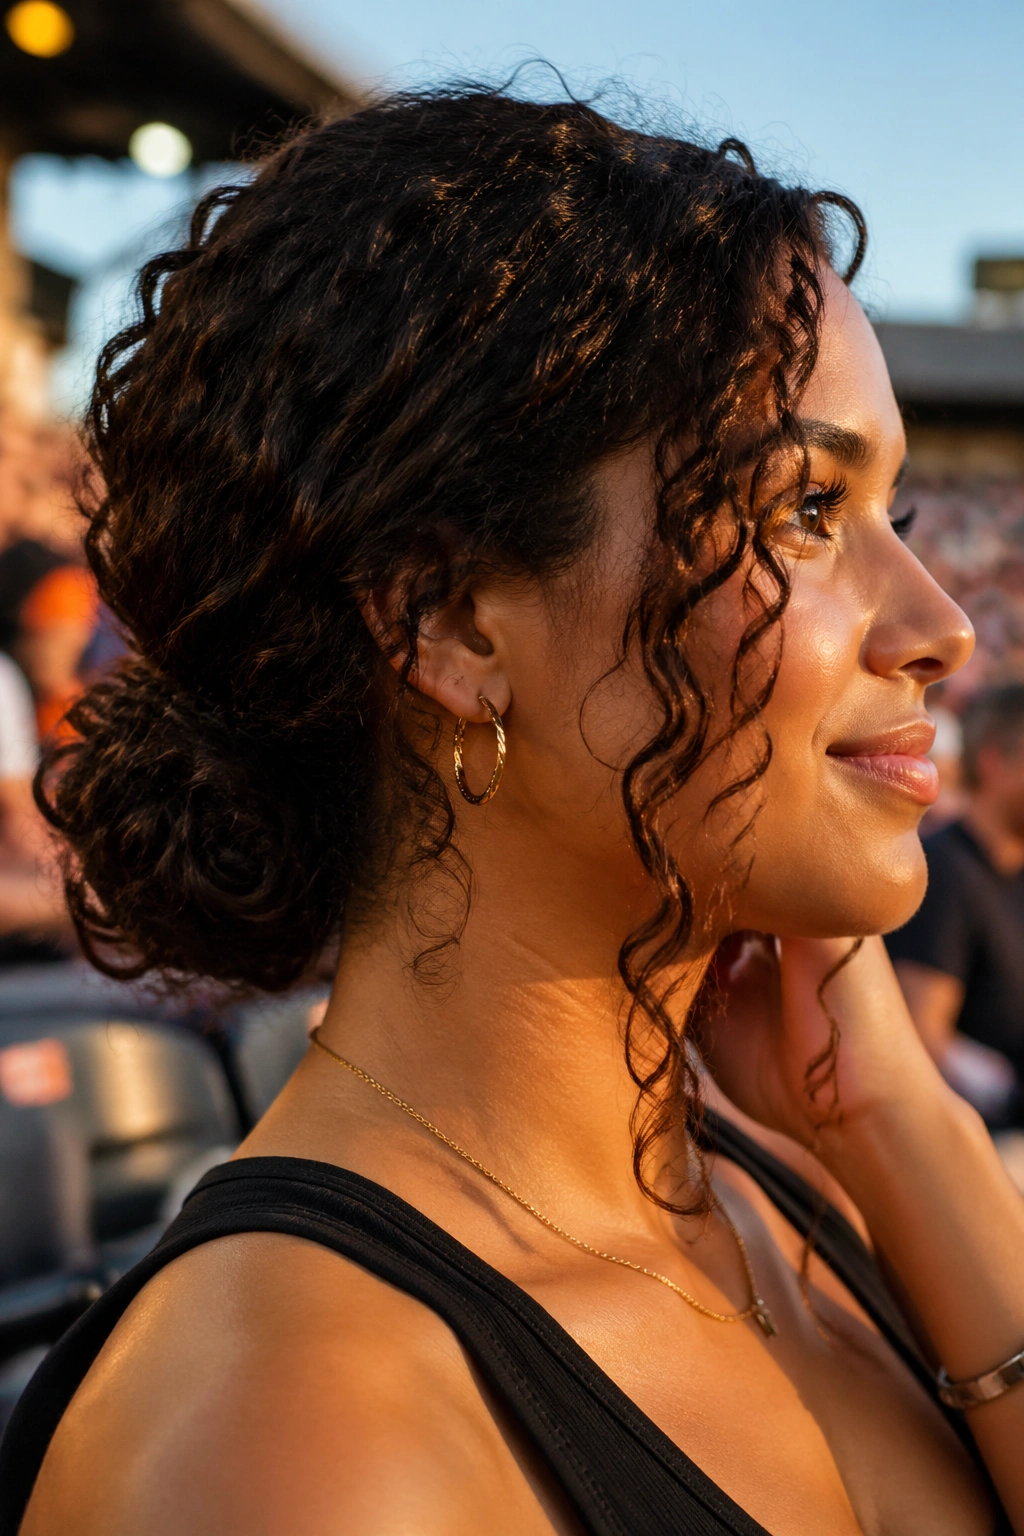
A low curly bun looks the most polished of the bunch, and it costs almost no time.
Pull the curls into a low ponytail at the nape, then twist the length into a bun and pin it until it feels secure. Leave two small face-framing pieces out at the front. That one detail keeps the style from looking severe. Without those pieces, the bun can read a little too formal for a casual game day.
The best version of this style keeps the bun soft. You do not want every curl smoothed into submission. Let the texture stay visible around the base, and let the bun have a bit of air in it. Thick curls usually do better when split into two twists before wrapping, because that keeps the bun from turning into one dense lump.
Where People Mess It Up
- Pulling the ponytail too tight, which flattens the crown.
- Using too few pins, so the bun shifts after a few hours.
- Forgetting the face-framing pieces, which makes the whole thing look harsher.
- Trying to slick every strand down, which never looks as good on curly hair as people think it will.
If you want a cleaner finish, tap a small amount of gel along the part line and the top edge of the bun. That’s enough. The rest can stay textured.
6. Two Dutch Braids Into Loose Curls
Unlike a flat French braid, two Dutch braids sit a little higher and show off the pattern.
That’s why this style works so well for curly hair on a busy day. The braids keep the roots controlled, but they don’t crush the length. You get structure at the scalp and movement through the rest of the hair, which is a nice combination when you want to look put together without losing all that curl volume.
You can braid all the way down and leave the ends loose, or stop at the nape and let the rest of the curls fall. The second version looks softer. The first version holds better. I tend to pick the second one when the goal is style; I pick the first when I know I’ll be running around a lot.
The key is even tension, not tight tension. Tight braids can create that narrow, pulled-back look that fights curly texture. Medium tension keeps the braid neat without making the head hurt halfway through the day.
This style is especially good if your curls frizz at the roots before the ends. The braid gives the roots a job, and that alone can make the whole style last longer.
7. Claw Clip Twist for Shorter Game Days
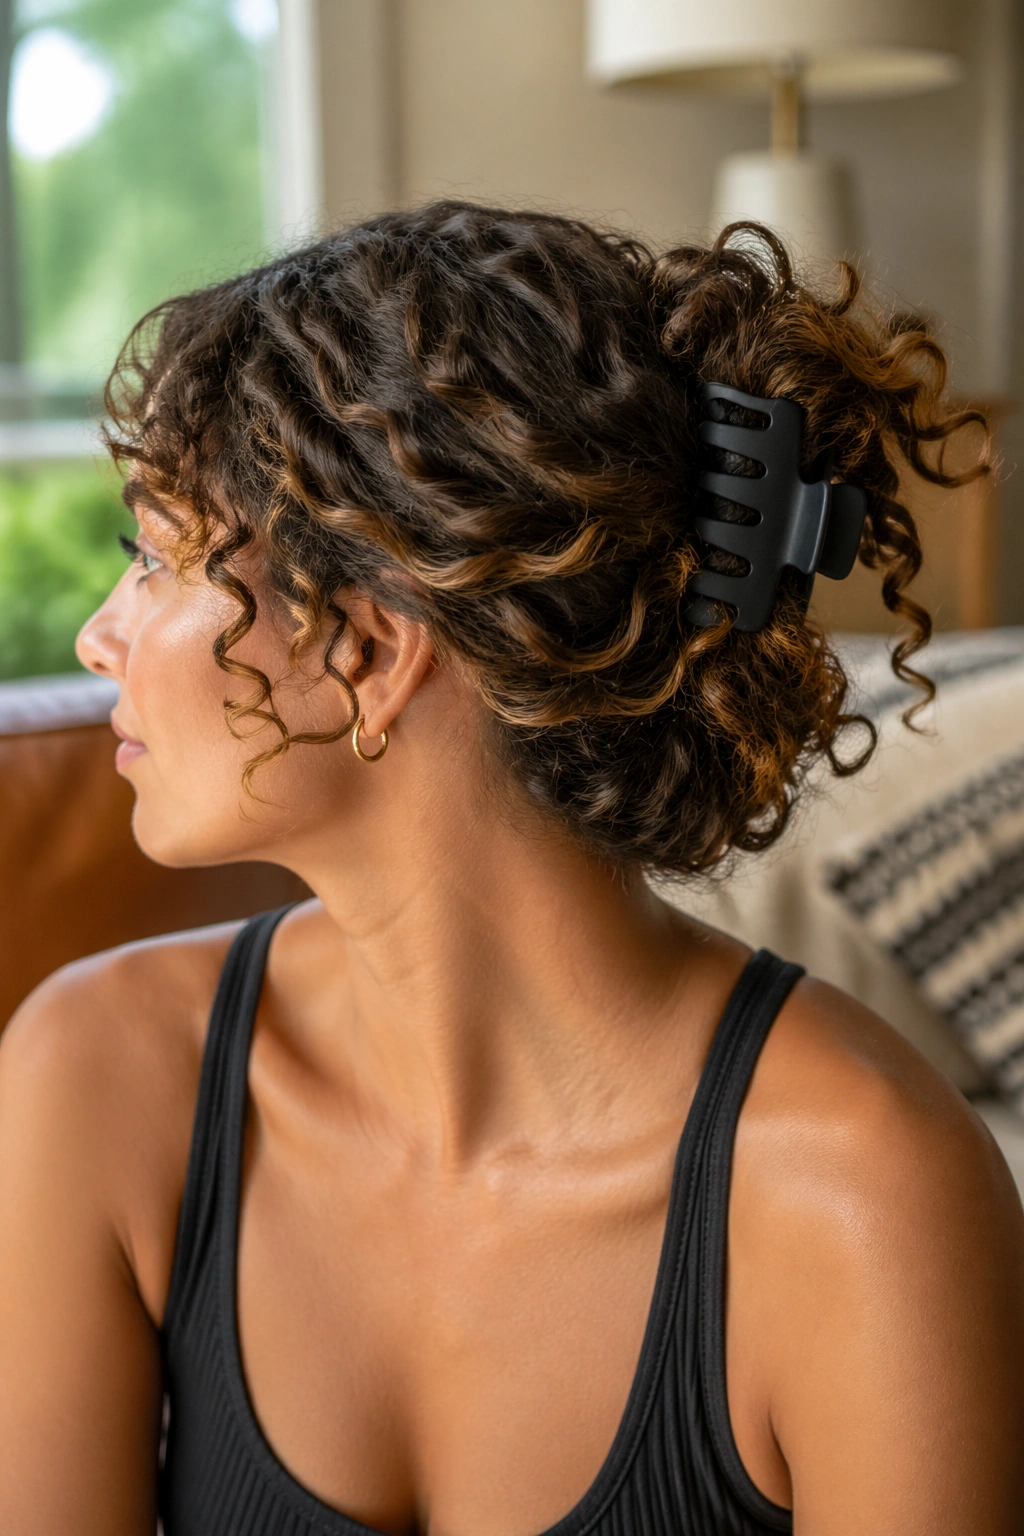
Sometimes you want your hair off your neck in ten seconds flat.
A claw clip twist does exactly that, and for curly hair it can look much better than it has any right to. Twist the hair up from the nape, fold the length once if you need to, then clip it so the ends spill in a soft cascade. The shape should feel relaxed, not packed down.
This is a smart move for shoulder-length curls or layered cuts because the clip can grab the middle of the hair without flattening the top. Use a large clip with a solid grip. Cheap smooth clips slide. A matte clip with deeper teeth holds better, especially if your hair is dense.
What Makes a Clip Actually Hold
- Pick a clip at least 4 inches long for medium curls.
- Twist the hair once before folding it up.
- Let the ends stick out a little; trying to hide every curl usually backfires.
- Place the clip a touch lower than the crown if your hair is heavy, so the weight settles naturally.
This style is casual, but not sloppy when the clip is the right size. That detail matters more than people like to admit. A tiny clip on thick curls is a joke. A good clip turns the whole thing into an easy, wearable style that still feels intentional.
8. Side-Swept Curls With Bobby Pins
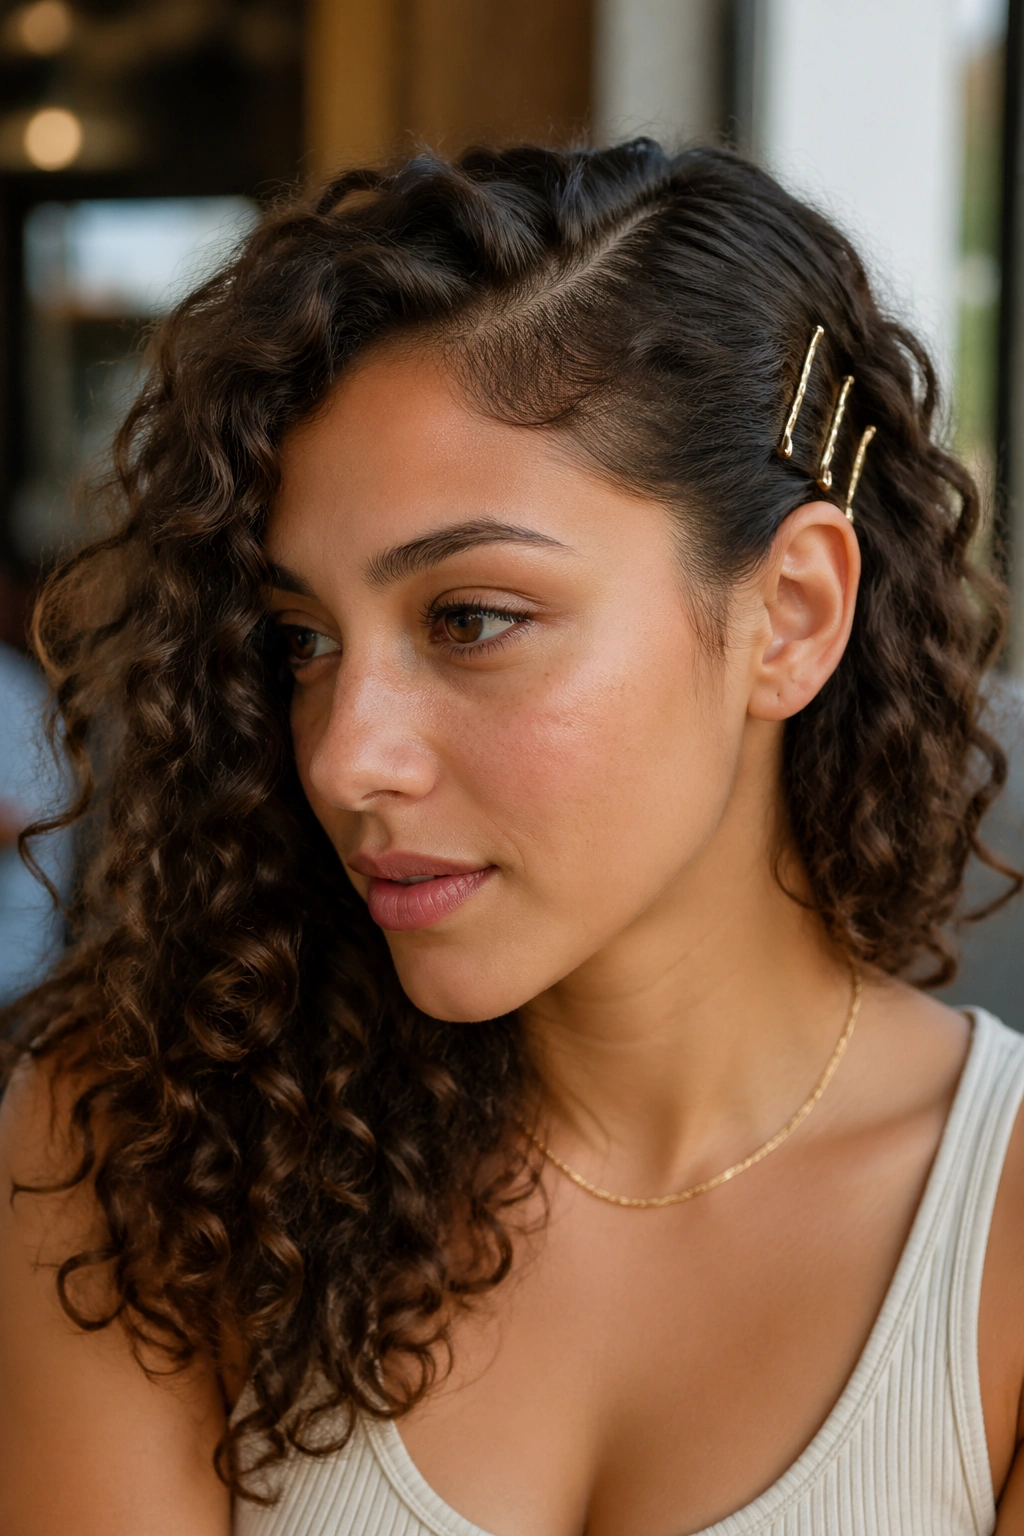
Do you want the smallest possible styling job? Side-swept curls do that.
Make a deep side part, sweep one side back, and pin it behind the ear with two or three bobby pins. Leave the rest of the curls loose and full. It’s one of those styles that looks understated from a distance but still has shape when you’re close to it. And because it doesn’t require much manipulation, the curl pattern stays intact.
The best part is how quickly it can adapt. If your hair is a little flat on one side, pin more of it back. If the front curl is doing something cute on its own, leave it alone and let it hang. This style gives you room to work with what your hair already wants to do.
How to Keep the Pins From Slipping
- Use ridged bobby pins instead of smooth ones.
- Slide the pin in with the wavy side against the scalp.
- Crisscross two pins if one section keeps popping loose.
- Tuck the pin into a small hidden curl clump, not straight into open hair.
A decorative clip can replace one pin if you want a little more polish. Just keep the shape simple. The point here is to look relaxed and tidy, not overdone.
9. Curly Faux Hawk With Lift at the Center
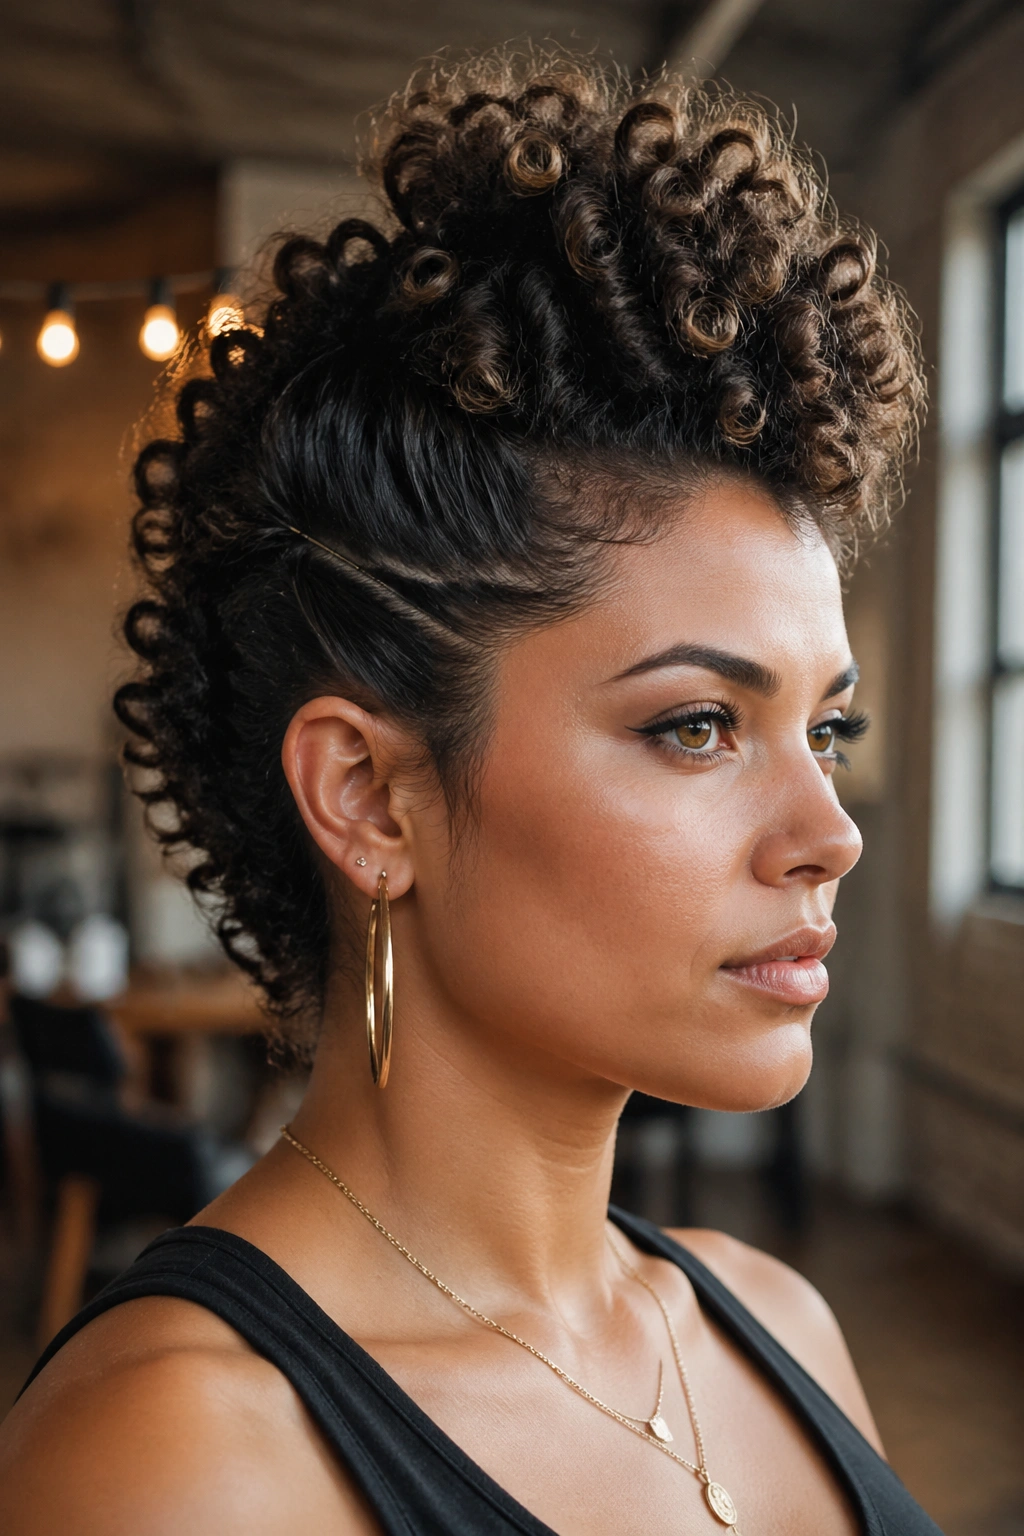
A little attitude goes a long way.
The curly faux hawk is what happens when you want a style with some edge but you don’t want to cut or shave a thing. Pin or smooth the sides back toward the center, then leave the middle ridge full and high from the front hairline to the nape. That center strip does all the visual work.
This style loves dense curls. It also works on stretched curls or blown-out curls if you want more height. The sides can be pinned low and tight, or softly brushed back, depending on how bold you want it to feel. I lean toward softly brushed. It keeps the style from looking too severe.
What to Leave Alone
- Don’t flatten the center ridge with too much product.
- Don’t overpin the sides; two pins per side is often enough.
- Don’t chase every frizzy piece at the temples. A few flyaways make the shape look less rigid.
- Do use a little gel where the hair changes direction, because that spot tends to puff first.
The faux hawk has a nice side effect: it makes curly hair look taller. That may sound like a small thing, but on a day when you want your hair to stand out in a crowd, it absolutely counts.
10. Bubble Ponytail on Curly Lengths
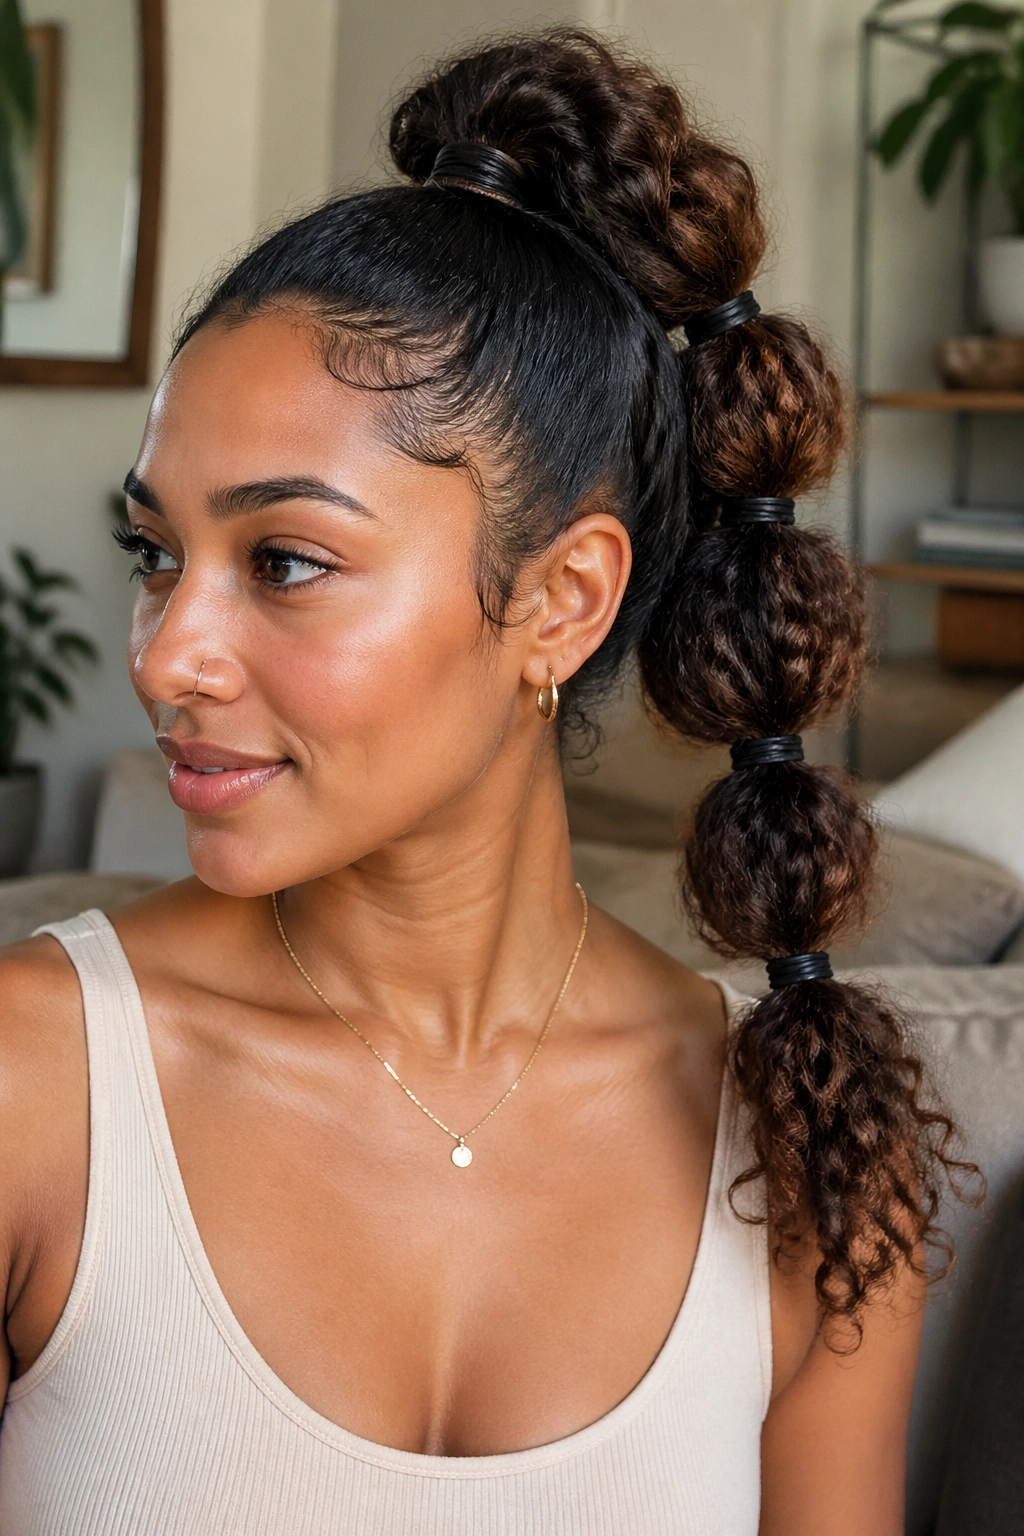
If your curls reach past your shoulders, a bubble ponytail adds shape without demanding perfect smoothness.
Start with a medium or high ponytail, then add small elastics every 3 to 4 inches down the length. Gently pull each section outward so it forms a rounded bubble. The bubbles do not need to be even. In fact, with curly hair, a little variation usually looks better because the texture already creates movement.
This style works well when you want the ponytail to stay contained but still have some volume. Regular ponytails can get heavy at the bottom. Bubble sections break that line up and give the eye more to look at. It’s a small adjustment, but it changes the whole shape.
A Few Things That Help
- Use clear elastics if you want the style to stay quiet, or colored ones if you want the bands to show.
- Place the first elastic close to the base so the ponytail doesn’t sag.
- Tug the bubbles gently; overpulling makes them look skinny instead of rounded.
- If your hair is layered, leave the smaller pieces loose around the face instead of forcing them into the pony.
This is one of those styles that looks more planned than it feels. That’s a good thing on game day. You get movement, structure, and enough personality to keep it from looking like an afterthought.
11. Headband Tuck With Defined Ends
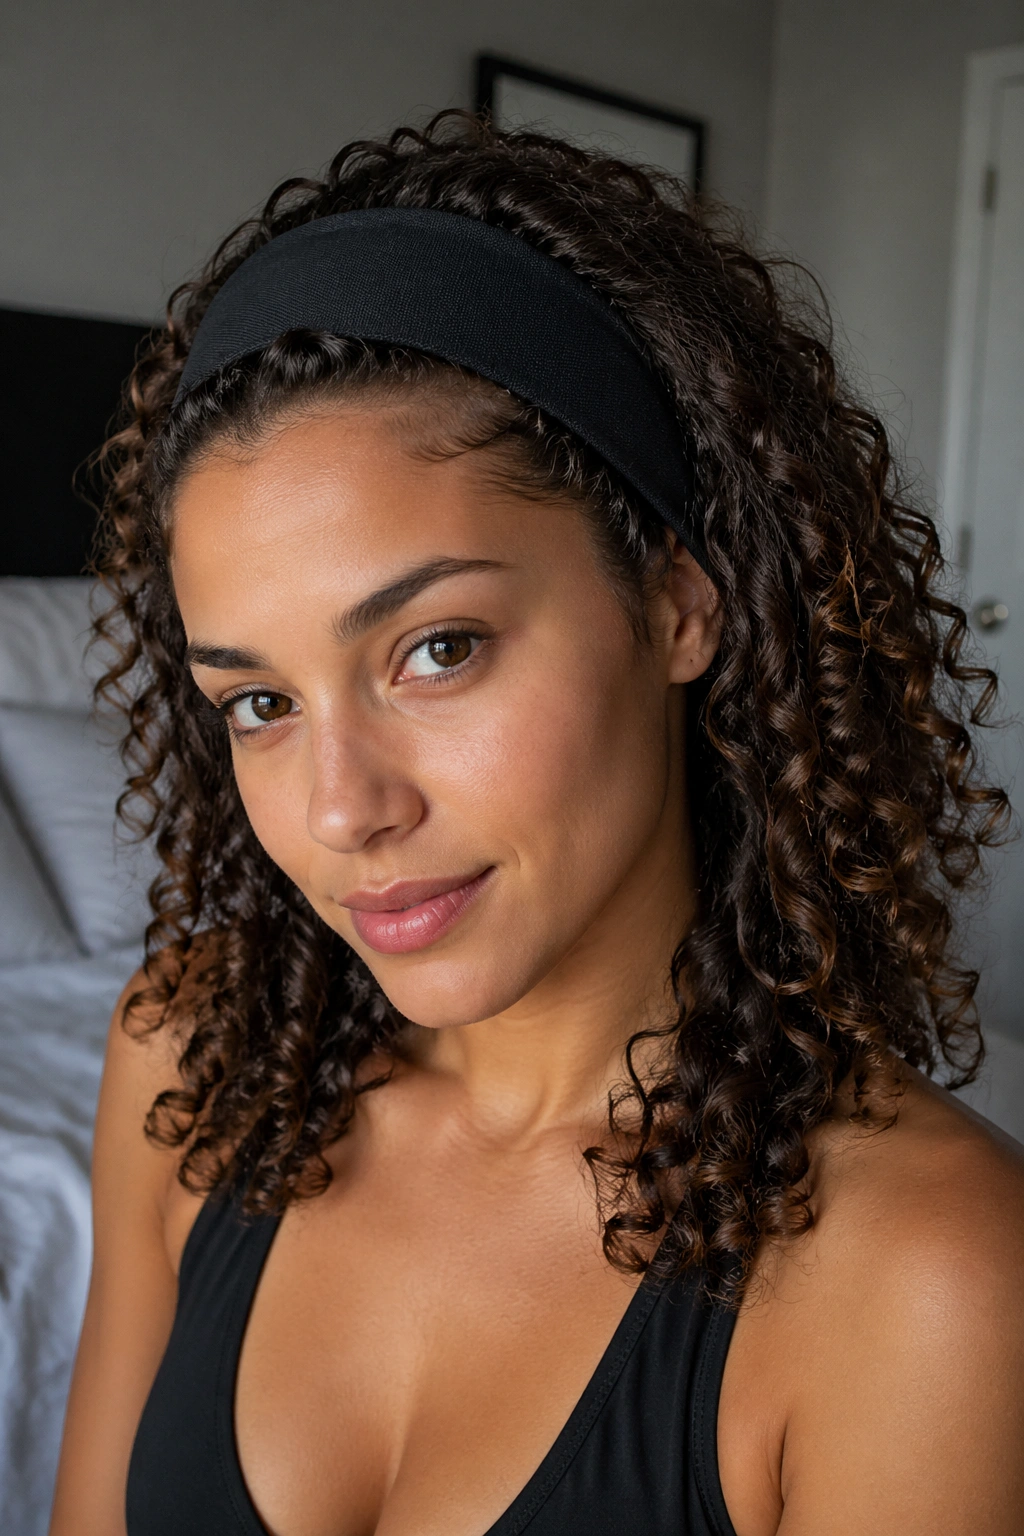
Headbands save the front half of your style when day-two frizz shows up first.
Use a wide, non-slip headband and place it an inch or so back from the hairline. Then tuck the front curls loosely under or around the band, leaving the rest of the hair free. The trick is not to squash the curls. You want them guided, not trapped.
This style is especially helpful when the front section looks puffier than the rest. It gives that area a job to do and lets the back stay defined. A soft jersey headband or a braided fabric band usually holds better than the hard plastic kind, which tends to slide or dig in.
Choose the Right Band
- Pick a band that’s at least 1 to 2 inches wide.
- Look for grip on the underside if your hair is silky or very fine.
- Avoid anything that leaves a sharp dent across the crown.
- If the band keeps moving, add one hidden pin on each side.
The nice thing here is that the headband can match your outfit or team colors without making the hair itself compete for attention. The curls stay the focus, which is how I like it. A good band should support the style, not become the style.
12. Scarf-Wrapped Finish for Windy Game Days
Wind changes everything.
If you already know the day will be breezy, a silk or satin scarf can save your curls from doing the most. Wrap it around a puff, tie it under a low bun, or fold it into a band that sits over the hairline. The scarf acts like a soft boundary, which is exactly what curly hair needs when the air starts tugging at every loose piece.
This is also the style I’d reach for if I wanted the outfit to do a little extra work. A plain black scarf feels sleek. A patterned one adds color without turning the hair into a project. Keep the knot secure but not tight. If you pull the scarf hard enough to flatten the curls, it stops being useful.
A small extra detail helps a lot here: leave a few curls or tendrils out near the ears if the scarf placement feels too rigid. That keeps the look from getting stiff. And if the scarf is going over a bun, let the bun stay soft under it instead of crushing it flat.
Keep one spare scarf or a few extra pins in the car. Wind, humidity, and a long walk from the parking lot can undo a good style faster than you’d expect. A backup plan is worth the tiny amount of space it takes.