Work hairstyles for Black curly hair should do one thing well: stay neat after a commute, a desk fan, and a day of touching your hair exactly zero times.
The sweet spot is a style that respects curl pattern instead of flattening it. A clean part, a calm hairline, and a shape that doesn’t fight shrinkage matter more than whether every strand lies flat.
I also care about the small stuff. A bun that sits too high gets lopsided under a coat collar, a gel that flakes on a dark blazer looks messy fast, and a style that pulls at the temples will make you regret it by lunch.
Some of these looks take ten minutes. Some take a wash day and a little patience. The point is to give you options that feel put together without turning your morning into a wrestling match with your own texture.
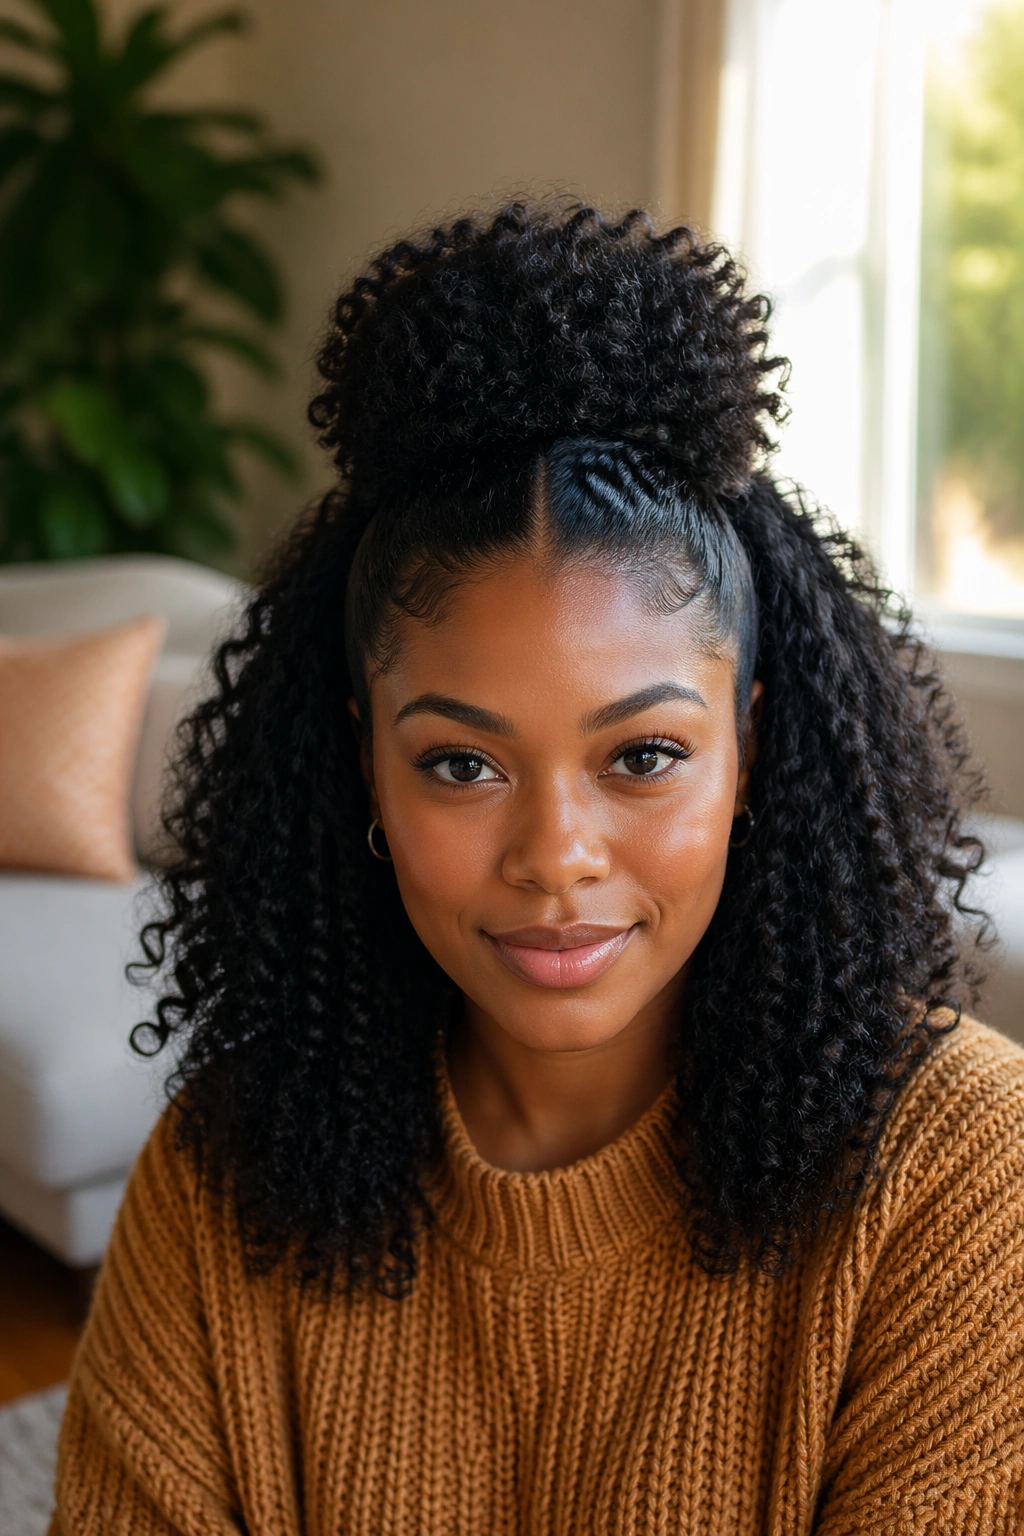
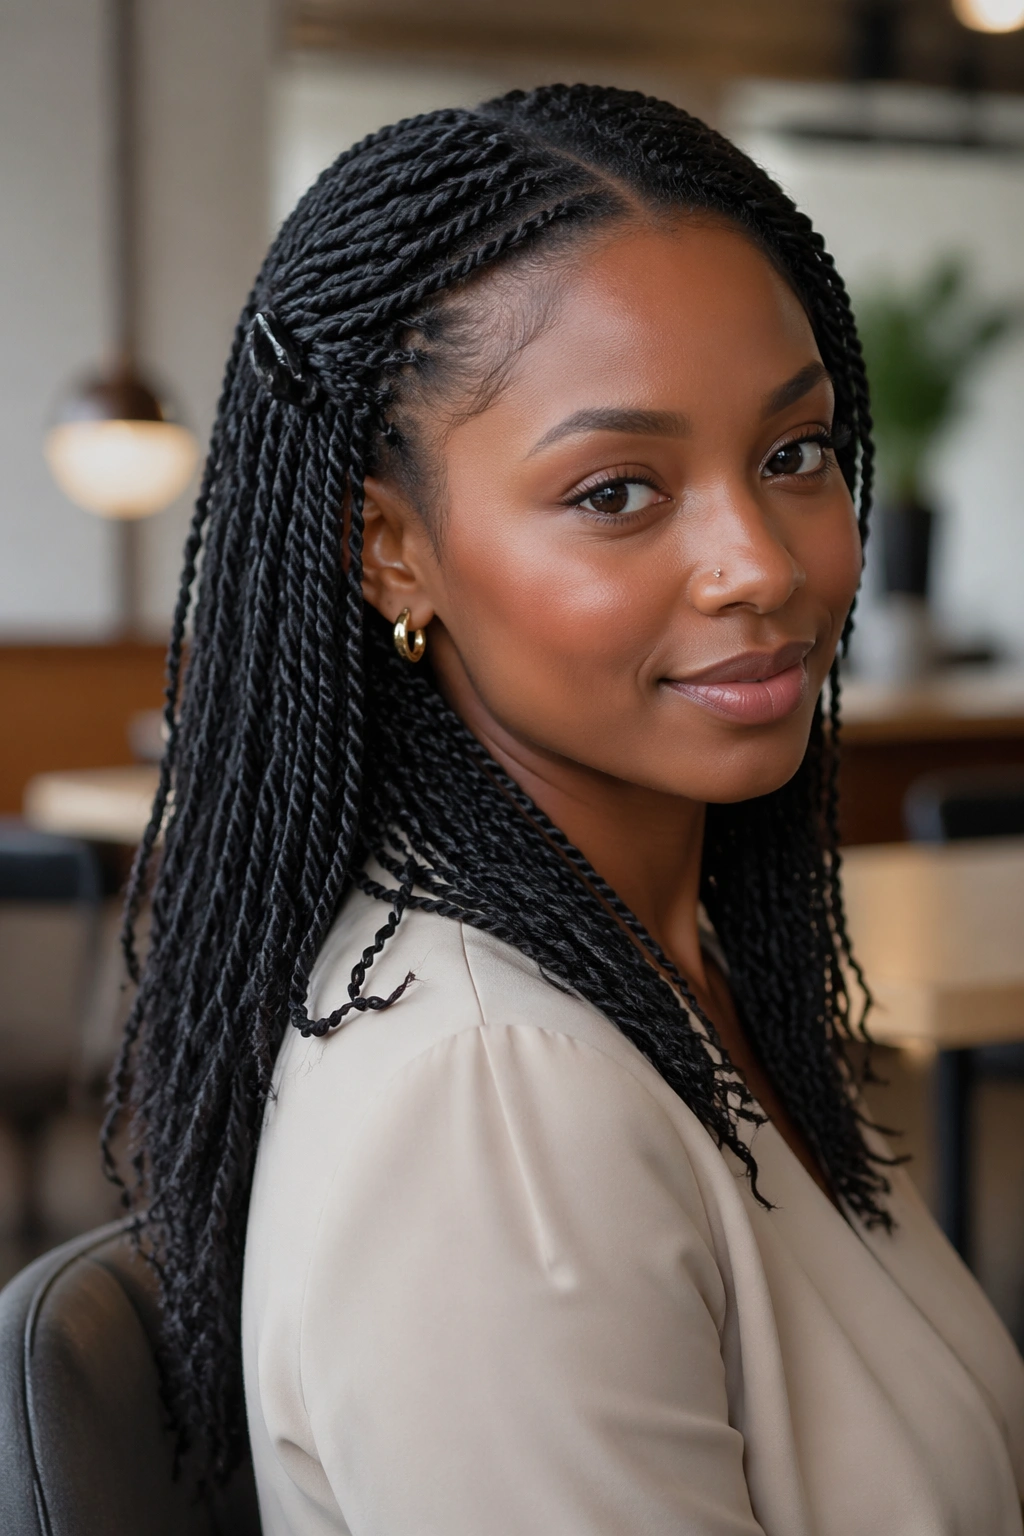
1. Defined Wash-and-Go for Black Curly Hair
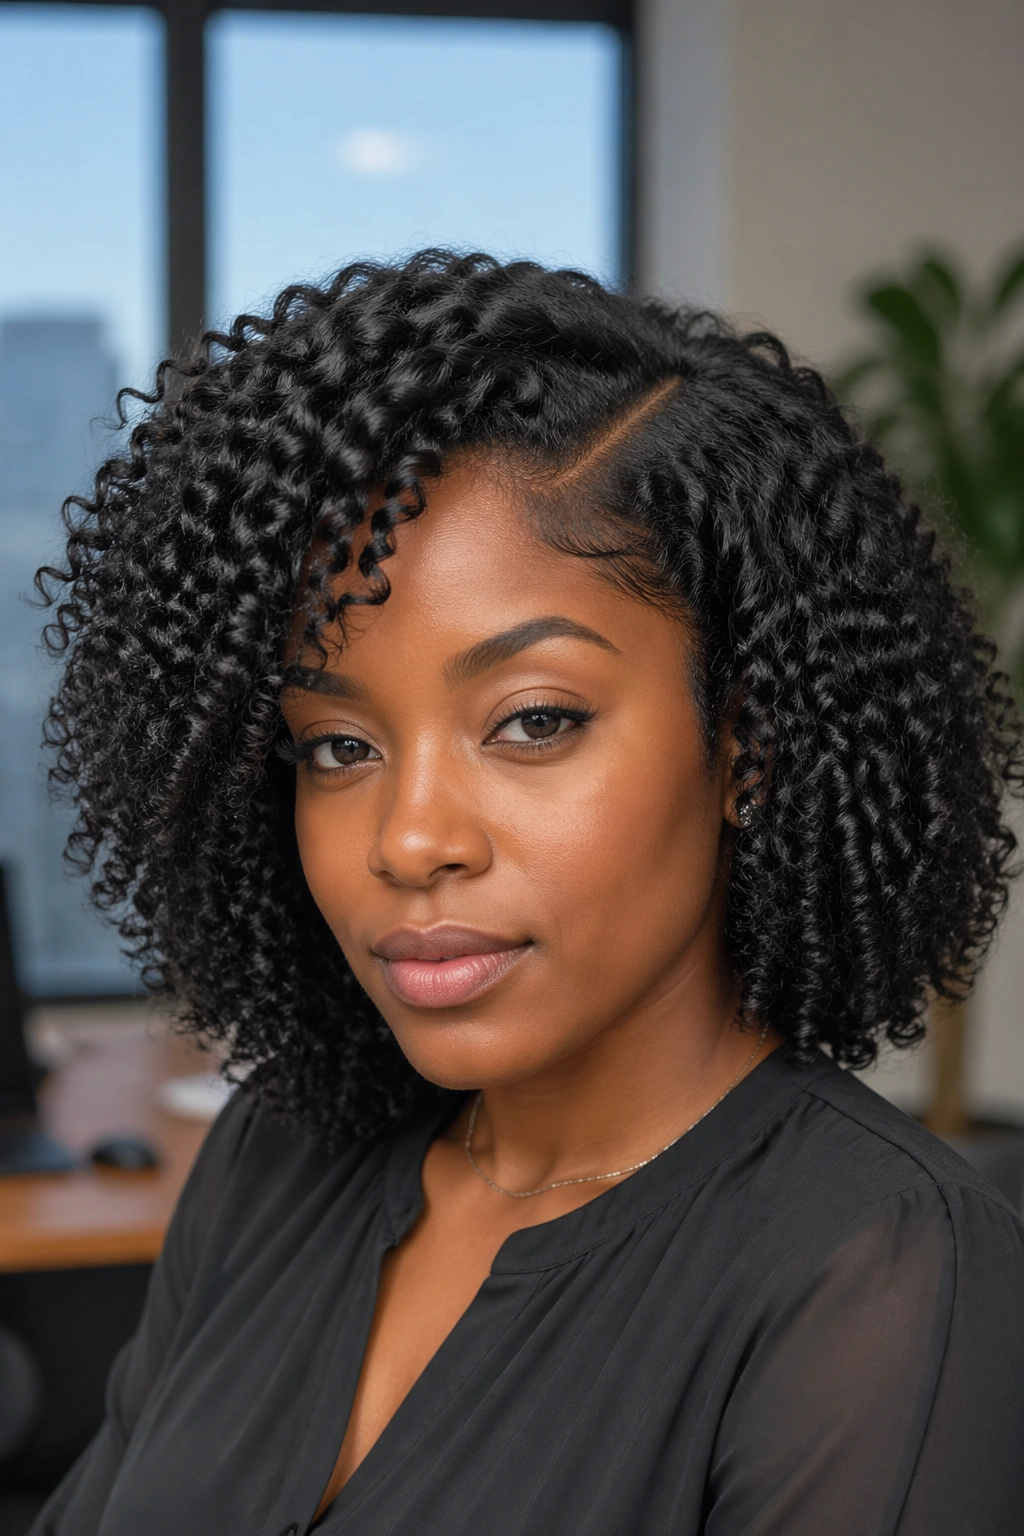
A wash-and-go is the easiest style to overcomplicate.
Start on wet hair, not damp hair, if you want the curl pattern to clump cleanly. Work in a leave-in, then a curl cream if your hair likes extra softness, then a gel with enough hold to keep the shape from puffing out before noon. Scrunch upward with your hands, then leave the curls alone while they set.
What keeps it work-appropriate
- Use a clean side part or middle part so the shape looks intentional, not rushed.
- Smooth the crown with your palms or a soft brush so the top doesn’t balloon.
- Clip the roots at the front for 15 to 20 minutes if they tend to dry flat.
- Wait until the hair is fully dry before touching it, or the frizz will travel.
A good wash-and-go looks calm at the scalp and lively through the ends. That balance matters. Too much product gives you flakes; too little gives you a puffy halo that needs constant fixing.
Pro tip: if your curls love a cast, break it gently with a drop of lightweight oil once the hair is dry, then stop. More rubbing only makes the frizz worse.
2. Low Puff with a Smooth Base for Black Curly Hair
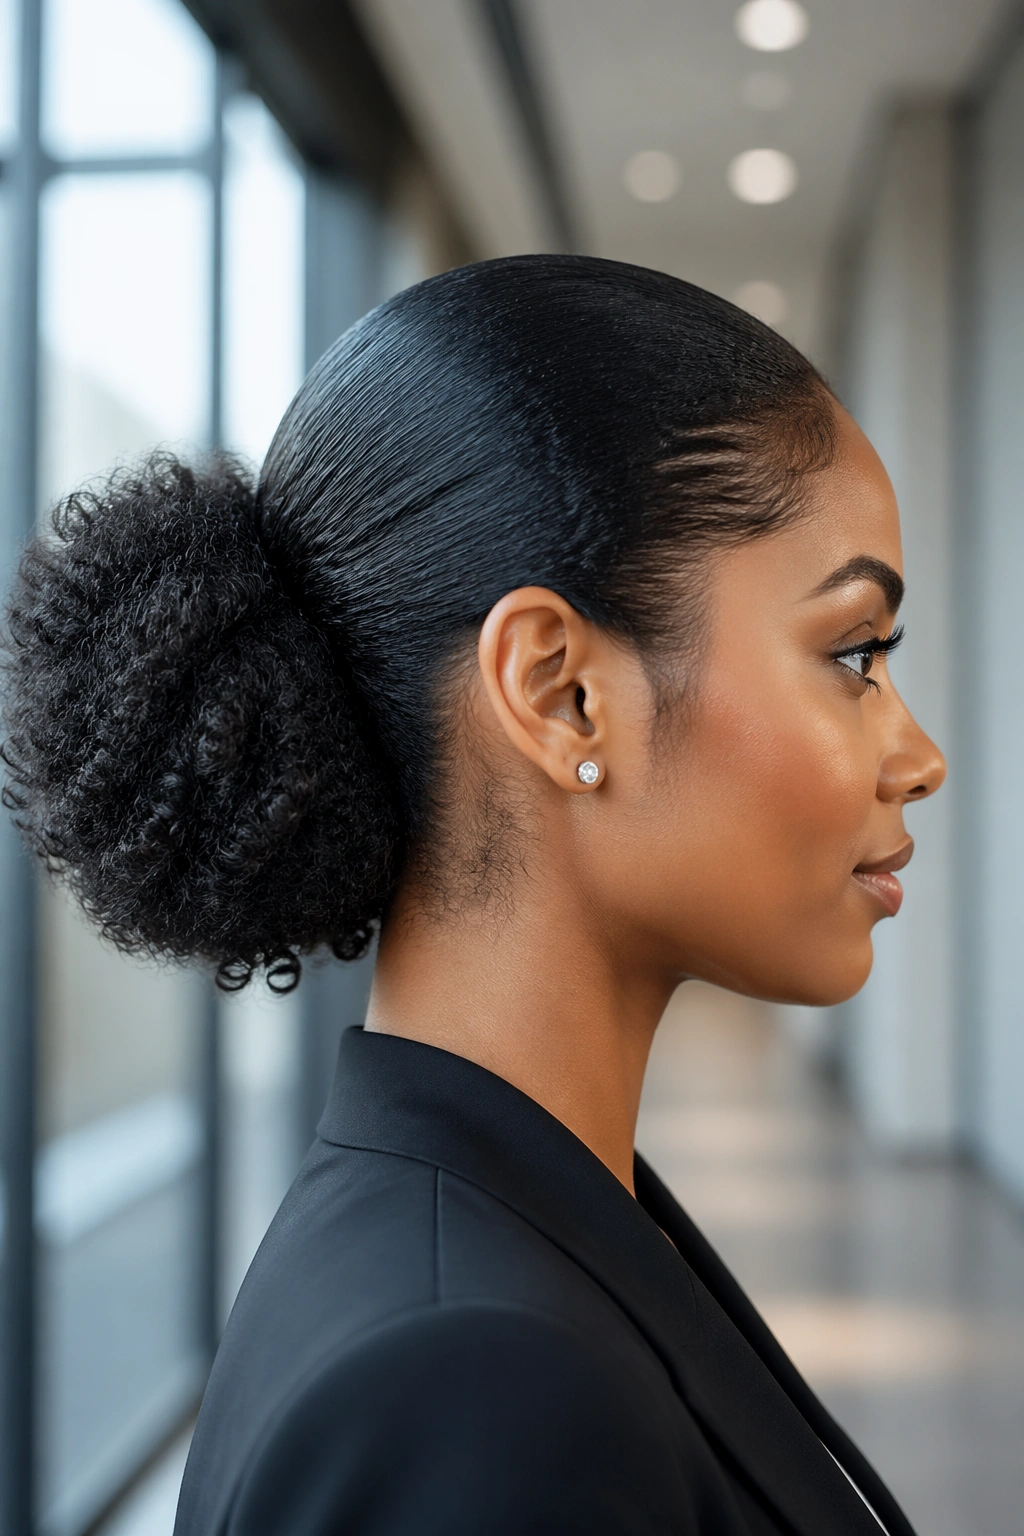
A low puff looks simple because it is simple.
What makes it work is the base. Brush or smooth the top and sides toward the nape, then secure the puff with a wide elastic or satin scrunchie so the back sits low and full. I like this style because it keeps the silhouette neat from the front while letting the texture do its thing at the back. It reads tidy, not stiff.
The biggest mistake is pulling the hair too tight just to make it sleek. Nope. You want tension, not pain. If your edges are fragile or your scalp gets sore fast, leave a little softness around the hairline and use a scarf for five minutes to set the front instead of forcing it flat with a brush.
This is one of those work looks that makes sense on busy mornings. It takes about the same effort whether your hair is freshly styled or on day three, and it plays nicely with earrings, collars, and glasses. Clean, fast, dependable. That’s the whole appeal.
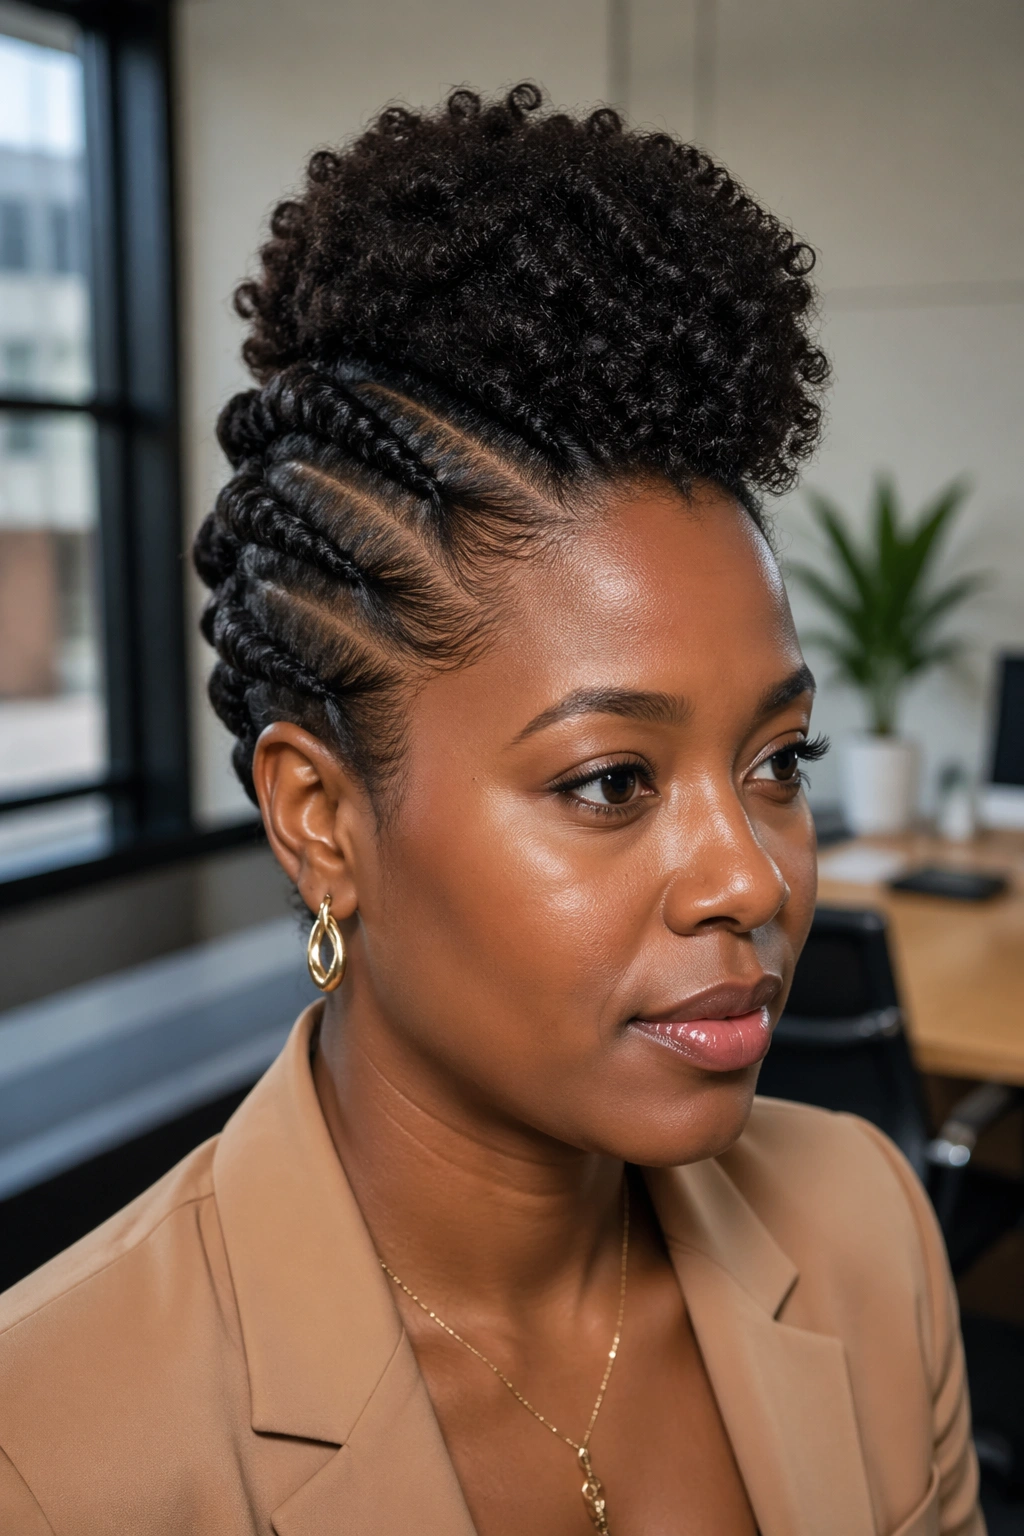
3. Flat Twists into a Low Bun
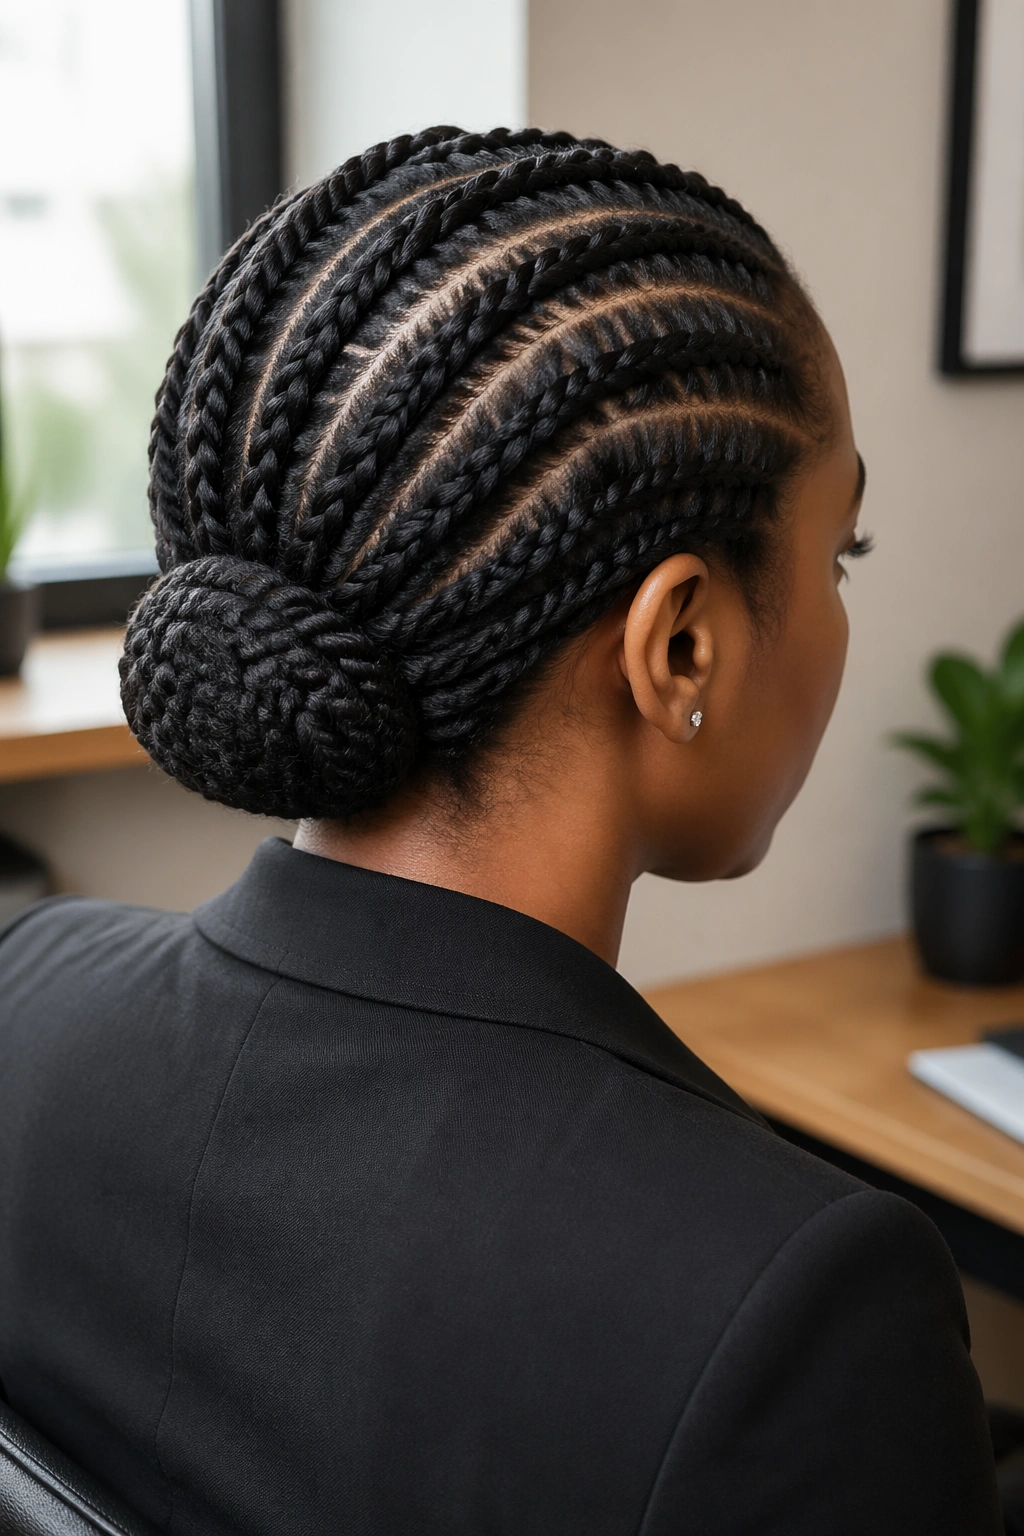
Need your hair off your neck by 9 a.m.?
Flat twists solve that without looking fussy. Part the front into two, four, or six sections depending on how much control you want, then twist each section close to the scalp and guide the twists toward the nape. Gather the ends into a low bun and pin it flat enough that it sits comfortably under a blazer or cardigan.
How to keep the part clean
A rat-tail comb helps, but steady fingers matter more. Create the part on stretched or freshly washed hair, and keep the sections even so one side does not look heavier than the other. If your hairline frizzes quickly, smooth only the first half-inch with a little gel. That is enough.
This style feels especially good when you want structure without a slicked-back look. It has shape at the front, stability at the back, and enough texture to keep it from feeling severe. That is a hard balance to get, and flat twists do it better than most styles that try to look “professional” by flattening everything.
4. Twist-Out with Tucked Ends

Picture a twist-out on day two: soft, shaped, and still cooperative.
That’s the version worth wearing to work. The trick is to set the twists small enough that the definition lasts, then separate only once the hair is completely dry. After you fluff the roots, tuck the sides behind the ears or pin the ends into a low arrangement at the nape if you want less volume. The style keeps movement, but the outline stays controlled.
I like this look when the office mood leans a little relaxed. It has personality. It also hides the fact that you did not want to spend 40 minutes reworking your hair before a meeting. A good twist-out can carry a plain button-down and make it look finished without trying too hard.
Use a light oil on your fingertips when separating, not on the whole head. That tiny detail helps reduce frizz where your hands do the most damage. And if the ends start to puff up too much by the second day, pin just the back section instead of redoing the whole style. That is the kind of shortcut that keeps your morning sane.
5. Sleek Low Bun with a Curly Side Piece
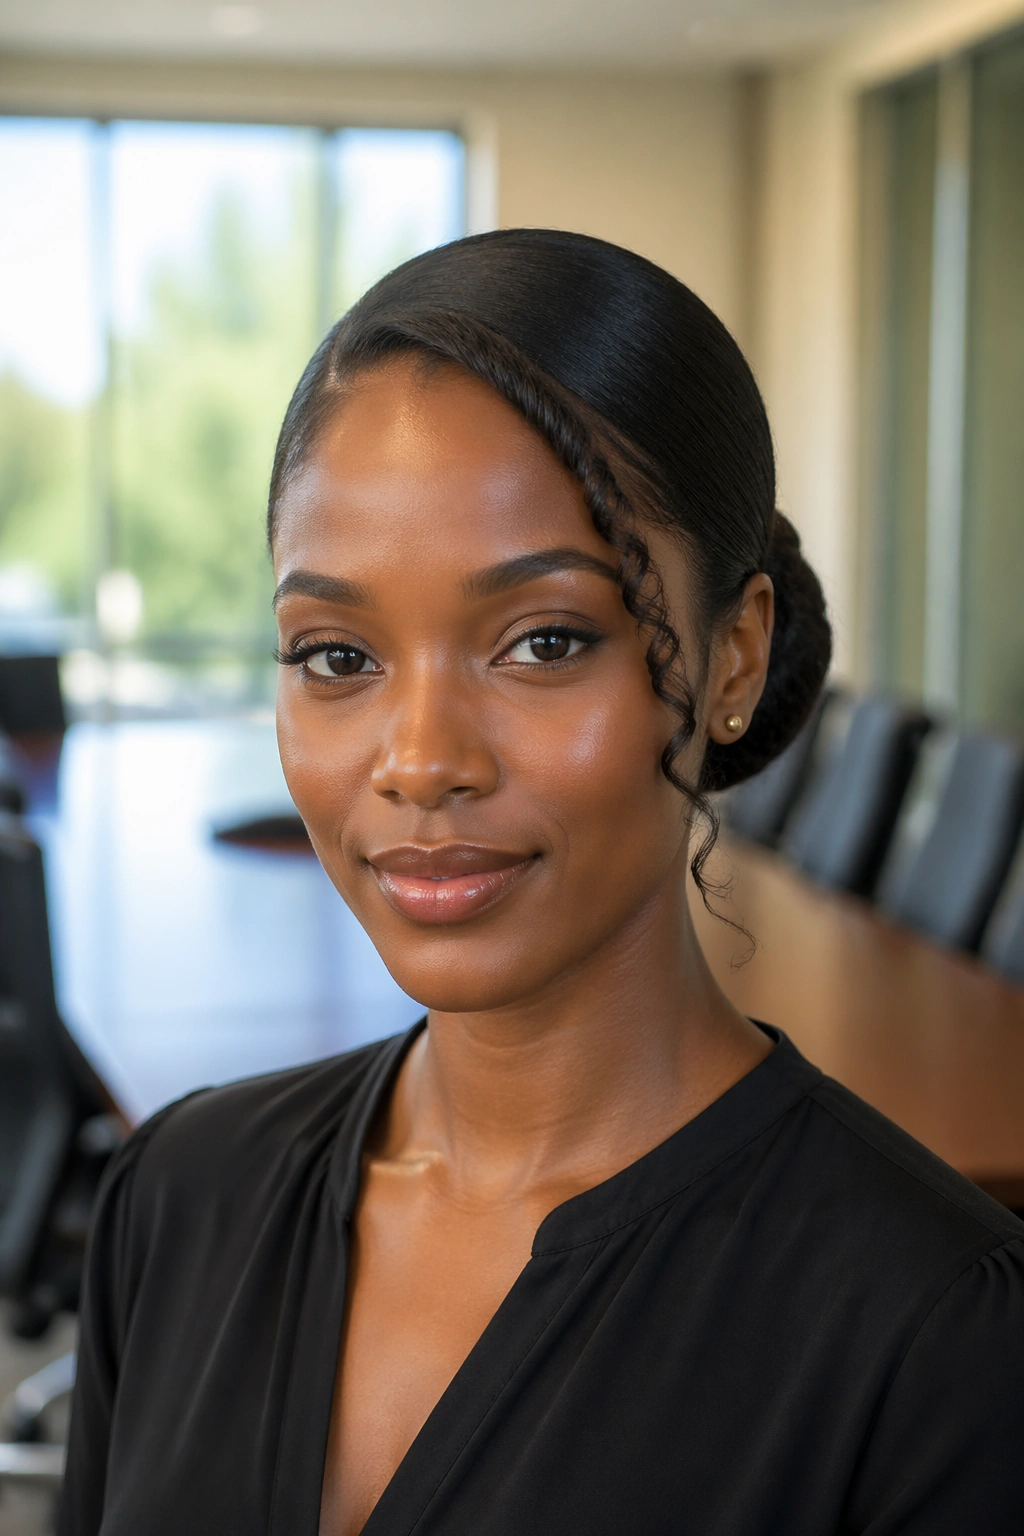
Unlike a fully slicked bun, this version leaves a little texture on purpose.
That one detail changes the whole mood. Smooth the top and sides into a low bun, but leave a slim curly side piece or a softly curled front section out near the cheekbone. The contrast keeps the style from looking flat or severe, and it gives the face a softer frame. It also makes the bun feel less “formal event” and more “I know exactly what I’m doing.”
This is a smart choice when you want a neat front for the workday but still want some curl to show. Keep the bun low, almost at the nape, and wrap the elastic with a section of hair so the base looks finished. A little gel at the hairline goes a long way here; you do not need to paint every inch down. A smooth top and one intentional curl are enough.
If your hair is thick, pin the bun horizontally instead of stacking it up into a round ball. The shape stays flatter, which looks cleaner from the side and feels better against a chair back.
6. Half-Up Crown Puff for Black Curly Hair
The half-up crown puff gives you height without committing to a full updo.
It works because it keeps the top section controlled while the rest of the curls stay visible. Gather the hair from temple to temple, or a little farther back if you want more lift, then secure it high enough to show the shape but not so high that the puff starts to droop. The lower curls can hang loose, fall to one side, or get lightly finger-coiled if they need a little help.
This is one of my favorites for days when I want my face open and my texture visible at the same time. There is no need to choose between the two. The style also forgives shrinkage, which is a blessing when your curls have their own opinions about where they want to sit.
A satin scrunchie helps the crown puff stay comfortable, and two crossed bobby pins can stop the top from sliding if your hair is slippery. Keep the section at the crown a touch looser than you think you need. Too tight, and the puff sits awkwardly. Too loose, and it loses shape before lunch. The middle ground is the sweet spot.
7. High Puff with a Wrapped Base
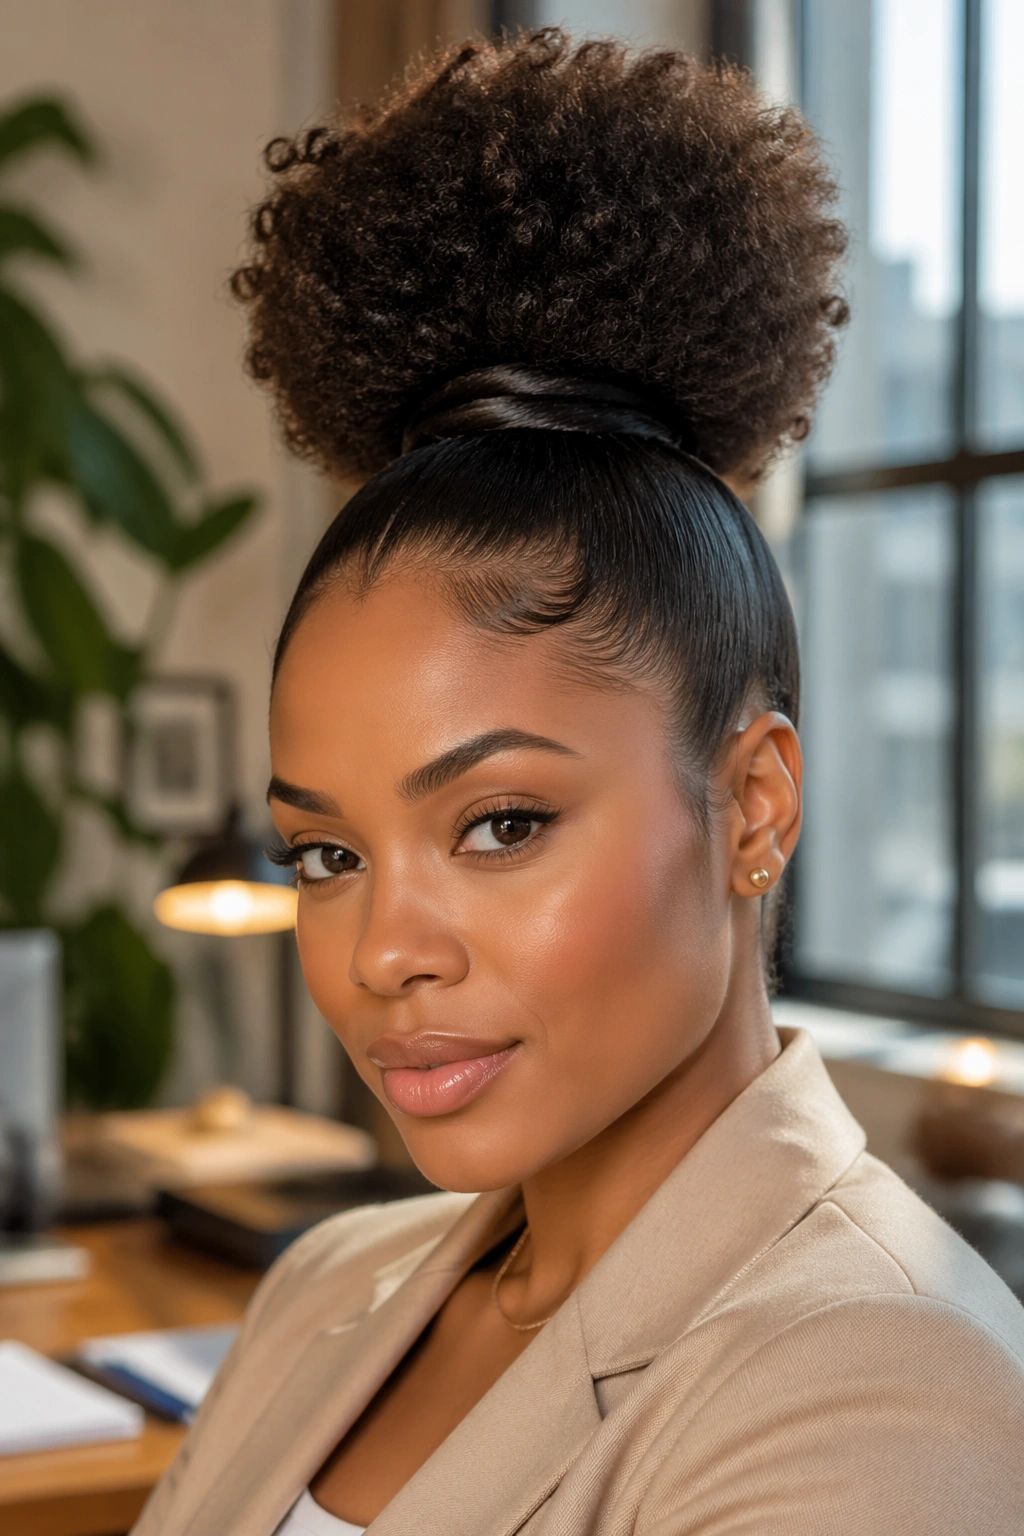
A high puff is the fastest way to make curly hair look intentional.
Seriously. The height does half the styling work for you. Smooth the hair upward, secure it with a wide band, then wrap the base with a strip of satin, a puff cuff, or a small section of hair so the anchor disappears. Once the base looks tidy, fluff the puff until it feels balanced rather than lopsided.
- Use a wide band, not a thin elastic, so the back of your head does not get dented.
- Smooth only the outer layer of hair; don’t brush through every curl.
- Lift the puff with your fingers instead of shaking it hard.
- Stop once the shape looks round and even.
I reach for this style when I want something fast that still has presence. It works on shorter and longer curly hair, and it looks especially good with big hoops or a simple neckline. The trick is to keep the base controlled. If the anchor looks messy, the whole style feels unfinished. If the base is clean, the puff can be as full as it wants.
8. Tapered Afro with a Sculpted Shape
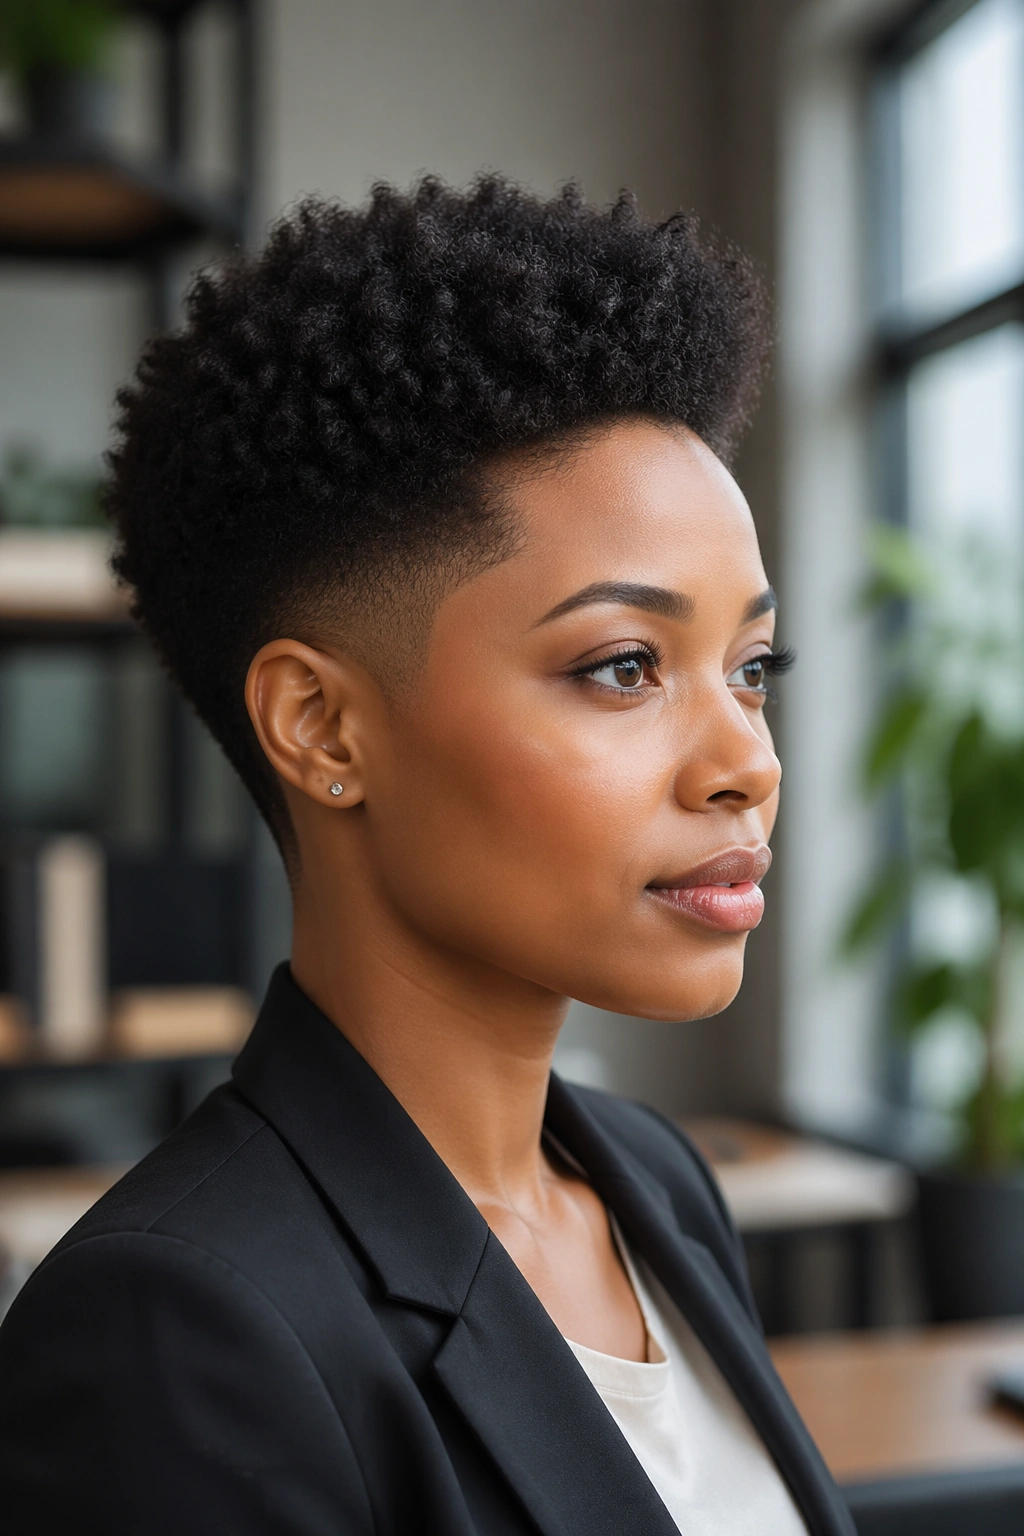
A good tapered afro feels crisp at the edges and full through the top.
That shape is doing a lot of work. When the sides and nape are trimmed close and the top is left fuller, the style looks deliberate even on a low-effort day. A quick pick at the roots can revive the shape, but the real win comes from the cut itself. If the outline is solid, you spend less time fixing it every morning.
Where the shape matters most
- The temples should stay neat, because that area frames the face first.
- The nape should be clean enough that collars do not make it look fuzzy.
- The top should keep enough length for curl definition, not just volume.
I like a tapered cut because it refuses the idea that work hair has to be pinned down to count as polished. It doesn’t. A structured afro can look sharper than a bun if the lines are clean and the curls are moisturized. A little cream on the ends, a gentle pick at the roots, and you are done.
If the front tends to get flat, finger-coil just the top row of curls. That small move gives the style more definition without making the whole head look styled within an inch of its life.
9. Halo Braid with Curly Ends
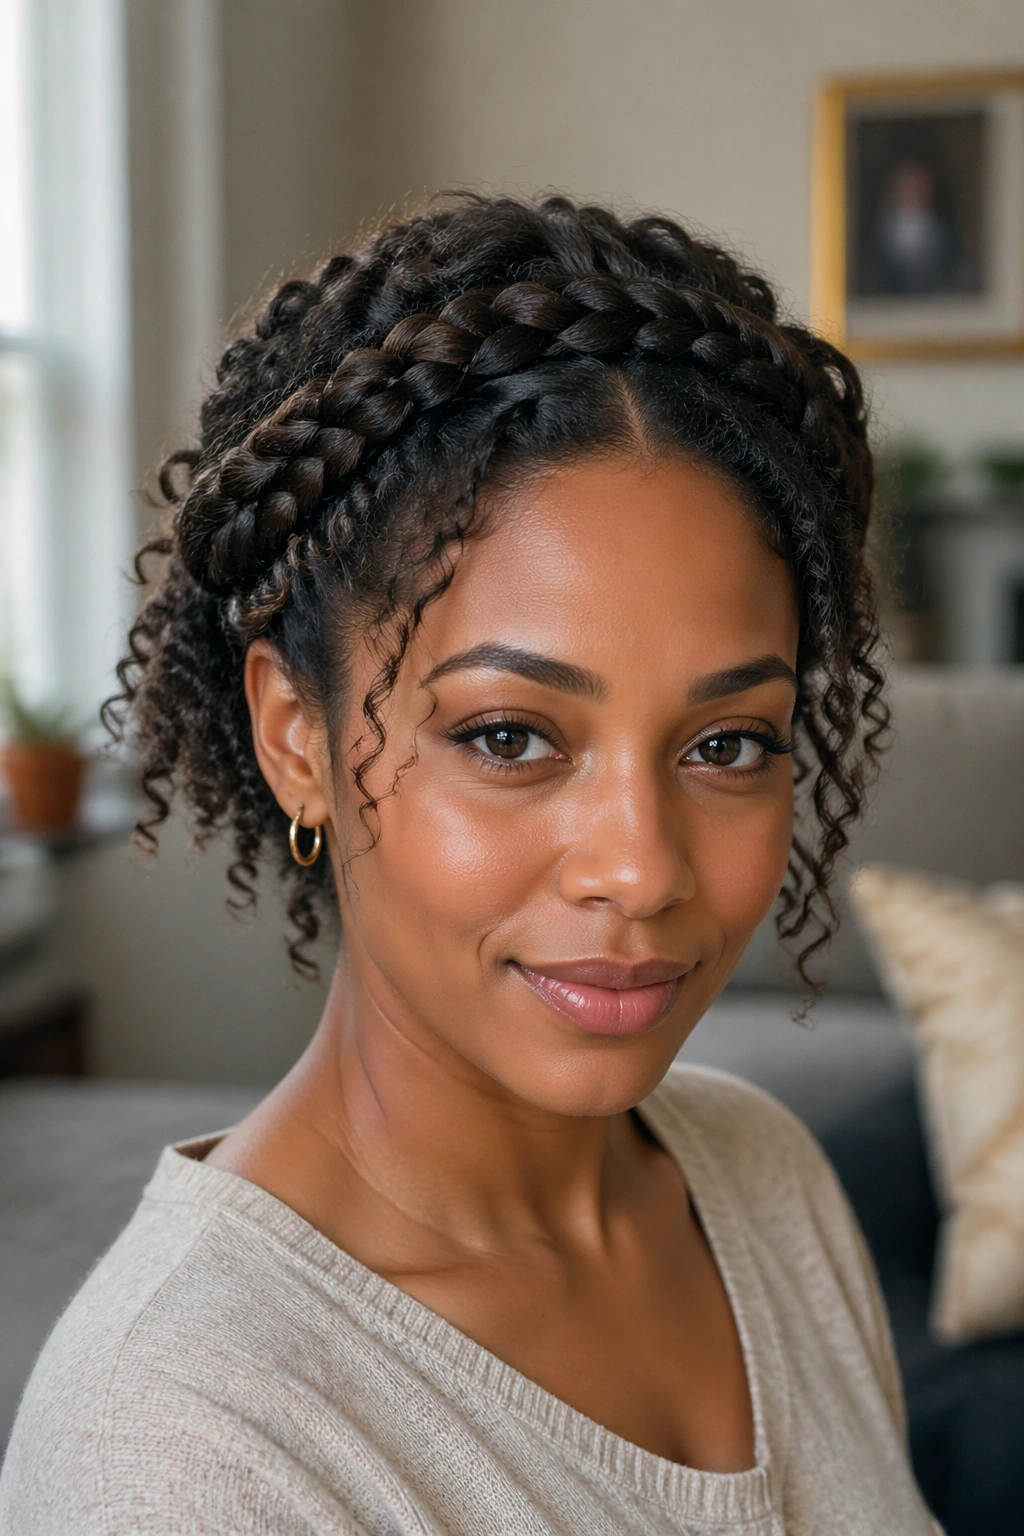
Some mornings you want to touch your hair once and move on.
That is where a halo braid earns its keep. Start the braid near the hairline and guide it around the head like a crown, keeping the tension light so the scalp stays comfortable. Leave the ends curly if you want softness, or tuck them into the braid if you prefer a cleaner finish. Either way, the face stays open and the style stays put.
A halo braid looks especially good when the parting is neat. You do not need tiny, fussy sections. You need steady hands and a clean line around the perimeter. If the braid sits too high, it can look childish. If it sits close enough to the hairline, it reads elegant and calm.
Use two or three bobby pins to anchor the braid behind each ear if your hair tends to slip. A little moisture on the ends keeps them from looking dry by the end of the day. I also like this style with simple earrings because the braid already frames the face; too many accessories start to compete with it. Quiet is better here.
10. Mini Twists Worn Loose and Pinned Back
Mini twists are the quiet workhorse of curly hair styling.
They take time up front, and I’m not going to pretend otherwise. But once they’re in, your mornings get easier. The twists stretch the hair, keep the ends tucked away, and give you the option to wear everything loose one day and pinned back the next. That kind of flexibility is hard to beat when your schedule is full and your energy is not.
Why they earn their keep
Mini twists look neat because the sections are small and uniform. Use a rat-tail comb to part the hair, keep the product light so the twists do not get greasy, and twist all the way to the ends so they stay closed. A little mousse on the tips helps keep fuzz down without making the whole style stiff.
The thing I like most is the middle ground they offer. They are not as formal as braids, not as loose as a twist-out, and not as demanding as a wash-and-go that needs daily fussing. Pin one side back with a plain clip and they look tidy enough for work. Wear them down, and they still have movement. That combination makes them a smart choice when you want low-stress styling that lasts.
11. Bantu Knot-Out with Soft Definition

A Bantu knot-out is not too much for work when you keep the knots small and the parts clean.
That’s the part people miss. The style can look playful or sharp depending on how you set it. Make the knots medium or small, keep the sections even, and let them dry fully before you take them down. Once you unravel, separate only enough to shape the curls. If you go too far, the volume starts to spread sideways and the look loses its polish.
This style gives you a strong curl pattern with a little bounce at the ends. It also works well when you want volume without a full afro. I especially like it for medium-length hair because the curls sit neatly around the face and hold their shape with less morning effort than a twist-out.
The downside is time. You need patience on the setting side, and there is no shortcut if the knots are still damp. But once they are dry, the result feels controlled and lively at the same time. If your workplace leans creative, this style has enough personality to feel right at home. If the dress code is stricter, keep the parts neat and the size moderate.
12. Curly Low Ponytail with a Wrapped Base
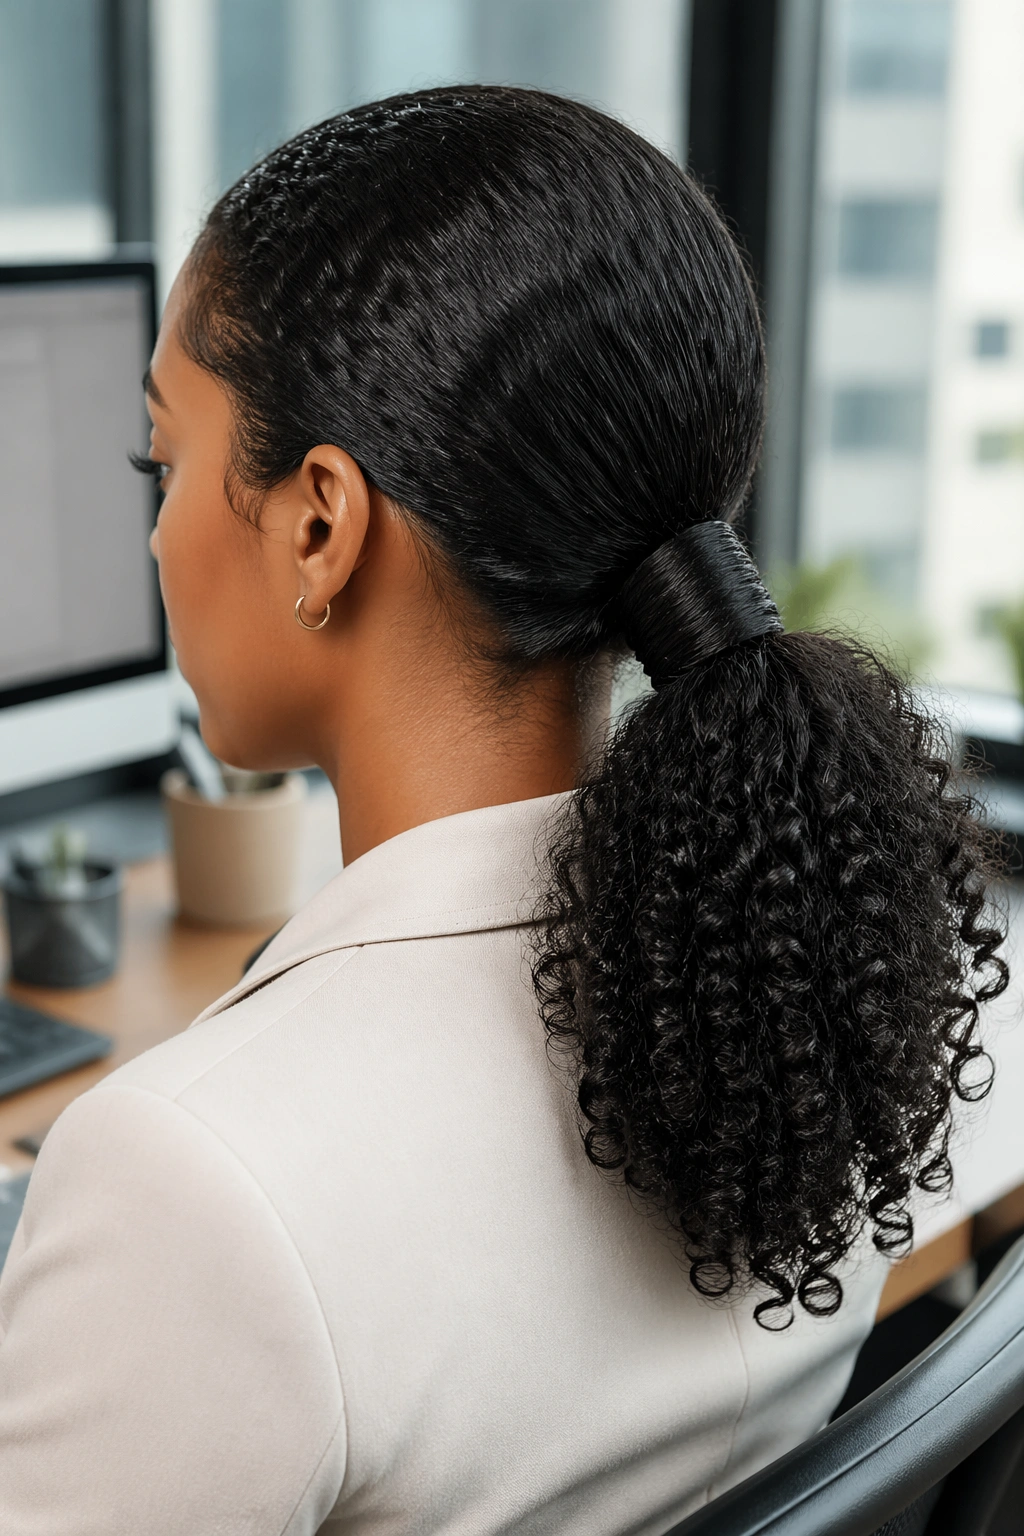
You need your hair off your face, and a bun feels too severe.
That is exactly when a curly low ponytail makes sense. Smooth the front and sides toward the nape, secure the ponytail low, then wrap the base with a small piece of hair or a narrow cuff so the elastic disappears. Leave the ponytail loose enough to keep its curl pattern. If you brush it too hard, it turns into a sad rope. Nobody wants that.
A low ponytail works best when the front is neat and the ponytail itself still has life. I like to brush only the surface layer and leave the underneath sections alone. That keeps the shape sleek without crushing the curls. If your hair is layered, the ponytail may look fuller on one side than the other, so give it a quick twist with your fingers before you walk out the door.
- Use a soft brush on the top only.
- Keep the elastic low and flat.
- Wrap the base for a cleaner finish.
- Let the curls fall naturally instead of forcing them into a perfect cylinder.
It’s a solid everyday option, especially when you want something that survives a long day without needing a lot of repair.
13. Flat-Twist Mohawk into a Puff
Unlike a plain puff, this style gives you shape through the center.
The sides get flat twisted or slicked back, and the middle section rises into a puff or curly mound that runs from the crown toward the back. It has a little edge to it, but not so much that it feels out of place in a work setting. The structure on the sides keeps the look controlled; the center gives it personality.
I like this one when a single puff feels too simple and a full updo feels too strict. The flat twists create clear lines, which help the style look clean even if the curls are doing plenty of volume work in the middle. If you want a softer version, keep the puff smaller and the side sections wider. If you want more drama, push the puff a bit higher and leave the curls fuller.
A few pins at the back usually solve any sagging. Use them where the twist meets the puff so the shape stays lifted. This style suits medium to thick hair especially well, but it can be adapted for finer curls if you keep the parting neat and don’t overload the roots with product. The shape does the talking.
14. Side-Swept Curly Roll with a Clip
What if you want something softer than a bun but cleaner than loose curls?
A side-swept curly roll answers that nicely. Make a deep side part, roll one side back toward the nape or behind the ear, and secure it with a strong clip or two bobby pins. Let the remaining curls fall across one shoulder. The result looks composed without feeling pinned down.
The part makes it
The part line needs to be clean, because it becomes the focal point. Use a tail comb, draw the line once, and stop touching it. Then smooth the rolled side just enough to keep it in place. You do not want a shellacked finish. You want a deliberate shape that still looks like hair, not plastic.
This style pairs well with simple earrings and a plain neckline because the hair already creates the visual interest. If the clip is ornate, keep it subtle; a matte finish or a plain metal barrette tends to look better in a work setting than something overly shiny. I also like this one on days when the front of the hair is acting a little stubborn, because the side sweep turns that stubbornness into part of the style.
15. Twisted Chignon with Curly Tendrils
The twisted chignon is the style I reach for when I want the back of my head to look calm.
It sits low, near the nape, and gives you that neat folded shape that works with blazers, collared shirts, and plain knits. Start by twisting the hair back in one or two sections, then fold it into a chignon and pin it flat. Leave a couple of curly tendrils out near the temples or behind the ears if you want a little softness around the face. Those small pieces keep it from looking severe.
A chignon like this works because it shows control without demanding total smoothness. The curls can stay textured; the outline just needs to be tidy. If your hair is short, build the shape with a mini twist bun and pin the loose ends underneath. If your hair is longer, wrap the twists more loosely so the bun keeps a round shape instead of flattening into the back of your neck.
This is the style I’d choose for an important presentation, a long day with too many meetings, or any morning when you want one less thing to think about. Keep a small kit nearby — four bobby pins, a satin scrunchie, and a tiny brush — and you can refresh the front in under a minute. Good hair helps, sure. A style that doesn’t ask for constant babysitting helps more.