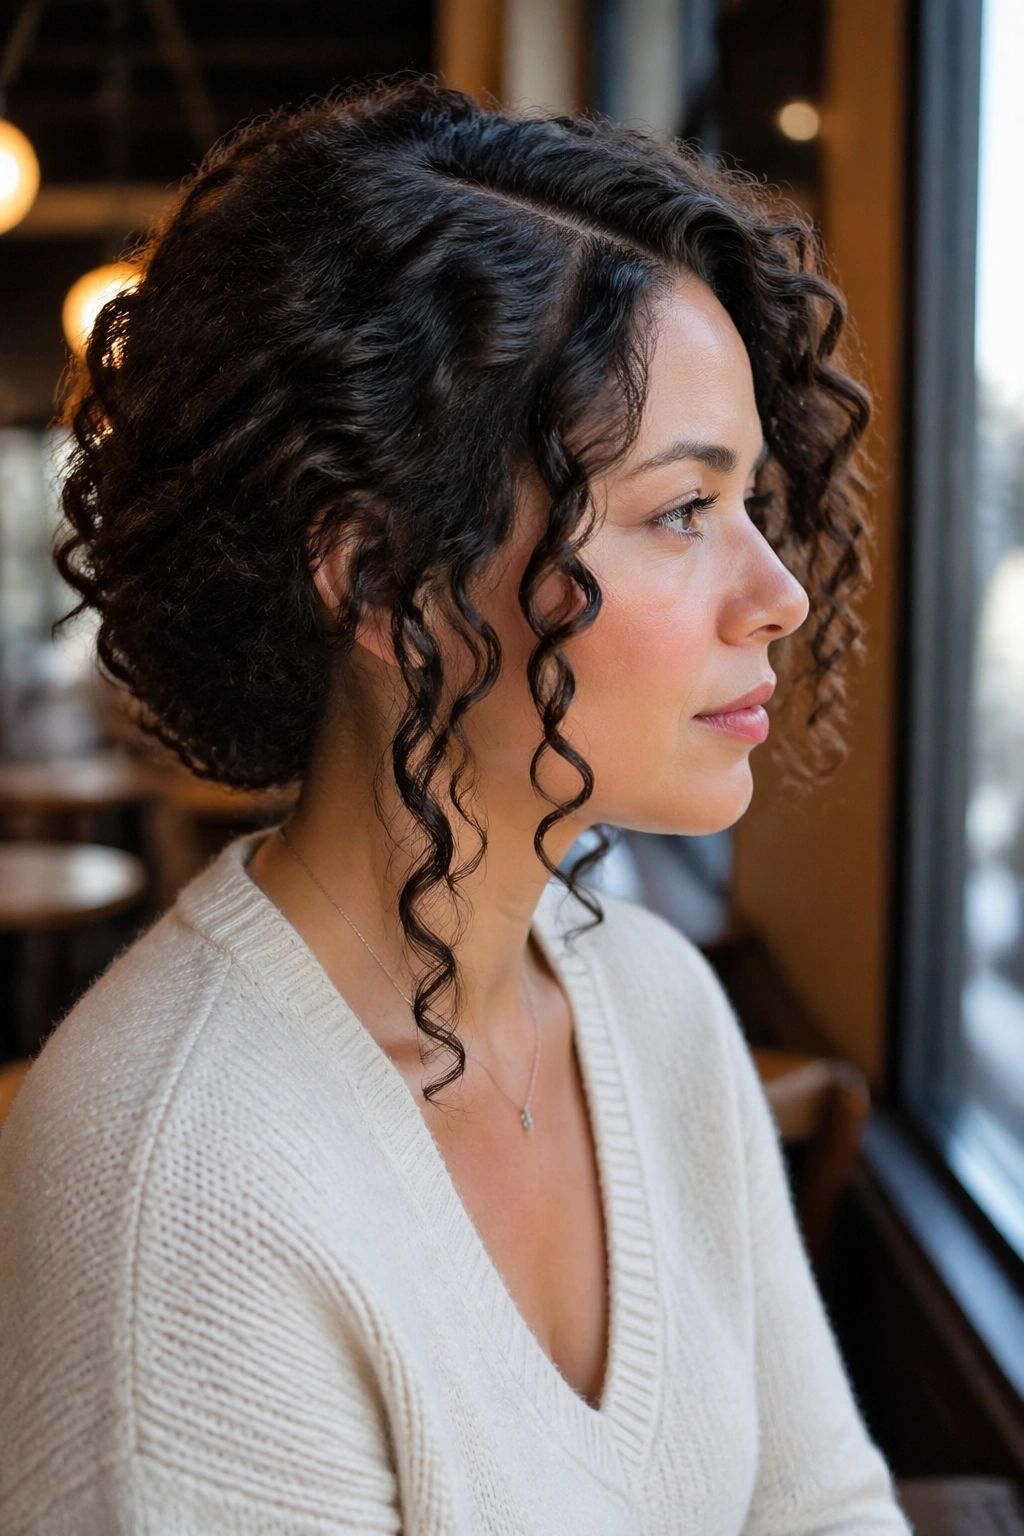
Thinning curls can look flat in a hurry. The wrong shape drags them down; the right one makes the same hair read fuller, bouncier, and much more alive. That’s why curly hairstyles for thinning hair are less about hiding anything and more about changing where the eye lands.
The biggest mistake is treating curl density like straight hair density. Heavy ends pull the whole shape toward the shoulders, a hard center part can expose the crown, and too much product at the roots often leaves the top looking stuck to the scalp. Good curly styling does the opposite. It lifts where the hair needs lift, keeps the outline soft, and leaves enough movement that the curls do their own visual work.
Fine hair and thin density are not the same thing, either. Fine curls can be plentiful, and a lot of coarse curls still look sparse if the cut is too long, too blunt, or weighed down by one overbuilt layer after another. That detail matters. A haircut that works on dense hair can look limp on thinner curls, while a shape that looks almost too simple on the hanger can be brilliant once it’s on your head.
I keep coming back to a handful of shapes for a reason: bobs, shags, pixies, crown-lift styles, and pinned-up looks can all make thin curls look intentional instead of tired. Some are quick. Some ask for a diffuser, a few clips, and five extra minutes in the morning. All of them beat a heavy one-length curtain that sits there like wet laundry.
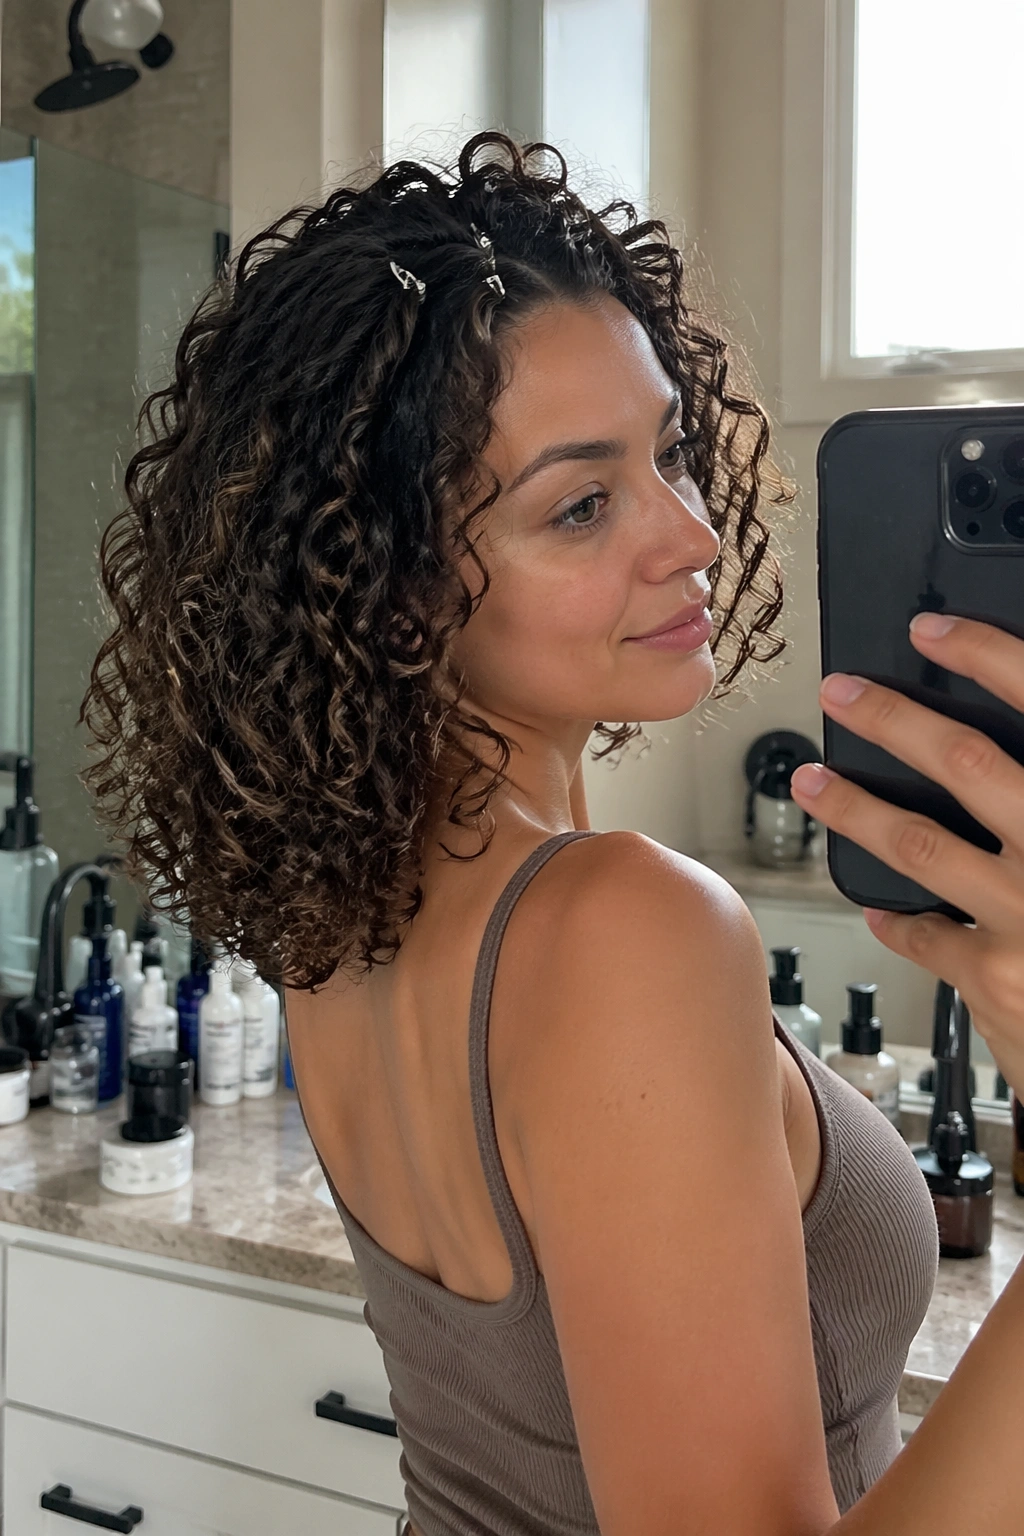
1. Shoulder-Length Curly Bob for Thinning Hair
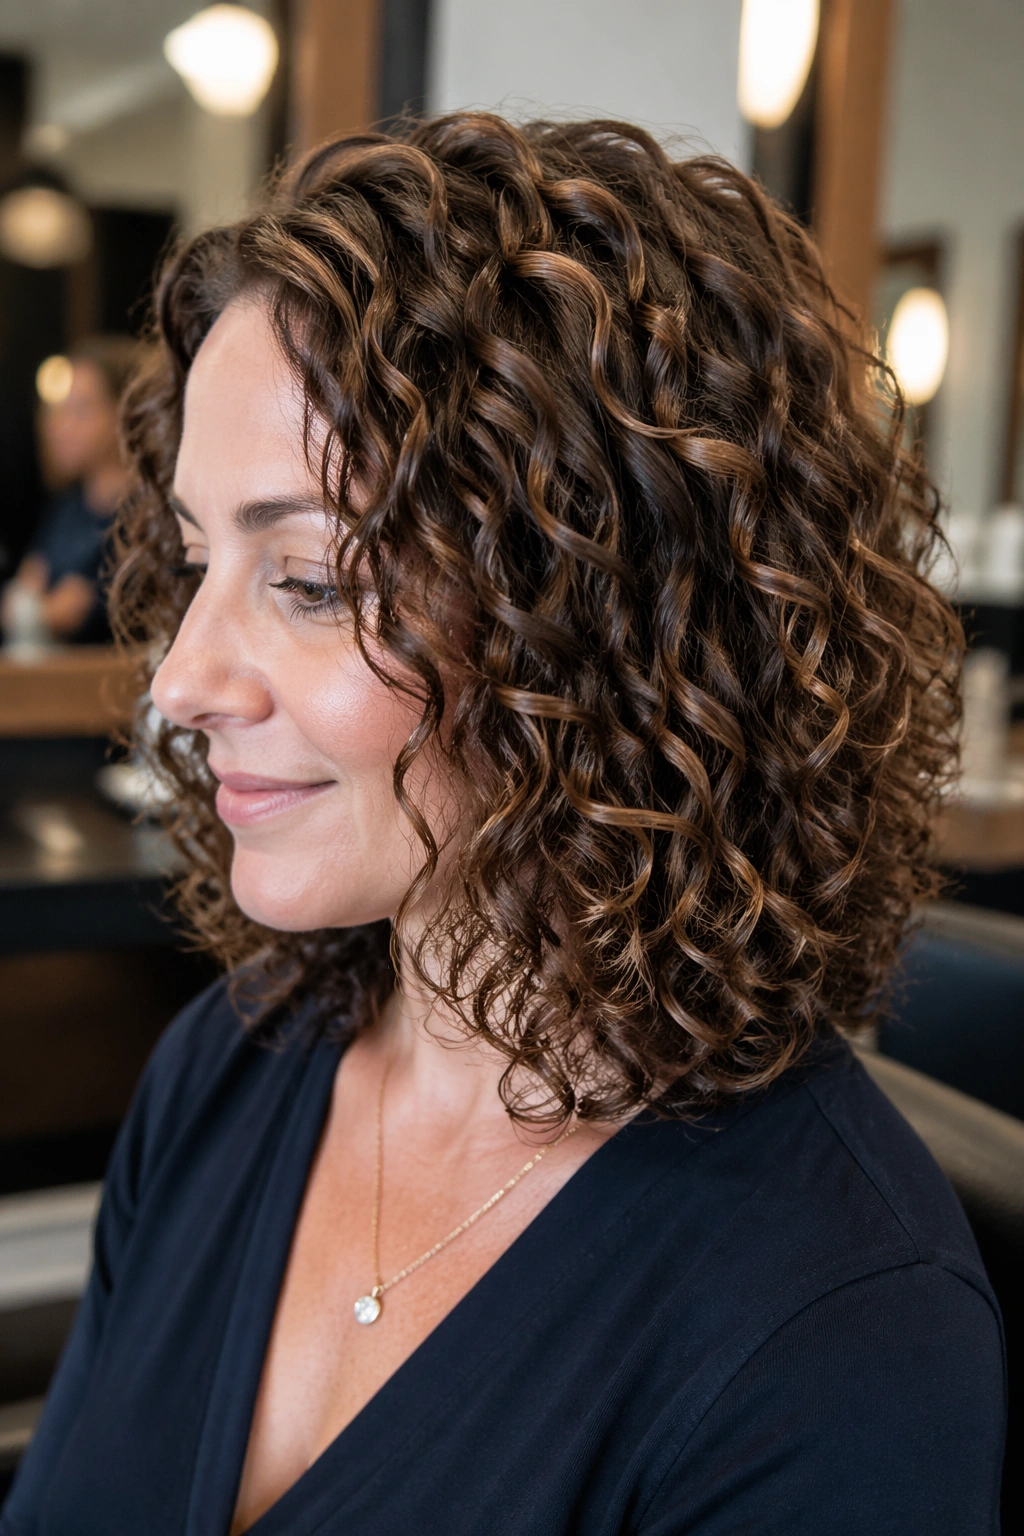
A shoulder-length curly bob is the easiest place to start if you want more fullness without losing the length you already have. It keeps enough hair on the head to feel feminine and soft, but it does not drag the curls down the way long, weighty layers can.
Why the Shape Helps
The sweet spot is usually somewhere between the jaw and the shoulders. That length lets the curl spring up instead of hanging straight, and it gives the outline enough width to look balanced from the front and side. If your curls are loose and thin, a bob also stops the ends from looking stringy.
Ask for long layers, not chopped-up layers. Long layers remove weight without breaking the silhouette into wisps. If your stylist reaches for thinning shears near the ends, I’d pause right there. That tool can be useful on very dense hair, but on thinning curls it often makes the perimeter look see-through.
What to Ask For
- Length that lands around the collarbone or just above it.
- Layers that begin below the cheekbone.
- Soft internal shaping instead of heavy texturizing.
- A slightly rounded outline rather than a flat shelf.
Best tip: dry the top half with a diffuser first, then tilt your head to each side so the bob keeps width where you want it.
2. Side-Parted Curly Shag
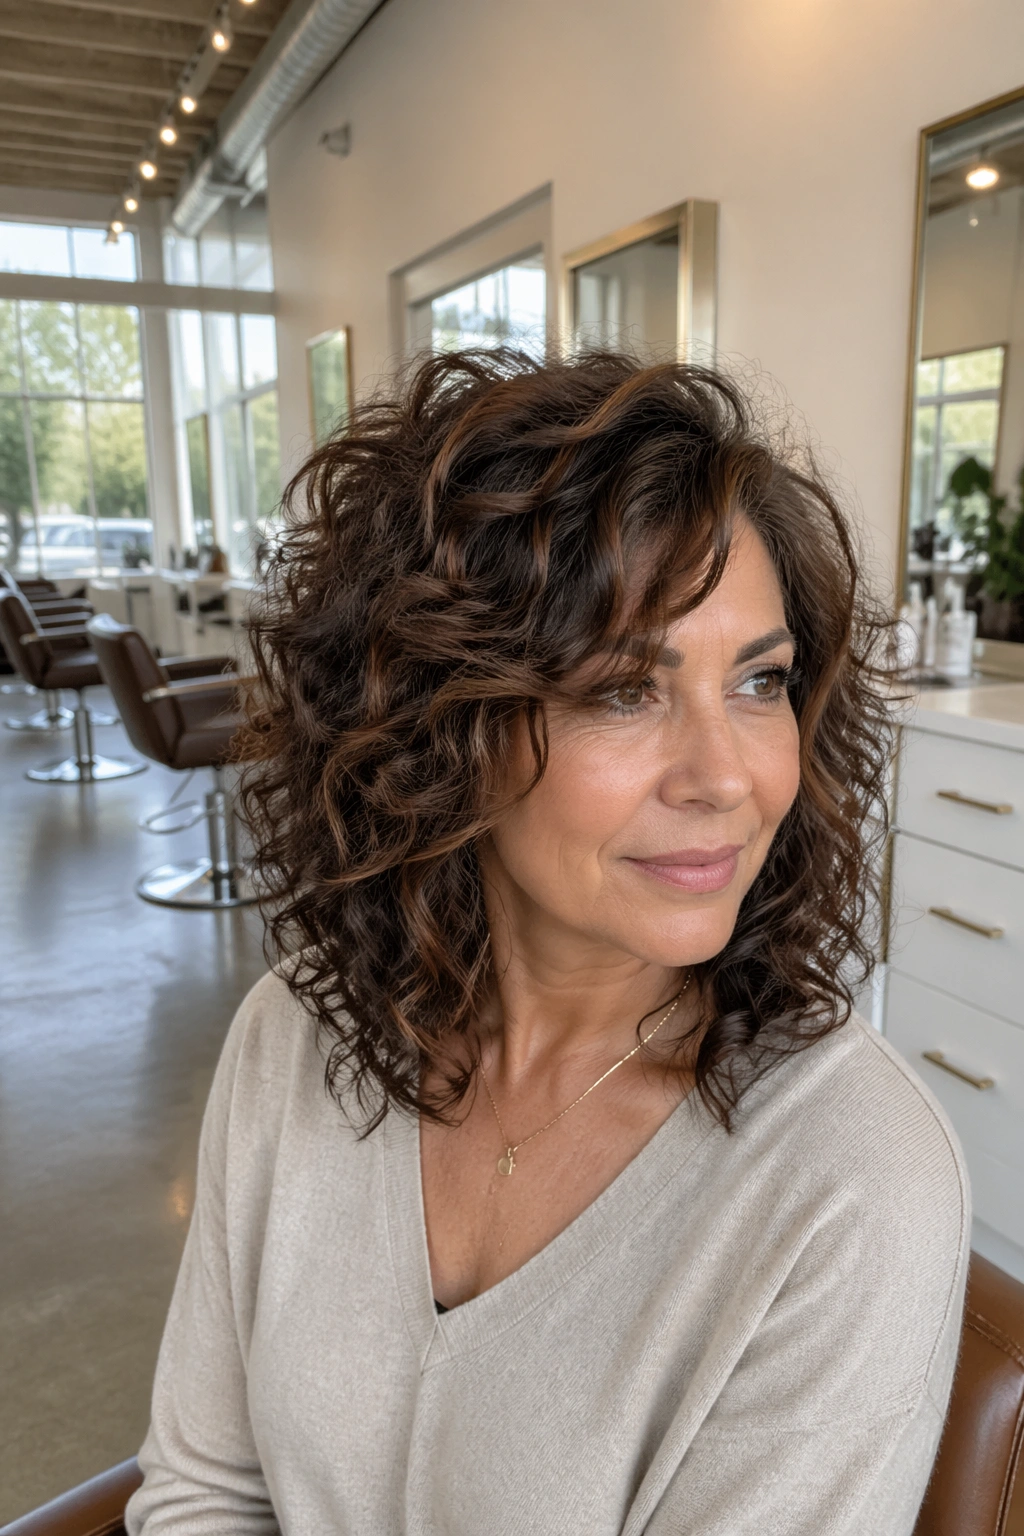
If I had to pick one cut that makes thin curls look fuller fast, the side-parted shag is the one. It creates movement at the crown, breaks up flatness, and makes the whole head read as bigger than it really is.
The reason is simple. A shag builds texture into the upper layers, then uses a side part to stack volume toward one side instead of splitting it cleanly down the middle. That asymmetry works in your favor. Your eye sees lift, angles, and pieces that overlap, which is exactly what thin curls need.
What Makes It Different
A good shag is not random layering. It has a plan. The top needs enough shortness to lift, while the bottom still needs enough length to keep the shape from puffing out like a triangle.
The cut looks even better when the front pieces sweep away from the face. That tiny shift draws attention to your eyes and cheekbones instead of the scalp at the crown. It’s a small thing. It matters a lot.
Use a light mousse or foam on damp hair, then scrunch from the ends up. A curl cream can still work, but keep it modest. Heavy cream on a shag can kill the airy look you’re trying to build.
3. Curly Pixie with a Soft Fringe
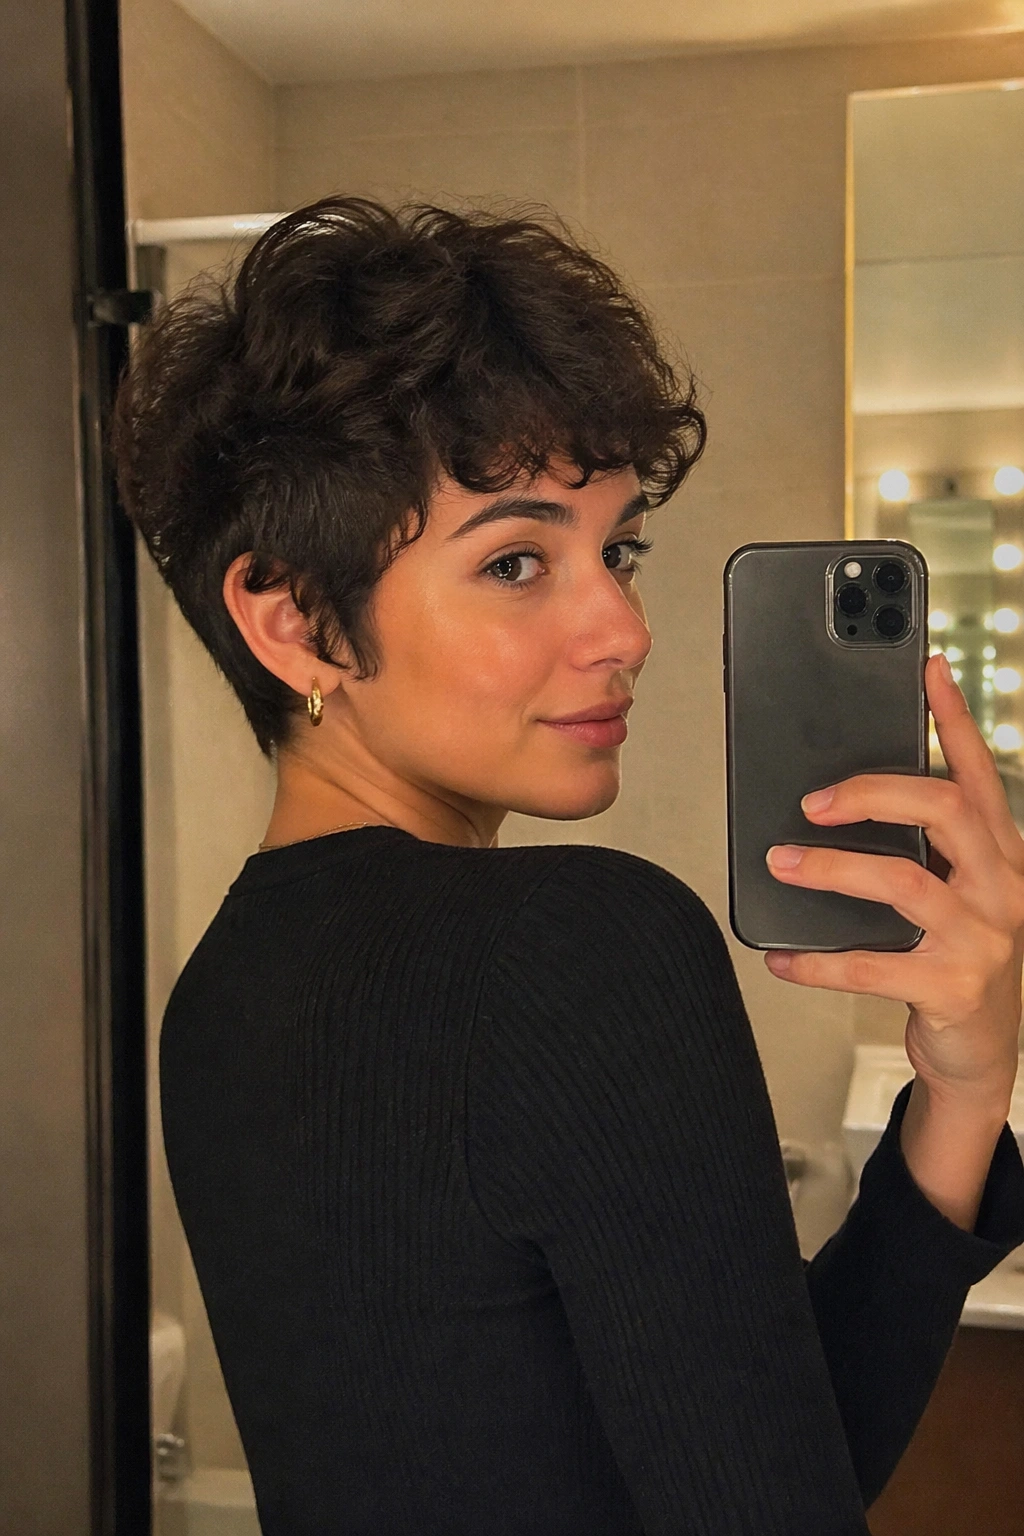
Can a pixie work on thinning curls? Absolutely, if it’s cut with softness instead of harsh edges. A short curly pixie removes weight from the length, which lets the curl pattern stand up instead of collapsing.
A soft fringe is the part I care about most here. Too-short bangs on thin curls can make the hairline look open in the wrong way. A fringe that lands around the brow or just below it gives shape at the front without stealing density from the crown.
How to Keep It Airy
Leave a little more length on top than you think you need. Curly hair shrinks, and shrinking can make a cute pixie look much shorter than planned. You want enough top length for the curl to form a little bend, not a tight little nub.
What to Tell Your Stylist
- Keep the top longer than the sides.
- Soften the fringe so it curves, not chops.
- Avoid razor-heavy ends if your curls frizz easily.
- Leave enough length around the temples so the cut doesn’t expose too much scalp.
A pixie is bold, yes. It’s also practical. Less weight means more lift, and more lift is the whole game here.
4. Collarbone Lob with Invisible Layers
Picture a lob that brushes the collarbone, moves when you turn your head, and doesn’t sit like a helmet. That’s the version that usually works best for thinning curls.
The trick is in the layers you don’t immediately notice. Invisible layers sit inside the cut instead of cutting obvious shelves into the outside. They keep the shape light while leaving enough hair around the perimeter to look full. You get bounce without the choppy look that can make fine curls go patchy.
A Good Way to Ask for It
Tell your stylist you want volume without losing the outline. That phrase is plain, and it usually gets better results than asking for “lots of layers,” which can mean almost anything.
- Keep the front a touch longer than the back.
- Shape the ends so they curve under or outward, not both.
- Leave the crown soft, not over-thinned.
- Style with a middle or slight off-center part only if it flatters your face.
The collarbone length works because it gives curls room to exist. Shorter can look puffier. Longer can start to drag. This length sits in the middle, which is why it keeps showing up in real life instead of just in salon mood boards.
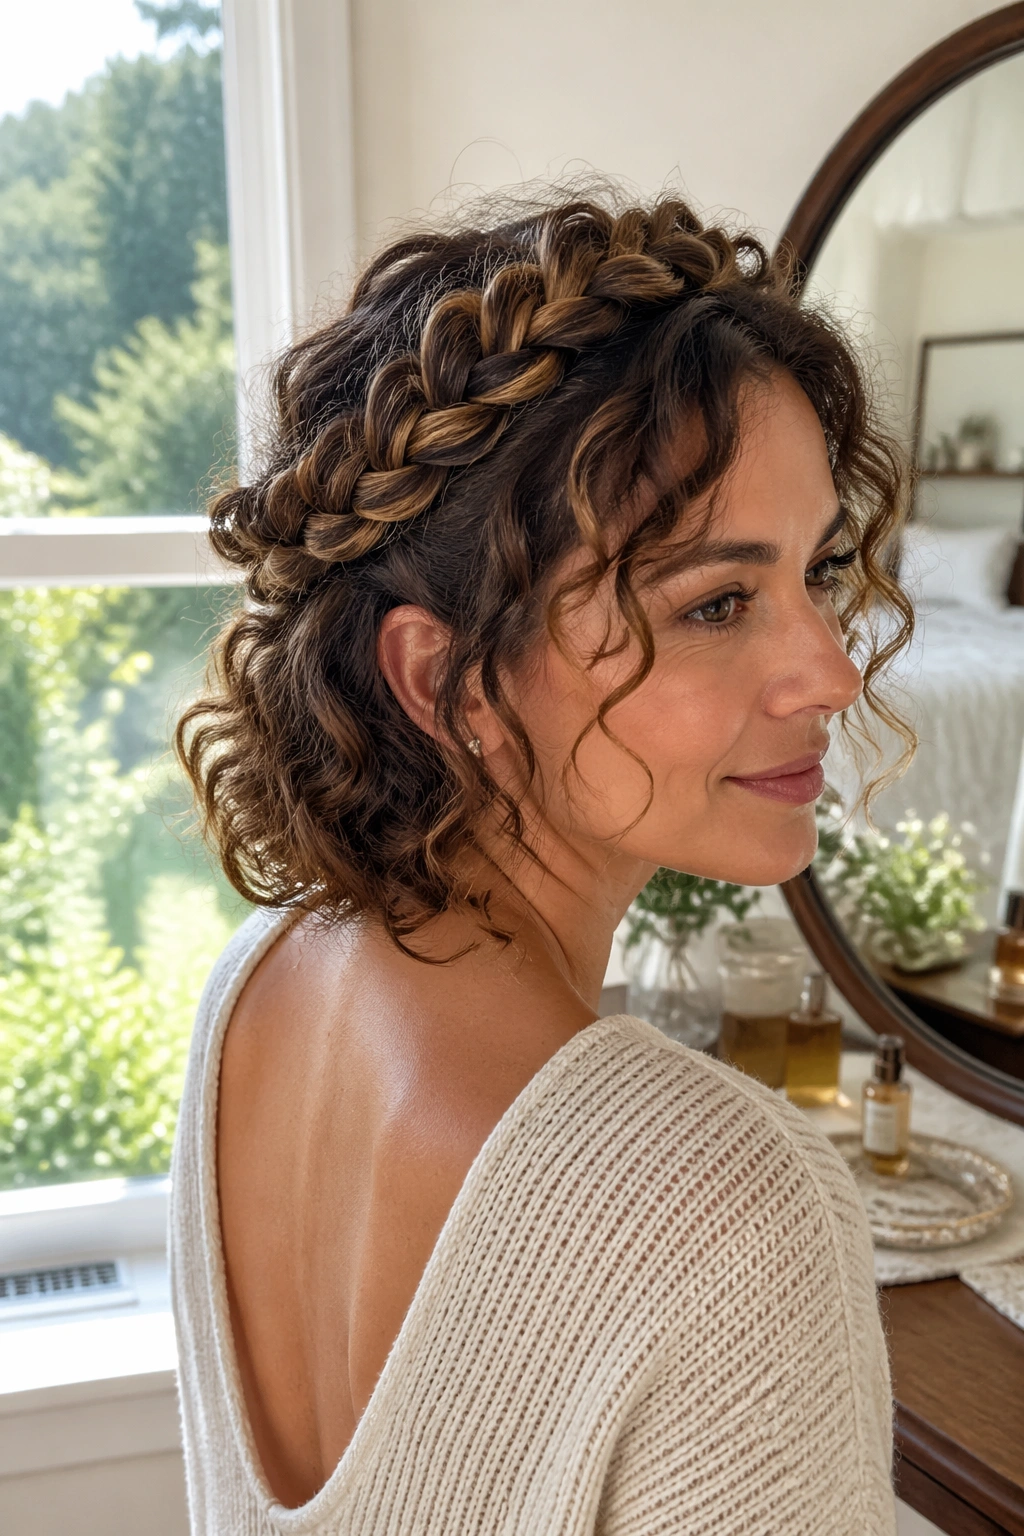
5. Face-Framing Ringlets with a Deep Side Part
A deep side part does more for thin curls than another layer ever will. That sounds blunt, but I mean it. If your crown is low in volume and your face needs more framing, moving the part can change the whole balance of the style in about ten seconds.
The part shifts the weight of the hair so one side appears fuller. At the same time, the front pieces fall across the forehead and cheek, which softens the look of a sparse hairline. I like this trick on medium-length curls because it gives an instant lift without requiring a cut.
What It Looks Best On
This style is strongest when the front curls are a little longer than the rest. Those pieces can be finger-coiled, twirled, or just encouraged with a bit of cream so they land in clean arcs instead of frizzing out.
A deep side part also plays well with a tuck behind one ear. That tiny move makes one side look intentional and gives the style a little asymmetry. It feels less polished than a straight, centered look, and that’s the point.
If your curls split flat at the roots, clip the heavier side up while drying. Let the lift set before you shake it loose. A few minutes of patience here saves a lot of fiddling later.
6. Pineapple Updo for Second-Day Volume
The pineapple is not fancy, and that is exactly why it works. It keeps curls on top of the head, which protects the shape and makes thinner hair look fuller than a low bun ever could.
A tight bun sits at the neck and shows every gap. A pineapple sits high, lets the curls fan out, and turns the crown into the visual focus. On second-day hair, that matters a lot. Curls already have a little memory from the day before, so you’re working with texture instead of starting from scratch.
The Simple Setup
Use a soft scrunchie or coil tie and gather the hair near the crown. Don’t yank it tight. The goal is height, not tension.
- Keep the tie loose enough that the curls can puff.
- Let the ends spill upward or outward.
- Pull a few face pieces free if the shape feels too severe.
- Sleep on a silk pillowcase if you want the style to last.
Best for: casual days, errands, travel, and mornings when your curls are doing that flat-at-the-roots thing.
If the hair around your hairline is sparse, this style helps because the eye goes up. That’s the trick. Up is flattering.
7. Half-Up Curly Crown Lift
Half-up styles are the quiet heroes of thinning curls. They lift the crown, hide a soft spot near the roots, and keep enough hair down that the style still feels full.
The best version does not pull back half your head in one slick motion. That’s too much. You want the top section to lift, not disappear. A smaller section gives the crown height while leaving the bottom curls to create width around the jaw and neck.
How to Build the Shape
- Take the top section from temple to temple.
- Secure it with a clip or small elastic at the crown.
- Gently tug the roots above the elastic for a softer lift.
- Leave the lower curls loose and defined.
A little teasing at the root can help, but keep it light. You are not building a 1960s bouffant. You just want enough support so the top does not flatten against the scalp.
This style is excellent when the top is sparse but the ends still have good curl. It gives the illusion of more hair because the volume sits where people look first.
8. Curly Bangs and a Rounded Shape

Do bangs make thin curls worse? Only when they’re cut too short or too blunt. Curly bangs can actually be one of the smartest moves for thinning hair because they bring attention to the face and help hide a high or sparse hairline.
The key is softness. You want a fringe that bends with the curl pattern instead of fighting it. A rounded shape around the face keeps the hair from looking too narrow at the top, and that matters when the temples or crown are a little thin.
What to Ask Your Stylist
Tell them to cut the bangs dry, or at least with the hair in its natural curl state. Wet curls shrink. Sometimes a lot. A bang that looks perfect wet can land halfway up the forehead when it dries.
What to Avoid
- Micro bangs unless you truly want that look.
- Over-thinning the fringe.
- Straight-across cuts that ignore shrinkage.
- Heavy products near the front that make the bangs stick together.
Curly bangs are a commitment, sure. But they can also save a style that feels too open at the front. They make the haircut look styled even when you’ve done very little.
9. Tapered Curly Cut
A tapered cut can make a tight curl pattern look denser from top to bottom. It’s a sharp shape, but not a harsh one. The back and sides sit closer to the head, while the top and crown keep more length and lift.
That difference in length is what creates the illusion of fullness. The eye reads the top as thick because the silhouette rises there. It reads the sides as neat because they’re controlled. You avoid the mushroom effect that can happen when short curls are left all one length.
Where It Works Best
This cut shines on tighter curls and coils, especially when the ends are fragile or see-through. Instead of trying to force the entire head to look uniform, it lets the strongest part of the curl pattern carry the shape.
I’d keep the taper soft around the temples if those spots are already sparse. Too much tightness there can expose more scalp than you want. Ask for a gradual taper, not a hard one.
A little edge control can clean up the hairline, but do not drown the style in gel. The point is a neat outline with room for the curls to rise on top. Clean shape, not shellacked shape.
10. Messy Curly Top Knot with Loose Tendrils
A polished bun can betray thinning hair. A messy curly top knot usually does the opposite. It hides the smaller ponytail size by turning the shape into texture, not neatness.
The knot should sit high enough to lift the face, but not so tight that it pulls the front flat. Leave a few tendrils out around the temples and cheekbones. Those loose pieces soften the look and keep the style from feeling severe.
The Part That Matters
Use fewer pins than you think. Two or three well-placed bobby pins often hold better than a nest of metal. Too many pins can flatten the crown and make the bun look thin from the side.
The best version has a bit of controlled mess to it. Let a few curls loop out. Let the ends show. A perfectly tight curly bun can expose every weak spot. A soft knot hides them.
This is one of those styles that looks casual but can be surprisingly polished if the texture is even. It works for work, dinner, and those days when your hair needs to stay off your face without looking like you gave up.
11. Sculpted Twist-Out with Height at the Crown
Twist-outs need patience, but the payoff is obvious. They create a pattern that looks more organized than loose curls, and that neatness can make thin hair read as fuller because every section has its own shape.
The real trick is where you place the twists. I like larger twists on the top and slightly smaller ones around the sides. That keeps the crown from going flat while building a frame around the face. Once the hair is dry, you separate the twists only enough to add width. Don’t shred them apart. That turns definition into frizz fast.
When a twist-out works, it has a soft, sculpted look. The curls feel placed rather than random. That kind of control can be flattering on thin hair because it makes the style look intentional and contained.
A little mousse plus a cream or leave-in is usually enough. Heavy butter can weigh the hair down and blur the shape. If your hair is fine, keep the products light and build them in layers instead of dumping them all at once.
12. Loose Curly Ponytail with Hidden Volume
The loose curly ponytail works because it refuses to show off every thin spot. A sleek ponytail can be unforgiving on thinning curls. It pulls everything back, exposes the hairline, and makes the ponytail itself look smaller than it is.
A loose ponytail does the opposite. It lets the top puff a little, which hides the base, and it leaves some curl around the face so the style feels soft. If the hair is long enough, wrap a small curl around the elastic to cover it. That tiny move goes a long way.
How to Build Hidden Volume
- Place the ponytail slightly higher than the nape.
- Lift the roots at the crown before securing it.
- Pull gently at the top after tying it off.
- Leave a few face-framing pieces loose.
A ponytail like this is easier on the scalp, too. Tight tension can make thin hair look even thinner over time because it presses the roots flat. Looser is better here. It looks fuller and feels less harsh.
This style is good when you need speed and shape in the same five-minute window.
13. Curly Halo Braid for Sparse Ends
A halo braid is a smart way to make sparse ends disappear into the style. Instead of hanging the hair out where the thinness shows, the braid wraps the look around the head and keeps the visual focus near the face.
It’s a good choice for medium to long curls, especially if the ends are frizzier or thinner than the roots. The braid draws the eye in a circle, which makes the whole head appear more balanced. You are not pretending the hair is thicker than it is. You are just choosing a shape that flatters what’s there.
What to Watch For
- Braid on hair that has a little stretch, not soaking wet curls.
- Keep the braid loose enough that it doesn’t pull on the hairline.
- Pin the ends inside the braid instead of letting them stick out.
- Leave a few soft pieces around the front if the style feels too strict.
This is one of the better formal styles on the list. It can look elegant without asking for a huge amount of density. That’s a rare thing. Thin curls usually pay a price for tight styles, and this one keeps the shape graceful instead.
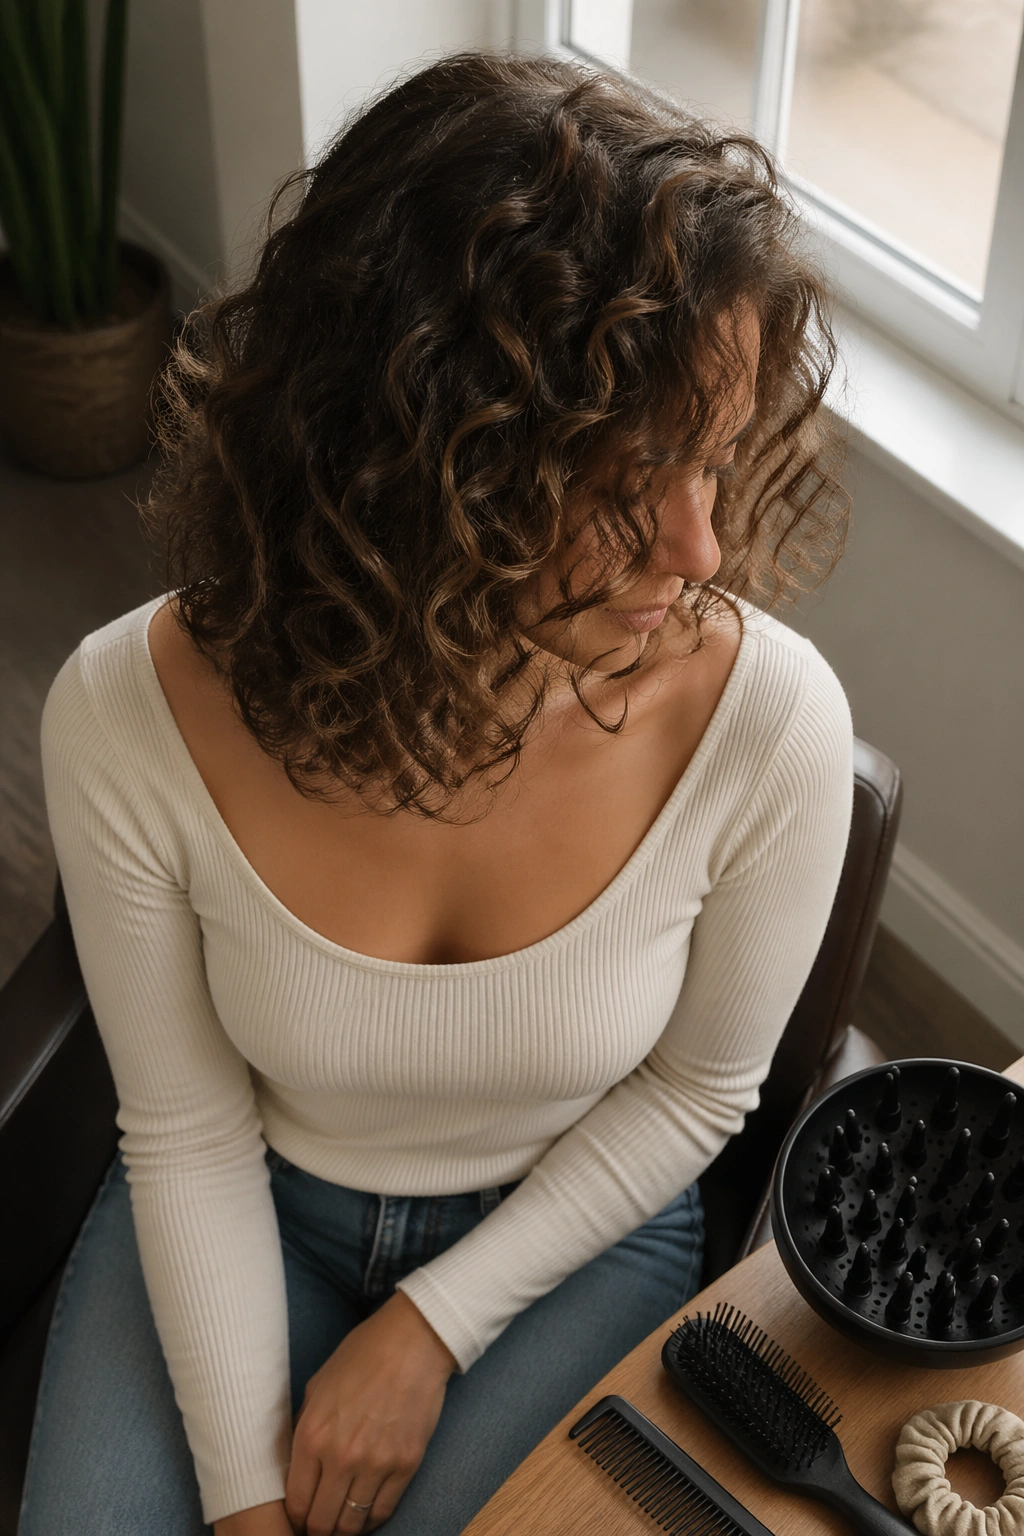
14. Defined Wash-and-Go with Root Clipping
A wash-and-go can be flat—or it can be the easiest way to get the most out of your curl pattern. The difference usually comes down to how you set the roots.
Thin curls need the crown lifted while they dry. Root clipping does exactly that. You place small clips at the roots near the crown and let the hair dry with a bit of height built in. It sounds simple because it is. It also works.
The Part Most People Skip
Apply your styler evenly on soaking-wet hair, then scrunch gently so the curls clump without getting stretched out. Once the top is arranged, clip the roots up for about 10 to 15 minutes while diffusing or air-drying. That small window helps the hair set away from the scalp.
- Use clips only where you need lift.
- Keep the front pieces in a shape that flatters your face.
- Do not touch the curls until they’re dry.
- Break the cast only after the hair feels fully set.
If you’re dealing with thinning curls, this method gives you volume without forcing a whole new style. It works with your natural texture, not against it. And that’s the point.
15. Faux Bob with Strategic Pinning
A faux bob is the trick I reach for when the ends look tired. It shortens the silhouette, tucks away the thinnest pieces, and makes the style look fuller near the face where volume matters most.
The pinning has to be smart. You want the curl mass to sit under itself in a soft curve, not folded into a hard knot. Leave enough shape at the ends so the style still feels like curls, not a clipped-up compromise. A little hidden pinning under the nape or behind the ears is usually enough.
When It Makes Sense
This style is useful when your hair has enough length to wrap but the last few inches are see-through. Instead of letting those ends hang and show every thin spot, you tuck them in and let the top and sides do the work.
It also looks good with a side part, which keeps the front from feeling flat. A few loose curls around the face make the style softer and more believable, too.
The best part is that it makes thin curls feel deliberate. Not hidden. Deliberate. That’s a better result, and usually a prettier one, than fighting for fake fullness with heavy products and too much tension.
Sometimes the smartest move is not adding more hair. It is giving the hair a better outline.