Medium-length curls have a sweet spot that long hair never quite gives you and short hair often resists: enough length to twist, pin, knot, and stack, without dragging the style flat by lunchtime. That matters with curly updos for medium length hair, because curls don’t behave like straight strands. They compress, spring back, frizz at the edges, and sometimes refuse to sit where a bobby pin wants them to sit. Good. That’s not a problem. It’s the whole point.
The trick is working with the shape your curls already make. A medium-length curl usually lands around the shoulders, collarbone, or just below, which gives you just enough material for a real updo while still leaving texture visible. If you try to flatten it into a smooth bun, the style can look overworked fast. If you leave too much loose, the whole thing can feel accidental instead of styled.
What makes curly updos look polished is rarely perfection. It’s pin placement, curl placement, and a little bit of restraint. A few face-framing pieces, a twist that follows your natural part, or a bun that sits low enough to keep the weight balanced can change everything. And yes, second-day curls usually help.
1. The Low Pineapple Twist Bun for Medium-Length Curls
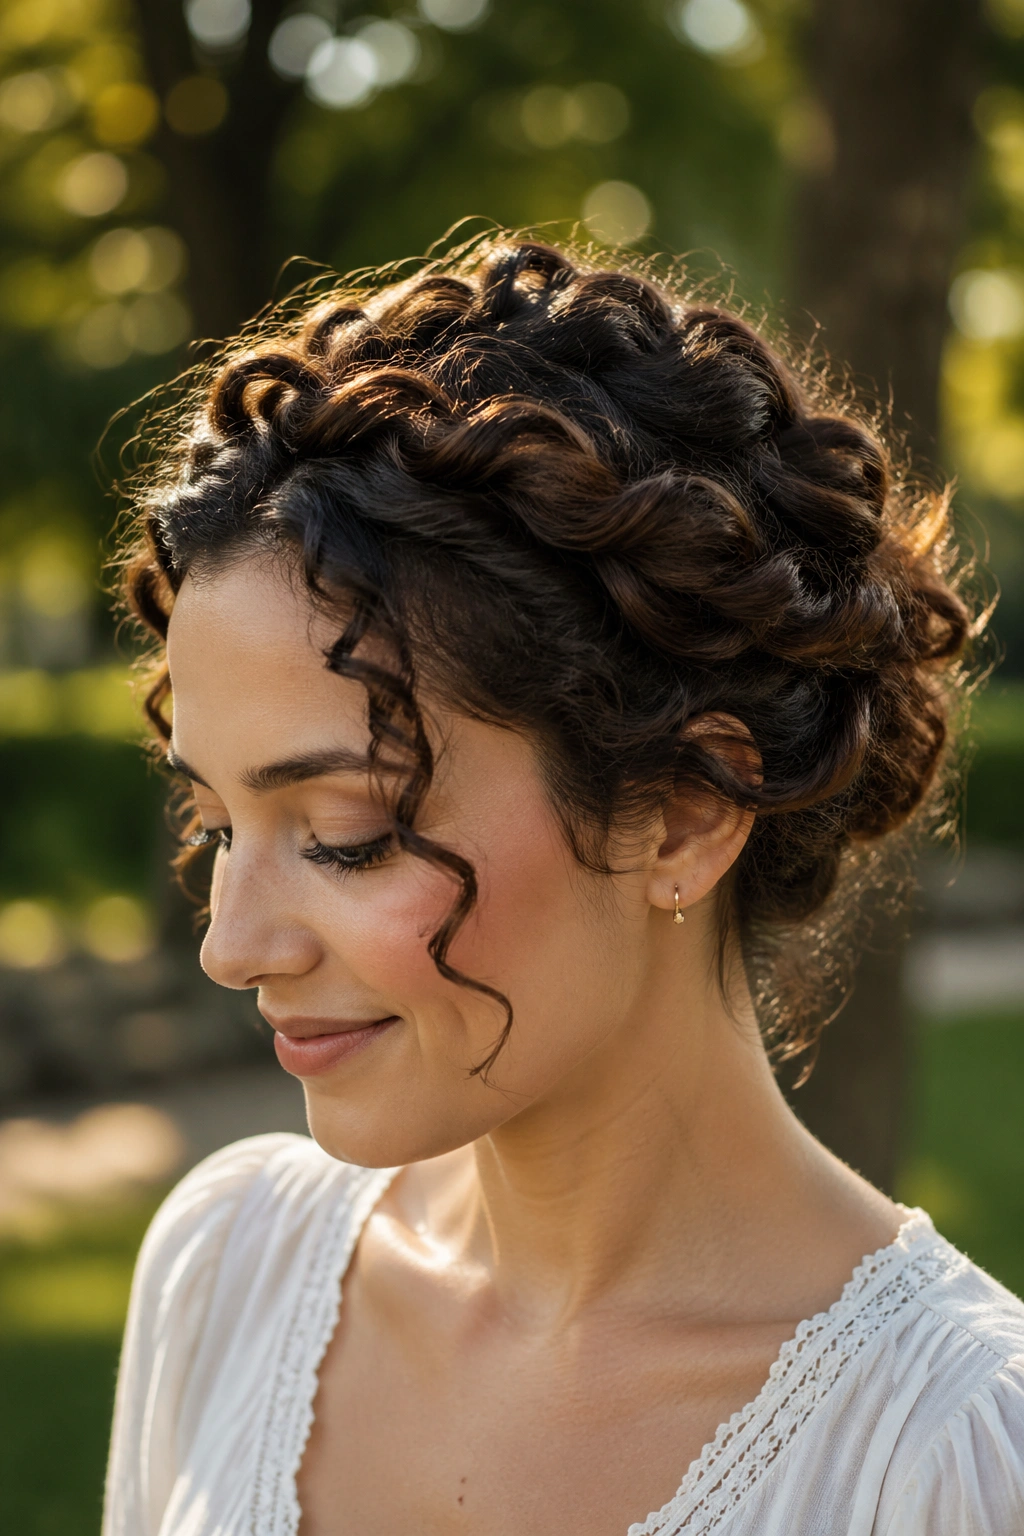
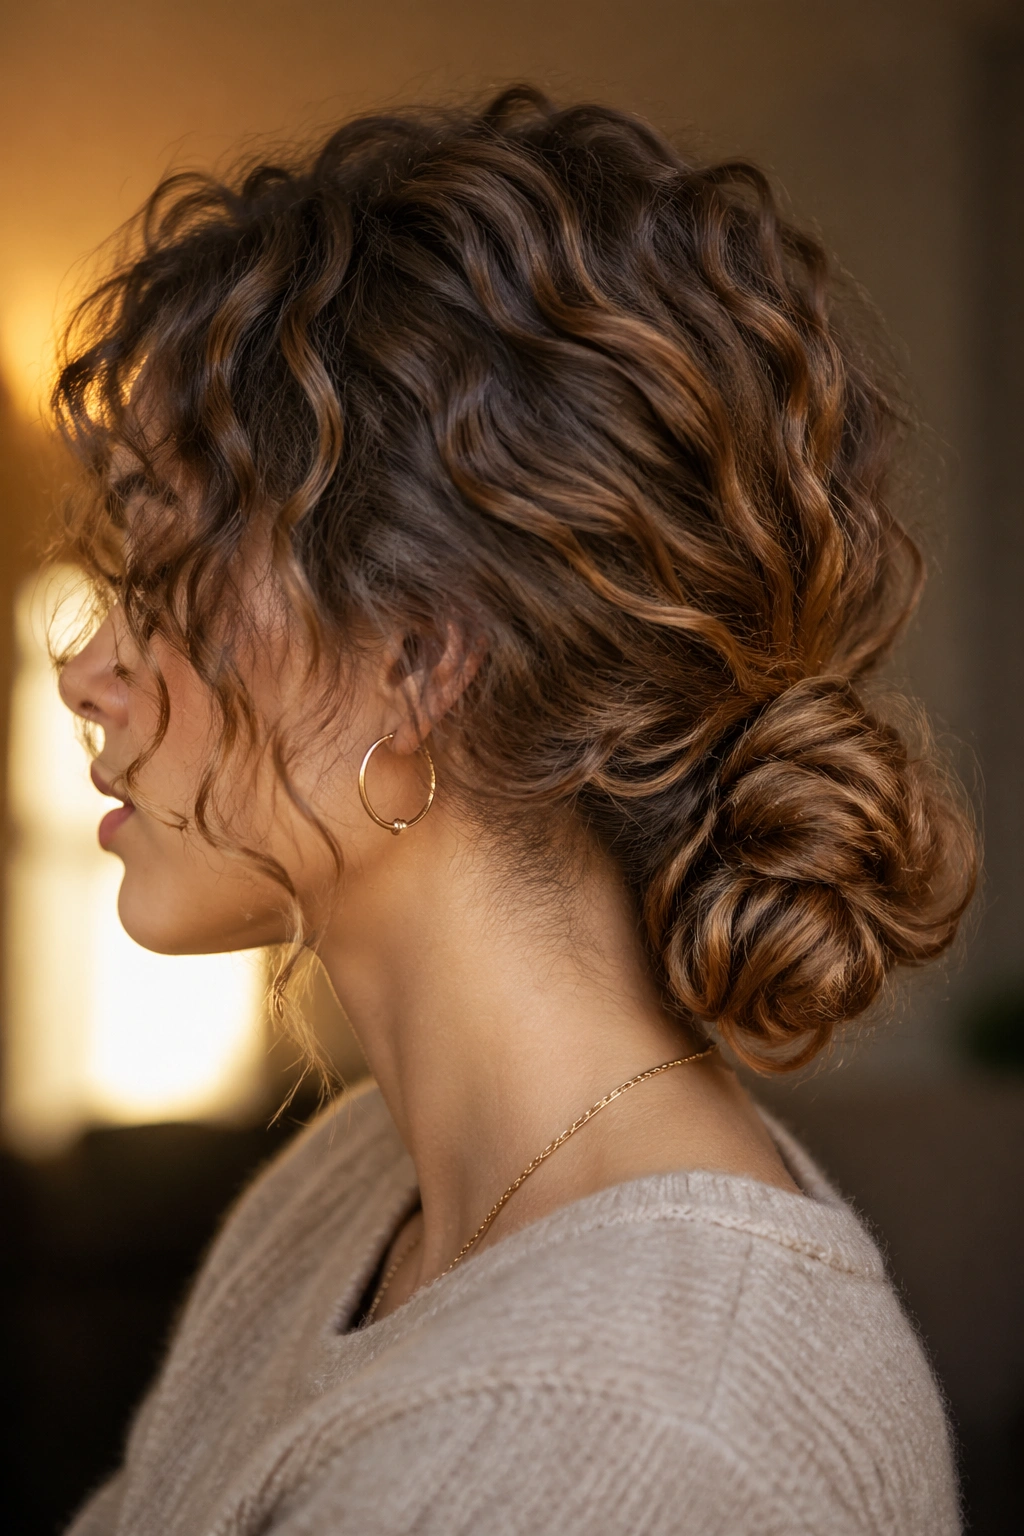
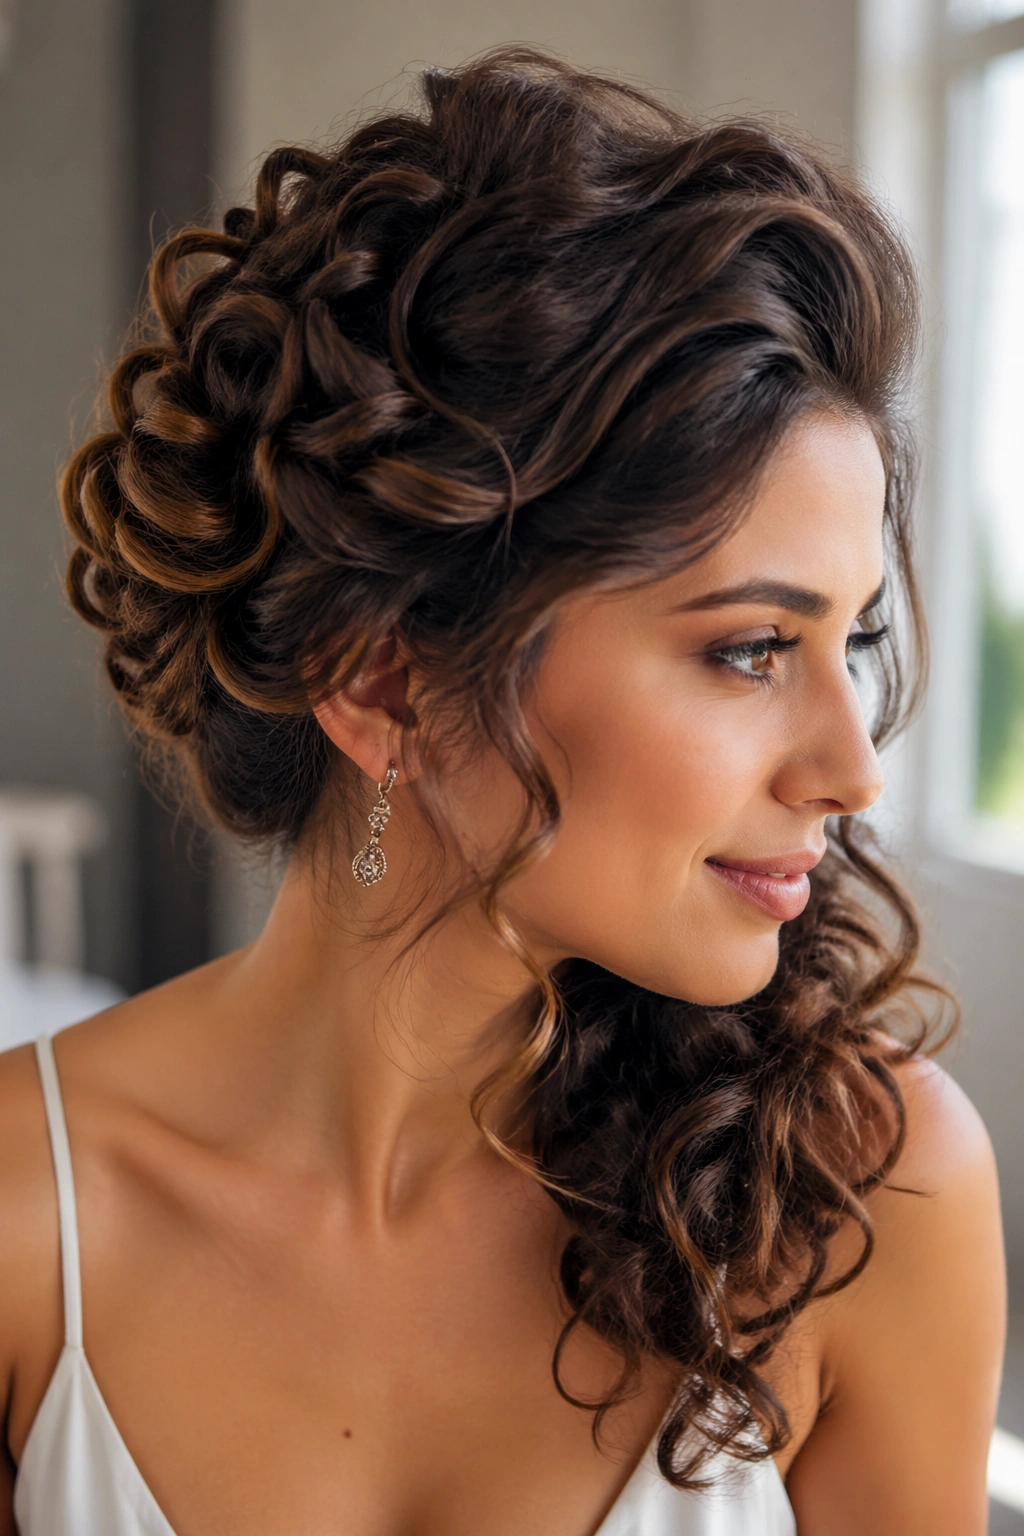
This is the curly updo I’d hand to anyone who wants something quick, secure, and still pretty enough for dinner or a work event. The low pineapple twist bun keeps the crown soft while gathering the ends into a compact shape at the nape, which is exactly where medium-length curls tend to cooperate best. It avoids the common problem of trying to build height your hair doesn’t naturally want to hold.
What helps here is leaving the top section loose for a little lift, then twisting the side sections back before pinning them into the bun. The result looks fuller than a plain knot. It also handles shrinkage better, because the curls can compress without wrecking the silhouette.
A few things make this style behave:
- Start on dry hair with a light curl cream or mousse so the curls hold their shape.
- Use 2 to 4 bobby pins on each side, crossing them in an “X” if the hair is slippery.
- Keep the bun slightly off-center if your layers are short around the face.
- Leave the ends a little loose instead of tucking every single curl in tightly.
Best for: shoulder-length curls, dense hair, and anyone who wants an updo that still looks soft.
Watch for: pinning too high. That usually makes medium-length curls stick out at odd angles.
2. Half-Up Crown Twist with Loose Ends
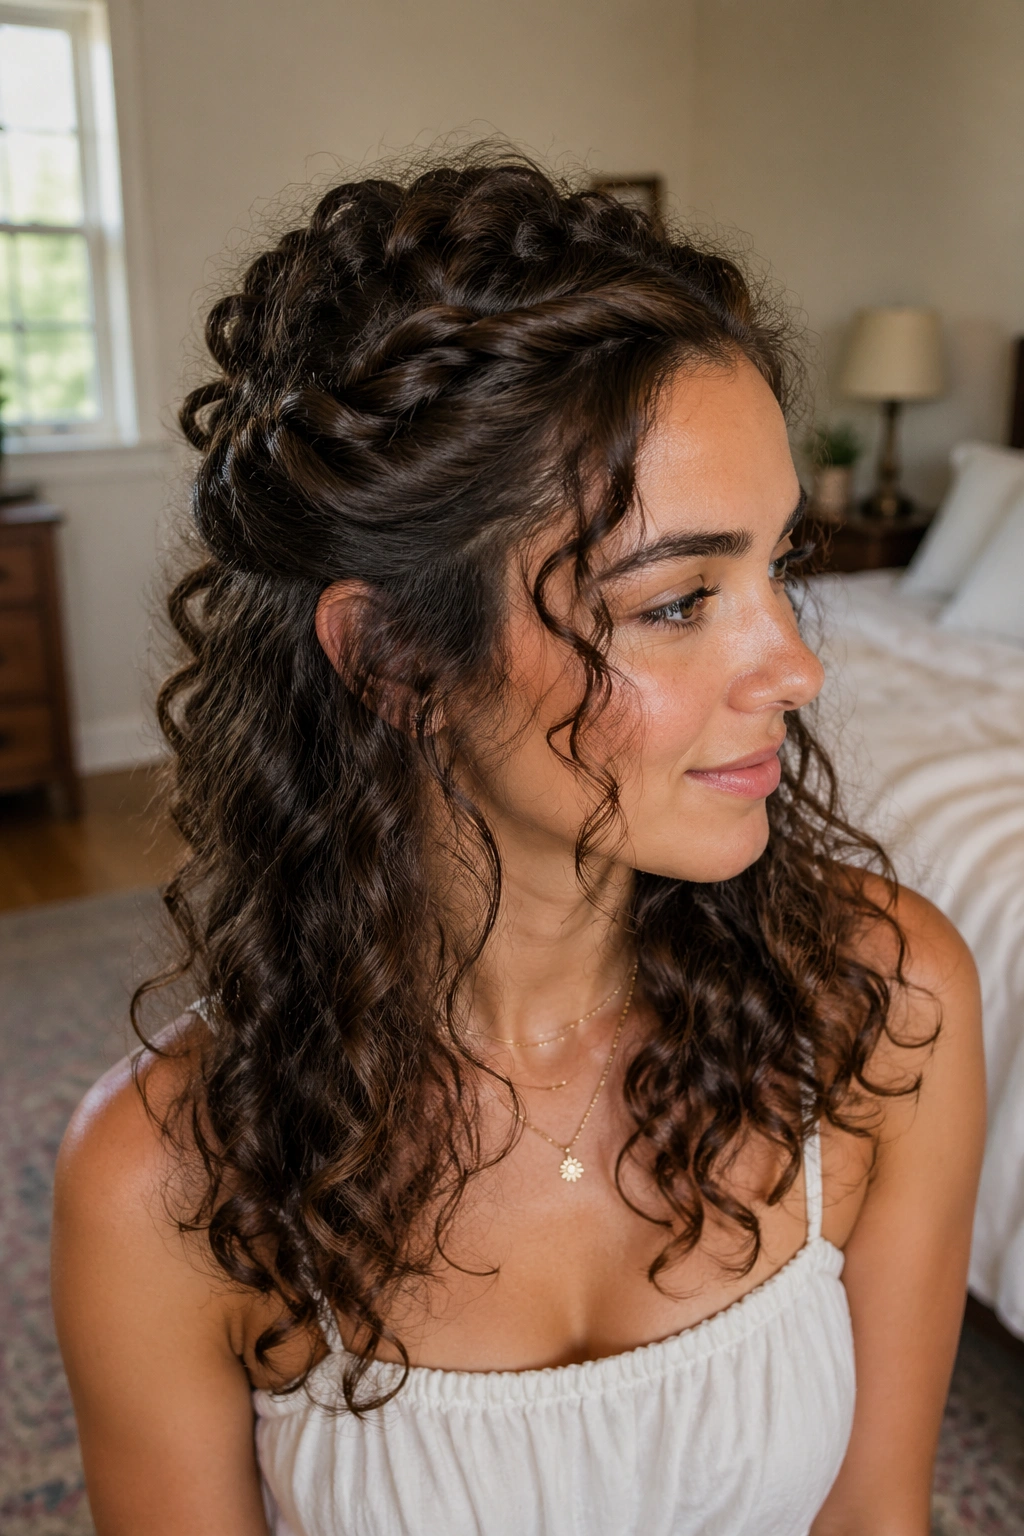
Why does this style work so well on curly medium-length hair? Because it lets the curls do half the job. The crown twist lifts the front and side sections away from the face, while the rest of the hair stays free to keep the shape from looking stiff. It’s romantic, but not fussy.
The real trick is section size. Take too much hair and the twist becomes heavy and starts sliding. Take too little and it looks thin. The sweet spot is a strip about 1½ to 2 inches wide on each side, twisted back toward the center, then pinned where the twists meet. If your hair is layered, leave the shorter curls out near the temples. They soften the whole thing.
Why It Stays Put
The twist has a better grip when you cross the pin through both the twist and the hair beneath it. That tiny detail matters. One straight pin through the surface will fail the second you move your head.
Finish with a light mist of hairspray, then scrunch the loose curls around your shoulders so the top and bottom sections feel connected. If the bottom looks too flat, flip your head once and shake it out gently. That’s usually enough.
3. The Curly Chignon at the Nape
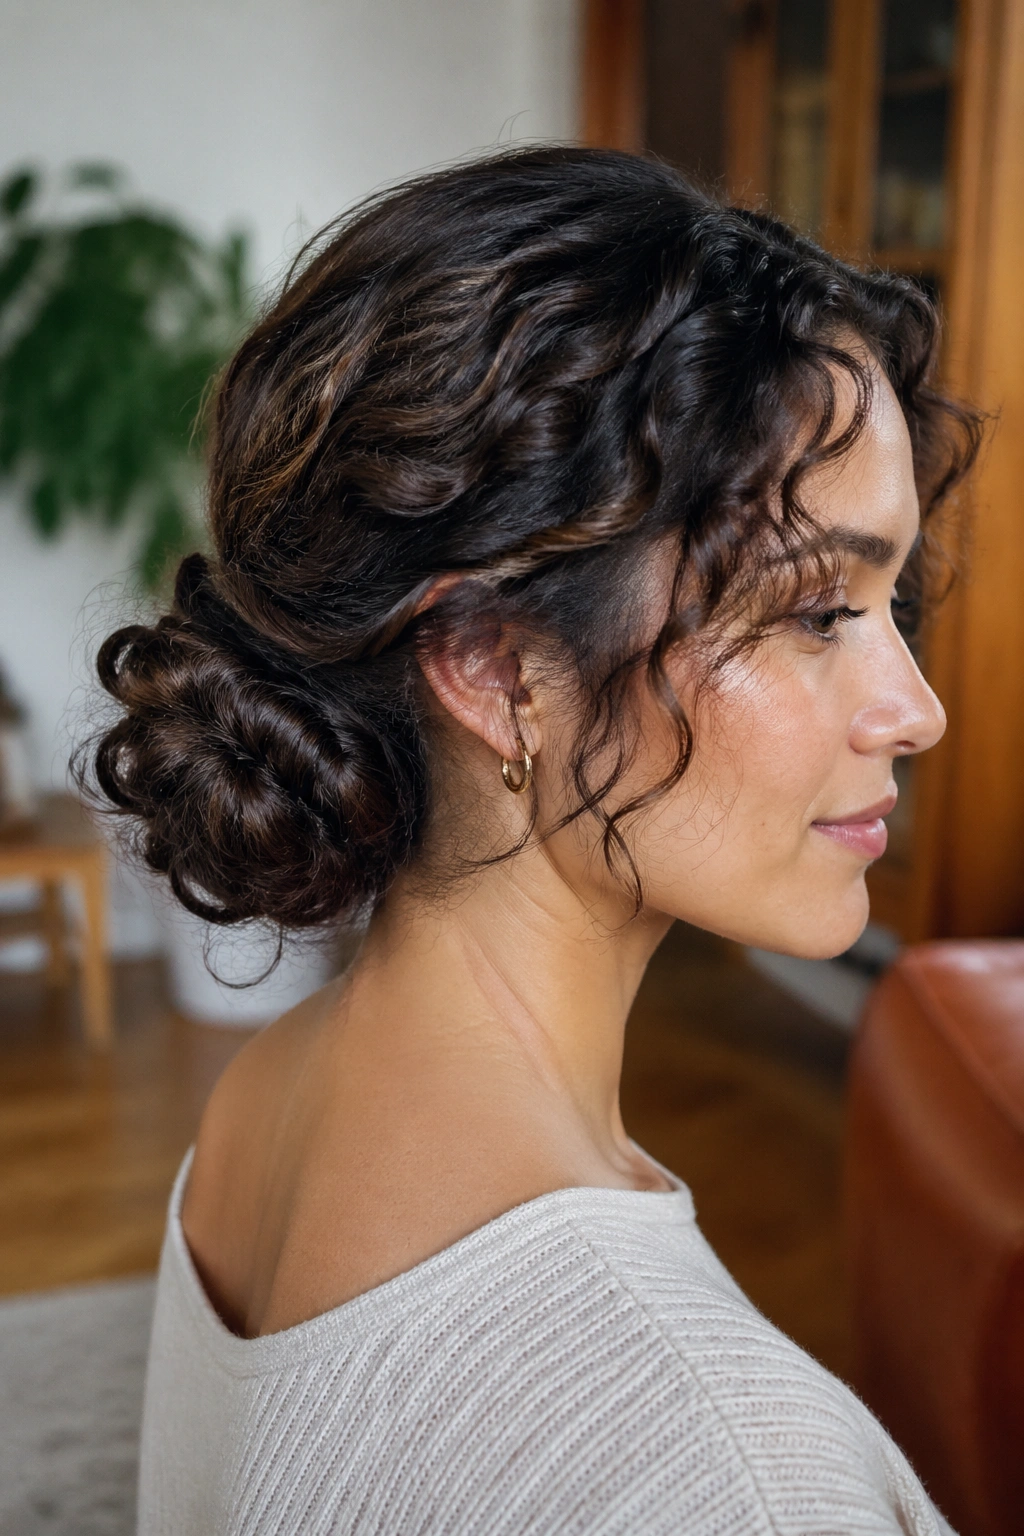
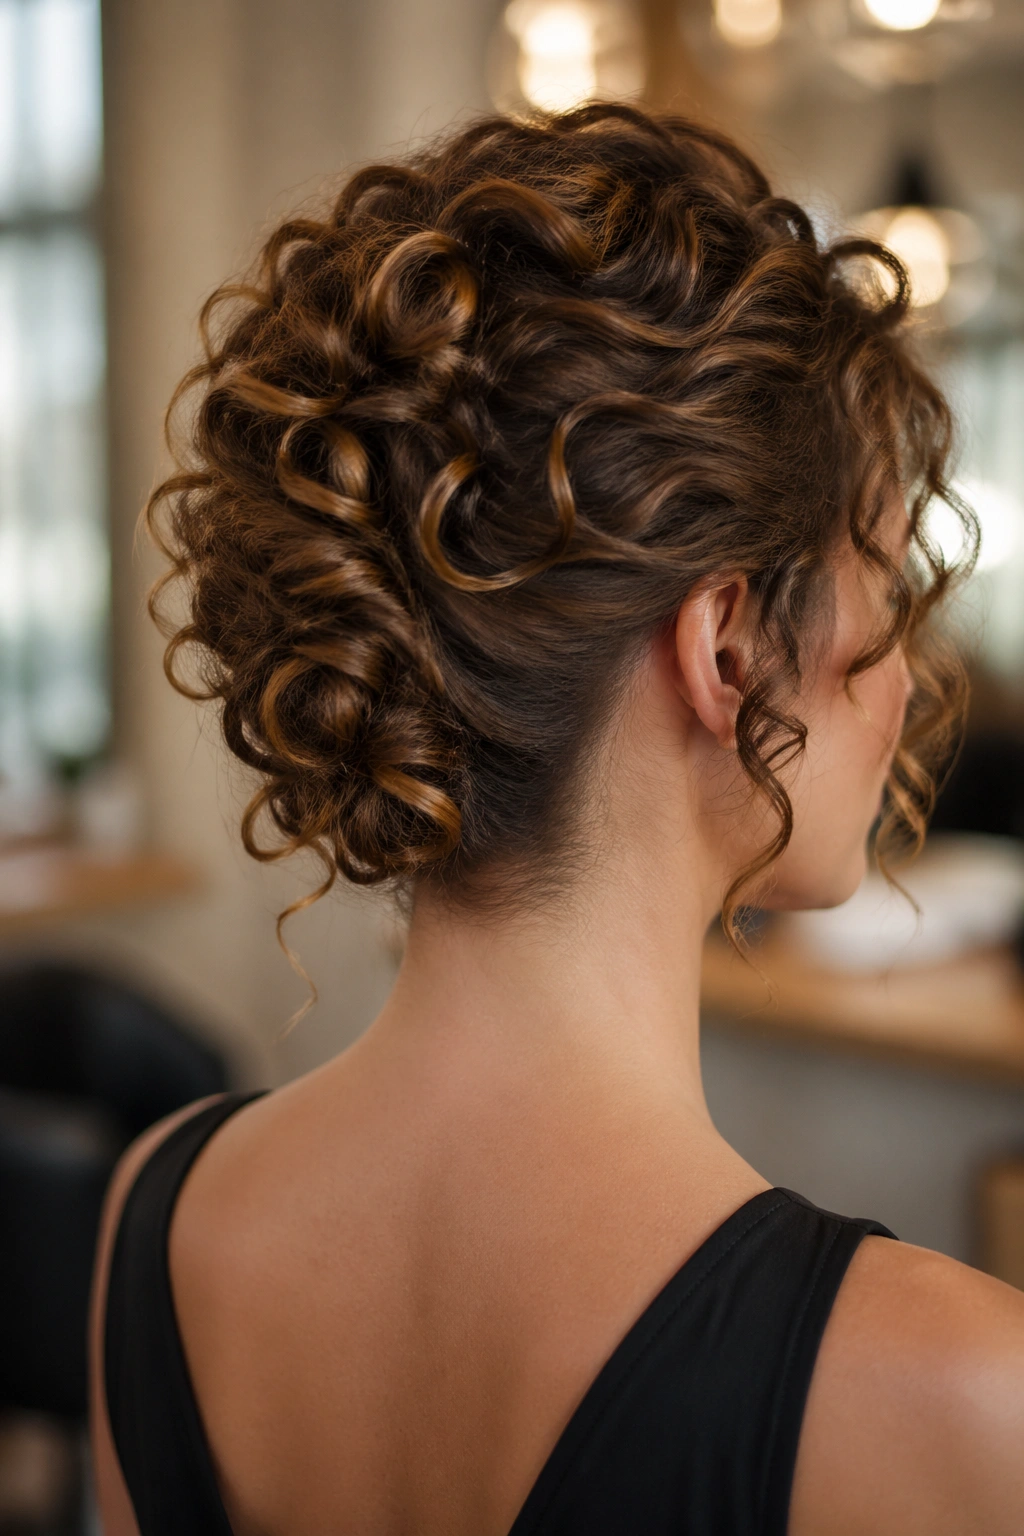
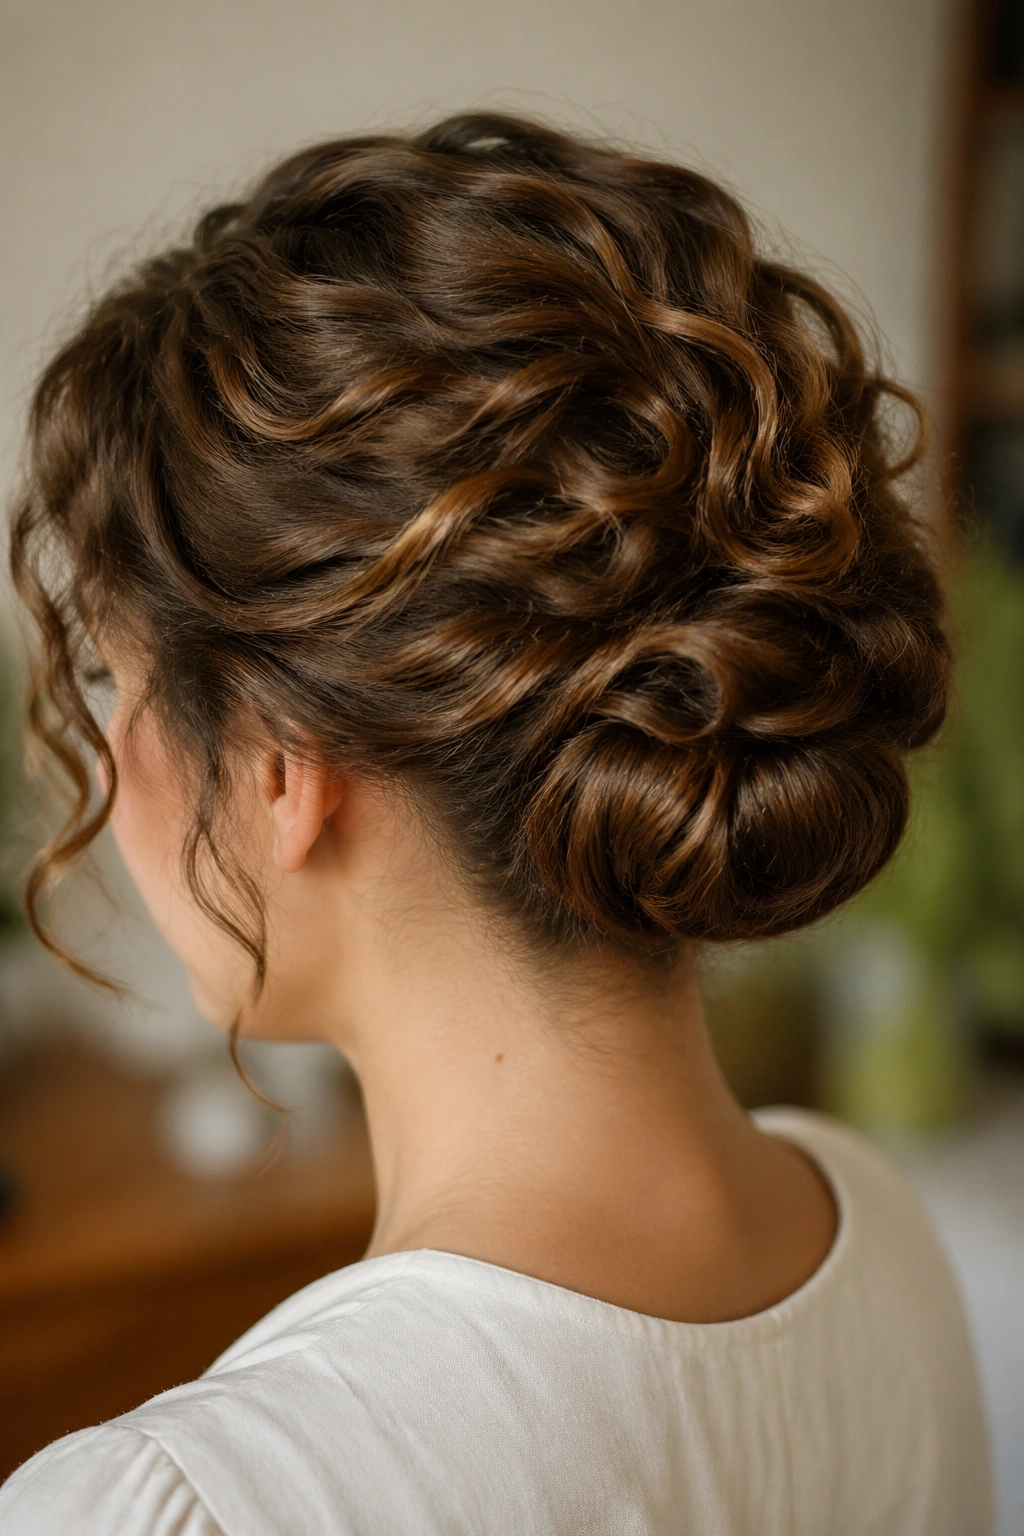
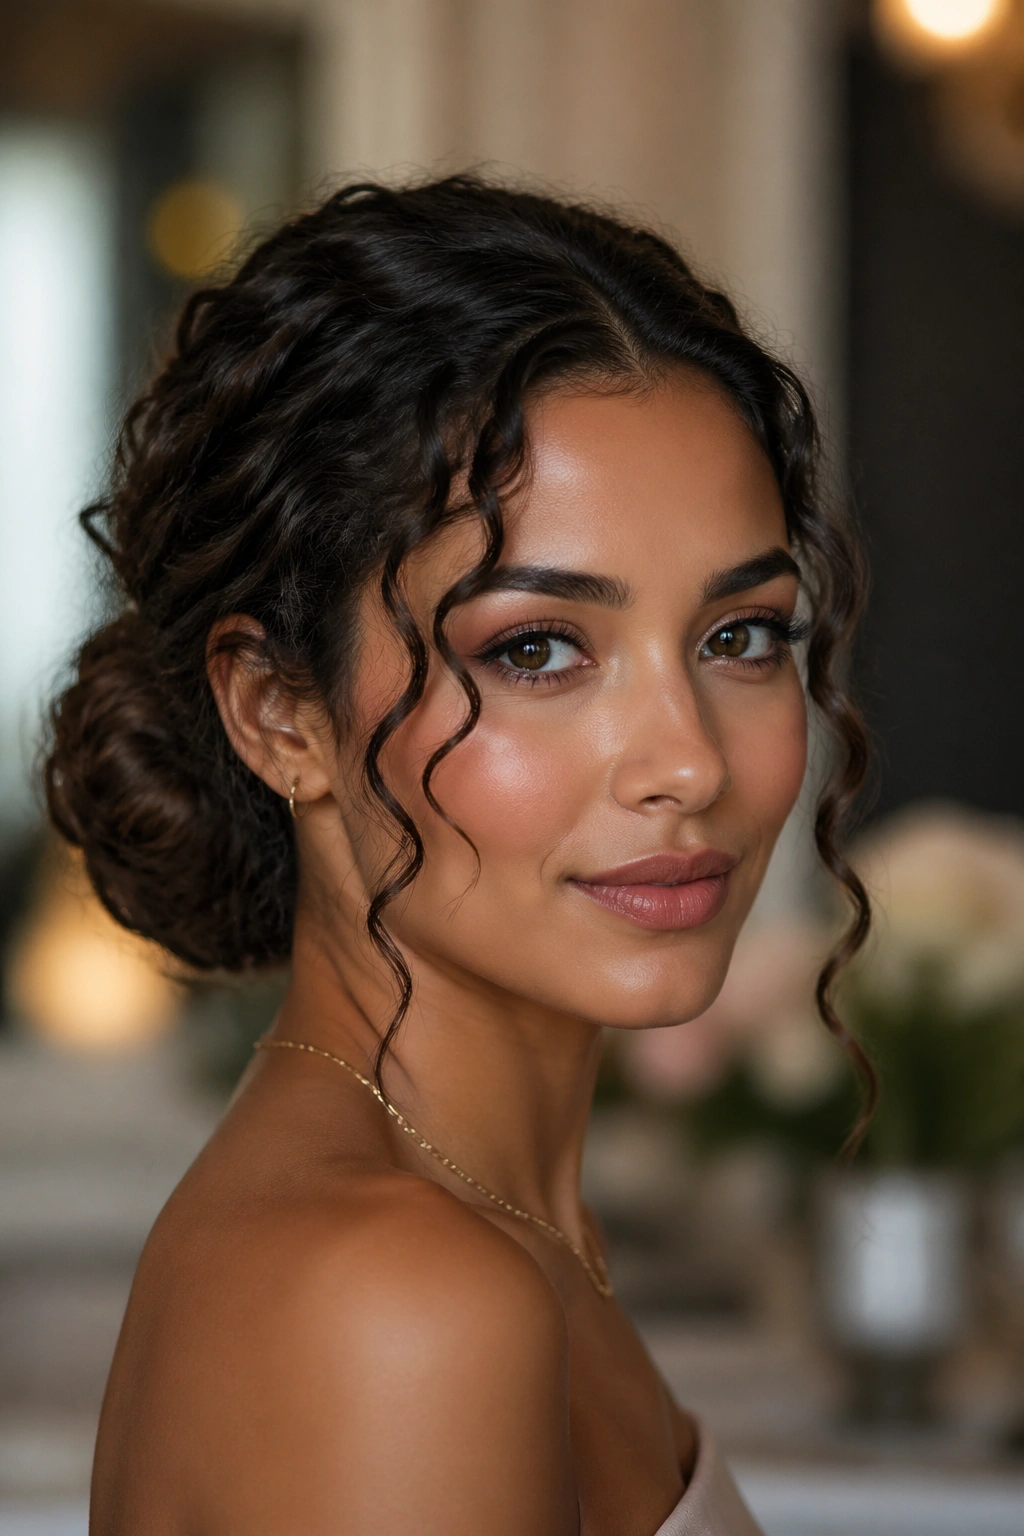
A low chignon is one of those styles that looks more controlled than it is. Medium-length curls are actually a good match for it, because the shorter ends build natural fullness instead of hanging in a limp tail. If you want a clean profile, this is one of the smartest curly updos to keep in rotation.
Begin by gathering the hair just above the nape, then twist the length into a soft rope before wrapping it into a coil. Don’t iron every curl into submission first. Let the texture stay visible. That texture is what keeps the bun from looking like a plain office knot. A little frizz around the edges is fine here, and honestly, it usually looks better than a sealed-off finish.
The part that usually goes wrong is tension. Pull it too tight and the style loses the shape of the curls. Pull it too loose and the chignon drifts downward. Aim for firm, not tense. You should feel the style sitting on the scalp, not biting into it.
A metal hair pin or 6 to 8 bobby pins will usually do the job. If your hair is very dense, anchor the bun first with a small elastic, then pin the wrapped curls around it. That extra step saves a lot of frustration.
4. Side-Swept Roll with Bobby Pins
Picture this: one side tucked cleanly back, the other side falling in a cascade of curls. It’s simple, but it has shape, which is more than most rushed updos can say. Medium-length hair works beautifully here because the curls are long enough to drape but short enough to stay lifted when pinned to one side.
Start with a deep side part or your natural part pushed over just a bit. Smooth the heavier side back along the temple, roll it inward once, and pin it at the back of the head. Then do the same with the other side, keeping the roll slightly lower so the style opens up around the face. A couple of curls can stay loose near the cheekbone. They soften the line.
- Use 4 to 6 bobby pins in the same color as your hair.
- Mist each pinned section lightly before pinning if the curls are very soft.
- Keep the rolls loose enough to show texture.
- Choose one statement earring and let the hair frame it.
One small warning: if your layers are cut high, don’t over-roll the sides. Short pieces will poke out and make the shape look messy in a bad way.
The style works because it creates a clean diagonal line across the head. That line is flattering on most face shapes, which is why this one keeps showing up for events, even when people swear they want something “different.”
5. Double Mini Buns on Curly Medium Hair
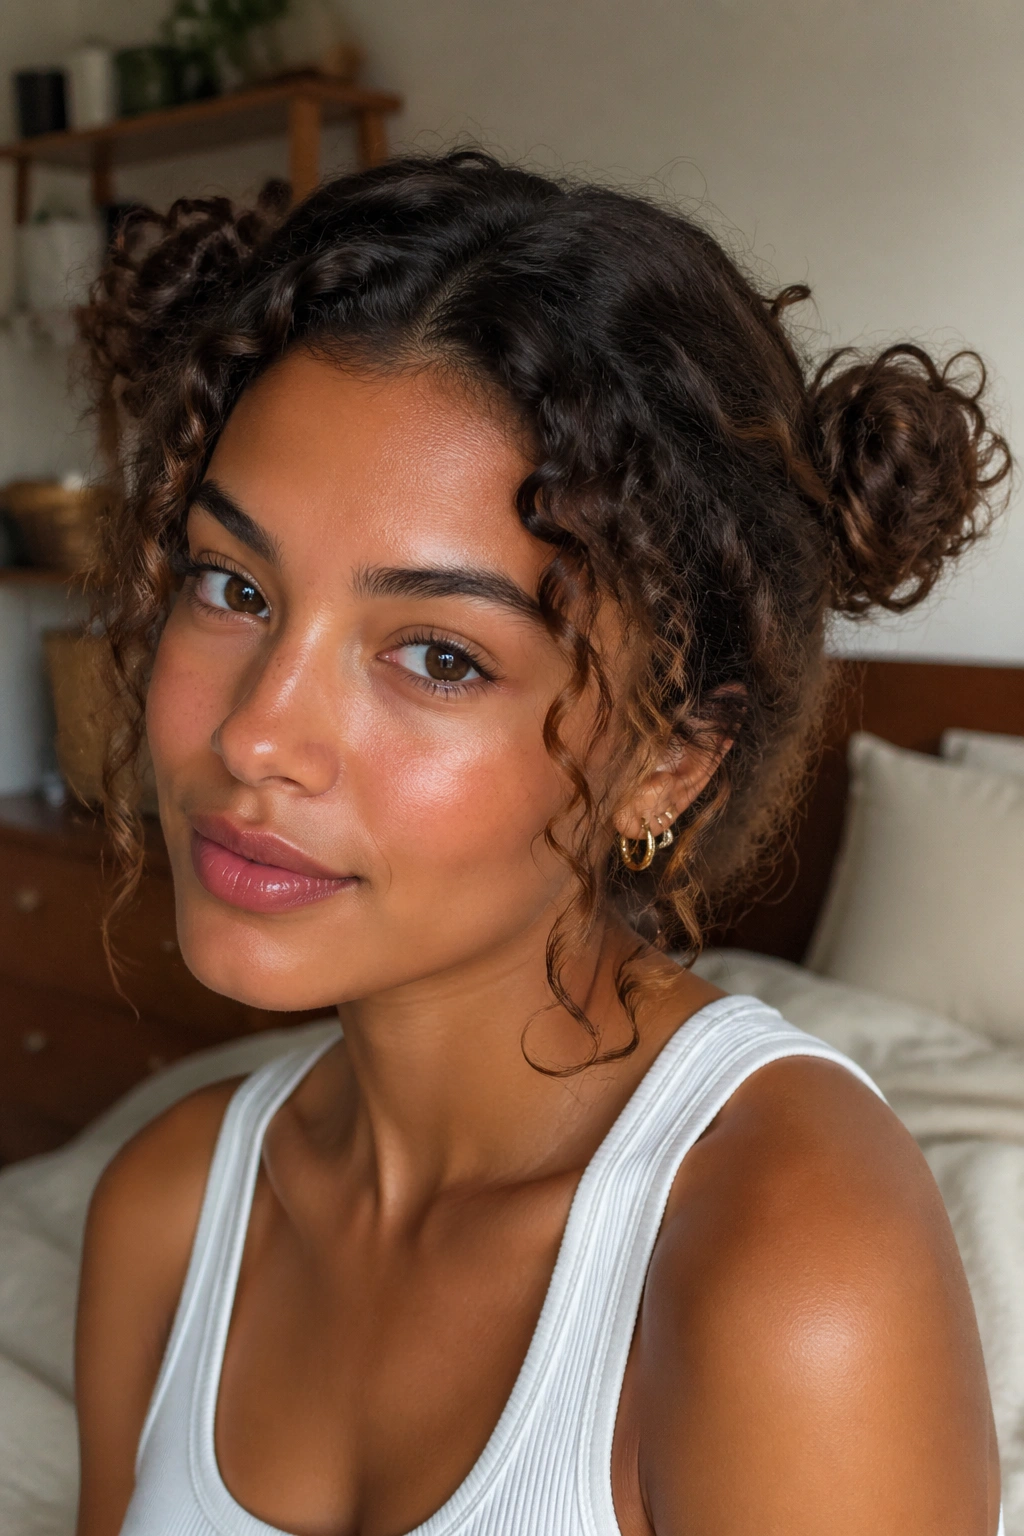
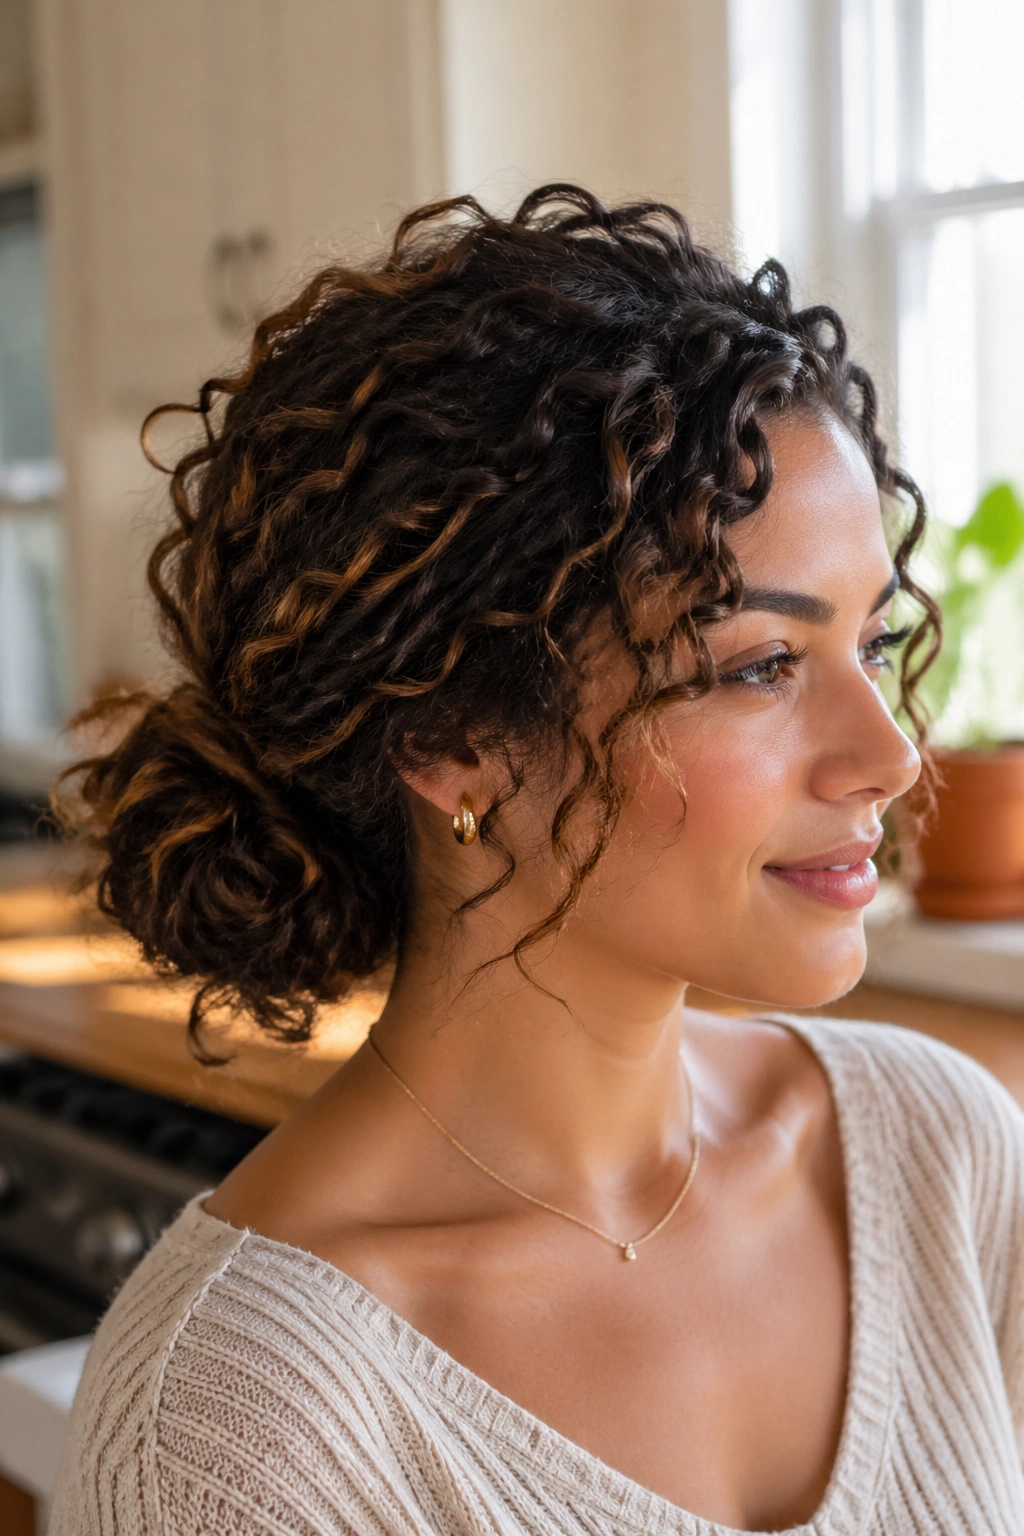
Double mini buns can look playful, but they’re also practical when your curls are medium length and you want the ends off your neck. The style gives you two secure anchor points instead of one heavy bun, which makes it easier to distribute the volume without flattening the curl pattern. It’s a smart choice for dense hair that fights single-knot styles.
The split is what matters. Part the hair straight down the middle and keep the division clean. Build each bun at about ear level or just above the crown, depending on how much lift you want. Smaller buns look neat; slightly larger ones feel more casual. Both work.
Honestly, the style looks best when the buns are not identical. One can sit a touch higher than the other. One can be a little fuller. That tiny imbalance keeps the updo from feeling too stiff, and curls are forgiving in a way straight hair often isn’t.
A few face-framing curls make the whole thing less precious. If you have shorter layers, let them escape near the hairline instead of trying to tuck everything in. The style reads better when it feels lived-in rather than shellacked.
6. Twisted Halo Updo
A twisted halo gives medium-length curls a polished frame without asking the ends to do anything impossible. The hair wraps around the head like a soft crown, which is helpful if you want height and shape but still want the texture to stay visible. It’s one of those styles that looks more complicated than it is.
Where the twist should sit
Place the twists low enough to keep the crown from bulking up too much. If you twist too high, the shape starts to look like a helmet. If you twist too low, the halo loses its outline. Around the upper ear line is usually the sweet spot for medium-length curls.
Pin the left side, then the right, then go back and check the back seam where the sections meet. That’s usually where things loosen first. Use U-pins if you want a softer hold, or bobby pins if your hair is fine and slippery.
A halo looks especially good with curly hair because the texture disguises the joins. You don’t need to hide every seam. You only need to keep the line smooth enough that the eye reads “intentional” instead of “fell together by accident.” A few small curls around the hairline are enough to keep it from feeling too formal.
7. The Curly French Roll
The French roll is a classic for a reason, but curly medium-length hair changes the whole mood of it. Straight hair makes the roll sleek. Curly hair makes it fuller, softer, and a little more interesting. That extra texture is a gift, especially if you want something elegant without looking too severe.
The important move is not over-compressing the curl pattern before you roll. Gather the hair at the back of the head, smooth the outer layer only, then tuck the length upward and inward along the center line. Pin vertically along the seam. If the roll is too flat, it stops looking like a French roll and starts looking like a shellacked fold. Nobody wants that.
This style loves medium-length hair because you have enough length to tuck, but not so much that the roll becomes bulky. If the ends keep slipping, use a small clear elastic at the base before you tuck. It won’t show once the roll is pinned.
A decorative comb or a few pearl pins can finish it off, though the style is strong enough to stand on its own. That’s the part I like most. It doesn’t need much.
8. Messy Top Knot with Face-Framing Spirals
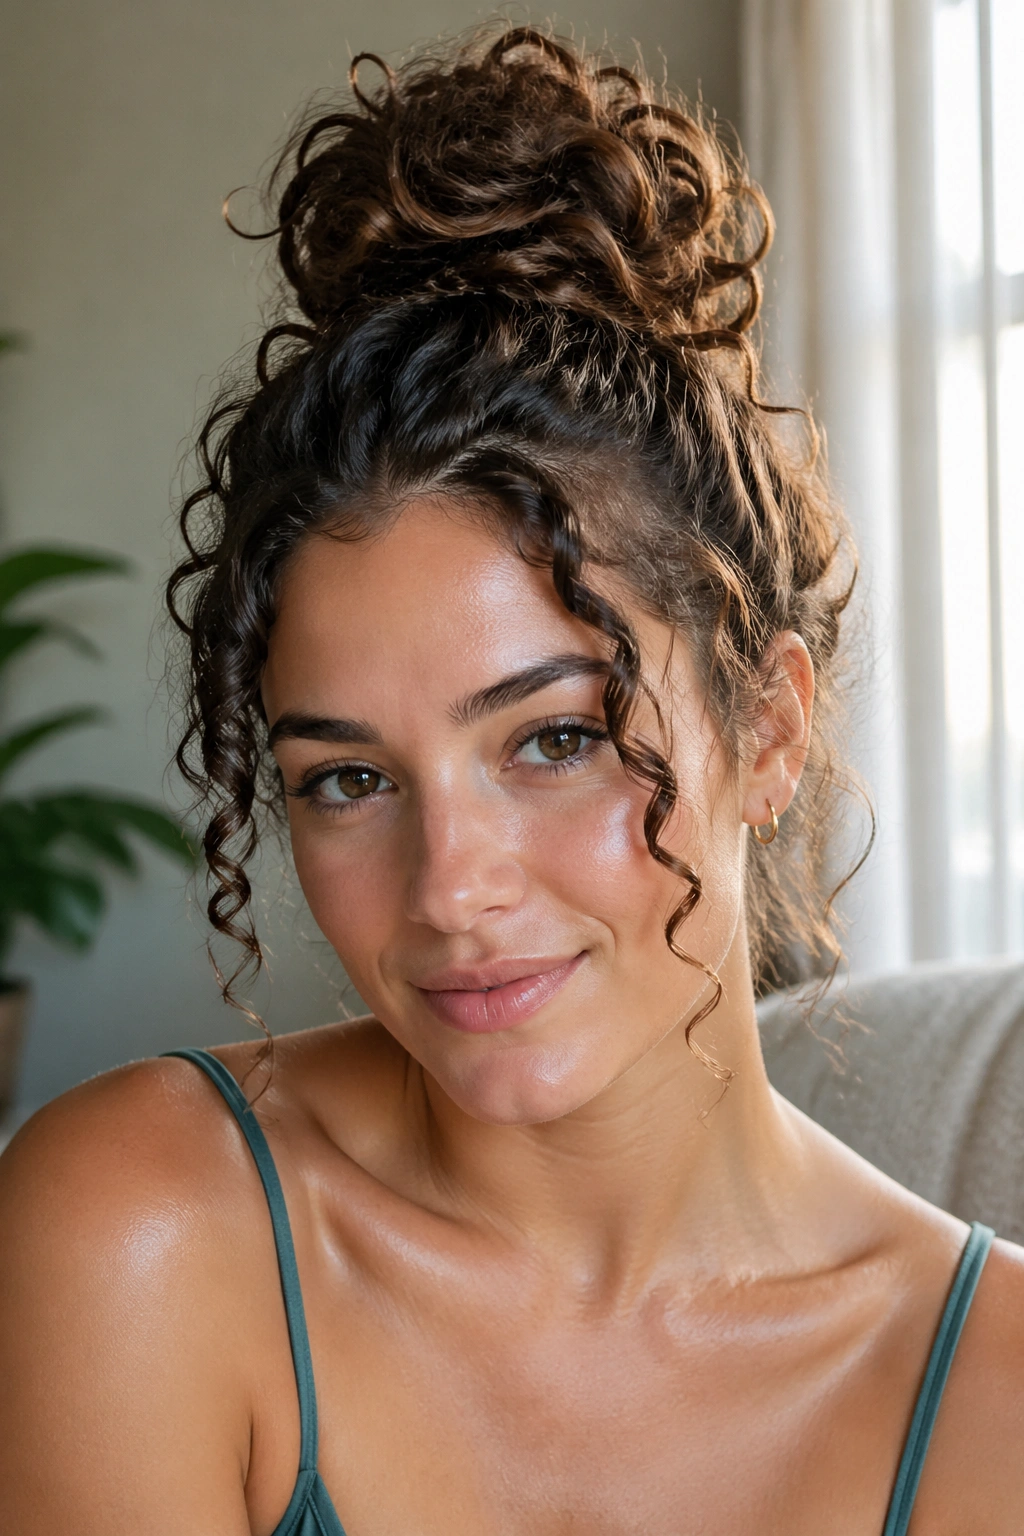
This one is the quick answer to a rushed morning that still needs to look intentional. The messy top knot works on medium curls because the texture builds the knot for you. You’re not making a perfect bun. You’re creating a shape with enough hold that it survives a day of movement.
Pull the hair to the crown or slightly behind it, twist once, and wrap the length loosely into a knot. Secure it with a soft elastic first, then reinforce with pins if the curls are thick. Leave the front section alone if you can. Face-framing spirals are what make this style feel soft instead of thrown together.
A top knot can get heavy fast on medium-length curls, so don’t stack all the volume directly on the highest point of the head. Shift it back an inch or two. That tiny move changes the balance and keeps the style from pulling forward.
If the ends poke out, leave them. Seriously. A few visible curls at the bun edge give the style its shape. A perfectly hidden knot often looks smaller and less flattering than a knot with texture showing through.
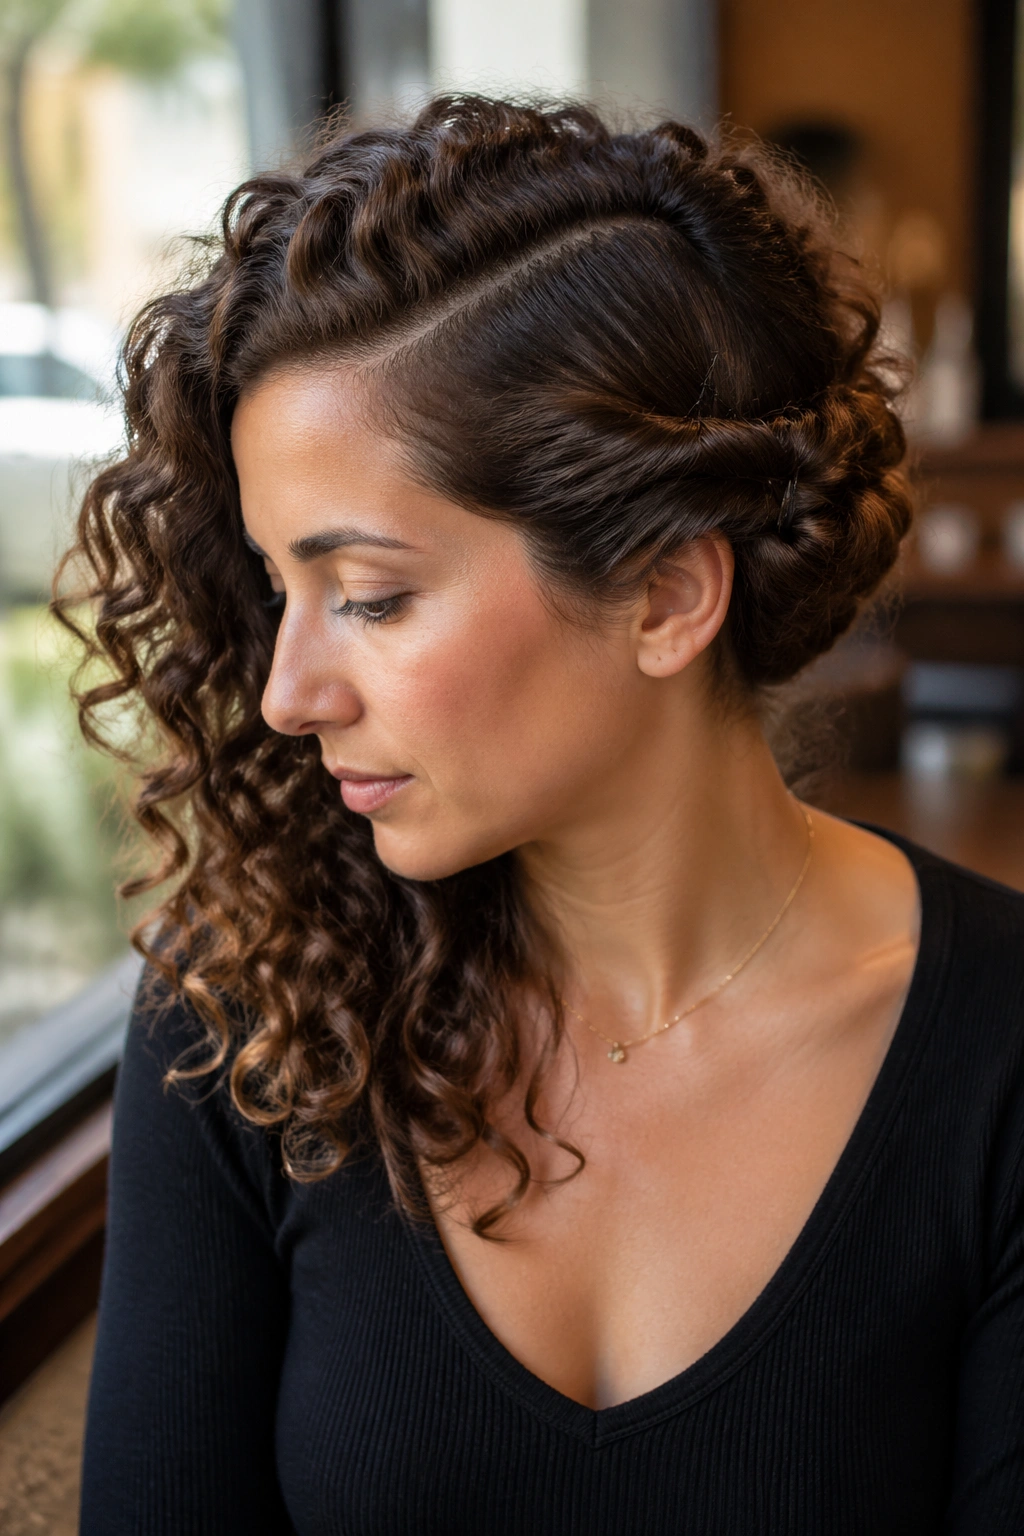
9. Braided Crown into a Bun
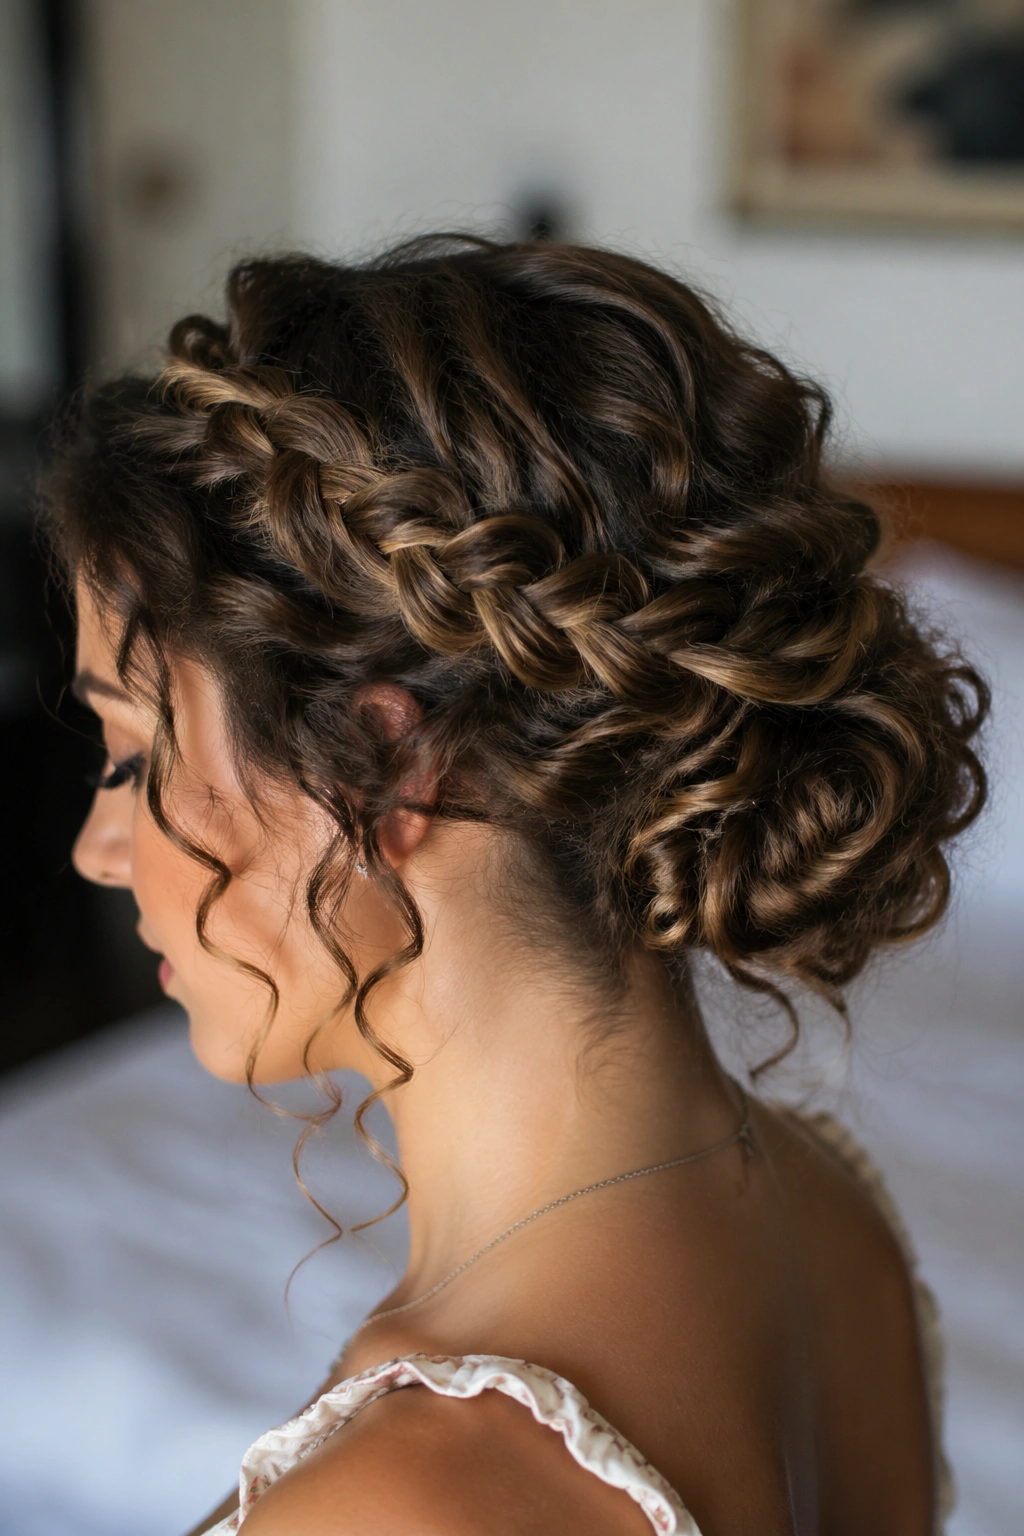
Braids change curly updos fast. They add a stronger line, give the style more grip, and help medium-length hair feel more structured without losing texture. A braided crown into a bun is especially useful when you want the top of the head to look neat but still want the rest to stay soft.
Start by parting the hair from ear to ear, then braid or twist the front sections back toward the center. If your curls are very springy, a flat twist may hold better than a tight braid. Gather the remaining hair into a low bun or coil at the back, then wrap the crown pieces around it. The braid becomes part of the shape instead of sitting on top like an afterthought.
If your hair is layered
Keep the braid a little wider than you think you need. Layers shrink more than people expect, and a skinny braid can vanish into the rest of the curls. A broader braid reads better in medium-length hair and gives the whole style a little more weight.
A style like this is one of the few curly updos that can handle both polish and movement. It looks good when it’s done neatly. It also looks good when a few curls loosen up during the day. That’s not a flaw. That’s texture doing its job.
10. Knotted Low Bun with Texture
A knotted low bun has a built-in advantage: it looks designed even when you keep it soft. The knot itself creates visual interest, and the curls around it keep the style from feeling too formal or stiff. Medium-length hair has enough length to make the knot visible without making the bun huge.
Pull the hair into two sections, tie them once like a simple knot, then wrap the ends under and around the base. Secure each side with pins as you go. The goal is not a perfect sailor knot. The goal is a soft, layered shape that stays together. If you make the knot too tight, the curls lose their bounce. If you make it too loose, it won’t hold.
- Keep the knot low, around the nape.
- Use a tiny bit of texture spray if the curls are freshly washed.
- Hide the elastic under the crossed strands.
- Leave one or two curls free at the temples if the face needs softness.
This style is especially good when you want a clean neckline. It keeps hair off the collar without looking severe. And because the knot is built from the hair itself, not just a wrapped bun, the finish has a little more depth.
11. Clipped Twist Updo for Second-Day Curls
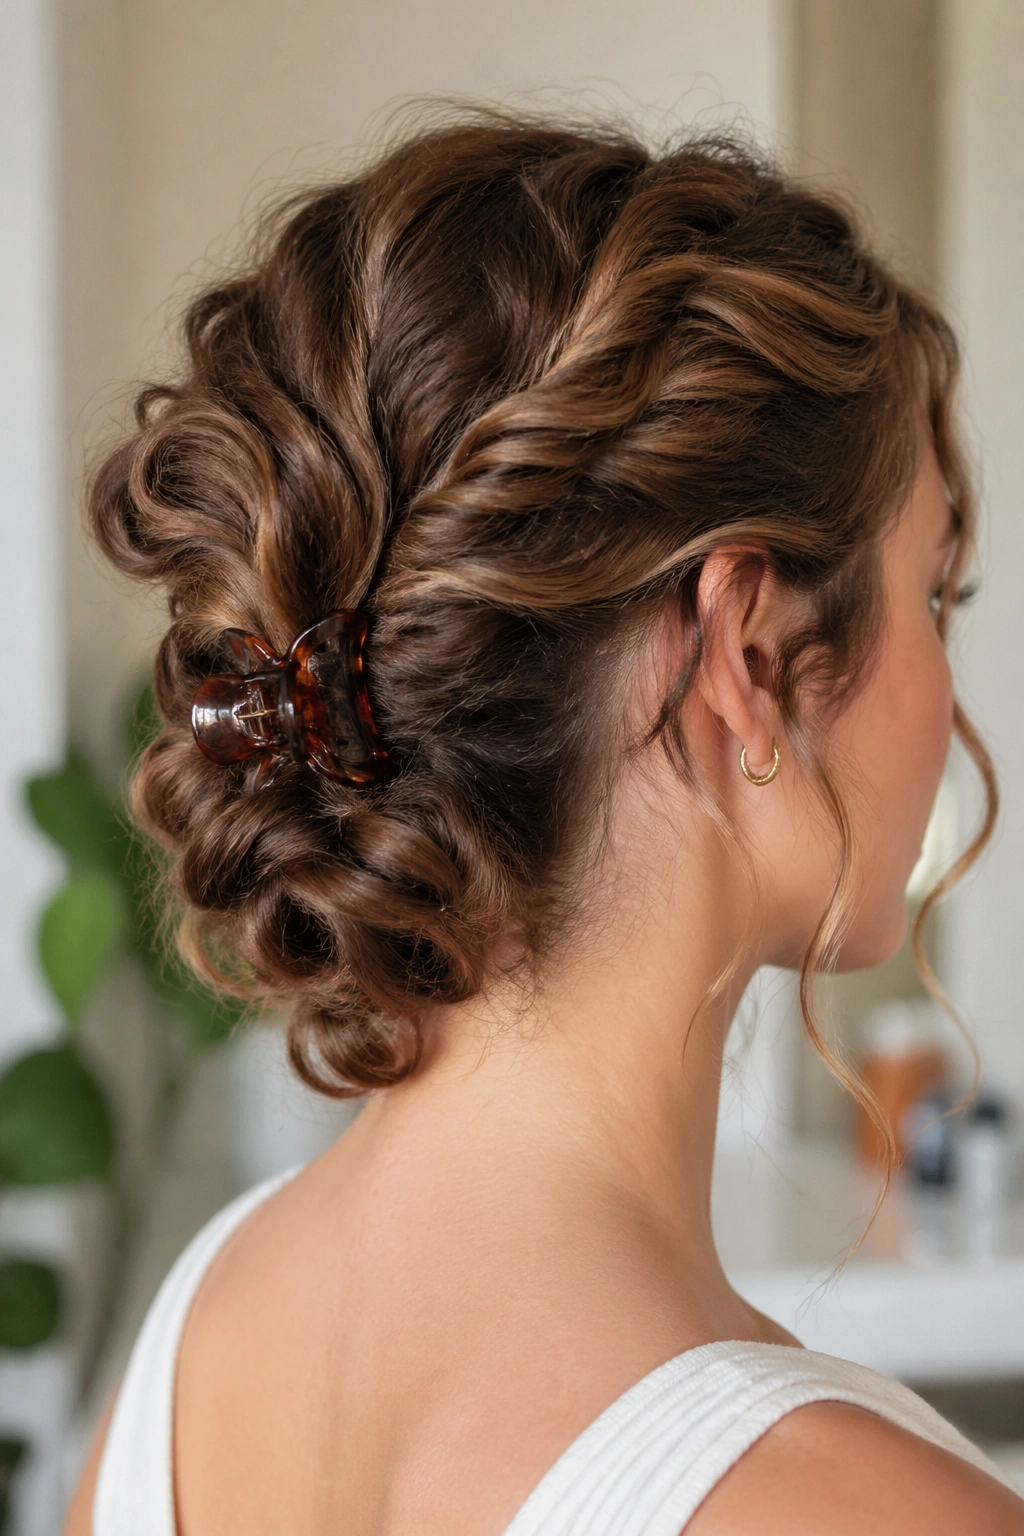
Second-day curls are usually the easiest curls to style into an updo. They have a bit more grip, less slip, and fewer flyaways fighting the shape. That’s exactly why a clipped twist updo works so well for medium-length hair. It can look polished with almost no heat and very little fuss.
Take two side sections, twist them back loosely, and secure them with a decorative clip or a sturdy claw clip at the back. Let the remaining curls gather beneath the clip in a soft roll or loose tuck. The clip should hold the structure, not crush the curls. If the clip is too small, it will dig in. If it’s too large, the style will slide.
The real advantage here is speed. You can do it in minutes, and it still looks like you spent time on it. Use a clip with strong teeth, not just a pretty shell. Looks matter less when the style falls out.
Try this if you want a low-pressure version of an updo that still has shape. It’s especially useful for medium-length hair that sits right at the shoulders, because the clip can catch enough hair to anchor the style without needing a full bun.
12. Rolled Tuck Updo
A rolled tuck updo is one of those styles that rewards medium length more than long length. Long hair can make the roll heavy. Medium curls tuck in neatly and hold their shape with less bulk. That makes this a strong option for weddings, dinners, or any place you want something tidy but not severe.
The method is straightforward. Create a low horizontal section, roll the ends upward toward the inside of the head, and pin along the roll as you go. Keep the surface loose enough that the curls still show. If your hair is fine, a little backcombing at the roots can help the roll stay anchored. If your hair is dense, you probably won’t need it.
The tuck technique
The tuck works best when you don’t force every curl into the same path. Let the ends fall into the roll in small groups. That keeps the surface from looking bumpy in a bad way. If one side gets fuller, leave it. Symmetry is overrated here.
A rolled tuck is especially kind to growing-out layers. It hides awkward ends without pretending they’re not there. That’s a small thing, but it matters. A style that can make peace with layers is worth knowing.
13. Curly Faux Hawk Updo
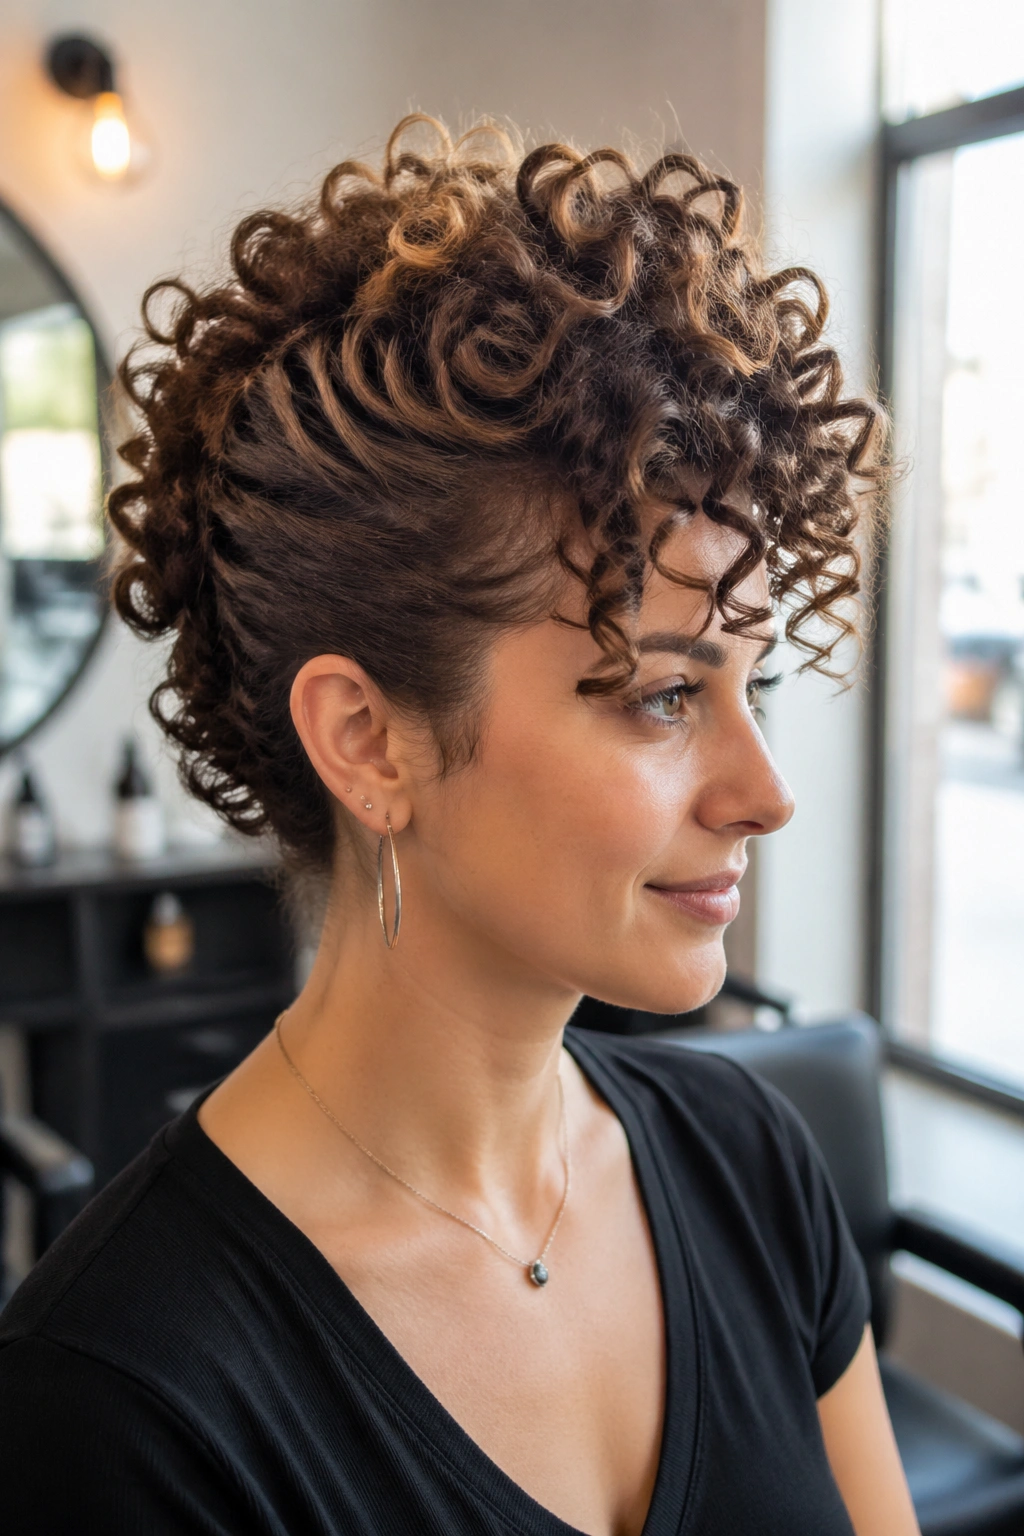
This one has attitude. A curly faux hawk creates height through the center of the head and keeps the sides pinned close, which makes medium-length curls look sharper and more sculpted than a lot of other curly updos. It’s a strong choice if you want something bold without shaving anything off.
Start by sectioning the hair from temple to temple, then pin the sides up toward the center back, not flat against the scalp. That little lift is the whole point. The middle section can stay loose and voluminous, or it can be twisted into loose knots along the ridge. Both versions work. The key is keeping the shape narrow at the sides and fuller in the middle.
A faux hawk looks best when the curls aren’t brushed into submission. You want visible texture. You want body. You do not want a smooth, helmeted ridge that forgot it’s curly hair. Use pins underneath the outer curls so the hold stays hidden.
This style is one of the few that actually gets better when the curls expand a little over the day. The shape becomes more defined instead of collapsing. That’s rare, and I never argue with it.
14. Pinned-Up Side Sweep
A pinned-up side sweep is softer than a full updo but more dressed up than wearing the hair down. It’s a nice middle ground for medium-length curls, especially when you want one side exposed and the other side controlled. The shape has movement, and that matters more than perfection.
Sweep most of the hair to one side, then pin sections underneath in layers so the surface stays curved rather than flat. If you only pin the top layer, the style can slide. If you pin everything too tightly, the curls lose their shape. You want a gentle curve from the crown to the nape, with the ends spilling over one shoulder.
A side sweep is especially flattering when the curls at the ends are a little more defined than the roots. That contrast gives the style depth. If the roots are flat, lift them with a small amount of mousse or root spray before you pin anything.
One good trick: pin the hair from the underside only, then lightly tug the outer curls to cover the pins. It sounds fussy. It isn’t. It’s just the difference between visible hardware and a clean finish.
15. Bubble Ponytail Updo with Curly Ends

A bubble ponytail sounds playful because it is, but it can also look surprisingly polished on medium-length curls. The style works by creating several puffed sections along the length, which gives curly hair a lot of shape without requiring a full bun. If your curls are dense, this is a smart way to keep volume controlled instead of fighting it.
Gather the hair into a mid or low ponytail, then place small elastics every 2 to 3 inches down the length. Gently pull each section outward until it forms a rounded bubble. Leave the ends curly and visible if your hair is medium length. That finishing detail keeps the style from looking too engineered.
What makes it work
The bubbles should not be exact. If each one is the same size, the style can look stiff. Let the top bubble stay slightly fuller and the lower ones a touch smaller. That shape reads more natural.
Use soft elastics and cover them with a tiny wrap of hair if you want a cleaner look. If you want something more casual, leave the elastics visible. Either way, the style gives you order without flattening the curl pattern, which is why it’s such a good fit for medium lengths.
16. Elegant Low Bun with Tendrils
A low bun with tendrils is the answer when you want something formal but not severe. The bun anchors the style, and the loose curls around the face keep it from feeling too tight. Medium-length hair is ideal here because the bun can be full without turning into a heavy mass at the nape.
Smooth the crown first, then gather the hair low and twist it into a bun just above the neckline. Leave two to four curls loose around the face and near the ears. Those pieces should look intentional, not forgotten. If you have shorter layers, let them stay soft near the hairline. They’re part of the design.
The bun itself can be neat or slightly undone. I prefer slightly undone with curly hair. It keeps the texture visible and gives the style some life. A perfectly sealed bun on curls often misses the point.
A pearl pin, a simple barrette, or even one strong gold clip can finish the look. You do not need much. In fact, too much decoration starts fighting the curls. Let the shape do the work.
17. Sculpted Pin-Up Roll for Special Events
This is the most dressed-up style in the bunch, and it rewards a little patience. A sculpted pin-up roll gives medium-length curls a vintage shape that feels deliberate from every angle. It is not the fastest style here, but it is one of the most satisfying when you want the hair to look shaped rather than merely gathered.
Work with clean sections. Roll the front and side pieces inward, pin them along the curve of the head, then shape the back into a compact coil or tucked roll. The surface should show curl texture, but the outline needs to stay crisp. That balance is what makes the style look finished instead of overdone.
A few details matter more than people think:
- Use strong pins, not flimsy ones.
- Mist each section lightly before rolling.
- Check the side profile before you leave it alone.
- Keep the roll anchored low enough that it does not pull upward during the day.
The style works especially well with earrings, a clean neckline, or a dress with structure. It has a bit of drama, which is exactly what special-event hair should have. And if one curl escapes near the temple, leave it. That tiny bit of softness keeps the whole thing from feeling staged.