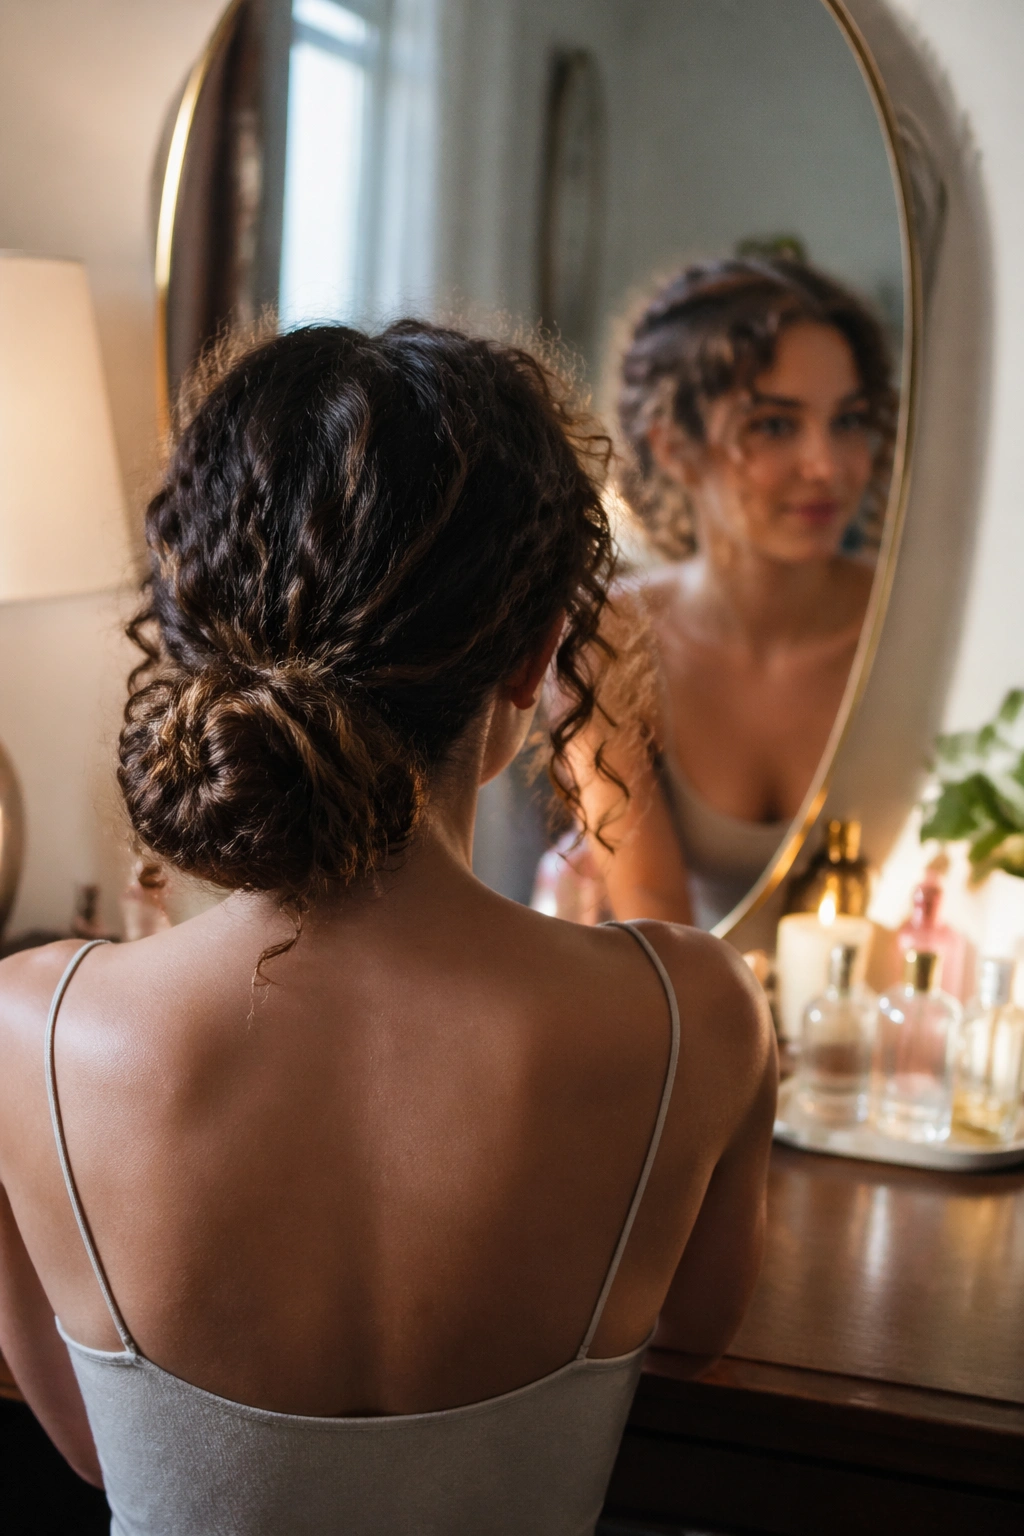
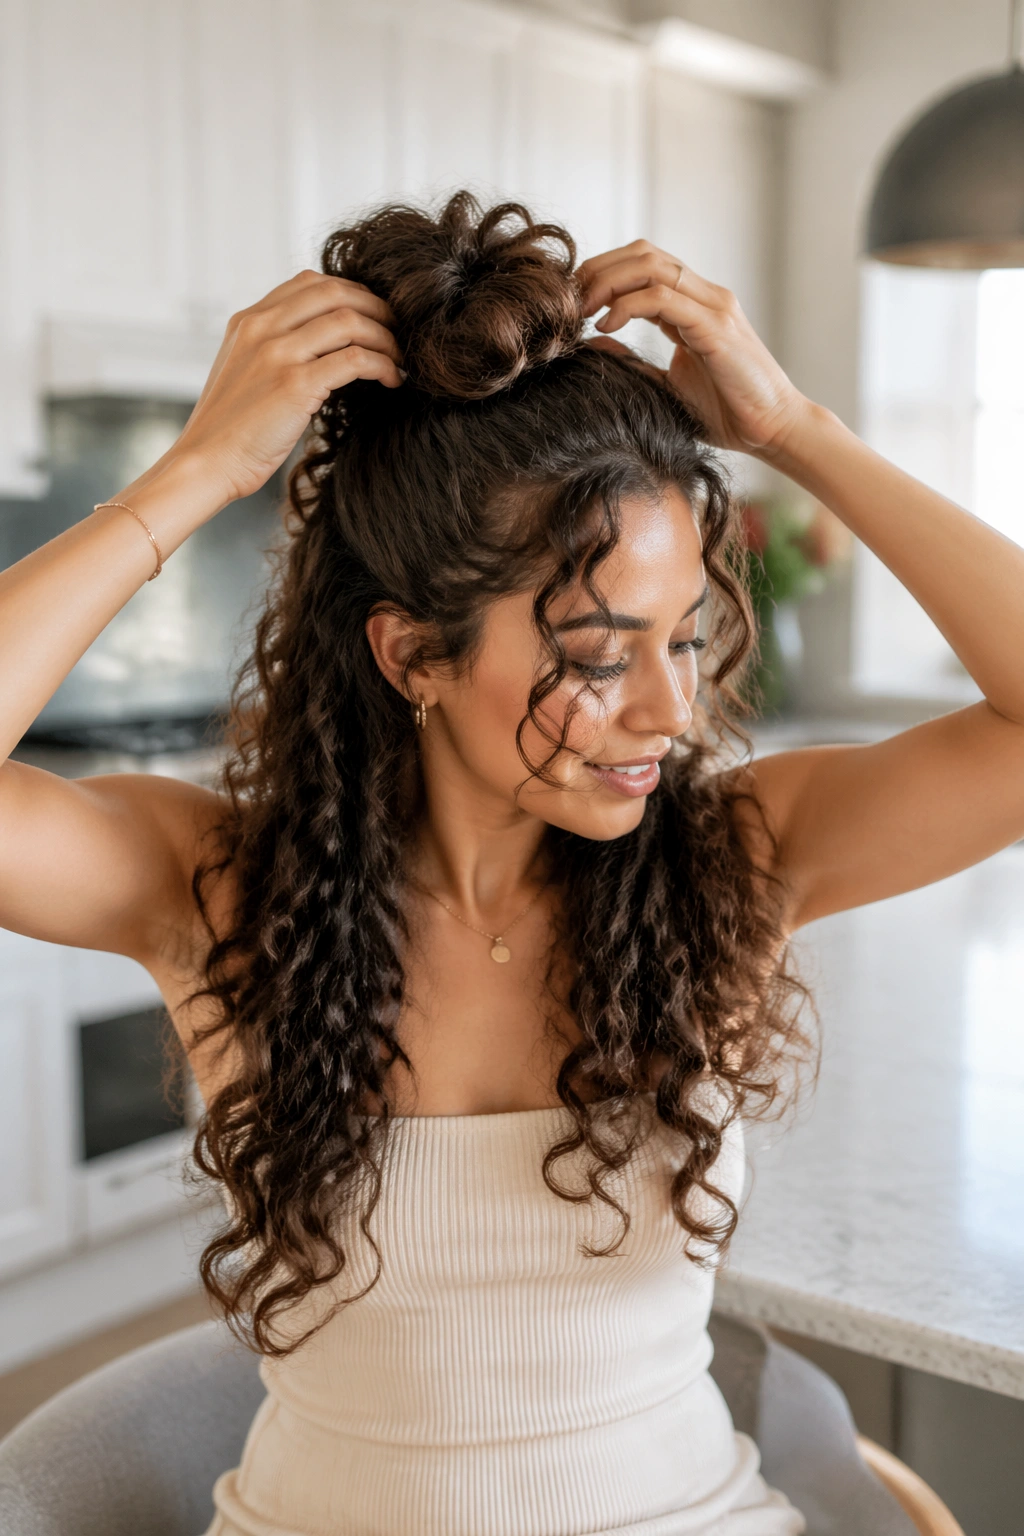
Curly hair and neat little buns rarely get along. Pull the crown too tight and the curls lose their spring; leave the bun too loose and the whole style slips into fuzzy chaos by lunch. Messy half up half down bun looks for curly hair work because they sit in that middle ground: enough lift to keep hair off your face, enough length left down to show the curl pattern, and enough looseness to keep the style from looking stiff.
The best versions do not fight the curl. They let the texture do half the work. A few face-framing spirals, a softly wrapped crown, and a couple of hidden pins can change the whole shape without making it look overbuilt. That is the part a lot of people miss. Curly hair does not need to be controlled into obedience; it needs a shape that keeps the curl pattern readable.
A satin scrunchie, a handful of bobby pins, and a light mist of water or leave-in conditioner can make the difference between a lopsided puff and a style you actually want to keep on. And no, every side does not have to match. In fact, the slight unevenness is often what makes the bun look better.
Some of these looks are quick enough for a busy morning. Others feel a little dressier and hold up for dinner, photos, or any day you want your curls to look deliberate without losing their personality. Start with the high-crown versions first; they tend to give curly hair the most flattering shape.
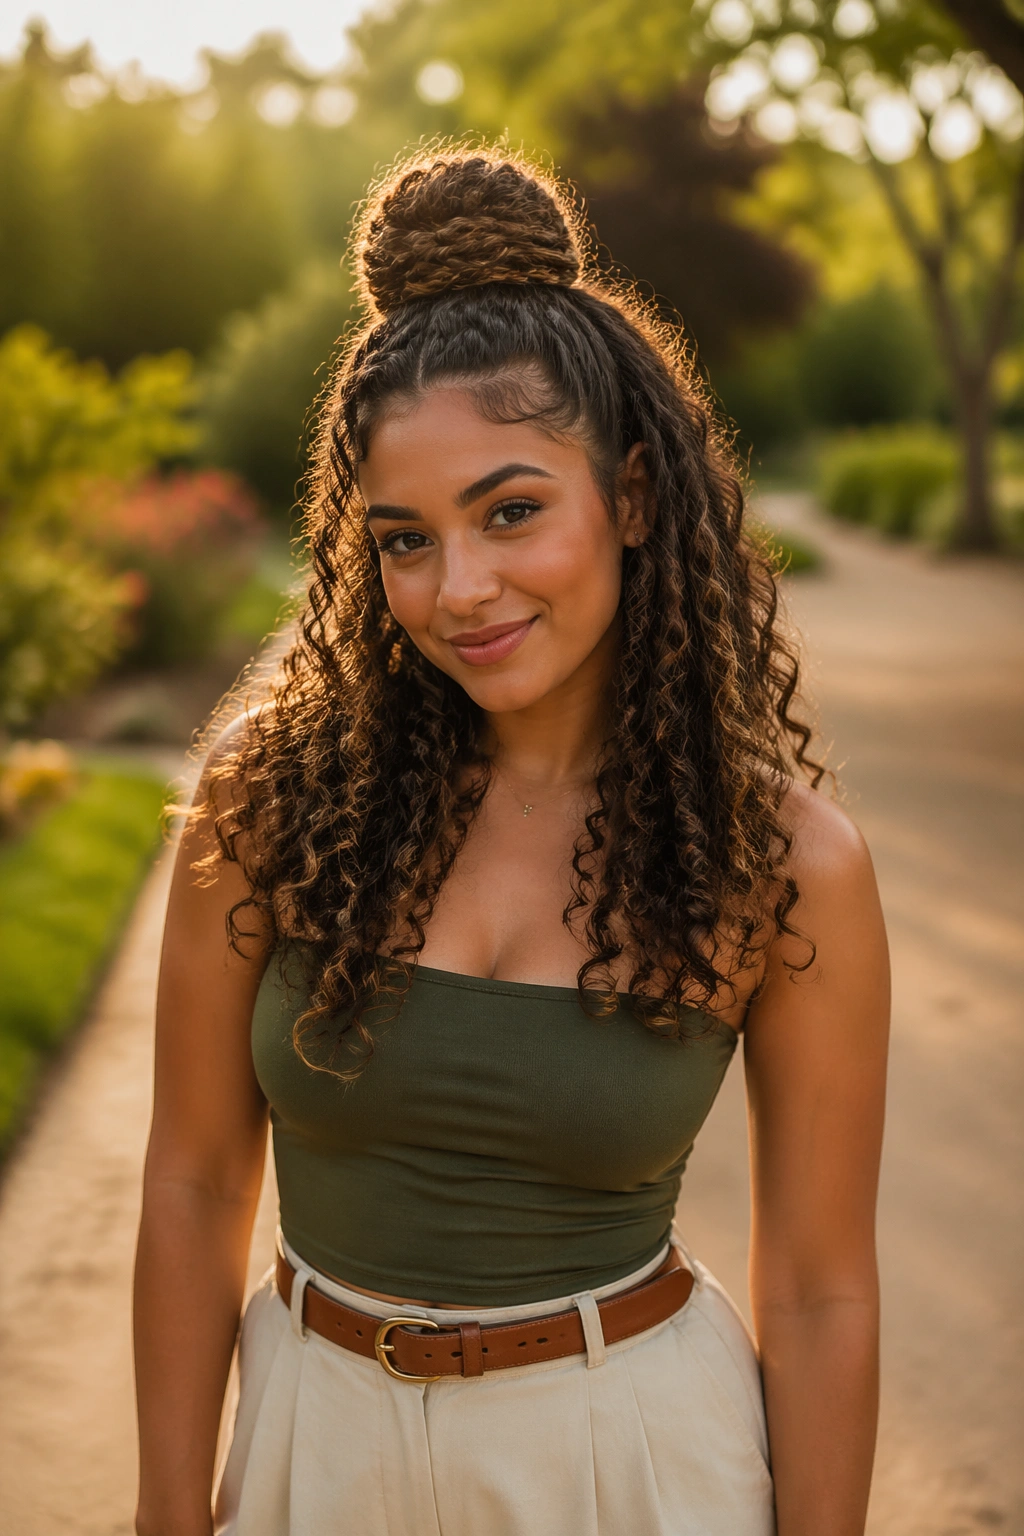
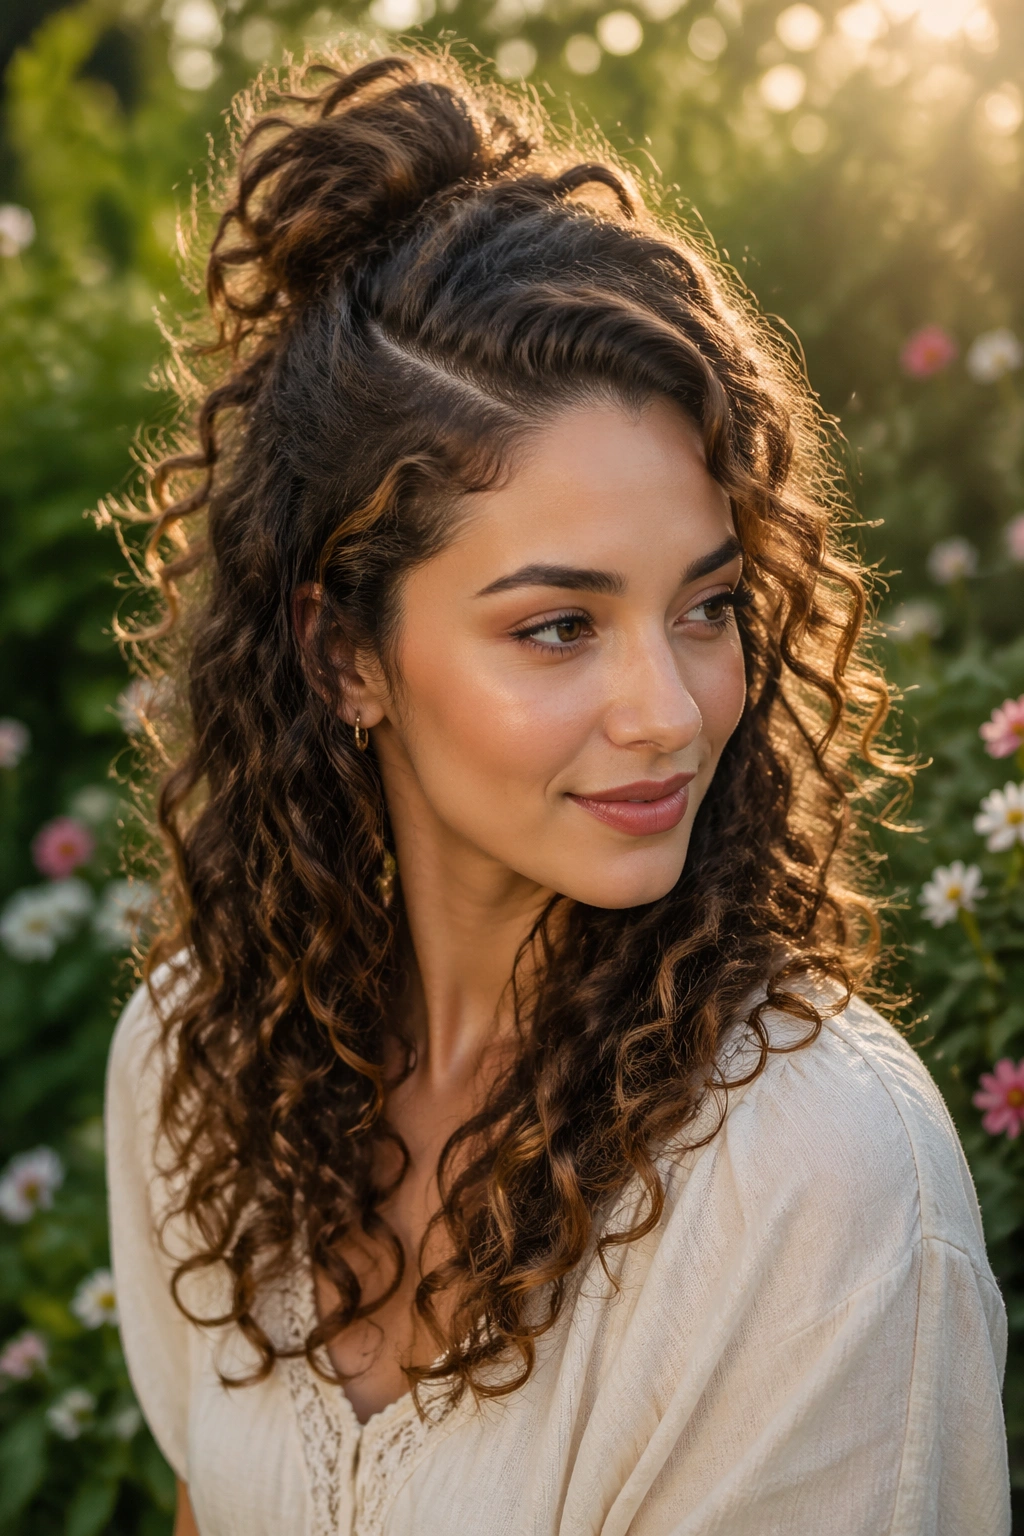
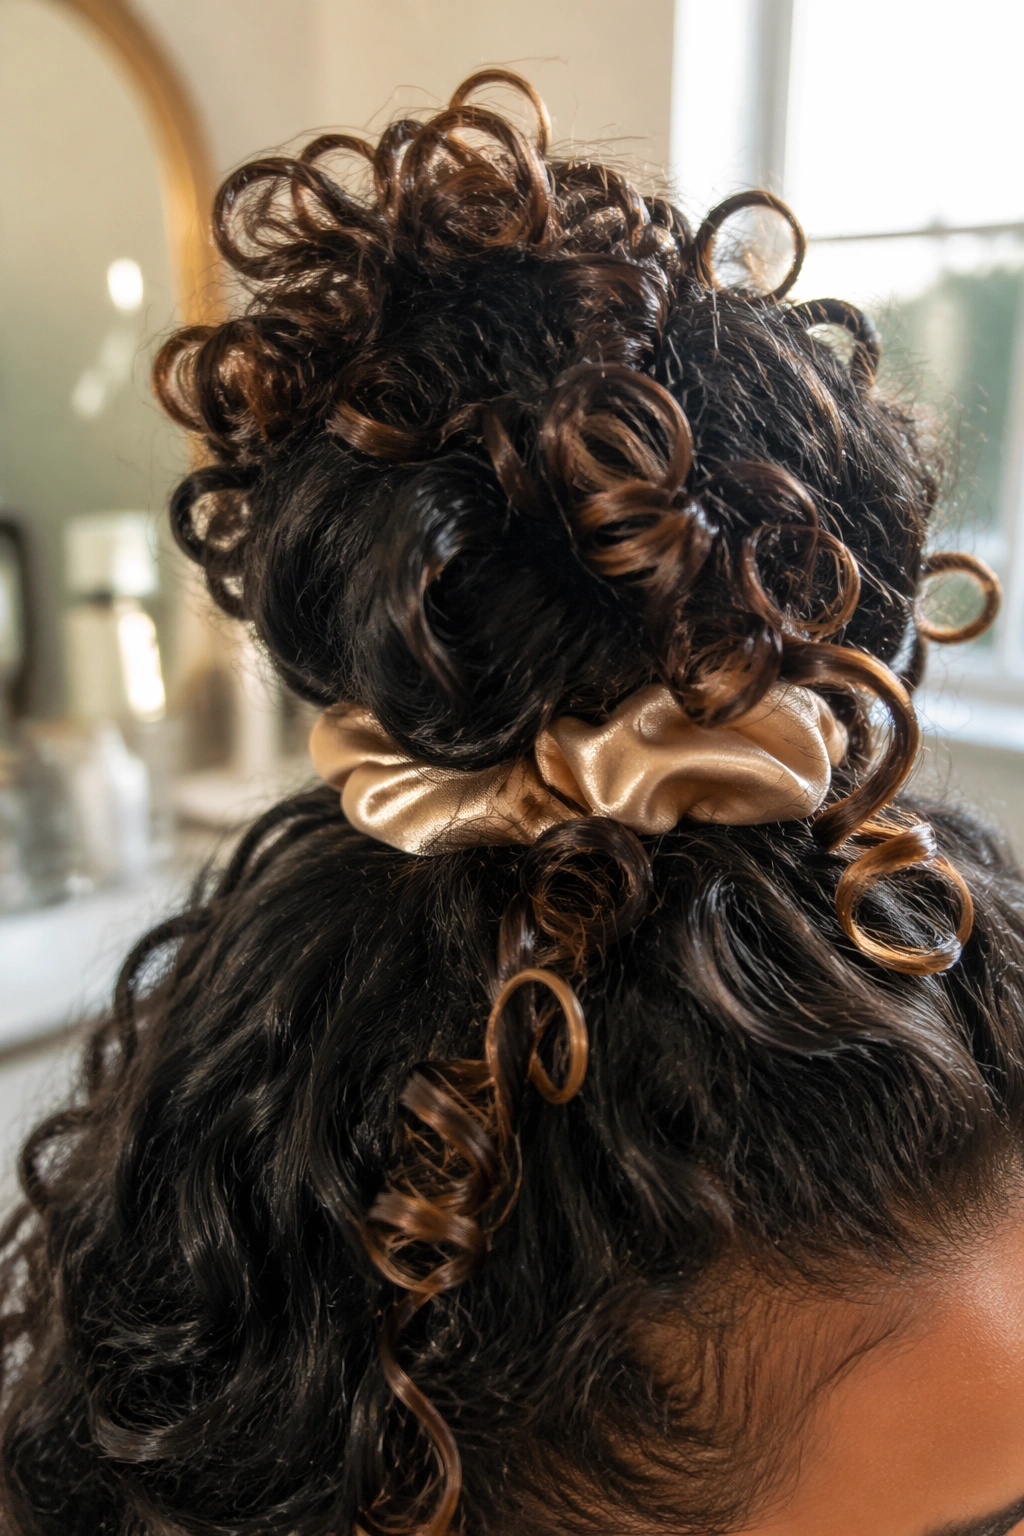
1. High Pineapple Bun With Loose Spiral Ends
High buns and curls are natural friends. The pineapple shape keeps the bun at the top of the head, where curly hair already wants to gather, and it leaves the rest of the length hanging in spirals instead of flattening them down.
Start by tipping your head forward and gathering the top half with your fingers, not a brush. Stop once the crown feels lifted but not tight. A satin scrunchie helps here because it grips without carving a hard line into the curl pattern.
How to place it
- Gather the top section at the highest part of your crown.
- Leave 2 to 4 curls free at the temples.
- Twist once, then wrap only halfway around.
- Pin the tail ends under the bun so they disappear.
Keep the bun a finger-width higher than the top of your head. Too low and the shape turns plain; too high and it starts to look rigid.
One more thing: this style gets better when the curls underneath are a little separate. Shake them out with your fingers after you finish. Tiny frizz is fine. It reads as volume, not mess.
2. Twisted Temple Half Bun

This is the version I reach for when I want the style to look done in five minutes. The two temple twists pull the hair away from the face, while the bun itself stays small and slightly uneven on purpose.
Take a section from each temple, about two fingers wide, and twist them back toward the crown. Do not pull them tight. The goal is soft tension, not a scalp-stretching style that gives you a headache by noon.
The twists meet in the center and disappear into a small bun made from the top half of the hair. I like this one on curls that have layers, because the shorter pieces around the face add shape instead of sticking out awkwardly. If your hair is slippery, tuck one bobby pin through each twist before you wrap the bun. That usually keeps the whole thing from sliding.
Leave the bottom half untouched except for a quick finger-fluff. The contrast between the tidy top and the free curls below is what makes the look work.
3. Low Cloud Bun With a Soft Center Part
Why does a lower bun feel softer on curls? Because it lets the weight of the hair sit near the back of the head instead of floating at the crown, which can make thick curls feel heavy fast. The result is calmer, less top-heavy, and a little more romantic without trying too hard.
Start with a loose center part and gather the top section just above the ears. Twist the hair into a low, puffy bun that sits closer to the nape than the crown. You want shape, not a tight coil.
How to get the swoop right
- Use fingers to part the hair so the part line stays soft.
- Pull the top section back only until the sides lie flat.
- Let 1 or 2 curls fall in front of each ear.
- Pin the bun from underneath so the top stays rounded.
This style is especially kind to dense curls because it spreads the bulk out. It also gives long faces a little more width near the cheeks. If the bun looks flat, tug gently at the sides after pinning. A small amount of puff is the whole point.
4. Side-Swept Half Bun That Hugs the Hairline

Picture a deep side part, one side tucked, the other side left to drape. That simple shift changes the whole mood of the style, and on curly hair it keeps the volume from feeling too centered or too perfect.
This version works best when one side of your hairline has slightly more curl than the other. Let that side stay loose and guide the smaller side into the bun. The asymmetry makes the style look intentional instead of accidental.
- Place the part above the arch of the eyebrow.
- Sweep the smaller side back first.
- Keep the bun slightly off-center.
- Leave one curl over the ear to soften the line.
A side-swept bun is good when your curls are doing that thing where one side looks bigger than the other. Instead of fighting it, you lean into it. A little imbalance becomes part of the design.
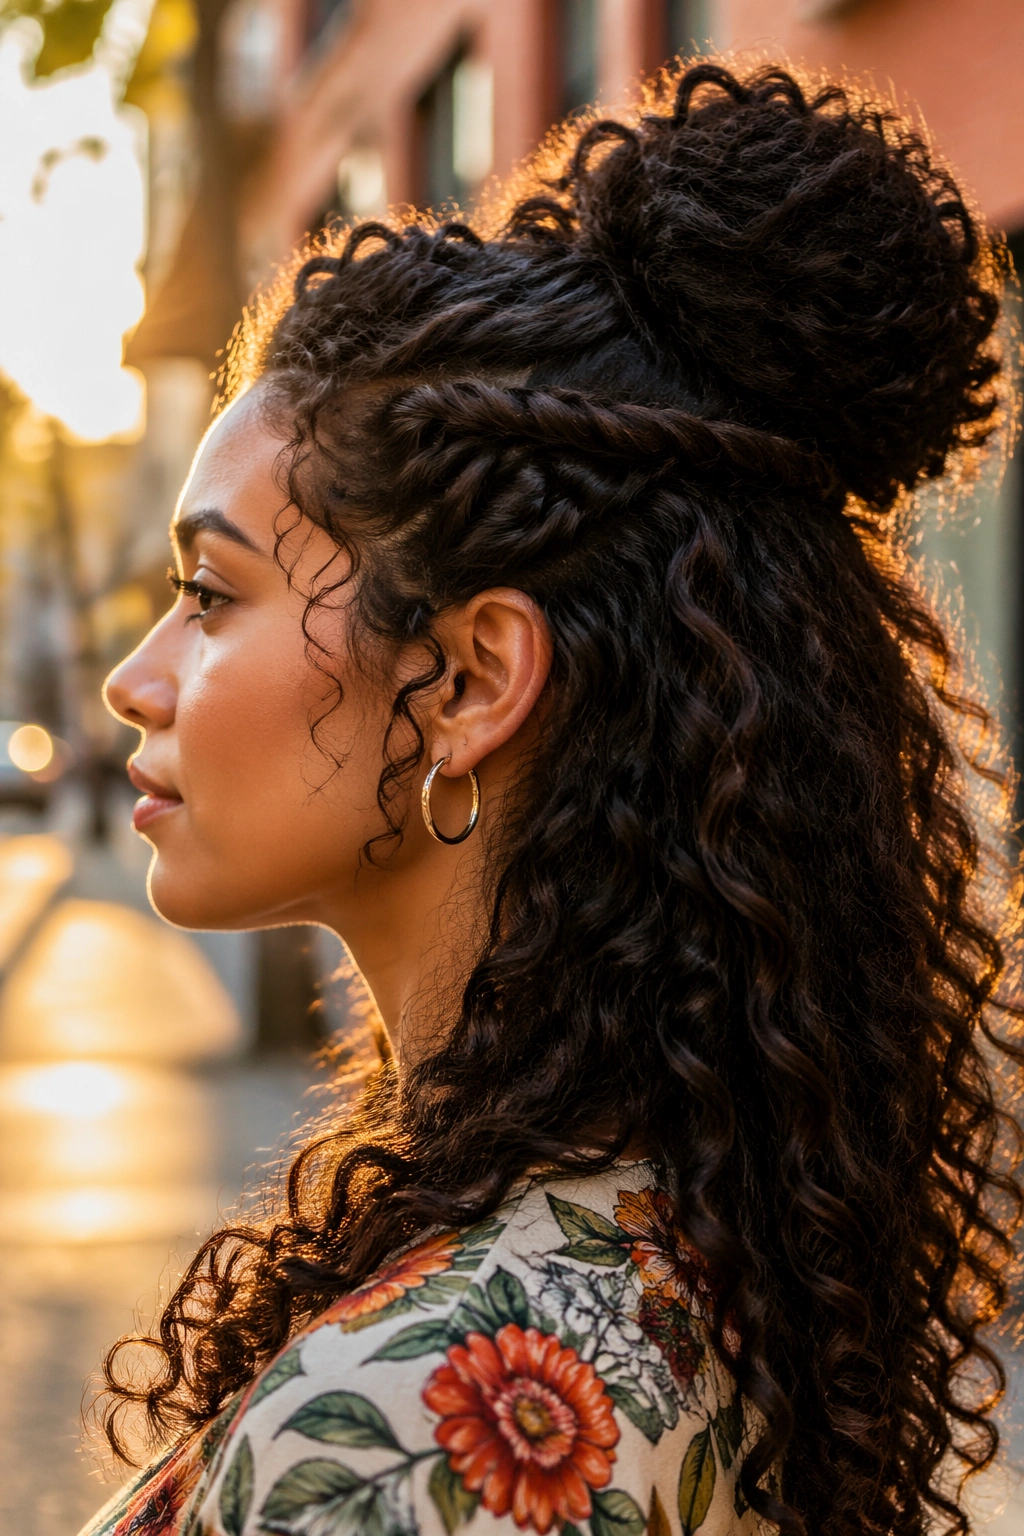
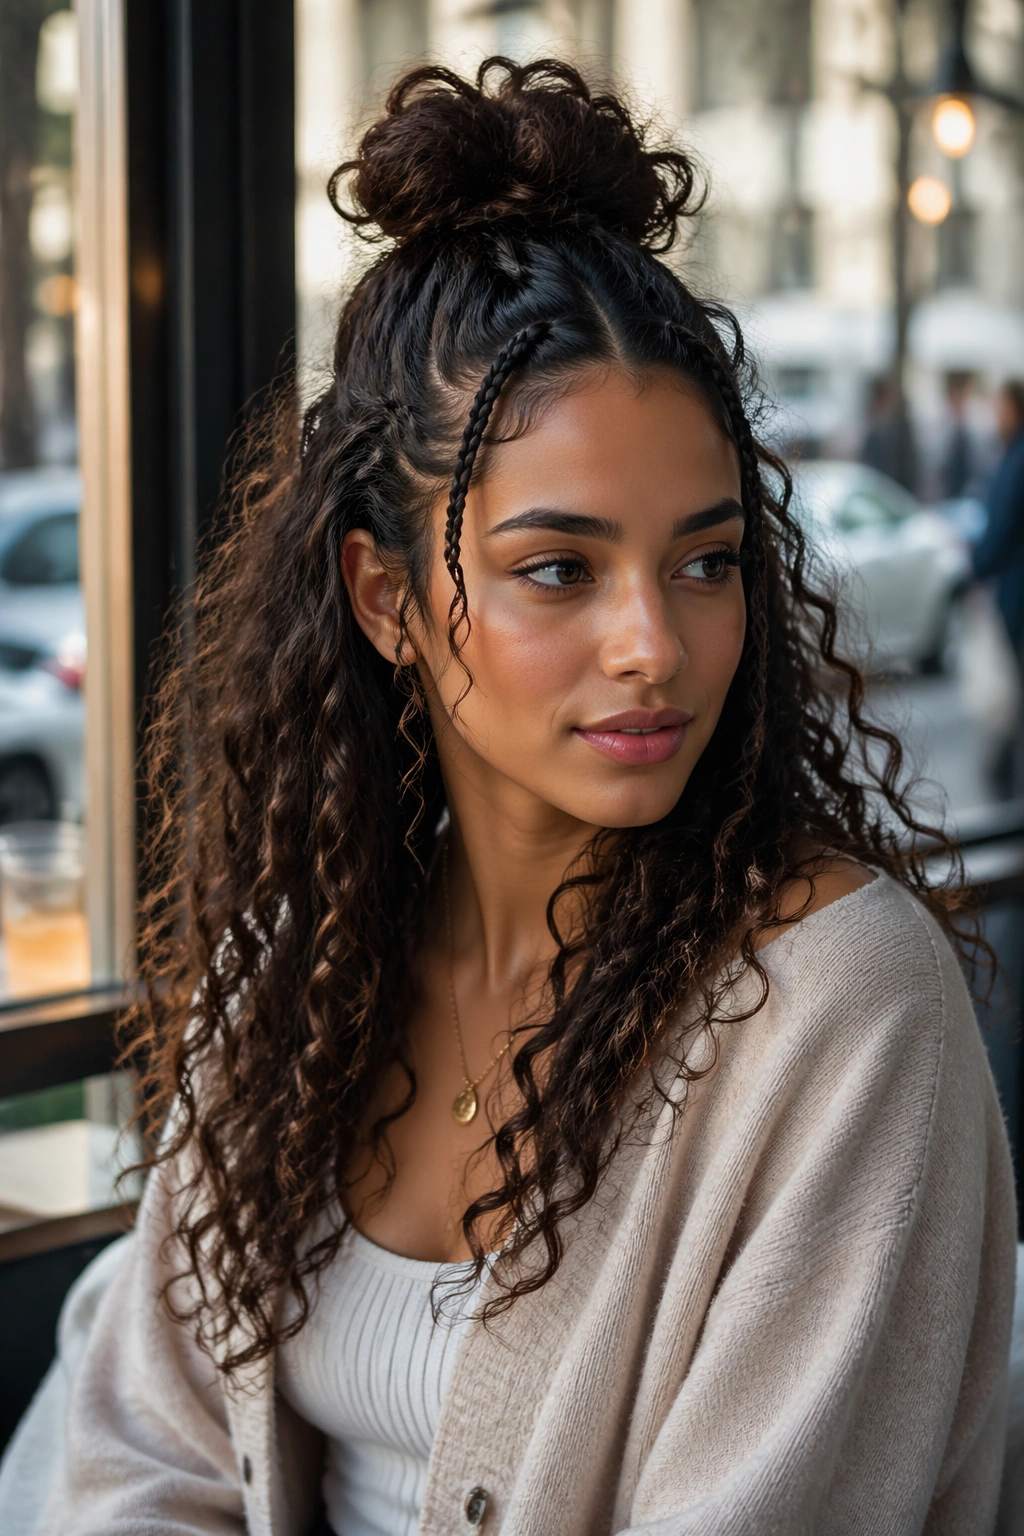
5. Braided Front Half Bun With Floating Ends
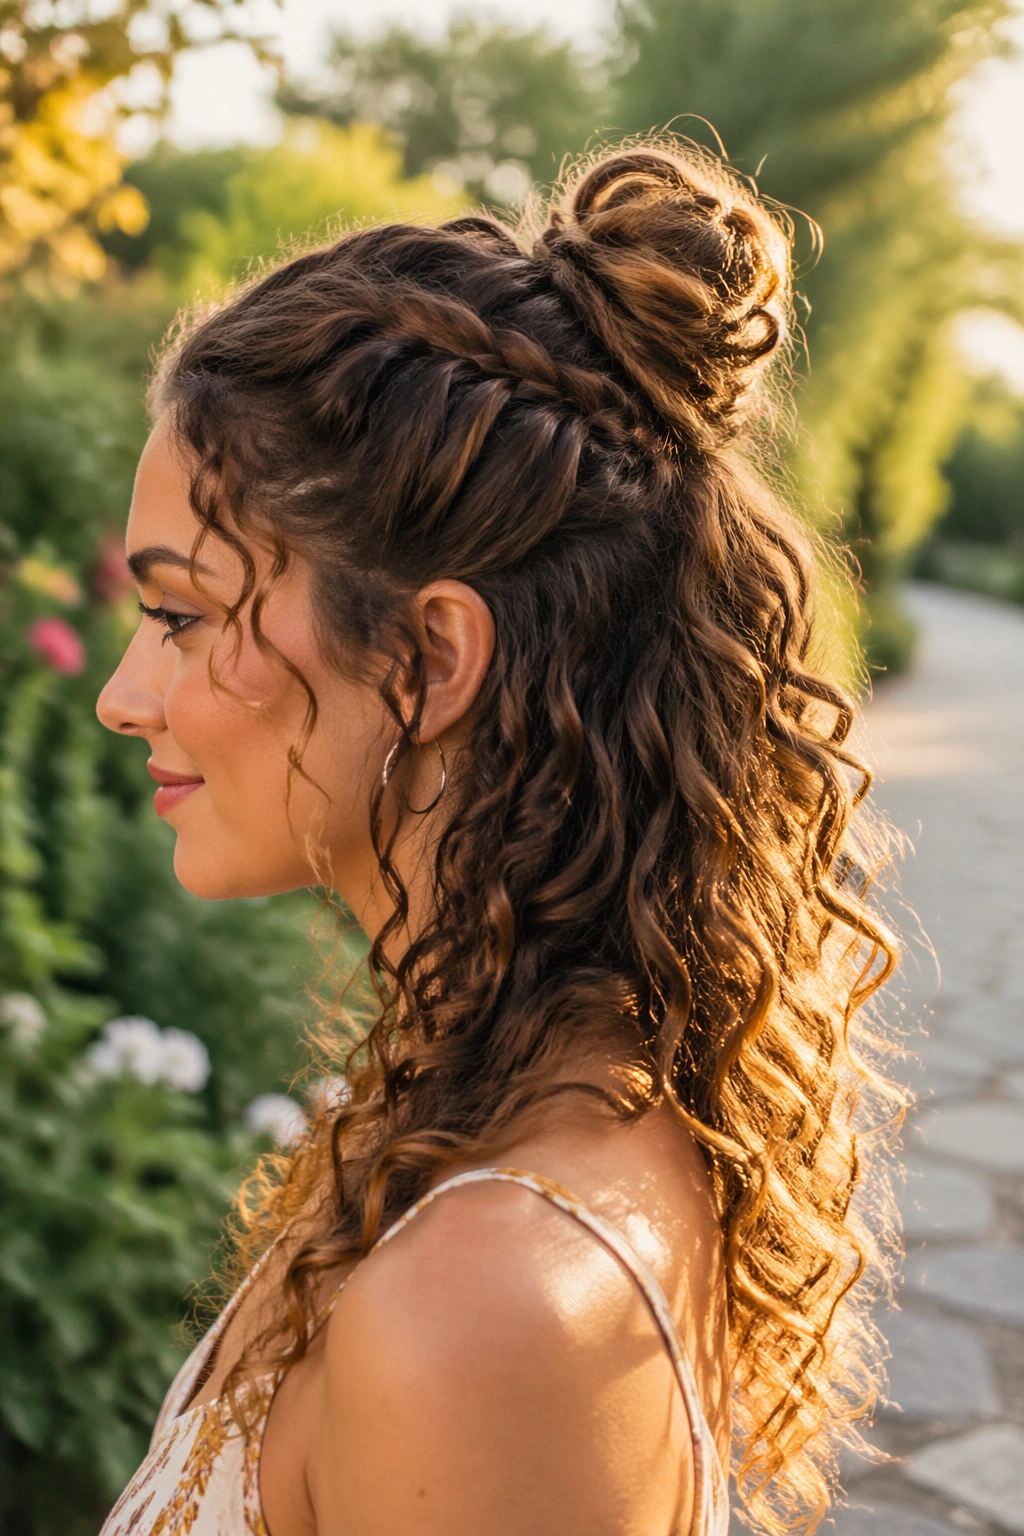
Braids change the whole mood of a half-up bun. They give the front section some structure, which is useful when your curls are frizzing at the hairline or your layers keep falling out of the bun before you are ready.
Take a section from each side of the front hairline and braid it loosely toward the back. You do not need tiny, careful braids here. Chunky, soft braids look better because they blend into curls instead of sitting on top of them like an afterthought.
Once both braids reach the crown, gather them with the rest of the upper section and twist into a bun. Keep the braid ends tucked under the wrap, but leave the lower curls free. That floating bottom half is what keeps the style from feeling too done.
The best part is how it handles second-day curls. The braid gives the front of the style some grip, which means less slipping and less puffing around the temples. If your ends are dry, smooth a pea-sized amount of cream on them before braiding. The braid will look cleaner, and the bun will feel easier to pin.
6. Rope-Twist Crown Bun That Stays Put
Unlike a simple twist, a rope twist gives textured curls a little more control. The two strands hold each other in place, so the style tends to stay put better on hair that is thick, slippery, or both.
Split the top half into two sections, twist each one clockwise, then wrap them around each other counterclockwise. That opposite direction matters. It gives the twist its shape and keeps it from unraveling while you pin it into a bun.
Best for
- Thick curls that feel bulky at the crown.
- Hair that slides out of basic buns.
- Styles that need to last through a long day.
- Anyone who wants the bun to look defined, not fluffy.
This one gives you a tighter shape without making the whole style look sleek or flat. Leave the lower curls loose and separate the ends with your hands. The finished look should feel textured and secure at the same time. If the crown feels too tight, loosen the twist with your fingers before pinning. That tiny adjustment makes a big difference.
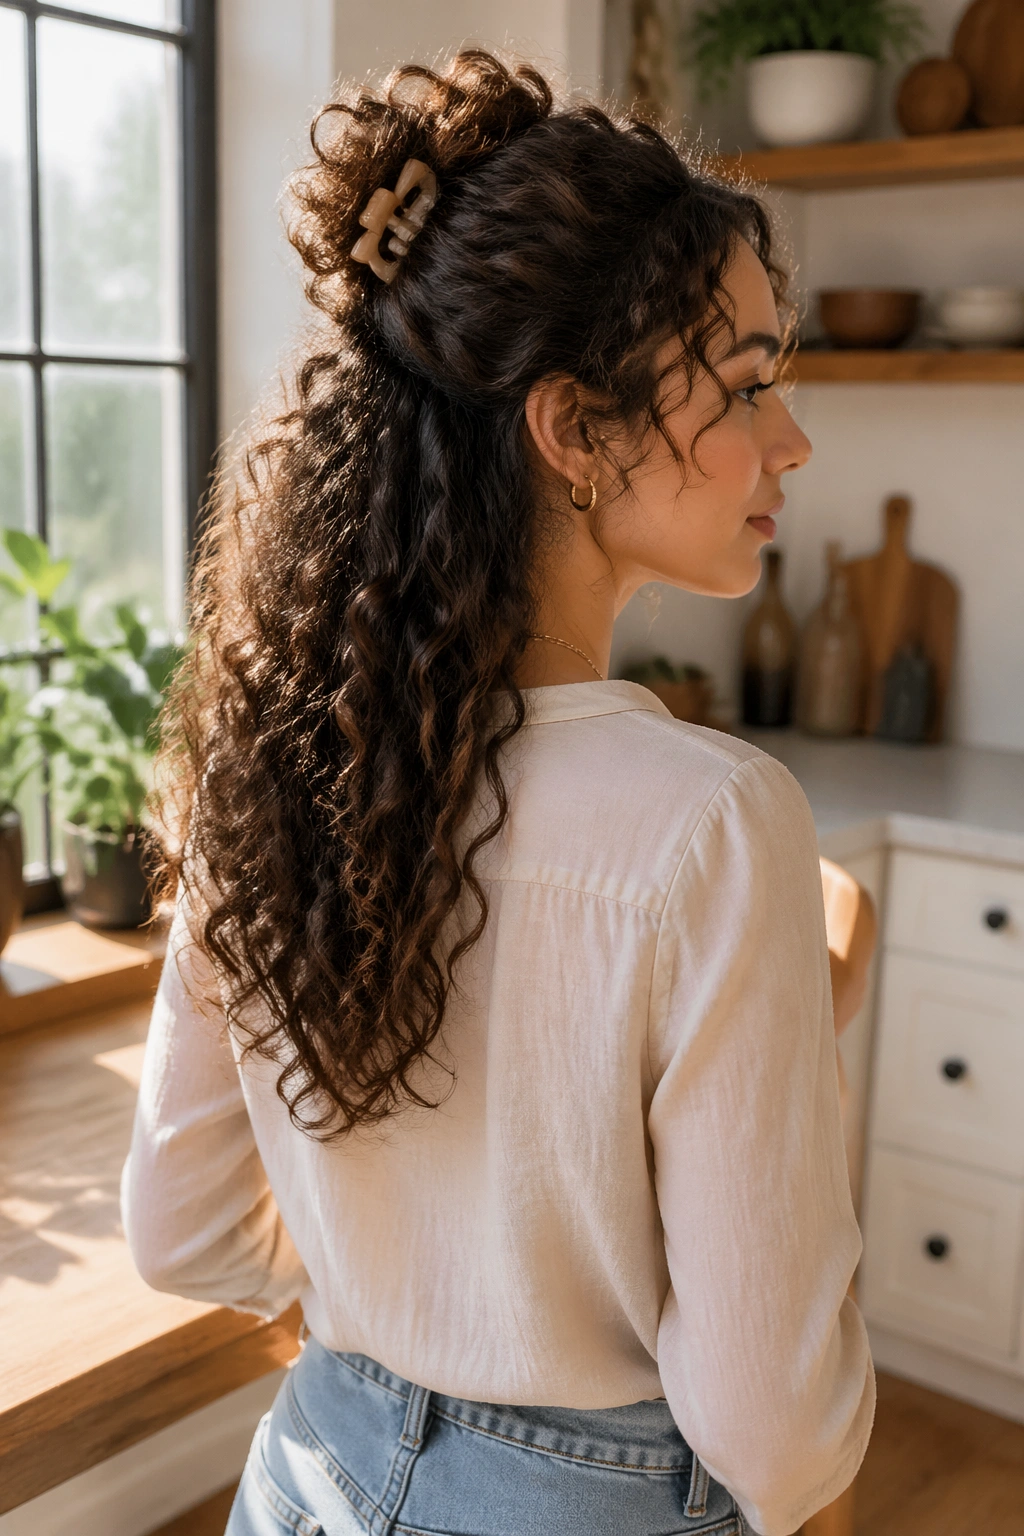
7. Curly Curtain Bangs With a Tiny Top Knot
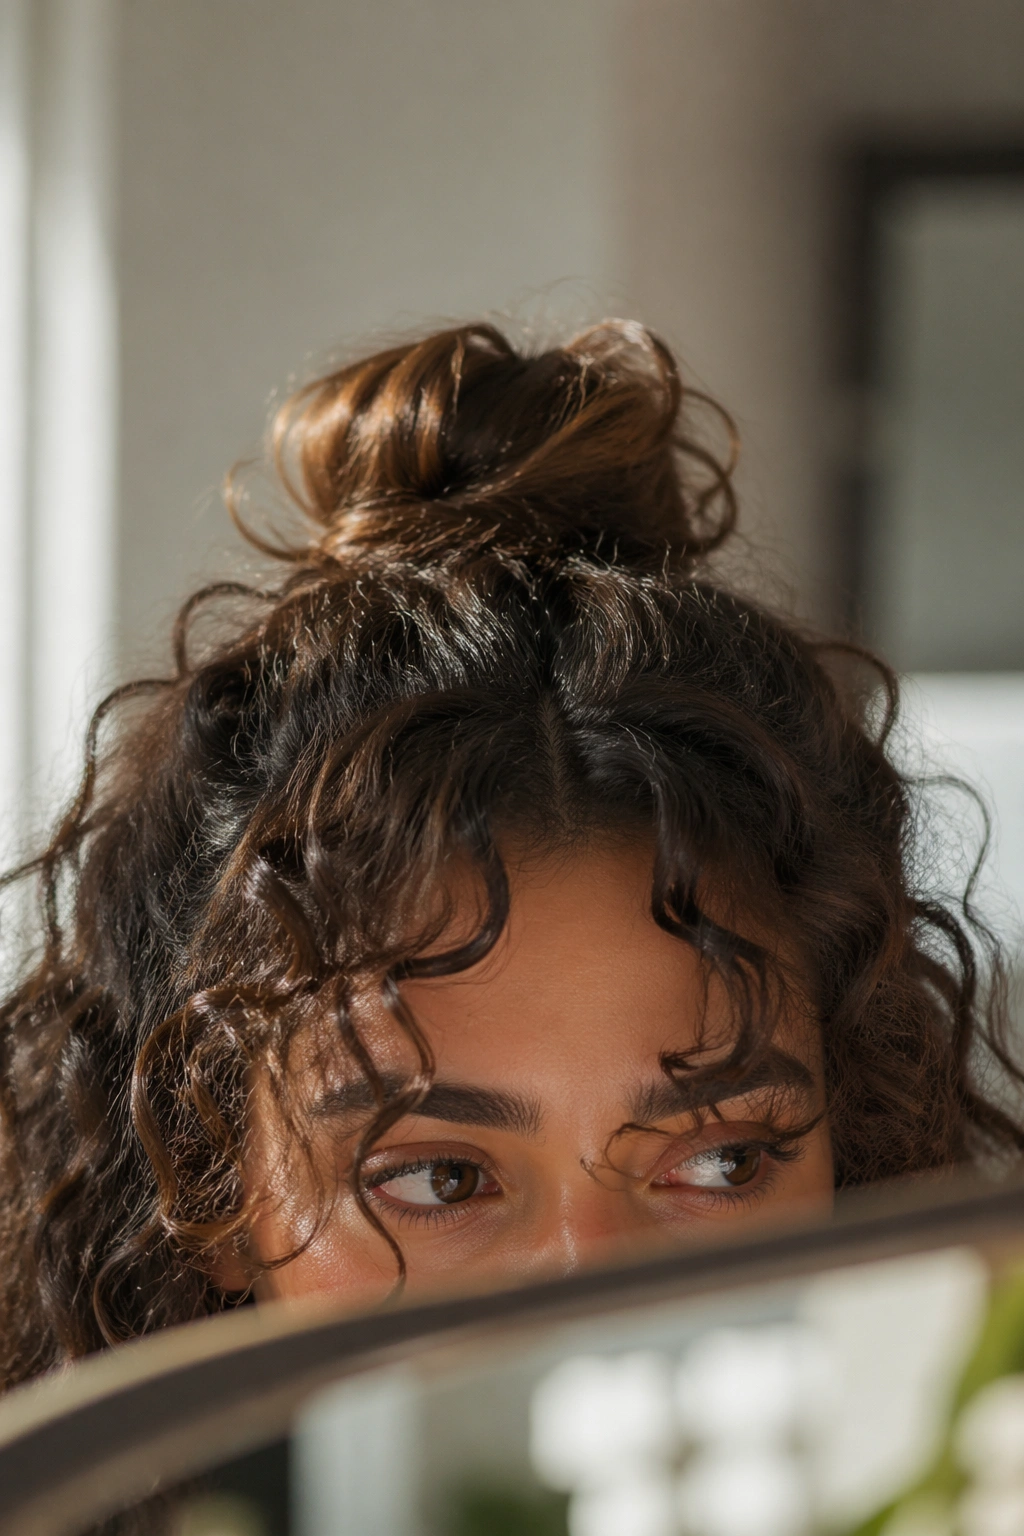
Curly bangs make this style better than people expect. A tiny top knot can look nearly formal when the fringe is left soft around the eyes, and that contrast keeps the hairstyle from feeling too heavy.
Pull only the top center section into a small bun and leave the curtain bangs or fringe to fall on either side. If your bangs are short, twist them lightly away from the face and let them spring back on their own. Forced symmetry looks awkward here. Soft movement is what you want.
What to leave loose
- The shortest curls around the temples.
- Any fringe that naturally curves toward the cheekbones.
- One or two front pieces if your layers are chin length.
- The full bottom half, untouched and fluffy.
This look is especially good when you want to show off your cut. A curly fringe can get lost in a full updo; a tiny bun keeps it visible. And if your bangs separate into two different shapes, leave them alone. That mismatch is part of the charm.
8. Clipped-Back Slouch Bun for Fast Styling
Some mornings are about speed. You grab the top half, twist it once, clip it, and call it done — and honestly, that can still look good if the clip and the bun are placed with a little care.
Use a strong claw clip or two flat clips, depending on how much hair you have. Gather the upper section loosely, twist it once, and secure it so the bun sits like a soft fold instead of a compact knot. Curly hair likes that little bit of slack.
If you want the style to feel less casual, leave one side of the front section higher than the other. It breaks up the shape and makes the clip look deliberate instead of like a backup plan. Matte clips tend to blend into curly texture better than shiny ones, especially if your hair has a mix of loose spirals and tighter coils.
One practical note: this is the least fussy option on the list, but it needs decent clip grip. Slippery curls will slide if the clip is tiny or cheap. Pick one that can actually close over the hair bulk, or it will open halfway through the day.
9. Scarf-Wrapped Half Bun for Extra Shape
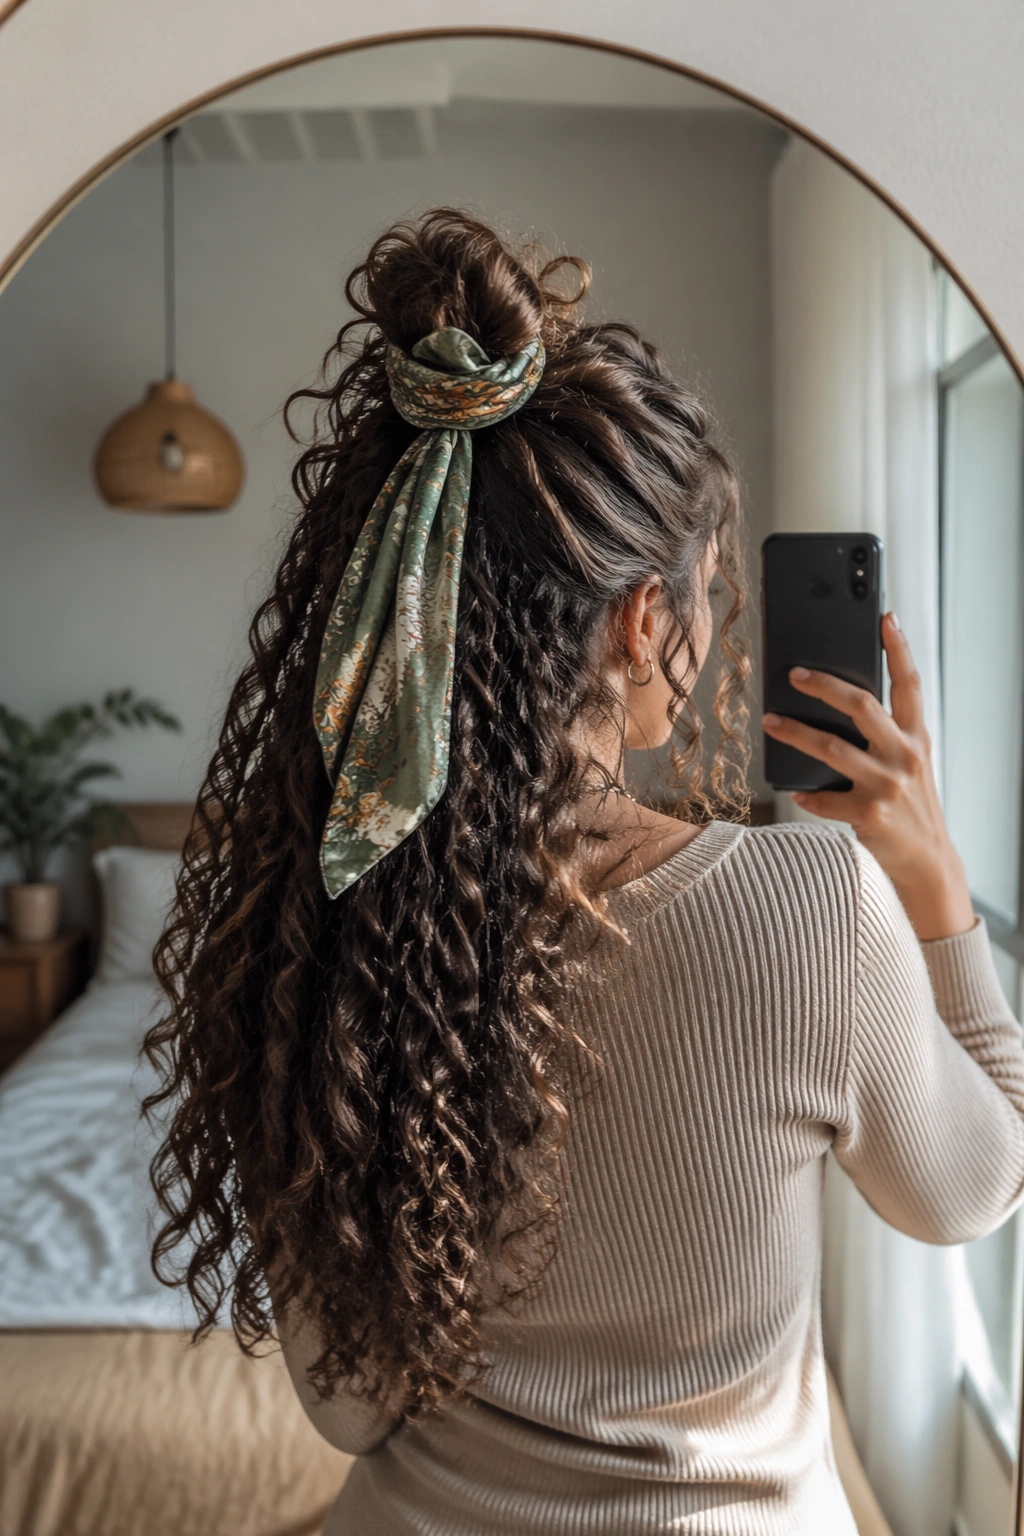
Can a scarf make a messy bun look cleaner? Yes, and on curly hair it can solve a few problems at once. It hides the elastic, adds color, and gives the bun a shape that feels finished without losing its softness.
Tie a slim silk scarf or satin ribbon around the base of the bun after you pin it. Let the ends hang loose, or knot them in a small bow if you want the style to feel a little more playful. The fabric should sit snug, not tight. If you pull too hard, the bun starts to flatten.
How to keep it from sliding
- Start with a small, secure bun.
- Place the scarf over the elastic, not the loose curls.
- Tie it once, then tuck the knot slightly under the bun.
- Keep the tails short if your hair is very fine.
This look is useful when your curls are a bit frizzy and you do not feel like smoothing every strand down. The scarf gives the eye something else to look at. That is the trick. It lets the texture stay visible while the overall shape looks intentional.
10. Knotted Half Bun With a Puffy Finish
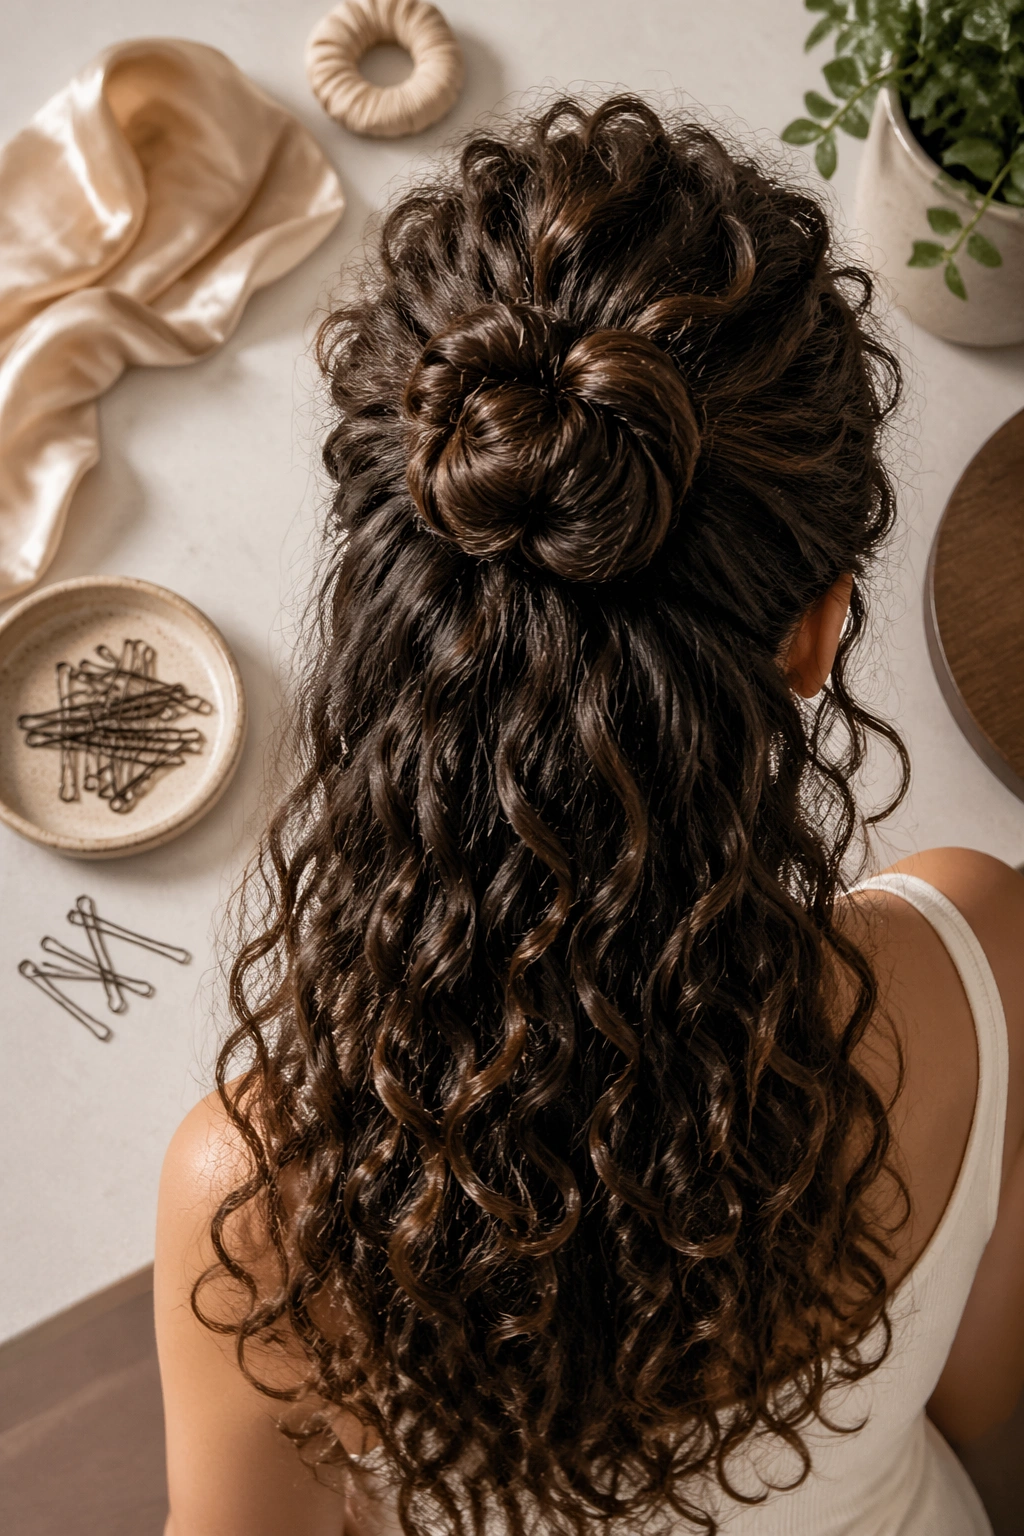
A knot sounds fussy, but it really is not. If your curls are long enough to loop through themselves, a simple knot at the crown creates a soft, puffy shape that reads as messy in the best possible way.
Split the upper section into two and tie it once, almost like the first step of tying your shoes. Stop there. Do not yank it tight. Then pin the loose ends underneath so the knot holds its round shape. The result is more relaxed than a wrapped bun, which makes it useful for thicker curls that need a little room.
The lower curls should stay loose and full. That contrast keeps the knot from looking too neat. If you have layered hair, let the shorter pieces at the back escape a little. They add movement and stop the style from looking like one solid block.
A knot works especially well when your curl pattern is uneven. It hides a lot. Badly behaved curls, humidity frizz, pieces that refuse to join the party — all of it becomes part of the texture instead of a problem you need to fix.
11. Double-Twist Puffed Bun on Thick Curls
Two twists are better than one when your curls are thick. The extra sectioning helps distribute the weight, so the bun feels lighter on your head and the crown does not collapse after an hour.
Take one section from each side of the head, twist them back loosely, and bring them together at the center. Then wrap them into a puffier bun instead of a tight coil. Keep the twist edges a little messy so the style does not look too engineered.
Thick curls can swallow a small bun fast. That is why this shape needs room. Let the top section sit above the bun in a soft curve, and leave the lower half with enough volume to balance it out. If you flatten the crown too much, the whole style gets heavy.
This one is good for people who want shape without feeling like they have piled all their hair into a knot. It gives the illusion of control while still showing off a big, healthy curl pattern. That is not a bad trade.
12. Deep Side Part Half Bun for Extra Lift
A deep side part changes the whole face shape. It pulls the eye upward on one side, which makes curls look fuller at the crown and less square around the cheeks.
Instead of dividing the hair evenly, place the part almost over one eyebrow and gather the larger side into the half bun. The smaller side stays loose, which creates a little sweep across the forehead. That sweep is the point. It softens the look without hiding the curls.
Unlike center-part buns, this one works nicely when your hair naturally likes to fall to one side anyway. Fighting that tendency usually ends in frizz. Following it gets you a better result with less effort.
Try this if your curls are fine but dense. The deep part gives the illusion of more height, and the off-center bun keeps the top from feeling flat. A single bobby pin under the heavier side can help the shape hold. You do not need a forest of pins. One solid anchor usually does the job.
13. Bubble Crown Bun With Elastic Sections
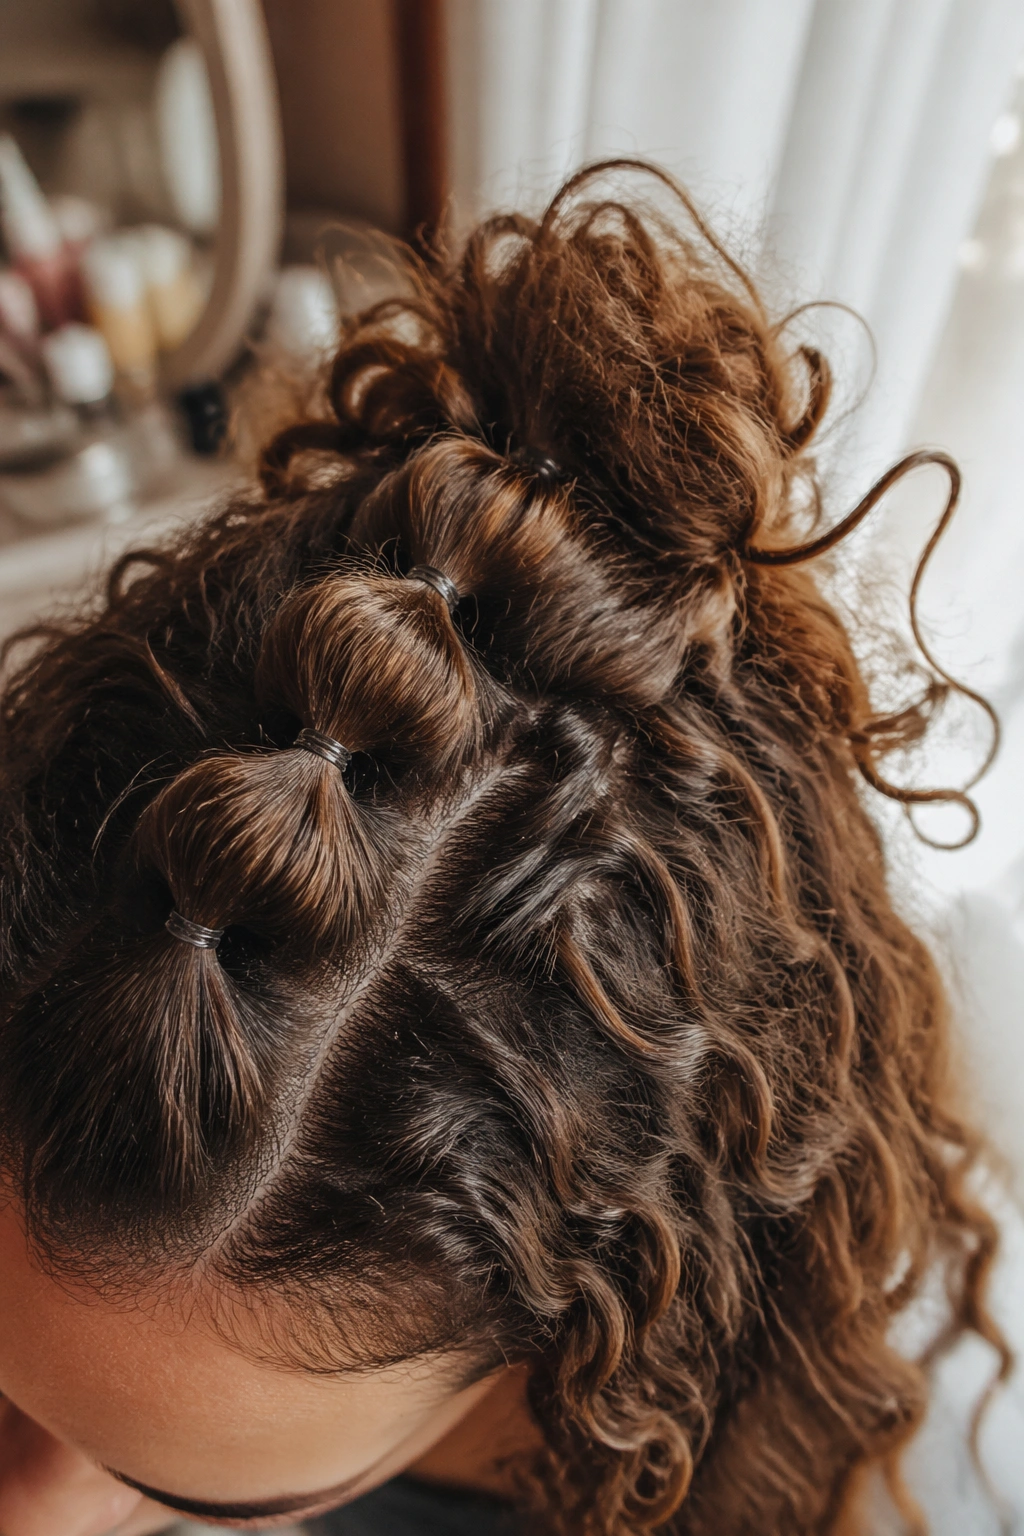
A bubble crown bun sounds playful because it is. The style uses a few tiny elastics to create visible sections before the hair reaches the bun, which gives the top half a little extra texture and keeps the shape from collapsing.
Start by dividing the upper section into two or three short segments and securing each one with a small clear elastic. Gently pull each segment outward so it forms a soft bubble, then gather the ends into a messy bun. The bubbles should be loose, not puffed to the point of snapping the elastic.
How to build the bubbles
- Use small elastics that match your hair color.
- Space the ties about 1 to 1½ inches apart.
- Tug each bubble evenly on both sides.
- Stop if the section starts to feel tight at the scalp.
This style is handy when your curls need a little visual structure. The bubbles create shape even if the bun itself is deliberately undone. It also gives shorter layers something to do instead of sticking out in random directions.
14. Micro-Braided Accent Bun Along the Front
Micro-braids are tiny, but they change the outline of the style. A few slim braids near the front make the half-up bun look more detailed without turning it into a full braided updo.
Braid one or two narrow sections from the hairline and let them travel back toward the crown. Keep the braids loose enough that they blend into the curls. If they are too tight, they sit on top of the hair and look separate. You want a soft edge, not a hard line.
Once the braids meet the upper section, fold them into the bun and pin them under the wrap. The rest of the curls can stay loose and airy. This is one of the better looks for people whose hairline frizzes first, because the braids give that area a bit of structure.
If you want the style to feel more polished, braid only one side and leave the other side curly. That uneven finish can be better than symmetry. It looks a little more relaxed and a little less predictable, which is usually the point of a messy half-up style anyway.
15. Mini Half Bun for Shorter Curls

Shorter curls can do this too. Shoulder-length hair, grown-out bobs, and layered cuts often look best in a mini half bun because the top section stays manageable and the bottom section still shows off enough curl.
Take only the upper third of the hair instead of half. That smaller section keeps the bun from swallowing the whole cut. A tiny bun on shorter curls can look almost like an accessory, especially when the ends are left loose and bouncy.
The mistake people make here is overbuilding the bun. A giant top knot on short curls can throw the proportions off fast. Keep it compact, then let the bottom curls do the rest of the work. If your layers keep slipping out, pin them from underneath rather than trying to force them into the bun.
This look is one of the easiest ways to make short curls feel styled without losing their shape. It does not need much product. A little curl cream at the ends and a light hold at the crown is usually enough.
16. Sleek Roots and a Big Curly Bun
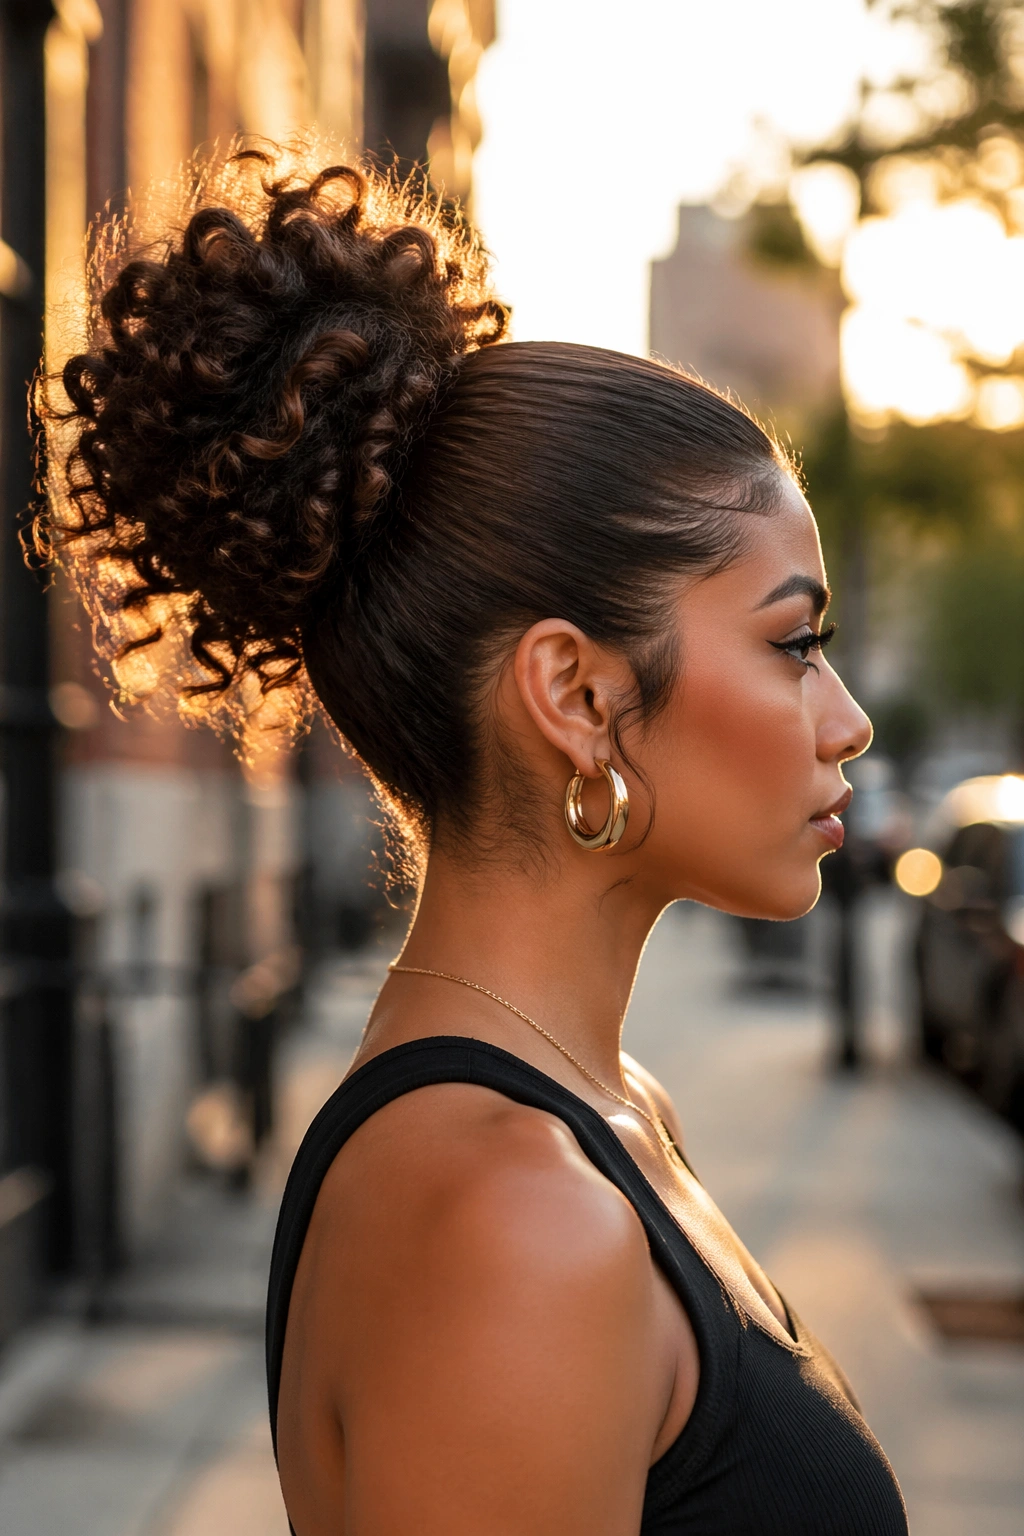
You do not have to choose between polished roots and big curls. This style keeps the front controlled and the bun full, which is useful when you want the hair off your face but still want texture where it counts.
Use a small amount of gel or edge control only on the top inch or so near the hairline. Smooth the roots with a brush, then stop. Do not drag the product through the whole section, or the curls will lose their spring and the bun will look flat.
Where to smooth and where to stop
- Smooth the crown and front edges only.
- Leave the mid-lengths fluffy.
- Build the bun from the natural curl texture.
- Let the lower half stay untouched and bouncy.
This split approach gives a neat front view and a fuller back view. It is a good option for events when you want the style to hold shape in photos but still look like curly hair, not a slicked-back ponytail wearing a bun.
17. Undone Event-Ready Half Bun
Event hair does not need to be stiff. A messy half-up bun can still feel dressy if the shape is clean, the curls are defined, and the accessories stay simple.
Start by smoothing the top section with your fingers and gathering it into a soft bun that sits right at the crown. Leave the lower curls separated and glossy. If the hair is dry, a tiny drop of lightweight oil on the ends can help the lower half look finished without making it heavy.
A few pearl pins, gold clips, or plain bobby pins can dress it up fast. Keep the accessories sparse. Three pins placed well usually look better than a bunch of shiny extras fighting for attention. The same goes for the bun itself. You want enough looseness to keep the curls alive, but not so much that the style collapses.
This is the look I would pick for dinner, a party, or any setting where you want your curls to feel a touch more deliberate. It still has movement. It just behaves a little better.
18. Soft Defined Crown Bun That Works Anywhere
If you only try one version, make it this one. The soft defined crown bun sits in the sweet spot between neat and messy, which is why it plays nicely with loose waves, ringlets, and tighter curls that need a little room.
Build the bun from the top half, then pause before you tuck every piece in. Leave one or two curl tips out so the style keeps some shape at the edges. The crown should look lifted, not flattened, and the bottom half should stay full enough to balance it out. That balance is what keeps the style from leaning childish or overdone.
I like this look because it does not fight the haircut you already have. Layers, face-framing pieces, and mixed curl patterns all have a place here. If your hair is finer, keep the bun smaller. If it is dense, widen the bun a little and let the sides stay soft.
The smartest move is to match the bun to the curl pattern you already own. Tight curls usually like a looser wrap. Stretched curls can handle a bit more height. Layered cuts often look better when a few ends are left free, even if that means the bun is slightly imperfect. That tiny bit of mess is doing a lot of work.