A side stitch braid ponytail can make a rushed morning look deliberate in a few minutes. One braid laid close to the scalp, a smooth crown, and a ponytail that sits where it should — that’s enough to make the whole style read as neat.
The cleanest versions depend on restraint. A crisp part matters. So does keeping the braid snug without yanking at the hairline, because tight does not always mean tidy. A braid that lies flat, stays even, and doesn’t puff up at the sides will always look sharper than one that’s overworked.
Side placement changes the mood fast. It pulls the eye across the face, gives the style direction, and makes a plain ponytail feel more considered. And if you like your hair to look controlled rather than fussy, this is one of those styles that keeps paying off from every angle.
Some versions stay low and sleek. Others go high, add curls, or bring in a wrapped base. The details matter more than the label, and that is exactly why these 21 side stitch braid ponytails each earn their own place.
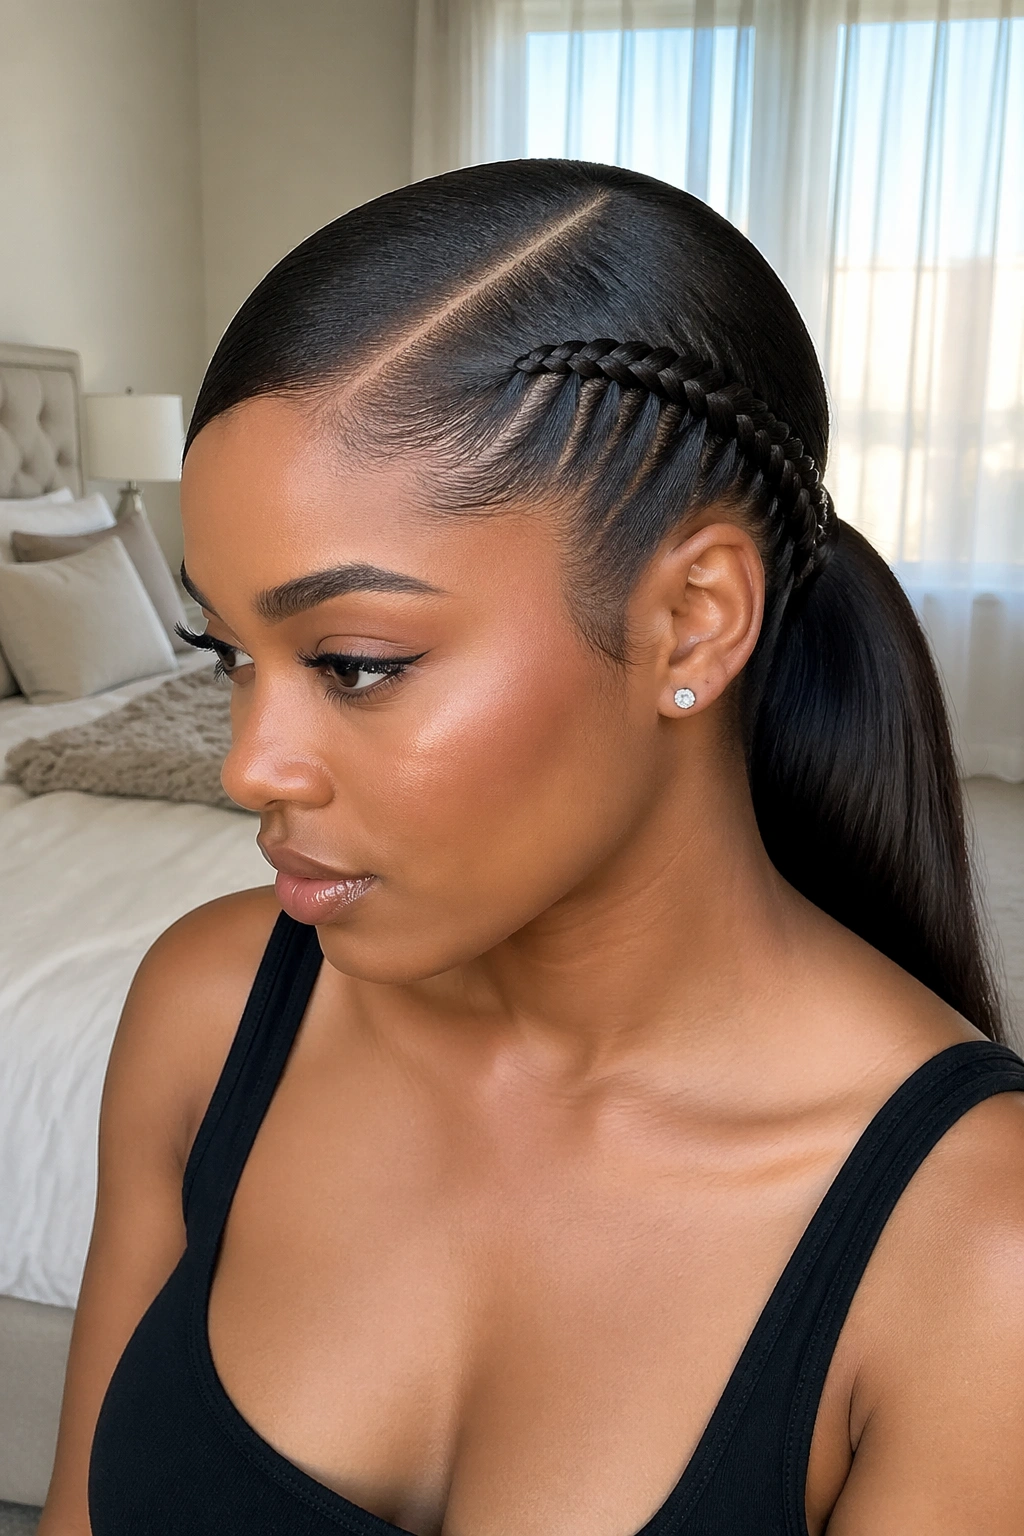
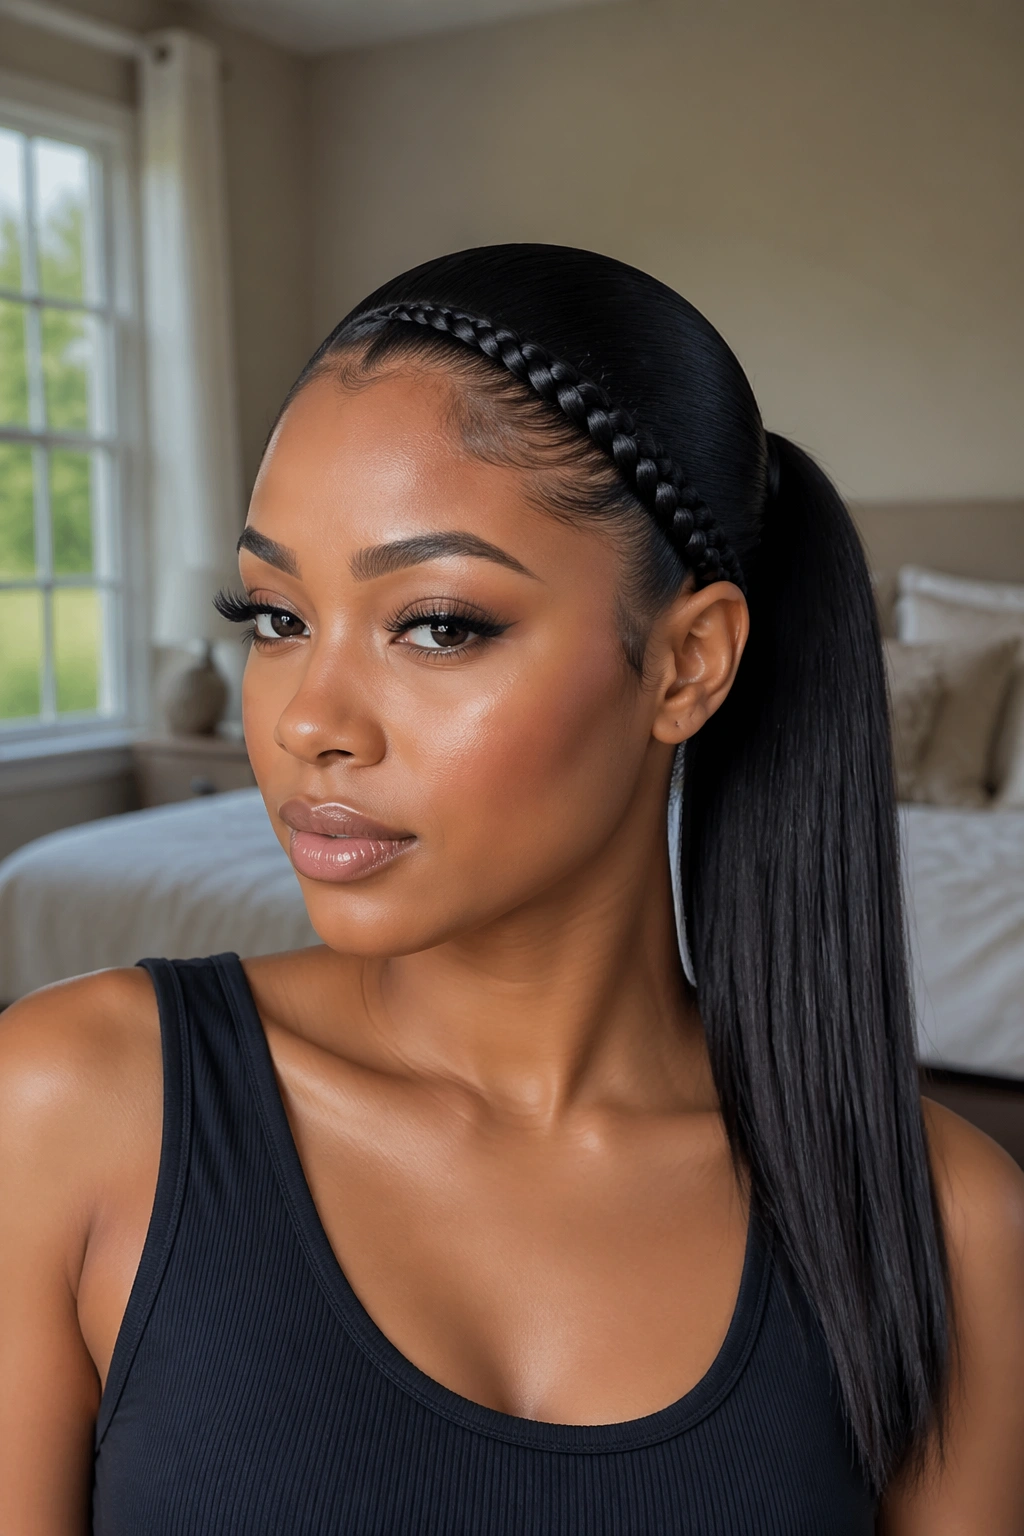
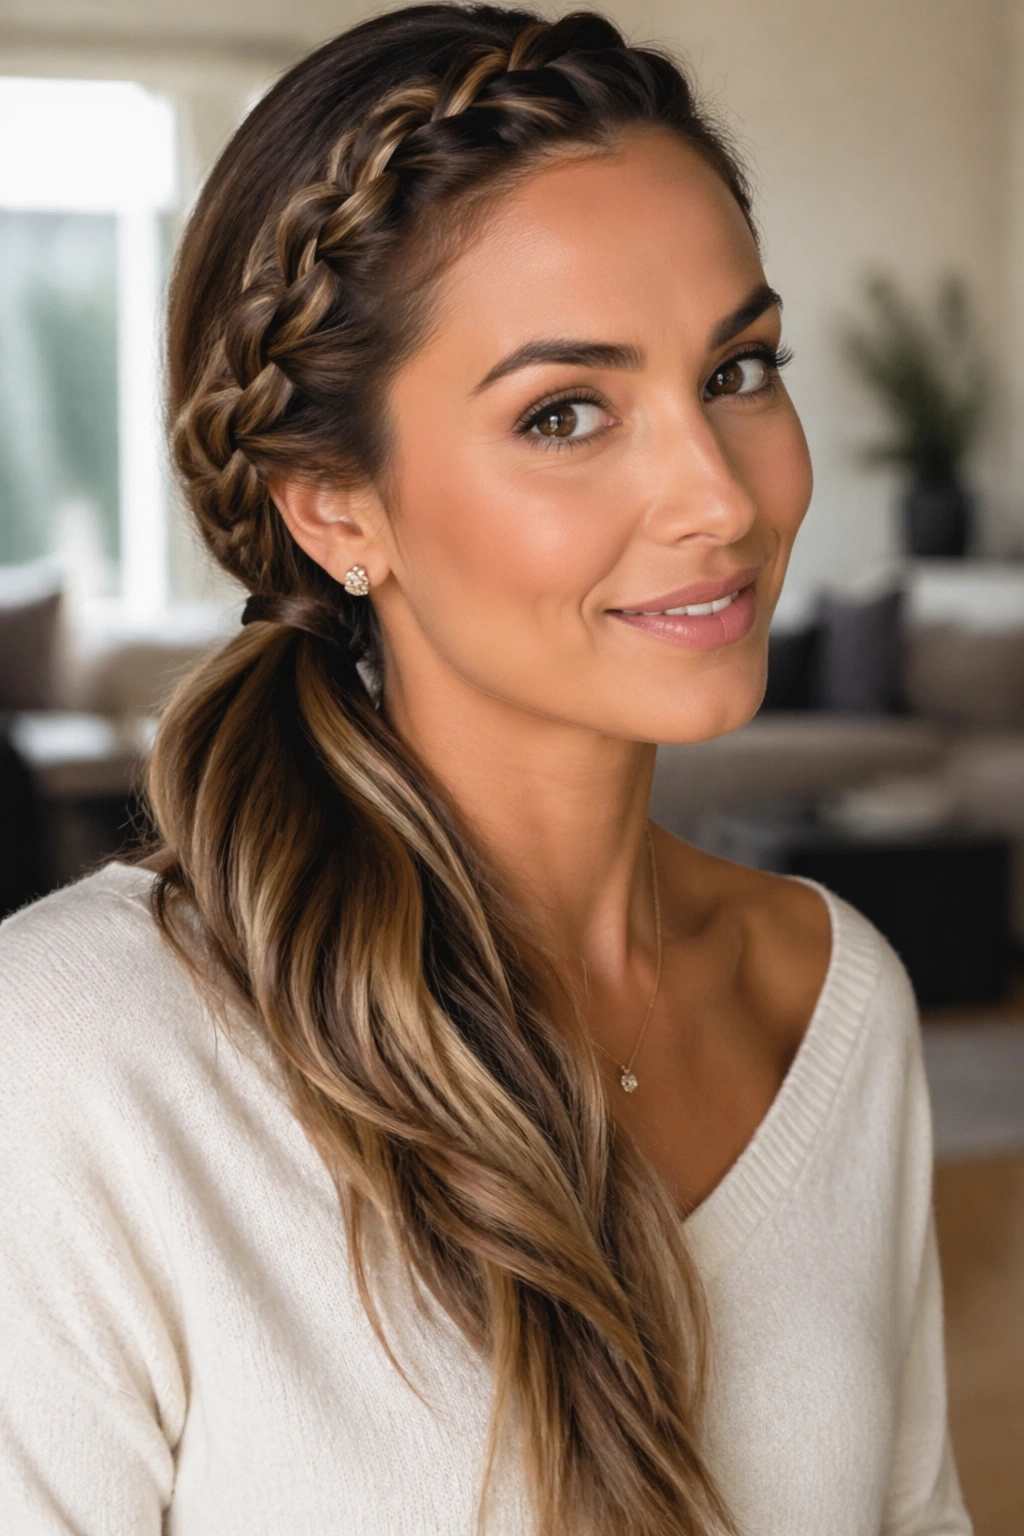
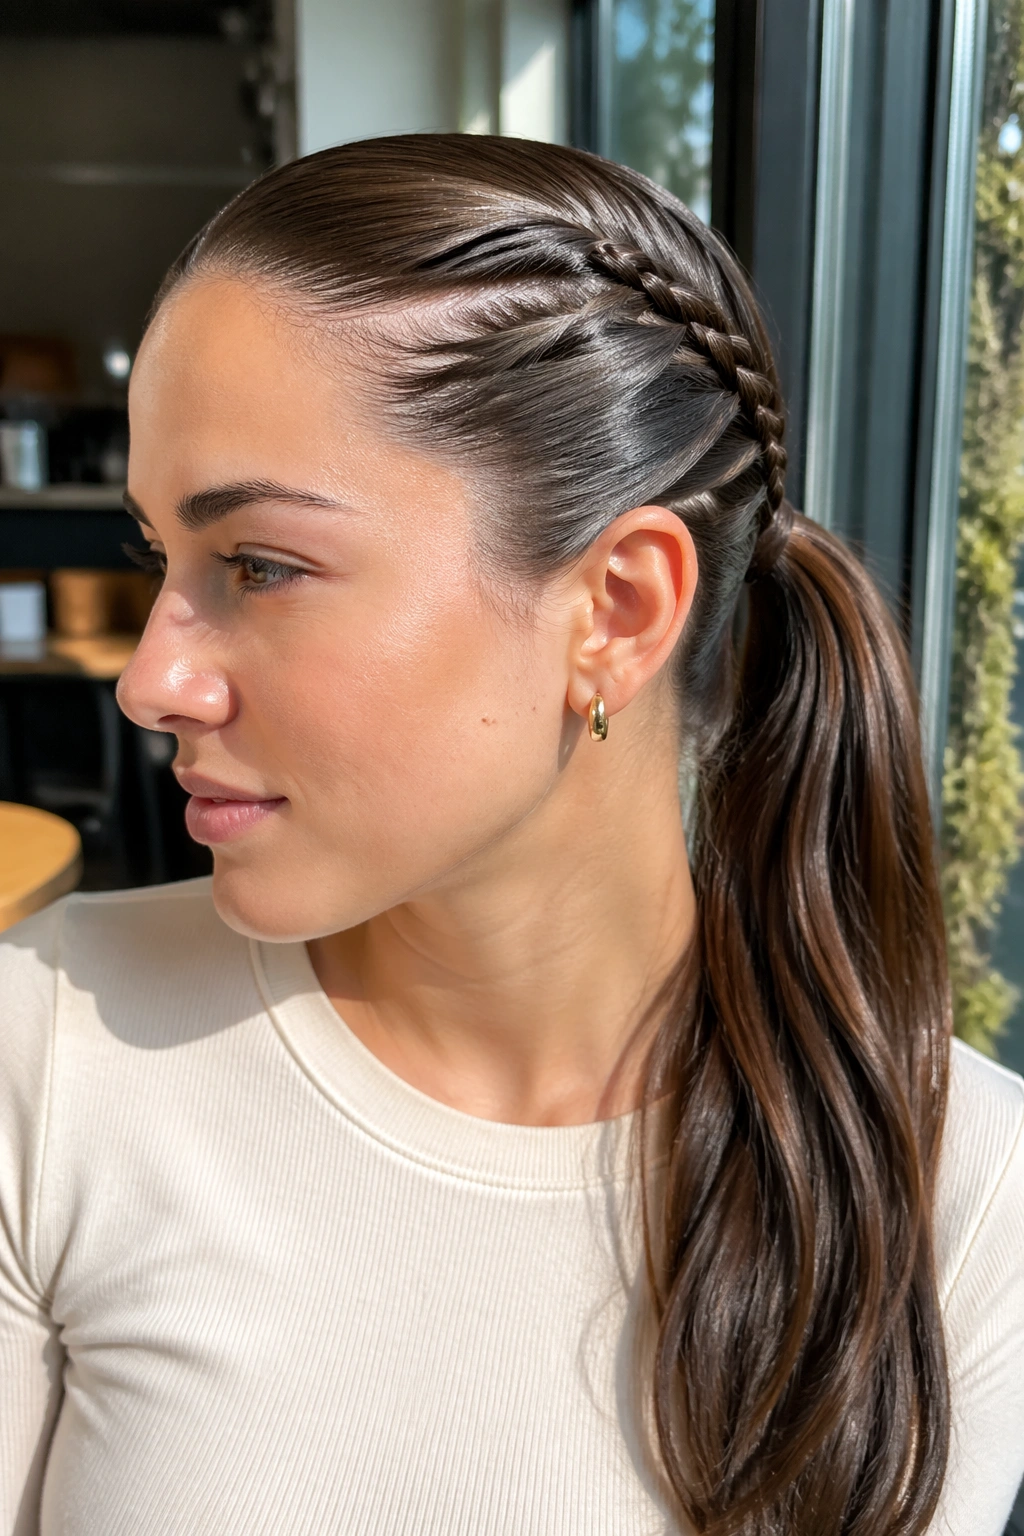
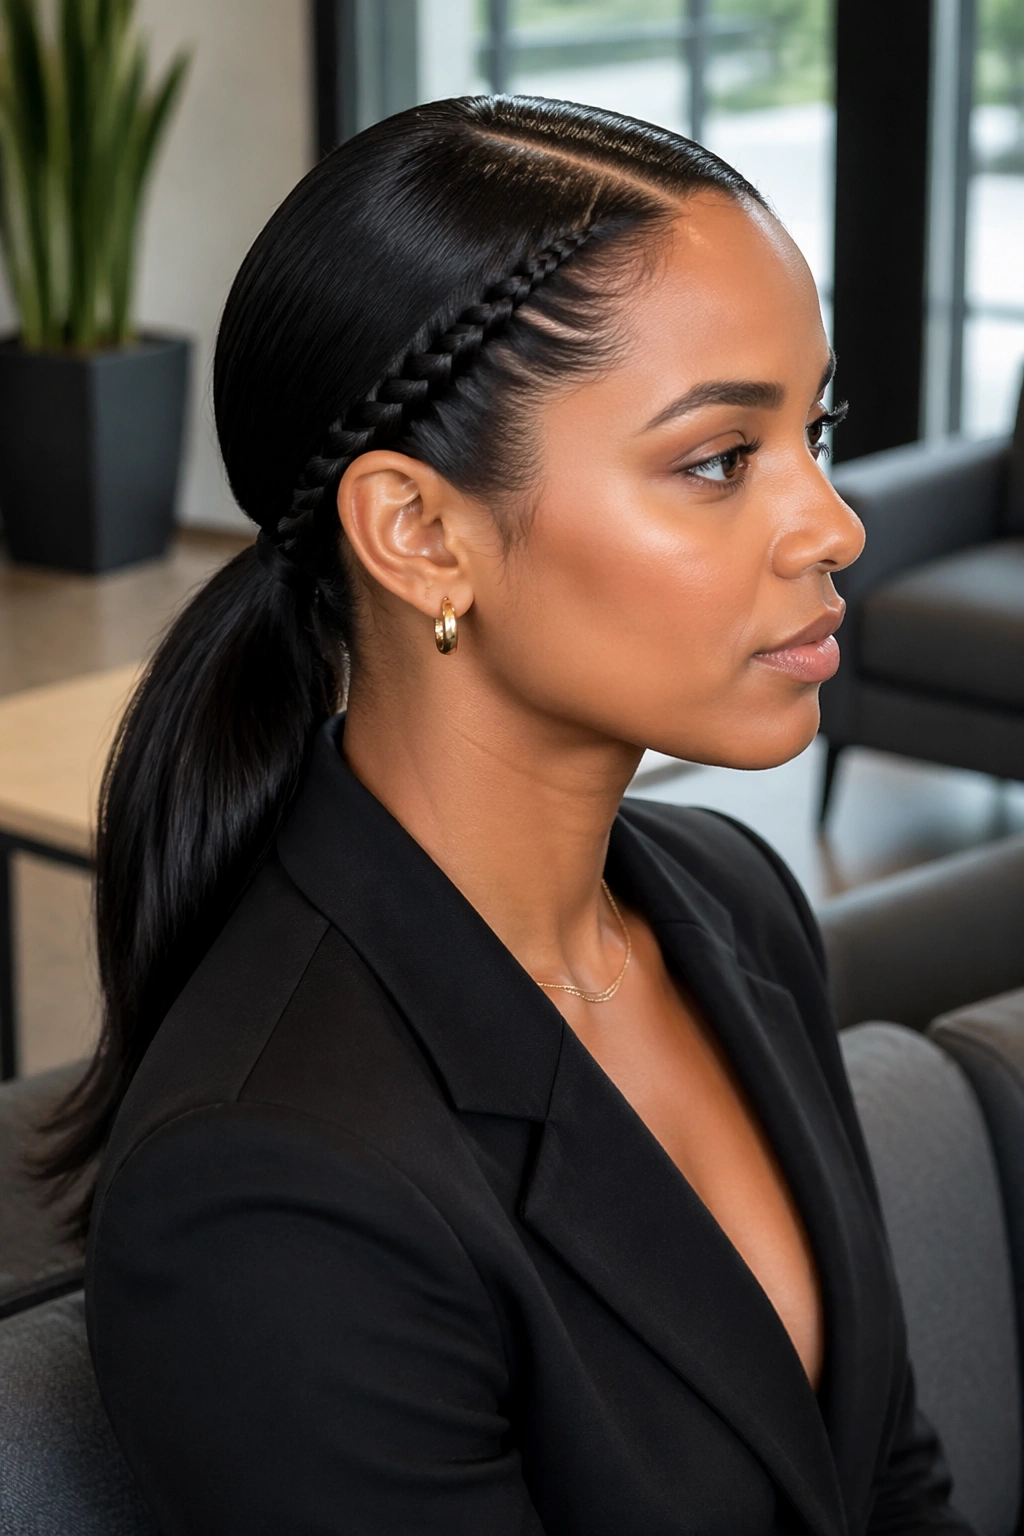
1. Sleek Low Side Stitch Braid Ponytail
This is the version I trust when the hair has to look calm and tidy all day. The braid starts near the temple, stays tight to the scalp, and feeds into a low ponytail at the nape. The whole shape sits close to the head, so nothing feels loose or accidental.
Why the low placement works
A low side stitch braid ponytail has a natural polish because the line is long and controlled. The braid creates structure at the side of the head, and the ponytail keeps the finish compact instead of floating around.
That makes it a smart pick for work, interviews, or any day when you want your hair to look finished without looking loud. If your hair tends to frizz at the crown, this style hides a lot of that trouble fast.
- Use a rat-tail comb to make one clean side part.
- Smooth the hair with a light gel or mousse before braiding.
- Keep the ponytail elastic low and snug, not tight enough to pull the scalp.
- Wrap a small strand around the base if you want the finish to look extra neat.
Pro tip: a tiny mist of setting spray on the part keeps the style from puffing up around the first braid pass.
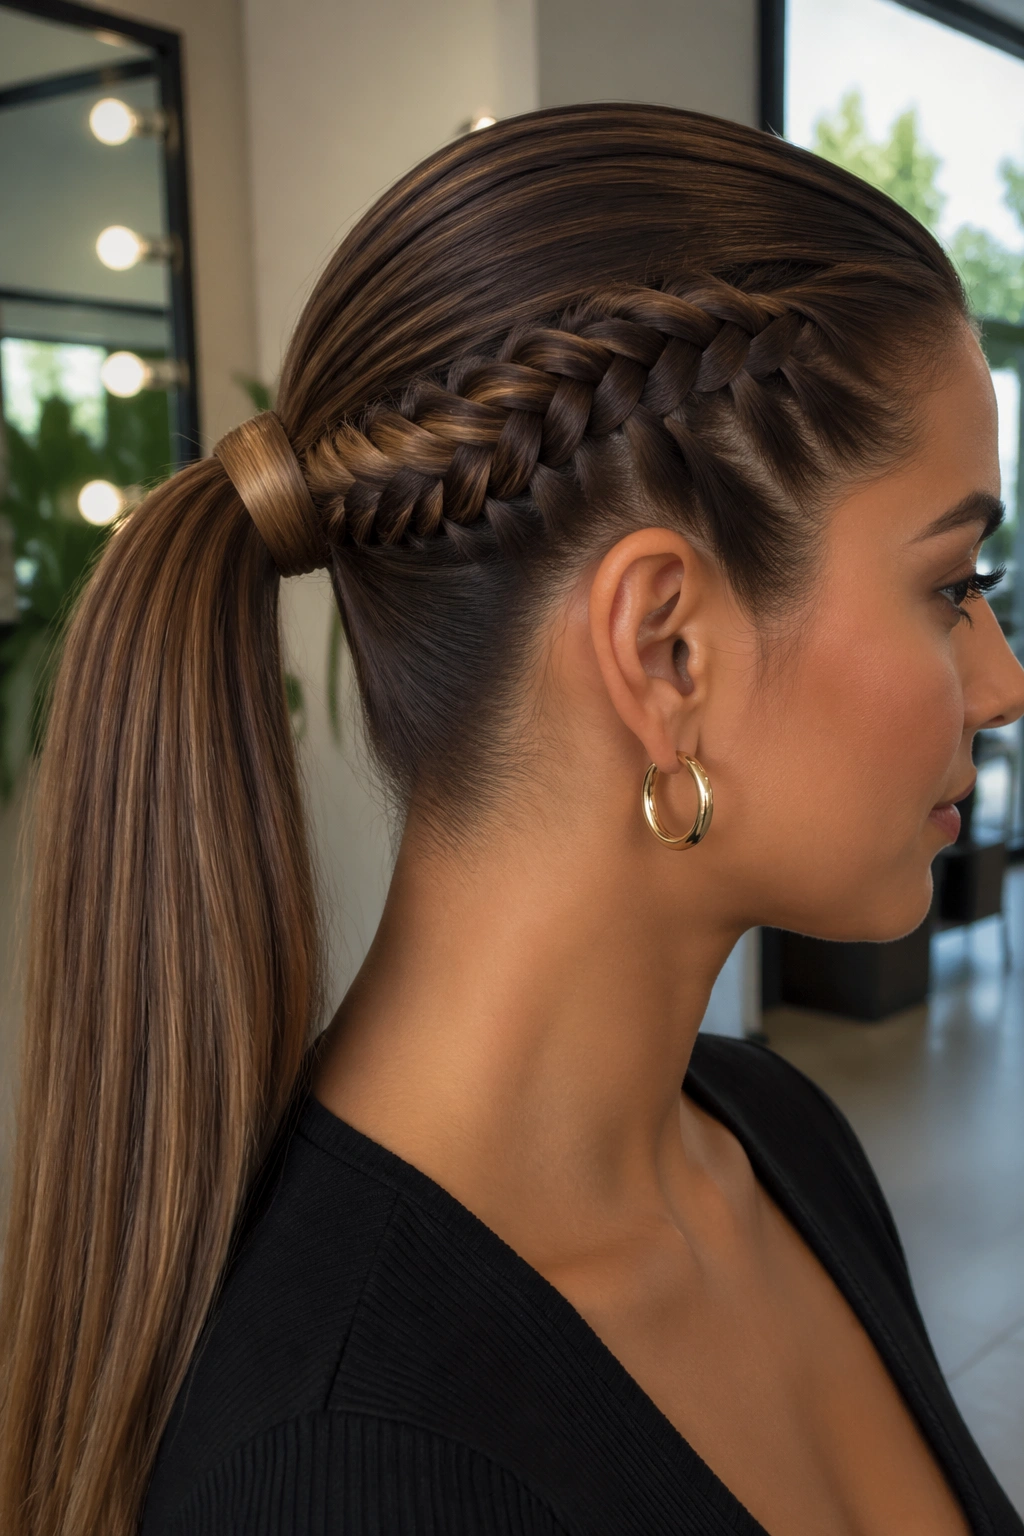
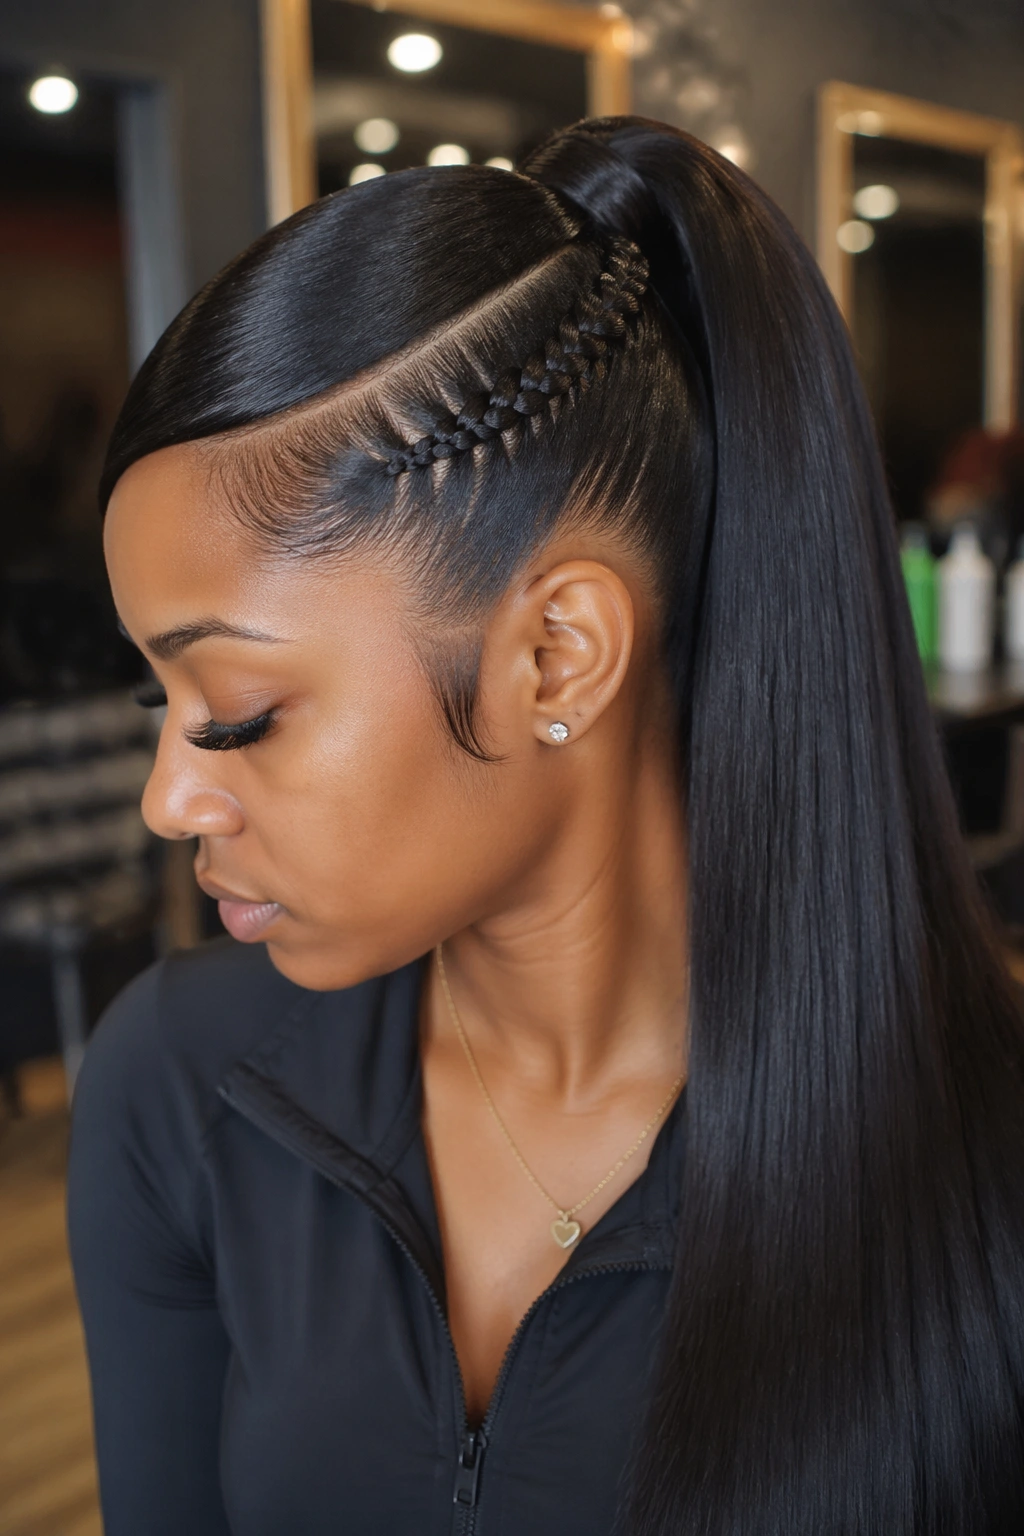
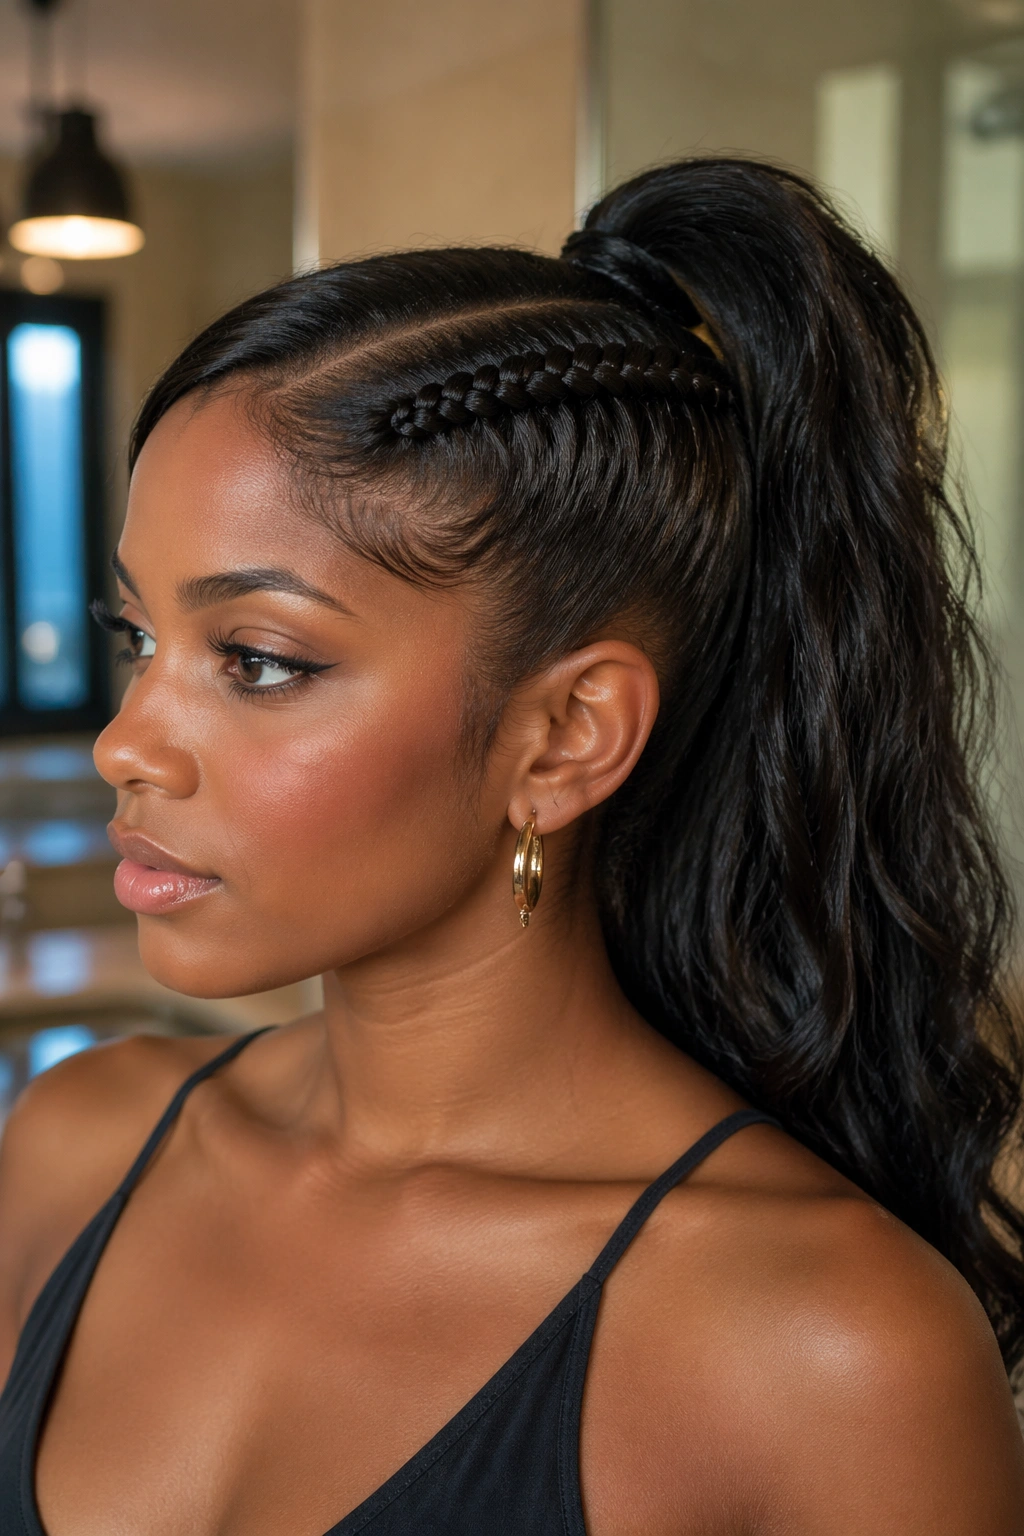
2. High Side Stitch Braid Ponytail

A high side stitch braid ponytail changes the whole attitude of the style. The braid still starts at one side of the head, but the ponytail sits high enough to give lift through the crown and a little more bounce through the length.
That higher placement makes the braid look sharper, too. The side line has more contrast against the raised ponytail, so the style reads bold without needing extra decoration. It’s the one I’d reach for when straight hair feels too flat and a low ponytail would disappear into the neck.
The trick is balance. If the braid is too loose, the top can look slouchy. If it’s too tight, the front can look stiff. Aim for a smooth crown, then let the ponytail do the visual work.
A high placement also shows off the base of the braid better, so the stitch pattern needs to stay even all the way back. No gaps. No bumps. Clean all the way through.
3. Deep Side Part Side Stitch Braid Ponytail
A deep side part gives this style a more sculpted feel. The braid starts on the heavier side of the part, then tracks backward until it meets the ponytail, which usually sits low or mid-height depending on how dramatic you want the shape to feel.
What the side part changes
A deep part does two things at once: it gives the braid a longer runway, and it opens up more space on the smoother side of the head. That makes the style look intentional instead of symmetrical in a boring way.
It’s a good move if you want the face to look a little longer or if you like the hair pushed off one side more than the other. The clean look comes from the contrast between the sleek, flat side and the stitched braid line.
A deep side part also helps if one side of your hair is naturally flatter. You can use the braid to hide that unevenness and turn it into part of the style.
- Choose the heavier side of your part before you start braiding.
- Keep the sectioning line straight; wavy parts make the whole style look rushed.
- Use a light edge brush touch-up at the front only, not all along the braid.
- Finish with a ponytail that matches the mood of the part — low for sleek, mid-height for a bit more lift.
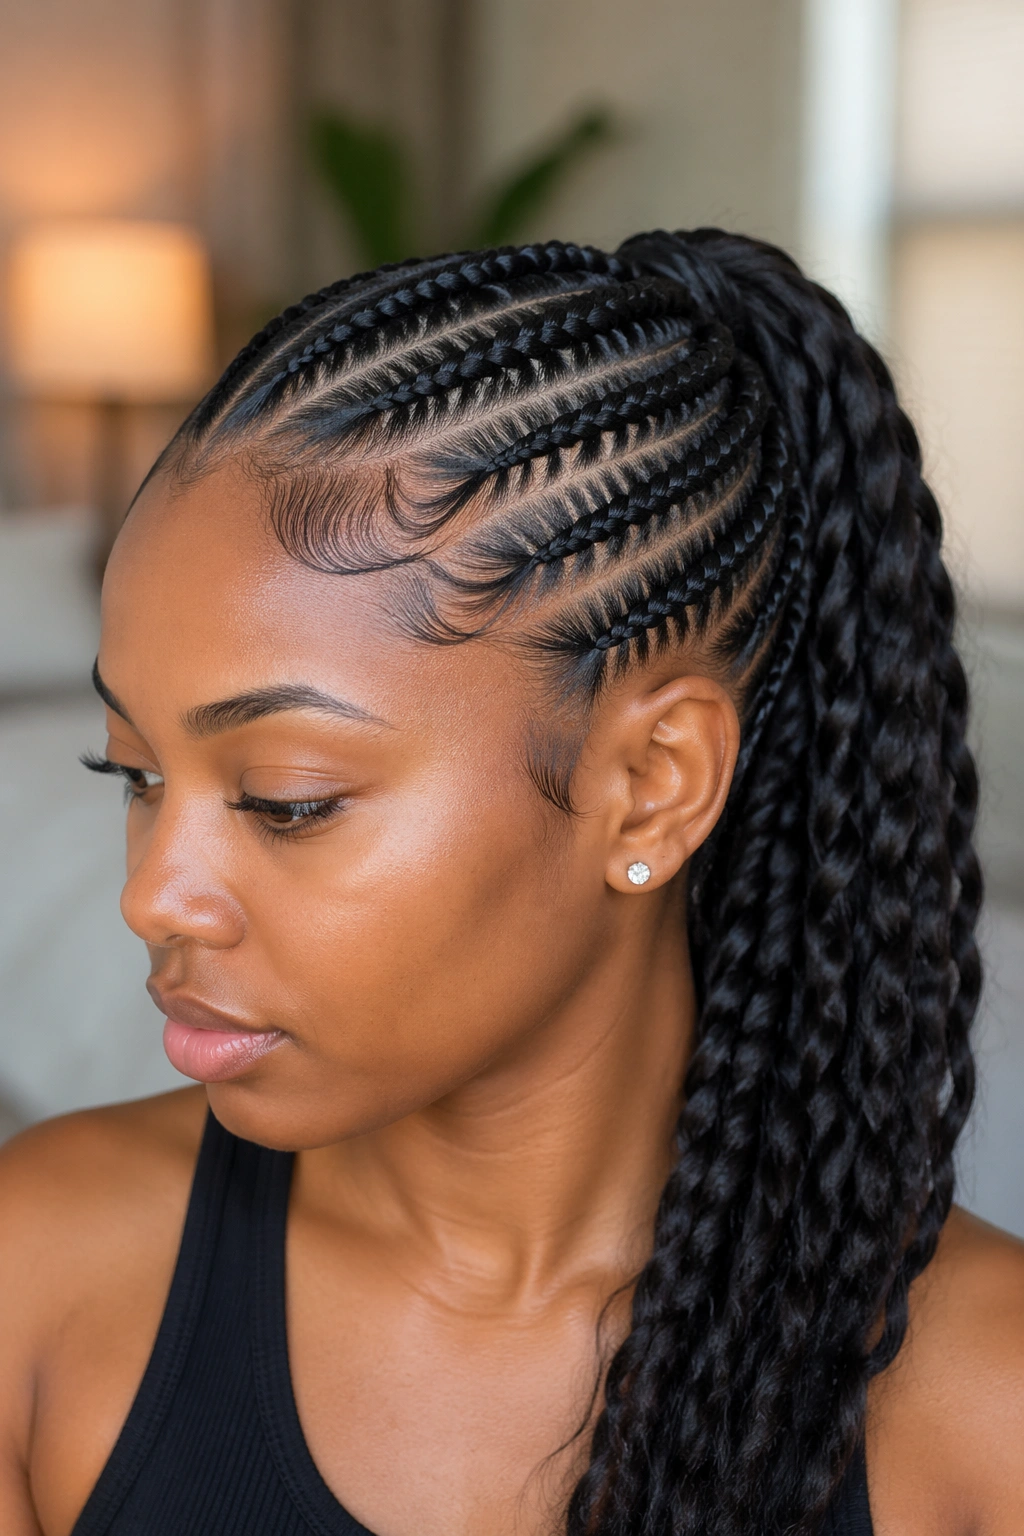
4. Two Side Stitch Braids Feeding Into One Ponytail
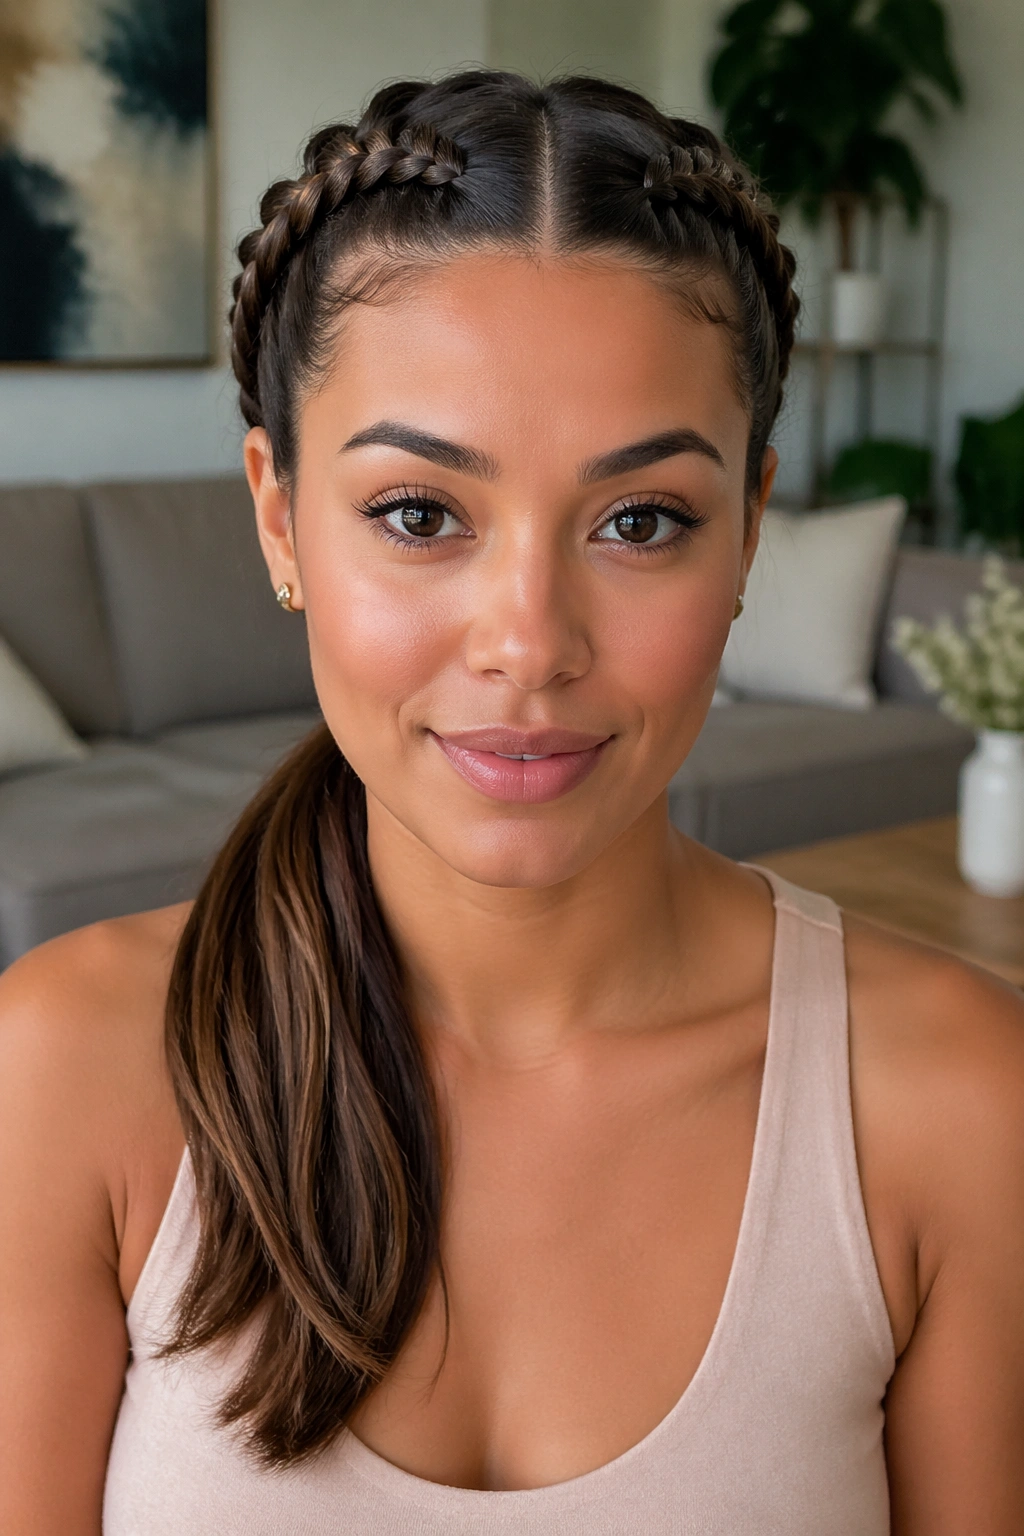
Two braids are better than one when you want the front to look tidy from both sides. This style uses a stitch braid on each side of the head, then joins them into a single ponytail at the back. The effect is structured, balanced, and a little stronger than a one-sided braid.
It also solves a real problem: when one braid alone looks too lonely near the part line, adding a second braid creates symmetry without making the style feel heavy. The center back ends up cleaner, too, because the ponytail base has more support.
I like this version on medium to thick hair. The extra braid gives the style some weight, so the ponytail doesn’t flop around by lunchtime. Fine hair can wear it, but the braids should stay narrow and close to the scalp or the style starts to feel bulky.
What to watch for
- Keep both braids the same width.
- Match the tension from side to side.
- Join them with one elastic, then hide that elastic with a small wrap.
- Leave the ponytail smooth if you want the cleanest read.
The style has a tidy, almost tailored feel. Nothing sloppy about it.
5. Bubble Side Stitch Braid Ponytail
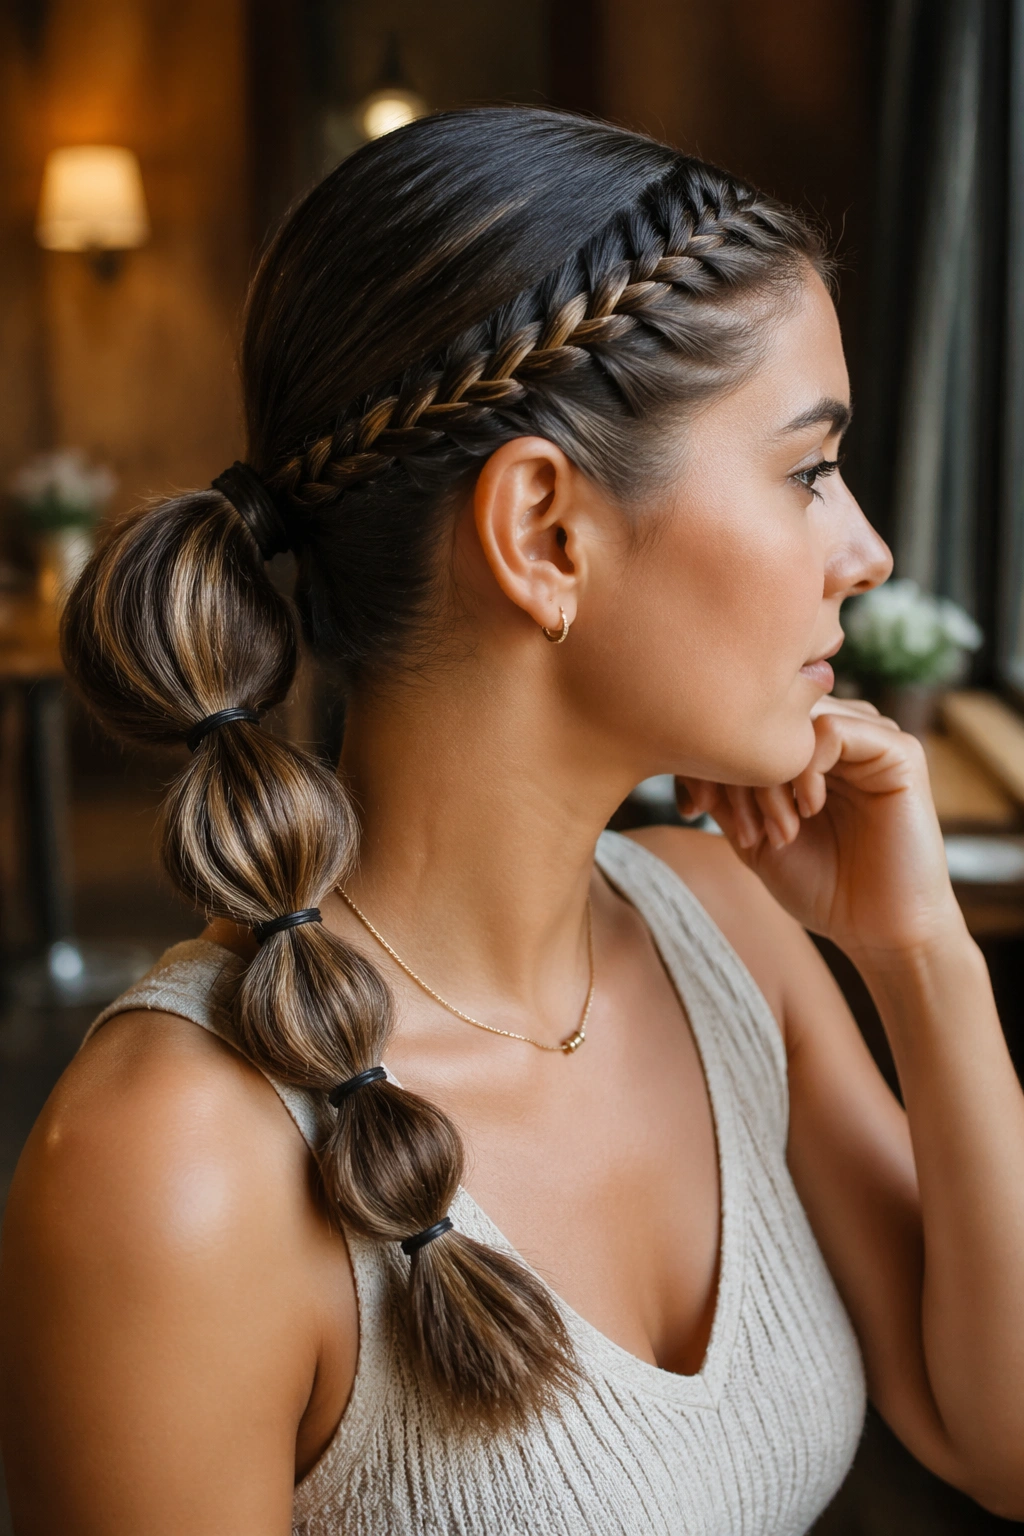
The bubble version takes a clean braid and gives the ponytail length a little structure. The side stitch braid stays neat along the scalp, while the tail gets segmented with small elastics every 1.5 to 2 inches. The result feels playful, but not messy.
That spacing matters. If the elastics sit too far apart, the bubbles sag. If they sit too close together, the tail looks crowded and stiff. The sweet spot is usually a short gap that lets each section puff out a little without losing shape.
This style works especially well when you want the braid detail to stay the main event and the ponytail to act as a graphic finish. It also helps when the ends need a break from heat styling. You can keep them straight, add a small bend, or even leave them natural.
The clean look comes from consistency. Same size sections. Same tension. Same tiny bit of smoothness around each elastic. That’s what keeps the whole thing from sliding into party-hair territory.
6. Curled Side Stitch Braid Ponytail
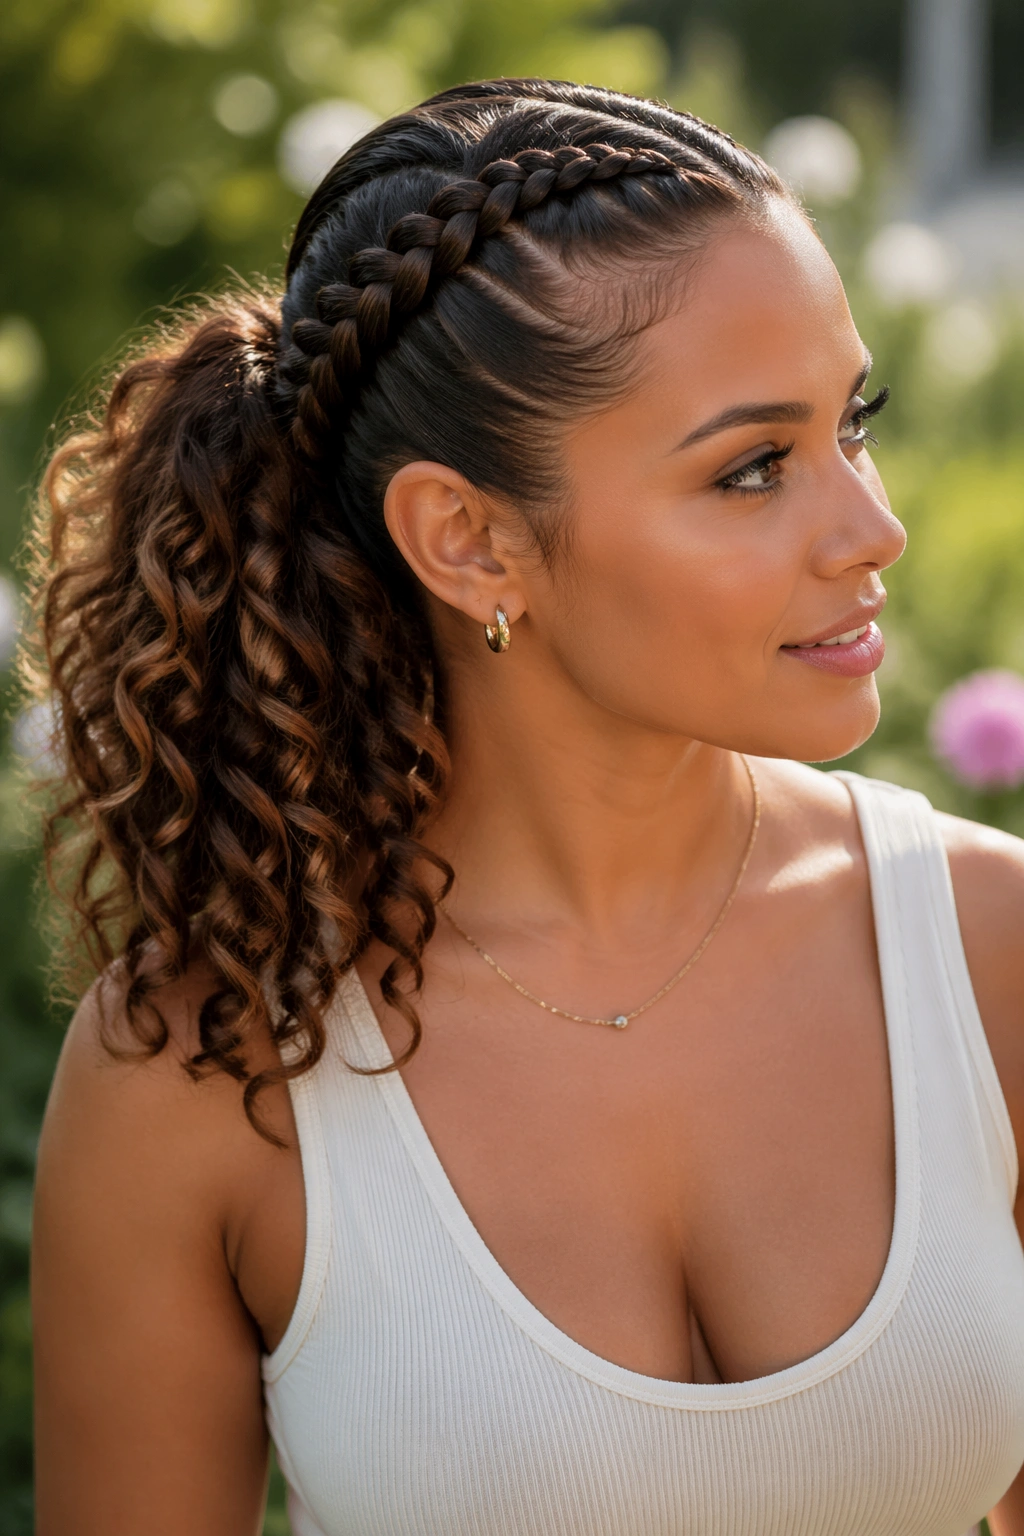
Curls soften the sharpness of the braid in a way I like a lot. The side stitch braid brings the structure, while the ponytail gets body and movement through loose curls or a soft wave pattern. The contrast is the point.
This version is especially good when you want the hair to look clean at the front but not too severe at the back. Straight ponytails can feel hard. Curls fix that without taking away the neat braid line.
What makes it work
The braid should stay sleek and close to the scalp, while the ponytail length gets the texture. That separation keeps the style from looking overdone. If both the braid and the tail are packed with texture, the finish can get busy fast.
A 1-inch curling iron gives a controlled curl pattern. Bigger irons make softer bends; smaller ones make tighter spirals. Either can work, but the ponytail should still feel cohesive, not like three different textures fighting each other.
- Curl the tail in the same direction for a smoother read.
- Let the curls cool fully before you touch them.
- Brush only the top layer if you want a softer finish.
- Keep the braid polished so the style still feels clean.
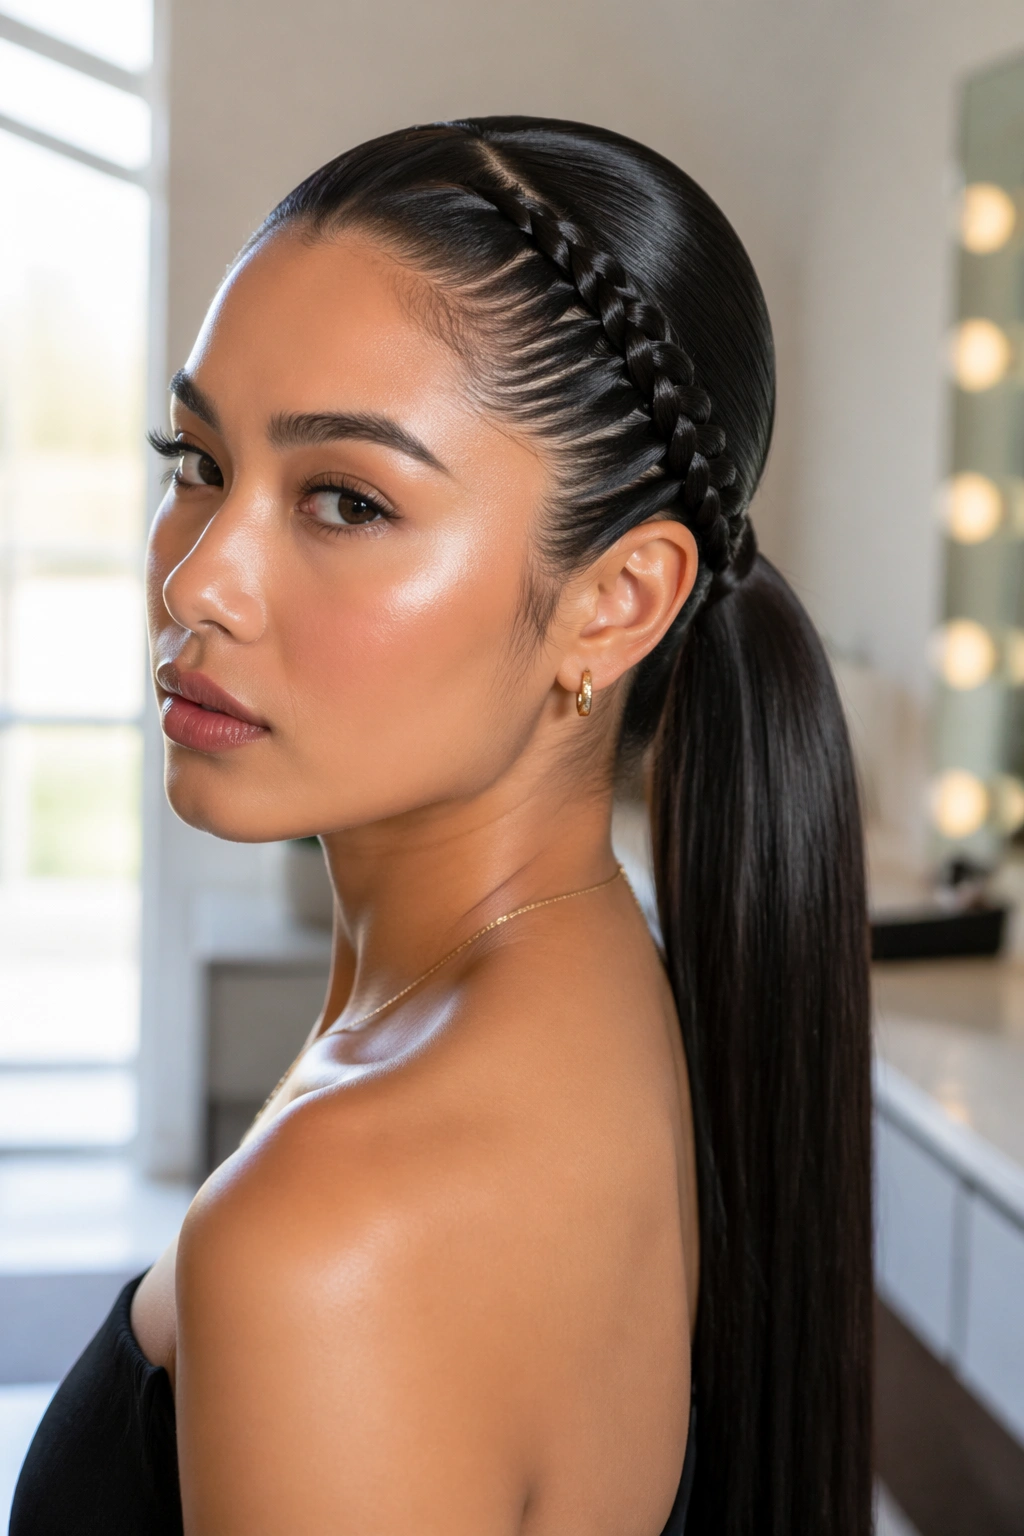
7. Straight Glass-Hair Side Stitch Braid Ponytail
A straight, glossy ponytail is the blunt-force answer when you want the cleanest possible finish. The side stitch braid gives the style character, but the lengths stay sleek and reflective, with no bend and no fluff.
The prep matters here more than anywhere else. A smooth blow-dry or flat iron pass, a heat protectant, and a light anti-frizz serum on the mid-lengths make a huge difference. Skip heavy oils. They can separate the hair and make the tail look greasy instead of polished.
The shine comes from the prep, not the spray
A toothbrush-size amount of gel along the part, a fine comb to smooth the surface, and one last pass over the top with a soft brush are enough for most hair types. You do not need to drown the style in product.
The braid should look almost stitched on, not puffy. If the braid starts to widen, the style loses that sharp, clean edge.
- Use a flat iron only if your hair can take it safely.
- Cool the hair before tying the ponytail so the shape holds.
- Wrap the base with a small section for a neater finish.
- Choose a snag-free elastic so the tail stays smooth.
This is the one that looks expensive without trying too hard. Quietly sharp.
8. Braided Wrap Side Stitch Braid Ponytail
Need the elastic to disappear? Wrap it. That’s the whole appeal of this style. The side stitch braid feeds into a ponytail, and a small section of hair — or a thin extra braid — coils around the base to cover the band.
The base matters because it’s where a clean style often falls apart. A visible elastic can be fine for gym hair, but it makes an otherwise neat look feel unfinished. A wrap fixes that in seconds.
What I like here is how controlled the finish feels. The braid line stays visible from the side, the crown stays smooth, and the base looks tucked in rather than exposed. It’s a small detail, but it changes the read of the whole style.
If you’re using braiding hair or extensions, blend the wrap so it doesn’t look like a separate piece stuck on top. Keep it snug and narrow. Big, sloppy wraps look fake fast.
A clean side stitch braid ponytail does not need extra decoration. Sometimes the wrap is enough.
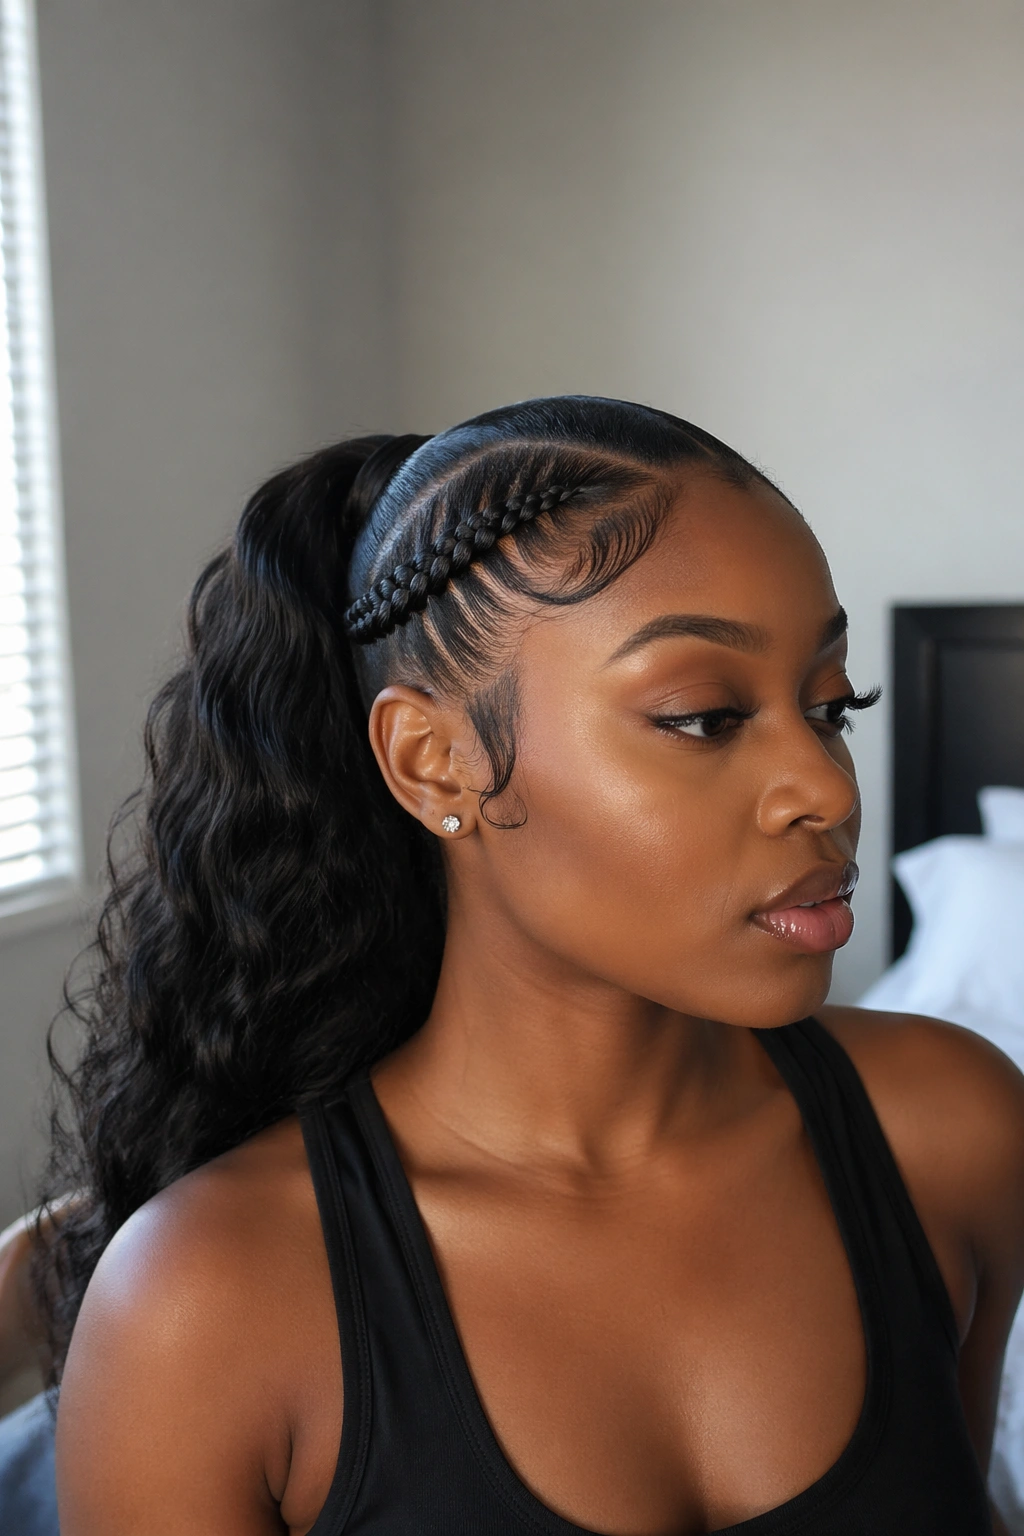
9. Side Stitch Braid Ponytail for Natural Curls

Natural curls and stitch braids work well together when you stop trying to force the whole head into one texture. The braid gives the front structure, and the ponytail lets the curls show off in the length. That contrast is what makes the style feel fresh rather than stiff.
The important part is the foundation. A lightly stretched base — from a blow-dry, banding, or a twist-out that’s been separated carefully — helps the braid sit flatter and keeps the ponytail from ballooning at the root. You want control at the scalp and movement in the tail.
A curl cream or leave-in can keep the ponytail ends soft, but don’t load it up. Too much product weighs the curls down and makes them clump in a greasy way. A small amount is enough.
This style is especially good when your natural texture does the work and the braid only frames the face. The clean look comes from the part and the braid placement, not from flattening everything. That’s the part people get wrong.
10. Feed-In Side Stitch Braid Ponytail
Feed-in braids give you a cleaner slope from the hairline into the braid because the extension hair gets added gradually instead of all at once. That makes the braid look slimmer at the front and fuller as it moves back, which is exactly what a tidy ponytail needs.
Why feed-in braiding matters
A hard jump from your own hair to added hair can make the braid look chunky at the first inch. Feed-in braiding avoids that. The stitch line stays even, the tension feels more balanced, and the braid settles closer to the scalp.
This is one of the better choices if you want the ponytail to last several days and still look presentable by the end. The braid holds shape better, and the ponytail base usually stays neater than a loose, quickly tied version.
- Add extension hair in small pieces, not big clumps.
- Keep the added hair the same color family as your own for a smoother blend.
- Use a firm but flexible holding gel at the part.
- Seal the ends if your hair type needs that extra bit of control.
Feed-in side stitch braid ponytails look especially good on thicker hair, but they also help fine hair look fuller without obvious bulk.
11. Side Stitch Braid Ponytail with Swooped Baby Hairs
Do baby hairs help? Sometimes. Not always. In this style, they act like a small frame around the braid and part, softening the front without taking over the whole look.
The key is restraint. A few swoops can clean up the hairline and make the style look more finished. Too many swoops, or ones that are thick and heavily drawn, can pull the eye away from the braid and make the front look crowded.
What I prefer is a light curve near the temple and maybe one smaller wave near the edge of the part. That gives shape without turning the style into a lot of extra work. A soft-bristle brush or edge brush helps, but use only a small amount of gel. Heavy product makes baby hairs look stiff and shiny in a bad way.
This version is best when the ponytail itself stays simple. Let the braid and the ponytail do the main work. The baby hairs are there to clean up the frame, not steal the scene.
12. Low Side Stitch Braid Ponytail Draped Over One Shoulder
There’s something about a ponytail moved over one shoulder that makes the whole style look more finished. The side stitch braid starts at the hairline, tracks into a low ponytail, and then the length gets swept across the chest instead of hanging straight down the back.
That small shift changes the silhouette. The style looks softer from the front, and you get to see the braid and the tail at the same time. It also helps if the hair is a little longer than you want to manage behind the shoulders, because bringing it forward keeps it tidy.
Best details to keep in place
- Secure the ponytail low enough that it won’t slide up when moved forward.
- Use a smooth elastic that doesn’t catch on the ends.
- Add a tiny bit of serum to the lengths if they tend to snag on clothing.
- Keep the braid tight near the part so the front stays crisp even when the tail is shifted.
This style has a neat, almost dressed-up feel without needing curls or accessories. The shoulder placement does the styling work for you.
13. Silk Press Side Stitch Braid Ponytail
A silk-press finish gives the braid a sleek backdrop and makes the ponytail line look long and clean. If your hair has been heat-styled straight, the braid sits flatter, the part looks sharper, and the tail can move with a smooth, reflective finish.
The downside is obvious: the hair has to be prepared carefully. Heat protectant is not optional, and the flat iron should not be run through the same section over and over. One clean pass usually beats three rushed ones. Let the hair cool before you tie it back, or the ponytail can get dents in the first hour.
This version is ideal when you want a very smooth, controlled look for a formal event or a dressier day. The braid still gives the ponytail a little texture, but the overall effect stays sleek.
I’d keep accessories minimal here. A shiny barrette or a wrapped base is enough. Anything else starts crowding the clean lines that make the style work.
14. Half-Up Side Stitch Braid Ponytail
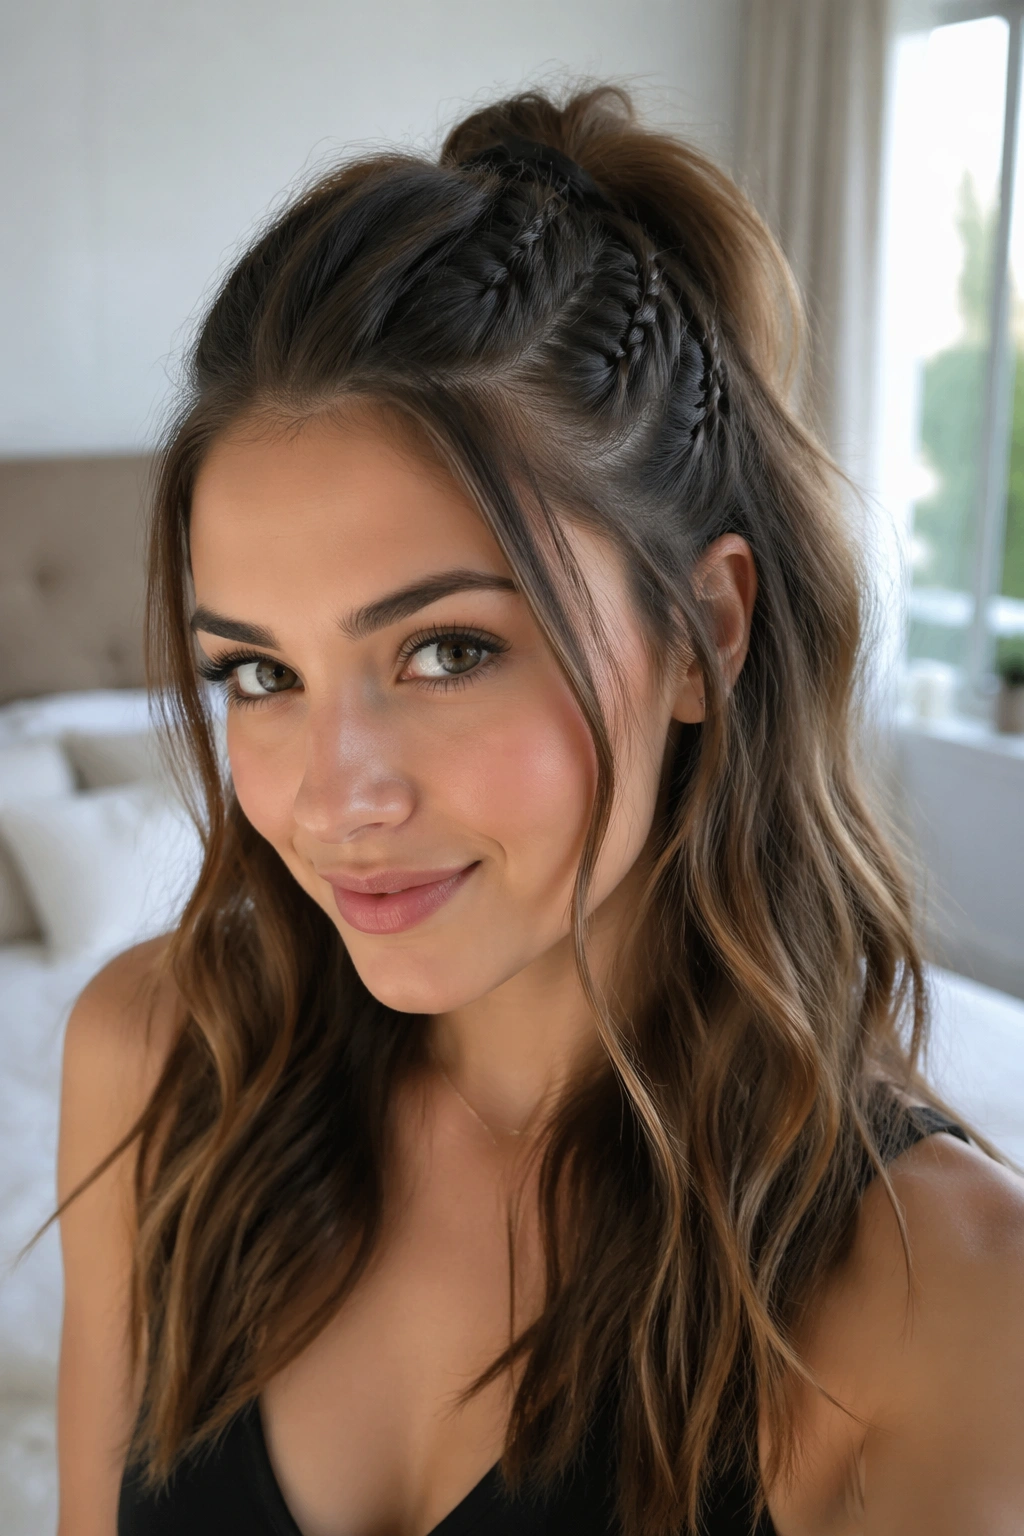
A half-up version is useful when you want the face framed and the length left loose. The side stitch braid gathers into the top half of the hair, leaving the bottom section free. It keeps hair off the face, but it doesn’t commit to a full ponytail.
That makes it lighter to wear and easier to reset during the day. If a full ponytail feels too tight or too severe, this is the softer route. The braid still gives shape, and the top section still looks neat, but the loose hair below keeps the style from feeling boxed in.
The clean look comes from the split between the top and bottom halves. If that line is uneven, the whole thing looks accidental. If it’s sharp and the ponytail is secured close to the crown, the style feels deliberate.
A small amount of smoothing cream near the top helps, but avoid loading the loose hair with too much product. It should move.
15. Rope-Tied Side Stitch Braid Ponytail
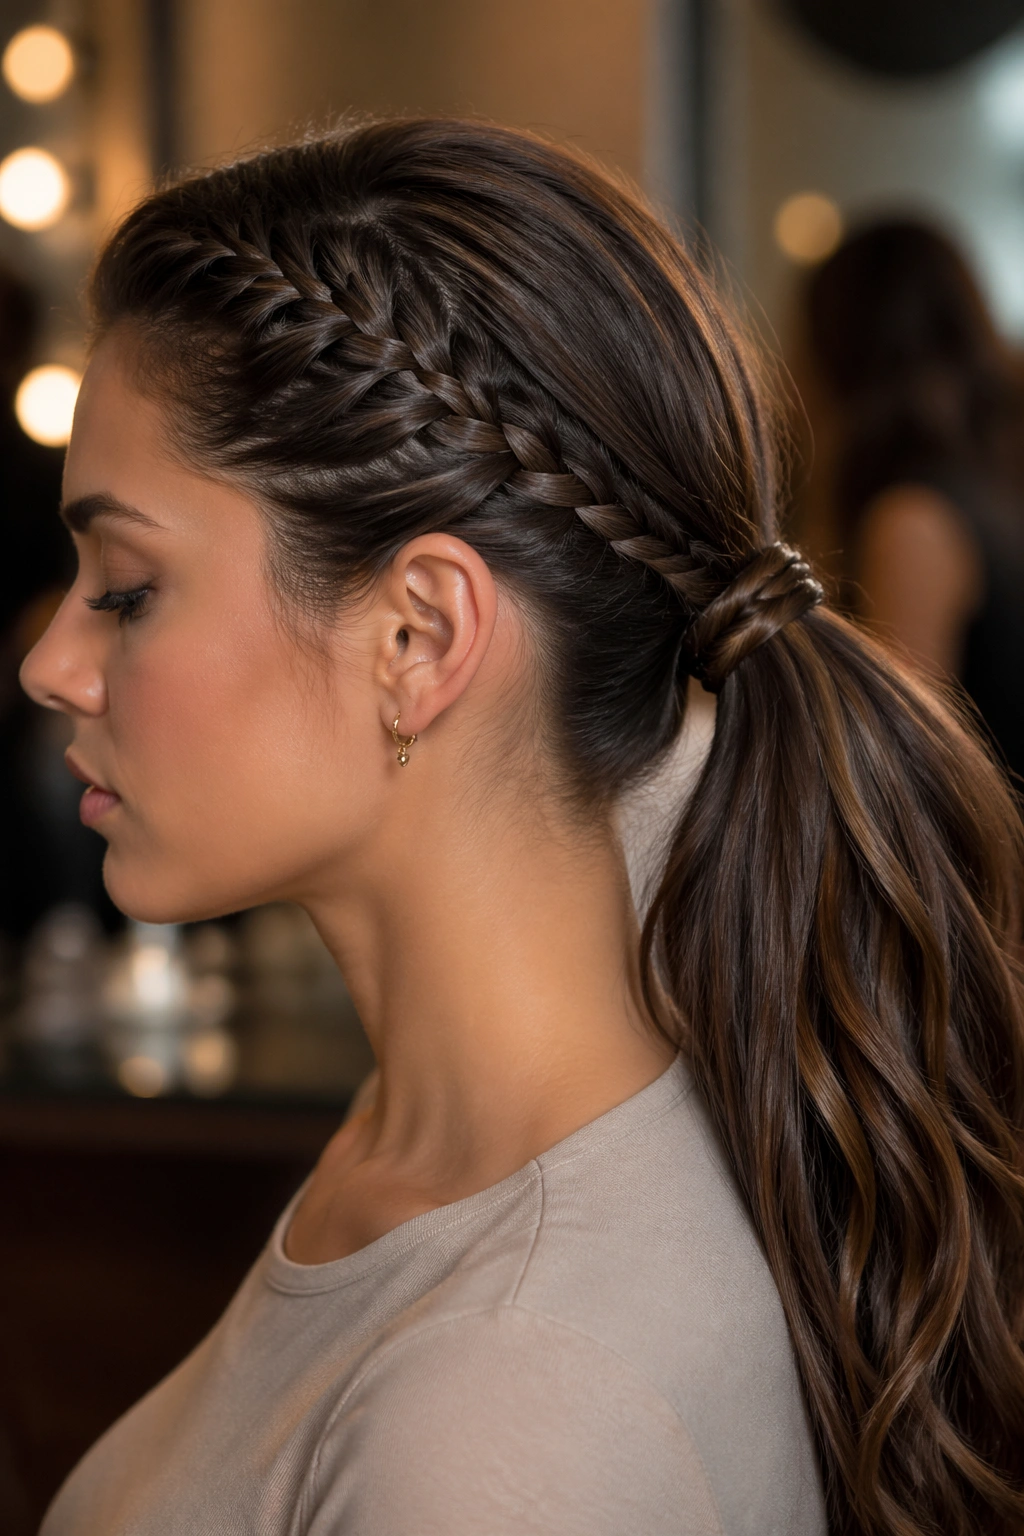
A rope tie gives the ponytail base a little extra texture without cluttering the side braid. Two slim strands twist around each other and then wrap the elastic, which looks cleaner than a thick, chunky wrap and a bit more interesting than a bare band.
How the rope tie changes the shape
The twist creates a narrow spiral at the base, so the ponytail starts with a little tension and then opens into the length. It’s a small detail, but it keeps the eye moving. That helps when the braid itself is simple and you want one extra point of visual interest.
This version works well on medium-length hair and on extensions, because the rope wrap hides the joining point. It’s also a decent fix when the elastic doesn’t match the hair color exactly.
- Use two thin sections, not two fat ones.
- Twist them in the same direction before wrapping.
- Pin the ends underneath the ponytail so they don’t poke out.
- Keep the braid side clean; the rope detail should stay at the base only.
The style looks planned, not crowded. That’s the sweet spot.
16. Short-Hair Side Stitch Braid Ponytail with Extensions
Short hair does not rule this style out. It just means you need help from clip-in ponytail pieces, braided-in extensions, or a small hairpiece that gives the length enough weight to hang properly.
The side stitch braid still starts at the scalp, which is the part that makes the style look clean. The extension work happens at the back, where it can stay hidden. If the attachment point shows, the whole effect falls apart, so anchoring matters.
What keeps it looking neat
A firm base is the biggest thing. Use a small braid anchor, secure the ponytail piece tightly, and smooth the top hair over the join. If your own hair is short at the nape, bobby pins can help tuck away the loose ends before the ponytail is attached.
- Match the texture of the extension to your natural hair as closely as you can.
- Don’t overload the front with product just because the hair is short.
- Keep the braid narrow so the head doesn’t look crowded.
- Check the back in a mirror before leaving the style alone.
This is one of those styles that looks simple when done well and a little messy when the base is sloppy. The difference is all in the anchor.
17. Thick Chunky Side Stitch Braid Ponytail

A chunky braid has more presence than a skinny one. The sections are wider, the stitch line is bolder, and the braid reads from farther away. Paired with a ponytail, it can look strong and clean at the same time.
This version works especially well on thick hair because the braid size matches the natural density. On finer hair, you can still do it, but you’ll probably need added hair to keep the braid from looking thin against the head. That extra density helps the style hold its shape.
When chunky wins
If the rest of your outfit is simple, a chunky side stitch braid ponytail can carry the look on its own. It doesn’t need curls, ribbons, or heavy shine. The braid already gives you enough structure.
- Build the braid with larger feed-ins for a wider line.
- Keep the ponytail base sleek so the braid remains the focus.
- Use a soft gel, not a crunchy one, or the larger sections will look stiff.
- Check that the braid stays even from start to finish; big braids show mistakes faster.
This one has a stronger, more graphic feel than the rest. Nice when you want the hair to do a bit of the talking.
18. Skinny Accent Side Stitch Braid Ponytail
A skinny accent braid is the quiet version of the style. Instead of taking up a lot of space, the braid skims along one side of the head and feeds into a smooth ponytail. The result is tidy, minimal, and easy to wear with almost anything.
I like this version when the outfit already has texture or when the hair needs to stay understated. A thick braid can feel too dominant in those situations. A narrow braid leaves room for the ponytail and keeps the front clean.
The sectioning has to be precise, though. A skinny braid looks best when the part is sharp and the braid stays close to the scalp the entire way back. If it puffs out, the style loses the point.
This is also the easiest version to tuck behind an ear on one side if you want even more face framing. The ponytail stays simple, the braid stays visible, and the whole thing reads neat without shouting for attention.
19. Wet-Look Side Stitch Braid Ponytail
The wet-look version is for when you want shine, not softness. A side stitch braid sits against a slicked base, and the ponytail length carries that glossy finish through the ends. It looks sharp, a little editorial, and very controlled.
The trick is not to overdo the product. Too much gel can make the hair look weighed down or flaky once it dries. Too little, and the style puffs up before you’ve even finished the braid. A thin layer on damp or freshly misted hair usually does the job.
This style is strongest when the braid and crown stay smooth and the ponytail length remains coated but not sticky. You want sheen, not clumps. A shine spray can help at the end, but only a light pass.
No need for extra accessories here. The whole point is that the finish itself carries the style. If anything, a clean elastic and a tight part are enough.
20. Workout-Secure Side Stitch Braid Ponytail
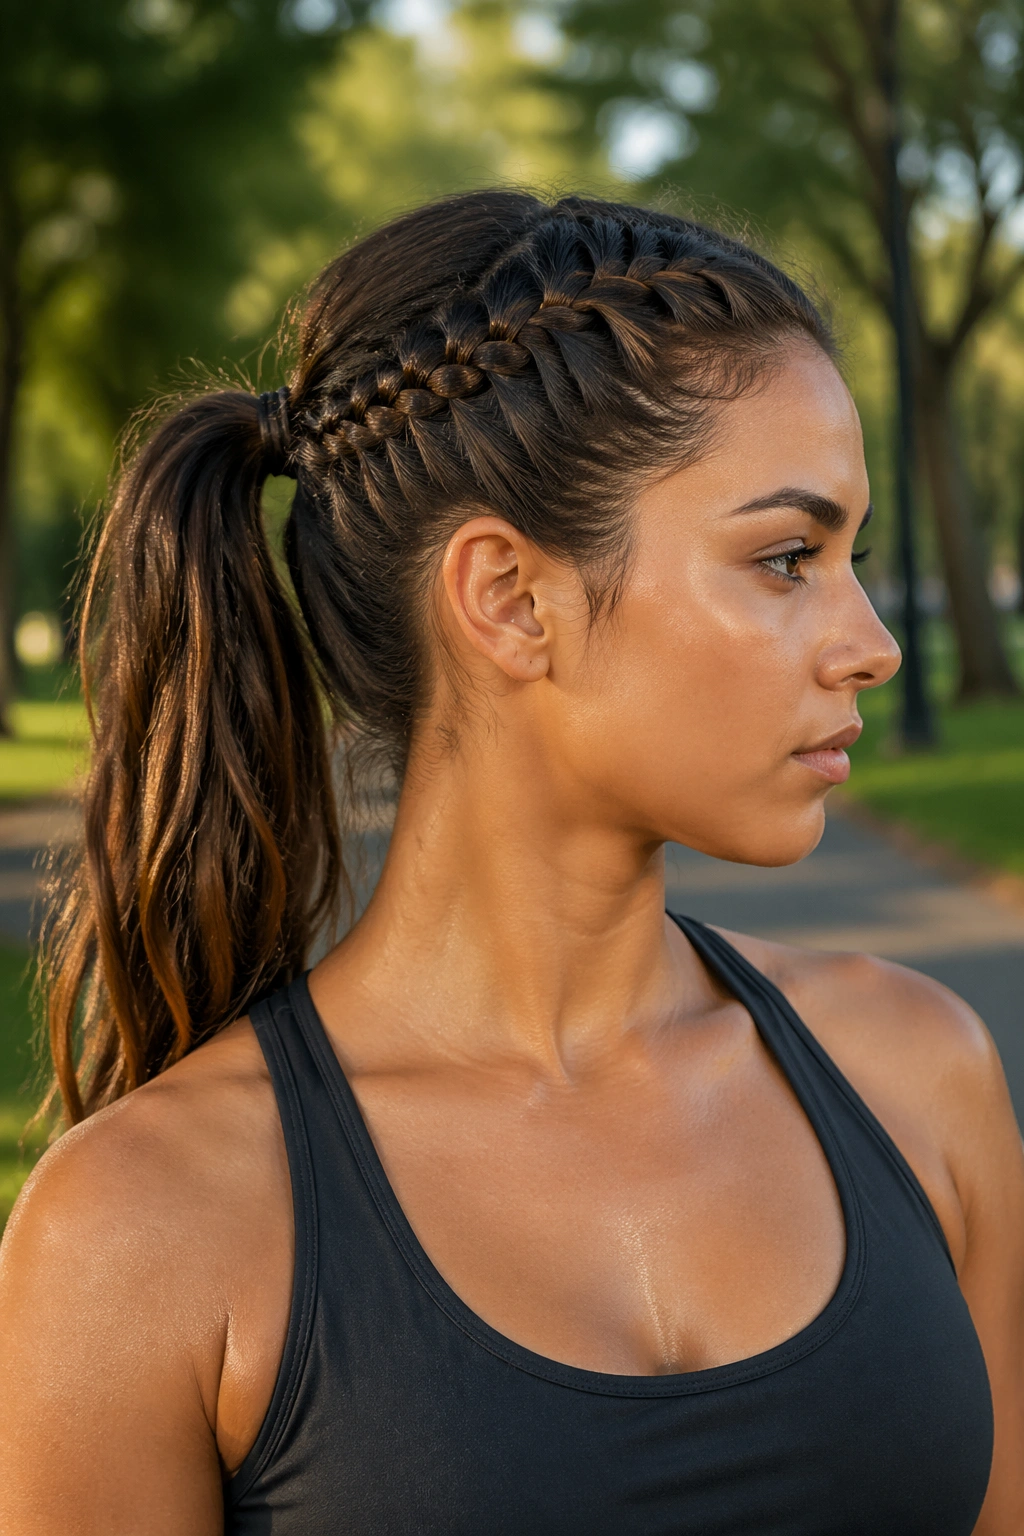
This is the version that stays put when you move, sweat, or keep adjusting your headphones. The braid begins at the side, grips the scalp closely, and feeds into a ponytail that’s anchored with a strong elastic and, if needed, a few hidden bobby pins.
Why it holds better
A side stitch braid distributes tension along the head instead of placing all the stress in one loose tie. That means less sliding at the crown and less need to keep fixing it throughout the day. The clean look survives because the braid does the gripping.
It’s especially useful for long walks, errands, or training days when you still want the hair to look neat afterward. A ponytail that looks good before movement and after movement earns its keep.
- Use a sweat-resistant gel at the part.
- Braid tightly enough to hold, but not so tight that the scalp feels sore.
- Secure the ponytail with two elastics if the hair is very heavy.
- Choose a low or mid-height base if you want the style to stay steady.
This version is practical first. Still clean. Still sharp. Just less precious.
21. Pearl-Pin Side Stitch Braid Ponytail
A pearl pin or a small metallic clip can finish a side stitch braid ponytail without making it feel dressed up in a fussy way. The trick is to choose one accent and let it sit where the braid meets the ponytail, or just above the base on the stitched side.
Too many pieces spoil the line. One small pin gives the style a point of focus; three or four start to look crowded. That’s especially true with a clean look, where the braid and the smooth crown already do enough work.
I like this finish for dinners, events, and any day when you want the ponytail to look intentional from across the room but still neat up close. The braid keeps the structure. The pin gives the eye something to land on.
Keep the rest simple. Smooth part, controlled base, polished lengths. That balance is what makes the accessory look chosen rather than added because the hair needed saving.