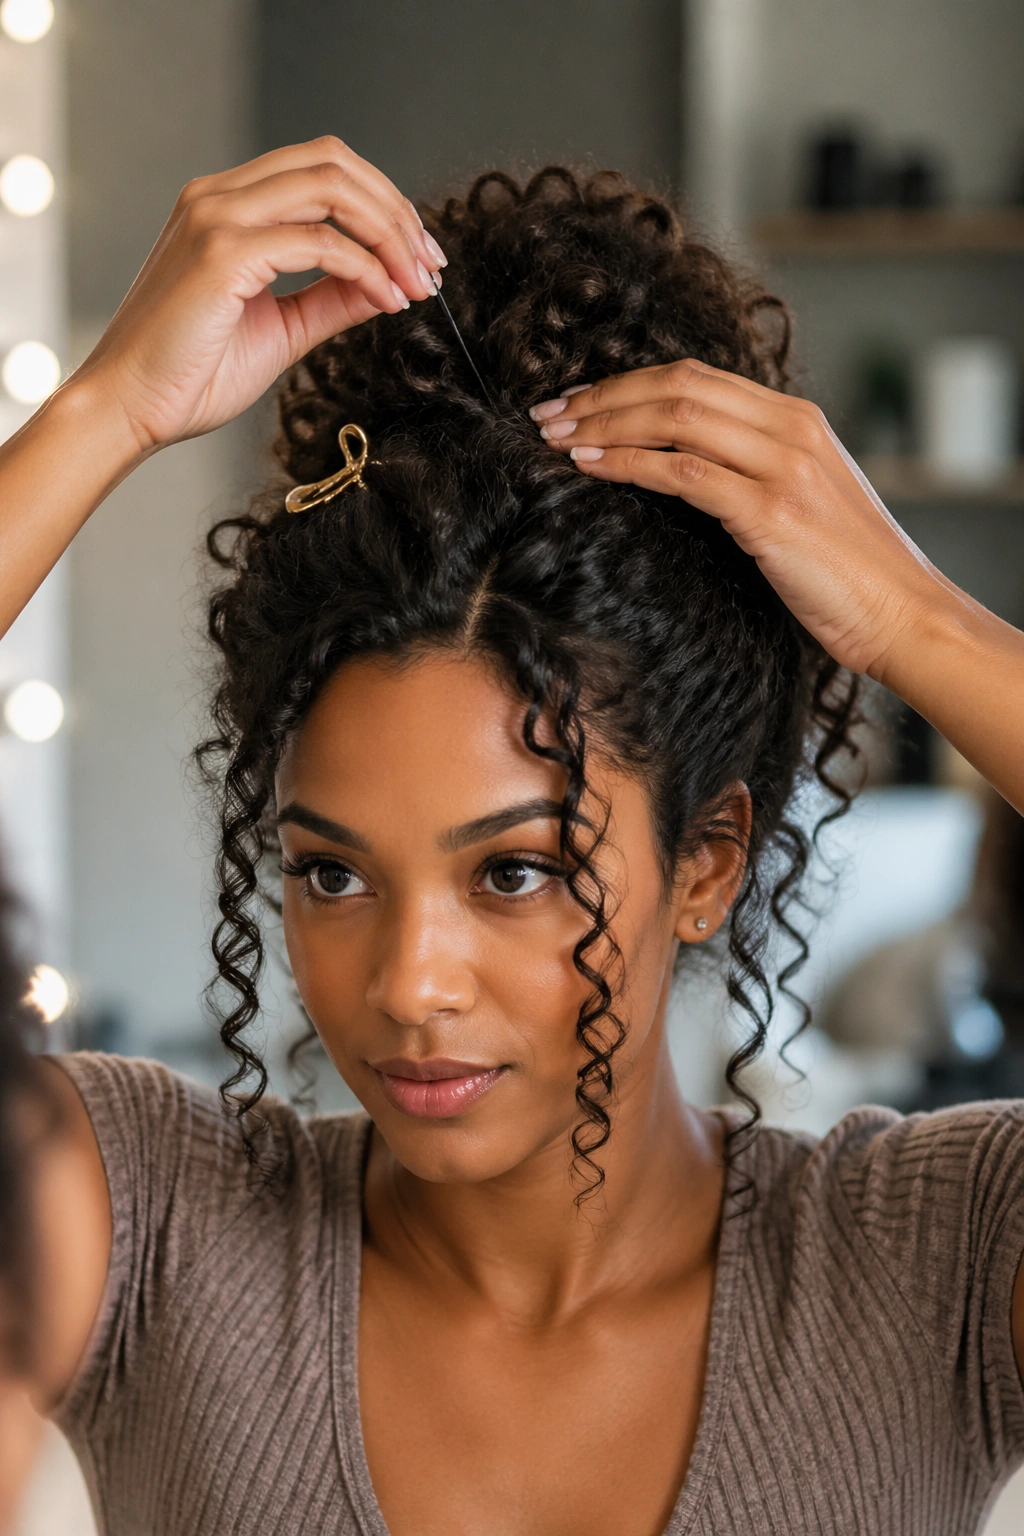
Long natural hair is genuinely its own category of blessing and challenge. The length is something many naturalistas spend years working toward — protective styling, careful moisturizing, gentle handling, patient waiting — and when it finally arrives, knowing what to do with all that hair becomes its own art form. Curly hair updos for long hair are where the real range of natural hair styling opens up, because length brings options that shorter textures simply can’t access: dramatic topknots, full braided crowns, cascading half-updos, sweeping chignons, and sculptural buns that fill an entire hand.
What “Long” Actually Means for Natural Hair
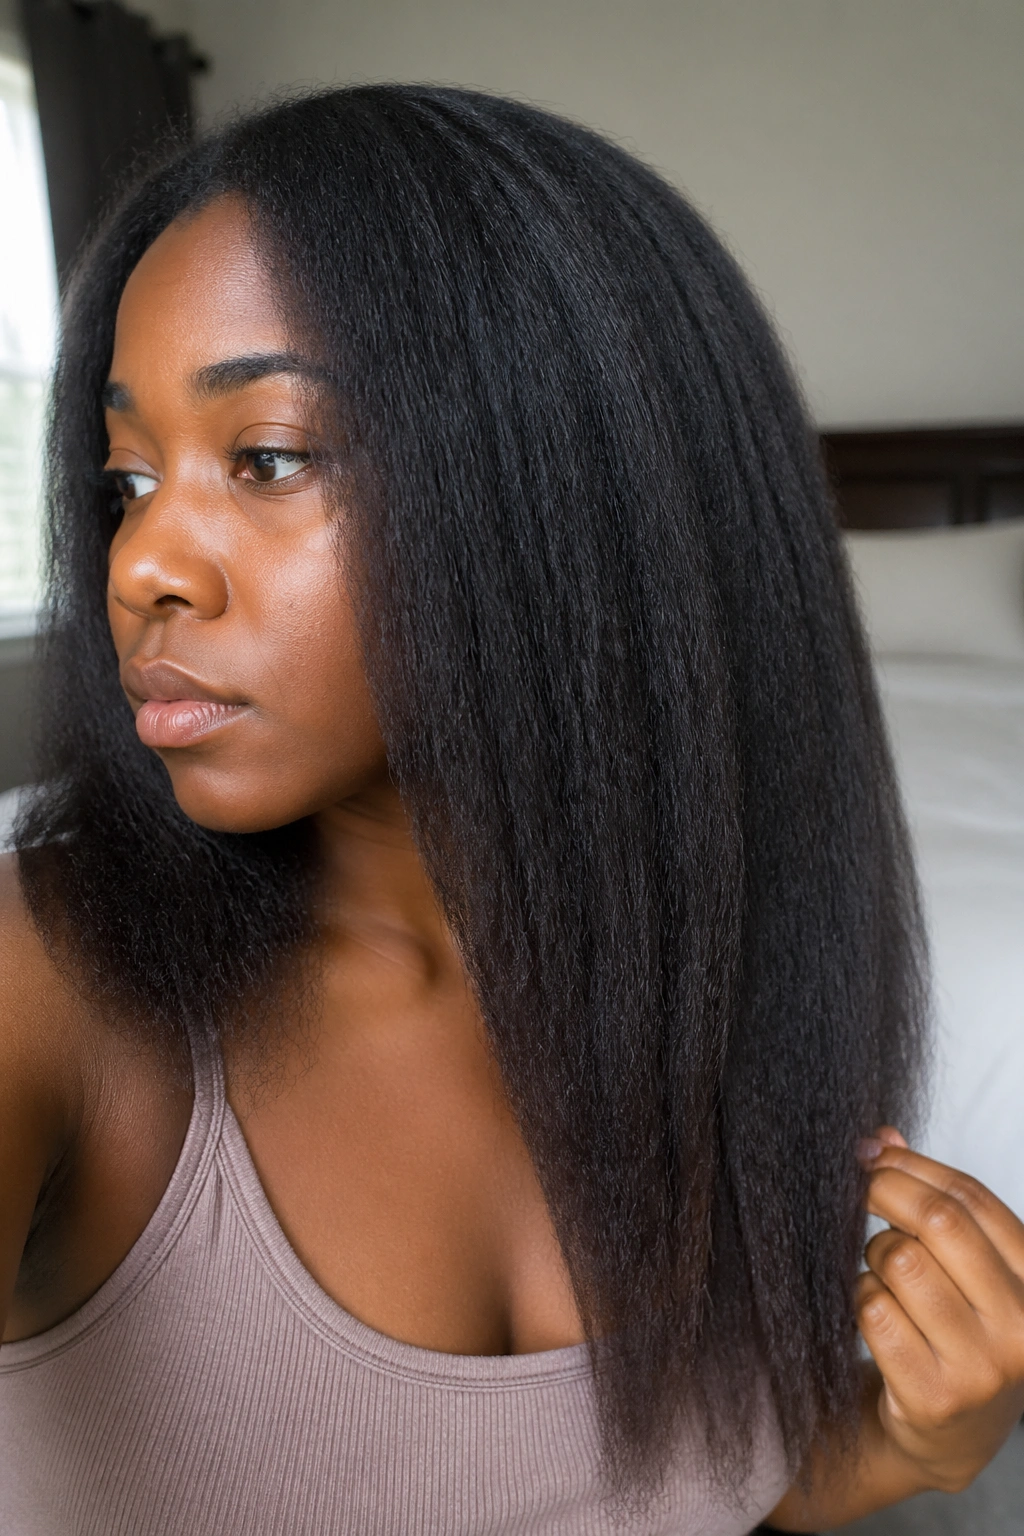
Due to significant shrinkage in tighter curl patterns, “long” natural hair can look deceptively short in its natural state. A woman with 4C hair at armpit length might look like she has shoulder-length hair when her curls are fully coiled. But when that same hair is stretched, blown out, or wet, the actual length becomes apparent.
For the purposes of this list, long natural hair means hair that reaches at least shoulder length when stretched or blown out — roughly eight to twelve inches of actual length. Some of the more dramatic styles here work better with bra-strap length or longer, and those are noted.
Shrinkage also means that long natural hair styles require different techniques than long straight hair styles. You can’t simply pull everything up and call it a day — the texture, density, and curl memory of long natural hair means that gathering, pinning, and securing require more thought, better products, and sometimes significantly more time.
The Advantage of Length in Curly Updos
Volume. That’s the defining advantage. Long natural hair — especially 4B and 4C textures — produces updos of truly remarkable scale. A full high bun on a woman with bra-strap length 4C hair isn’t a small, tidy shape. It’s a sculptural statement that you can see from across a room. The volume of long, dense natural curls gathered upward creates a silhouette that makes people stop.
Length also allows for greater variety in updo architecture. You can do a French twist. You can do a stacked spiral bun. You can do a braided crown that makes a full circuit around the head. You can create multiple buns, layered updos, and styles with both gathered sections and hanging sections — because there’s enough hair to do all of it.
Long natural hair updos take more time and more product than short hair styles. But the result — a fully realized, dramatic, and distinctly Black updo — is worth every minute.
Moisturizing Long Natural Hair Before an Updo
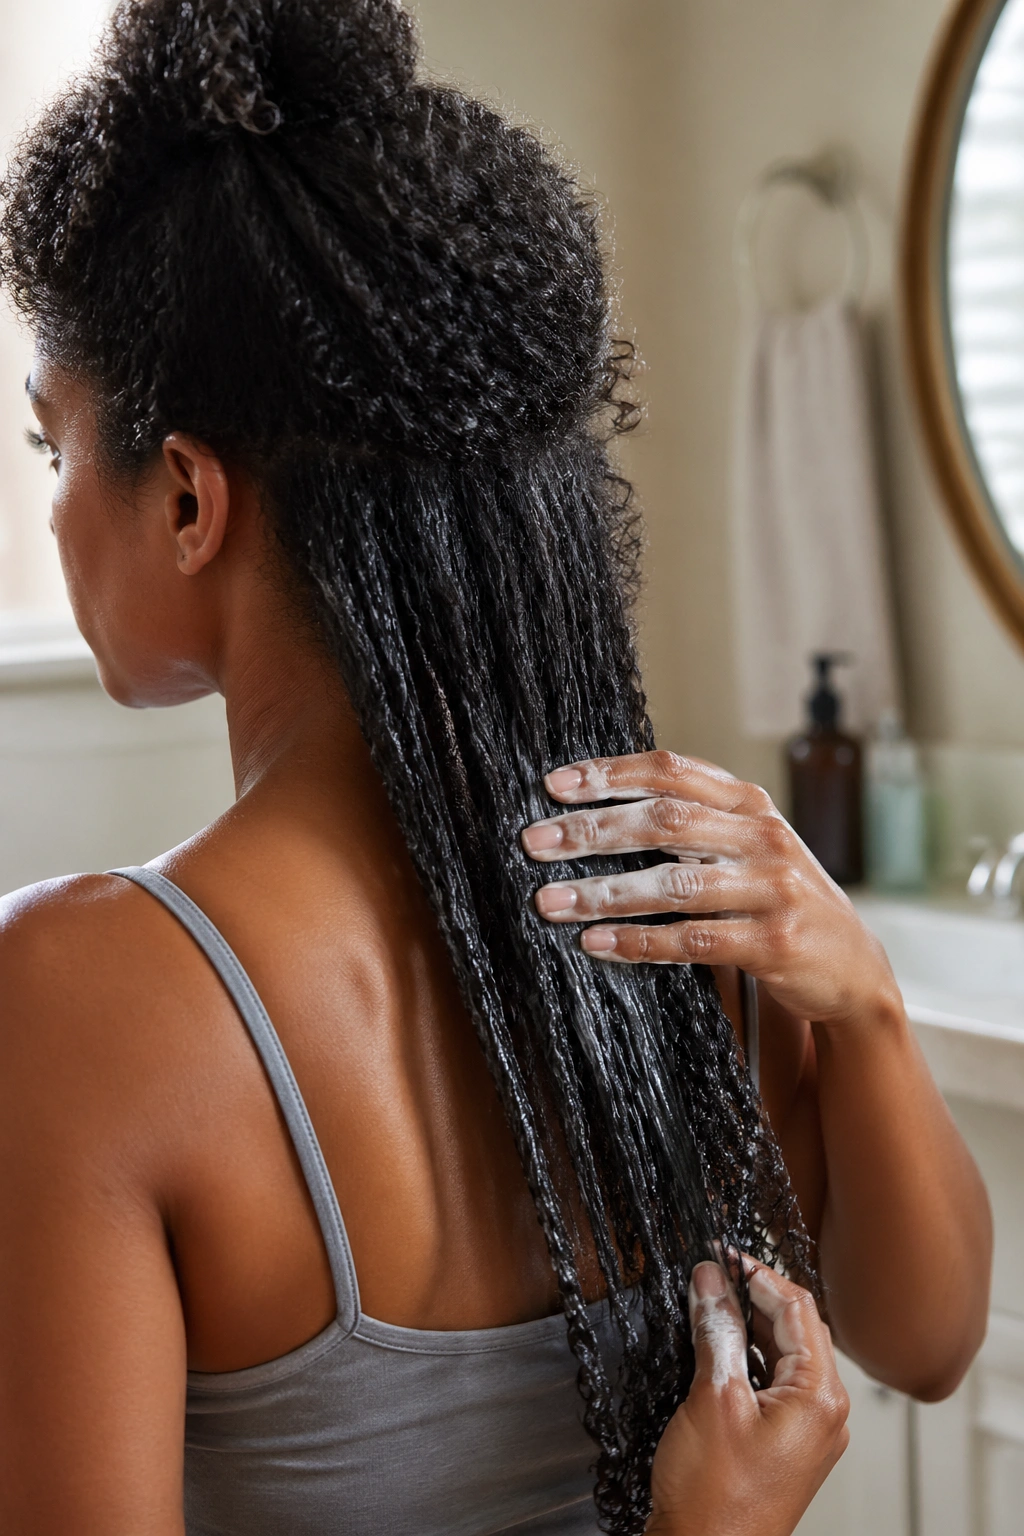
Long hair that hasn’t been properly moisturized before styling is a liability in an updo. Dry, long natural hair is fragile along the length — especially at the ends, which are the oldest part of the hair and the first to dry out and snap. An updo that puts tension on dry long hair causes breakage right at the points where the hair is gathered, twisted, or pinned.
Always apply a leave-in conditioner to the entire length before styling. For very long hair, sectioning into four to eight manageable parts and applying moisture to each section individually ensures every part of the hair is reached. Follow the leave-in with a light cream or oil to seal the moisture in before gathering the hair into your chosen style.
Pay special attention to the ends. If you’re doing a style where the ends are tucked into a bun or rolled under, those tucked ends should be well-coated with a moisturizing product before they go in. Tucked ends tend to dry out fastest in an updo because they’re not exposed to the air for re-moisturizing.
Tools for Long Curly Hair Updos
Long hair needs different tools than short hair — specifically, more of them. You’ll want a wide-tooth comb for detangling in sections, multiple sectioning clips (at least six to eight for very long hair), a large barrel brush for smoothing if any sections call for it, and a generous supply of bobby pins. Long, thick natural hair can eat through bobby pins — always have more than you think you need.
For length-specific needs: large satin scrunchies that can accommodate the volume, hair ties in multiple sizes, and possibly a few spiral spin pins (they hold large bun shapes more securely than bobby pins in dense, long hair). A good-quality holding spray is essential to keep everything in place once it’s up.
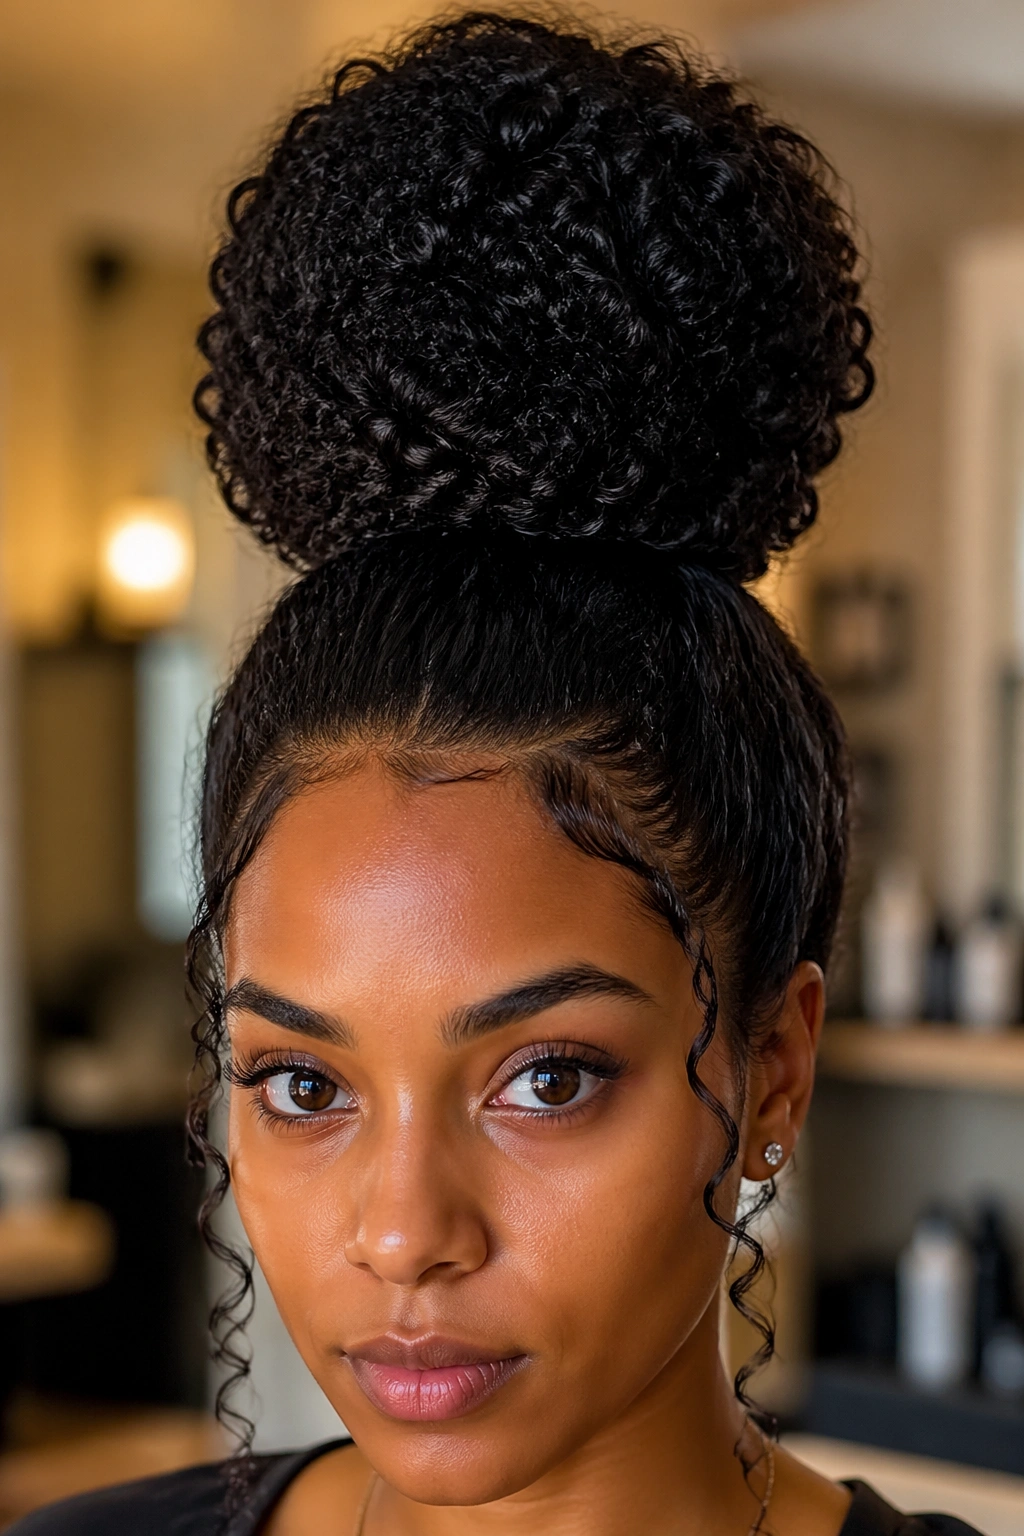
1. The Grand High Bun
On long natural hair, a high bun stops being a simple style and becomes a declaration. All the hair gathered at the crown, secured and then arranged into the largest possible bun shape — this is where the scale of long 4C hair does something straight hair genuinely cannot match.
How to Get This Look
Section hair into two halves — front and back — to make gathering more manageable. Apply a small amount of smoothing gel or cream to the back section and gather it upward. Secure with a large scrunchie at the crown. Add the front section, smoothing it upward and backward to join the back section. Secure again. Then twist or coil the gathered tail around the scrunchie in a clockwise direction, pinning as you go. The finished bun should sit directly on top of the head, as high as possible.
- Use spiral spin pins through the bun for maximum hold without visible pins
- Apply edge control along the hairline and brush with a soft-bristle brush
- Fluff the bun slightly outward on all sides after pinning for maximum volume
- The height of this bun on long hair is genuinely spectacular — don’t minimize it
2. Double Stacked Buns
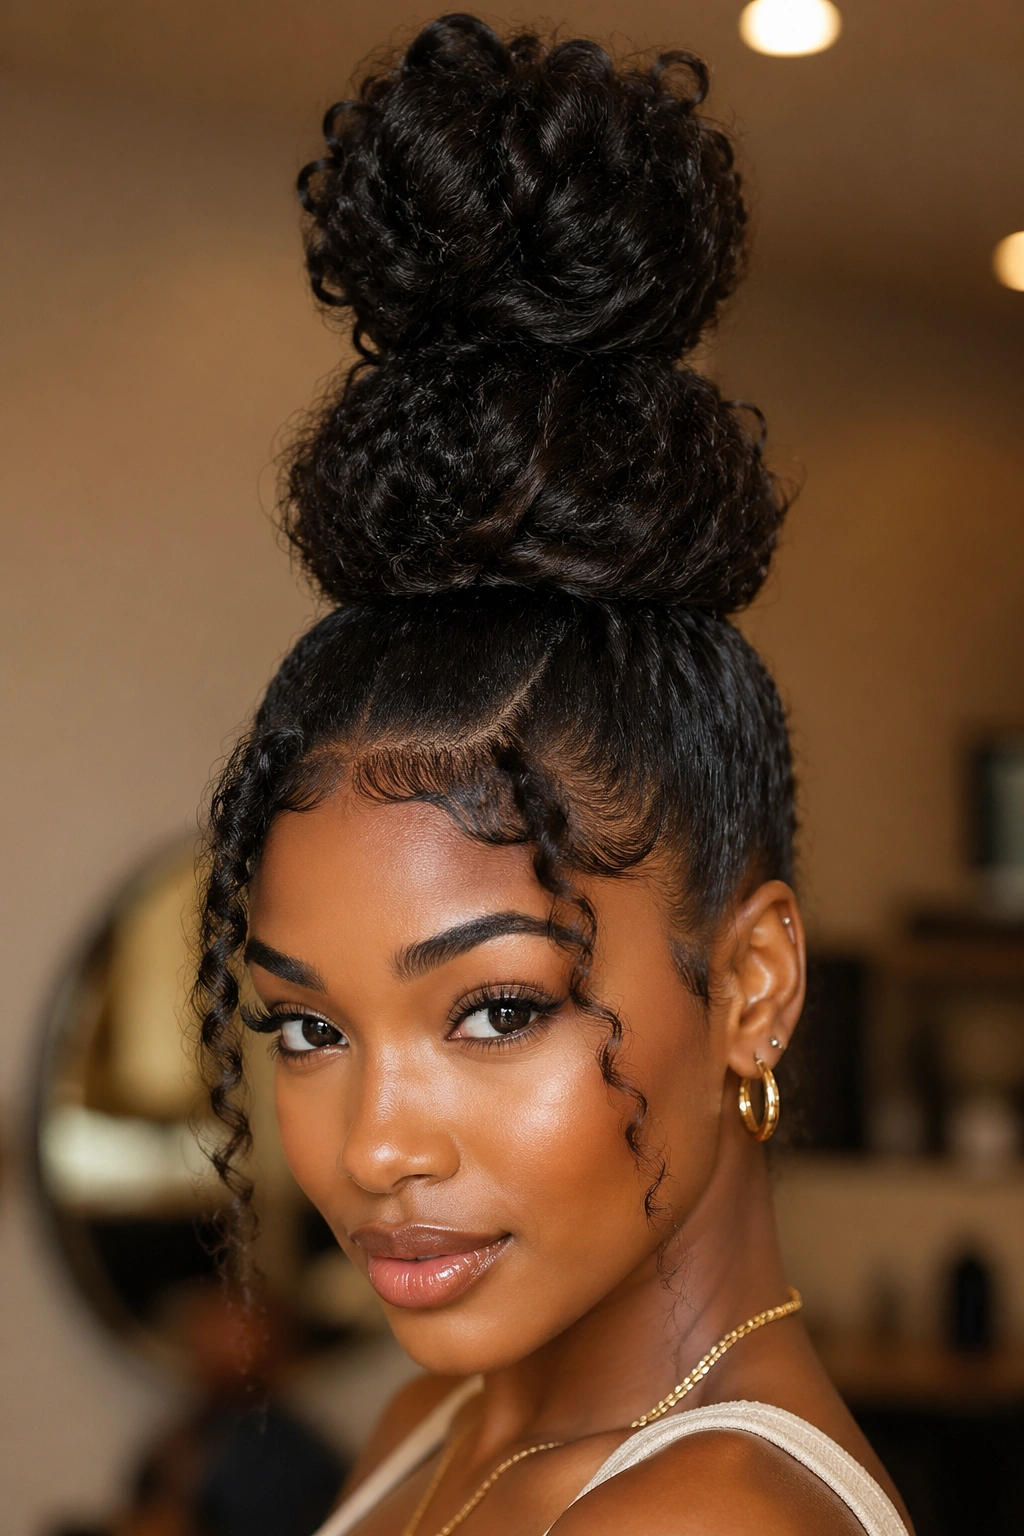
Two buns, stacked vertically from the nape to the crown, create a style that’s distinctly architectural and impossible without significant length. The bottom bun sits at the base of the skull; the top bun sits at or near the crown. Together they create a vertical column of texture that adds dramatic height.
Divide hair horizontally — roughly from ear to ear — to create the upper and lower sections. Create each bun independently, securing each with its own scrunchie and pins. The upper bun will rest slightly on top of the lower one. Use bobby pins at the border between them to secure them together.
3. Braided Crown Updo
A braided crown requires enough length that the braid can travel all the way around the head and still have hair left to secure. This is typically achievable at shoulder length or slightly longer when stretched, though very long hair creates a more dramatic, fuller crown.
Start at one temple and cornrow or flat-braid horizontally, picking up hair along the front hairline as you go. When you reach the opposite temple, angle the braid backward along the nape. Secure at the back. Do the same from the other side, crossing the two braids and pinning where they meet. The result is a full crown of braided hair around the perimeter of the head, with the interior hair gathered into a puff or bun.
4. Low Cascading Bun
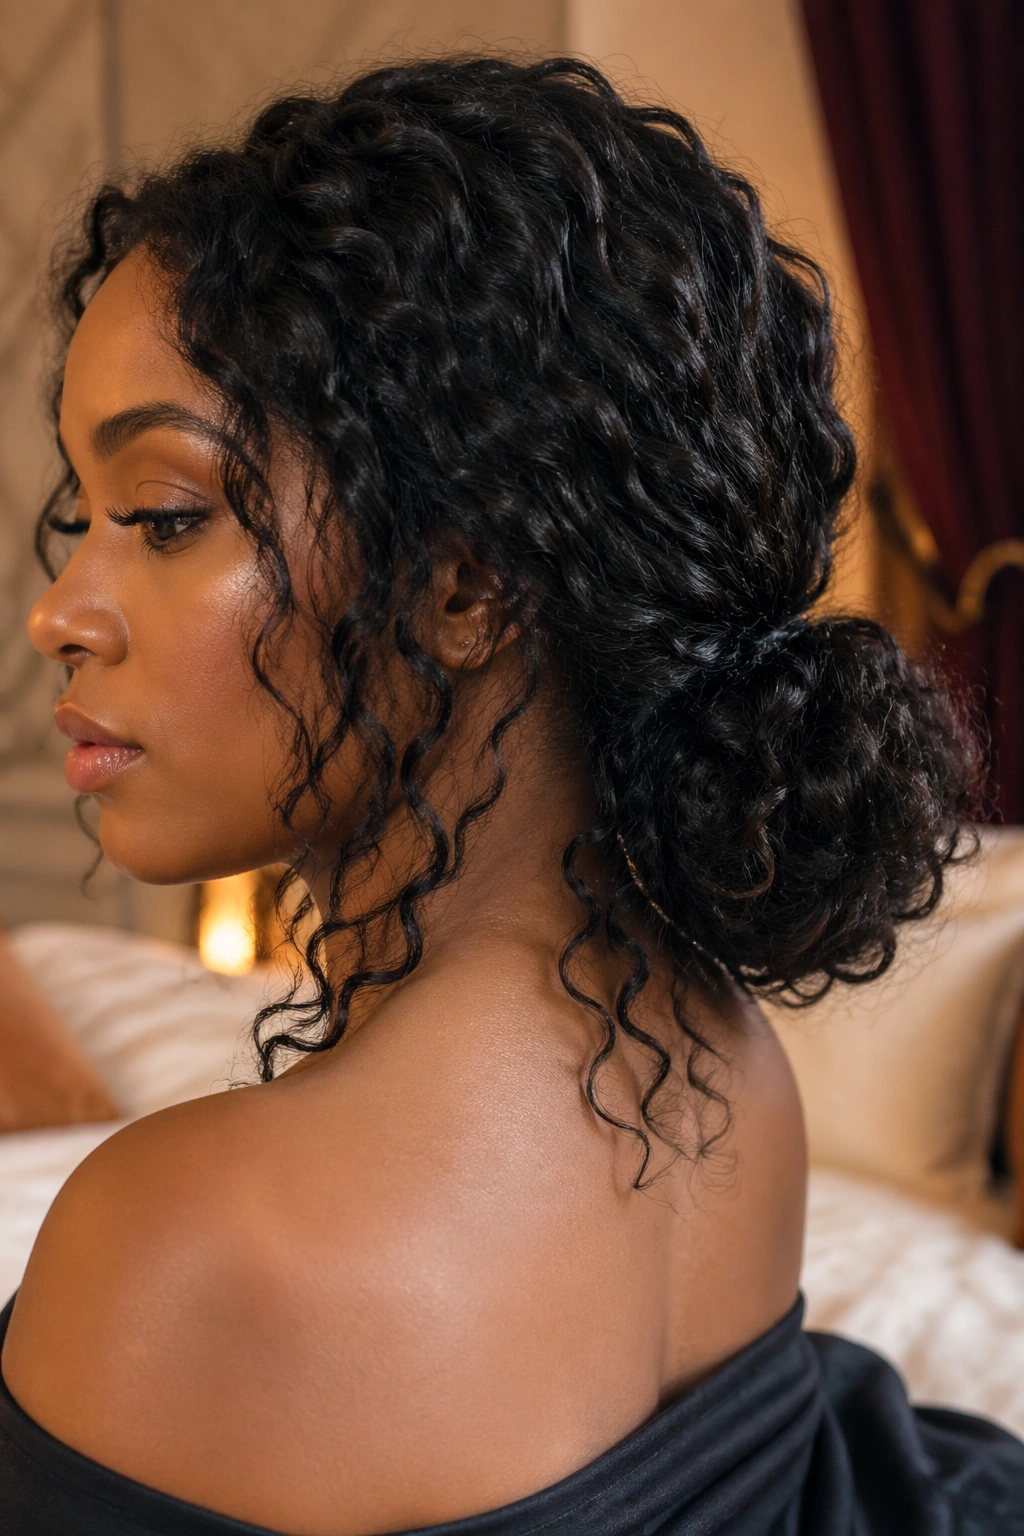
A low bun at the nape of the neck, gathered loosely so that the curls within it cascade slightly outward rather than sitting in a tight ball — this is the romantic, feminine updo choice for long hair. It works beautifully for formal occasions, especially when accessorized with decorative pins or a jeweled clip.
The looseness is intentional. Don’t tighten this bun so much that it loses its soft, organic quality. Gather the hair, twist it once, secure with a scrunchie, and let the shape be imperfect. Then add a few strategic pins to keep the loosest pieces from falling out entirely.
5. Full Twist-Out Gathered Into an Updo

Do a full twist-out on long hair — larger sections than usual for maximum volume — and once the twist-out is fully set and separated, gather the defined curls into an updo. The difference between this and a regular updo is that the individual sections inside the updo retain their twist-out definition — so instead of a mass of loose hair gathered inside a bun, you have a bun made of distinctly defined, separated curls.
Gather the defined curls loosely, twist the ponytail upward, and pin it into a bun without disrupting the individual sections too much. The result is a textured, dimensional bun where the interior has visible curl structure.
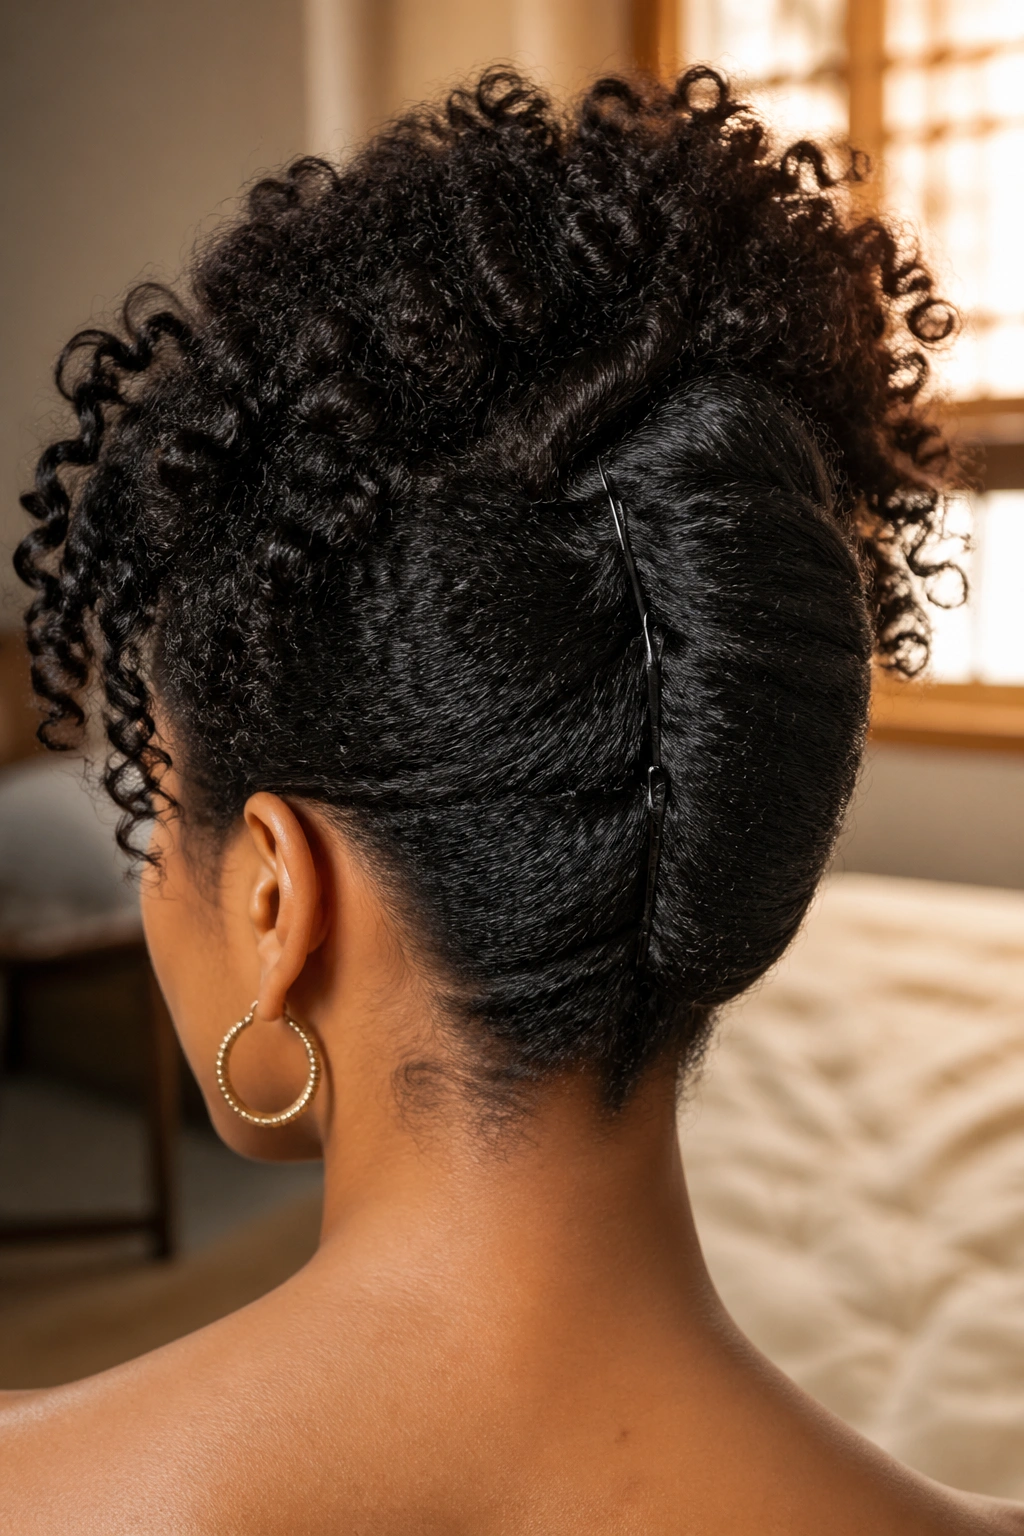
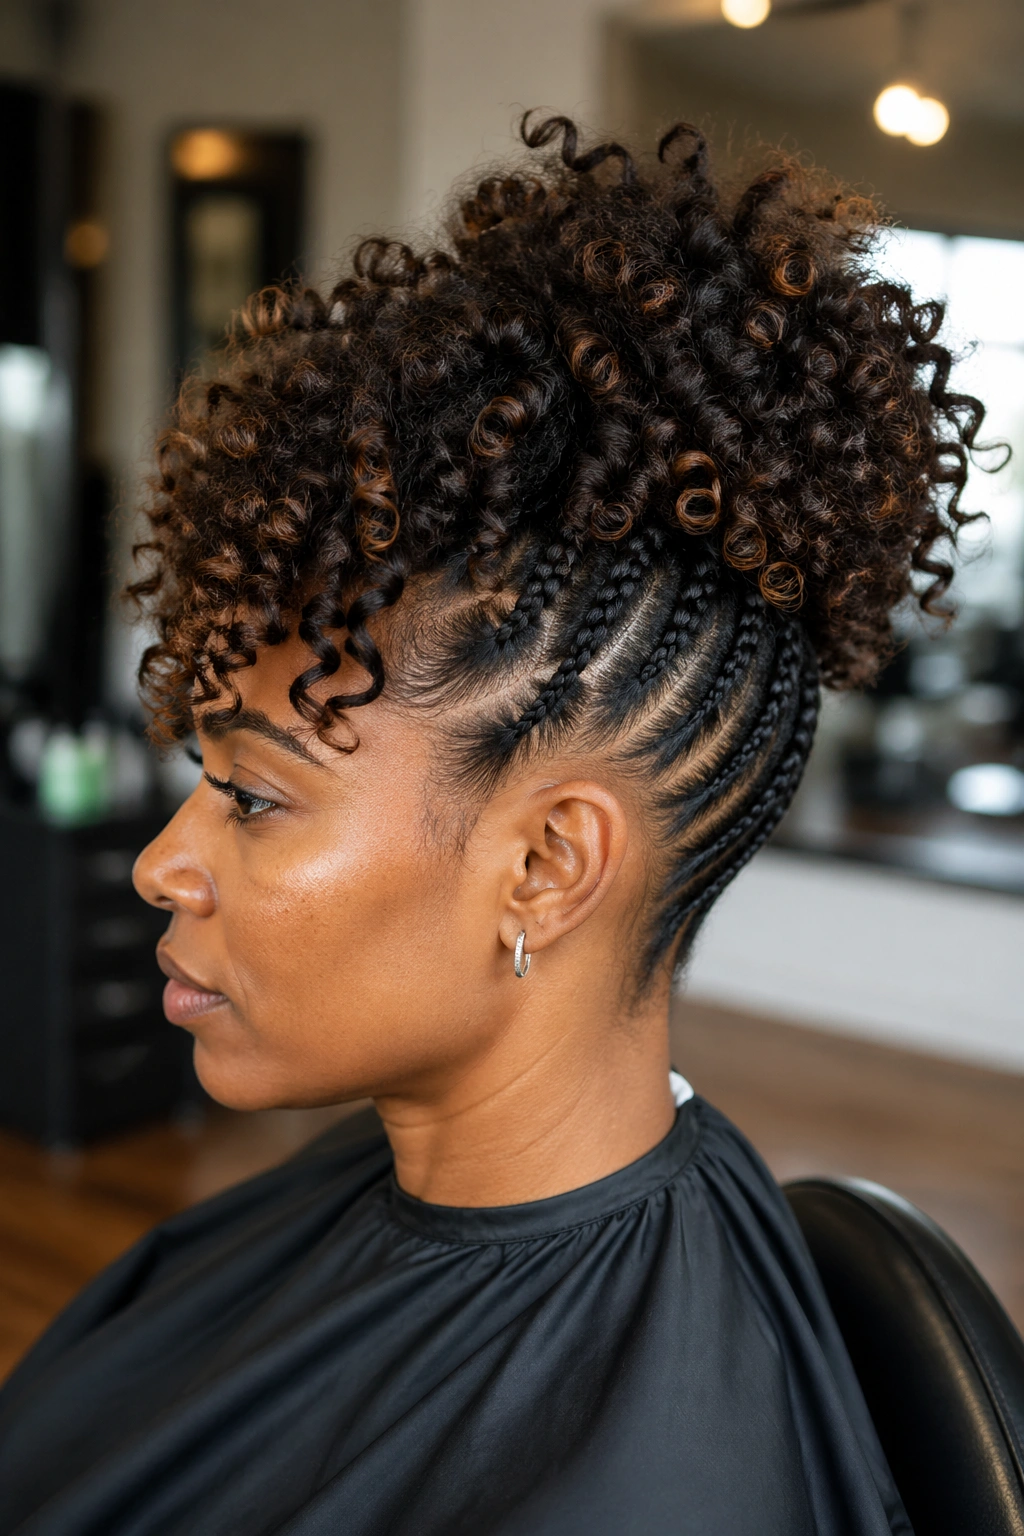
6. The Frohawk Updo With Length
On long hair, the frohawk takes on an entirely different scale than on short hair. Gather the sides of the long hair upward, securing them with bobby pins or small elastics at regular intervals along each side. Leave the central section free, pulling it upward into a dramatic crest that runs from the forehead to the nape.
On long hair, that central section — fully stretched — can reach significant height, creating a dramatic silhouette. Fluff the central section with an afro pick for maximum volume, or leave the defined curl pattern intact for a more refined version of the style.
7. Rope Twist Chignon
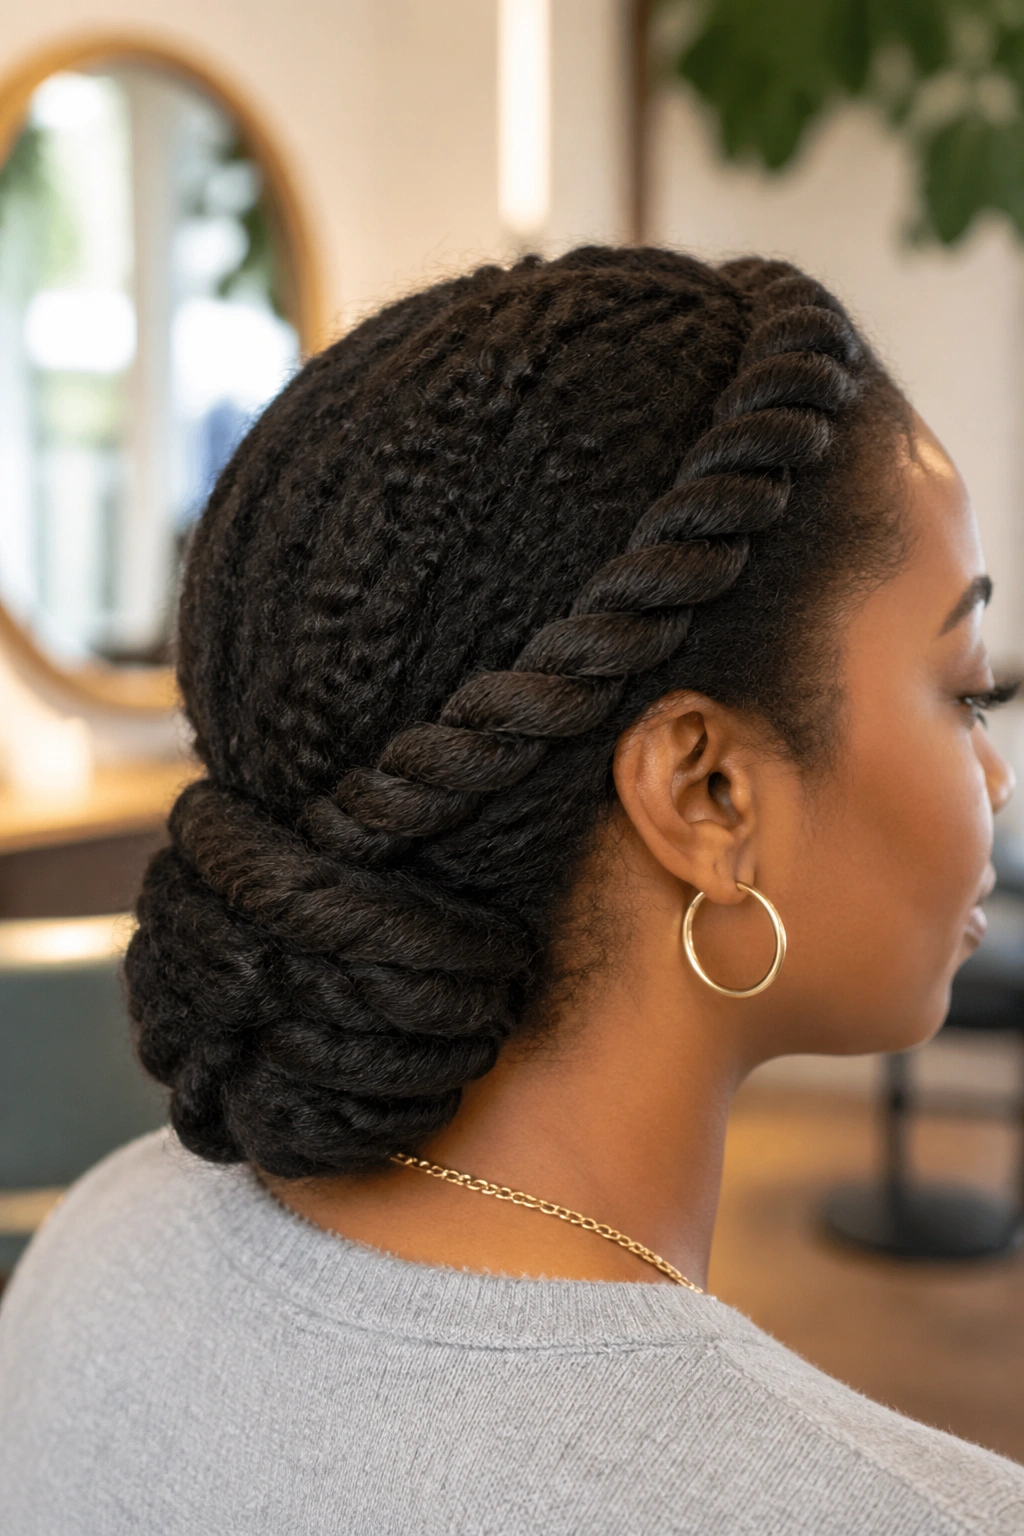
Rope twists — created by twisting two strands in the same direction before wrapping them together — are strong, structured, and beautiful. On long hair, one or two large rope twists can be coiled into a chignon at the nape, creating a low, structured updo with visible textural detail.
Divide the hair into two sections. Create a rope twist with each section. Coil both twists together at the nape, wrapping them around each other before pinning. The tight twist pattern remains visible even after coiling, creating a chignon that looks like a work of art.
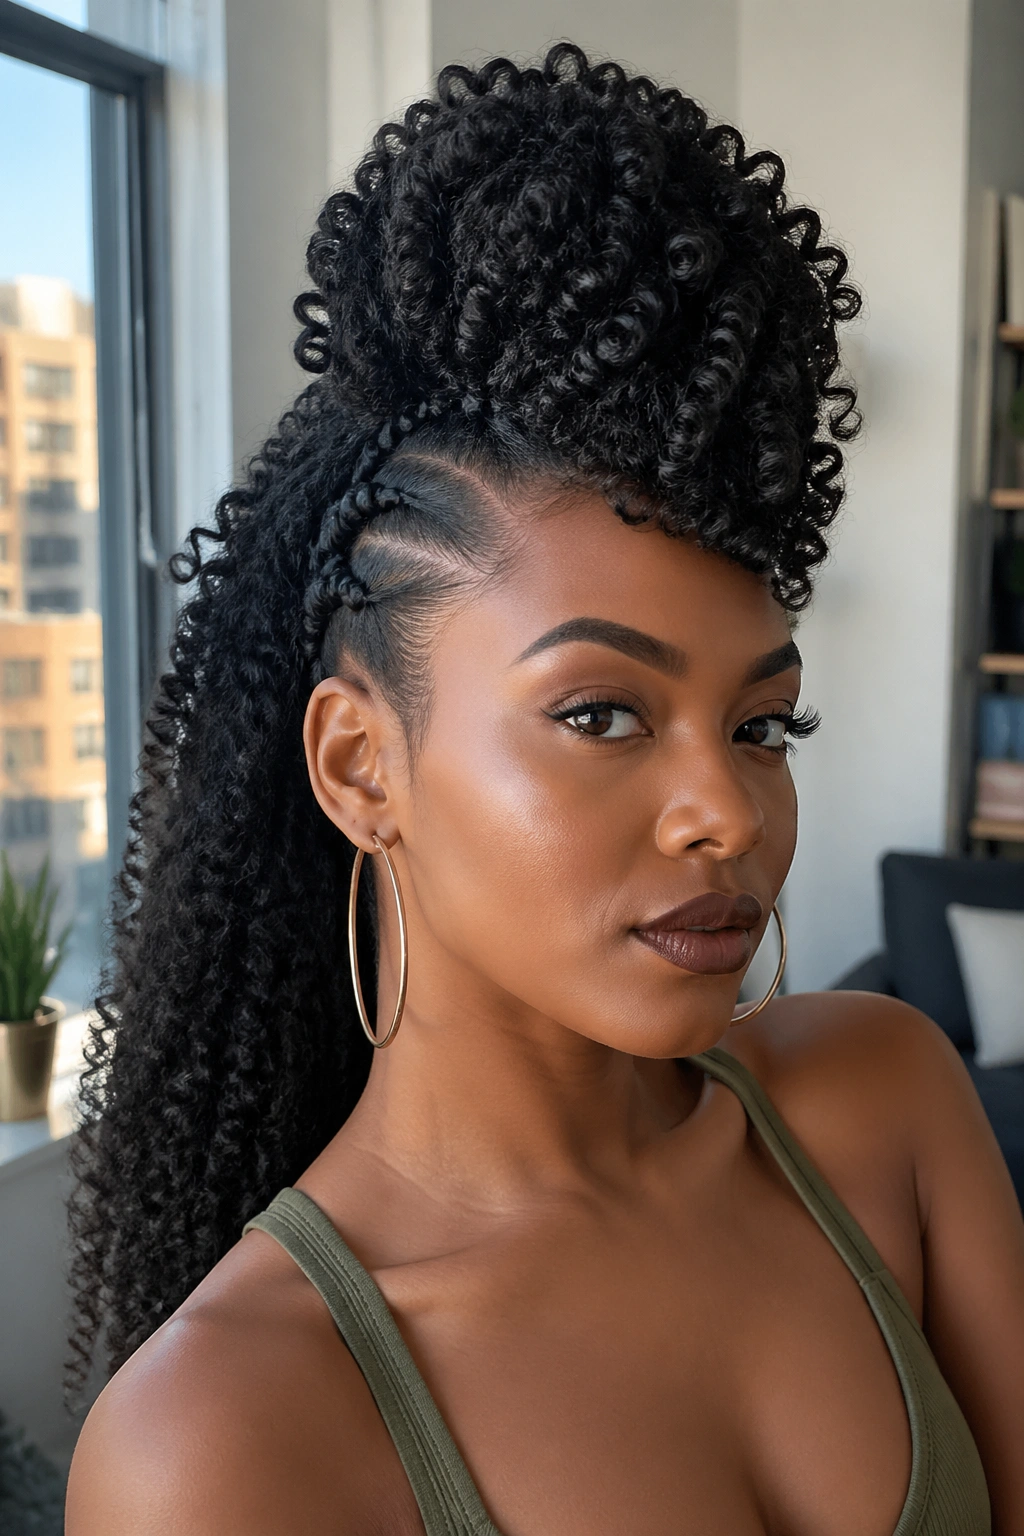
8. Half-Up, Half-Down With Volume
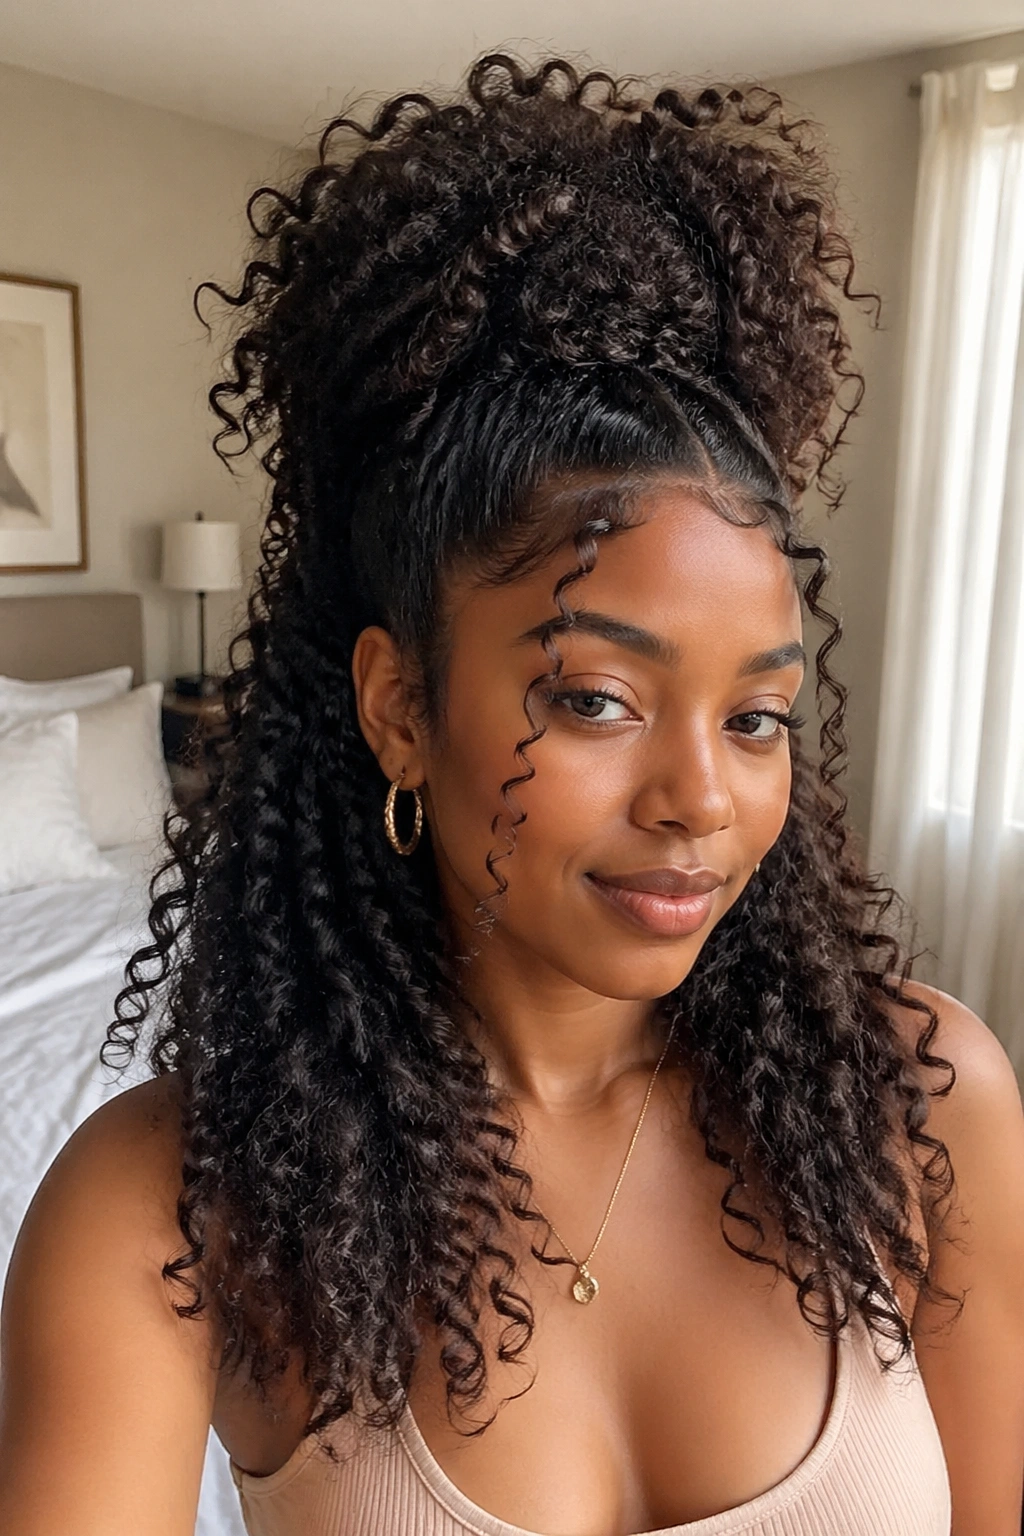
Long natural hair half-up styles hit differently than shorter versions because the hanging section has actual length and weight. The top half is gathered into a puff or bun at the crown; the bottom half hangs free in all its defined-curl glory, sometimes reaching mid-back on fully stretched lengths.
How to Get This Look
Section from ear to ear. Gather and secure the top half at the crown — either a puff with a scrunchie, a twisted mini bun, or a knotted style. Apply a curl cream and a light gel to the hanging section, scrunching upward to define the curl pattern. Let air dry or diffuse. The defined hanging curls become the visual anchor of the style.
9. French Roll on Long Natural Hair
The French roll on long, thick natural hair is a workout — but the result is worth the effort. Gather all hair into a low side sweep, then fold it upward along the back of the head, tucking and pinning as you go. The roll should sit vertically along the back of the skull, with the top section — the thickest part on long hair — fanning outward in a natural curl burst.
Use vertical bobby pins along the fold of the roll to hold everything in place. A holding spray along the surface adds shine and helps control any frizz that the manipulation brings out.
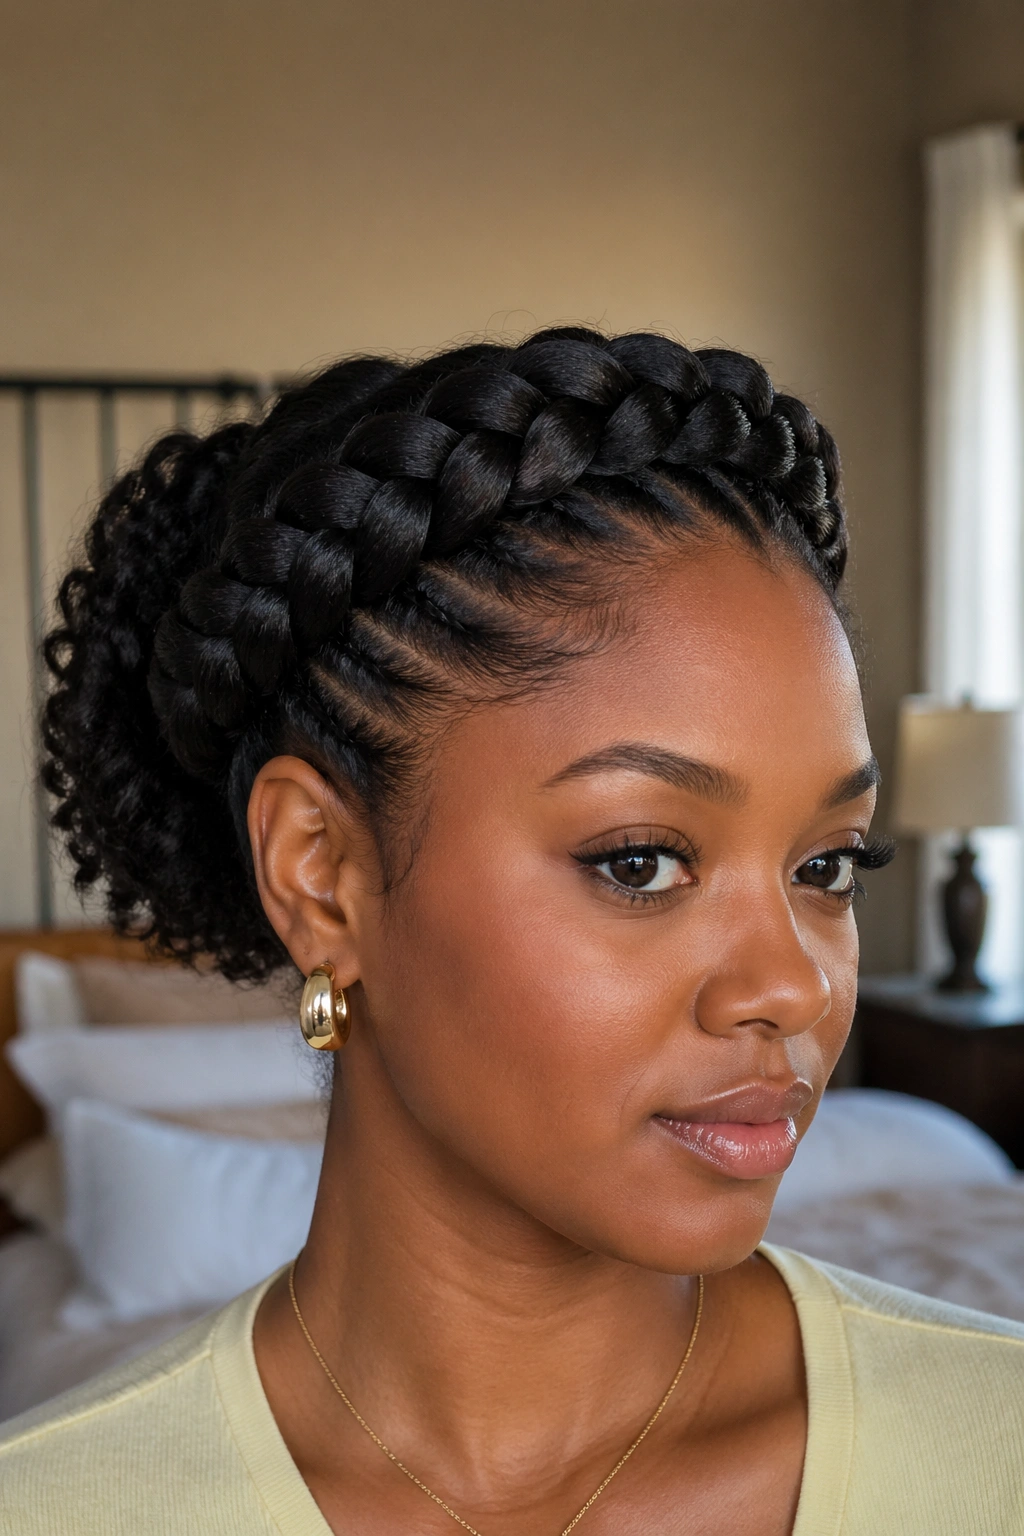
10. Halo Braid Updo
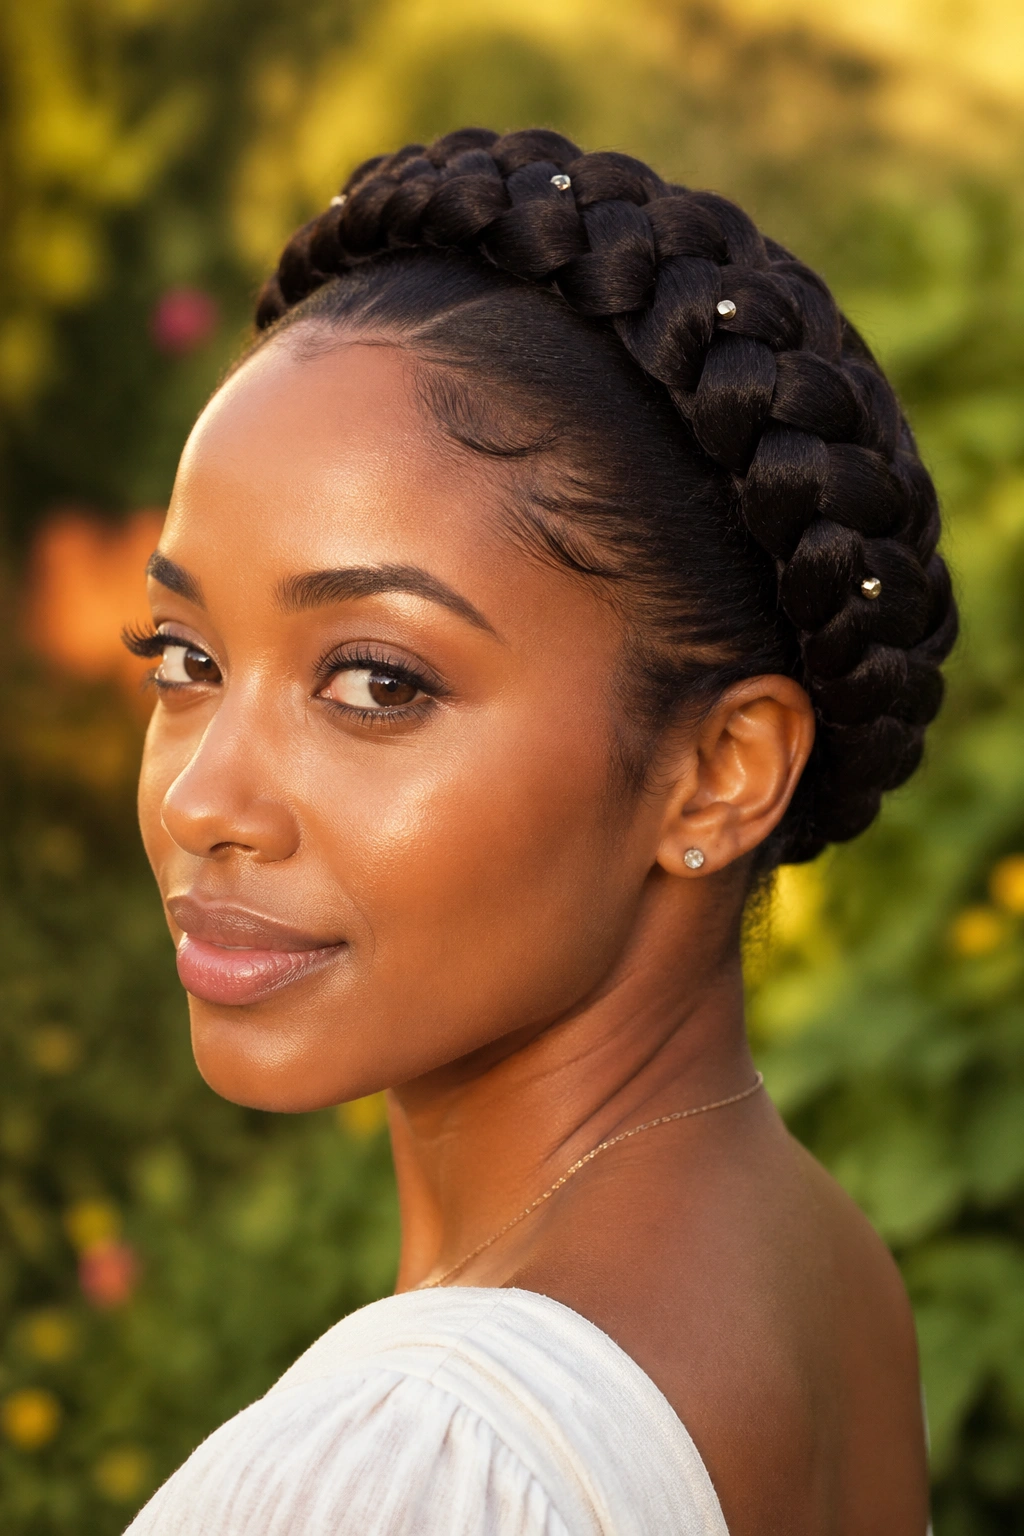
A halo braid on long natural hair wraps a single large braid (or two braids) all the way around the head, sitting flush against the scalp like a crown. On long hair, this braid can be thick and full — a substantial structure that frames the entire face from one side of the hairline to the other.
The key is keeping the braid tight enough to lay flat without causing tension at the roots. Work slowly, keeping even tension throughout. A few pins along the braid at strategic points keep it from lifting away from the scalp.
11. Stacked Twist Updo
Create multiple two-strand twists of varying sizes across the entire head. Then gather all the twists upward and pin them into a loose, stacked arrangement at the crown — some pinned flat, others coiled, others pulled straight up. The variety of positions creates a multi-layered, sculptural updo that looks complex but is made entirely of the simple twist technique.
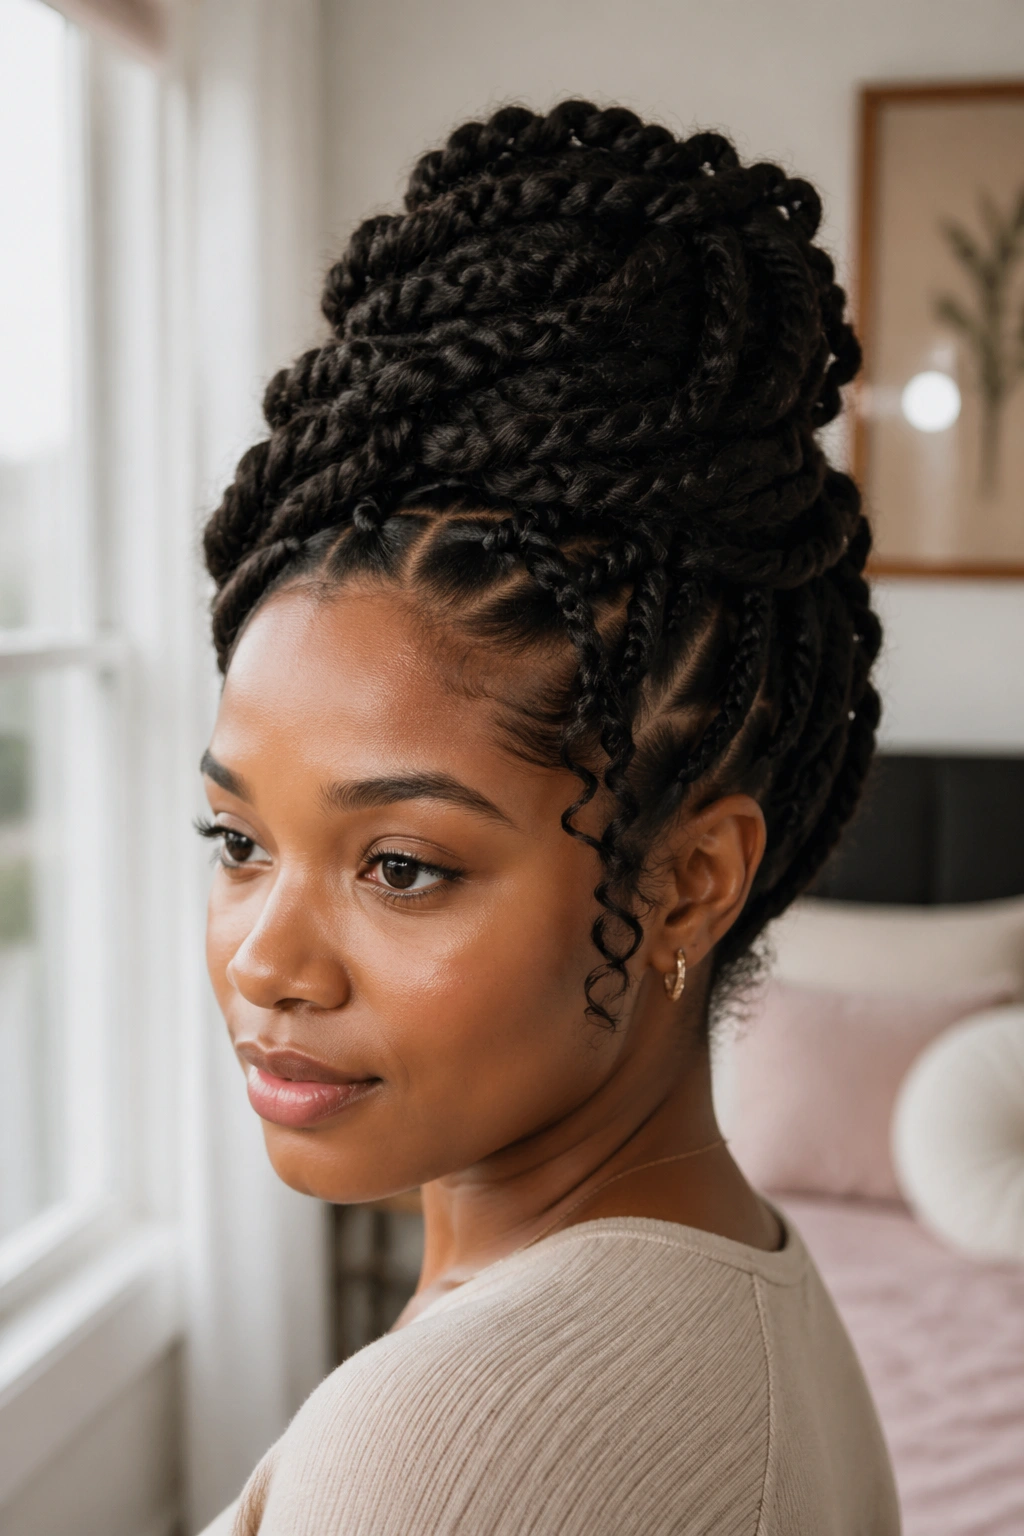
12. Knotless Braid Bun on Long Hair
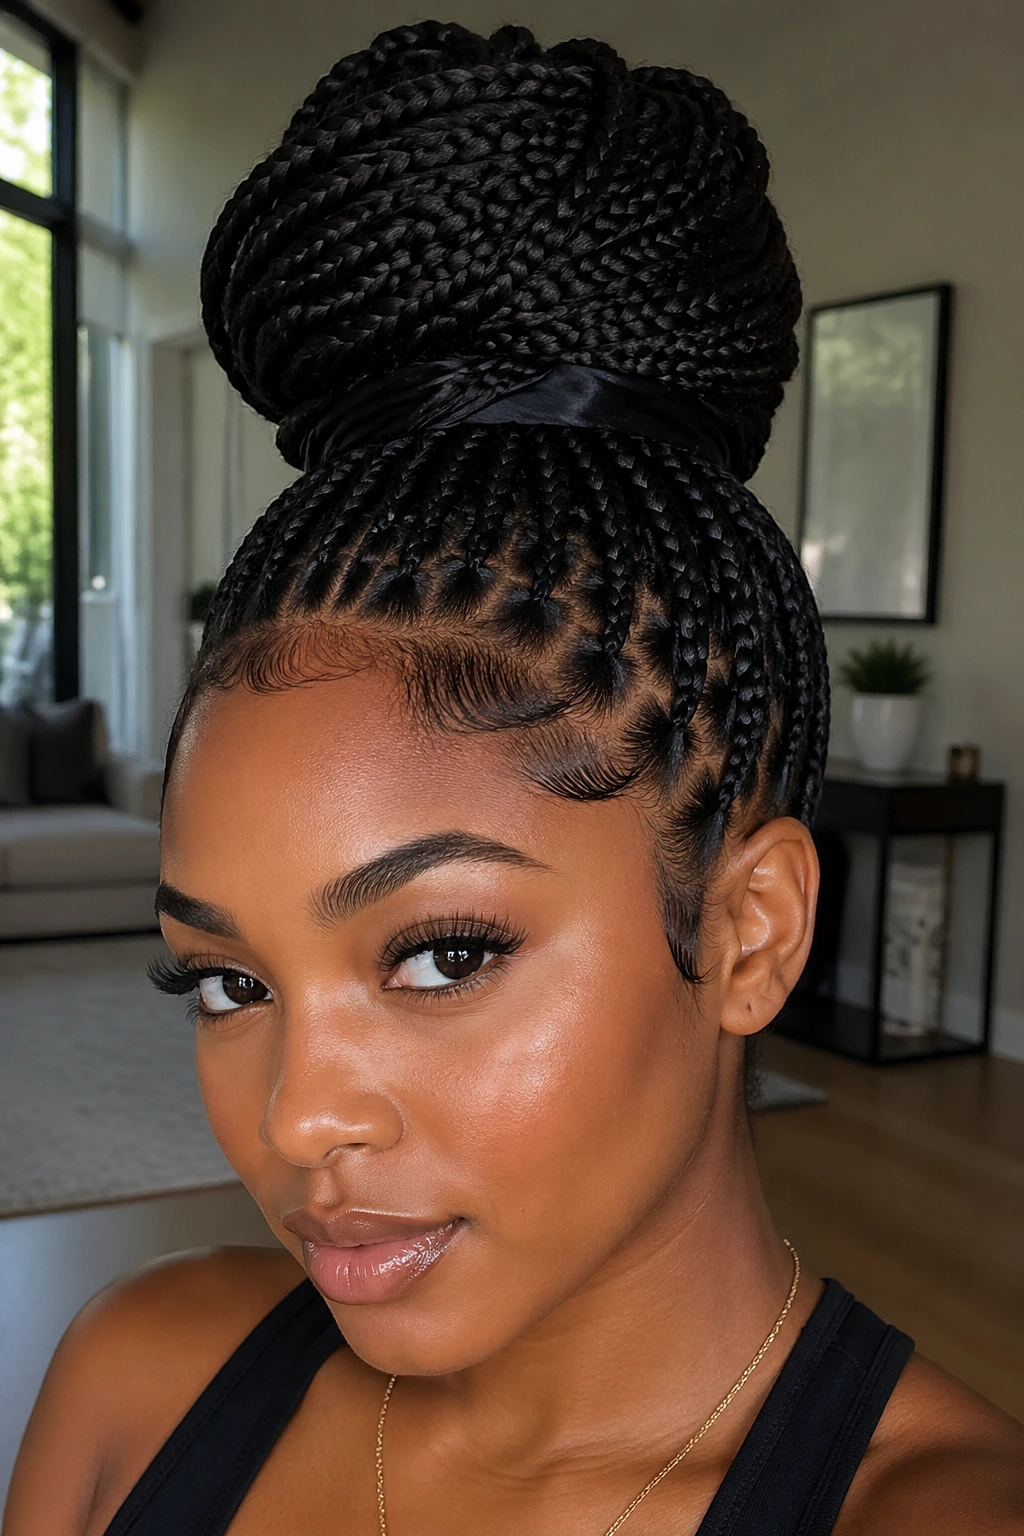
Long knotless braids gathered into an updo create a silhouette that combines the volume of natural curls with the structure of braids. A high bun made of long knotless braids has a gravity-defying quality that photographs beautifully and holds its shape all day.
Gather braids high at the crown, coil them around the base, and secure with large bobby pins. For extra hold, use a satin-wrapped elastic at the gathering point first, then coil and pin on top.
13. Waterfall Updo

A waterfall updo gathers the hair in a way that allows some sections to “fall” — to hang through the gathered body of the style — creating the impression of flowing hair within a structured updo. On long natural hair, these falling sections cascade in defined curls, creating a romantic, layered effect.
Pin the main body of the updo at the crown or nape. Before securing completely, pull a few sections through the outside of the gathered hair and let them hang. Scrunch those sections with a curl cream to define them, then hold the main body of the updo in place with pins.
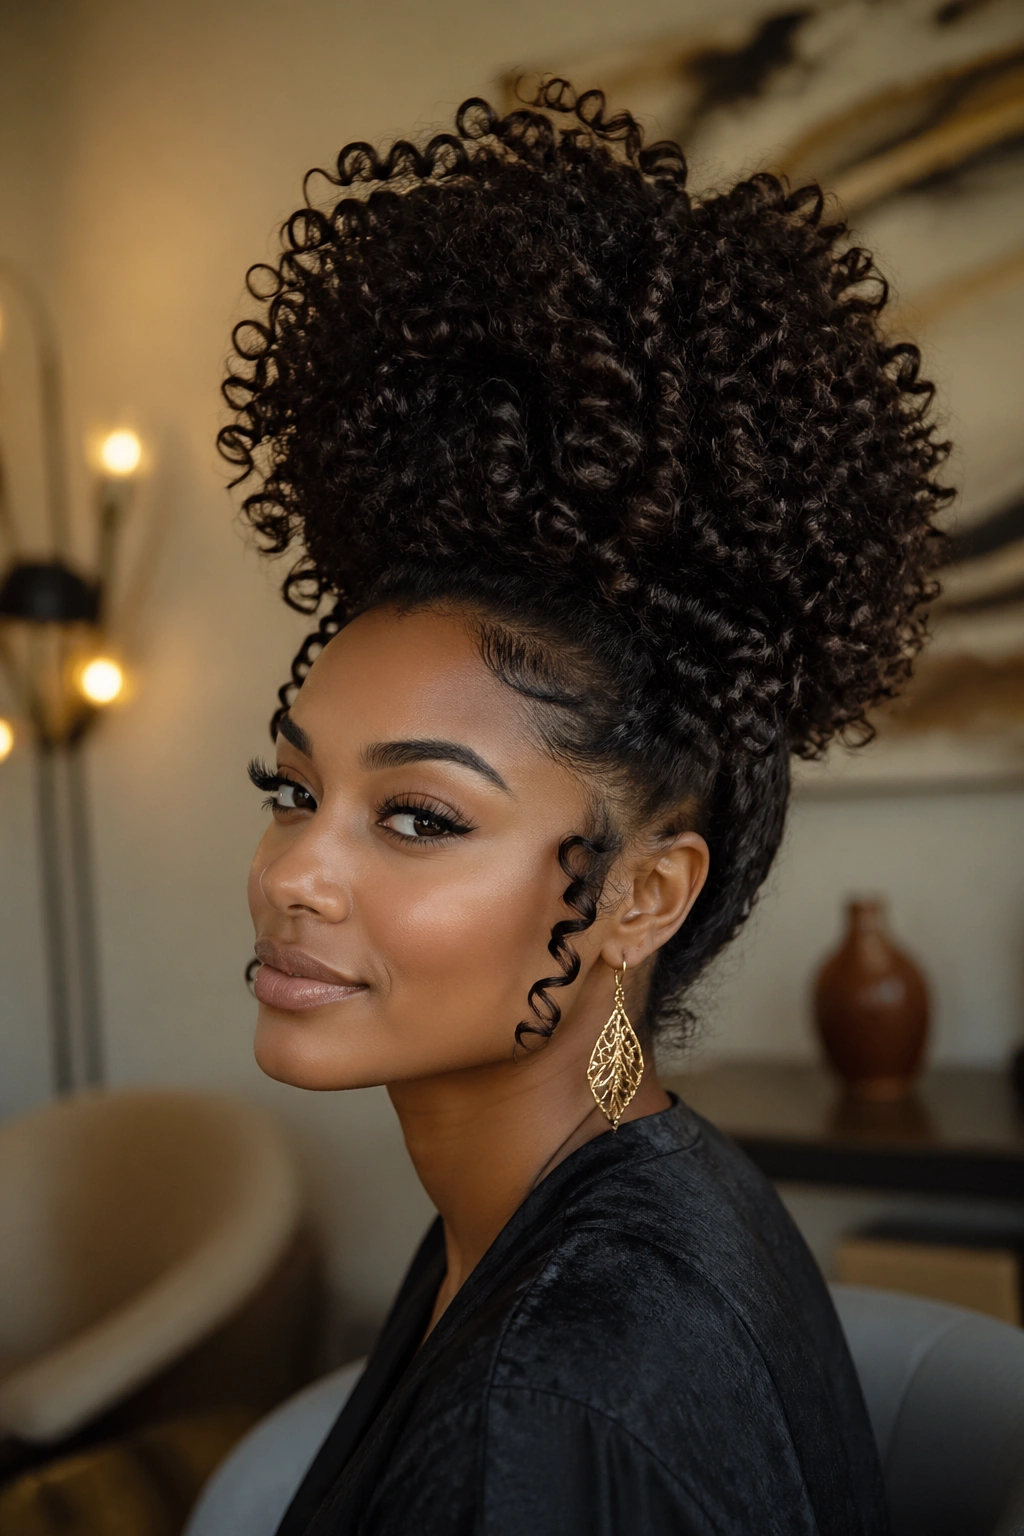
14. Jumbo Puff
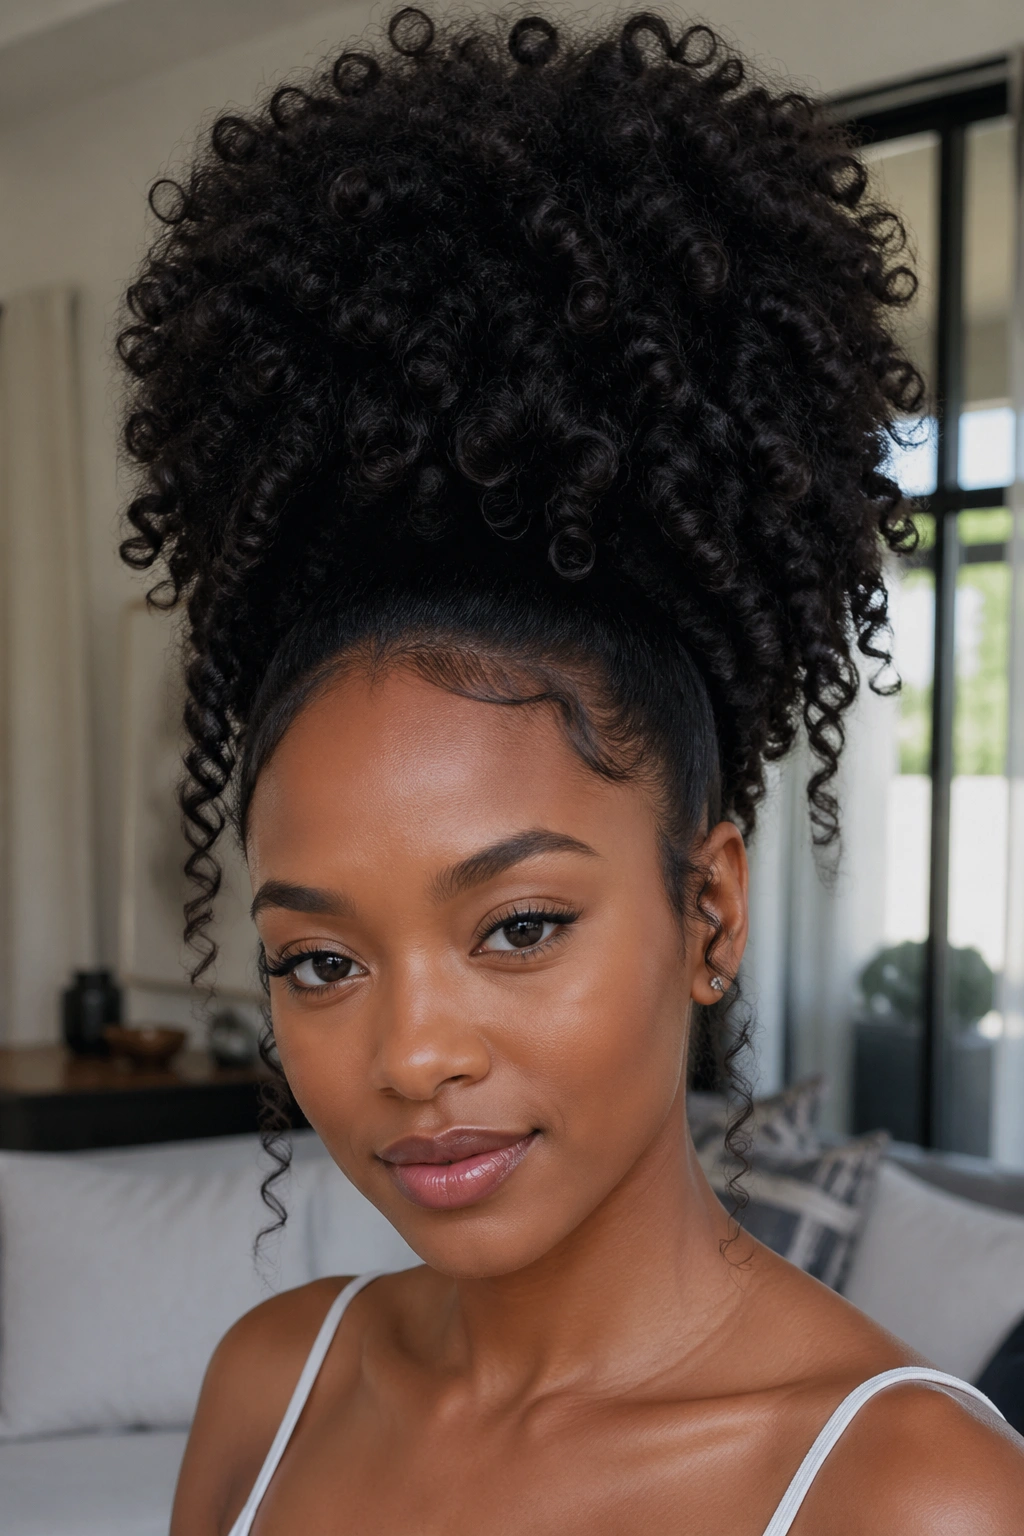
On long hair, a puff — gathered with a large scrunchie at the crown — can reach extraordinary volume and height. The jumbo puff is essentially a high bun without the coiling step — just a massive gathered ponytail of curls sitting at the crown. The volume alone makes it a style.
Don’t underestimate the jumbo puff. On long, dense 4C hair, it creates a silhouette that few other styles can match. Smooth the edges, secure the base, and let the volume do everything else.
15. Scarf-Wrapped Updo
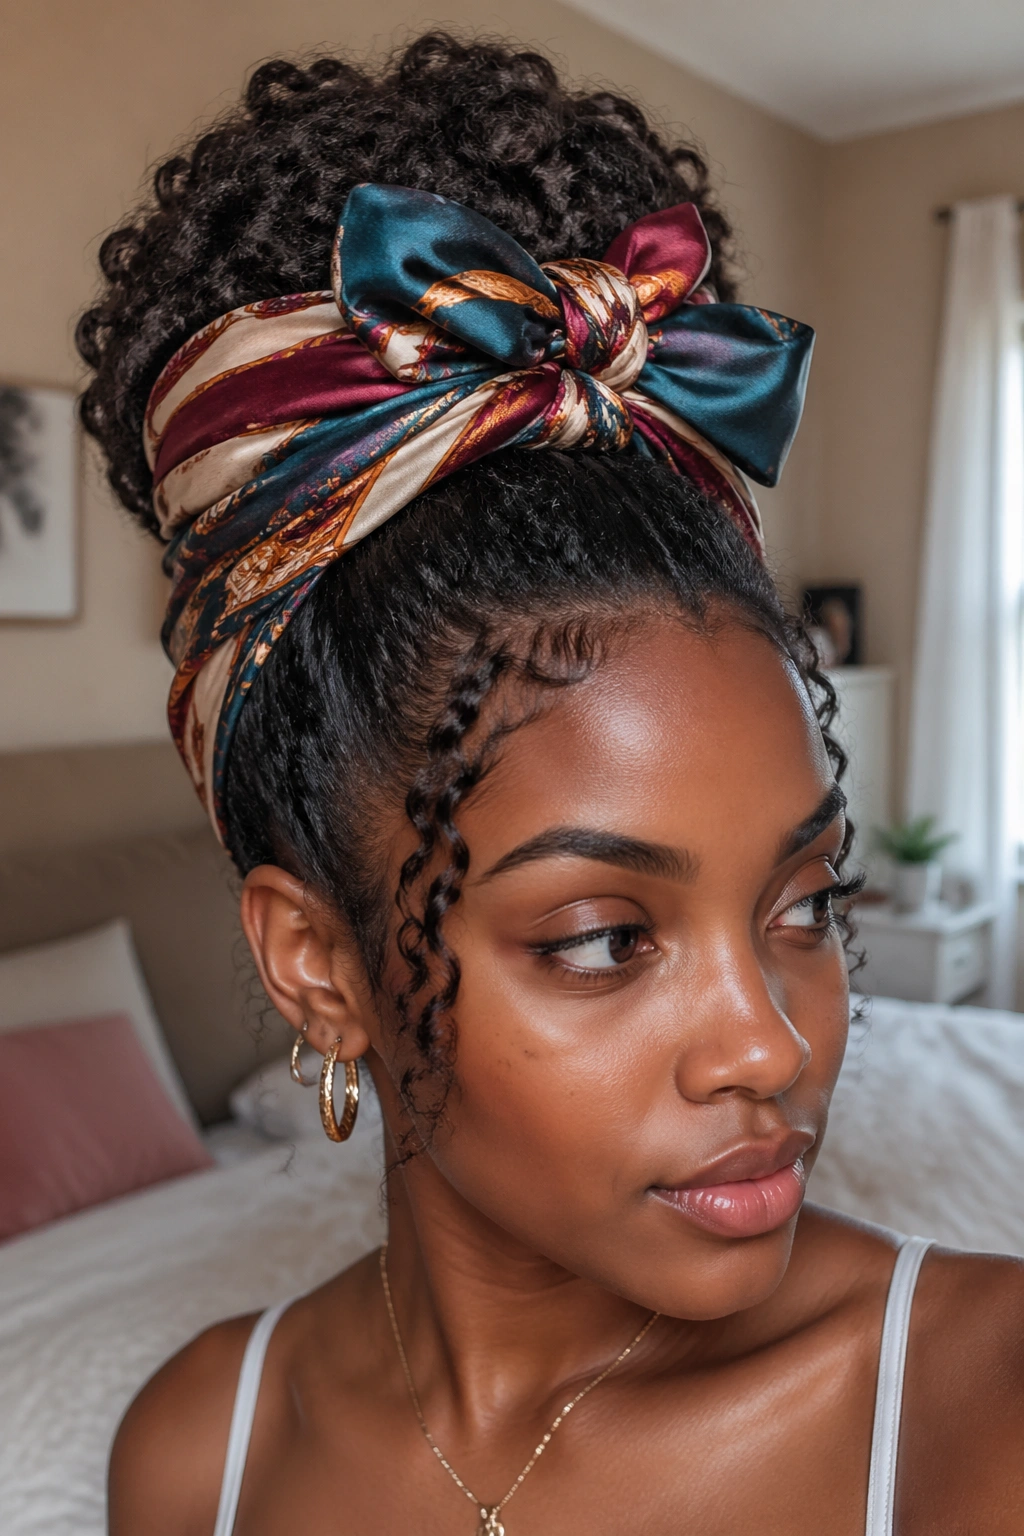
Wrap a large silk or satin scarf around a gathered updo — through the bun, around the base, or tied on top in a bow — and the entire style transforms. The scarf adds color, texture, and dimension to what might otherwise be a simple updo. On long hair, a large scarf can be wound multiple times, creating a substantial wrapped structure that doubles the visual impact of the style.
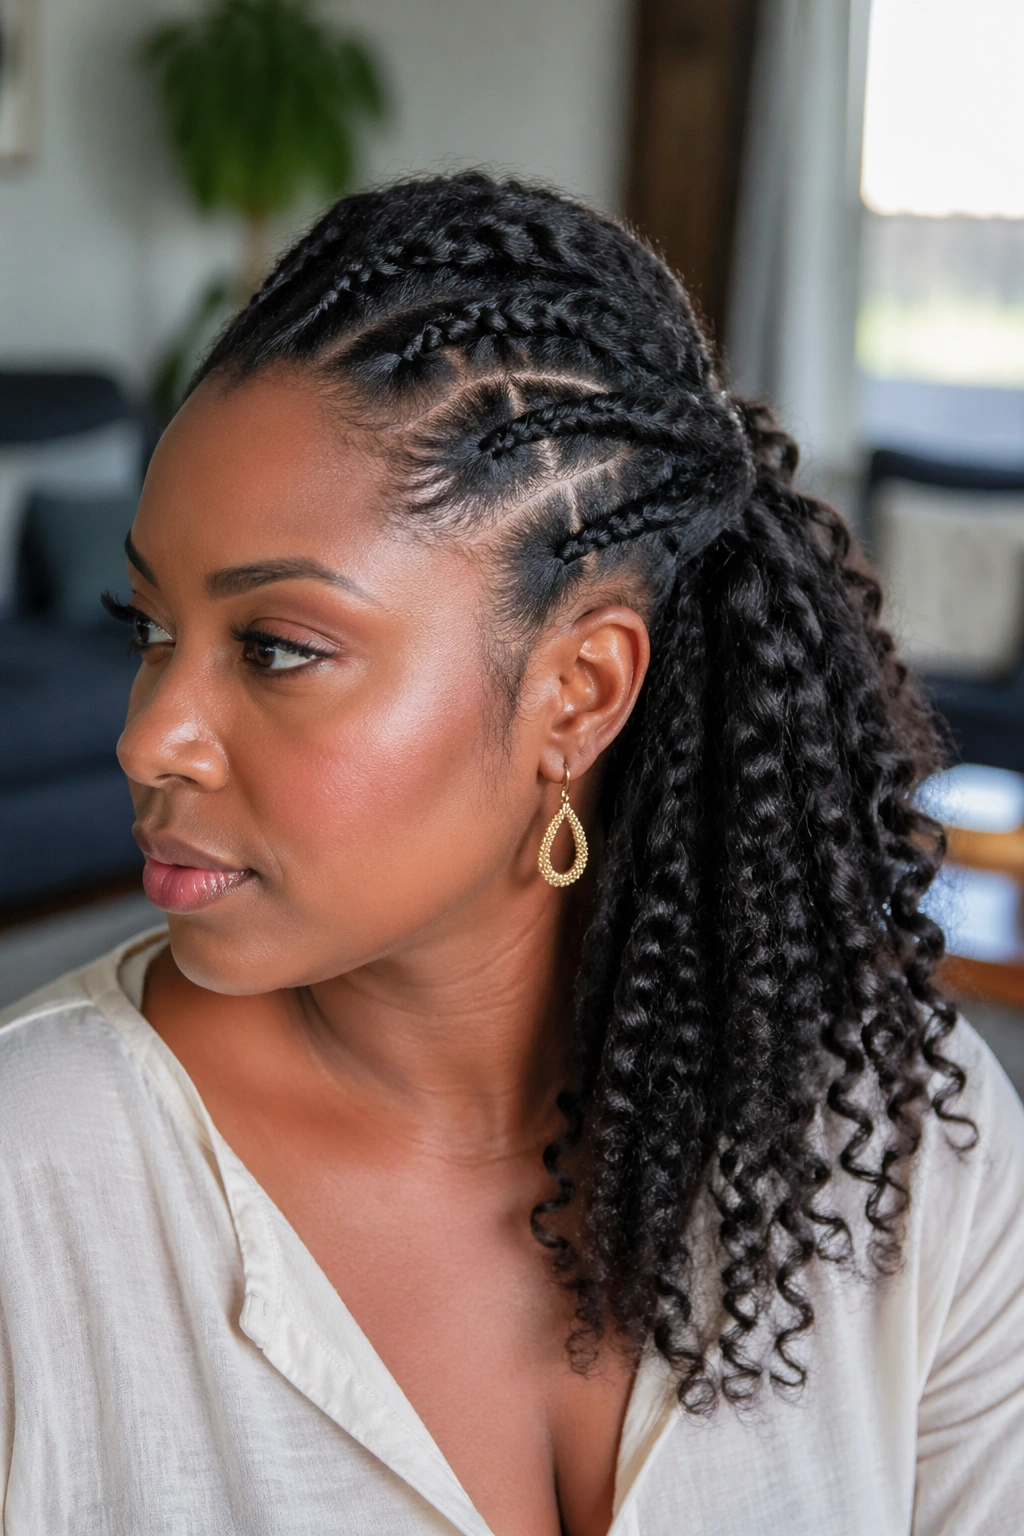
16. Braided Updo With Loose Curly Top
Cornrows or flat braids along the sides and back, with the top section gathered into a loose, curly puff — this style combines the structure of braiding with the volume of loose natural curls. It’s visually dynamic because the two textures create contrast: the smooth, geometric cornrow pattern against the free, organic curl cluster at the top.
17. Coiled Bun With Chunky Sections
Divide long hair into four to six large sections. Twist each section loosely, then coil it around its own base to create a large, loose curl formation. Gather all of these coiled sections into a single bun shape at the crown, pinning each one into place. The individual coils remain visible within the bun, creating a dimensional, textured effect.
18. Giant Bantu Knot Arrangement
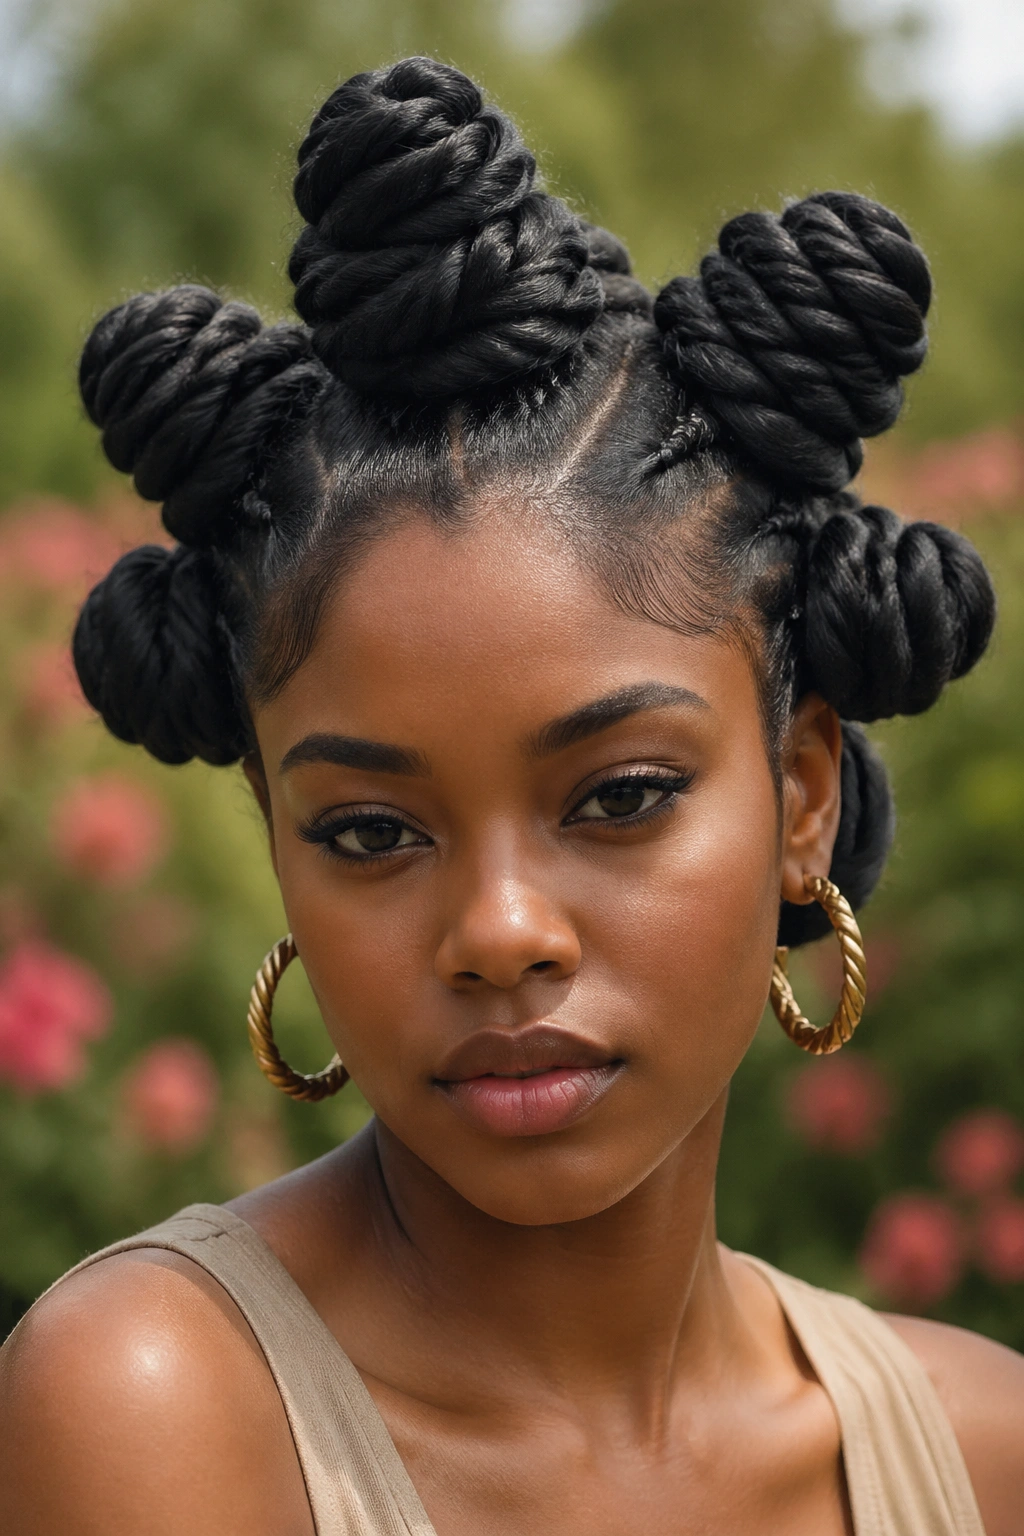
Full-head bantu knots on long hair create larger knots than on short hair — each one a substantial, coiled structure. Arranged in a deliberate pattern (a crown of knots, a cluster at the top, a spiral arrangement), they become an updo of real sculptural beauty. The longer the hair, the taller each knot can be.
19. Asymmetrical Sweep Updo
Gather all hair to one side of the head. Pin it at a low diagonal — from behind one ear down to the opposite shoulder — creating a dramatically asymmetrical updo where all the volume sits on one side. The asymmetry is the entire style. On long natural hair, the visual weight of the gathered texture on one side creates a genuinely dramatic silhouette.
20. Flat Twist Updo With Flowing Ends
Create flat twists across the top of the head, directing them toward the back. Instead of tucking the ends or gathering them into a bun, let the twisted sections release their twist at the point where they run off the scalp, allowing the ends to hang loosely in a natural curl pattern.
The contrast between the structured, flat-against-the-scalp twist section and the loose, flowing curl section at the ends creates a style that reads as both controlled and free. It’s a beautiful split personality of a style.
21. Pinned Curl Arrangement
This is not a bun. Not a puff. Not a standard updo in any traditional sense. A pinned curl arrangement takes individual curl clusters from long hair and pins them upward in a deliberate pattern — some pinned flat against the head, others pinned in a lifted, arching position, others coiled and pinned. It’s an artistic, composed style that looks different every time.
22. Single Large Braid Pinned Up
One large cornrow or French braid running from the front to the back, then folded upward and pinned flat at the nape — a single, prominent braid pinned into an updo position. Simple, clean, and bold. The exposed scalp on either side of the braid becomes part of the style itself.
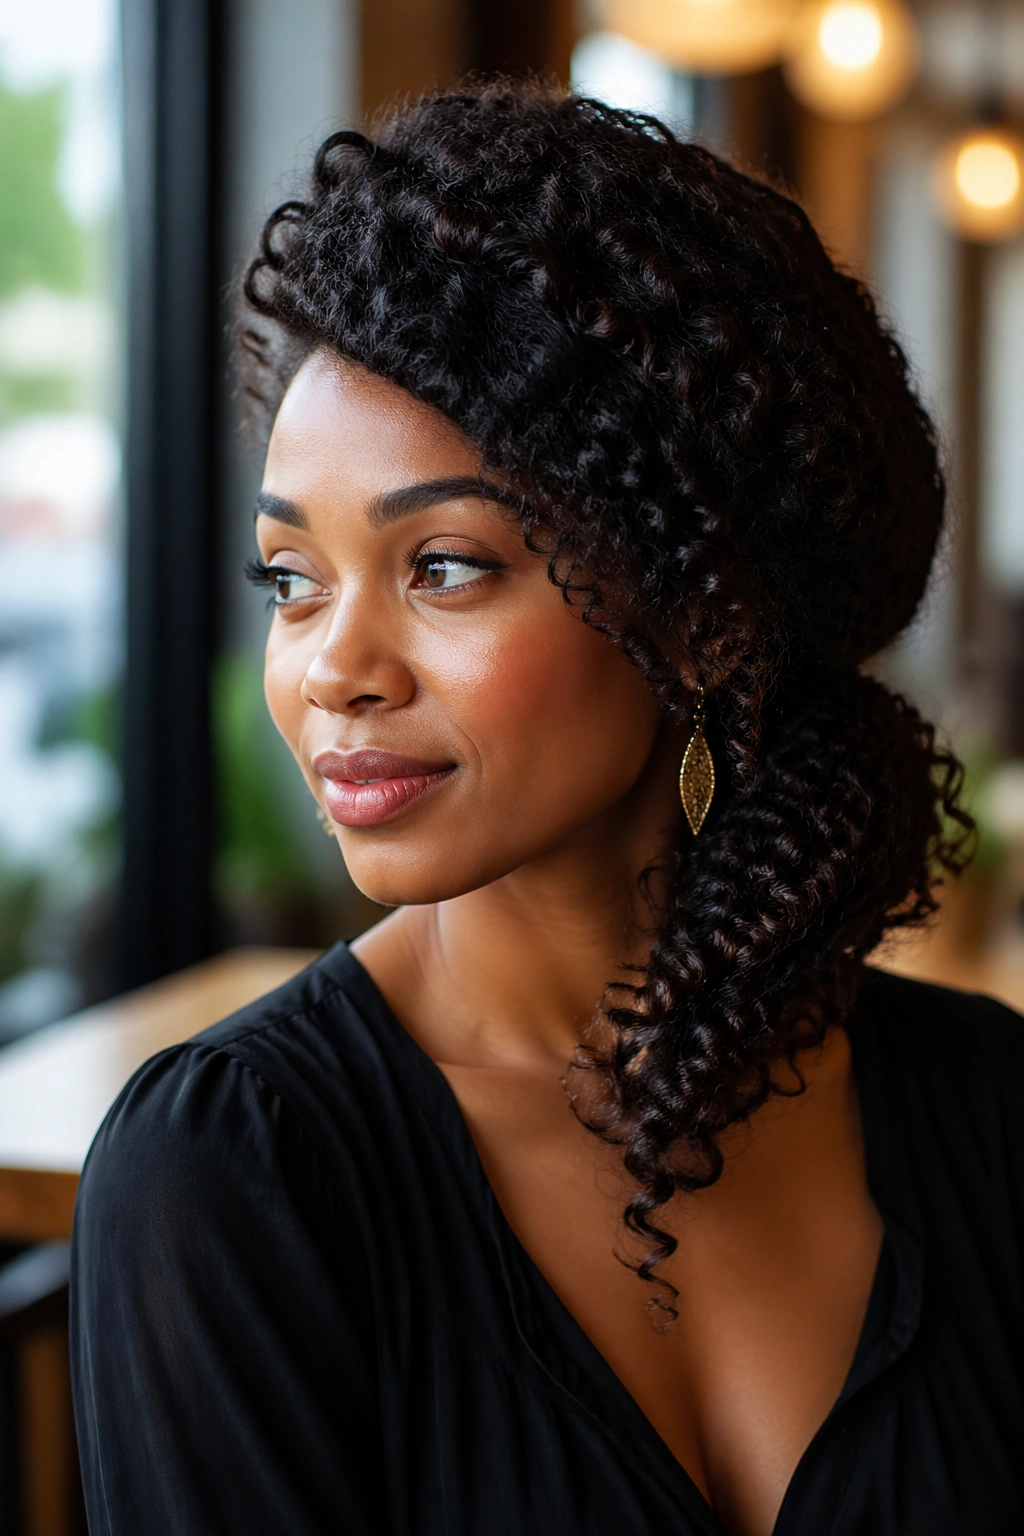
23. Twisted Side Chignon
Part deeply to one side. Twist the smaller section loosely away from the face. Gather everything at the back and twist again. Coil the full gathered twist at the nape on the heavier side, pinning into a low chignon. Leave the lighter section — the side with less hair — sleek and controlled. The result is an asymmetric, low chignon with a natural twist texture.
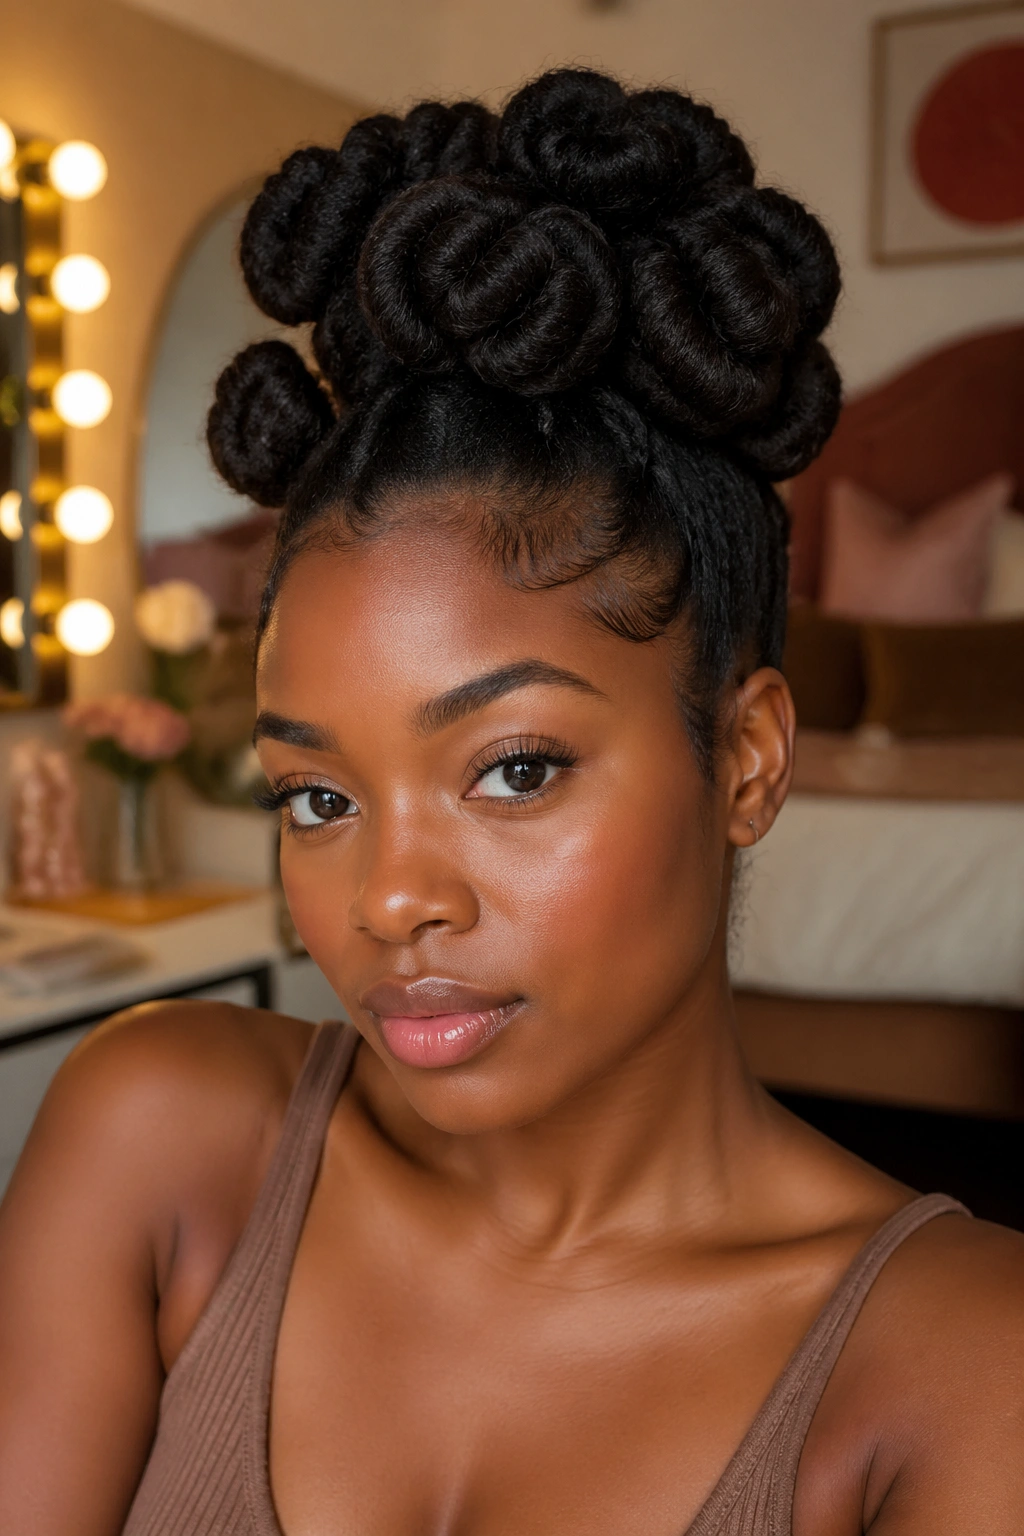
24. Multi-Bun Updo
Three to five small-to-medium buns distributed across the back of the head — at the crown, the mid-scalp, and the nape — create a distributed updo that spreads the hair’s volume across a larger area of the head. It looks like a composed, architectural arrangement of texture that requires significant length to achieve.
Making Long Curly Hair Updos Last
Long natural hair updos face specific durability challenges. The sheer weight of dense, long hair puts more downward pull on whatever is holding the style — scrunchies, pins, and twists all bear more load. Use more pins than you think you need. Spin pins are especially effective in long, thick hair because they spiral into the mass of the bun rather than just sitting on the surface.
A light-hold misting spray applied over the finished style helps control surface frizz and locks the edges in place. For styles worn over multiple days, a satin bonnet large enough to cover the entire style is essential — improvise with a king-size pillowcase over the head if the style is too large for any bonnet you own.
Long natural hair is a privilege worth protecting. The updos you create with it are some of the most visually powerful styles in the entire natural hair playbook.