



Beach days are where wavy hair behaves best and worst at the same time. Salt gives it shape. Wind gives it movement. Then humidity shows up and tries to turn the whole thing into a puffed-up halo by noon.
The trick is not forcing waves into something stiff and shellacked. That never lasts near water, and it usually looks awkward after the first bit of spray hits. A better beach style works with texture, keeps the front pieces under control, and still looks good when a few strands escape.
I always think the smartest beach hair has a little flexibility built into it. Not messy for the sake of being messy. Just enough structure that you can shake it out, tuck it behind an ear, or let it dry in the sun without losing the shape.
Keep the roots light, the part movable, and the ends protected if you plan to swim. That’s the whole game. The rest is choosing a style that fits your length, your wave pattern, and how much time you want to spend with a comb before the sand gets involved.
1. Air-Dried Center-Part Waves for Beach Days
This is the easiest place to start because it looks like you did almost nothing, which is exactly the point. A clean center part and soft, air-dried waves hold up well when the weather is doing its own thing.
Work a light leave-in conditioner through damp hair, then add a small amount of mousse from mid-lengths to ends. Scrunch once, not five times. If your waves lean loose, let them dry with a slight twist tucked behind each ear for the first 10 minutes so the front pieces don’t collapse flat.
- Best for 2A to 2B waves
- Strong choice for hair that frizzes when brushed dry
- Pairs well with a tiny bit of salt spray at the ends
- Looks even better after the hair has dried halfway and been touched once with your hands
A lot of people overthink this style. They shouldn’t. If the part is clean and the waves are defined from a damp set, it already reads as intentional.
2. Slicked-Back Low Bun with Face-Framing Pieces
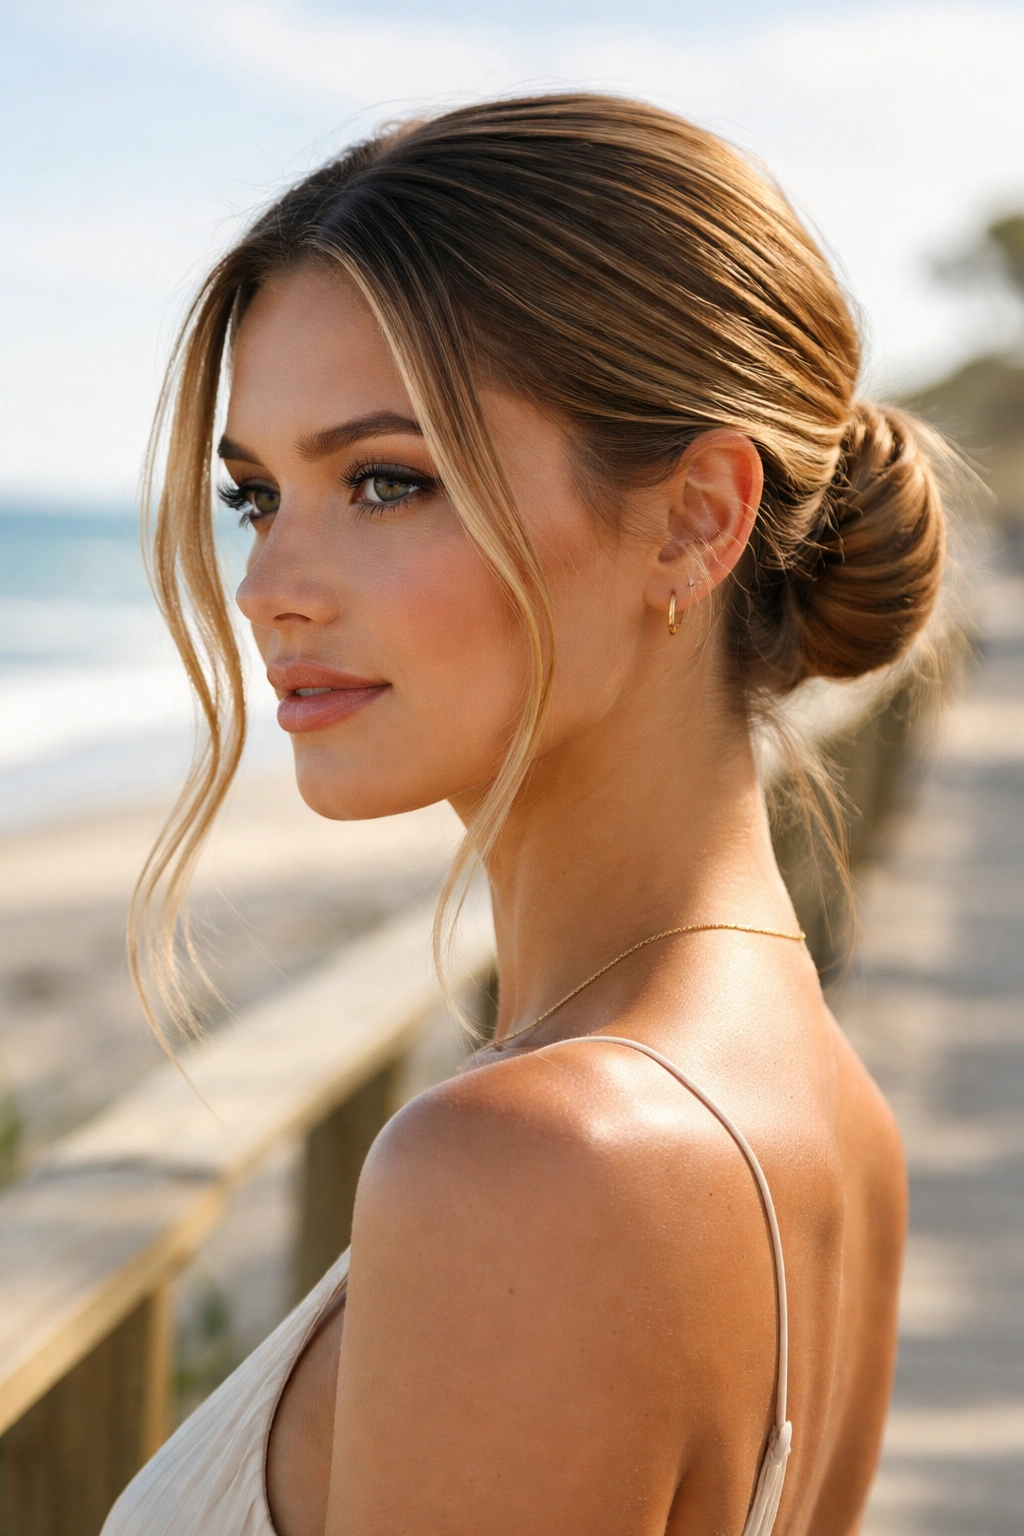
Want something that survives wind, waves, and lunch on the boardwalk? This one does the job. A slicked-back low bun is one of those styles that looks more polished the more the day wears on.
Smooth a pea-sized amount of gel through the top and sides, then gather the hair at the nape. Leave out two thin face-framing pieces before you tie it off. Those little pieces matter. They soften the look and keep the bun from feeling severe, which is useful if you’re wearing a swimsuit cover-up or a tank top and don’t want your hair to feel too dressed up.
The low bun is also kind to wavy hair because it keeps the ends tucked away. Less rubbing against towels. Less tangle. Less sand trapped in the bottom layer.
3. Half-Up Claw Clip Twist
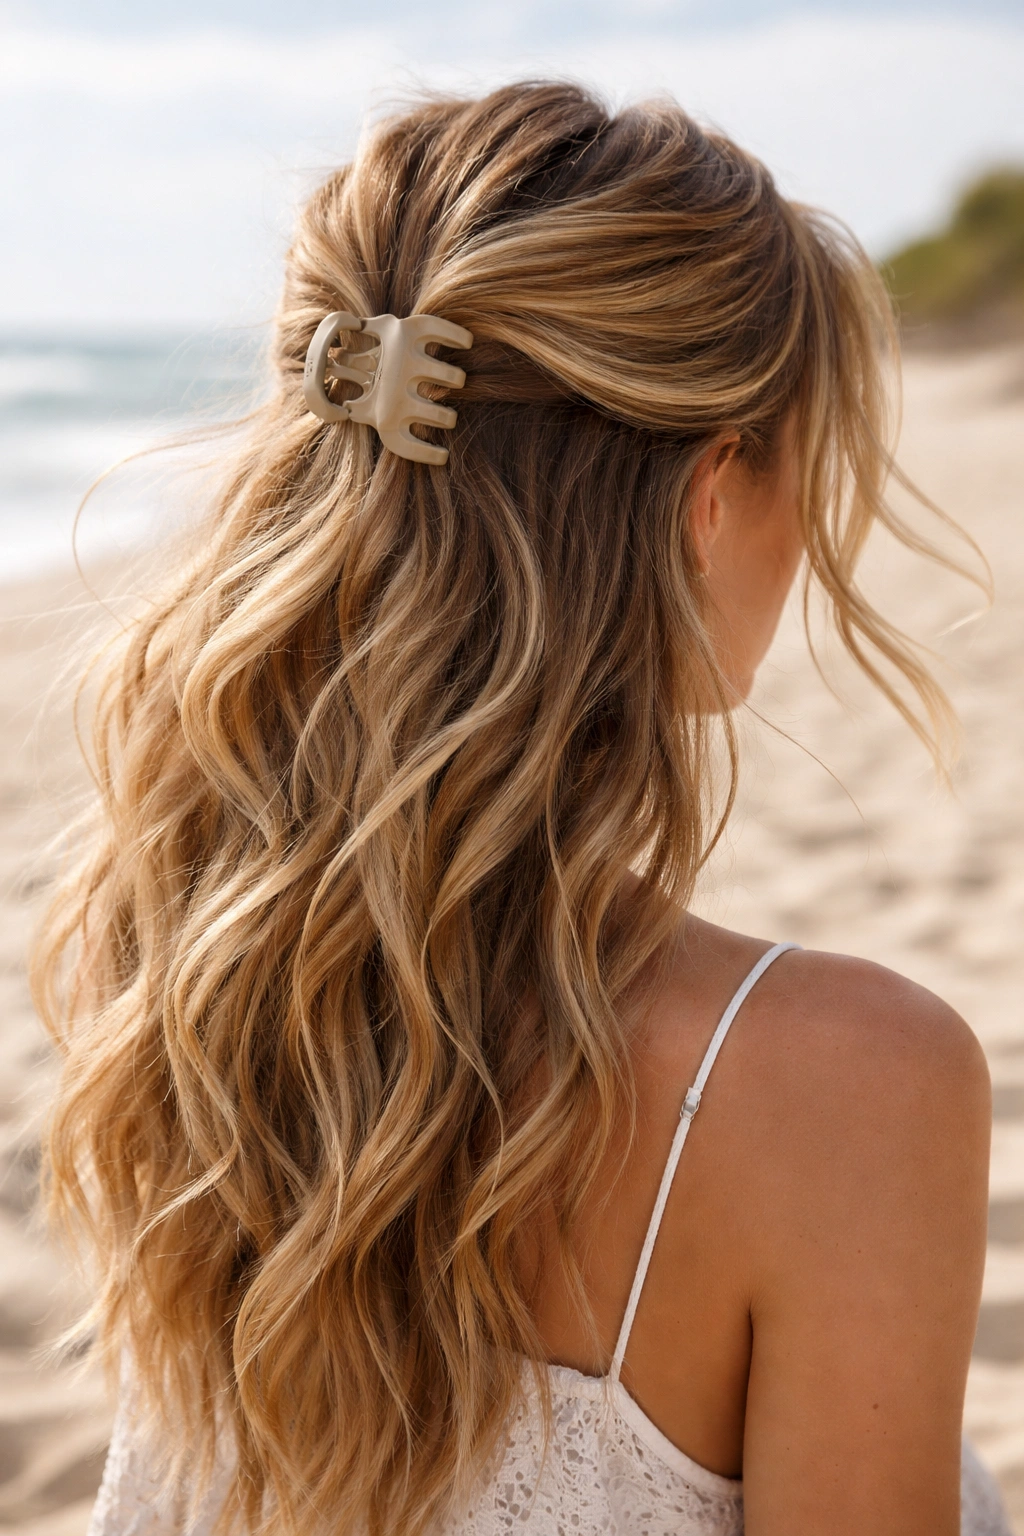
If your waves are thick enough to hold a clip, this is one of the best beach-day shortcuts around. Twist the top half back, lift it once, and secure it with a medium claw clip. Done.
The lower half can move around freely, which keeps the style relaxed. The top stays off your face, which is the part that usually gets annoying first when the air gets sticky. Use a matte clip if your hair is fine; glossy clips can slide when salt water has dried into the strands.
There’s a nice middle ground here. You get shape without committing to a full updo, and you can redo it in about 20 seconds after a swim.
4. Double Dutch Braids into Beachy Ends
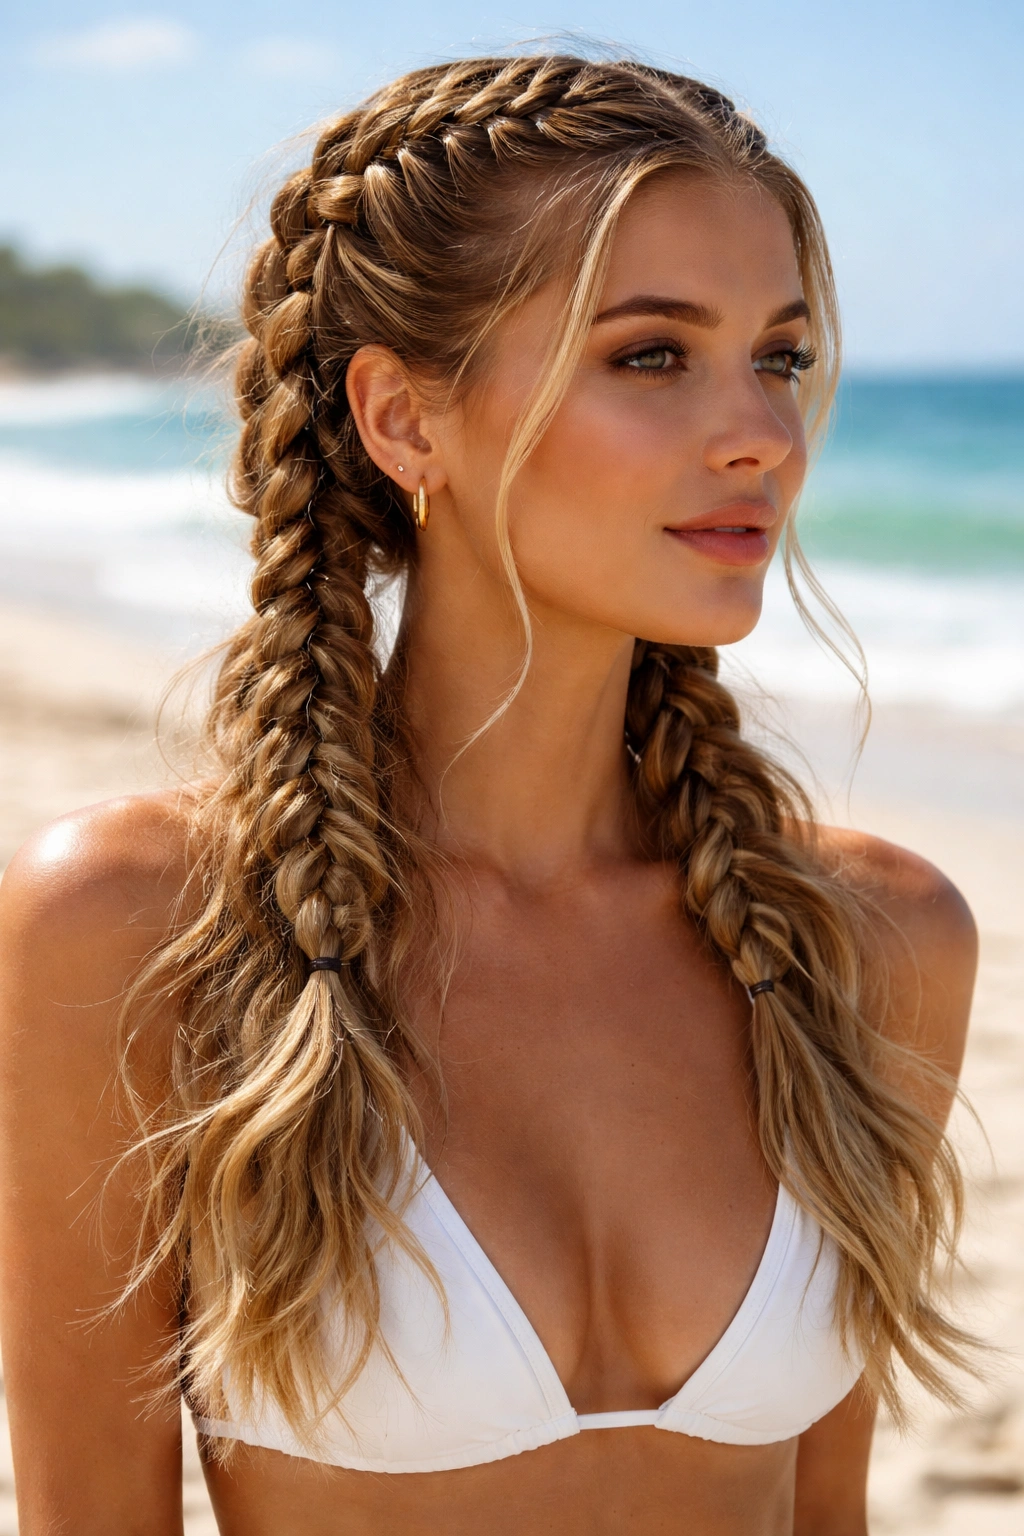
Braids and beach days are old friends. Double Dutch braids keep the hair close to the head, which means less tangling and less fuss while you’re moving around.
Start the braids just above the temples and braid down to the nape, then leave the bottom few inches out if you want softer ends. That little detail matters. Tight braid ends can feel too formal for a day near the water, while loose ends keep the look casual and a little windblown.
This style is especially useful if your hair gets puffy when humidity hits. The braid pattern gives the waves a second life once you take it down later.
5. Loose Side Braid
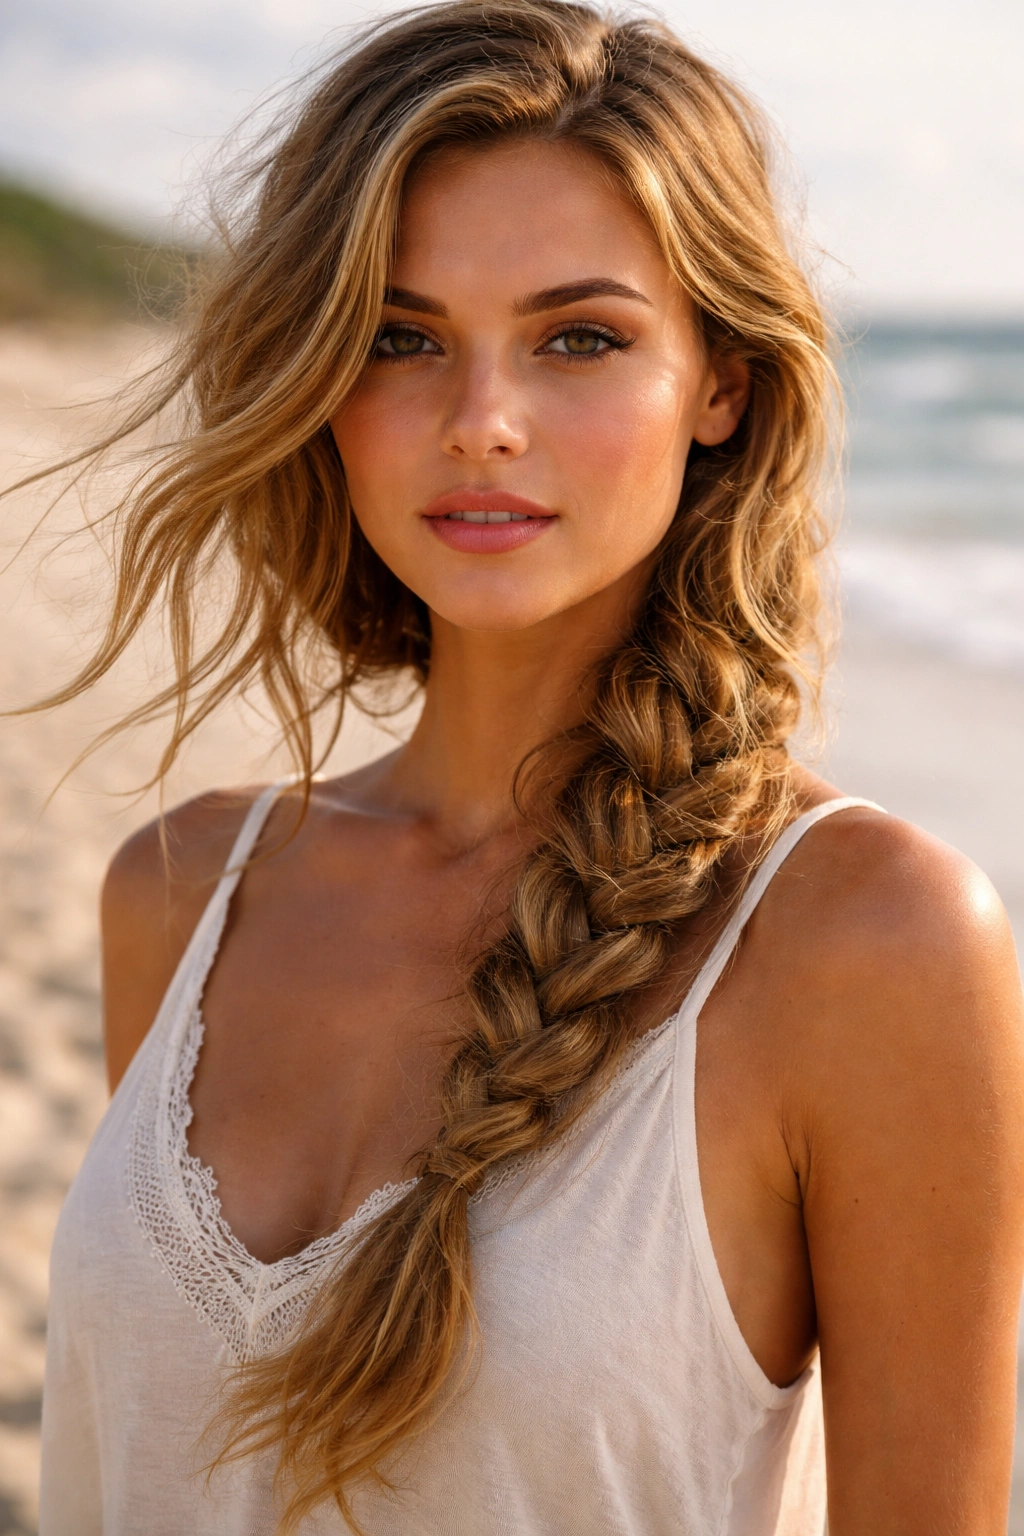
A loose side braid is the sort of style that looks even better after a little wear. It’s simple, but not plain. And it works especially well on wavy hair because the texture gives the braid more depth than straight hair usually gets.
Pull everything over one shoulder and braid without tugging too hard. Stop before the ends get too polished. A soft braid with a few pieces slipping out is exactly what you want near the beach. If your hair is layered, mist the loose lengths with a tiny bit of leave-in before braiding so the shorter pieces don’t go dry and fuzzy.
Why It Works So Well
The side placement keeps the braid out of the back of your neck, which is nice when the sun is hot and you’re already dealing with sunscreen, sunglasses, and sand. It also lets one side of the face stay open while the other side feels a little hidden, which can be a flattering balance on windy days.
6. Bubble Ponytail on Wavy Lengths
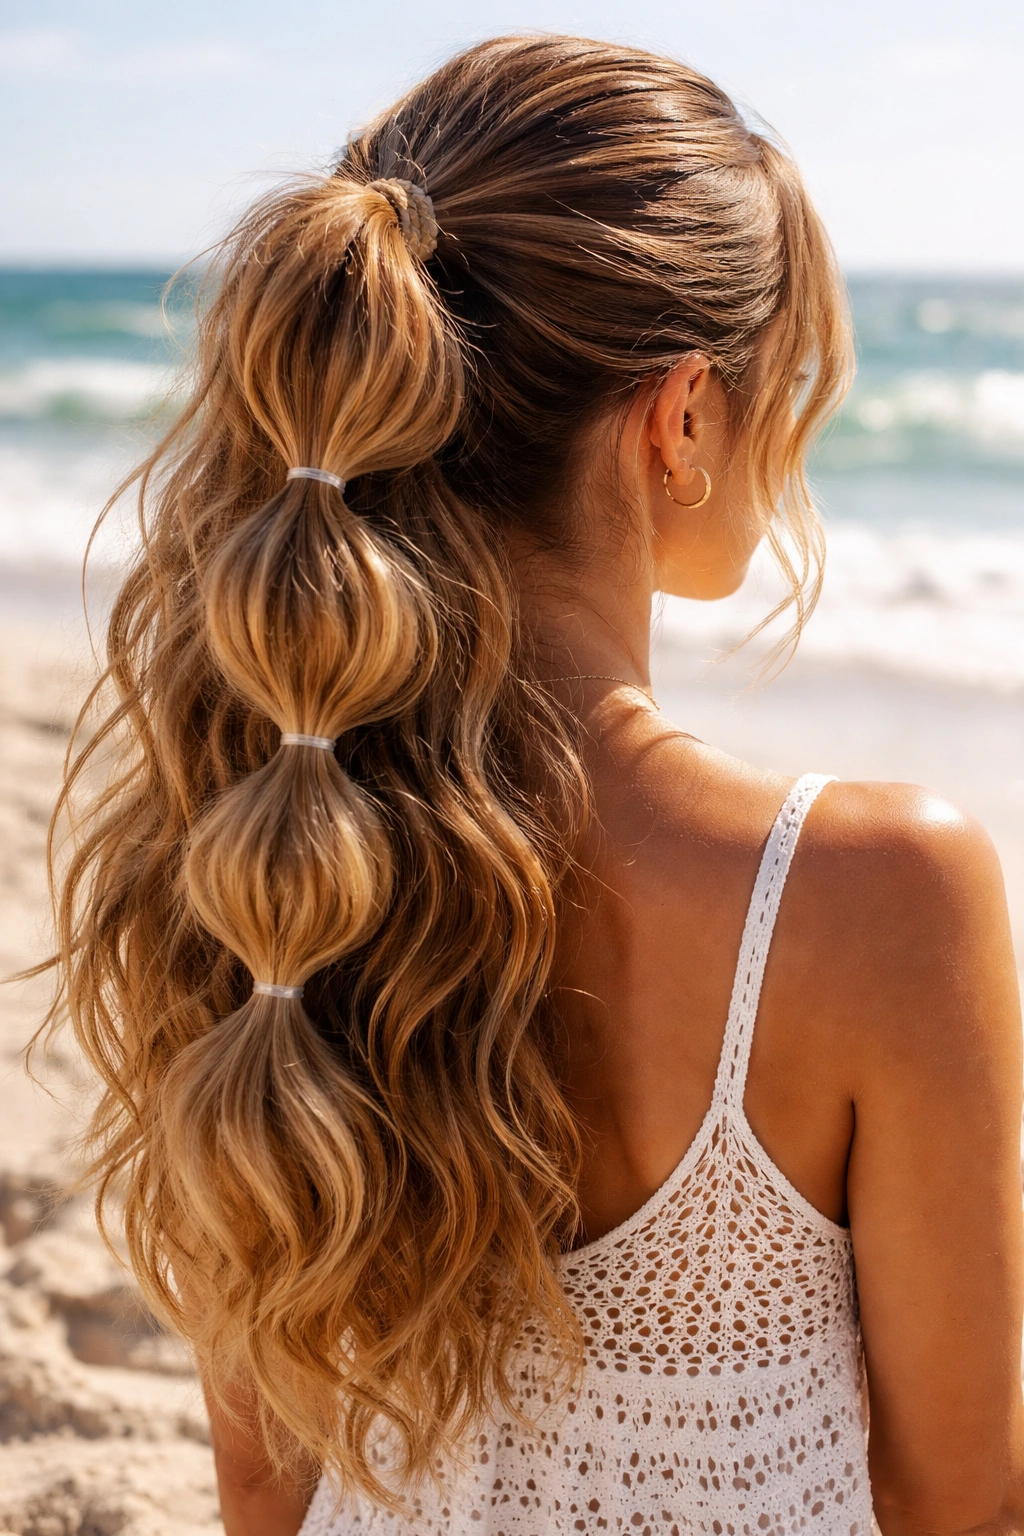
Bubble ponytails can look playful or sporty, depending on how tight you make them. On wavy hair, they tend to look softer and less precious.
Tie a low or mid ponytail, then add small clear elastics every 2 to 3 inches down the length. Gently pull each section outward until it puffs into a rounded bubble. Don’t yank too hard. You want rounded volume, not a stretched mess. A tiny bit of dry shampoo at the roots helps if your hair is already a day or two past wash day, and honestly, that texture usually works in your favor here.
This style is smart for beach days because the elastic points keep the shape from collapsing in wind. It also stays put if you’re moving from the sand to a café to the car.
7. Scarf-Tied Low Ponytail
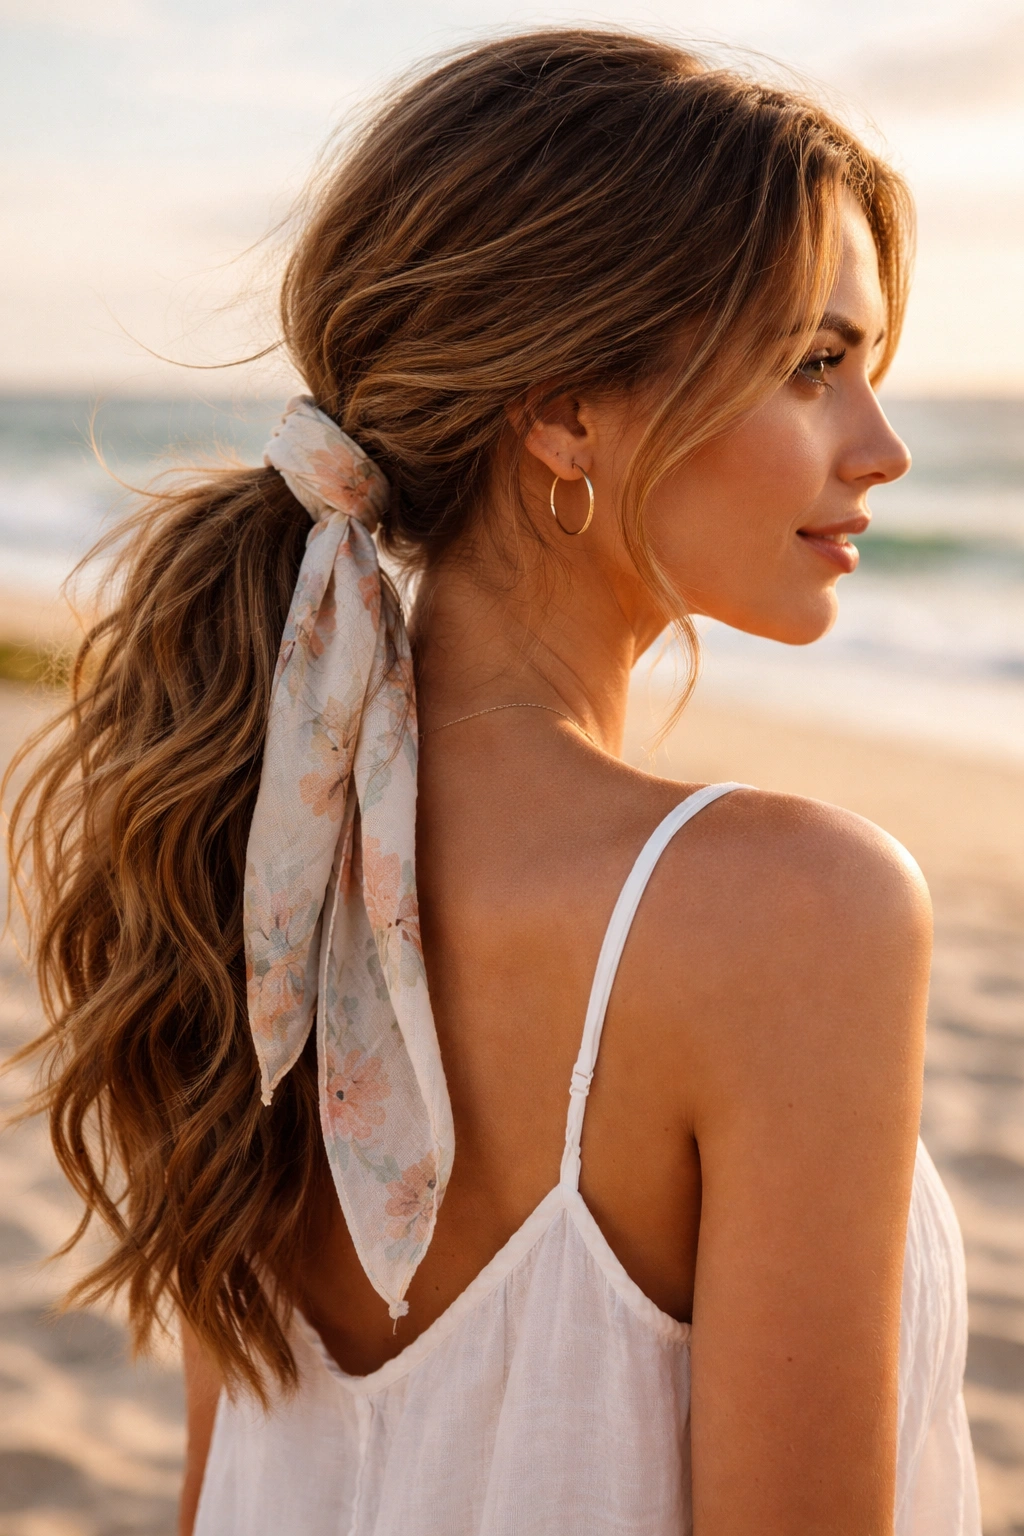
A scarf can save a ponytail that feels a little too basic. It also keeps the elastic from digging in, which is nice if you’ll be wearing the style for hours.
Gather the hair low at the nape, secure it with a soft elastic, then wrap a lightweight scarf around the base. Leave the ends of the scarf hanging or tie them in a small knot, depending on the look you want. If the waves are especially frizzy, smooth a drop of serum only on the ponytail length, not the roots.
The scarf does two jobs at once: it adds color and it shields the band from sand and salt. Small detail. Big difference.
8. Messy Top Knot with Loose Texture
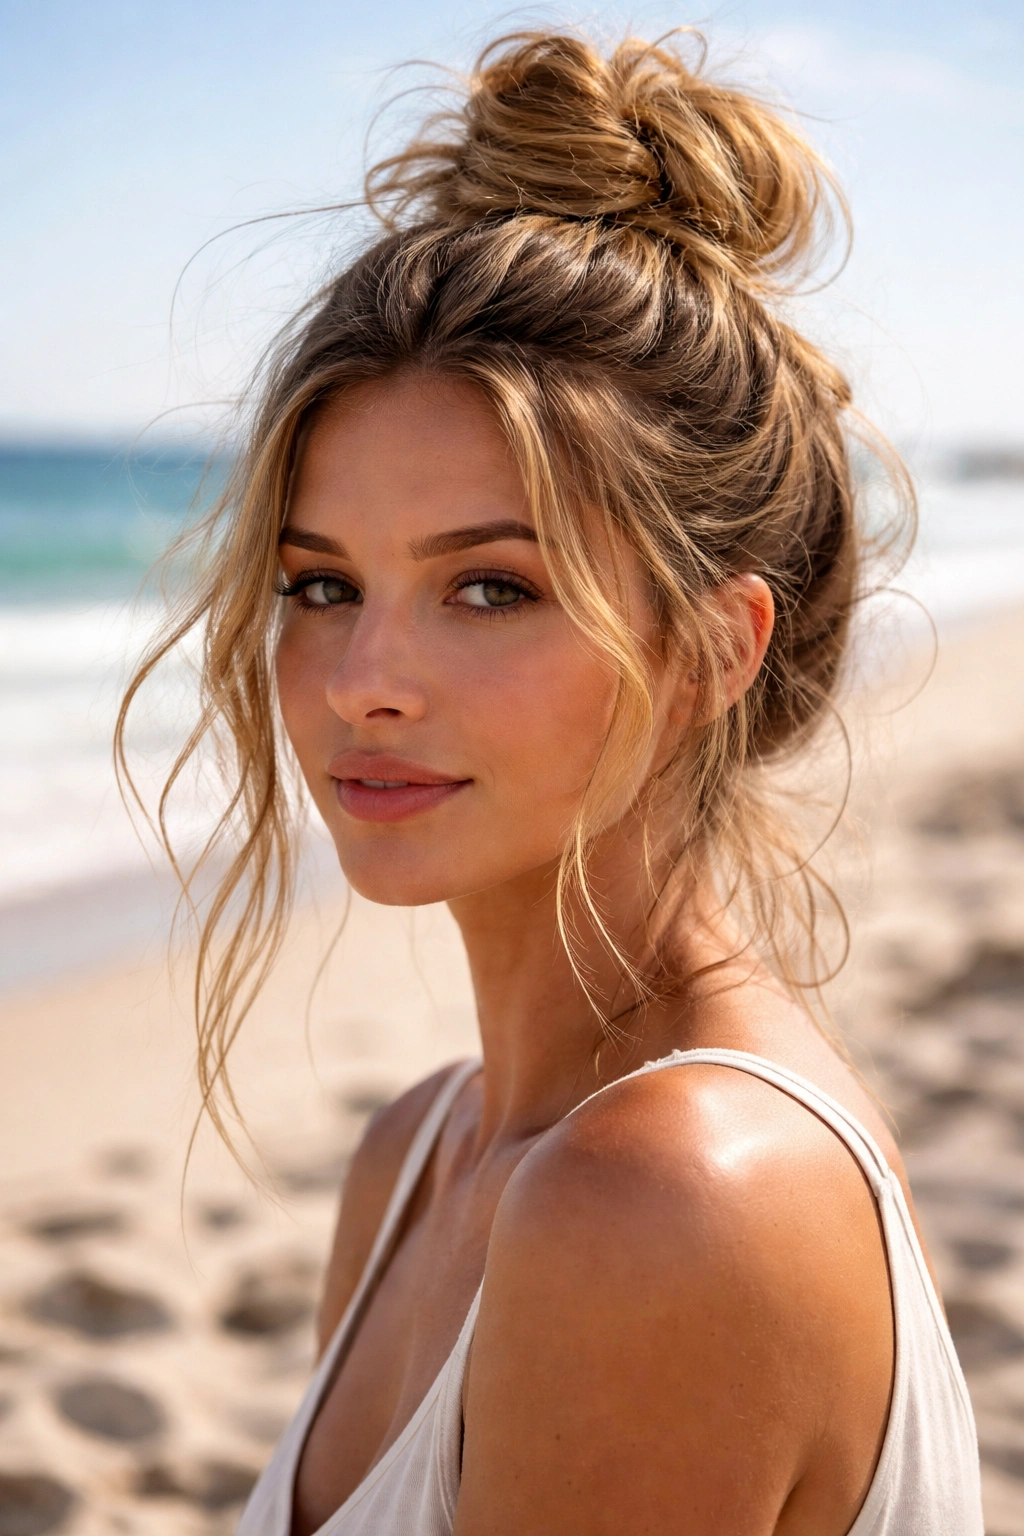
A top knot is not automatically boring. On wavy hair, it can be one of the nicest beach-day styles because the texture keeps it from looking too neat.
Flip the hair up, gather it high, and twist it once before wrapping it into a knot. Leave the ends a little uneven. That imperfection helps. Pull a few pieces around the hairline if you want a softer finish, and keep the knot loose enough that it doesn’t give you a headache after an hour in the sun.
This is the style I’d pick when the day includes heat, salt spray, and a tote bag full of sunscreen. It gets hair off the neck fast and doesn’t ask for much.
9. French Braid Crown
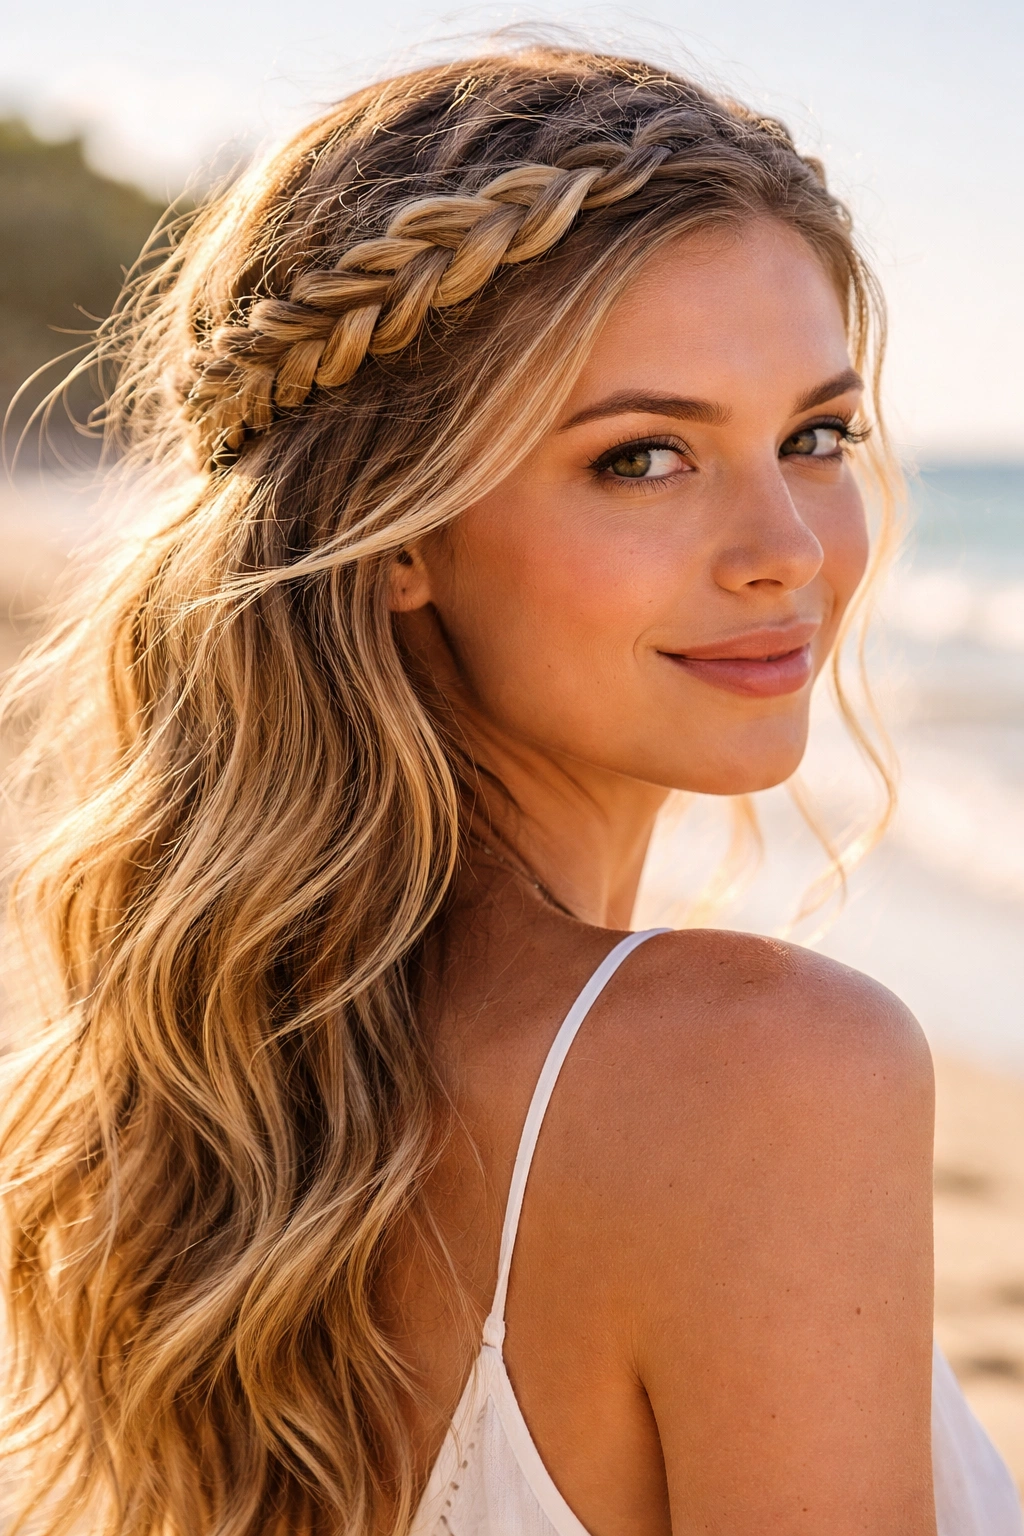
A French braid crown is one of those styles that looks like it took a lot more time than it really did. It wraps the hair around the head, keeps the front pieces secure, and still feels romantic in a beachy way.
Start near one temple and braid around the hairline, adding small sections as you go. Pin the braid as you cross toward the opposite side. If your hair is layered, use a few discreet bobby pins to catch the shorter pieces underneath. Otherwise they’ll pop loose in the wind and do their own thing.
It’s a good option when you want the whole front of the hair off your face but don’t want a severe updo. A little soft wave left in the back keeps it from looking too formal.
10. Half-Up Mini Braids
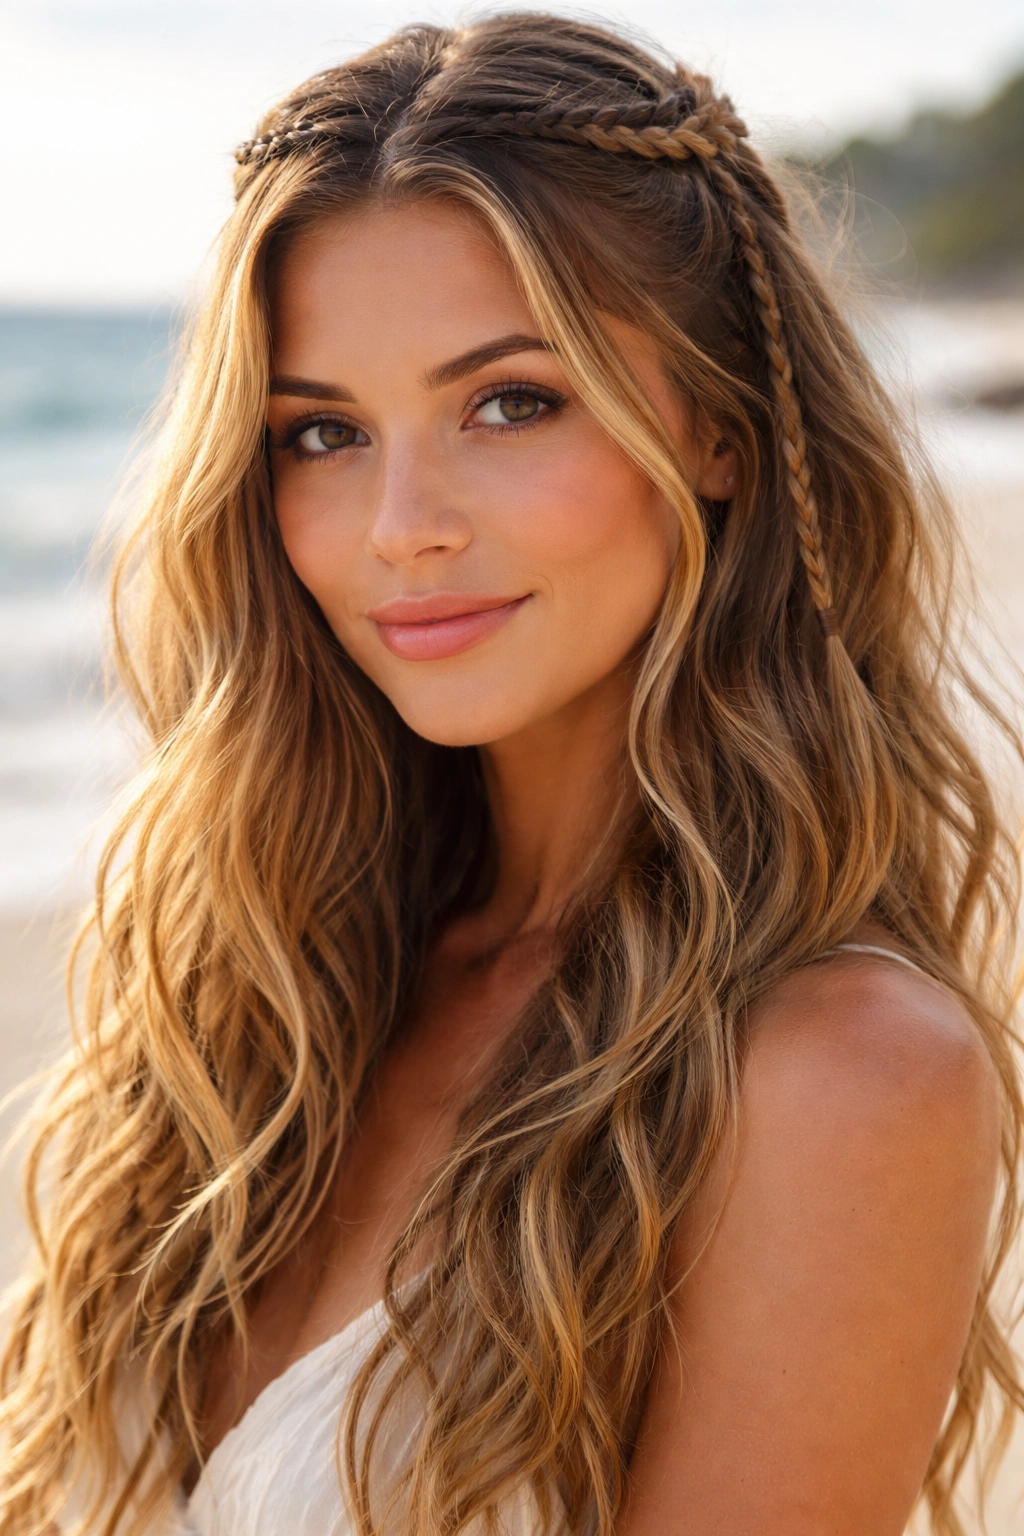
Tiny braids in the top sections are a nice fix for wave patterns that puff up around the face. You get control where you need it, and you keep the rest of the hair loose.
Take two small sections from each side of the part and braid them back toward the crown. Tie them together or clip them underneath a top layer. A few fine braids can also work as a base for the rest of the day’s hair, especially if you know you’re going to be in and out of the water.
What Makes It Different
It’s not a full braided style, so the ends still move. That matters. A lot of beach hair looks best when one part is controlled and the rest can bounce around a little. Mini braids give you that balance without making the whole head feel tight.
11. Twisted Half-Up Knot
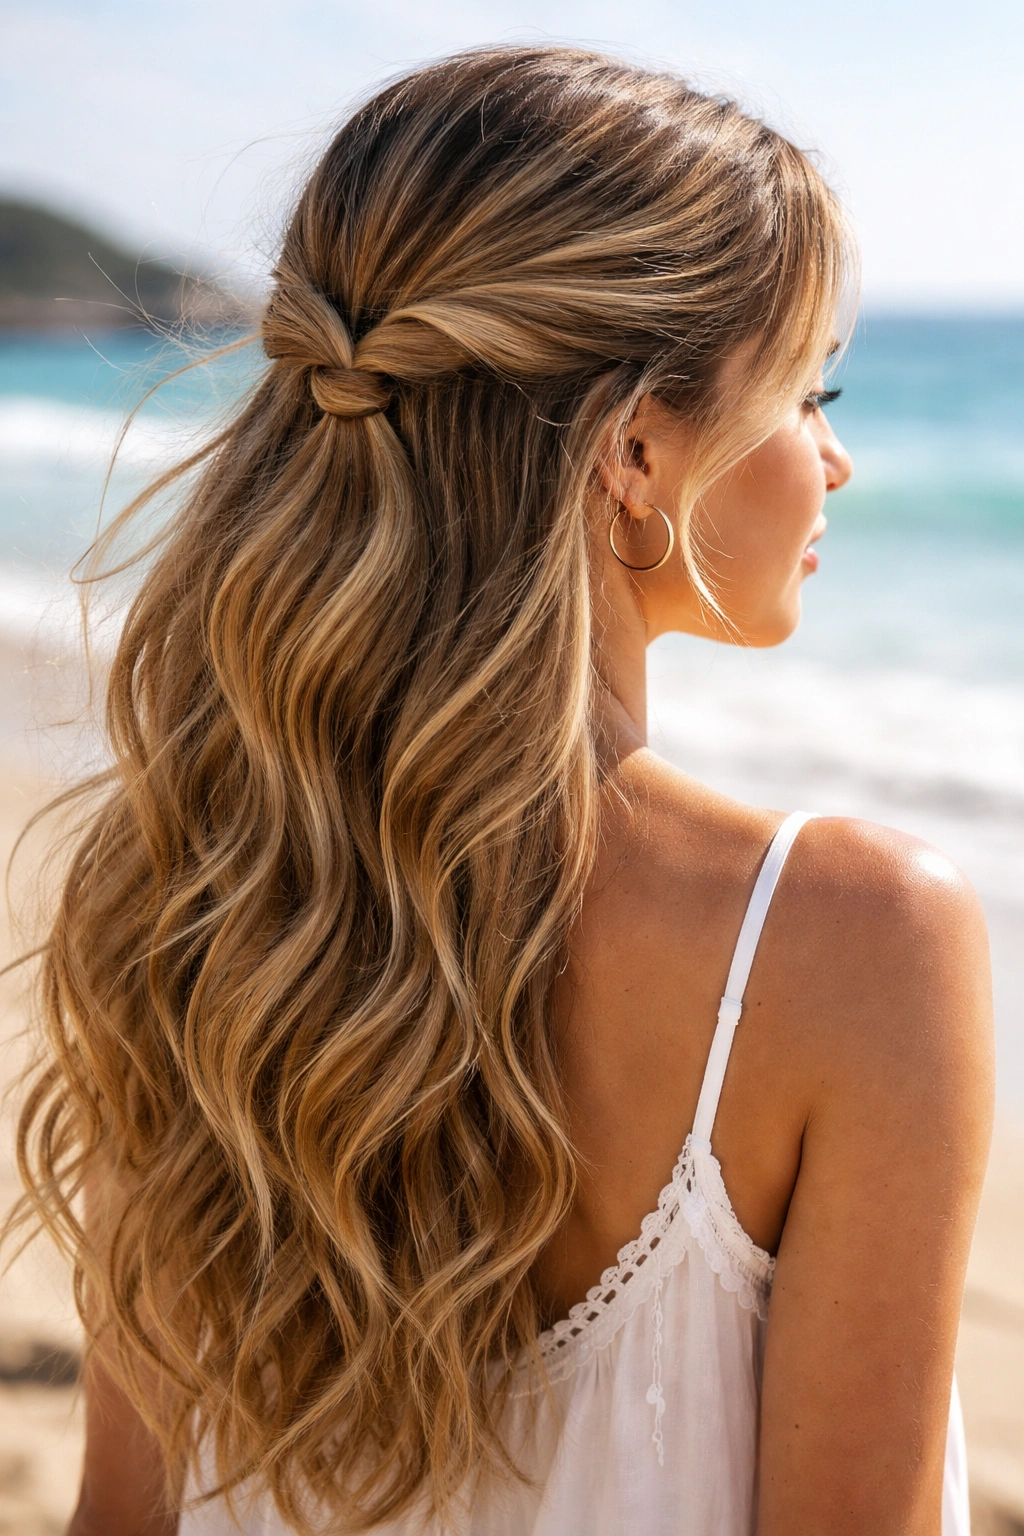
This one works well when you want something softer than a ponytail but less casual than wearing the hair all the way down. Twist two front sections back, tie them together, and pin the knot flat against the back of the head.
The beauty of the twisted half-up style is that it opens up the face without taking away the wave pattern underneath. If the hair is fine, spray the twisted sections with a little texture spray before you pin them. That helps them grip instead of slipping apart.
It’s also a good beach style for second-day waves. The twists hide the fact that the roots may not be at their freshest. Which, frankly, is a gift.
12. Low Braided Bun
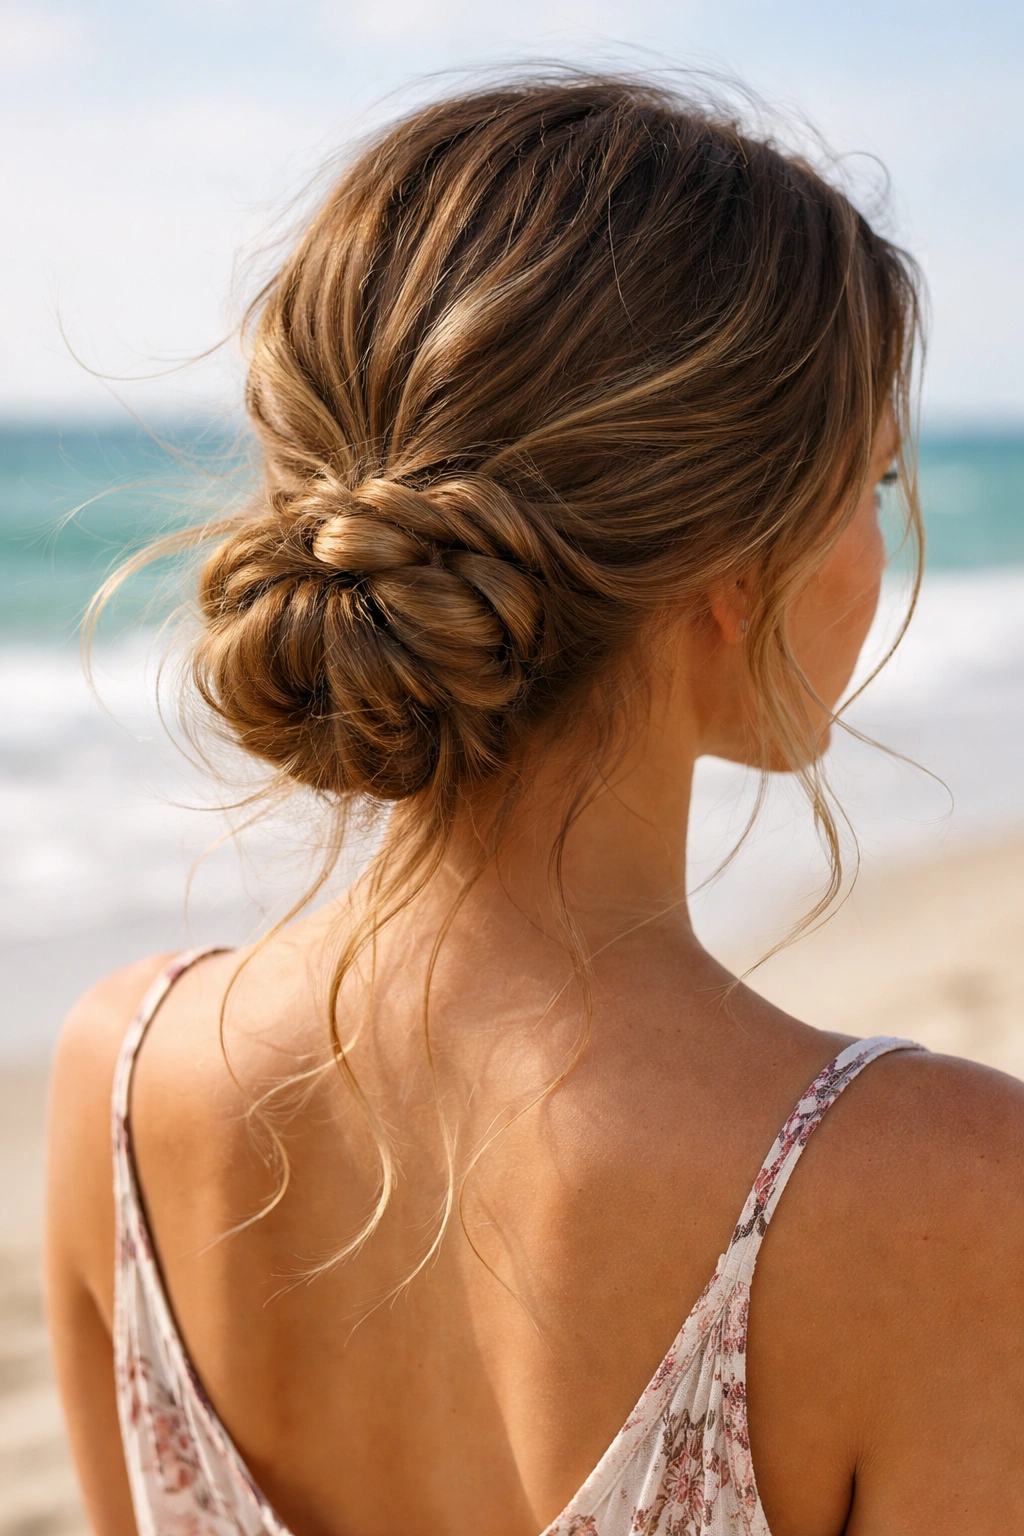
A low braided bun is the polished cousin of the regular messy bun. It holds better because the braid gives the bun more grip and structure.
Start with a loose braid at the nape, then coil it into a bun and secure with pins. If you want a softer effect, tug the braid slightly before coiling it so it looks fuller. That tiny stretch makes a difference, especially on medium-length waves that can otherwise look too small in an updo.
The style is practical for beach days because it keeps the ends tucked away from salt, wind, and sunscreen residue. It also works if you’ll wear it from morning to evening and don’t want to think about your hair again.
13. Wet-Look Waves with Gel Scrunch
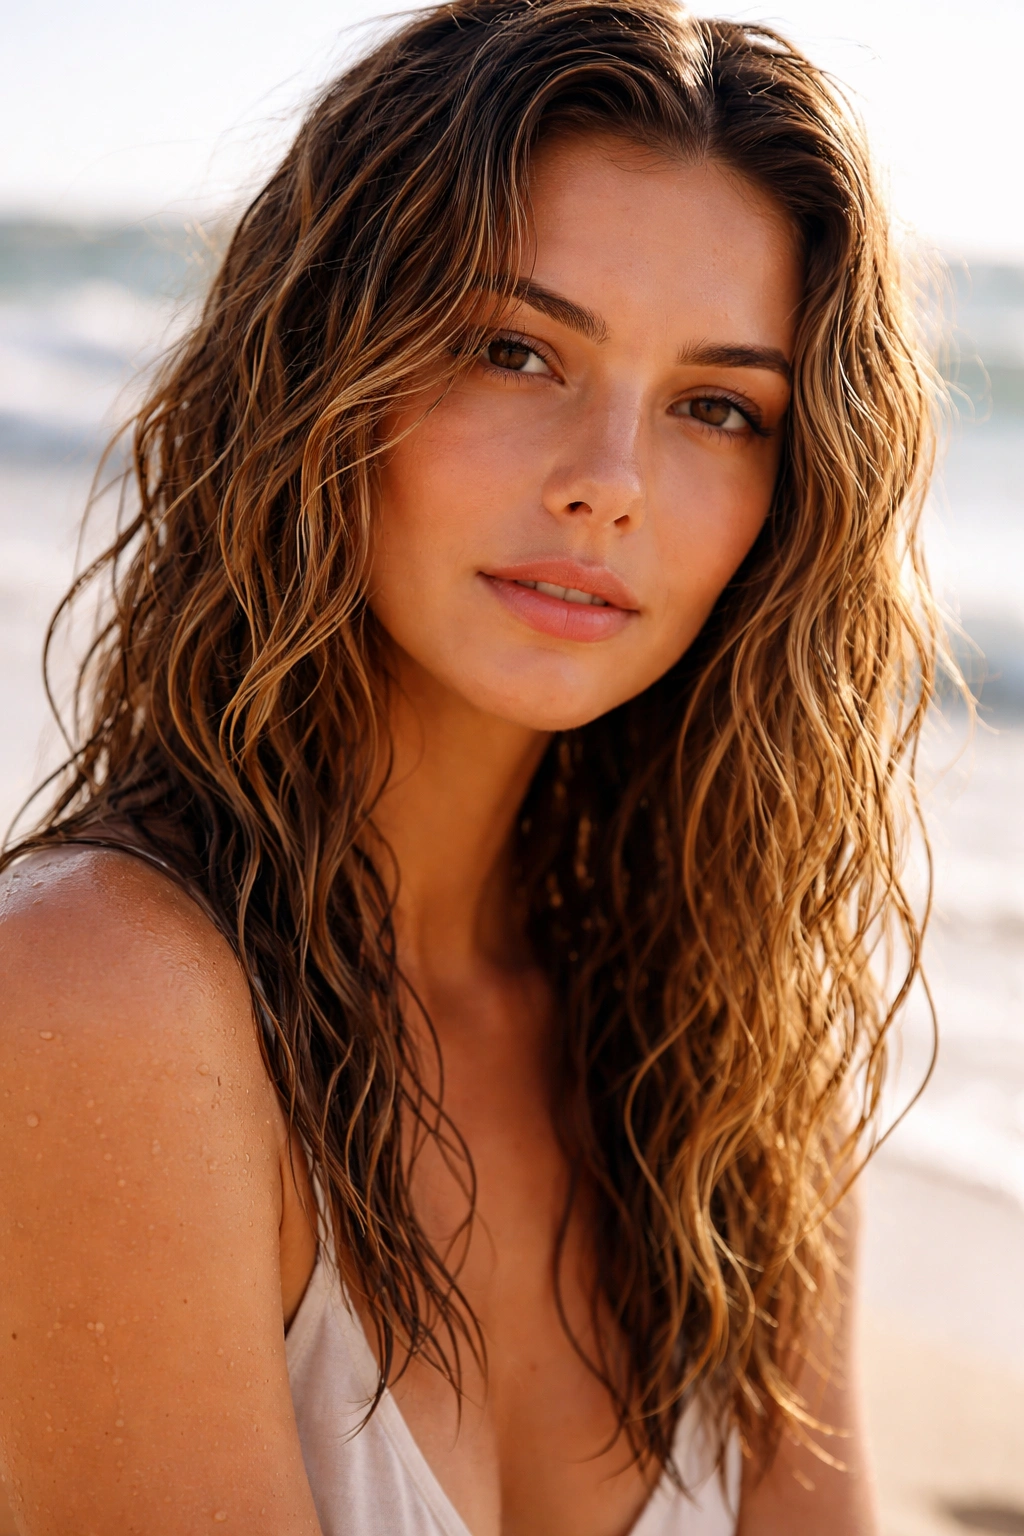
Wet-look waves can be a smart beach choice when you want the hair to look deliberate even after it’s been damp. The key is using a light gel instead of something sticky or crunchy.
Start with damp hair and rake gel through the mid-lengths and ends. Use your hands to scrunch upward, then let the hair set without touching it too much. If you keep smoothing it every few minutes, the hold will break down and the finish gets patchy. Let it dry. Seriously.
This style works because it leans into the coastal vibe instead of fighting it. The result is shiny, shaped waves that still feel relaxed.
14. Pineapple Puff for Long Waves
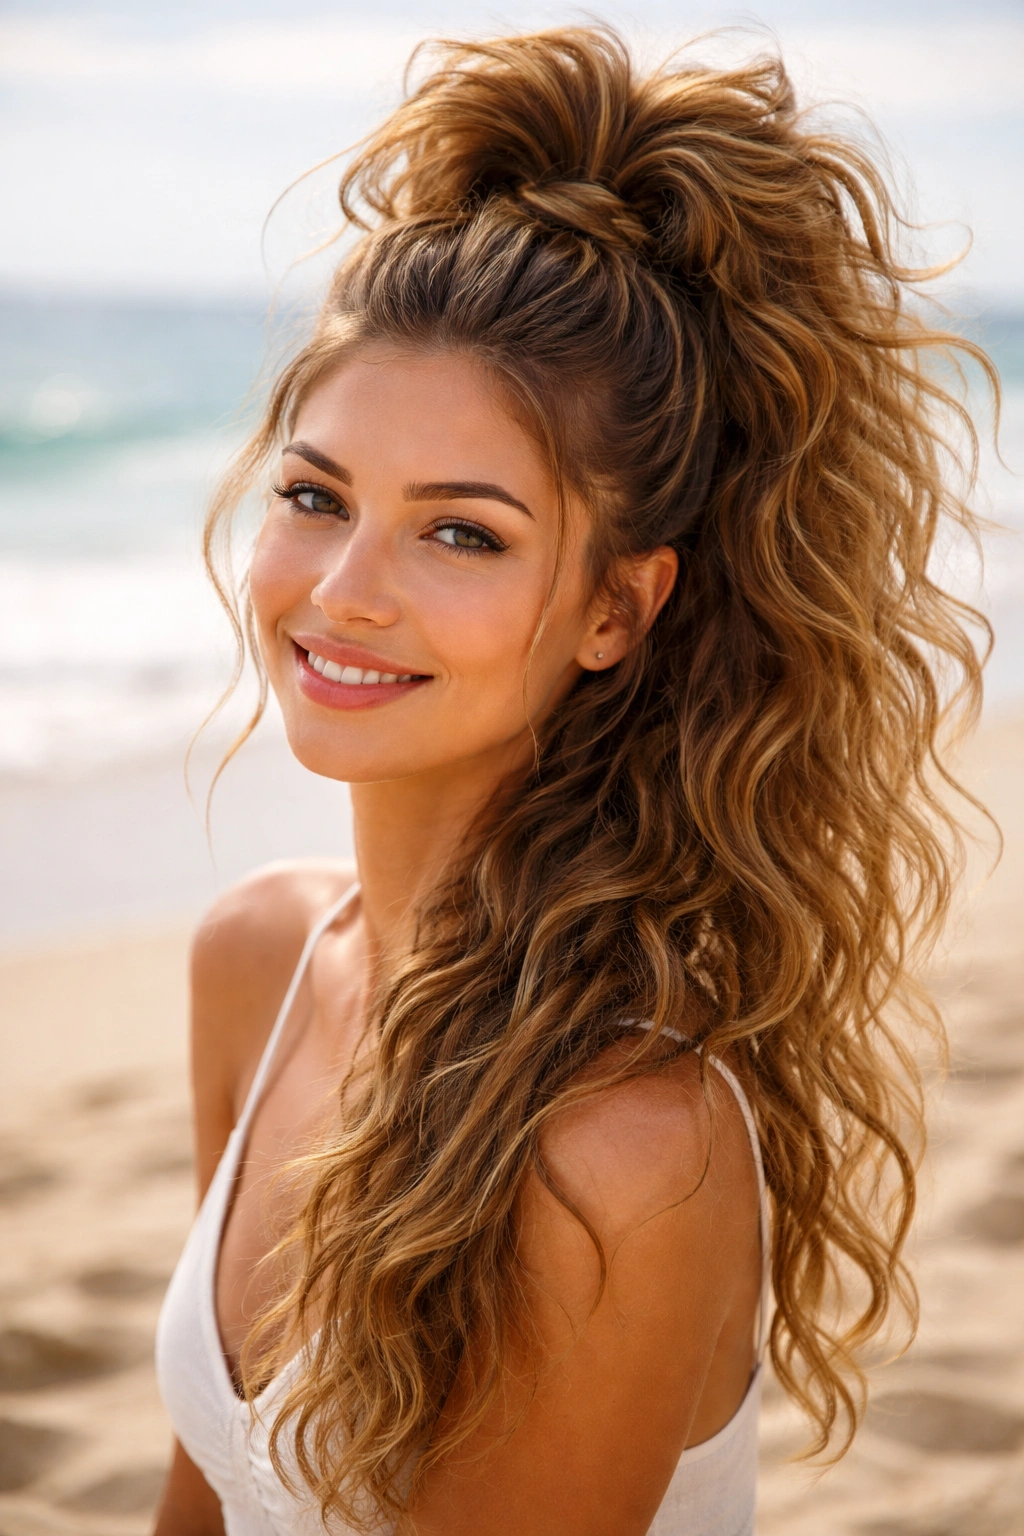
Long wavy hair can get heavy on a hot day, and the pineapple puff solves that fast. Gather the hair very high, almost at the crown, and tie it loosely so the waves fall outward.
You want height, not tension. If the ponytail is too tight, the roots flatten and the ends lose their shape. Use a soft scrunchie, not a thin elastic, so the hair doesn’t crease badly. A pineapple puff also helps preserve wave pattern if you plan to take the style down later and let the hair fall back into loose texture.
It’s not just for sleeping. On beach days, it keeps the hair up and lets the waves fan out in a way that feels playful, not fussy.
15. Rope-Braid Ponytail
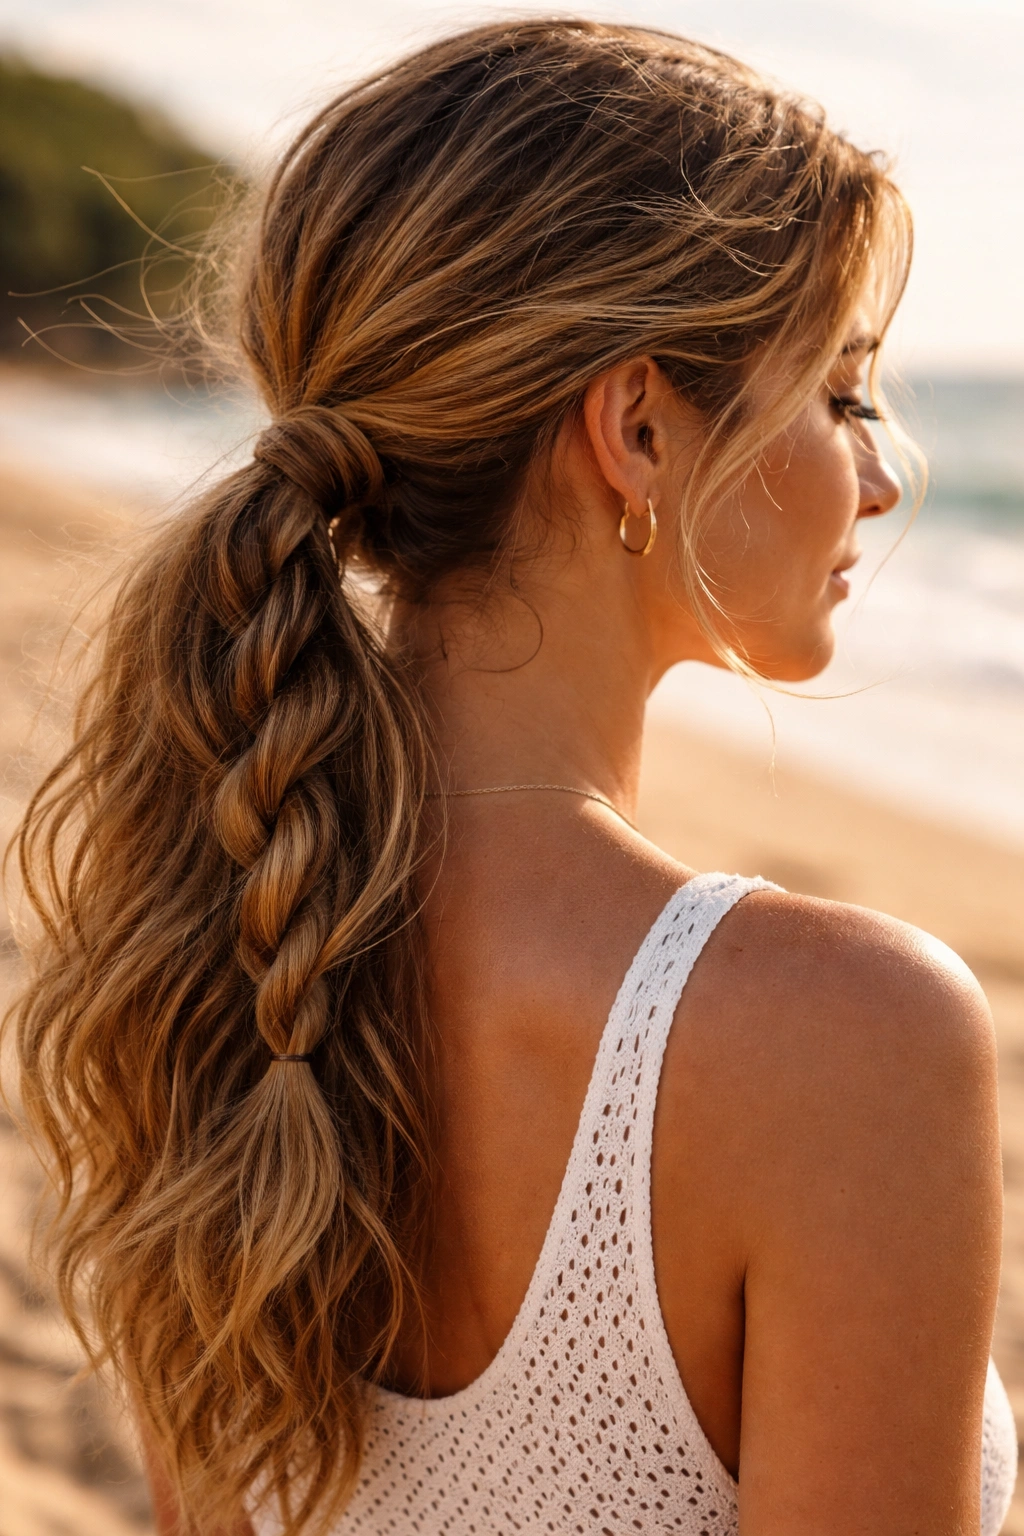
A rope braid is two sections twisted around each other, and it looks especially good on wavy hair because the texture makes the twist appear thicker than it is.
Pull the hair into a mid or low ponytail, split it into two sections, twist each section in the same direction, then wrap them around each other in the opposite direction. That’s the part people forget. If you twist both sections the same way and braid them together the wrong way, the rope falls apart fast.
Use this style when you want a ponytail with a little more shape than the usual elastic-and-go version. It feels neat, but not stiff.
16. Side-Swept Waves with Barrette Stack
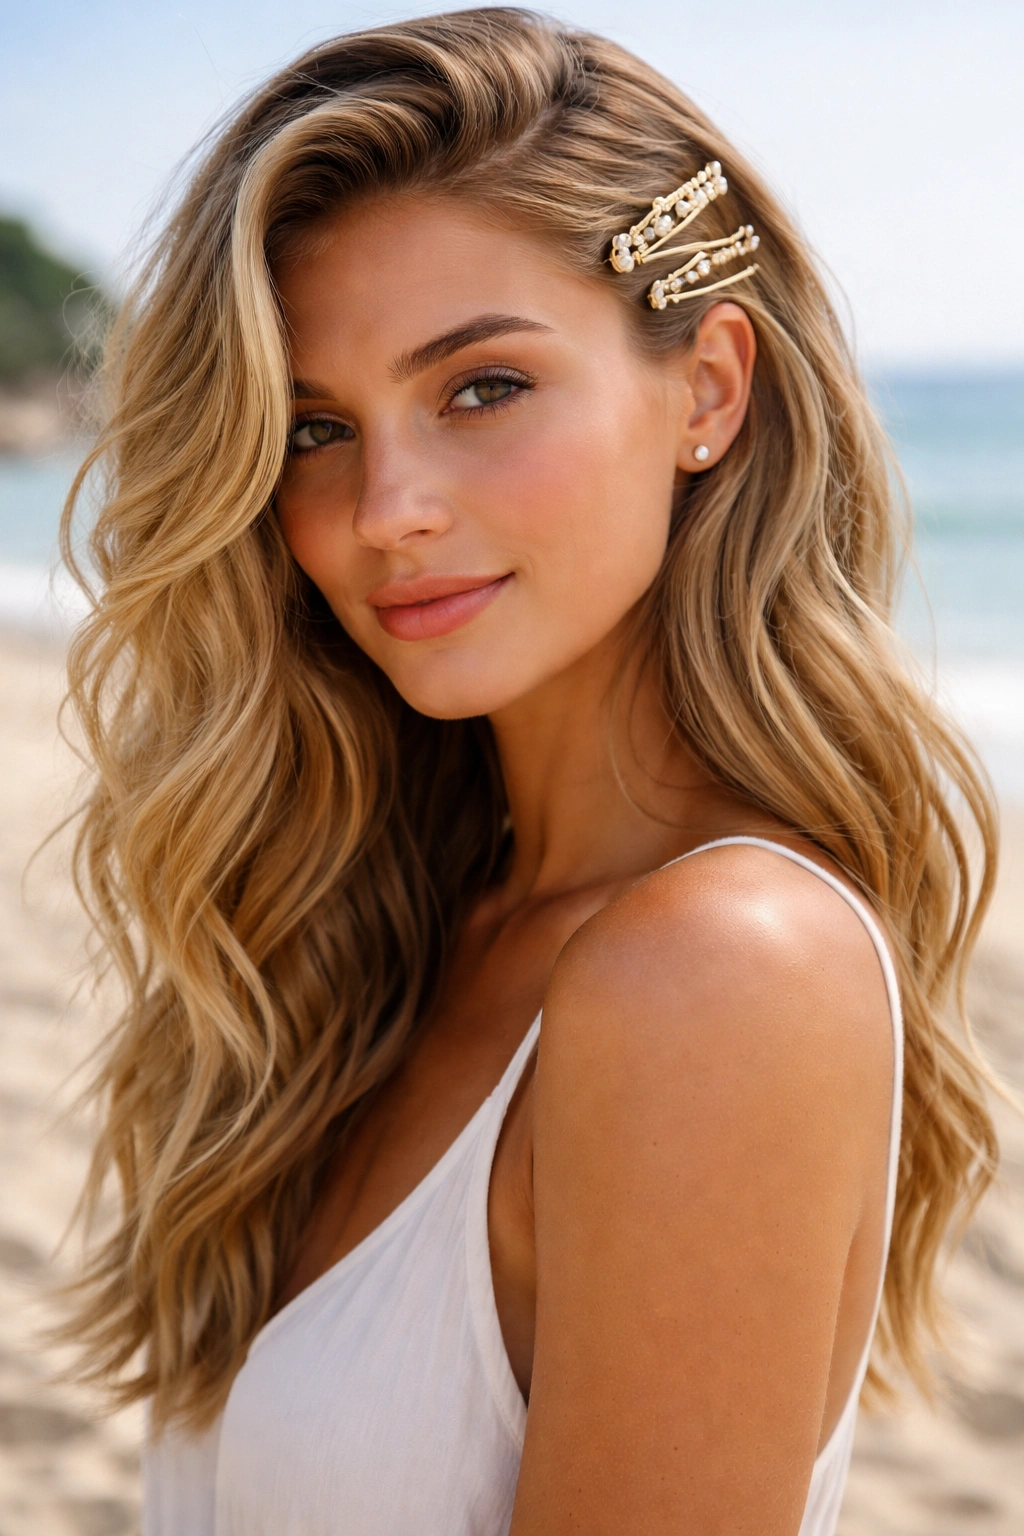
Sometimes the best beach hairstyle is barely a hairstyle at all. Sweep one side back and pin it with two or three barrettes stacked near the temple.
The point here is to keep the front from falling into your face while letting the rest of the waves stay loose and touchable. If your hair is thick, pin a small section first, then add the decorative barrettes on top. That keeps them from sliding under the weight of the hair. Choose clips with a secure clasp, not the flimsy decorative kind that opens in a gust of wind.
It’s easy, quick, and a little more styled than simply tucking hair behind the ear. Good for lunch spots. Good for beach photos too.
17. Space Buns with Soft Ends
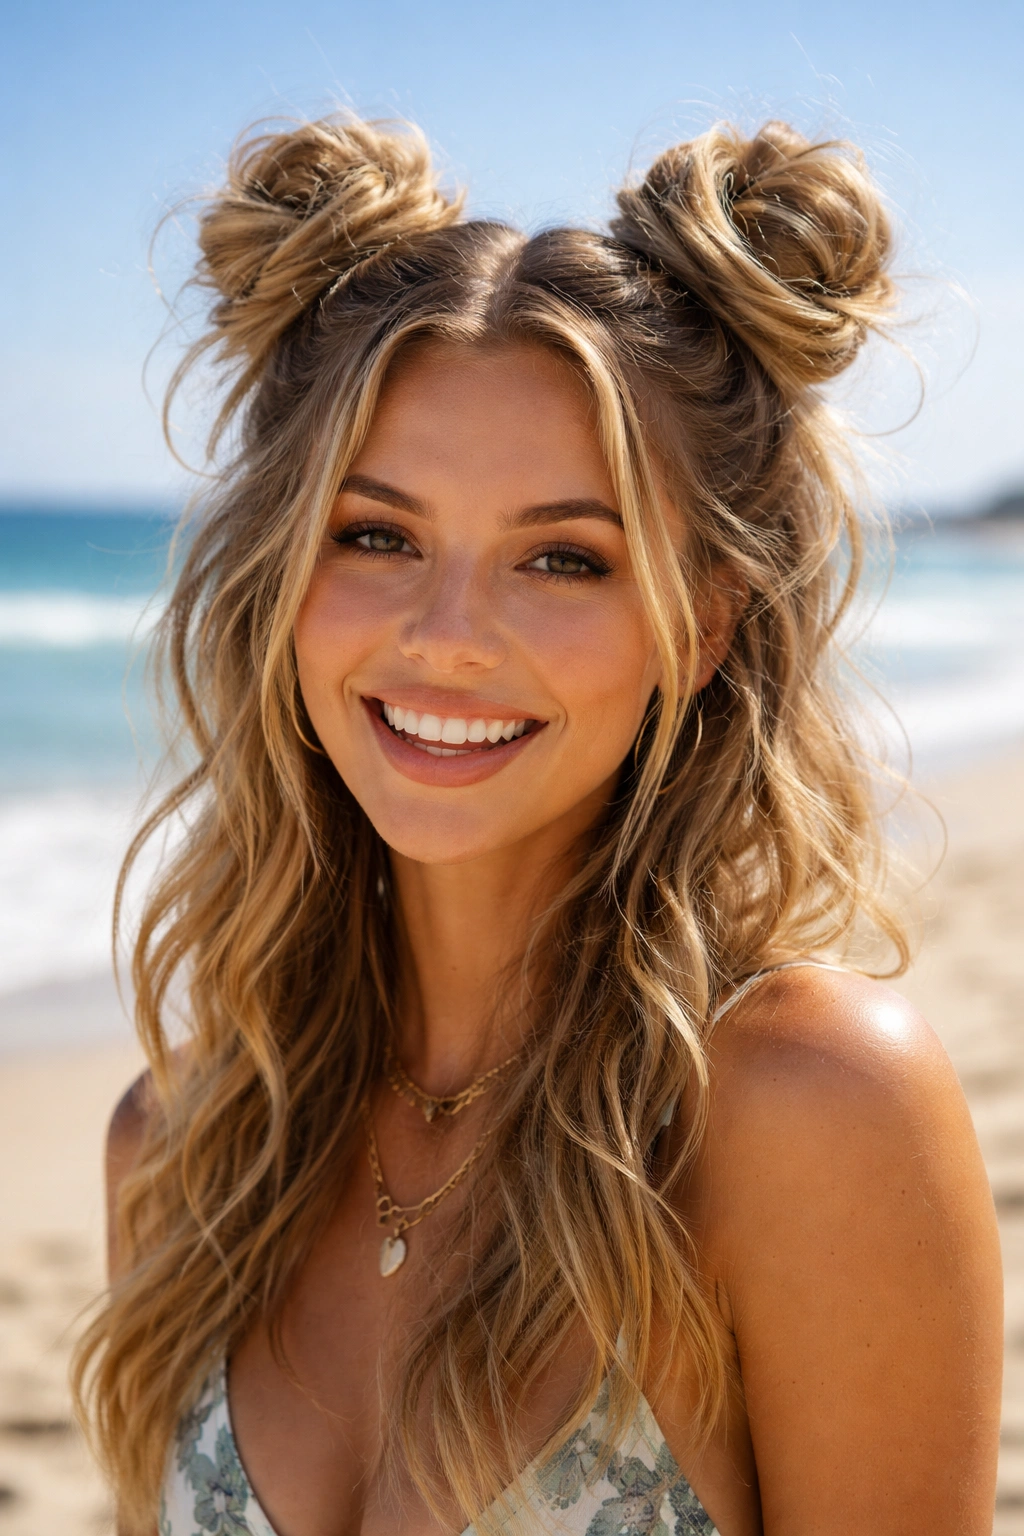
Space buns can be playful, but on wavy hair they also solve a very practical problem: keeping the top half under control while the rest stays movable.
Divide the hair down the middle, twist each side into a bun, and leave the ends a little loose instead of pulling them tight. The buns should sit high enough to keep hair off the neck, but not so high that they feel cartoonish. If you’re using this style at the beach, a small amount of texturizing spray at the roots keeps the sections from sliding apart.
This one works best when you want something fun and not overly serious. Which, on a beach, feels about right.
18. Mini Claw Clips Row
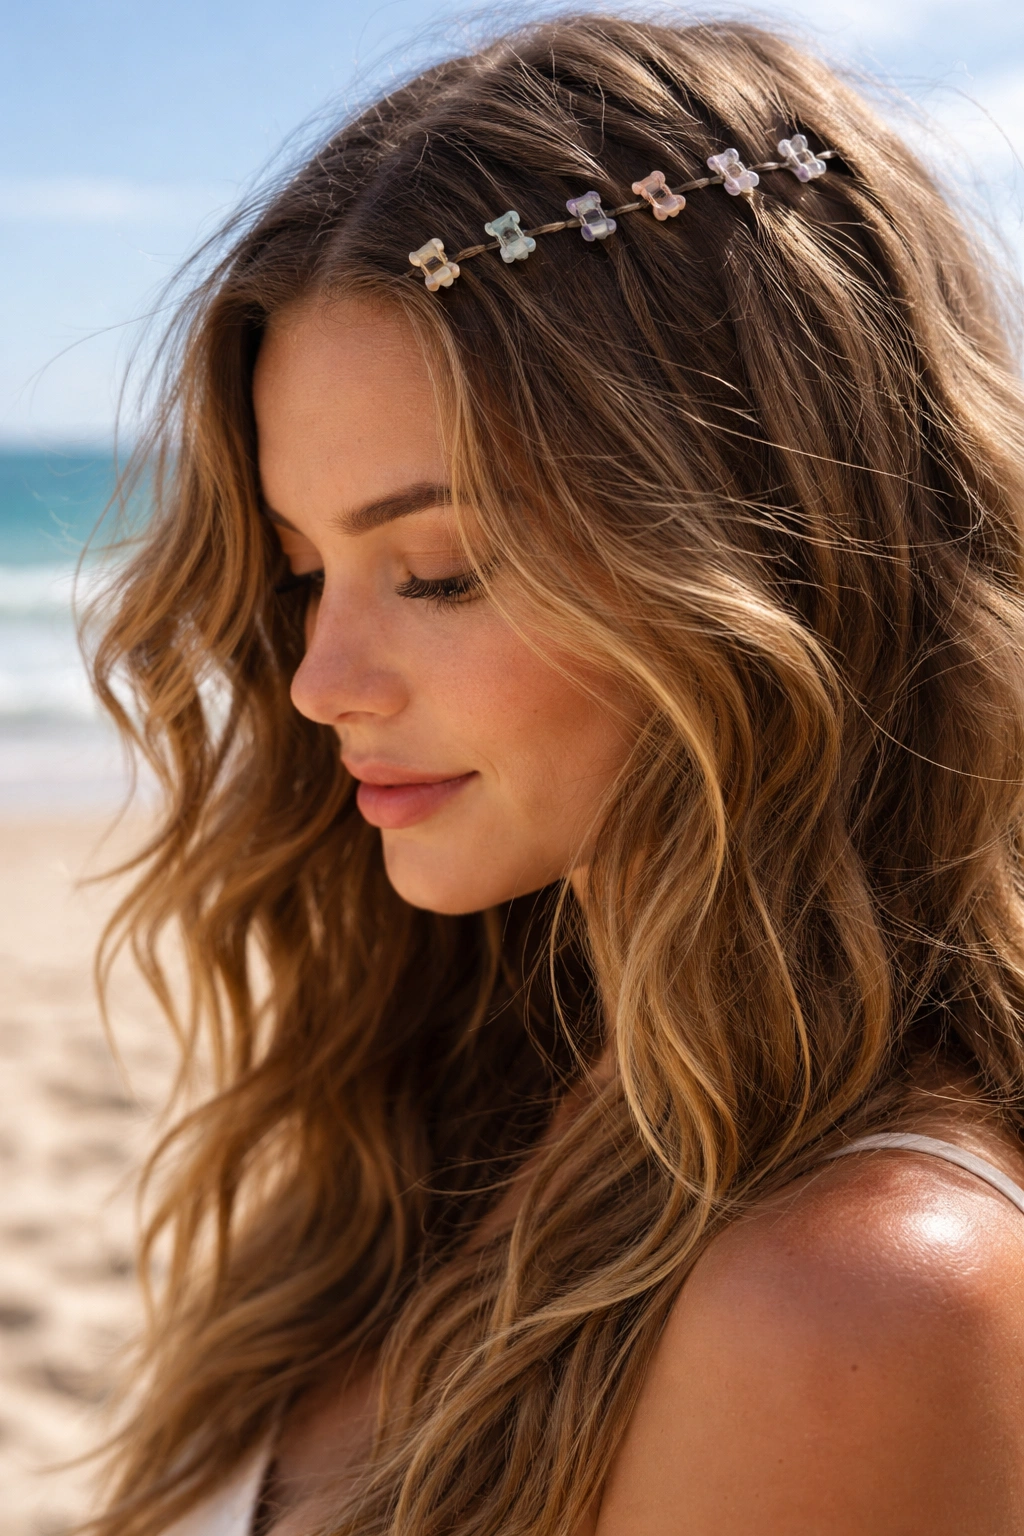
A row of mini claw clips is one of the easiest ways to shape wavy hair without a single heat tool. It’s also one of the most underrated.
Take small sections from the front and sides, twist each one slightly, and clip them back in a line. The rest of the hair stays down, so the style keeps movement. You can use matching clips for a clean look or mix colors for something more casual. Either way, the clipped sections hold the face-framing strands off your skin, which matters when the day gets sweaty.
This style is especially useful if your waves are fine and prone to getting flattened by heavier accessories.
19. Classic Low Pony with Wrapped Strand
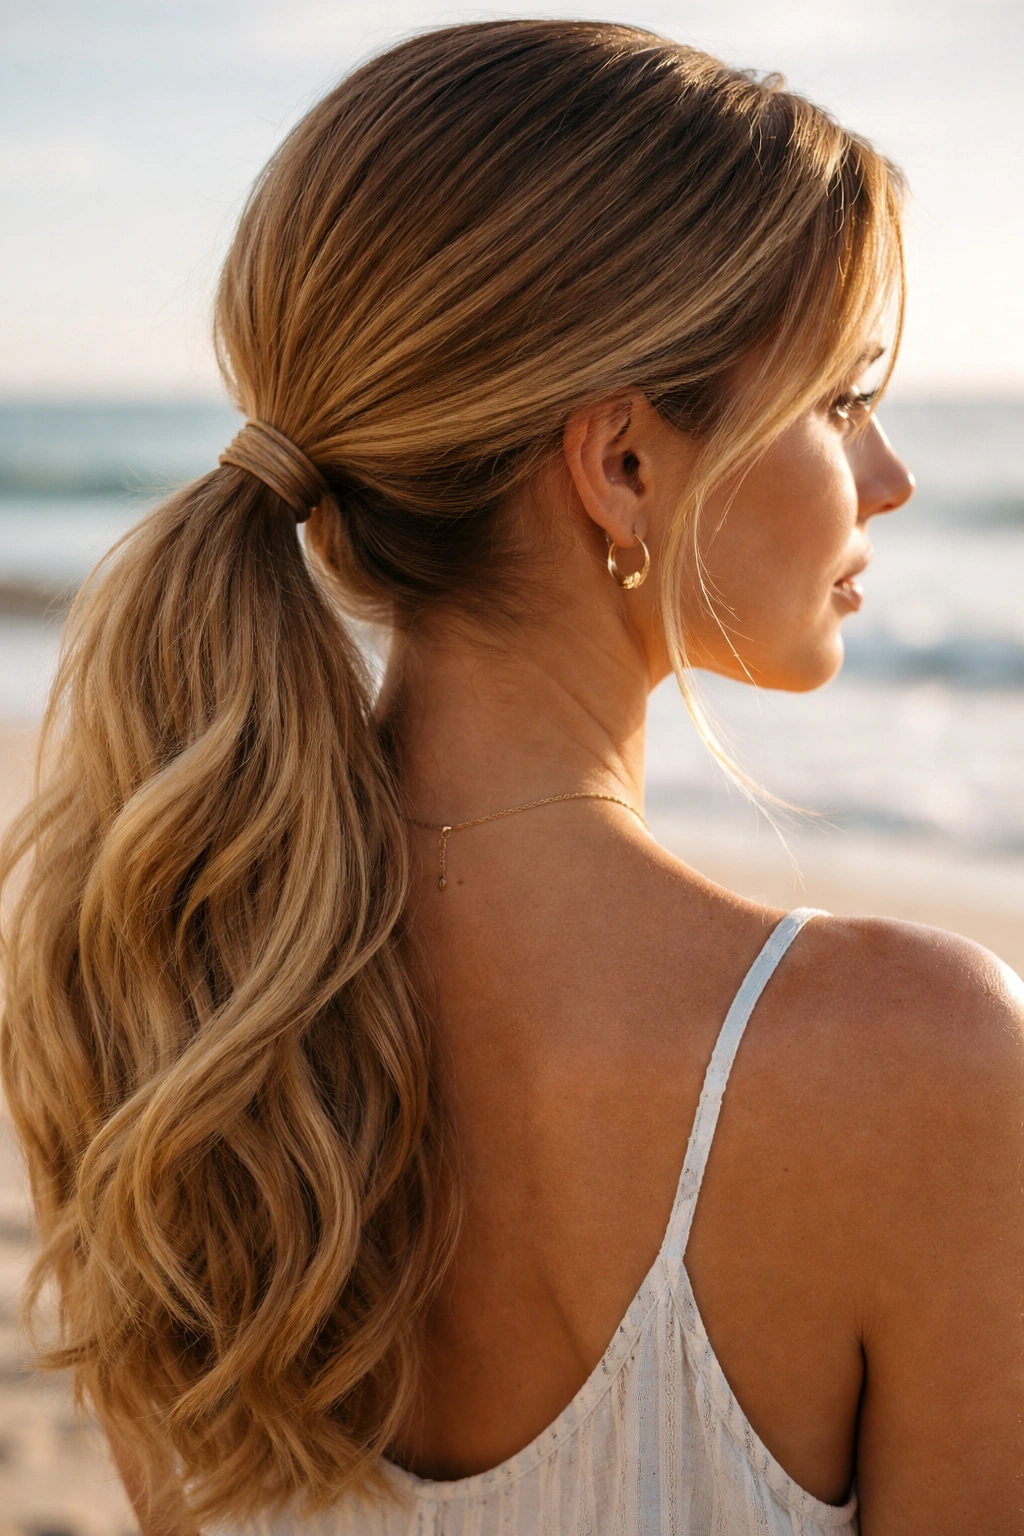
The low ponytail is not exciting on its own. Wrap one small strand around the elastic, and it becomes a completely different thing.
Pull the hair low and smooth the top with your hands. Don’t overbrush it; a brushed-out beach pony can look too flat. Use a strand from underneath the ponytail to cover the elastic and pin the end underneath. That gives the style a finished look without making it fussy. A little wave in the tail keeps it from feeling severe.
This is a solid choice when you want something easy that still works with a sundress or a button-up cover-up.
20. Boho Crown Braid
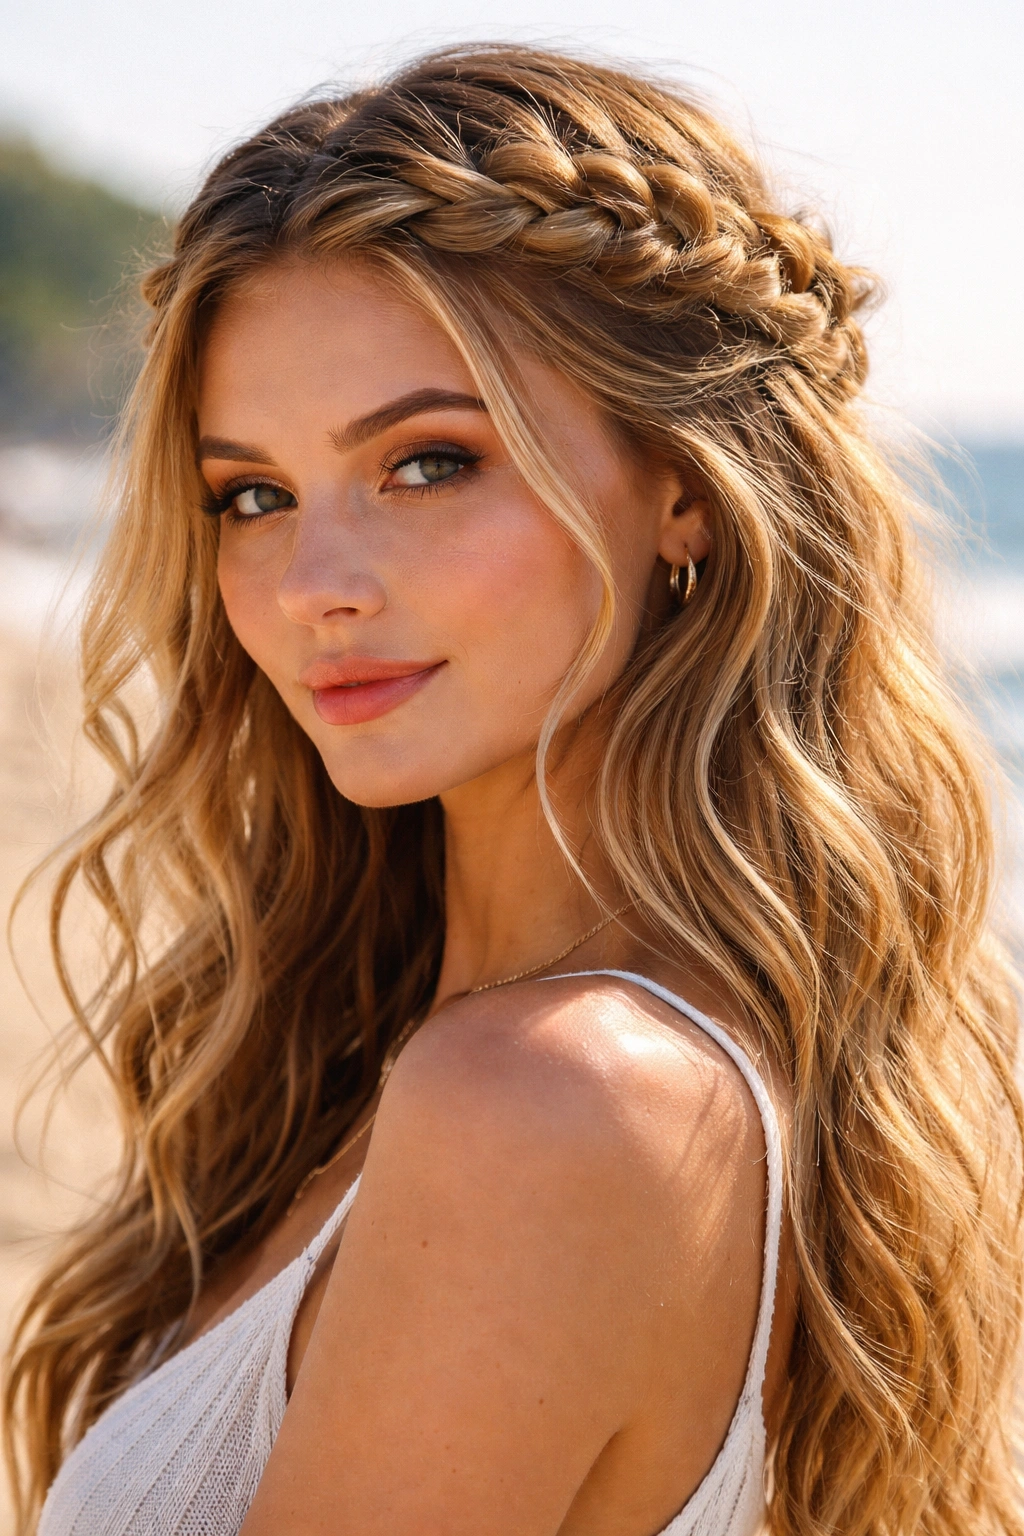
A crown braid has a softer mood than a tight French braid, and that softness suits wavy hair. It circles the head and keeps the front sections from turning into a tangled mess.
Braid loosely from one side, pinning as you go around the crown. The braid should sit a little above the ears so the shape stays visible. If the hair is layered, use discreet pins every few inches to stop the braid from slipping.
How to Keep It From Looking Too Tight
Gently pull on the edges of the braid after it’s pinned. Not a lot. Just enough to widen the plaits and soften the line. That little adjustment is what makes it feel beach-appropriate instead of wedding-guest formal.
21. Loose Fishtail Braid
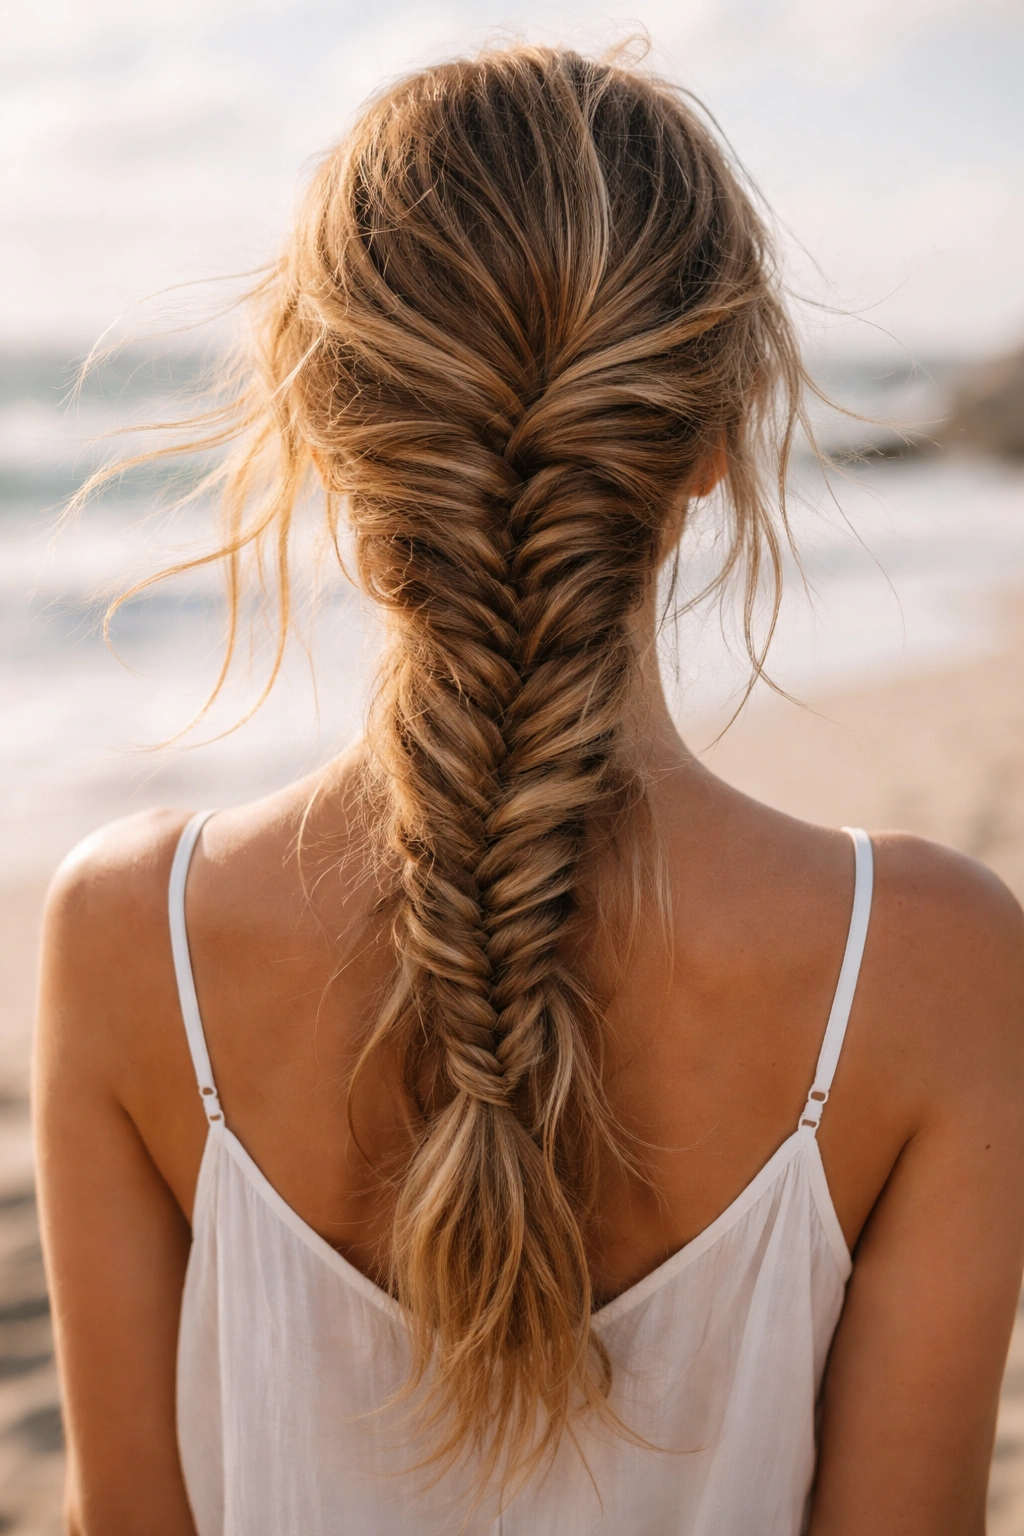
A fishtail braid looks detailed, but the trick is that it doesn’t have to be perfect. In fact, on beach days, it’s better when it isn’t.
Split the hair into two sections and pull small pieces from the outside edges across to the other side. Once it’s secured, tug gently at the braid to loosen it. That fluffing step is what makes the braid feel airy and wave-friendly. It also helps if your hair has already picked up a bit of salt texture from the air or the water.
This style is nice when you want the hair contained but still visibly textured. It’s a little more interesting than a standard braid, and the shape holds up well in wind.
22. Twisted Low Bun
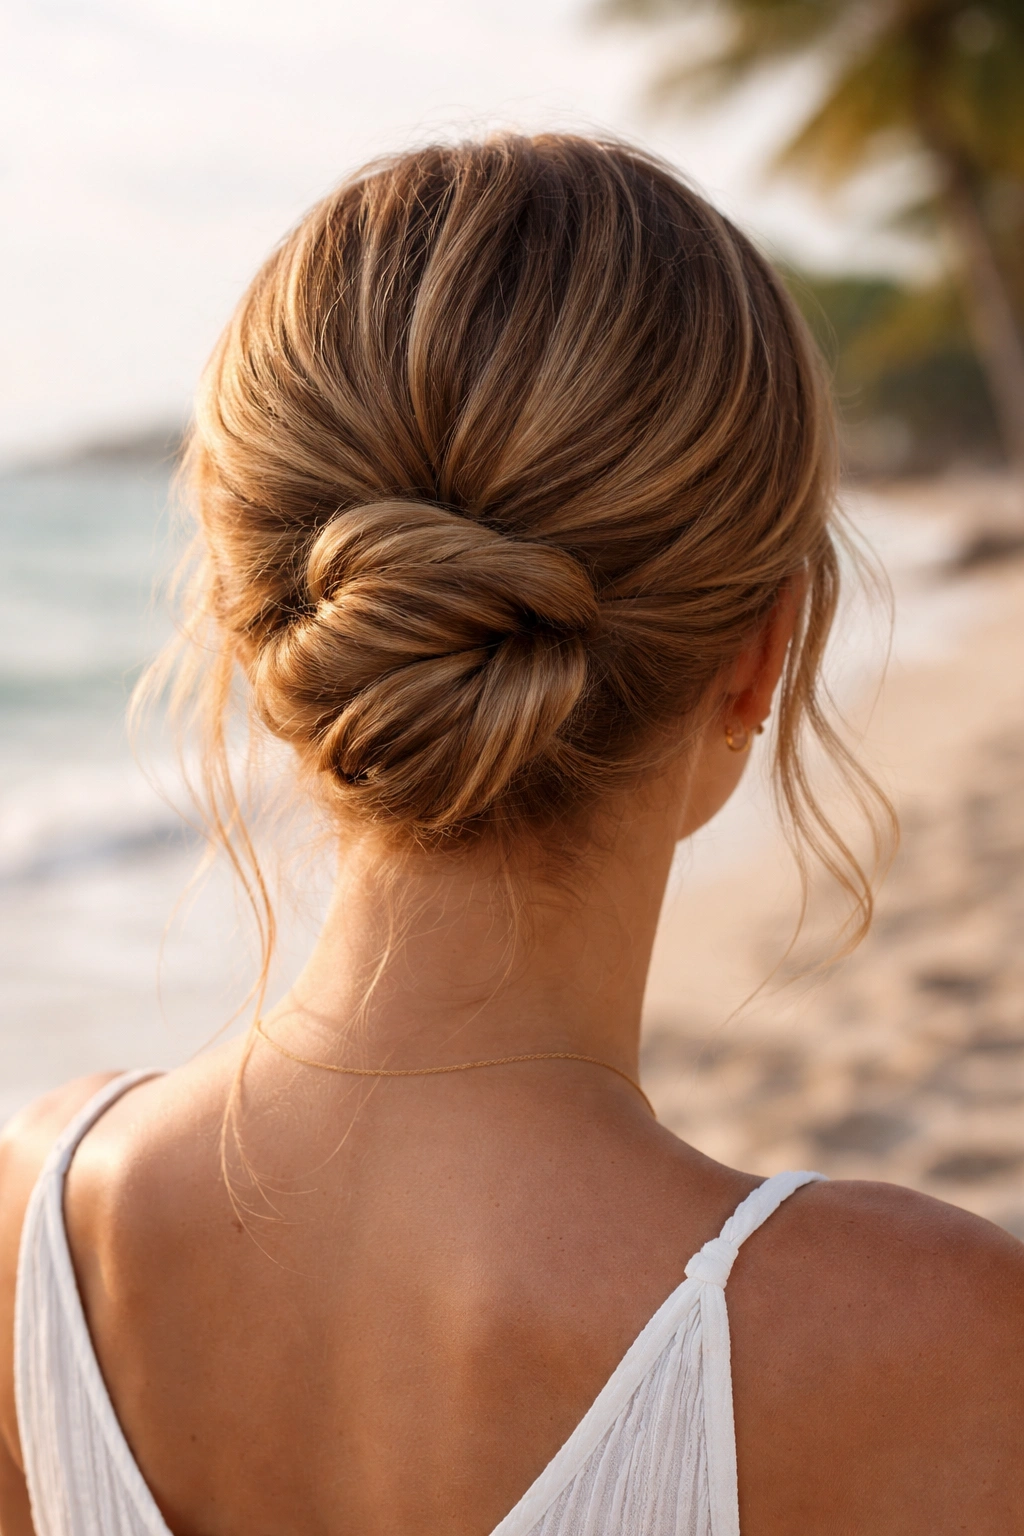
If braids feel like too much work, a twisted low bun is the next best thing. It’s simple, secure, and friendly to wavy hair that likes to puff up around the neck.
Split the hair into two large sections, twist each one, then wrap them into a bun at the nape. Use pins that match your hair color if you want the style to look cleaner. A few hidden bobby pins do a better job than one giant elastic, which tends to dig in and shift as the day goes on.
The twist gives the bun a little more texture than a plain knot. Small detail, but it matters when the hair is going to be photographed in harsh light.
23. Headband Tucked Waves
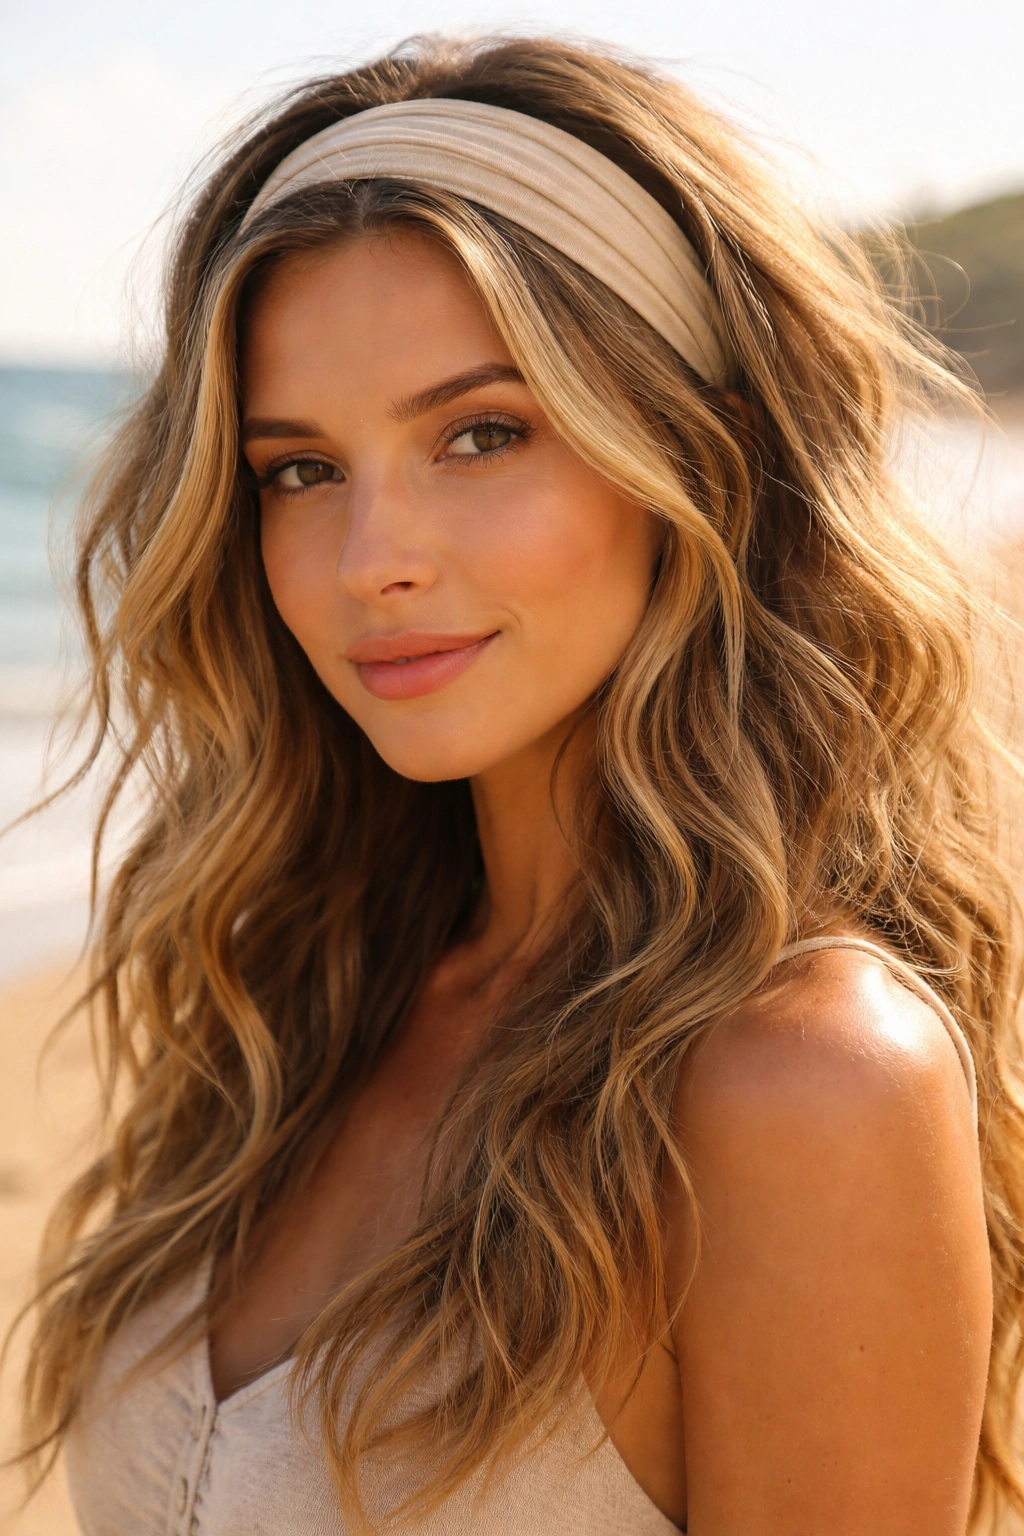
A soft headband can solve a bad beach hair day in under a minute. It holds the front back and gives the waves a shape that feels casual rather than controlled.
Place the headband just behind the hairline, then tuck small front pieces under it if you want more polish. The style works especially well when the rest of the hair is loose and a little dry at the ends. If the band is too tight, it’ll create a dent and leave a line across the forehead. Choose one with enough stretch to sit comfortably.
This is the sort of style you reach for when you want to spend time in the water instead of in front of a mirror.
24. Bandana Wrap with Loose Ends
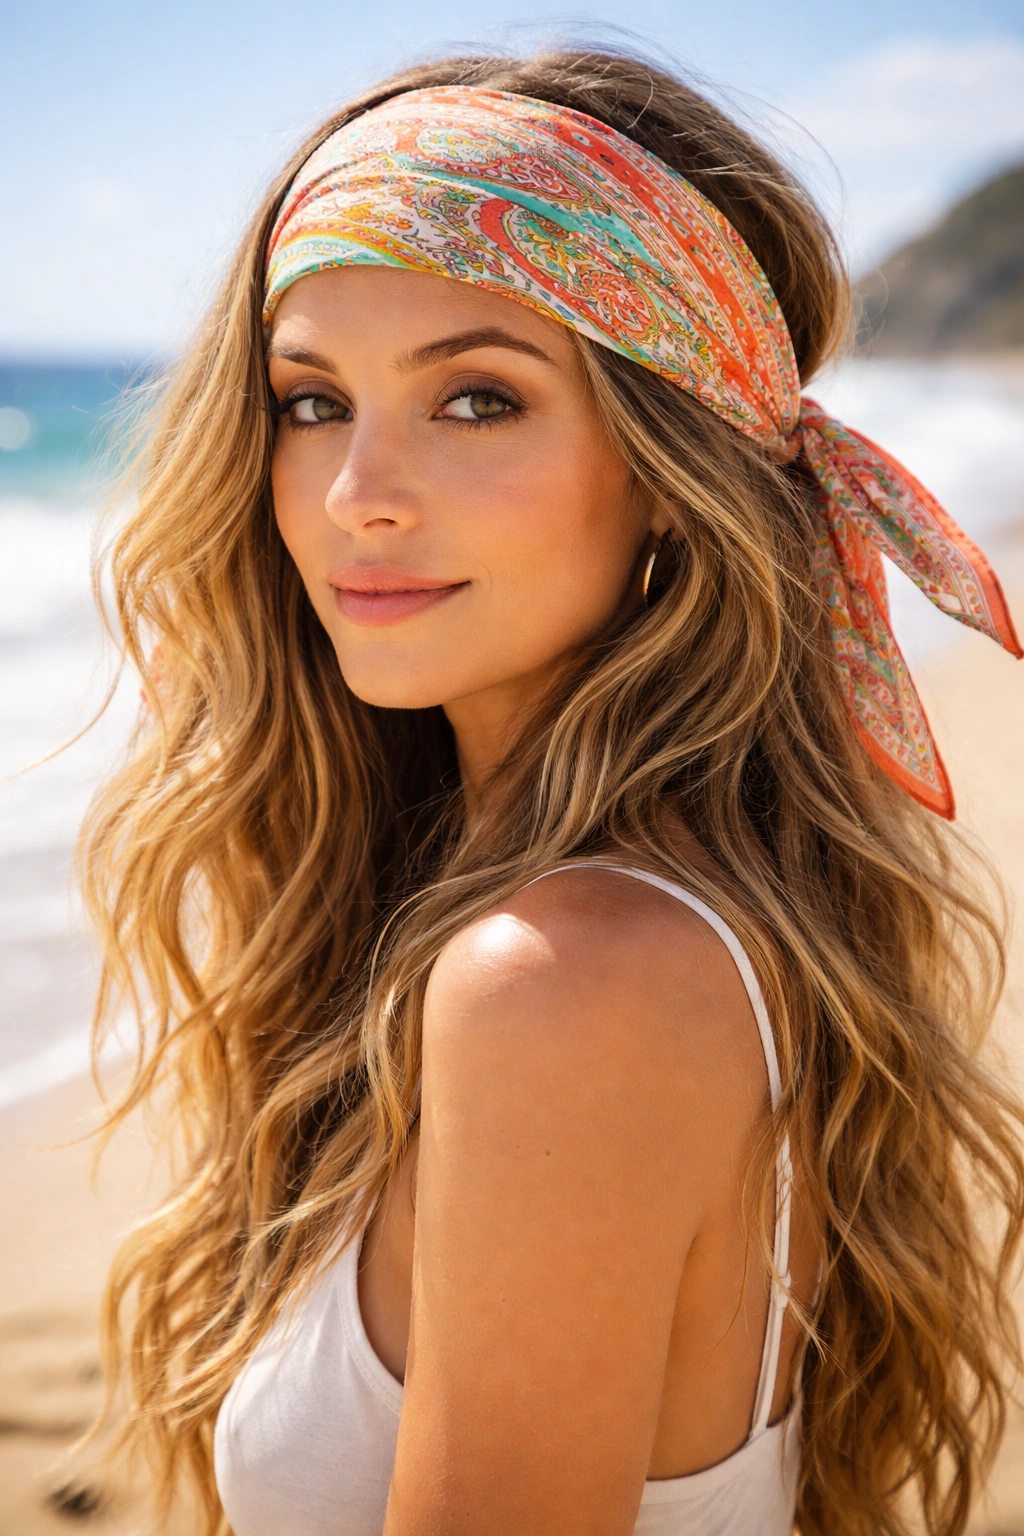
A bandana brings color, keeps flyaways down, and gives wavy hair a little personality. It also protects the hairline from wind, which is a sneaky benefit people forget.
Fold the bandana into a band, tie it around the head, and leave the tail ends loose at the back or off to one side. If you have thicker waves, keep the knot slightly higher so it doesn’t ride down during the day. The hair itself can stay loose underneath, or you can tuck the top half back first for more control.
It has that easy beach feel without looking careless. And yes, it covers a bad root day in a very useful way.
25. Mermaid-Length Loose Braids
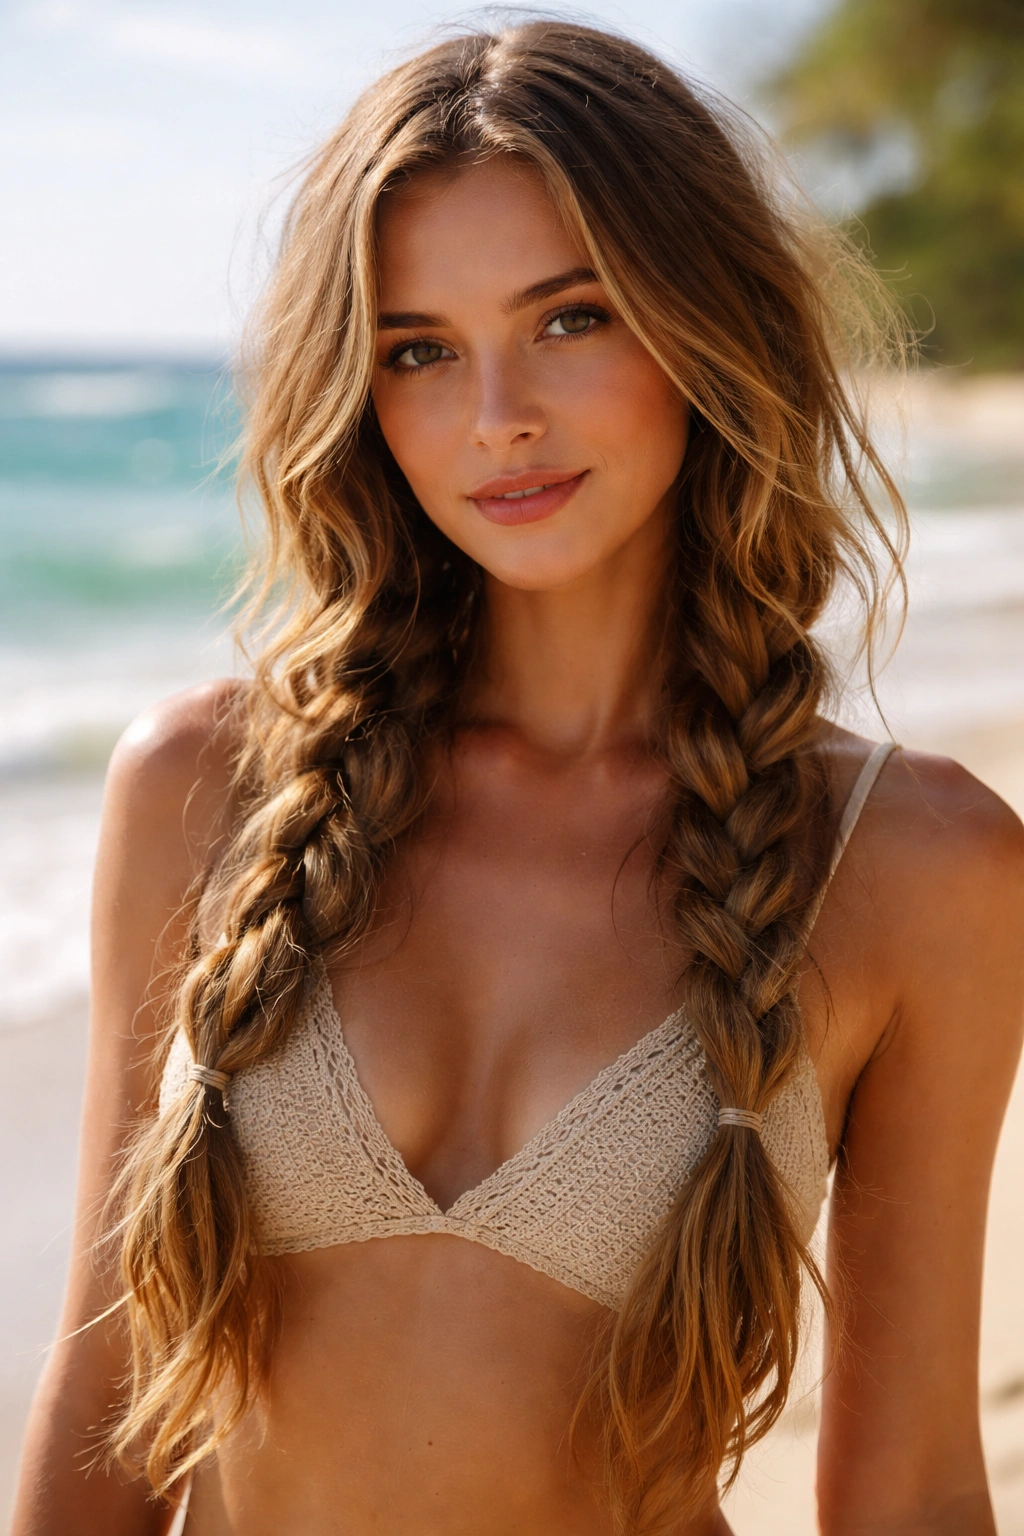
Long wavy hair can turn into a tangle magnet near water, and loose braids are a good answer. Not tight. Loose. That matters.
Divide the hair into two or three sections and braid each one softly, leaving the ends undone if you want a more relaxed finish. The goal is to keep the length separated so it doesn’t knot itself while you’re moving around. Use a soft elastic at the end of each braid so there’s no crease when you take it out later.
This style is excellent for very long hair because it keeps the weight distributed. The braids swing nicely too, which feels right for a beach day.
26. Pinned-Back Front Sections
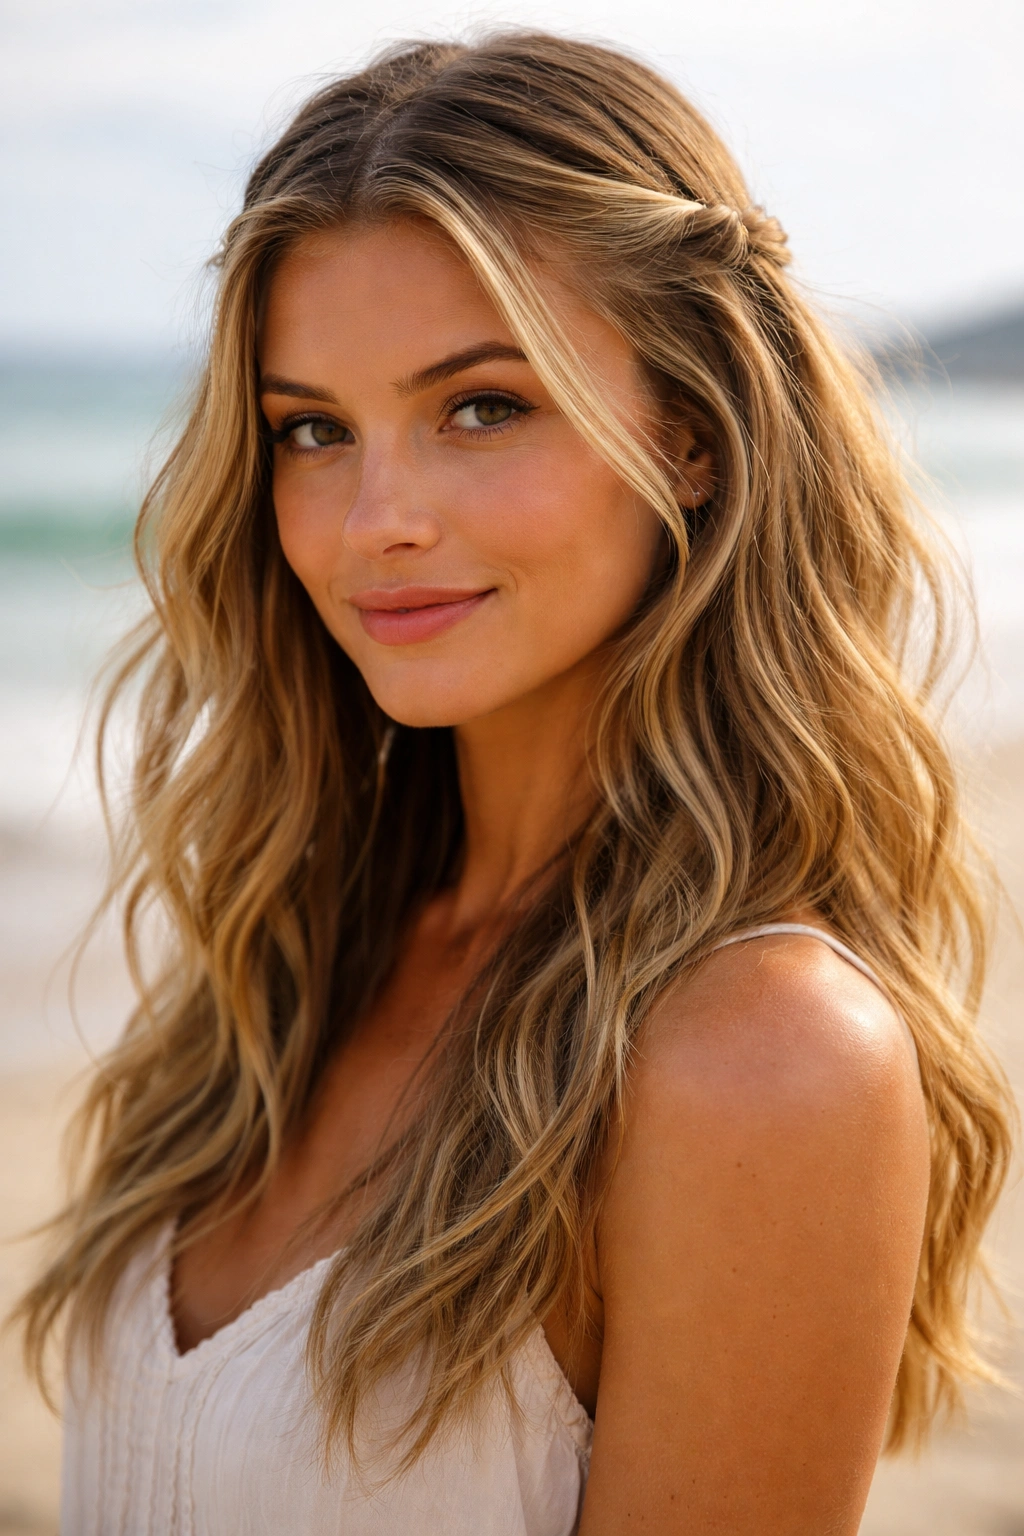
Sometimes the simplest fix is the smartest one. Pinning back the front sections keeps the wave pattern visible and stops the hair from falling into your eyes every five minutes.
Take a small piece from each temple, twist it back, and secure it with bobby pins or a decorative clip. You can leave the rest of the hair down, half-dry, or lightly styled with sea salt spray. This approach is especially good if you like the look of loose hair but hate the way the front pieces stick to your face once the air gets damp.
It’s a small move, but it changes the whole mood of the style.
27. Double Half-Up Buns
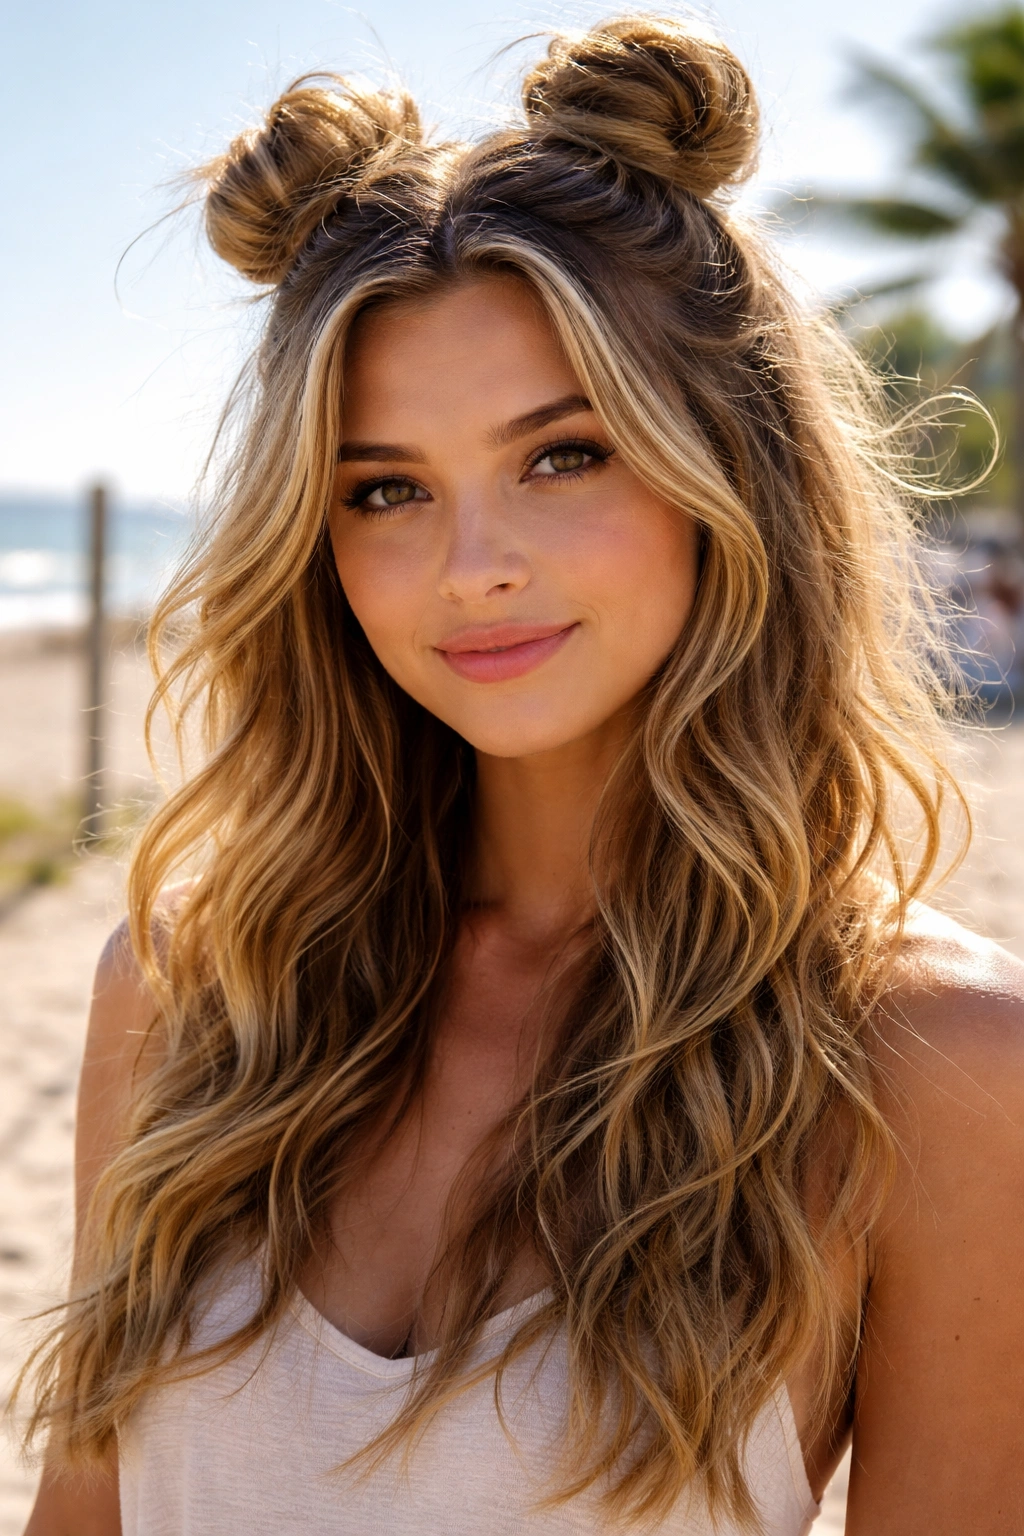
Double half-up buns are playful and practical at the same time. They keep the crown controlled while the bottom half stays loose and wavy.
Split the top section into two parts, twist each into a small bun, and pin them securely. The buns should sit wide enough apart that the style reads cleanly, not crowded. This one works best on medium-length waves and shoulder-length cuts because the proportions stay balanced.
It’s a style that looks better when a few pieces loosen during the day. That built-in softness keeps it from feeling too staged.
28. High Pony with Wavy Tail
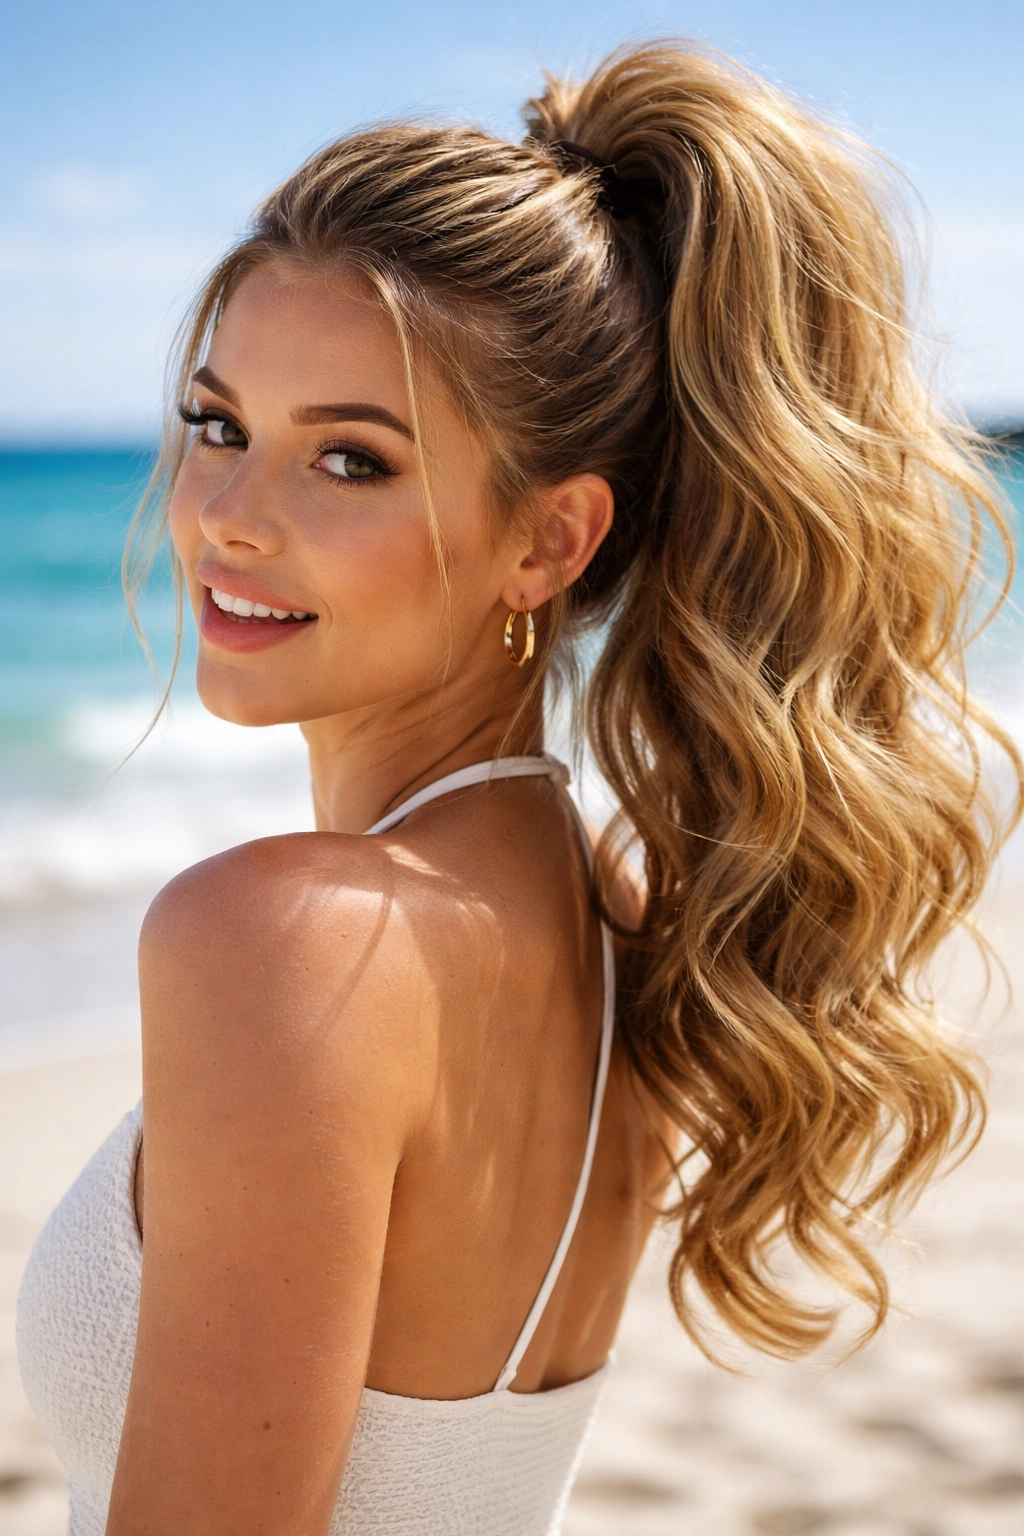
A high ponytail can feel sporty or polished depending on how much volume you leave at the crown. On wavy hair, it usually lands somewhere in the middle.
Flip the head back, gather the hair high, and secure it with a firm elastic. Then use your fingers to lift the crown slightly for shape. If you want the tail to look fuller, curl the ends around your hand once before letting them fall. That preserves some bend instead of flattening the whole thing.
This style is good when you need your hair out of the way but still want the waves to show. It’s fast. It holds. It doesn’t argue with the weather.
29. Braided Headband
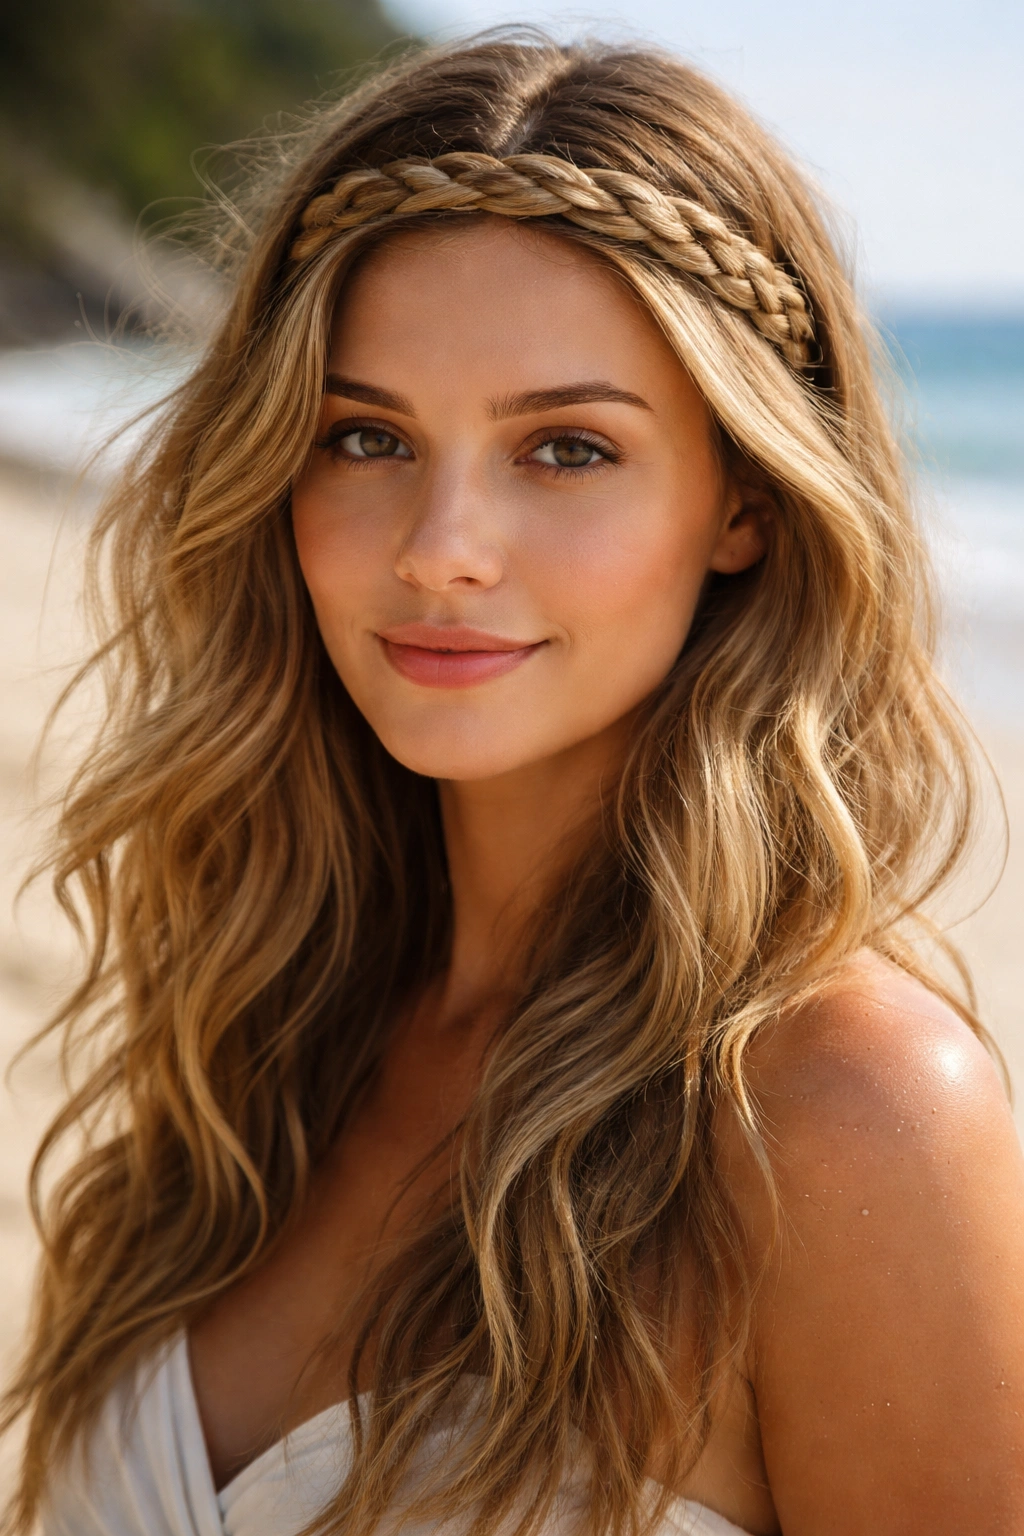
A braided headband is one of the cleanest ways to keep wavy hair off the face without losing the rest of the length. It uses the hair itself as the accessory.
Take a front section from one side, braid it across the forehead line, and pin it behind the opposite ear. Then let the remaining waves fall loose. If your hair is fine, backcomb the section lightly before braiding so it has enough grip. If it’s thick, a couple of hidden pins will keep the braid from sliding.
This style is especially nice if you like soft, face-framing structure but don’t want a full updo. It’s tidy where it needs to be and loose everywhere else.
30. Pin-Curl Inspired Tucked Waves
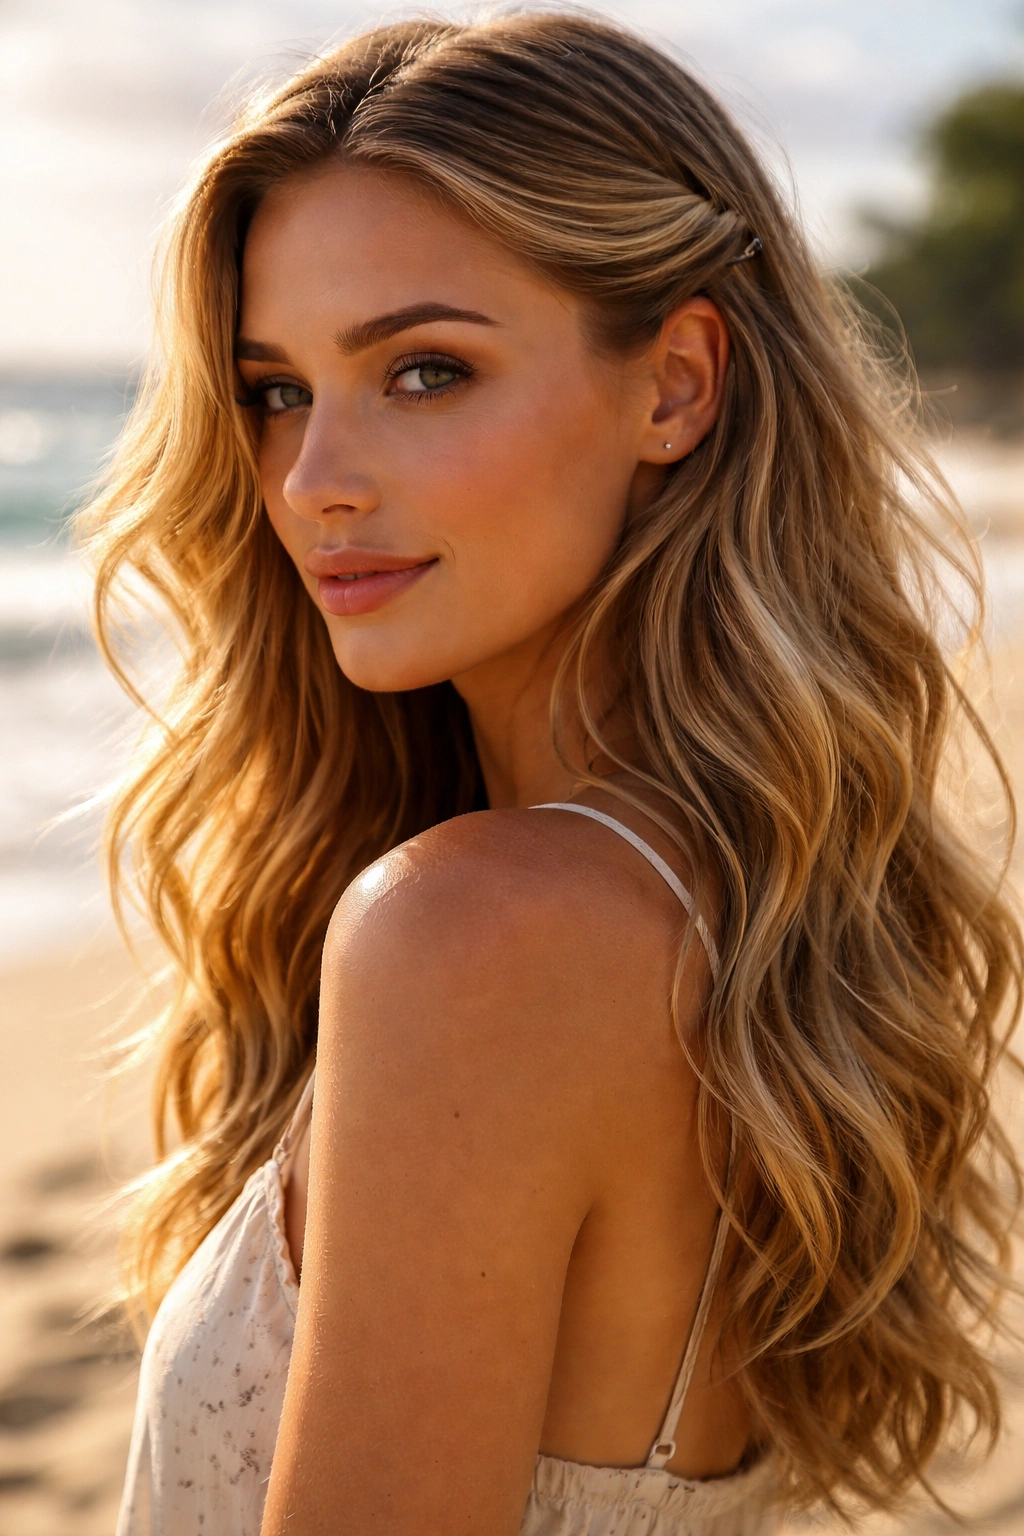
This is a pretty little trick for waves that need shape near the face. Tuck the front sections back and secure them with pins so the hair bends softly behind the ears.
The effect is subtle, but it changes the whole silhouette. You keep the texture in the length while opening up the front. If the waves are damp, the tucked sections dry with a gentle curve that stays put better than a regular tuck. Use pins that cross in a small X if the hair tends to slip.
What to Watch For
Don’t pull the sections too tight. If the hair is strained flat against the head, it can create an odd dent once you let it down later. Loose is the goal. Always.
31. Side Pony with Volume
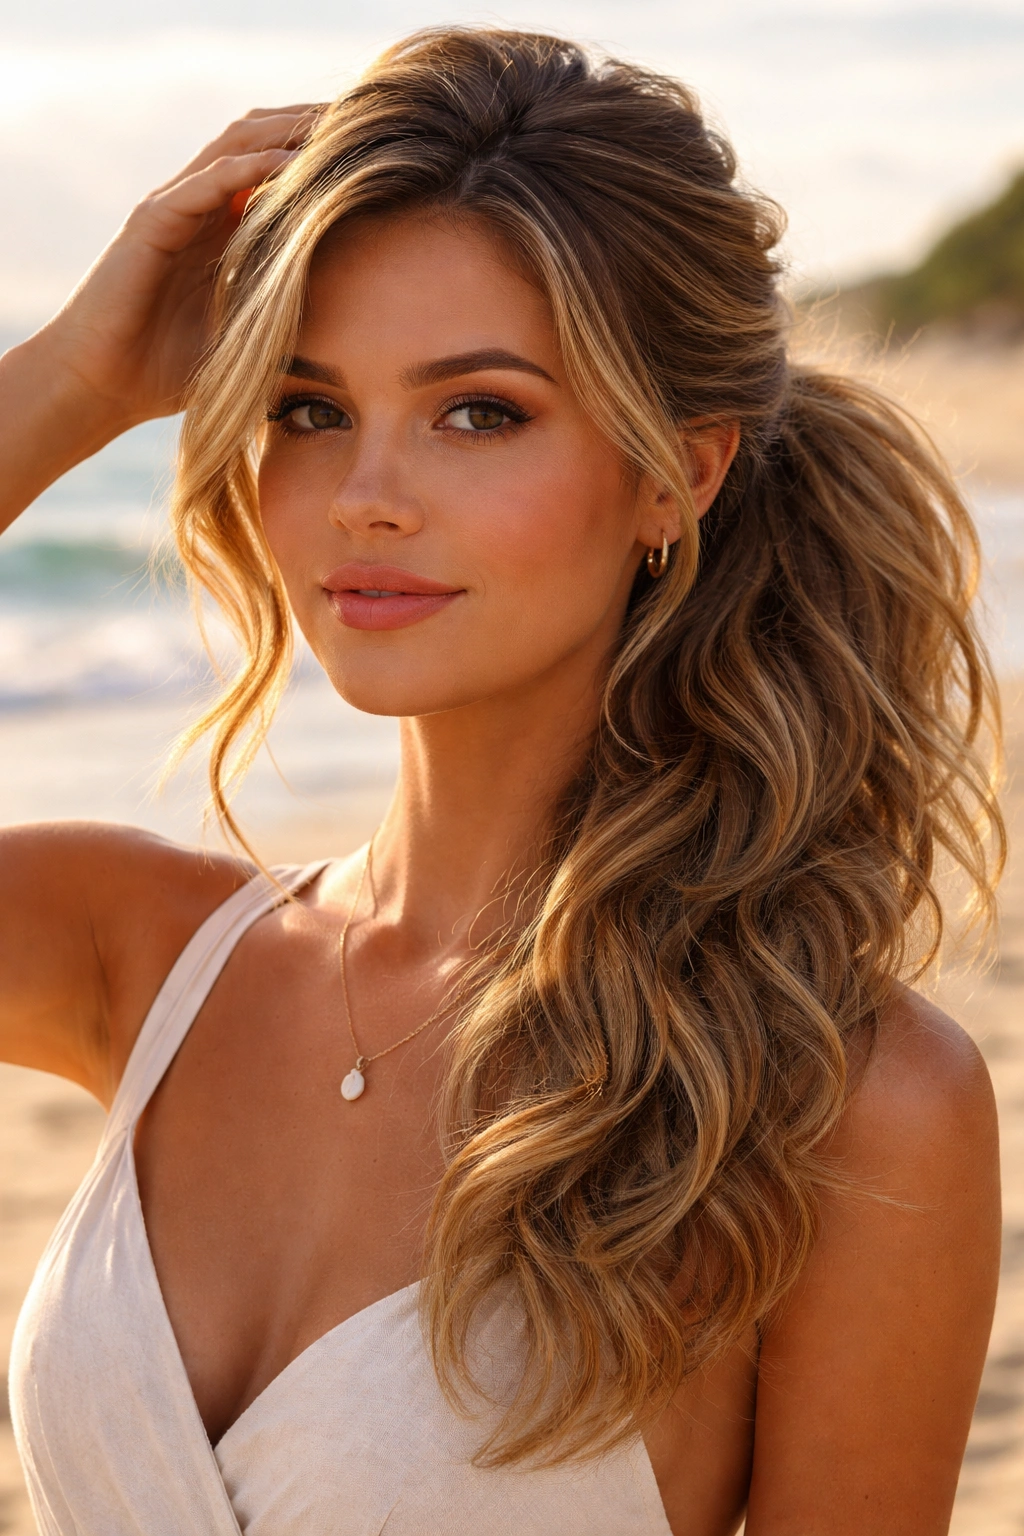
A side ponytail gives wavy hair a softer shape than the standard center-back pony. It also feels a bit more relaxed, which suits a beach setting.
Sweep the hair to one side, fasten it low near the shoulder, and lift the crown a little with your fingers. A side pony looks best when the waves in the tail stay visible, so skip heavy brushing. If the hair is layered, a few face-framing pieces can drop naturally around the cheekbones and make the whole thing feel less pulled-back.
It’s an easy switch if you already wear ponies often but want something that feels more interesting near the water.
32. Short Wavy Bob with Tucked Side
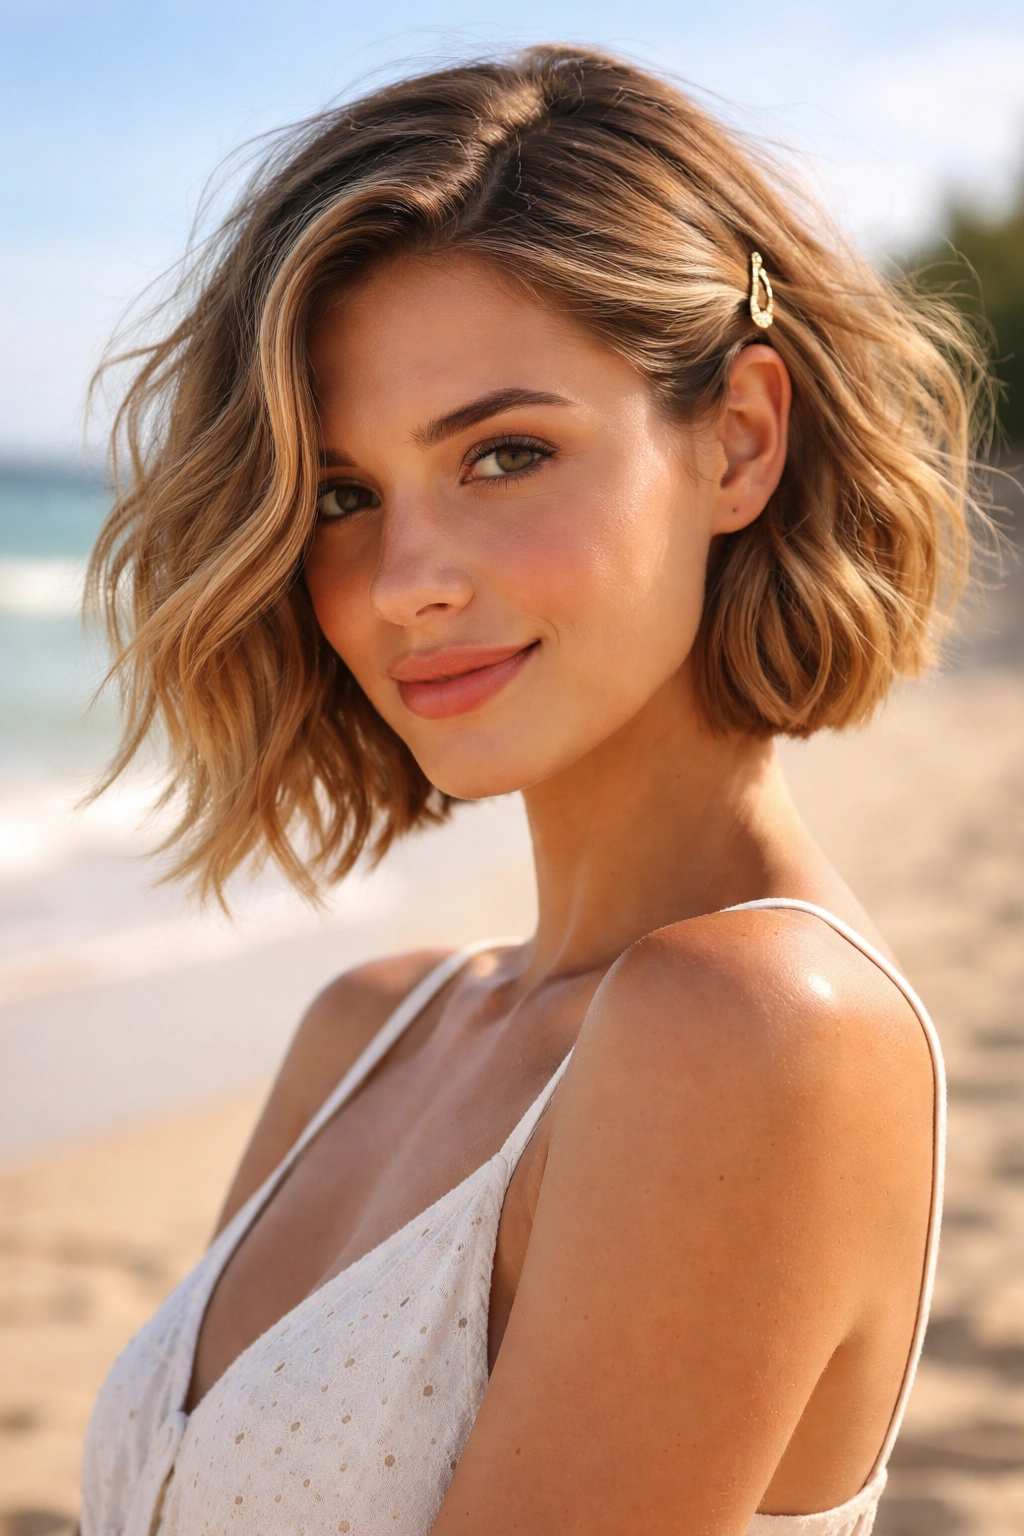
Short wavy hair doesn’t need a big style to feel finished. A side tuck and one well-placed clip can be enough.
Push one side behind the ear, secure it with a small barrette, and let the other side fall forward a little. The asymmetry keeps the bob from looking too neat, which is useful because a beach breeze can flatten one side fast. A bit of texture cream on the ends helps define the wave pattern and keeps the cut looking deliberate instead of puffed up.
This is one of my favorite low-effort beach looks for shorter hair. It’s fast, it feels light, and it doesn’t ask the cut to do more than it already does well.
33. Shoulder-Length Wavy Shag with Clips
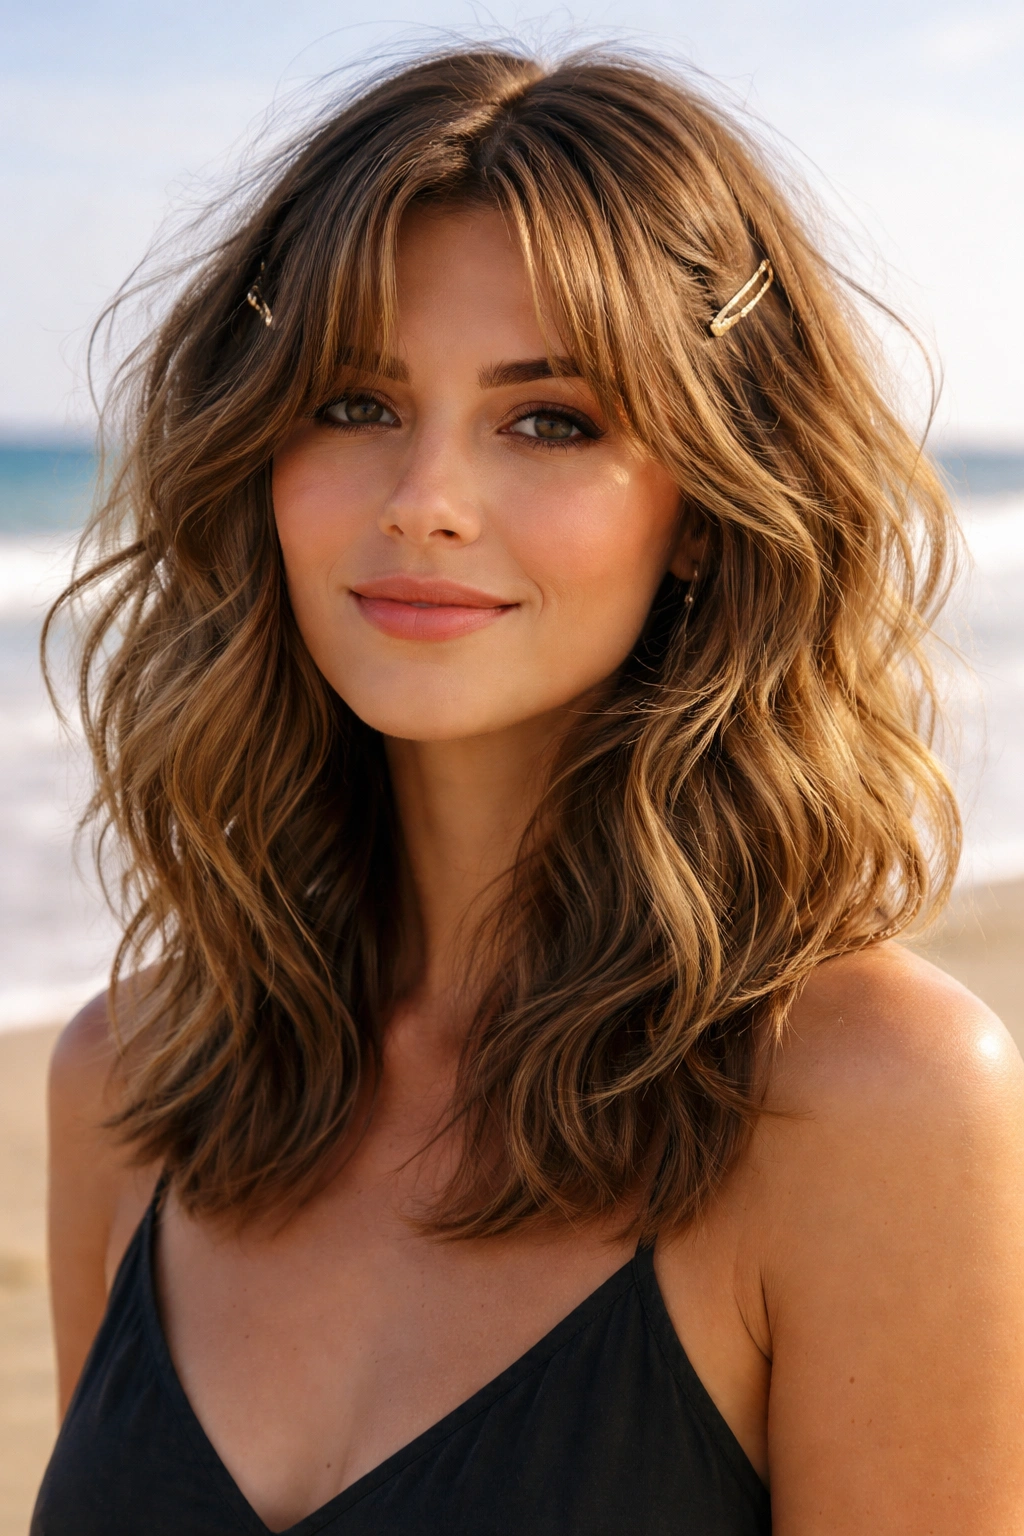
A shoulder-length shag already has movement built in, so the beach version should lean into that. Small clips near the temples or just above the ears keep the shape open while letting the layers do their thing.
If your shag has curtain bangs, pin them back with a tiny clip or sweep them into a soft twist. That keeps the fringe from separating into odd pieces when the air gets humid. A little mousse at the roots and a quick scrunch through the ends is often enough.
This cut looks especially good when it’s not over-managed. The layers want to move. Let them.
34. Wet-Waves with a Barely-There Part
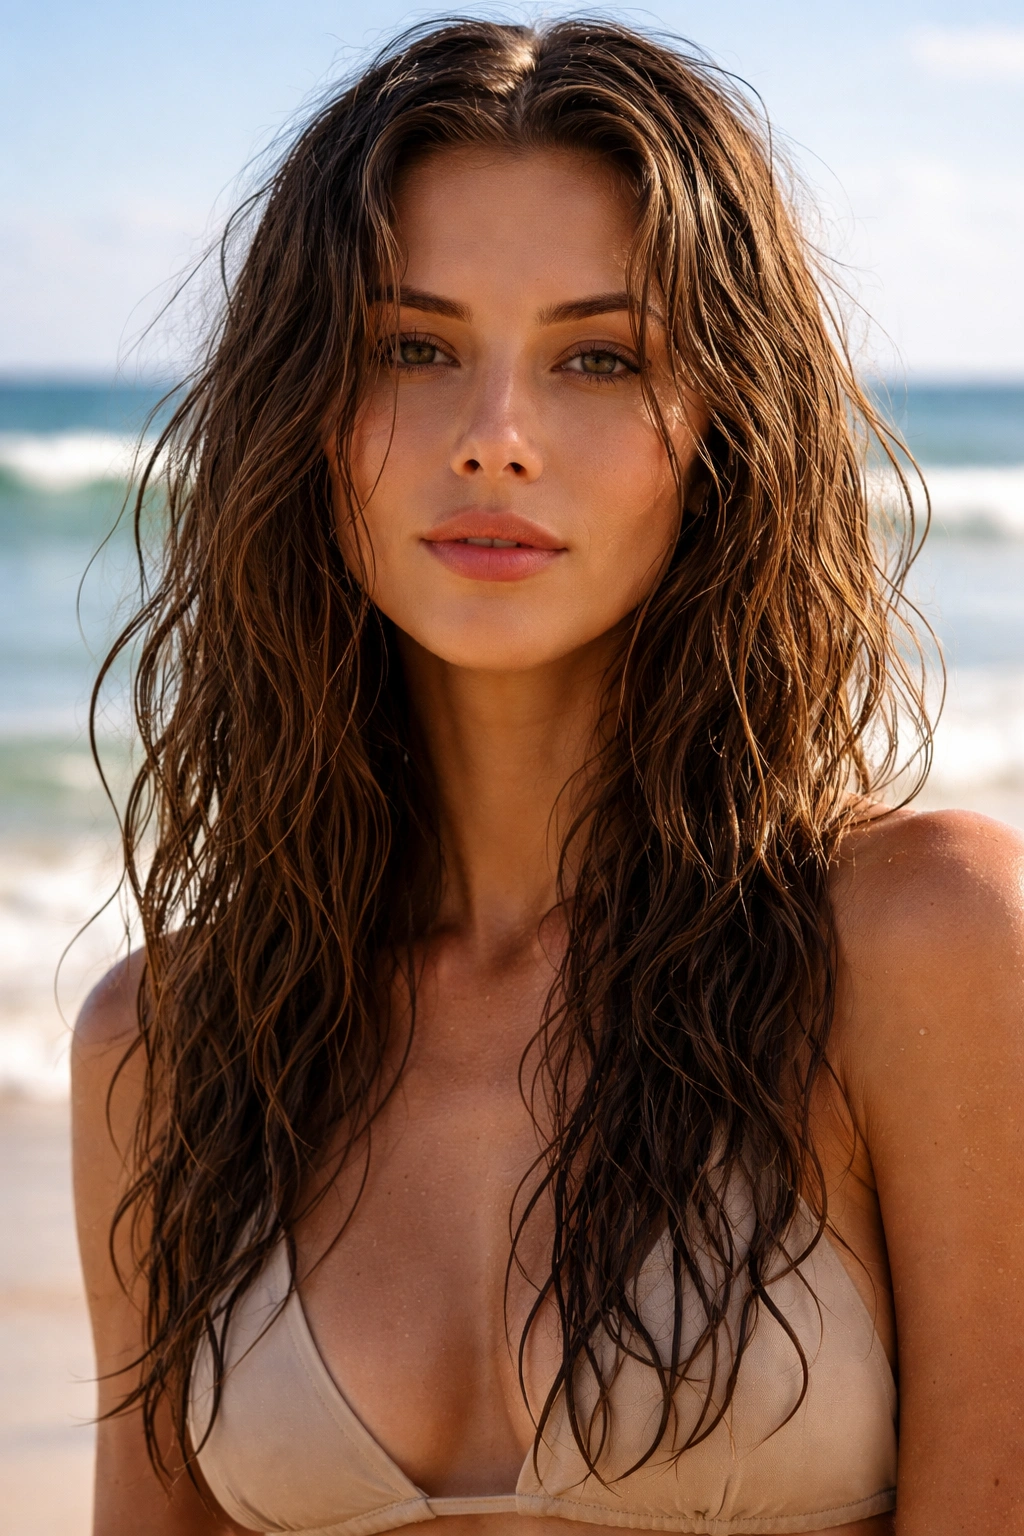
A loose, almost-hidden part can make wet or damp waves look intentional instead of unfinished. That’s useful on beach days when the hair never really dries on schedule anyway.
Comb the hair back with your fingers, let the part fall where it wants, and add a little gel or cream to encourage the wave pattern. Then scrunch and leave it alone. The trick is restraint. If you keep redrawing the part, the style gets broken up and the hair starts to puff.
This look works especially well after swimming because it accepts the damp texture instead of hiding from it. Sometimes that’s the nicest move.
35. Windproof Beach Knot
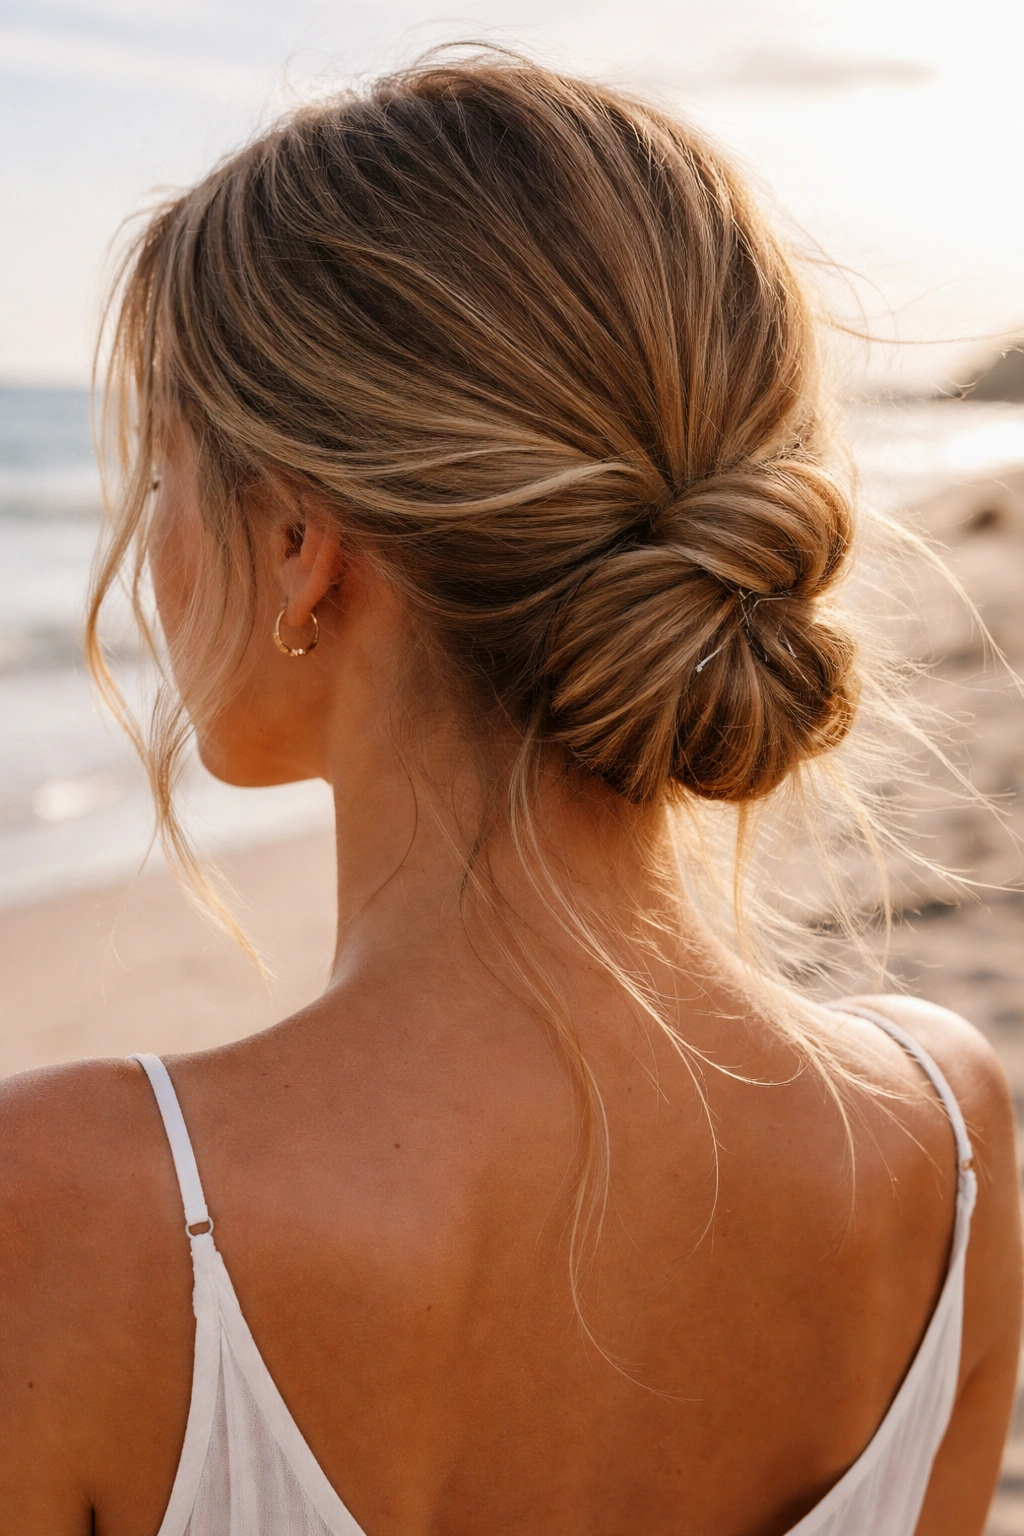
A windproof beach knot is the style for the days when everything else is too much trouble. It’s secure, low, and built to handle movement.
Twist the hair into a low knot, anchor it with an elastic, and finish with two crossed bobby pins through the base. If the hair is extra thick, wrap a second elastic around the knot before pinning. That double hold makes a real difference when gusts start messing with the style. Leave a few ends soft around the neck if you want it to feel less severe.
It is not fancy. It is dependable. And on a beach, that counts for a lot.
Final Notes
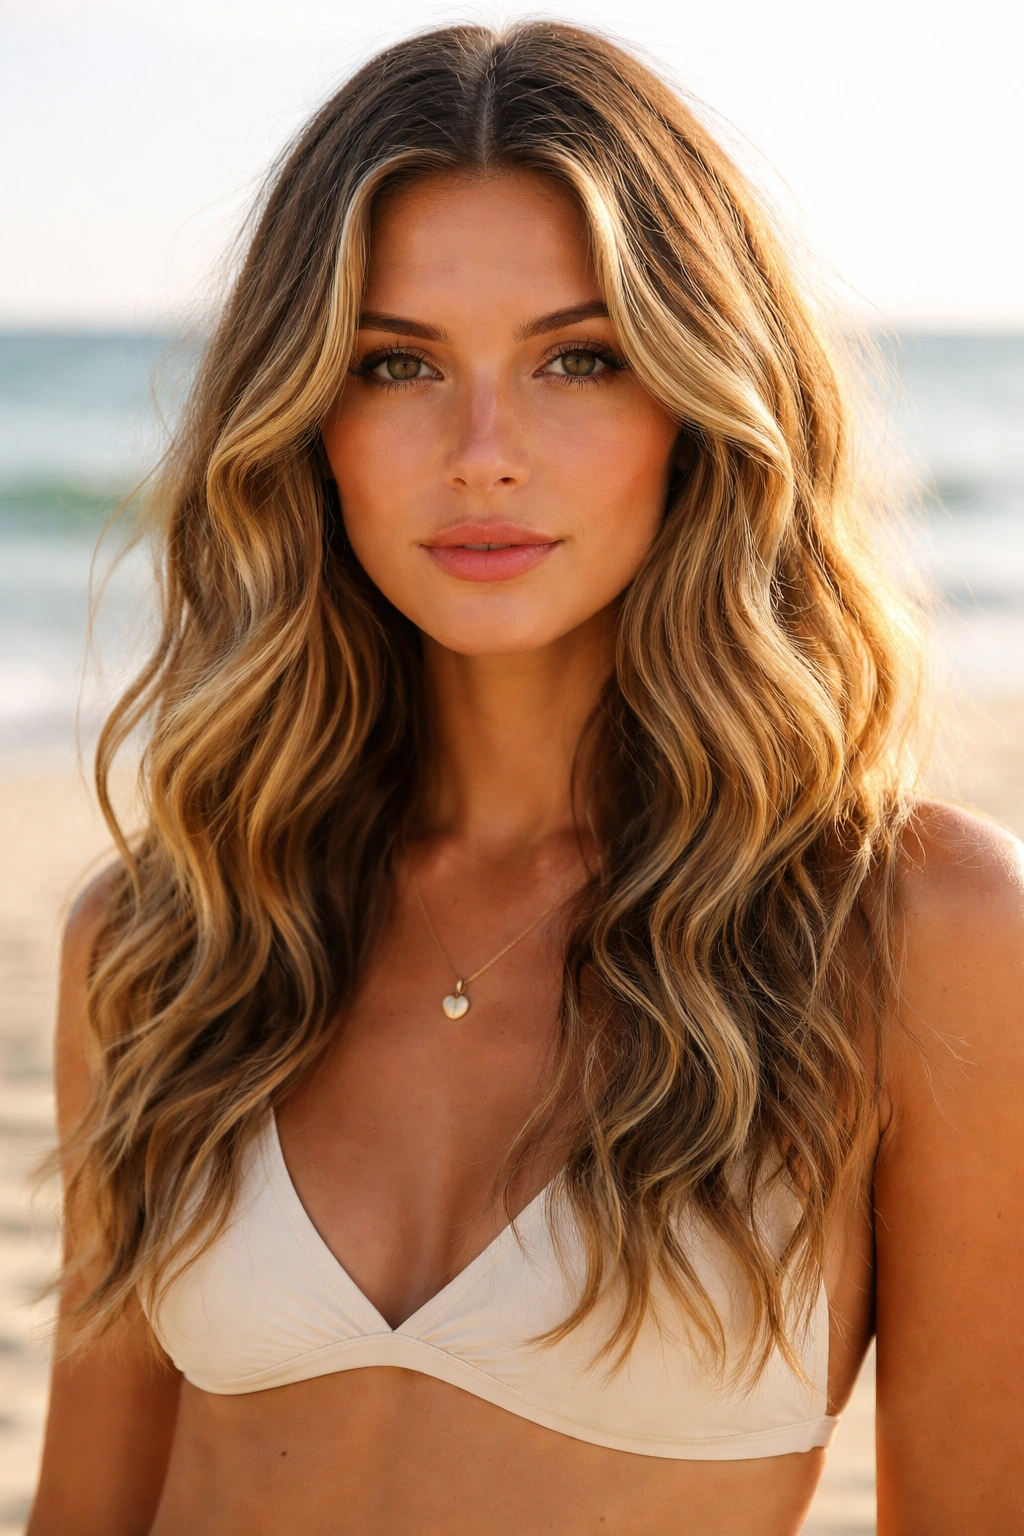
Beach hair does not need to be perfect to look good. In fact, perfection is usually the wrong target. A style that holds up to wind, salt, sunscreen, and a towel is worth more than one that looks polished for ten minutes and then falls apart.
Wavy hair has a built-in advantage on the sand. Give it a little shape, a little support, and room to move. That’s where the good stuff happens.
