Beads can rescue curly hair from looking unfinished. They also expose bad styling fast.
The best bead hairstyles for curly hair are built on shape first and decoration second. If the braid, twist, puff, or part is weak, the beads just make that weakness louder. If the base is clean, the beads feel deliberate and sharp.
Weight matters. A few small acrylic beads sit very differently from chunky wooden ones, and both behave differently from metal, which I usually skip unless the hair is thick, the braid is sturdy, and the style is meant to stay on for a short stretch. Curly hair holds movement well, but it also frizzes, shrinks, and catches on rough edges if you choose the wrong hardware.
The sweet spot is a style that gives your curls room to breathe and gives the beads a job to do. Some add sparkle near the face. Some keep the hairline neat. Some turn a plain twist-out or puff into something with shape and purpose. The details do the heavy lifting, and the best ones are easier to wear than they look.
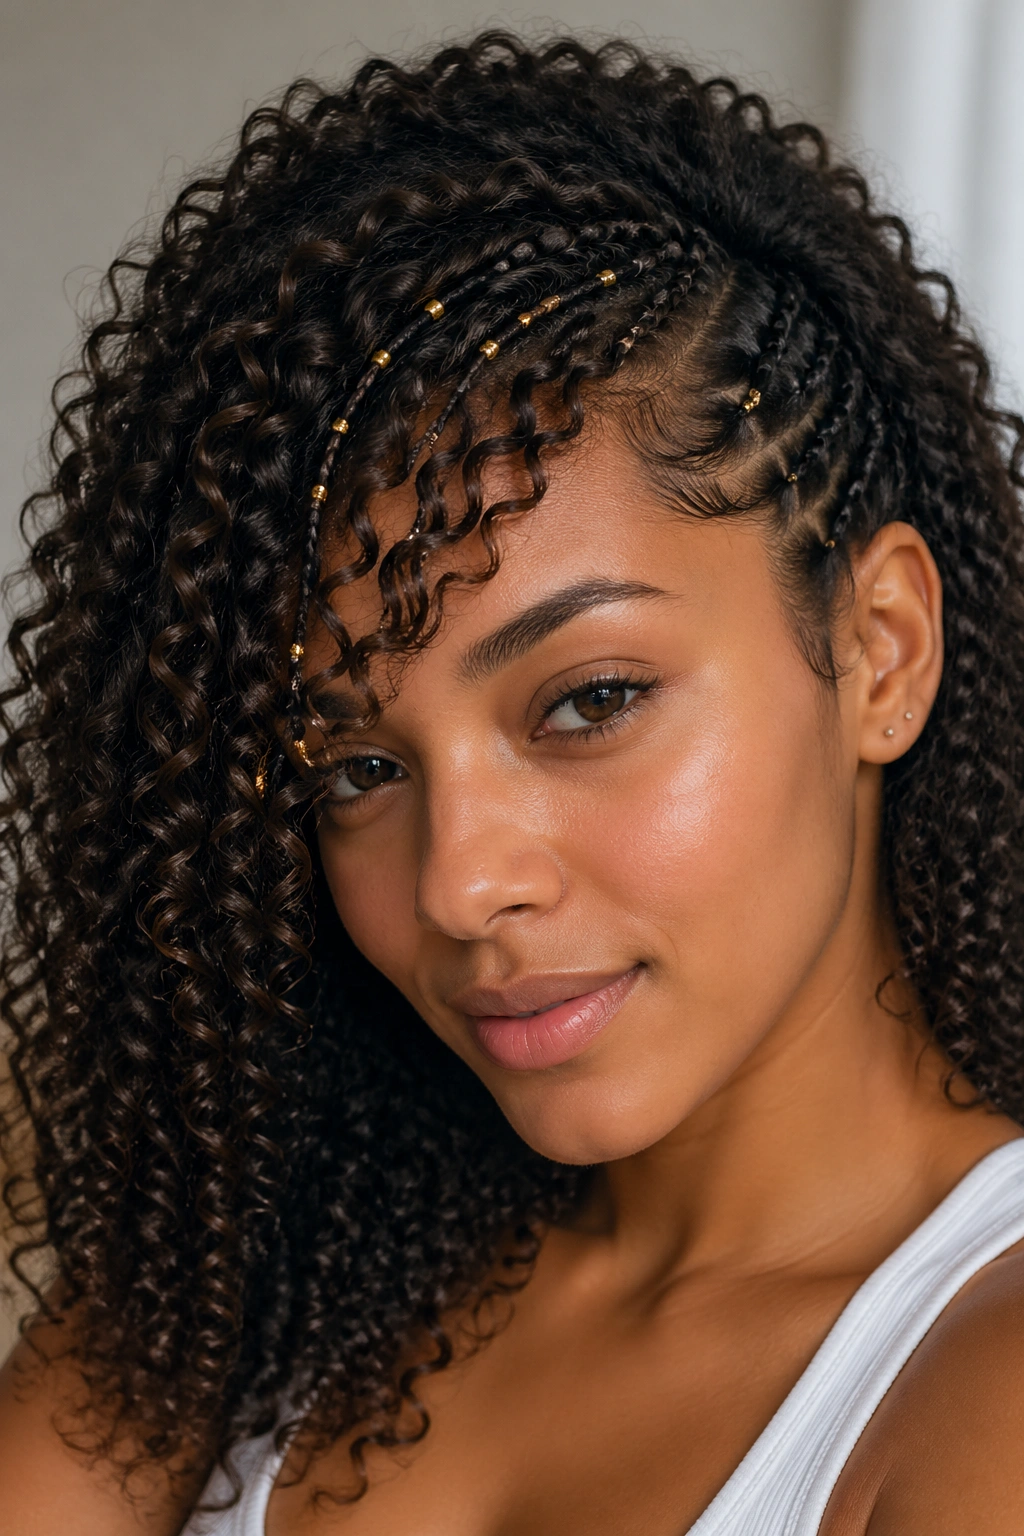
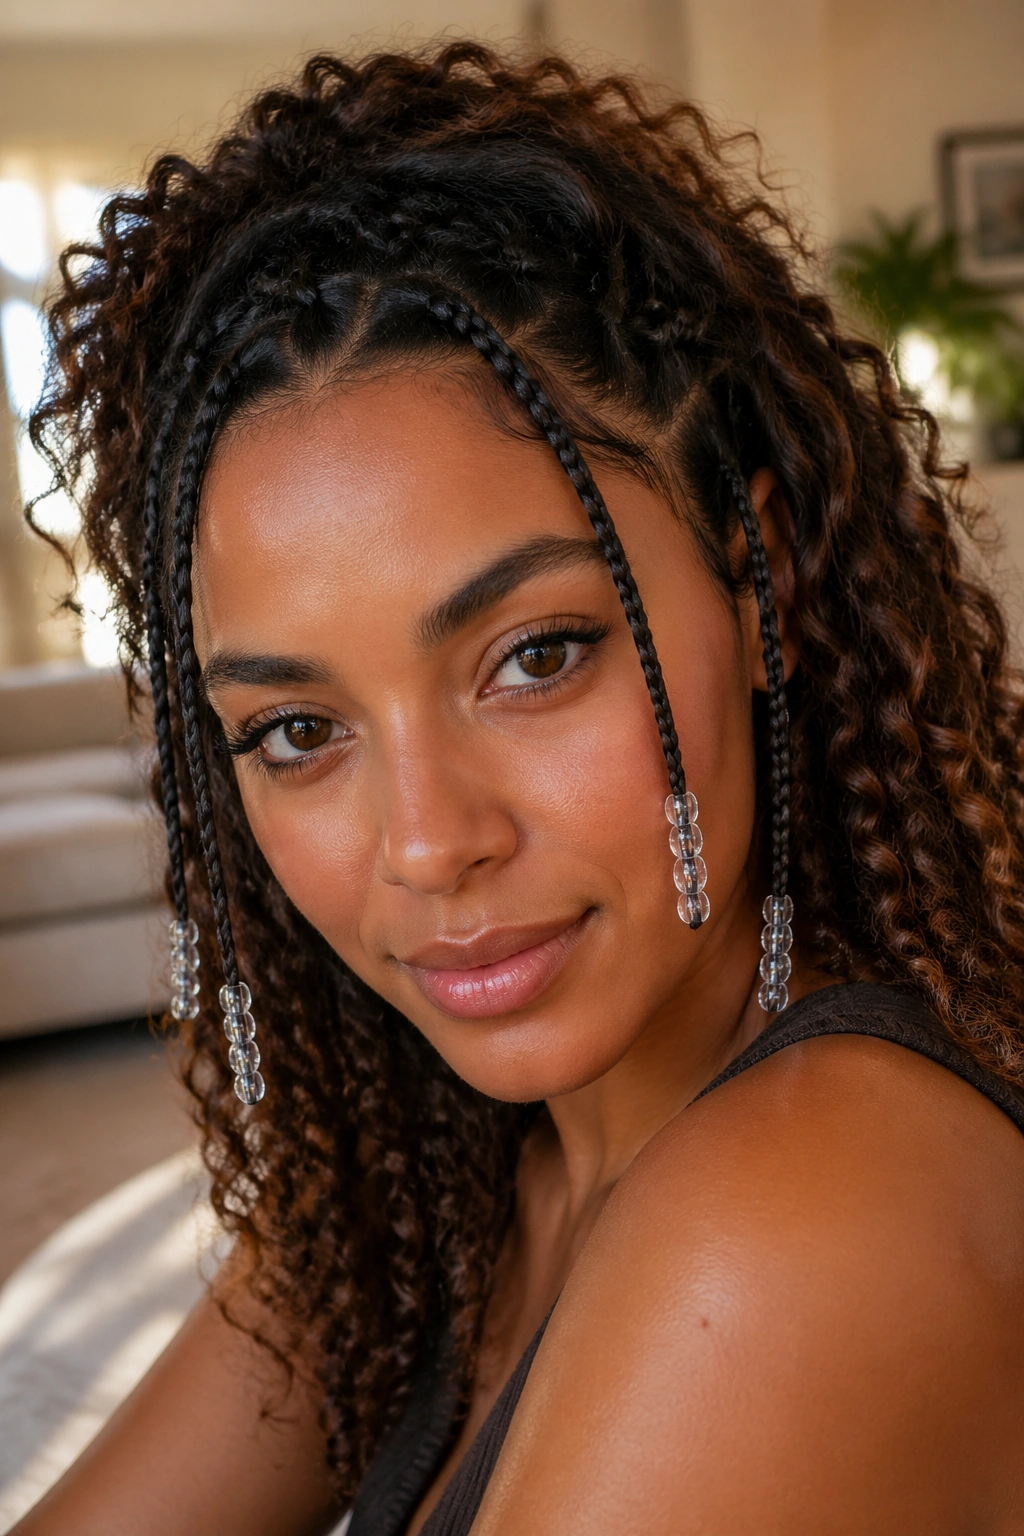
1. Face-Framing Mini Braids with Clear Beads
This is the easiest place to start if you want bead hairstyles for curly hair without committing to a full head of decoration. A few narrow braids around the face give you structure, and the beads sit where they can be seen without dragging down the rest of the style.
I like this look on shoulder-length curls, especially when the front pieces tend to frizz by noon. Two braids on each side is enough for most people. Three works if your hair is dense or your face shape can handle a little more framing. Keep the braids slim, keep the parts clean, and leave the bulk of the curls loose so the style still reads soft.
Why It Works
Clear or frosted beads pull light into the style without fighting the curl pattern. They also make the front sections feel finished, which matters more than people think. Loose curls near the face can look romantic, but they can also look accidental. A braid with beads looks chosen.
The trick is to keep the bead count modest. Two to four beads per braid is plenty. If you pack on too many, the braid starts to bow and the curl at the end loses bounce. A small elastic at the base, a dab of curl cream on the braid itself, and a bead size that matches the braid width will keep the whole thing tidy.
Best for:
- 3A to 4C curls that need front control
- medium to long lengths
- casual days that still need polish
- people who want beads without a lot of scalp tension
Avoid: rough plastic beads with sharp inner edges. They snag. Every time.
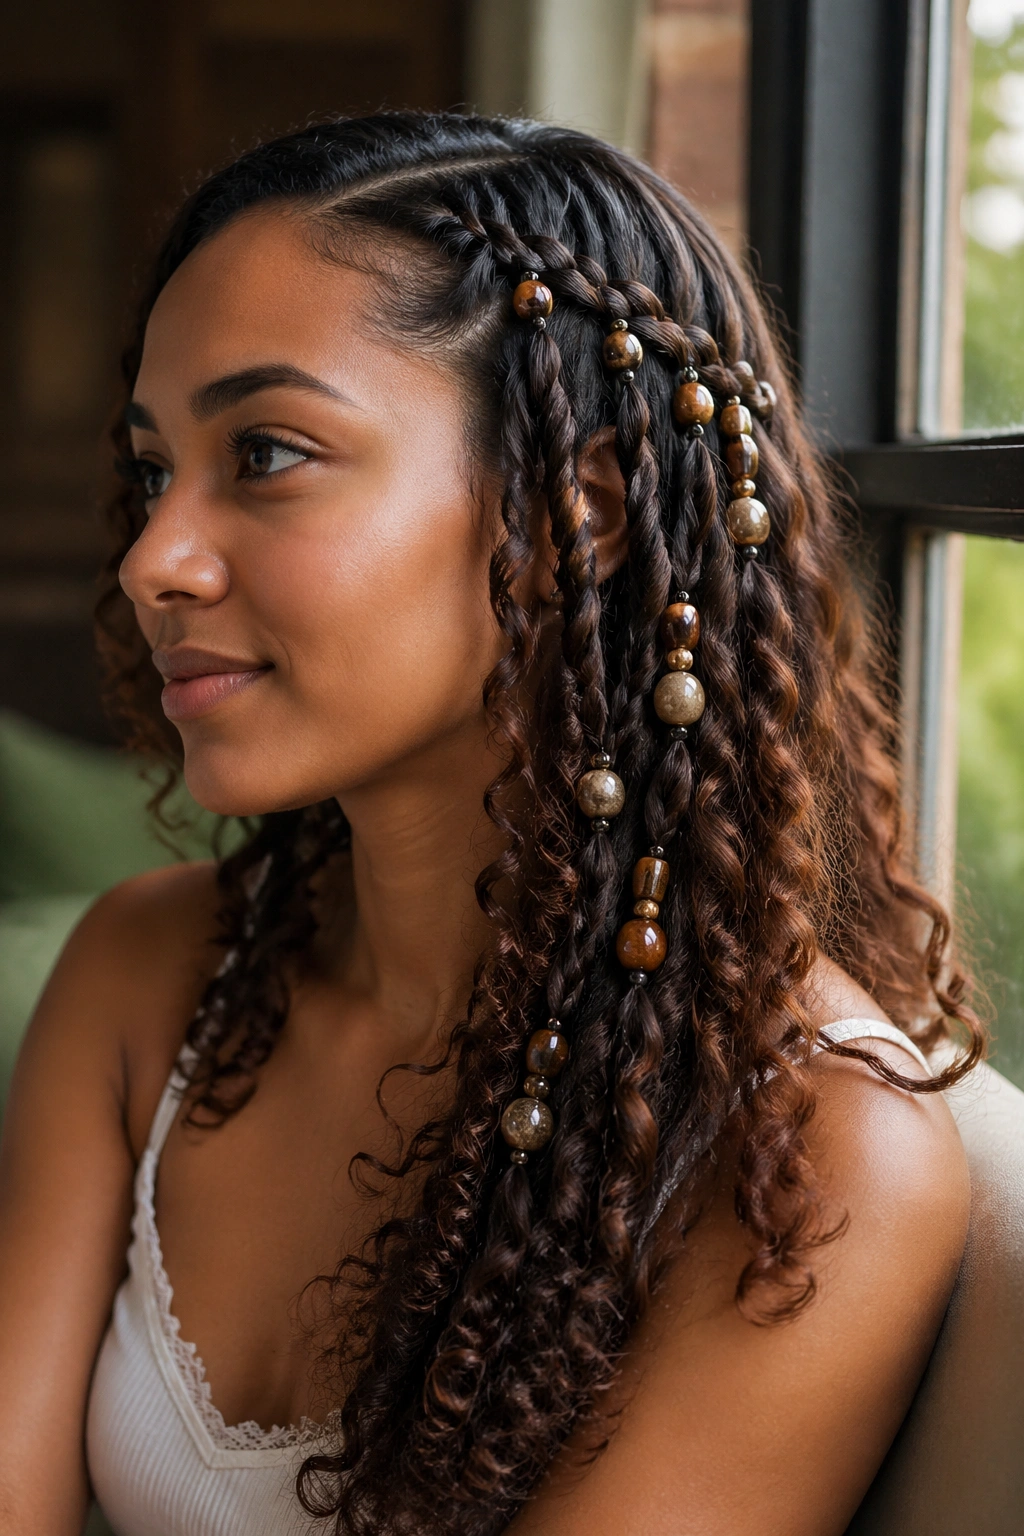
2. High Puff with Beaded Corners

A high puff with beaded corners is one of those styles that looks far more styled than it actually is. The puff gives you height and shape, while the beaded braids at the front or sides keep the hairline from looking loose and unfinished.
Heavy beads pull. That’s the part people forget.
If you’re doing a puff, let the puff be the star and use the beads as a frame, not a blanket. Four tiny cornrows or twists at the front is usually enough. Push the back hair up with a strong elastic, then shape the puff with your fingers so it sits high and round instead of stretched flat. The beads belong on the smaller front sections, not at the root of the puff where they can drag the style down.
This works especially well with dense curls because the puff already has body. You do not need to force volume with teasing or product overload. A little edge control around the hairline helps, but keep it light. A stiff front and a soft puff is a better contrast than trying to make everything look sleek.
I’m picky about bead color here. Transparent beads, black beads, or warm amber tones tend to look best. Loud color can work, but only if the outfit is doing the same thing. Otherwise the style starts to feel busy for no reason.
3. Side-Swept Curly Bangs with Micro Beads
Why does this style work so well on curly hair? Because it uses the hair’s own movement instead of fighting it. A side-swept front section gives the face softness, and the micro beads add just enough detail to stop the look from disappearing into a plain wash-and-go.
This is one of my favorite bead hairstyles for curly hair when the goal is low effort with a little personality. You part off a narrow front section, braid or twist it diagonally, and leave the rest of the curls free. The braid should land over one eyebrow or just beside it, not cut straight across the forehead. That diagonal line matters. It feels more relaxed and less like school-picture-day hair.
How to Keep the Beads from Sliding
The best insurance is a tight enough braid at the top and a bead hole that fits snugly, not loosely. A bead that is too wide will wobble, and a bead that is too narrow will catch and chew the braid. Aim for a few small beads rather than one oversized one.
- Use 3 to 5 micro braids, not 12 tiny ones.
- Stop the braid before it gets too thin at the end.
- Add beads only to the last third of the braid.
- Keep the rest of the curls loose and lightly separated with your fingers.
This style is especially good if your hairline frizzes fast. The braid controls the front, and the curls behind it keep the style from looking stiff. Put a satin scarf on before bed, and the front section usually lasts much better the next day.
4. Braided Crown with Tucked Beads
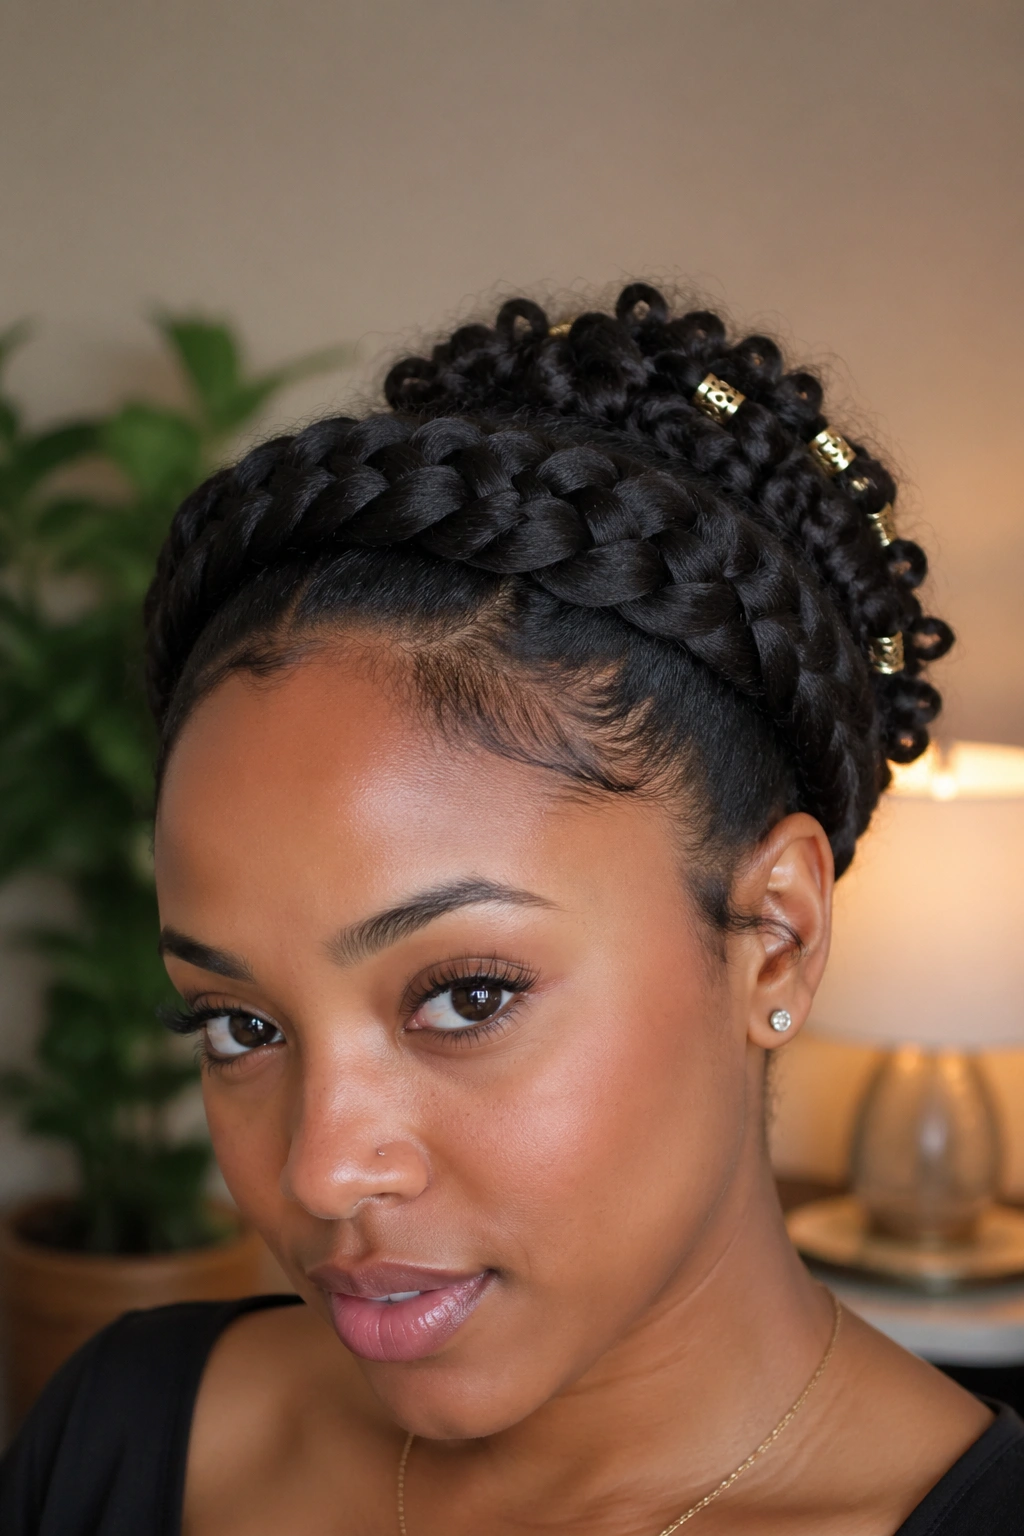
Picture a dinner, a graduation, or any event where you want curly hair off your face but still want it to look like curly hair. That is where a braided crown with tucked beads earns its keep.
The crown braid wraps the head in a soft arc, and the beads can either hide in the back portion or sit just behind the temples where they catch the eye without stealing the whole look. I prefer this style when the front needs control and the ends need to stay out of the way. It is neat, but not severe. That balance is hard to fake.
The best version uses one continuous braid across the hairline or two braids that meet near the nape. If your hair is thick, make the braid line slightly wider so the crown does not shrink too far inward. Curly hair loves to pull up and away from the scalp, which sounds lovely until the crown starts feeling too small. Give it room.
Beads work best here when they are tucked into the back half of the braid rather than scattered everywhere. A few pearl beads look clean. Wooden beads give it a more earthy feel. Clear beads make it lighter and less formal. The rest of the curls can sit low and loose at the back, or you can pin them up if you want the crown to be the main event. Either way, the braid should feel secure before the beads go on.
5. Half-Up Twists with Beaded Ends
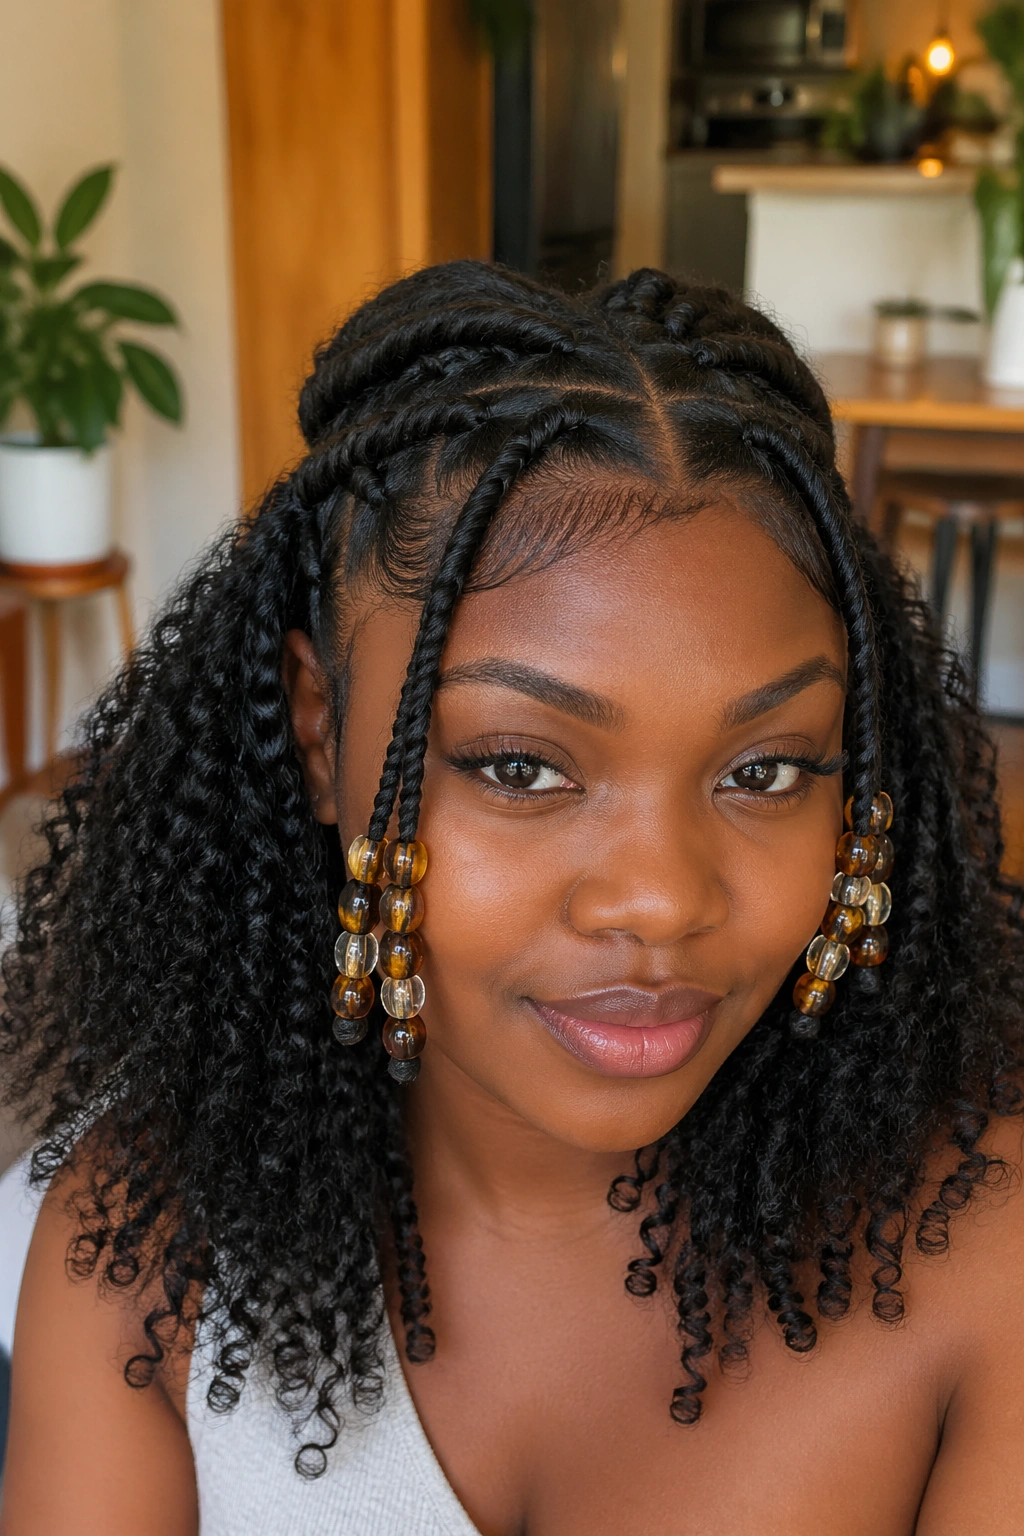
A half-up style with beaded ends gives you the best of both worlds: the top stays controlled, and the bottom keeps its length and swing. Unlike a plain half-up ponytail, this version gives the eye something to follow. The twists lead down, the beads mark the ends, and the loose curls below keep everything from looking too tidy.
This is especially good for curls that sit between shoulder and mid-back length. Shorter hair can do it, but the bead ends need enough length to hang cleanly. I usually like two twists on each side, pulled back to a center point. You can also do four thinner twists if you want more detail, though I would stop there. More twists can start to feel busy fast.
The beads should live only at the tips. That keeps the roots light and makes the style swing better. If you add beads too close to the scalp, the half-up section loses its lift. A small claw clip or a clear elastic can hold the center, but the twists themselves should do most of the visual work. That’s the part people skip. They think the beads are the style. They’re not. They are the punctuation.
This one plays well with soft curls left loose underneath, especially if you refresh the ends with a little water and cream first. Dry frizz at the bottom can make the whole look feel messy in a bad way.
6. Beaded Space Buns for Curly Hair
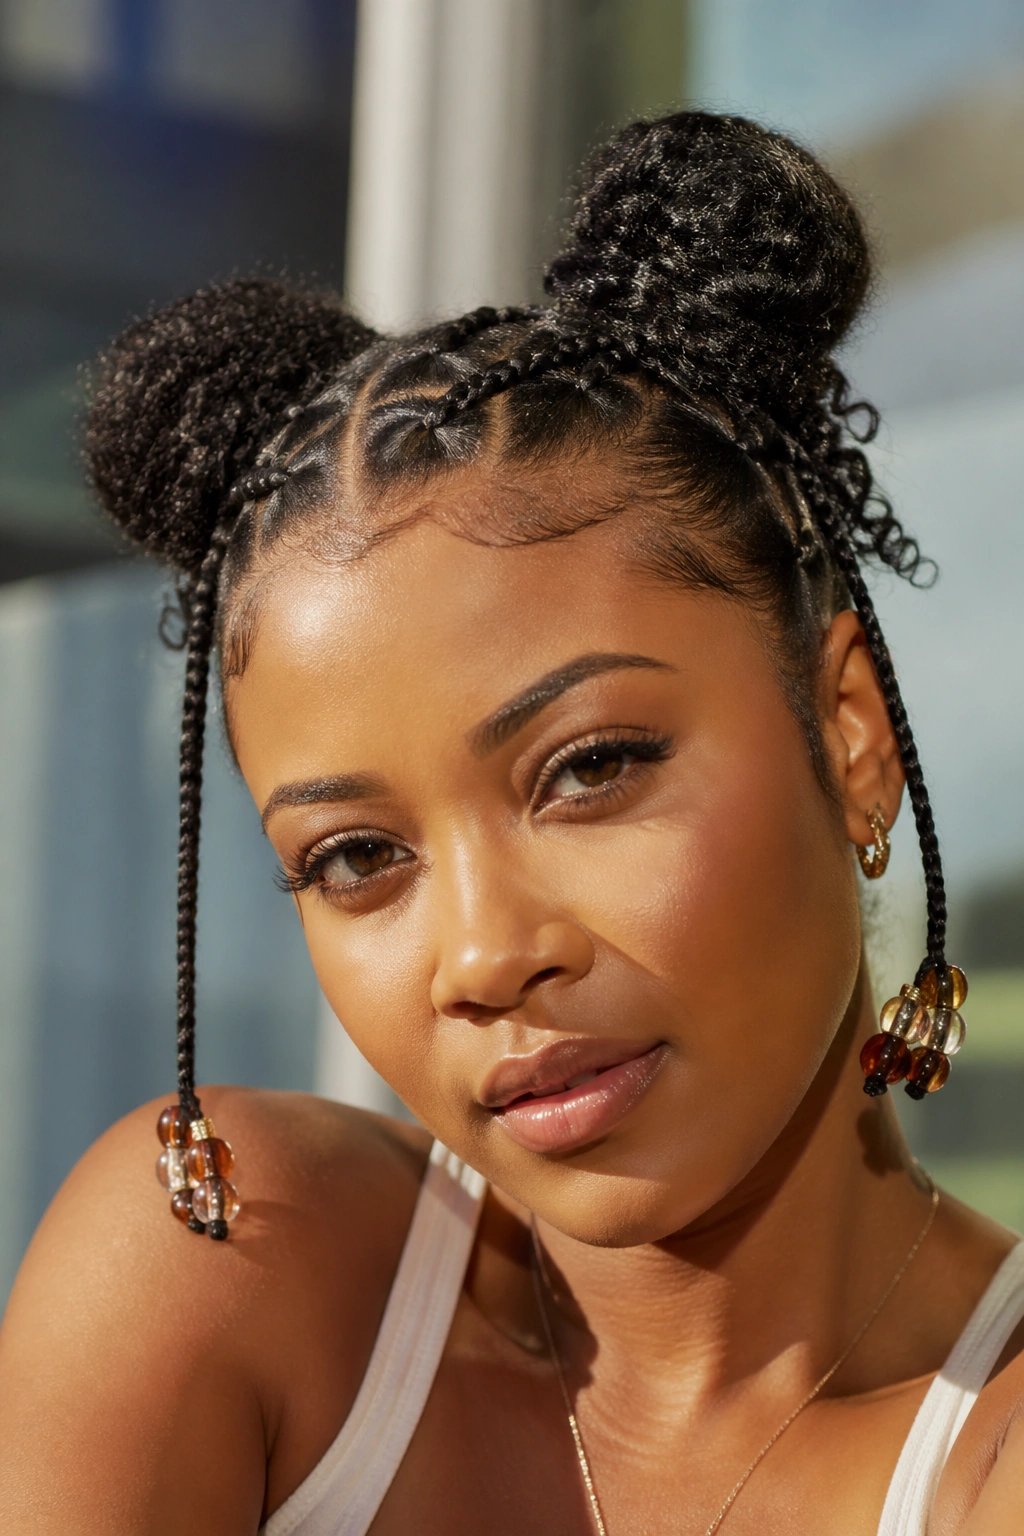
A good space-bun style should feel light at the scalp and still look intentional when you turn your head. If it pulls too much, the buns flatten. If the beads are too heavy, the whole thing starts tipping backward. So the first job is balance, not decoration.
I like this look best when the buns sit a little high but not cartoon-high. Two buns, one on each side, work better than trying to pack too much hair into a tiny knot. Leave a few curled pieces out near the ears if you want a softer line. Then add beads to the small braided tails that trail from each bun or to the side sections leading into them.
Where the Beads Go
- At the ends of the braided tails, not in the bun itself.
- On one side only if you want the style to feel less busy.
- In pairs, so the look stays balanced from left to right.
- With lightweight acrylic or wood, never with heavy mixed metal pieces unless the hair is very dense.
The reason this style works is simple: the buns give shape, and the beads give motion. When you walk, the beaded tails move. That movement keeps the style from feeling frozen in place. It’s playful without being childish, which is harder to pull off than people admit.
If your curls are short, fake the tails with tiny braids added into the bun. That gives you bead placement without forcing extra length that is not there.
7. Curly Ponytail Wrapped with Beaded Braids
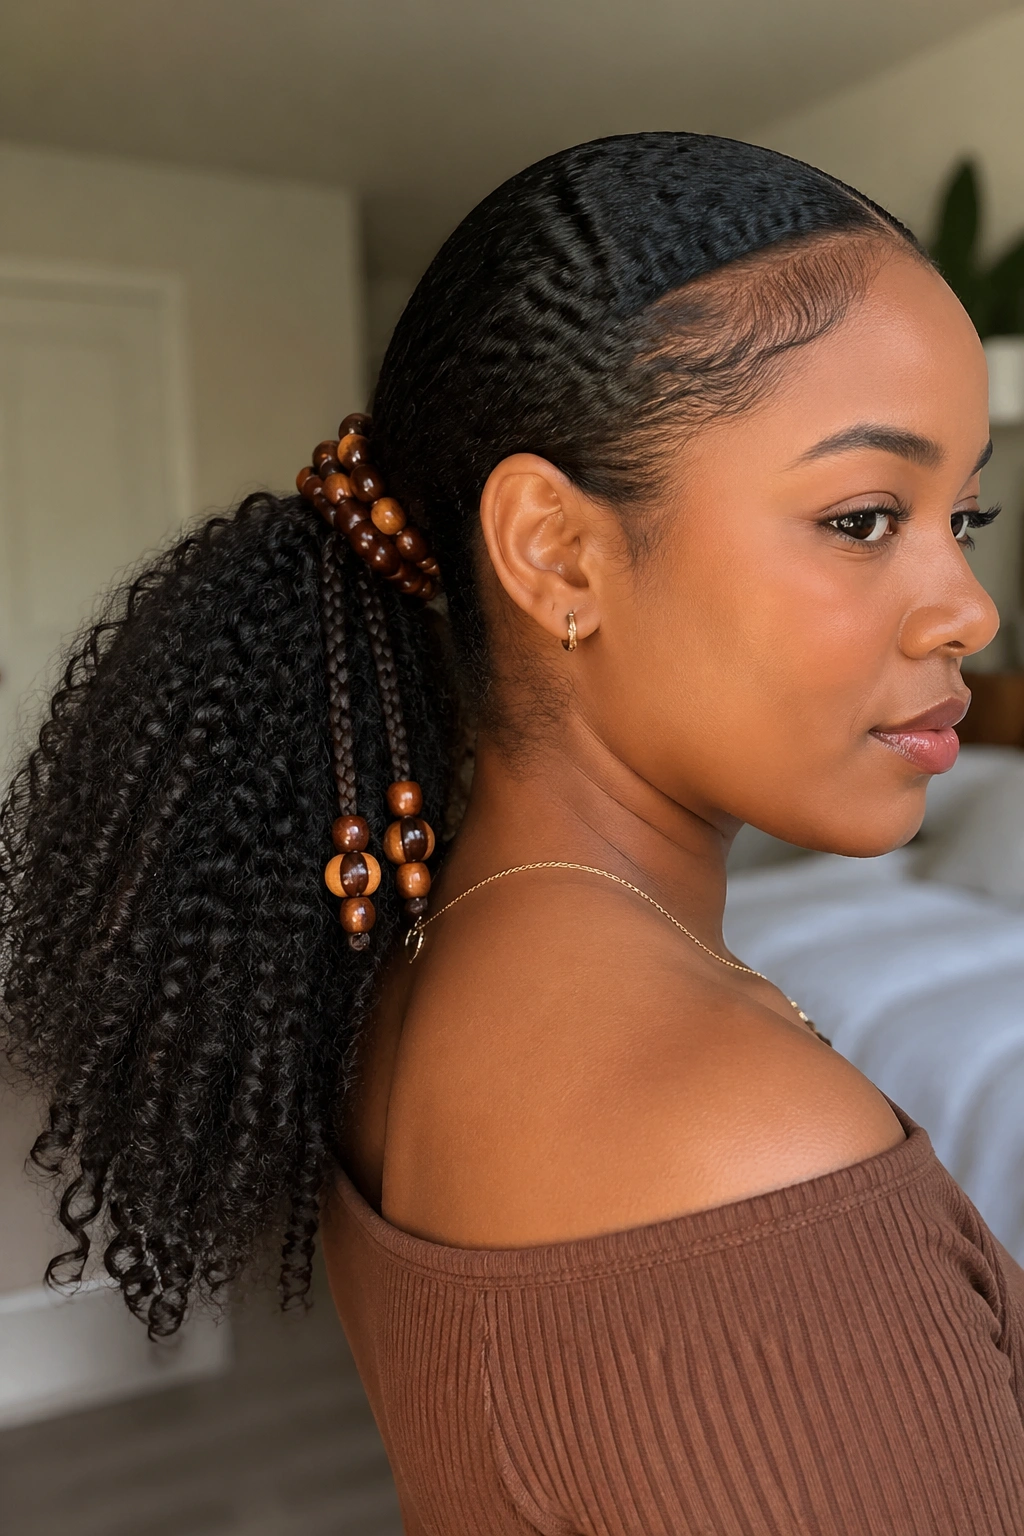
This is the workhorse style. It looks polished, it stays put, and it does not ask much from the rest of your hair. A low or mid ponytail wrapped with one or two beaded braids is one of the most reliable bead hairstyles for curly hair because the ponytail itself does the heavy lifting.
Start by smoothing the crown back with your hands or a soft brush. Don’t overdo the gel. Too much product makes the hair look wet in the wrong places and dry everywhere else. Then take two narrow sections from the front or sides, braid them, and wrap them around the base of the ponytail. The beads can sit at the braid ends or along the final inch of each wrap.
The ponytail can stay curly, stretched, or lightly brushed out. I prefer a stretched ponytail because the bead detail shows better against the length. If your curls are very tight, use a satin scrunchie or a coated elastic so the base does not snag. A second elastic underneath can help if your hair is thick and the first tie keeps slipping.
One thing I like here: the beads don’t have to be identical. Matching pairs look neat, but a slightly larger bead on one side and a smaller one on the other can keep the style from feeling overworked. Just keep the palette controlled. Black, amber, cream, and transparent are the safest bets.
8. Bantu Knots with Beaded Parting Sections
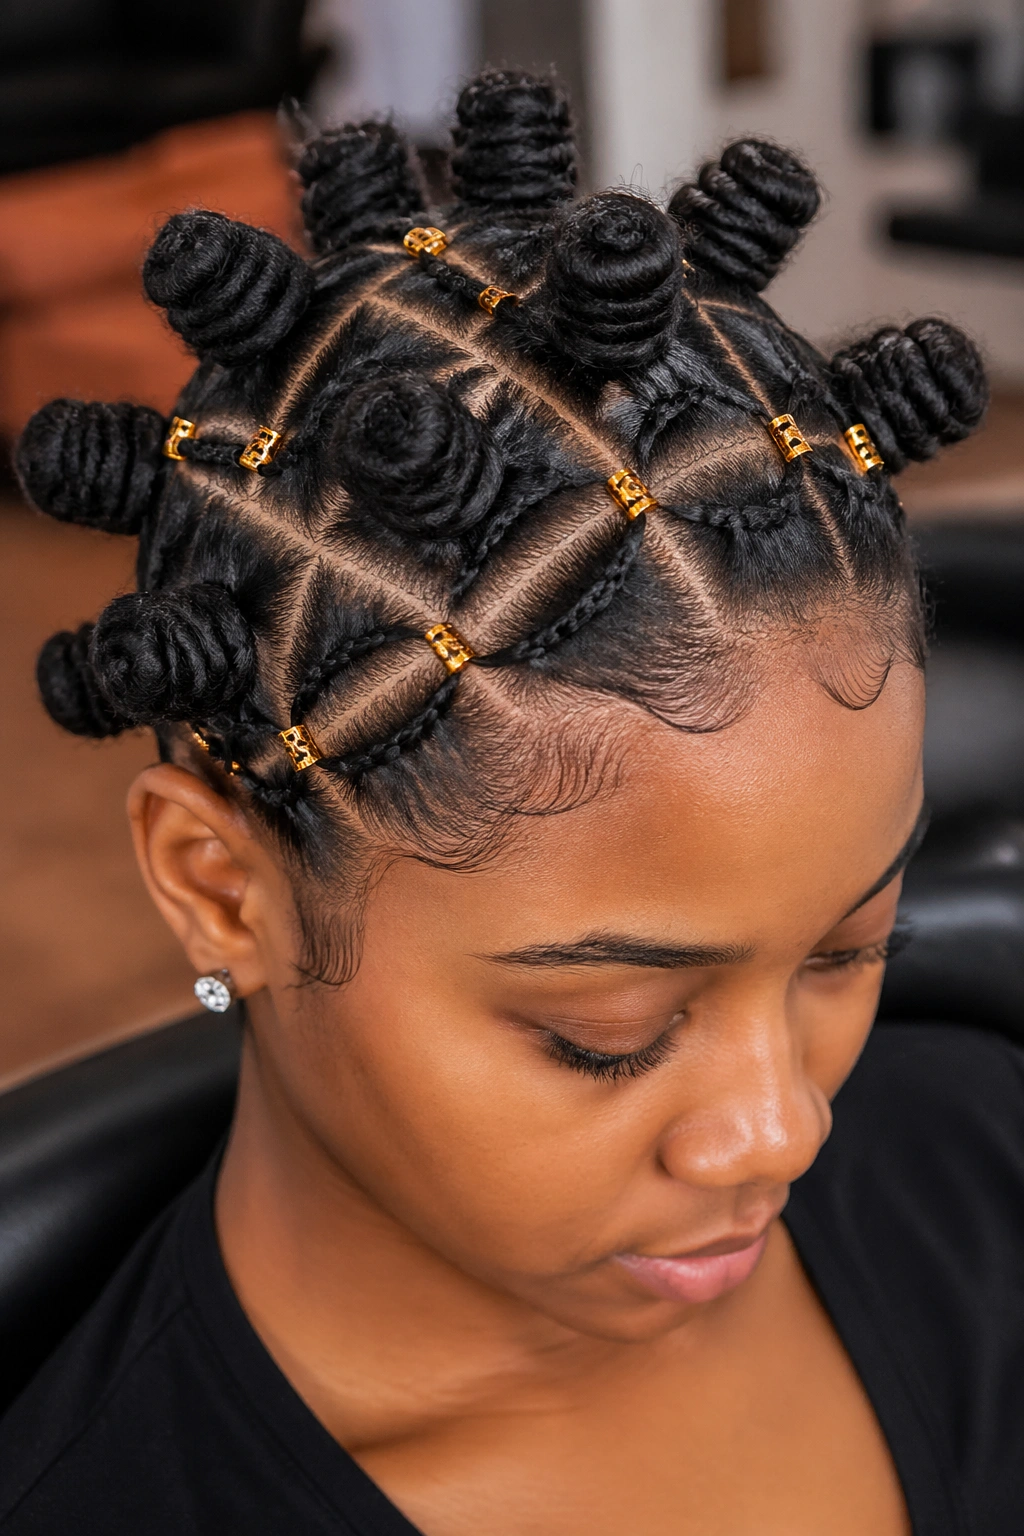
Can Bantu knots and beads work together without looking crowded? Yes, but only if the beads stay on the parting sections and leave the knots alone to do their sculptural job. That’s the whole point. The knot itself already has shape. It does not need help.
This style works best when you section the hair into a clean grid and leave tiny braided or twisted strips between the knots. Those strips are where the beads belong. A few rows of beads along the parting lines give the style rhythm without turning it into a costume piece. If you place beads on every knot and every section, the eye gets tired fast.
I like this on coily hair because the knots hold the texture beautifully, and the small beaded sections echo the round shape of the knots. There’s a good visual repeat there. The style can be worn as a knot-out later, too, which gives you two looks from one setup. That is worth the effort if you have the patience for sectioning.
A clean middle part or a symmetrical grid works best. Uneven parting turns the whole thing lopsided, and beads make that obvious. Use a rat-tail comb, take your time, and keep the bead count modest. Five or six accent beads per side is usually enough. More than that starts to crowd the scalp, which is not a feeling I recommend.
9. Curly Fro-Hawk with Flat Twists and Beads
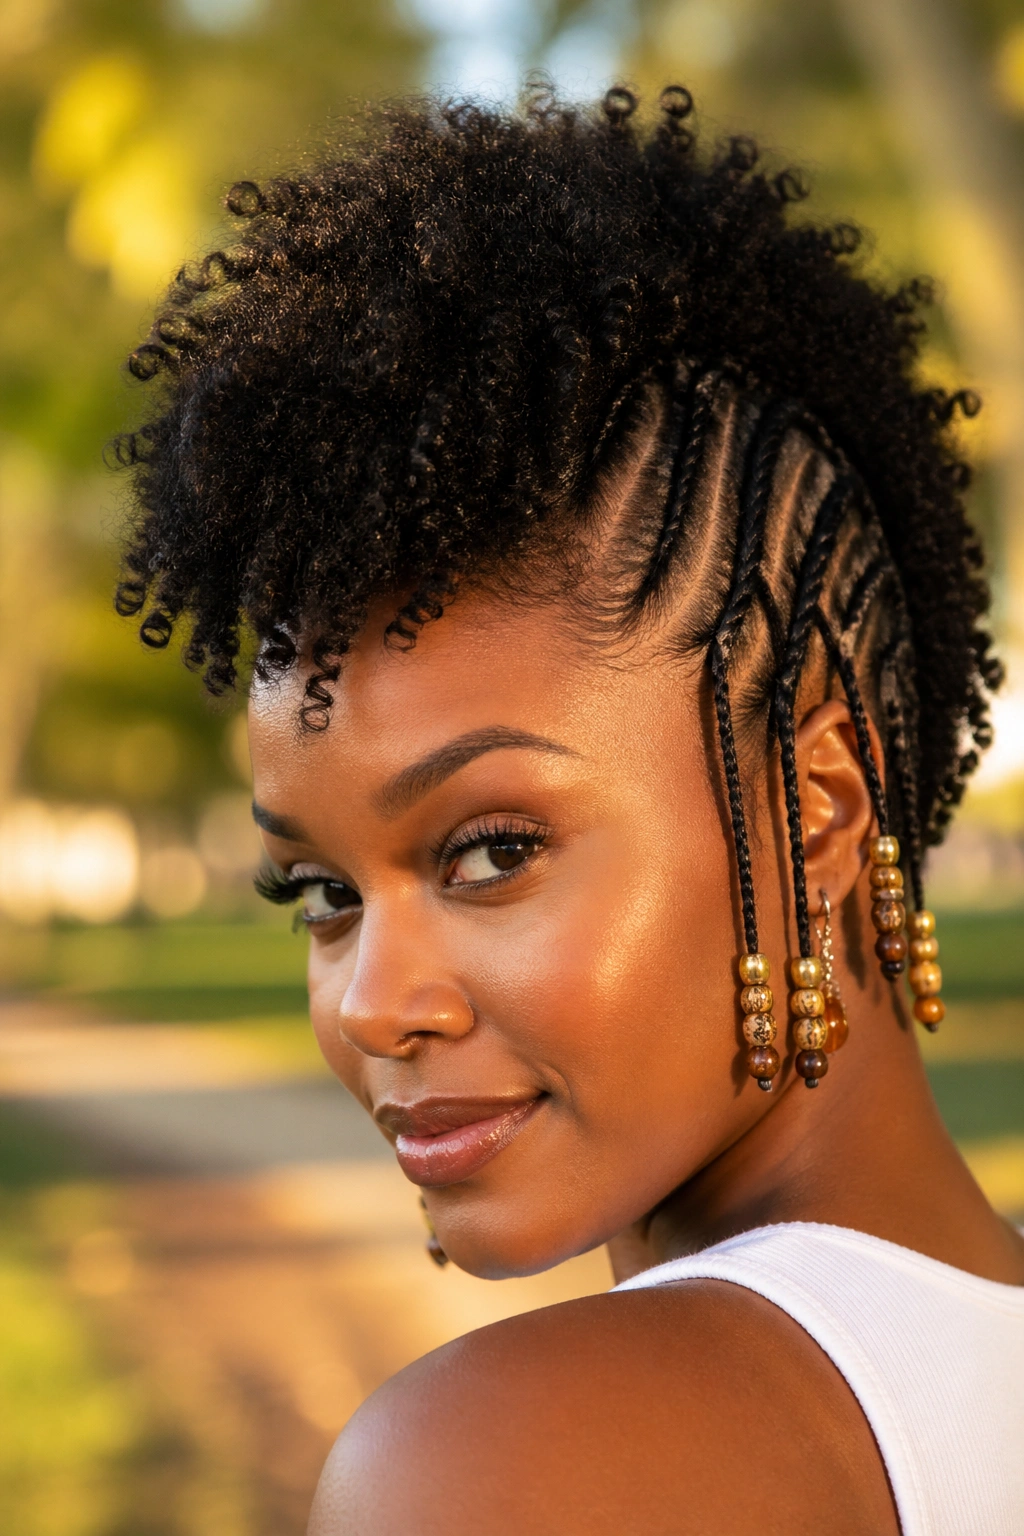
A curly fro-hawk with flat twists is the style I reach for when the goal is edge control and lift. It keeps the sides neat, opens up the center, and gives the curls a shape that reads bold without needing a lot of extra decoration.
The structure is simple. Flat twists run along both sides of the head, or from the temples toward the nape, and the center section stays full and curly. Add beads to the ends of the side twists if you want movement, or place a short run of beads on one side only if you want the look to feel less symmetrical. Either version works. The key is keeping the center volume high so the beads do not take over.
How to Get the Sides Neat
- Part the sides with a fine-tooth comb and a light hand.
- Twist close to the scalp, but not so tight that the hairline looks stretched.
- Pin the twists flat with small bobby pins if the hair is slippery.
- Finish the center with a curl cream that holds shape without crunch.
This style is one of the few that looks stronger when the texture is a little rough around the edges. The fro-hawk wants personality. It does not need every curl perfectly separated. In fact, over-defining the center can make it feel stiff. Leave some puff and movement in there.
If you want a more formal version, use pearl or clear beads. If you want a casual version, wood beads or matte black beads keep the edges from looking too dressy.
10. Low Puff with Wooden Beads
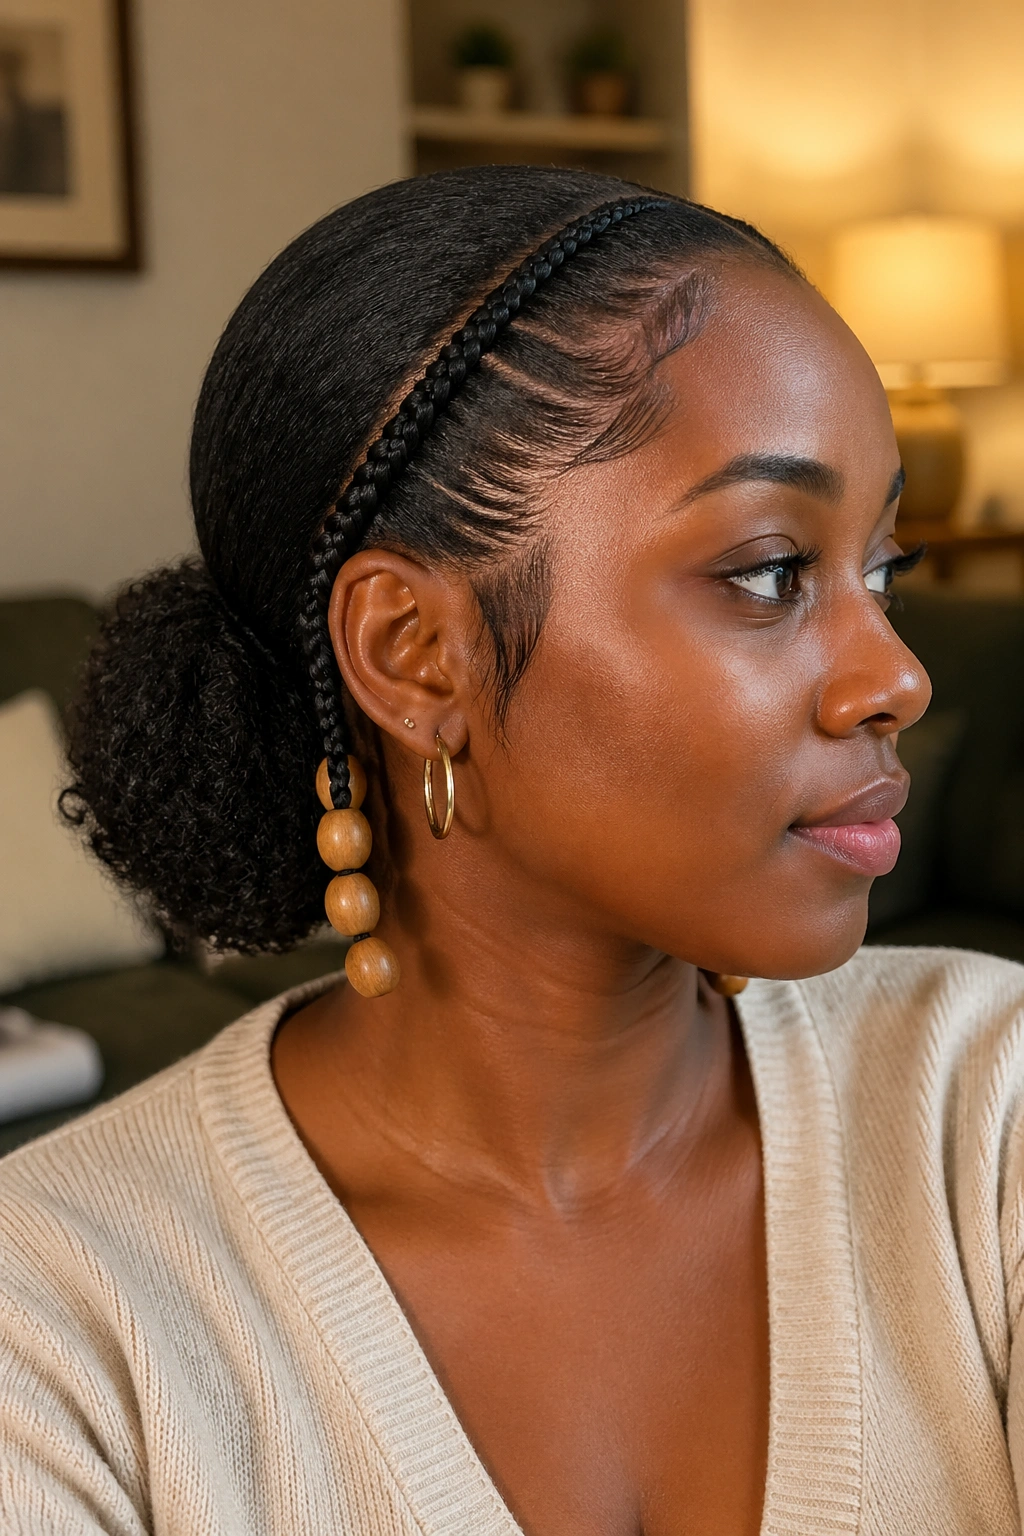
Not every beaded style needs to sparkle. Sometimes the smartest move is a low puff with wooden beads, because the hair itself stays the star and the beads act like a frame instead of a shout.
Wood beads work especially well on thick curls and coils. They have a little weight, which helps them sit still, and their matte finish keeps the look grounded. A low puff at the nape gives the style softness, while one or two thin braids feeding into it give the beads a place to live. I reach for this style when I want something calm, warm, and easy to wear with simple clothes.
The parting does matter here. A clean side part makes the beaded section feel more deliberate, while a center part gives a more balanced, everyday look. Keep the puff low enough that the beads do not collide with the base. If the beads are too close to the elastic, they tug. If they’re too far away, they look disconnected. There’s a sweet spot around the last inch or two of the braided feed-in section.
One practical note: wood beads can feel rough if the inner hole is unfinished. Run your finger along the edge before committing. If it catches your skin, it will catch your hair. That tiny test saves a lot of frustration later.
11. Waterfall Braid with Mixed Bead Sizes
A waterfall braid with mixed bead sizes looks richer than a braid that uses the same bead everywhere. Small beads near the top keep the section light. Slightly larger beads lower down give the braid a taper that feels natural, almost like the style is dropping into place on its own.
This is a strong option for medium to long curly hair because the braid needs enough length to show its shape. The loose curls that spill out of the braid create the “waterfall” effect, and the beads sit like markers along the line. I like to keep the biggest bead below cheekbone level. Any higher, and the weight starts to interrupt the shape around the face.
There is a catch. Mixed sizes only look good when the color story is controlled. Clear, ivory, amber, and matte black can usually mix without fighting. Bright colors need a clear plan, or the braid starts to read random instead of styled. If you want the braid to look elegant, keep the palette tight and let the sizes do the work.
A Simple Placement Rule
Use one tiny bead near the start, one medium bead in the middle, and one slightly larger bead closer to the end. That’s enough. More beads than that can crowd the curl drop and make the braid look stiff, which defeats the whole point of the waterfall shape.
12. Halo Braid with Free Curls and Beads
There is a reason the halo braid keeps showing up in curly styling. It makes the head look shaped without stealing the softness of the curls, and beads can add just enough detail to keep the braid from disappearing into the hairline.
This version works best when the braid circles the head but leaves a few free curls around the ears or at the nape. That little bit of looseness stops the style from feeling too strict. If every strand is pulled in, the whole thing can look severe. A few free curls fix that fast. Add beads near the end of the braid or at the back where the braid tucks in, and the style gets a subtle point of interest without turning flashy.
I like this for formal events, but it also works on ordinary days when you want your hair out of your face and still want some shape. The braid should sit snug, not tight. If the front edge digs in, it will show by the end of the day. Leave a tiny bit of softness at the hairline and the style lasts longer because it is not fighting your scalp.
A final practical note: remove the beads before you wash if they are not sealed well, and sleep in a satin scarf if you want the braid to keep its line. The style looks its best when the curls around it still feel alive, not flattened into place. That is the whole game with beads and curls — build a strong base, keep the extras light, and let the texture do half the work.