Curly hair already knows how to put on a show. Give it a little shape, a few pins, maybe a ribbon or a braid, and it stops looking “styled” in the usual sense and starts looking like it belongs in a storybook. That is the appeal of fantasy hairstyles for curly hair: the texture does half the work, and the curls do not need to be bullied into pretending they are straight.
Texture is the point.
The mistake I see most often is people trying to smooth curly hair into submission before they build anything on top of it. That usually backfires. A fantasy look wants movement, lift, and a few soft pieces left out on purpose. It also wants grip. Day-two curls, a light gel cast, a bit of mousse, and enough bobby pins to anchor the shape usually do more for you than a mountain of shine spray ever will.
And yes, accessories matter. Not because you need them. Because curls and metal, ribbon, beads, and combs are a very good pair when you use them with a little restraint. The trick is choosing one or two focal points — a braided crown, a jeweled pin, a wrapped ponytail base — instead of piling everything on at once. Too much and the style starts to look like costume. Too little and it just looks unfinished.
1. Half-Up Crown Braids for Fantasy Hairstyles for Curly Hair
If you want the easiest route into a fairy-tale look, start here. A half-up crown braid keeps the top controlled, lets the curls stay big underneath, and gives you that “I woke up in a castle” feeling without turning your whole head into a construction project.
Why it works on curls
Curls already create their own volume, which means the braid doesn’t have to carry the entire visual load. The braid acts like a frame. The curls do the rest.
This style is especially kind to shoulder-length and longer hair because the braid can sit across the crown without fighting the length below it. If your hair has some bend or shrinkage, even better. The lifted shape at the top and the loose texture underneath create contrast, and contrast is what makes the look read as magical instead of plain.
How to style it
- Take two sections from each temple and braid or twist them back toward the crown.
- Keep the braid loose. Tight braids can look stiff on curls.
- Pin each braid behind the head with 4 to 6 bobby pins crossed in an X shape.
- Leave the rest of the curls free, then define the front pieces with a small amount of curl cream or light gel.
Best on: day-two curls, twist-outs, and braid-outs with a little frizz left in them.
Avoid: soaking wet hair. The style needs grip.
Finish with: a light mist of shine spray on the braid only, not the whole head.
A tiny bit of puff at the roots is fine. Actually, it helps. The goal is not sleek perfection. It’s a crown that looks like it belongs on real hair, not a wig head.
2. Twisted Space Buns With Curl Spill
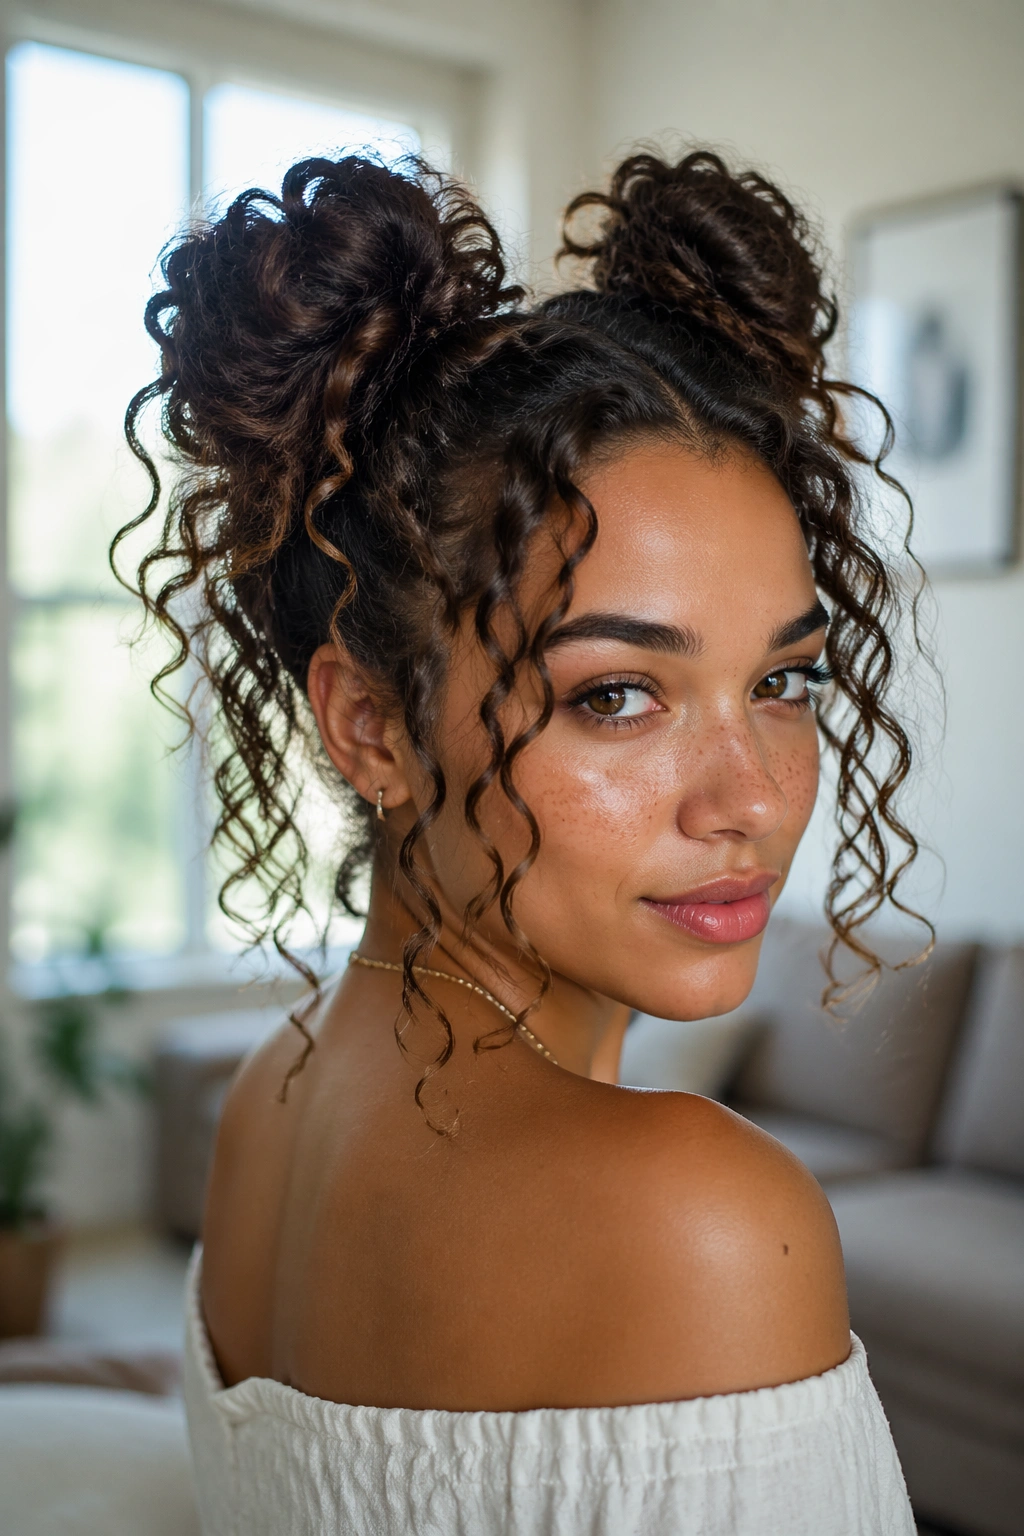
Space buns are one of those styles people either underestimate or overdo. Done well, they can look playful, modern, and oddly regal. The trick is to let the curls spill out a little instead of tucking every strand away like you’re preparing for surgery.
The version I like most on curly hair uses two twisted buns set high and slightly wide, not tiny little knobs glued to the scalp. Give each side enough body to show off the texture. If your curls are thick, a slightly messier bun looks better than a tight one. If they’re finer, you can fluff the base with a pick before pinning.
One clean part down the middle helps here. So does a little mousse at the roots before you twist the sections upward. I would skip heavy oils before this style; they make the twists slide and the buns go soft too fast. A satin scrunchie or two hidden elastics usually does the job without flattening the curl pattern.
Do not smooth everything flat. Really. That usually kills the shape. Leave a few spirals free around the face, and let the ends of the buns peek out a bit. That’s the part that makes the style feel whimsical instead of childish.
If you want the look to last longer, pin the buns in two directions — one pin from above and one from below. Curly hair loves that little bit of cross support.
3. Waterfall Braid Into Open Curls
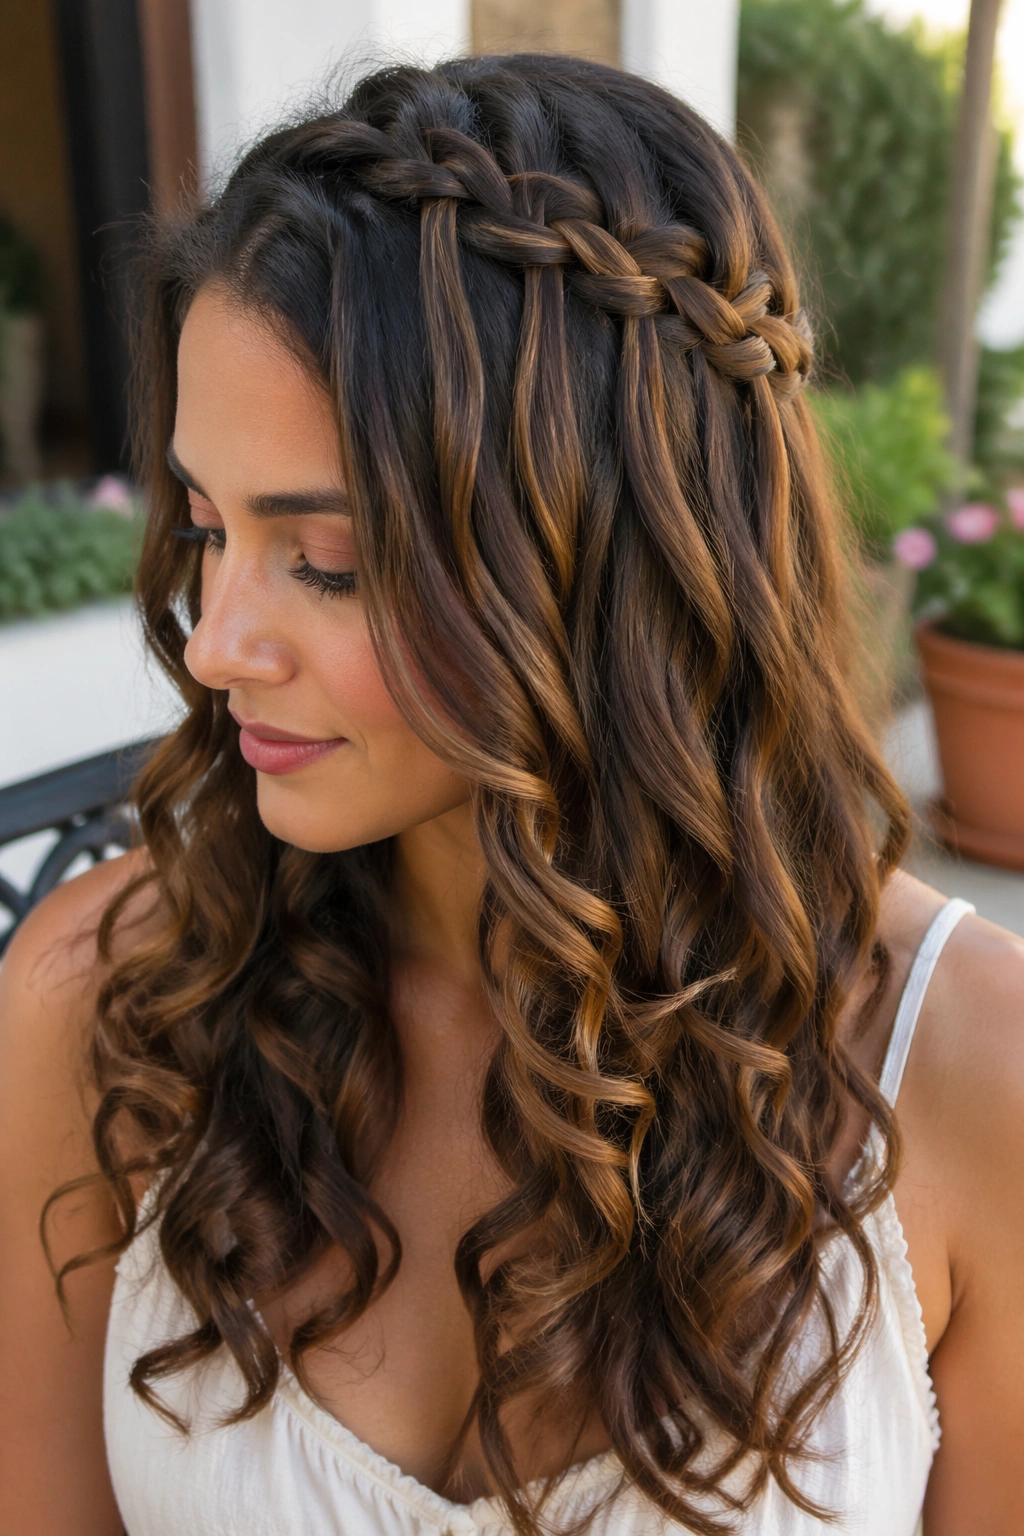
Want the most romantic style on the list? This is the one. A waterfall braid gives you structure at the top while the rest of the hair stays loose, which means you get the elegance of a braid without losing the drama of the curls.
The beauty of a waterfall braid is that it looks much harder than it is. One side of the braid feeds across the head while small sections drop through the weave like little curtains. On curly hair, those dropped pieces blend into the rest of the texture so naturally that the whole thing reads soft and intricate at the same time.
How to keep it from slipping
- Start with hair that has a little texture. Freshly washed, ultra-slippery curls are harder to manage.
- Use a rat-tail comb to make a clean side part.
- Clip the lower half of the hair out of the way while you braid the upper section.
- Add a pea-sized amount of braiding cream only at the roots of the braid.
A waterfall braid looks best when it stops before it gets too long. If you keep dragging it all the way down, it can lose the airy feel that makes it special. End it near the back of the head, tuck the tail under a curl cluster, and let the rest of the hair fall open.
This style is lovely for photos, weddings, and any moment when you want people to think you spent ages on your hair. You didn’t have to. That part is half the fun.
4. Side-Swept Mermaid Braid
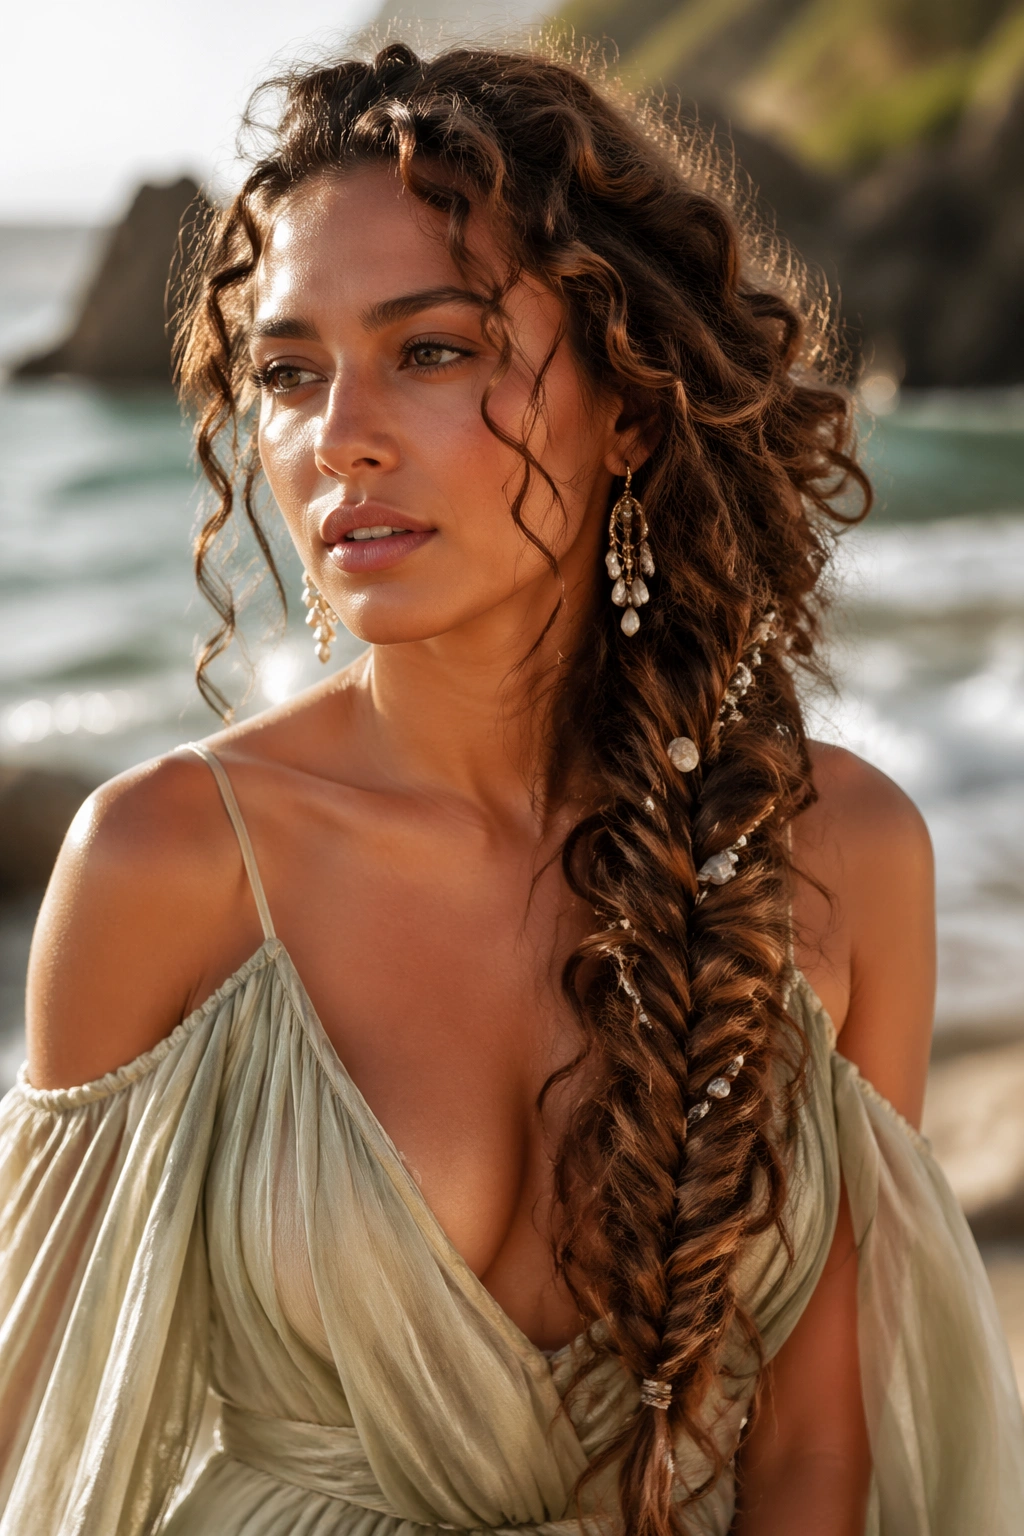
A side-swept mermaid braid is basically a braid with a little more attitude. It starts dramatic, stays soft, and lets the curls spread out in a way that feels a bit underwater, a bit forest-nymph, and a lot more wearable than a fully pinned-up style.
The side placement matters. When the braid sits over one shoulder or begins near one temple and falls diagonally, the whole look becomes more interesting because the eye follows the line. Curly hair makes this especially good, because the braid doesn’t need to be tiny or perfect. In fact, it looks better when the braid is slightly wide and the surrounding curls are still visible.
Pull the braid apart gently after it’s secured. Not aggressively. Just enough to make each braided section look fuller. That “pancaking” trick works well on textured hair, especially if the braid is starting from a voluminous base. A few face-framing spirals help soften the front so the style doesn’t feel too formal.
- Use one large decorative clip or a shell barrette near the shoulder.
- Keep the braid loose at the crown and tighter near the nape.
- Wrap the elastic with a small curl or ribbon to hide it.
- Let the end of the braid mix with loose curls instead of forcing a blunt stop.
The whole thing has a little sea-creature energy, which is exactly why it works. Curly hair and asymmetry are old friends.
5. High Puff With Beaded Tendrils
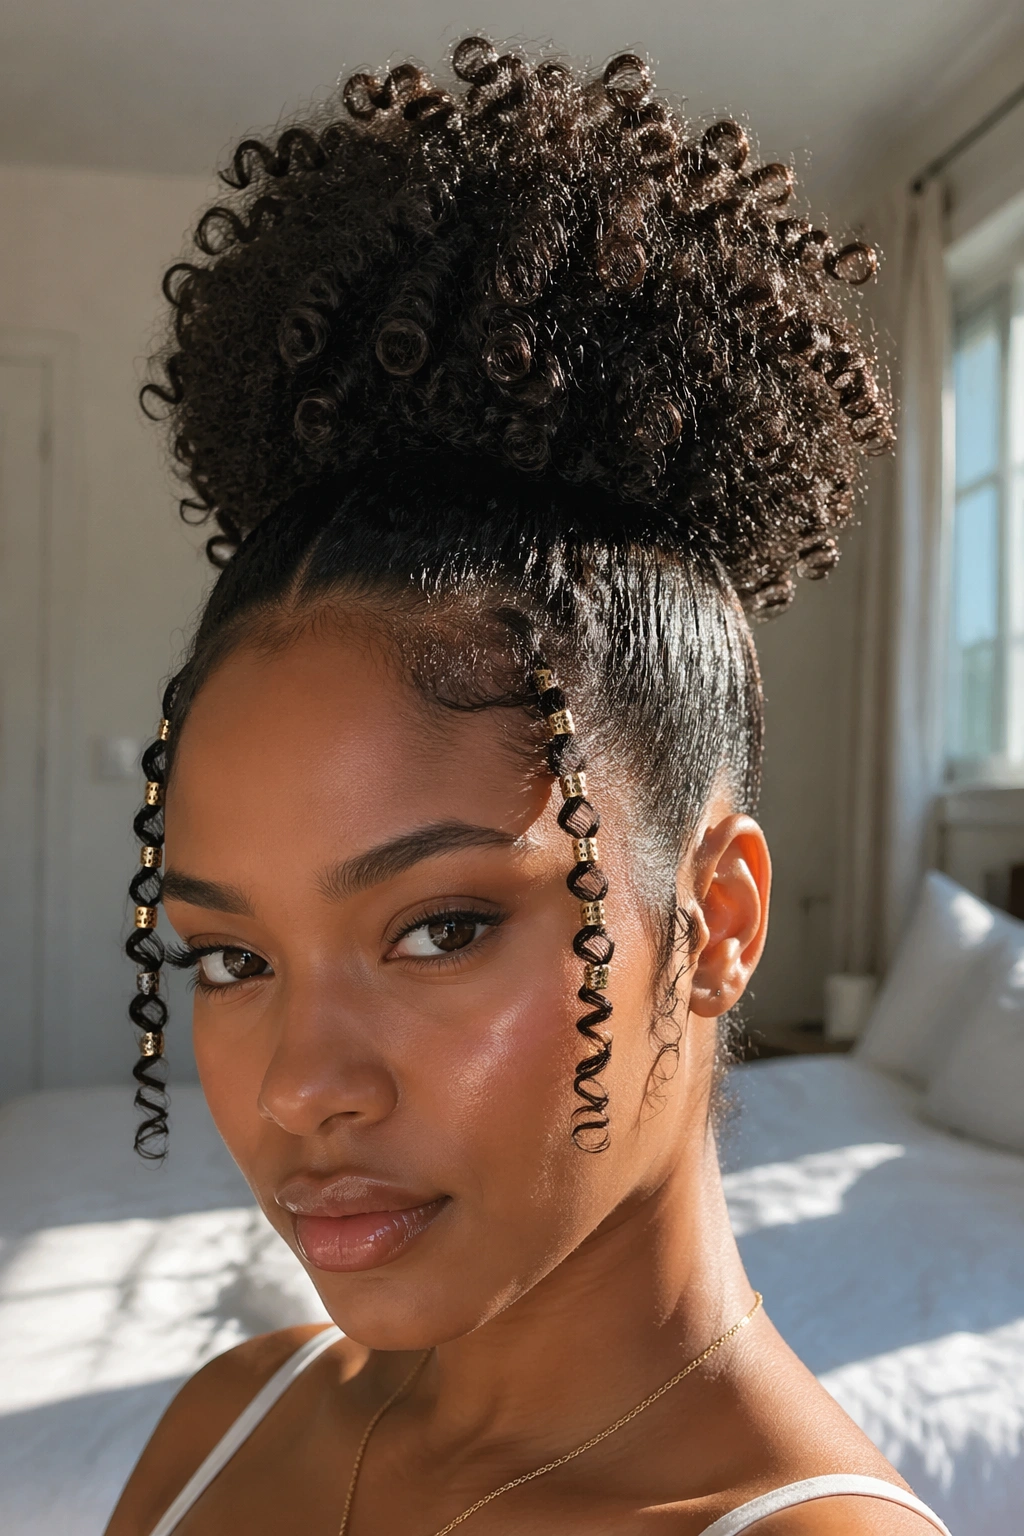
A high puff is not a backup plan. It is a main character style. On curly hair, it creates a tall, clean shape that feels bold without needing a ton of extra work, and the fantasy part comes from what you leave out: a few carefully placed tendrils, beads at the ends, maybe a little shine at the hairline.
The puff itself should sit high enough to lift the face but not so high that it looks like a stretched-out bun. Think crown level or just above it. Use a wide satin scrunchie or a soft band that won’t dig into the curls. If your hair is dense, gathering it with your hands first and then smoothing the surface with a brush gives a cleaner look without flattening the texture underneath.
The tendrils make this style sing. Pull out two slim pieces near the temples or cheekbones, then define them with a small amount of leave-in and gel. Beads work best when they’re not competing with everything else, so use one or two per tendril, not a whole festival display. Gold, pearl, or dark wood all read well against curly hair.
What I like about this style is the contrast. The puff is big and structured. The tendrils are soft and mobile. That tension keeps the look from feeling static, which matters more than people think. Hair that moves a little looks more alive.
If your edges are fragile or dry, go easy on the gel. A fantasy style should look cared for, not scraped into place.
6. Bantu-Knot Faux Hawk for Fantasy Hairstyles for Curly Hair
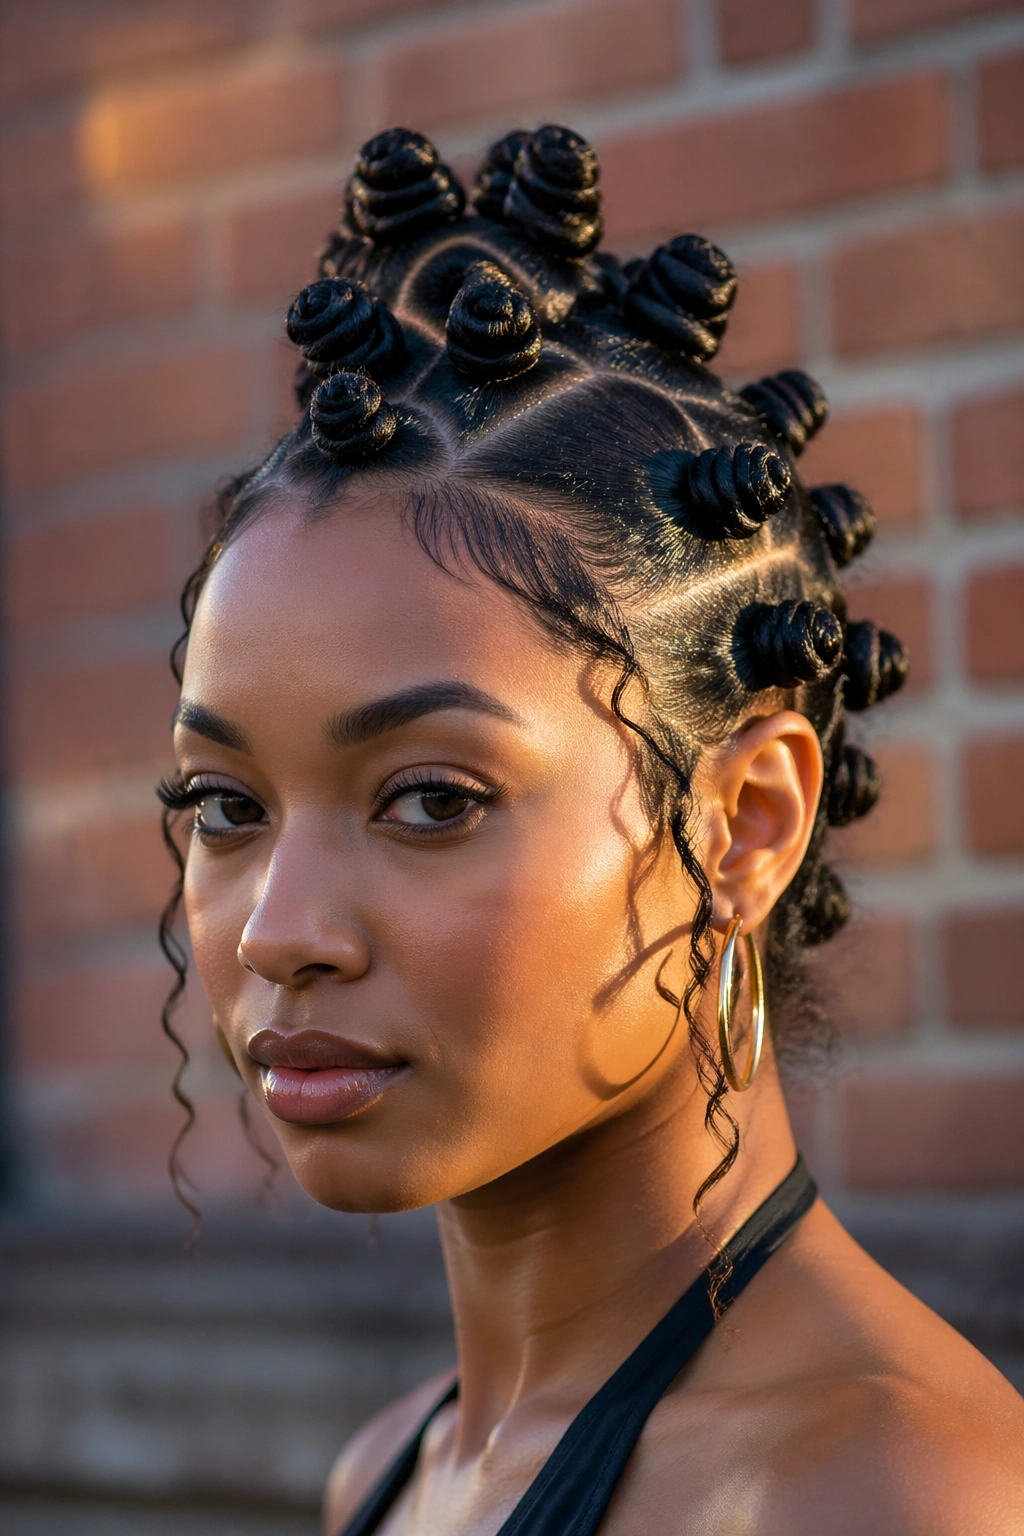
This one has edge. A Bantu-knot faux hawk gives you height down the center of the head and a clean shape on the sides, which makes it feel a little warrior, a little runway, and very much not boring.
Unlike a single bun or a simple ponytail, the faux hawk breaks the hair into repeating shapes. That repetition is what makes it stand out. On curls and coils, each knot becomes a little sculptural piece, and the row of knots creates a line that draws the eye straight down the center. You can keep the sides slicked back, braided down, or gently twisted if you want a softer look.
Where the shape comes from
The central line of knots should be evenly spaced. Three to six knots usually works, depending on hair length and density. If the knots are too close together, the style starts to blur. Too far apart, and the faux hawk loses its shape.
The sides matter almost as much as the top. Smooth them with a brush and a small amount of styling gel, but don’t chase every tiny hair. Some texture around the edges keeps the style from looking hard or too polished. That balance is where the magic sits.
This is a strong choice for thicker curls and coil patterns because the knots hold shape easily. It also works nicely with hair cuffs or small metallic rings tucked near the base of each knot. Not many accessories. One or two is enough.
If you want the style to feel more wearable, leave a few curls loose at the nape. That tiny bit of softness makes a big difference.
7. Ribbon-Wrapped Curly Ponytail
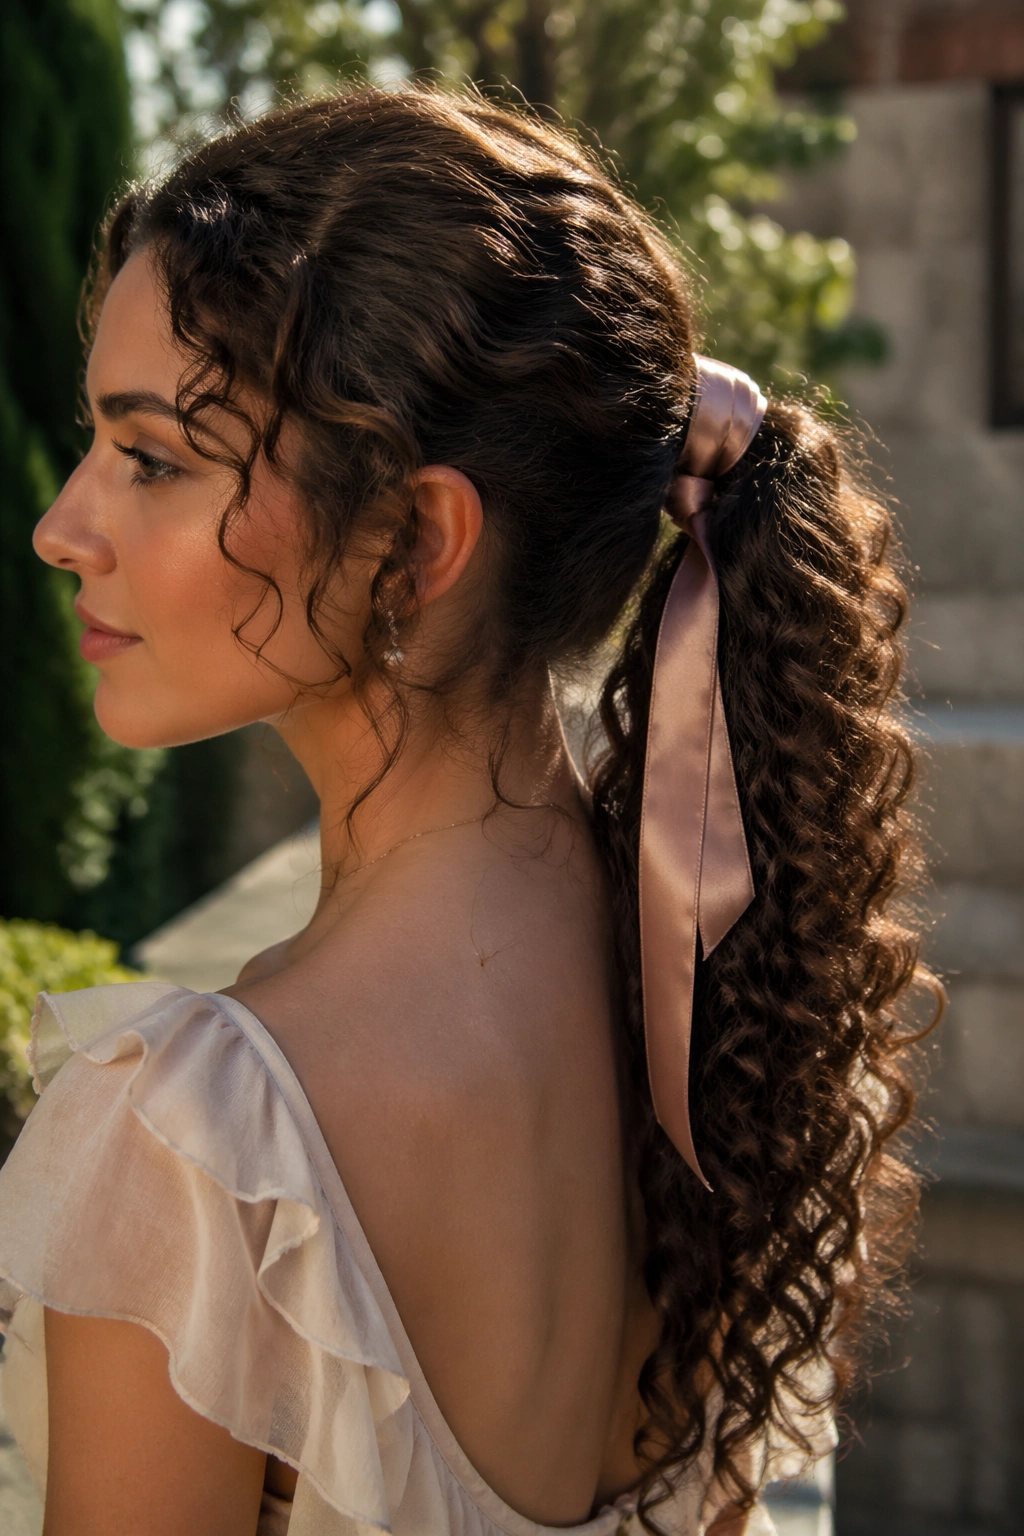
A curly ponytail sounds simple until you wrap it with ribbon and let the curls fall in a full cascade. Then it stops being simple and starts looking deliberate. That is the charm here — it is quick, but it does not look quick.
Set the ponytail either high or mid-height, depending on the mood you want. High reads brighter and more playful. Mid-height feels a little more grounded. Either way, the key is to keep the base neat and the tail loose. Gather the hair with a brush just enough to control the crown, then let the curls keep their shape below the elastic.
A 1-inch silk or satin ribbon works well because it wraps cleanly and does not snag. Wind it around the base of the ponytail a few times, then weave a short length through the top section of the tail. You do not need a perfect knot. A loose wrap is prettier. It also moves better when you walk.
What the ribbon changes
The ribbon adds a vertical line that makes the ponytail feel finished. Without it, the style can look like a gym ponytail with better curls. With it, the whole thing reads more like a costume from a story set in a garden or a moonlit hall.
Try deep jewel tones, black velvet ribbon, or pale metallic shades. Bright satin can be lovely too, but it changes the mood fast. Dark ribbon looks moody. Light ribbon looks airy. Pick one and commit.
The best part? You can swap the ribbon in seconds. A tiny change, and the whole mood shifts.
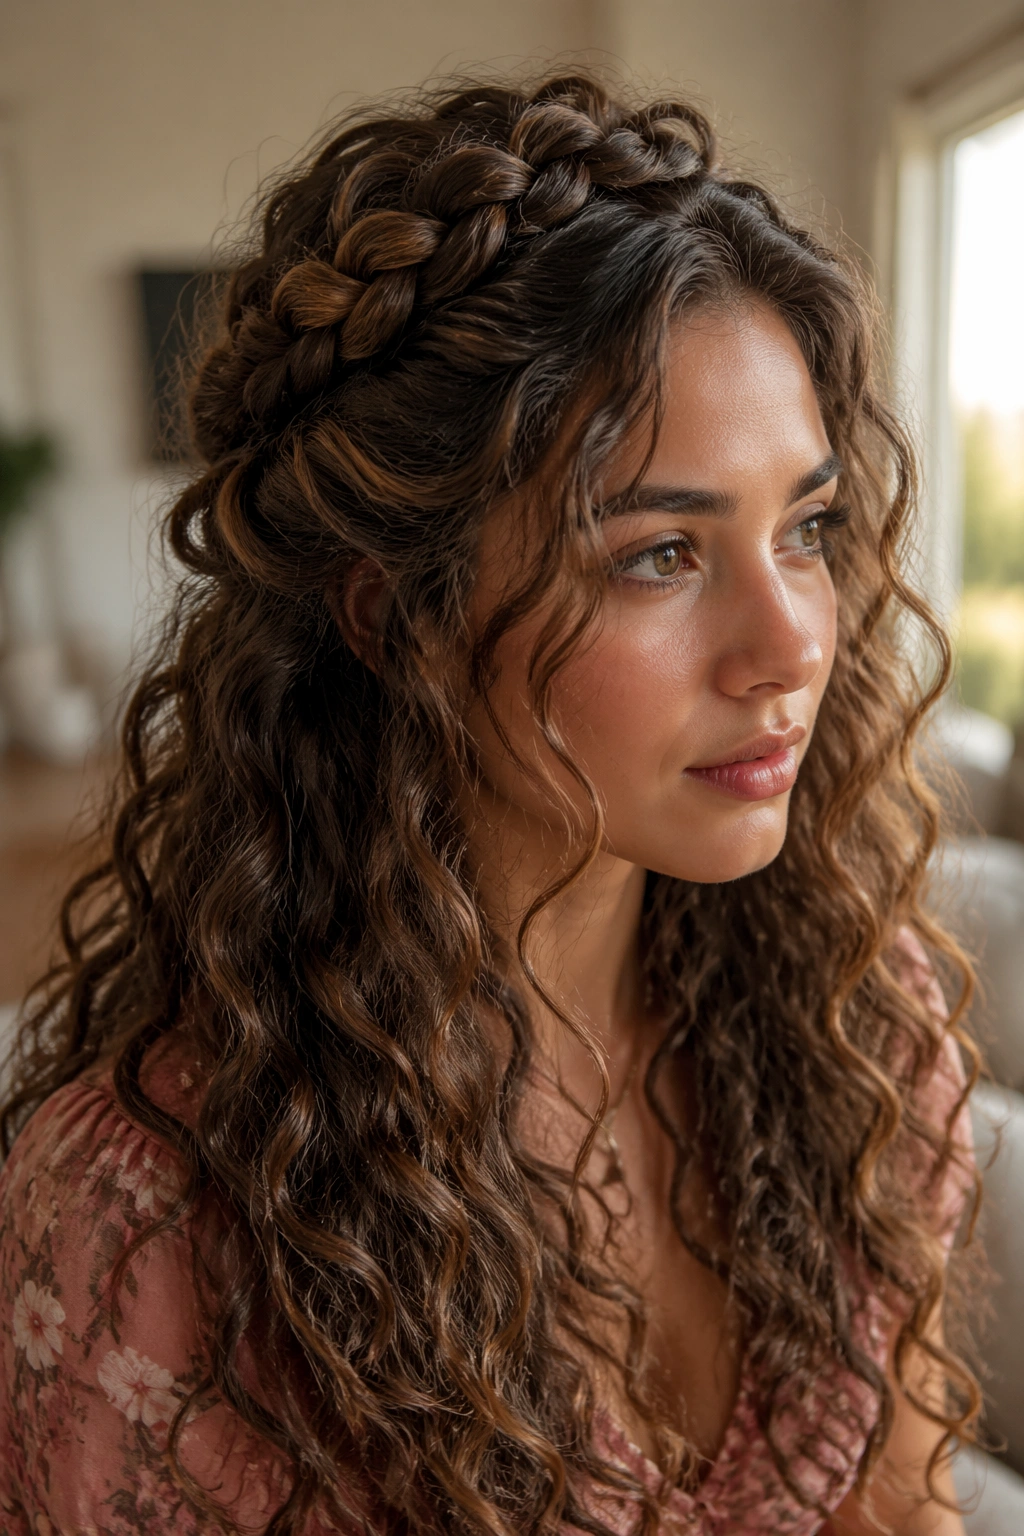
8. Braided Headband With Soft Fringe Curls
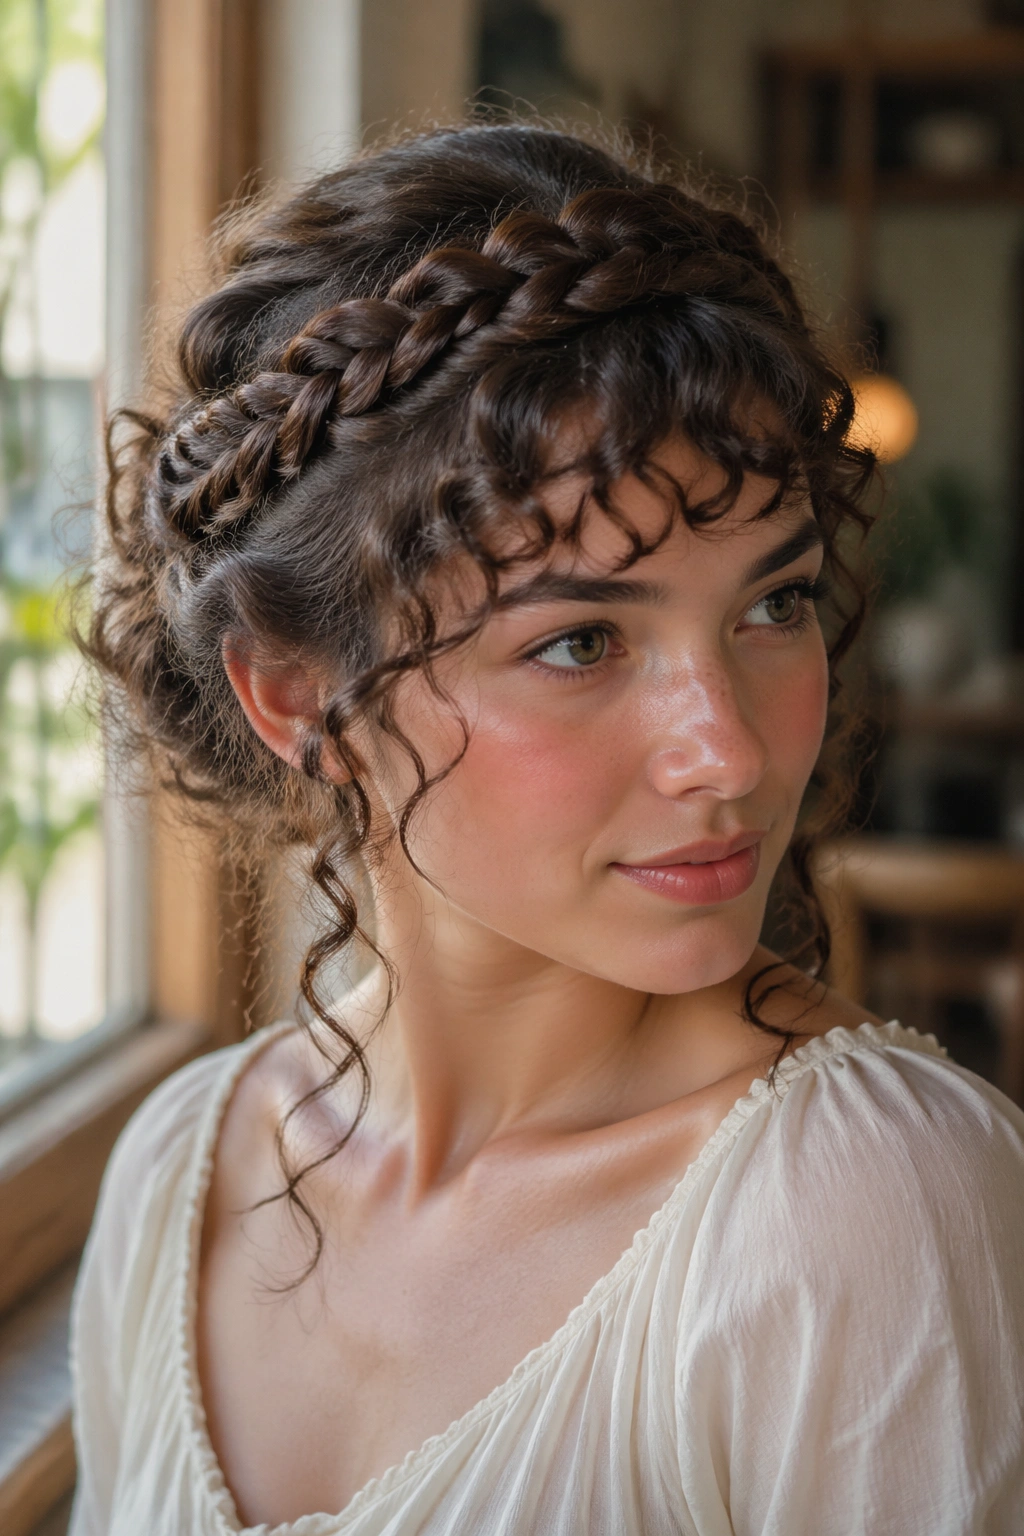
Can a braid act like an accessory? Absolutely. A braided headband is one of those styles that looks delicate from a distance and more detailed the closer you get, which is exactly what you want from fantasy hair.
The braid sits across the front of the head like a soft crown, while the rest of the curls stay loose. It works especially well if your hair has a natural side part or if you like to keep volume at the top without pulling everything back. The braid can be thin and subtle or slightly wider if you want a more visible band across the hairline.
The fringe pieces are the part people forget. Leave a few curls free near the forehead and temples. Those soft pieces stop the style from feeling too tidy. If you want more polish, define the front curls with a touch of gel and twirl them around your finger before they dry. If you want more softness, leave them alone and let them frizz a little.
- Start the braid behind one ear and angle it across the crown.
- Secure it behind the opposite ear with 2 to 4 pins.
- Lift the braid gently at the center so it looks fuller.
- Add a small barrette or leaf-shaped clip near one side if you want more ornament.
This style is a good pick when you want your curls to stay visible. The braid frames the face; the fringe pieces keep it human.
9. Low Knot With Face-Framing Spirals
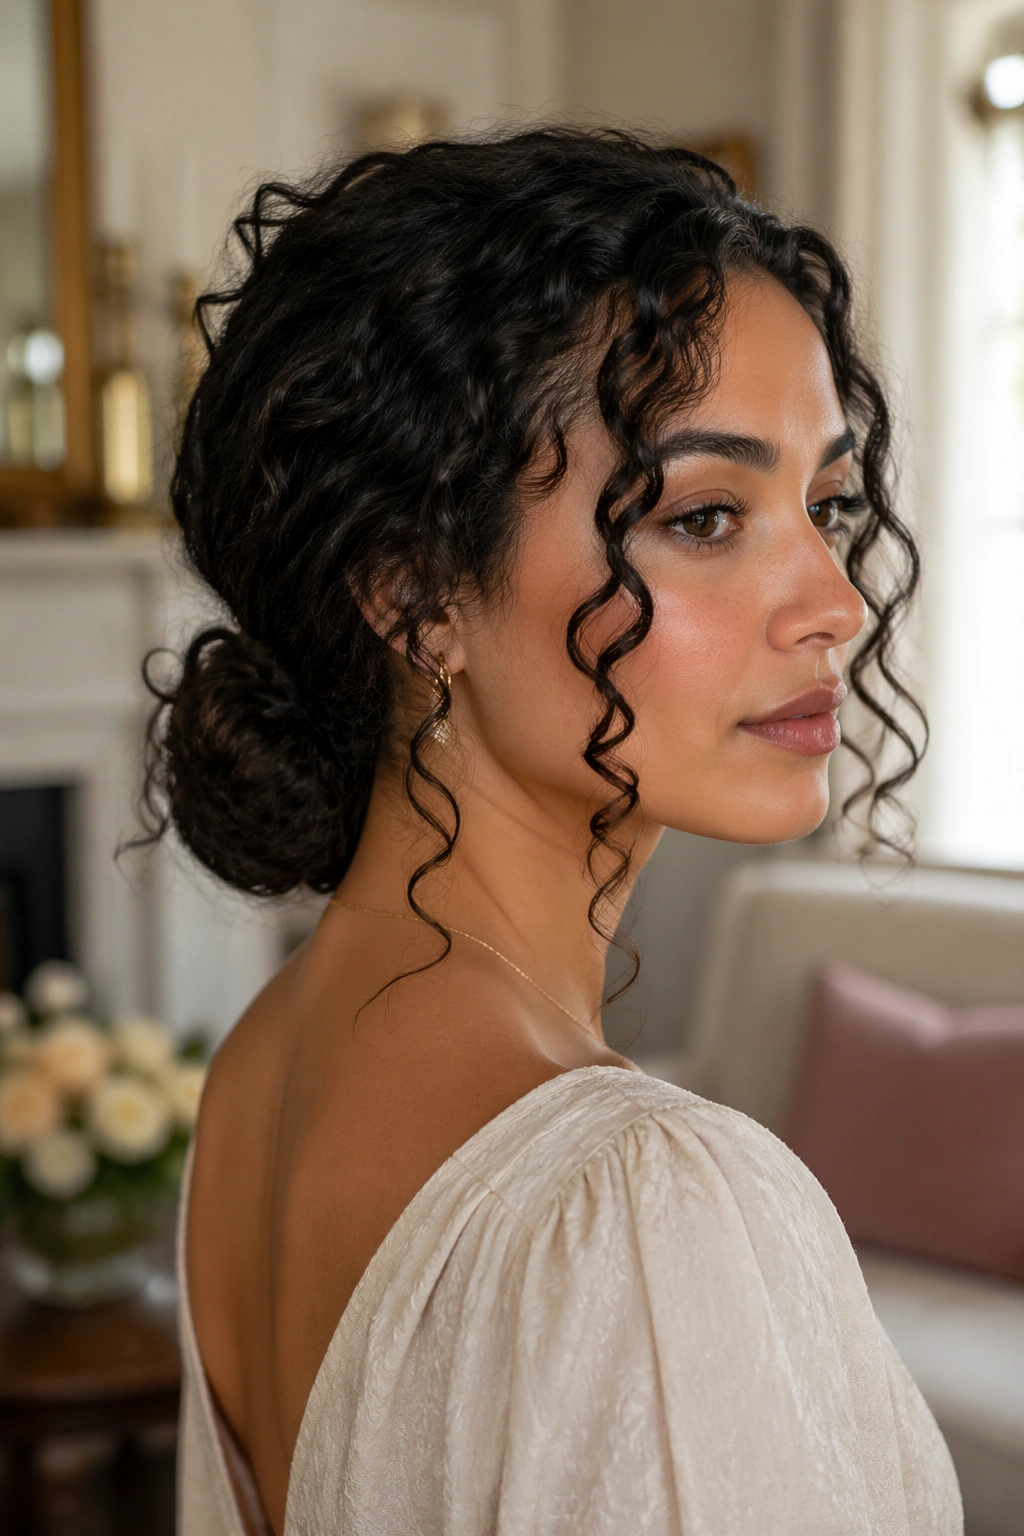
This is the style I reach for when the rest of the outfit is loud and the hair needs to behave. A low knot keeps the silhouette calm, while the face-framing spirals bring the fantasy back in through the front door.
The knot should sit near the nape, not halfway up the back of the head. That lower placement is what gives the style its elegance. On curly hair, you can twist the lengths before tucking them into the knot, or simply wrap them loosely and pin the ends under. Either version works, but the loose wrap tends to look softer and more romantic.
Face-framing spirals do most of the emotional work here. Leave two tendrils out, then define them with a little curl cream or mousse. If your curls are tighter, stretch the tendrils just a touch before pinning the knot so the front pieces fall more gracefully. A side part can help too, especially if you want a little asymmetry.
- Use 6 to 8 bobby pins for a medium-density knot.
- Cross the pins so the bun stays secure.
- Keep the crown slightly lifted instead of slicked flat.
- Finish with a small jeweled pin at the side, not the center.
The style looks calm from the back and dreamy from the front. That contrast is the whole point. It has restraint, but not too much.
10. Curly Gibson Tuck With Crystal Pins
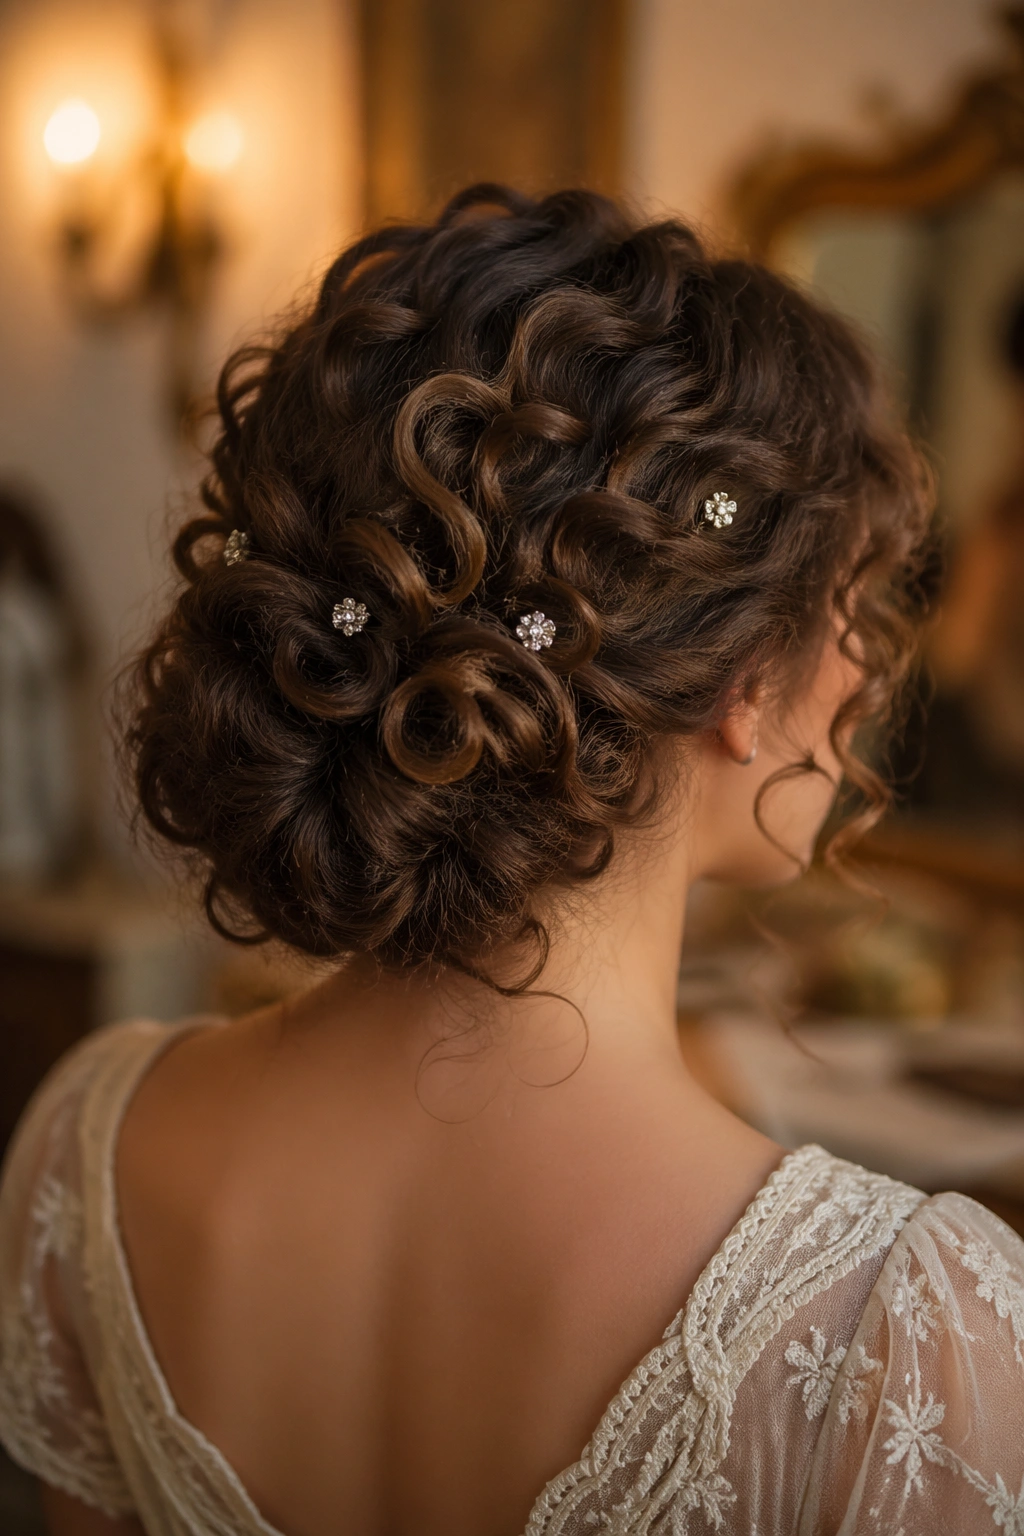
The Gibson tuck has old-world energy built right in. On curly hair, it becomes even more interesting because the texture keeps the style from looking too strict. The ends tuck under, the crown stays soft, and the whole shape has the kind of quiet drama that feels perfect for a fantasy setting.
What makes this style work is the roll at the nape. Instead of gathering the hair into a hard knot, you fold it upward and tuck it into a loose channel along the back of the head. Curly hair helps here because it fills out the shape naturally. You do not need every strand hidden. In fact, a few ends peeking out can make the tuck look richer and less staged.
Crystal pins belong in this style. A few small ones placed where the hair curves inward can make the tuck look deliberate without turning it into a bridal helmet. I prefer scattered placement over a straight row. That feels more organic, and it lets the light move across the style in a softer way.
A medium-length cut works beautifully here, but long curls can do it too if you tuck in sections instead of all at once. Take your time with the roll. If it feels tight, it probably is too tight. The tuck should hold, not pinch.
There is a nice old-fashioned elegance here, but not the stiff kind. More like a dress you can still breathe in.
11. Braided Mohawk With Defined Coil Rows
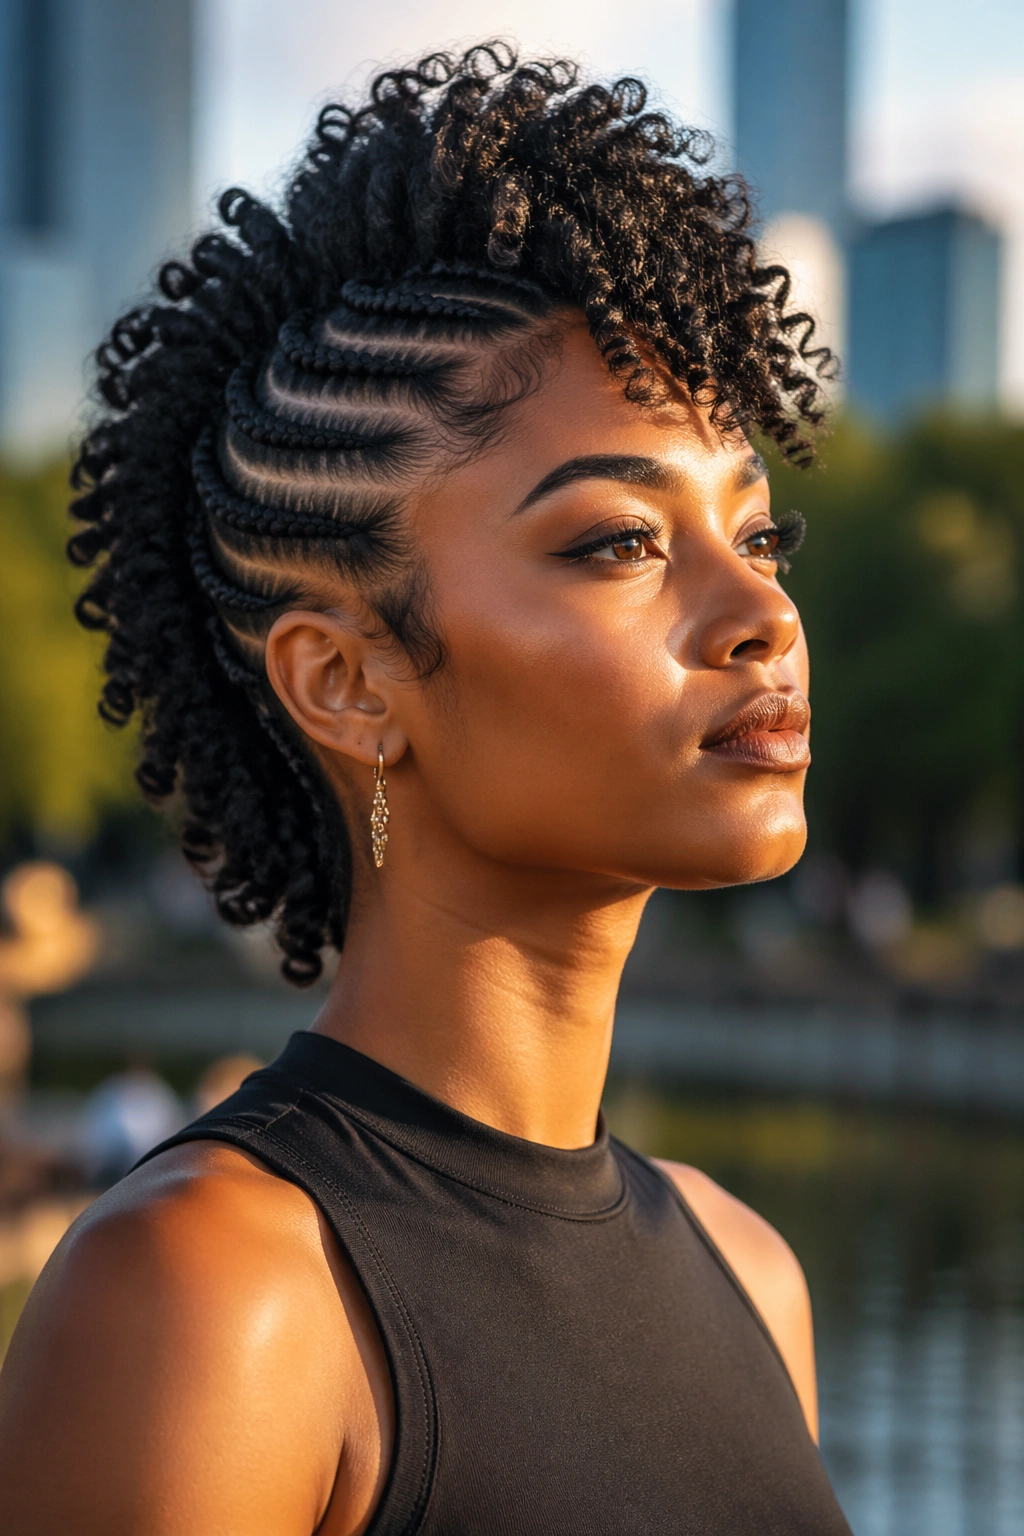
A braided mohawk is not for someone who wants to fade into the background. Good. Fantasy hair should sometimes look like it has an opinion.
Unlike a faux hawk made from puffed knots, this version uses braided rows or flat twists along the sides to push the eye toward the center. The middle section stays full and textured, which makes the mohawk shape more dramatic. On dense curls or coils, the center row can be left natural, shaped into chunky twists, or divided into several small coil clusters.
How to soften the edges
If the sides are too severe, the style can feel harsh. Leave a little softness around the temples, or loosen the braid just enough that it does not look pressed down. A few curls at the hairline help. So does a narrow part that isn’t perfectly straight — a tiny imperfection keeps the look from becoming too rigid.
This style is best if you want height and a little edge. It pairs well with ear cuffs, tiny metallic rings, or a single dramatic pin near the back. But do not add everything. The mohawk shape already does a lot of the talking.
For curl types that shrink a lot, stretching the center section first can make the silhouette easier to control. For longer curls, a bit of root lift with a pick is usually enough. The point is not smoothness. The point is shape.
If you like styles that feel a little fierce, this one has range.
12. Moonlit Crown Bun for Fantasy Hairstyles for Curly Hair
If one style on this list can move from evening event to formal portrait without changing a thing, it is this one. A moonlit crown bun gives you height, softness, and just enough ornament to feel special, while the curls around it keep the whole thing from looking too sealed up.
The shape starts as a high or mid crown bun, but the bun itself should not be too tight. Curly hair looks better when the bun has a little air in it. Pin it in a rounded shape, then leave a few curls hanging loose around the temples, ears, and nape. Those stray pieces are not mistakes. They are the reason the style feels alive.
Small jewel pins or pearl pins work beautifully here, especially if you place them in a crescent around one side of the bun. A single hair vine can also be gorgeous, but only if it follows the curve of the hair instead of sitting on top like a headband that wandered off. The bun should feel like a crown, not a helmet.
A silk scarf can be useful while you set the front, especially if you need the roots to dry in place. Remove it once the shape is secure and finger-separate the curls around the face. That last step matters more than people expect. It gives the style a soft frame and keeps the top from looking too firm.
For me, this is the one to pick when you want the hair to look intentional from every angle. Not overworked. Just finished.