Curly hair does not need to be tamed to look royal.
That is the part most styling advice gets backward. The prettiest princess hairstyles for curly hair usually keep the shape, keep the lift, and let the texture do half the work. A good crown braid, a ribboned ponytail, or a pinned half-up style should look intentional, not forced. If the curls are squeezed flat at the roots or shellacked into stiffness, the whole thing starts to feel off.
The trick is balance. Too much product and the curls go crisp. Too little and the front pieces slip loose before the event is even halfway over. What you want is a style that still moves when you turn your head, with a little shine, a little softness, and enough hold to survive clips, braids, and the occasional enthusiastic hug.
Princess hair on curls also needs a different kind of planning. You are not building a smooth sheet of hair and decorating it. You are working with volume, spring, and a shape that changes from strand to strand. That is exactly why the styles below work so well — they flatter the curl pattern instead of fighting it.
Princess Hairstyles for Curly Hair Start with the Right Prep
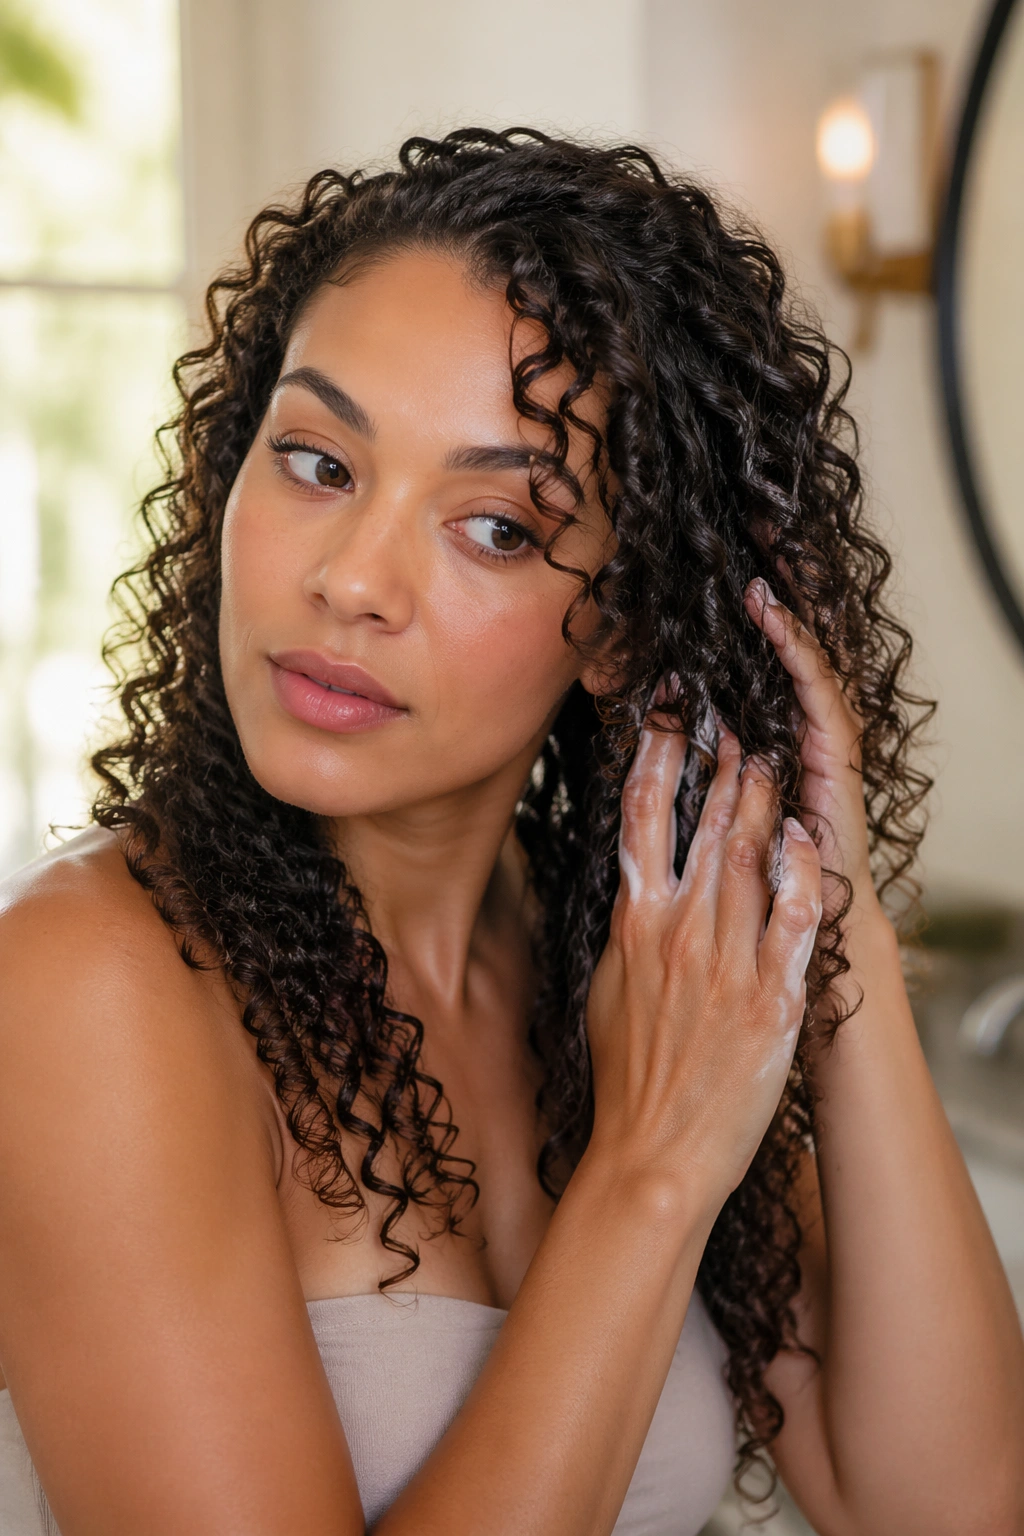
A good style starts before a single pin goes in. Curls that are too dry frizz at the edges. Curls that are too soft slide out of braids and clips. The sweet spot is hair that feels hydrated, but not coated, and has enough grip to hold a twist when you shape it.
I like to think about prep in three layers: moisture, shape, and hold. Moisture comes from a leave-in conditioner or curl cream. Shape comes from drying the curl pattern fully, then refreshing only the pieces that need it. Hold comes from a light mousse or a soft gel at the roots and along the sections you plan to braid. Heavy oils usually make things worse here. They can weigh down the crown and make pins skate right out.
What to do before styling
- Work on fully dry hair whenever possible, especially if you’re using braids or pins.
- Detangle with your fingers or a wide-tooth comb so the curl clumps stay intact.
- Smooth a small amount of curl cream or leave-in through the lengths.
- Use light-hold mousse at the roots if you need a little extra grip.
- Keep a spray bottle handy for the front pieces, not the whole head.
A lot of people rush the prep because they think the accessory is the main event. It isn’t. The accessory is the last step. The base decides everything.
What to skip
Skip crunchy styling gel on the full length unless you want a hard finish. Skip brushing curls dry unless you enjoy frizz fighting back by the minute. And skip the urge to stretch every curl straight before you pin it — princess styles on curly hair usually look better when the curls are still obviously curls.
Accessories That Make Princess Hairstyles for Curly Hair Hold
The right accessory does more than decorate. It gives a style structure. That matters with curls, because the texture already has movement and personality, which means the accessory has to cooperate instead of fighting for attention.
Bobby pins are still the workhorse. Pick ones with a grip finish, not the slippery shiny kind. U-pins help with buns and twists because they disappear into the curl mass without flattening it. Mini elastics are useful for half-up sections and braided starts. And if you want the style to read as regal instead of casual, think ribbon, pearl pins, a velvet headband, or a small comb placed off-center.
The mistake I see most is piling on too many decorations at once. One pearl clip line or one satin bow usually does more than five random pieces scattered across the head. Curls already give you texture. You do not need to shout over them.
A second thing worth saying: match the grip to the job. Thin barrettes slip on dense curls. Tiny claw clips can vanish in thick hair. Wider combs and sturdier pins tend to work better, especially if the style sits high on the head or gets worn for hours.
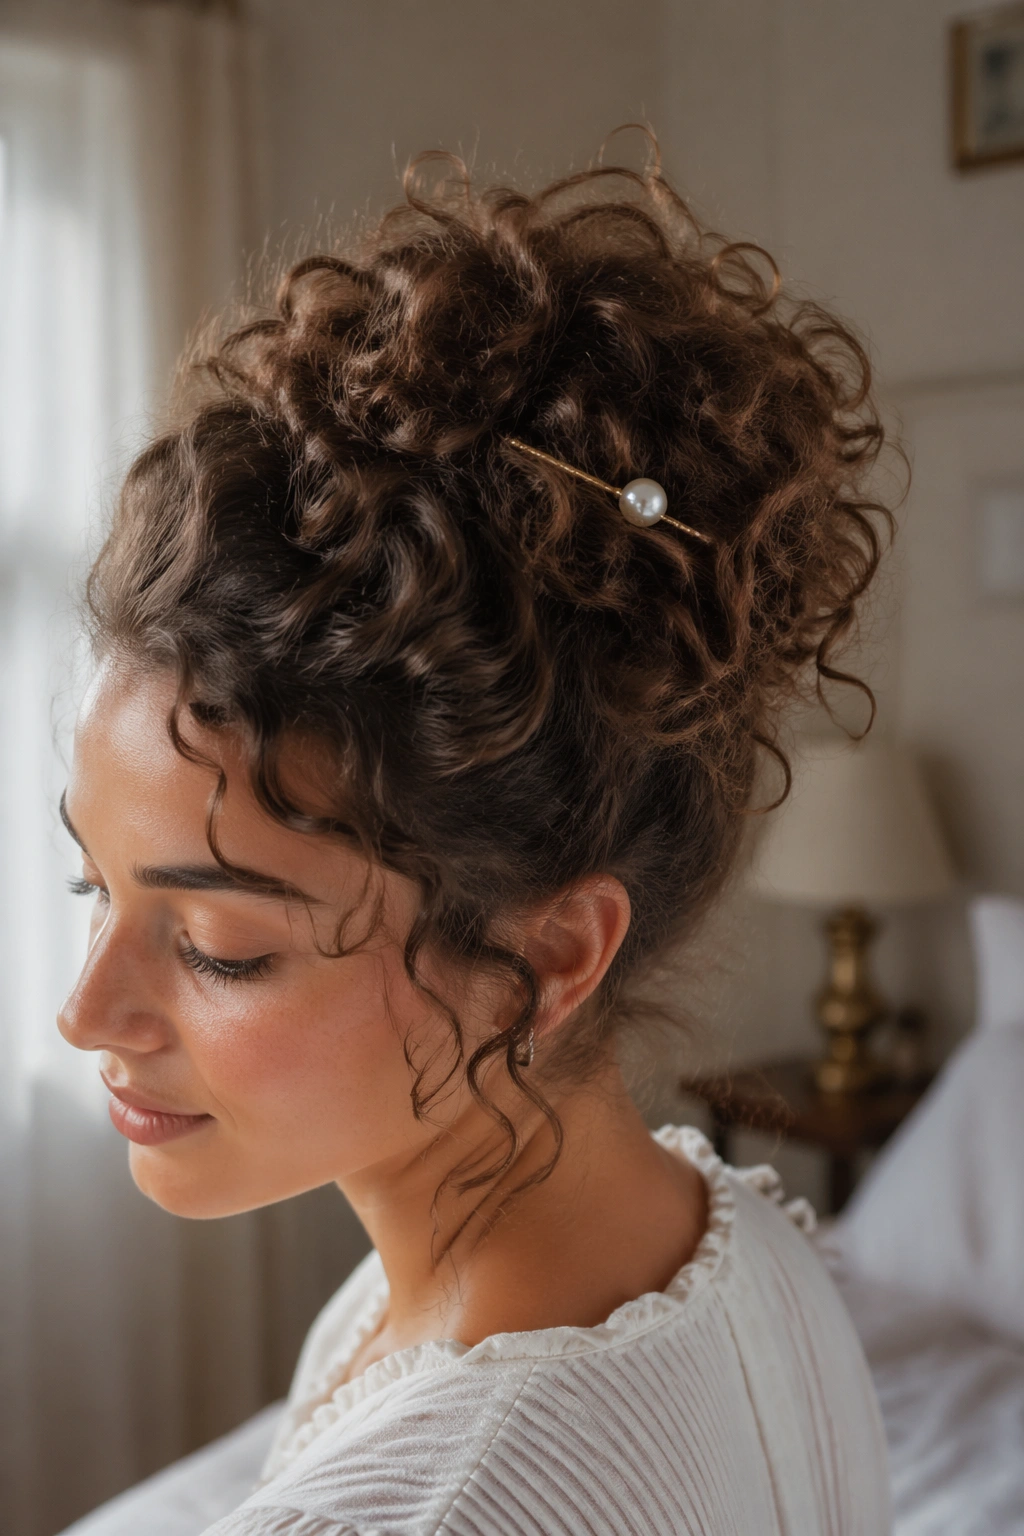
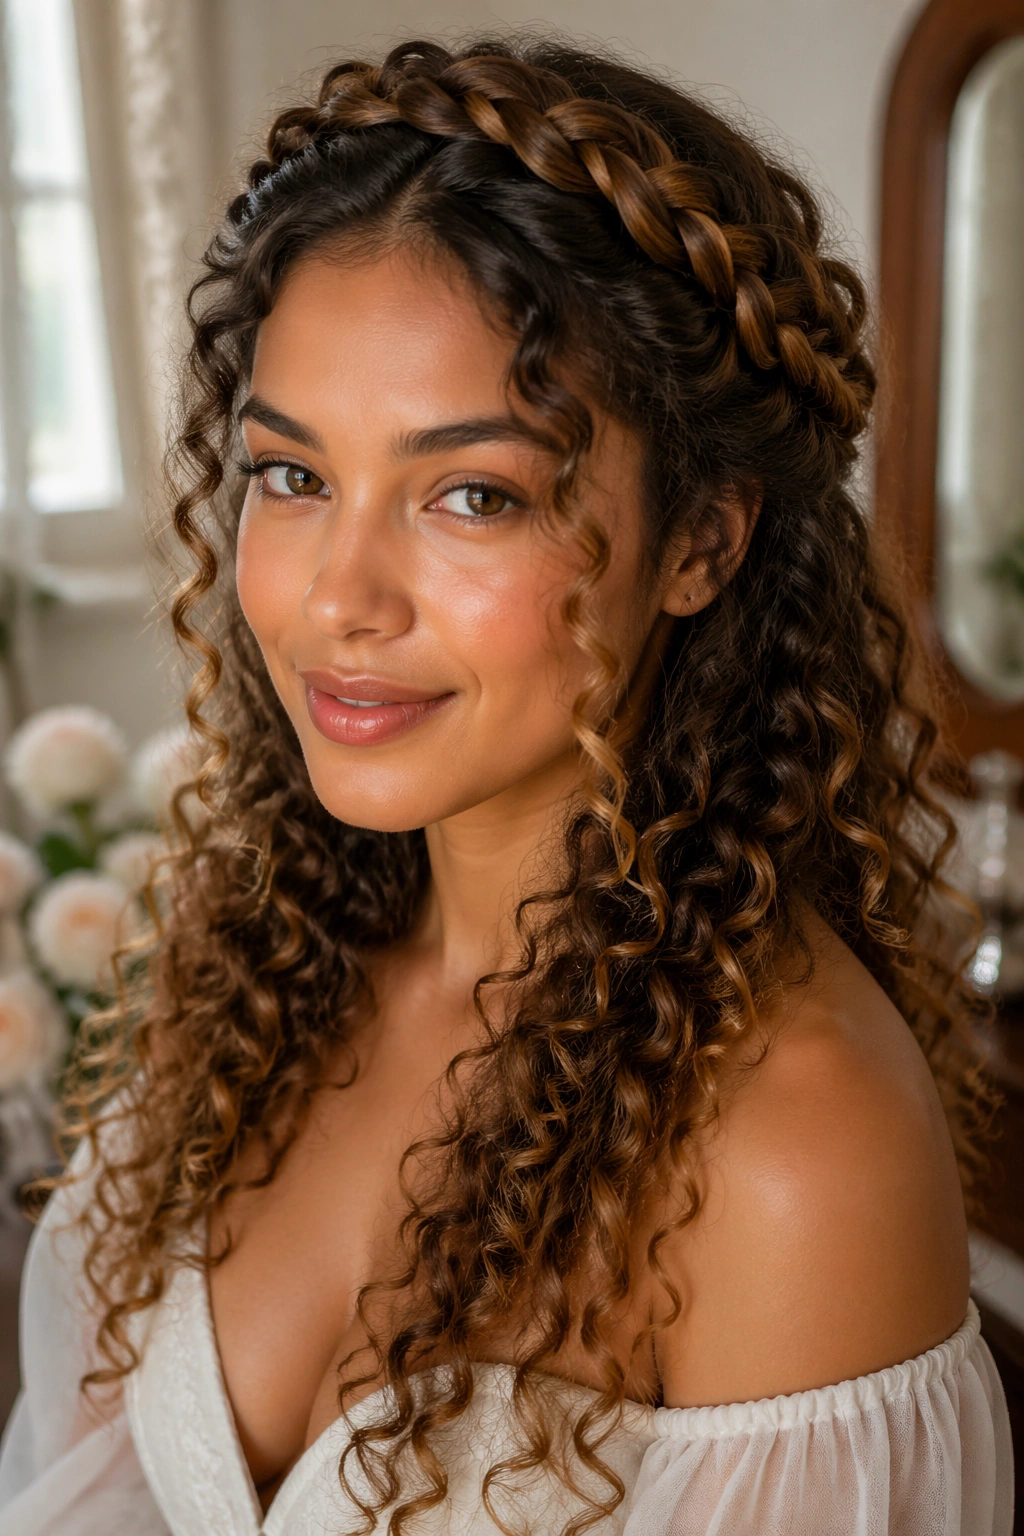
1. Curly Crown Braid
A curly crown braid is the closest thing curls have to a built-in tiara. It wraps the hairline in a soft arc, leaves the texture visible, and keeps the face open without flattening the whole top of the head. It looks especially good when the braid stays a little loose and the curls around it stay full.
Why it works on curls
Curly hair gives the braid body. You do not need a tiny, tight braid to make this style hold; in fact, a braid that is pulled too hard usually looks stiff and fights the curl pattern. A better version uses a shallow braid along the front hairline or a pair of side braids meeting at the back, with the rest of the curls left loose and springy.
Quick shape tips
- Braid the front section about 1 to 2 inches back from the hairline.
- Leave a few fine tendrils near the temples if the face needs softness.
- Pin the braid base with 2 to 4 bobby pins, crossed for extra grip.
- Fluff the crown gently after pinning so the top does not sit flat.
- Finish with a tiny mist of flexible-hold hairspray, not a stiff shell.
My favorite trick: tug the outer edge of the braid once it is pinned. Just a little. That tiny loosened edge makes the whole look feel softer and more expensive than a tight braid ever will.
2. Half-Up Twisted Tiara
If a crown braid feels too structured, the half-up twisted tiara gives you the same royal feel with less work. Two twists start at the temples, arc back like a soft headpiece, and leave most of the curls down. It is airy. It is flattering. It also suits hair that is more loose-wave than springy ringlet, because the twists help define the front without forcing a braid where the hair does not want one.
A deep side part makes this style look even better. So does keeping the twists slightly raised instead of pinned flat to the head. That little lift at the temples creates shape around the face and keeps the whole style from disappearing into the curls behind it.
How to wear it
Take a section from each temple, twist them back toward the crown, and secure them together with a clear elastic or two crossed pins. Then hide the join with a small clip, a pearl comb, or even a narrow velvet ribbon if the outfit calls for it. The rest of the curls should stay loose and defined.
Do not overthink the twists. The charm is in the softness. If you make them too neat, the style loses its easy, storybook feel. A few uneven curls near the part are fine. Better than fine, actually.
3. High Curly Ponytail with Ribbon
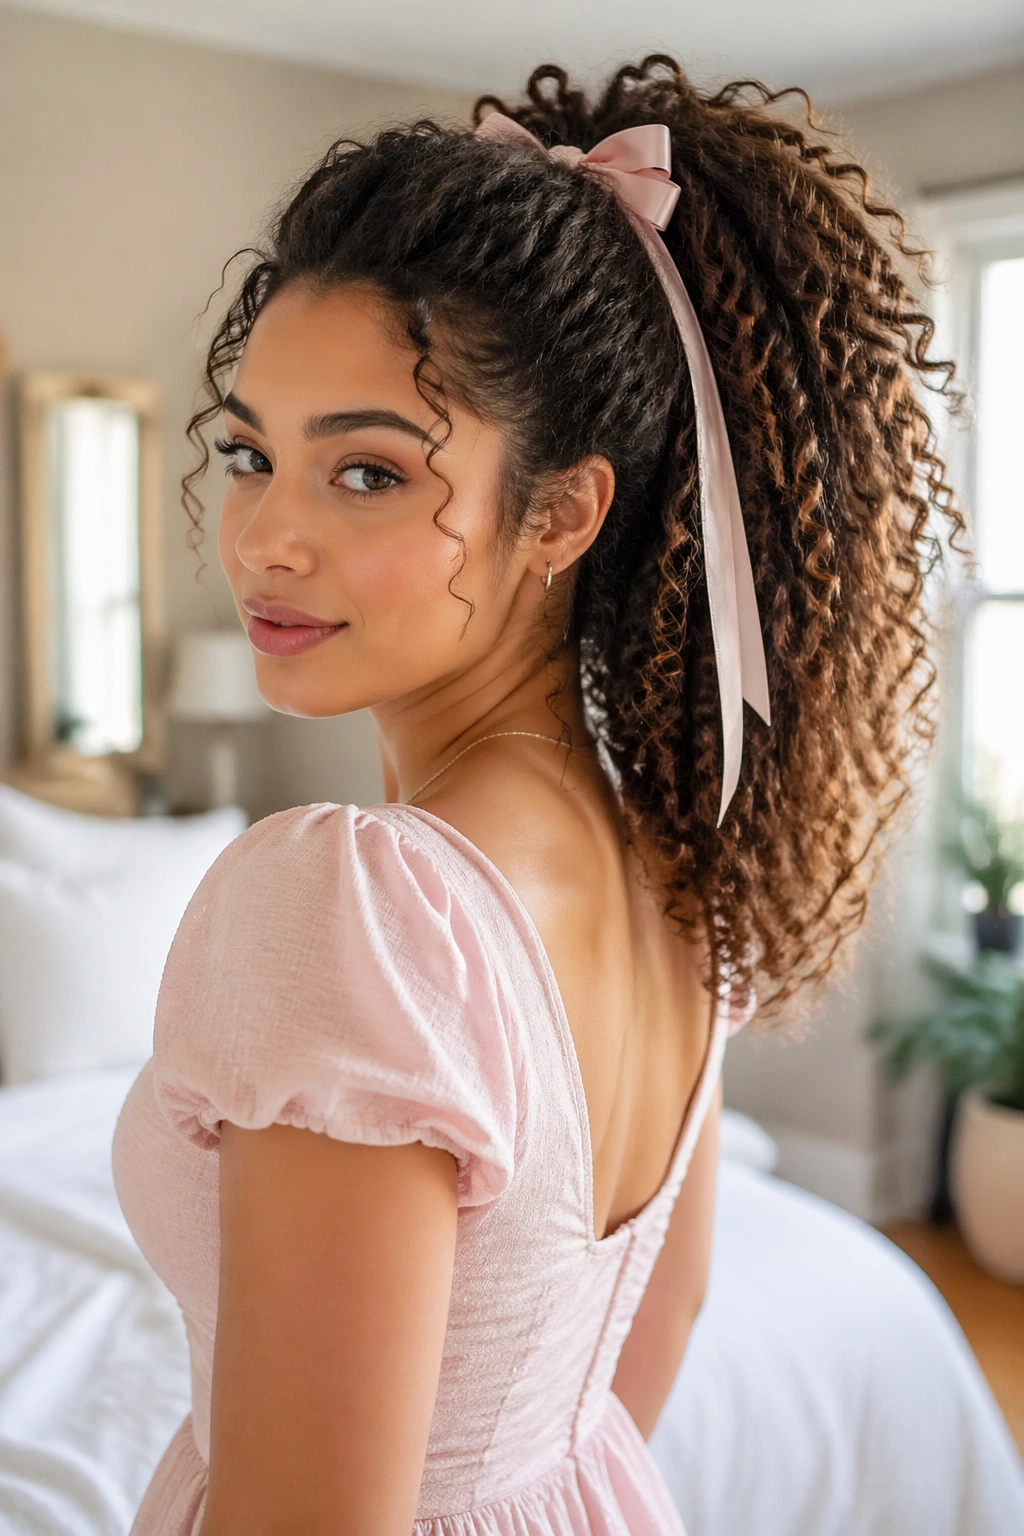
A high ponytail can be regal when the curls are full and the base is finished with ribbon. That sounds almost too simple, but simple is the point. A strong crown lift, a little fullness at the top, and a ribbon tied around the base can turn everyday curls into a formal look in minutes.
This style is especially useful when the hair is long enough to make a dramatic cascade but not so long that it starts to drag the ponytail down. The higher the placement, the more the curls show off. The trick is not to slick the sides into a tight helmet. Leave a touch of volume near the roots so the ponytail sits proudly instead of looking pinned down.
Best details for this style
- Use a fabric scrunchie or elastic first, then cover it with ribbon.
- Tie the ribbon once in a knot, then let the tails fall 4 to 8 inches.
- Wrap a small section of hair around the base if you want a cleaner finish.
- Smooth the front with a tiny bit of mousse, not a heavy cream.
- Leave one or two front curls free near the cheeks.
A satin ribbon gives this style a softer finish. Velvet reads richer and a little more formal. Either one works, but the ribbon should be wide enough to be seen from across the room. Thin ribbon tends to disappear into curly texture, and that defeats the whole point.
4. Side-Swept Curly Updo with Pearl Pins

A side-swept curly updo has a more grown-up feel than a straight center bun, and that is exactly why it works. The curls are gathered low and to one side, then pinned in a loose cluster so the shape stays soft rather than strict. Pearl pins along the sweep make the whole thing read as intentional.
The side part matters here. A deep part creates a stronger line through the style and gives the forehead and cheekbones room to show. Once the hair is parted, sweep the heavier side back toward the nape and pin it where the curls naturally want to sit. Fighting the curl pattern is a waste of time. Follow it instead.
Where to place the pins
Put the first pin near the part line, about 1 inch behind the hairline, to anchor the front. Add two or three more where the hair bunches at the side of the head. Then place pearl pins in a short curve, not scattered randomly. A line of three looks cleaner than a cloud of six.
This is one of those styles that can go formal or casual depending on the accessories. Pearl pins and a soft matte finish make it feel ceremonial. A single jeweled comb makes it feel lighter. Either way, the side sweep is what gives it its charm.
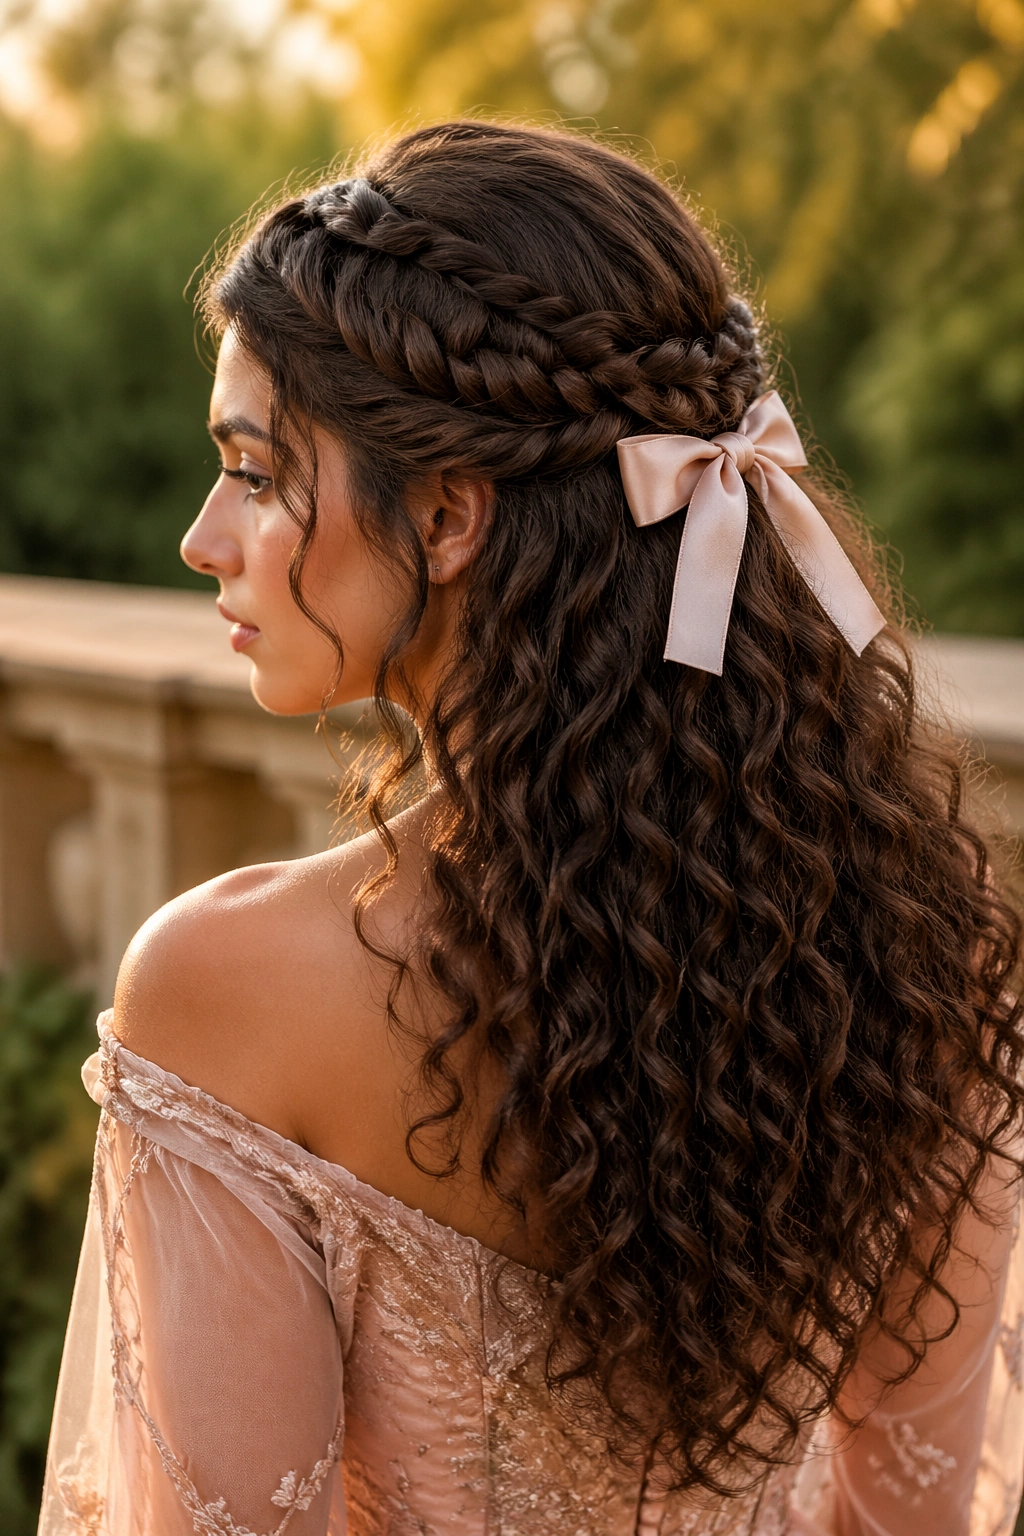
5. Halo Braid with Loose Ringlets
The halo braid has a quiet drama that curly hair handles especially well. The braid circles the head like a soft frame, while the ringlets stay loose around the shoulders or near the nape. It is one of the few styles that can feel both delicate and full at the same time.
What makes it work is contrast. The braid gives you a clean outline. The curls keep it from looking severe. If the hair is thick, two smaller braids pinned into a circle often look better than one bulky braid trying to do everything at once. That is the part people miss. A halo braid should feel like it belongs to the hair, not like the hair was squeezed through it.
The finish matters, too. Pull a few wisps loose around the temples. Leave the braid a little raised from the scalp. Let the ringlets sit where they want to sit. When the braid is too tight, the style turns hard and the whole point is lost.
This one is lovely for formal dinners, portraits, and events where you want the face framed but not crowded. It also holds up better than people expect, as long as the pins are hidden under the braid and the roots have enough texture to grip.
6. Double Space Buns with Curly Ends
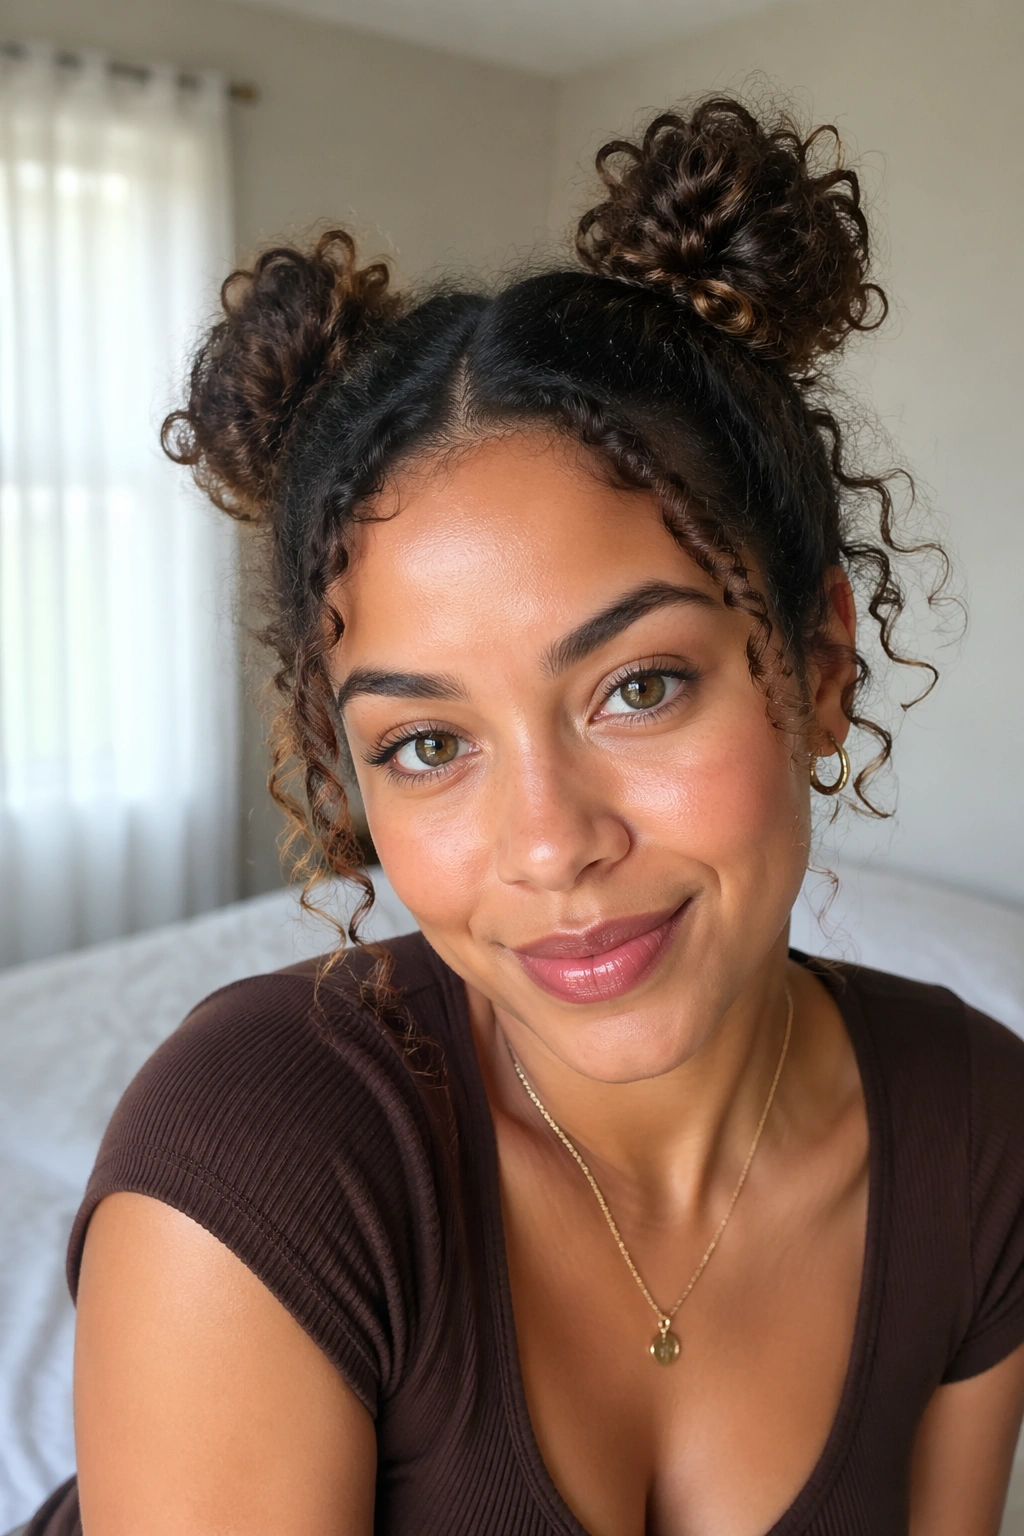
Space buns can look playful, but they do not have to look childish. On curly hair, the key is keeping the buns small, lifted, and a little loose, then letting the ends curl out instead of tucking every strand away. That tiny bit of mess keeps the style from looking stiff.
Unlike a sleek twin-bun look, this version leans into the curl pattern. Two high puffs or buns sit on either side of the crown, and the curly ends are left visible or looped just enough to show movement. The result feels fresh, not overworked. It is also one of the easier princess hairstyles for curly hair if you want something that stays secure without a long pinning session.
What helps most
- Part the hair cleanly down the middle first.
- Anchor each side with a small elastic before twisting the bun.
- Use 2 bobby pins per bun if the hair is medium-density.
- Leave the ends out by 1 to 2 inches if the curl pattern is defined.
- Add pearl clips or a narrow ribbon only if the rest of the outfit is simple.
This style suits shoulder-length curls especially well because the bun sits high while the ends still have enough length to spring outward. On very long hair, keep the buns compact or they can start to droop. And if the hairline needs softness, pull out a few baby curls at the front. They do a lot of work here.
7. Curly French Twist with Soft Tendrils
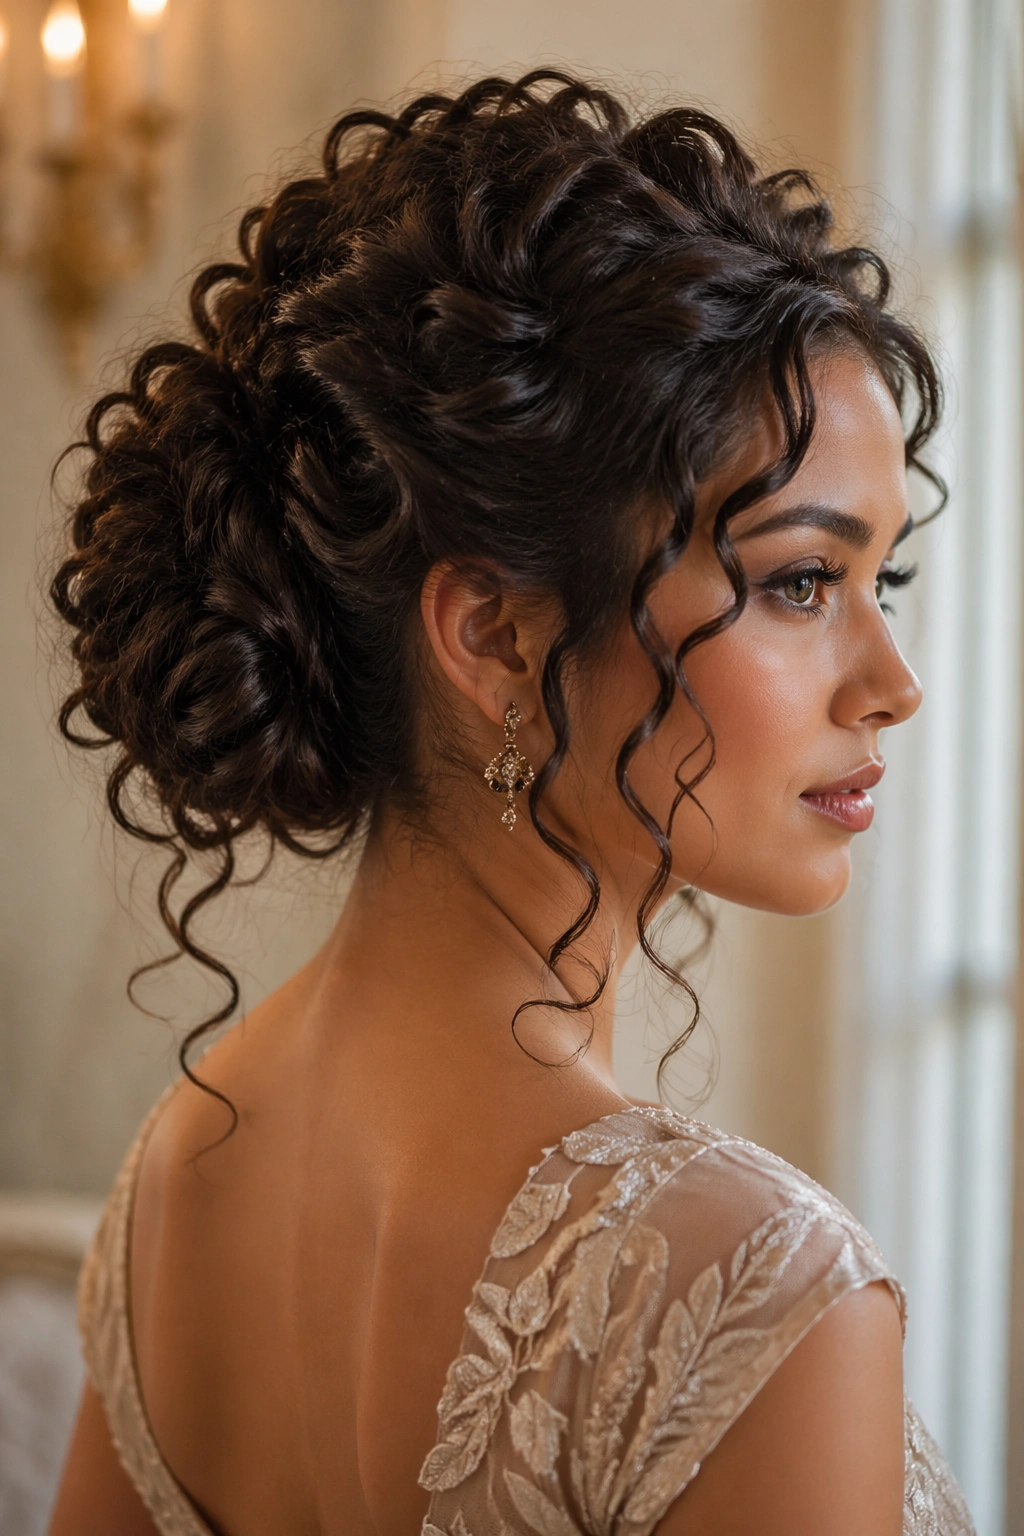
A curly French twist is not about making curls disappear into a shell. It is about rolling the hair up the back of the head while leaving enough texture visible that the style still feels alive. That is why this version needs soft tendrils at the sides. Without them, the whole thing can look too severe for curly hair.
The best version starts with a low, loose gather at the back. Twist the lengths upward, tuck the ends inside, and pin the roll vertically with U-pins or strong bobby pins. Then step back and check the shape from the side. If the twist is collapsing into the head, it needs more support near the center. If it looks too tight, pull the surface a little so the curves show.
What to watch for
- Keep the roll slightly off-center if the hair has a natural side part.
- Use pins that match your hair color so the twist looks clean.
- Leave two tendrils near the ears, each about half an inch to 1 inch wide.
- Spray the inside of the twist, not the outside, to avoid crunch.
- Add one small clip at the top if the hair is thick and wants to open.
This is one of the more polished curly updos, but it still needs softness. The tendrils are not an afterthought. They are the thing that keeps it from feeling overly strict.
8. Waterfall Braid into Full Curls
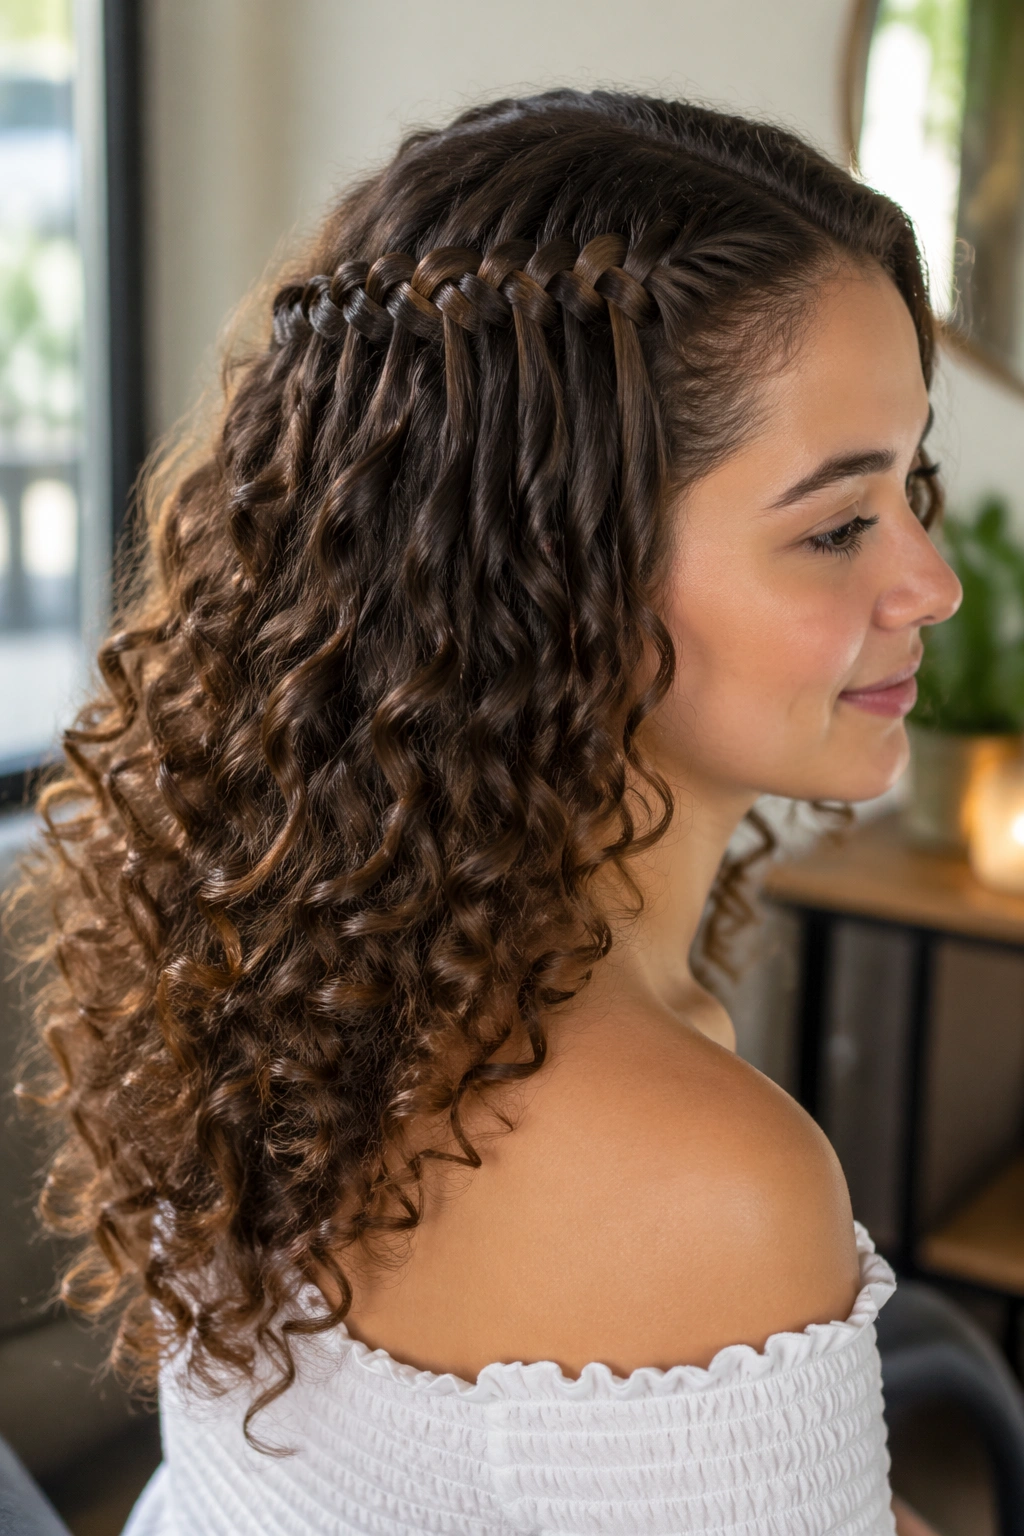
There is something especially pretty about a waterfall braid on curly hair because the braid seems to spill right into the rest of the texture. One strand drops through, another strand is picked up, and the curls underneath stay loose and full. The effect is gentle, not fussy.
This style works best when the braid runs across one side of the head, usually from the temple toward the back. It gives the illusion of more detail than it actually takes, which is useful if you want the hair to look dressed up without spending forever in front of the mirror. A waterfall braid also keeps the front controlled while letting the rest of the curls move freely.
A few practical notes
The braid should be loose enough that the dropped pieces hang like part of the design. If you braid too tightly, the waterfall effect gets lost and the texture near the crown starts to flatten. A touch of mousse on the sectioning fingers helps keep the parts clean.
This one is especially nice on layered curls, because the lighter pieces around the face fall in a softer way. If the hair is long and dense, secure the braid behind the ear with two crossed pins so it does not slide. And if the curl pattern is very springy, let the dropped pieces do their thing. The little bounce is half the charm.
9. Pinned-Back Side Part with Jeweled Clips
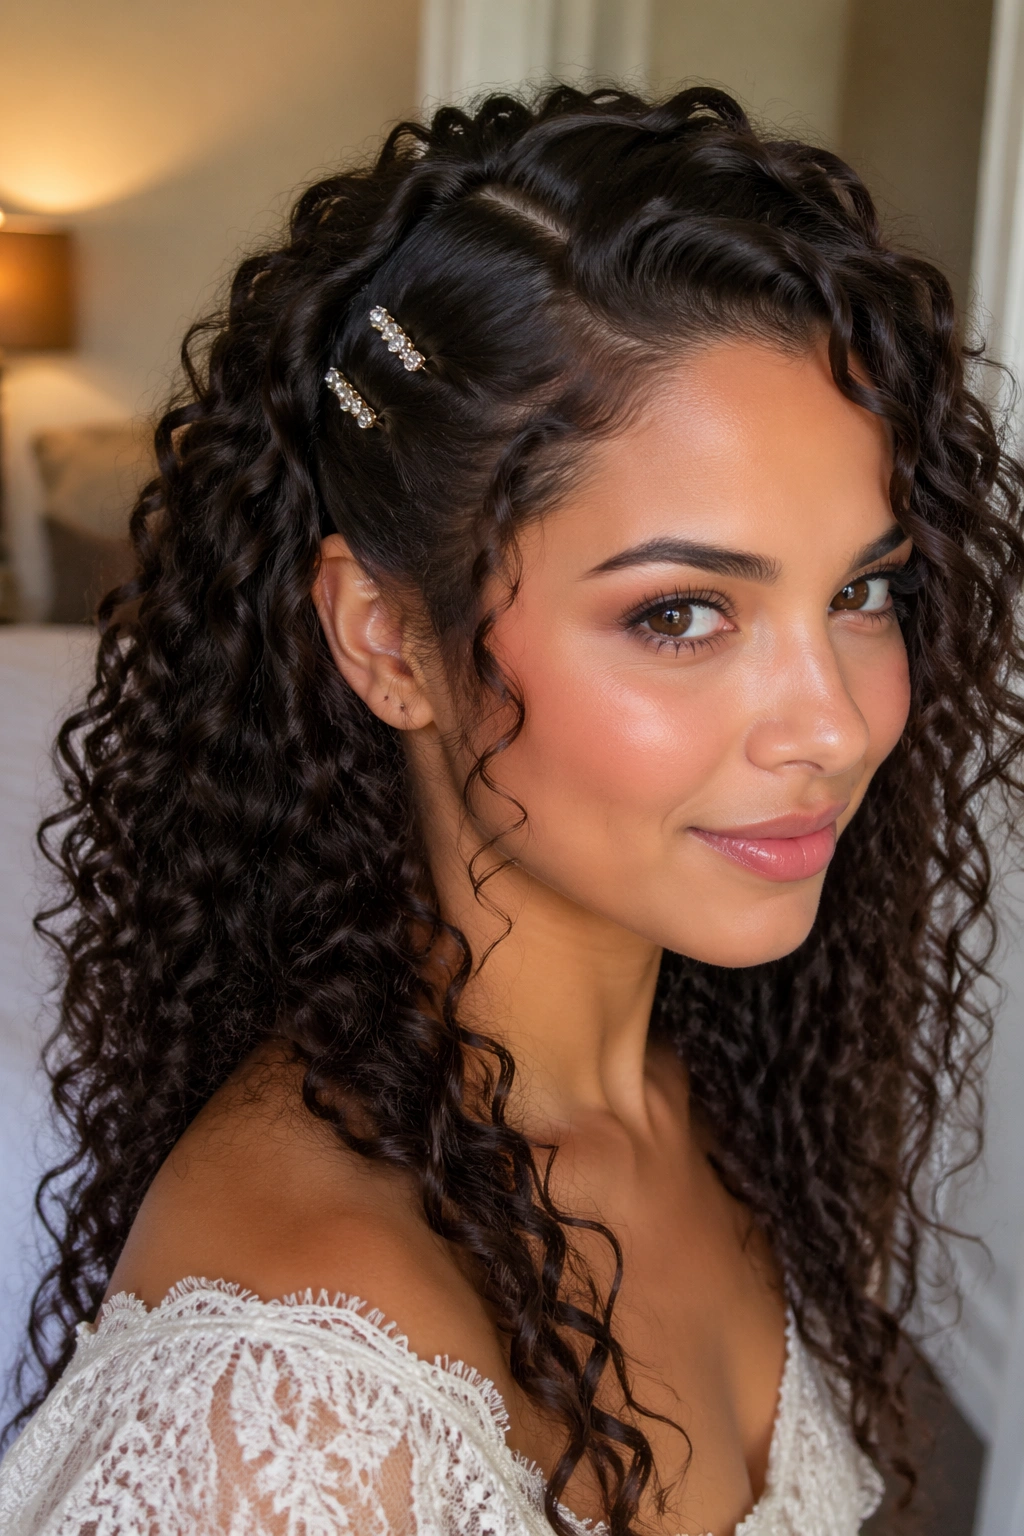
Sometimes the prettiest answer is the least complicated one. A deep side part, two or three pinned-back front sections, and a jeweled clip or two can look more refined than an elaborate updo, especially on short to medium curly hair. It is quick. It is clean. And it leaves the curl pattern front and center.
The best part is how little you have to change. You are not forcing the whole head into a shape it does not want. You are just opening one side of the face and giving the hair a little structure near the temple. That makes it a smart choice for anyone with curls that look best when they stay loose.
How to make it feel intentional
Place the first clip about 1 inch above the highest point of the eyebrow on the side you are pinning back. Add a second clip a little higher if the hair is thick or the curl pattern keeps springing forward. If the clips are decorative, let them line up along the part rather than scatter across the head.
A single clip can feel like an afterthought. Two or three in a neat line feel styled. That small difference matters more than people think.
This is also the easiest style to adjust during the day. If one curl goes wild, leave it. That is part of the look. A little imperfection suits curly hair better than a rigid finish ever will.
10. Velvet Headband Puff
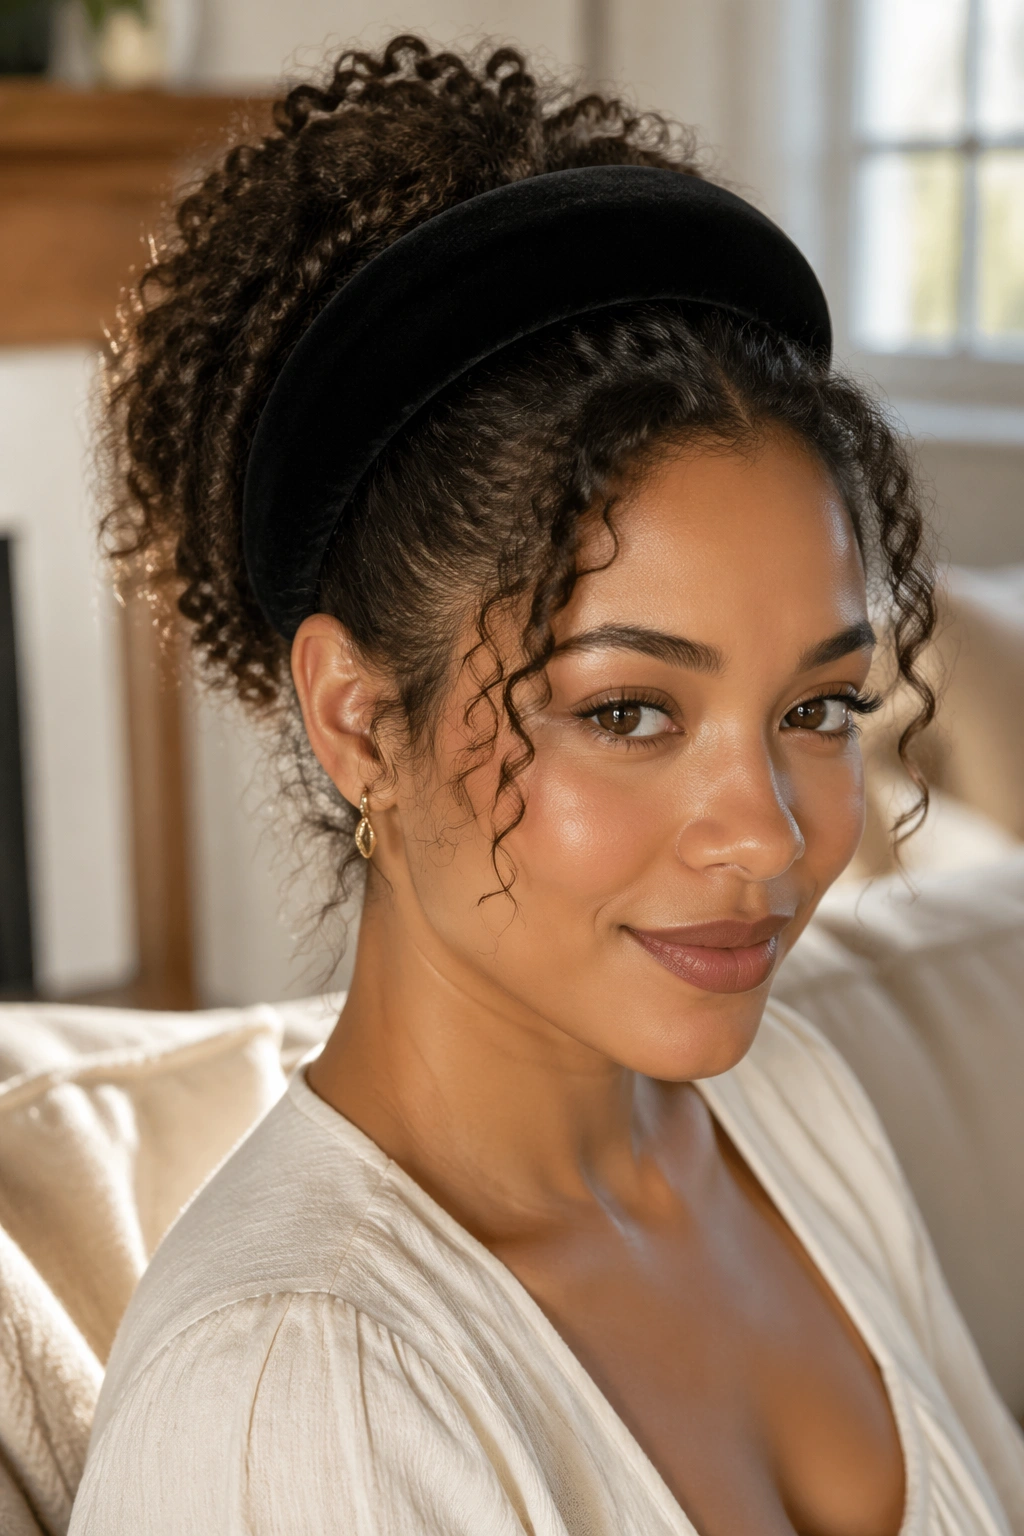
A velvet headband puff is one of those styles that looks polished without making you fight your hair. The curls are gathered into a puff, a low pony, or a half-up shape, and a wide velvet band holds the front in place while the back stays full. It has a soft, storybook feel that works surprisingly well for curly texture.
The width of the headband matters. A band that is too narrow gets lost in curls. A band that is too tight gives you a headache and presses the roots flat. I like a band with a bit of thickness, usually around 1 to 2 inches wide, because it gives the front real shape.
The puff itself should stay round and airy. Don’t brush it smooth. That’s the trap. Curls need room to expand a little, especially if the headband is doing the job of keeping the front controlled. A small amount of root lift near the crown helps the style feel regal instead of plain.
This is one of the easiest princess hairstyles for curly hair when the roots need help and the ends still look good. It is also a smart choice for second-day hair, because the headband disguises softness at the front while the back keeps its curl pattern.
11. Low Curly Chignon with Face-Framing Pieces
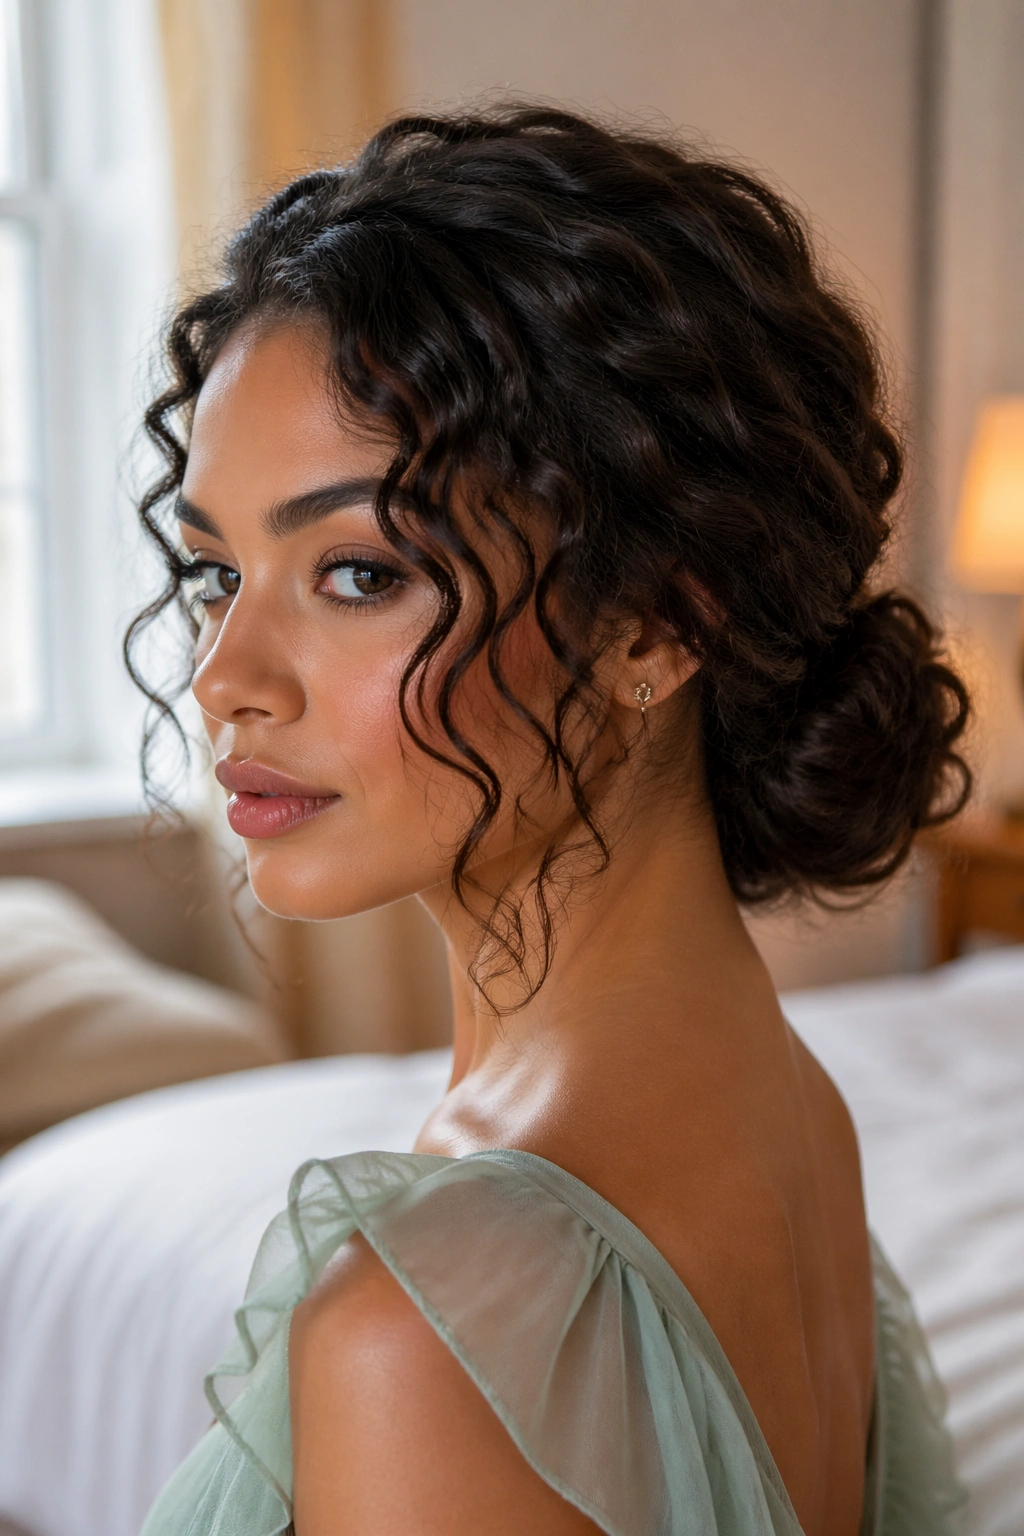
A low chignon on curly hair should never look packed down. The best version sits at the nape, keeps some texture on the surface, and lets a few face-framing pieces escape at the front. That makes it elegant without turning the curls into a hard knot.
There is a difference between a chignon and a bun that has been squeezed too tightly. A good chignon still looks like hair. You can see the bends in it. You can see where the curls fold into one another. That texture is the whole reason to wear it on curly hair instead of trying to smooth it into something else.
How to shape it
Gather the hair low and slightly off-center. Twist the lengths into a loose coil, then tuck the ends under and pin around the base with 4 to 6 pins, depending on thickness. Leave the front pieces out first, then decide how much to pull later. You can always let more hair fall around the face, but you cannot put it back once it is pinned down.
This style is especially good for formal events because it sits neatly against the neck and does not pull focus from jewelry or a neckline. Still, the front pieces should stay soft. A rigid chignon on curls can look a little severe. A textured one looks like it was meant to be there.
12. Braided Half Crown with a Bow
If you want one style that feels festive without becoming fussy, this is the one. Two braids start near the temples, curve back like a half crown, and meet at the back under a bow. The curls stay down, which keeps the style light, while the braid adds shape at the top.
A bow changes everything here. Satin feels sweet and polished. Velvet feels richer. Grosgrain feels a little more structured. The bow should sit where the braids meet, not buried under them. That placement lets it read as the finish, not an extra piece someone added late.
How to place the bow
Braid each side loosely, then secure them with tiny elastics before crossing them at the back. Tie the bow around the join, or pin the bow over the join if the ribbon is slippery. Keep the tails short if you want a cleaner look, or let them hang down for a softer finish.
This style suits thick curls, fine curls, and everything between because the braids do the framing while the bow does the decorating. It also works with simple outfits. In fact, it looks best when the rest of the look is not too busy. Let the curls and the bow do the talking.
The Bottom Line
The strongest princess hairstyles for curly hair do not erase the curl pattern. They frame it, lift it, and give it a little structure where it needs support. That is the real trick. Not control. Shape.
If you remember only one thing, make it this: soft hold beats hard hold almost every time. Curls usually look richer when they can move a little, especially around the face and crown. A braid can be loose, a twist can be airy, and a bow can be the final piece without doing all the work.
Pick the style that matches the hair’s length, density, and curl type. Then choose one accessory and use it well. That combination tends to look far better than a crowded head of pins and a stressed-out curl pattern.