A fresh curl-out and a six-hour dinner rush do not get along.
That is why server hairstyles need a different standard than the cute looks you save for a day off. A style has to stay off your face, keep hair out of food, survive heat and sweat, and still look neat when you are carrying plates in one hand and refilling water with the other. On curly hair, that usually means a secure base, low-friction accessories, and less fiddling than you think you need.
Pretty is not the job.
The styles that earn their keep are the ones that hold their shape after a humid patio section, a hot pass, and one accidental brush against a door frame. I like looks that leave some curl texture visible, because curly hairstyles can get flattened into something stiff if you over-control them. You want control, not helmet hair. And if a style needs a touch-up every ninety minutes, I skip it.
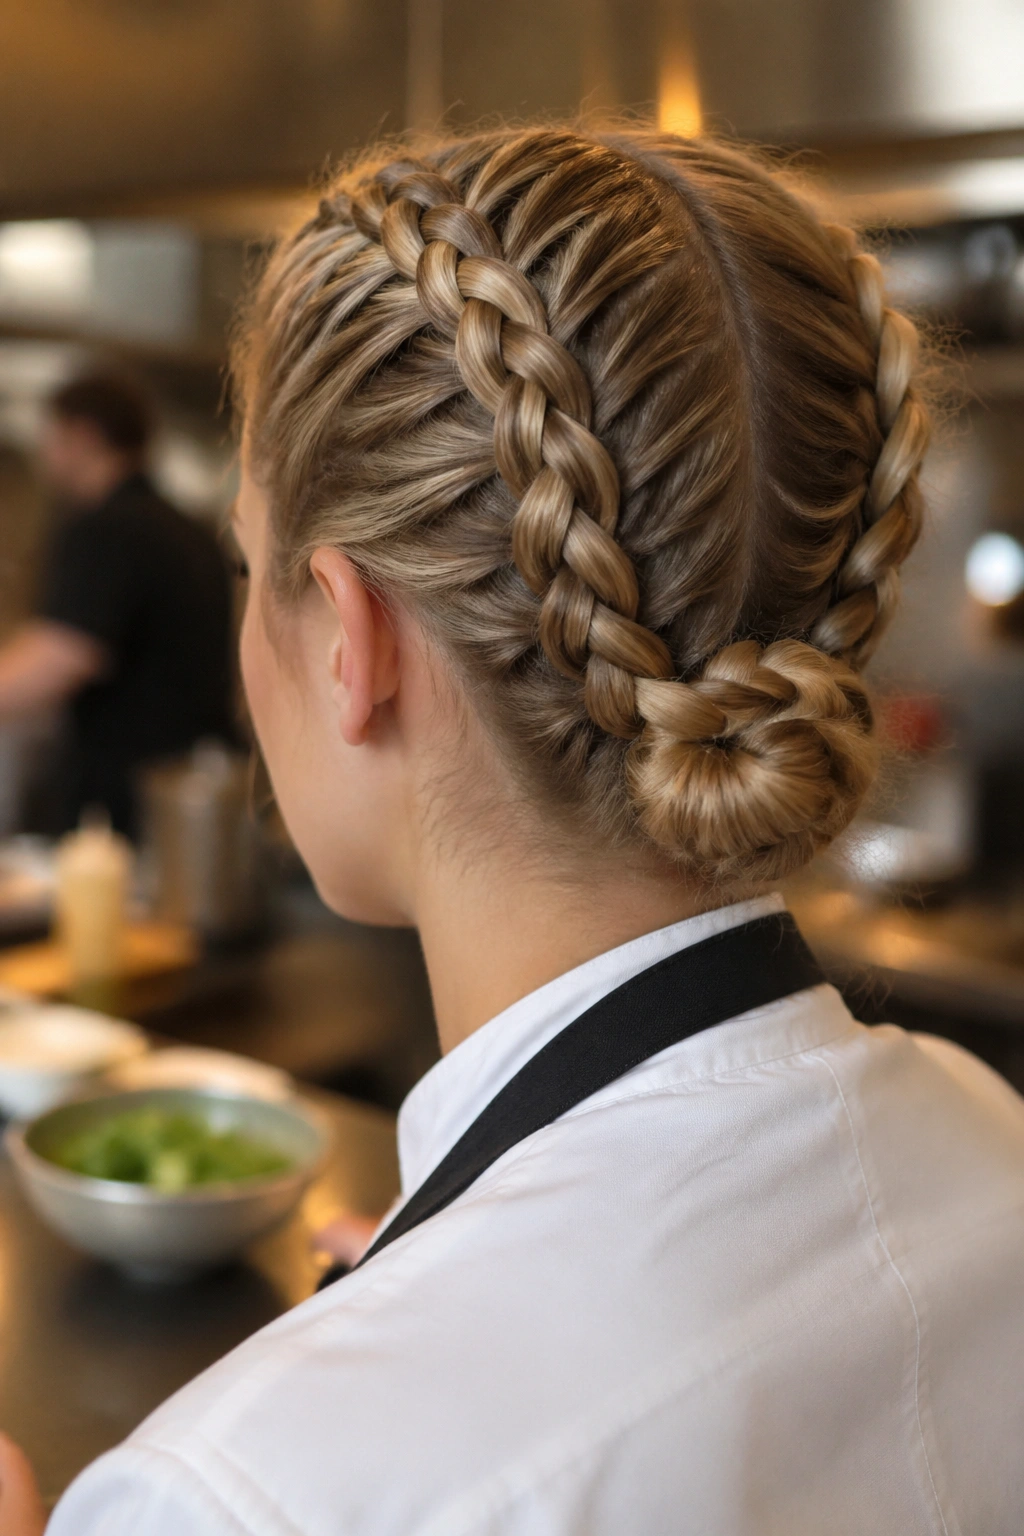
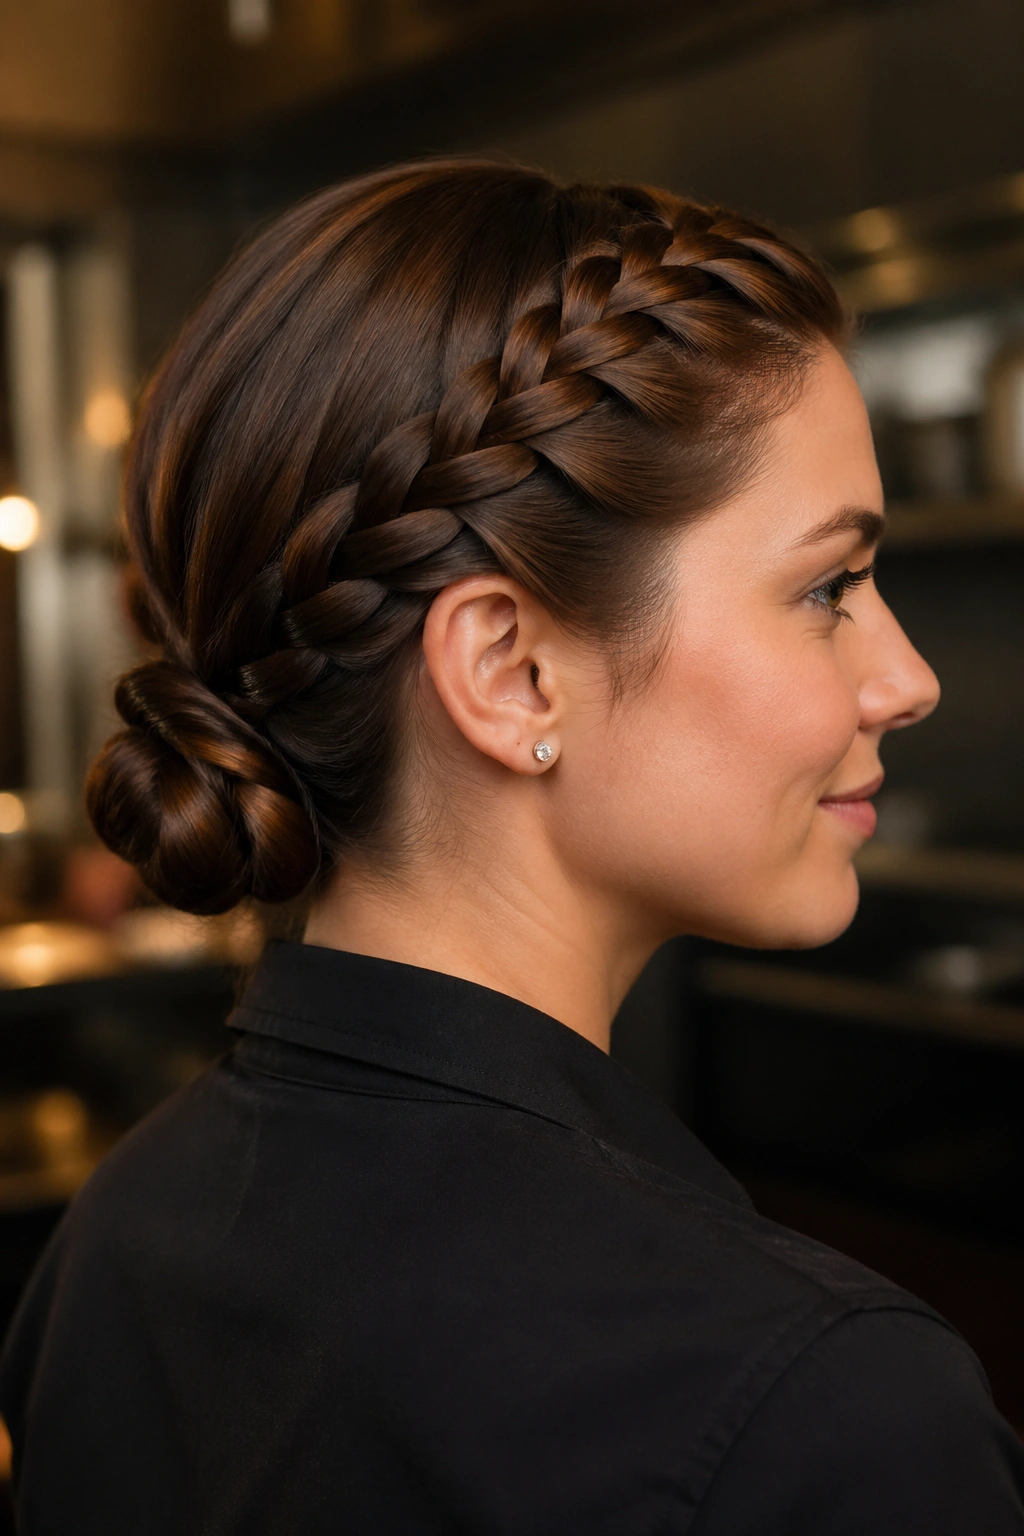
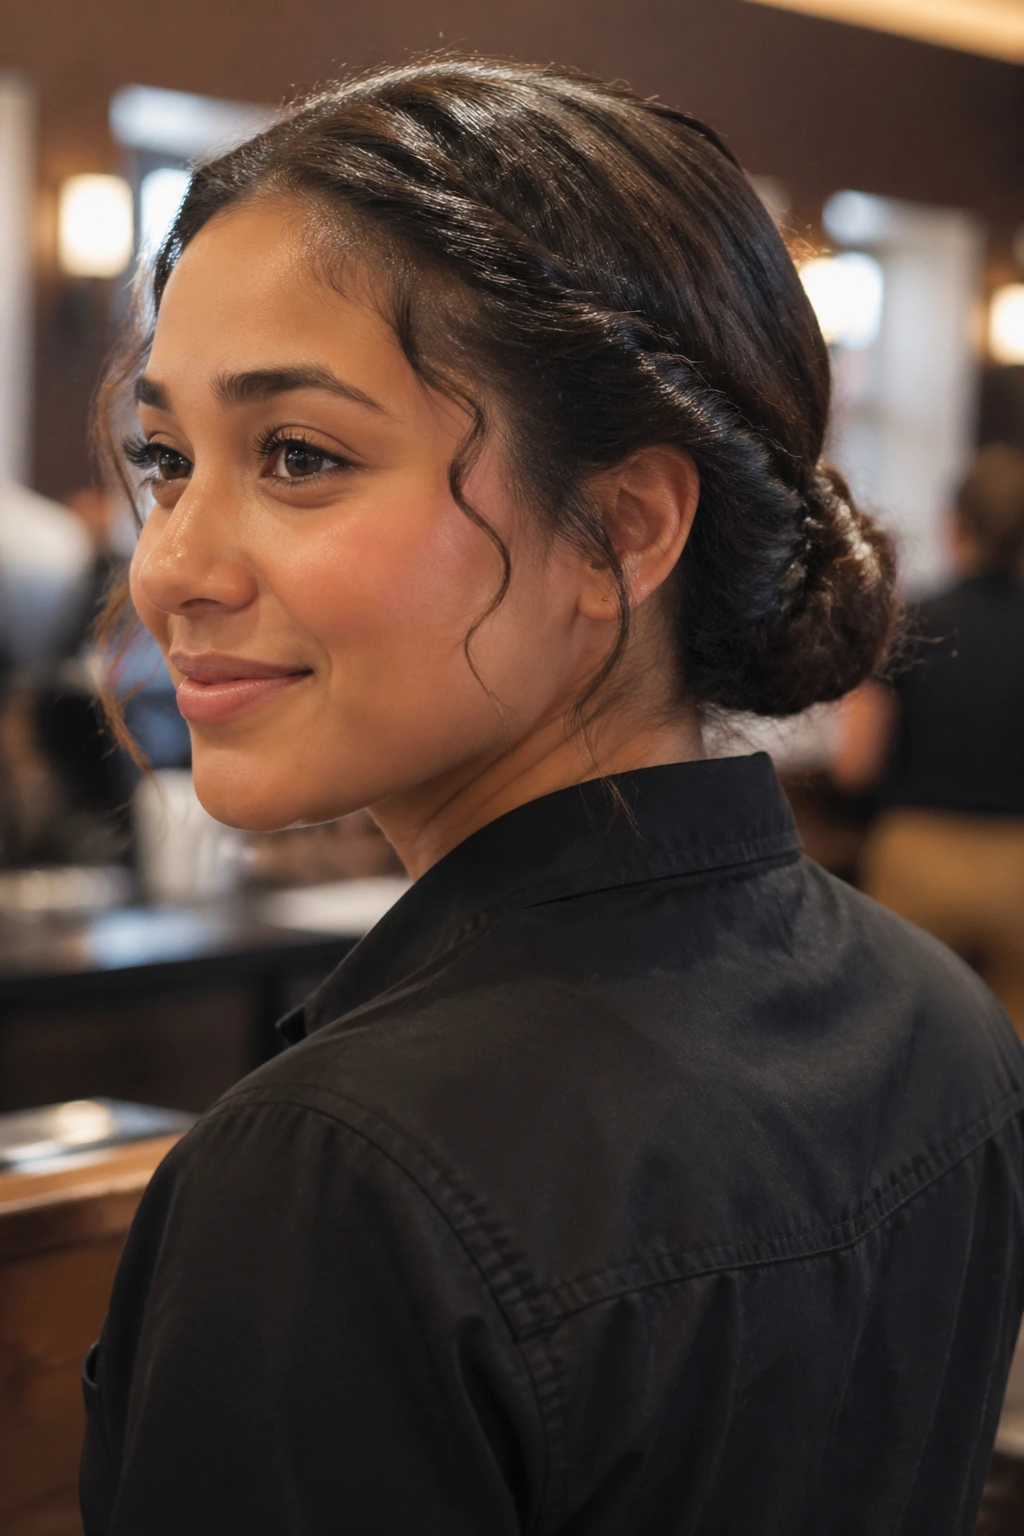
1. Low Braided Bun at the Nape

This is the one I reach for when curls are thick, long, and a little too eager to spring loose. A low braided bun keeps the weight at the nape instead of the crown, which matters when you are leaning, turning, and moving fast. It also looks more finished than a plain bun, even if you only have five minutes and a mirror that is not very forgiving.
The braid is doing more work than it looks like it is doing. Once the length is braided, the hair stops behaving like a cloud of separate curls and starts acting like one compact rope. That makes the bun easier to pin down, and it gives you a base that does not puff out halfway through the shift.
Why It Holds So Well
A braid spreads tension across the length of the hair instead of dumping it all into one elastic band. That is a big deal on curly hair, especially if your strands are dense or layered. A single ponytail can loosen at the root, but a braid stays snug longer because the sections support each other.
I like this style best with a light leave-in and a small amount of gel at the hairline. Keep the braid low and flat, then coil the end into the bun and pin it with two crossed bobby pins or two U-pins. If your curls are very springy, tuck the ends under the coil instead of leaving them loose. Loose ends are the first thing to frizz.
- Best for shoulder-length to long curls
- Works well on day-two hair
- Usually needs 6 to 8 pins, not 20
- Sits cleanly under a cap or visor
- Takes about 5 to 7 minutes once you have the motion down
Use one strong elastic at the base and stop there. Too many bands make the bun bulky, and bulky buns start sliding once you sweat.
2. High Pineapple Puff with a Wrapped Base

A high pineapple puff is the fastest style here that still looks intentional. It keeps the curls off your neck, shows your texture, and takes almost no styling once you know where to place the band. If your workplace is warm or you end up in and out of the kitchen a lot, this one is a lifesaver.
The trick is not making it too high. Too high turns into a wobbling top knot that gets bumped by everything. Keep the puff centered or slightly forward, so the curls sit like a soft halo without feeling top-heavy. A satin scrunchie works better than a thin elastic because it grips without chewing up the curl pattern.
I like to wrap the base with a small section of hair or a narrow scarf if the dress code allows it. That little wrap makes the style look deliberate, not rushed. It also hides the band, which is useful on curly hair because a visible elastic can make the whole thing look unfinished.
The puff itself should stay loose enough to keep volume but tight enough that the front is calm. If you pull too hard, the roots can ache by the middle of a double. If you pull too softly, the puff slides. There is a narrow middle ground here, and once you find it, the style is stubborn in the best way.
3. Two Dutch Braids Into a Low Knot
Why does this hold better than one braid? Because two Dutch braids divide the weight and keep the shape balanced instead of letting one heavy section do everything. On dense curly hair, that makes a real difference by the end of a shift. The style stays low, the scalp feels less tugged, and the whole thing looks neat from the front and back.
Dutch braids are a little more visible than French braids because the sections sit on top of the hair instead of sinking inward. That makes this style look crisp, which I like for polished uniforms and busier dining rooms. Once both braids reach the nape, twist the tails together into a knot and pin them flat.
How to Wear It
Start with a center part if you want symmetry, or a deep side part if your face shape likes a little softness. Braid each side tightly enough that the roots are controlled, but do not yank the hair so hard that your scalp feels sore. Sore styles do not last long. People touch them. Then they loosen.
- Best for thick, coily, or frizz-prone hair
- Good for shifts with a lot of bending and lifting
- Stays flatter than a single high braid
- Works under hats better than loose twists
- Uses fewer pins if the braid tension is even
A tiny bit of edge control at the hairline is fine. A heavy layer is not. Too much product near the front can flake once the room gets warm, and that is a bad trade for a style that is supposed to look clean.
4. Half-Up Crown Twist with Loose Curls
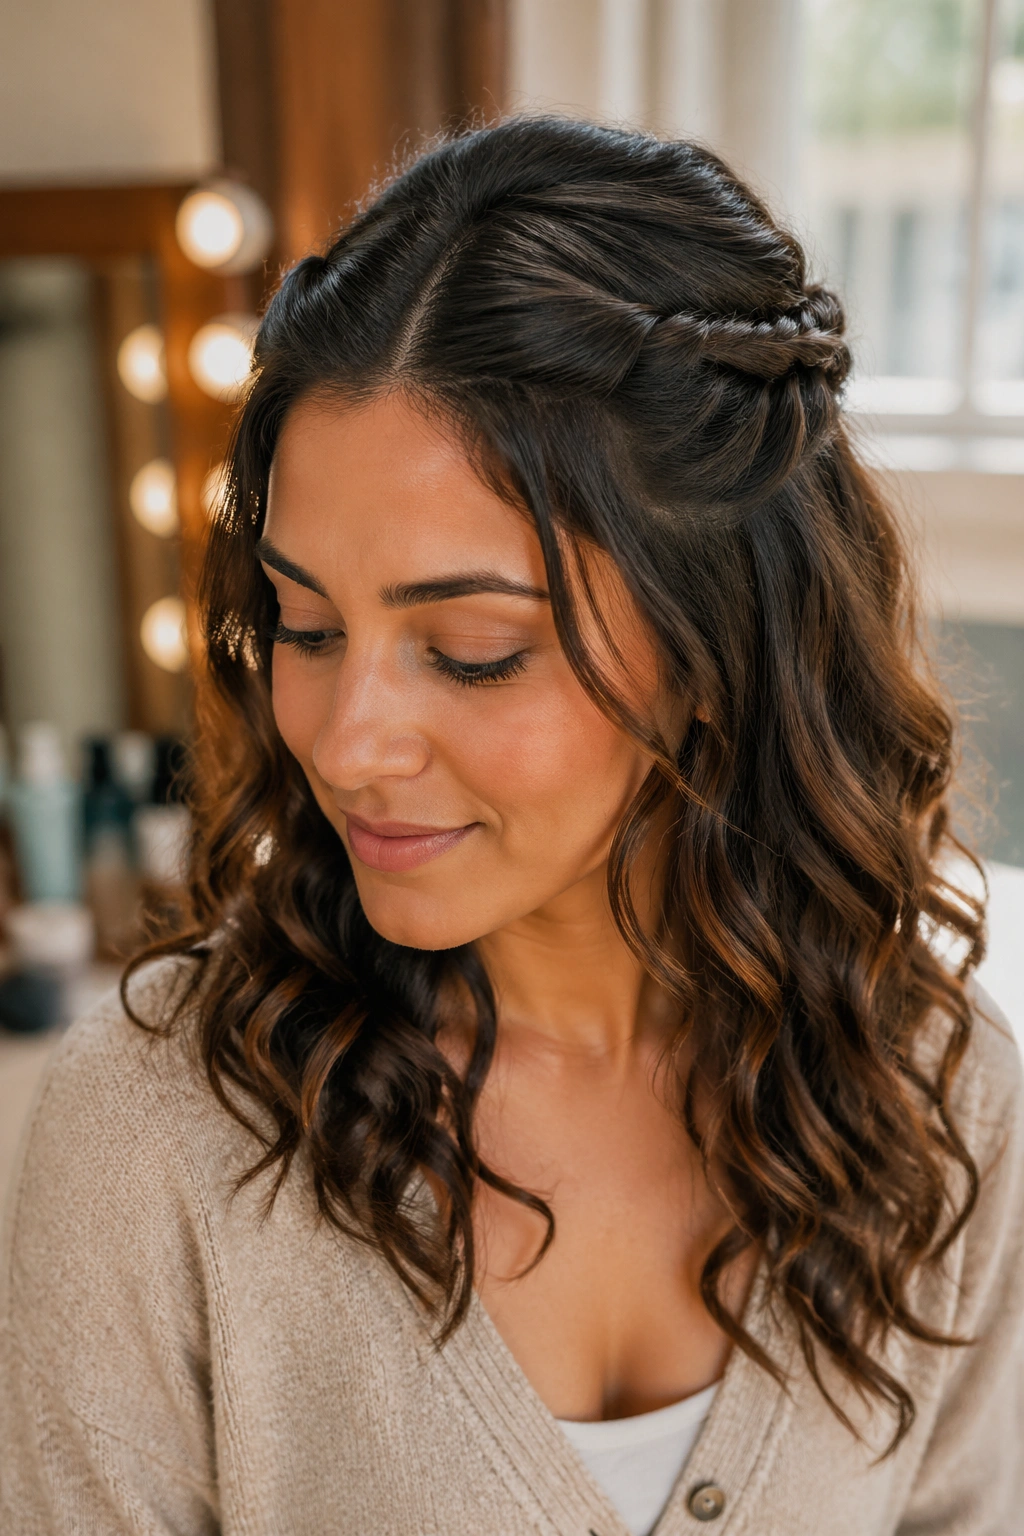
Some shifts call for control at the front and movement everywhere else. This is that style. The half-up crown twist keeps your face open, lets the lower half of your curls stay visible, and gives you a softer look than a full updo. It is a good choice when you want your hair to feel like yours, not like it has been recruited into a uniform.
The crown twist works because it removes the pieces most likely to fall into your eyes or onto your cheeks. You twist back two front sections, meet them at the back of the crown, and secure them with strong pins. The lower curls are left alone, which keeps the style from looking stiff. That part matters more than people think.
Use this one when your curls still have shape from a previous wash day. It looks best when the loose section has some definition, not when it has already puffed out into a cloud. A little curl cream on the ends can keep the bottom half from fuzzing up under heat, but do not pile product on the front twists. That is how you end up with greasy roots and flat hairline pieces.
- Best for shoulder-length curls and longer
- Good for brunch or dinner service
- Needs 4 to 6 pins at the crown
- Holds better when the front sections are slightly damp, not wet
- Works well if you want to show off curl pattern
One thing I like about this style is that it looks a little softer at the end of a long shift. It may not be as armored as a full braided updo, but it ages better than a lot of sleek styles.
5. Side-Part Low Puff with Gelled Edges
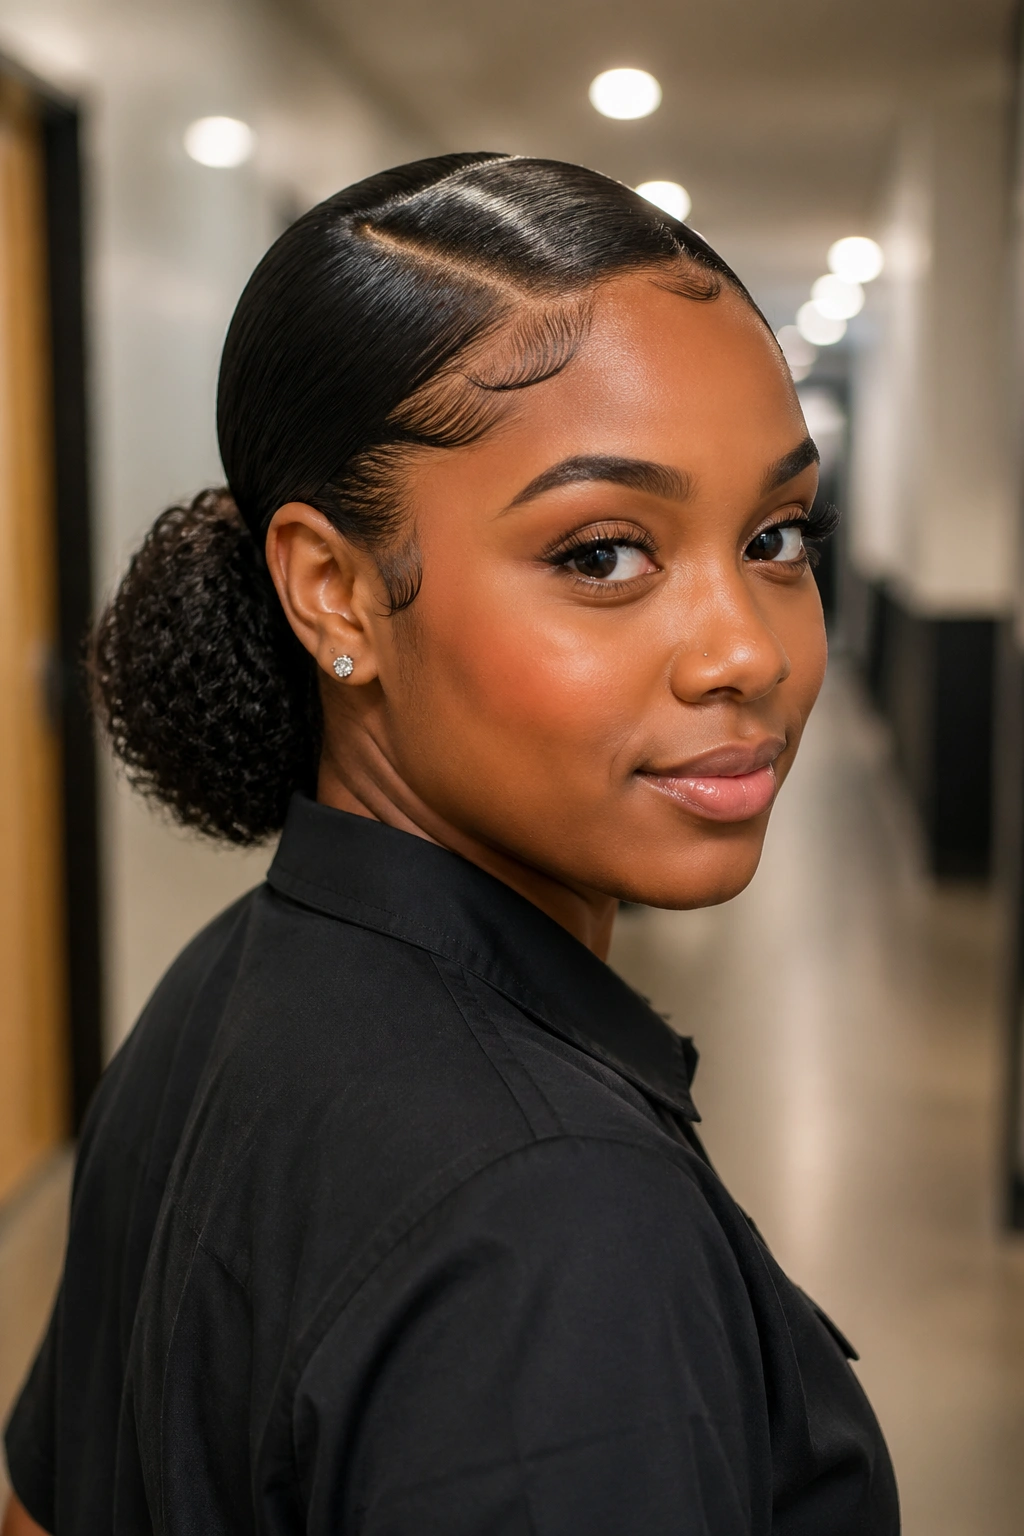
A side-part low puff can look more polished than a tight bun when the part is clean and the crown stays smooth. That is the version I trust for curly hair that likes volume but still needs to stay controlled. It gives shape without crushing the curl pattern, and it sits neatly at the nape where it will not keep bumping into collars or apron straps.
The side part does a lot of the visual work here. It draws the eye across the face and makes the puff feel styled instead of improvised. If your roots are very dense, brush or smooth only the top layer, then gather the hair low and let the puff sit compactly at the back. You want fullness, not a balloon.
Edges are where this style can go wrong. A light touch of gel or edge cream is enough. Too much and the hairline starts to look crunchy, then the first bit of sweat turns it tacky. I prefer to smooth the front with a soft brush, pin the puff low, and leave the rest alone unless the flyaways are truly unruly.
Less gel, more control.
This style is not the one I would choose if you hate product near your hairline. It is, however, one of the better server hairstyles for curly hair when you want a clean look that still feels like your own hair. The puff keeps breathing room at the back, which matters during long, hot shifts.
6. French Braid Into a Coiled Bun

Unlike a plain three-strand braid, a French braid starts at the scalp and keeps picking up hair as it goes. That means the style stays anchored from the top down instead of depending on one tight elastic at the bottom. On curly hair, that extra anchor point makes the whole thing feel more secure.
I like the French braid into a coiled bun for long shifts because it keeps the crown smooth and the length locked together. The braid can begin at the front hairline or just behind the part, then travel down toward the nape where you coil the rest into a bun. It is tidy, but not severe, which is a nice balance in front-of-house work.
This one suits people whose curls are layered or heavy enough to slip out of other updos. It also works well if your hair has a bit of second-day texture, because that texture gives the braid more grip. Freshly washed curls can be too slippery. That is not a moral failing. It is just hair.
If you are braiding your own hair, keep the sections even and do not rush the first few passes. Once the braid gets going, it is easier to manage. The bun at the bottom can be pinned with two U-pins and one bobby pin, and that is usually enough unless your hair is extremely dense.
7. Claw-Clip Shell Twist
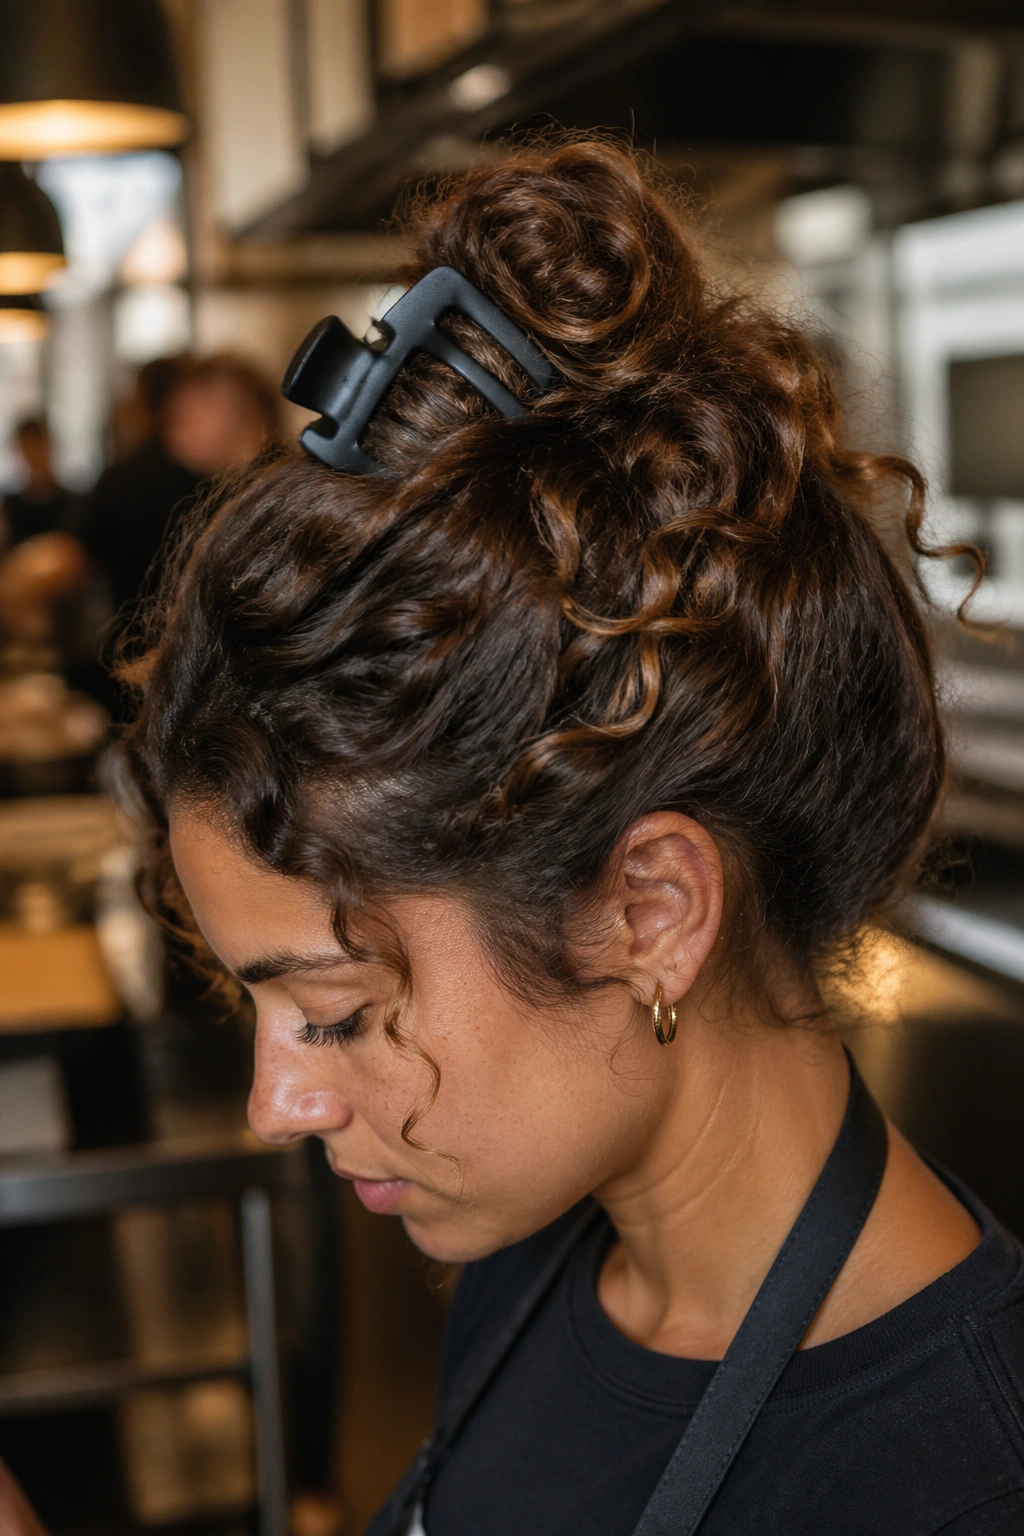
This is the fastest style in the group, and that is the whole reason it deserves a spot. A good claw-clip shell twist can save you on days when the shift starts faster than your hair cooperates. It is especially useful for curly hair that has enough length to twist but not enough patience to be braided from scratch every time.
How to Make the Clip Behave
The clip matters. A wide-toothed, medium-to-large clip grips curls better than a tiny decorative one that looks cute and then gives up. Twist the hair upward first, fold the length under so the ends tuck inside the shell, and clamp the clip over the thickest part of the twist. If the clip only catches the outer layer, it will slide.
A matte clip usually behaves better than a slick plastic one, especially on finer curls or hair with a lot of slip from leave-in products. If your hair is very dense, use the clip as the main anchor and add one pin under the twist for backup. That little pin is not glamorous. It does matter.
- Best for medium to long curly hair
- Takes under 2 minutes when you are practiced
- Good for quick changes before clock-in
- Works better on dry or mostly dry hair
- Easier with a clip that is 3.5 inches or wider
If the clip slips, the style was not built tightly enough at the base. Do not blame the clip first. Most of the time, the twist needs to be flatter before you clamp it.
8. Headband Tuck and Pin
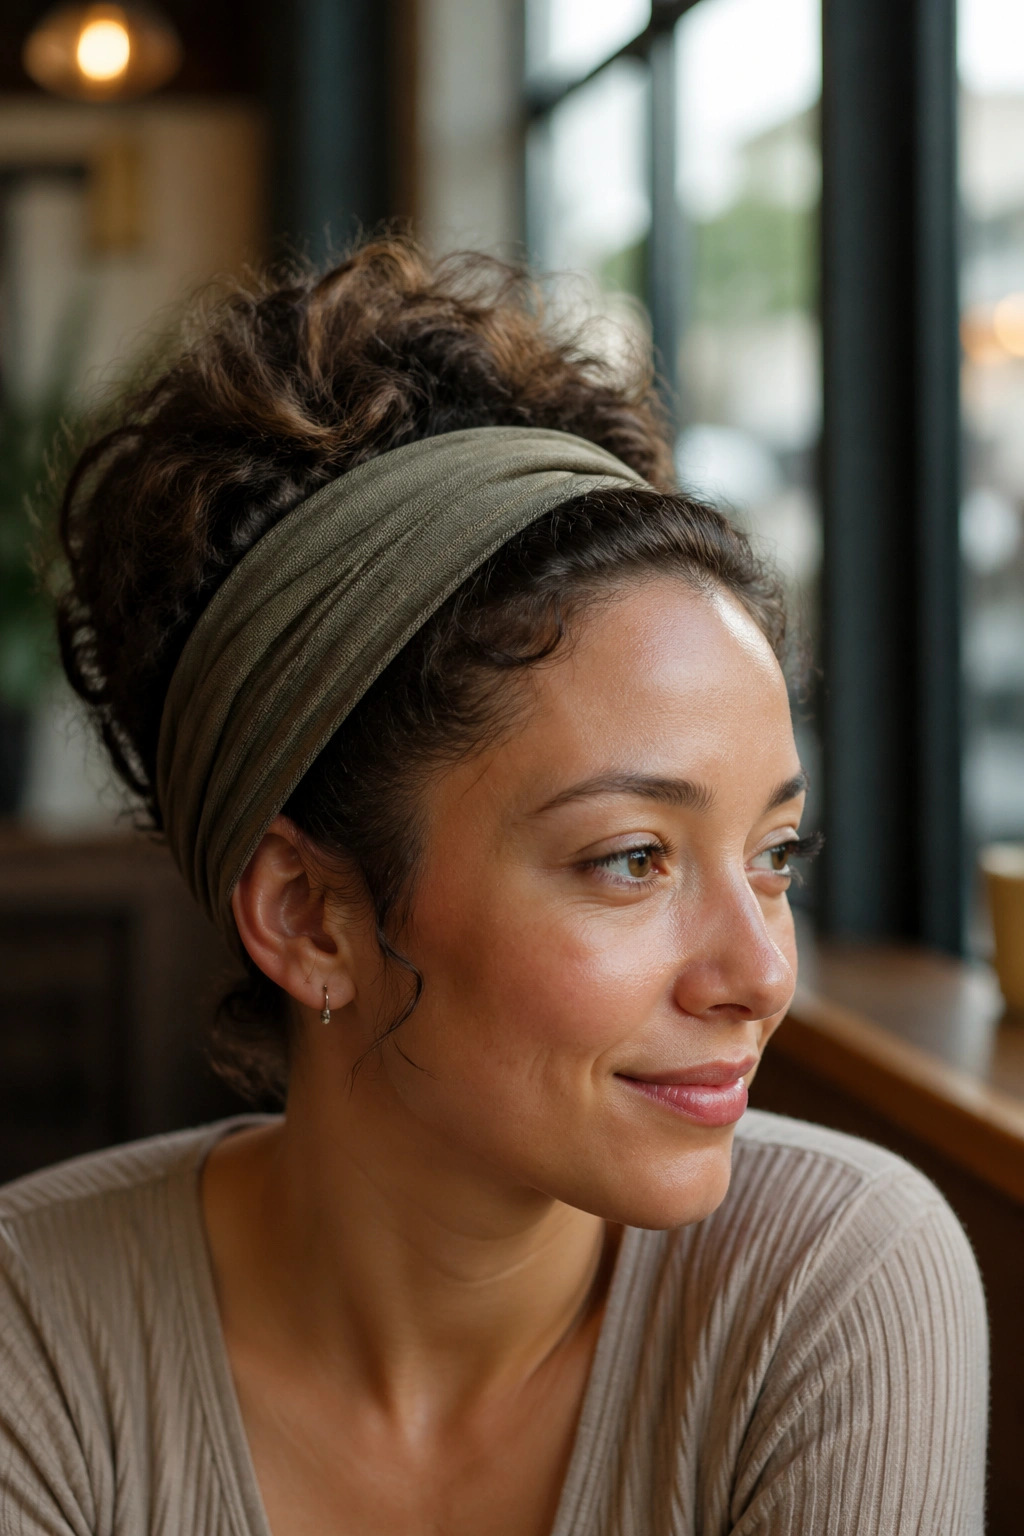
Can a headband hold up for a real shift? Yes, if you choose the right one and do not treat it like decoration. The best version here uses a wide fabric headband, tucked curls, and a few pins hidden underneath. It is one of the few fast styles that can look soft without becoming sloppy.
The band should be wide enough to sit comfortably across the crown without digging in. I like fabric bands with a little grip on the inside, because smooth plastic bands tend to creep back once sweat starts. Place the band a little behind the hairline, then tuck the front and side curls up and under it so they sit neatly against the head.
What Makes It Stay
The pins are hidden in the work, not the look. Slide them upward under the band so the curled ends stay tucked and the band has something to bite into. If you pin downward, the hair can slip. That tiny angle change makes a bigger difference than most people expect.
This style works especially well for shorter curls, shoulder-length cuts, and people who hate heavy buns. It is also useful when your hair has too much texture for a slick low ponytail but not enough length for a full braided updo. I would not choose it for the most formal dining rooms unless the headband itself is simple and understated. A loud band can pull attention in the wrong direction.
9. Side-Swept Braid Into a Ponytail Coil
A side-swept braid is one of those styles that quietly fixes the things curly hair likes to do at the sides of the face. The front pieces stay tucked away, the braid creates a clean line, and the ponytail coil at the back keeps the rest of the hair from bouncing around. It is tidy without feeling severe.
I like this one for layered curls because the braid controls the shorter pieces that usually escape first. Start with a deep side part, braid the heavier front side back toward the ear, then gather the rest into a low ponytail. From there, twist the ponytail into a coil and pin it flat. You get structure at the front and a neat finish at the nape.
There is a nice side effect here: the braid softens the look around the face, which keeps the style from feeling too pulled-back. That matters if you wear it for many hours. Hair that is too slick often starts to feel like a helmet by the end of the night. This one moves a little.
- Best for medium to long hair with layers
- Good for people whose side pieces frizz first
- Needs 5 to 7 pins if the hair is thick
- Holds better when the braid starts close to the hairline
- Works under a hat if the coil stays low
If your ends are especially dry, put a tiny bit of cream on just the last few inches before coiling. That keeps the ponytail from turning fuzzy where it sticks out of the pin line.
10. Flat Twists Into a Sleek Chignon
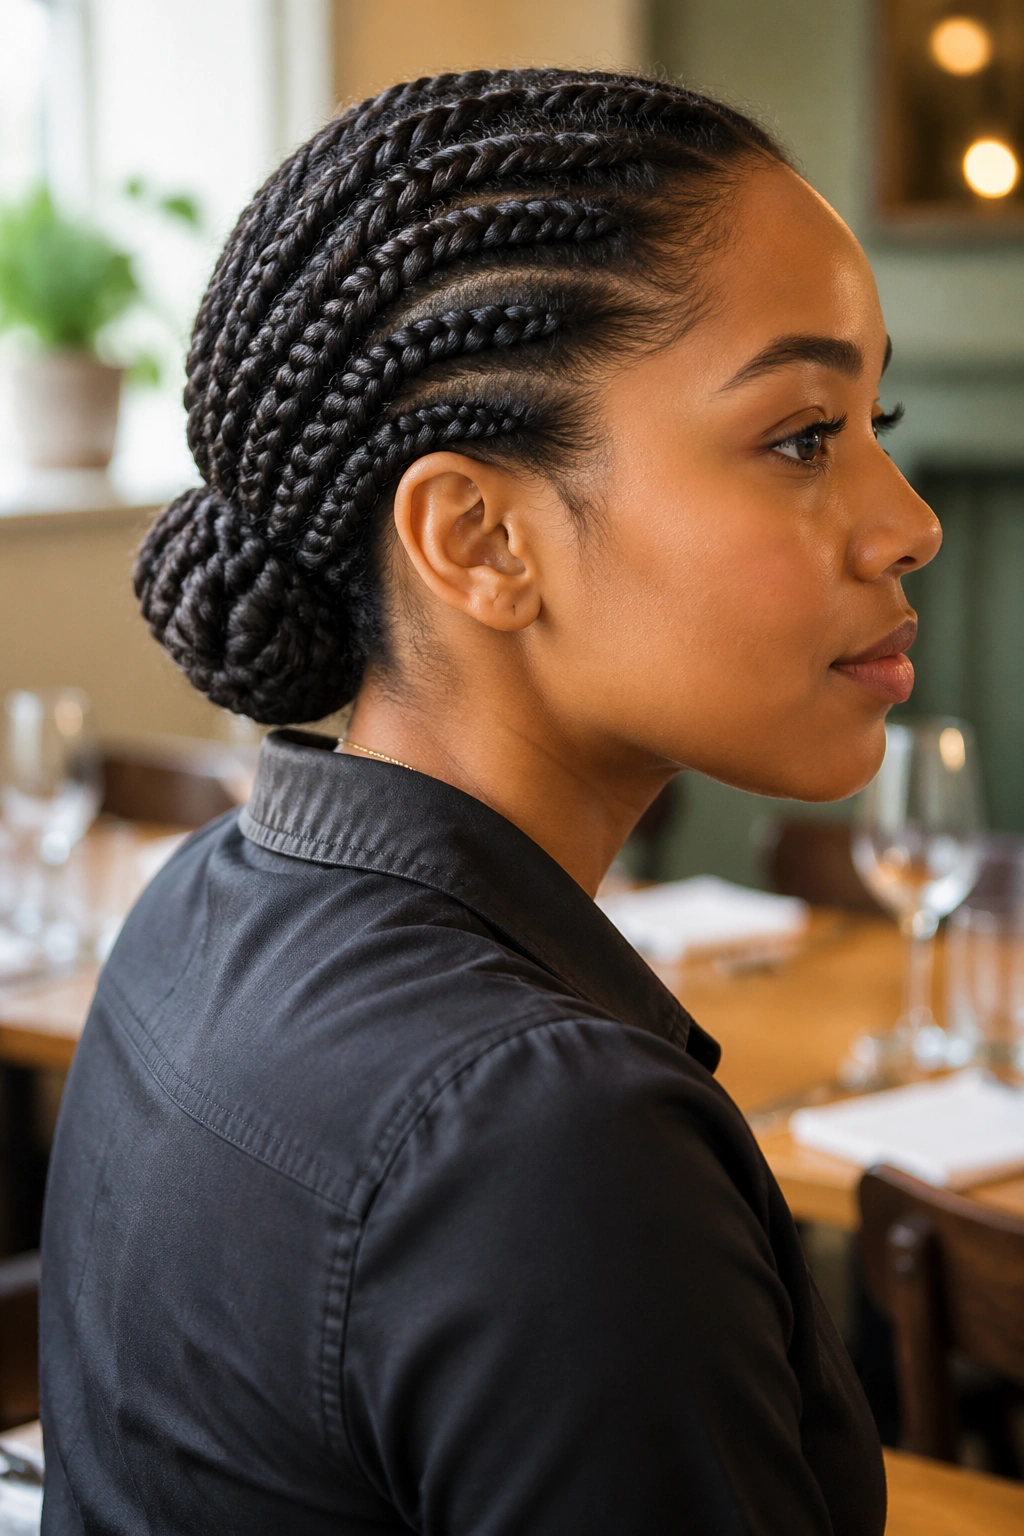
Flat twists sit flatter than loose braids, and that is why they are so useful for server hairstyles that need to stay neat from clock-in to close. They hug the scalp, keep bulk low, and create a smooth base that does not puff up as easily as a looser style. On curly hair, that stability is worth a lot.
This is one of my favorite looks for formal rooms because it manages to feel controlled without looking overworked. The twists can run from the front hairline back toward the nape, where they feed into a chignon. The chignon itself should sit low and compact, almost like a tucked coil rather than a dramatic bun. Big buns start arguing with apron ties and collar seams.
Tension matters here. Pull the twists snug, but not so tight that your scalp feels tender. Tender roots are a problem by the second hour, and nobody wants to spend a shift thinking about their hairline. A little cream through the twists keeps them smooth, while a touch of gel at the roots helps the front stay clean.
If your hair is very dense, this style takes a few extra minutes. That is the trade-off. The payoff is that it stays put with fewer emergency pins, and it wears well under caps, visors, or a required hairnet. For curly hairstyles that need to look polished and stay that way, this one is hard to beat.
11. Rolled Gibson Tuck
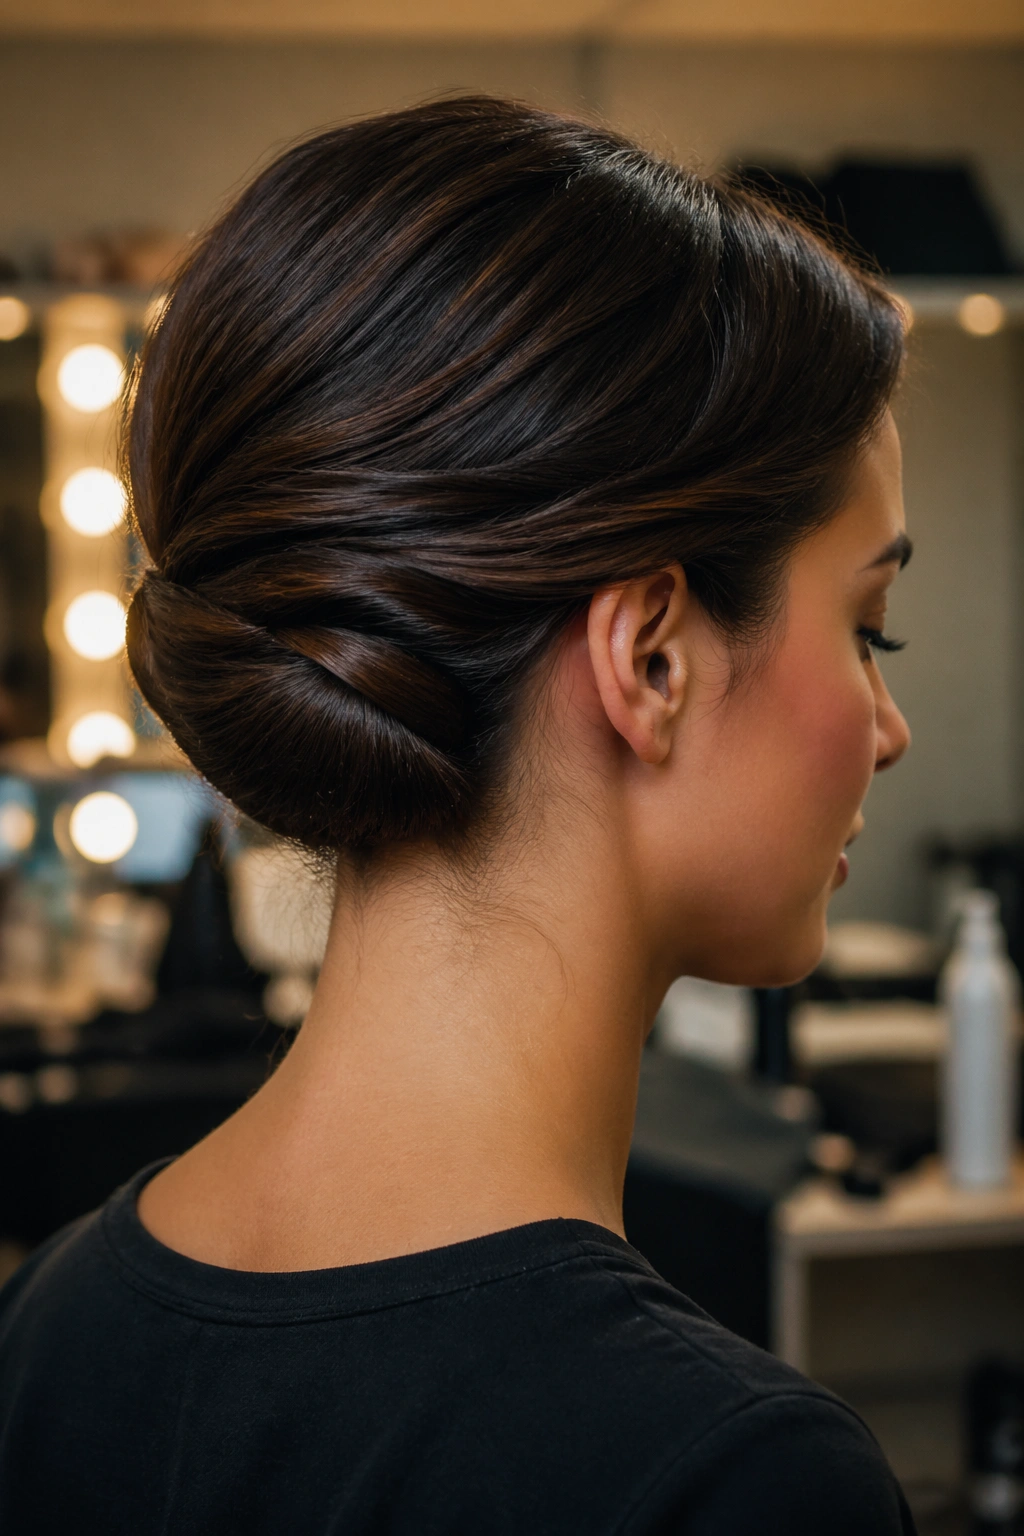
If your hair hits the shoulders or collarbone, the Gibson tuck gives you a neat shape without needing a mountain of pins. It rolls the length inward, which keeps the curls protected and the neckline clear. The look has a little old-school charm, but the real reason to wear it is simple: it holds.
I like this style for medium-length curls that are too short for a full bun and too long to leave loose. You can start with a stretchy headband or a small band at the crown, then tuck the length upward and under until it forms a rolled pocket. Pins go along the fold, not scattered everywhere. That is what keeps the line clean.
Best for Medium-Length Curls
The Gibson tuck behaves best when the hair has a little texture. Fresh, slippery curls can slide out of the roll, while second-day curls tend to grip better and stay tucked. If your ends are dry, smooth a tiny amount of cream through them before folding the hair under. The tuck will look softer, and the ends will not fray as easily.
- Best for shoulder-length curls
- Good for more formal service uniforms
- Sits low and keeps the neck open
- Needs fewer pins than a full chignon
- Not ideal for very short layers
The downside is that very short layers can escape around the sides. If your haircut is full of shorter pieces, you may need a few extra pins near the temples. Still, when it works, it looks clean in a way that feels effortless without actually being loose. There is a difference, and you can usually tell.
12. Quick Low Twist Bun
When you are five minutes from clocking in, stop trying to be fancy. A quick low twist bun is the style I use when the mirror time is short and the apron is already on the hook. It is simple, secure, and a lot better than walking out with loose curls that will end up in your eyes by the second table.
Split the hair into two sections, twist each one toward the nape, then wrap both twists together into a low bun. The individual twists give the bun grip, which is why this holds better than a bare loop of hair. Pins go in where the twists cross, not at random around the outside. That placement matters more than pin count.
The style works on almost any curl pattern, from looser waves to dense coils. If your hair is very frizzy, smooth only the outside layer with a little cream or gel before you twist. Do not chase every flyaway. You will waste time, and the shift will start anyway. A neat shape is enough.
Keep a tiny kit nearby if you can: 4 U-pins, 2 strong bobby pins, 1 satin scrunchie, and a travel-size smoothing cream. That kit covers almost every last-minute fix without turning your station into a vanity. My favorite part of this style is that it looks calm even when your day is not. It earns its place because it does the job, then gets out of the way.