A curly bun can look polished in five minutes or look like you wrestled it into place. The difference is not luck. It’s the hairline, the tension at the roots, and how much of your curl pattern you let show on purpose.
Sleek curly bun hairstyles work because they give you contrast: smooth at the scalp, texture in the bun, and enough softness around the edges to keep the style from feeling stiff. That contrast is what makes the whole thing read as intentional. A little gel, a firm brush, and a few well-placed pins can do more than a pile of product ever will.
The trick is not to flatten every curl into obedience. That usually ends badly. A good curly bun keeps the roots neat, stretches the hair enough to tame frizz, and leaves the bun full enough to look alive instead of helmet-like.
Some versions are clean and formal. Some are softer and easier to wear on a regular day. The styles below lean into different placements, parts, and curl textures, because a sleek bun on loose waves behaves differently from one on tight coils. The details matter.
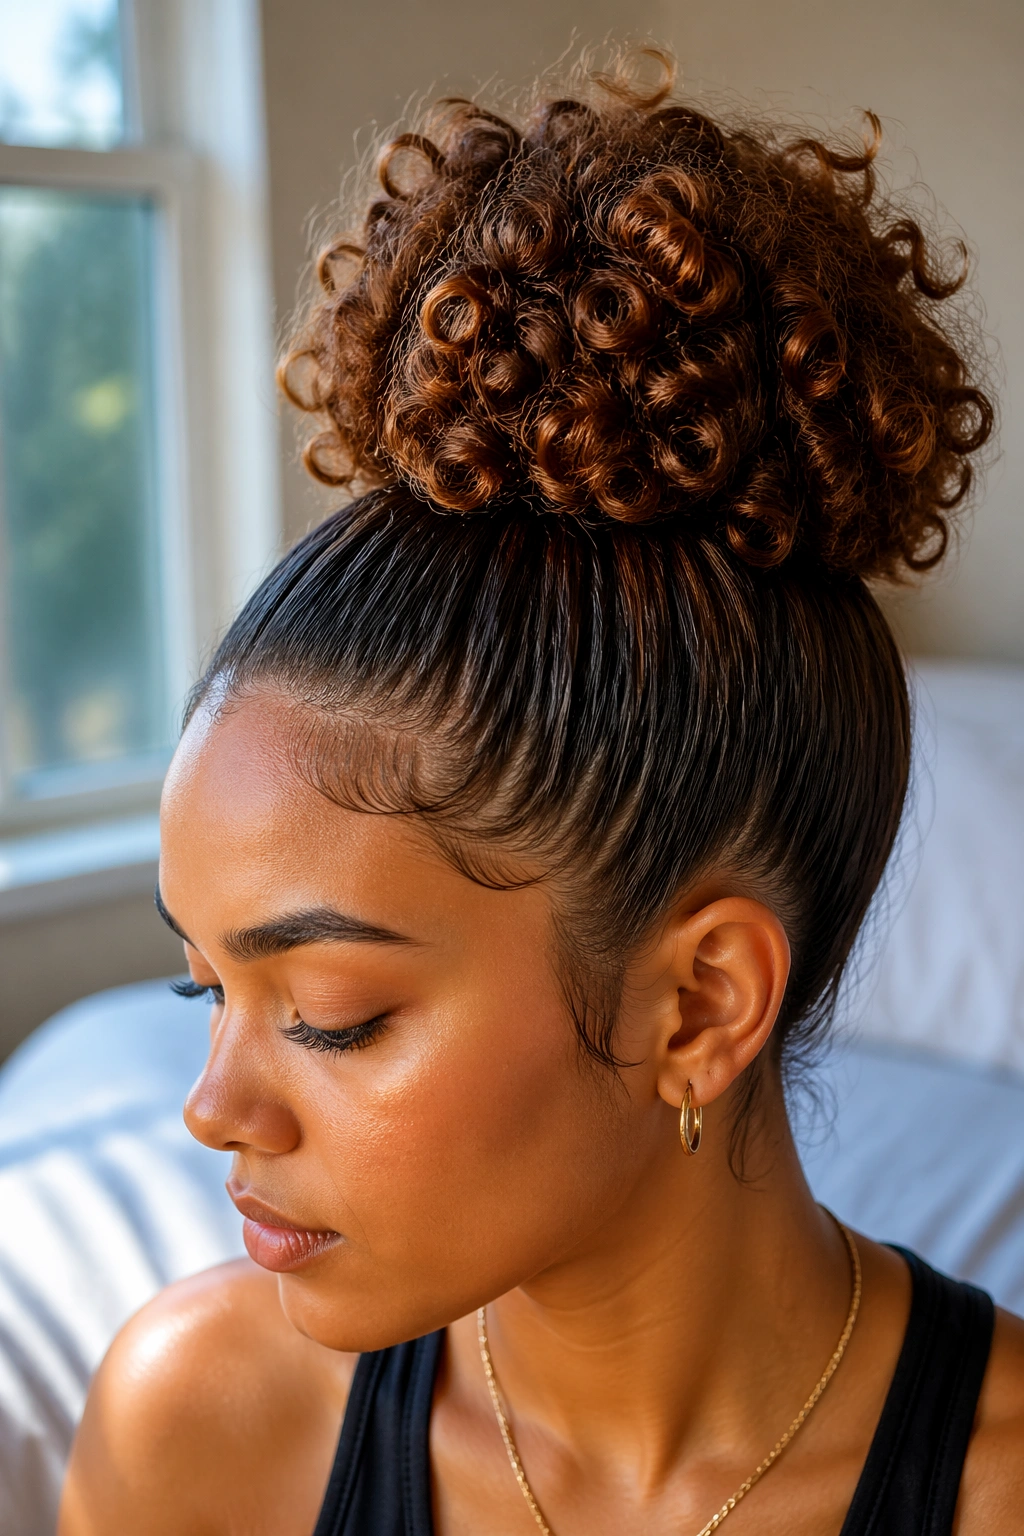
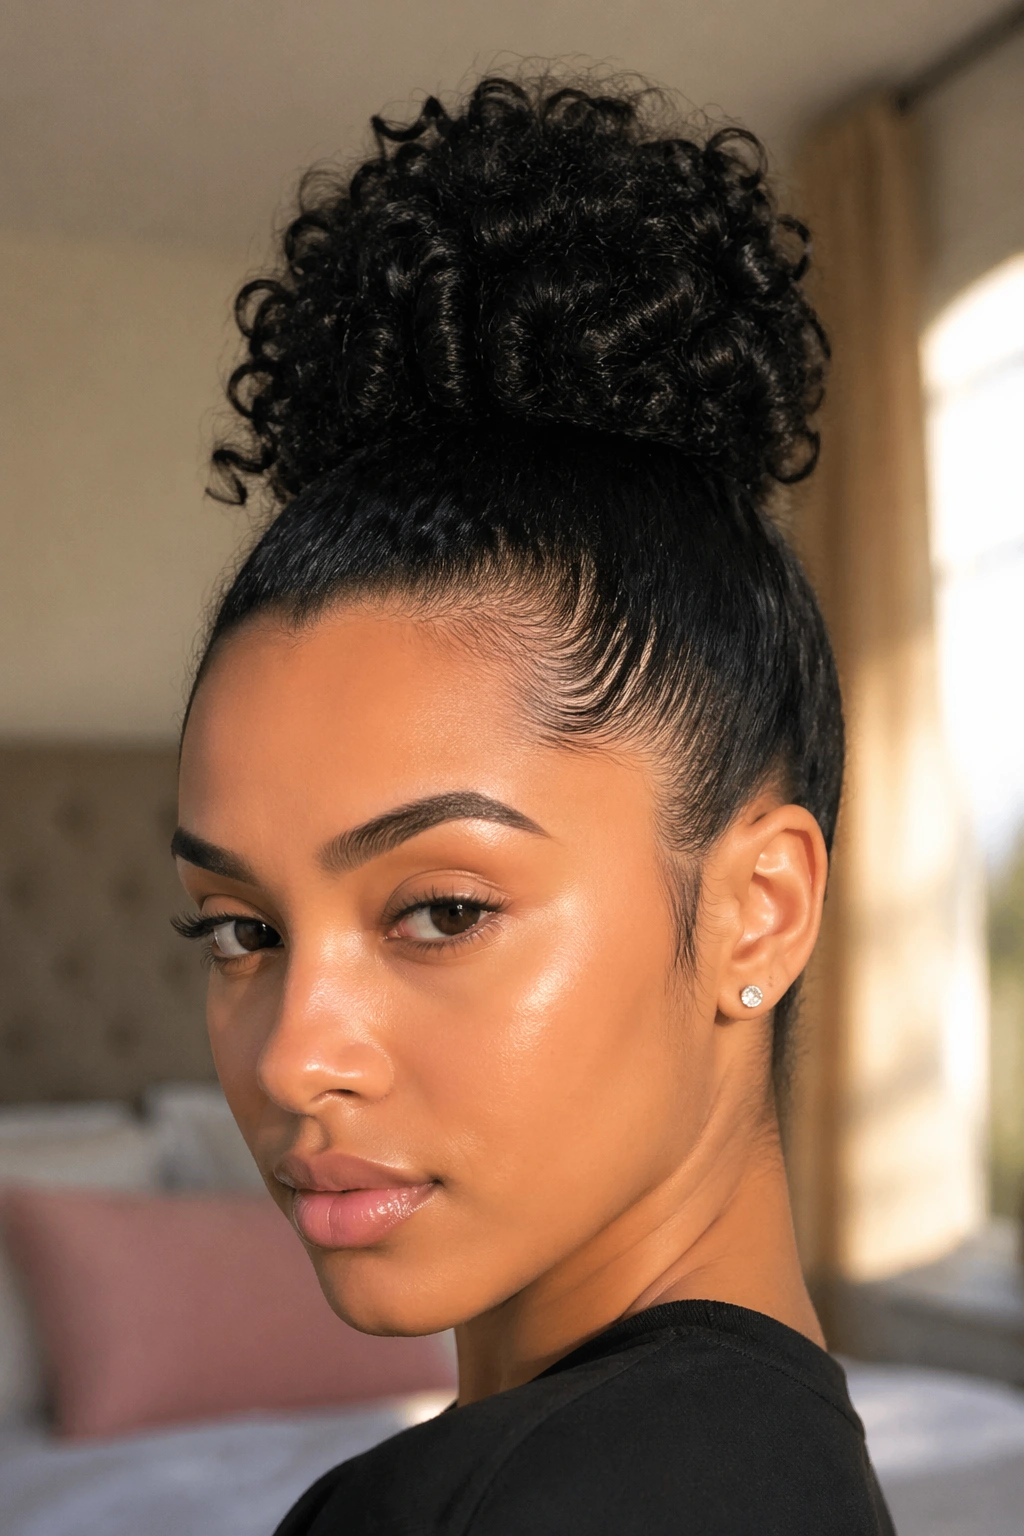
1. High Curly Bun with a Sharp Hairline
A high curly bun gives instant lift. It pulls the eye upward, opens the face, and makes the crown look neat without forcing every curl to disappear. If you want one of the most flattering sleek curly bun hairstyles, start here. It’s the version that feels the most awake.
Why It Works
The height does a lot of the visual work for you. A bun placed near the crown gives structure to curls that might otherwise spread outward and lose shape. The sleek part is all about the roots, not the bun itself. Keep the top smooth, then let the bun stay slightly textured so it still looks like hair and not a taped-down knot.
A fine-tooth comb and a strong-hold gel make this style easier than it looks. Brush the hair upward in sections, not all at once, or you’ll get bumps at the nape. Once the ponytail is secure, twist the length into a bun and pin the base first. That base is the part that needs the most help.
- Best on medium to long curls
- Works well for round, oval, and heart-shaped faces
- Strongest finish comes from gel plus a brush with firm bristles
- Feels neat, but not severe, if you leave the bun a little full
Quick tip: wrap a silk scarf around the hairline for 10 minutes before you leave. It helps press down puff without making the whole style look flat.
2. Low Curly Bun with a Deep Side Part
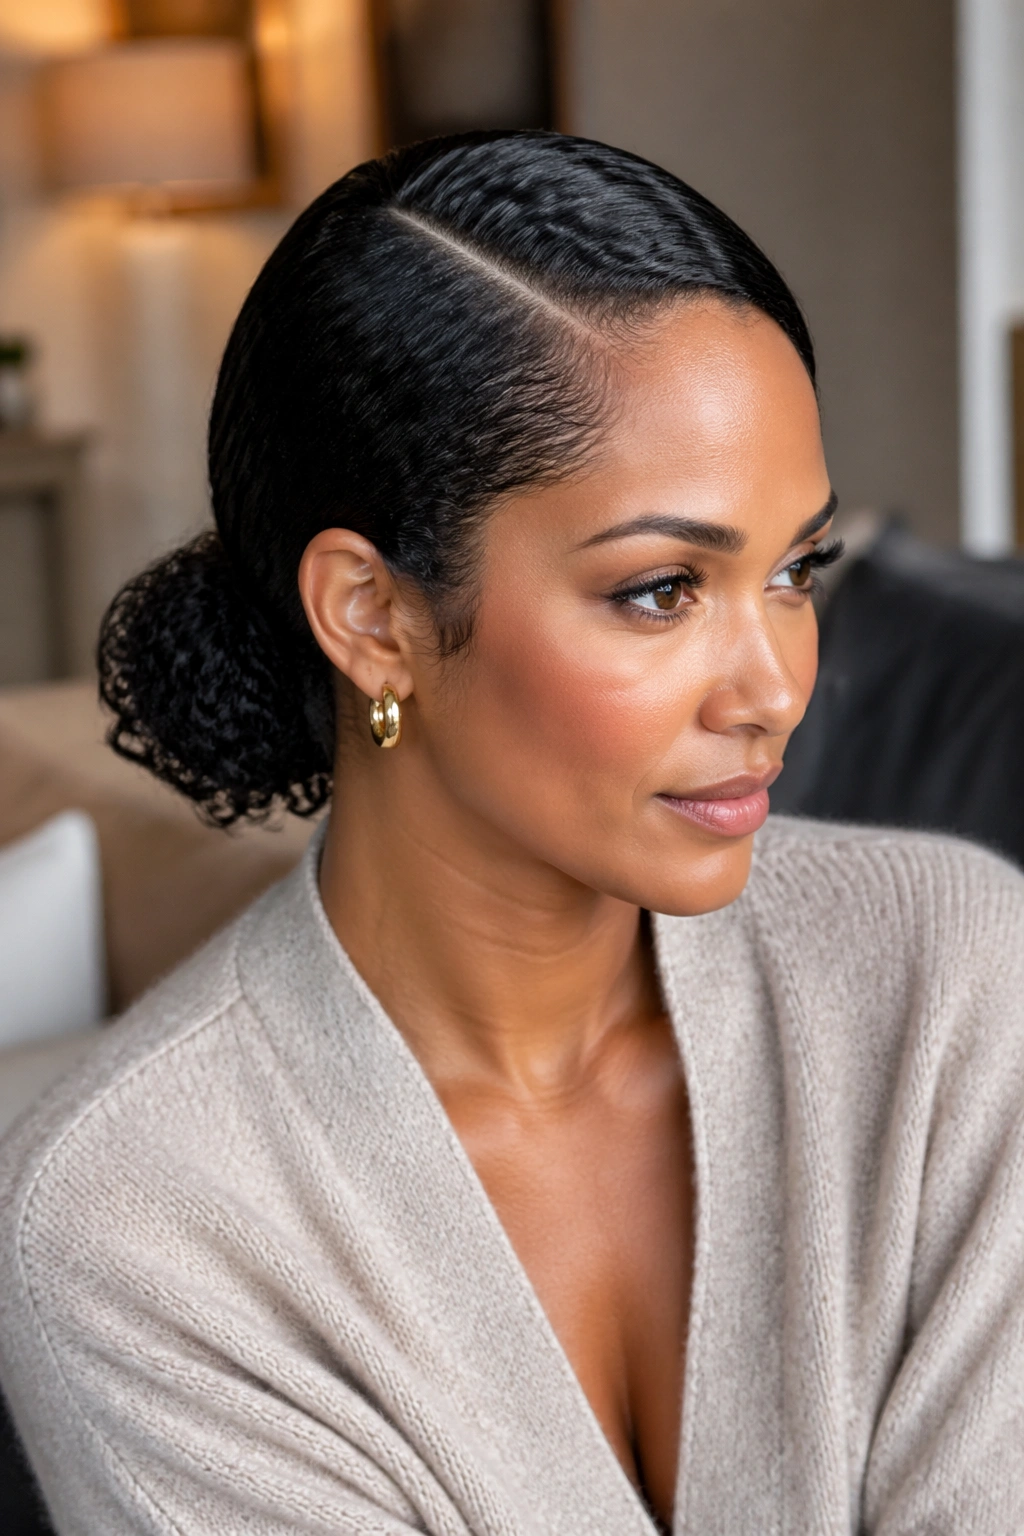
Why does a low bun look so polished on curly hair? Because it gives the style weight. A bun sitting at the nape feels calm and grounded, and the deep side part adds a little drama without needing any extra decoration. It’s one of those styles that looks expensive in the plainest possible way.
The side part matters more than people think. It changes where the eye lands first, which makes the bun feel softer and less rigid. On curls, that’s a gift. You get sleek roots on one side, a little bend through the part, and a low shape that stays put longer than a high bun usually does.
Keep the part clean and start smoothing from the wider side first. That helps avoid a lopsided crown. If your hair is thick, secure the ponytail low, twist it once, then pin the bun in a flat oval rather than a ball. That shape sits closer to the head and feels neater under coats, collars, and scarves.
A tiny dab of edge control around the temples is enough. More than that and the style can start to look sticky.
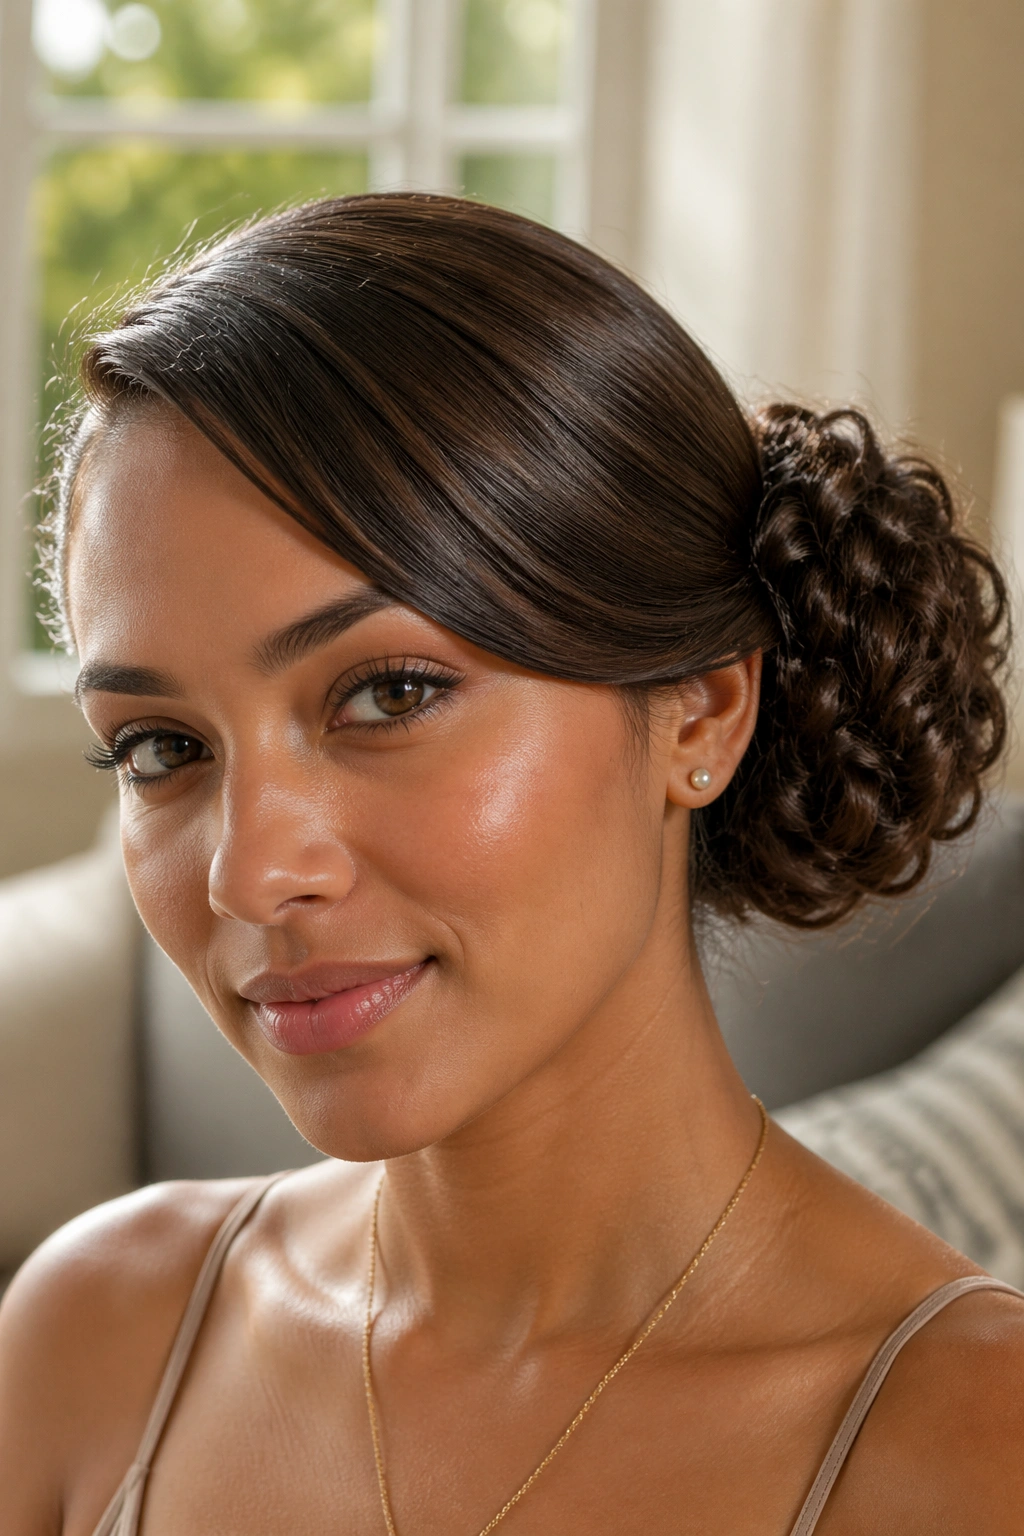
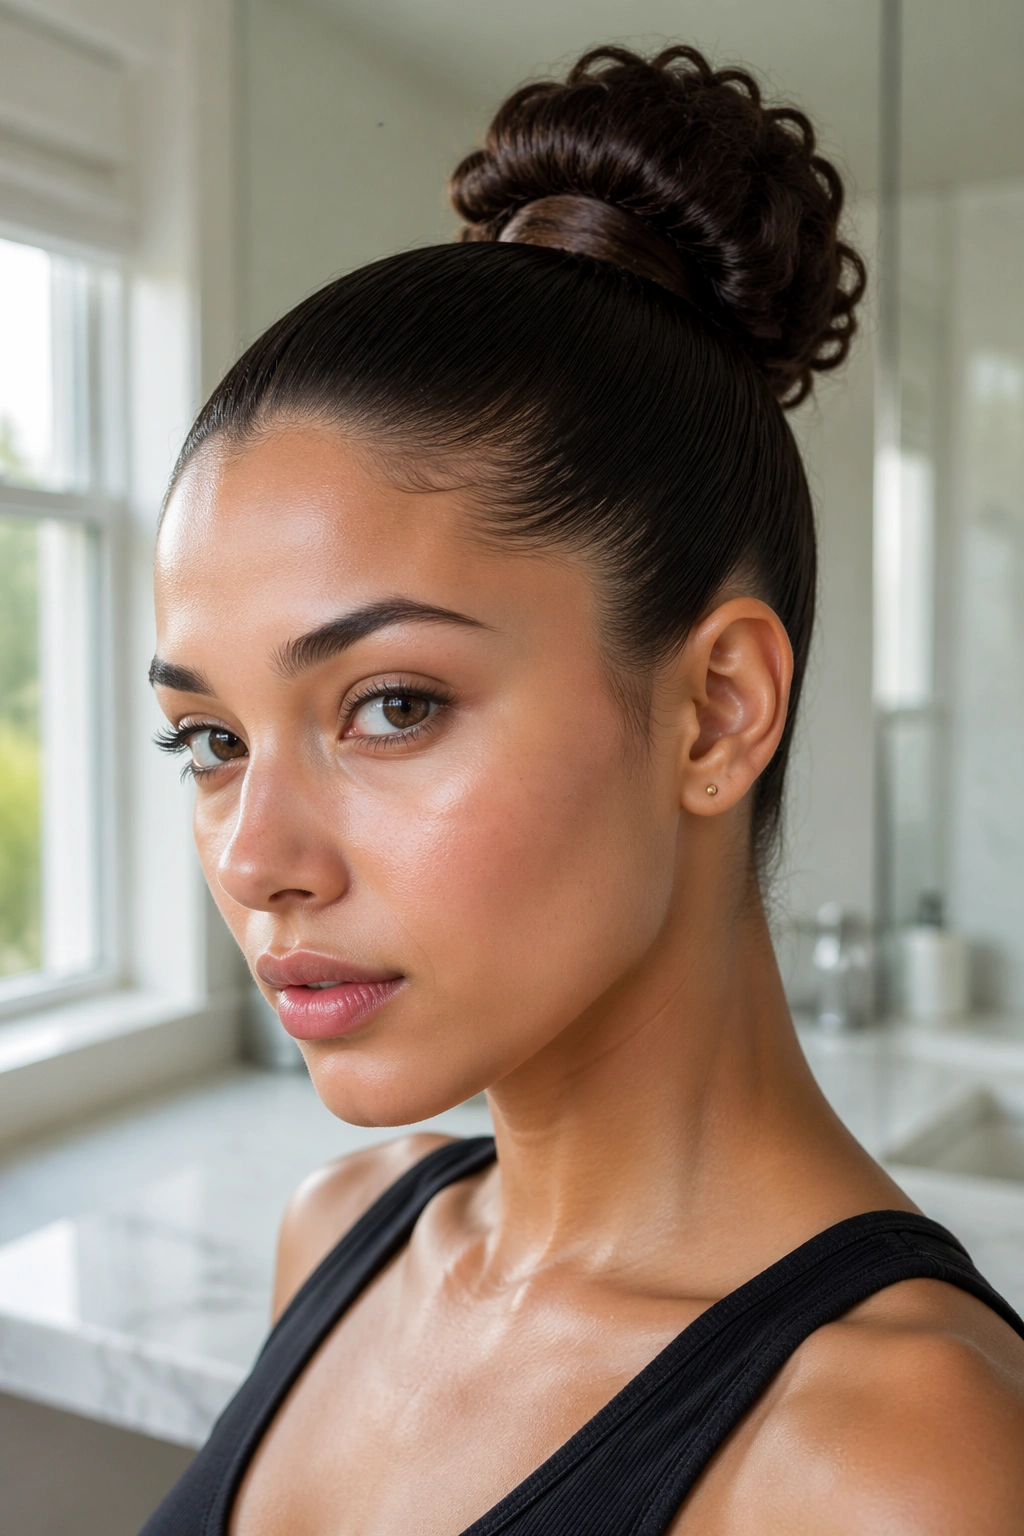
3. Center-Part Curly Bun with Smooth Roots
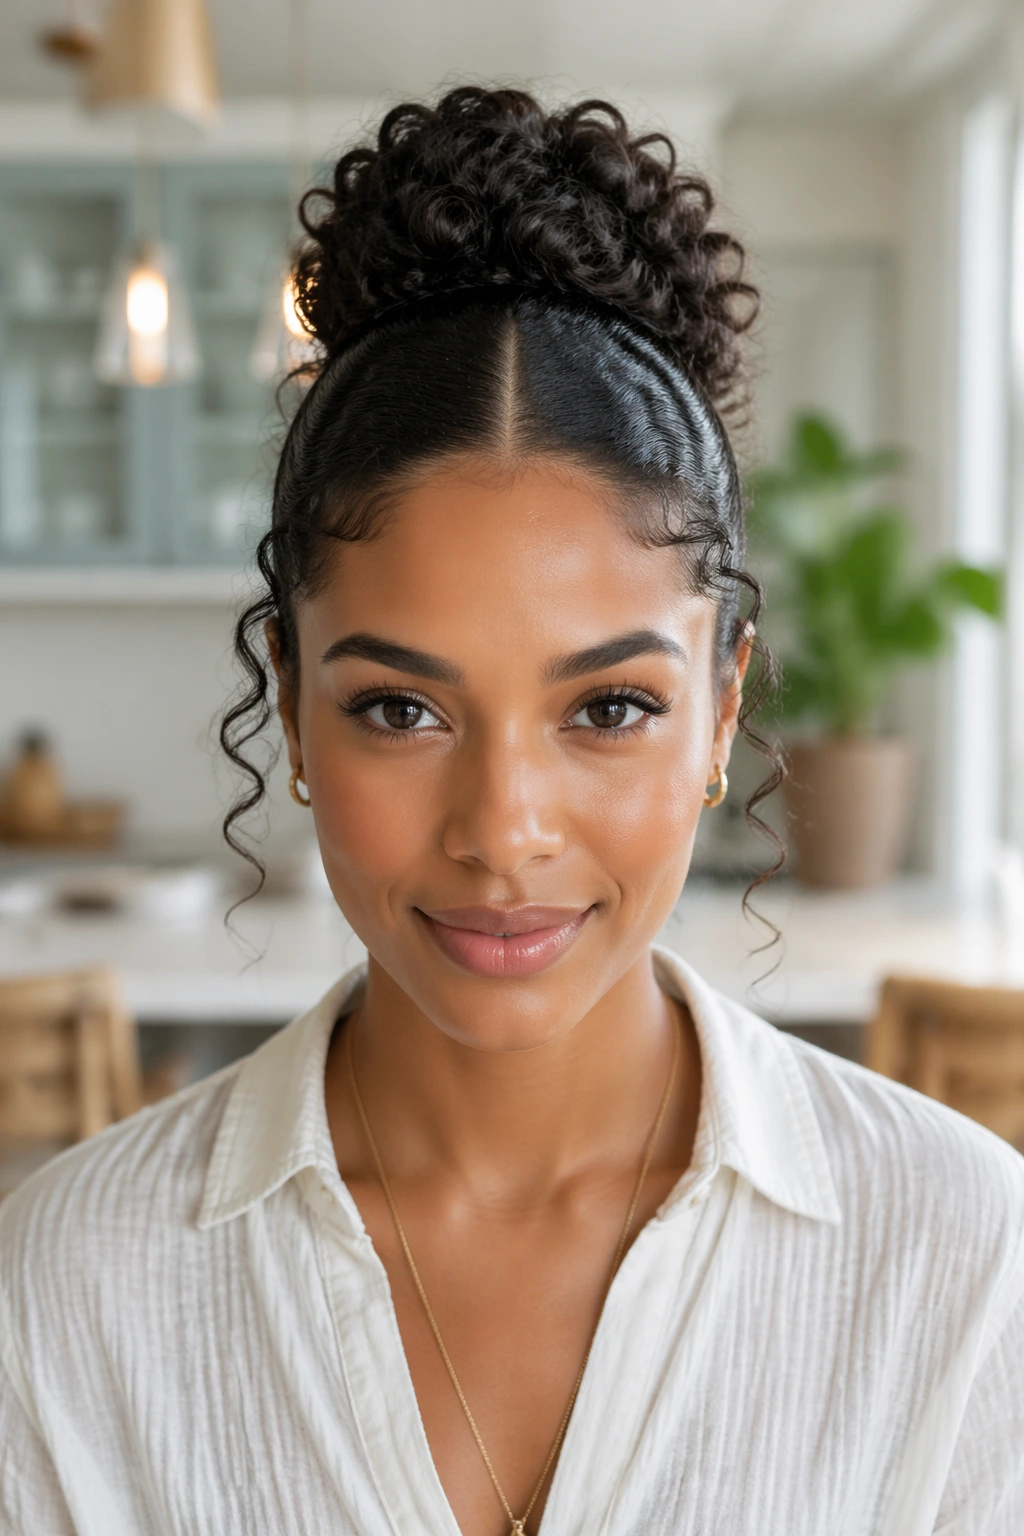
If your curls like symmetry, this one feels almost tailored. A center-part curly bun is clean from the front and still gives you texture where it counts, so it never crosses into stiff territory. It’s also one of the easiest sleek curly bun hairstyles to repeat once you get the part right.
How to Keep the Part Straight
Start with damp or lightly misted hair so the comb glides instead of snagging. Use the tail end of a rat-tail comb to draw the part all the way back to the crown in one steady line. Don’t stop halfway. That’s where wobbly parts start.
After the part is in place, smooth each side back with a brush and a small amount of gel or mousse. I prefer mousse on curlier textures because it gives control without making the roots feel crunchy. Once the hair is gathered, twist the lengths into a bun and pin around the base, not just across the top.
The center part is especially useful if your face feels better with balance. It can soften strong angles and make the bun look deliberate, not thrown together. And if you like a clean profile from the front, this is a strong choice.
Watch for this: if the part starts to zigzag after brushing, stop and redo it before the gel sets. Fixing it later is a nuisance.
4. Braided Base Curly Bun
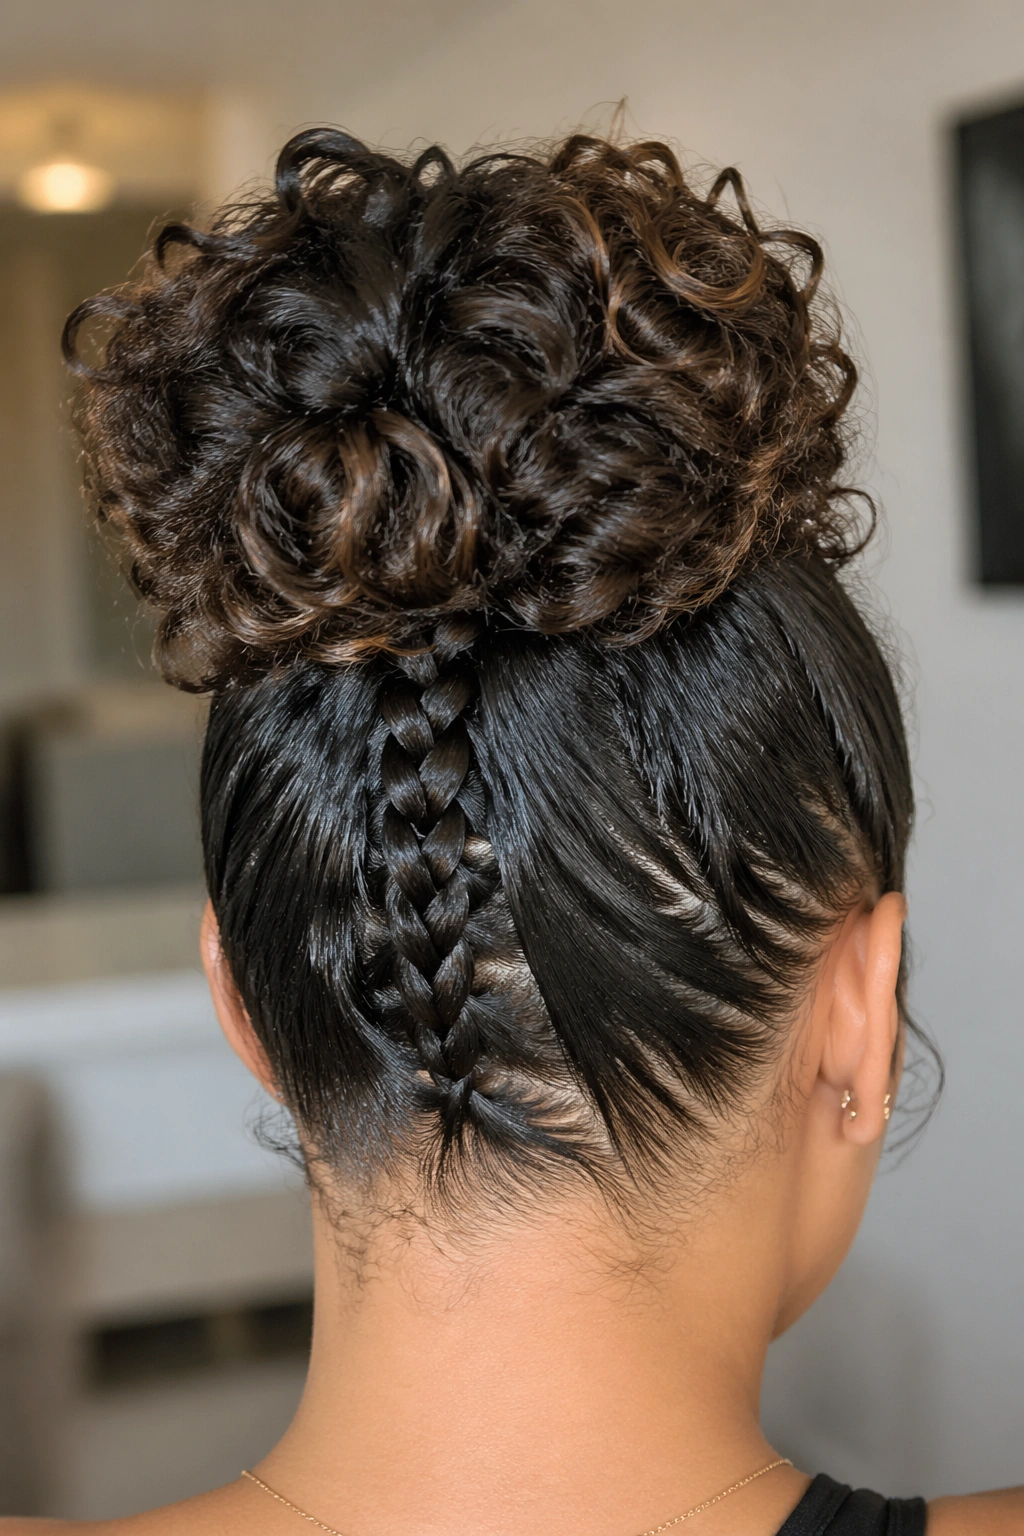
A braid at the base is the easiest way to make a curly bun look like you planned it days ago. It adds grip, keeps the roots under control, and gives the whole style a little extra texture where the bun starts. That small detail makes a bigger difference than people expect.
You can braid just the top section, or do two slim braids from the temples back into the ponytail. Either way, the braid creates a cleaner path for the bun. It also helps if your hair tends to puff at the nape, which is where sleek styles usually start to fall apart. The braid holds that area down before the bun even goes in.
What Makes It Different
The braid gives you structure without needing a heavy amount of product. That matters on curls, because too much gel can make the roots stiff while the bun itself still frizzes. A braid does the quiet work. It keeps the style anchored.
- Best for thick or dense curls
- Great when you need the style to last through a long day
- Useful for hair that slips out of regular ponytails
- Looks more detailed without needing accessories
Pin the bun low if you want a calmer look, or mid-height if you want the braid to show more clearly. Either way, don’t over-polish the braid itself. A little texture there makes the style look human. Too smooth and it starts to feel artificial.
5. Rope-Twist Curly Bun

A rope-twist bun has a slightly more sculpted feel than a plain twist, and that’s exactly why it works on curly hair. You split the ponytail into two sections, twist them in the same direction, then wrap them around each other. The result is tidy, compact, and a little more interesting than a standard coil.
This one is especially nice for second- or third-day curls. The hair usually has enough texture already, so it grips itself better. You don’t need to fight for perfection. In fact, a little grip helps the bun stay tight at the base. If your curls are looser, a touch of styling cream on the lengths can keep the rope twist from unraveling.
- Twist both sections firmly, but not until they feel strained
- Wrap the twist around the base in the same direction it was formed
- Use U-pins if you want the bun to sit flatter
- Set the hairline with gel first so the bun stays the focal point
The rope shape is a good choice when you want something neat but not formal enough to feel fussy. It has polish, but it still moves a little when you turn your head.
6. Curly Bun with Face-Framing Tendrils
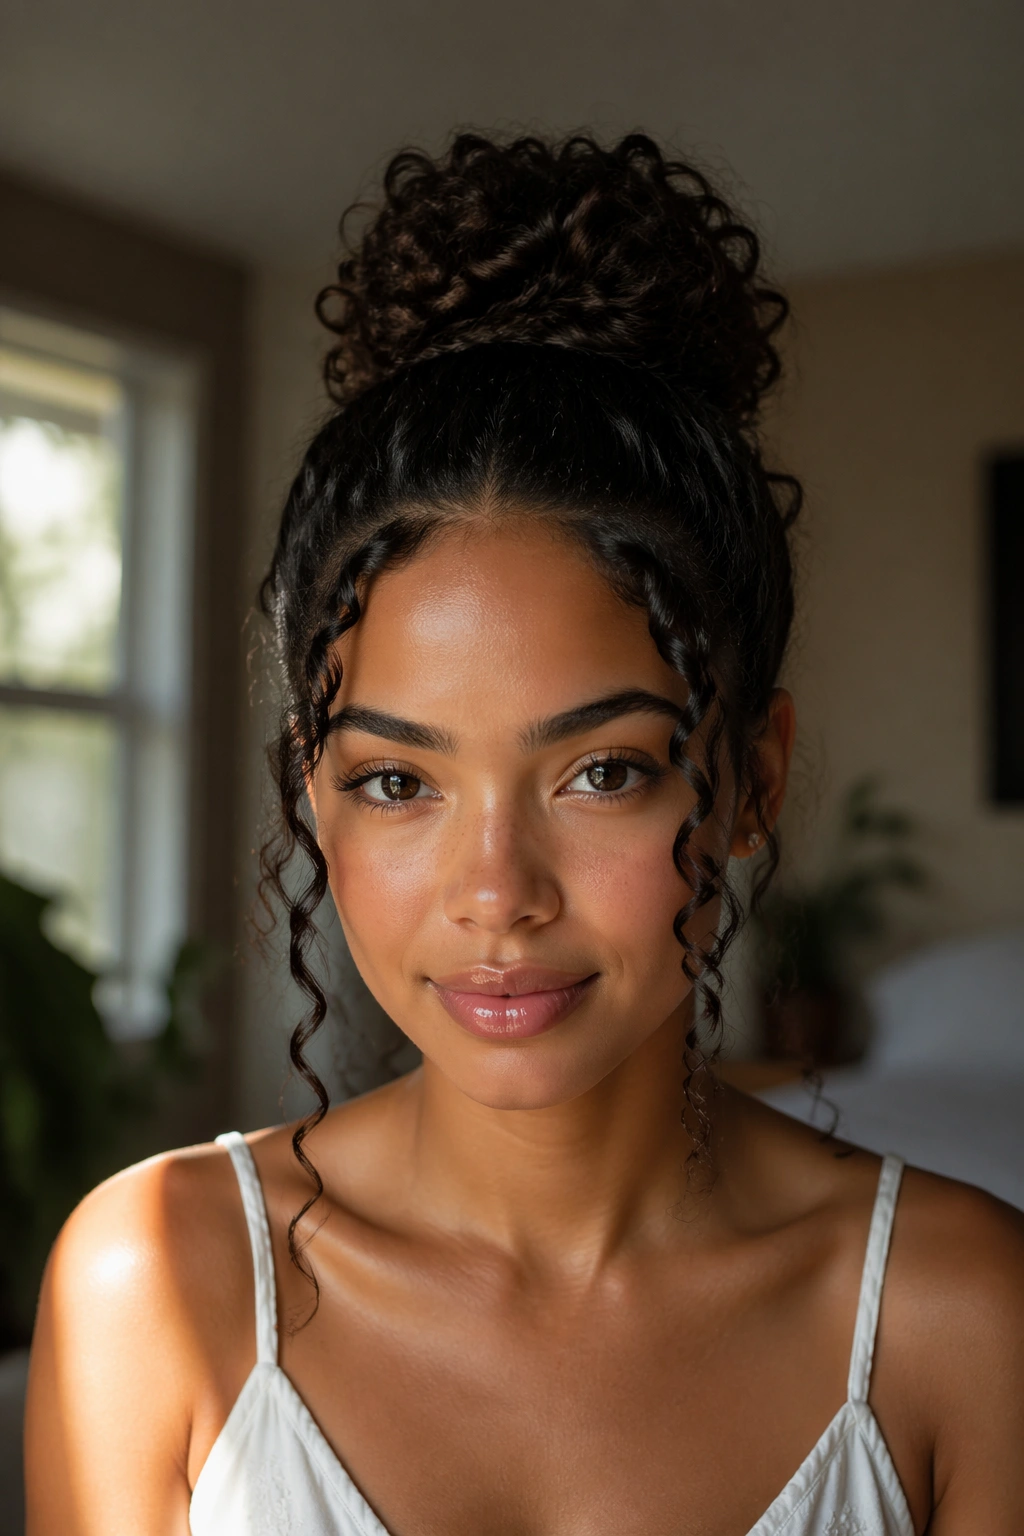
A few loose tendrils can change the whole mood of a sleek curly bun. The style stops reading as severe and starts feeling softer around the cheeks and jaw. That small release of texture matters, especially when the rest of the hair is pulled smooth.
Keep the tendrils narrow. That’s the part people often get wrong. If you leave out too much hair, the style loses the sleek finish and starts drifting toward messy. Two slim pieces near the front are enough. Shape them with your fingers while they’re still damp, then let them dry in place or define them lightly with a small curling iron if needed.
The bun itself should stay clean and tucked. If the front pieces are loose, the back needs to be more controlled. That contrast is what makes the style look polished. A shine serum can help, but use it only on the ends of the tendrils and nowhere near the roots.
This version works when you want structure but not severity. Think dinner, a wedding guest look, a nicer workday, or any moment when you want your curls to look on purpose without looking pinned down.
7. Side Curly Bun with a Smooth Sweep
Unlike a bun that sits dead center, a side curly bun brings movement before you even see the back. The sweep changes the line of the hairstyle, and on curly hair that shift can be a relief. It feels softer, less formal, and a little more flattering if you like asymmetry.
Start by brushing the hair toward the side where you want the bun to sit. The front can stay sleek and tight while the bun itself rests near one ear or slightly behind it. That placement is useful if you wear statement earrings or want one shoulder to stay open. It also keeps the style from feeling too severe.
What to Watch For
Side buns can get lumpy if the hair underneath is not smoothed evenly. Take an extra minute at the back of the head. That’s where the shape either works or falls apart. A rat-tail comb helps, but a damp brush and a touch of gel on the crown can be enough.
A side bun looks best when the bun stays compact. If it gets too big, the angle can feel accidental instead of styled. Keep the silhouette neat, and let the curl texture do the rest.
8. Crown Braid Curly Bun
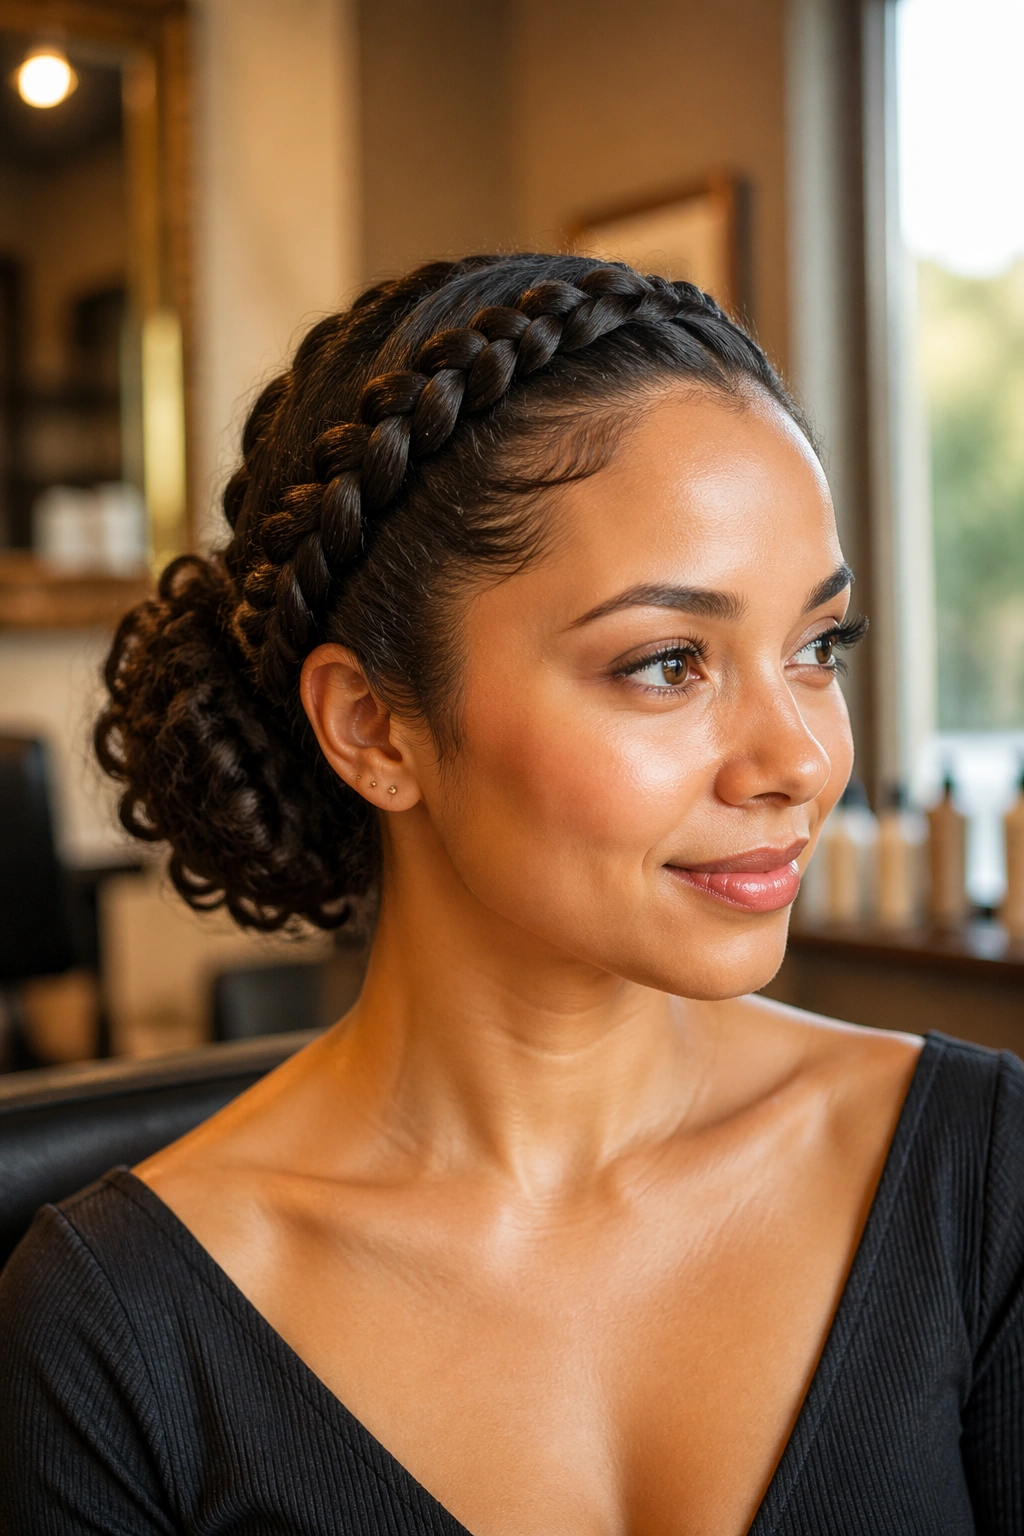
Want a curly bun that stays tidy longer? Feed a braid into it. A crown braid gives the front of the style a clean frame, then funnels the rest of the hair into the bun so the transition looks deliberate. It’s one of the more detailed sleek curly bun hairstyles, and it pays off because the style holds.
The braid can be a full crown braid or just a braided band across the front hairline. Either way, it helps tame the front section before the bun goes up. That matters on curls that frizz around the temples, because the braid acts like a built-in border. Once the braid is secured, gather the remaining hair low or mid-level and twist it into a bun.
How to Place the Braid
Keep the braid close to the head. If it sits too high, the bun can feel disconnected from it. Use small pins at the end of the braid so the seam disappears into the rest of the style. If your hair is very thick, split the braid into two sections and keep them slim. Heavy braids tug at the scalp and loosen faster.
This style works well for formal settings, but it is not only for big events. It’s also useful when you want your hair out of the way and still want the front to look finished.
9. Sleek Curly Bun for Short Hair

Short curls can absolutely do a bun. Not a giant one, maybe, but a neat, tucked version that looks intentional and fresh. The mistake is trying to force too much hair into a shape that needs length. Short hair does better when you work with the natural body instead of against it.
Use a small elastic and gather the hair at the crown or upper back of the head. Then tuck the shorter ends under and pin them flat. If pieces fall out, don’t keep rewrapping them forever. That’s how the style turns fuzzy. Pin them where they land, then smooth the outer layer with a brush and a little gel.
- Best for chin-length to shoulder-length curls
- Small pins help more than one heavy clip
- Works well with a soft side part or clean center part
- Looks best when the bun stays compact
The style has a tidy, almost sculpted finish when done right. And because the length is shorter, the bun often sits closer to the head, which can be easier to wear all day.
10. Sleek Chignon for Curly Hair
A curly chignon is the most formal version on this list, and honestly, it earns that title. It sits low, usually at the nape, and rolls or folds back on itself so the ends disappear into the shape. On curls, the mix of smooth roots and tucked texture looks especially clean.
The key is control at the surface. Brush the outer layer until it lays flat, but do not chase every single frizz into submission. That usually backfires. A little sheen is fine. A greasy-looking scalp is not. Use a light gel or cream at the roots, then finish with U-pins along the seam so the chignon stays closed.
This style rewards patience. You may need to smooth, tuck, and pin a second time. That is normal. A chignon is not a rushed bun. It’s the sort of style that looks best when the base is neat and the fold is clean. If you have layers, tuck the shortest pieces deepest into the fold so they do not poke out later.
One small note: a chignon can look too tight if the hairline is over-brushed. Leave the edges clean, but not stretched to the point of strain.
11. Double Curly Buns with a Clean Part
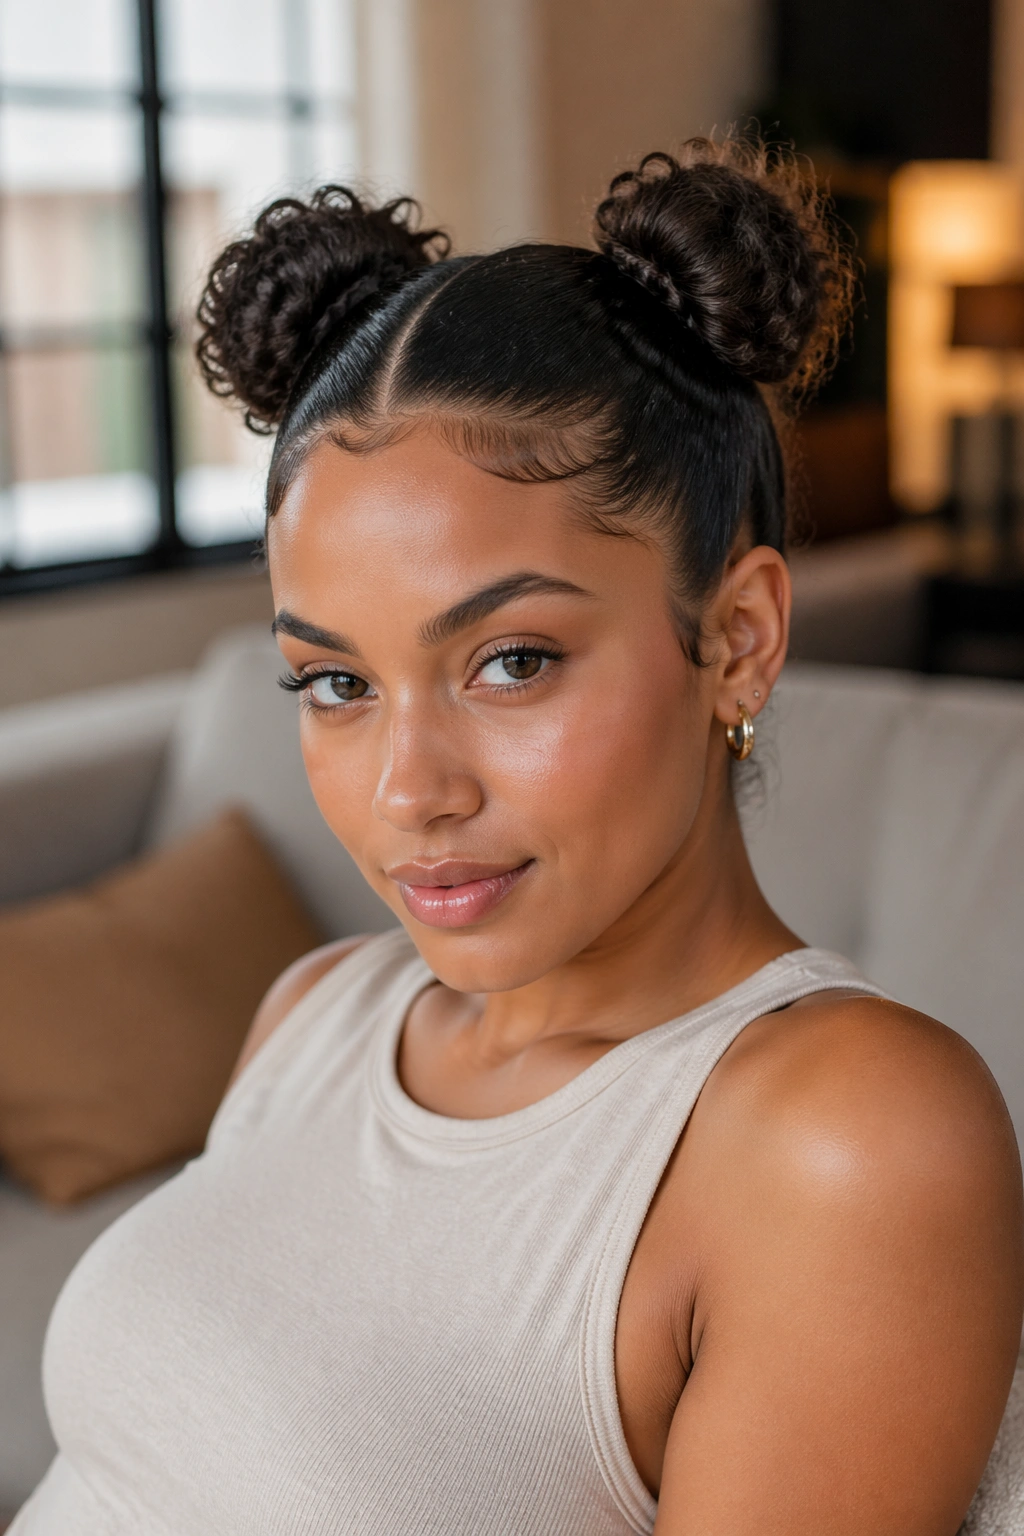
Two buns can feel playful, but they do not have to look childish. The trick is keeping the part crisp and the buns neat. On curly hair, that contrast gives the style a polished edge that reads more styled than silly.
A center part works best if you want symmetry, but a slightly off-center part can soften the whole look. Gather each side into a small bun at the same height, usually above the ear or just behind it. Keep the buns compact. Small, neat buns look cleaner than oversized ones, especially when the roots are slicked back.
Who Should Try It
This style suits medium-length curls that still have enough body to build shape on both sides. It also works well if you want the hair off your neck but do not want a single heavy bun pulling at one spot. That can be a relief on long days.
If you want the style to feel more grown-up, keep the part extra clean and the buns small. If you want it softer, leave a few tiny curls around the hairline. Don’t overdo those pieces. Just a little movement is enough.
The style can be fun, but it still benefits from discipline at the roots. That’s the part that keeps it sleek.
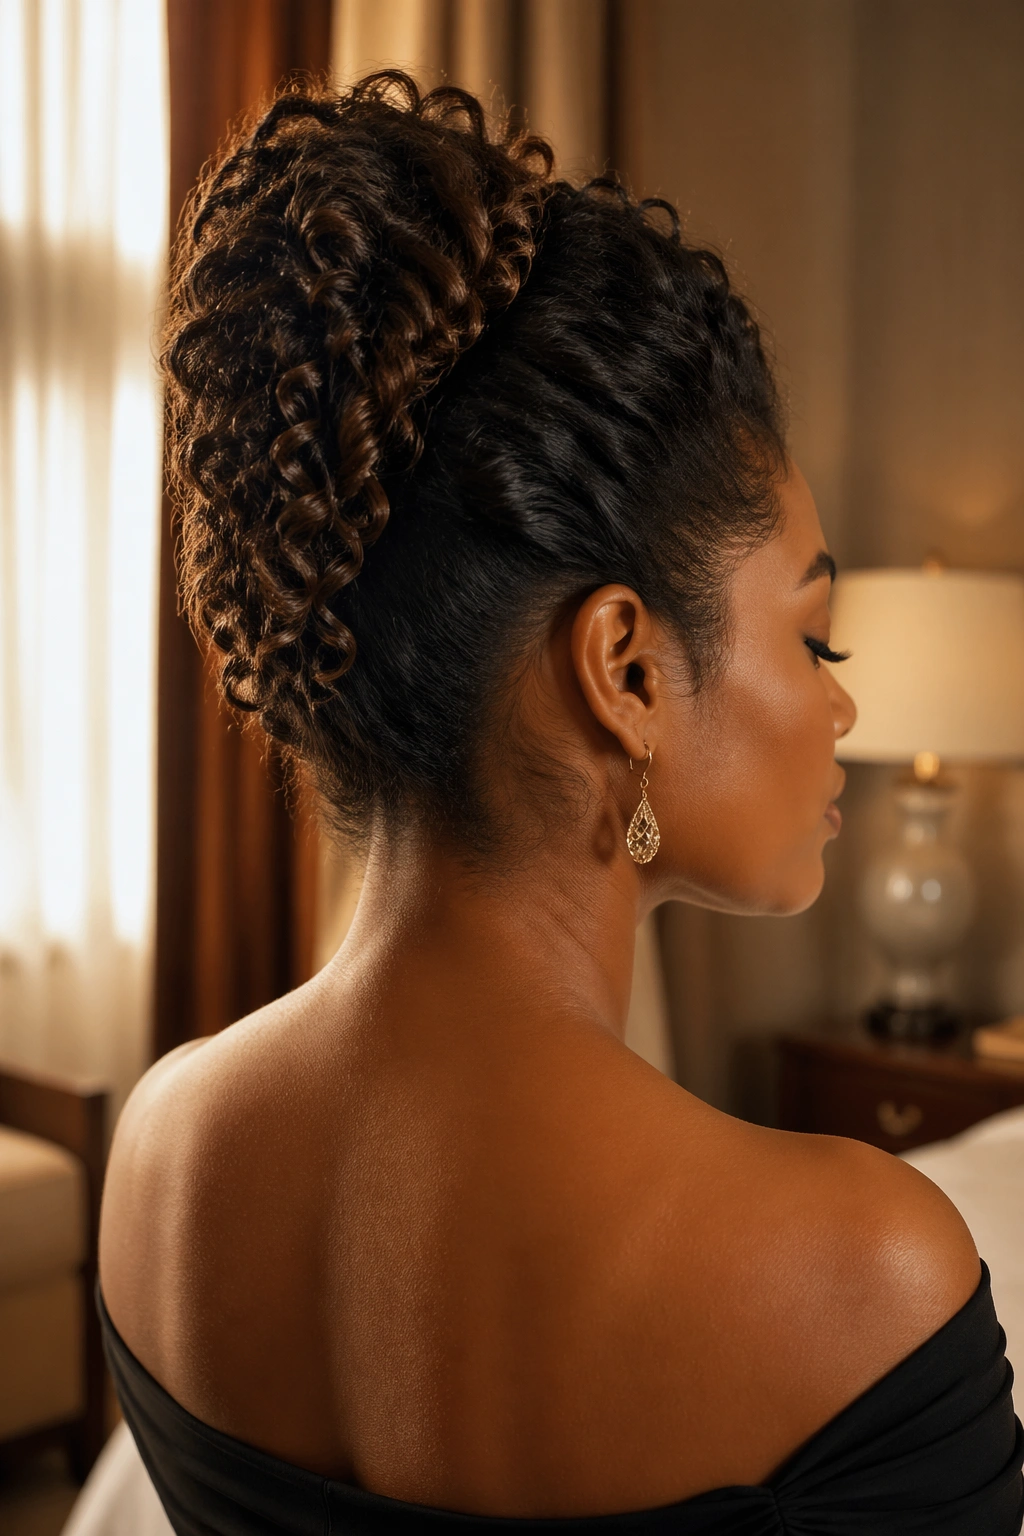
12. Pineapple Bun with Sleek Edges
A pineapple bun is not the first style people think of when they hear sleek, but that is exactly why it belongs here. It gives you height and curl preservation at the same time. The bun sits high and loose, so the curl pattern keeps its shape instead of getting crushed flat.
The sleek part comes from the edges and the front. Brush the hairline back, smooth the nape, and leave the crown itself a little fuller. That contrast is the whole point. You get a bun that protects the curls and still looks deliberate enough to wear outside the house.
Unlike a tight ballerina bun, a pineapple bun keeps more texture visible. That makes it a smart choice for people who want volume. It also works well on hair that shrinks a lot when pulled back, because the shape is meant to sit high and let the curls do their own thing.
Use a soft elastic that does not pull too hard at the base. If you squeeze the bun too tightly, the top can flatten and the height disappears. Let the bun stay airy. That’s what gives it its shape.
13. Wrapped Ponytail Bun with a Clean Base
Sometimes the simplest style is the one that looks most finished. A wrapped ponytail bun starts with a sleek ponytail, then the length wraps around the base and gets pinned into place. It is direct, fast, and dependable. No strange tricks.
The clean base is doing most of the work here. Smooth the hair back with a brush and a light layer of gel, then secure the ponytail at the height you want. After that, wrap the length around the elastic in one direction and pin the ends under the bun. If your hair is very curly, twist the length lightly first so the wrap feels tighter and the bun does not puff out.
- Best when you need a neat style fast
- Works on many curl patterns, from loose waves to tight coils
- Can sit high, mid, or low
- Takes well to a shine spray on the surface only
This one is good for days when you do not want to think too hard. It still looks polished, which is the whole appeal. A wrapped ponytail bun rarely looks accidental if the base is smooth and the pins are hidden.
14. French Roll–Inspired Curly Bun
A French roll–inspired curly bun has a little old-school elegance to it. It pulls the hair upward and inward, usually along the back of the head, so the shape feels long and tidy rather than round. On curly hair, that vertical line can be especially flattering.
The style works because it hides the ends well. Instead of showing the whole coil or twist, the bun folds into itself and sits in a narrow shape. That makes the back look clean and controlled. If your curls are thick, use long pins along the seam and a few extra bobby pins where the roll starts to open. The seam is where the whole thing either holds or slides.
What to Watch For
This style can lose shape if the hair is too slippery. A little texture helps. If your hair is freshly washed and very soft, a small amount of mousse at the roots can give the roll something to grip. Don’t drown it in product. That only makes the surface slick in the wrong way.
It is a strong choice for formal settings, but it also works when you want the bun to look refined without sitting in a classic circular shape.
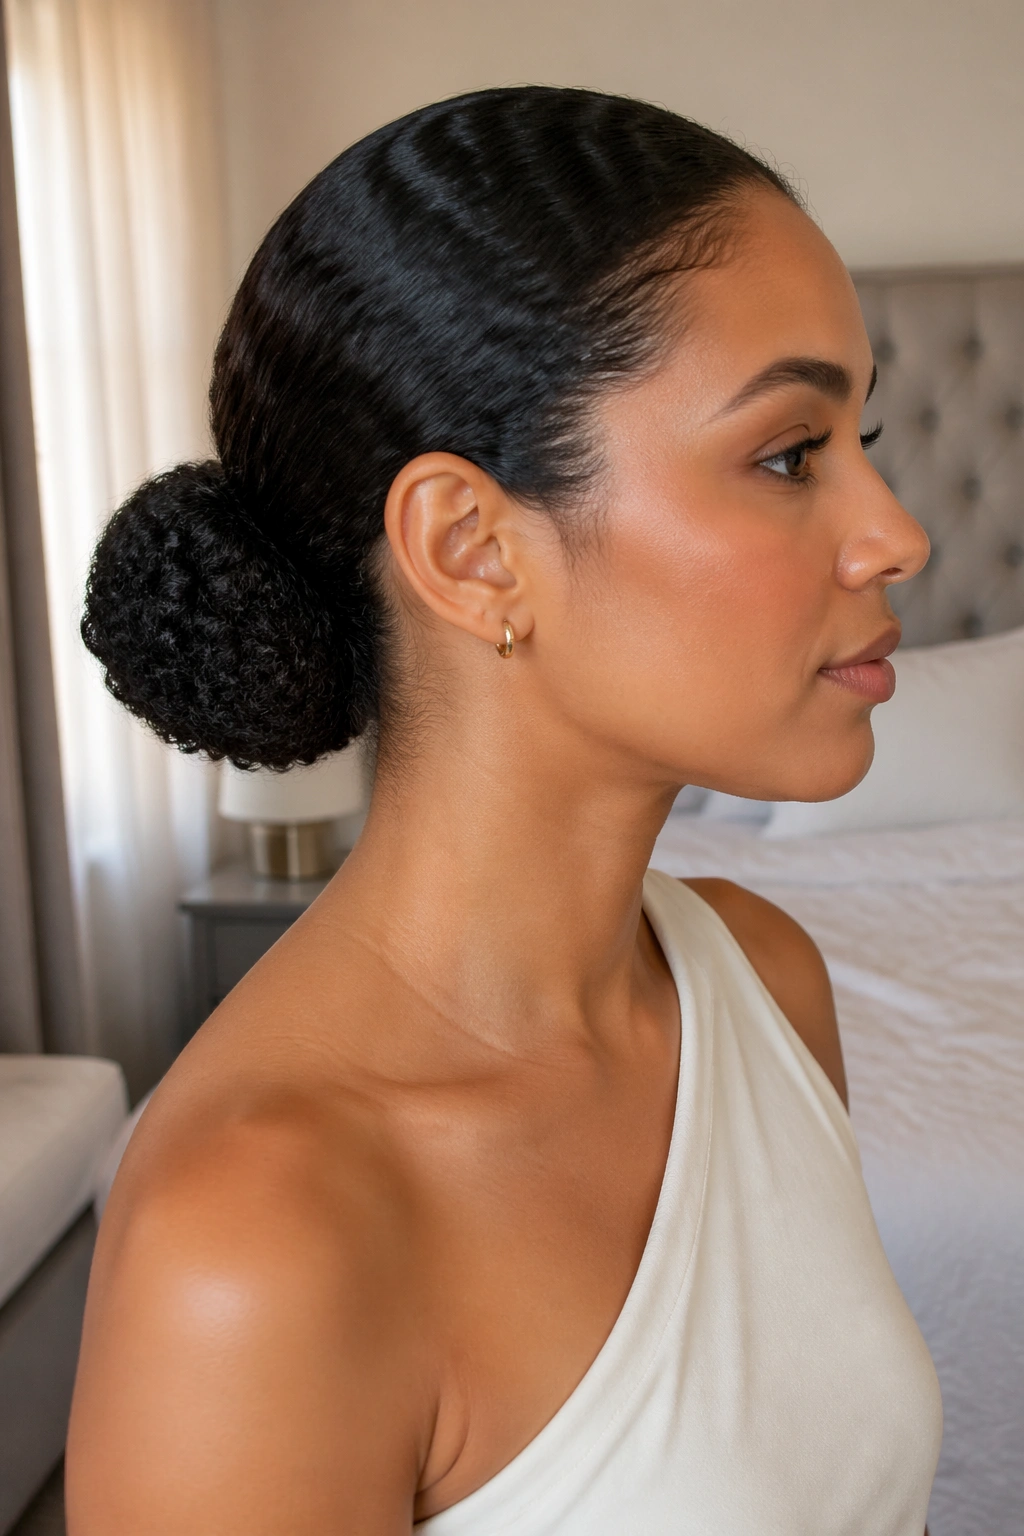
15. Low Tucked Curly Bun with a Soft Coil Finish
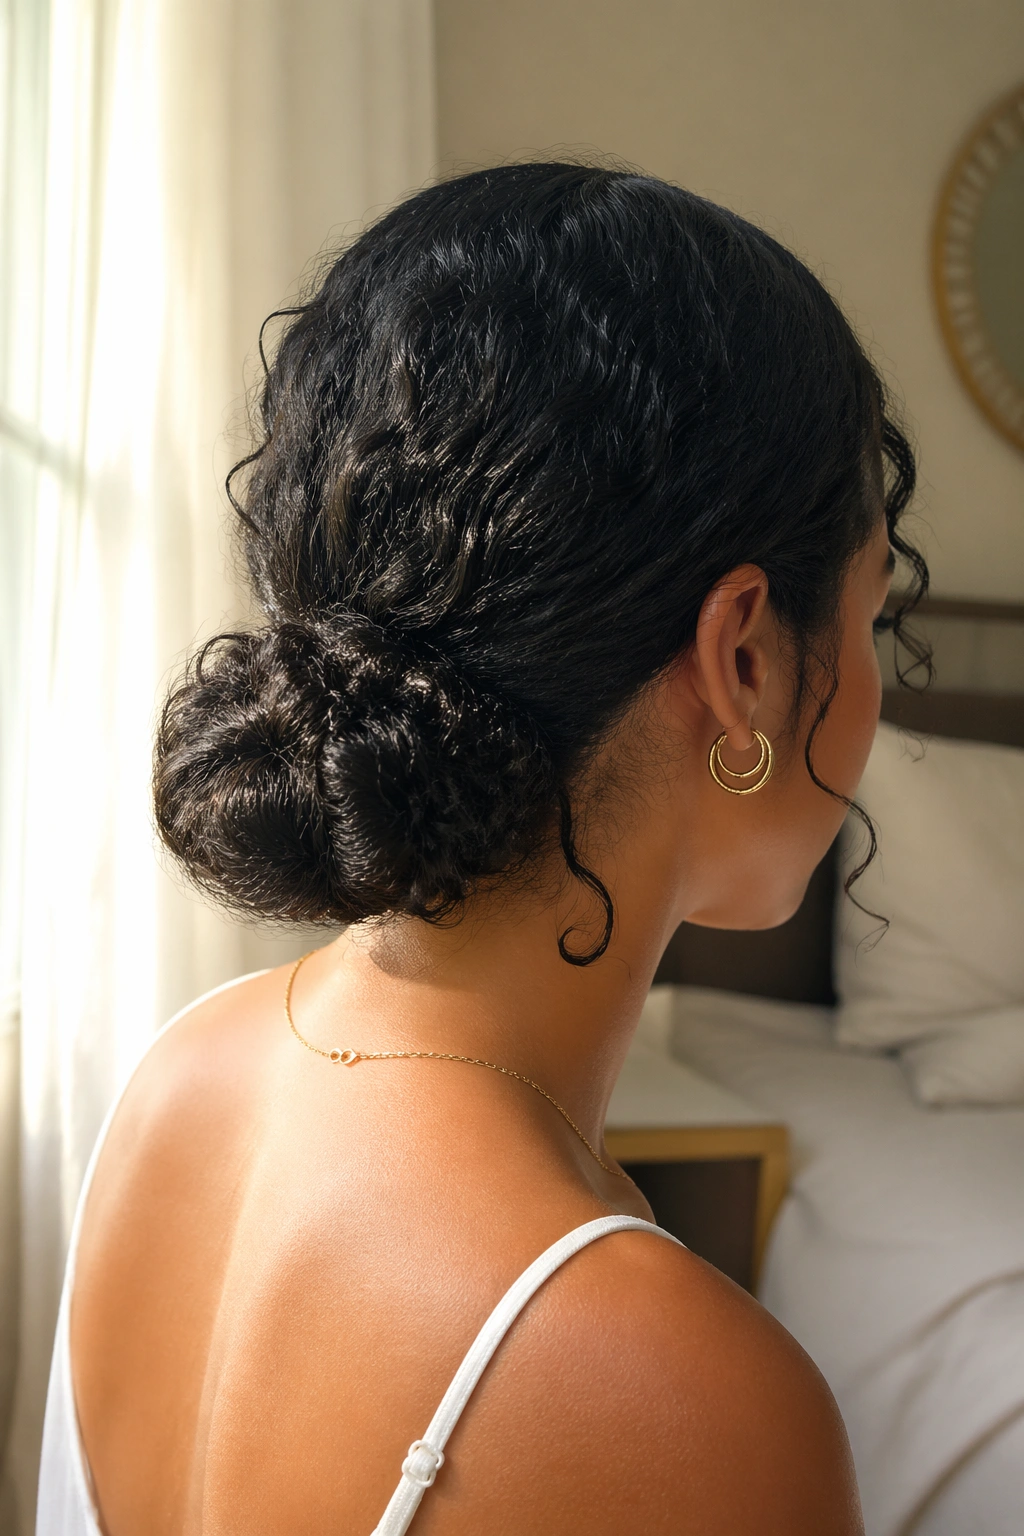
This is the quietest style on the list, and maybe the one you’ll wear the most. A low tucked curly bun sits at the nape, keeps the roots smooth, and hides the ends so the silhouette stays clean. If you want sleek curly bun hairstyles that feel wearable instead of precious, this one belongs near the top.
The soft coil finish is what keeps it from feeling too severe. Instead of flattening every curl into the head, let one or two small coils show near the tuck or at the edge of the bun. That tiny bit of texture softens the shape and keeps it from looking like a straight-haired chignon copy. Curly hair should still look like curly hair.
Use pins that match the direction of the tuck. Push them in following the fold, not across it. That helps the bun stay flatter and last longer. If the nape tends to puff up, smooth it first with a brush and a dab of gel, then let the tucked section do the rest.
This is the style I’d reach for on a long day. It stays neat, it feels easy on the scalp, and it does not ask for much once it is pinned.
Final Thoughts
A sleek curly bun works best when you stop trying to erase the curl and start controlling the shape around it. Clean roots, smart placement, and a little texture in the bun itself will get you farther than a heavy hand with product ever will.
The fastest improvement usually comes from the hairline. Smooth that first, then worry about the bun. Everything else gets easier after that.
And if a style feels too tight, it probably is. Loosen it a touch, pin the bun more securely, and keep the finish neat rather than stiff. That small shift makes the whole thing easier to wear and a lot better-looking from the side.