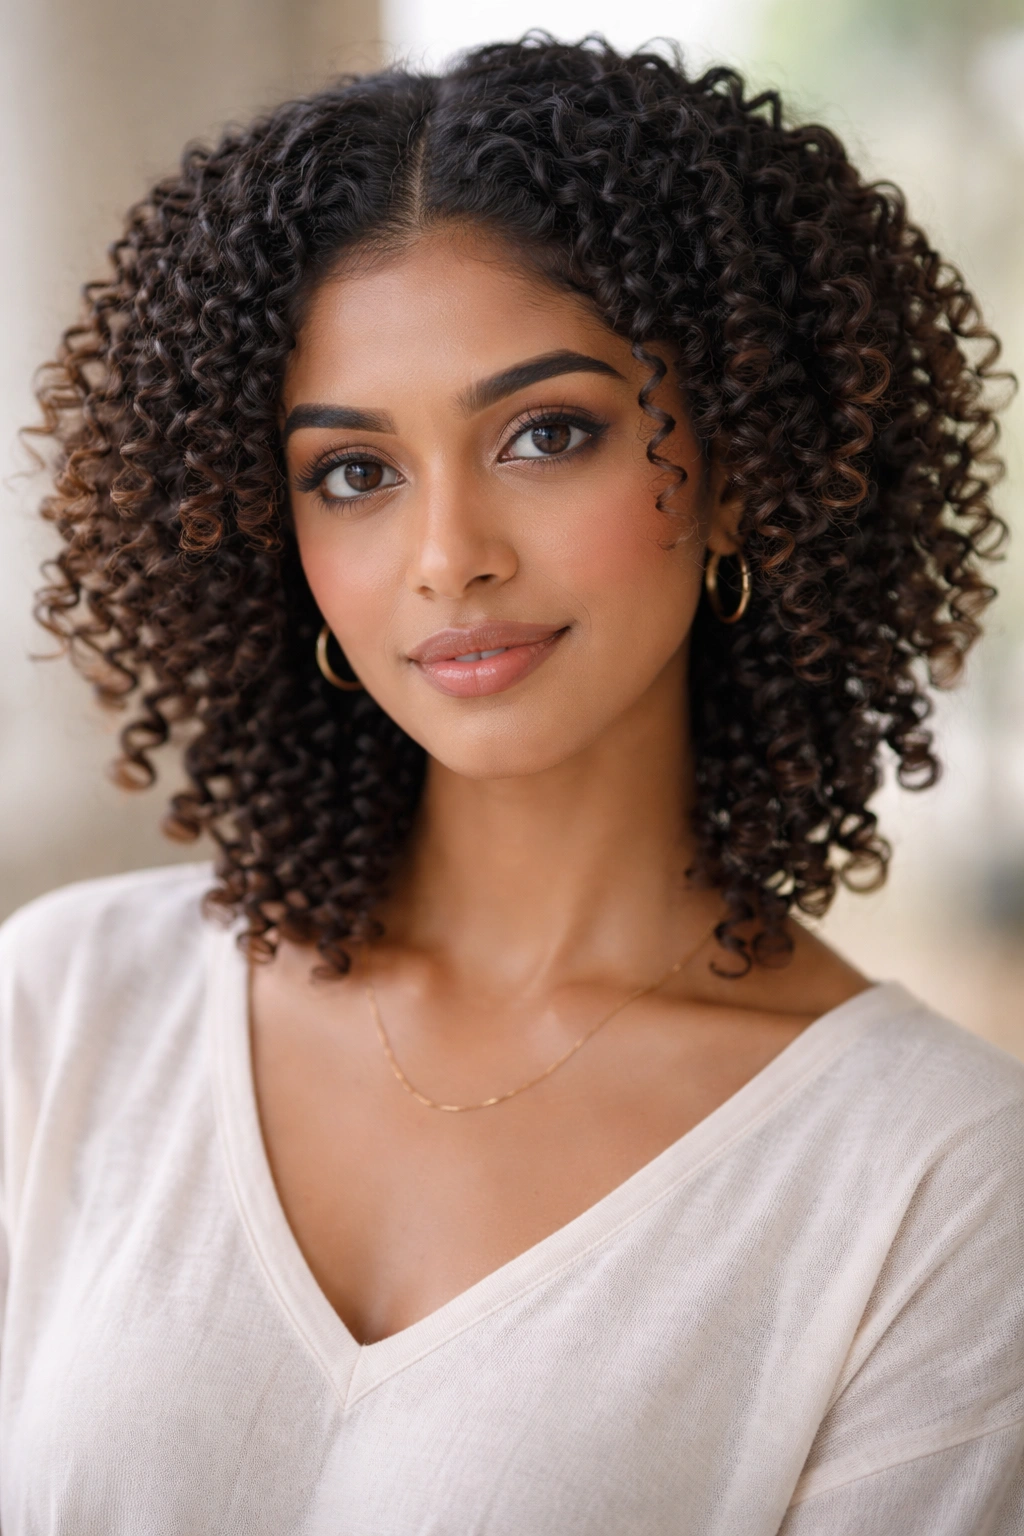
Curly hair has a habit of looking calm at 8 a.m. and completely different by lunchtime, especially when heat, dust, and the kind of humidity that makes every curl negotiate its own agenda start to show up. That is why curly hairstyles for Indian hair need more thought than a quick braid and a hopeful bobby pin.
A lot of Indian hair sits thick at the roots, dense through the mid-lengths, or somewhere between wavy and curly with a few stubborn sections that do their own thing. The trick is not forcing that texture into straight-hair habits. It is choosing shapes that let the curl move while still keeping the top controlled and the overall look neat.
That balance matters for ordinary days and dressier ones too. A style should survive a metro ride, a long lunch, a wedding hall, or a photo session with relatives without collapsing into a frizzy triangle. Start with the styles that respect the curl first, and the rest gets easier fast.
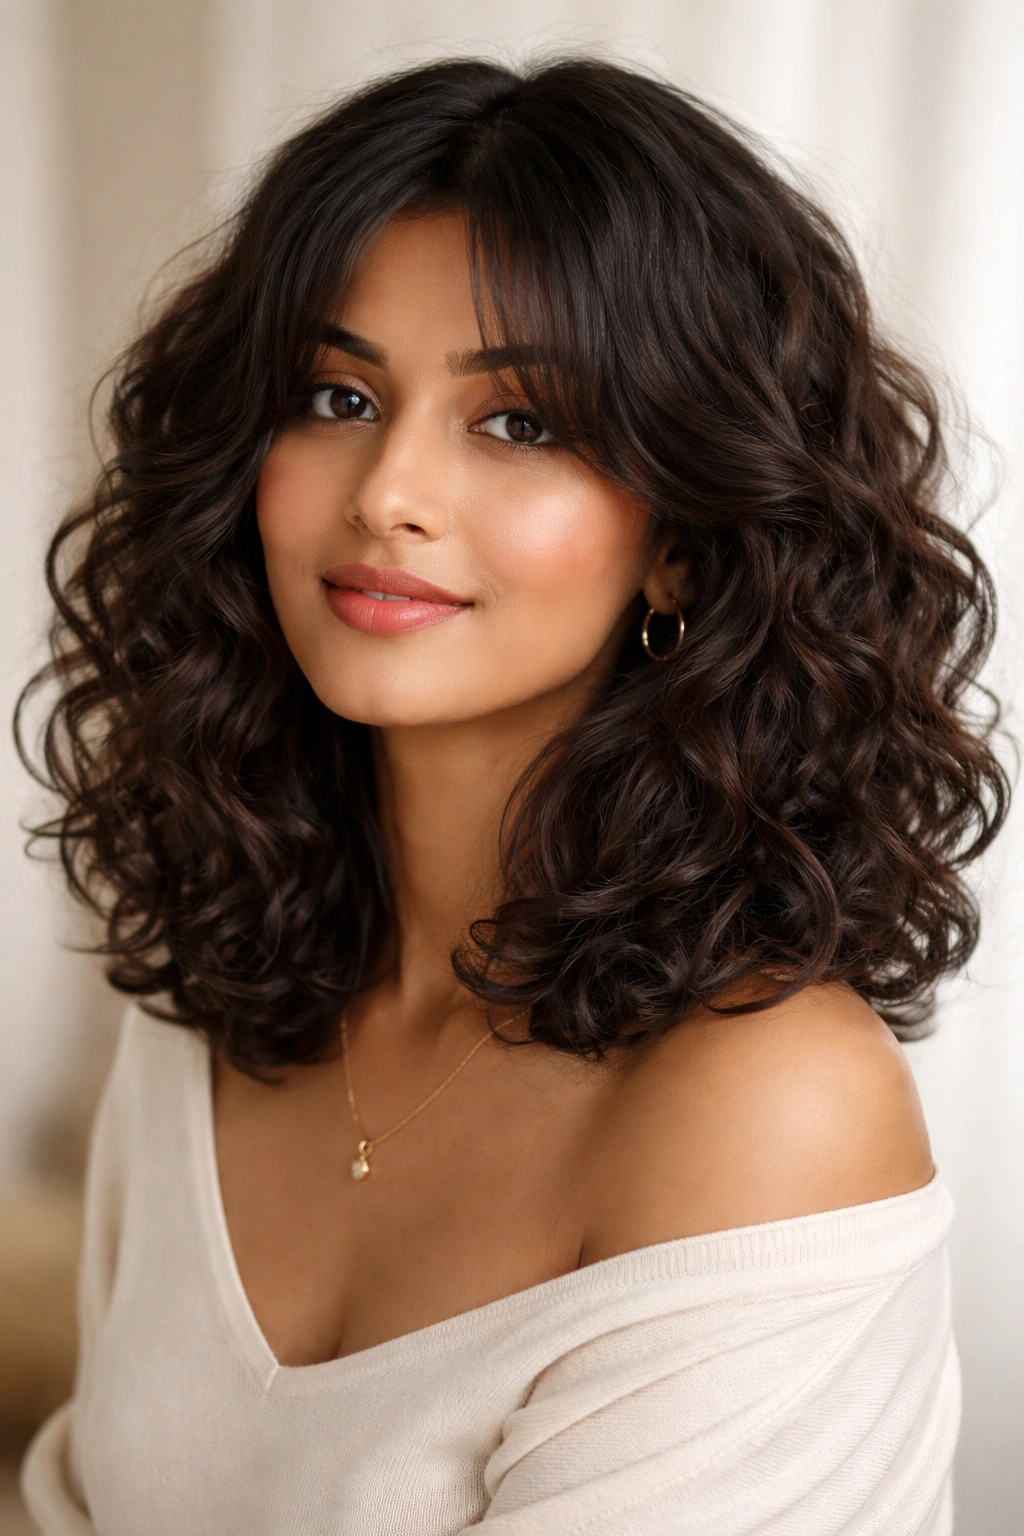
1. Defined Layered Curls for Indian Hair
If you only learn one style, make it this one. Layered curls give thick Indian hair shape without stealing its volume, and that matters more than people admit.
Ask for long layers that begin around the chin or collarbone, not chopped-up layers near the crown. The difference is huge. Short layers can make some curls spring up too high and leave the ends looking thin, while longer layers let the curl pattern stack in a softer, fuller way.
What to ask for at the salon
Tell the stylist you want movement, not a heavy shelf of hair at the bottom. If your curls are tighter near the nape and looser on top, the cut should respect that difference instead of flattening everything into one shape. Dry cutting often helps because curls sit where they naturally fall.
A defined layered cut also makes styling faster on busy mornings. A small palmful of curl cream, a gel cast if you like hold, and a quick diffuse can be enough. I like this style because it still looks good when a few pieces frizz up a little — the layers hide the mess instead of announcing it.
- Best for shoulder-length to long curls
- Works well when hair is thick or dense
- Needs only a small amount of product near the ends
- Looks neat with a center part or side part
Tip: Ask for a few face-framing pieces that start below the cheekbone. That keeps the front soft without turning the whole cut into a shaggy blur.
2. Side-Part Volume Curls That Frame the Face
Need something that makes the face look a little more open without flattening the crown? A side part does that job better than most people expect.
A deep side part gives curly hair a soft sweep that works especially well for round, square, or heart-shaped faces. It also helps when the curl pattern is uneven, because one side can carry a little more volume while the other side stays closer to the head. That asymmetry looks deliberate, which is handy when your hair has other plans.
My own bias? Side parts do more work than they get credit for.
A clean side part also plays nicely with a maang tikka or a small clip near the temple. Keep the part line crisp by making it on damp hair, then letting the curls dry in place. If your roots puff up, clip the top flat for 10 to 15 minutes while it dries. Remove the clip only after the hair feels set, not halfway through when it is still soft and springy.
The easiest mistake is overloading the front with serum. Don’t. A tiny bit on the ends is enough. The goal is shape, not shine at the roots.
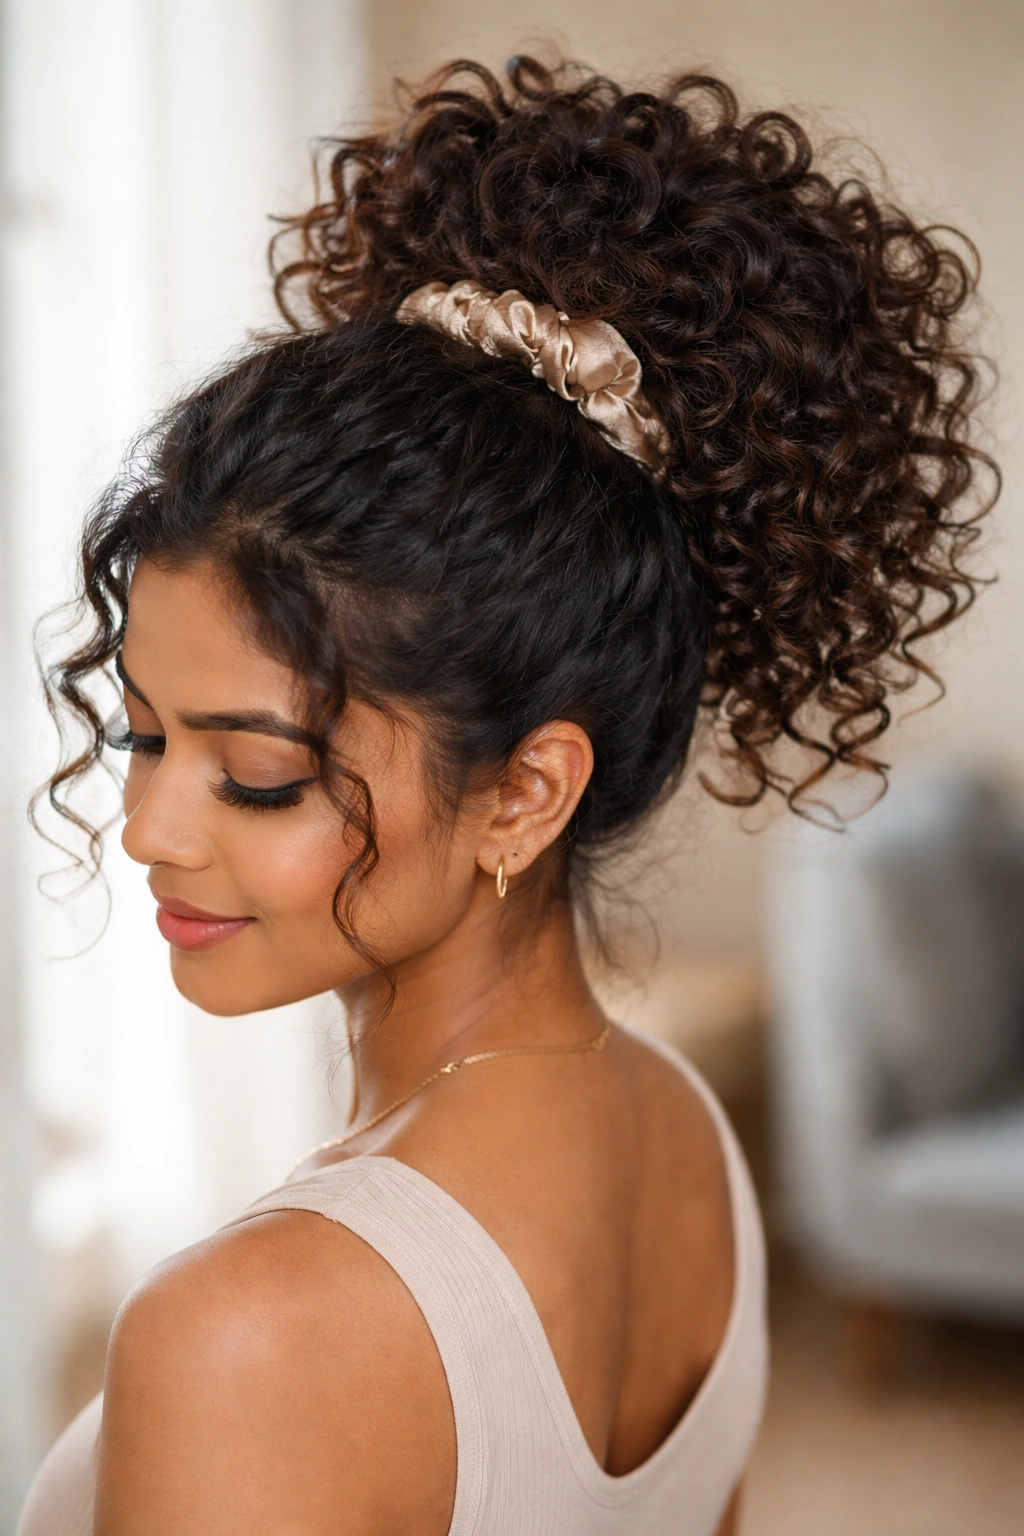
3. High Curly Ponytail with a Wrapped Base
A high ponytail is not lazy when curls are involved. On thick Indian hair, it can look sharp, lifted, and surprisingly elegant if you leave the crown smooth and let the length do the talking.
Gather the hair at the crown or just above it, then secure it with a strong elastic. Pulling too tight can give you a headache by noon, so leave a little give at the scalp. Take a 1-inch section from the ponytail and wrap it around the elastic to hide the tie; pin the end underneath with a bobby pin.
This style works for days when your curl pattern is loose but your roots are behaving badly. It also saves time on second-day hair, because the ponytail lifts the curls away from the face and hides a slightly rough top. If the ponytail feels too flat, tug the sides gently for a softer shape.
Best ways to wear it
- With a satin scrunchie for less breakage
- With a festive clip at the base for events
- With a curl-defining gel if you want a sleeker crown
- With a few baby hairs left out if that suits your face
A wrapped-base ponytail is one of those styles that looks more intentional than people expect. Clean, quick, and done.
4. Half-Up Twisted Crown with Loose Ringlets
Need a style that stays neat through an evening but still shows off your length? The half-up twisted crown is a very good answer.
Take two sections from each temple, twist them back loosely, and pin them together at the back of the head. Then leave the lower curls free. It sounds simple, and it is, but the result is better than a plain clip because the twist gives the front a little structure without crushing the curl pattern.
How to make the twists hold
Use two small pins per twist instead of one large pin. Cross the pins in an X shape so they lock better. If your hair is heavy, mist the section with a little water before twisting; damp hair grips better than dry hair that is slipping everywhere.
This style is good for long hair, layered hair, and curls that fall apart if you try to pin too much of them up. The lower half stays visible, so the style still feels airy. It also works well under a dupatta, because the front stays anchored and the back keeps its shape.
I like this one for family dinners and mehendi events. It looks done, but not stiff.
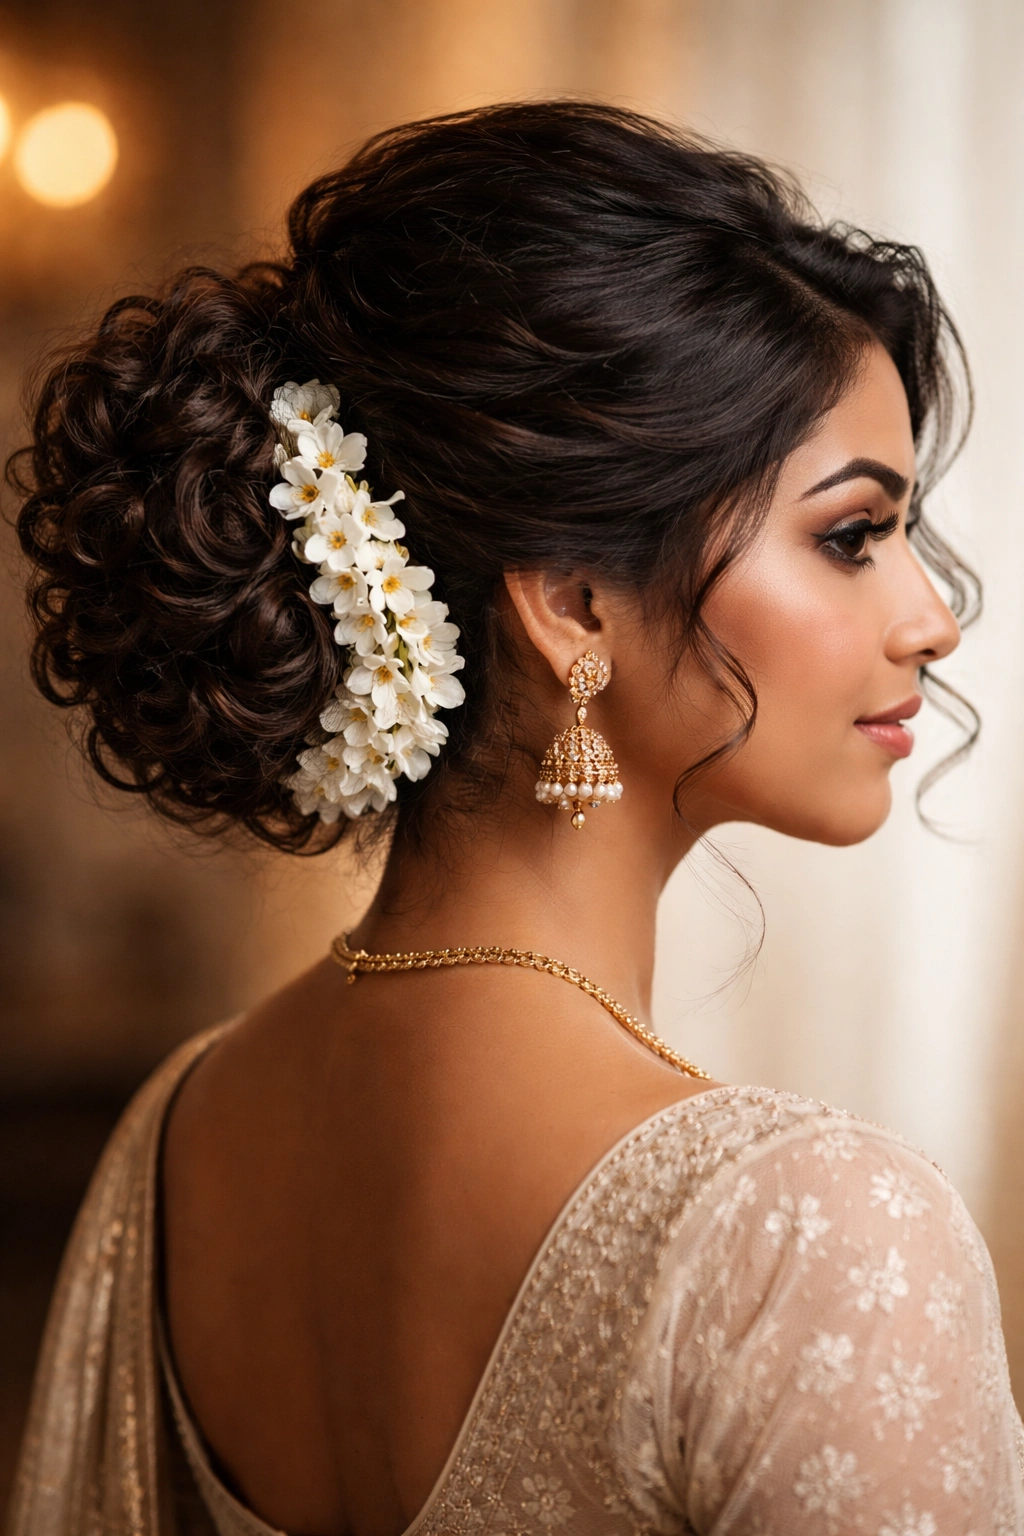
5. Low Curly Bun with Face-Framing Pieces
A low curly bun is the grown-up version of “I need my hair off my neck.” It is neat, practical, and far less severe when you leave a few curls loose around the face.
Gather the hair at the nape, twist it into a soft bun, and pin it in place without trying to make it perfectly round. Perfect buns on curly hair often look oddly flat; a little texture makes them better. Pull out two front pieces, one on each side, and let them sit around the cheekbones or jaw.
That small choice changes the whole face. It softens the bun, especially with sarees or high neck blouses, and it gives the style a less formal feel. If your hair is very thick, use two elastics first — one to secure a low ponytail, another to anchor the bun — so the weight does not drag the style down.
A low bun also gives you room for accessories. A small comb, a pearl pin, or fresh flowers all sit well here. If the bun feels too tight, loosen the top with your fingers. Curly hair likes a little space.
6. Pineapple Puff for Second-Day Curls
The pineapple puff is one of those styles that sounds casual because it is, but that is exactly why it works. For second-day or third-day curls, it keeps the definition while lifting the hair away from your neck and face.
Flip the head forward, gather the curls high on the crown, and secure them loosely with a soft scrunchie. Not tight. Tight hair ties can leave a crease across the top layer, and curly hair remembers everything. The ends should fall forward and upward, like a soft fountain.
Second-day curl rescue
If the back looks crushed, mist only the flattened sections with water and a little leave-in conditioner. Then scrunch upward once or twice. Do not soak the whole head. That turns the front frizzy and the back limp, which is a bad trade.
This is one of my favorite styles for travel days and lazy mornings. It looks deliberate enough to wear outside the house, and it protects the curl pattern enough to save you a wash. A silk or satin scrunchie helps a lot here, especially if your hair tangles easily.
The pineapple puff is also a good fallback style when nothing else behaves. That is not a small thing.
7. Curly Side Braid with Soft Tendrils
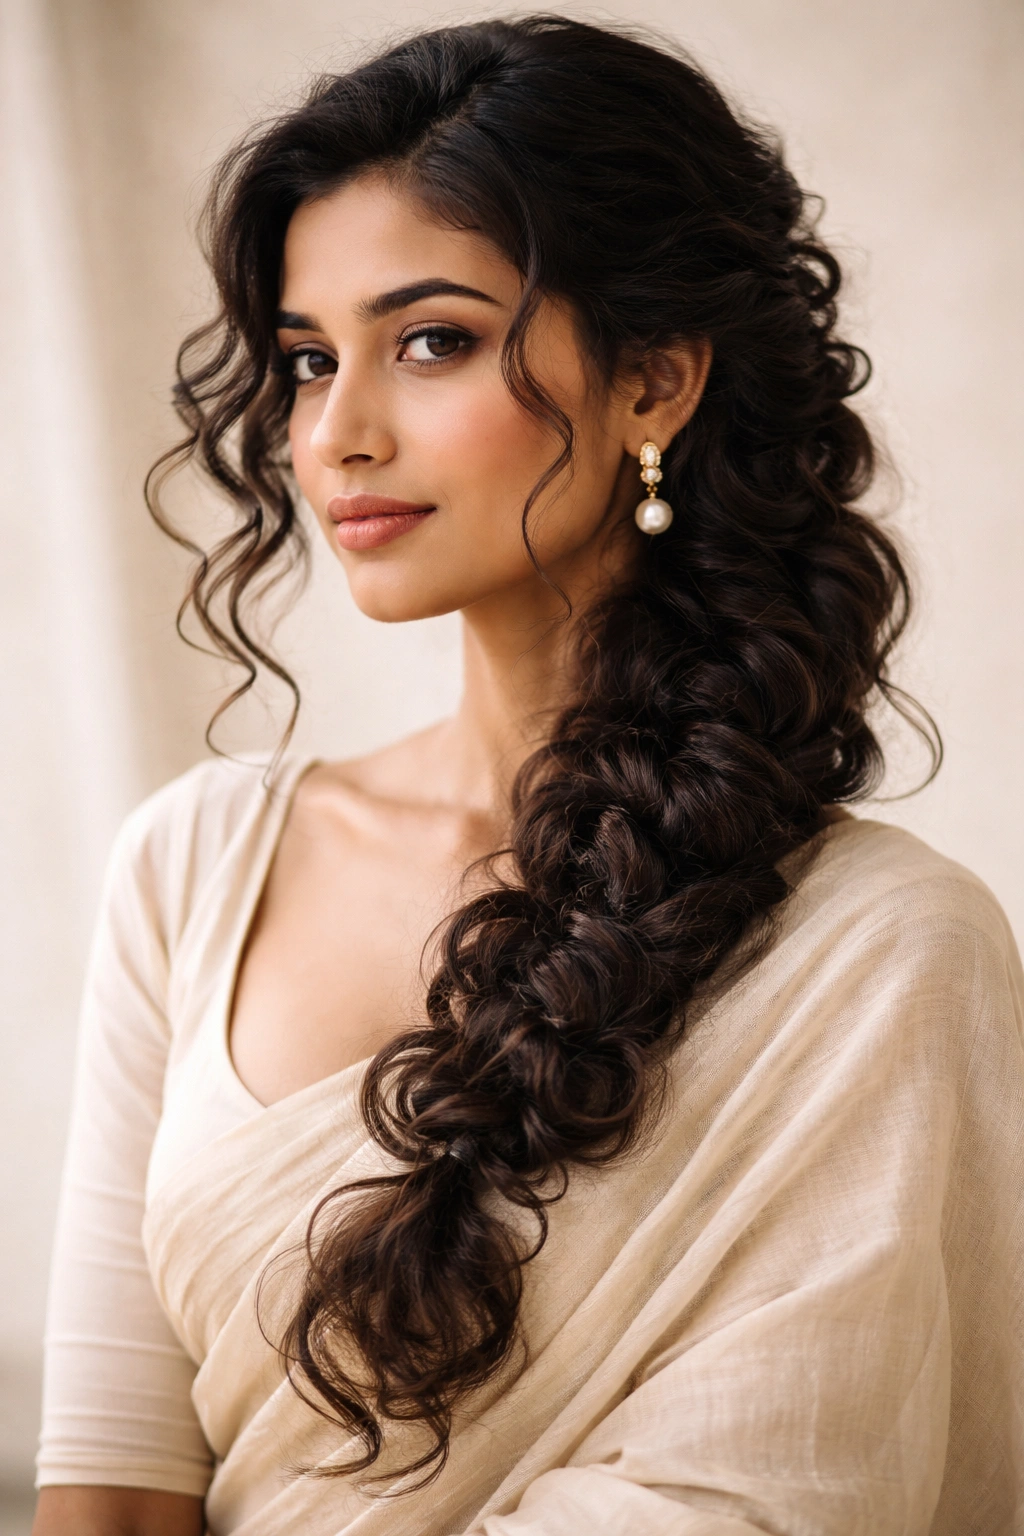
Unlike a tight three-strand braid, this version is meant to look a little loose. That is the whole point.
Sweep the hair over one shoulder and start the braid low near the ear or the nape, depending on how much volume you want at the top. Keep the braid relaxed so the curls can stay visible in the sections. Once the braid is done, gently pull the outer edges apart with your fingers. People call this “pancaking,” which sounds odd, but it gives the braid a fuller look.
Leave a few tendrils free around the face. Those small pieces keep the style from looking too rigid, and they soften sharper features. If the curls are very springy, use a light mist of water before braiding so the sections do not pop out halfway through the day.
This works especially well on longer hair because the braid has enough length to show shape. It is also handy under scarves and dupattas, since one side carries the bulk and the other side stays clean. If you want it to feel fancier, tuck in a single pin or a tiny flower near the braid’s start.
8. Claw-Clip Twist for Thick, Dense Curls
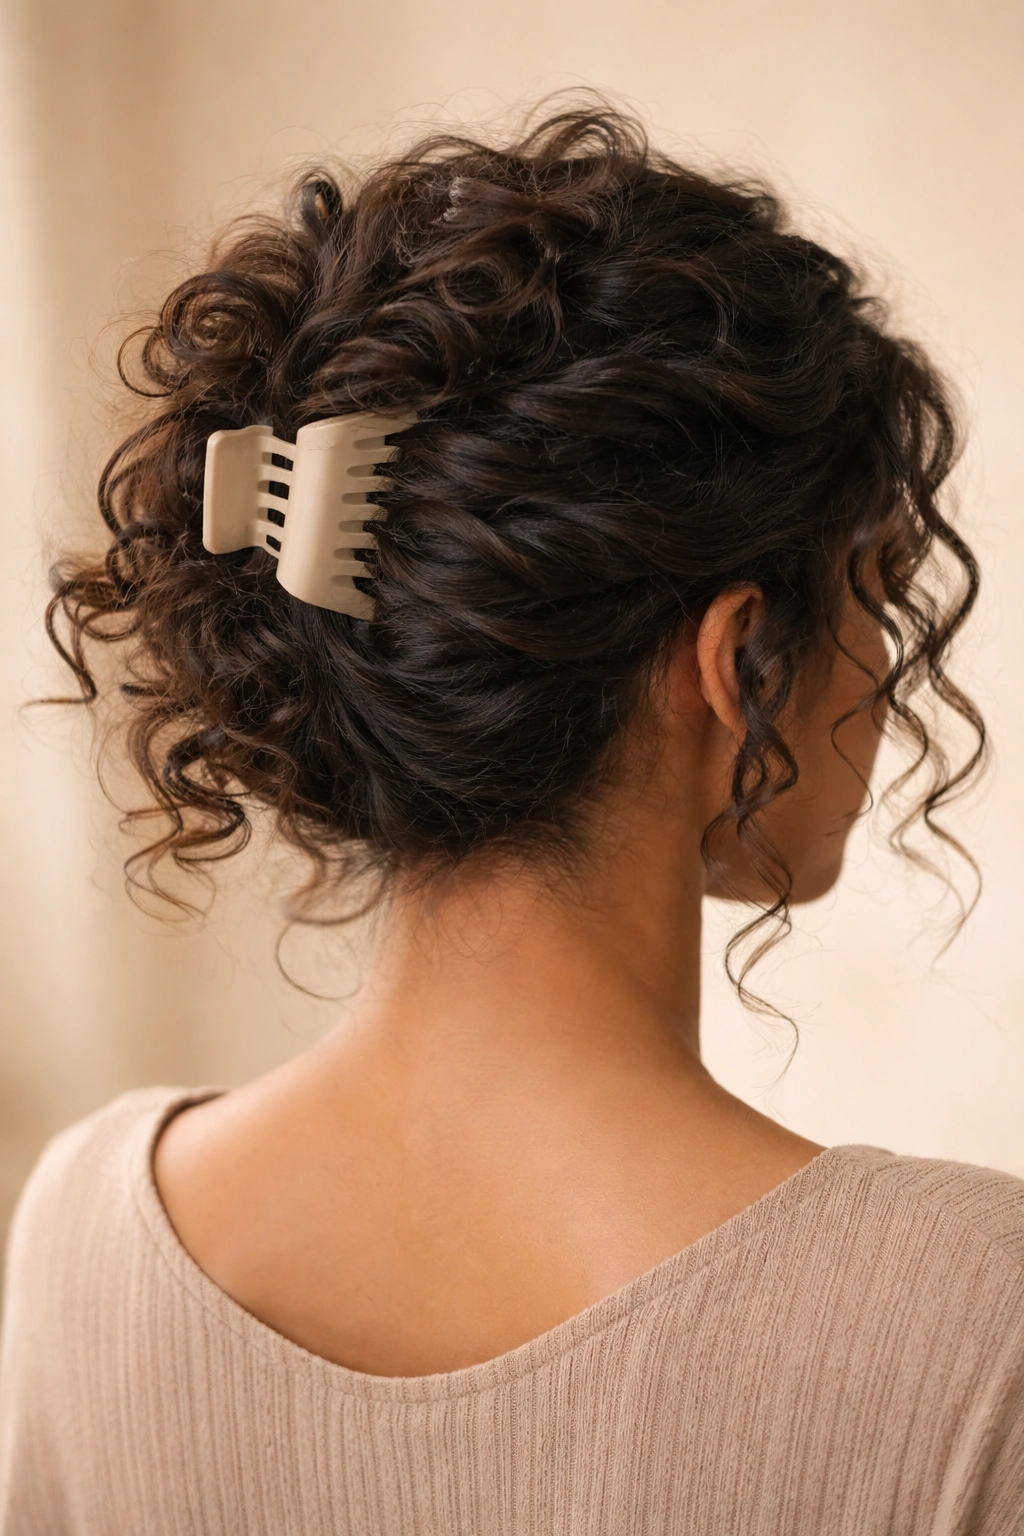
A claw clip is not a lazy shortcut on thick curls. It is a survival tool.
Take the hair into one hand, twist it upward once or twice, and clip it at the back of the head so the ends fold over the top. Large claw clips with grippy teeth work better than tiny decorative ones, because thick Indian hair can slip out of flimsy clips in minutes. If your hair is heavy, choose a matte clip with a wide opening instead of a glossy one that slides.
This style is useful when you want the neck clear but do not want the tension of a bun. It also gives the roots a little lift without flattening the curl pattern. When done well, it looks relaxed in a good way — not messy, just unfussy.
The trick is leaving a few face-framing pieces out. Without them, the style can look severe. With them, it feels softer and more wearable for office days, errands, or casual dinners. If the clip feels loose, secure the twist first with a tiny elastic, then place the clip over it. That extra step saves you from constant readjusting.
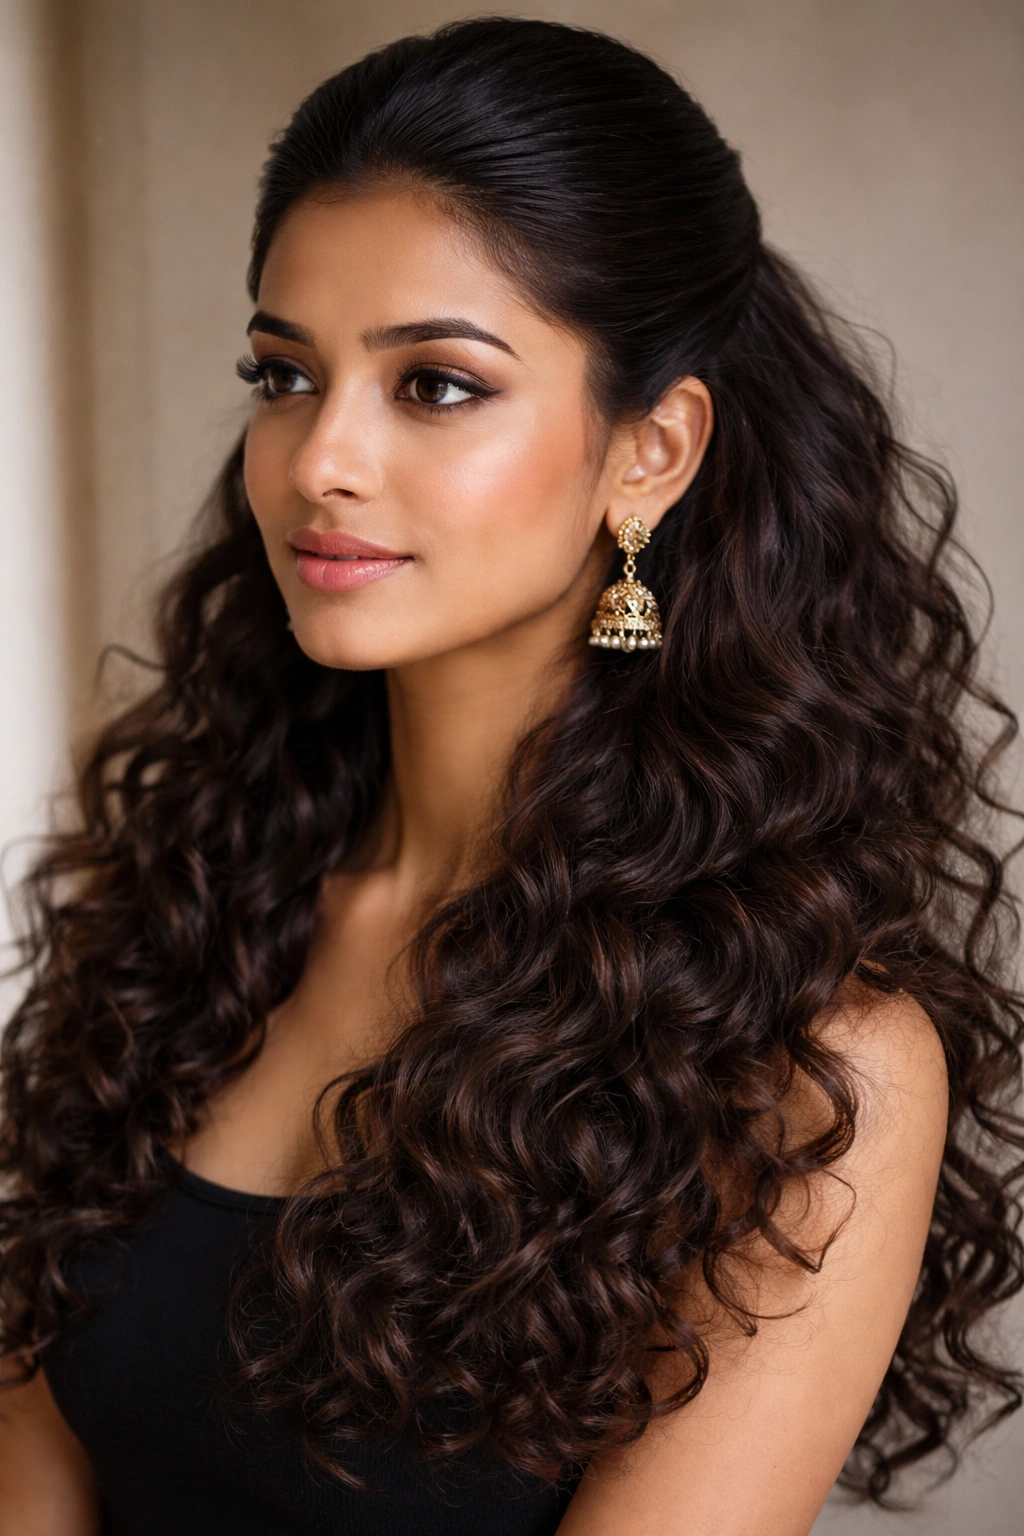
9. Middle-Part Open Curls with a Gloss Finish
Middle parts are not boring when the curls are strong enough to carry them. On Indian hair with good density, they can look balanced, clean, and a little dramatic in the best way.
A center part works because it splits the volume evenly and lets the curls frame both sides of the face. It is especially useful if one side of your hair is always fuller than the other. The symmetry hides that difference and gives the whole style a calmer shape. If your part tends to vanish, draw it with the tail of a comb while the hair is still damp.
What gives this style its finish
A light gloss serum on the mid-lengths and ends helps the curls catch light without turning greasy. Use a tiny amount — about a pea-sized drop for each side — and keep it away from the roots. A small clip at the crown can add lift if the part makes the top sit flat.
This style suits straight-across brows, oval faces, and anyone who wants the curl pattern front and center. It also pairs well with earrings, because the hair stays open and the face stays visible. If your curls are loose, diffuse them until about 80% dry, then leave the rest alone. Hands can ruin the shape fast.
10. Curly Lob with Curtain Bangs
Can curls and bangs behave together? Yes, if the bangs are cut with room to move.
A curly lob — a long bob that hits around the collarbone — keeps the weight manageable while still giving enough length for ponytails, clips, and soft waves. Add curtain bangs, and the whole cut becomes easier to shape around the face. The bangs should be longer than straight-hair bangs, because curly hair springs up after it dries. Cutting them too short is a mistake people regret quickly.
The best version is blended, not blunt. The fringe should fall around the cheekbone or a little below, then open in the middle or just off-center. That shape helps round faces and softens strong jawlines. It also keeps the front from looking too heavy when the rest of the hair is big.
How to stop the bangs from puffing
Dry the bangs separately with a diffuser on low heat, or let them air-dry while clipped in their shape. If they dry wrong, they can balloon out and steal the whole style. A dab of cream on the ends only — not the roots — usually keeps them calm.
I like this cut because it does a lot without looking fussy. That matters.
11. Sleek Crown with Loose Curly Lengths
Sometimes the smartest move is smoothing only the top and leaving the curls alone everywhere else. That combination gives you control without killing texture.
Brush the front section back with a little gel or edge-control cream, then pin or tuck it so the crown sits close to the head. Leave the mid-lengths and ends loose and curly. This is a strong choice when you want a clean face line for a maang tikka, a big pair of earrings, or a blouse with a high neckline.
The best part is that it solves a common problem: frizz at the hairline. Many curly-haired people have the right curl shape but a fuzzy top layer that refuses to behave. Smoothing just the crown takes care of that without flattening the whole head.
Don’t make the front too slick. That is where it starts to look harsh. A soft, controlled crown with textured lengths reads as intentional and comfortable to wear. If your hair is very thick, section the front into two parts before brushing it back. That keeps lumps from forming near the temples.
It is one of the few styles that feels tidy and relaxed at the same time. Rare, honestly.
12. Crown Braid into Free Curls
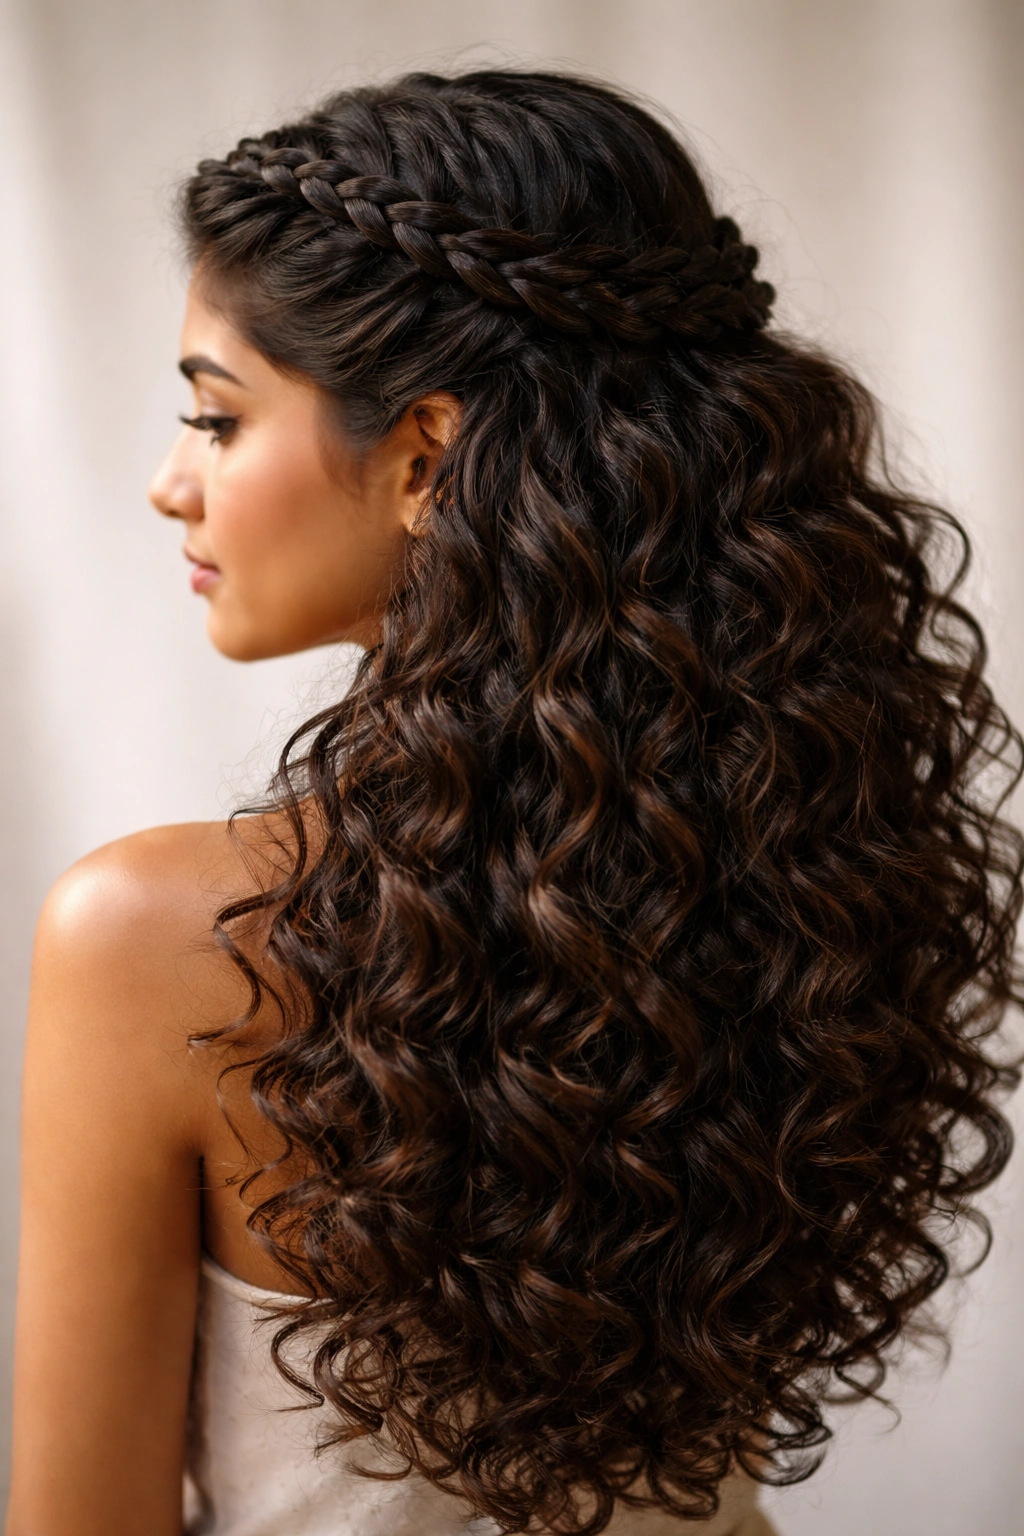
A crown braid gives curly hair a built-in frame. The braid sits around the head like a band, and the loose lengths behind it keep the style from feeling too formal.
Start the braid near one ear and work it across the top of the head to the other side. Pin the end under the braid so it disappears. Leave the rest of the curls free. That contrast — braided crown, open ends — is what makes the style interesting.
Where this works best
- Long curls that can carry both braid and length
- Weddings, pujas, or dinner events
- Hair that gets frizzy at the temples
- Outfits with heavy earrings or a decorated neckline
This style can be dressed up with a few small pins, but it does not need much. In fact, too much accessory work can make the braid feel crowded. If you want volume at the crown, gently lift the braid after it is pinned. A braid that is too tight can look flat and pull the whole style backward.
It is a nice option when you want something more decorative than a ponytail but less formal than a bun. That middle ground is useful.
13. Messy Bun with a Gajra Ring

Jasmine changes the mood of a bun in seconds. The scent, the softness, the little white ring around dark curls — it works because it feels traditional without looking stiff.
Make a loose bun first. Don’t press every curl into place. Curly hair looks better when some texture stays visible in the bun itself. Once it is pinned, wrap a gajra around the base or around the bun in a loose ring. If the flowers are fresh, keep them in the fridge until right before you use them so they stay firm longer.
The messy part matters. A too-smooth bun can make the flowers feel pasted on. A textured bun gives the gajra somewhere to sit, and the whole look feels richer. This style is especially good for weddings, temple visits, or family functions where you want the hair to feel festive but not overworked.
If your hair is slippery, pin the bun first, then use a thin hairnet or a few extra pins to hold the gajra in place. It saves you from petals slipping halfway through the evening. The smell alone is worth the effort for many people. There’s a reason this style keeps coming back.
14. Bubble Ponytail on Long Curly Hair
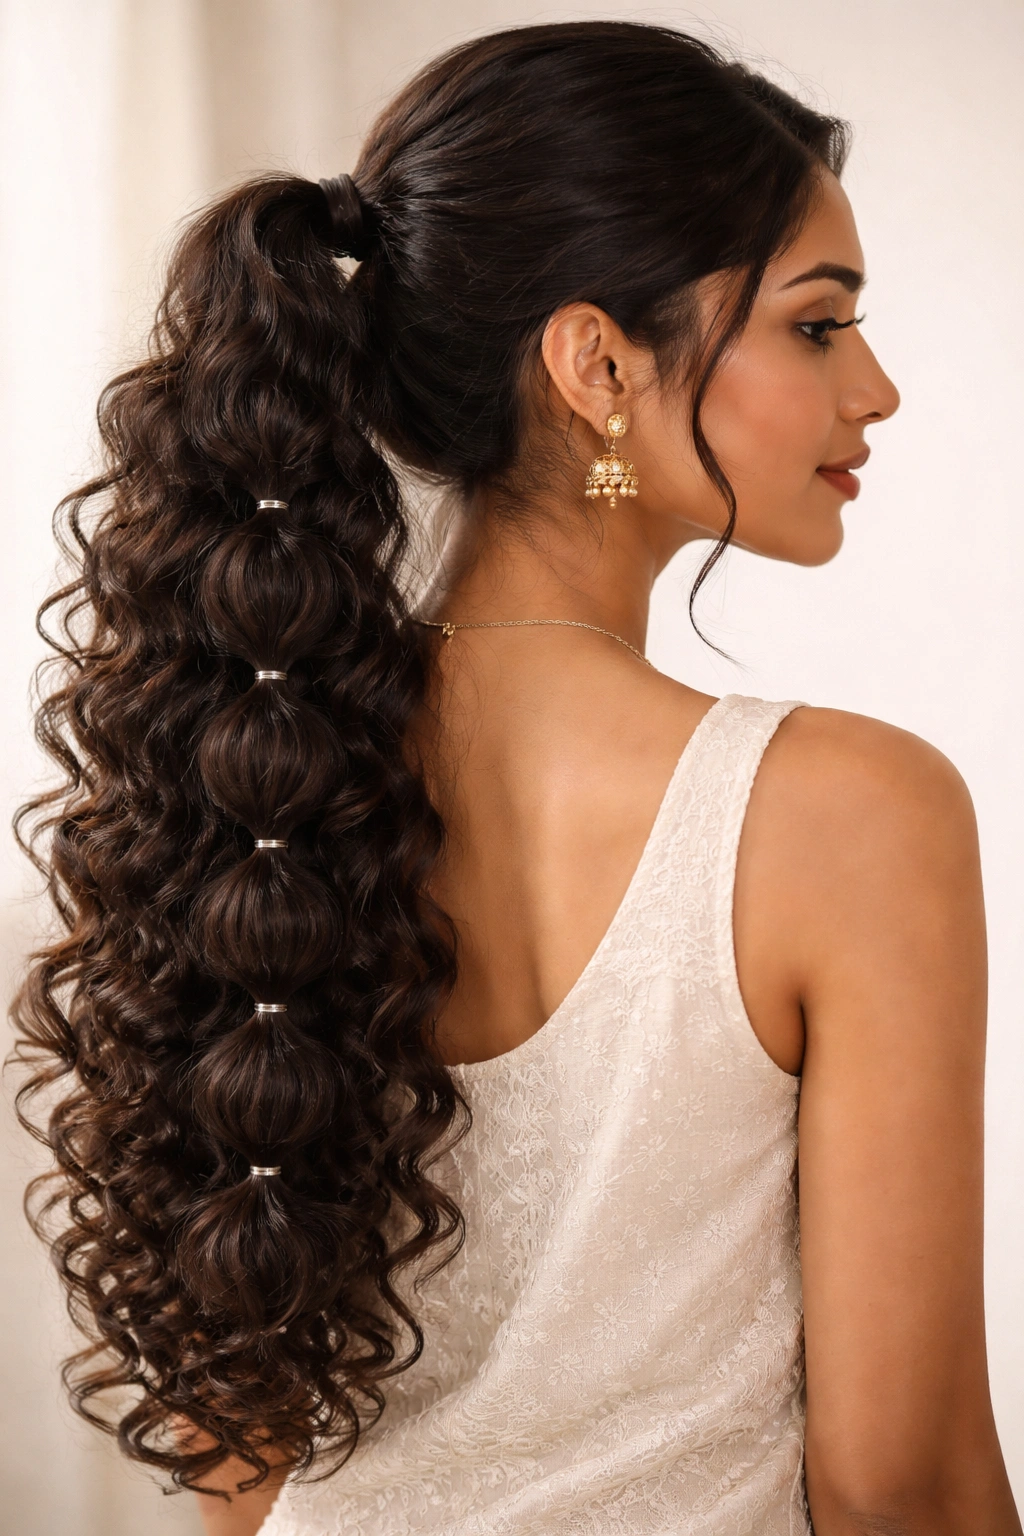
Want a ponytail that looks a little playful without needing heat? The bubble ponytail does that job well, and long curls make it even better.
Tie the hair into one ponytail, then place small elastics every 2 to 3 inches down the length. Gently pull each section outward between the elastics so it forms a rounded “bubble.” Curly hair already has texture, so the bubbles show up more clearly than they do on straight hair.
How to keep the bubbles round
Use clear elastics or elastics that match your hair color, then wrap a tiny strand around the first tie if you want the top to look cleaner. Tug the bubbles evenly on both sides, not just one, or the ponytail will lean. If the curls are dry, mist the ponytail lightly before shaping it so the sections separate without snapping.
This style is good for travel, college days, and events where you want movement without a full open style. It keeps the length controlled while still showing off the curl pattern. If your hair is shorter, the bubbles can get lost, so this one works best on medium to long hair.
A bubble ponytail looks more styled than it sounds. That’s the fun of it.
15. Side Bun with Jasmine and Volume
A side bun has a softer feel than a center bun, and curly hair gives it more life.
Sweep the hair to one side, gather it near the ear or just below it, and pin it into a rounded bun. Leave the top with a little lift so the shape does not look glued to the scalp. The side placement gives the face a gentle diagonal line, which often looks nicer with sarees, high-neck blouses, or festive jewelry.
This is not the same thing as the low bun earlier. The side bun has more personality. It sits off-center, which means it can balance heavier earrings on the opposite side or make a simple outfit feel dressed up. A few loose curls near the front keep it from looking too rigid.
Wrap a small string of jasmine around the base if you want a traditional finish. Keep the flowers closer to the bun, not scattered all over the head, or the style starts to look busy. If your hair is very dense, pin the bun in two stages: first secure a side ponytail, then twist it into the bun. That extra anchor helps a lot.
16. Double Mini Buns for Playful Curls
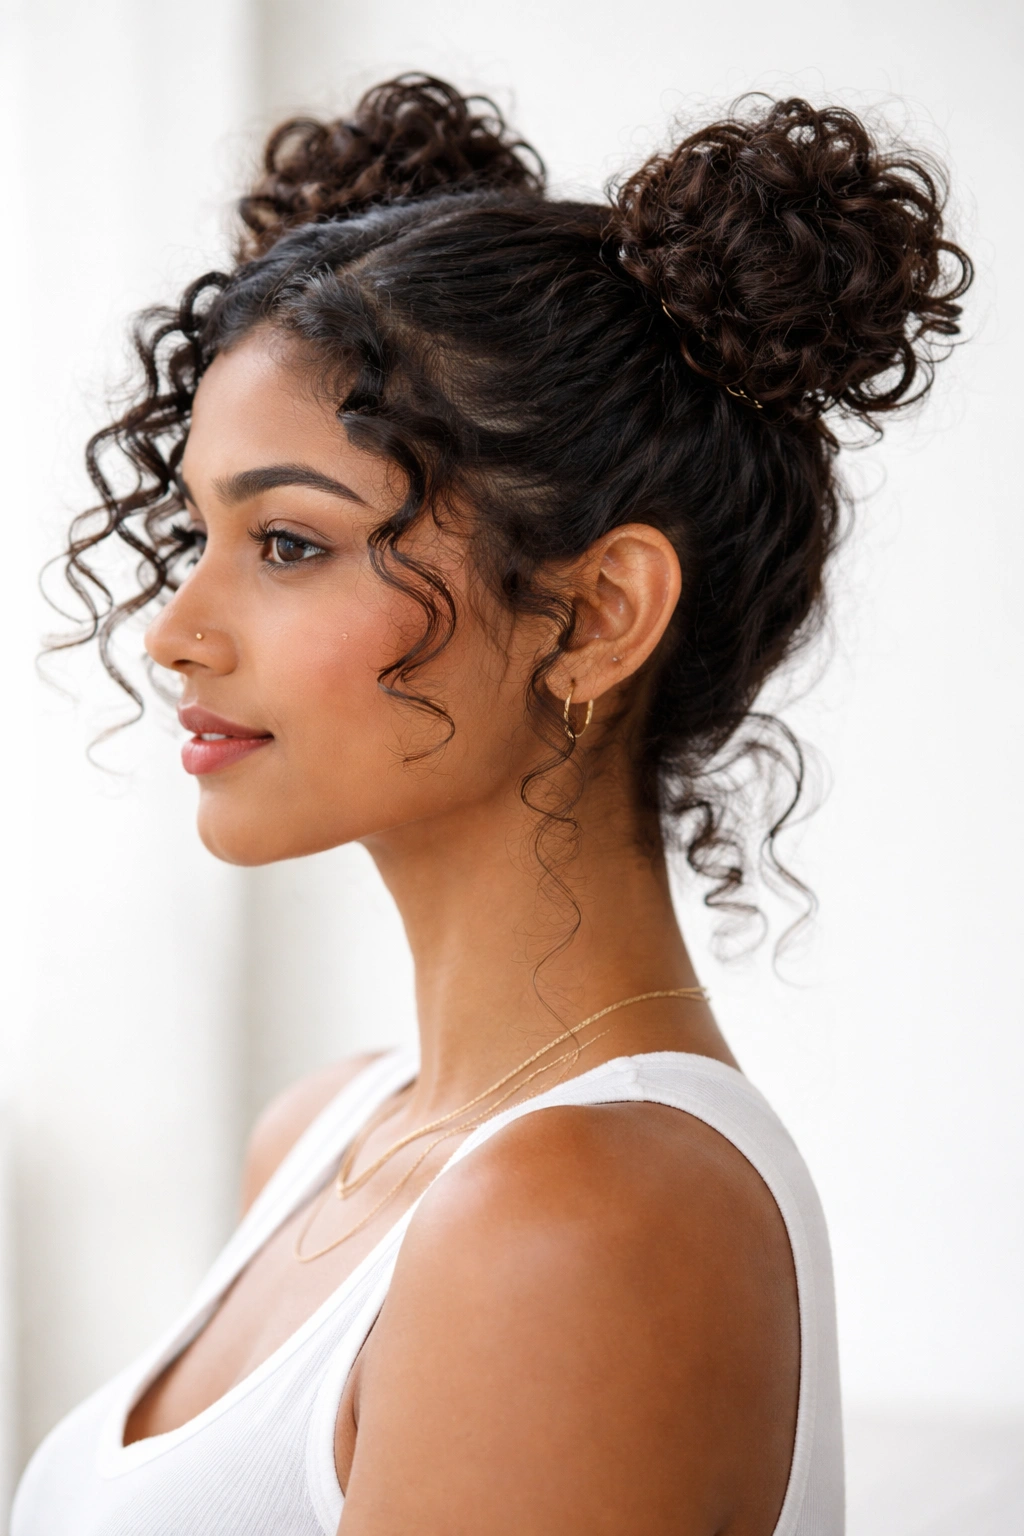
Two small buns can be more practical than one big one when your hair is thick. They spread the weight out, which helps if your scalp gets tired from heavy styles.
Part the hair down the middle and create two high or mid-height buns, one on each side. Keep them a little loose so the curls can show at the edges. If you make them too tiny, they vanish into the hair. If you make them too tight, they start to feel childish in a way you may not want.
This style works best when the rest of the hair still has texture. A few loose curls at the temples or along the nape make it feel more current and less costume-like. It is a good option for college, casual outings, or a day when you want your hair off your neck but still want a style with energy.
You can also wear the buns lower, closer to the ears, if your hair is very long. That version feels softer and less loud. Use a few pins inside each bun so the shape stays put, because curly hair can loosen fast once you start moving around.
It’s fun. No need to pretend otherwise.
17. Faux Hawk Pinned Through the Center
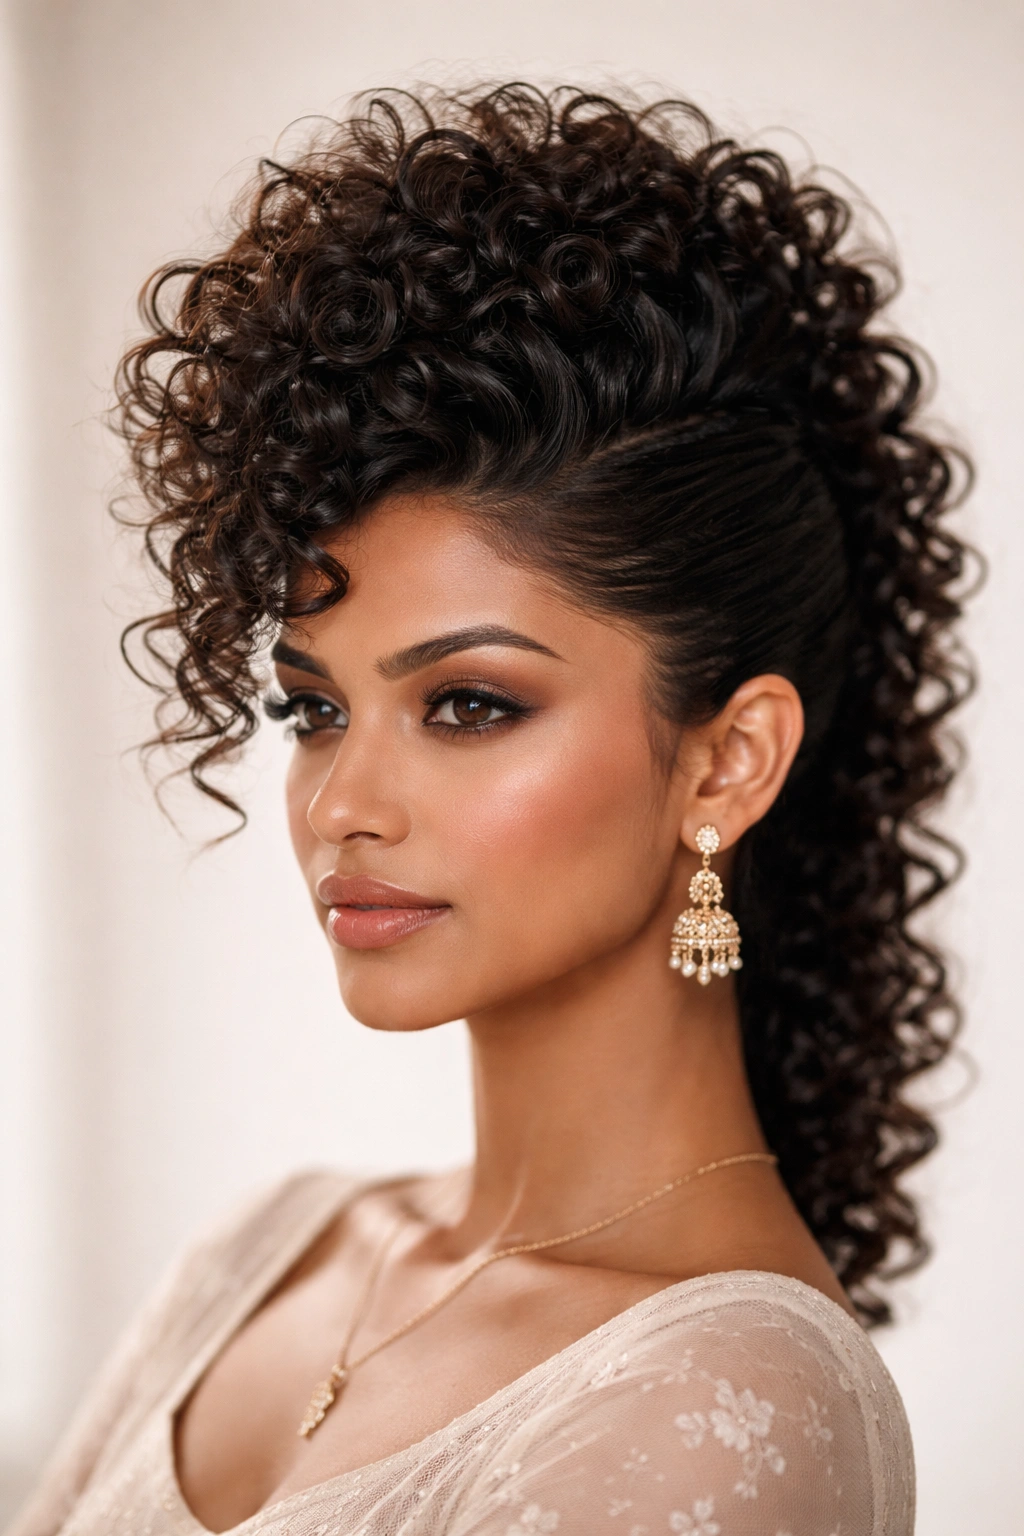
If you want one style that looks bold fast, this is it. The faux hawk gives curly hair height down the center and keeps the sides tight, which creates a strong shape without cutting anything off.
Section the hair from temple to temple, then pin the side sections back close to the head. Leave the center strip loose and curly, or twist it into a raised ridge if you want more height. The style can be as soft or as dramatic as you like. That flexibility is the point.
It works especially well for receptions, concerts, and photos where you want the hairstyle to feel a little sharper. It also shows off earrings and necklines because the hair stays away from the sides of the face. Use 6 to 8 bobby pins, crossed in pairs, if your hair is heavy. Fewer than that and the sides may drift loose before the night is over.
This is not the quietest option on the list. Good. Not every style needs to whisper. If your curls have a strong pattern and you want that pattern to look deliberate, a faux hawk makes a strong case for itself.
18. Twist-Out Halo with Defined Ends
A twist-out halo is one of the neatest ways to wear curls when you want definition without heat or a lot of daily restyling.
Start with small two-strand twists on damp hair, let them dry fully, then unravel them gently. Pin the front and sides around the crown so the shape forms a soft halo, while the ends stay loose and defined. It is a lovely option for textured hair that needs protection and shape at the same time.
Why it holds so well
The twists create a controlled base, which means the hair is less likely to swell into a frizz cloud later. That matters on busy days when you will not have time to keep touching your hair. If you want more shine, smooth a tiny bit of cream on the unravelled ends, not the whole head.
This style can feel modest or festive depending on what you add. A small clip, a pin near the temple, or fresh flowers near the back can change the mood fast. I like it because it gives the crown structure while leaving enough curl to keep the style alive.
It is a quiet finish, which is sometimes the smartest finish.
Final Thoughts

The best curly hairstyle is the one that survives your actual day. Not the one that behaves for ten photos and then gives up.
For Indian hair, that usually means thinking about weight, frizz, and where the curl needs room. A side part, a low bun, and a high ponytail cover a lot of ground. So do the half-up styles and the pinned twists. Keep one easy option, one festive option, and one emergency option in your back pocket, and you will stop feeling stuck every time you wash your hair.
The fun part is that curly hair does not need to be tamed into one shape. It just needs the right shape for the job.