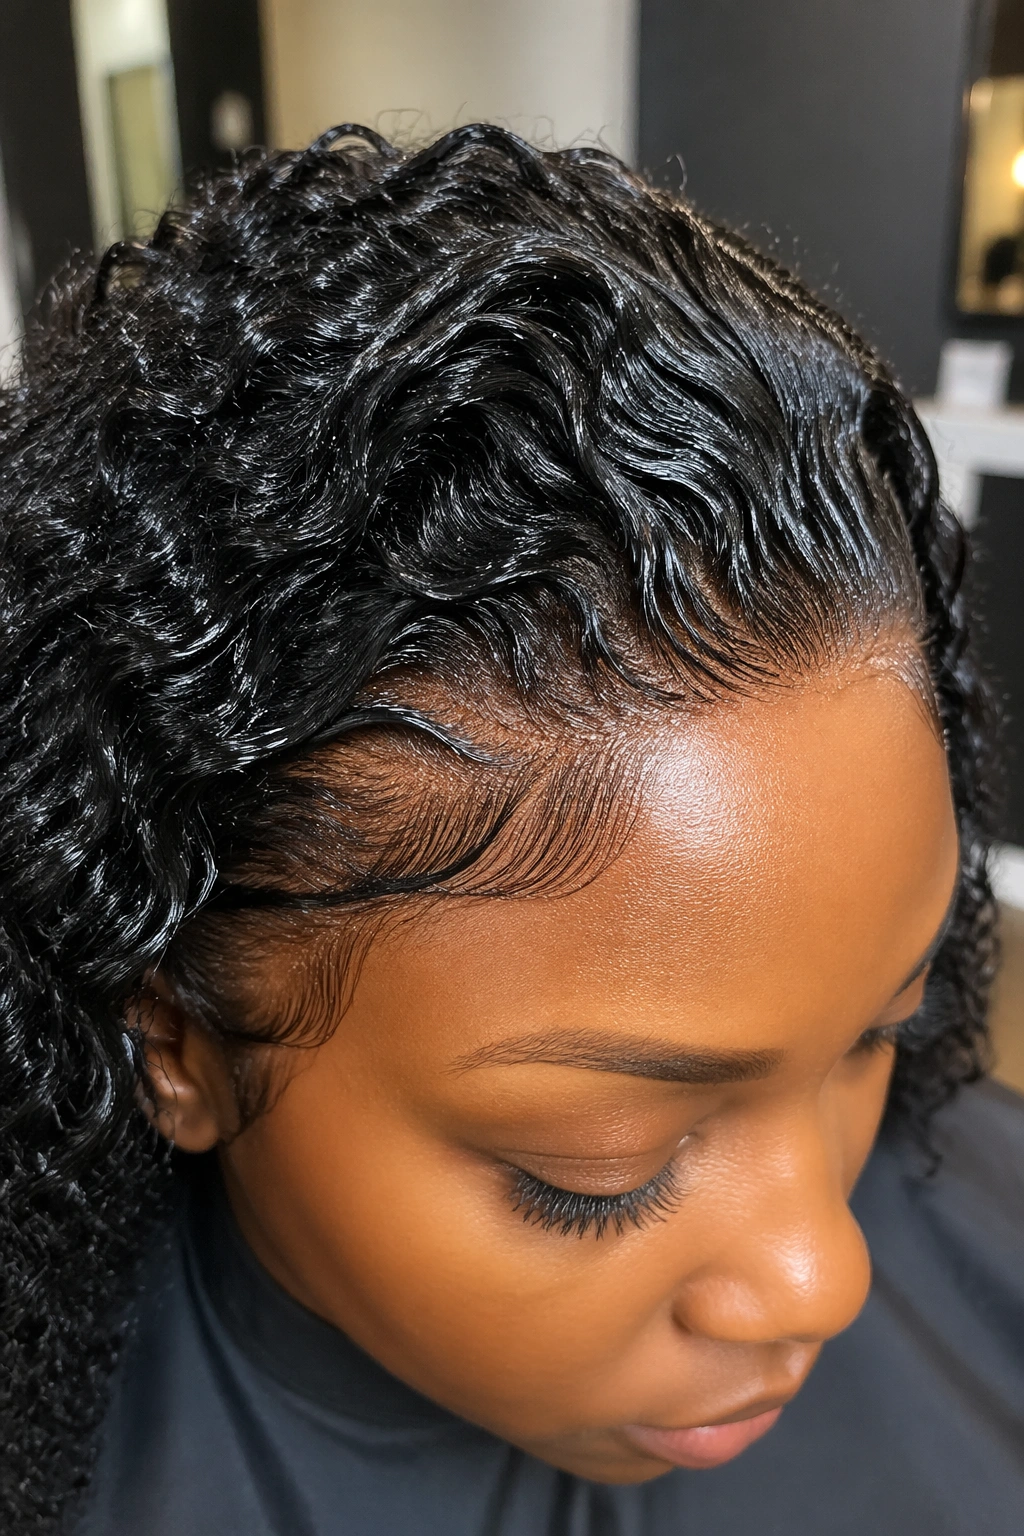
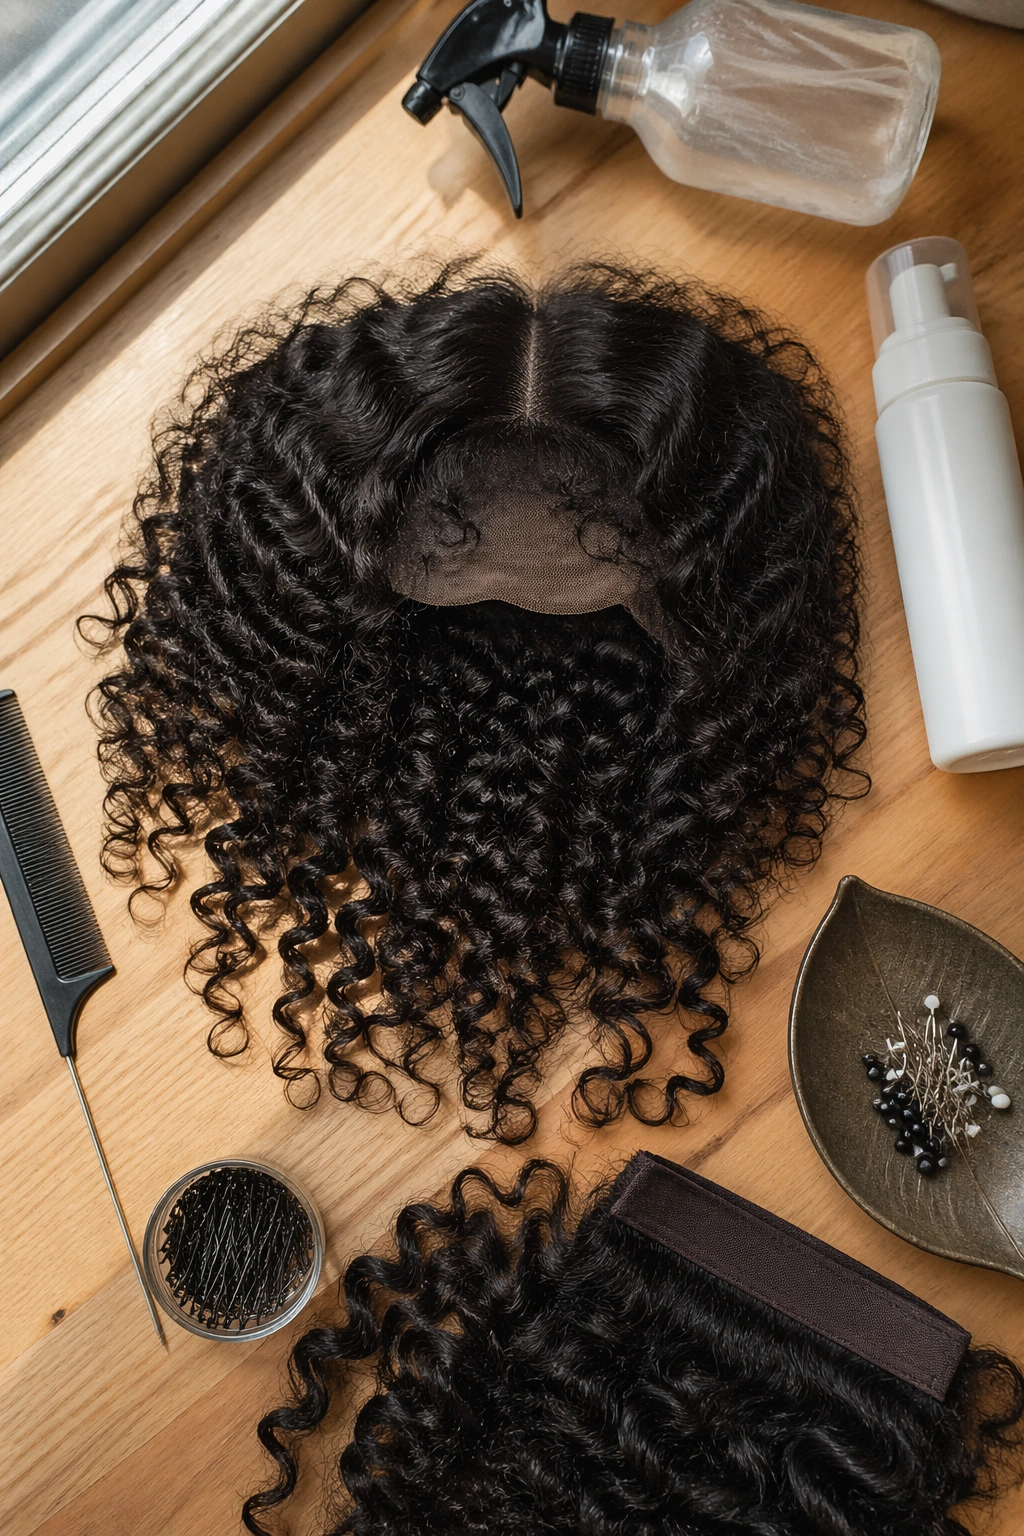
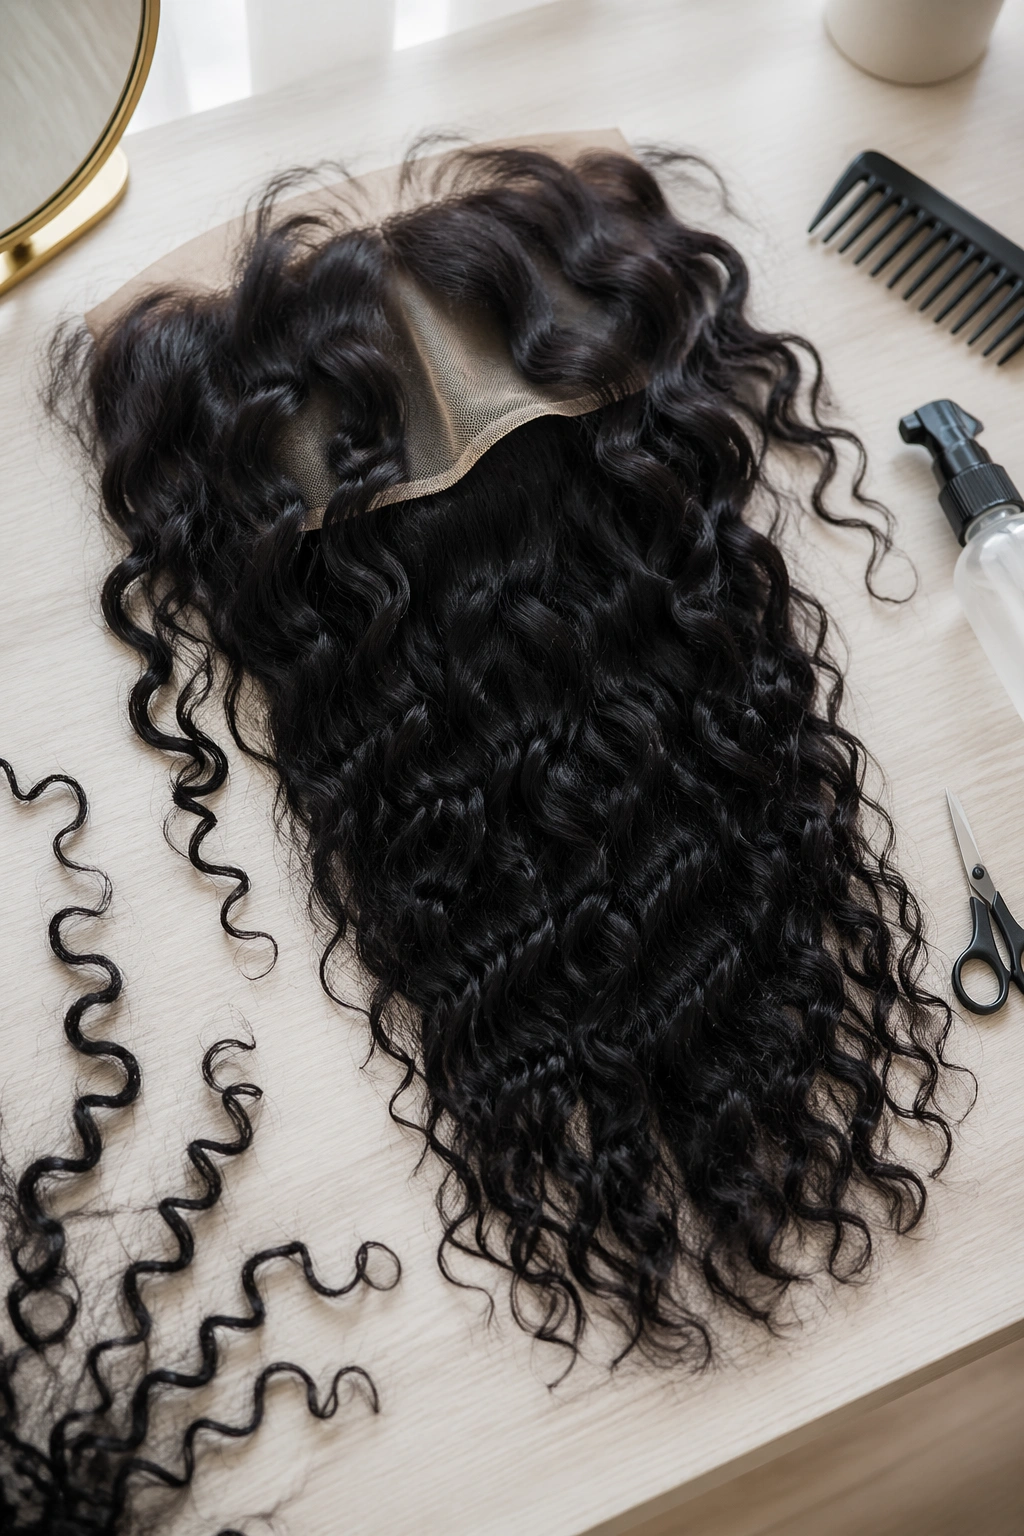
A curly frontal can be the difference between hair that looks done and hair that looks finished. For Black women, that matters more than people outside the chair sometimes realize. The curl pattern has to read right at the hairline, the lace has to disappear, and the part has to sit clean without fighting the texture underneath.
The best curly frontal styles for Black women also do something practical: they cut down on daily manipulation around the front of the head. Less brushing. Less tugging. Less time trying to make a part behave. That’s the real appeal. And yes, the details matter—a 13×4 frontal gives you a narrower styling lane, while a 13×6 opens things up when you want a deeper part or more room to play.
Texture changes the whole mood. Water wave gives soft movement. Deep wave brings bigger, fuller curls. Kinky curly blends more naturally with coily hair and looks especially good when you want volume rather than polish. The style works best when the hairline is clean, the density makes sense, and the curls aren’t overhandled into a puffed-up mess.
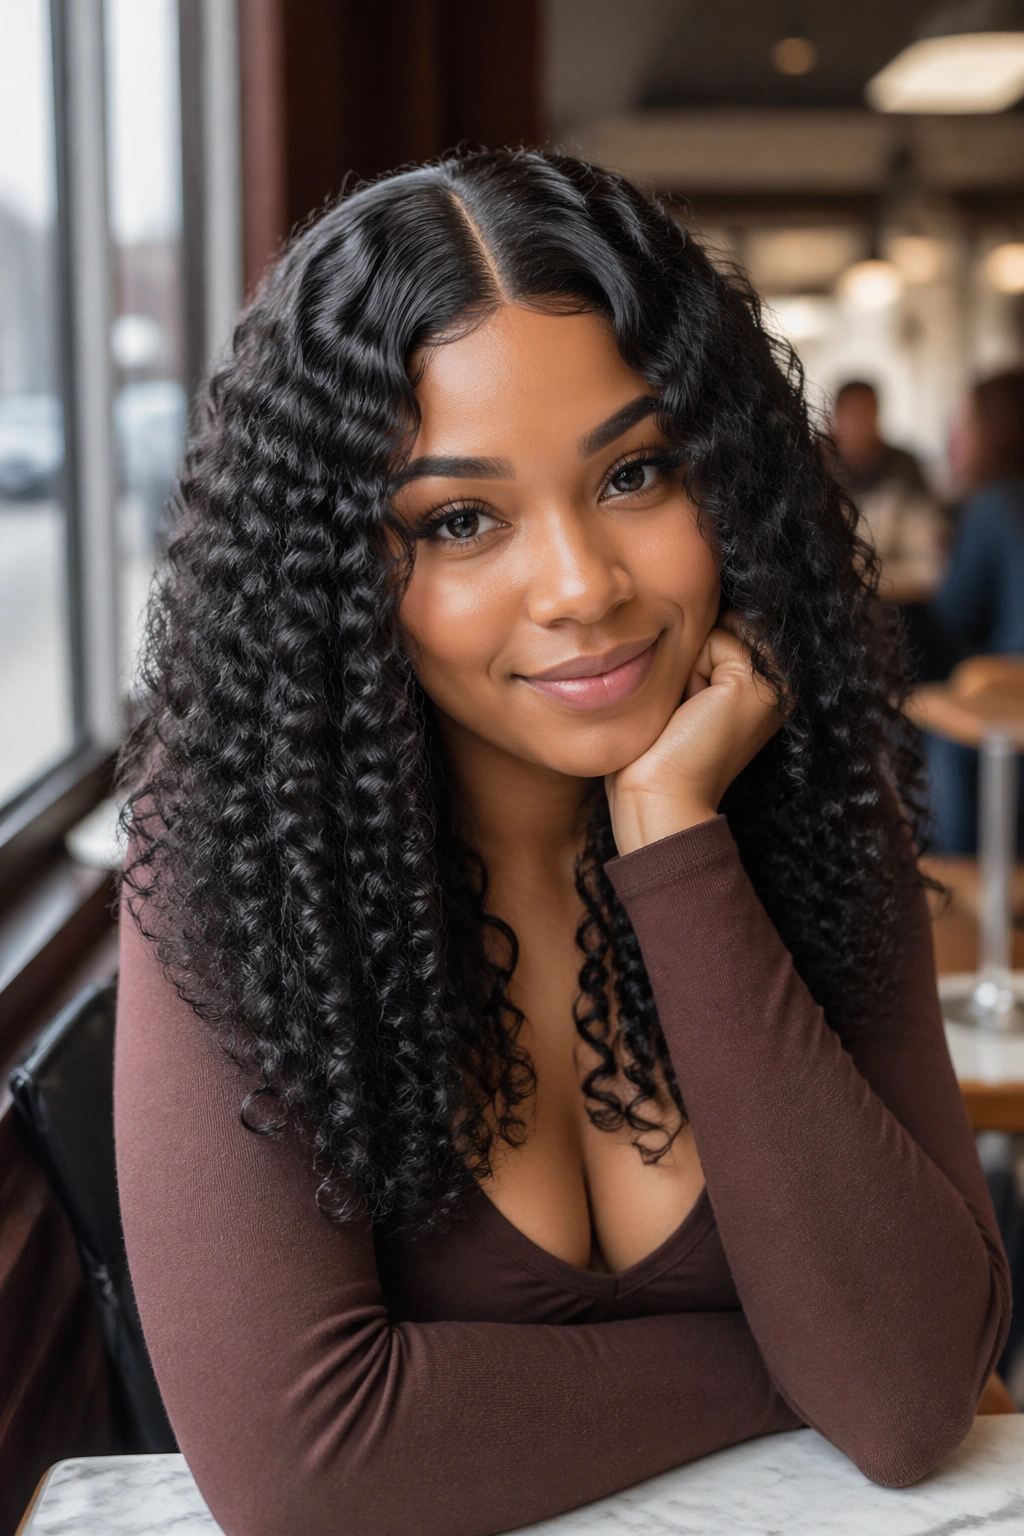
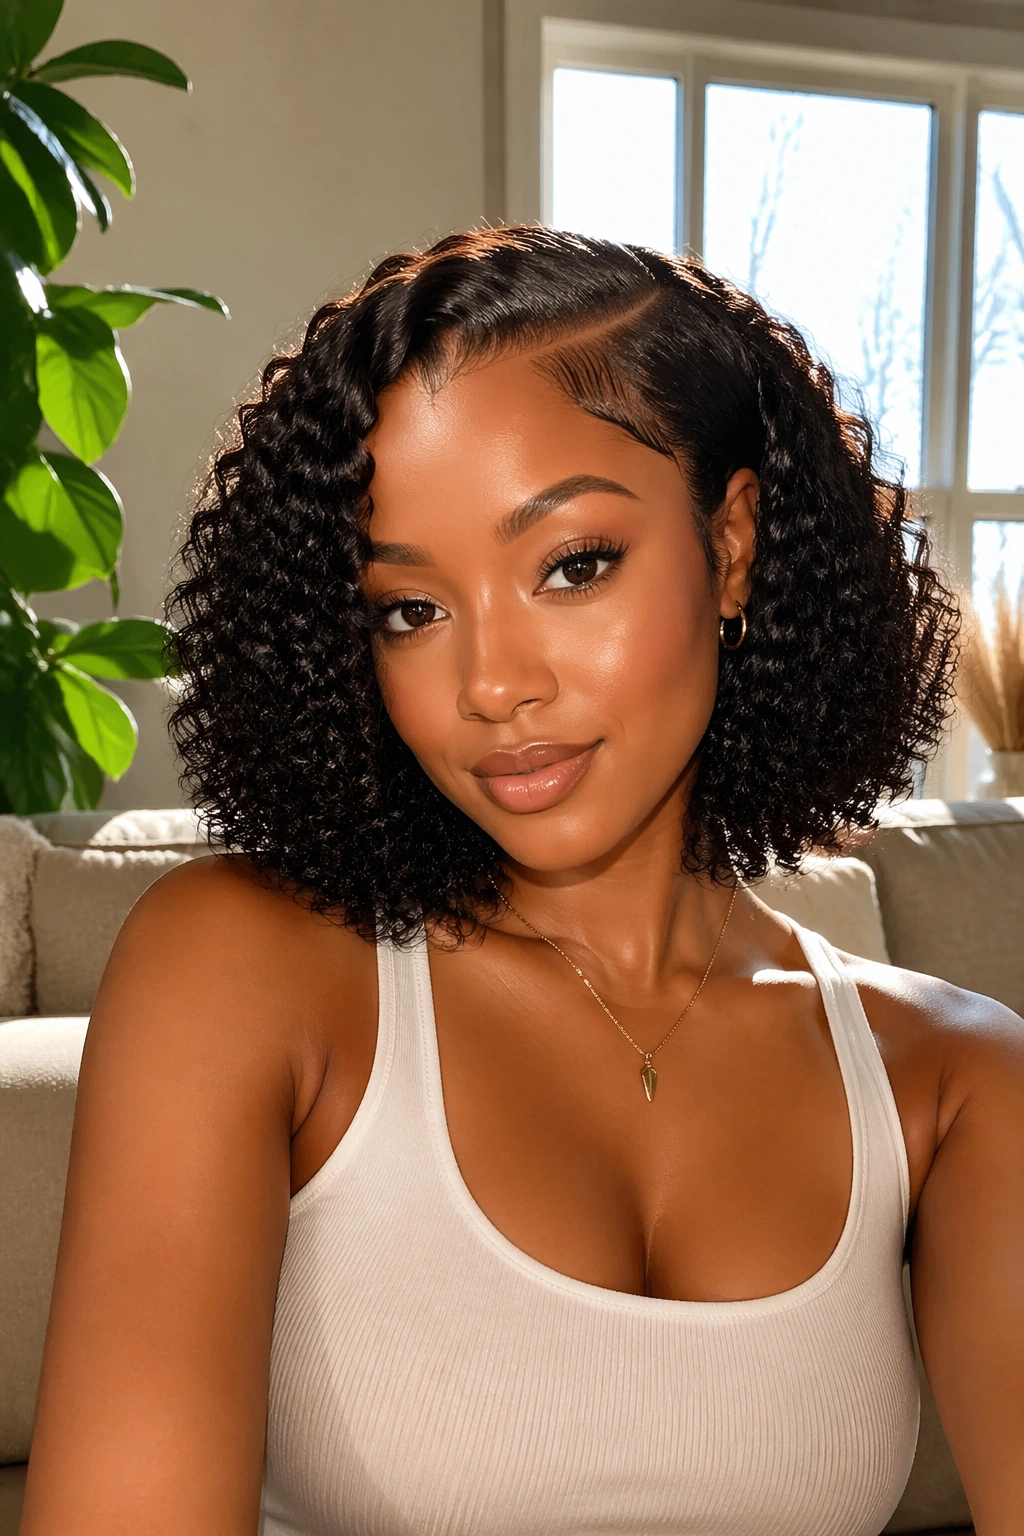
Among curly frontal styles for Black women, the winning looks are the ones that match the occasion without looking stiff. Some are sleek. Some are soft. Some are loud in the best possible way. Start with the deep side part that never really goes out of favor.
1. Deep Side Part Curly Frontal With Water Waves
A deep side part has a built-in advantage: it gives instant shape before you even touch the curls. The part draws the eye upward, the fringe softens the forehead, and the hair falls in a way that feels easy even when the install took real work.
Water wave textures are especially good here because they move without looking too busy. You get bend, shine, and a little bounce at the ends, which helps the style look full from root to tip. If the frontal is lightly plucked and the lace is tinted to match your skin, the whole look lands cleaner.
What makes the side part hold
The part itself should not look wide or chalky. A narrow part with a soft melt usually reads better than one that looks carved in with a razor. Keep the roots flat at the front, then let the curls start lifting just behind the hairline.
- Use a rat-tail comb to mark the part while the hair is damp.
- Smooth the front with mousse, not heavy gel.
- Pin the heavier side back under the curls if it starts to collapse.
- Keep baby hairs sparse and soft, not drawn on.
Best trick: let the part breathe for a few minutes after styling. If you touch it too early, it can puff up and lose that clean line.
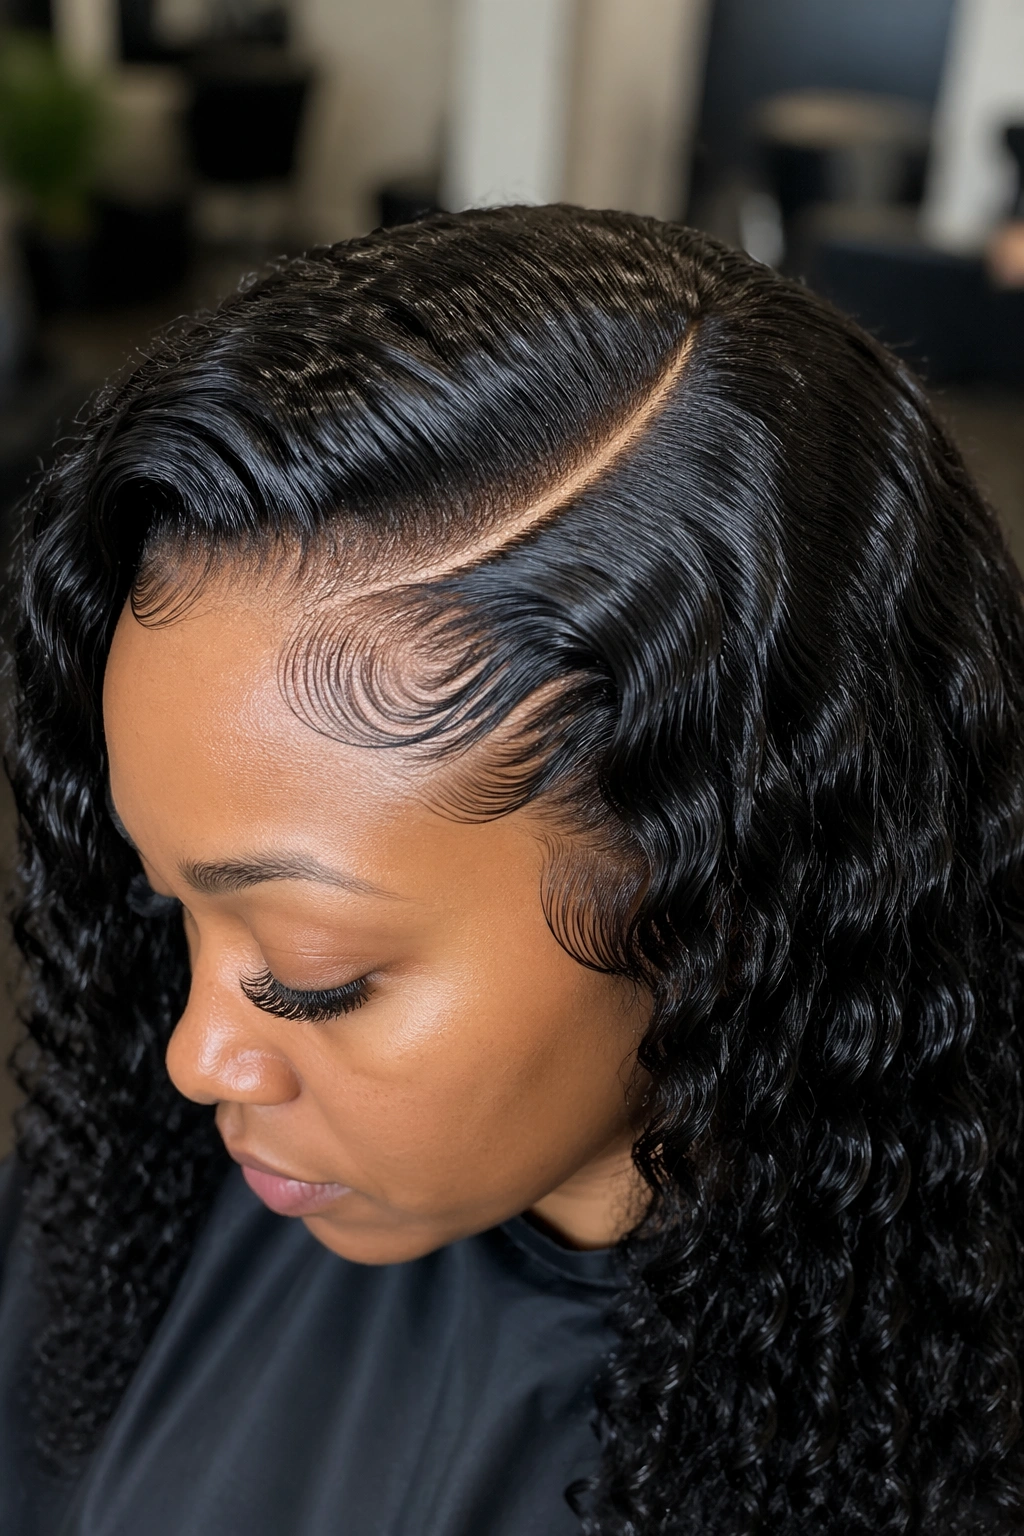
2. Middle Part Defined Ringlet Curly Frontal
Want a style that feels balanced without looking plain? A middle part does that job fast. It works especially well when the curls are defined into loose ringlets, because the symmetry gives the eye a place to rest and the texture keeps the look from going flat.
This style likes a frontal with enough parting space to show a clean center line. A 13×6 or a wider front gives you more room if you want the part to stretch back a little farther. The curls should fall evenly on both sides, and the front hairline needs a light hand. Too much plucking makes the scalp line look thin. Too little, and the part can read bulky.
When the middle part works best
It’s a good pick when you want the face fully framed without pushing everything to one side. The shape can feel polished with hoop earrings, a square neckline, or a soft makeup look that doesn’t fight the hair.
A middle part also shows off curl definition in a way side parts sometimes hide. Every coil has space to move. Every strand gets noticed.
Keep the roots smooth and the ends lively. That balance is the whole thing.
3. Half-Up, Half-Down Curly Frontal
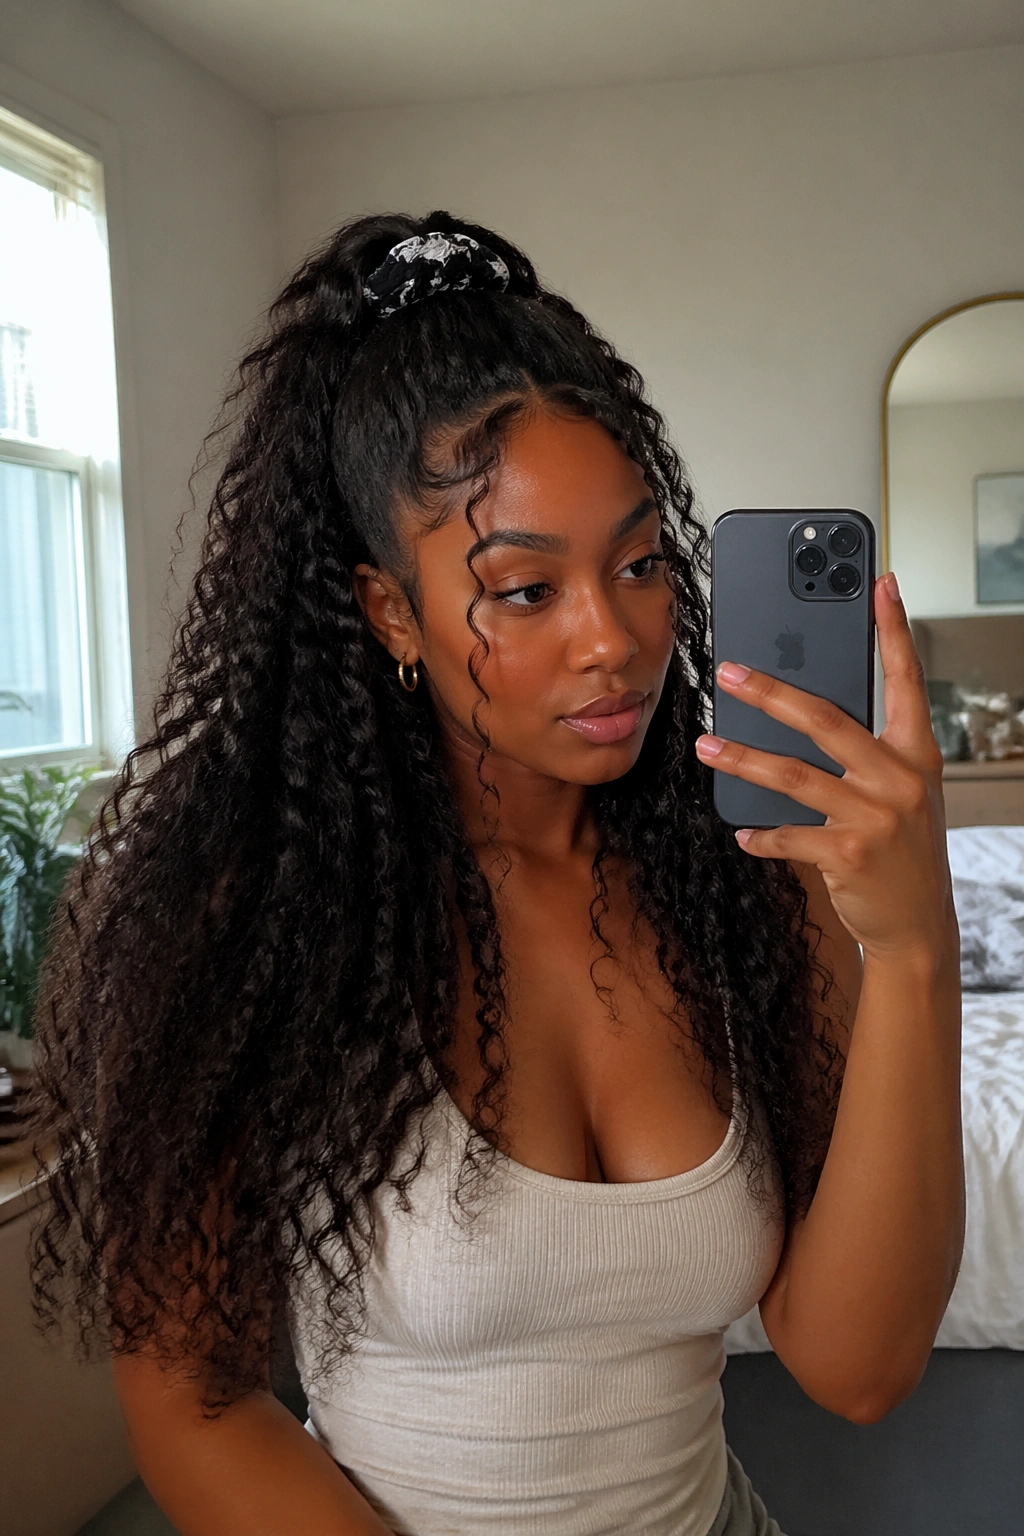
Picture this: you want the curls out of your face, but you still want the length to swing when you move. Half-up, half-down solves that without making the style feel heavy. It’s one of those looks that works for brunch, a party, a dinner out, or a day when you simply do not want hair falling across your lashes.
The trick is in the top section. Pull too much hair up and the style looks stiff. Pull too little and the base feels random. A clean section from temple to temple usually gives the best balance, with the crown smoothed down before the top is tied or pinned.
How to keep the crown flat
Use a soft brush and a little mousse to flatten the frontal area before you gather the top half. A silk scrunchie is kinder than a tight elastic, especially if you’re wearing the style for more than a few hours.
- Section the top at the temples, not too far back.
- Smooth the crown before you secure anything.
- Leave a few curls loose around the front to soften the line.
- Wrap the base with a small strip of elastic or a hidden bobby pin.
One sentence is enough here: Keep the top loose enough to breathe.
That small bit of slack keeps the style from looking like it was pulled into submission.
4. High Curly Ponytail Frontal
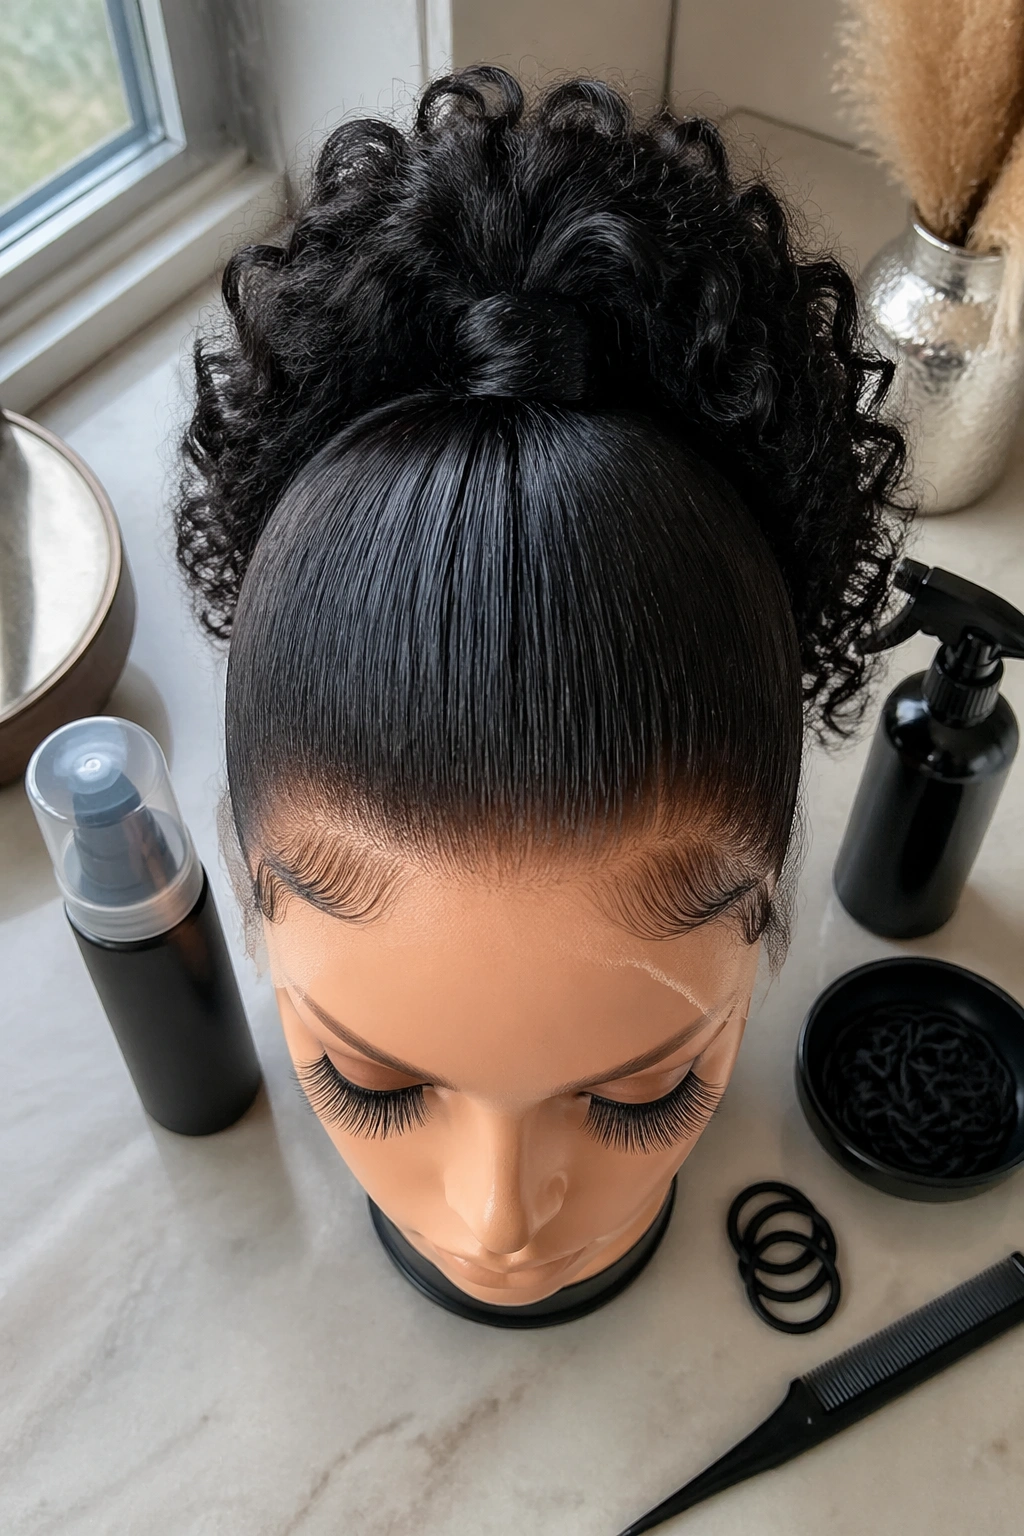
A high ponytail is never boring when the ponytail itself is full of curls. On a frontal, it can look sharp, lifted, and polished all at once. The height opens the face, the curls add drama, and the overall shape usually photographs clean from the front and the side.
The main thing is tension. The ponytail should sit securely, but the pull should not drag at the edges. A soft ponytail holder, a bungee cord, or a wrapped piece of hair over the base often gives a neater finish than a thick elastic. The frontal needs to be laid flat first, because once the ponytail goes up, any bump at the front becomes hard to hide.
Keeping the base neat
Smooth the top with a light styling foam, then brush upward in small strokes. If the curls are tight or dense, gather the ponytail in stages instead of yanking everything at once. That keeps the front from bunching.
A high curly ponytail also gives you a lot of room to show off earrings, necklines, and makeup. It has a lifted energy that works well when you want the face to stay open. And if a few curls wrap around the hairline? Good. That softness helps.
5. Side-Swept Glam Curls That Fall Over One Shoulder
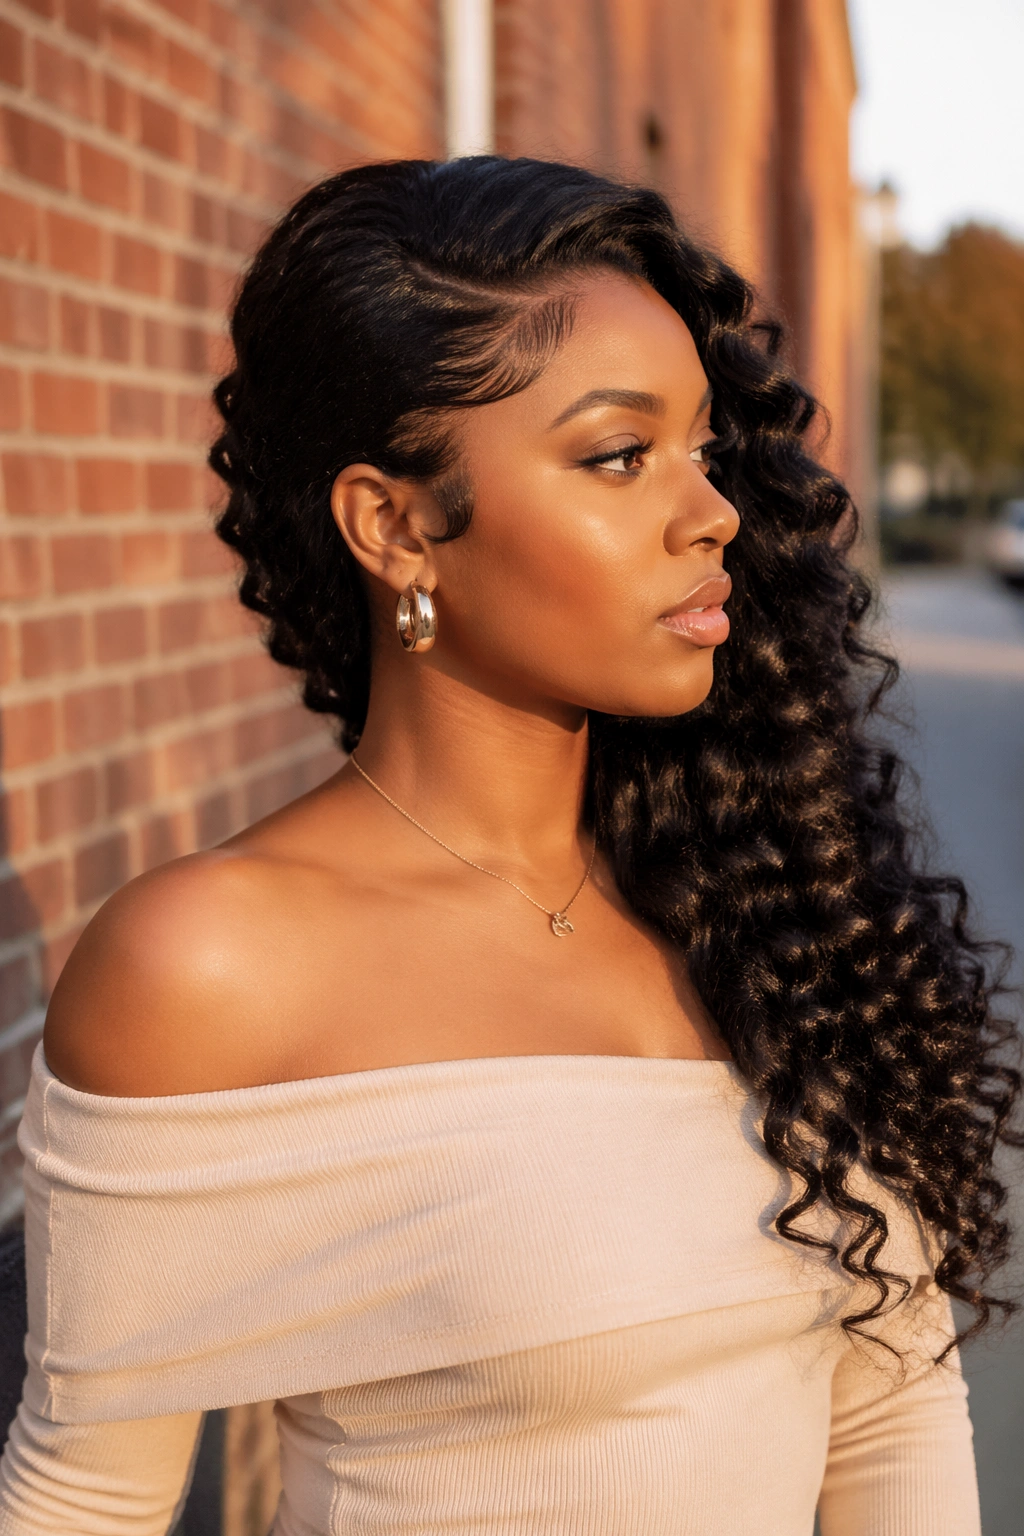
Side-swept curls have a little old-school drama, but they do not have to feel costume-like. When the frontal is styled with a deep sweep over one shoulder, the whole look gets softer and more elegant without trying too hard. The line of the shoulder suddenly matters. So does the neckline. That’s the fun part.
This style depends on movement, not stiffness. Let the front section bend naturally across the forehead, then guide the curls to one side with a few hidden pins placed low and underneath. If the front is too stiff, the style loses that loose, expensive-looking drape. If it’s too loose, the curls slide everywhere. There’s a middle ground, and it’s worth finding.
The best version uses a curl pattern with enough body to hold shape. Deep wave, loose curl, or defined water wave all work well. Keep the side the hair is swept to full and soft, then tuck the opposite side behind the ear or pin it close to the temple.
A single large earring changes the whole mood here. So does a bare shoulder. The hair does the talking, though.
6. Curly Bob Frontal With a Clean Hairline
Why does a curly bob look so expensive when it’s cut right? Because the shape sits close to the face and leaves very little room for mess. A bob takes the guesswork out of length. It says exactly what it is.
This style works best when the ends stop around the chin, jaw, or just above the shoulders. Anything longer starts to behave differently, especially with curl shrinkage. On a frontal, the hairline has to be clean enough to support the shape, because a bob exposes more of the face than a long install does. There’s nowhere for a bad part to hide.
What to ask for
- A slight side or center part, depending on your face shape.
- Curl definition that stays soft near the ends.
- A cut that follows the curl pattern after the install, not before it.
- Light layering if the bob starts to look boxy.
The bob can be sleek or fluffy, but it should not look heavy. That’s the mistake. Heavy bobs lose their charm fast.
A good curly bob frontal feels crisp at the line and lively at the ends. Small shape. Big payoff.
7. Wet-Look Curly Frontal With Glossy Definition
The wet look is not wet hair. That distinction matters. Real wet-look styling uses water, leave-in, mousse, and a light gel layer to make the curls look fresh and defined without turning them into a crunchy shell.
This style makes sense with water wave, deep wave, and softer curl patterns. You want definition and shine, not a helmet. Start with damp hair, then rake product through with your fingers in small sections. A little goes a long way. Too much gel near the front can flake when it dries, and that ruins the whole effect fast.
Product order matters
- Mist with water until the hair is damp, not soaking.
- Work in a lightweight leave-in first.
- Add mousse for movement.
- Finish with a small amount of gel only where you need extra hold.
A shine serum can help on the ends, but use it sparingly. Heavy oils often make this style collapse. They also steal the fresh look that makes the wet finish appealing in the first place.
This is one of those styles that looks clean under good light and even better in motion. The curls should move like they still have a little moisture in them, even after they’re dry.
8. Braided Crown Into Loose Curls
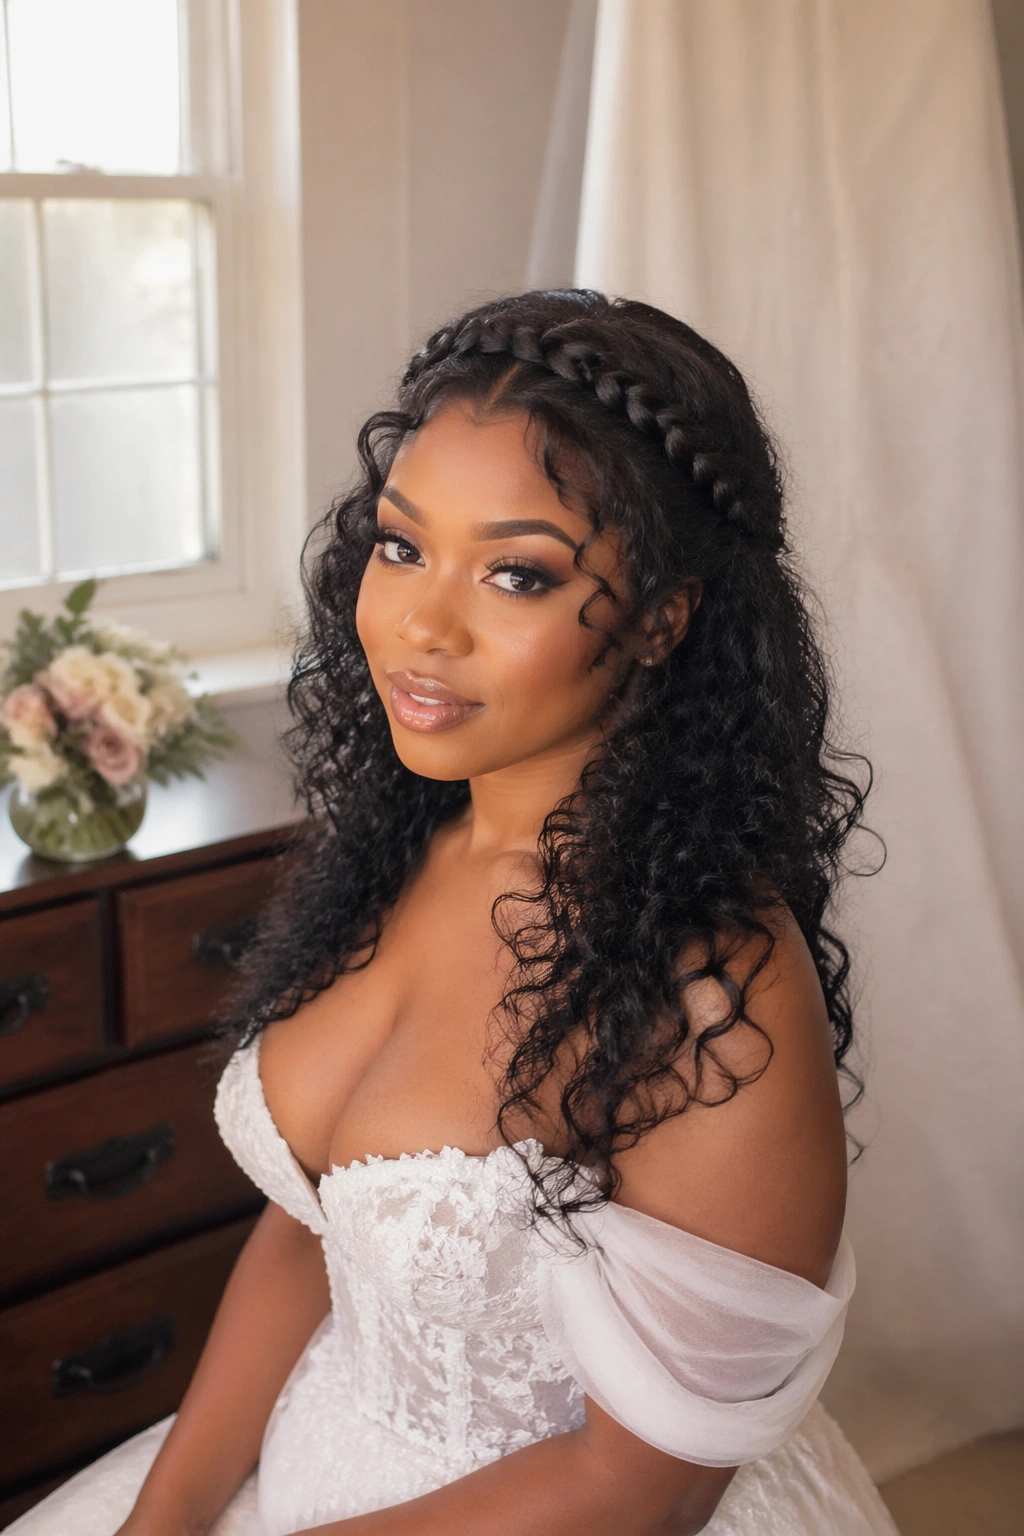
A braided crown gives a curly frontal a little structure before the curls even start. It’s a strong look for weddings, graduations, photos, and any day when you want the front to feel framed instead of loose. The braid acts like a border. The curls bring the softness back.
Keep the braid low enough to sit at the hairline, not high enough to look like a separate headband. One side braid, two side braids, or a wrapped crown all work, depending on how much hair you want visible around the face. The curly length should still move freely. If the braid takes over, the style loses its balance.
Small details that keep it neat
- Use a braid width of about 1 inch for a subtle crown.
- Pin the braid flat at the back if it starts to lift.
- Leave the curls fuller through the middle and ends.
- Add a touch of mousse to the braid so it stays smooth.
This style is especially handy when the frontal is starting to grow out a little but still looks good. The braid distracts the eye in the best way.
It’s tidy. It’s pretty. It does a lot with one strong detail.
9. Double Buns With Curly Ends
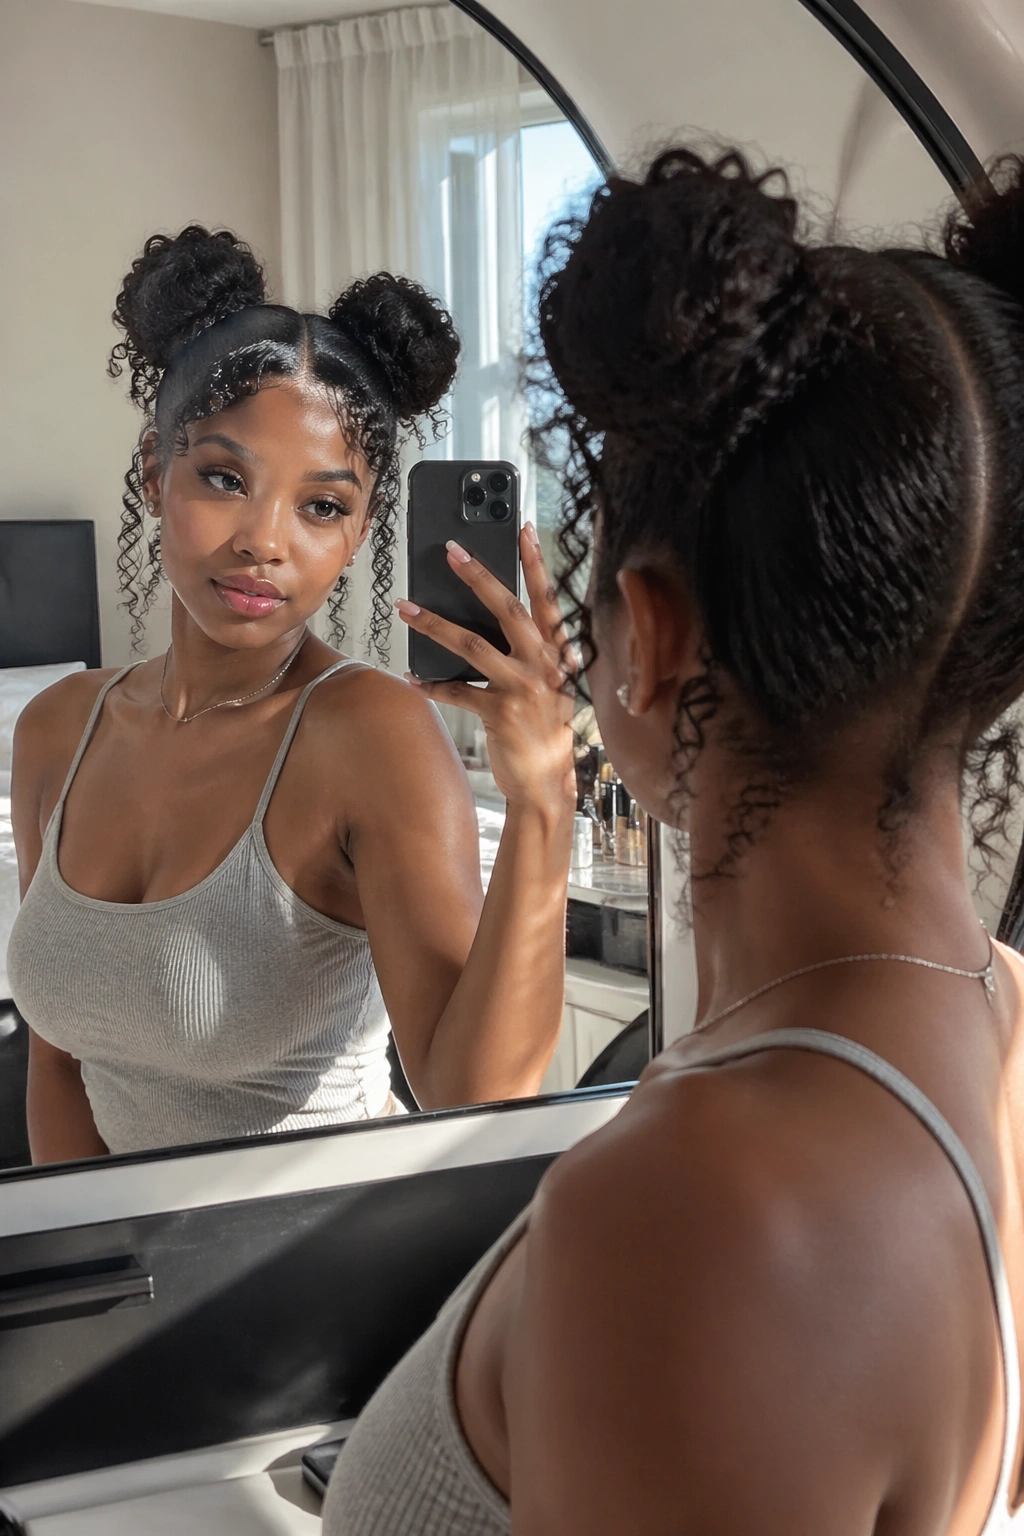
Double buns can look playful, but they do not have to look juvenile. On a curly frontal, the trick is to keep the buns neat and small while letting the curls do the rest of the work. The style feels fresh when the buns sit high and the remaining curls frame the face or spill out from the back.
A center part usually helps, though a shallow side split can make the look feel less symmetrical and a little more relaxed. If you leave the ends curly instead of tucking everything in, the style keeps its texture. That matters. Flat buns with no movement can look harsh.
Keep the buns above the temples, not near the ears. That placement lifts the face and makes the install look intentional. If the buns are too low, the whole shape starts to sag.
One-sentence truth: Small buns are cleaner than big ones.
That sounds simple because it is. Big buns pull attention away from the curls, and the curls are the point.
This one works especially well with a glossy lip, bare shoulders, or a casual outfit that needs a little lift.
10. Faux Bang Curly Frontal
Curly bangs without cutting bangs? Yes, and that’s why this style stays interesting. You let the frontal curls fall forward, pin the rest back, and shape the front into a soft fringe that brushes the forehead instead of sitting heavy on it.
The beauty of faux bangs is flexibility. If the fringe looks too dense, you can shift it. If it sits too short, you can loosen the front section. A real cut bangs on a curly unit can be hard to undo. This style gives you room to test the shape first.
The crown should stay smooth so the fringe feels like part of the style, not a separate piece glued on top. A little mousse at the roots helps the front lie where you want it. Too much product at the fringe, though, and the curls clump into one thick curtain. Not cute. Not at all.
How to keep the front believable
- Start with a slightly deeper front section than you think you need.
- Finger-shape the curls instead of combing them flat.
- Pin the back pieces low and hidden.
- Let a few side curls fall beside the temples for softness.
The result is a look that reads playful and grown. That’s a hard combination to fake, and this style gets there with less risk than a permanent cut.
11. Fluffy Kinky Curly Afro Frontal
A fluffy kinky curly frontal has one job: look full, natural, and rich without feeling overworked. It’s a favorite when you want texture that blends with coily hair and gives the front a soft, rounded shape instead of a straight-across wig line.
The key here is restraint. Do not brush it into a cloud. Use fingers, a wide-tooth comb only where needed, and a little water to wake up the curl pattern. The volume should build outward from the crown and sides, not balloon out from the hairline in a way that hides your face.
Texture blend is the whole point
This style works best when the frontal texture matches the rest of the install closely enough to look believable. Kinky curly and coily textures usually blend well with natural hair, especially when the edges are smoothed just enough to create a clean frame.
- Mist the curls lightly before fluffing.
- Pick the roots more than the ends.
- Separate only the clumps that stick together.
- Avoid heavy creams that make the curl pattern limp.
A fluffy afro shape can look stunning because it feels honest. It doesn’t pretend to be sleek. It doesn’t need to.
If you like volume with less polish and more personality, this is one of the strongest curly frontal styles for Black women.
12. Flip-Over Curly Frontal With No Fixed Part
Not every style needs a perfect part. The flip-over curly frontal is proof. You sweep the hair from side to side, keep the front flexible, and let the curls fall where they want without forcing a hard line into the scalp.
This is one of the best styles for days when you want movement and speed. It also gives the frontal a break, because you’re not training the same part every single time. That matters more than people think. Hairlines can get tired, and so can your patience.
The flip-over look works especially well when the curls are medium to long and the front isn’t packed too tightly. A little root lift is fine. Too much, and the hair starts to puff away from the face in a way that feels unfinished.
One-sentence note: A soft bend beats a stiff part here.
You can pin one side behind the ear, sweep the front to the other side, then switch it later if the mood changes. That freedom is the appeal. It’s casual, but not careless.
13. Low Curly Bun With Face-Framing Tendrils
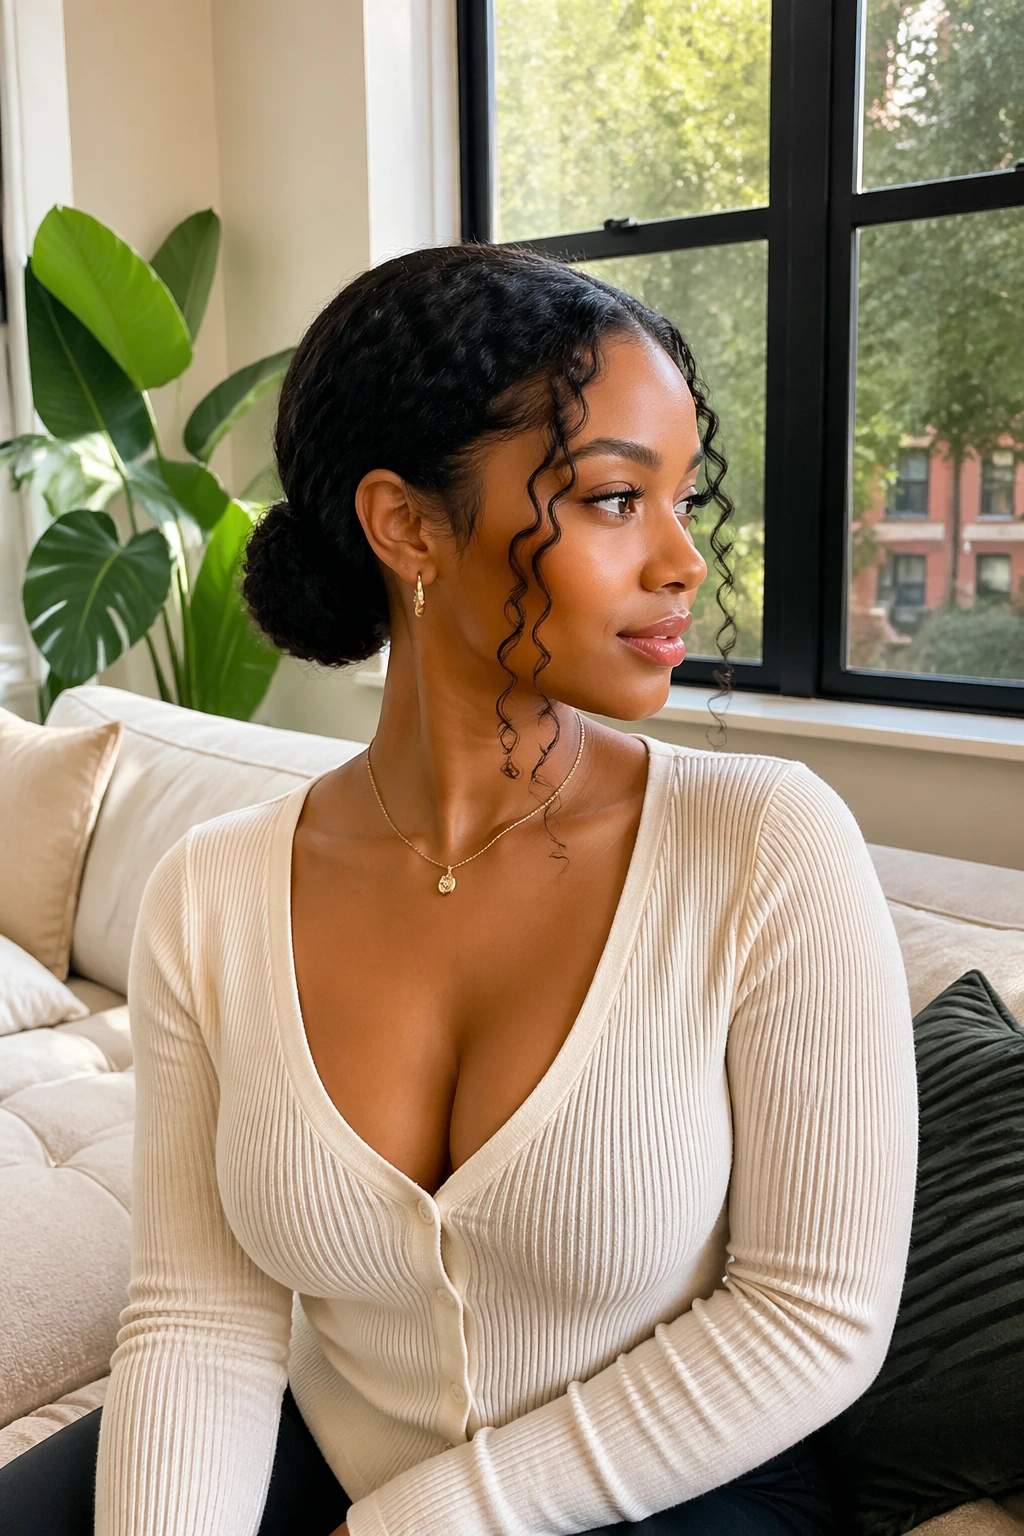
A low bun can look plain from far away. Up close, with the right curls around the face, it becomes one of the prettiest ways to wear a frontal. The bun sits at the nape, the front stays smooth, and two tendrils soften the cheeks and jaw.
This style is excellent when you need hair off your neck or when you want something neat that still feels feminine. The tendrils matter more than people realize. If they’re too short, they look accidental. If they’re too long, they overwhelm the bun. Aim for pieces that hit around the cheekbone or jawline.
Where the tendrils should land
- Cheekbone length gives a soft frame.
- Jaw length adds a little more shape.
- Longer pieces work if the rest of the bun is very sleek.
Smooth the front of the frontal with a brush and a tiny bit of mousse, then gather the bun low and secure it flat. Use bobby pins instead of stacking a thick elastic if you want the base to stay slim.
This is the style you wear when you want polish without drama. It stays put. It looks neat. It still has movement where it counts.
14. Layered Water Wave Frontal With Curtain Curls
A long water-wave frontal can turn boxy fast if the ends are left blunt. Layers fix that. They break up the triangle shape, let the curls fall in steps, and keep the front from looking like a heavy curtain hanging off the face.
Curtain curls—those front pieces that split softly around the cheeks—can make the style feel lighter and more modern without needing a lot of extra work. The hair moves better when the layers are cut to follow the curl pattern. That part matters. Cutting straight across a curly unit usually looks harsher once the curls dry and shrink.
Ask for movement, not choppiness
- Keep the shortest face-framing pieces below the eyebrow line.
- Let the middle layers support the shape.
- Leave the ends long enough to keep length visible.
- Avoid over-thinning near the lace, where the front needs density.
This style is a good pick if you like long hair but hate the heavy, triangle look that some installs get after a few days. Layers also help the curls separate more cleanly after a quick finger refresh.
It’s the kind of style that looks like it took effort, even when the shaping was mostly done by the cut.
15. Side-Swept Mohawk-Inspired Curly Frontal
A mohawk-inspired curly frontal is for the woman who wants the front to be bold without losing softness. The sides are pinned or braided tight, the top stays full, and the curls ride down the center like they own the room. It has edge. It also has balance.
This style works best when the center section has enough height to read as a focal point. If the top sits flat, the whole thing loses its shape. The sides should be sleek but not tight enough to drag on the frontal or tug at the edges. A neat braid, a pinned flat side, or a light sculpted swoop can all work, depending on the install.
What makes this style different is the contrast. Tight sides. Big center. Loose curls. It’s a built-in shape story, and the eye follows it immediately. That makes it a strong choice for statement earrings, bold makeup, or a dress with clean shoulders.
Why this version stands out
- The center height gives lift without needing a full updo.
- The sleeker sides keep the face open.
- The curls in the middle create movement from every angle.
- It photographs well because the shape is obvious from the front and side.
Keep the top full and the sides neat, and the whole look stays sharp. That’s the whole game.