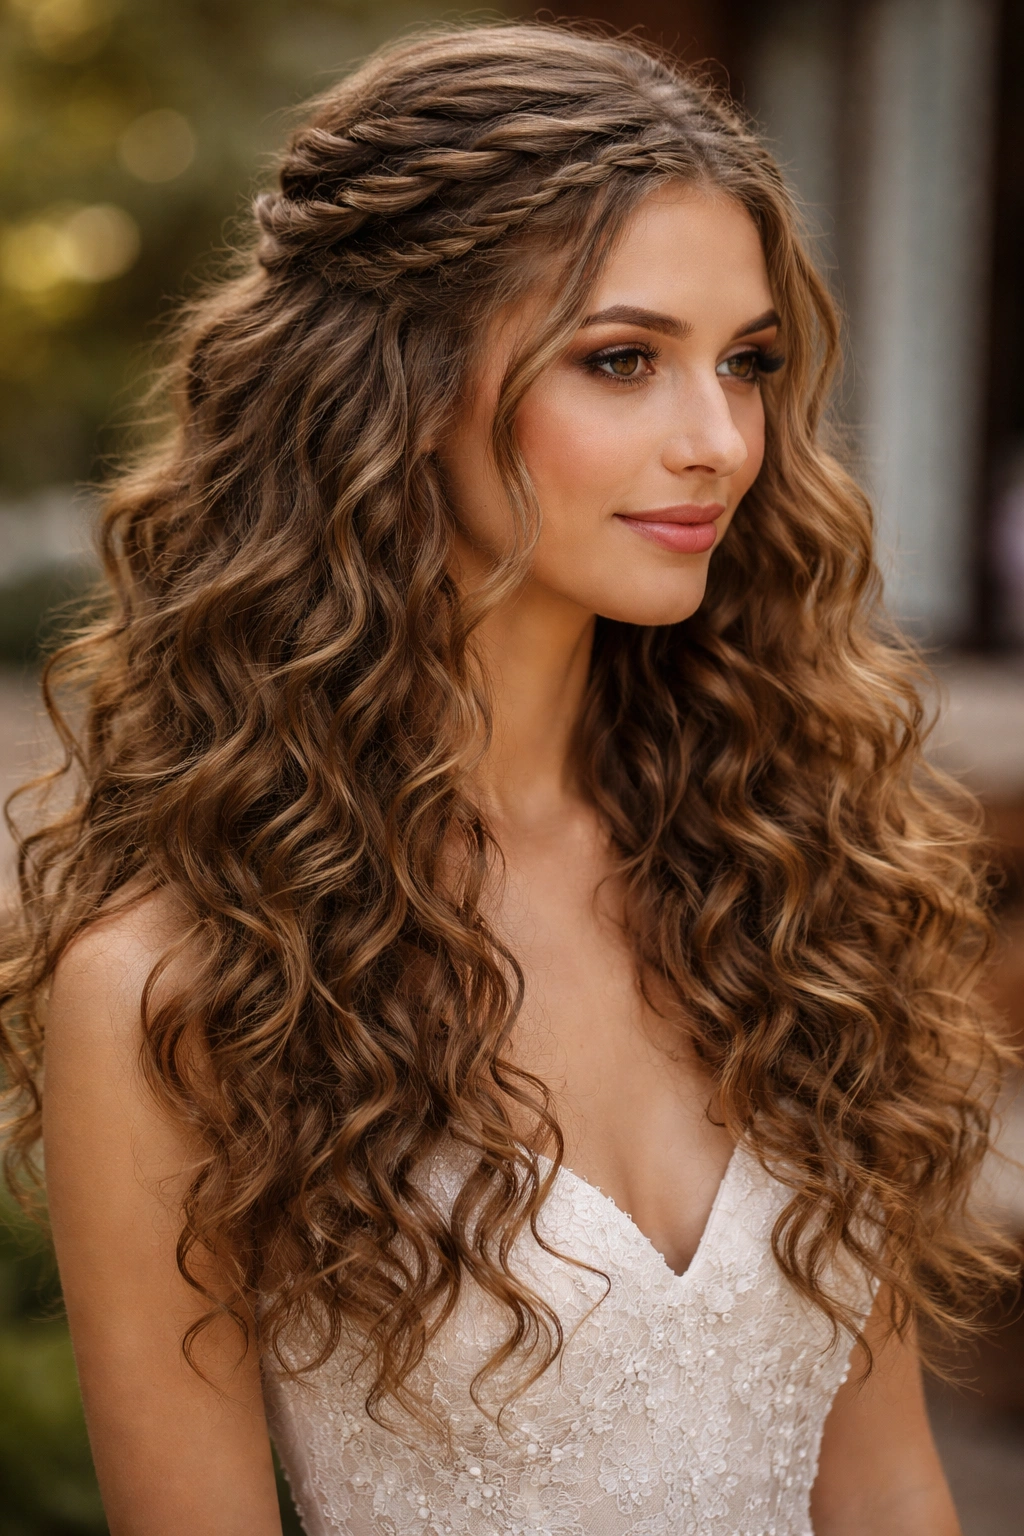
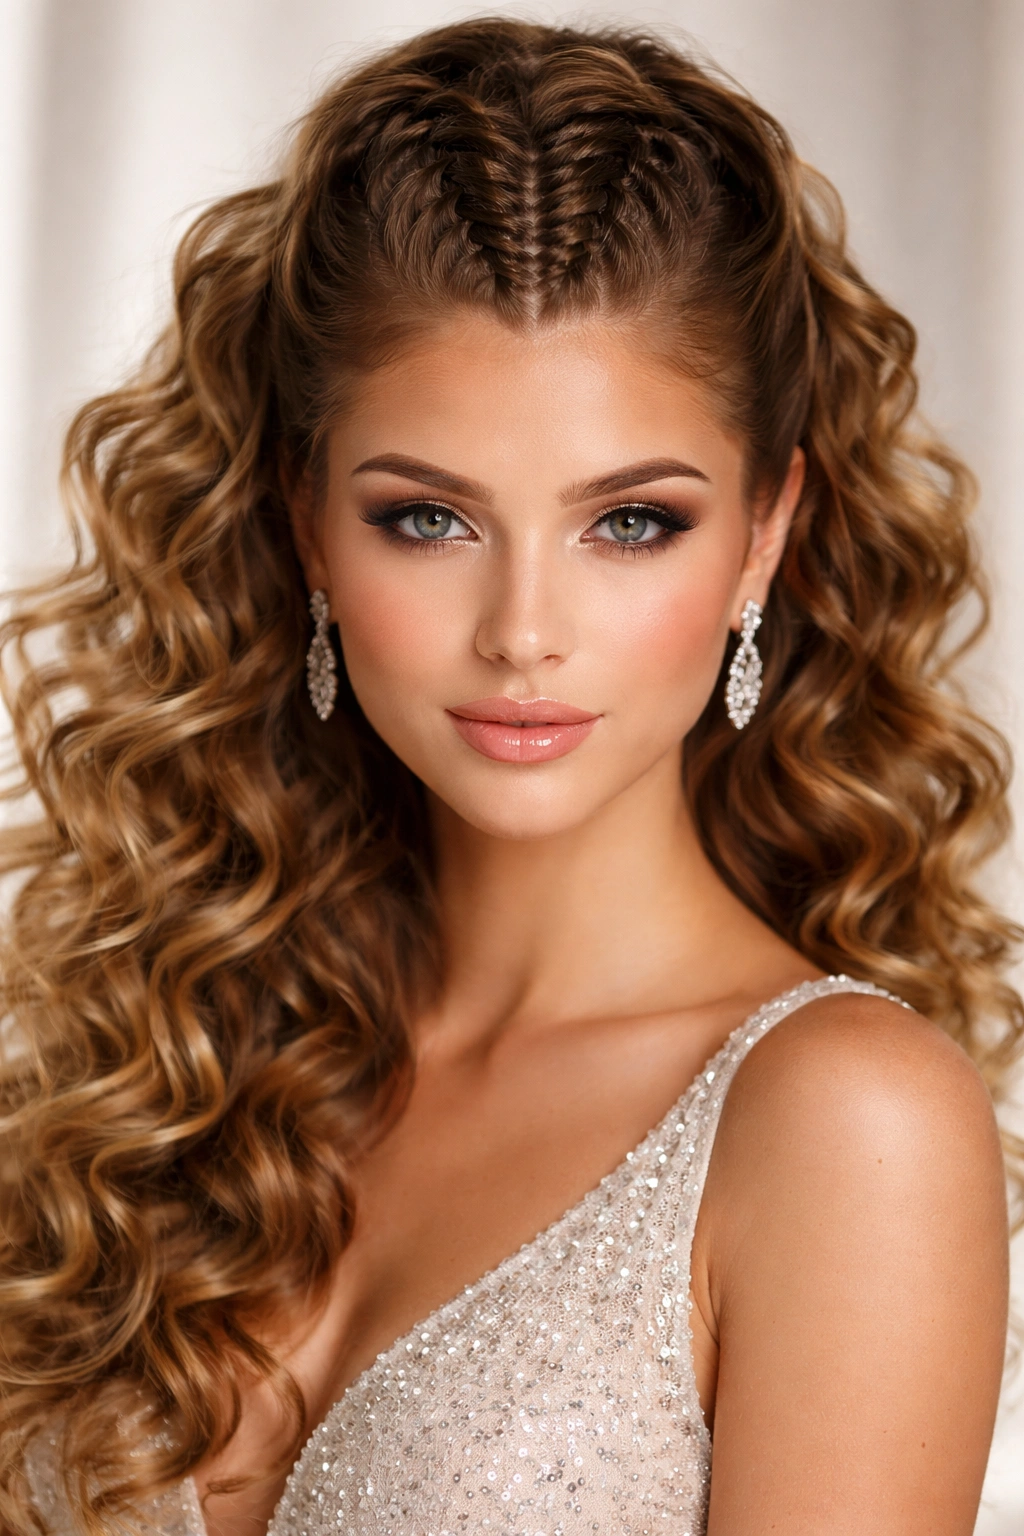
Prom night is a high-stakes evening. Your hair is an accessory, a statement, and often the thing that causes the most stress when the humidity hits or the dance floor gets crowded. If you have curly hair, you already know the drill: standard styling tutorials usually assume your hair behaves like a smooth, flat fabric, which it absolutely does not. Your hair has volume, texture, and a life of its own. Trying to force it into a slick, straight style is a battle you are going to lose, especially under the lights of a dance floor.
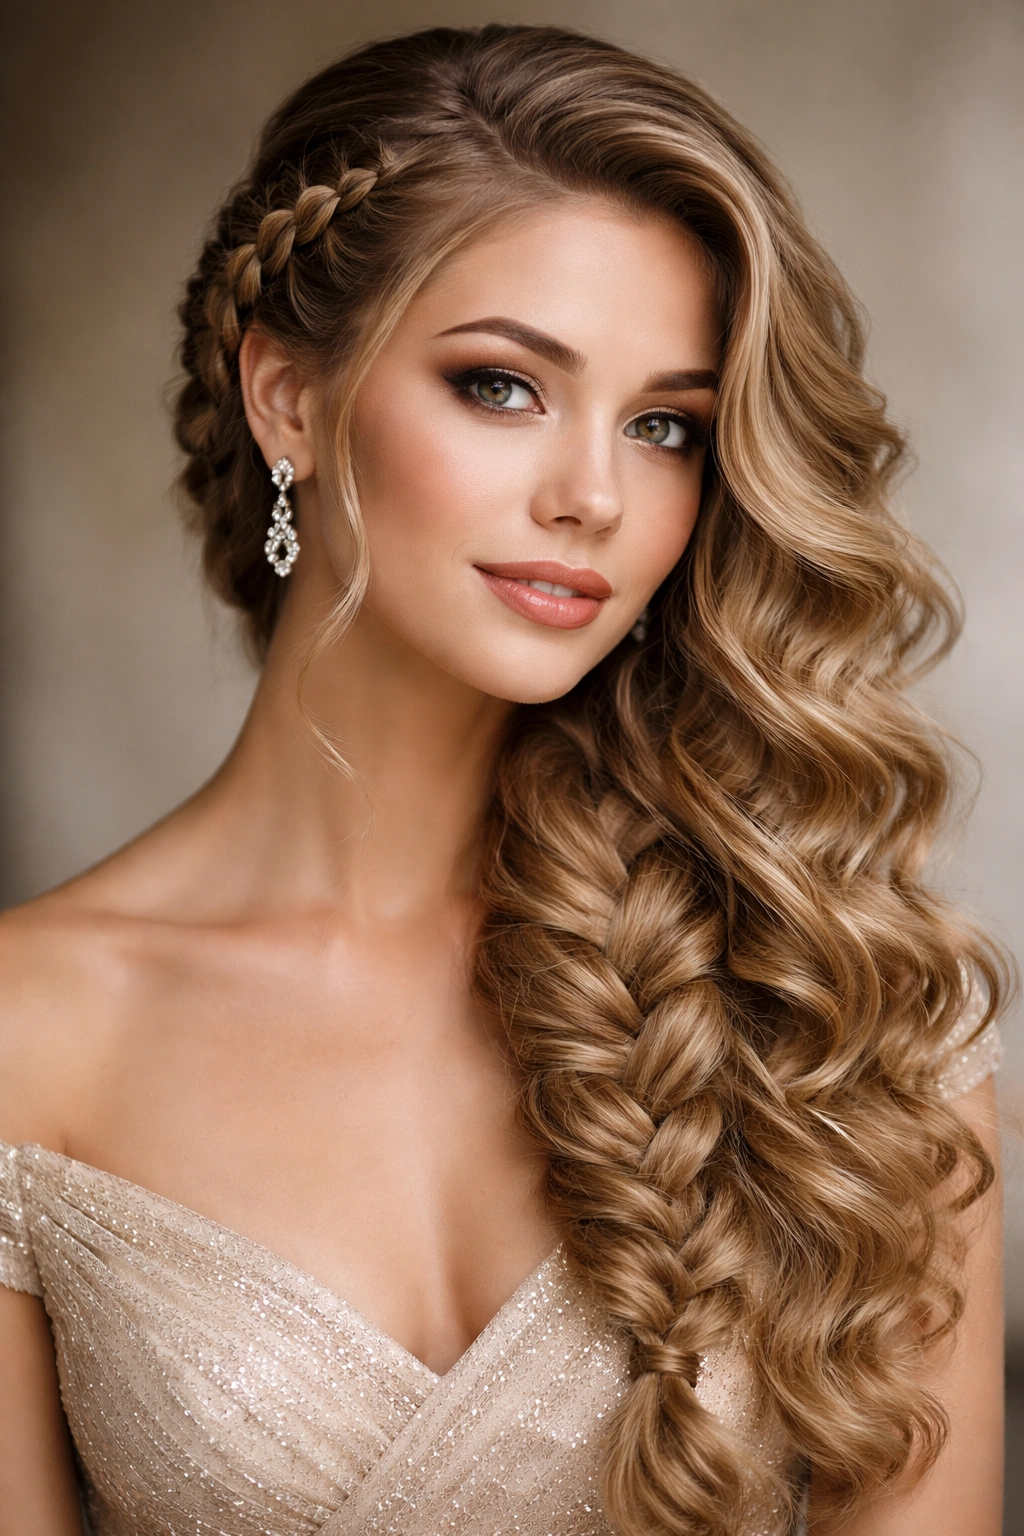
The half-up, half-down look is the sweet spot for curly textures. It gives you the drama and control of an updo while letting your natural curls frame your face and fall over your shoulders. Adding braids to the mix creates structure. It keeps the hair out of your eyes and provides a solid foundation that won’t sag or droop by the time the last song plays. Whether you have loose waves, tight coils, or springy ringlets, incorporating braids into a half-up style creates a sophisticated, romantic, or edgy vibe that stays put.
Preparation is everything. You cannot approach these styles on dry, unconditioned hair. Your curls need to be hydrated and defined before you even pick up a bobby pin. A leave-in conditioner or a light curl cream is your best friend—apply it while the hair is damp, use a diffuser if you have the time to set the shape, and do not—I repeat, do not—brush through the curls once they are dry. Let’s look at some of the most effective, striking ways to pin your curls back for a formal night.
1. The Classic Crown Braid with Loose Curls
This style is a staple for a reason. It creates a natural headband effect that pulls the hair away from your face without losing that romantic, voluminous feeling. For curly hair, this is particularly effective because the braid manages the shorter pieces around your hairline that tend to frizz up during the night.
Why This Style Works for Curls
The tension of the crown braid acts as a guard against the elements. Because you are anchoring the hair against the scalp, you have built-in security. The curls at the back remain loose, cascading down in a way that feels organic rather than stiff.
How to Execute the Look
- Section the hair from temple to temple, leaving the lower half of your hair untouched.
- Begin a Dutch braid on one side, working your way around the crown.
- Use the “pancaking” technique—gently pulling on the loops of the braid—to give it width and volume. This makes the braid look thicker and hides any tension that might pull on your curls.
- Pin the ends of the braid behind the ear on the opposite side, tucking the tail of the braid underneath the loose curls to hide the bobby pins.
Pro tip: Use a matte hairspray rather than a shiny one. You want the braid to look soft and lived-in, not shellacked into place.
2. Double Dutch Braids Into a Half-Bun
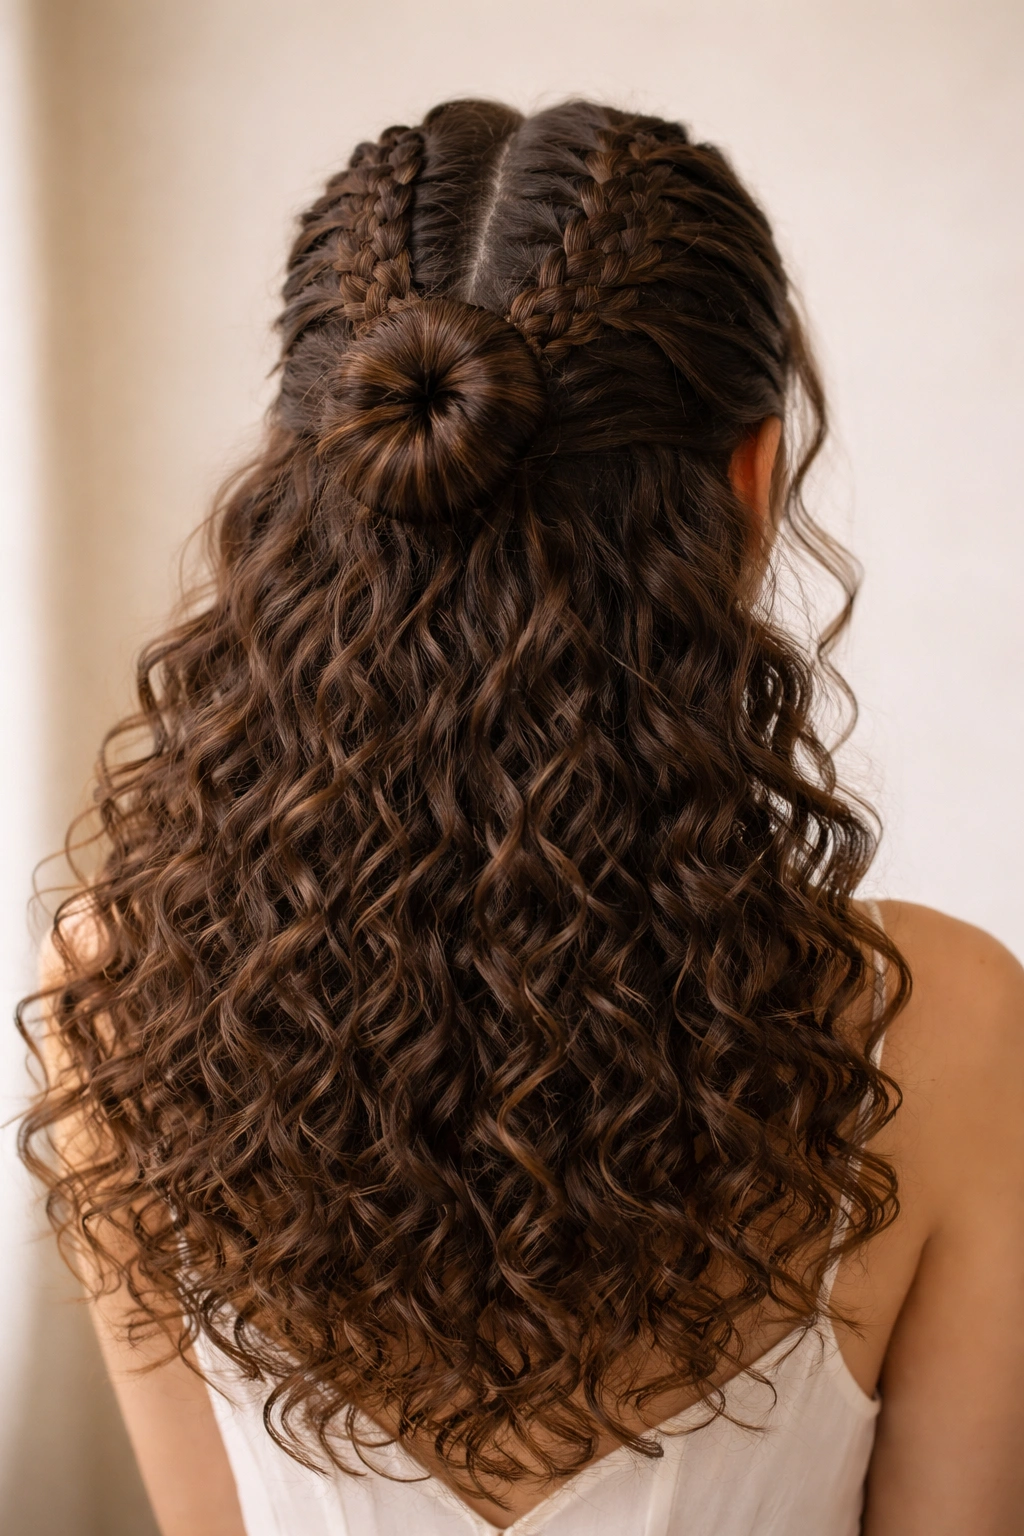
If you want something that feels a bit edgier and more structured, this is your go-to. The double Dutch braids provide a clean, sharp look at the crown, while the half-bun adds a touch of playfulness. It’s a great way to showcase the variety of your curl pattern.
Why It Holds Up
The dual-braid technique distributes the weight of your hair evenly. If you have thick, dense hair, this keeps it from feeling heavy on one side. By gathering the braids into a bun, you are essentially creating a focal point that keeps your hair out of your face entirely, even if you are moving around a lot.
Stylist’s Note
Don’t worry if the braids aren’t perfectly symmetrical. The beauty of curly hair is that it hides uneven sections effortlessly. Focus on the tension near the scalp. If the braids are too loose, they will sag within an hour. Keep your hands close to the head while you braid.
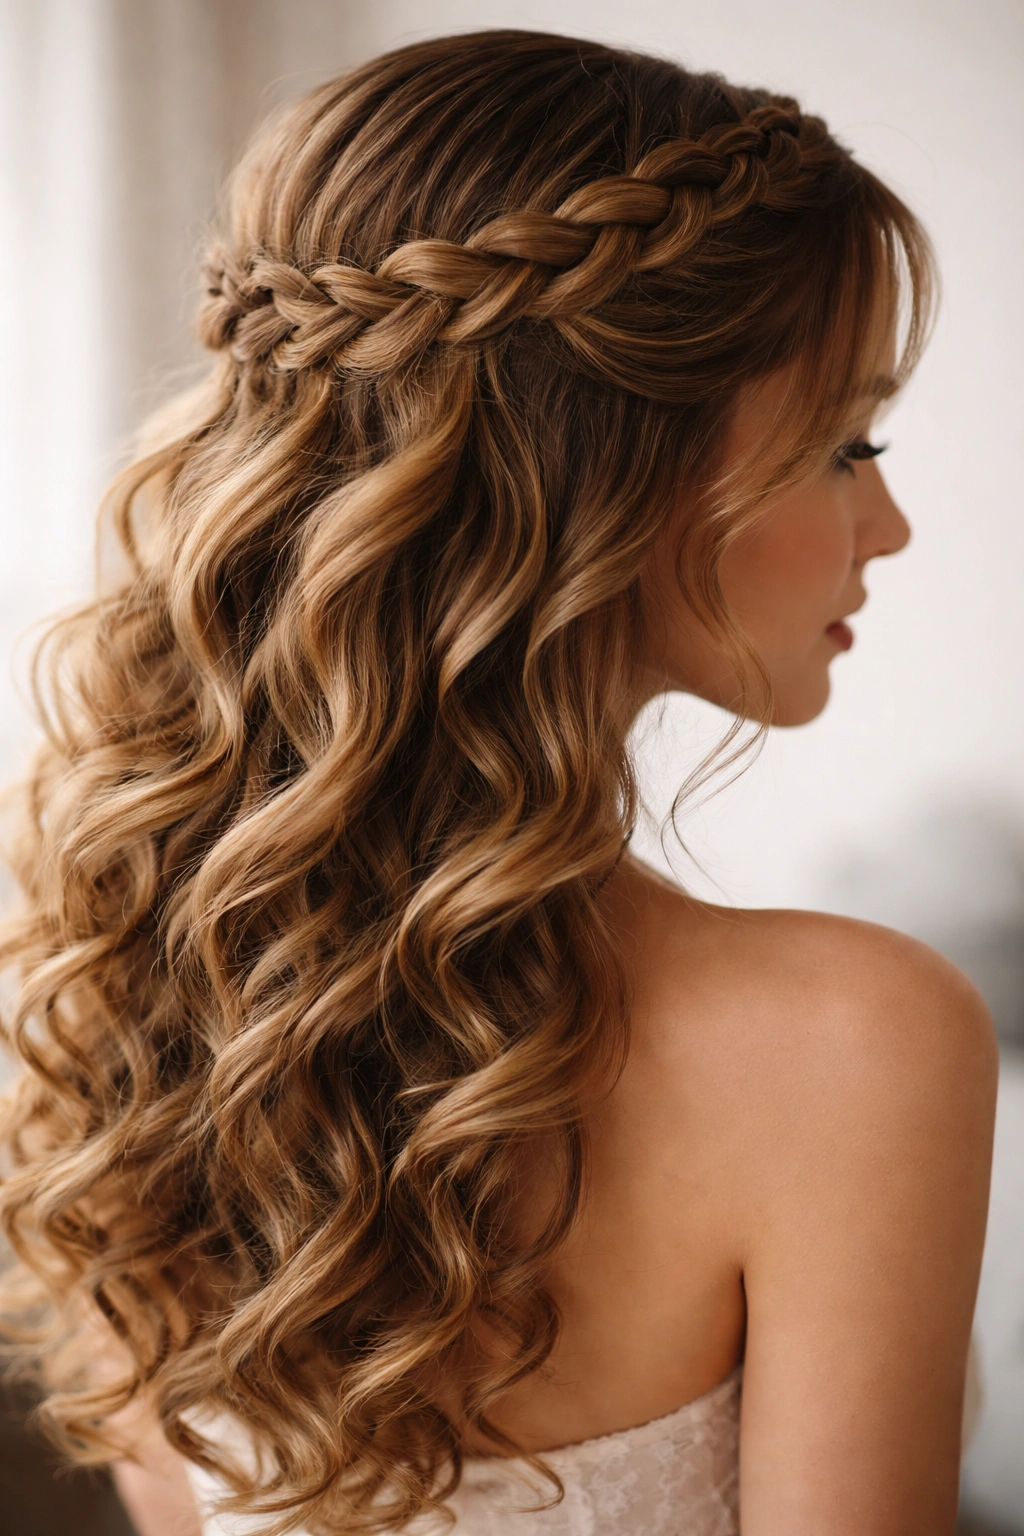
3. The Waterfall Braid with Ringlets
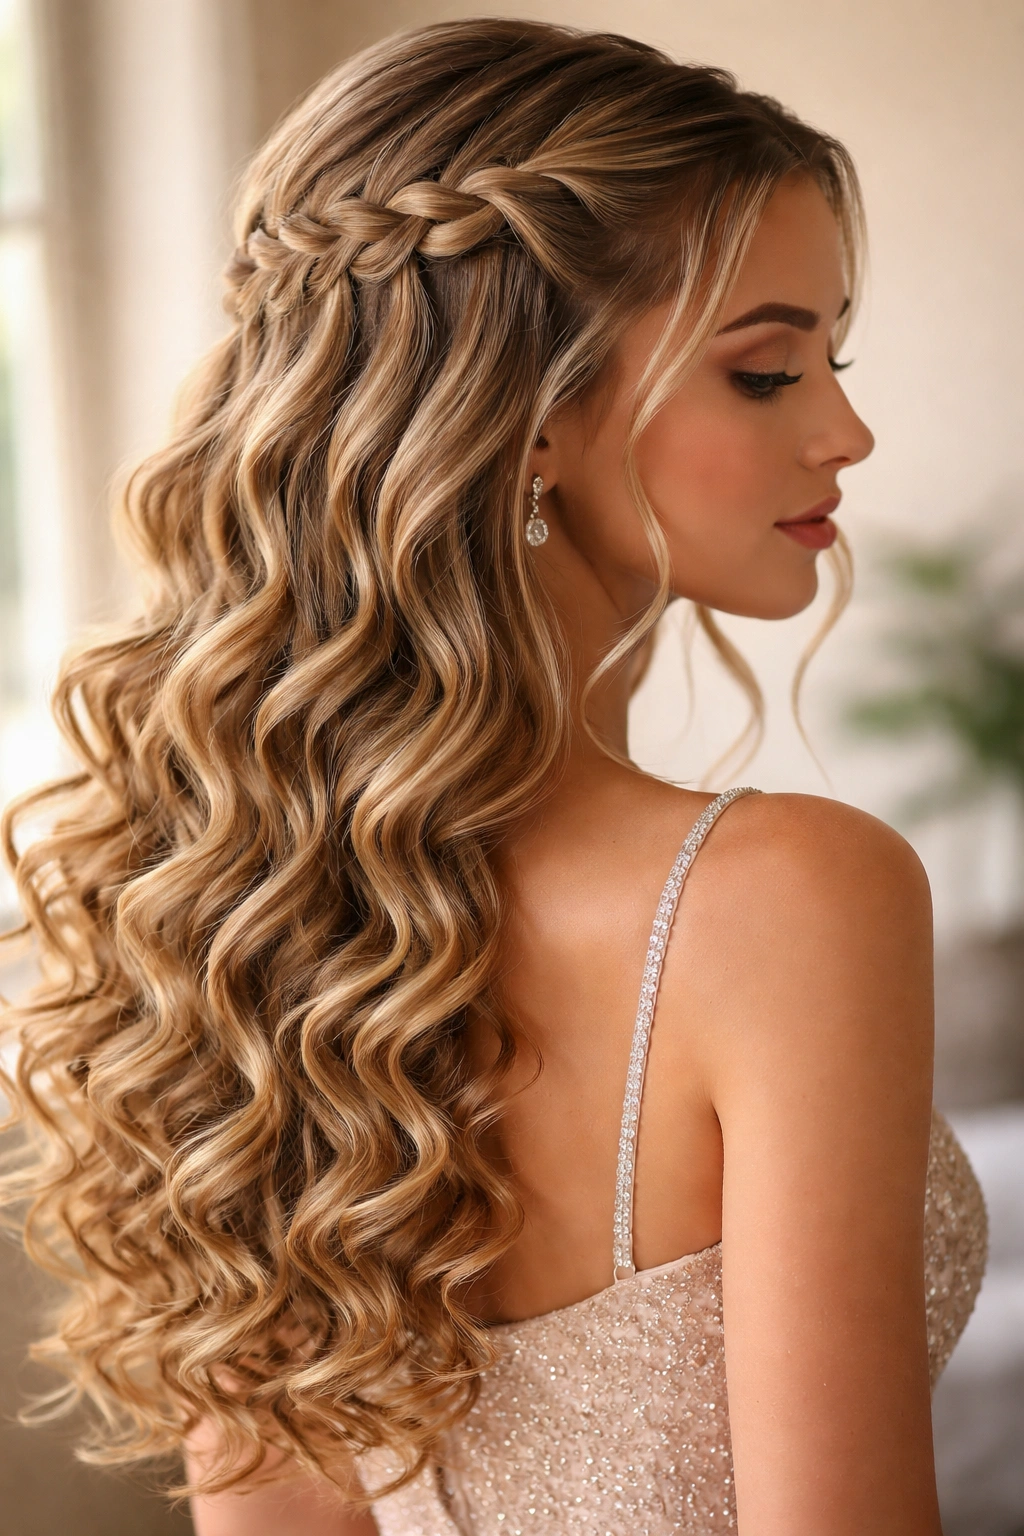
The waterfall braid is arguably the most romantic style you can choose for prom. It’s designed to let sections of your hair “fall” through the braid, creating a cascading effect. When you pair this with defined curls, it looks like you spent hours on your hair, even if you only spent twenty minutes.
The Technique
- Start the braid at your temple.
- As you weave, drop the bottom strand of the braid and pick up a new piece of hair from the top to replace it.
- Continue this around the back of your head.
- Let the dropped pieces mingle with your natural curls.
The key here is definition. Before you start braiding, make sure your curls are well-defined with a light gel. You don’t want the “dropped” strands to look frizzy. They need to look like intentional ringlets. If a piece looks a bit fuzzy, touch it up with a tiny dab of curl cream, but don’t brush it out.
4. Twisted Side Braids with Boho Volume
This is a looser, more relaxed take on the half-up style. It’s perfect if you are wearing a dress that has a bit of a vintage or ethereal feel. Instead of tight, intricate plaits, you are creating thick, twisted braids that sit flat against the scalp before disappearing into the mass of curls in the back.
Managing the Texture
You want to pull the twists loose. After you secure the twists with pins, go back and tease the hair inside the twists slightly. This adds volume and makes the style look fuller. If your hair is on the finer side, this style is a cheat code—it makes it appear like you have twice as much hair.
The Finishing Touch
Focus on your accessories. A pair of decorative pins or small flower clips placed along the twist can turn a simple style into a prom-ready look. Avoid heavy metal clips that might slide down; stick to hair-friendly, lightweight options.
5. The “Messy” French Braid Tuck
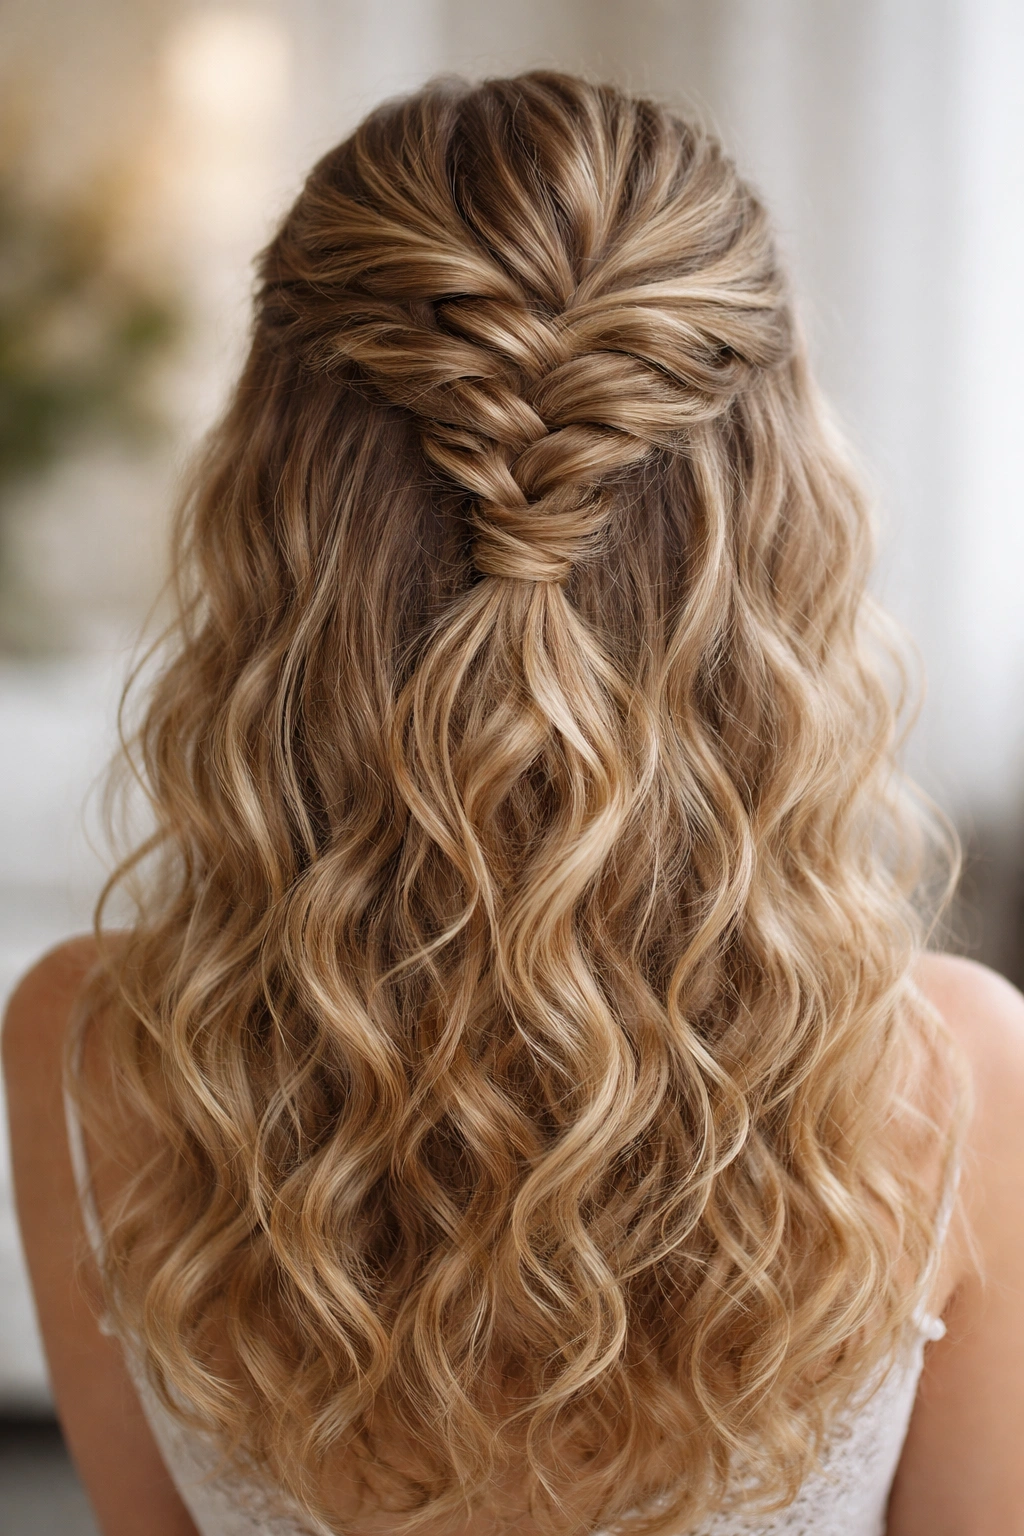
“Messy” is a relative term when it comes to formal hair. You want the appearance of effortlessness without it actually falling apart. A French braid that is pulled slightly apart creates a wide, soft silhouette that complements the wildness of curly hair.
Creating the Shape
Start the French braid at the center of your forehead, moving backward. As you braid, pull the hair outward to create a “pancaked” effect. Stop at the crown of your head, secure it with a clear elastic, and then wrap a small section of hair around the elastic to hide it.
Why It’s Reliable
This style keeps the front of your hair clean. If you are prone to getting flyaways right at the hairline, the French braid traps them. You’re left with a clear forehead, which creates a polished look that draws attention to your eyes and jewelry.
6. Small Accent Braids with Free-Flowing Curls
Sometimes, you don’t want to pin half your hair back. You just want a little bit of detail. Accent braids are tiny, thin plaits woven into the front of your hair, leading back to a single, small point of connection behind the head.
The Aesthetic
This style is all about the contrast between the tight, precise braids and the untamed, bouncy curls. You aren’t trying to manage all your hair; you are just decorating it. It’s a great option if you have tight coils that you really want to show off in their natural, full state.
Execution Tips
- Take two small sections from the front hairline.
- Create two tight, three-strand braids.
- Pull them to the back of your head and cross them over each other.
- Secure with one or two hidden bobby pins.
Make sure the braids are tight enough that they don’t lose their shape, but not so tight that they pull on your roots.
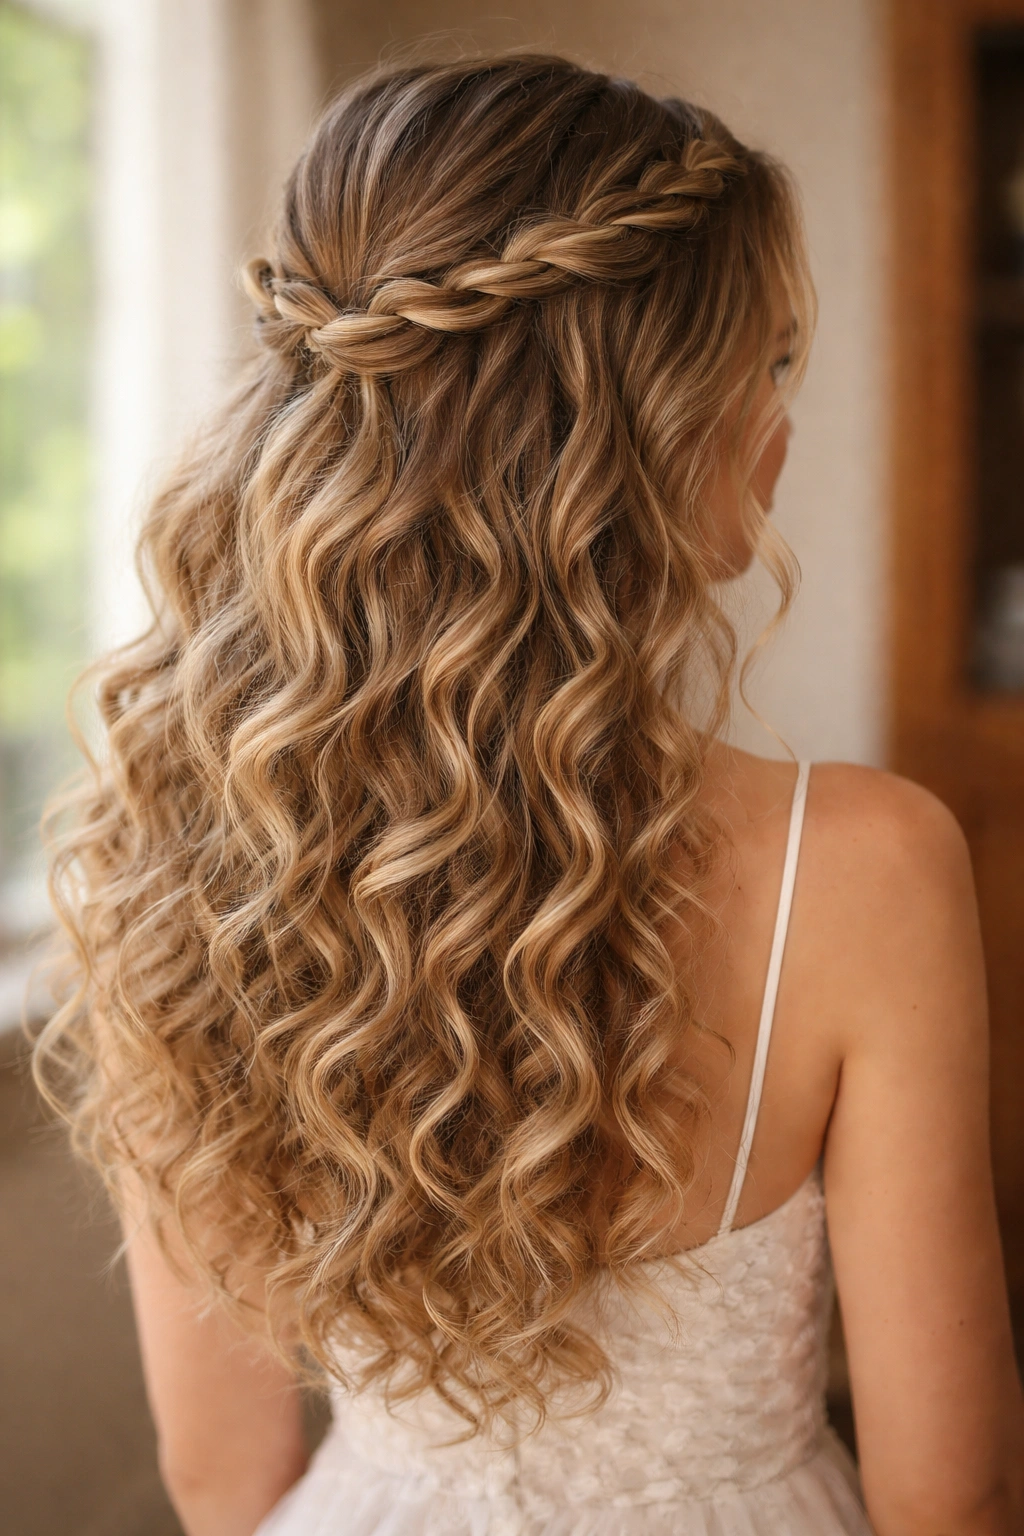
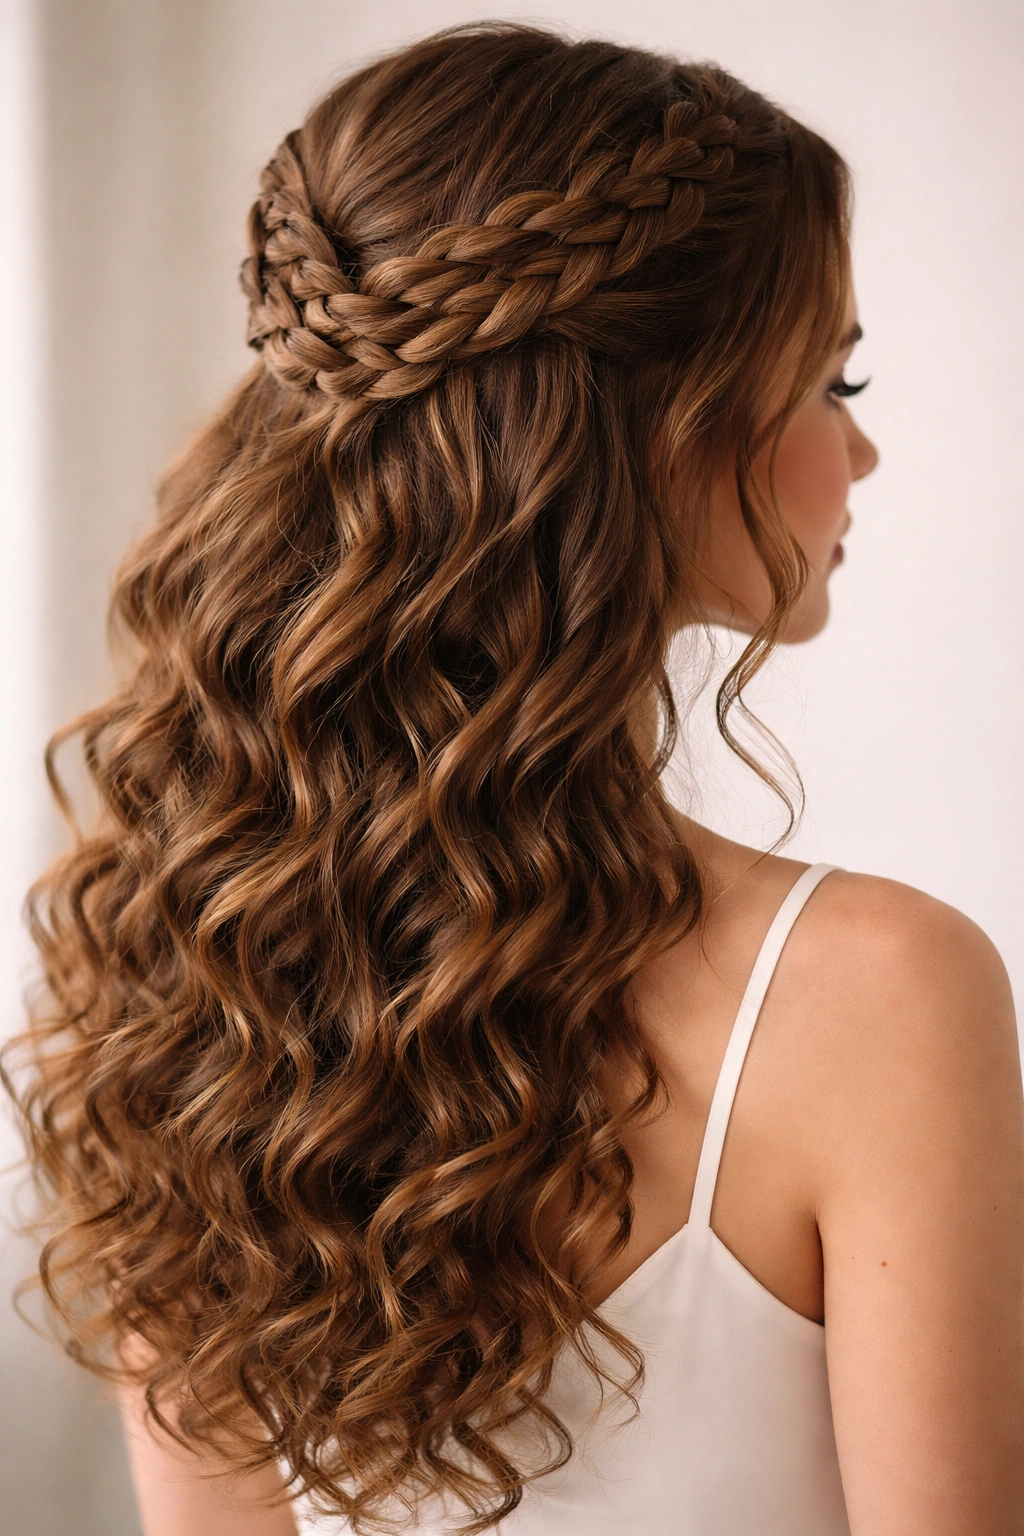
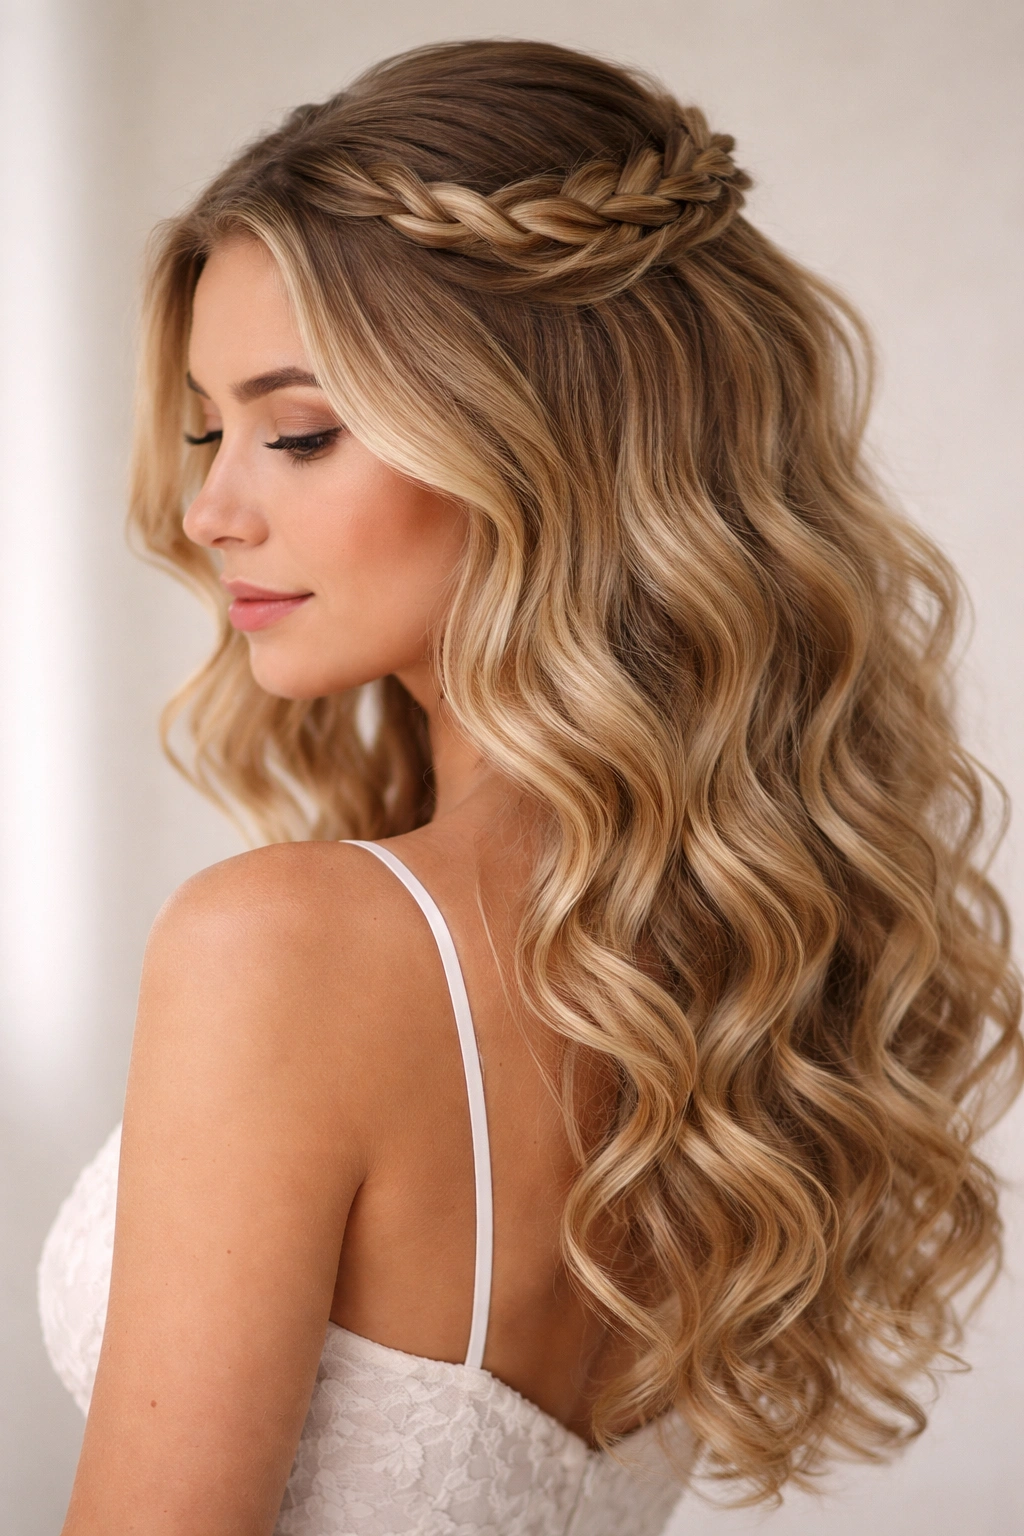
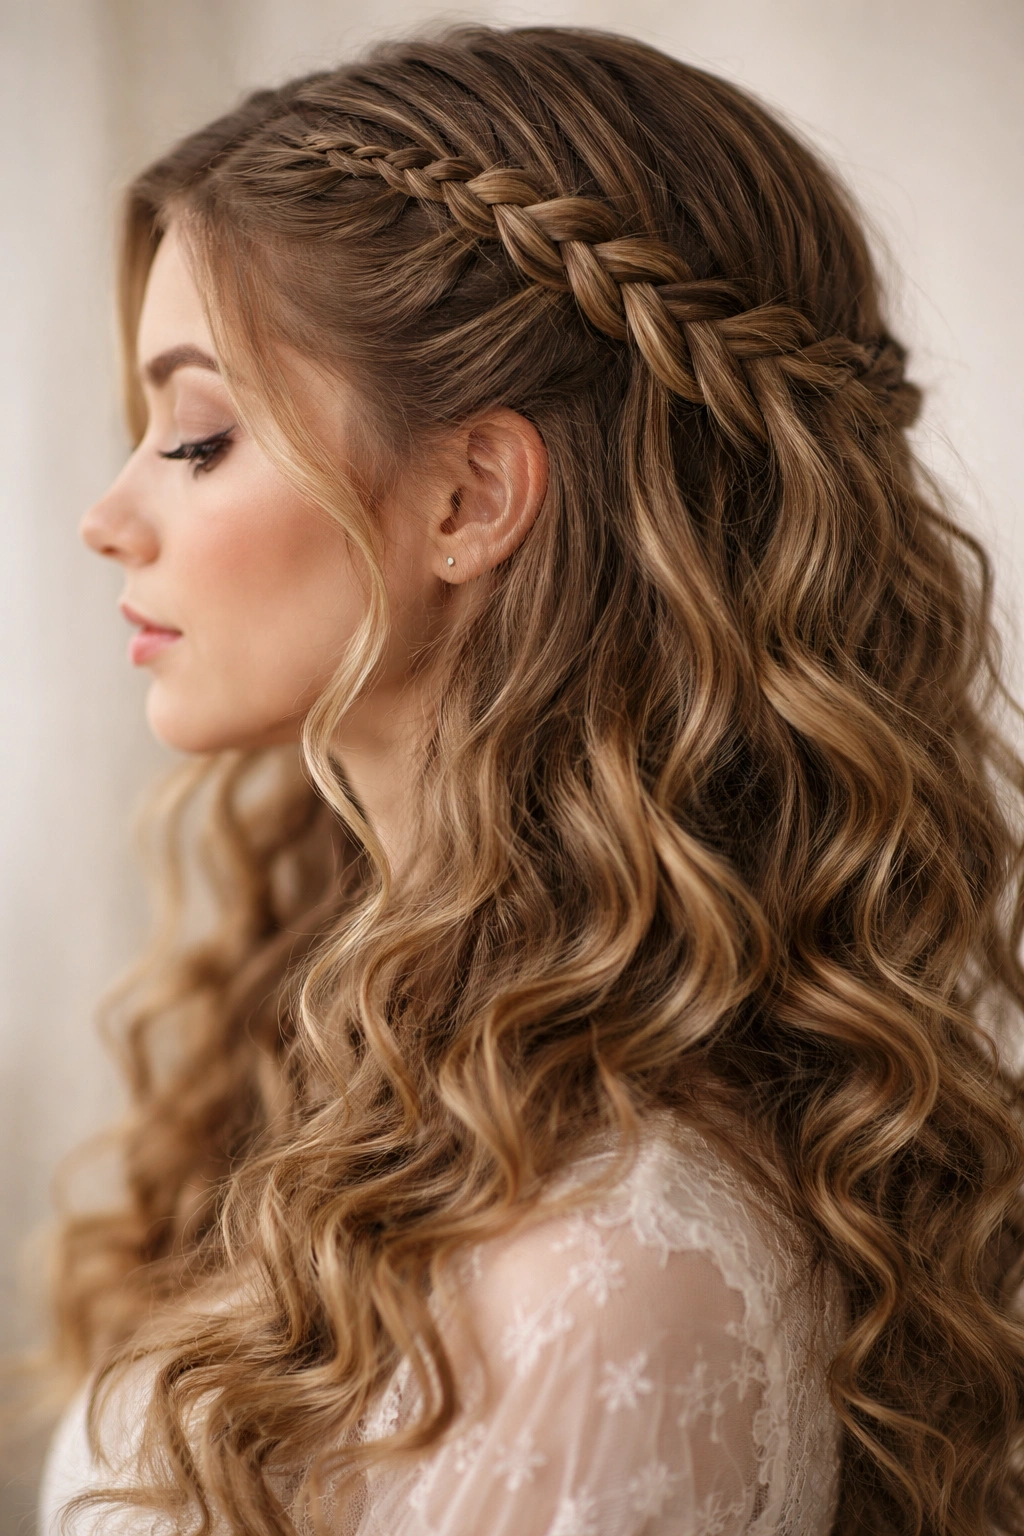
7. Braided Headband with Natural Texture

If you have a lot of volume and you’re worried about managing it all night, a braided headband is your best defense. This style mimics the look of a literal headband, but it’s crafted entirely from your own hair.
Why It Works for Long Prom Nights
The headband physically separates the front of your hair from the back. It acts as a barrier. Even if the humidity makes the curls at the back of your head expand, your face stays framed by the clean, braided line.
Important Structural Note
You will need a fair amount of length to create a headband that reaches all the way across. If your hair isn’t quite long enough, don’t force it. You can fake the look by creating two braids, one from each temple, and pinning them at the back of the head. It achieves the same visual goal without the stress of trying to stretch your hair too far.
8. Criss-Cross Braided Crown
This is visually complex and impressive, but surprisingly manageable. You essentially create two Dutch braids—one from each side of the head—and cross them over each other at the back. It creates an intricate, woven pattern that looks like a complex updo, but keeps the bottom half of your hair free.
How to Nail the Pattern
The key is the cross-over point. When you reach the back, make sure the braids lie flat against your head. If they sit too high, they will look awkward. Use U-pins instead of bobby pins here. They slide into the weave of the braid and provide a more secure hold without disrupting the pattern of the plait.
The Visual Effect
This creates a “basket-weave” look. It’s perfect for dresses with high necklines, as it keeps all the hair clear of your neck and shoulders, allowing your jewelry and dress details to shine.
9. Half-Up Top Knot with Braided Base
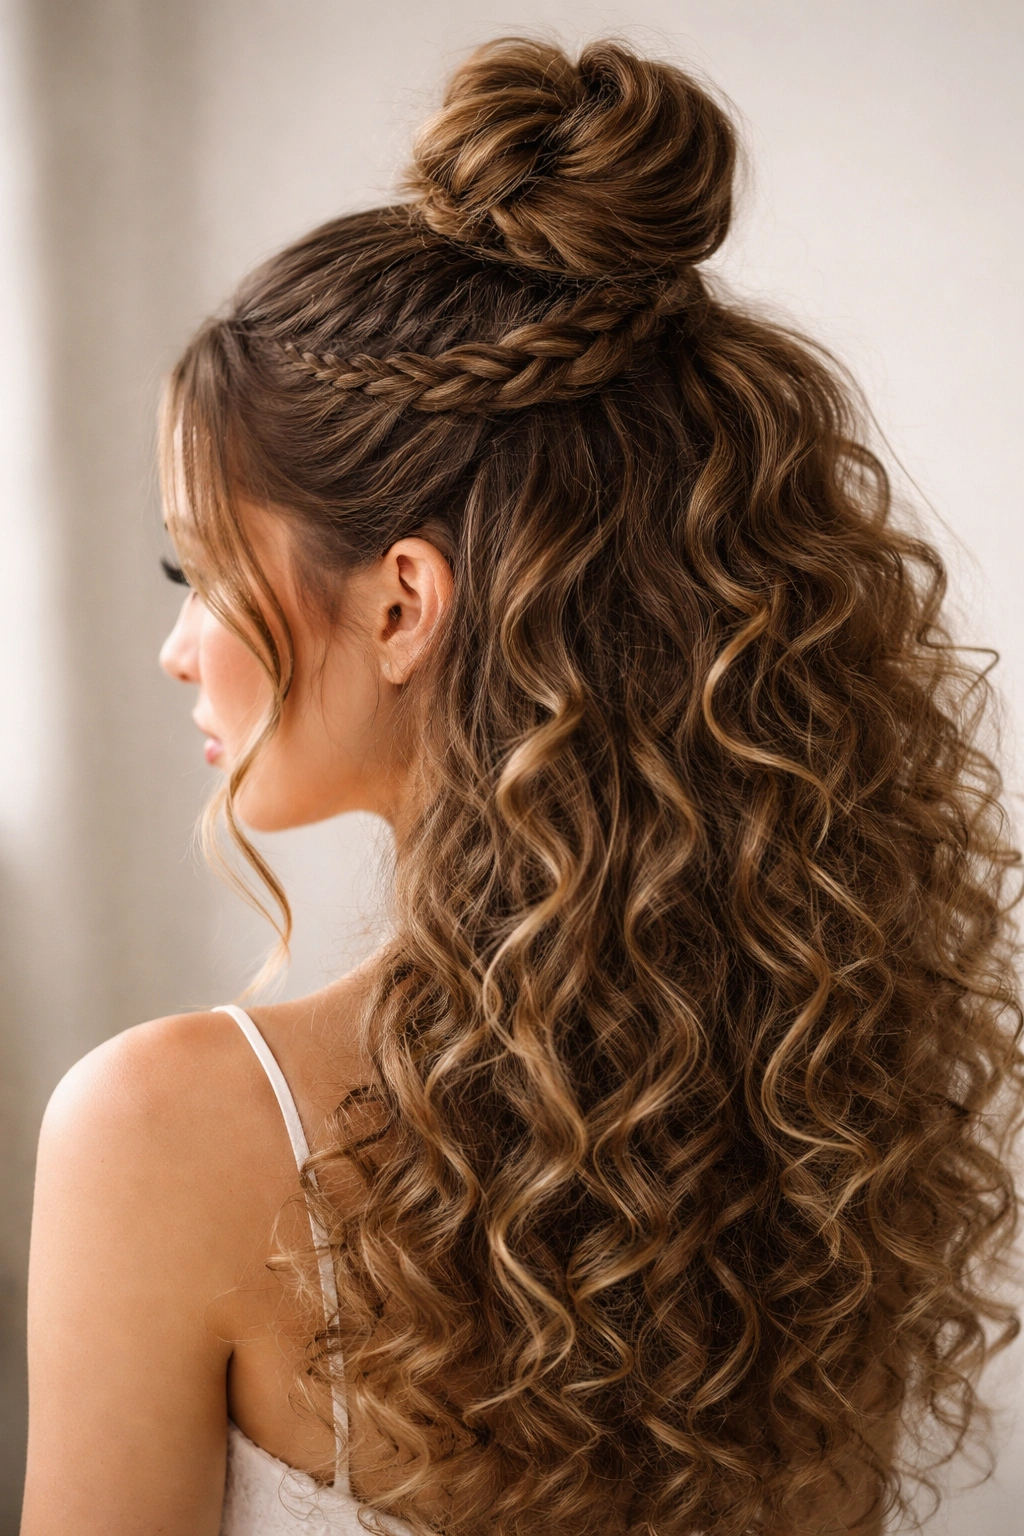
Top knots are popular, but they can look a bit casual. Adding a braided base elevates the style instantly. By braiding the hair before gathering it into the top knot, you add a layer of detail that makes the hairstyle look intentional and formal.
Why It’s Great for Curls
The top knot gives you extreme volume at the crown. If you have tight curls, this is the perfect way to embrace that height. The braid around the base provides a clean transition from the scalp to the bun.
Styling Instruction
- Section off the top third of your hair.
- Create a Dutch braid that moves from your forehead toward the center of your head.
- Once you hit the crown, stop braiding and gather the rest of the section into a bun.
- Wrap the remaining tail of the braid around the base of the bun and pin it.
It’s secure, it’s high, and it’s undeniably chic.
10. Three-Strand Braid with Floral Accessories

Sometimes the braid itself is just the foundation. If you are wearing a dress with a floral pattern or a soft, romantic style, incorporating fresh or faux flowers into a simple three-strand half-up braid is a classic, timeless choice.
Choosing the Right Braid
Keep the braid simple. A basic three-strand braid is best here because it’s a clean canvas for your accessories. If the braid is too complex, adding flowers will make the hair look cluttered and messy.
Handling the Flowers
Use hair-specific floral pins. Do not try to weave real flowers into your hair using wire unless you have a stylist to help. It’s heavy, it’s uncomfortable, and the flowers will wilt under the heat of the room. Use high-quality silk or dried floral pins that are lightweight and designed to lock into your hair.
11. Rope Braid Half-Up
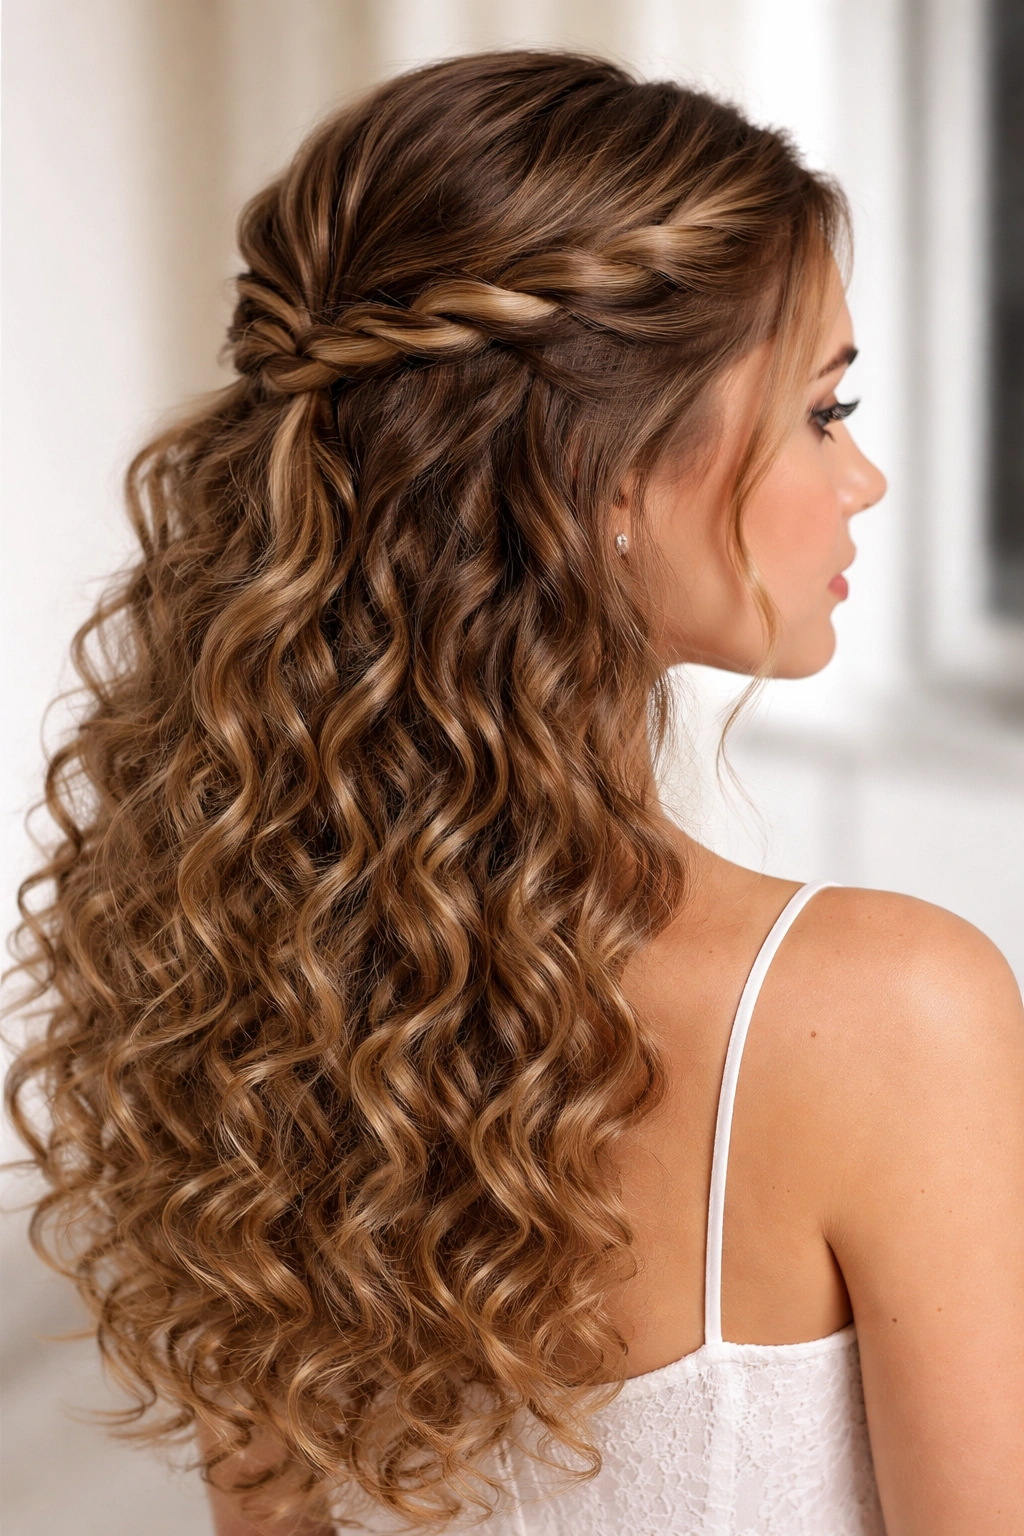
Rope braids look different than traditional plaits. They have a twisted, textured appearance that looks very modern. It’s a cleaner look than a messy braid and works exceptionally well with curly textures because it actually mimics the spiral shape of the curl itself.
How to Do It
- Take two sections of hair.
- Twist both sections in the same direction.
- Cross them over each other in the opposite direction.
- Keep twisting as you go down the length of the hair to keep it tight.
It creates a distinct “rope” visual that is very durable. Since it uses a twist-and-cross method, it’s less prone to coming loose than a traditional three-strand braid.
12. Crown Braid with a High Pony
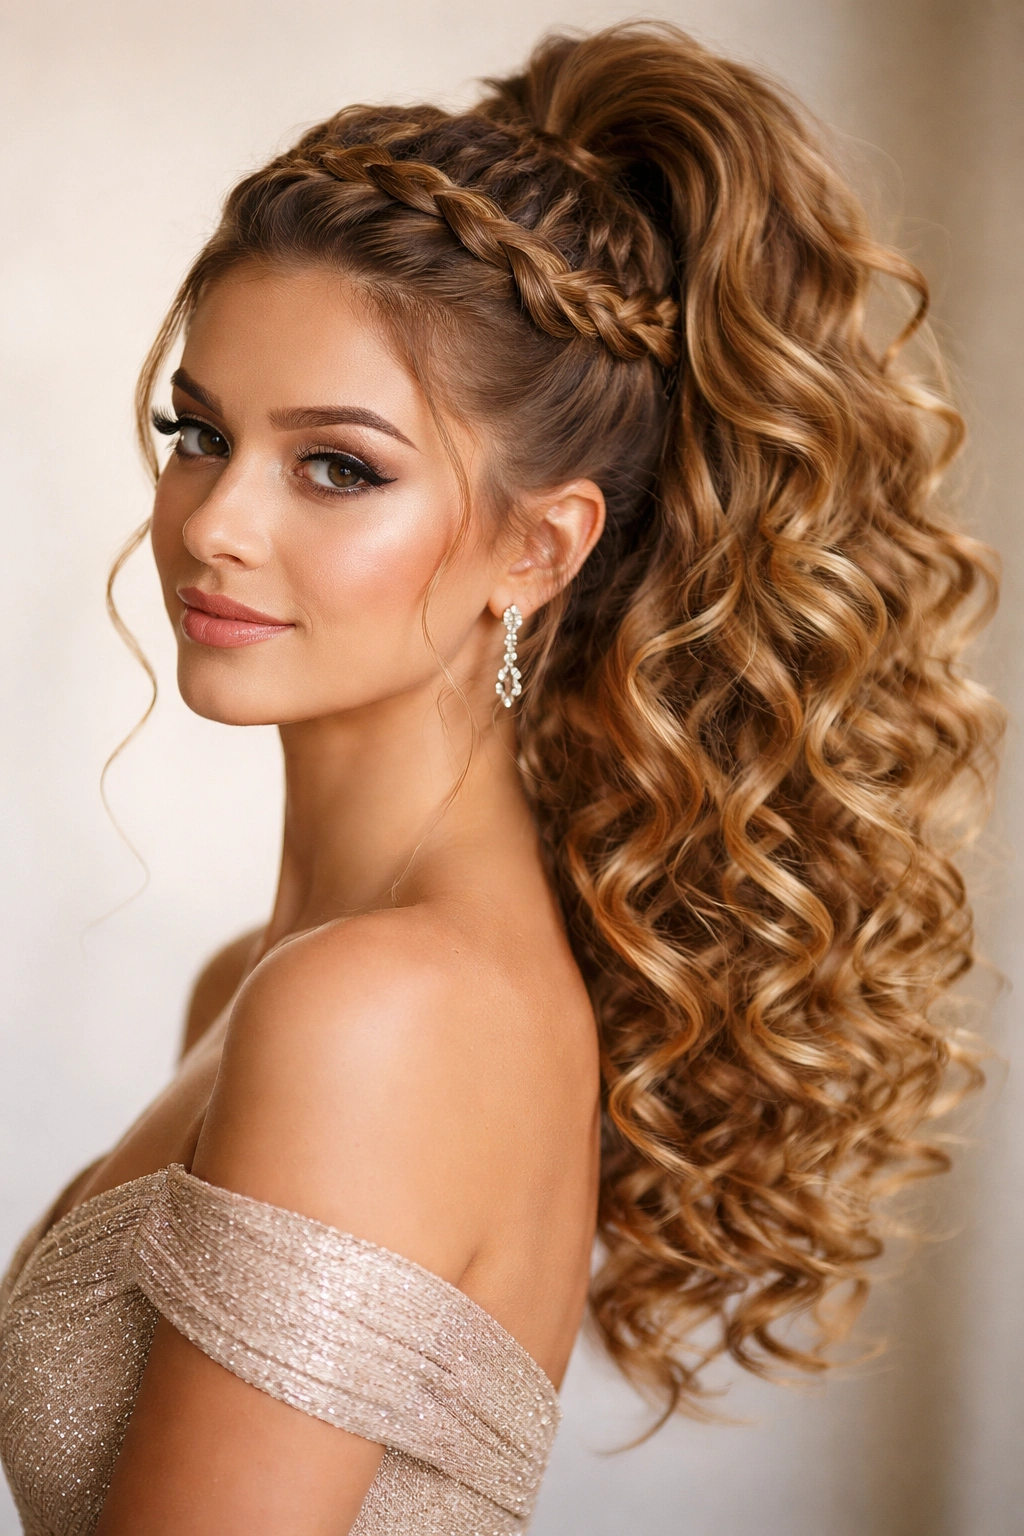
This is a specific variation of the crown braid. Instead of just braiding the sides, you pull everything into a high ponytail. It creates a sleek, lifted look that emphasizes your cheekbones.
Dealing with the Ponytail
Once the hair is in the ponytail, don’t let it just hang. Define the curls in the ponytail with a little bit of pomade. You want the ponytail to look like a concentrated fountain of curls, not a scattered mess.
Why It Works for Prom
It’s high-impact. It changes the geometry of your face, giving you a lifted, alert appearance. It’s also very practical—your hair is completely out of your face, but you still have the drama of a high, full pony.
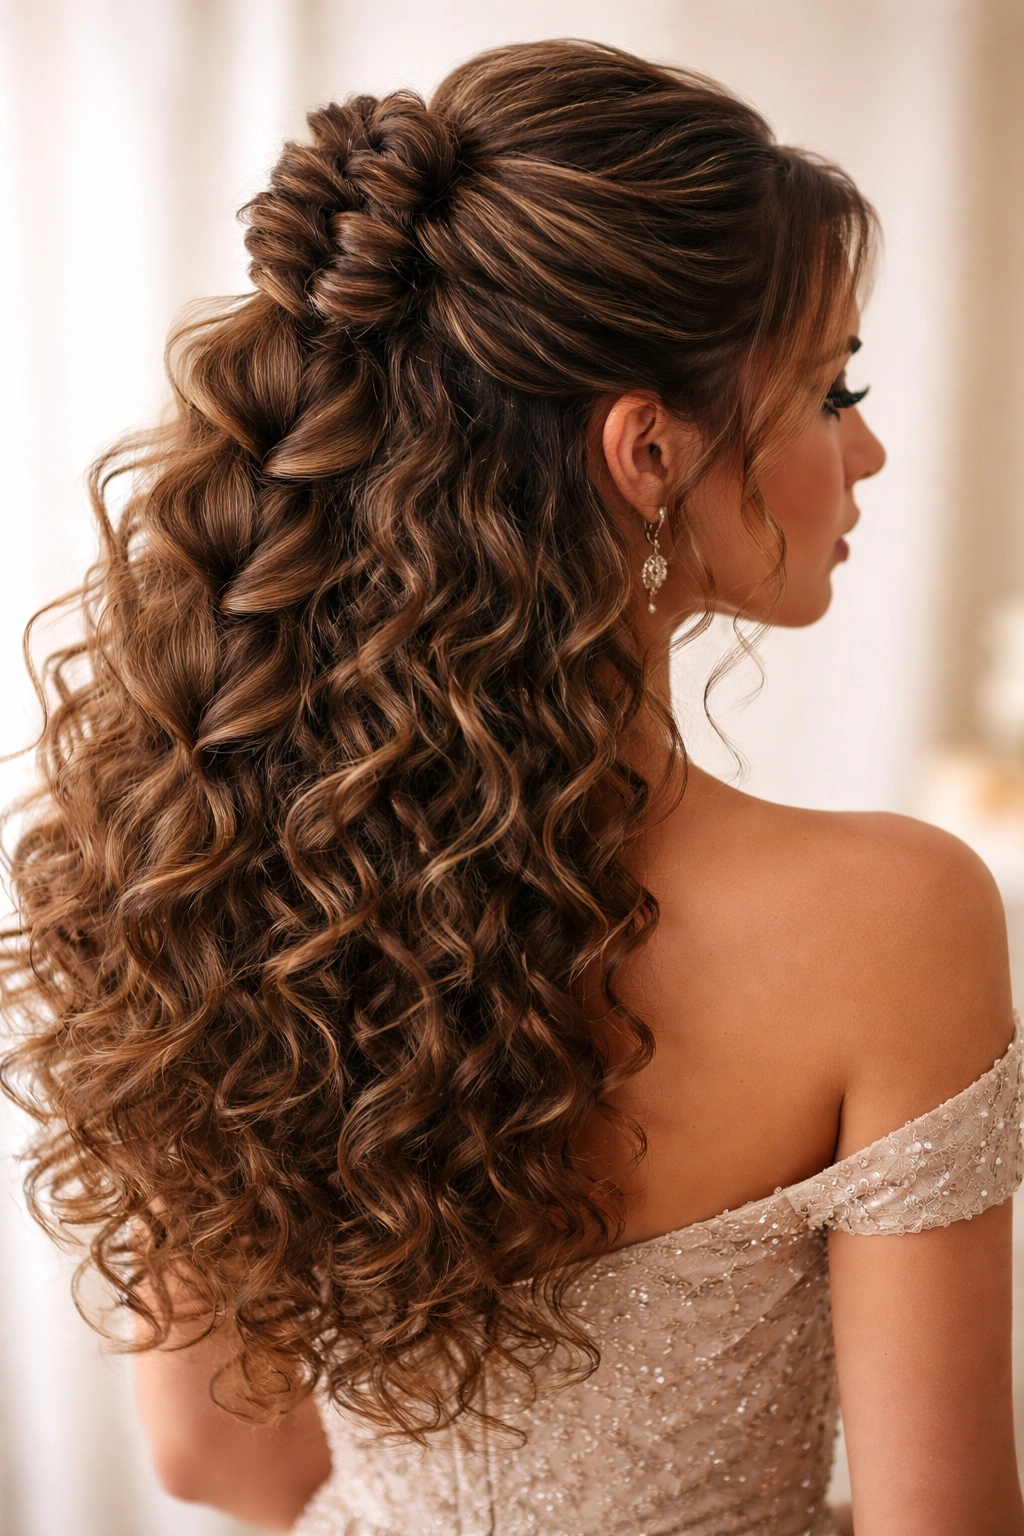
13. Braided Halo with Loose Curls
Similar to the crown braid but softer. A halo braid is typically done by wrapping one long braid around the head. For a half-up style, you are only wrapping the top section.
The Softness Factor
The goal is a “soft” halo. Do not pull the hair taut against the scalp. Let it have some slack. The braid should look like it’s resting on top of your hair, not digging into it. This preserves the volume of your curls and prevents the style from looking too severe.
Product Tip
Use a light-hold texturizing spray before you start. It gives your hair the grip it needs to stay in the halo shape without becoming stiff.
14. Cornrow-Inspired Sides with Curls
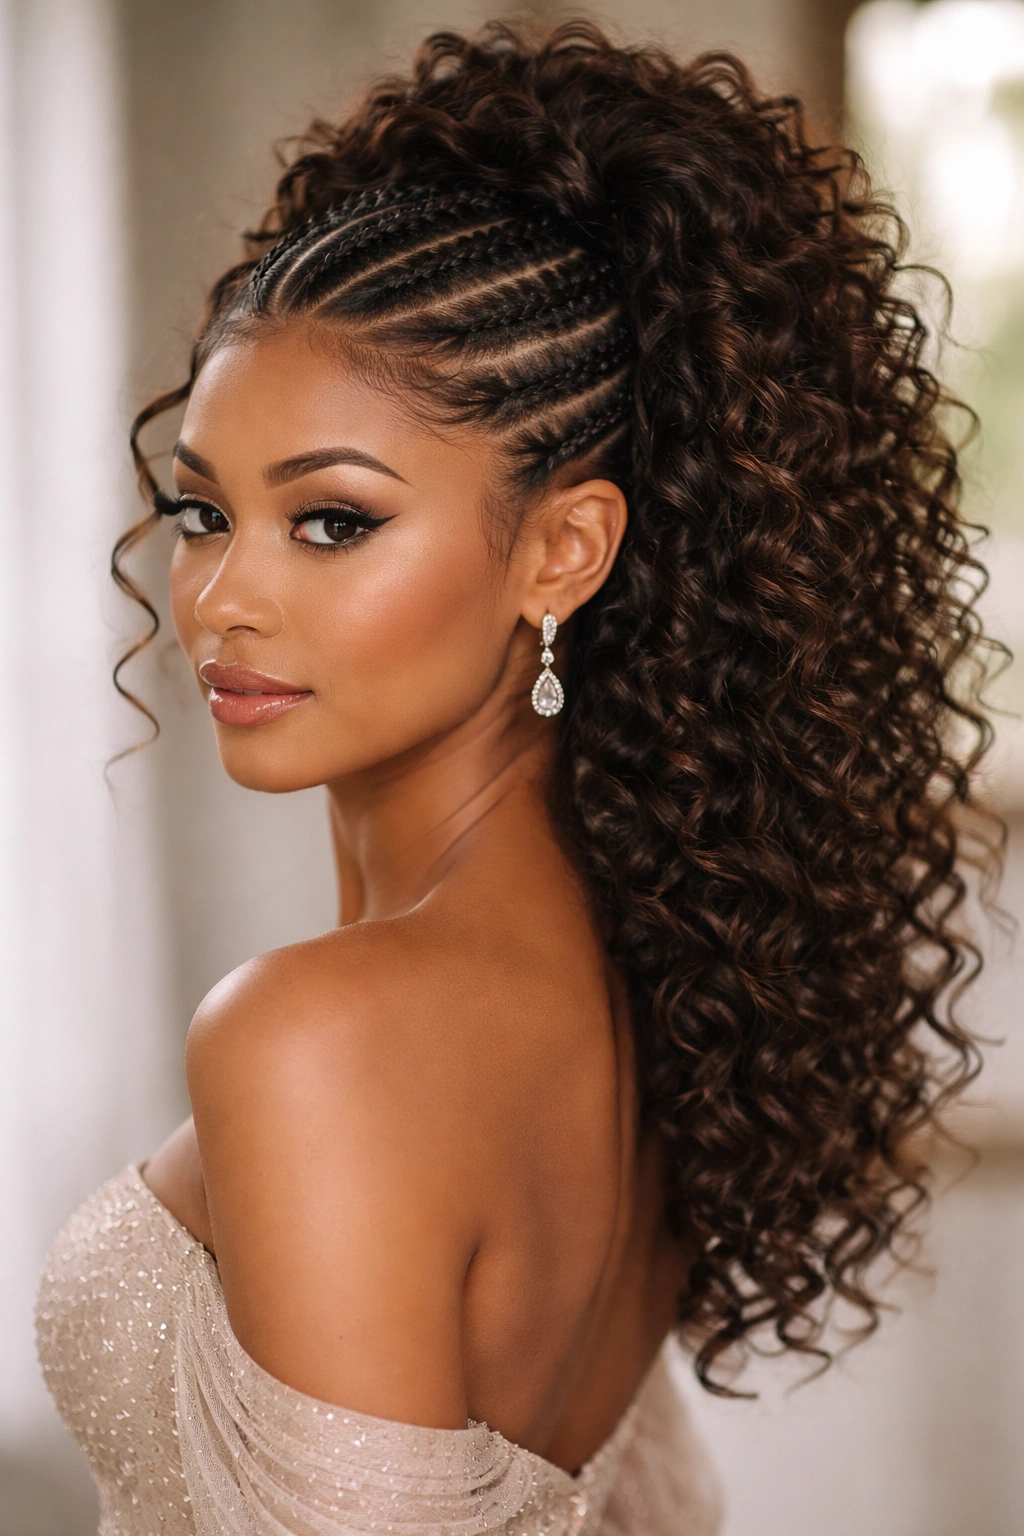
If you want an edgier, high-fashion look, consider cornrowing the sides of your head and leaving the top and back in a voluminous, curly half-up style. This mimics the look of an undercut without you having to cut a single inch of hair.
The Contrast
The tight, flat lines of the cornrows contrasting with the wild, bouncy volume of the curly half-up section is visually stunning. It’s a modern take on the prom aesthetic that feels strong and confident.
Execution
You will need a rat-tail comb to get the parts perfectly straight. Use a little bit of edge control gel to keep the cornrows smooth. If you aren’t comfortable with cornrows, you can achieve a similar effect with tight, flat-to-the-head Dutch braids, though the texture won’t be as sharp.
15. Pull-Through Braid Half-Up
The pull-through braid is a favorite among stylists because it creates the illusion of a massive, voluminous braid without actually having to weave it. It’s done using a series of small elastic bands.
The “Volume” Trick
Because you are pulling hair through elastics, you can manipulate each section to be as big or small as you want. For curly hair, this is a godsend. You can tease each section, spray it, and shape it to match the volume of your curls.
How to Style
- Create a small ponytail at the top.
- Split it into two, pull another section through, and secure with a second elastic.
- Repeat until you hit the desired length.
- Gently pull at the edges of each section to create the “braid” effect.
It is arguably the most secure hairstyle you can choose.
16. Side-Swept Braid with Volume
This is asymmetrical and dramatic. You gather the hair to one side, create a thick side-braid, and pin it back. It gives you all the benefits of an updo on one side, while the other side showcases the length and beauty of your curls.
Balancing the Look
The weight of your curls will want to pull the braid downward. You must anchor the braid securely behind your ear. Use multiple bobby pins—hide them by weaving them into the braid itself rather than just pinning the outside.
The Face-Framing Aspect
Pull out a few soft curls around your face on the side opposite the braid. This balances the style and keeps it from looking too lopsided. It frames the face and softens the transition from the braided side to the open side.
17. Viking-Inspired Braided Half-Up
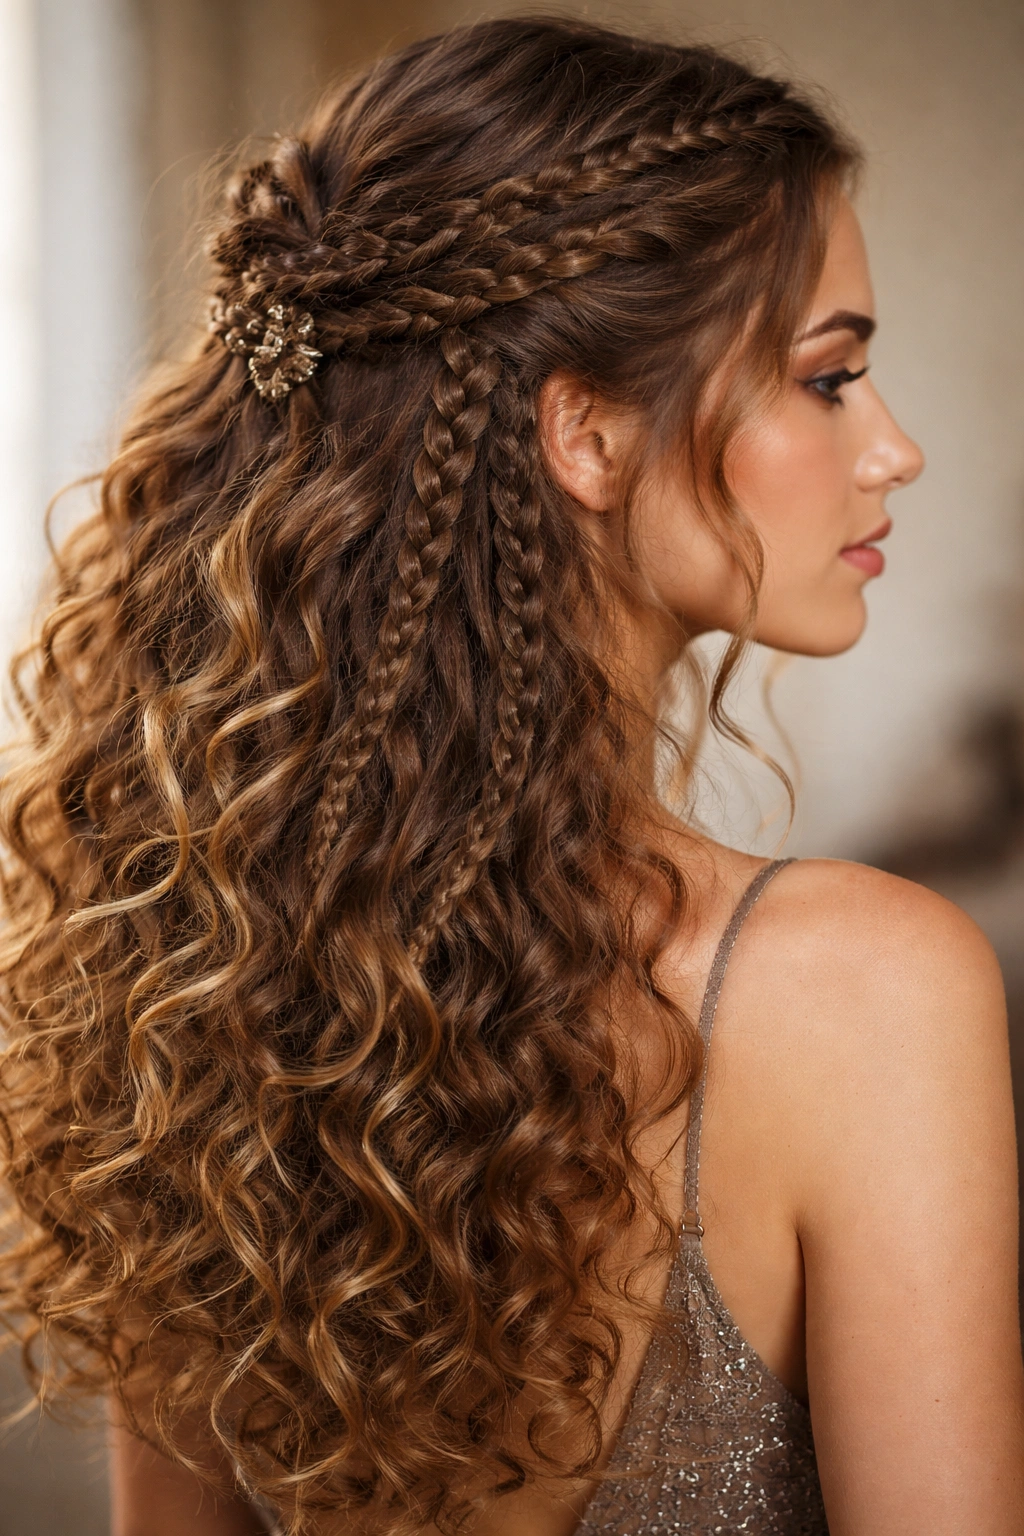
Think multiple small braids feeding into one central point. This is textured, complex, and looks incredible with curly hair. It’s not about one single braid; it’s about a collection of them.
Creating the Texture
Create three or four small Dutch braids on each side of the head, starting from the hairline. Bring them all together at the back of the head and secure them with a decorative clip or a wrap of hair.
The Benefit
Because you have so many small braids, if one comes loose, the style doesn’t fail. It’s a very resilient hairstyle. It’s also incredibly forgiving if your braids aren’t perfect; the multiplicity of them makes the overall look seem purposeful and intricate.
18. Braided Chignon Loop
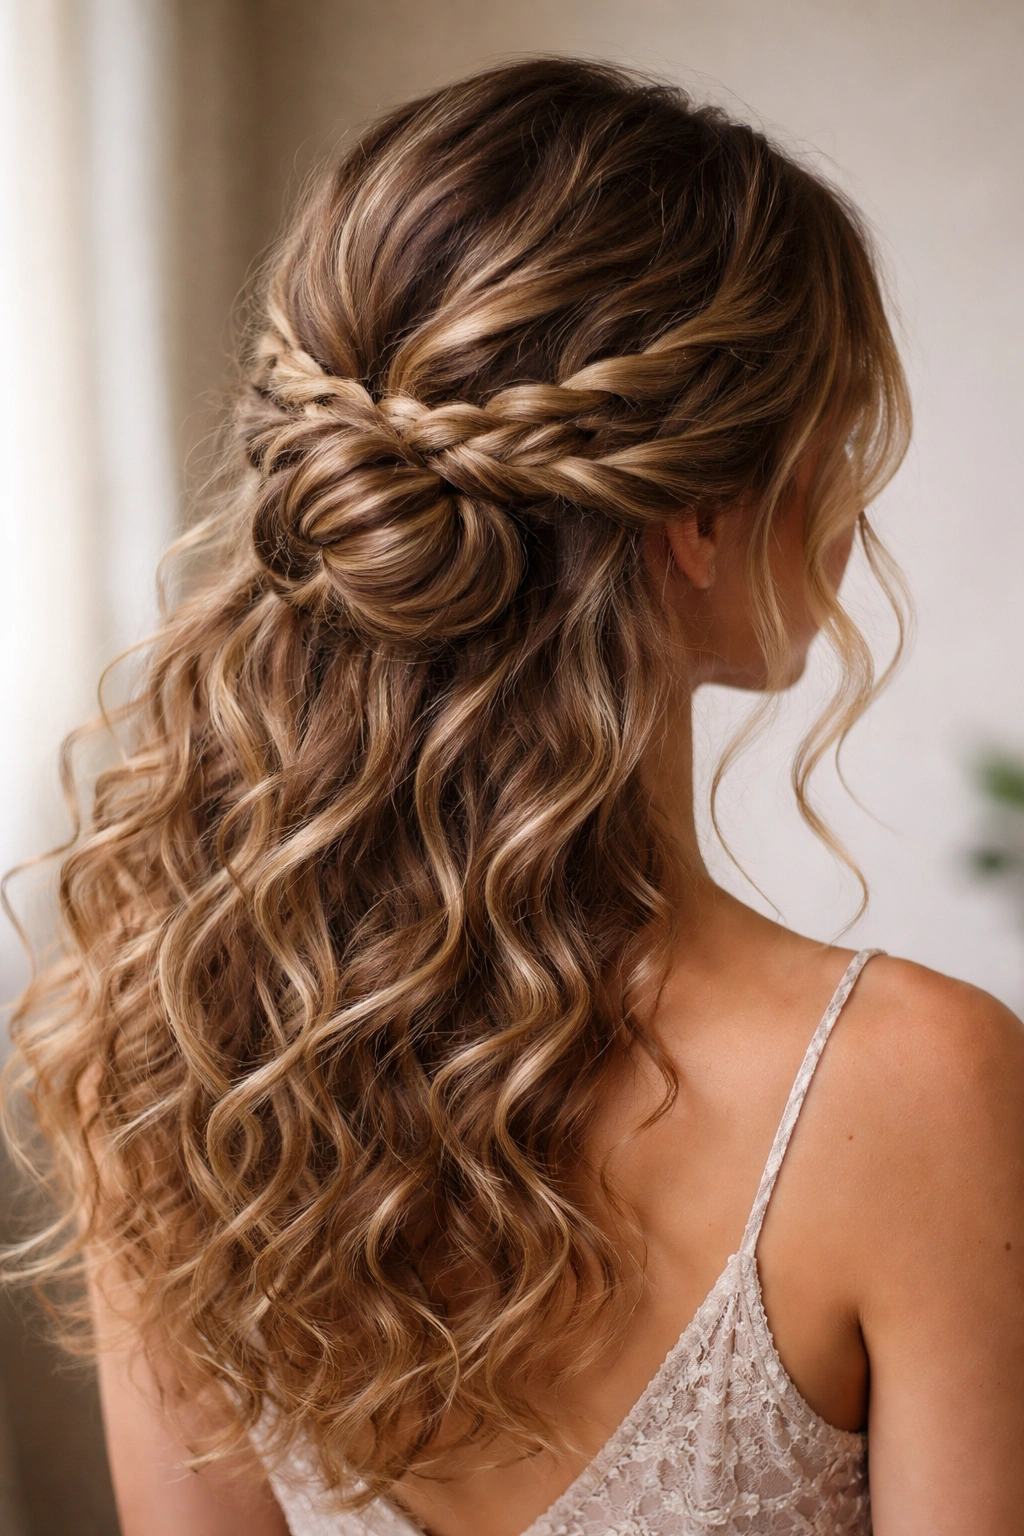
Take your braids and loop them into a small, braided chignon at the back of the head. It’s part-braid, part-bun. It keeps the hair off your neck, which is a massive relief if you are going to be on the dance floor all night.
Why It’s Sophisticated
It’s a very clean, structured look. The braid provides the texture, and the chignon provides the form. It’s a great option if you have a dress with a lot of detail on the back, as this style will keep that area clear.
Pro Technique
Use a hair donut or a small bun shaper if your hair is fine, but if you have naturally voluminous curly hair, your own curls will likely provide enough bulk. Simply coil the braid and pin it firmly.
19. Lace Braid with Waterfall Detail
A lace braid is a variation where you only add hair from one side of the braid. When you do this as a half-up style, you get a beautiful, delicate line of detail that follows the curve of your head.
The Visual
It looks like a delicate vine or a ribbon of hair. It’s less “heavy” than a Dutch or French braid. If you want something that feels lighter and more intricate, this is the one.
Styling Tip
Because it only picks up hair from one side, it can be a little tricky to keep it tight. Keep your tension constant. If you let the tension slip, the braid will sag away from your scalp. Keep your hands moving consistently as you braid.
20. The “Pinned” Mohawk Braid
This is the most aggressive and high-fashion option on the list. You braid the center section of your hair tight to the scalp from the front all the way to the crown, creating a faux-hawk effect, and then let the rest of the curls cascade around it.
The Wow Factor
It gives you incredible height. It’s a bold look, but for a night like prom, it’s often exactly what people want. It shows off your face, your jawline, and the full texture of your curls.
Critical Execution Detail
Ensure the braid is centered. A crooked center braid is very noticeable. Use a mirror behind you as you braid to ensure the line is perfectly straight from the forehead to the crown. If you can get a friend to help you with the sectioning, take them up on it.
Final Thoughts
Prom hair is about more than just looking good; it’s about feeling secure. There is nothing worse than worrying about your hair falling out halfway through the night. With curly hair, the secret isn’t fighting the texture—it’s using the texture to your advantage. Braids provide the structural integrity that curly hair sometimes lacks on its own, and the half-up, half-down format gives you the best of both worlds.
Choose the style that matches your dress and your comfort level. If you aren’t used to wearing braids, do a test run a week before the big night. Get a feel for how your hair reacts to the tension and how much product you actually need to keep the frizz at bay. On the night itself, focus on the fun—your hair is going to look great, and more importantly, it’s going to stay that way.