Nothing shifts your entire demeanor quite like a high ponytail. It is a silhouette that commands attention, exposing the neckline, framing the cheekbones, and pulling the focus upward. For natural hair, the high ponytail is not just a style choice; it is a declaration of confidence and a test of your routine. Achieving the perfect height and tension without sacrificing the integrity of your coils or curls takes more than just a brush and a hair tie. It requires understanding your specific hair porosity, the right product combinations, and the delicate balance of how much stress your hairline can handle.
The beauty of natural hair lies in its texture, its volume, and its ability to morph into almost any shape. You might be aiming for a sleek, glass-like finish, or perhaps you want to embrace the raw, untamed volume of your natural curl pattern. Either way, the foundation is the same. It starts with the health of your scalp and the hydration of your strands. If you are rushing to pull your hair back while it is dry, brittle, or tangled, you are setting yourself up for breakage. This isn’t just about looking good for the day; it’s about making sure your hair is still thriving when you take the style down.
Whether you are working with 3C curls, 4C coils, or anything in between, the options for high ponytails are vast. Some require a bit of extra help from extensions or braiding hair, while others rely entirely on your own natural density. The goal is to move beyond the basic hair tie and explore the techniques that make these styles work for your unique hair journey. We are going to break down twenty-seven different ways to wear this versatile look, focusing on the specific mechanics, styling tricks, and maintenance habits that make each one distinct.
1. The Classic Slicked High Puff

This is the baseline for high-ponytail mastery. It focuses on achieving a smooth, mirrored surface on the crown while allowing the puff to exist in its natural state. Achieving this requires a firm hold gel—preferably one that doesn’t flake—and a boar bristle brush. You want to work in sections, starting from the nape and moving upward, ensuring that every strand is gathered smoothly into the center.
Achieving the Perfect Puff
The secret here is the “layering” method. Start by misting your hair with water or a lightweight leave-in spray. Apply your product of choice, brushing firmly in the direction of the ponytail. Once you reach the base, secure it with a snag-free hair tie. To maximize the puff, use an afro pick to fluff the roots of the ponytail, creating volume without disturbing the sleekness of the base. If you have tight coils, use a gentle hand; you want volume, not frizz that compromises the base structure.
Product Selection
Avoid heavy waxes that build up. Look for aloe-based gels or flaxseed gels that provide hold without stripping moisture. If you need extra grip, a bit of edge control around the perimeter works wonders, but use it sparingly to avoid that “glued” look that feels unnatural.
2. Braided Base High Ponytail
If you are worried about tension or want a style that lasts for a few days, a braided base is your best friend. This style involves cornrowing the hair back toward the crown where the ponytail will sit. This creates a secure, sturdy foundation that relieves the pressure from your natural hair strands and distributes the weight of the ponytail more evenly across the scalp.
Why This Style Wins
The main advantage is longevity and reduced tension. Because the hair is braided down, you aren’t pulling and tugging at your hairline every morning. It also provides a sleek, flat surface that looks exceptionally professional. You can leave the ponytail natural, or you can attach a bundle of extensions if you want to experiment with different textures, lengths, or colors.
Maintenance Notes
Since your scalp is exposed in the cornrowed sections, keep it hydrated with a light oil like jojoba or almond oil. Do not over-saturate, or you will end up with buildup, but a light touch keeps the scalp happy and prevents that “dry hair” itch that often accompanies braided styles.
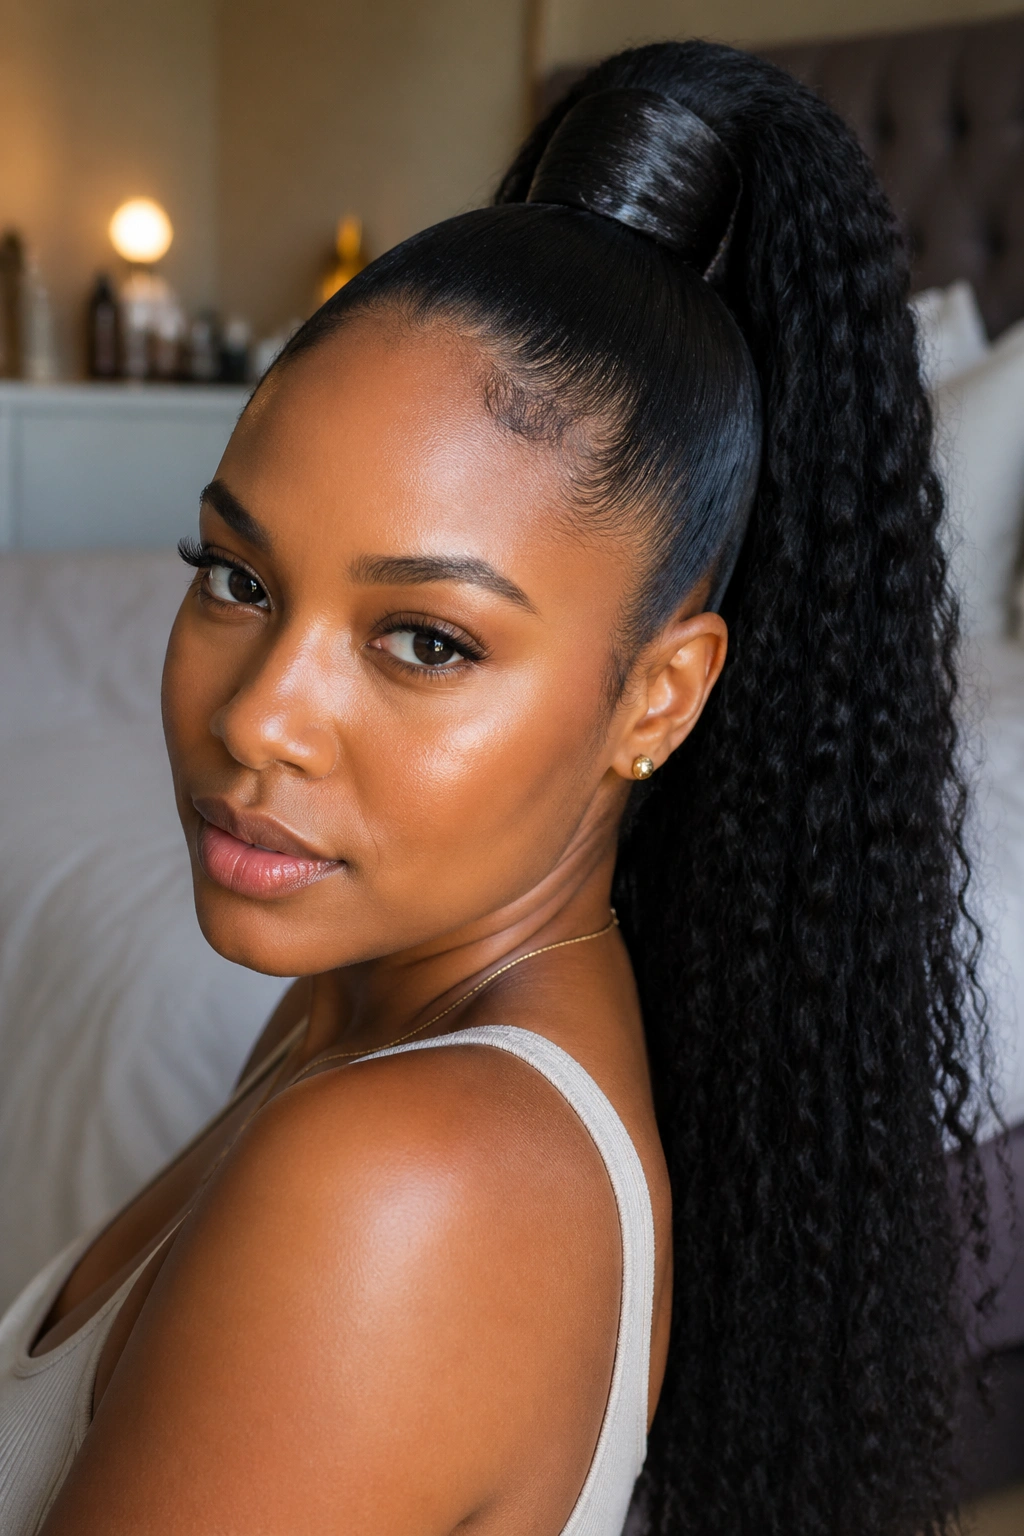
3. High Ponytail with Curly Extensions
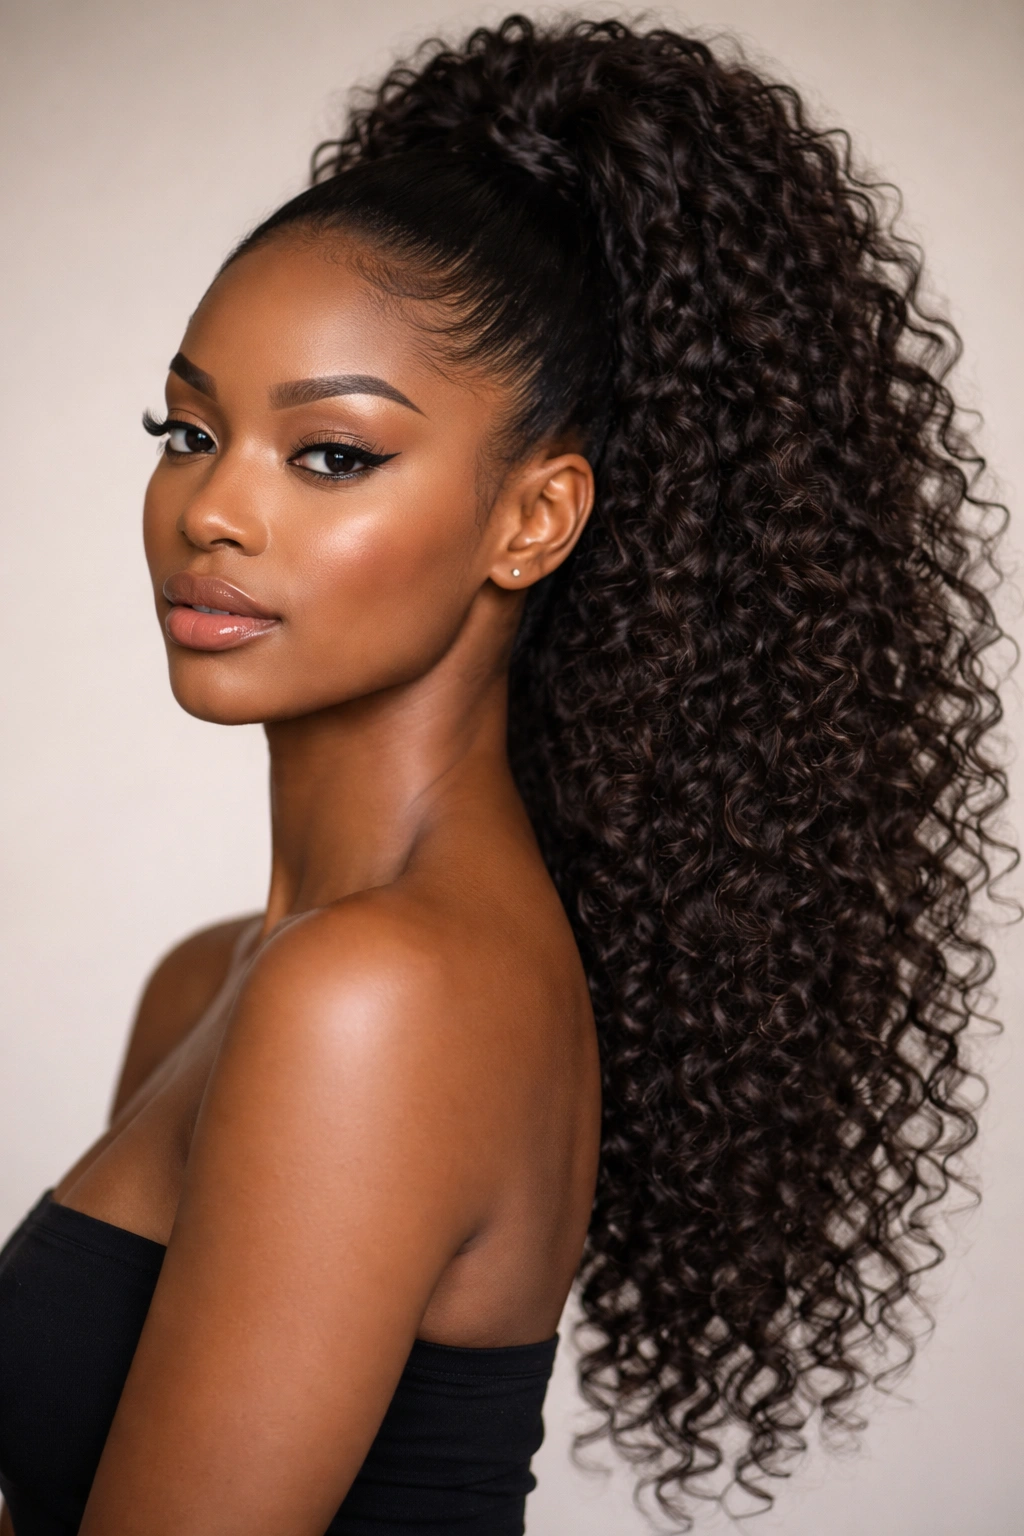
Sometimes you want the drama of length without the years of waiting. Adding curly extensions to a natural base is a classic move, but the trick is in the blend. You want the texture of the extensions to mimic your own curl pattern or a stretched version of it. Human hair extensions are almost always the better choice here because they react to products similarly to your own hair.
The Blending Technique
The most common mistake is creating a visible “seam” where your natural hair ends and the extensions begin. To avoid this, twist your natural hair in small sections before wrapping the extension around the base. This provides a natural, organic bridge between your hair and the added length. If you are using synthetic braiding hair, opt for pre-stretched or water-wavy hair, which tends to look more like natural, blowout-textured hair.
Securing the Extensions
Use bobby pins, not just hair ties, to secure the extensions. Weaving the bobby pin through the base of your natural ponytail and into the extension weft creates a much more secure hold that won’t slide out as the day goes on.
4. Sleek Top-Knot Ponytail
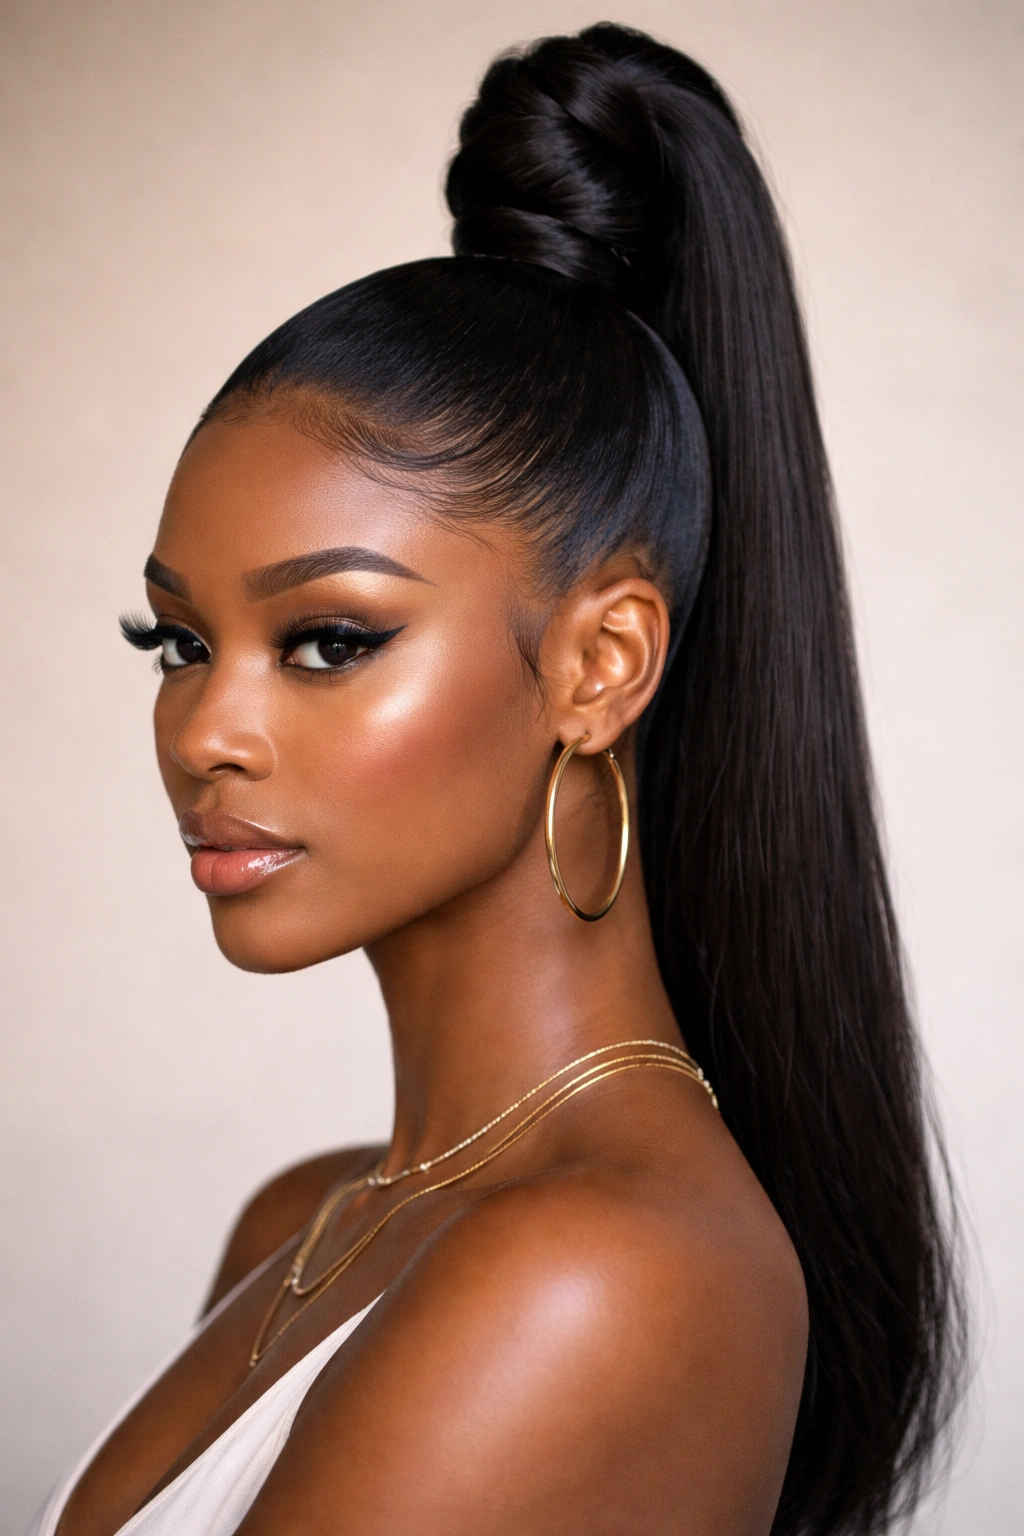
This is the high-fashion cousin of the standard ponytail. It is ultra-sleek, minimalist, and very structural. The focus here is on the transition from the scalp to the bun. It requires a significant amount of control, so this is where your scarf method—wearing a silk scarf tightly wrapped around your head while the product dries—is non-negotiable.
The Structural Secret
To get that perfect “top-knot” look, don’t just wrap the ponytail around itself. Twist the ponytail into a rope, then coil it around the base, tucking the ends in and securing them with two or three large U-shaped hair pins. This shape stays put much better than a simple rubber band-based bun. It creates a cleaner line that looks intentional and polished.
Styling Tip
If you have a bit of breakage around the hairline, don’t try to force it into the sleek base. Use a small toothbrush with a little edge control to swoop it gently, turning potential flyaways into a deliberate style element.
5. Deep Side Part Ponytail
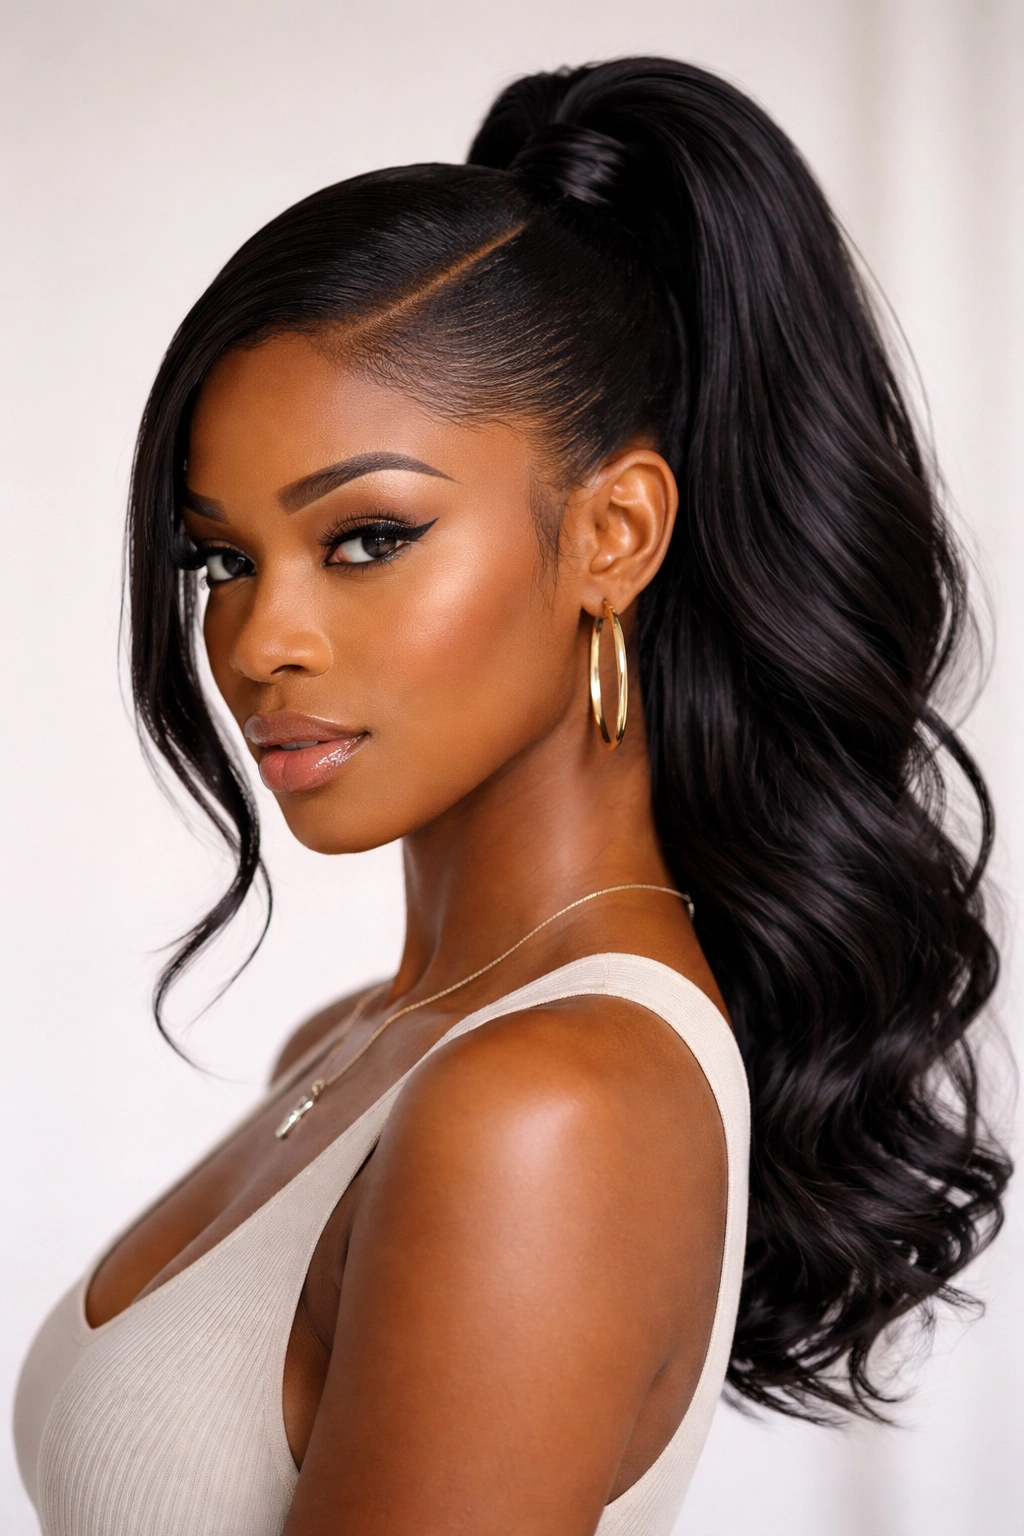
A deep side part adds an instant element of sophistication. It breaks up the symmetry of a standard center-slicked ponytail and adds a geometric element to your face shape. The key to this look is the precision of the part. If the part is crooked, the entire style looks unfinished. Use the end of a rattail comb to create a clean, sharp line from your temple back to the crown.
Achieving the Look
Once the part is set, you need to treat each side as a separate entity when you brush it into the ponytail. Brush the larger section over and the smaller section back. The tension needs to be equal on both sides, or the ponytail will pull to one side, which looks awkward and puts uneven stress on your roots.
Balancing the Face
A deep side part is particularly flattering if you have a rounder face shape. It draws the eye diagonally across the face, which can make it appear slightly more elongated. If you have bangs, you can let them fall naturally or incorporate them into the side-slicking process for a more uniform look.
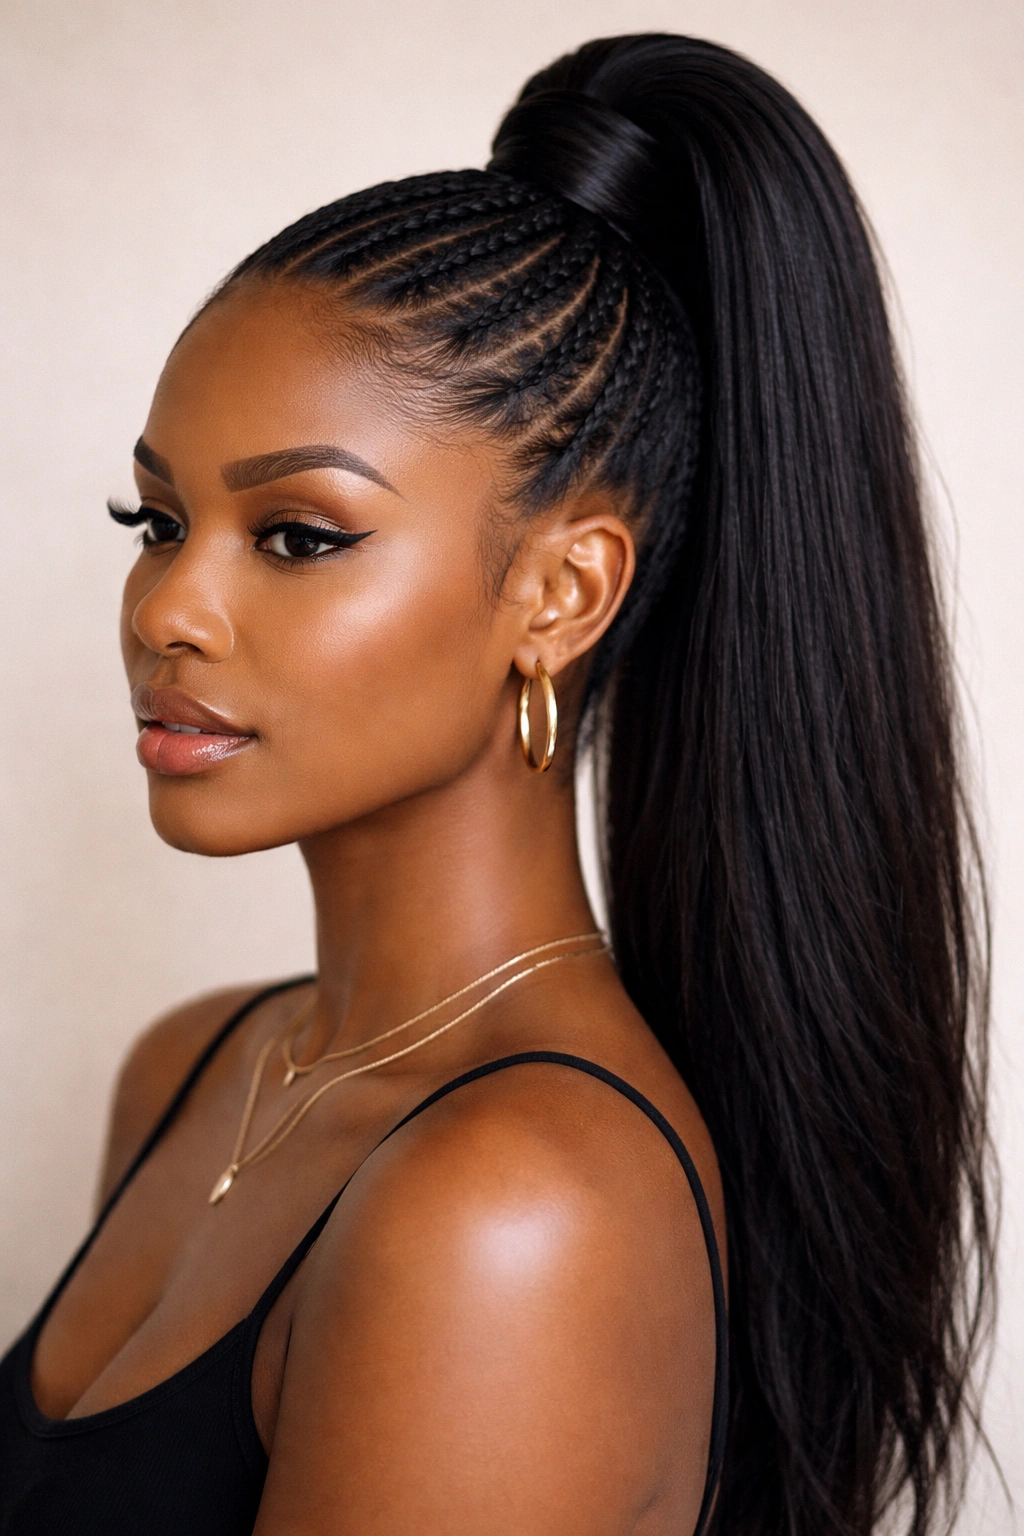
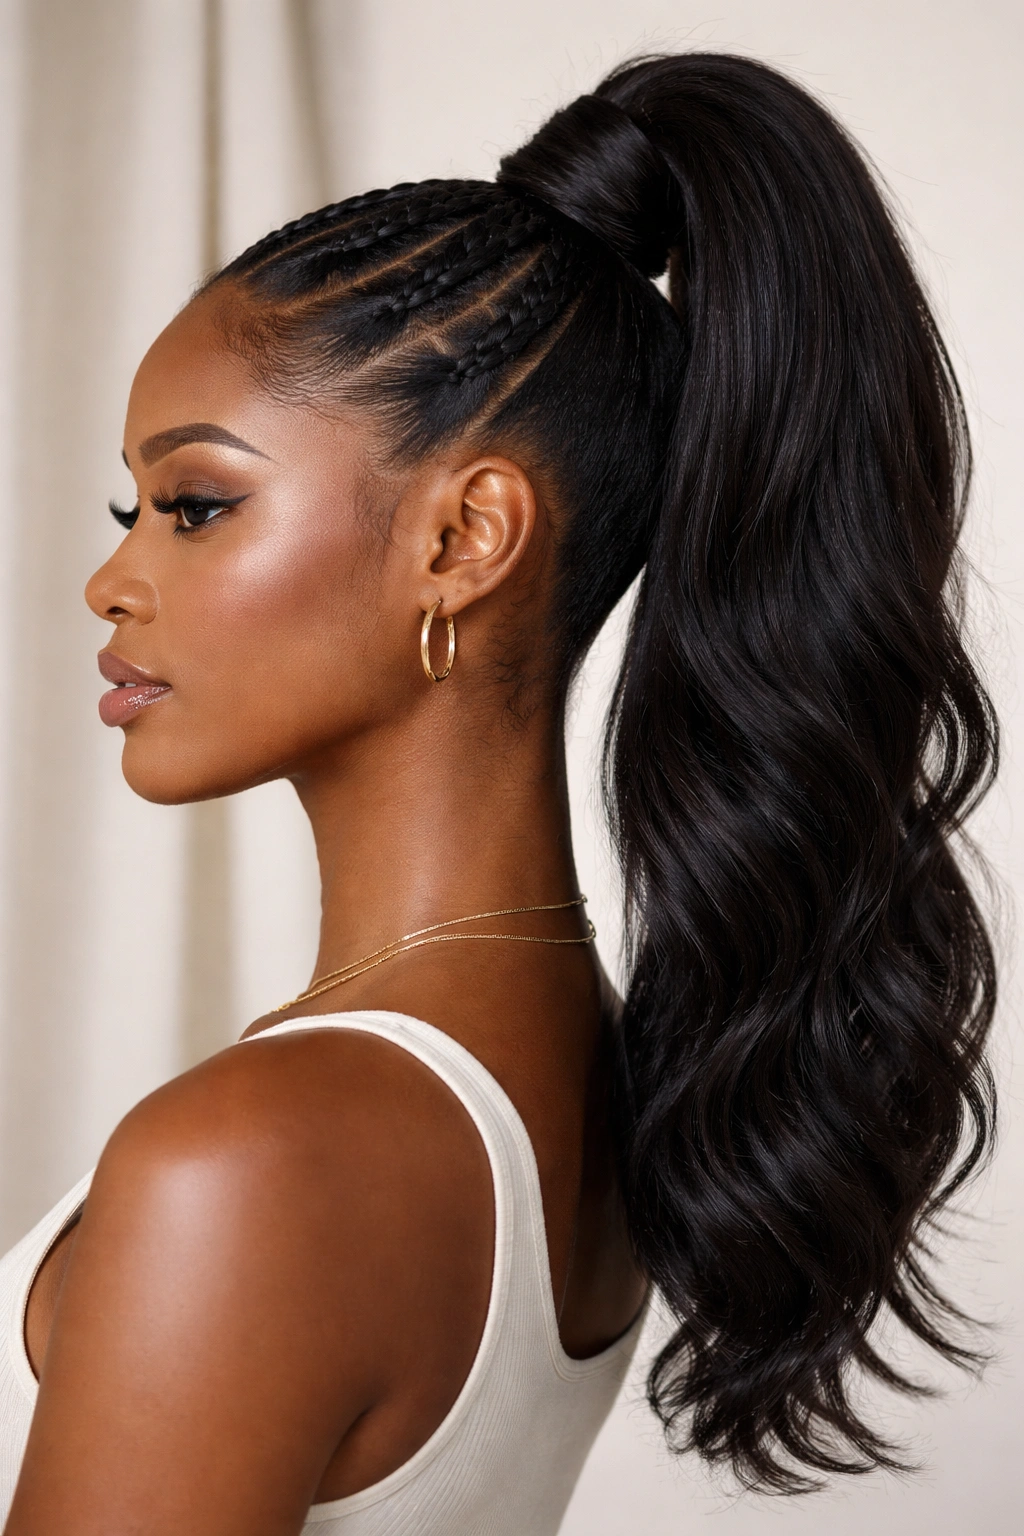
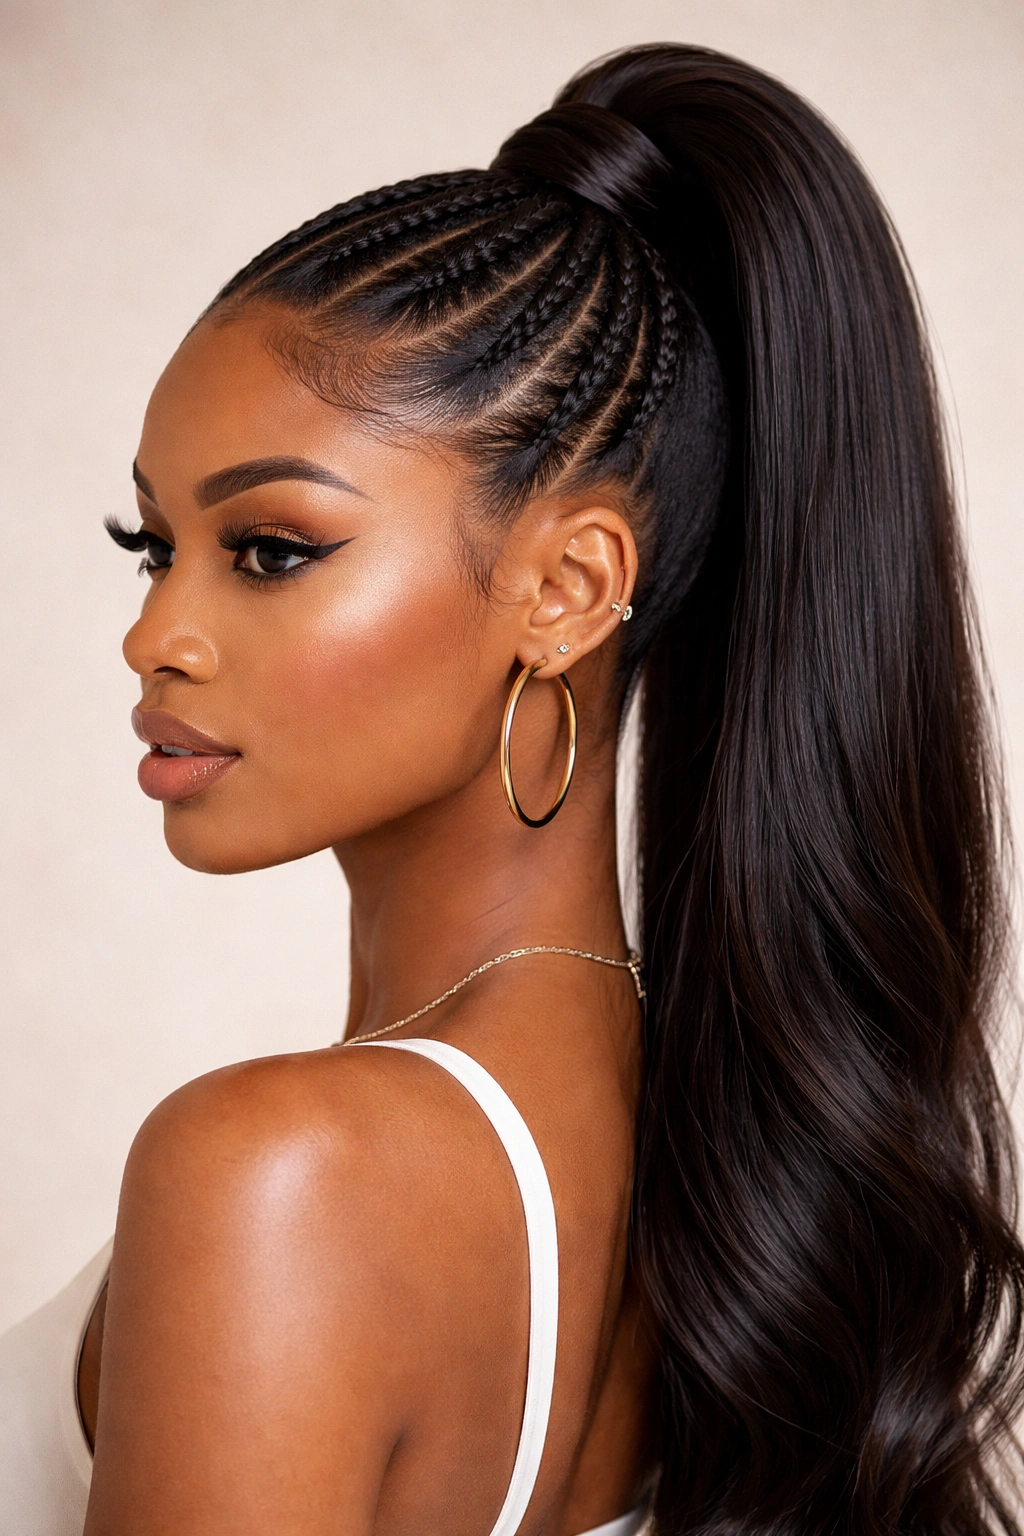
6. High Ponytail with Cornrow Accents
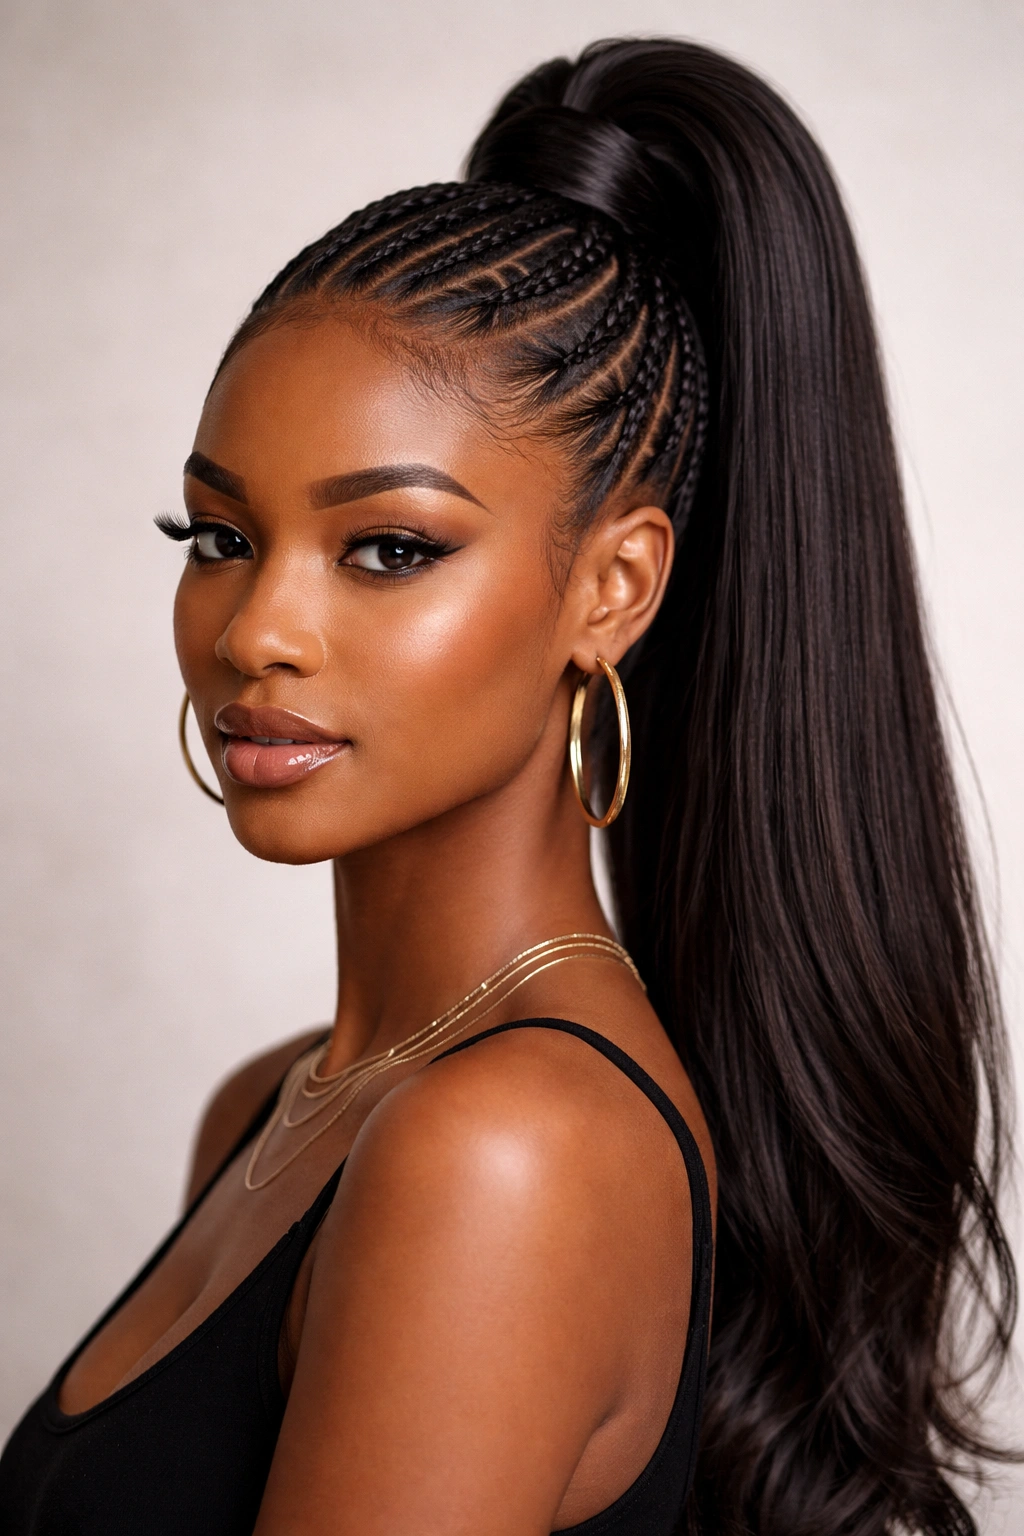
This style blends the structure of a braided base with the freedom of a ponytail. Instead of braiding all the hair back, create 3 to 5 cornrows starting from the hairline and stopping just before you reach the crown. This adds visual interest to the top of your head and ensures that the hair is laid perfectly flat before it hits the elastic.
The Artistic Approach
You can play with the cornrow patterns. Try zig-zags, curved lines, or even feed-in braids that gradually get thicker as they approach the ponytail base. This requires a bit of patience and, honestly, it might be easier if you have someone to help you braid the back, but the result is a custom look that feels like an intricate updo.
Product Strategy
Use a light pomade for the braids to keep them crisp. Avoid thick, greasy products that will make the hair look dusty or dull after a few hours. A clear, medium-hold gel is perfect for locking the braid shape without leaving residue.
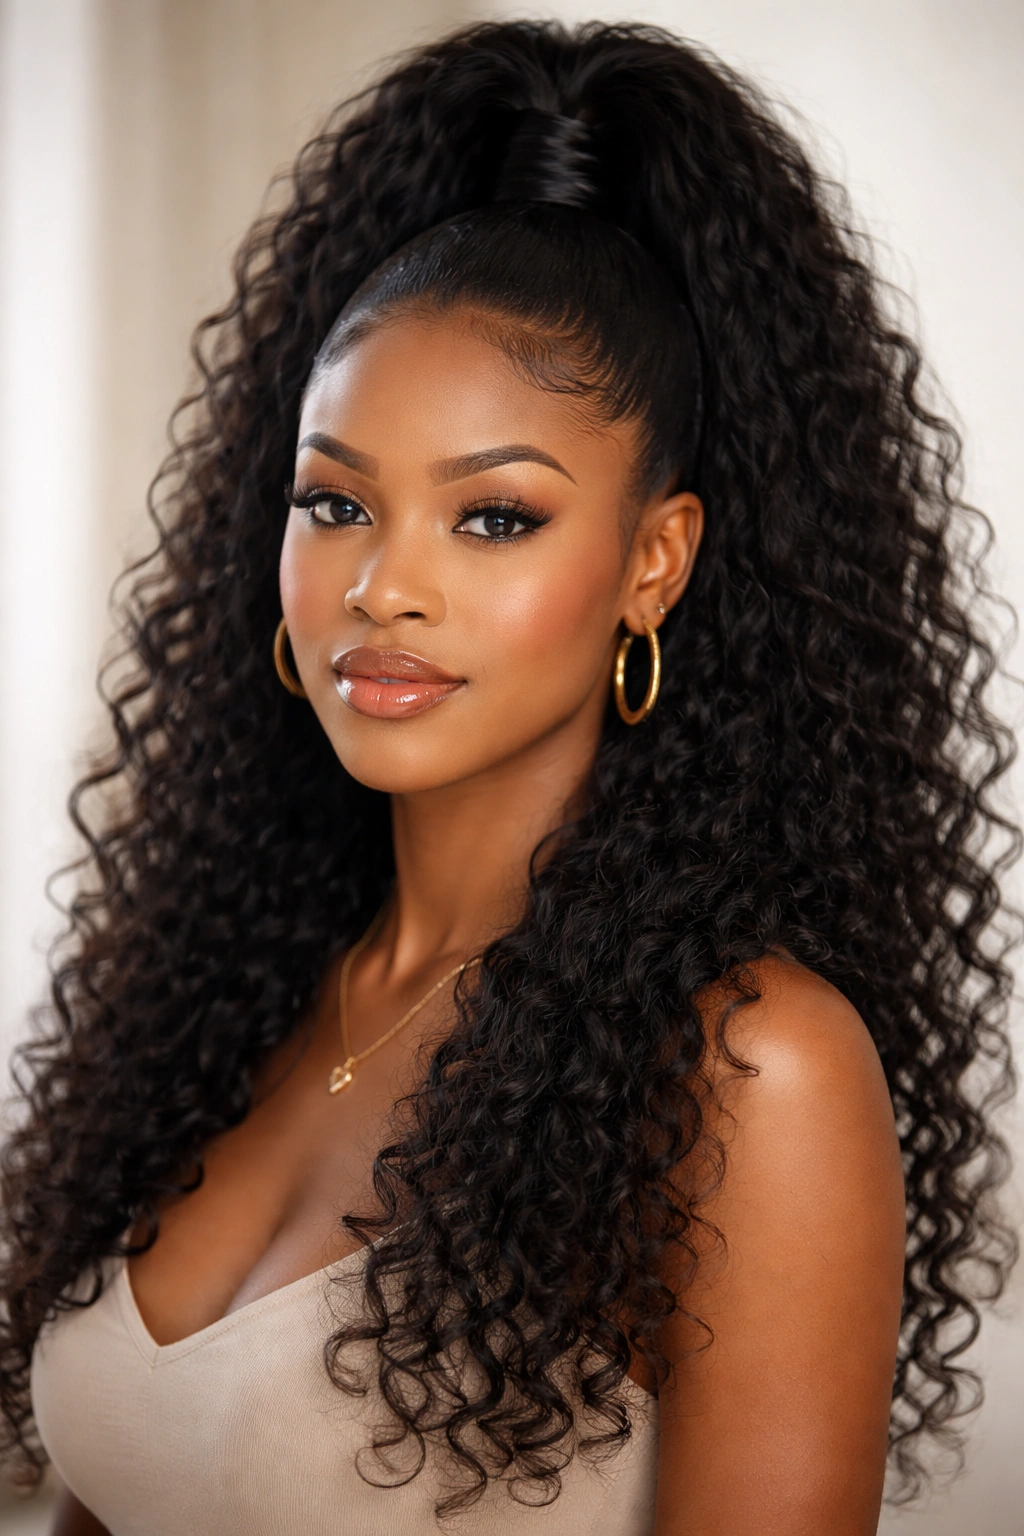
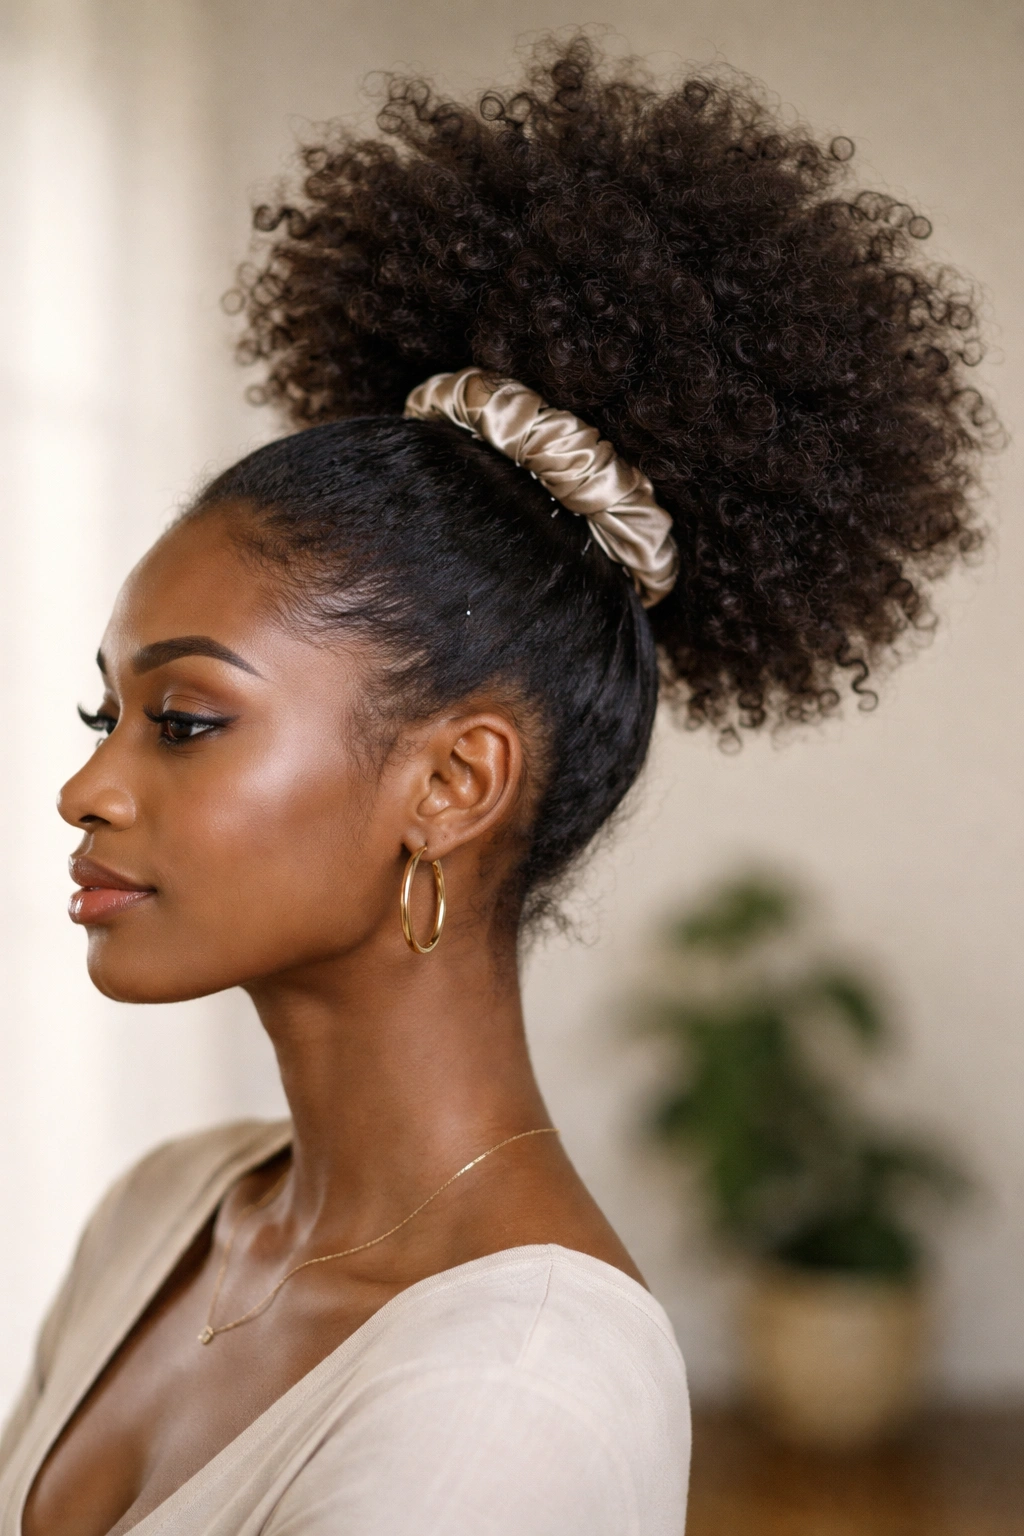
7. Textured Afro Puff Ponytail
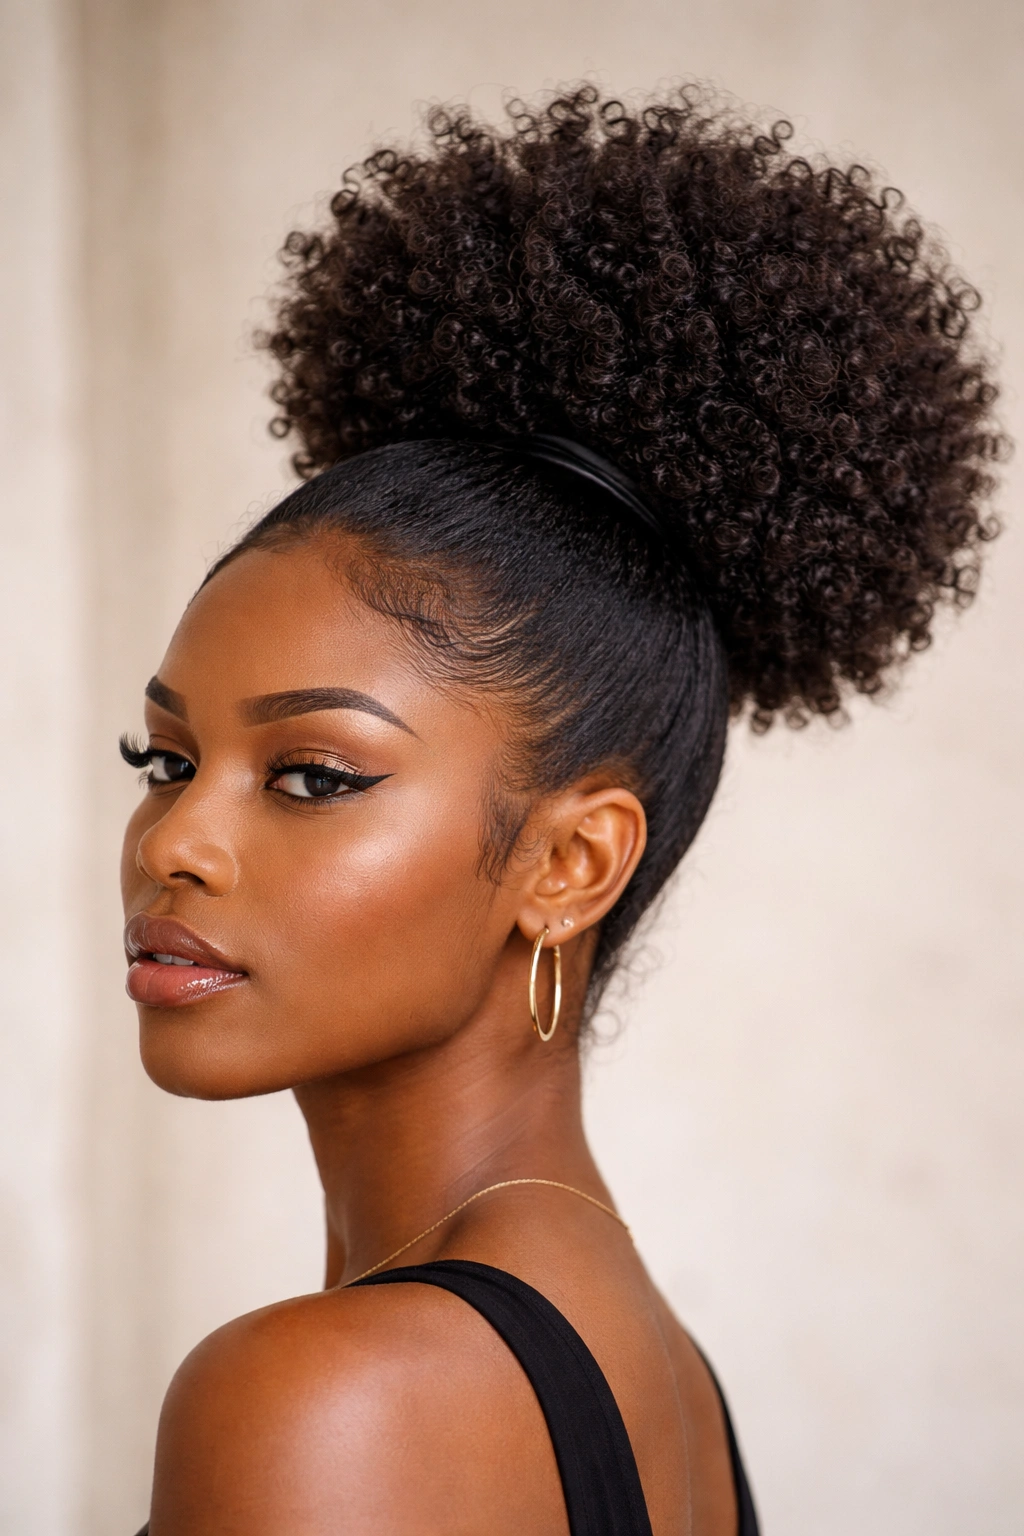
Sometimes, you just want to let the coils be the star. The Afro Puff Ponytail is about embracing the shrinkage and the shape. It isn’t about slicking the hair back so it looks like a flat surface; it’s about creating a contrast between a controlled hairline and a big, wild puff.
Creating the Shape
You want the ponytail to sit right at the crown of your head. Use a large elastic or even a drawstring piece to define the base. Once the base is secure, use a pick or your fingers to shape the puff. Pull small sections outward to create a rounded silhouette. If your hair is on the shorter side, you can achieve this by puffing the hair outward rather than pulling it back tight.
Maintaining the Volume
The biggest enemy of the Afro Puff is humidity, which can make it fall flat, or dryness, which can make it look brittle. Use a water-based curl cream to keep the texture defined and pliable. This allows you to reshape the puff throughout the day if it starts to lose its rounded shape.
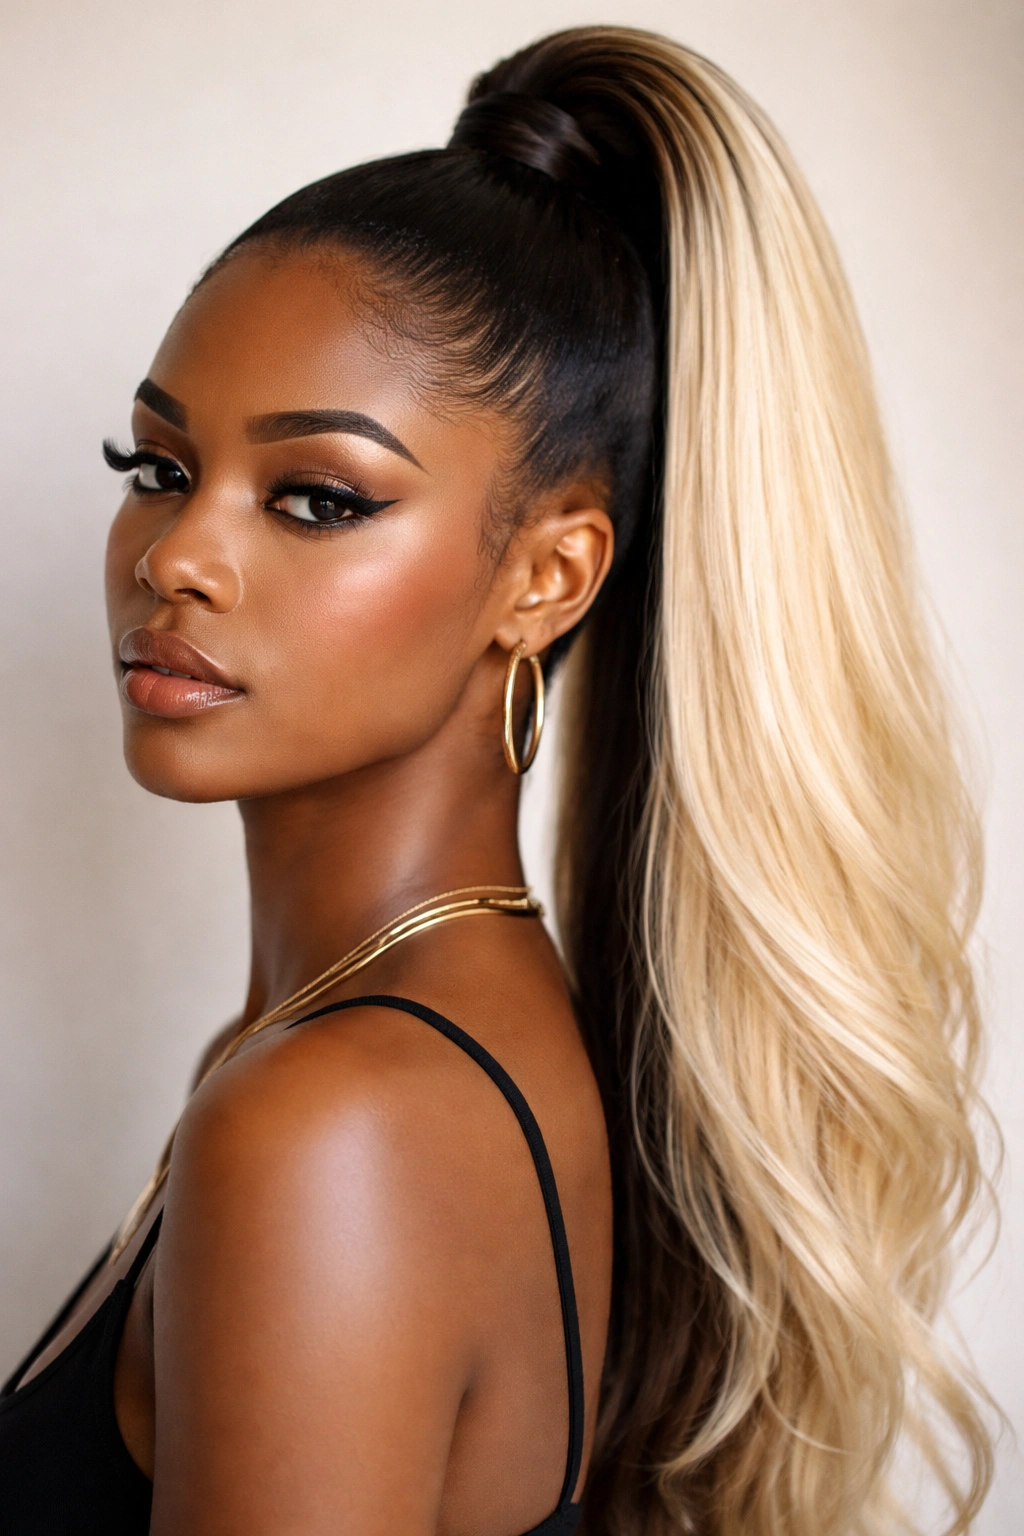
8. High Ponytail with Blonde or Color Highlights
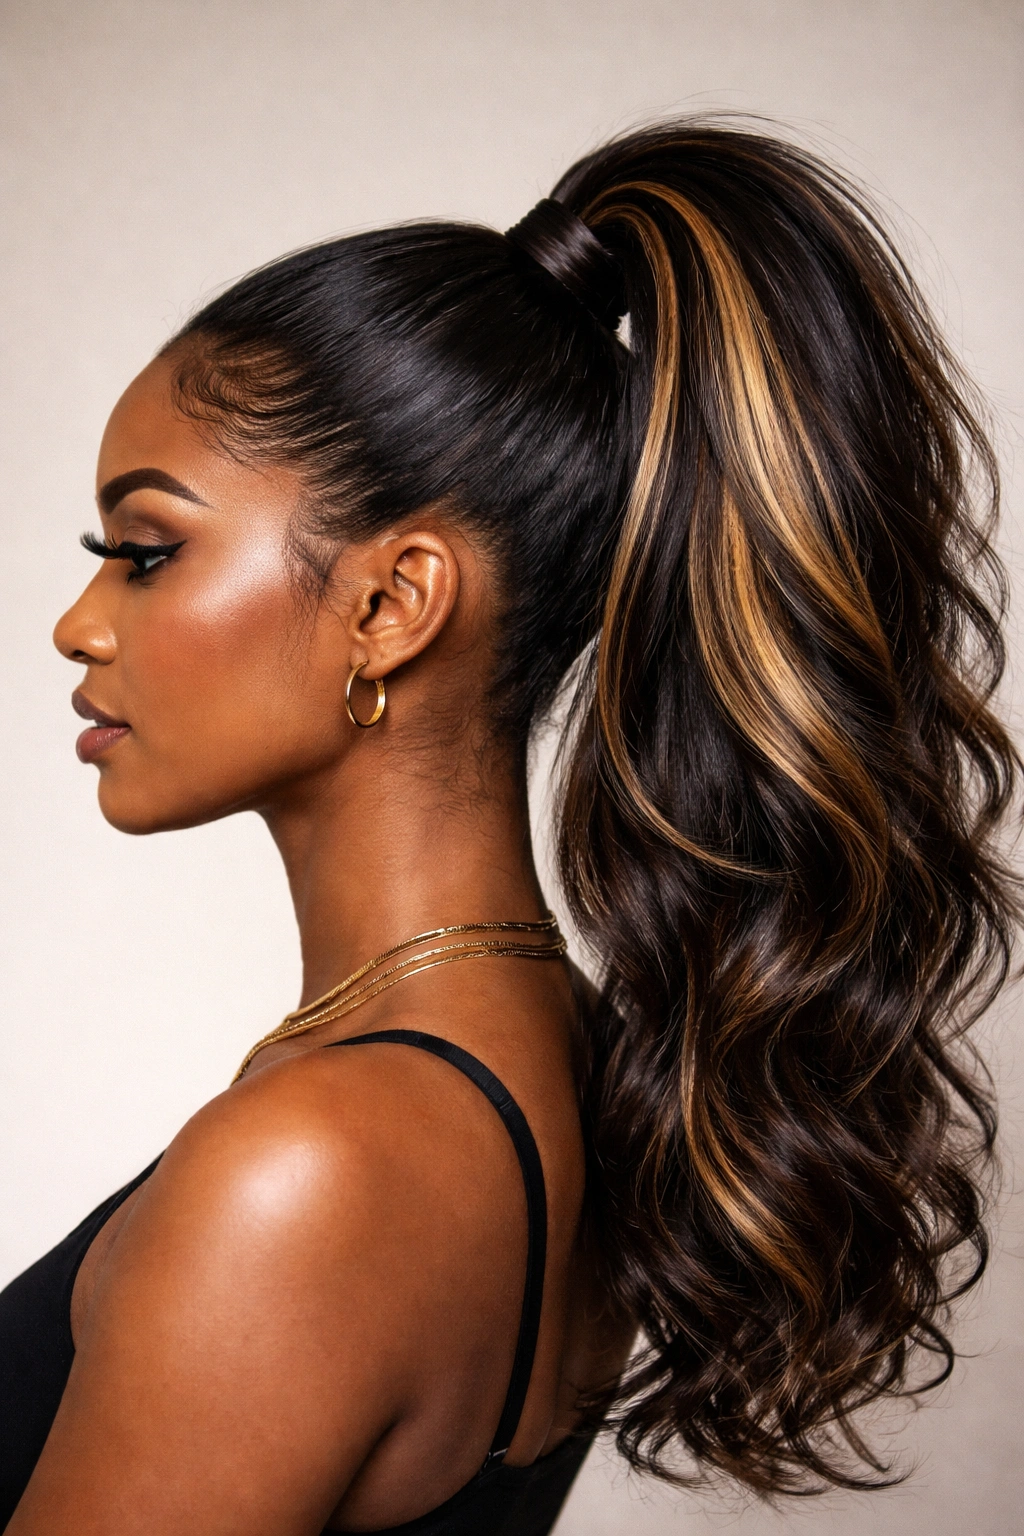
Color changes the texture of the hair. If you have bleached or highlighted hair, it tends to be drier and more prone to snapping under tension. When wearing a high ponytail with colored hair, you have to prioritize deep conditioning in the days leading up to the style.
Handling Color-Treated Strands
Color-treated hair has a different elasticity than virgin hair. Do not pull too tightly. Instead of using a harsh elastic that can snag on the porous surface of colored hair, use a satin-lined scrunchie or a silk-wrapped hair tie. These provide the necessary hold without creating friction that leads to breakage at the ponytail base.
Style Impact
The highlights or color will look amazing in a ponytail because the hair is gathered together, concentrating the color into one focal point. If you have “money pieces” or face-framing highlights, be sure to leave those out—or style them with a wand curler for added definition—to frame your face while the bulk of your hair is pulled back.
9. Twisted Base Ponytail
If you find that standard hair ties are too basic, use your own hair to create the “tie.” A twisted base involves wrapping a section of your own hair around the ponytail base to hide the elastic. It is a small detail that elevates the entire look from “gym hair” to “event hair.”
The Technique
Take a one-inch section of hair from the underside of your ponytail. Wrap it tightly around the elastic, overlapping it until the elastic is completely concealed. Secure the end of this hair strand with a bobby pin tucked into the underside of the ponytail. If you have enough length, you can even flat-twist this section before wrapping it for extra texture.
Why It Works
It makes the ponytail look like it is floating or held up by magic, rather than by a plastic band. It adds a finished, bespoke quality that shows attention to detail. Plus, it is a great way to hide a hair tie that doesn’t quite match your hair color.
10. High Ponytail with Swoop Bang
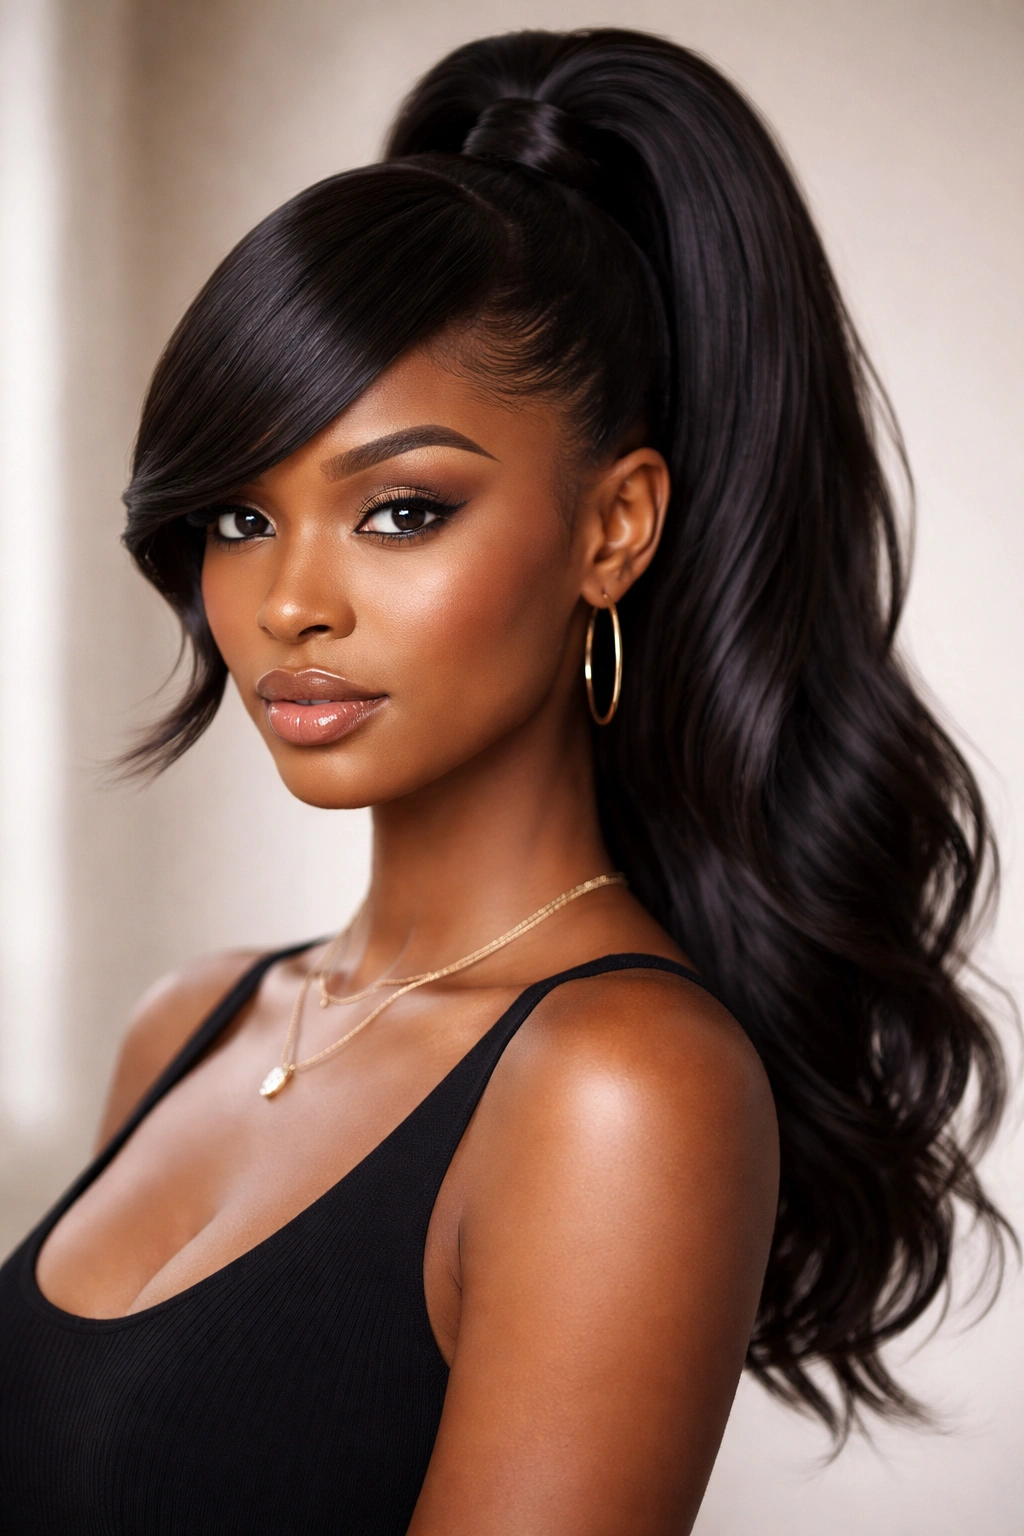
This is a classic 90s-inspired look that remains timeless. The key is the “swoop.” You want your bangs—or the front section of your hair—to have a deep side part and a dramatic, curved sweep that covers part of your forehead before tucking behind your ear or leading into the ponytail.
Getting the Curve
You need a heat protectant and a flat iron or a ceramic round brush. Straighten the bangs while pulling them slightly toward the side. The goal is a smooth, continuous curve. Don’t over-straighten; you want the hair to look silky and healthy, not stiff.
Keeping It in Place
Use a flexible-hold hairspray. Avoid the “helmet head” look of the past. A fine misting allows the bang to move naturally while keeping the shape you’ve sculpted. If you have shorter hair, you might need a tiny bit of pomade at the very tips to keep them from springing back up throughout the day.
11. Bubble Ponytail (Natural Texture)
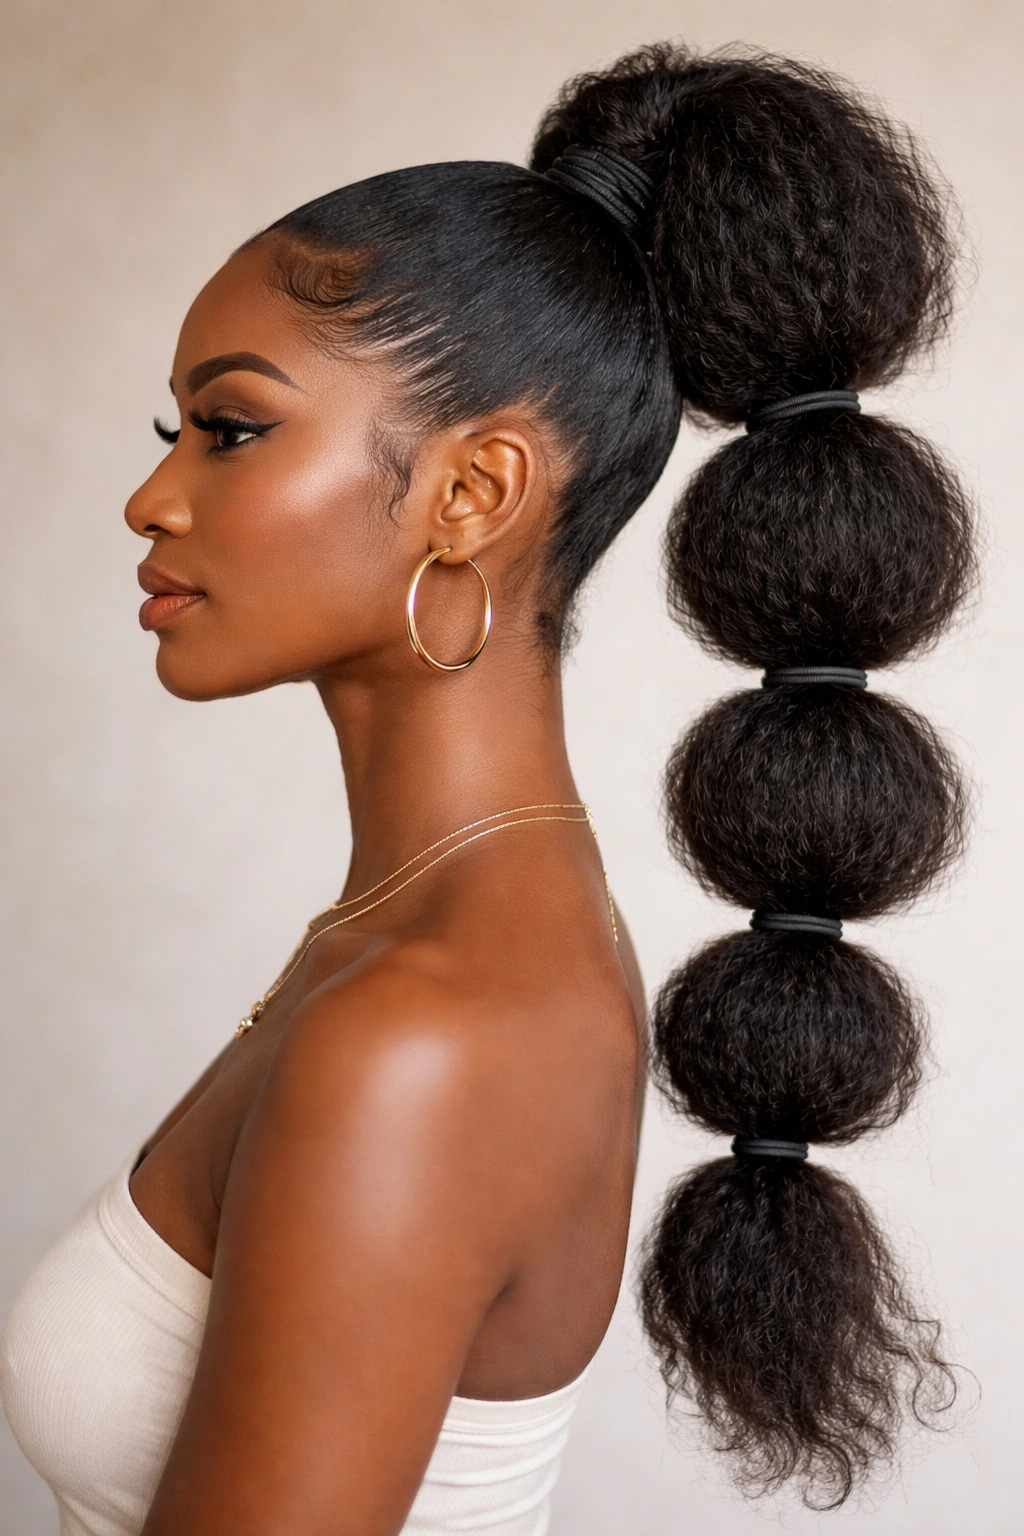
The bubble ponytail is fun, architectural, and surprisingly easy to do on natural hair. It involves creating sections within the ponytail and securing them with small hair ties, then “fluffing” the hair between the ties to create a bubble effect.
The Execution
Start with a high ponytail base. Every 2 to 3 inches, add another hair tie. After securing each tie, gently pull at the hair between the ties to create volume. If your hair is in its natural state, the bubbles will naturally look like little Afro-puffs, which is a great, playful look.
Hair Health
The danger here is the number of hair ties. If you use cheap, plastic-coated elastics, you will have a nightmare trying to remove them without pulling out hair. Always use fabric-covered ties or small satin scrunchies. When removing them, cut them off with safety scissors—never try to slide them down the length of your hair.
12. High Ponytail with Flat Twist
Flat twists are a fantastic, lower-tension alternative to cornrows. They provide a beautiful, rope-like texture that lays flat against the scalp, leading perfectly into your high ponytail. This is a very elegant look that works well for formal settings or professional environments.
The Twist Technique
Section your hair into clean lines leading to the crown. Twist each section, picking up more hair as you go, just like a French braid. The tension should be consistent; if one twist is tighter than the others, it will pull unevenly and look lopsided.
Why This Style Succeeds
It protects your hair by keeping the roots secure. It is also very easy to DIY compared to cornrows. You don’t need the same level of braiding dexterity to get a clean, polished result. Once you reach the base of the ponytail, secure the ends of the twists into the main ponytail with a hair tie.
13. Sleek High Ponytail with Laid Edges
Laid edges are the exclamation point on a sleek ponytail. This look requires “laying” the baby hairs along your hairline into intricate patterns. It is an art form that transforms the face and adds a finished, polished aesthetic to the overall hairstyle.
The Right Toolset
You need a dedicated edge brush—not just any toothbrush—and a high-quality edge control product that doesn’t turn white or crusty as it dries. Apply a very small amount of product to your edges. Using the brush, sweep the hair in a curved motion. Use your finger to press the hair down against the skin, locking the curl in place.
The “Less Is More” Rule
The biggest mistake is using too much product. Thick, goopy edge control will make your hairline look heavy and greasy. You want the appearance of fine, delicate, shaped hairs. Once they are set, leave them alone. Touching them or adding more product once they start to dry usually leads to the dreaded “white flakes.”
14. Half-Up Half-Down High Pony
If you can’t decide between wearing your hair down or pulling it up, this style gives you both. You gather the front and crown sections into a high ponytail, leaving the back section flowing freely. This is incredibly versatile because it frames your face while showcasing the length and volume of your natural hair in the back.
Balancing the Sections
The ratio of hair up versus hair down is crucial. A good rule of thumb is to take a section from ear to ear across the top of your head. If you take too much, you lose the volume of the hair down. If you take too little, the ponytail looks wispy and lacks presence.
Texture Matching
Since the bottom is loose, you want the textures to be somewhat cohesive. If your hair is naturally curly, you might want to define the curls in the back with a curl custard while smoothing the top section. This creates a deliberate contrast between the sleek top and the textured bottom.
15. High Ponytail with Marley Hair

Marley hair is a type of braiding hair that has a coarser, more “kinky” texture. It is a fantastic match for natural 4C hair. Using it for a ponytail gives you an incredibly realistic look that feels like an extension of your own natural texture.
The Wrapping Method
Create a standard high ponytail with your natural hair. Attach a bundle of Marley hair to the base (either by braiding it into your natural hair or using a drawstring wrap). Once attached, you can style the Marley hair into a bun or leave it as a long, thick ponytail. Because the texture is coarse, it blends seamlessly with natural hair, making it nearly impossible to tell where your hair ends and the extensions begin.
Care and Maintenance
Marley hair can be a bit thirsty, just like natural hair. If you are wearing this style for an extended period, spray the extensions with a water-based leave-in conditioner to prevent them from becoming frizzy or tangled.
16. Voluminous High Ponytail

This is the “go big or go home” style. It is all about height and mass. It works best if you have a lot of natural hair or if you use extensions to add volume. The base is sleek and tight, but the ponytail itself is allowed to expand into its fullest, most voluminous state.
Achieving Maximum Volume
If you are using your own hair, use a blow-dryer with a diffuser or a comb attachment to stretch your hair thoroughly before putting it in the ponytail. Stretching the hair removes shrinkage, instantly doubling the visible length and volume. If using extensions, choose hair that has a high volume-to-weight ratio.
The Finishing Touch
After securing the ponytail, use an afro pick to fluff the hair from the inside out. Don’t brush the surface; you want to maintain the “wild” volume. A light dusting of dry shampoo at the base of the ponytail can also help add texture and grip, preventing the hair from collapsing under its own weight.
17. High Ponytail with Accessories
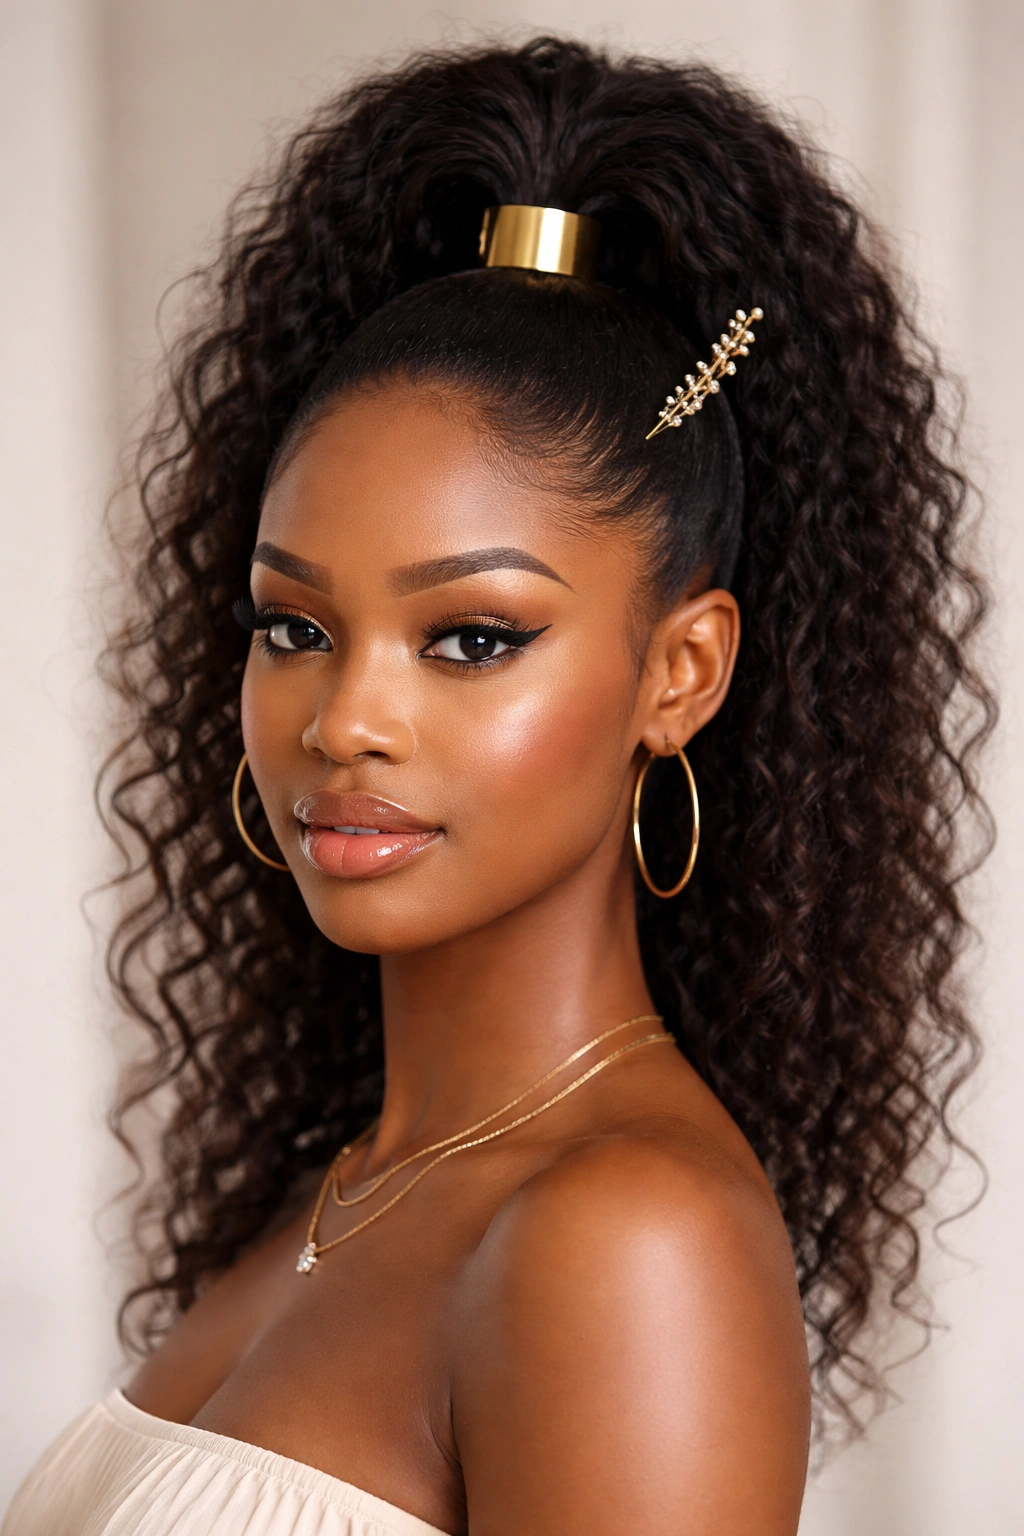
Sometimes, the hair needs a little extra bling. Gold cuffs, hair rings, or decorative pins can transform a simple high ponytail into an intentional style choice. This is great for events or when you want to add a bit of personal flair to your everyday look.
Placement Strategy
Don’t clutter the hair. Less is often more. If you have a braided base, place a small gold cuff at the start of each braid. If you have a sleek ponytail, a single, large decorative barrette at the base can be stunning. The goal is to highlight the style, not overwhelm it.
Material Quality
Avoid heavy metal accessories that will pull on your hair strands. If you are using rings or cuffs, ensure they are smooth on the inside so they don’t snag your hair when you take them out. Lightweight aluminum or plastic-based metallic accessories are usually best for daily wear.
18. High Ponytail with Knotless Braids
If you have knotless braids, you are already halfway to a great style. Knotless braids are incredibly lightweight and flexible, making them perfect for high ponytails. The lack of a knot at the scalp means you can pull them into a high ponytail without the discomfort usually associated with box braids.
The Styling Ease
Because knotless braids have a “natural” movement, you don’t need much to get them into a ponytail. Simply gather them and secure them with a large, heavy-duty scrunchie. You can wrap a few braids around the base to conceal the band, which creates a very high-end, custom look.
Tension Warning
Even though knotless braids are lighter, they still have weight. Do not pull them into a ponytail that is too high if your braids are very long, as the constant pulling can cause discomfort at the nape of the neck. A mid-high ponytail is often more comfortable for long-term wear.
19. Two-Tone High Ponytail
Color blocking is a bold way to make a ponytail stand out. This involves having one color at the base (or the natural hair section) and a contrasting color in the ponytail (or extensions). This creates a striking visual effect that is both modern and edgy.
Color Theory
For a subtle look, go with a lighter shade of your natural color—like a honey blonde or a copper tone—as an extension. For something more dramatic, go for a stark contrast like platinum blonde, bold red, or even silver. The key is that the transition between the two colors should be clean.
Why It Works
It draws attention to the contrast and makes the ponytail the centerpiece of your look. It also allows you to experiment with vibrant colors without having to dye your actual hair. If you get tired of the color, you just take out the extensions.
20. High Ponytail with Bantu Knots Base
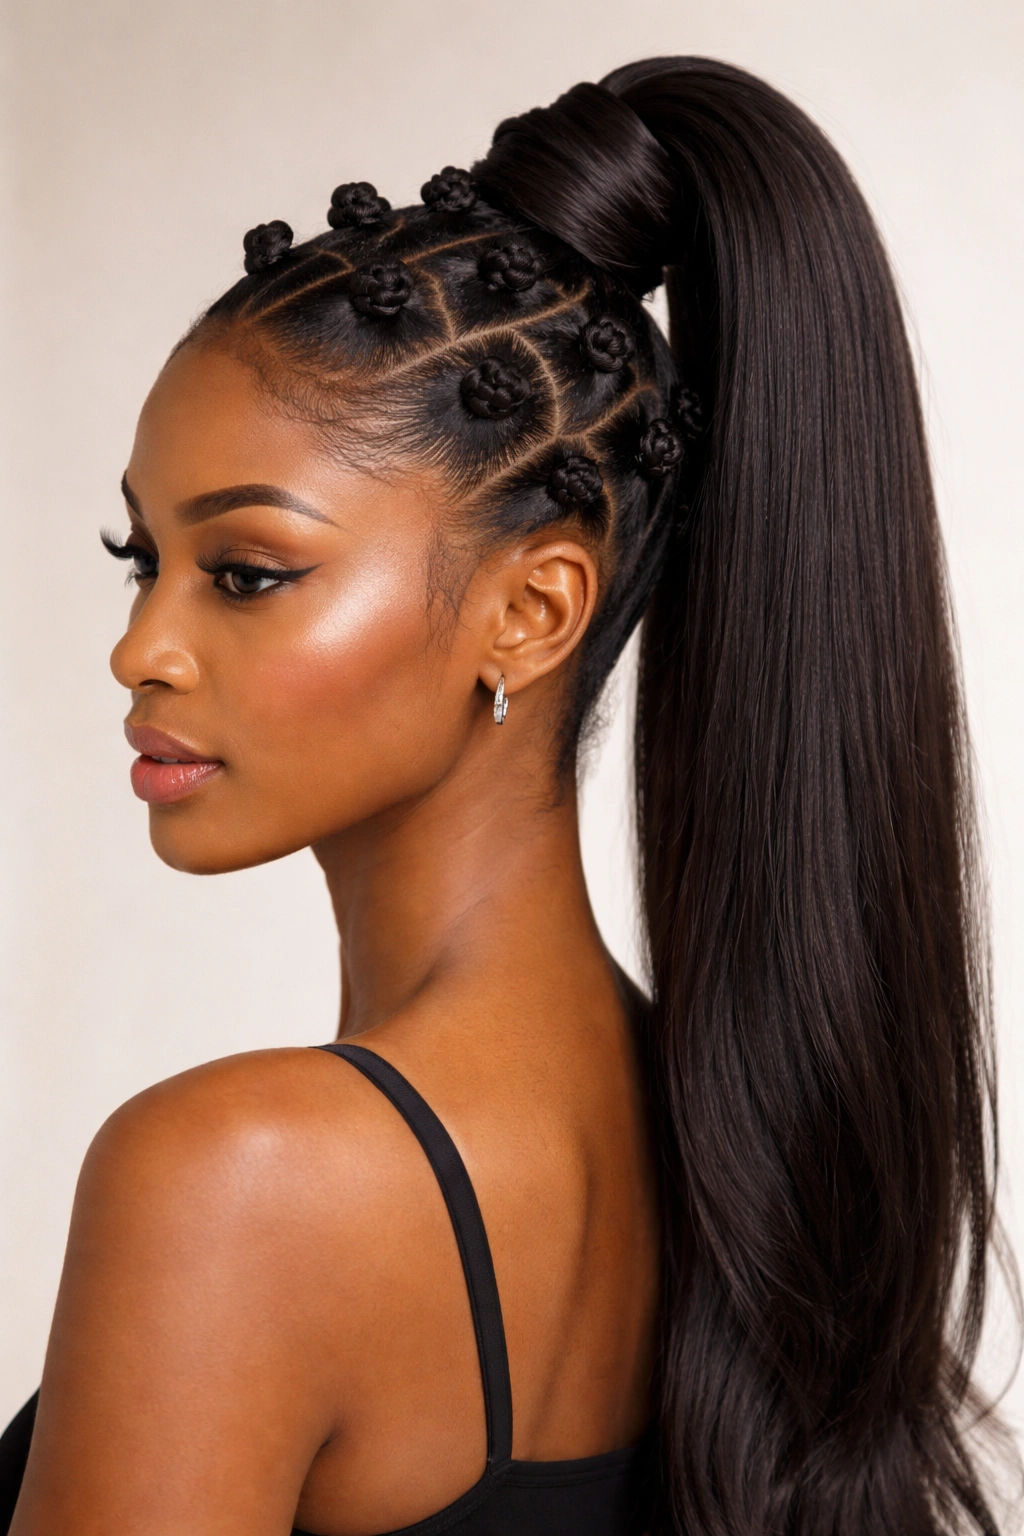
This is a fusion style. It involves doing small Bantu knots along the crown of your head and then pulling the remaining hair into a high ponytail. It creates a structural, geometric look that is incredibly intricate and visually arresting.
Creating the Base
Section your hair into squares or triangles for the knots. Twist the hair tightly and coil it into a knot, securing it with a bobby pin. Once you reach the center, gather the rest of the hair—or the ends of the knots—into a high ponytail. This style is best done on clean, detangled hair to ensure the knots are neat.
Longevity
This style can last for several days if you wrap it at night. It is a protective style that keeps your ends tucked away and your scalp clear. It’s perfect for those who want a look that is “done” and doesn’t require daily maintenance.
21. Messy High Bun Ponytail
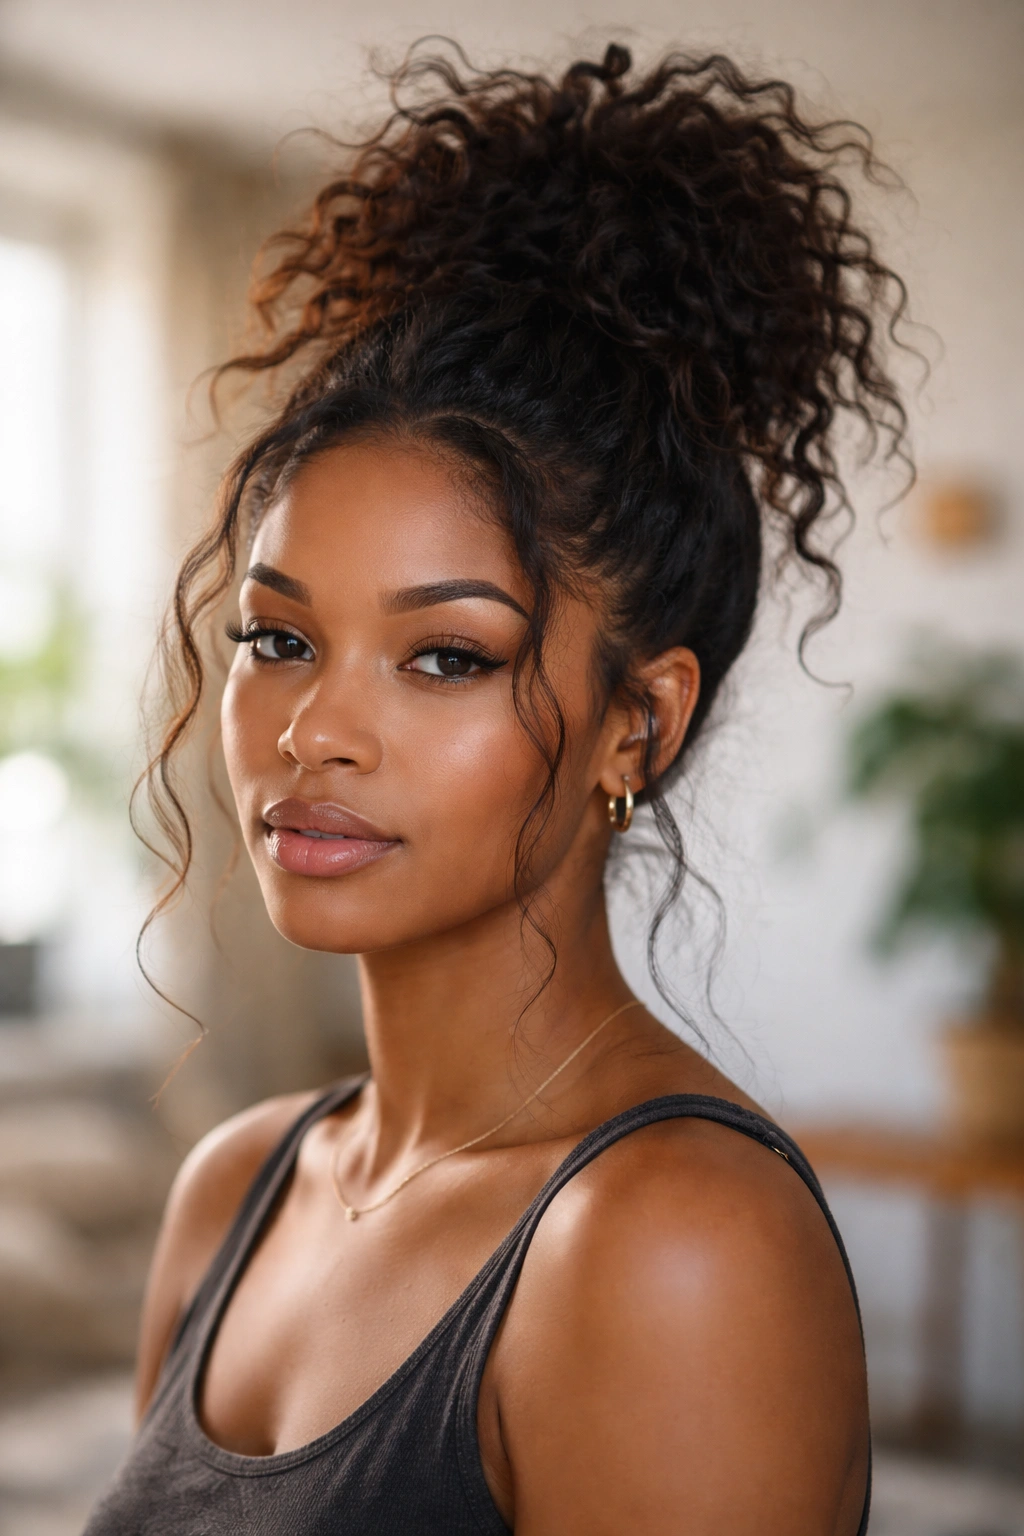
Not every ponytail needs to be a masterpiece of slickness. Sometimes, you want that “just rolled out of bed but somehow it looks great” vibe. A messy high bun ponytail is exactly that. It’s relaxed, effortless, and very chic.
The “Messy” Technique
The trick to a “perfect” messy look is actually a lot of effort. You want the appearance of looseness, but the structure needs to be secure. Gather your hair, tie it, and then tug at random sections to loosen them. Pull out a few face-framing pieces. The goal is to look like you didn’t try too hard, even though you spent five minutes getting it just right.
Why It’s Great
It is the most forgiving style for second- or third-day hair. If your curls are starting to lose their definition, this style hides that beautifully. It is also very gentle on your hairline because you aren’t trying to achieve a severe, slicked-back tension.
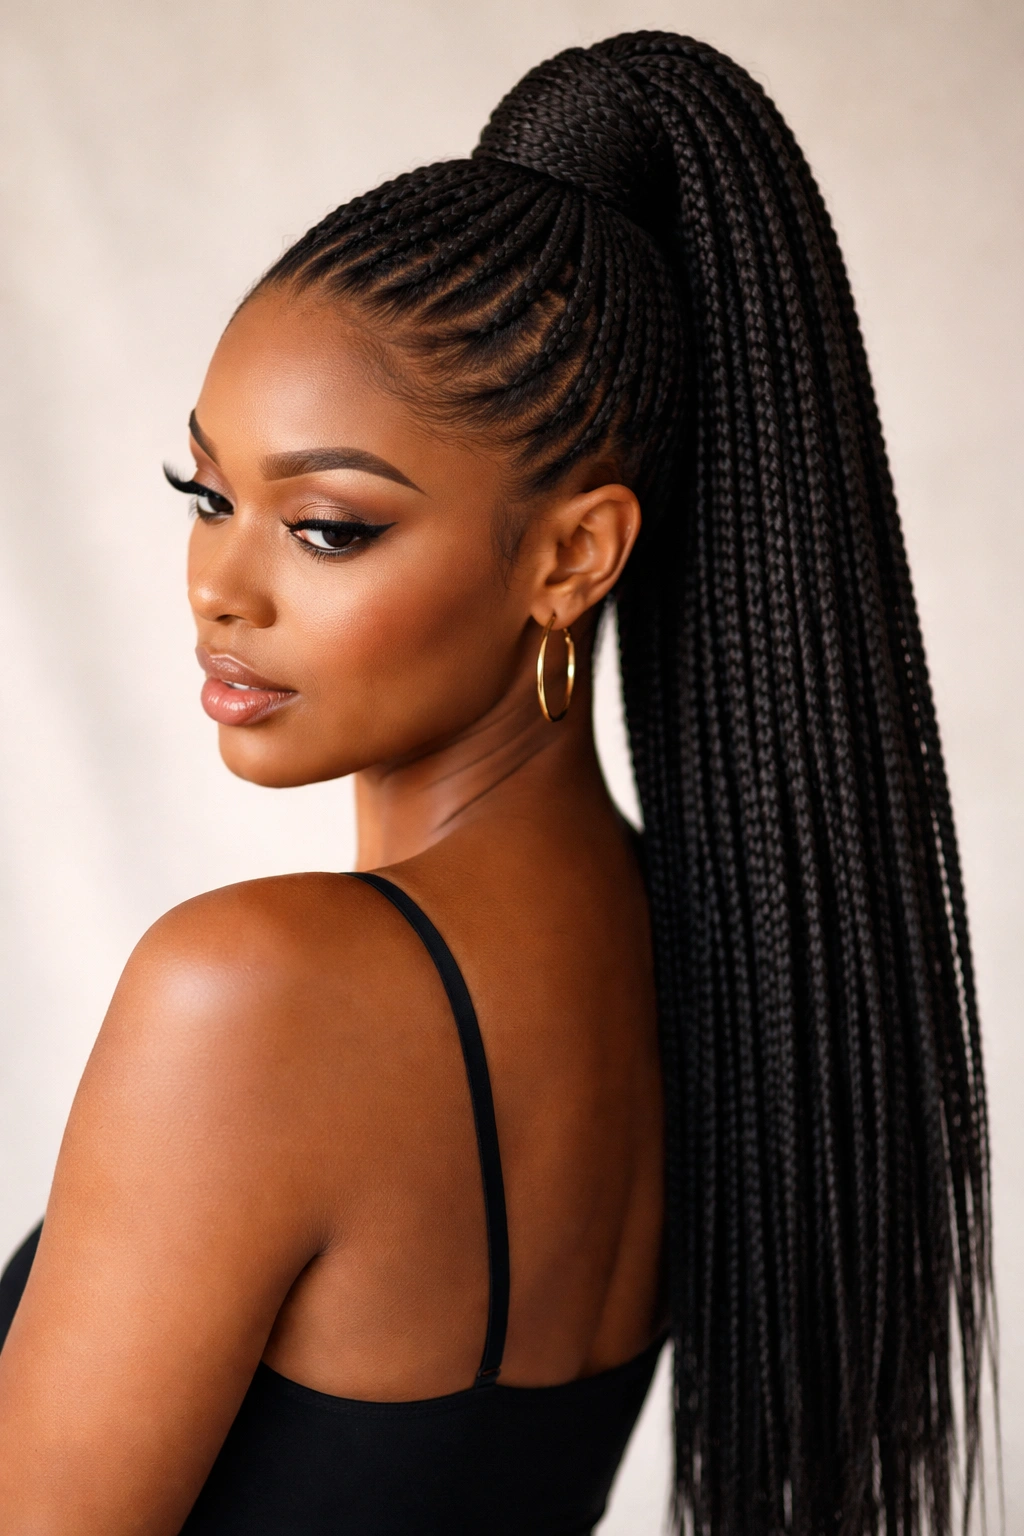
22. High Ponytail with Feed-in Braids
Feed-in braids are a technique where braiding hair is added to your natural hair near the hairline to create a seamless, natural look. Doing this into a high ponytail creates a very neat, clean, and long-lasting style.
The Precision Aspect
This requires a high level of skill. The feed-ins need to be tight, flat, and consistent in size. If you are doing this yourself, use a mirror and a rattail comb for parting. If you are not experienced with braiding, this is one style that is often worth visiting a professional stylist for, as the clean parting is what makes it look high-end.
Protecting the Hairline
Since feed-in braids start right at the hairline, be careful with the tension. Do not allow the braider (or yourself) to pull the hair too tight. If you feel any pain while the braid is being installed, speak up. A high ponytail should not be painful.
23. High Ponytail with Dreadlock Texture

If you have locs or are using loc extensions, a high ponytail is an excellent way to wear them. Locs have a unique weight and texture that makes a high ponytail look thick and substantial.
Loc Weight Management
Locs can be heavy. A high ponytail is a great way to get them off your neck, especially in warmer weather, but be mindful of the weight. Use a thick, reinforced hair tie or a satin-lined bungee cord to secure them. These hold the weight better than standard elastics and won’t cause the locs to slide down throughout the day.
Styling Options
You can wrap a single loc around the base to hide the hair tie, which is a very clean look. You can also leave a few locs hanging free around the face to soften the look and add movement.
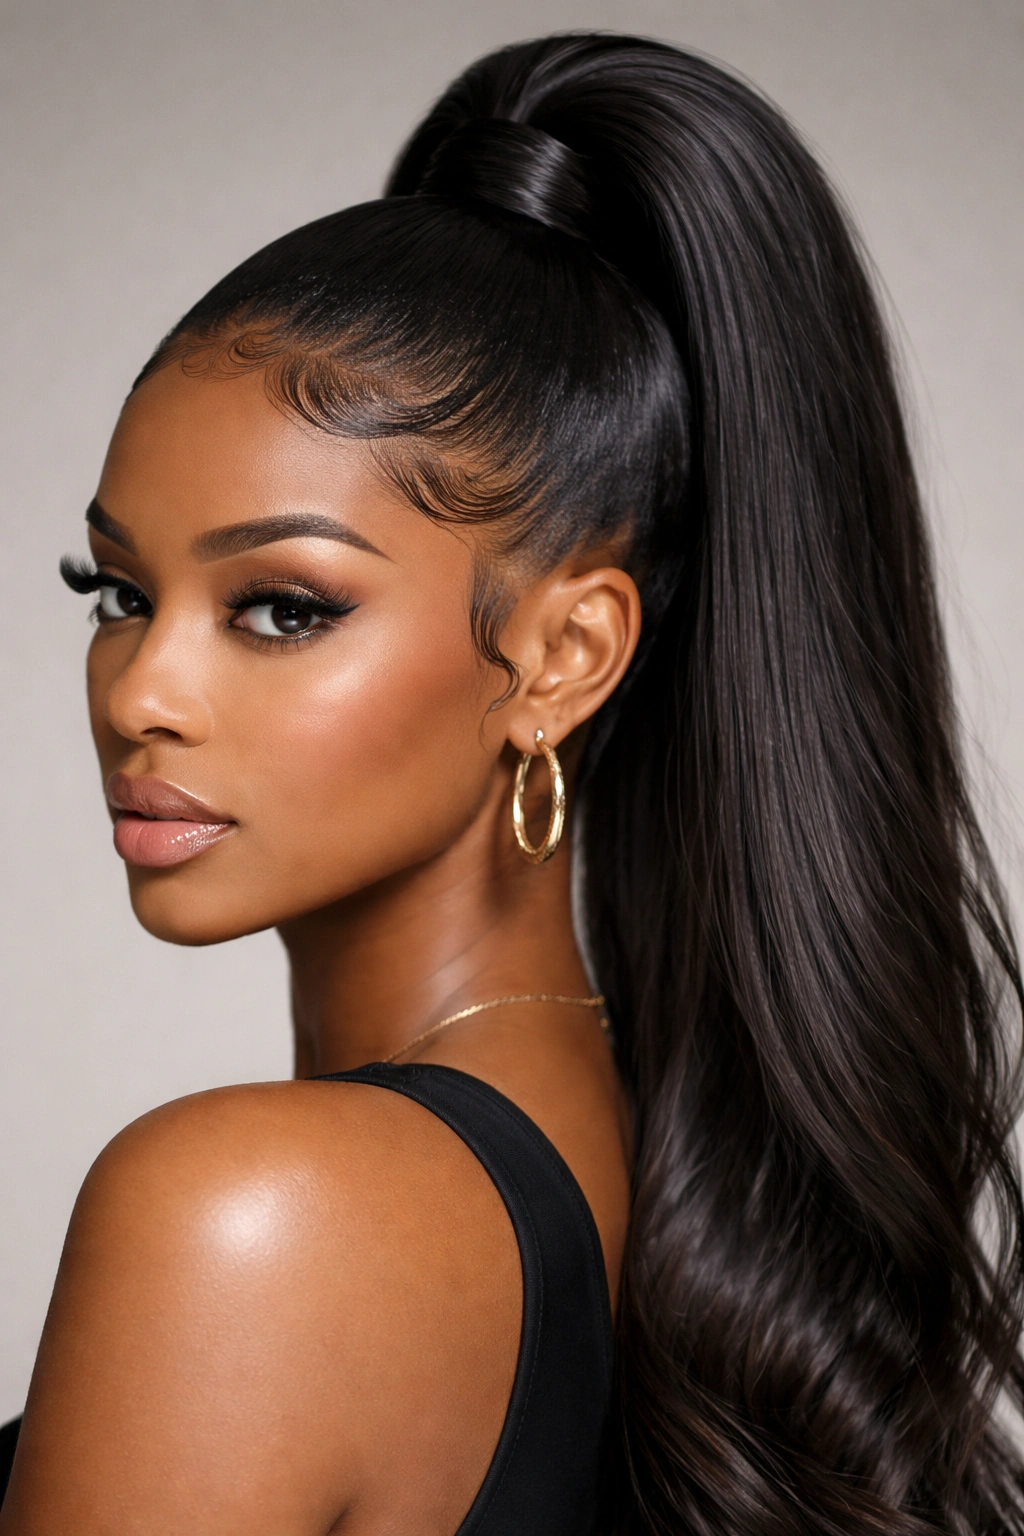
24. High Ponytail with Silk Press Finish

If you have just had a silk press (a professional blowout and flat iron), a high ponytail is the best way to show off the length and health of your hair. This look is all about that “glass hair” shine.
Maintaining the Straightness
Since you aren’t using product to slick back the hair—because you don’t want to ruin the straight style—you need to use a very gentle technique. Gather your hair lightly. Do not use a tight rubber band, as this will leave a permanent crease in your straight hair. Use a silk scrunchie or a ribbon-style tie that provides enough hold without crushing the hair fibers.
Why It’s Popular
It is the ultimate “clean girl” aesthetic. It highlights the sleekness, the shine, and the length of your hair. It’s perfect for a night out or a formal event where you want a very polished, sophisticated look.
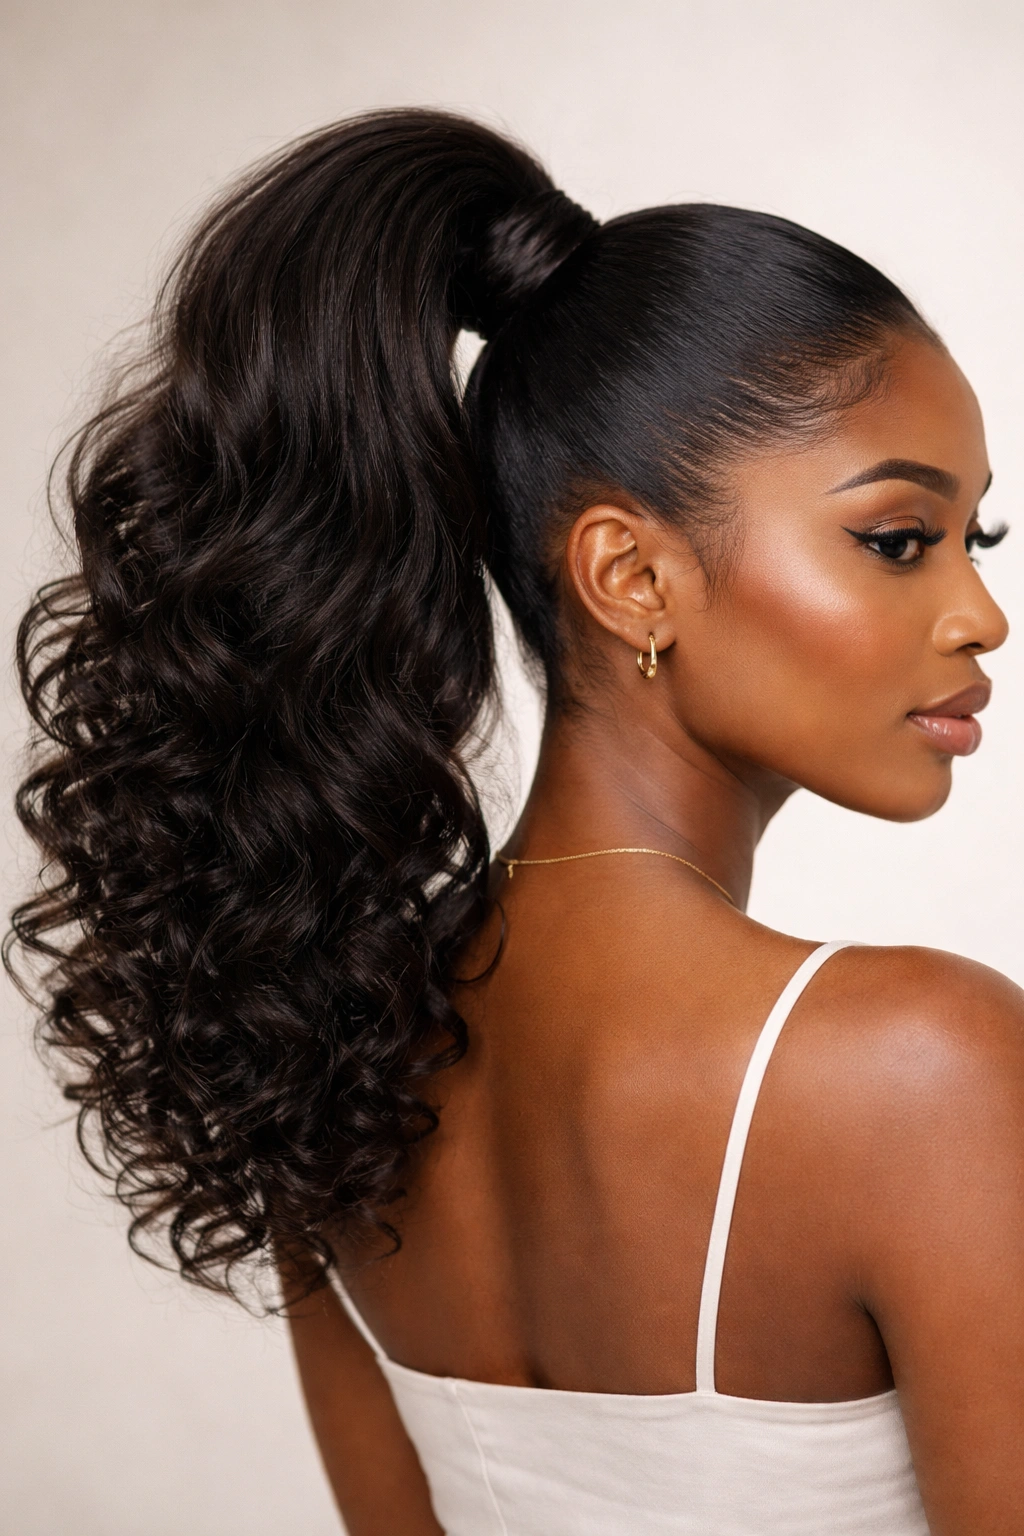
25. High Ponytail with Perm Rod Curls
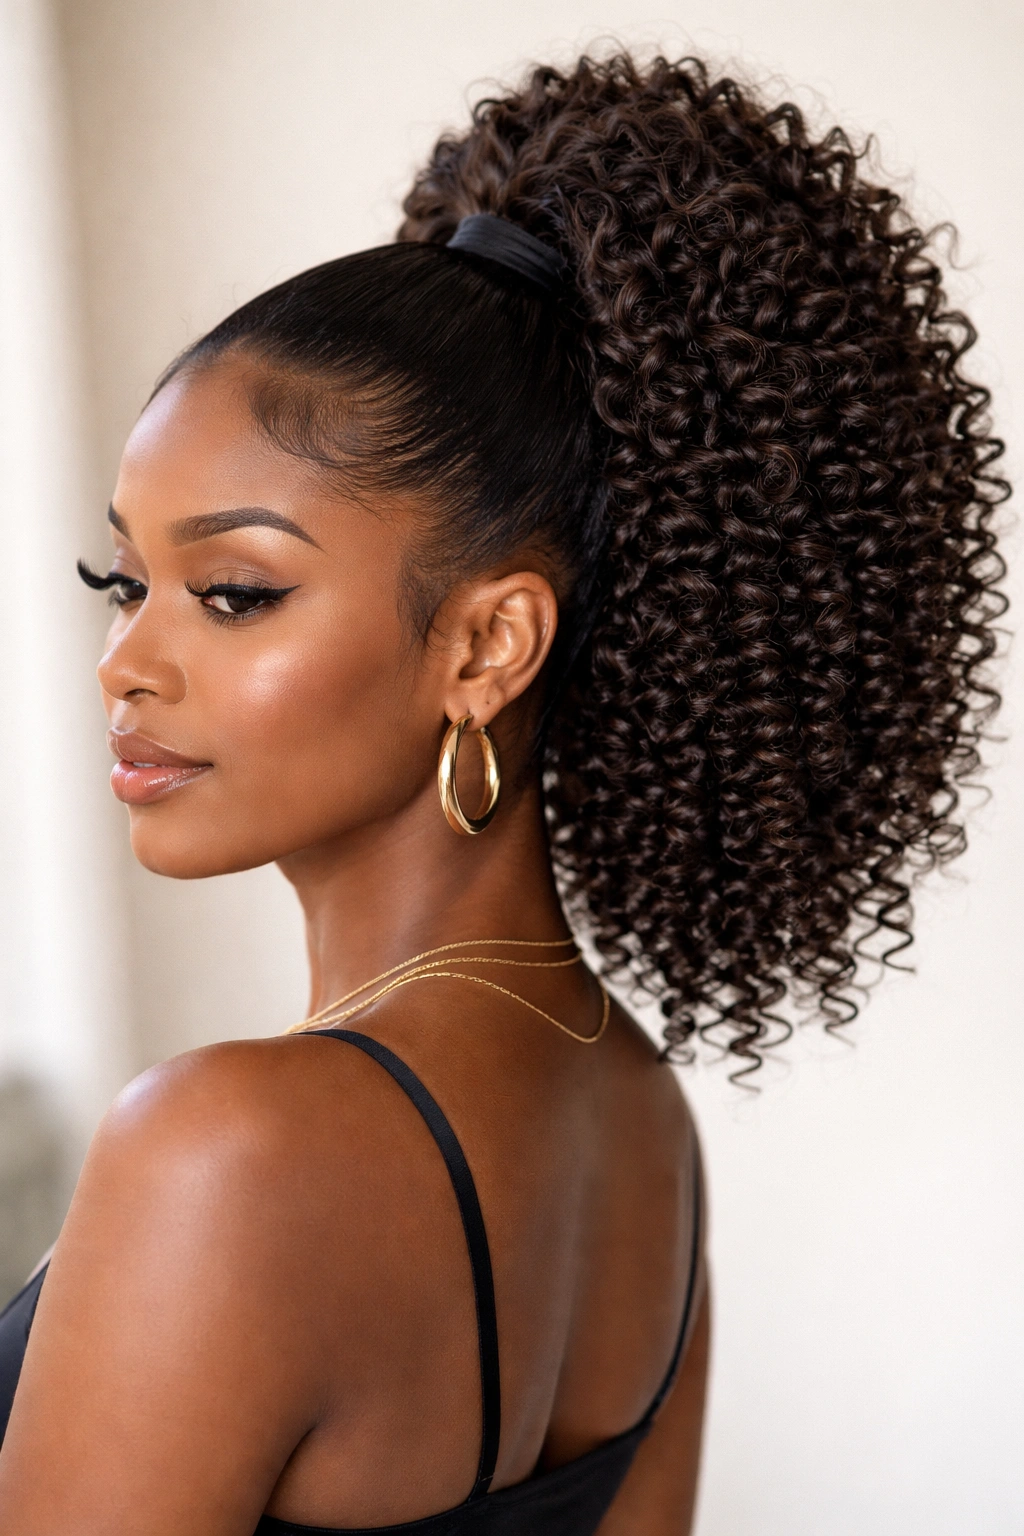
If you want a high-volume, uniform curl pattern, perm rod sets are the way to go. This style involves setting your hair on perm rods to create tight, defined spiral curls, then gathering them into a high ponytail.
The Setting Process
This is a process that requires drying time. Once the hair is fully dry and the rods are removed, use a small amount of oil to separate the curls. Do not brush the hair, or you will create a giant, undefined poof. Gather the curls gently into a high ponytail.
The Visual Effect
The result is a structured, bouncy ponytail that looks completely uniform. It is a fantastic look for weddings, parties, or any time you want a “styled” look that doesn’t just look like your everyday natural hair.
26. High Ponytail with Jumbo Braids

Jumbo braids are a statement. When you gather a high ponytail full of thick, chunky braids, you create a look that is bold, dramatic, and very high-fashion.
The Weight Factor
Jumbo braids are heavy. A high ponytail with jumbo braids can put a lot of strain on your scalp. To mitigate this, ensure the braids are not started too close to the hairline. Distribute the weight by securing the ponytail with a wide, soft elastic that won’t bite into the scalp.
Styling the Ends
Jumbo braids often look best when the ends are sealed or curled. Adding a slight curl to the ends of the braids gives the ponytail a finished, deliberate look. This is a great style for a vacation or a long-term protective style duration.
27. Low-Tension High Puff for Maximum Growth
This is the “health first” approach. If you are on a hair growth journey, constant high-tension styling is your enemy. This style focuses on achieving the high-puff look with zero stress on the follicles.
The “Band-and-Tuck” Method
Instead of pulling your hair tight, gather it loosely. Use a loose satin scrunchie. The goal is to lift the hair up without pulling the hairline back. You can achieve this by using hair pins to “pin up” the hair toward the crown rather than pulling it with a single elastic.
Why This Wins for Growth
It protects the delicate edges and the nape, which are the most fragile parts of your hair. It allows you to wear a high-style look while essentially treating it as a protective style. Your hair stays in a bun or puff, the ends are protected from friction, and your scalp remains happy.
Final Thoughts
The journey to the perfect high ponytail is as much about protecting your hair as it is about styling it. We often look at the final image and forget that natural hair is a living, breathing fiber that responds to stress, moisture, and manipulation. Never force your hair into a style that feels painful; the pinch you feel at your temples is a warning sign that your strands are being compromised.
The best style is the one that makes you feel confident while keeping your coils healthy. Don’t be afraid to experiment with accessories, textures, and techniques, but always revert to a routine of deep conditioning and gentle handling. Your hair is versatile enough to be anything you want it to be, provided you give it the care it needs to thrive. Keep your edges moisturized, your hair ties soft, and your approach patient, and you will find that a high ponytail isn’t just a look—it’s a signature.