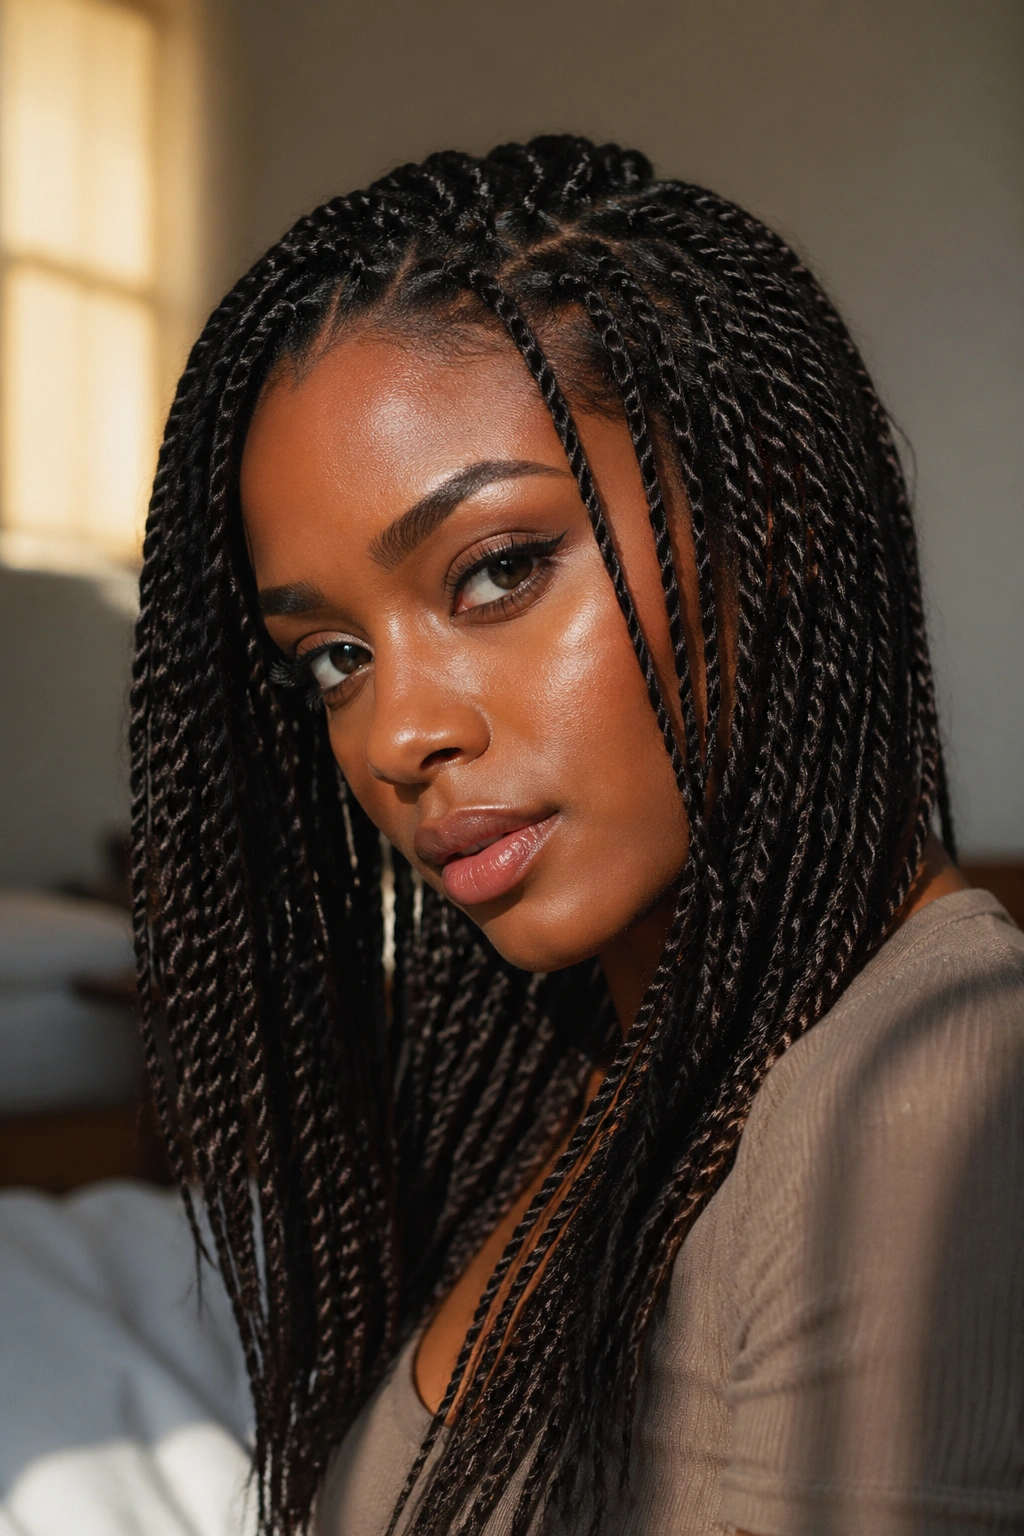
There’s something about Marley hair that just hits different. The texture is coarse, almost rough to the touch — it feels like a thick, kinky rope between your fingers — and that’s exactly what makes it brilliant for protective styles. Marley hair is a synthetic hair fiber designed to mimic the look and feel of Type 4 natural hair, and if you haven’t worked with it yet, you’re missing out on one of the most versatile tools in the afro hairstyle game.
Marley hair twist styles for afro hair types have surged in popularity for a simple reason: they blend seamlessly. If you have 4A, 4B, or 4C hair, Marley hair sits at a texture that matches yours closely enough that the line between your natural roots and the extension barely shows. That’s not something you can say about silky kanekalon or straight extensions, which often catch the light wrong and announce themselves as fake from across the room.
This is also a style category where the range is genuinely wild. We’re talking about skinny pencil twists and fat chunky ropes, freestyle freeform pieces and precise uniform spirals, color blends and solid blacks, updos and waist-length hangers. There is genuinely no one way to do Marley hair twists, and that’s the point.
What Marley Hair Actually Is — and Why Texture Matters
Before you start buying packs, it’s worth understanding what separates Marley hair from other synthetic fibers. Marley hair has a tight, coarse crimp that’s intentionally roughed up during production. It’s not smooth. Run a strand through your fingers and it’ll catch — that friction is what makes it grip your natural hair during installation instead of slipping loose over the first three days like softer fiber sometimes does.
Most Marley hair comes in packs of braiding hair labeled specifically as “Afro Kinky Marley Braid Hair.” You’ll see it from brands like Freetress, Rastafri, and Marley Braid by various manufacturers. The standard pack length is about 18 inches of coiled fiber, which stretches longer once you pull it apart. For a full head of medium-length twists — say, falling to your collar — you’ll typically need 4 to 7 packs depending on your desired thickness.
One thing that trips people up: Marley hair sheds more than smoother fibers. This isn’t a defect. It’s the nature of the coarse crimp. Pull your sections apart gently and keep a comb nearby to catch loose strands. Work in a well-lit space so you can see what you’re doing.
Picking Your Packs — Color, Length, and Brand Differences
Color selection matters more with Marley hair than it does with smoother extensions because the texture already draws attention. Solid colors like 1B (off-black) and 2 (dark brown) are classic choices that blend into natural roots without any effort. But burgundy and auburn shades — think T1B/30 or T1B/99J — add depth and warmth to twists in a way that photographs beautifully and holds up through weeks of wear.
The length you buy is always longer than the finished style length. Marley fiber stretches when you pull it from its coiled pack form, and how far it stretches depends on the crimp density. An 18-inch pack typically yields finished twists around 10 to 12 inches. If you want twists that fall past your shoulders, buy 24-inch packs or plan to use two strands from each pack section instead of one.
Brand differences are real. Freetress Marley Braid is often praised for being softer and slightly easier on the hands during installation. Rastafri tends to be denser with a tighter coil, which some people prefer for a thicker finished look. Neither is wrong — it comes down to your installation preference and the specific style you’re going for.
Prep Work That Actually Changes the Outcome
Your natural hair needs to be ready before Marley hair goes anywhere near it. Dirty hair tangles with the extension fiber in ways that make installation painful and removal even worse. Wash your hair at least two days before you plan to install — giving it a day or two to fully dry and settle means your coils or curls are in their natural state without being freshly manipulated.
Deep condition. Use a rich, thick conditioner like a shea butter mask or a protein-moisture blend, leave it on for at least 20 minutes under a plastic cap, and then rinse thoroughly. This step matters because protective styles can last 4 to 8 weeks, and your hair underneath needs to start the process in the best condition possible.
Moisturize with a leave-in before installation, but keep it light. Heavy butters or oils on the roots will cause the Marley fiber to slip, which leads to loose twists that unravel faster than they should. A water-based leave-in — something that absorbs rather than sits on top — is the right call.
Tools and Products You Actually Need
You can install Marley hair twists with genuinely minimal gear, which is part of their appeal. Here’s what you’ll use:
Rat-tail comb — for clean parting. The tail end needs to be sharp enough to make precise lines without dragging your natural hair.
Hair clips or butterfly clamps — to hold sections you’re not working on. You’ll go through sections faster than you think, so having 20 to 30 clips on hand is not excessive.
Edge gel — apply it along your hairline before you start, and your baby hairs will lie flat and look intentional. Eco Styler Olive Oil Gel or a heavy edge control like Murray’s work well here.
Scissors — for trimming Marley hair strands to consistent lengths or for tidying up the ends of finished twists.
You do not need a steamer, but if you want to set the curl on your finished twist ends, dip them in warm — not boiling — water for about 30 seconds, squeeze dry with a towel, and let them air dry fully before releasing.
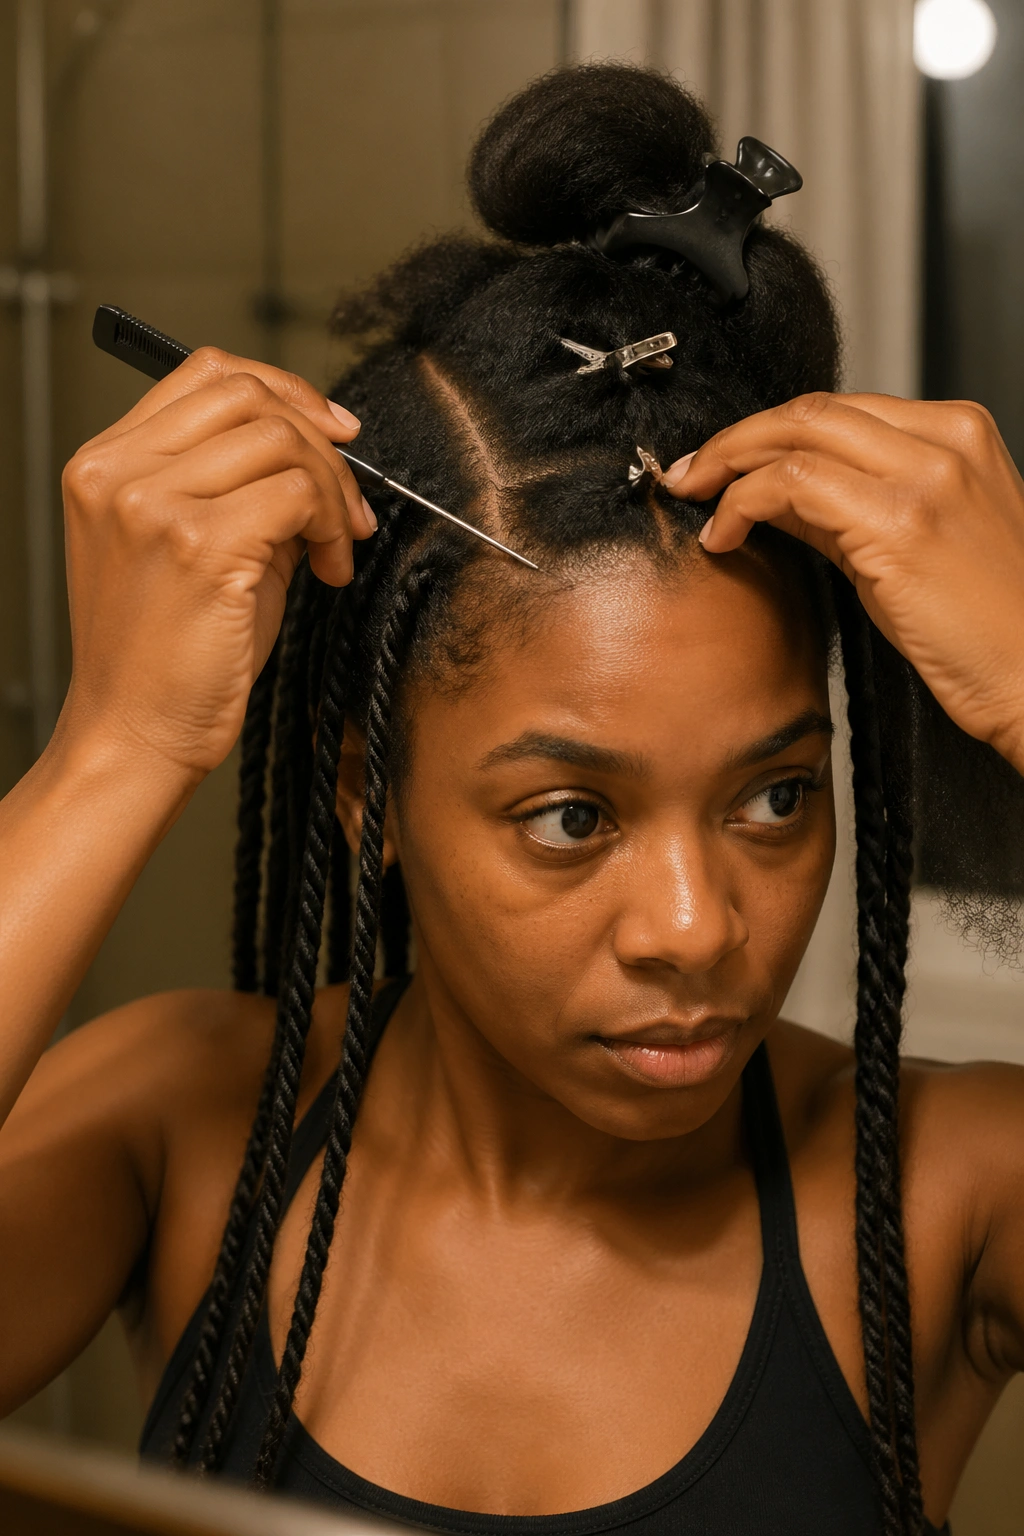
Basic Technique Overview Before the Styles
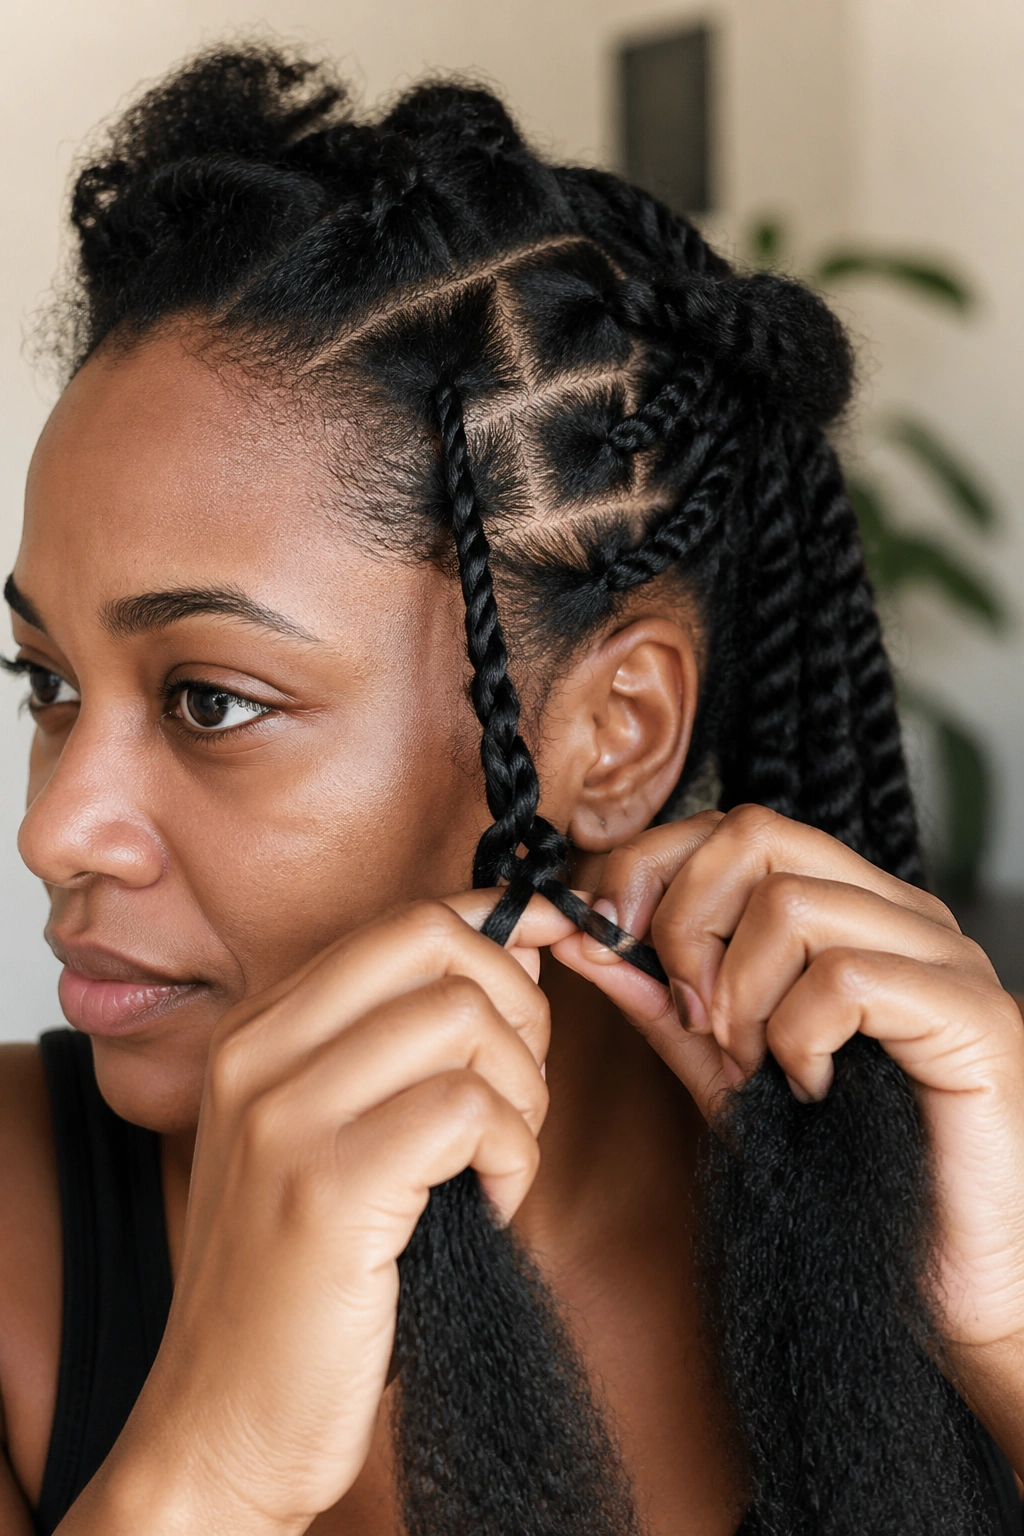
Marley hair twists are made using a simple two-strand twist technique combined with the extension fiber. Take a small section of your natural hair, split it into two, and introduce a piece of Marley hair to each side. Then twist those two combined pieces around each other — your natural hair wrapped around the extension fiber — all the way to the end.
The twist direction is your call. Clockwise twists tend to be tighter and hold better for 4A and 4B hair. Counter-clockwise can feel more natural for some 4C textures. Consistency matters more than direction — pick one and stick to it through the whole install.
Tension should be firm but not tight. If your scalp feels pulled or the roots look white with tension, you’ve gone too hard. Protective styles are meant to protect your hair, and scalp stress from over-tight installation leads to traction alopecia over time.
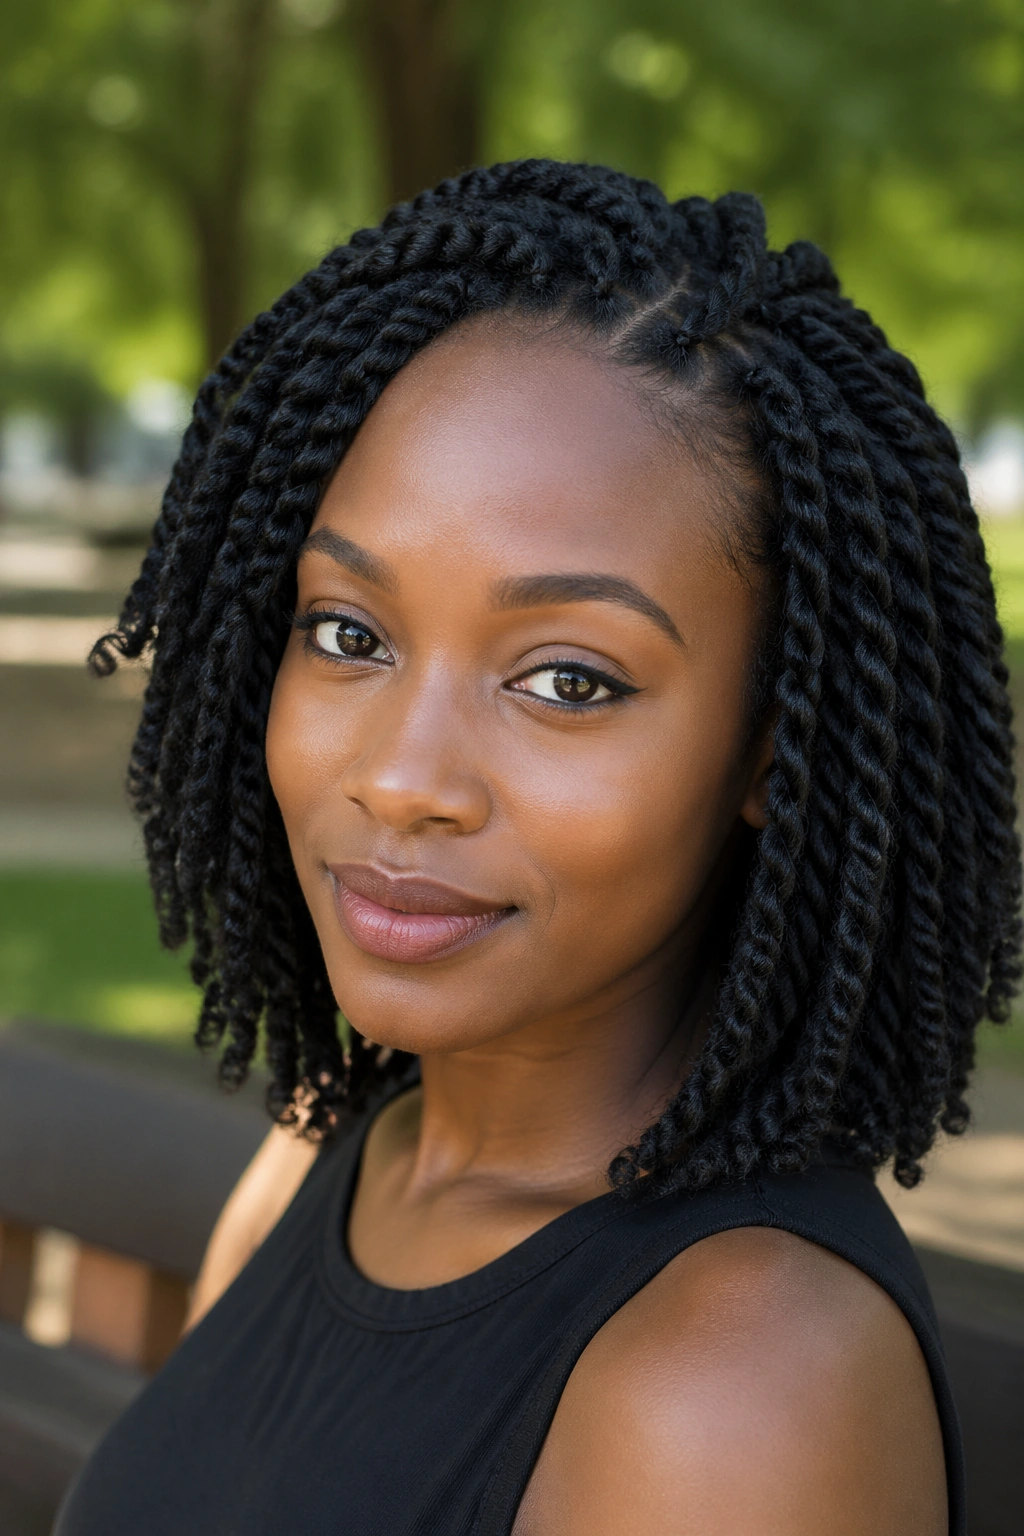
1. Classic Two-Strand Marley Twists
The foundation of everything. Classic two-strand Marley twists are the baseline style — individual sections of natural hair combined with Marley extension fiber and twisted from root to tip in a uniform spiral. Length typically falls between the chin and shoulder, and the twist diameter sits at about a pencil width.
What makes this style work is its complete predictability. You know exactly what you’re going to get, and after installation it behaves exactly as expected. Frizz is minimal for the first two weeks. Roots stay neat. The style looks intentional and polished without requiring any post-install manipulation.
Why It Works
Classic twists lay flat against the scalp at the base, which means they don’t catch on things, they don’t snag your clothing, and they don’t bulk up in unexpected places. The weight of the Marley fiber keeps each twist hanging straight and tangle-free.
For maximum longevity, wrap your twists in a satin scarf every night and sleep on a satin pillowcase as a second layer of protection. This combination reduces friction enough to keep the twist ends neat for 6 to 8 weeks before you need to redo the style.
Tip: Use the same amount of extension fiber per section throughout. Inconsistent portions cause some twists to look fat and others to look sparse — the whole look falls apart when sizing isn’t uniform.
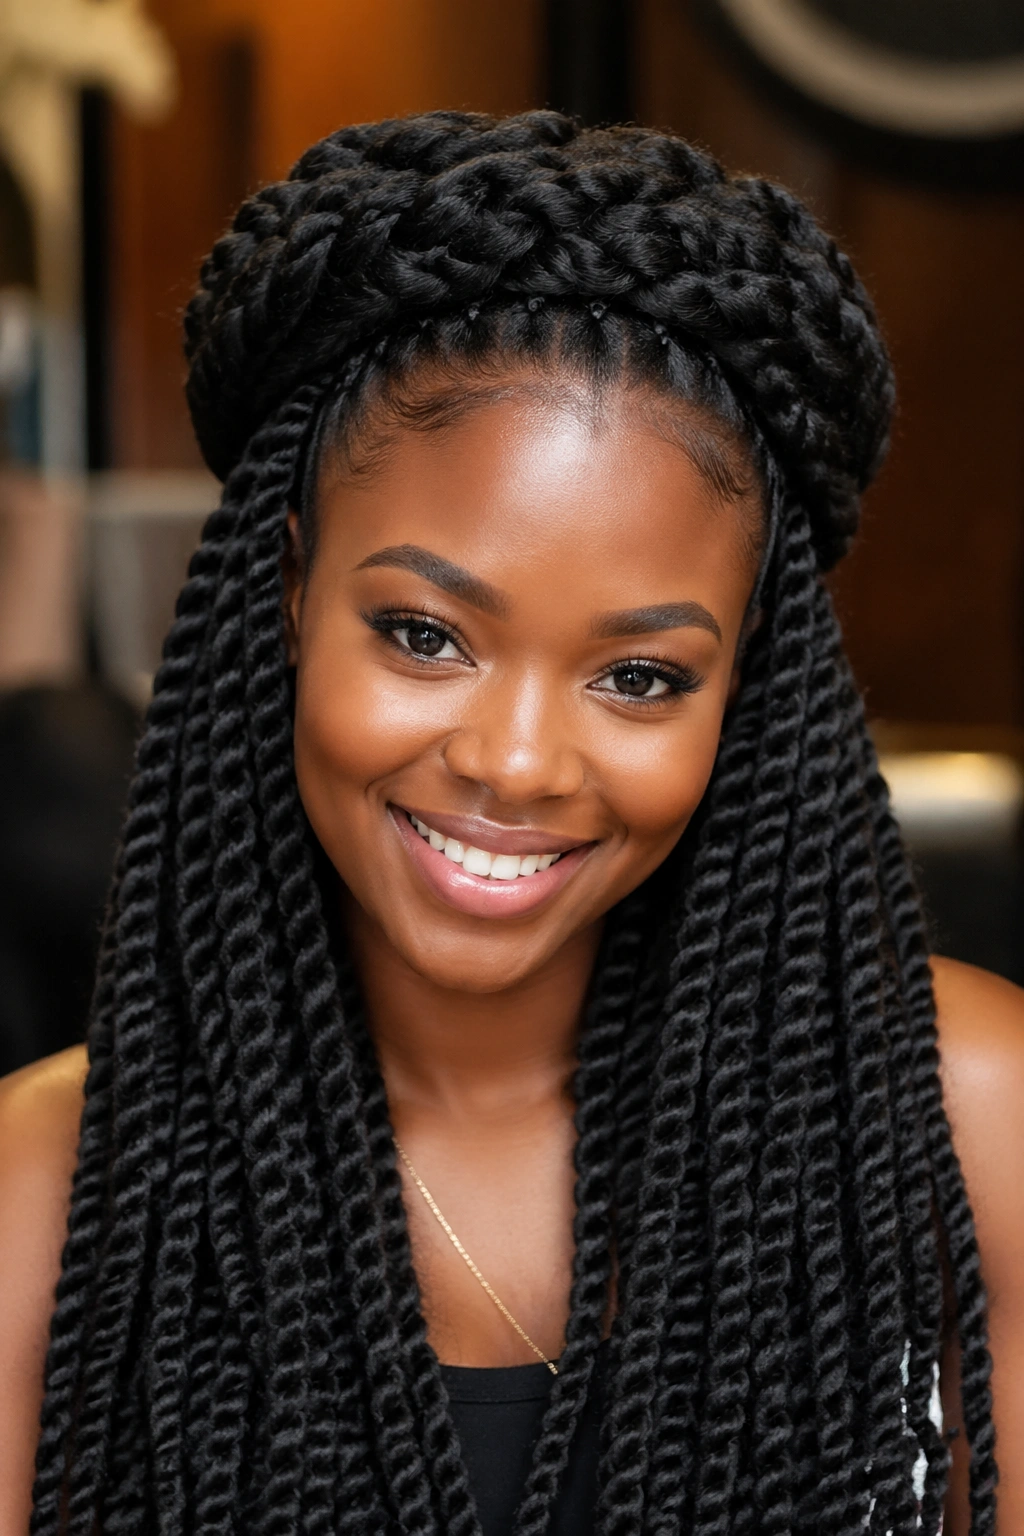
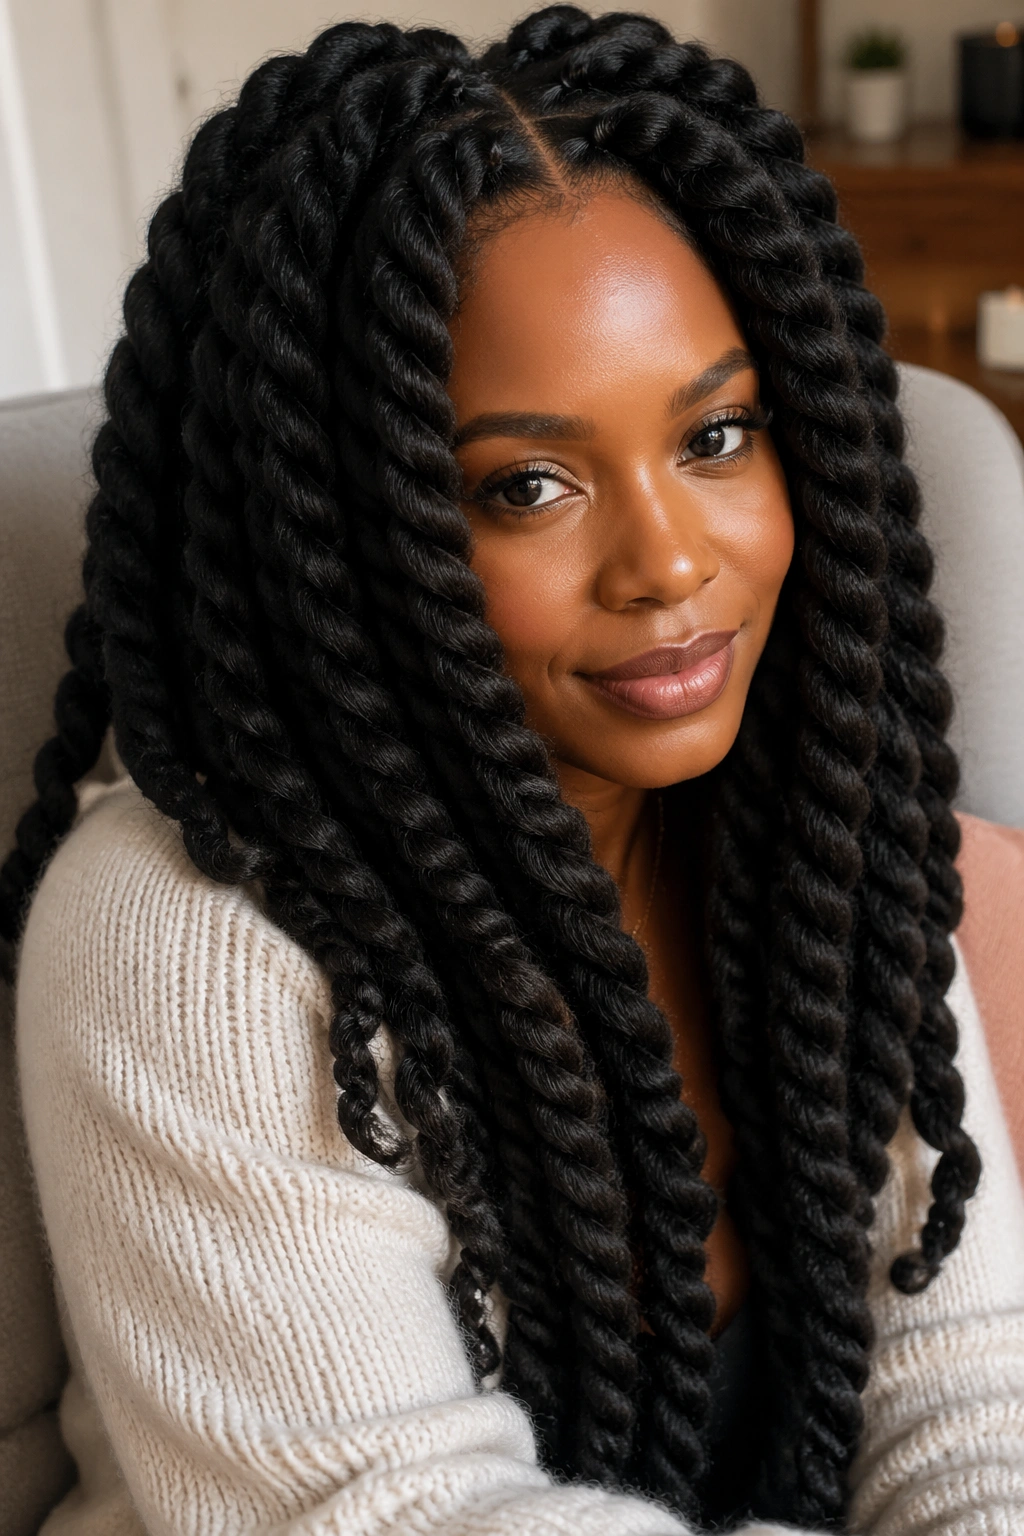
2. Jumbo Marley Twists
Bigger, faster, bolder. Jumbo twists use significantly more Marley hair per section — sometimes two to three times the standard amount — and the finished diameter ends up around your thumb or slightly larger. A full head of jumbo twists can be installed in three to four hours instead of the seven or eight that thin twists require.
Beyond the installation time, the look is genuinely different. Jumbo twists have a sculptural quality that thin twists don’t. They take up visual space. They move differently — slower, heavier, more deliberate. When you toss your head, jumbo twists swing in a way that feels dramatic and unapologetic.
The tradeoff is weight. A full set of long jumbo Marley twists can feel heavy on the scalp by the end of the day, and some people find this style less comfortable for sleeping. Keeping the length at shoulder or slightly below helps manage that.
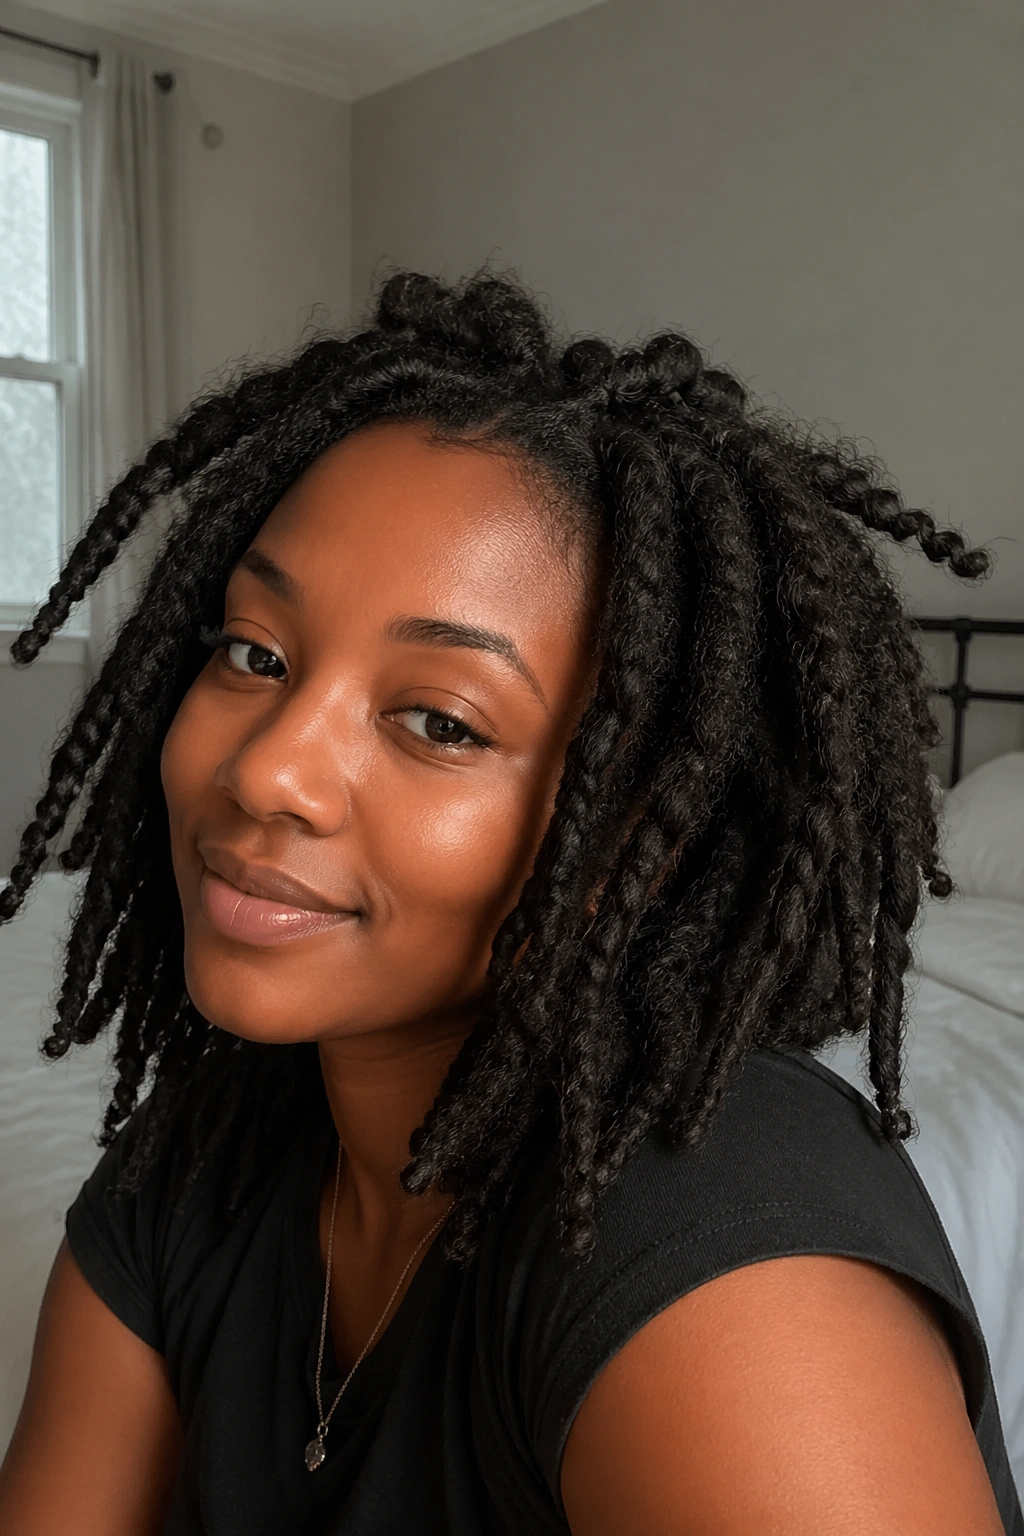
3. Mini Marley Twists
On the opposite end, mini twists are tiny — thinner than a pencil, sometimes thinner than a chopstick — and they require a level of patience that most people will either love or absolutely hate. But the payoff is real. Mini twists move like natural hair. They flow. They cluster together at the ends when they’re long enough, and those clusters create a fullness that reads more like a natural style than an installation.
This look works especially well on 4C hair, where the tight coil makes smaller twists grip the extension fiber with minimal slippage. The time investment is significant — expect 8 to 12 hours for a full install — but mini twists last longer than larger styles because there’s less surface area per twist to fray or frizz.
Who This Is For
If you like wearing your hair loose but need the length that extensions provide, mini twists give you that. They’re also a great option if your workplace has formal expectations around hair — mini twists read as neat, structured, and put-together at a glance.
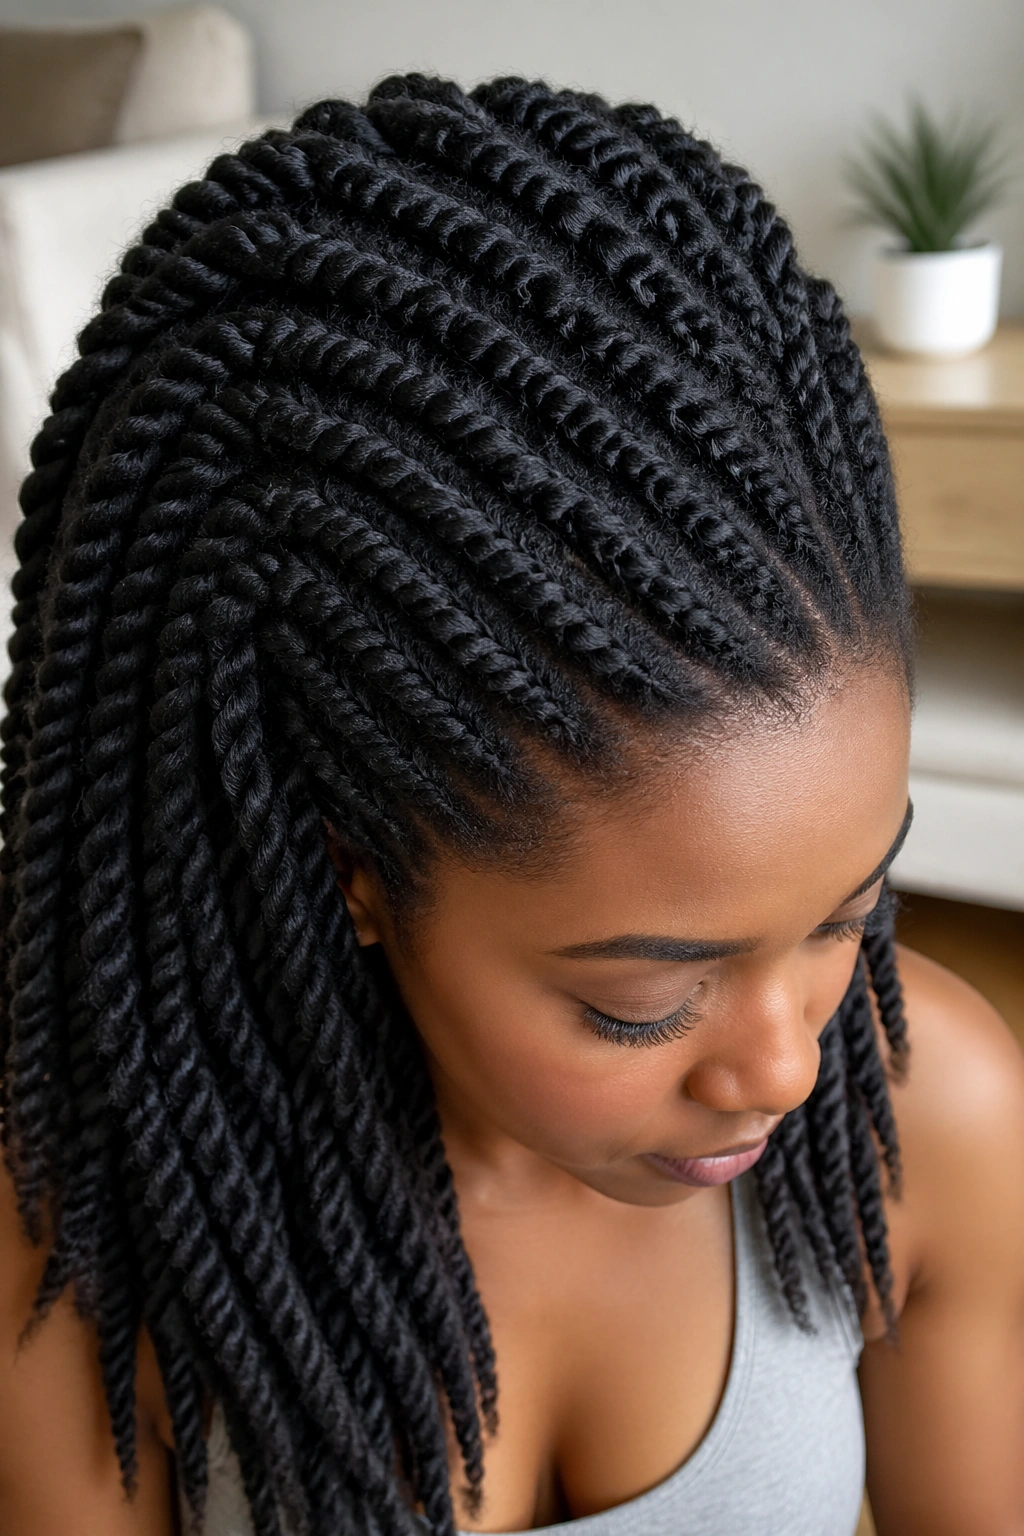
4. Senegalese-Style Marley Rope Twists
This style uses the rope twist technique rather than a standard two-strand twist, and the visual result is noticeably different. In a rope twist, both strands are twisted in the same direction first — clockwise, say — and then the two pre-twisted strands are twisted around each other in the opposite direction. The result is a tighter, rounder, more defined spiral that looks almost like actual rope.
Marley hair works exceptionally well for this technique because the coarse fiber holds the initial twist without slipping. Smooth kanekalon tends to unwind itself when you release tension — Marley fiber doesn’t have that problem to the same degree.
The finished look has a pronounced three-dimensional quality. It catches light along the ridges of the rope pattern. In person, these twists look more deliberately styled than standard two-strand twists.
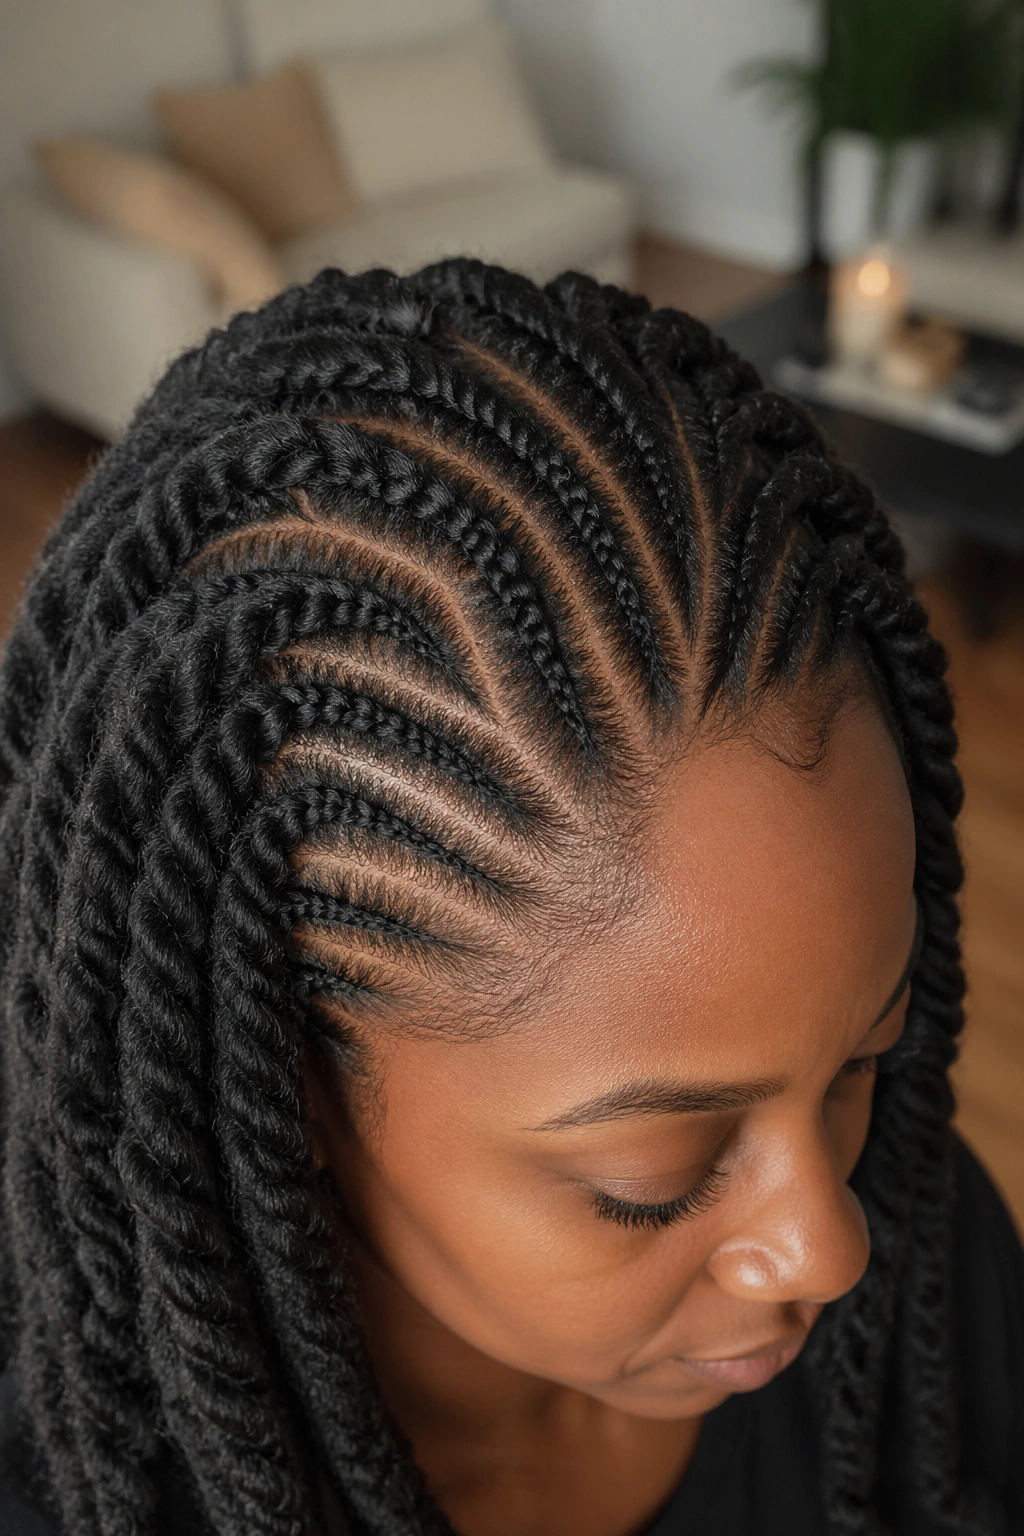
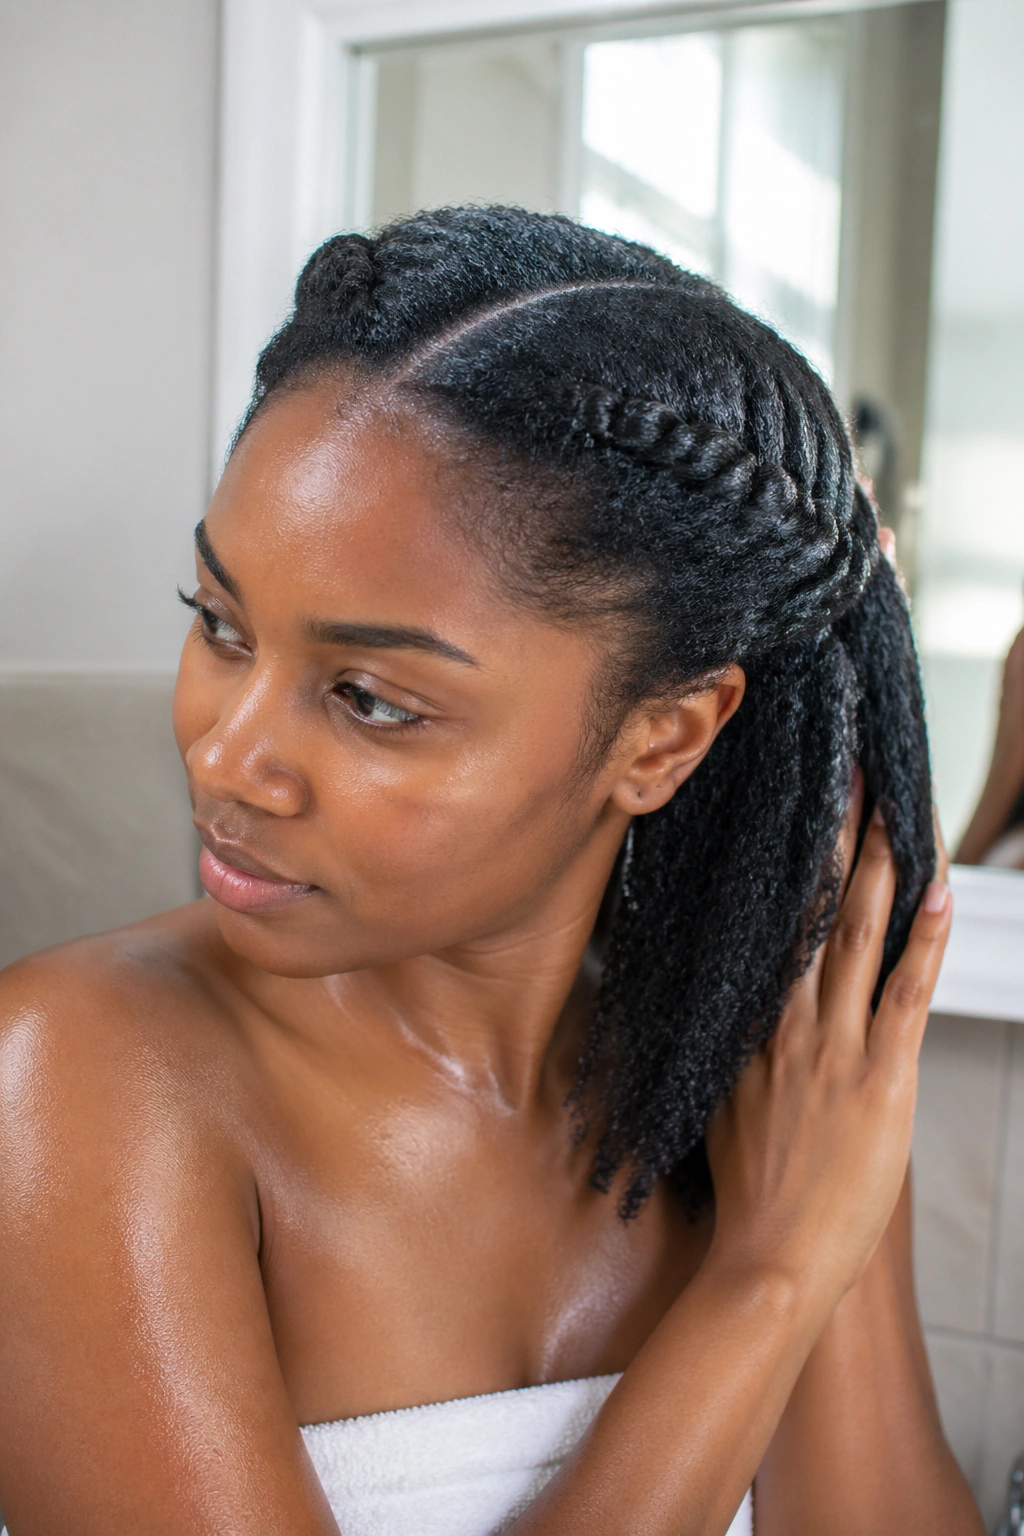
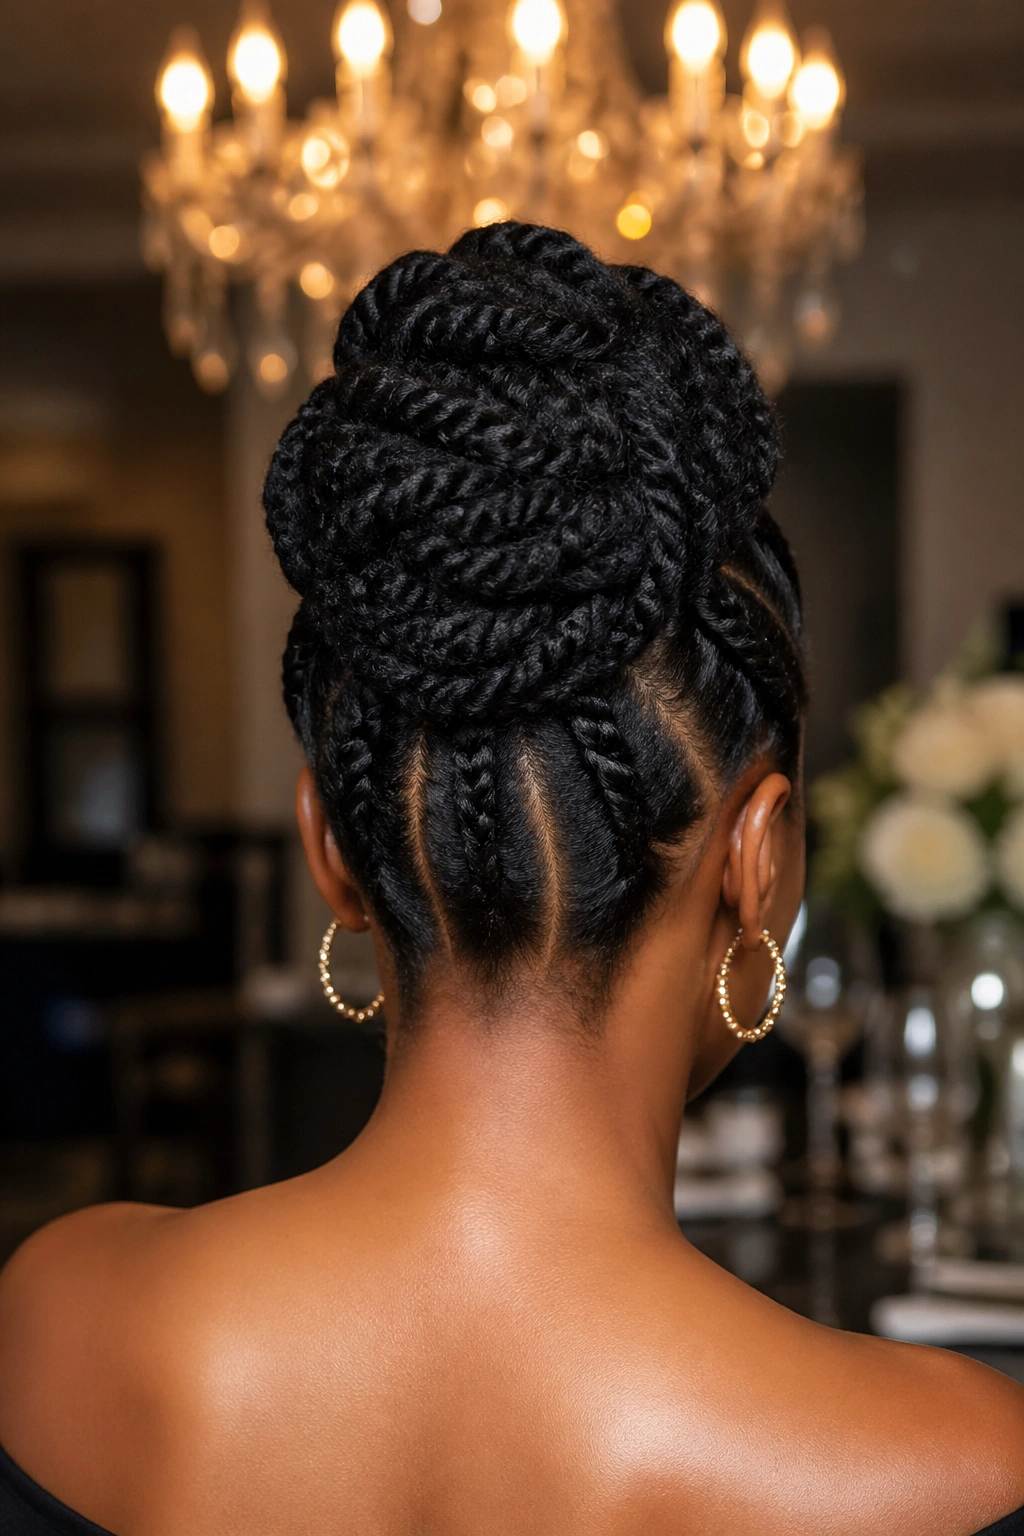
5. Flat Twist Marley Updo
Instead of individual hanging twists, flat twists lie against the scalp in rows or curves, similar to cornrows but using the two-strand twist technique instead of the braid pattern. When you add Marley hair, the texture of each flat twist looks rich and full — you see the coarse fiber running along the pattern, which has a distinct visual texture compared to the smooth look of traditional cornrows.
A flat twist updo pins all those rows up into a gathered shape at the crown or back of the head. The finished result is a polished, structured updo that doesn’t require any clip-in pieces or additional pins beyond the ones holding it in place.
This is one of the best styles for formal occasions — it reads as deliberate and elegant, it stays put all day, and it doesn’t require hours in a salon chair once you’ve mastered the flat twist technique.
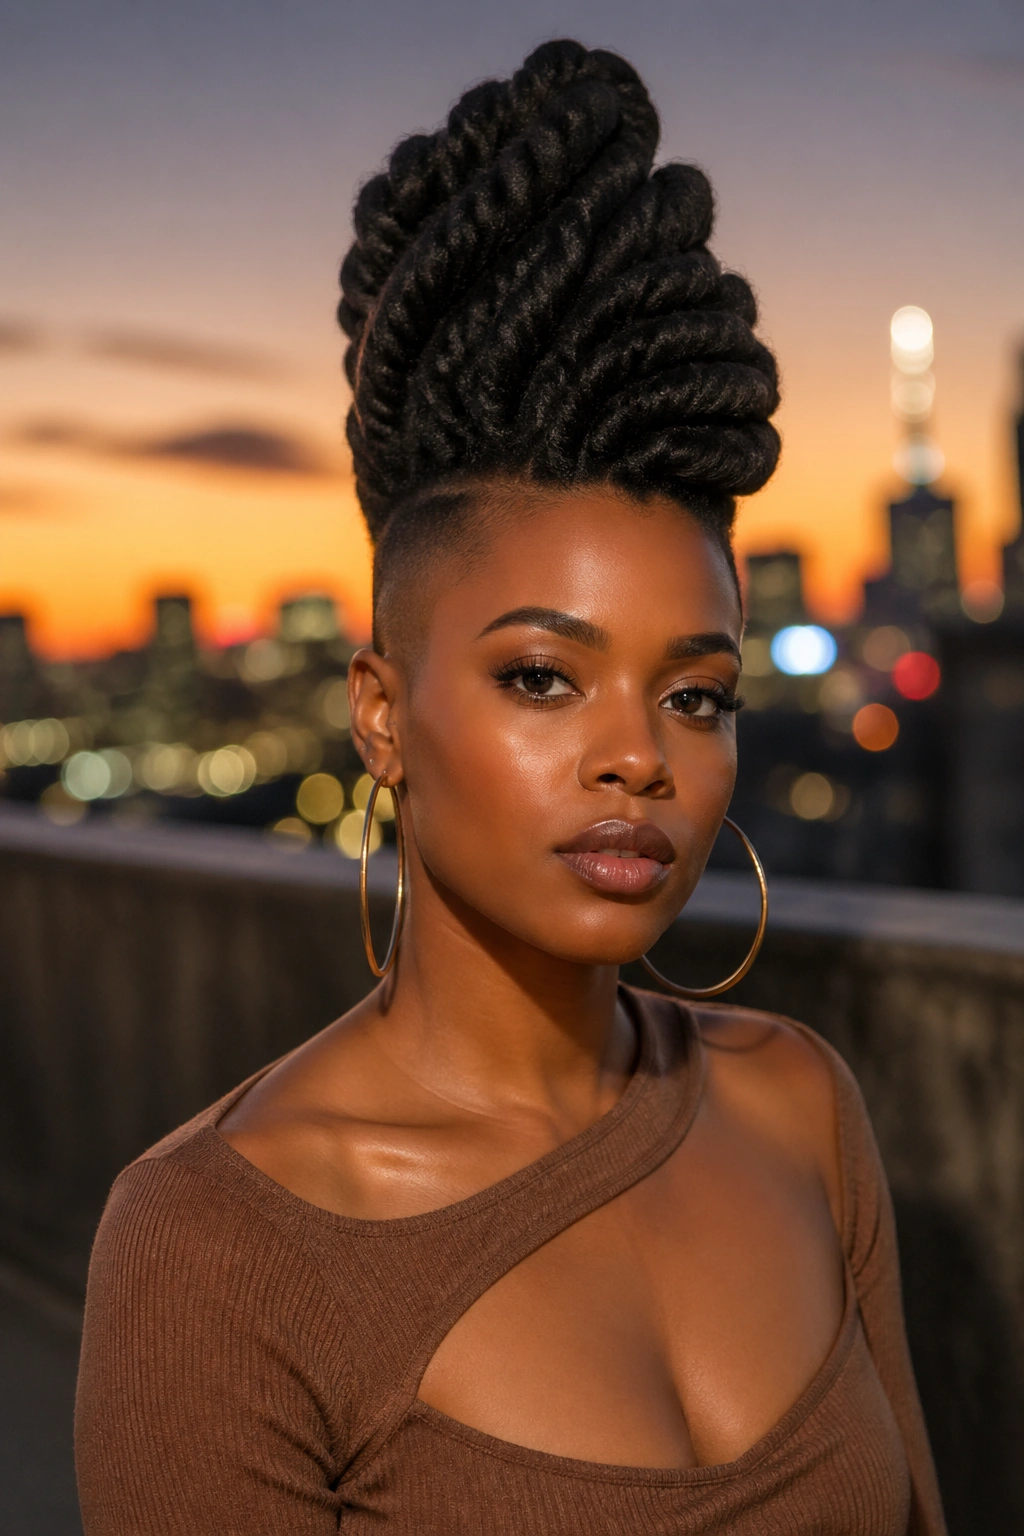
6. Twisted Mohawk with Marley Hair
A twisted Mohawk takes the natural hair on the sides of the head and either braids it flat toward the center or twists it flat in the same direction. The hair at the crown — or along a strip from the front hairline to the nape — stays free or gets individual twists that hang or puff upward. With Marley hair added to the crown section, you get a dramatic vertical contrast: flat and sleek on the sides, textured and voluminous on top.
The sides can be twisted flat with Marley hair too, which creates a uniformly textured look throughout while still keeping the height contrast.
What Makes It Different
Unlike a standard Mohawk where the shaved sides are the statement, this version uses texture and direction as the contrast element. Both sides can be entirely natural or extended — the drama comes from direction alone.
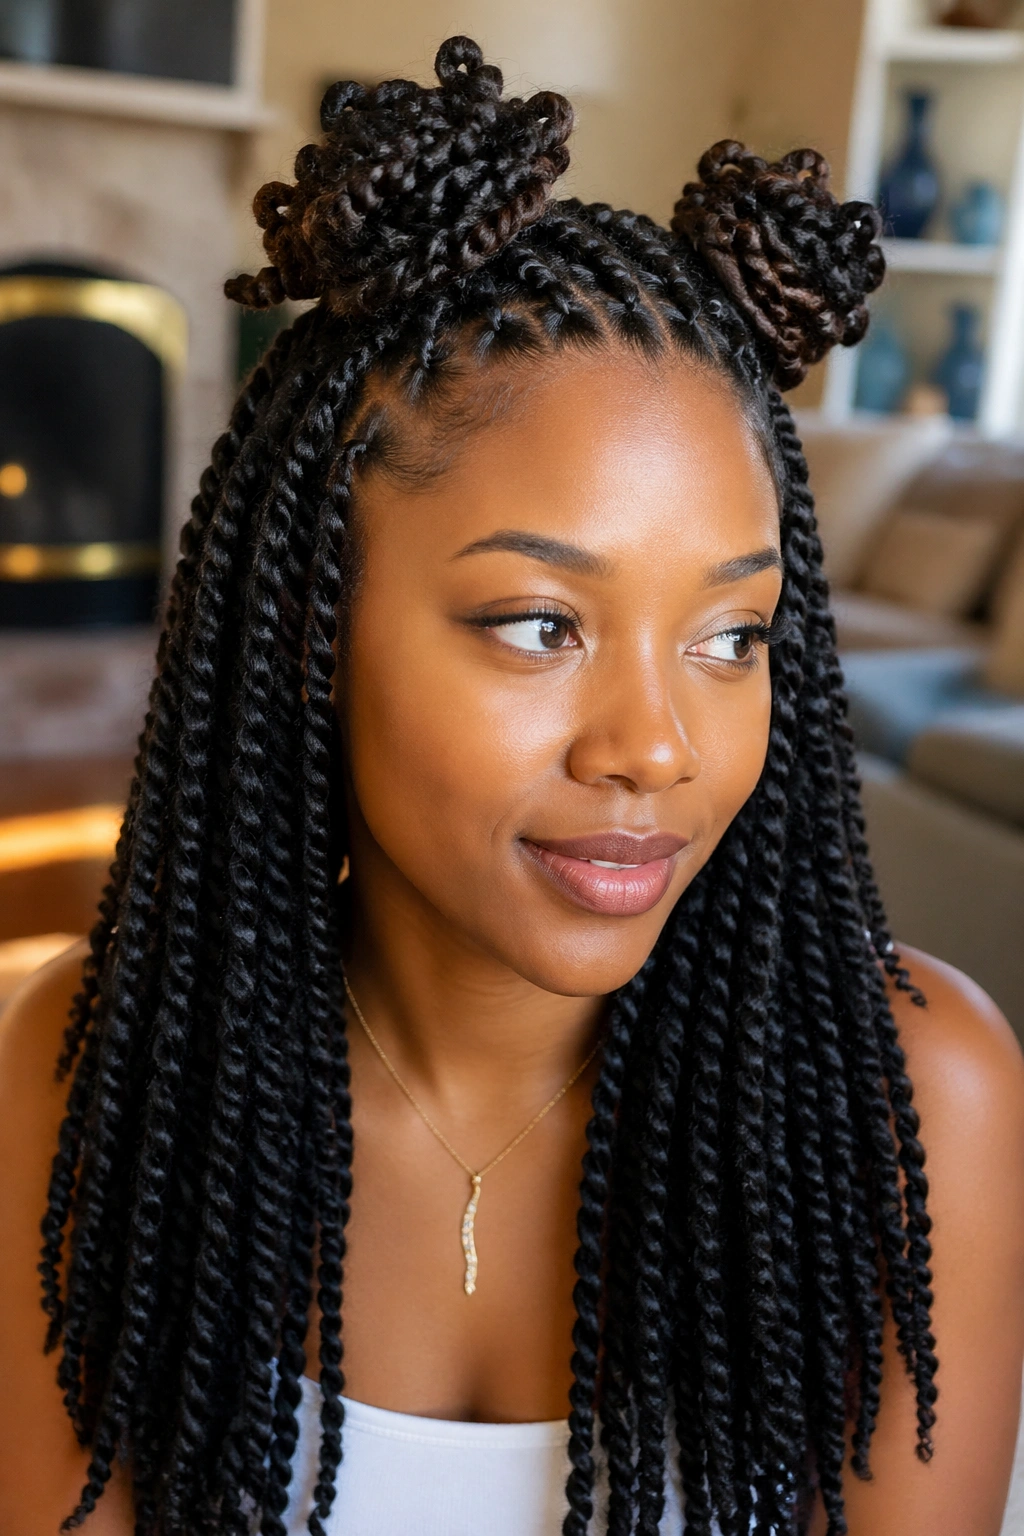
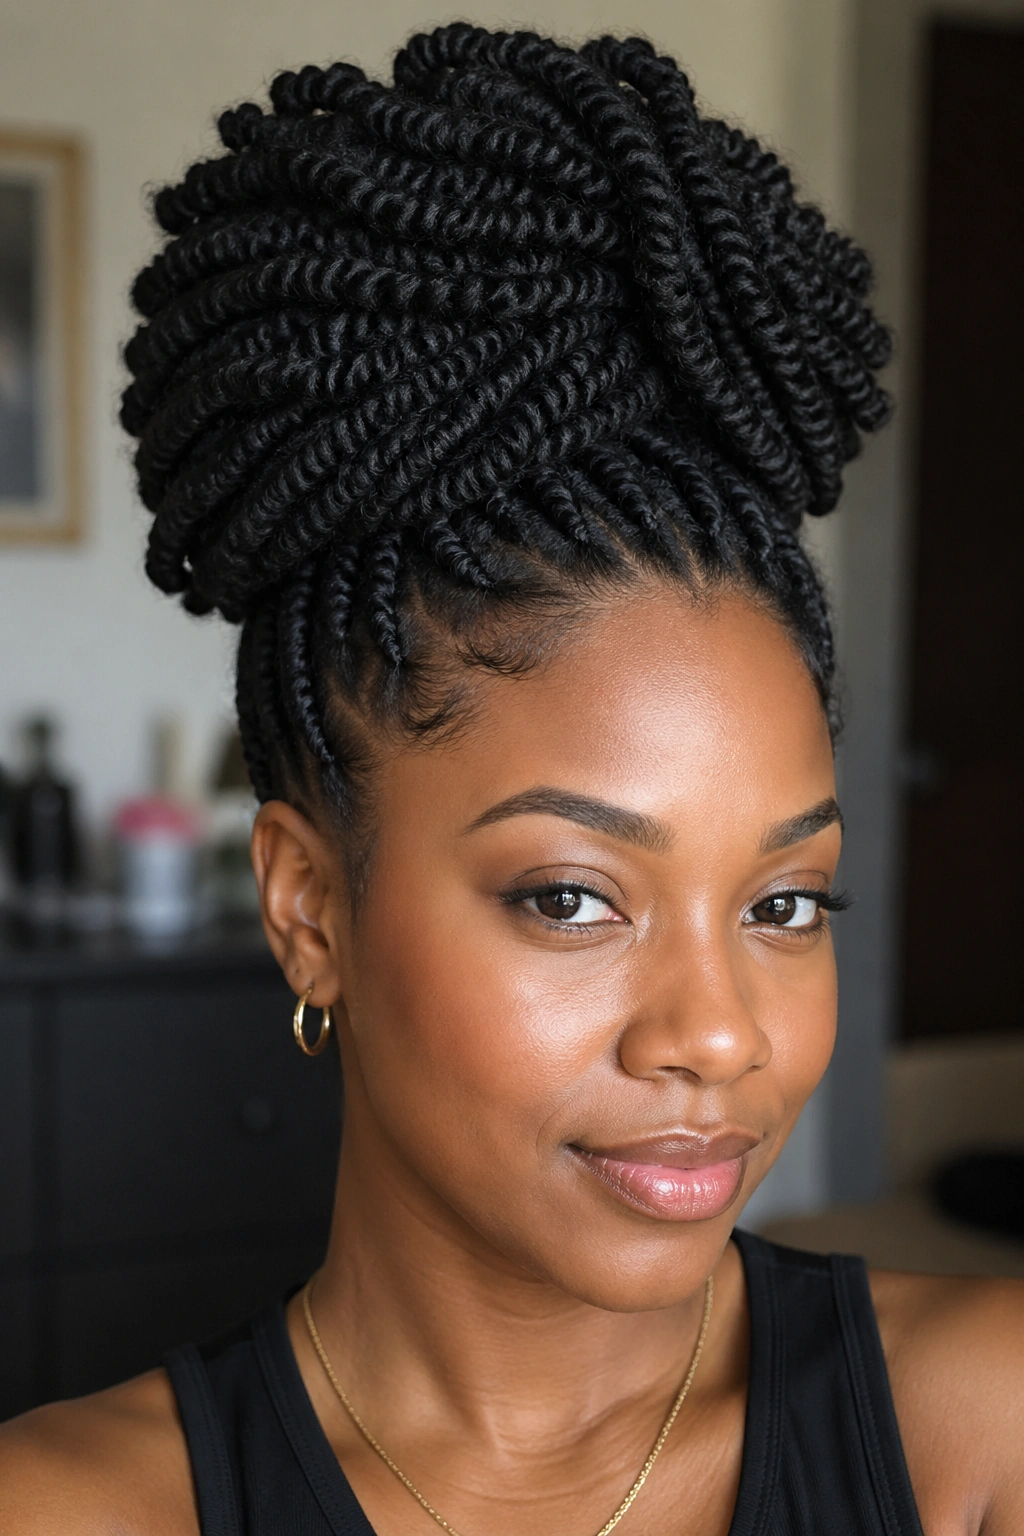
7. Half-Up Marley Twist Bun
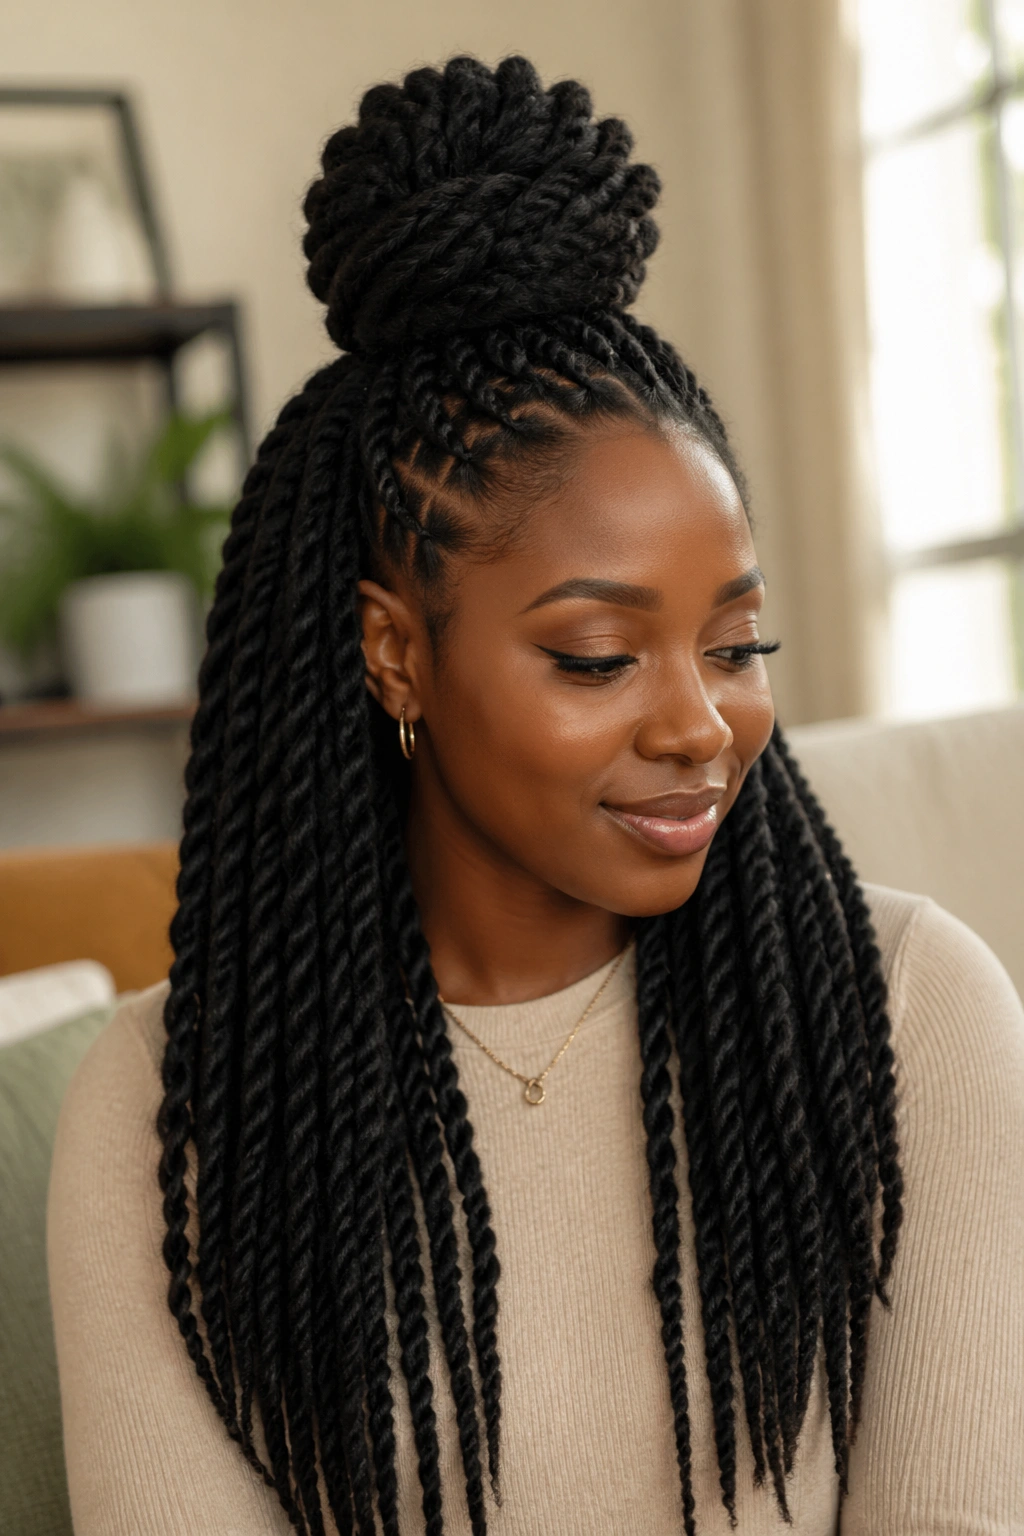
Install your Marley twists as usual, then gather the top half — roughly from ear to ear horizontally — and pile them into a high bun at the crown. Leave the lower half loose. The contrast between the gathered bun shape and the hanging twists below creates dimension without any extra installation effort.
The Marley texture is what makes this work. Smooth extension twists would slip out of a bun within hours. The coarse Marley fiber grips itself and holds the shape longer, especially with one or two bobby pins tucked in strategically.
8. Passion Twist Variation with Marley Fiber
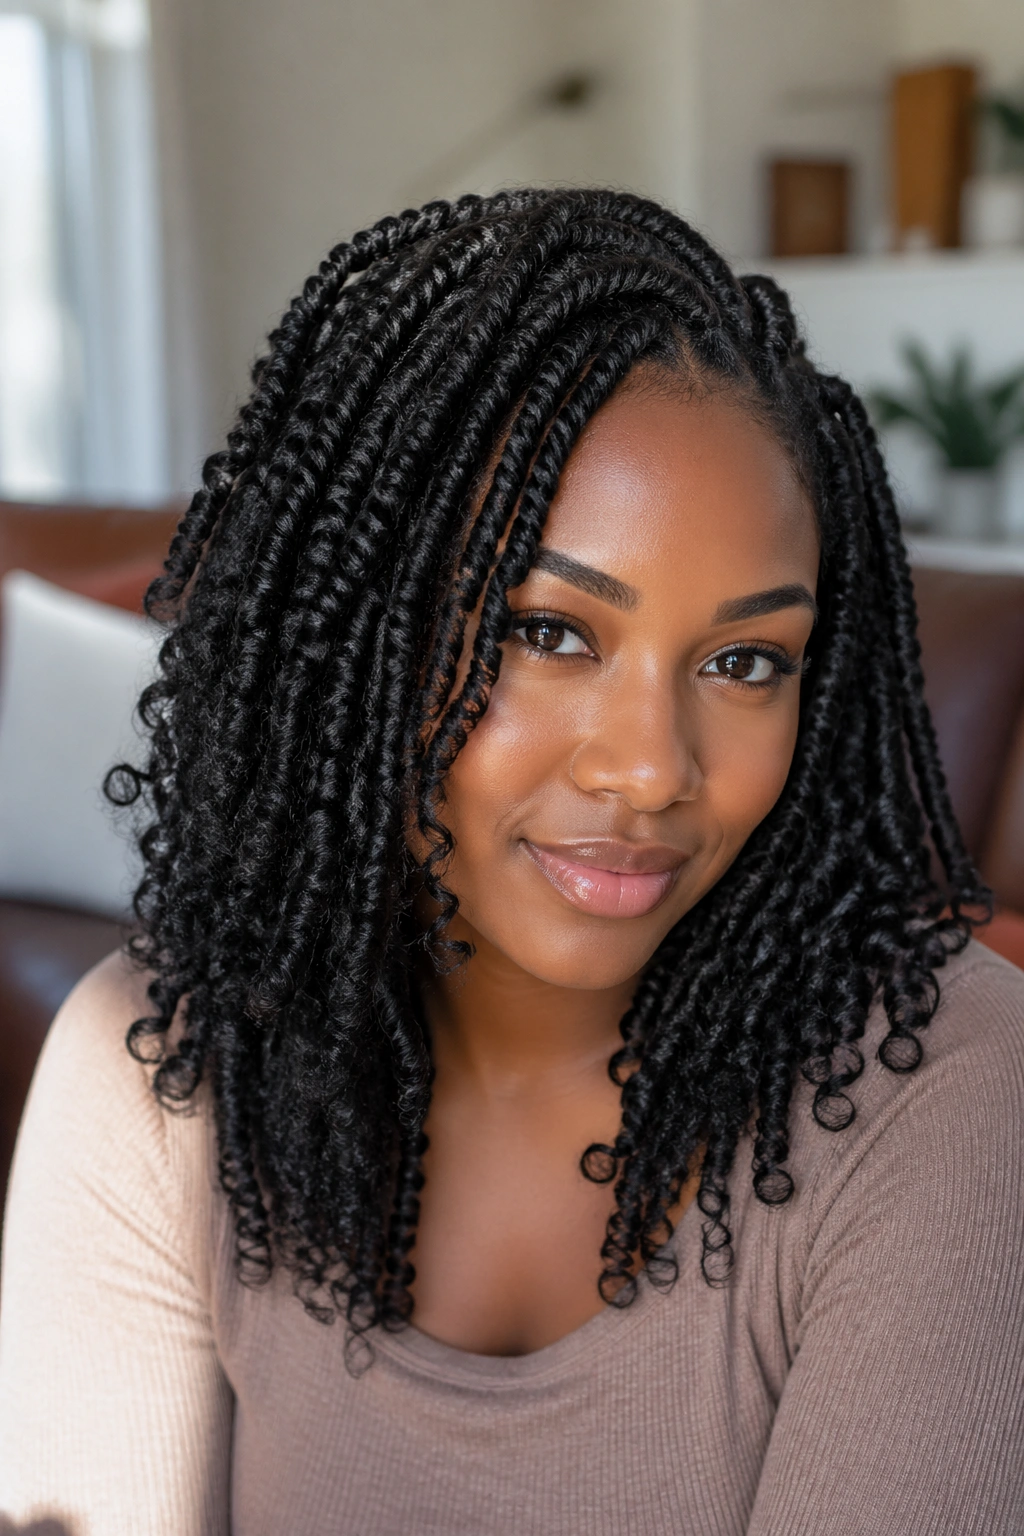
Passion twists are typically made with water wave hair or spring twist hair and have a springy, open curl at the end. But when you make them with Marley hair, the curl is tighter and the overall texture is more matte — less shiny, more true to natural 4C texture.
To get the effect, twist the Marley hair the same way you would for passion twists — a messy, open-wrap technique rather than a tight two-strand — and let the ends flare into a loose coil. The finished style looks deliberately undone and lively without being messy.
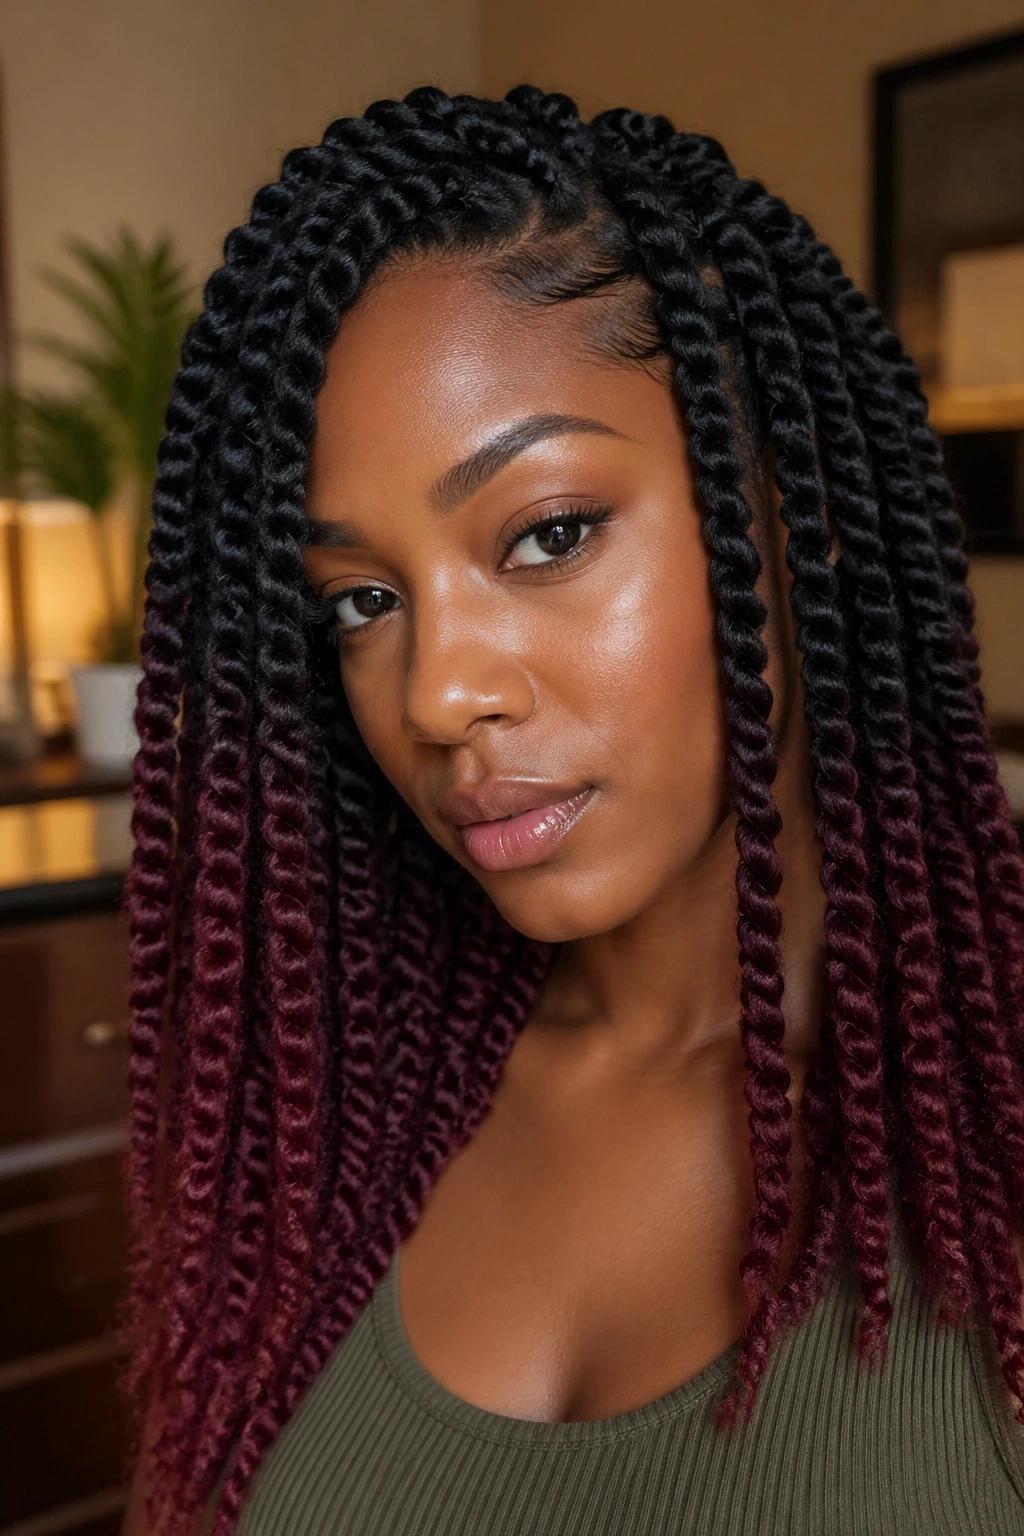
9. Color-Tipped Marley Twists
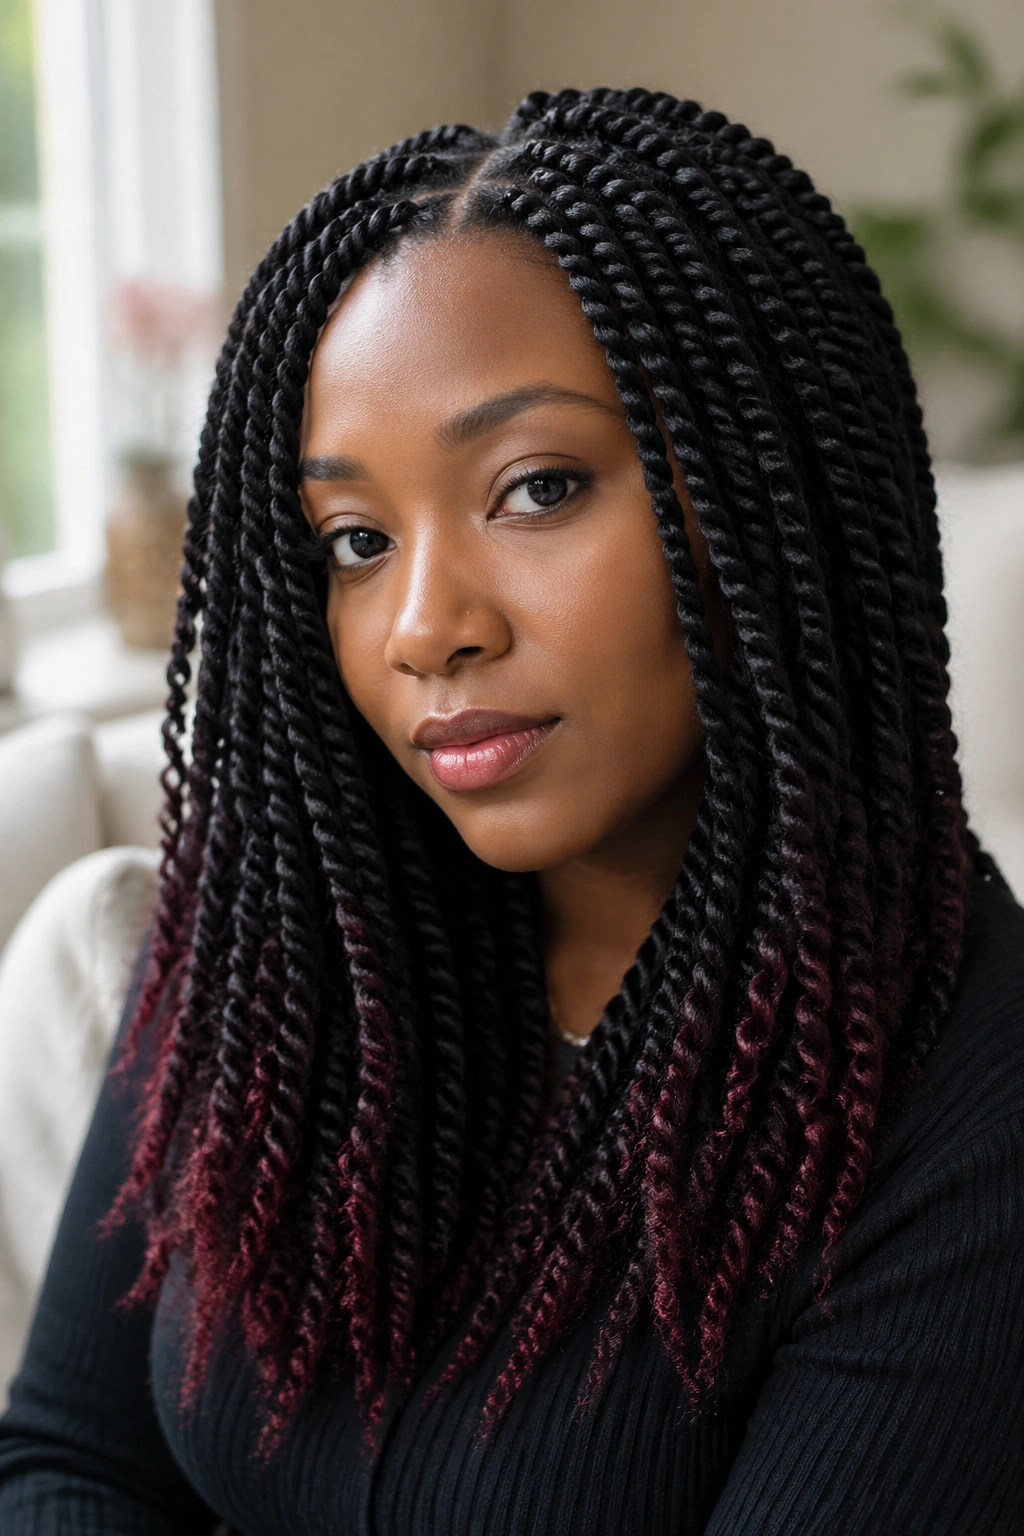
Start the twist with your base color — 1B or 2, usually — for most of the length, then switch to a contrasting Marley hair color for the last few inches. Burgundy or auburn at the ends of black twists creates a natural ombré without bleaching, dyeing, or any chemical process.
The switch happens mid-twist. Hold the two strands of your ongoing twist, introduce the colored extension fiber, fold it over one strand, and continue twisting. The color appears subtly at first, growing stronger toward the tip.
Color combinations that work well: 1B base with 30 (medium auburn) tips, 1B base with 99J (plum) tips, 4 (chocolate brown) base with copper-bronze tips.
10. Box Part Marley Twists
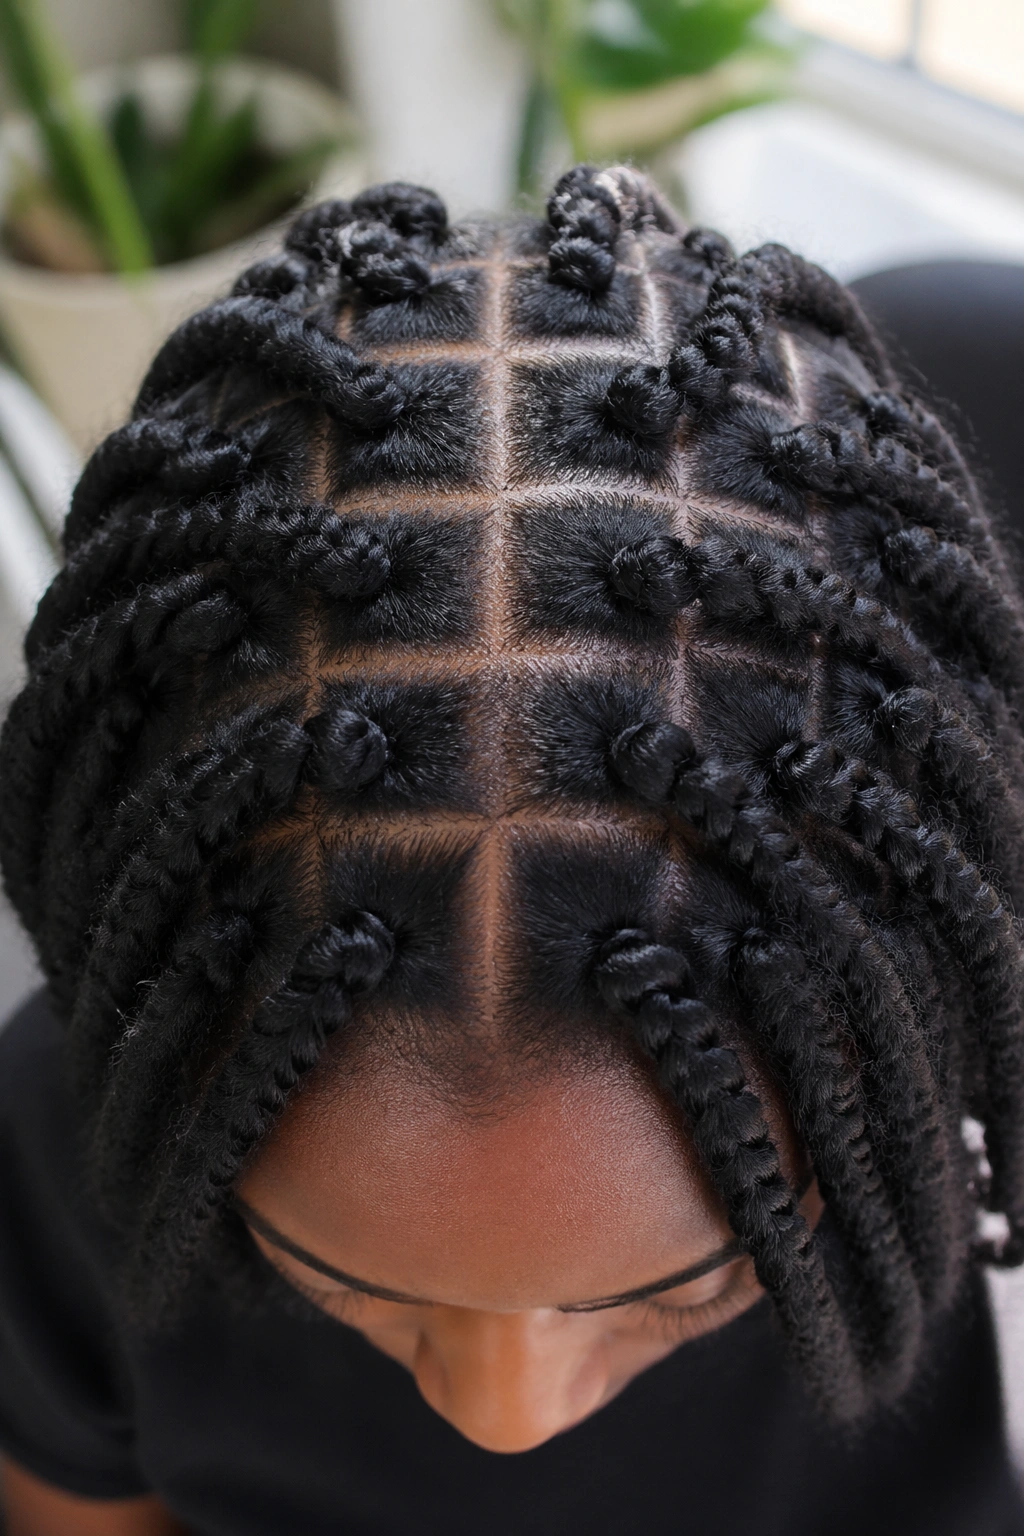
Most protective styles use diagonal or diamond-shaped sections. Box part twists use clean horizontal and vertical lines that create a true grid pattern across the scalp. Each individual twist grows out of the center of a perfect square.
The visual effect is geometric and precise. From above, your scalp shows a neat grid. From the side, the twists hang in orderly columns. It’s a more deliberate look that suits people who appreciate structure and symmetry in their style.
Section size matters here — squares that are too large make the scalp show through too much at the roots. Aim for sections about the size of a postage stamp for a clean, full look.
11. Freeform Marley Twist Locs
Not every Marley hair style is a precise installation. Freeform twists are done without clean parts, without uniform sizing, and without strict tension. The sections vary. Some twists are thicker. Some are thinner. Some join at the base. The result looks like natural freeform locs in the early stages — organic, earthy, like your hair grew that way.
The beauty of freeform styling is that it doesn’t demand perfection. It’s genuinely one of the fastest installations you can do with Marley hair, and if you’re new to working with extensions, this style is forgiving of uneven technique.
12. Marley Twist Bantu Knot Hybrid
Install individual twists throughout, then twist several neighboring twists together at the base and coil them into a Bantu knot pinned at the scalp. Leave the twist ends fanned out like petals around the knot. You can do this with every twist on your head — creating a full Bantu knot look — or do it selectively at the crown while leaving the rest of the twists hanging.
When you unpin the knots after a few hours, the bases of those gathered twists have a beautiful compressed curl pattern.
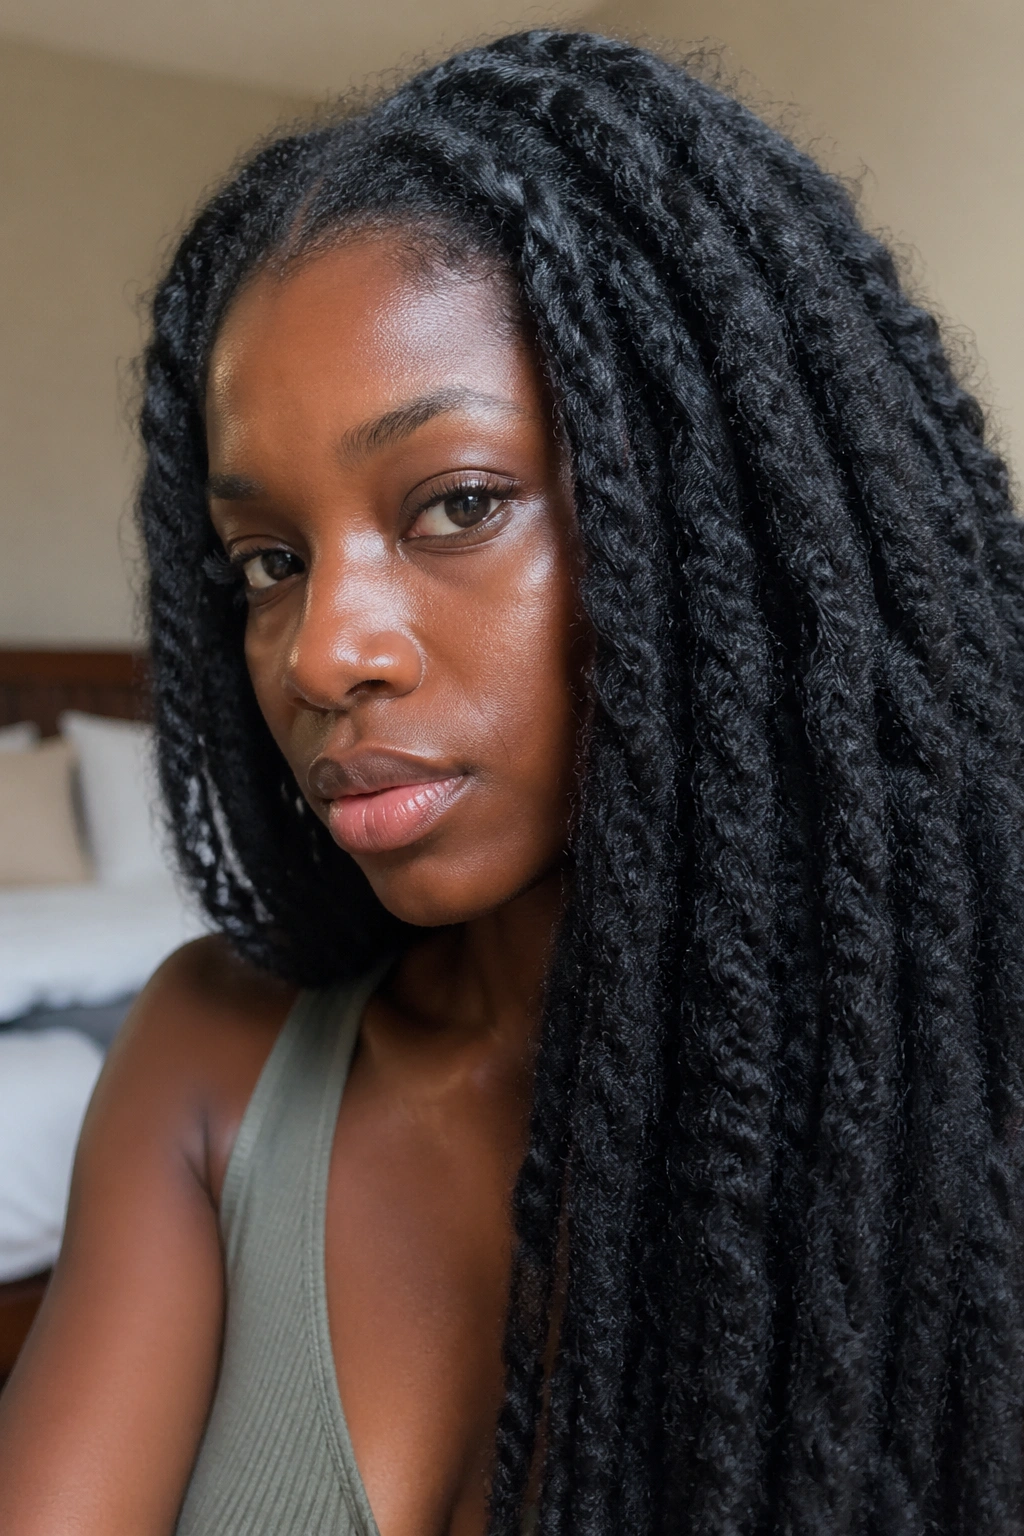
13. Long Waist-Length Marley Twists
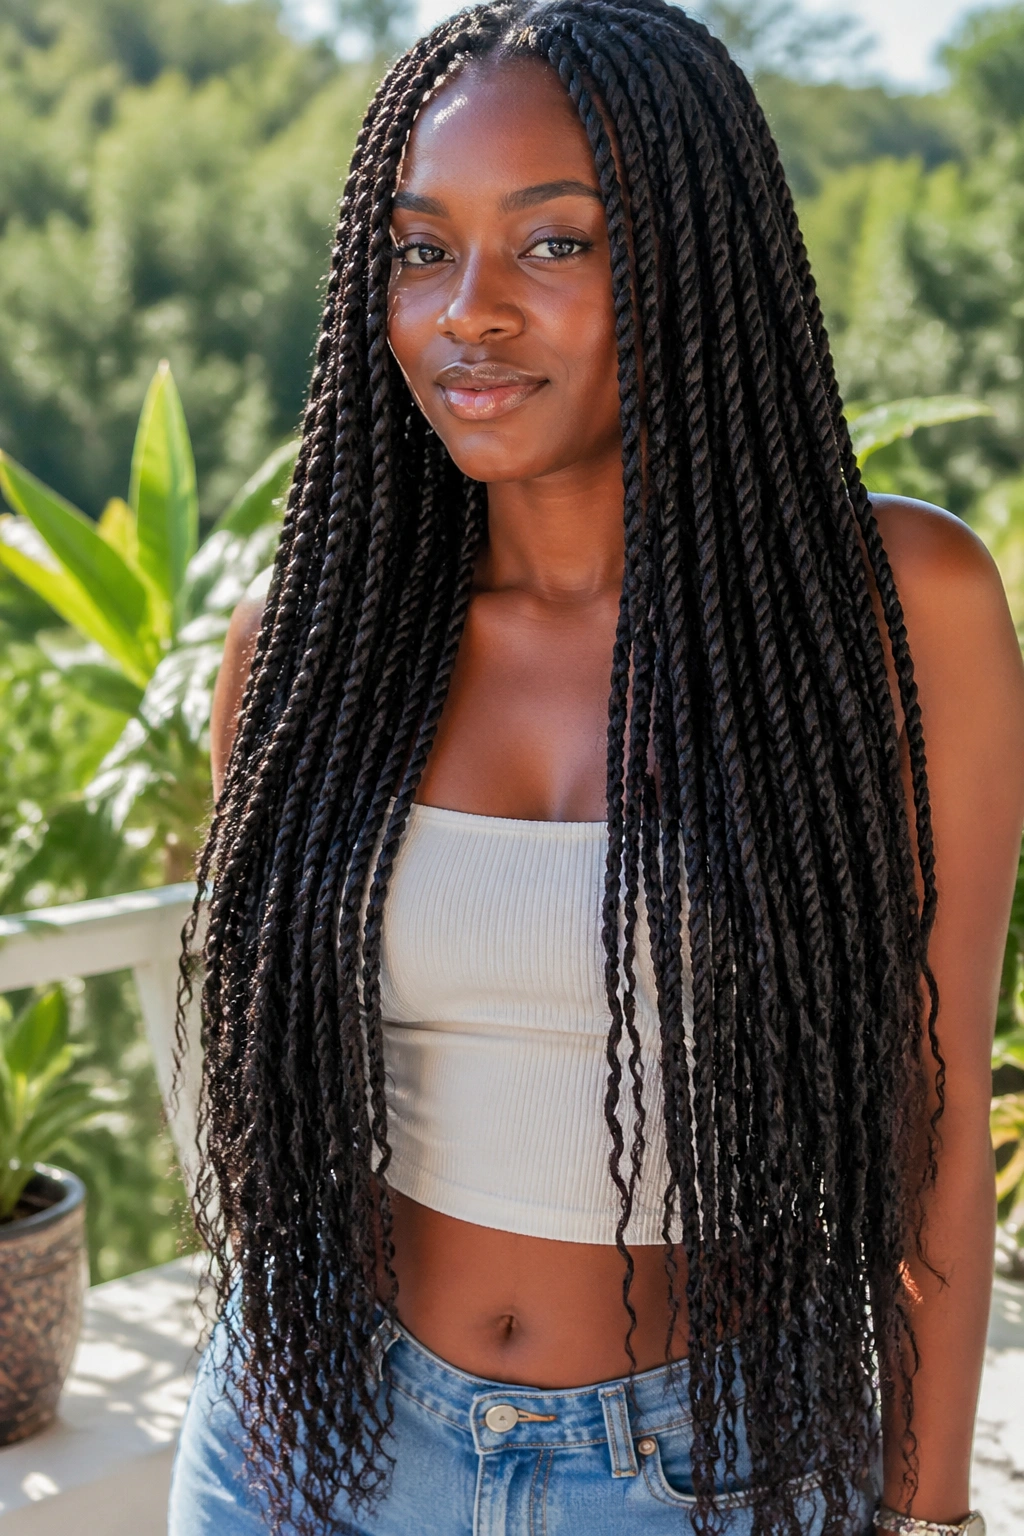
Long twists — falling to the waist or beyond — are a specific look that requires specific planning. You’ll need 24-inch or longer Marley hair packs, and you’ll need to accept that the installation time goes up proportionally. But the payoff is the kind of statement length that turns heads without any color, without any accessories, without anything extra at all.
The weight at this length is real. A satin pillowcase is non-negotiable for sleeping — dragging that much extension fiber across cotton every night will fray the ends within two weeks.
14. Marley Twists with Curled Ends
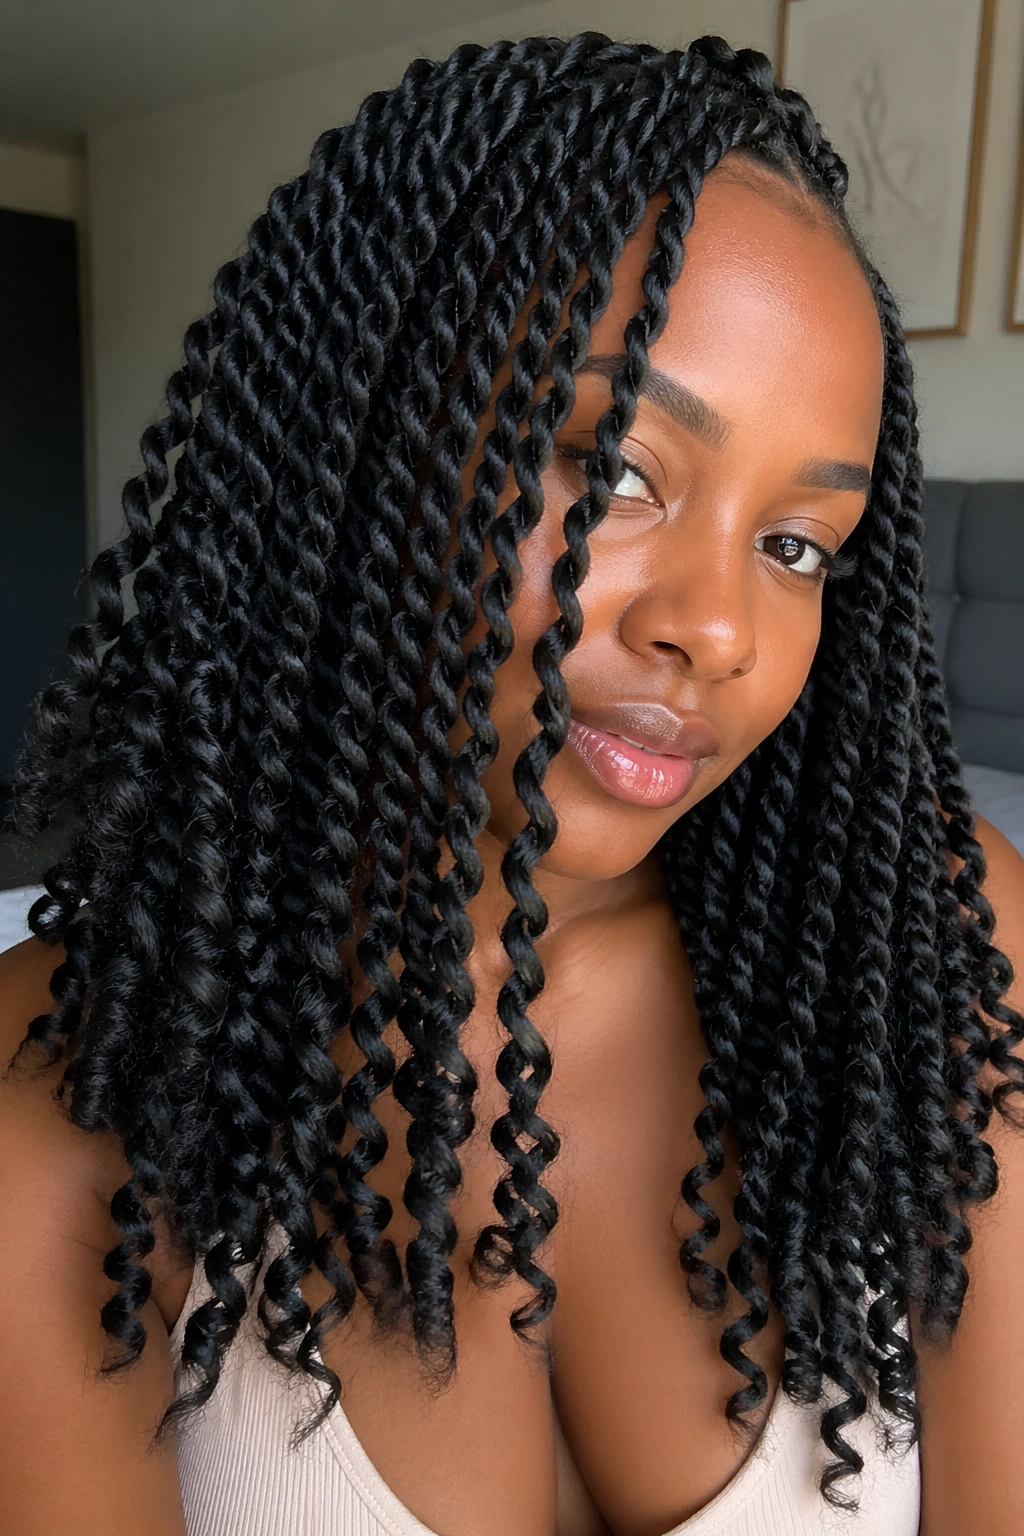
After completing your twists, dip the bottom 2 to 3 inches of each twist into a bowl of very warm water — aim for hot-to-the-touch but not actually boiling — and hold them there for 30 seconds. As the synthetic fiber heats, it curls and sets. Let the ends air dry completely — about 20 minutes — before releasing.
The finished tips have a soft, rounded curl that gives each twist a finished look. It’s a small detail that takes a standard installation from done to really done.
15. Braided Root Marley Twist
Instead of starting each section with a simple twist from the root, start with three to five stitches of cornrow braid, then transition into a two-strand twist once the section is secured. This gives each twist a braided base — tight, flat, and extremely secure — and then the Marley fiber takes over for the hanging portion.
This technique is worth the extra installation time if you plan to keep the style for more than four weeks. Braided bases hold significantly longer than twisted bases, and the roots stay neat even as your natural hair grows.
16. Invisible Part Marley Twists
The invisible part technique hides the scalp between sections by angling your parts away from the center line of the style. Instead of parting your hair in straight lines that show from the front, you take diagonal sections that nest against each other. When viewed from the front or sides, the scalp doesn’t show between the twists — the style looks full and thick from root to tip.
This is a more advanced installation technique, but the finished result looks more expensive and polished than standard-parted styles.
17. Marley Twist Crown Braid
Install the majority of your twists as usual — medium to long length, hanging loose — and then gather the top layer of twists from the front and wrap them around the crown of your head in a circular braid pattern, pinning as you go. The effect is a crown or halo braid made entirely of your own installed twists, with the remaining twists hanging beneath it.
No additional braiding skill is required. You’re just gathering and pinning existing twists, not creating new braid structure.
18. Ombre Marley Twist from Root
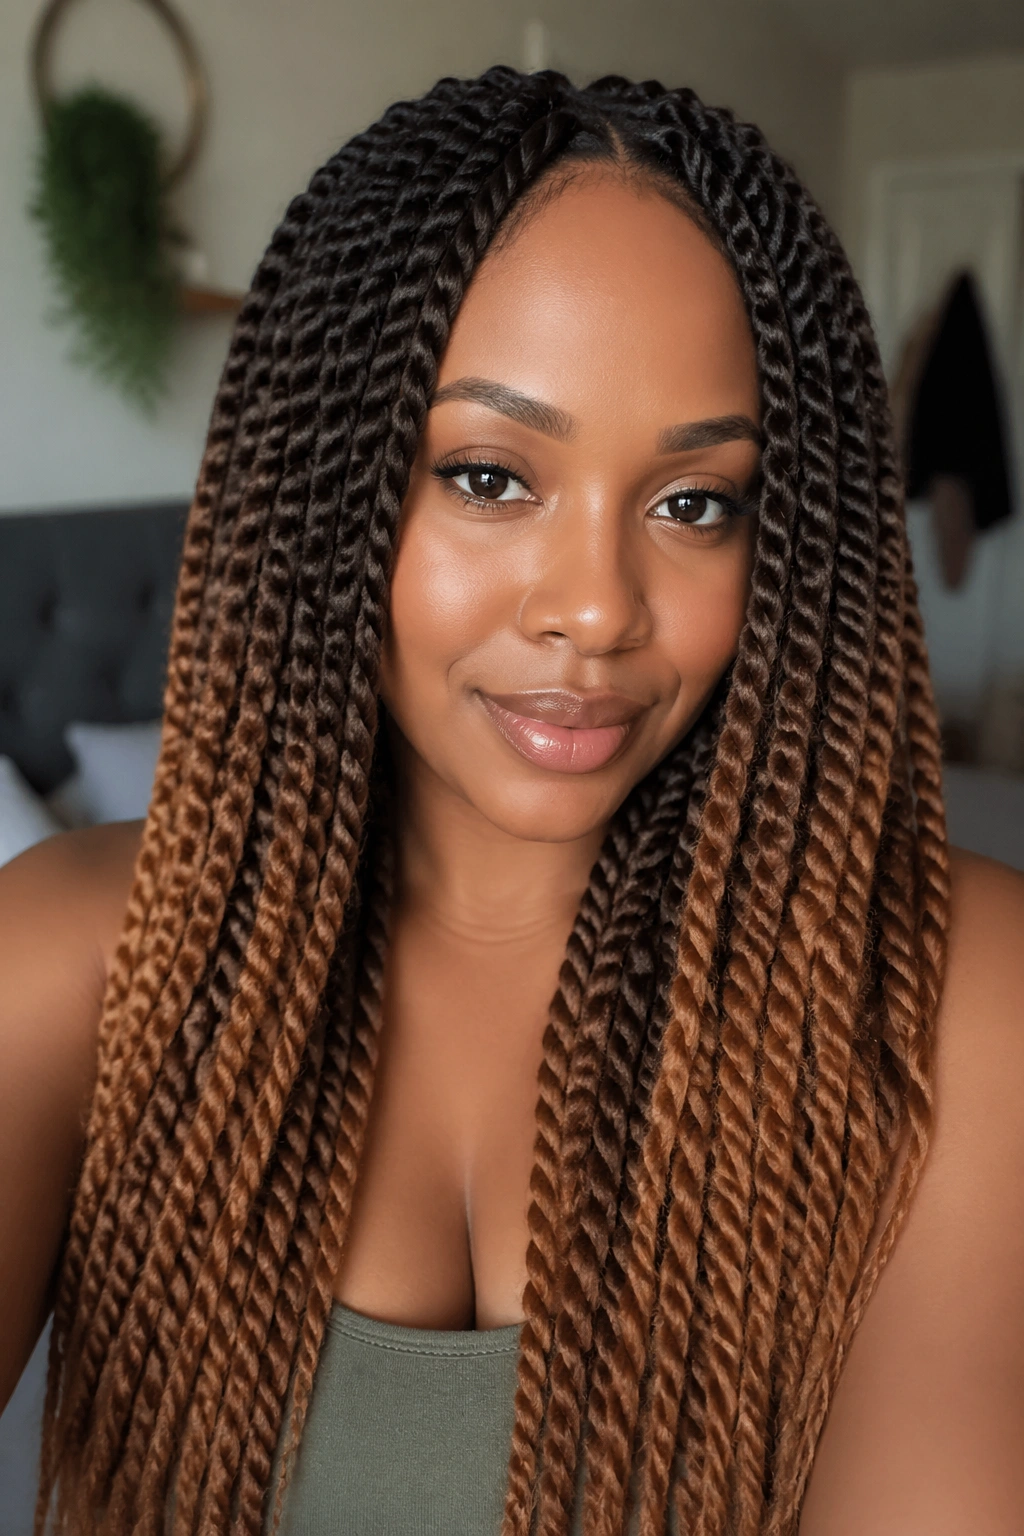
Instead of coloring only the ends, use two different shades of Marley hair simultaneously from the root down. Hold one strand in dark brown and one strand in light brown, then twist them together. The color variation blends throughout the entire twist, not just at the tip.
This creates a natural-looking ombre that mimics the variation of sun-lightened natural hair. The blend reads as dimensional rather than flat.
19. High Puff Marley Twists
After installation, gather all your twists up into a high puff at the crown using a wide satin scrunchie. The Marley texture gives the gathered bundle a full, rounded shape — it won’t collapse inward the way smooth extensions do. Leave the baby hairs down and laid with edge gel. The result is a simple, high-energy look that works from the gym to a casual dinner.
20. Marley Hair Passion Braids
This style combines braiding and twisting. The bottom half of each section is braided in a traditional three-strand braid, then the top half is a two-strand twist. Both portions use Marley hair. The contrast between the neat braid structure and the softer twist texture on the same section creates visual interest without being complicated.
21. Stacked Top Knot with Marley Twists
Gather all your Marley twists up onto the very top of your head — as high as they’ll go — and secure them with a satin scrunchie or two. Then fan the gathered bundle outward so it cascades down around the scrunchie in a wide, flat disc shape. From the side, this looks like a disc bun. From the front, it looks like a voluminous crown.
The Marley texture adds body to the gathered bundle that smoother hair can’t match. Each twist holds its shape without gel or spray.
22. Marley Twist Feed-In Ponytail
Feed-in technique adds Marley hair gradually to a braid or twist starting at the hairline, building up the ponytail as you work back toward the crown. The base is flat against the scalp — no bump where the extension was introduced — and the ponytail grows naturally out of the back as if it all grew from your head.
Start with just your natural hair at the very front, braid or twist two or three stitches, then begin folding in thin strips of Marley hair with each additional stitch. By the time you reach the crown, the ponytail should be thick and full. Secure the whole gathered section and let it hang.
Caring for Marley Twists Between Washes
Marley hair doesn’t need washing nearly as often as your natural hair usually does. Your scalp still produces sebum, though, and that buildup needs to be addressed. Use a diluted apple cider vinegar rinse — roughly two tablespoons ACV to one cup of water in a spray bottle — applied directly to the scalp between the twists. Let it sit for about five minutes, then rinse thoroughly.
For day-to-day moisture, a light water-based spray on the length of the twists keeps the fiber from looking dry and dull. Marley hair absorbs product less than natural hair does, so a little goes a long way. Avoid heavy oils directly on the extension fiber — they attract lint and dust, which gets trapped in the coarse texture and makes the twists look grimy by week three.
How to Remove Marley Twists Without Damage
Removal is where protective styles go wrong. Take your time. Start at the ends and work up. Use your fingers or a wide-tooth comb to gently separate the extension fiber from your natural hair — pulling or yanking causes breakage, especially at the root where your natural hair is most fragile after weeks of extension wear.
Saturate each twist with a moisturizing detangling spray — something like Kinky Curly Knot Today or a diluted conditioner — before you start separating. The slip makes the whole process faster and gentler. Once you’ve removed all the extensions, do a thorough detangling session on your natural hair before washing.
Common Mistakes That Ruin Marley Twist Styles
The most common mistake is installing on dirty or product-heavy hair. The second most common is using too much product on the roots during installation — it makes the twists loose and shortens the wear time dramatically. Third is skipping the nightly satin wrap, which leads to frizz on the extension fiber that’s nearly impossible to reverse without rewetting.
One that rarely gets mentioned: not separating the twist ends. When long twists hang down your back for weeks, the ends can start to connect and form unintentional locs. Check the ends every few days and gently pull any fused tips apart before they become permanent.
How Long Marley Twists Actually Last
With proper care — nightly wrapping, light moisturizing, no heavy product buildup — Marley twists typically last 4 to 8 weeks. The style stays neat-looking for the first two to three weeks. By week four, some frizz appears at the roots as new growth comes in. By week six or seven, the twists start looking lived-in rather than fresh. By week eight, most people are ready to remove them — not because the style is broken, but because it’s time for a break and a deep conditioning treatment.
The two-week mark is a good checkpoint. Look at your scalp. If the twists are still tight and your scalp feels clean and healthy, you’ve got another two weeks easily. If you’re noticing any itching that ACV rinse doesn’t fix, or if a few twists have come loose at the base, start planning your removal session.
Refreshing Your Marley Twists at the Midpoint
Around week three or four, even the best-maintained Marley twists start showing their age at the roots. This is normal. It doesn’t mean the style is failing. It means your hair is growing — about half an inch per month on average — and that new growth needs attention.
A root refresh takes about 30 to 45 minutes. Take down any twists that have come entirely loose at the base and re-twist them with a small amount of fresh Marley fiber. For roots that are still attached but showing frizz, apply a tiny amount of edge control or a lightweight gel directly to the new growth and smooth it down with a soft brush. Let it dry without touching it. The difference is immediate.
For the body of the twists, a light misting of water mixed with a drop of glycerin — just a few sprays, not a soak — revives the Marley fiber and makes it look fresher without requiring any product application. Shake each twist gently after misting to distribute the moisture and let them hang to dry in a warm room.
Don’t skip this midpoint maintenance step. It’s the difference between a style that looks great for six weeks and one that looks worn out by week four.
Accessorizing Marley Twists

Marley hair twists are a natural home for accessories. The coarse texture grips beads, cuffs, and wraps in a way that smooth extension hair doesn’t — they stay put without sliding down the twist length throughout the day.
Gold spiral cuffs slid onto individual twists add a warm, deliberate detail. Cowrie shells knotted into the tips of shorter twists give the ends weight and movement. Wooden or clay beads threaded onto specific twists before you seal the ends become permanent fixtures of the style. Thin copper wire wrapped tightly around a section of two or three twists creates a bundled, sculptural detail that you see in traditional adornment across West Africa.
Thread is another option that gets overlooked. Take a contrasting color of thread — deep red against black twists, gold against dark brown — and wrap it tightly around one or two twists for about two inches. The color pop is subtle up close but visible from across the room when the twists move.
One thing to watch: heavy beads on very long twists add weight at the ends and can pull the twist tighter at the root than intended. Keep bead accessories toward the middle or upper portion of the twist if your twists are shoulder-length or longer.
Styling Marley Twists for Different Occasions
Marley twists are more versatile than they get credit for. The assumption is that they’re a casual style — and they absolutely are. But they work in professional settings, formal events, and everything between when you know how to manipulate them.
For a professional or formal look, gather the twists into a low bun or a French roll at the nape. The structure of the bun reads as deliberate and polished. The Marley texture adds richness to the gathered shape. Use a few bobby pins hidden inside the bun to keep it secure all day, and apply a light-hold edge control along the hairline for a clean front edge.
For casual days, half-up works perfectly — gather the top layer of twists into a high bun with a scrunchie and let the rest hang loose. Or wear all your twists forward, piled over one shoulder in a side-swept cluster. Or simply shake them loose and let them do what they do naturally.
For special occasions — events, celebrations, anything that calls for a bit more drama — try the crown braid approach: wrap a row of twists from the front hairline all the way around the head and secure them at the back, leaving the remaining twists hanging below the crown. It takes about ten minutes and adds a formal, structural element to the style without requiring any additional products or tools.
Post-Removal Care for Your Natural Hair
The weeks immediately after removing a long protective style are some of the most important for long-term hair health. Your natural hair has been in a relatively static state — protected, minimally manipulated — and it needs to be eased back into active care, not shocked by aggressive styling right away.
Start with a thorough detangling session on dry hair before washing. This removes the shed hairs that accumulated during the wear period without the friction of wet detangling. Work through the hair in small sections with your fingers first, then follow with a wide-tooth comb from ends to roots.
Wash with a moisturizing sulfate-free shampoo. Don’t use a clarifying shampoo at this point — your hair has likely been a bit product-deprived during the protective period and needs moisture, not stripping. Lather twice, rinse thoroughly.
Deep condition for at least 30 minutes with a heavy, rich conditioner under a plastic cap and a warm towel or hooded dryer. Your hair is going to drink this up. The hair strands that were locked away for weeks emerge slightly more dehydrated than normal — the deep conditioning treatment is non-negotiable.
Give your hair a week or two of simple, loose styles before going into another protective installation. Wash-and-go styles, twist-outs, and puffs are all good options during this recovery window. Your scalp benefits from breathing, your follicles benefit from the gentle manipulation, and your strands benefit from regular moisture exposure without the restriction of extension hair.