Protective styles for afro natural hair aren’t a trend I picked up from a magazine. They’re the reason my ends are still attached to my head after years of manipulation, color, and the occasional bad decision involving a flat iron. Coily and kinky textures need tucking, shielding, and gentle handling — not because the hair is weak, but because every tiny curl is a miniature stress point waiting to snap if you look at it wrong.
The thing is, most people slap on a wig or grab some knotless braids and call it a day. And those can absolutely be protective. But there are so many more options, and the right one depends on your length, your edges, your schedule, and honestly, your patience.
I’ve worn almost every style on this list. Some saved my hair. A few made it worse — and I’ll tell you which ones and why. Let’s get into it.
What Makes a Style Actually Protective
A protective style has one job: keep your ends tucked and your strands from rubbing against each other, clothing, or pillowcases for days at a time. That’s it. A ponytail with your ends hanging out is cute, but it’s not protective. Neither is a twist-out you refresh every night with water and leave-in.
The real metric is tension plus ends. Low tension on the scalp, ends completely hidden or coated. Styles that pull your hairline tight while exposing your ends fail on both counts, which is why some “protective” looks actually break hair faster than leaving it alone.
A good protective style should let you forget about your hair for at least a week. You moisturize the scalp, maybe spritz a little water mix, sleep on satin, and go about your life. If you’re constantly retouching and restyling, it’s defeating the purpose.
Prepping Your Hair Before Any Protective Style
Prep is where most people rush and then wonder why their scalp hurts by day two. I don’t skip any step here, and I’ll tell you why once so I don’t have to repeat it inside every single entry below.
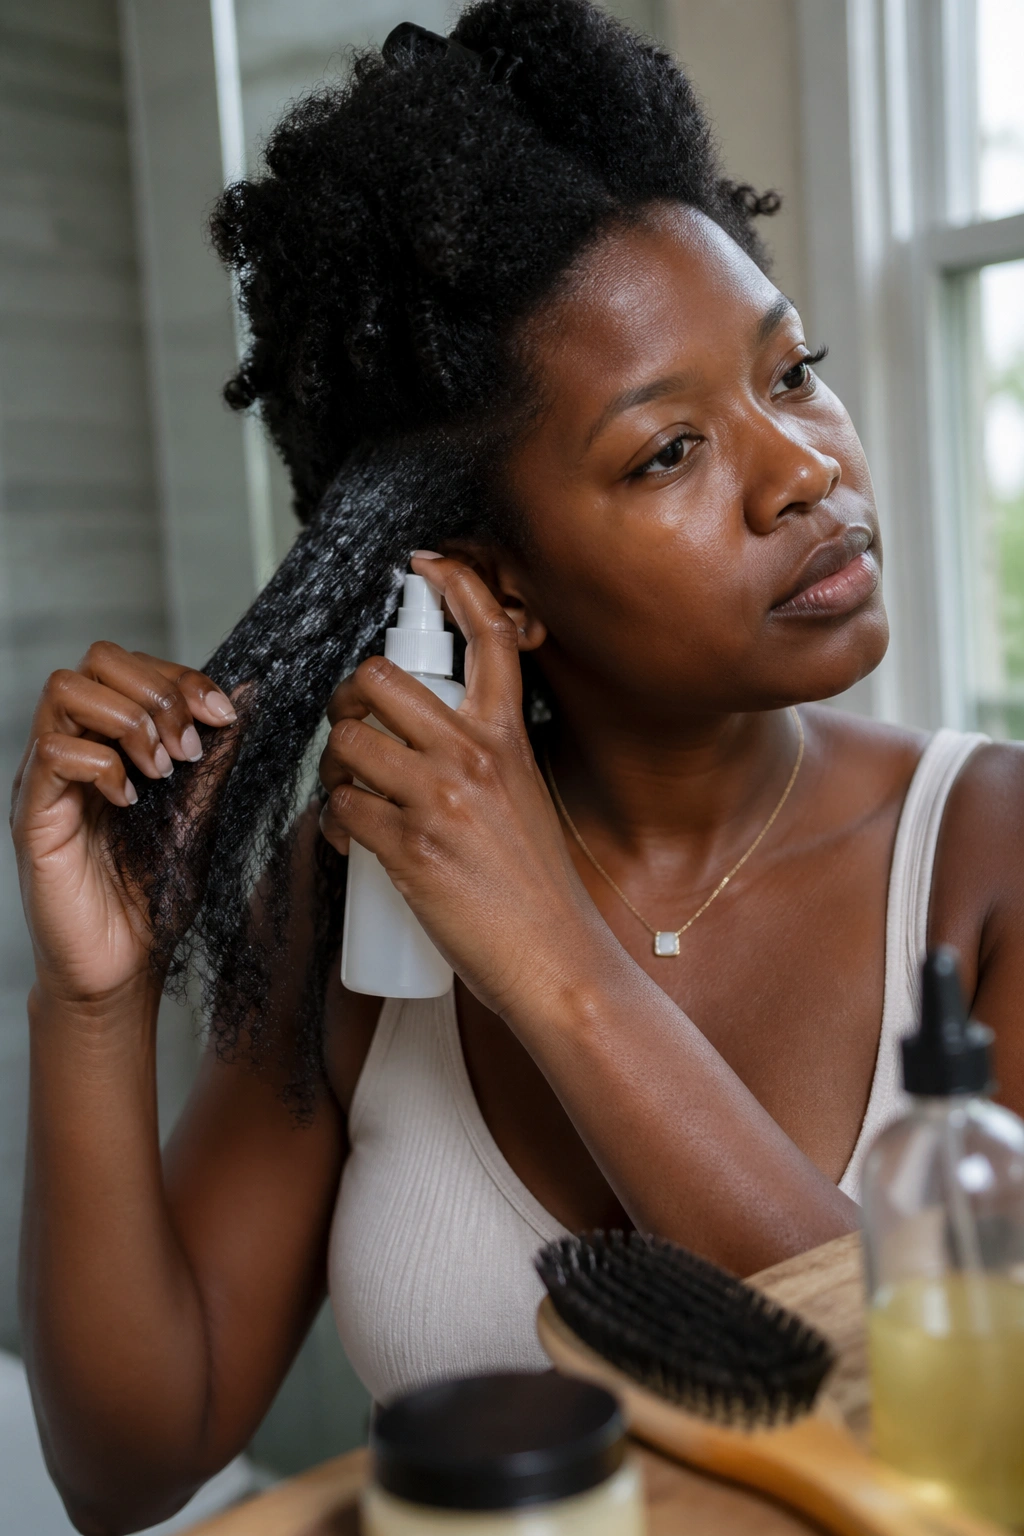
Clarify first. A clarifying wash strips old product buildup so your follicles can breathe while the style is in. Then deep condition with heat — a plastic cap and twenty minutes under a dryer or warm towel. This is not optional if you want the style to last without your hair feeling straw-dry when you take it down.
Blow dry on cool or low, or stretch with braids overnight. Detangle thoroughly from the ends up, section by section. Moisturize with a light leave-in, then seal with an oil your hair actually likes. Mine is grapeseed. Yours might be jojoba or avocado. Experiment.
One more thing. Trim visibly damaged ends before you install. You’re about to hide your hair for two to eight weeks. Anything frayed will fray worse under the style.
Tools and Products That Actually Matter
You don’t need twelve products. You need about four that work.
- A wide-tooth comb or detangling brush
- A water-based leave-in (not a heavy butter)
- A sealing oil
- A light edge control — only if you’re using it, skip otherwise
For installation, a rat-tail comb for parting, small clear elastics, hair clips to separate sections, and a handheld mirror. That’s the kit. Anything else is optional.
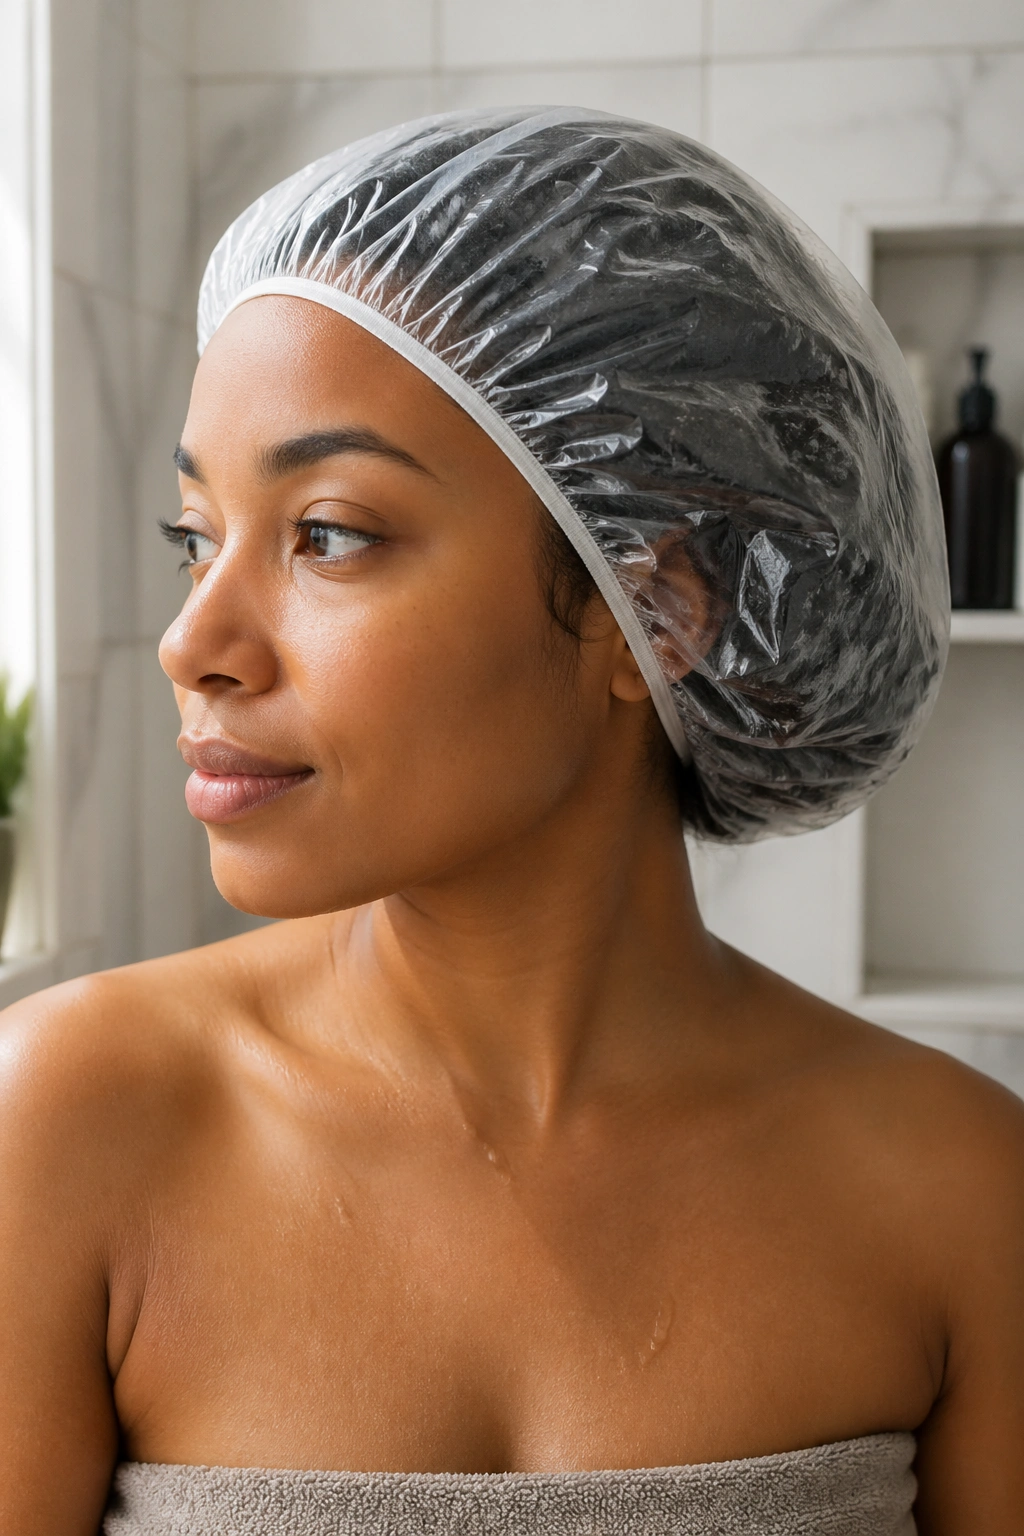
Satin is the non-negotiable. A satin bonnet at night, a satin or silk pillowcase as backup, and a satin scarf for quick tying when you need it. Cotton will wick moisture out of any protective style overnight — I don’t care how good the style looked on day one.
How Long Protective Styles Should Actually Last
Six to eight weeks max for installed styles. Most stylists push ten. I don’t, and here’s the honest reason: after week six, the new growth at your roots starts matting with the loose shed hair that would’ve naturally fallen out. When you take the style down, you get knots. Those knots cause breakage. That breakage is the reason people say protective styles damaged their hair.
They didn’t. The extra-long install did.
For styles using your own hair only — mini twists, flat twists, Bantu knots — I rotate every two to three weeks. You can go longer, but I start to get bored, and bored fingers pick at hair.
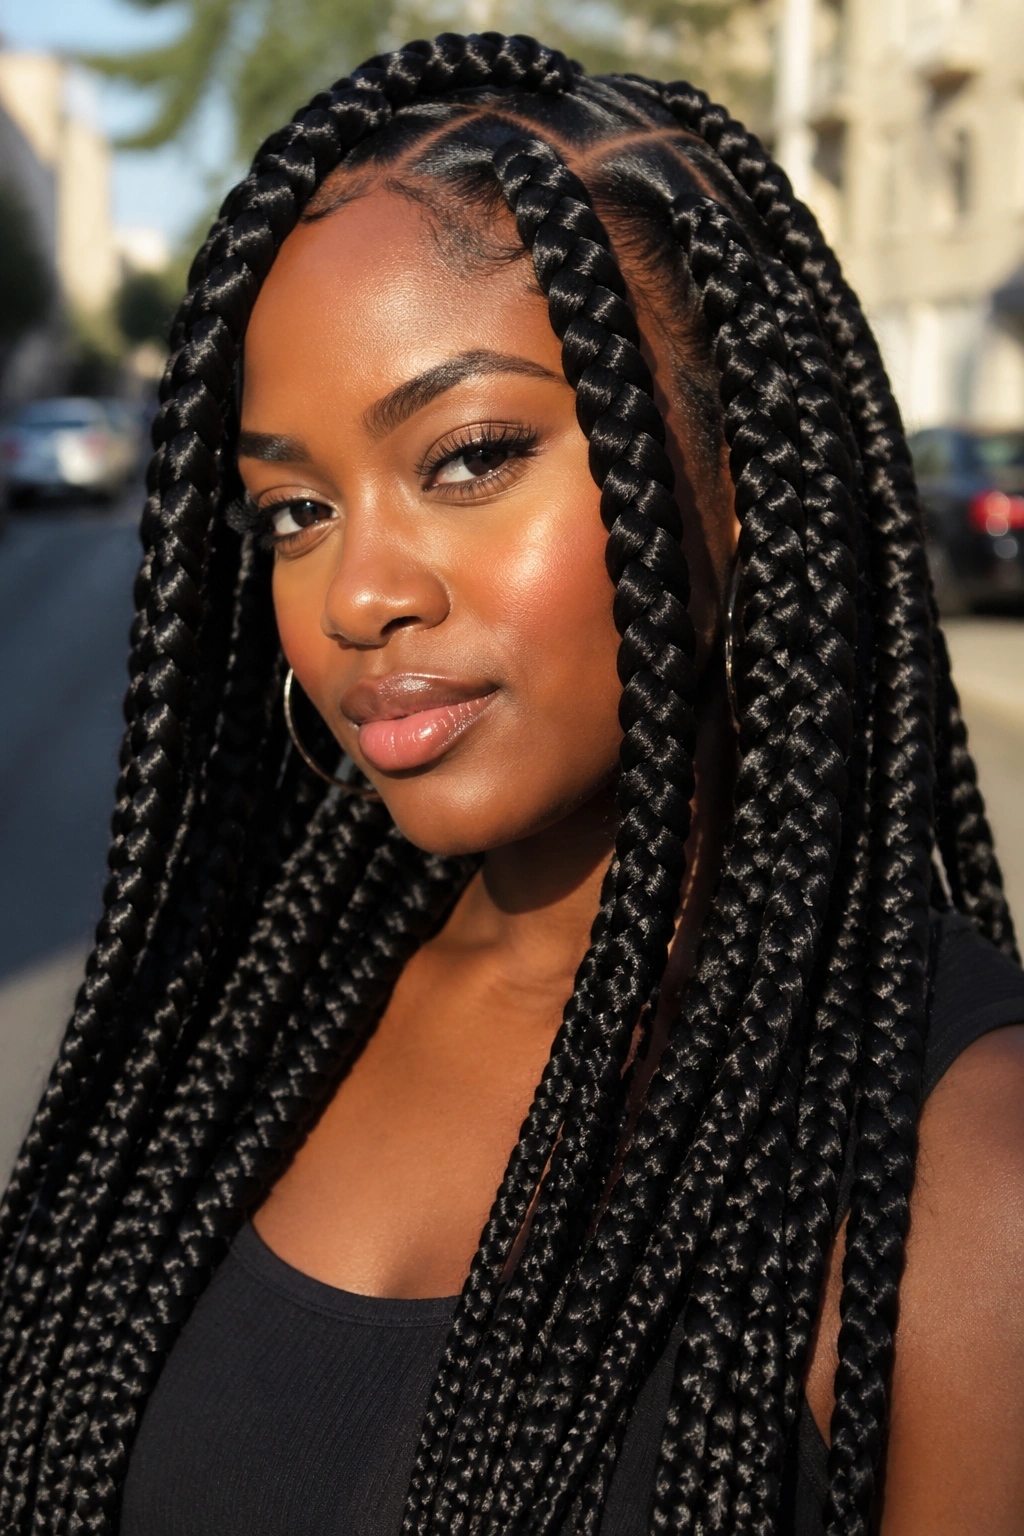
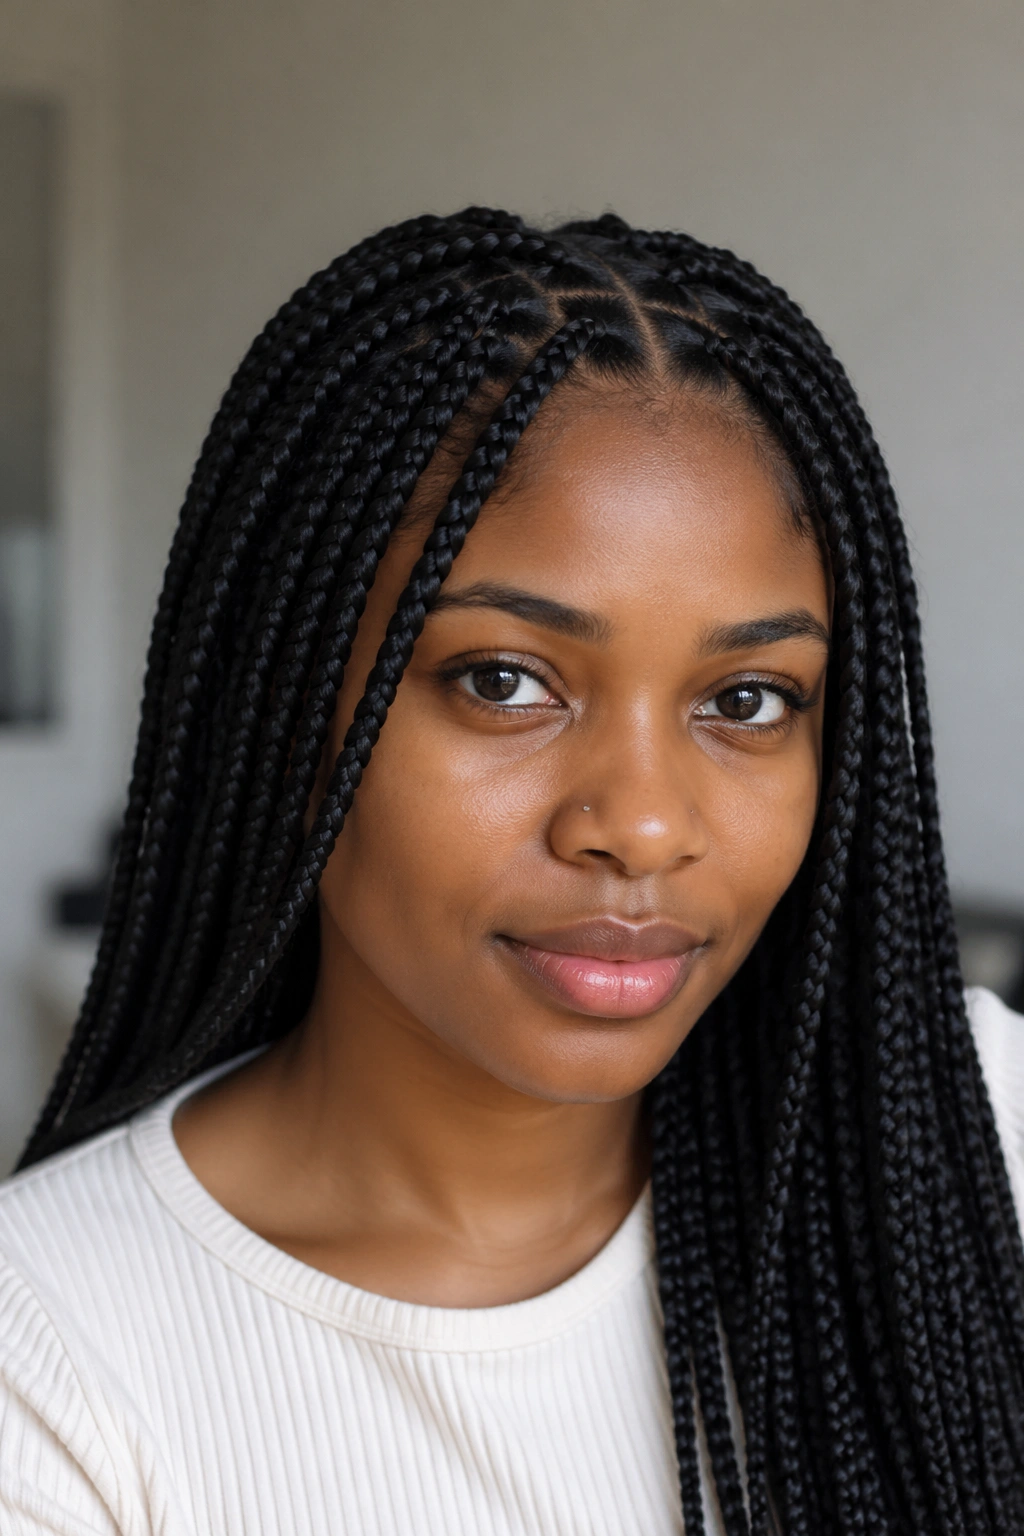
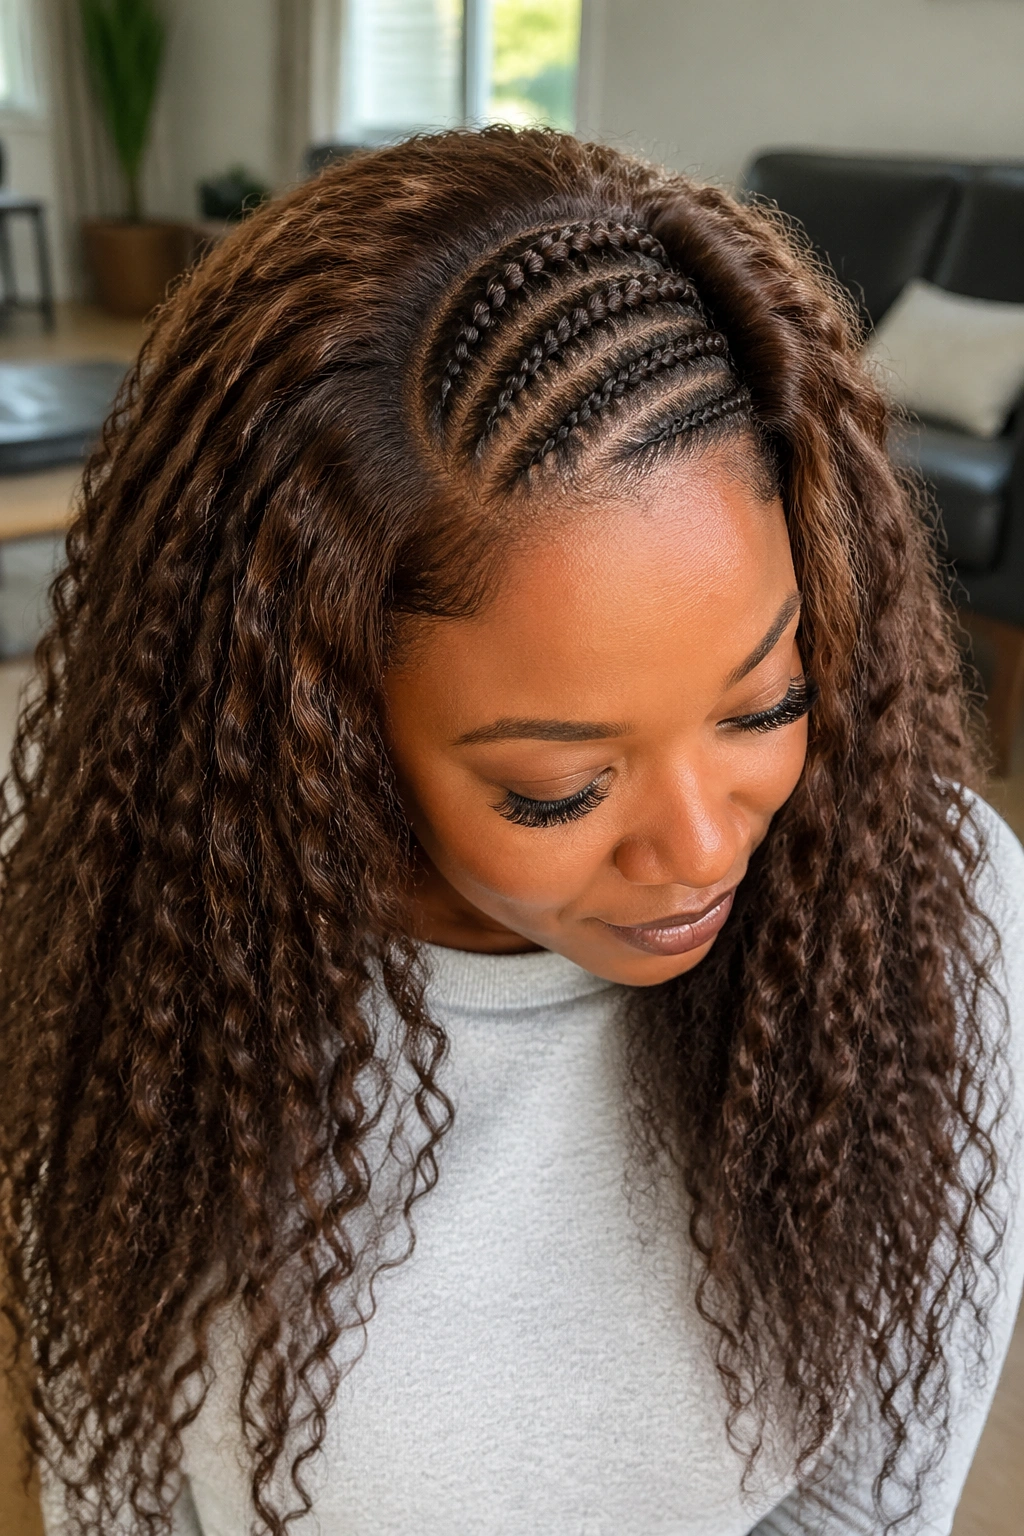
1. Knotless Box Braids
Knotless box braids changed the game. No bulky knot at the base, so you get the same length and versatility as regular box braids but without that first-week headache when the tension makes you want to cry.
Why They Work So Well
The stylist starts with your own hair, then feeds in the extension strands gradually. This means zero tension at the root, and the braid lays flat against your scalp instead of sticking out awkwardly for the first three days.
- Install time: usually 5 to 8 hours depending on size
- Wear time: 6 weeks comfortably
- Best for: people with sensitive scalps or edges prone to thinning
- Parting: medium square sections, around 1.5 inches across
Tip from experience: Ask for medium or jumbo, not micro. Micro knotless looks gorgeous but the takedown will eat your Saturday.
2. Halo Braid with Natural Hair
Unlike box braids that hang down, a halo braid wraps around the crown in one continuous rope. It’s the kind of style that makes your whole face look pulled together without a single extension.
What’s different is that everything stays on your head — no tail, no hanging pieces catching on jackets or shirts. It’s the most practical option I know for anyone who works with their hands, plays sports, or just can’t stand hair in their face.
Start with damp, stretched hair. Part down the middle, then begin a two-strand braid along your hairline on one side, feeding in hair as you move around the crown. When you reach the end, tuck the tail under the opposite side and pin.
Best for: medium-length natural hair, 8 inches or longer when stretched. Shorter than that and the wrap won’t reach.
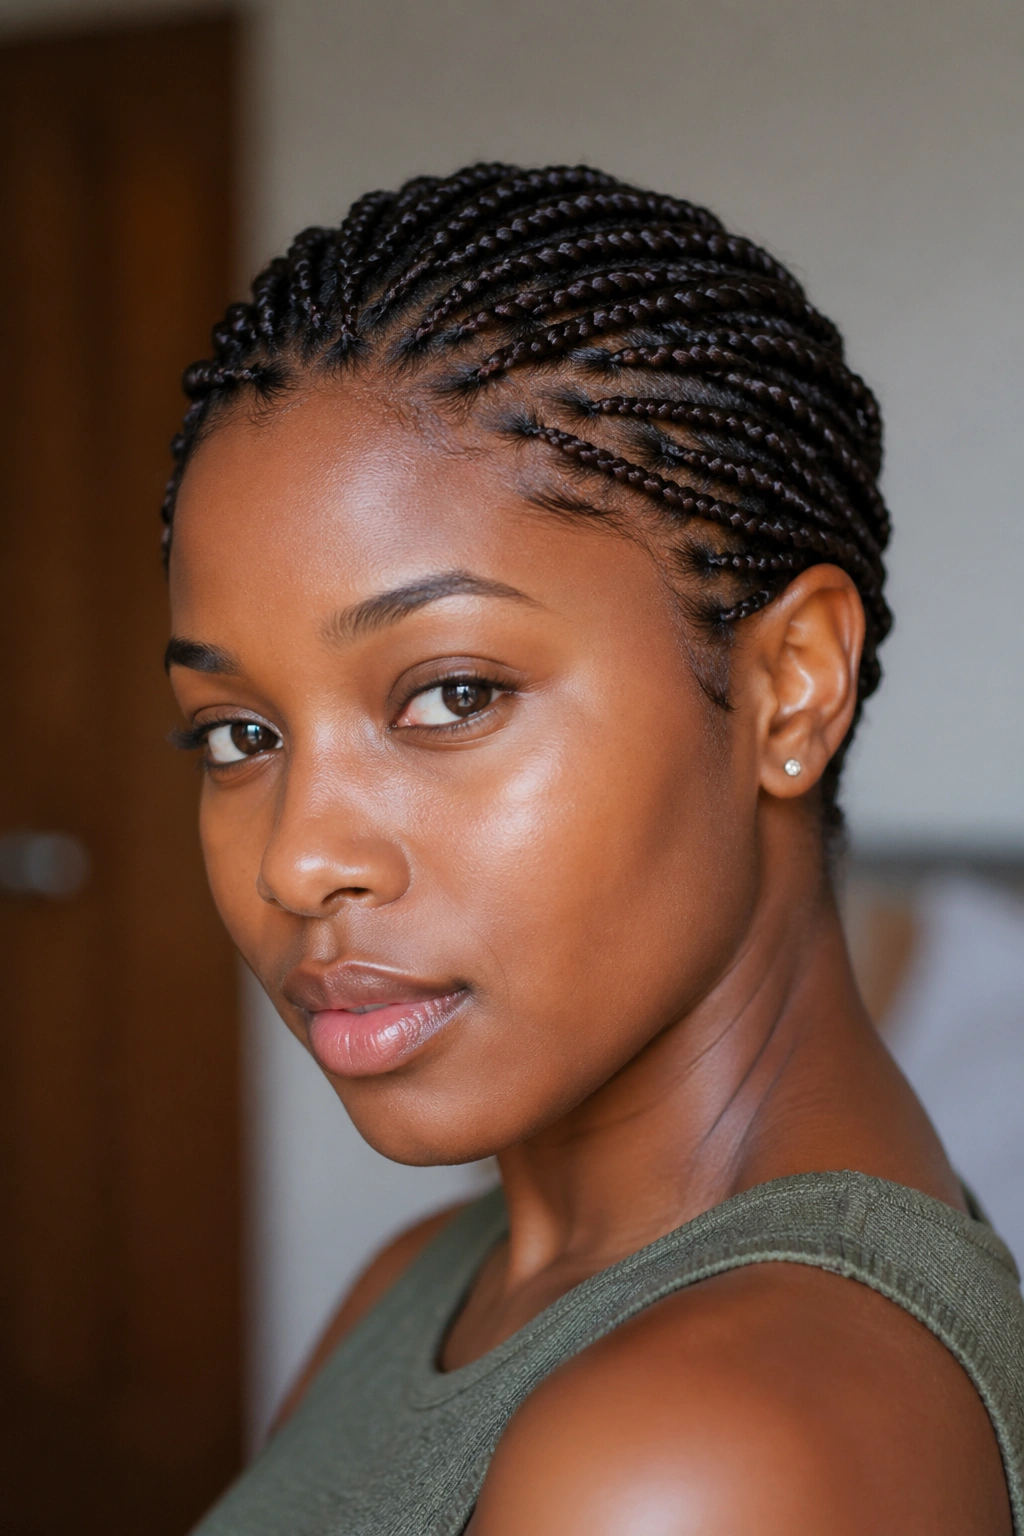
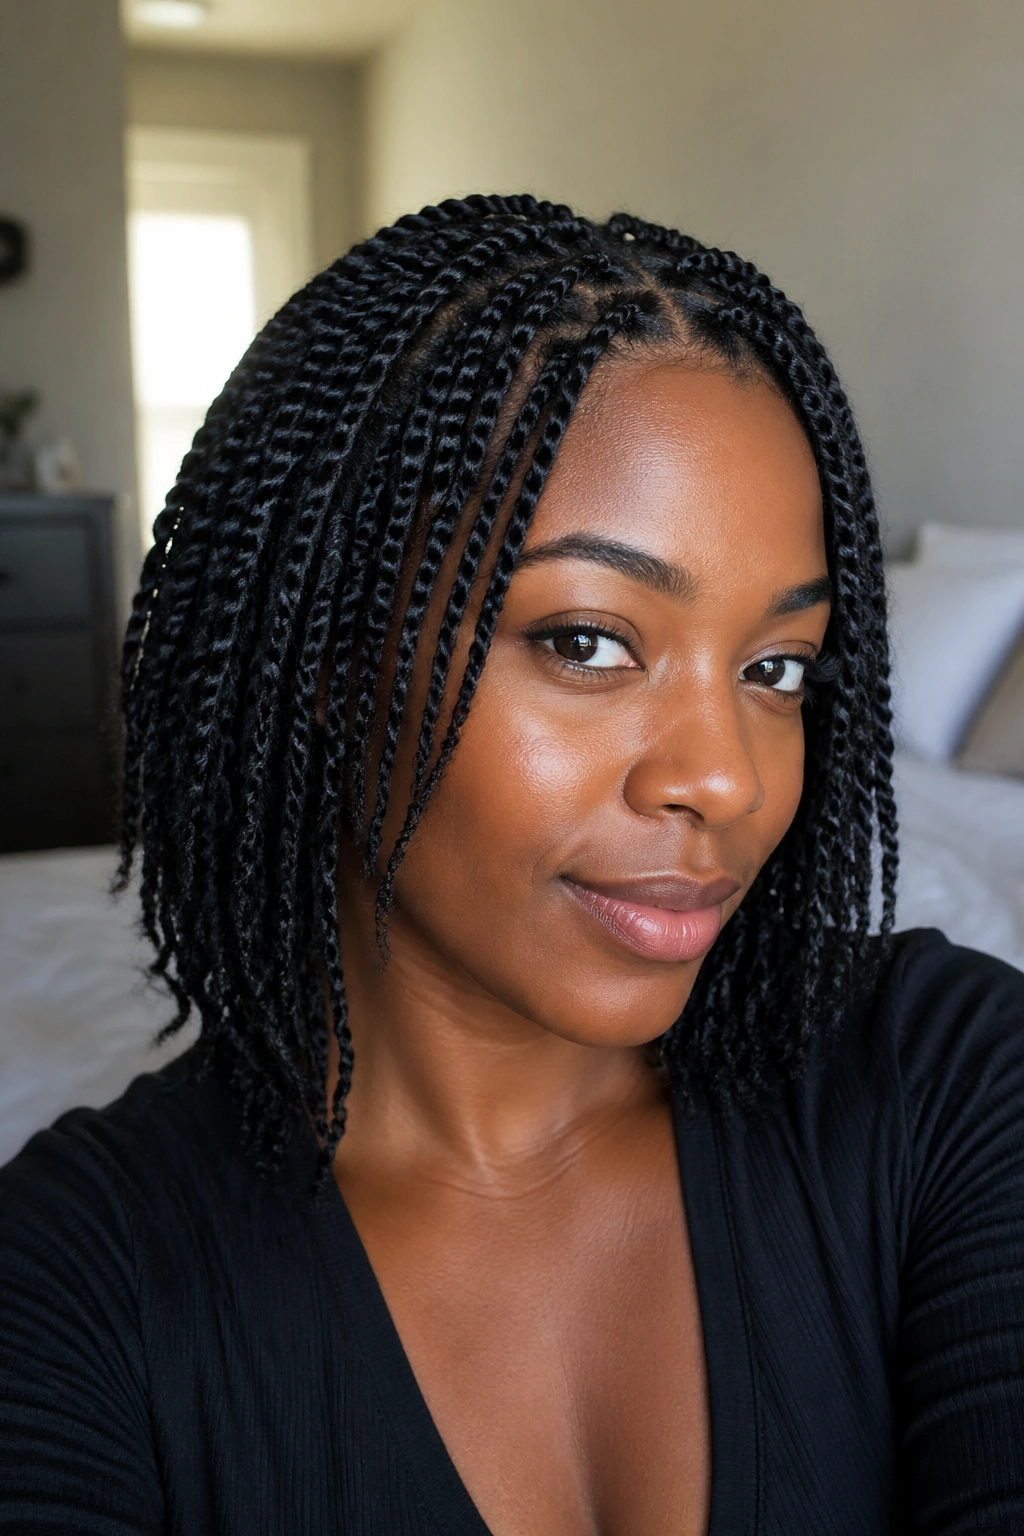
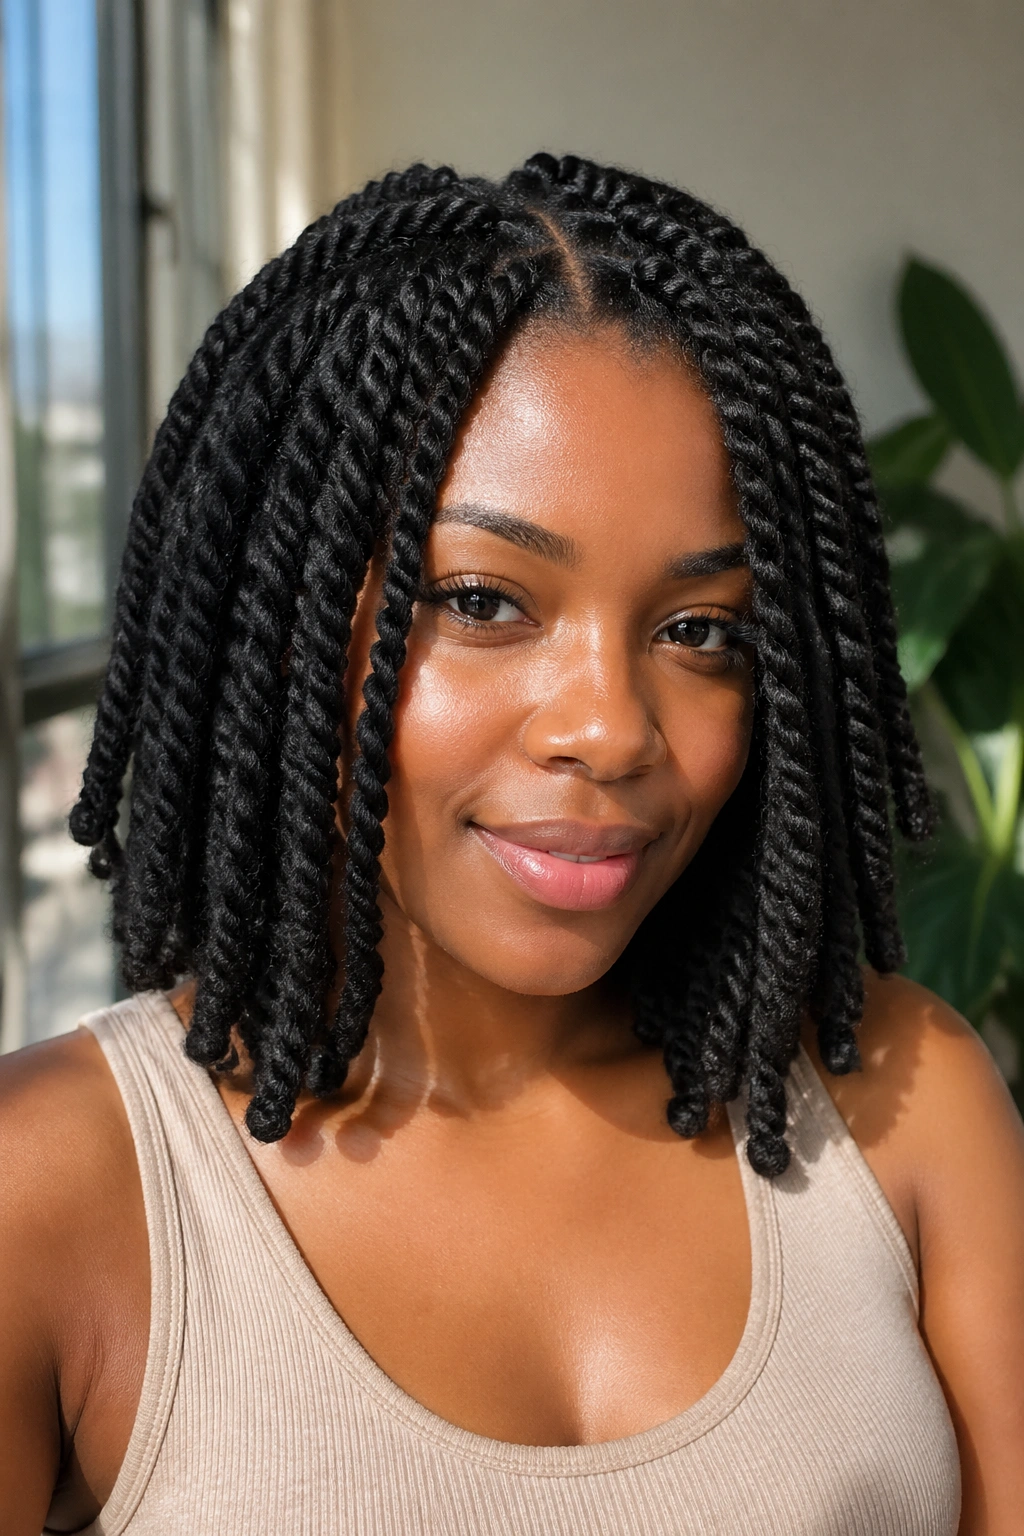
3. Mini Twists on Stretched Hair
Mini twists are exactly what they sound like — small two-strand twists done on your own hair, no extensions. They’re incredibly low-manipulation once installed, and the takedown twist-out is one of the best curl patterns you can get.
I do these on freshly washed, stretched hair every few months. Takes me about four hours for shoulder-length hair. I section into small 1-inch squares and two-strand twist from root to tip, no added product beyond what I put on during wash day.
Here’s the catch: mini twists can unravel at the ends on very loose curl patterns. A tiny bit of flaxseed gel smoothed on the last inch fixes this. Don’t use rubber bands — they’ll cause breakage at the tip.
Wear time is around three weeks for me. After that, the new growth makes them puff out and I prefer the full takedown look over a retouch.
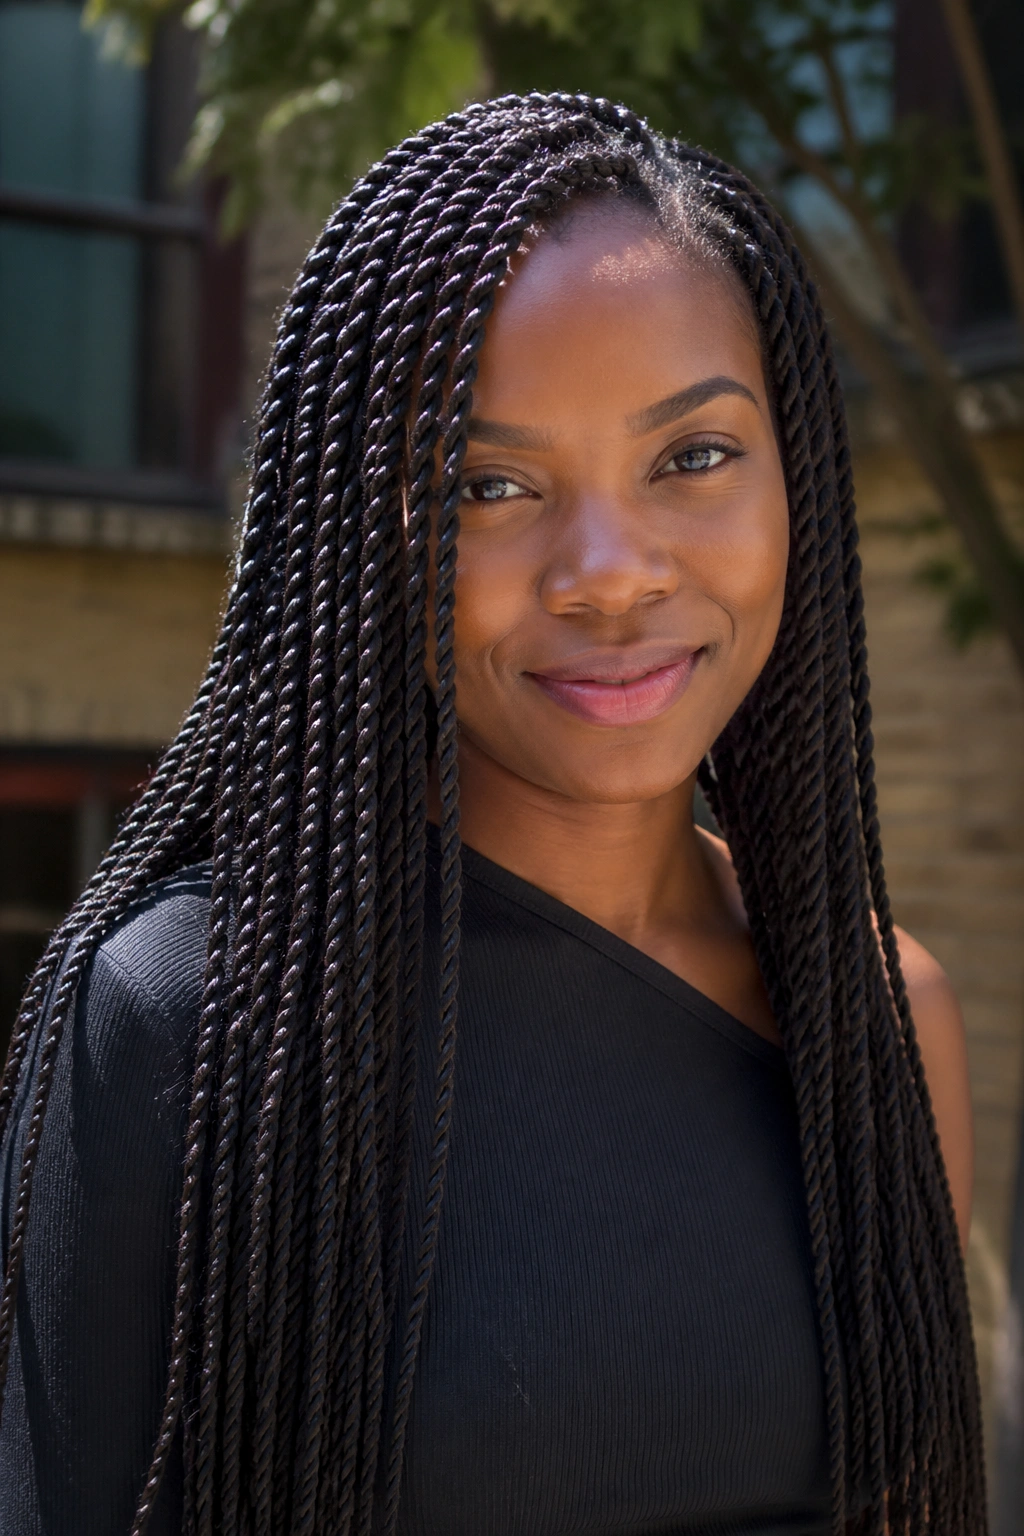
4. Senegalese Twists
Senegalese twists use synthetic hair (typically kanekalon) twisted into two-strand rope sections. They look sleeker than box braids and move differently — there’s a smooth, silky drape to them that braids don’t have.
The install is faster than box braids, maybe 4 to 6 hours, because twisting is quicker than a three-strand plait. The downside is they can unravel at the base if your stylist doesn’t anchor them well, especially in humidity.
For moisture, I mist with a rose water and glycerin mix every few days. Too much water and the synthetic hair frizzes up at the base — there’s a balance. Sleep in a satin bonnet. Always.
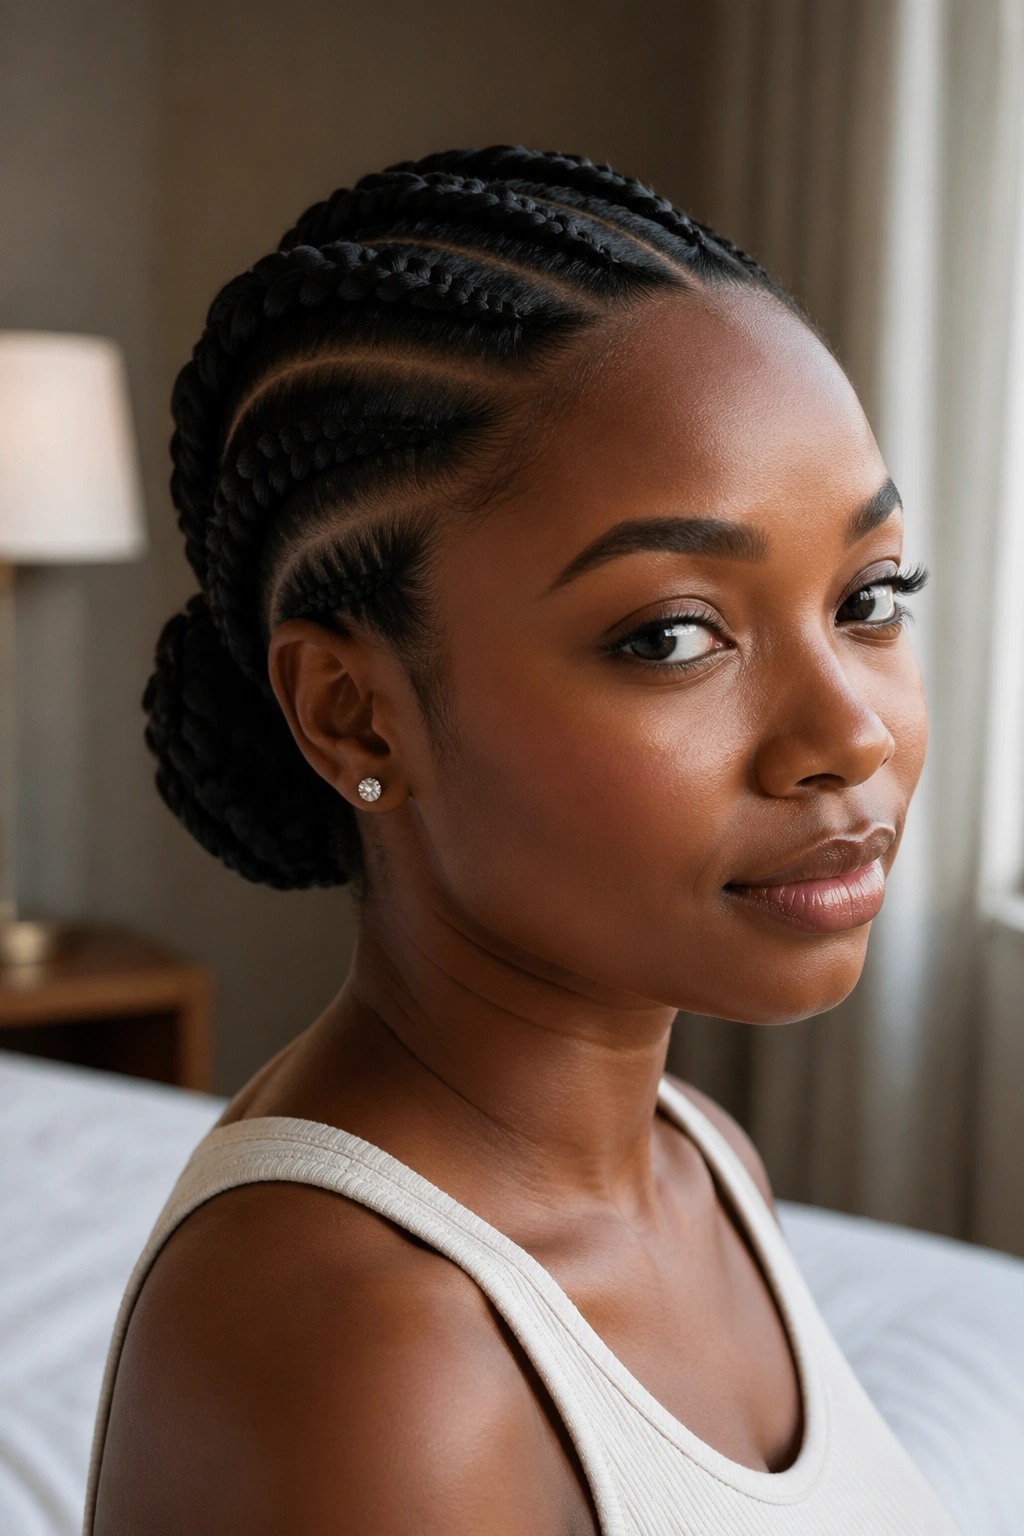
5. Flat Twists to the Back
A flat twist pressed against the scalp the whole way back, usually in straight rows. Simple, fast, and one of my favorite styles for wash-and-go weeks when I don’t want to commit to anything elaborate.
Is it fancy? No. Does it take forty-five minutes start to finish? Yes. Does it last a full week with a bonnet? Absolutely.
How to Use It
Part into six to eight sections running front to back. Starting at the hairline, take two small strands and twist them over each other, adding hair from the scalp as you go — like a cornrow but with two strands instead of three. Finish at the nape with a small elastic or a twist-and-tuck.
Best worn with earrings that draw attention up toward the crown. Also a perfect base for a wig day if you want a flat install.
6. Faux Locs (Crochet Method)
Faux locs give you the aesthetic of locs without the years of commitment. The crochet method uses pre-looped loc hair you pull through cornrows with a latch hook, and it cuts install time dramatically — I’ve done a full head in under three hours.
The hair itself is either synthetic or a wool blend. Wool feels softer and has a more matte finish, but it’s heavier. Synthetic is lighter, cheaper, and easier to find, but the shine can look artificial in photos.
A common mistake is installing them too tight at the edges. The loops only need to grip, not choke. If your scalp hurts by hour two of wearing them, something was done wrong during install.
Wear time: 4 to 6 weeks. After that the base gets fuzzy and you’re better off taking them down.
7. Marley Twists
Marley twists use Marley hair — a coarser, more matte fiber than kanekalon that mimics natural afro texture. When done well, they look almost like the twists you’d do on your own hair but longer and thicker.
I love these for people who don’t love the shiny finish of standard braiding hair. There’s a grounded, textured look to Marley that flat-out feels more like you.
Install is about 5 hours for shoulder-length. Pre-stretch the Marley hair (it comes in a big bushy bundle) by dipping the ends briefly in hot water so the tips seal. Two-strand twist as usual, anchoring at the root.
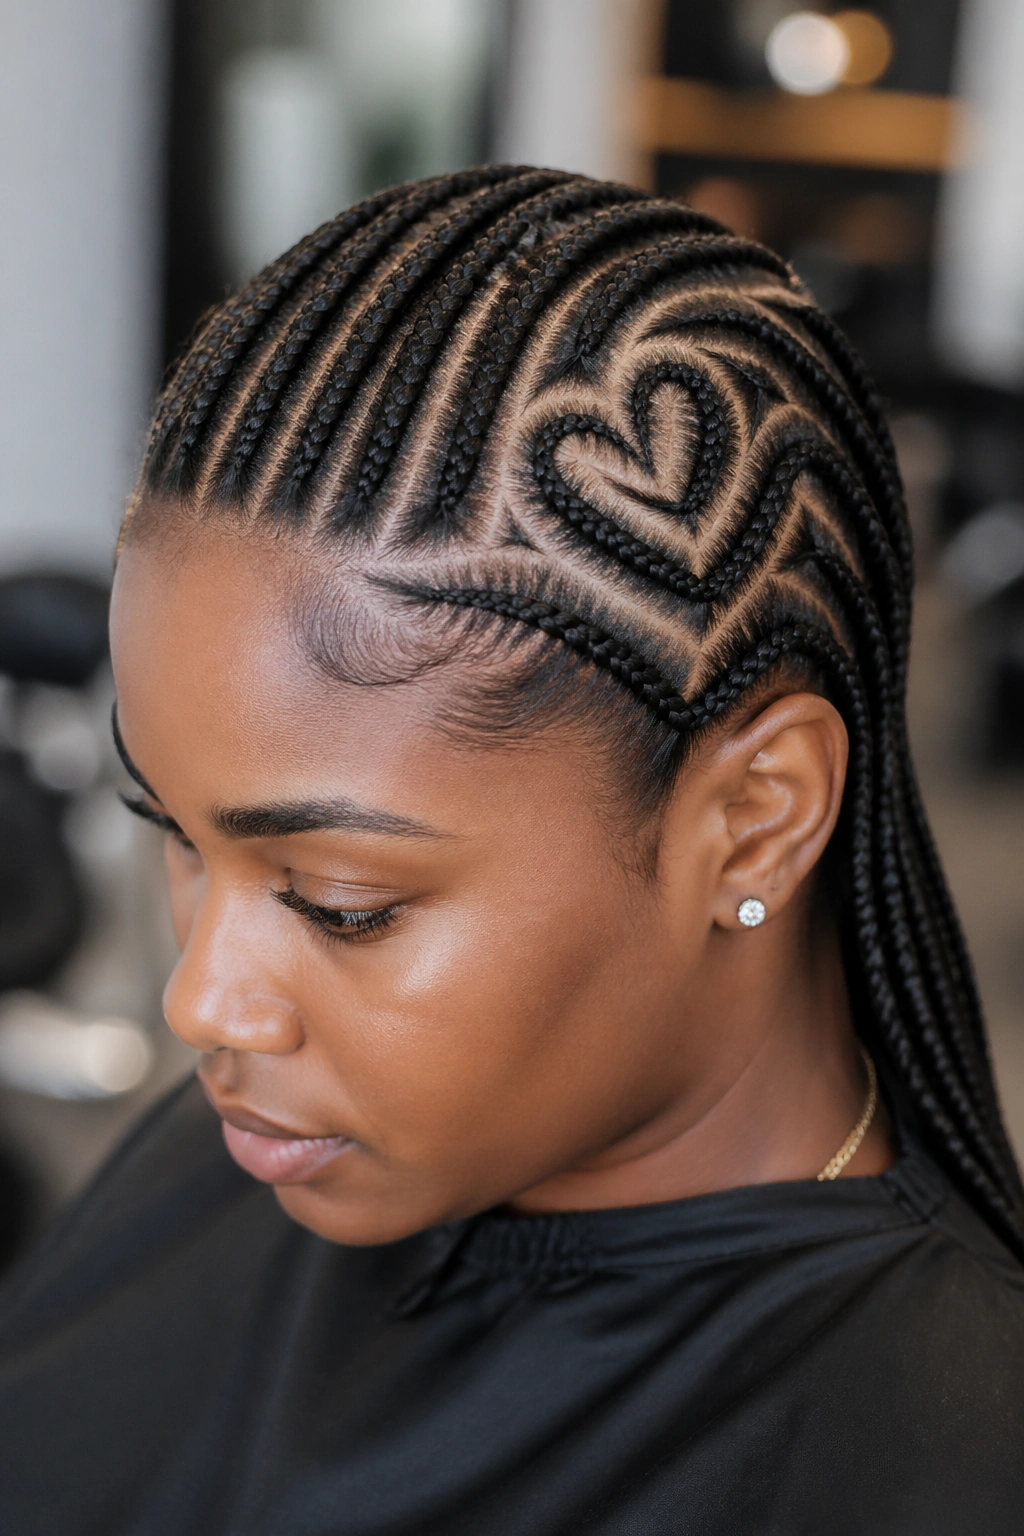
8. Cornrows with a Design
Cornrows are the old reliable. A good cornrower can do simple straight-backs in ninety minutes or an elaborate curved design in four hours. The style lies completely flat, which makes it perfect under a wig or on its own.
The design part is where cornrows get fun. Heart shapes, zigzag parts, curving lines that loop across the crown — these all take skill, so if you’re going this route, pay for a stylist who specializes. A straight-back is something you can do yourself with practice, but designs take years to master.
Keep them clean by scrubbing the scalp with a cotton ball dipped in witch hazel and tea tree oil twice a week. That’s honestly the trick to making cornrows last beyond three weeks without itching.
9. Two-Strand Twist Updo
A two-strand twist updo is what I reach for when I need to look polished and I only have an hour. You twist the hair wet or damp, let it partially dry, then pin the twists into whatever shape you want — a side bun, a crown, a faux mohawk.
The payoff is massive. Once you take it down later in the week, you get a twist-out with the volume and definition of a professional set. Two styles for the price of one.
The key is moisture control during the twisting stage. Too wet and the twists won’t dry by bedtime. Too dry and they won’t set. Aim for damp — like your hair felt thirty minutes after getting out of the shower.
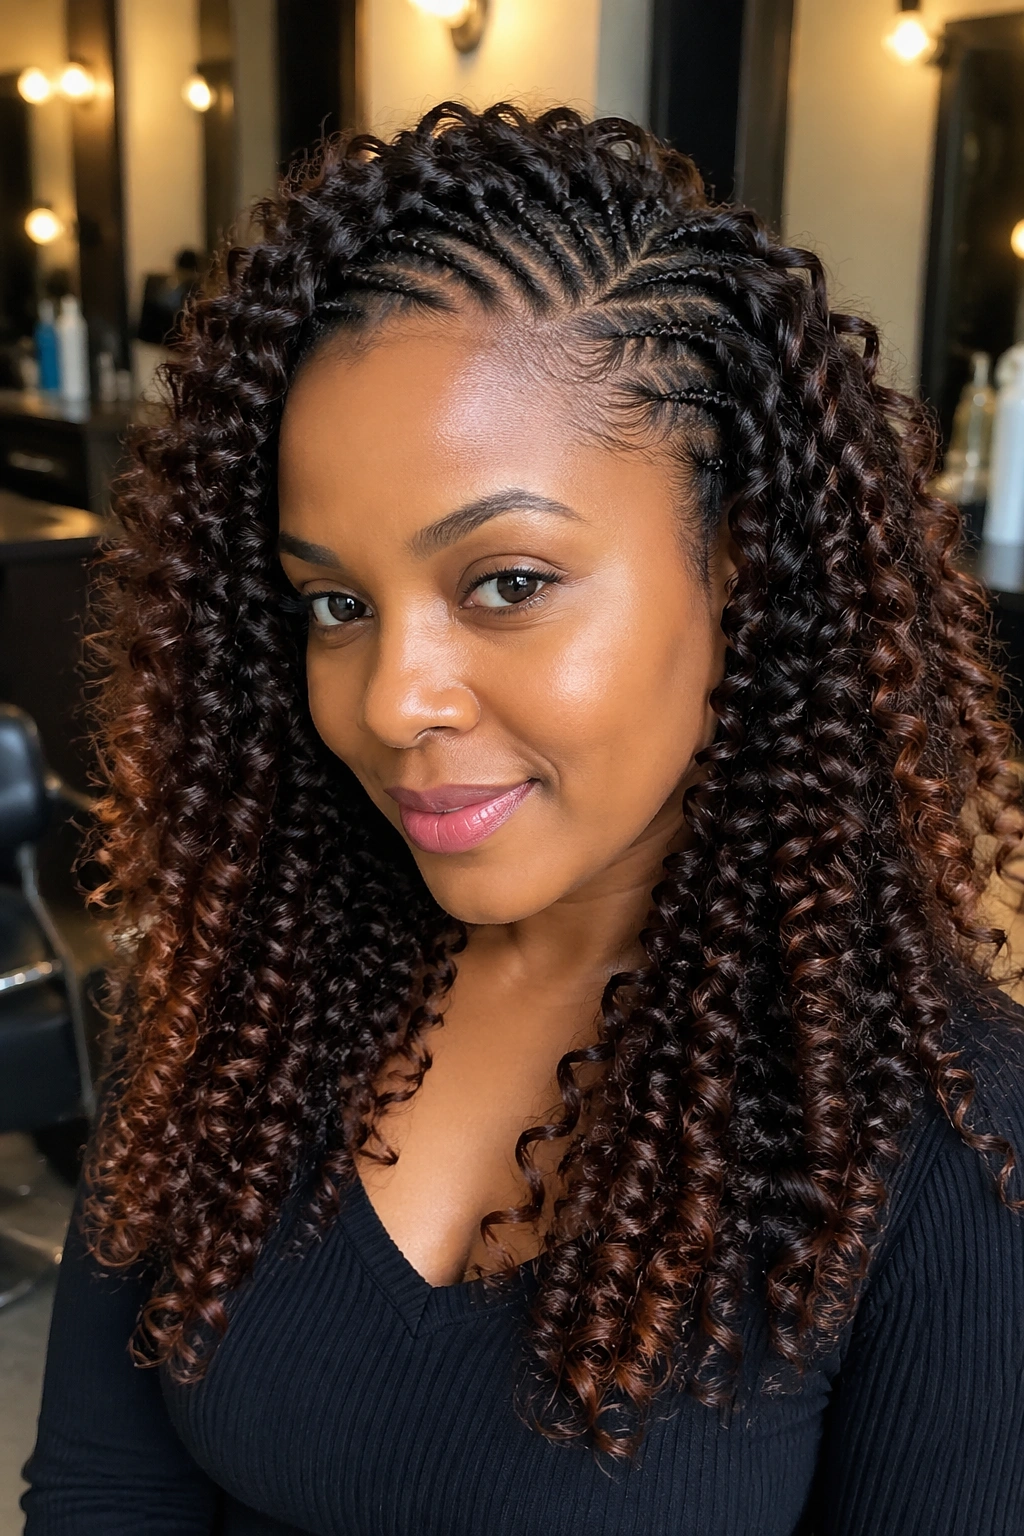
10. Crochet Braids with Curly Hair
A scenario: it’s a Wednesday, you have a wedding Saturday, and your hair has not been touched in ten days. Crochet braids with pre-curled hair solve this. You can have a full, curly install in about two hours.
The method is simple. Cornrow your natural hair into a flat base, take a crochet needle, and pull pre-looped hair extensions through the cornrow with a twist-and-lock motion. The curls spring back instantly, so the finished look is soft and voluminous without the multi-day commitment of individual braids.
- Hair to buy: 2 packs of curly crochet hair usually covers a full head
- Install time: 1.5 to 2.5 hours
- Wear time: 3 to 4 weeks
- Best for: last-minute events, new moms, anyone whose arms get tired
The catch is that crochet curls can matte at the nape if you sleep on them. Twist loosely before bed and bonnet up.
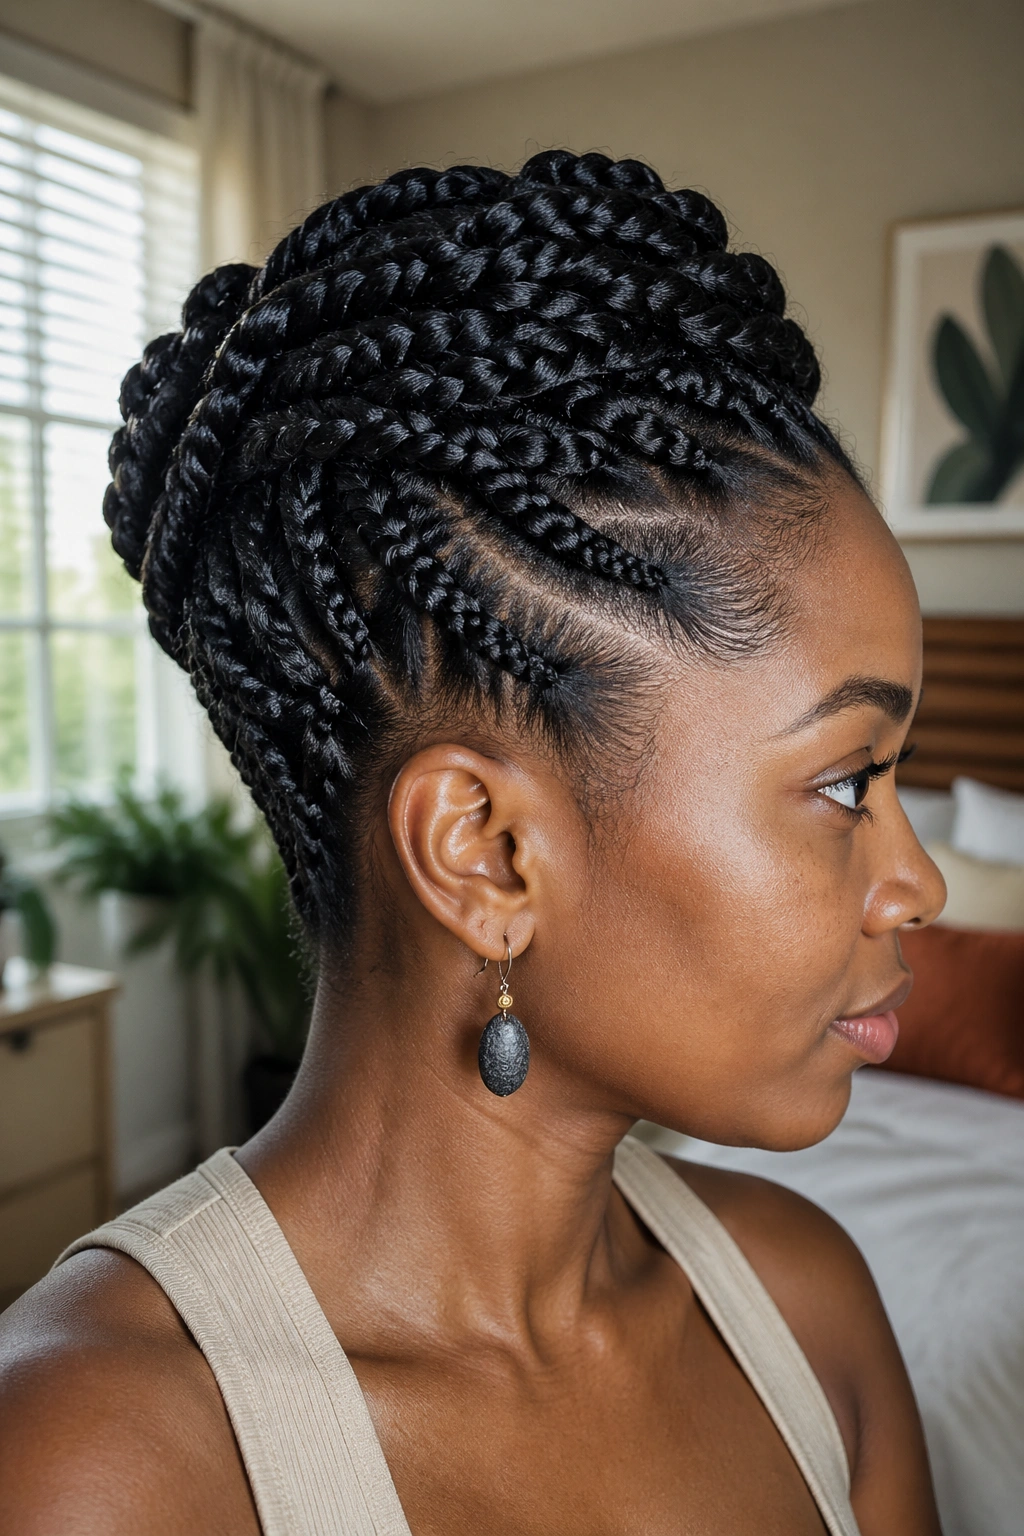
11. Goddess Braids
Goddess braids are thicker, chunkier cornrows, usually with added braiding hair for fullness. Instead of tight little rows, you get substantial braids that lay with presence — they’re the braid version of a statement necklace.
I like them in asymmetric patterns. Three or four big braids angled from one side of the hairline, curving toward the opposite ear and continuing into a low bun. The asymmetry photographs beautifully.
What surprises people is how little tension there is when goddess braids are done right. The size distributes pressure across a larger area, so your edges aren’t getting yanked like they would with micro cornrows.
12. Wig with Braided Base
What if you want to change up your look every other week without manipulating your real hair? A wig with a braided base is the answer.
You cornrow your hair flat, cover with a wig cap, then put on whatever wig you feel like wearing. Lace front, glueless, pre-styled — doesn’t matter. The braided base protects your real hair for weeks while you rotate wigs as often as you want.
Why This Beats Daily Restyling
- Your real hair stays in one state (the cornrow base) for the full duration
- You can be a pixie cut one day and waist-length the next
- Takedown is just unbraiding — no detangling extensions
- Rebraid every 2 to 3 weeks for scalp health
Tip from experience: Make your cornrow base flat and slightly snug, but not painful. A lumpy base shows through even a thick wig.
13. Jumbo Box Braids
Jumbo box braids are exactly what they sound like — box braids with sections about 2 to 3 inches wide instead of the usual 1 inch. The install flies. What takes 8 hours for medium box braids takes 3 for jumbo.
The tradeoff is that jumbo braids look less polished up close. Gaps between sections are more visible, the braids themselves are thicker and less intricate. From a distance, though, they’re stunning — big, bold, the kind of style people turn around to look at.
My rule: jumbo braids work better shoulder-length or longer. Super short jumbo braids can look stubby. Below the collarbone is the sweet spot.
14. Pixie Braids
Pixie braids are the opposite of jumbo — tiny, delicate, often fingertip-thin box braids that take an entire day to install but last forever. I’m talking 10, 12 hours in the chair, and I’m not exaggerating.
But then you wear them for two full months. Some people even get three.
I only recommend pixie braids for occasions where you know you want minimal hair management for a long time — a big travel stretch, a busy work season, a recovery period after a surgery or birth. They’re too much effort for a casual choice. When you do want them, though, nothing else comes close to the fine, delicate drape.
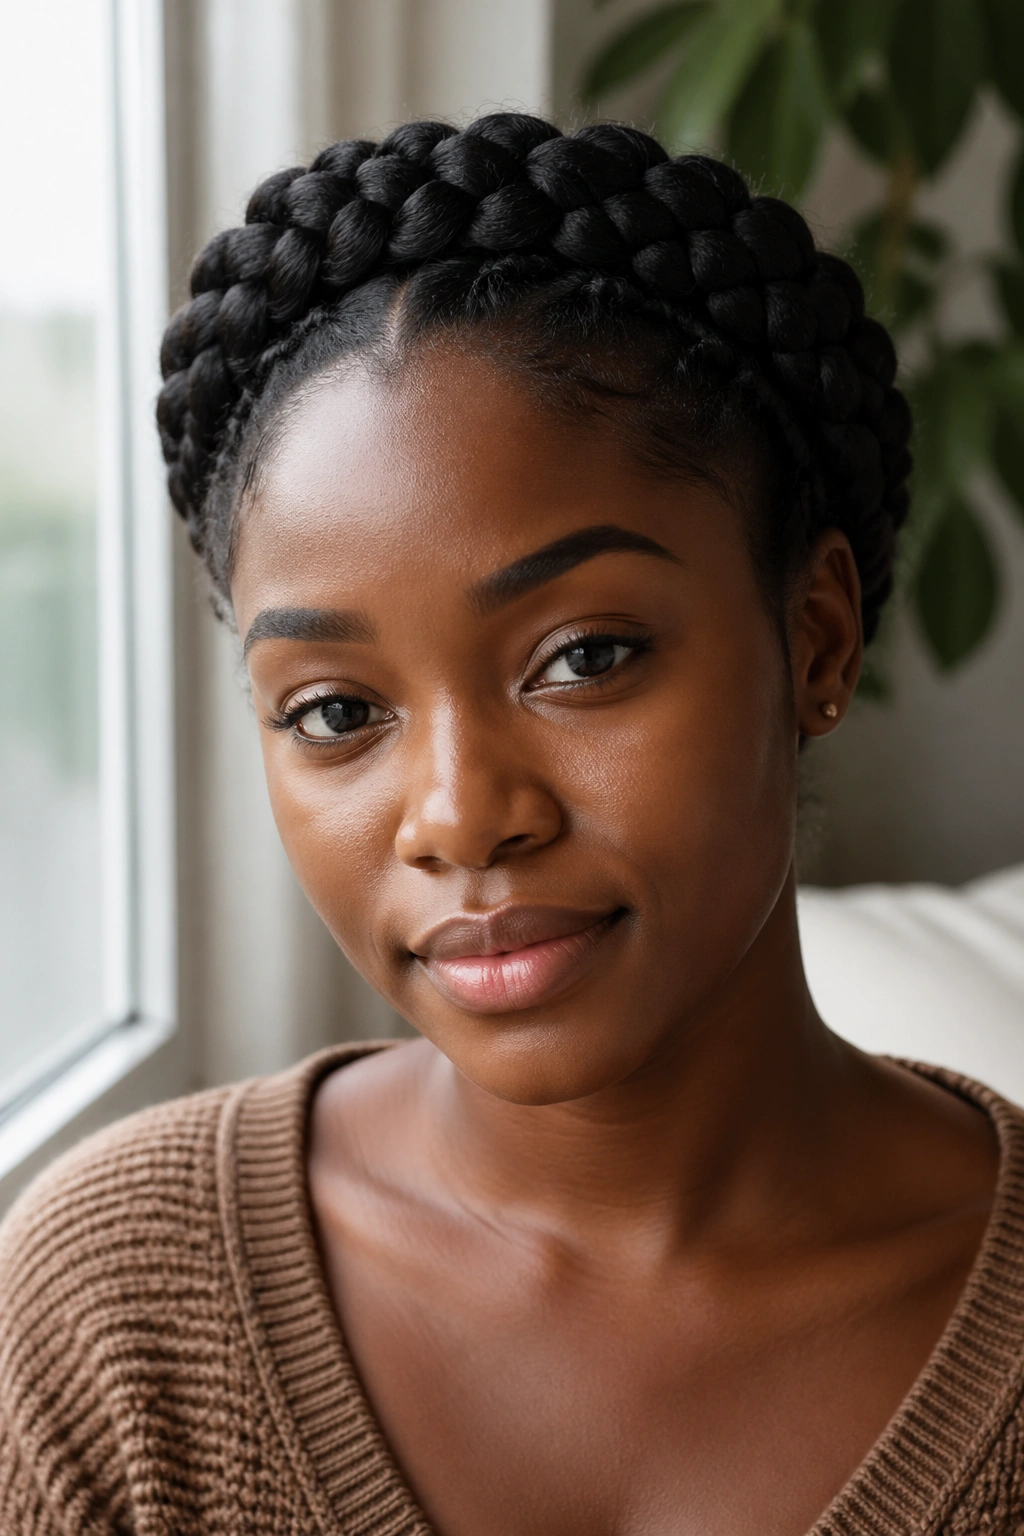
15. Stretched Bantu Knots
Bantu knots as a protective style (not a curling technique) means leaving them in for days, not just overnight. Done on stretched hair, you get a polished sculptural look that’s surprisingly wearable for work.
Part into small squares — maybe 1 to 1.5 inches. Twist each section into a rope, then coil the rope around its own base to form a knot, tucking the end underneath. Secure with bobby pins if needed.
Don’t try this on unstretched hair. The shrinkage will fight the coil and the knots will look lumpy.
Wear for 3 to 5 days, then take down for an incredible knot-out. Another two-for-one.
16. Halo Wig (No Glue, No Braid-Down)
Unlike traditional wigs that need a full cornrow base, a halo wig is designed to wear with minimal prep. Your natural hair sits in a low bun, a thin elastic band goes around your head, and the wig attaches to the band.
What’s different is the speed. Putting it on takes five minutes. No adhesive, no baby hair shaping, no wig cap. Take it off at night and your bun stays intact underneath.
Best for: people who want to wear a wig occasionally without committing to daily wig life. Also great for protective style beginners who aren’t ready for braids.
The limitation is style diversity. Halo wigs come pre-styled, and you can’t really change the cut or part dramatically. Pick one you love because you’re stuck with it.
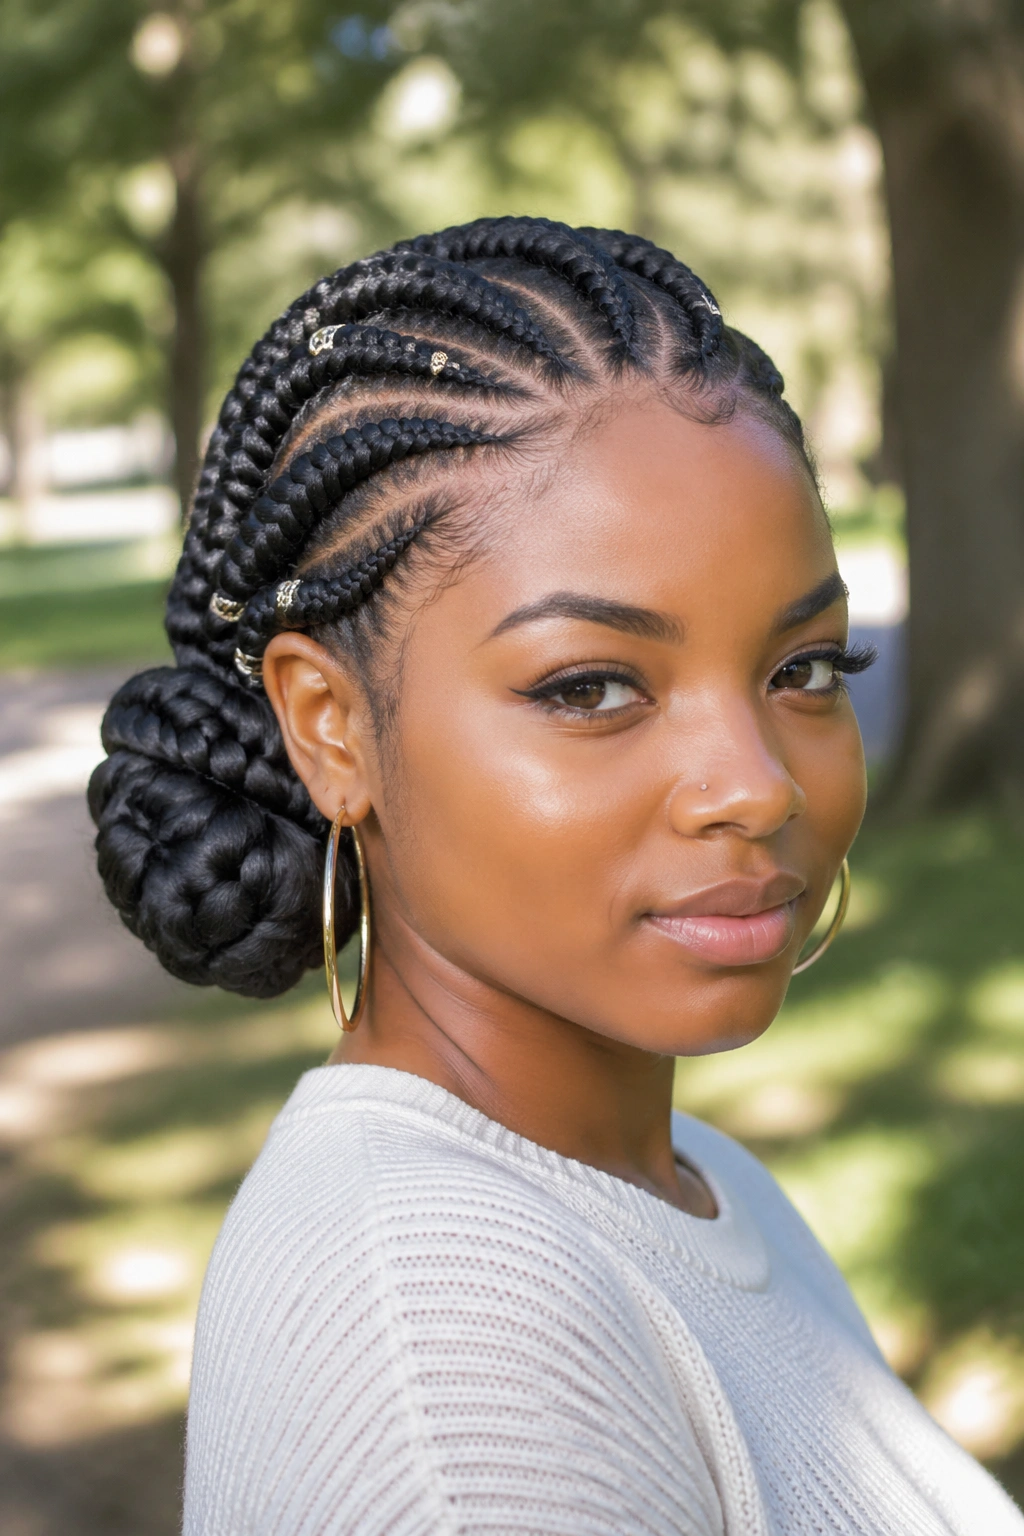
17. Tribal Braids with Beads
Tribal braids mix sizes — some thick, some thin, often arranged in specific patterns along the hairline, with cuffs or beads woven into the braids themselves. They’re showier than basic box braids and carry real cultural weight.
I get these when I want braids to feel like an event, not just a hairstyle. The small metal cuffs catch light when you move and they click softly against each other — there’s a sensory pleasure to them that surprises people who haven’t worn them before.
One thing to know: beads can pull at thin braids if too many are stacked on one section. Distribute them. Don’t load up the same braid with eight cuffs just because it looks cool in photos.
18. Updo with a Headwrap Base
Take a simple two-strand twist updo, then wrap a patterned scarf around the base, covering the crown and leaving the twists peeking out at the top. This combines low-manipulation styling with the visual drama of a headwrap.
The headwrap does triple duty. It hides any imperfections in the base, adds color that pops against any outfit, and protects your twists from friction when you move through doorways, headrests, and hugs.
Material matters. A stiff cotton scarf slides off all day. Satin or silk stays put and doesn’t wick moisture. A rayon-silk blend is the sweet spot — grippy enough to stay, slick enough to protect.
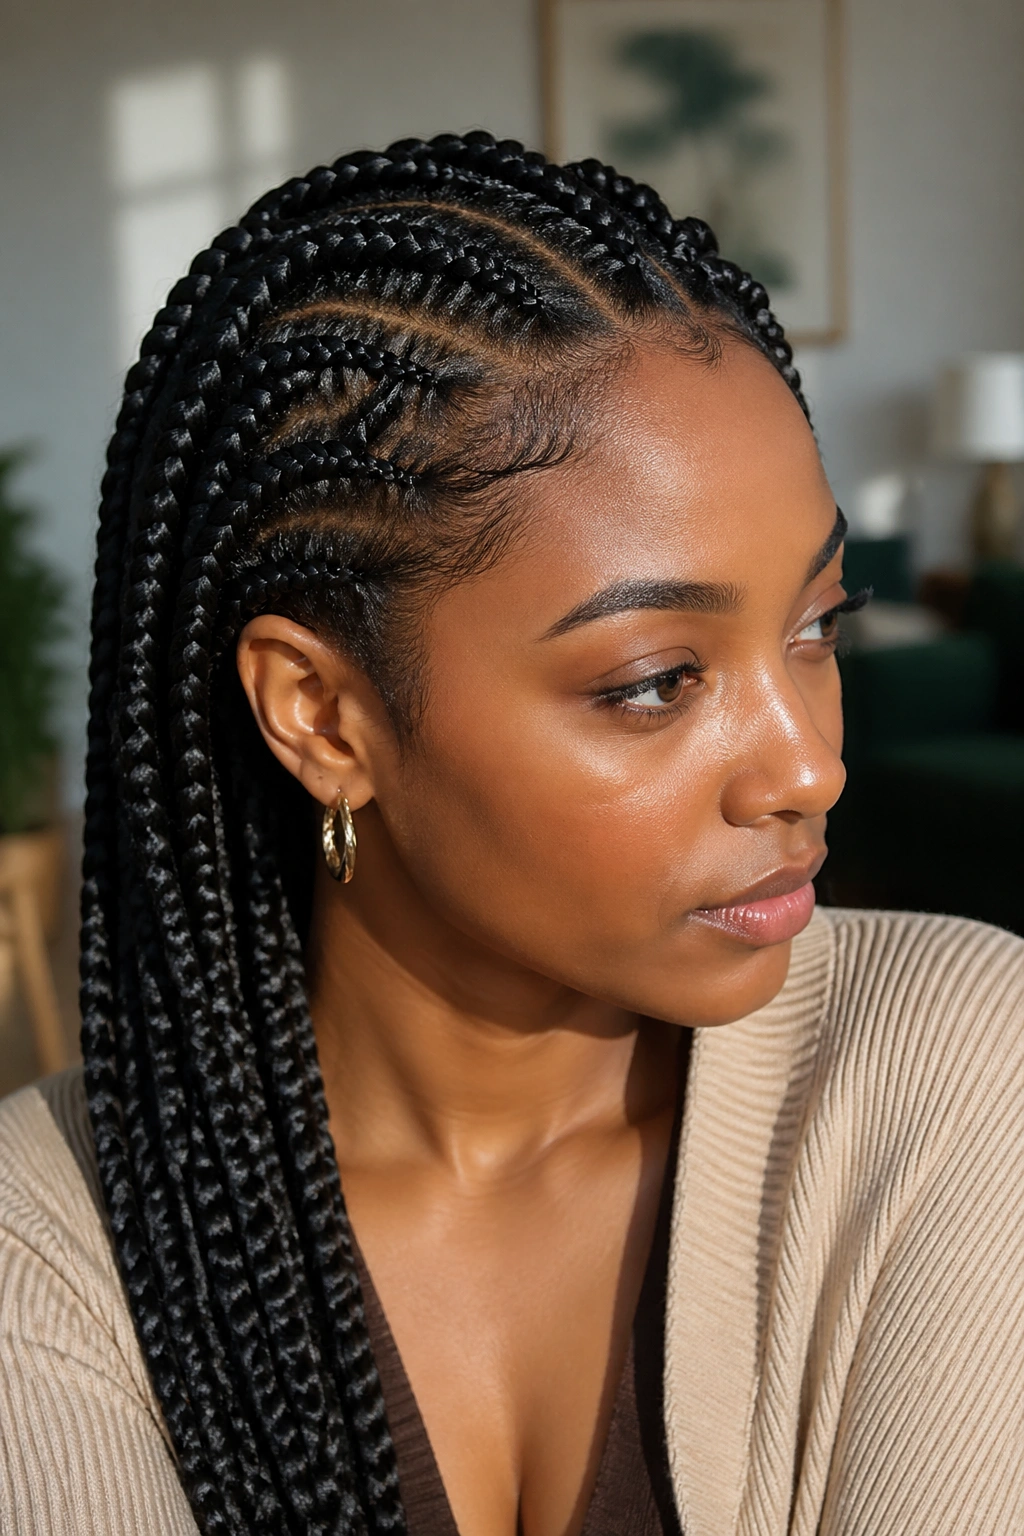
19. Fulani Braids
Fulani braids are a traditional West African style, typically featuring a single cornrow running down the center front with braids extending outward to the sides, often decorated with cowrie shells or gold beads. They’re striking and distinctive — nothing else looks quite like them.
I’ve worn Fulani braids for travel more than any other style. They last 5 to 6 weeks, don’t require nightly retwisting, and the cultural reference is immediately readable to anyone who knows the tradition.
Find a stylist who specifically lists Fulani braids in their services. The pattern takes practice, and a generic braider may get the geometry wrong.
20. Wash-and-Go Pineapple
Hold on — isn’t a wash-and-go the opposite of a protective style? Not if you do it the pineapple way and leave it alone.
The pineapple is when you gather all your hair loosely at the top of your head with a satin scrunchie, pile it into a soft puff, and let the curls cascade out the top. Your ends are tucked up away from your pillow or shoulders, and you’re not manipulating the style daily.
It works best on defined curls — so after a wash-and-go has set and the hair has dried fully. Don’t pineapple wet hair. It’ll disturb the pattern and you’ll wake up with a flat back.
Refresh with a water spritz and a tiny bit of leave-in every 2 to 3 days. Wear time: 5 to 7 days before you want to wash again.
21. Yarn Braids
Yarn braids use acrylic or wool yarn instead of synthetic braiding hair, and they’re one of the most underrated protective styles for natural hair. The yarn is lightweight, breathable, and gentle on the scalp in ways extension hair often isn’t.
The process: cut yarn into strands about twice the length you want your finished braid, fold and attach at the root, then braid the yarn together with your own hair. Seal the ends with a lighter (carefully) or by knotting.
Why I love them: they’re warm in winter without being hot, they absorb no moisture from your scalp, and the matte finish photographs beautifully. The downside is they can feel a bit stiff the first day and they absolutely do not get wet.
22. Havana Twists
Havana twists are like Marley twists but chunkier and with a looser, more tousled finish. Install time is shorter because you’re using fewer sections with thicker hair, and the end result has a casual, lived-in drape that feels less formal than standard twists.
Think of them as the weekend version of a Senegalese twist.
They hold up well to movement — I’ve worn them on long road trips, through gym sessions, to outdoor events — without looking frizzy by day three. The key is using Havana-specific hair, which has a heavier, rougher texture than kanekalon.
23. Low Bun with Braided Wrap
A scenario: you need to look clean and professional for a meeting but you have exactly zero time for an install. Gather your stretched hair into a low ponytail, two-strand twist a section from either side, and wrap them around the ponytail base like a rope. Pin.
Done in ten minutes. The wrap hides the elastic and the rubber band indentation, and the overall shape is polished enough for any office or formal setting.
Your ends are tucked inside the bun, which is the protective piece. Sleep in a bonnet and this bun holds for 2 to 3 days easily. On day three, smooth the front with a wet boar bristle brush and you’ve extended it another day.
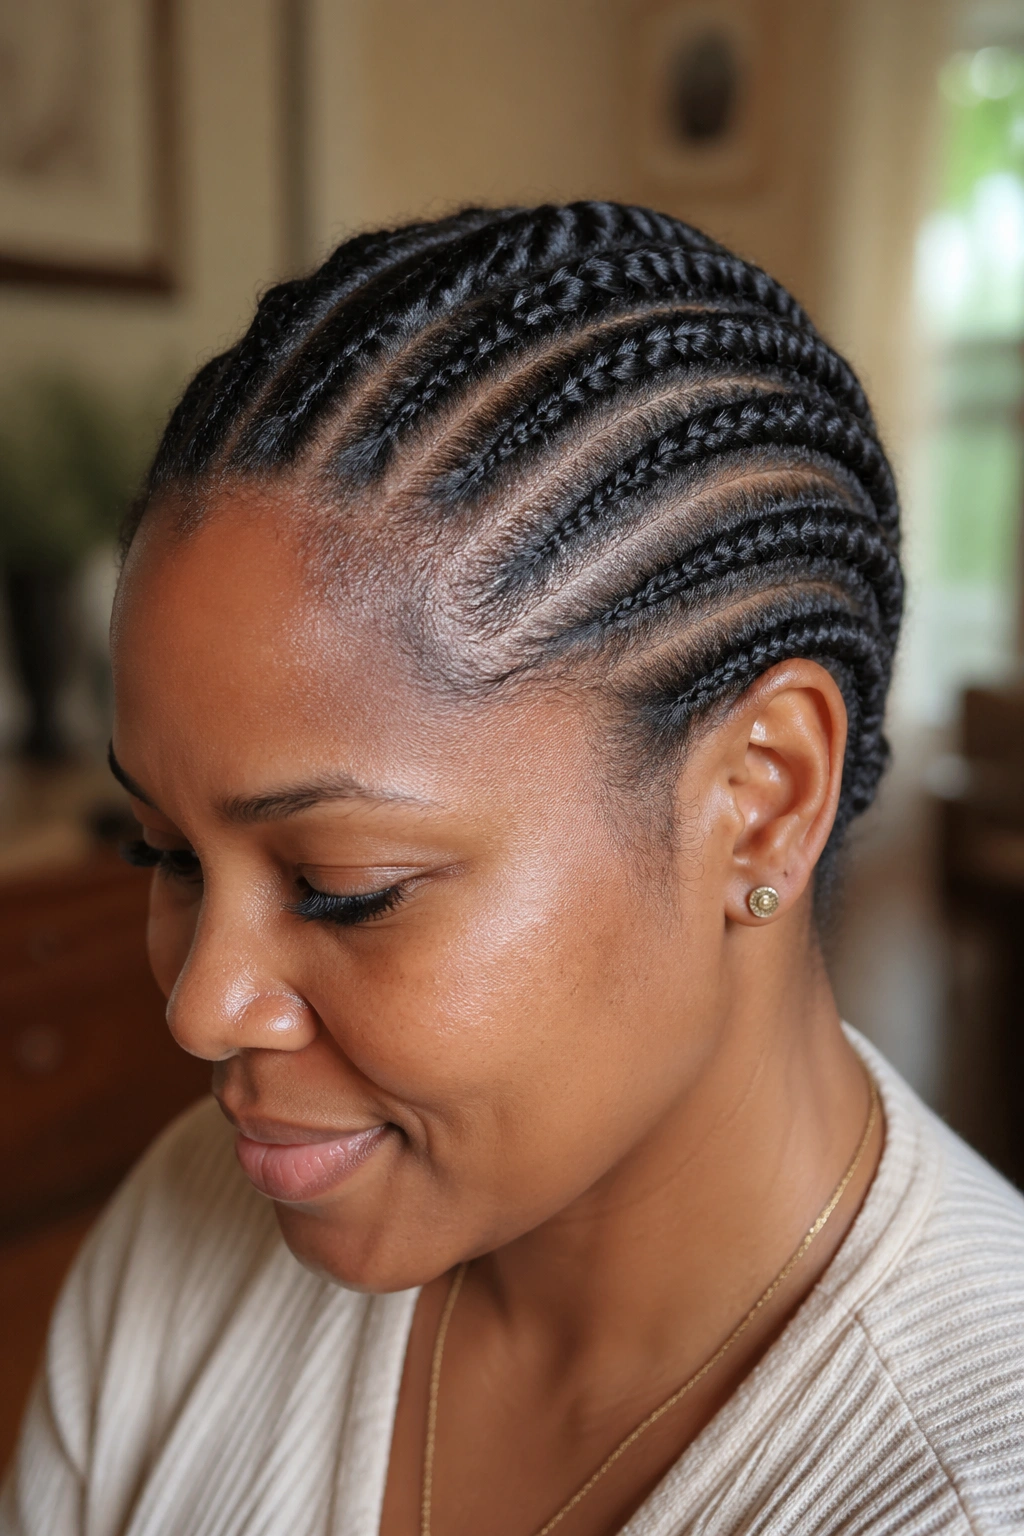
24. Scalp Braids (Tracks Only)

Scalp braids are the base under most protective styles — the cornrowed foundation used for sew-ins, crochet, and wigs. But sometimes the scalp braids themselves are the style, and they deserve their own entry.
Clean, precise cornrows against the scalp, usually all going in one direction or in a simple curving pattern. No added hair, no extensions, just your own hair rowed flat. It’s the minimalist’s protective style — low maintenance, low tension (if done correctly), and genuinely beautiful in its simplicity.
They last about 2 weeks before frizz takes over. After that, redo or switch to something else.
25. Rope Twists (Two-Strand with Added Hair)
Rope twists are two-strand twists with added Marley or kanekalon hair, creating long, coiling ropes that look substantial without the precision of braids. They’re faster to install than box braids and easier than Senegalese twists because the technique is more forgiving.
- Install time: 4 to 5 hours
- Wear time: 5 to 6 weeks
- Best for: first-time protective stylers
- Aesthetic: loose, textured, natural-looking
Tip from experience: Dip the ends in hot water to seal them — rope twists unravel fastest at the tips, and the hot water trick is the difference between a 2-week wear and a 5-week wear.
26. Stretched Silk Press with Satin Wrap (Night Protection Only)
Hear me out. A silk press itself isn’t protective — it’s heat, and heat has risks. But when you treat a silk press as a short-term wear with strict nighttime protection, it functions as a low-manipulation style. You’re not combing, twisting, or washing for 5 to 7 days. Your hair is straight and flat, easy to wrap.
The trick is the nightly wrap. Brush your hair to one side, pin, and cover with a large satin scarf. In the morning, unwrap, brush through, and go. Zero heat applied after the initial press.
Who this is for: people who want a break from styling, are already heat-trained or using heat very sparingly, and understand that a silk press is the exception, not the rule, in protective styling.
Would I pick this first? No. I’d pick braids or twists every time. But for a special occasion week where you want straight hair without touching a curling iron daily, it has a place on the list.
Maintenance Routine While Wearing Protective Styles
Protective styles fail when neglected, not when worn too long by themselves. A dry scalp, buildup, or trapped moisture under extensions ruins everything.
My routine, no matter which style is in:
- Spritz scalp with water and rose water mix every 2 days, lightly
- Apply a tiny amount of sealing oil to the scalp (not the hair) twice a week
- Scrub with witch hazel on a cotton ball once a week to lift buildup
- Sleep in satin every single night
- Don’t swim or soak the style unless you’re committing to re-drying it thoroughly
The scalp is where health lives. Your extensions are just the shell. Take care of the scalp and the style will last and your hair will come out healthier than it went in.
Mistakes That Ruin Protective Styles
A few honest ones I’ve made and watched others make.
Installing on dry, unmoisturized hair. Your hair enters the style already thirsty, gets locked up for weeks, and comes out brittle.
Going too tight at the hairline. Any install that hurts during hour one will cause traction damage by week three. Speak up during the install or walk out.
Sleeping uncovered. I will die on this hill. Cotton pillows eat protective styles in 24 hours.
Leaving it in too long. Six to eight weeks is the cap. After that, matting starts and takedown becomes a nightmare.
Skipping the deep condition on takedown. When you take the style out, your hair needs an immediate deep condition to replenish what it lost. Don’t put it into another style right away. Let it breathe for at least a week.
Choosing the Right Style for Your Lifestyle
The best protective style depends more on your routine than your hair type.
If you work out 4+ times a week, pick a style that can get wet and dry quickly — cornrows, scalp braids, or a halo wig. Anything with synthetic extensions will mildew if you don’t dry them fully after sweat.
If you travel constantly, long-wear braids (5 to 6 weeks) beat anything that needs nightly twisting. Fulani braids, knotless box braids, and Senegalese twists top my travel list.
If you’re growing out a cut or recovering from damage, low-manipulation wins over long-wear. Mini twists on your own hair, flat twists, or a pineapple. Let your hair rest, literally.
If you want to experiment with color without bleaching, a wig over a braid base is the only smart answer. Change colors monthly, real hair stays untouched.
When Protective Styles Stop Being Protective
Here’s the brutal truth. A protective style becomes damaging the moment one of these happens:
- It’s been installed longer than 8 weeks
- Your edges hurt or look thinner after install
- You’re not moisturizing the scalp at all
- You’re sleeping without satin
- Takedown is pulling chunks of tangled hair out
If any of these describe your current install, it’s not protecting your hair. It’s hurting it, and no amount of oil afterward will fully undo the damage.
Pull it down. Deep condition. Let your hair breathe for a week. Then try a different approach.
Protective styling done well is the single most powerful thing you can do for afro natural hair length retention. Done carelessly, it’s a fast track to setbacks. The difference is entirely in the prep, the install, the maintenance, and the timing — not the style itself. Pick what fits your life, respect the process, and your hair will thank you in inches.