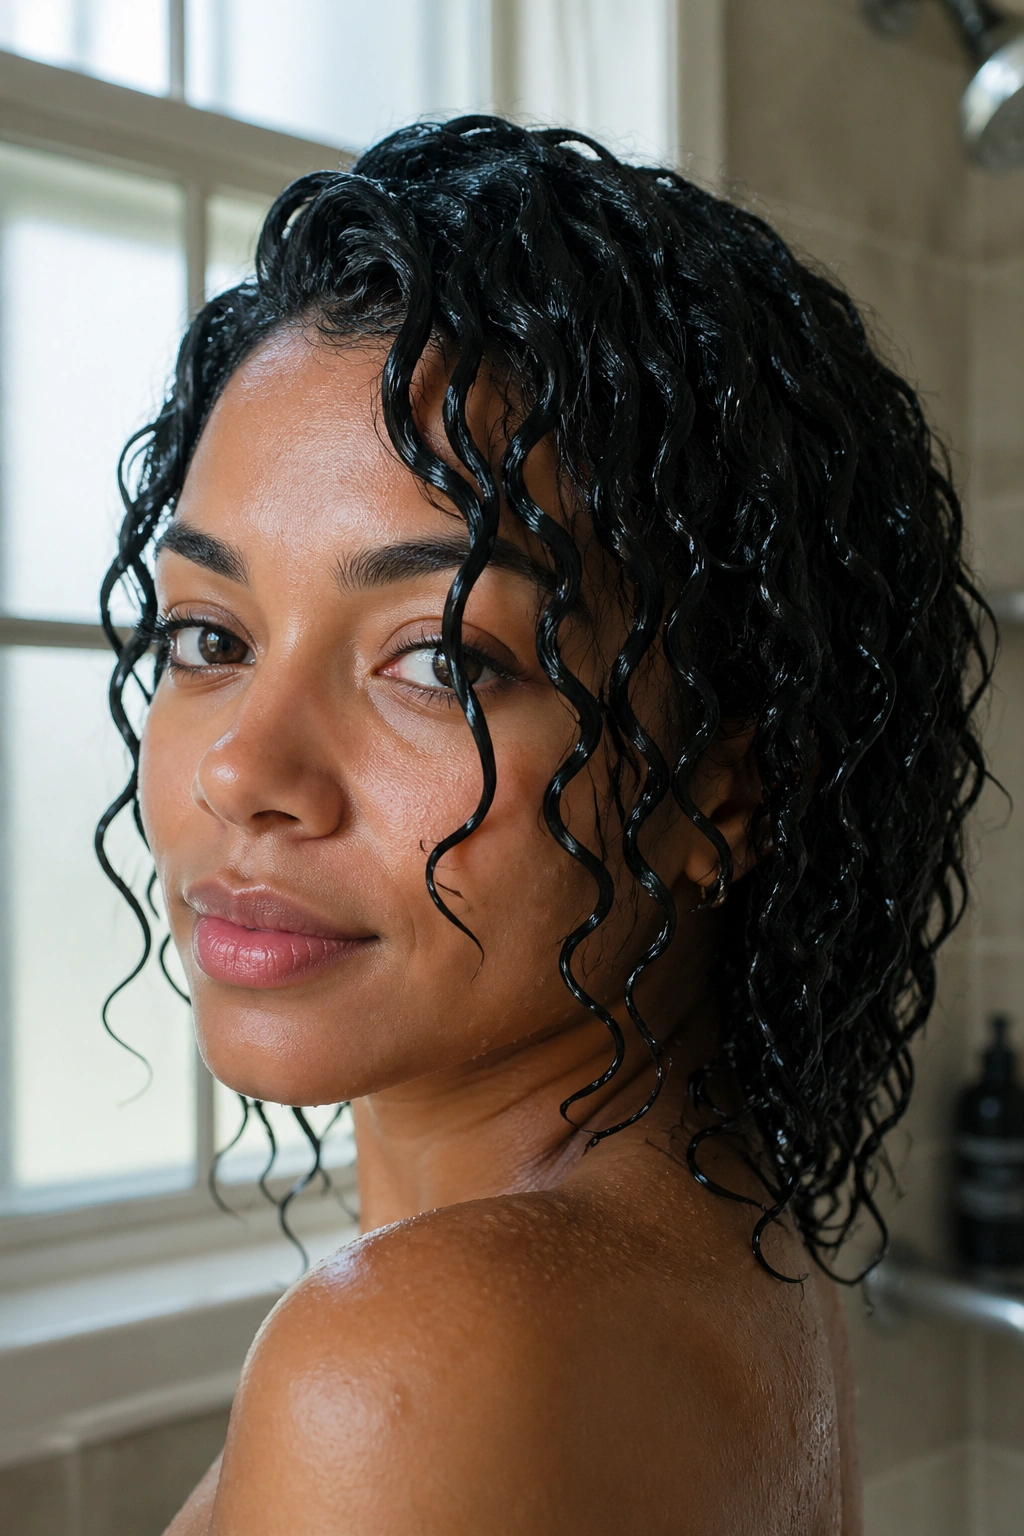
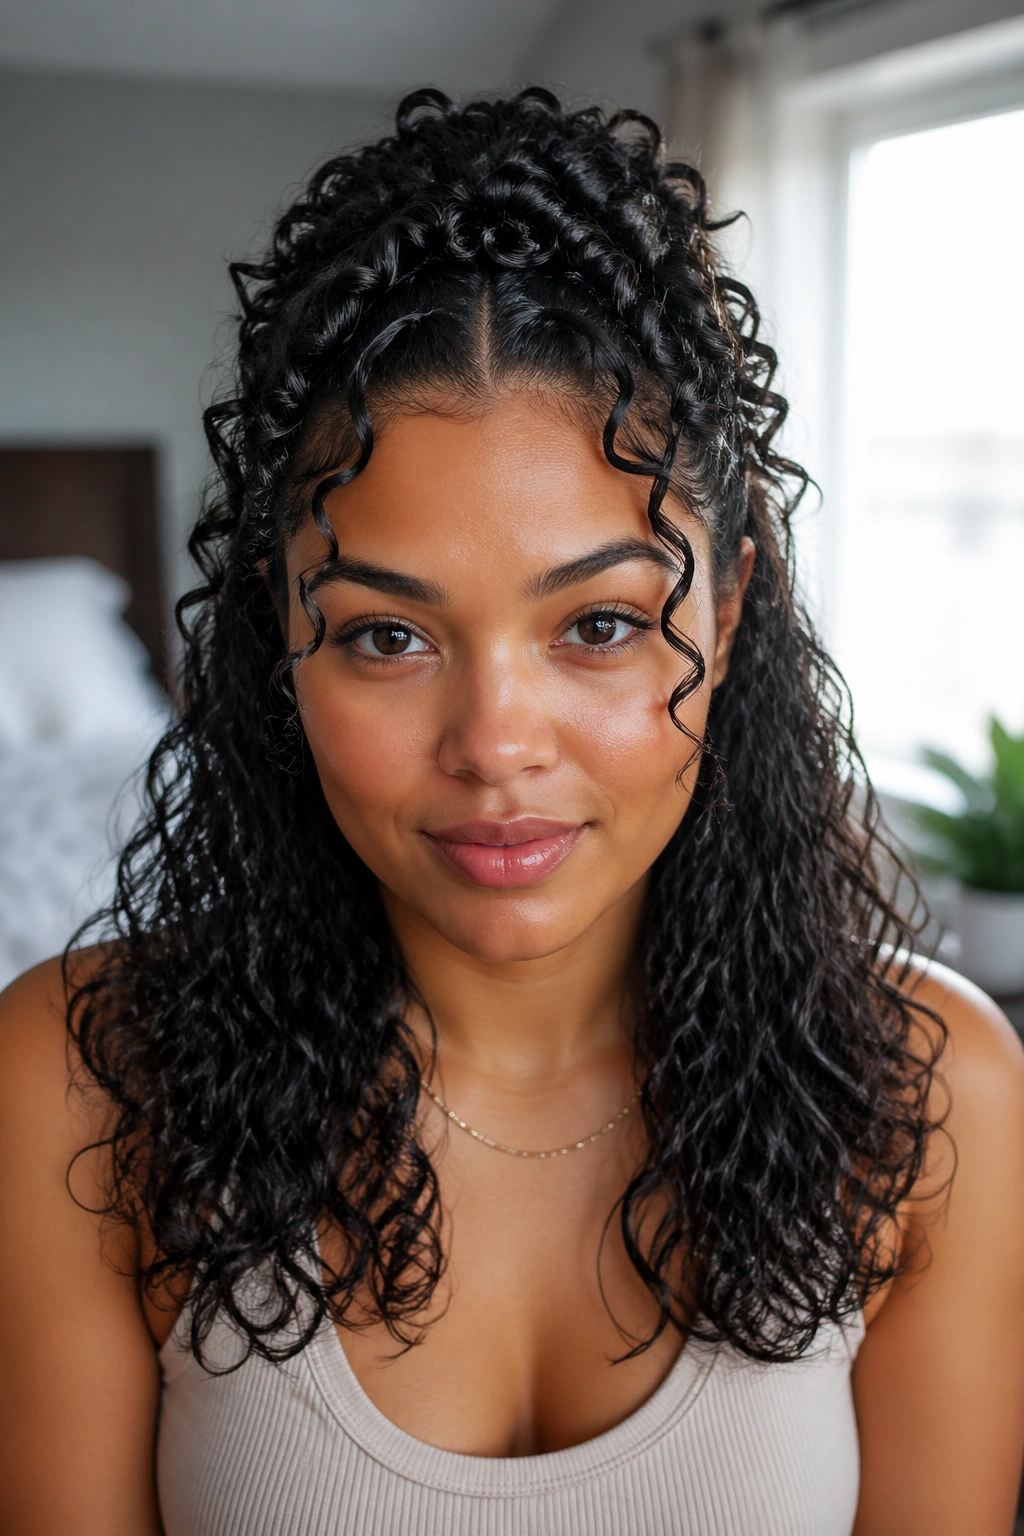
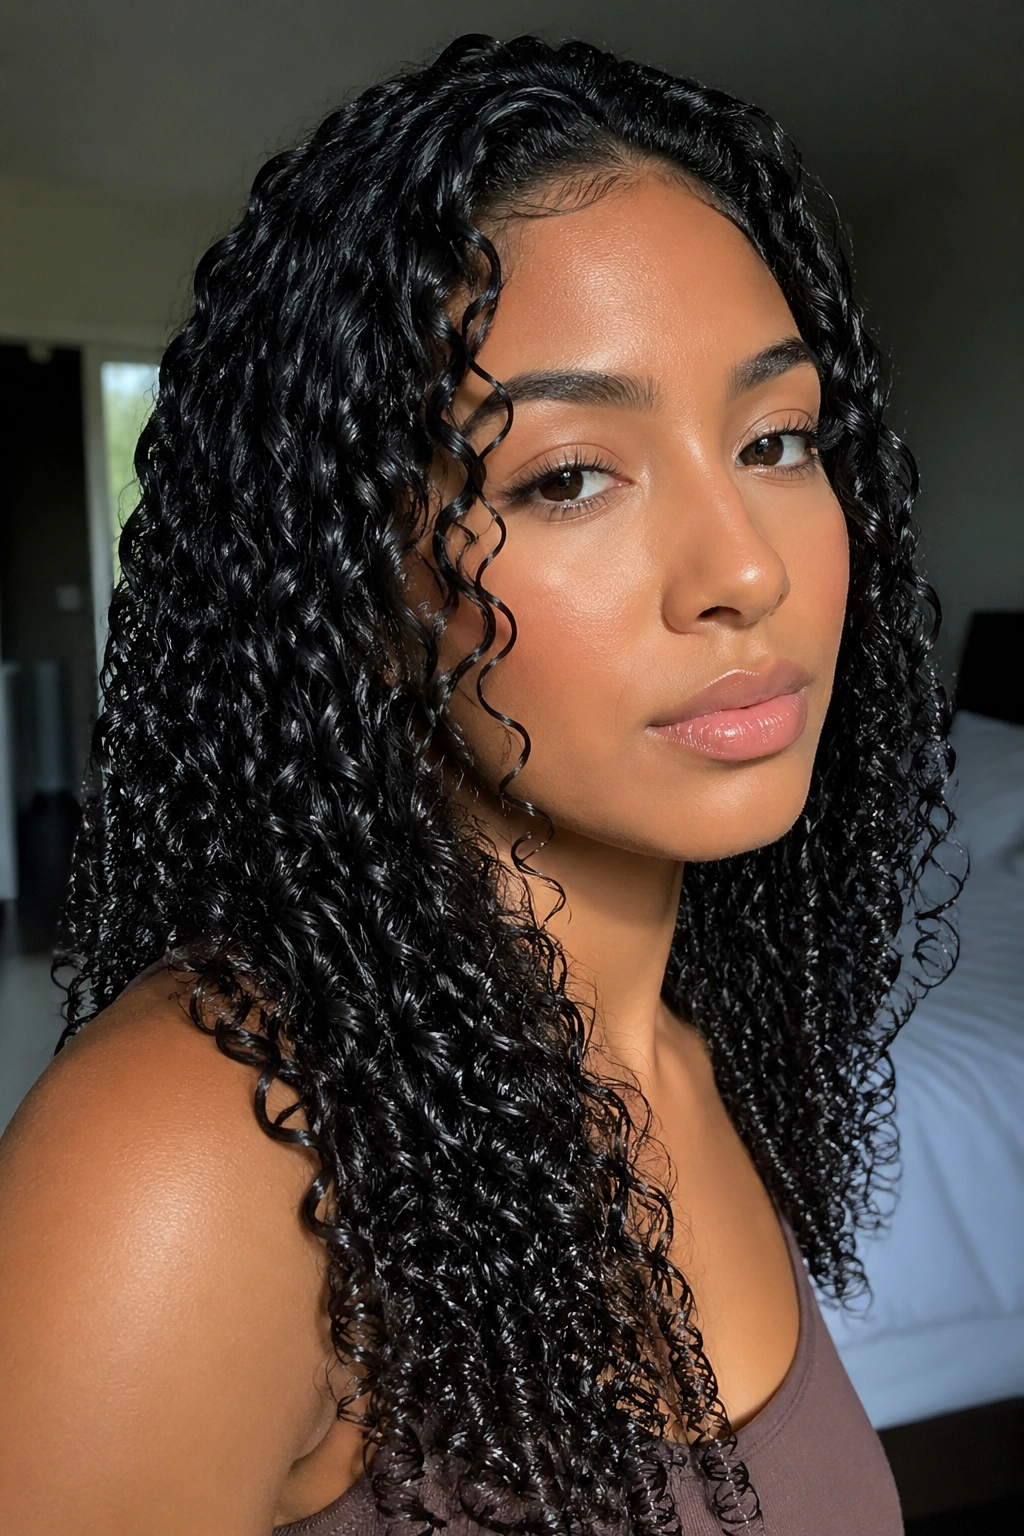
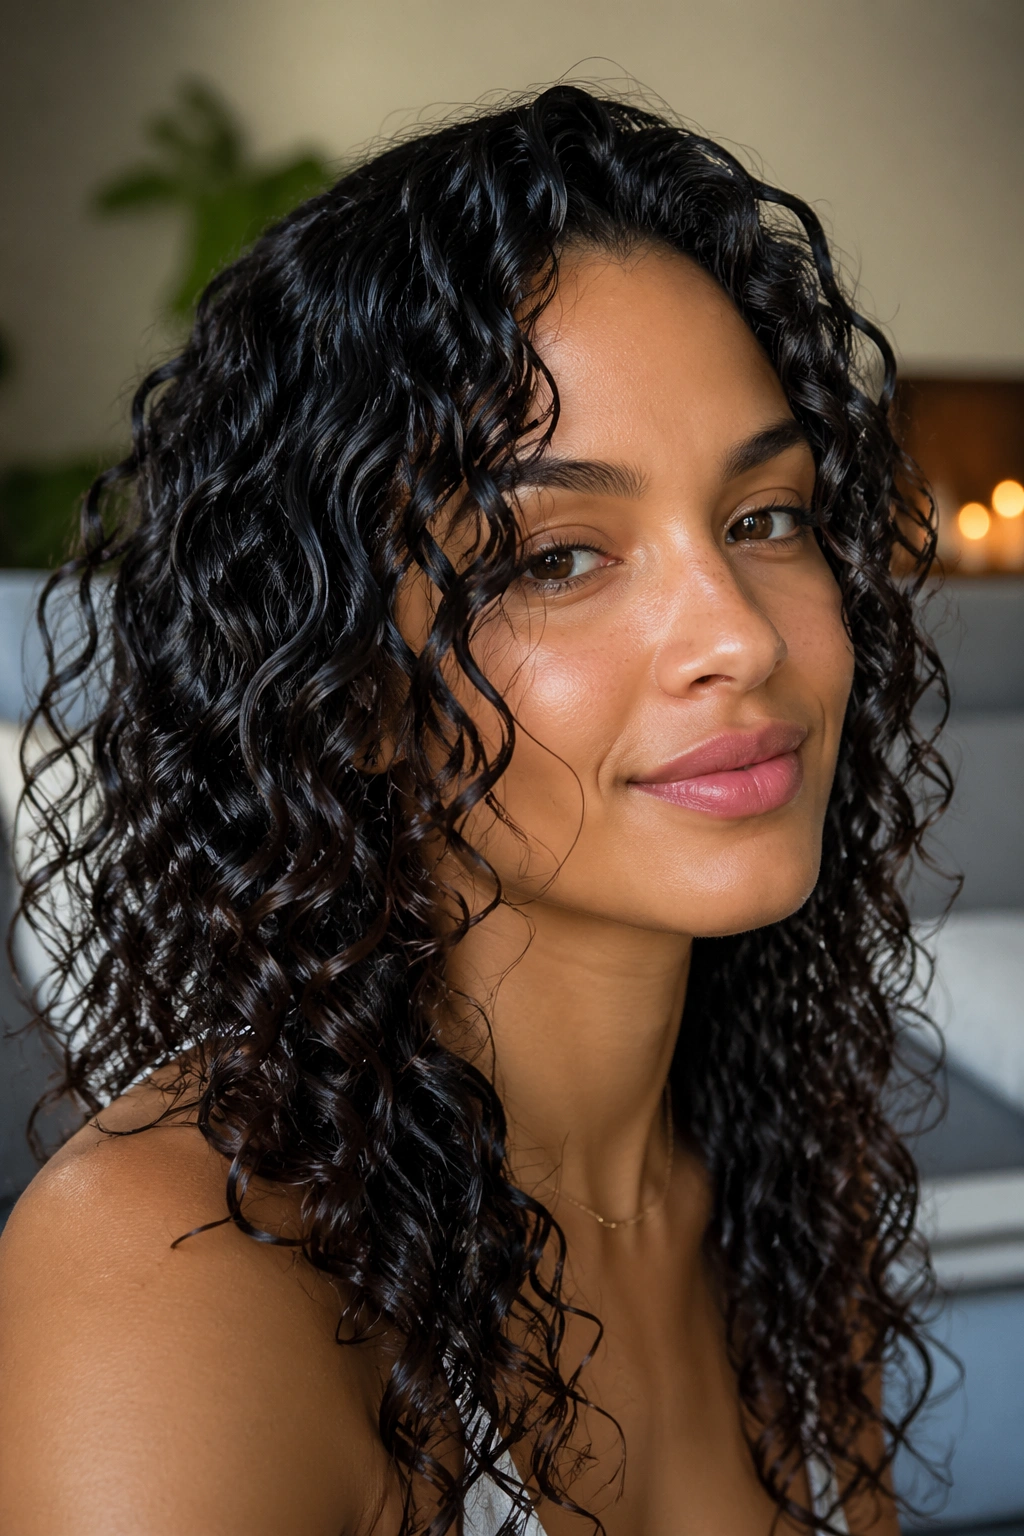
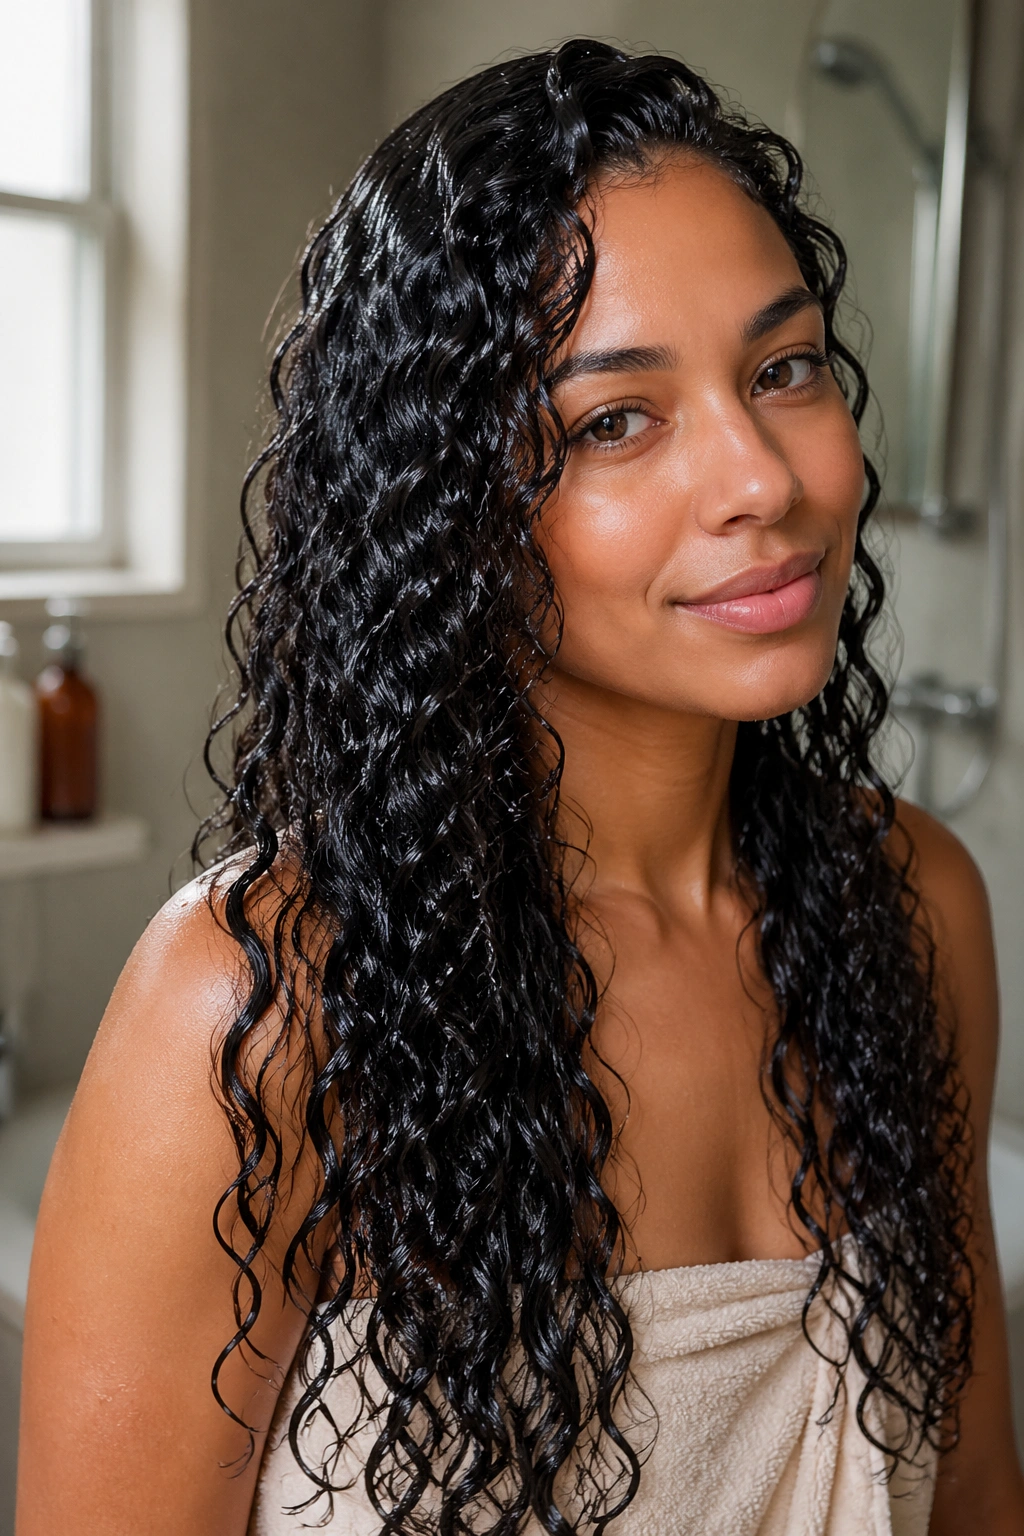
Wet curly hairstyles get dismissed as “unfinished” or “not done yet” — as if hair dripping with intentional product and coiled in its most natural state is somehow less valid than a style that took two hours to set and dry. That thinking misses something big. Wet and soaking-wet styles, when done with the right products and technique, are some of the most defined, polished-looking natural styles you can wear. They photograph beautifully. They last all day. And they take far less time than most people assume.
Why Wet Styles Work on Natural Curls
Water activates everything. When natural curls are saturated, they reveal their true pattern — the tightness, the coil shape, the natural grouping. Wet curly hairstyles take advantage of that moment and lock it in with product before the hair has a chance to dry and separate or frizz.
The science here is straightforward. Hair fiber swells when wet, making it more pliable and easier to shape. Product applied to saturated hair coats each strand more evenly than product applied to dry hair. And gel or mousse applied wet creates a cast around each curl as it dries, preserving the wet shape even after the water evaporates — which is exactly the look you’re going for.
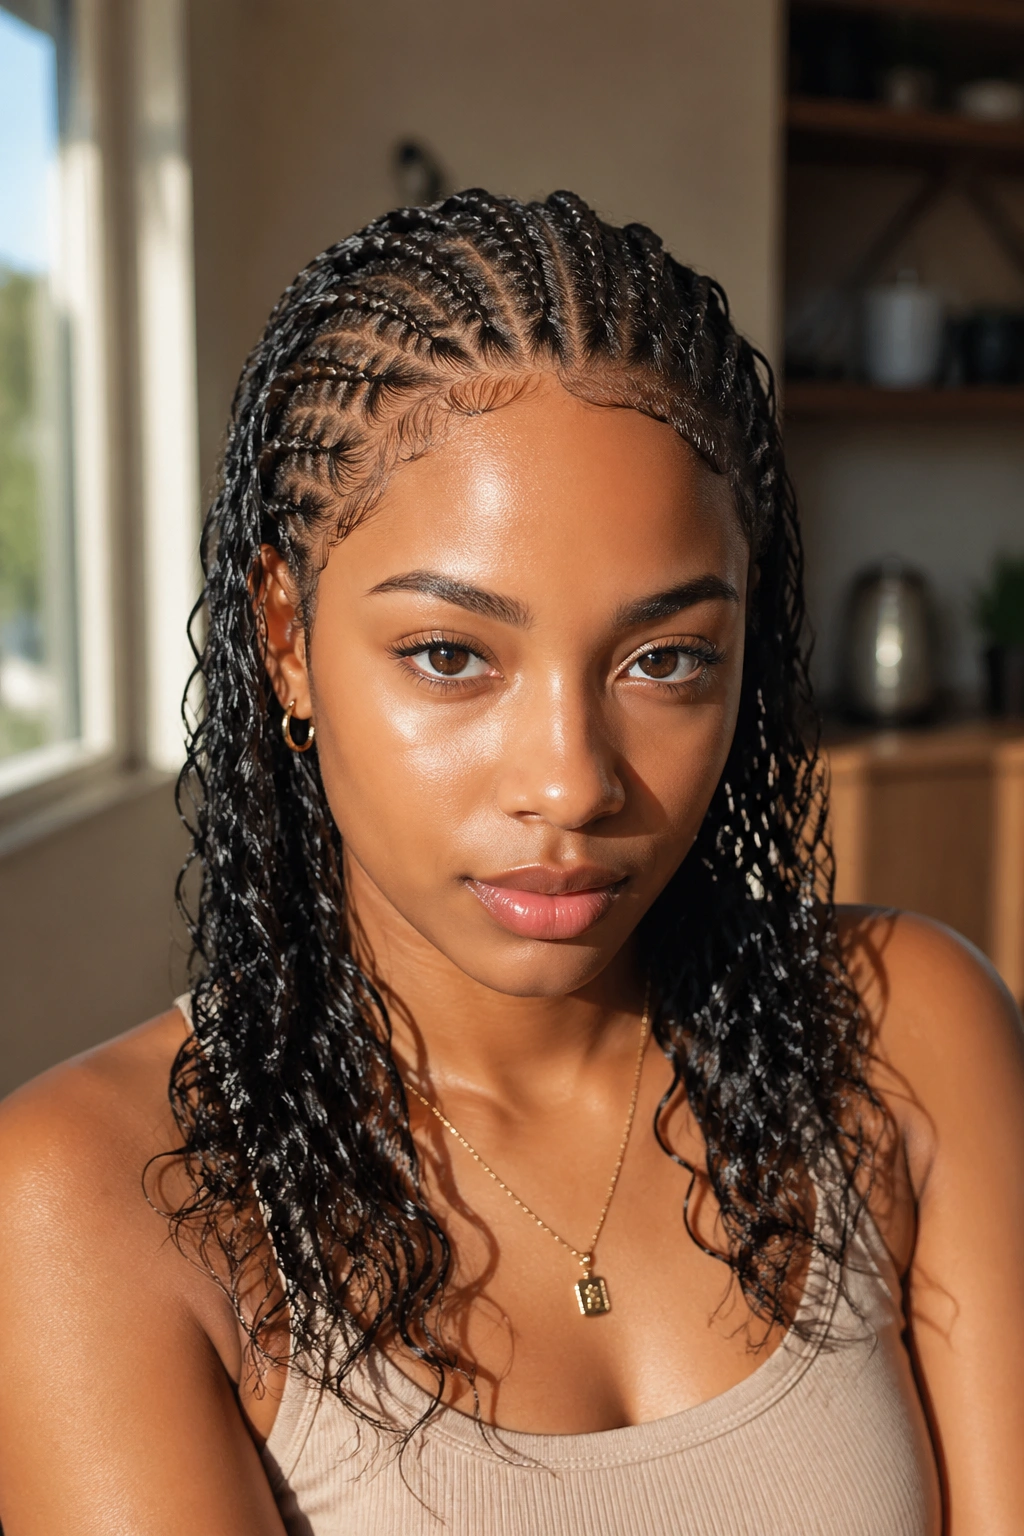
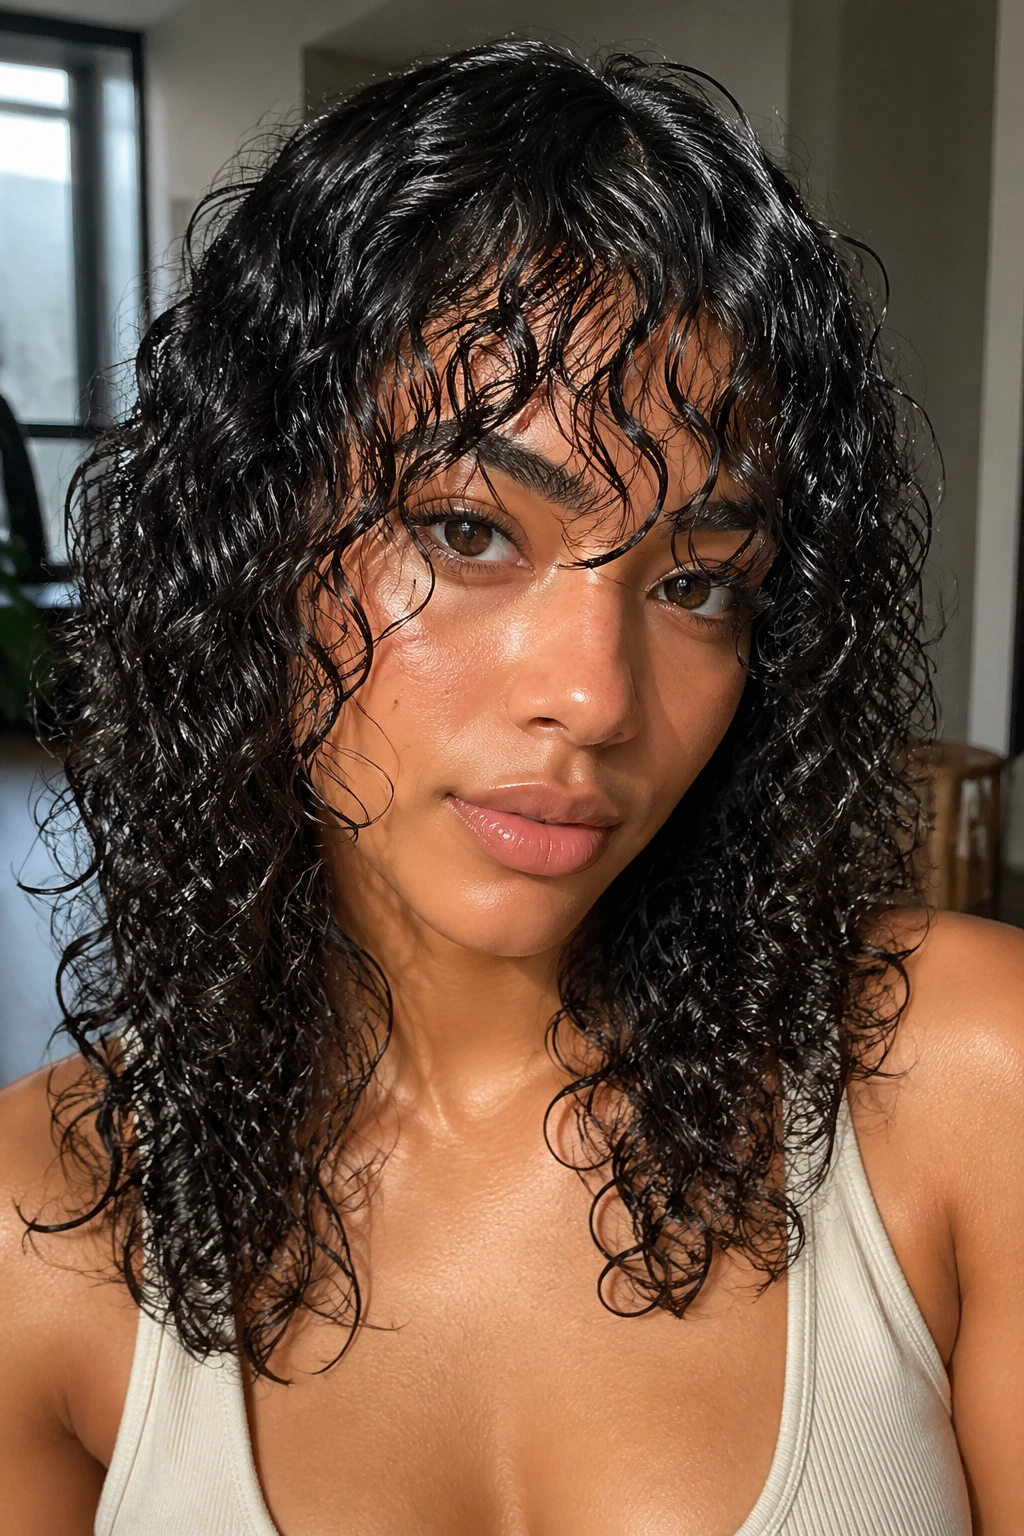
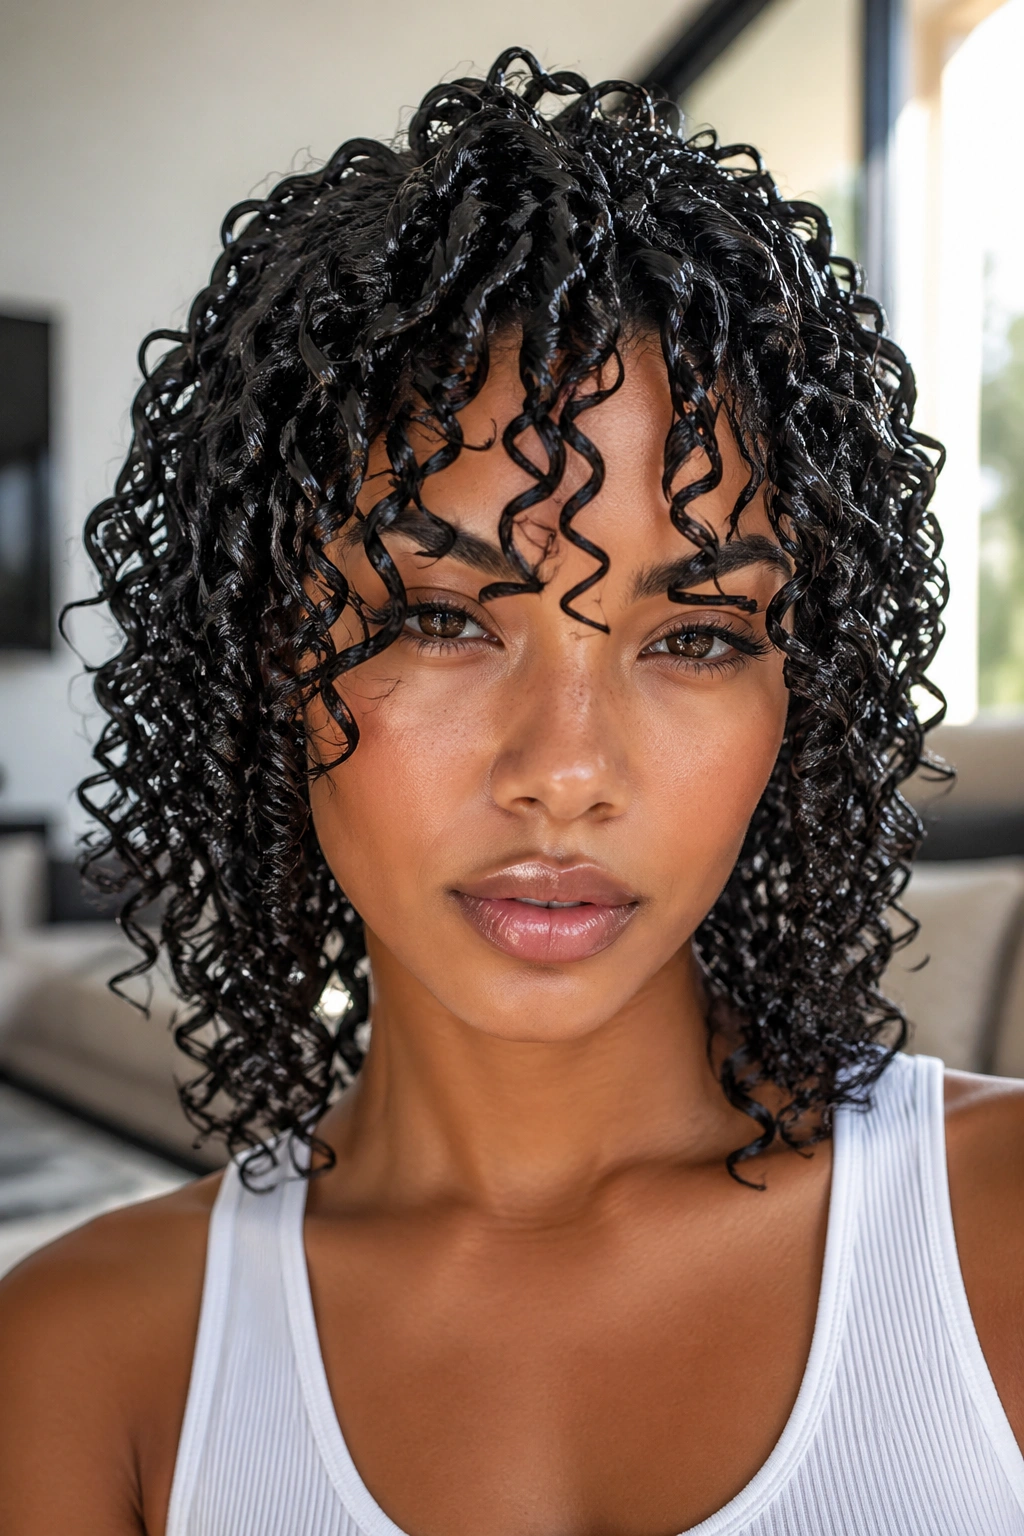
The “wet look” in natural hair has its own aesthetic, distinct from dry styles. It’s sleek, defined, and has a glossy quality that catches light beautifully. On 3A through 4C curl patterns, the wet look reads differently — less like a straight-hair wet look and more like an intensely defined curl pattern with depth and movement.
The Right Products for Wet Curly Hairstyles
Not all products create a successful wet look. You need products that are designed to be applied to soaking-wet hair and that dry clear — or dry to a slight sheen — without turning white or getting crunchy in a way that looks unfinished.
Flaxseed gel is one of the most popular natural-ingredient options for wet curly hairstyles. It applies to wet hair beautifully, defines curls without stiffness, and dries to a flexible hold with a natural sheen. You can make it at home by simmering flaxseeds in water and straining — or buy it pre-made from several natural hair brands.
Aloe vera gel — pure, not the heavily processed drugstore version — is another excellent wet-style product. It has enough hold to define curls, adds moisture, and dries without residue. Used alone or layered over a leave-in conditioner, it creates a clean, defined wet look that holds up through several hours.
Styling creams with a gel-like consistency work well for curl types that prefer a softer hold. Brands like SheaMoisture, Kinky Curly, and As I Am have formulas designed specifically for soaking-wet application that result in defined, polished wet styles.
The trick with all of these is application method. Apply with a raking motion from root to tip while hair is still dripping, then smooth each section with your palm. Never apply to hair that’s just damp — if the product soaks into the hair too quickly before you’ve distributed it evenly, you’ll get uneven definition.
Technique Matters as Much as Product
Two people can use the exact same product and get completely different results based on how they apply it. Wet curly hairstyles require a specific approach to technique that most tutorials skip over.
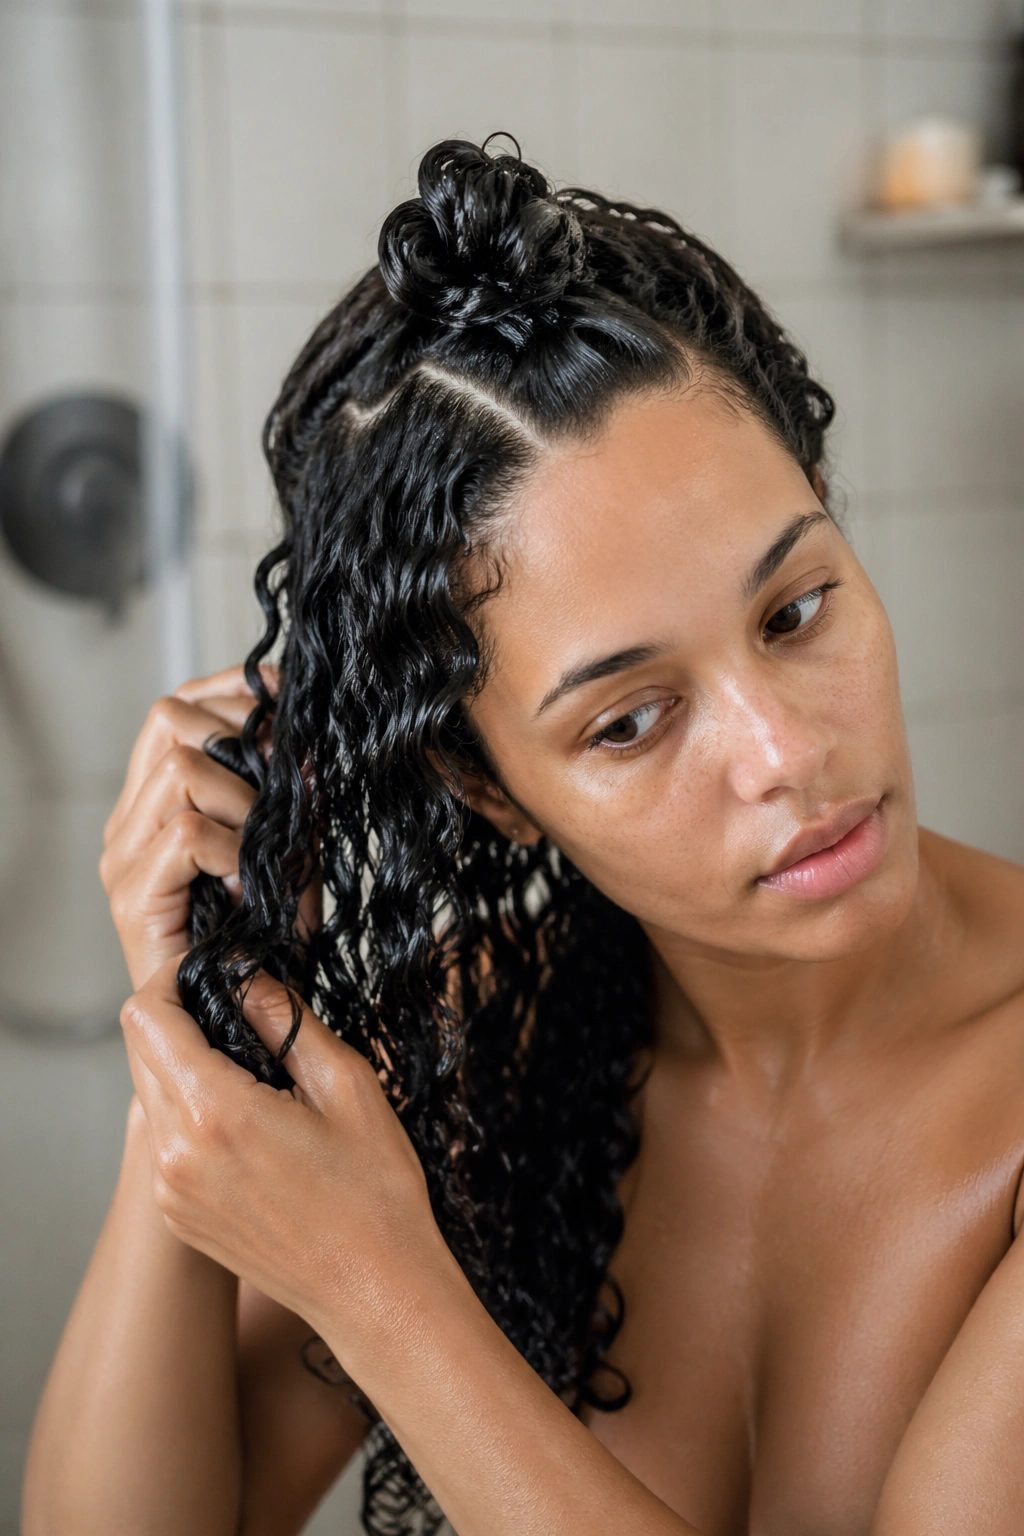
Section your hair while in the shower and apply product section by section, not all at once. Trying to distribute product across your whole head at once means some sections are already partially dry by the time you reach them. Section clips or butterfly clips hold finished sections out of the way while you work.
After applying product, use a wide-tooth comb or a detangling brush to distribute it from root to tip within each section. This smooths the product coating and encourages curl clumping — where multiple strands group together and dry in a defined cluster rather than as individual wiry strands.
The final application technique is scrunching. After raking and smoothing, cup your hands under a section of hair and scrunch upward firmly, bringing the ends toward the scalp. This compresses the curl and encourages it to spring into its natural coil shape. Scrunch each section several times before moving on.
For the wettest, most defined styles on this list, don’t use a towel after scrunching. Let the hair drip slightly and air dry or diffuse from that fully saturated state. Towels create friction and disrupt curl clumping — an old t-shirt or a microfiber towel is far less damaging if you need to remove some of the excess water.
Managing Frizz in Wet Styles
Frizz and wet curly hairstyles are not inevitable partners. The frizz that appears around the hairline and crown in many wet styles comes from disrupted curl clumping — either from touching the hair before it’s dry, from applying product too late, or from not using enough product.
The anti-frizz move for wet styles is this: seal your finished style with a very thin layer of a strong-hold gel on top of whatever product you’ve already applied. This creates an outer film around the curls that resists humidity and environmental frizz as the hair dries. It’s the same technique that gives gel cast styles their polished, frizz-free appearance.
Baby hairs around the hairline are a particular challenge in wet styles because they’re short, fine, and prone to frizzing before the rest of the hair is done. Apply edge control or a small amount of gel to your edges last, after the rest of the style is fully set, using a soft toothbrush or edge brush. The flatter you can get those edges, the more polished the overall wet style looks.
How Long Wet Styles Last
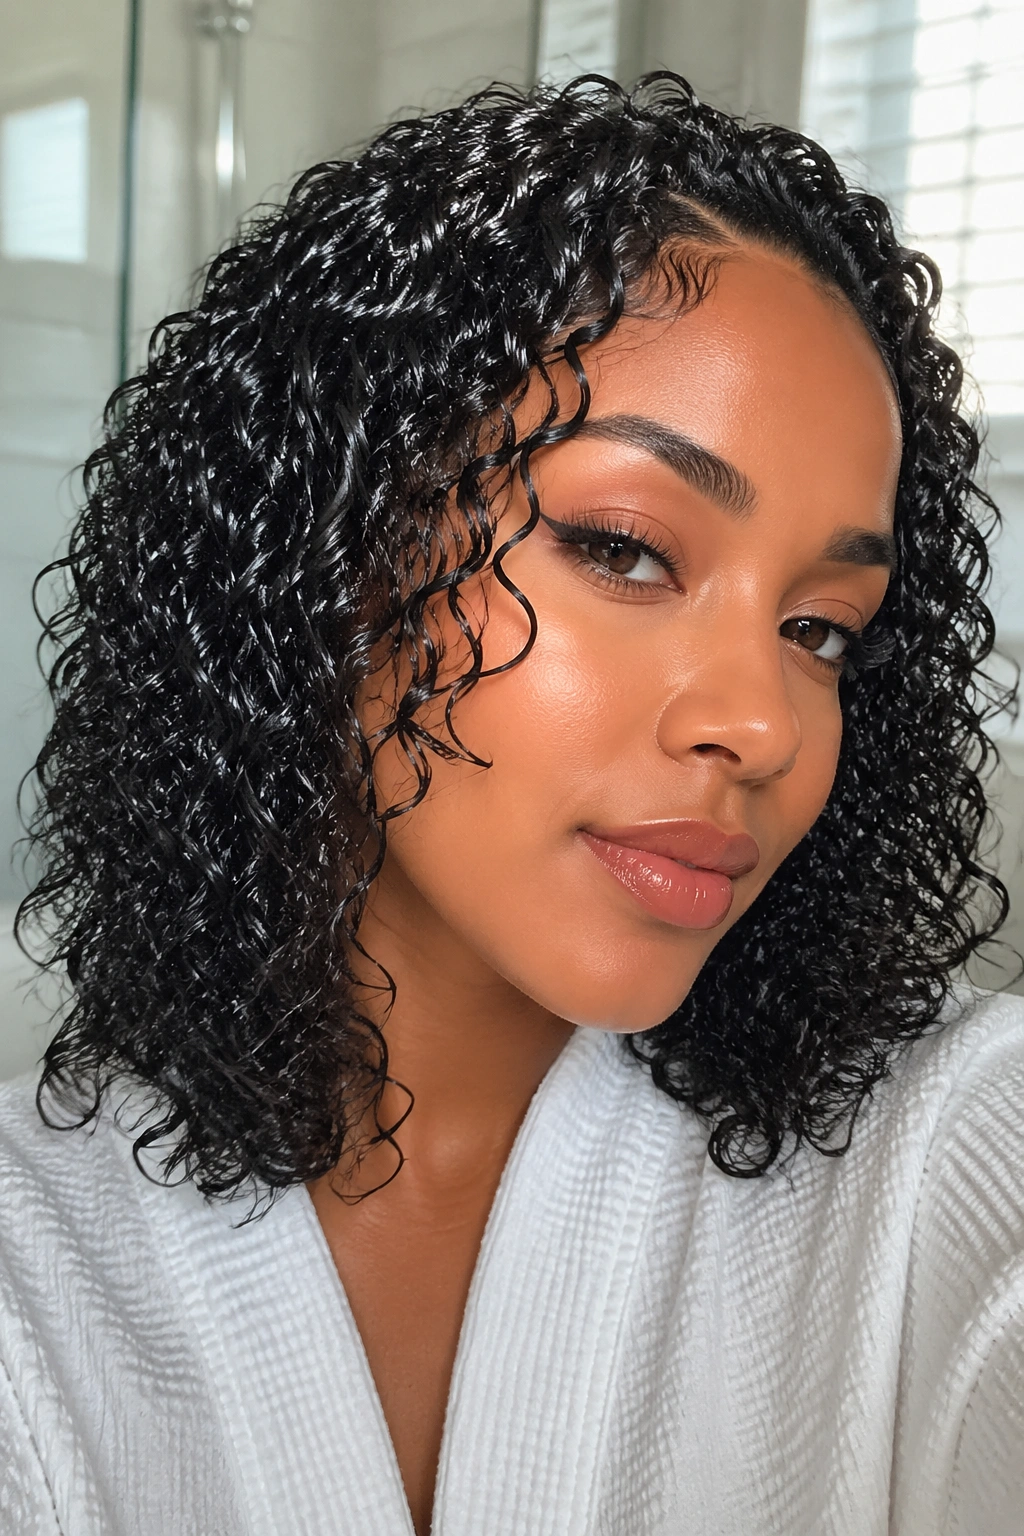
A well-done wet curly hairstyle doesn’t stay technically “wet” all day — it transitions from soaking wet to defined, somewhat crunchy curls (once the gel cast sets) to soft, defined curls (once you scrunch out the crunch). That full dry state is often the most beautiful version of the style.
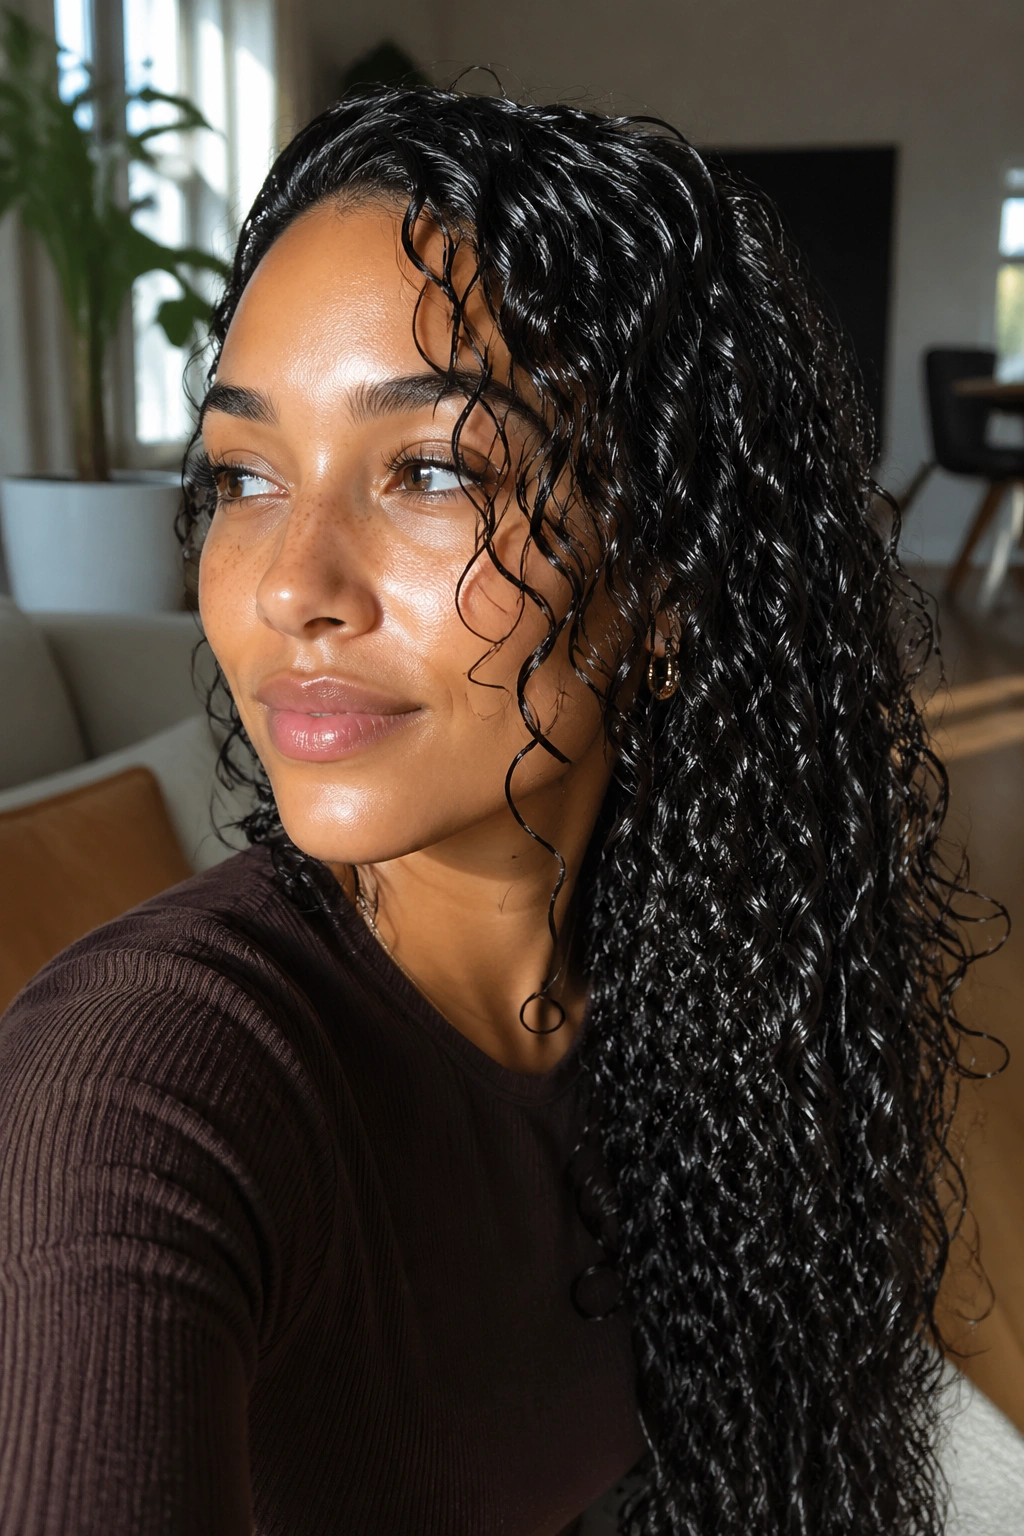
But the wet look can be maintained throughout the day if desired. A light misting of water over the style refreshes the shine and reactivates the curl without disturbing the definition. For styles that are meant to look visibly wet — slicked-down edges, shiny twisted sections, wet coils — carry a small spray bottle and give a light mist every few hours.
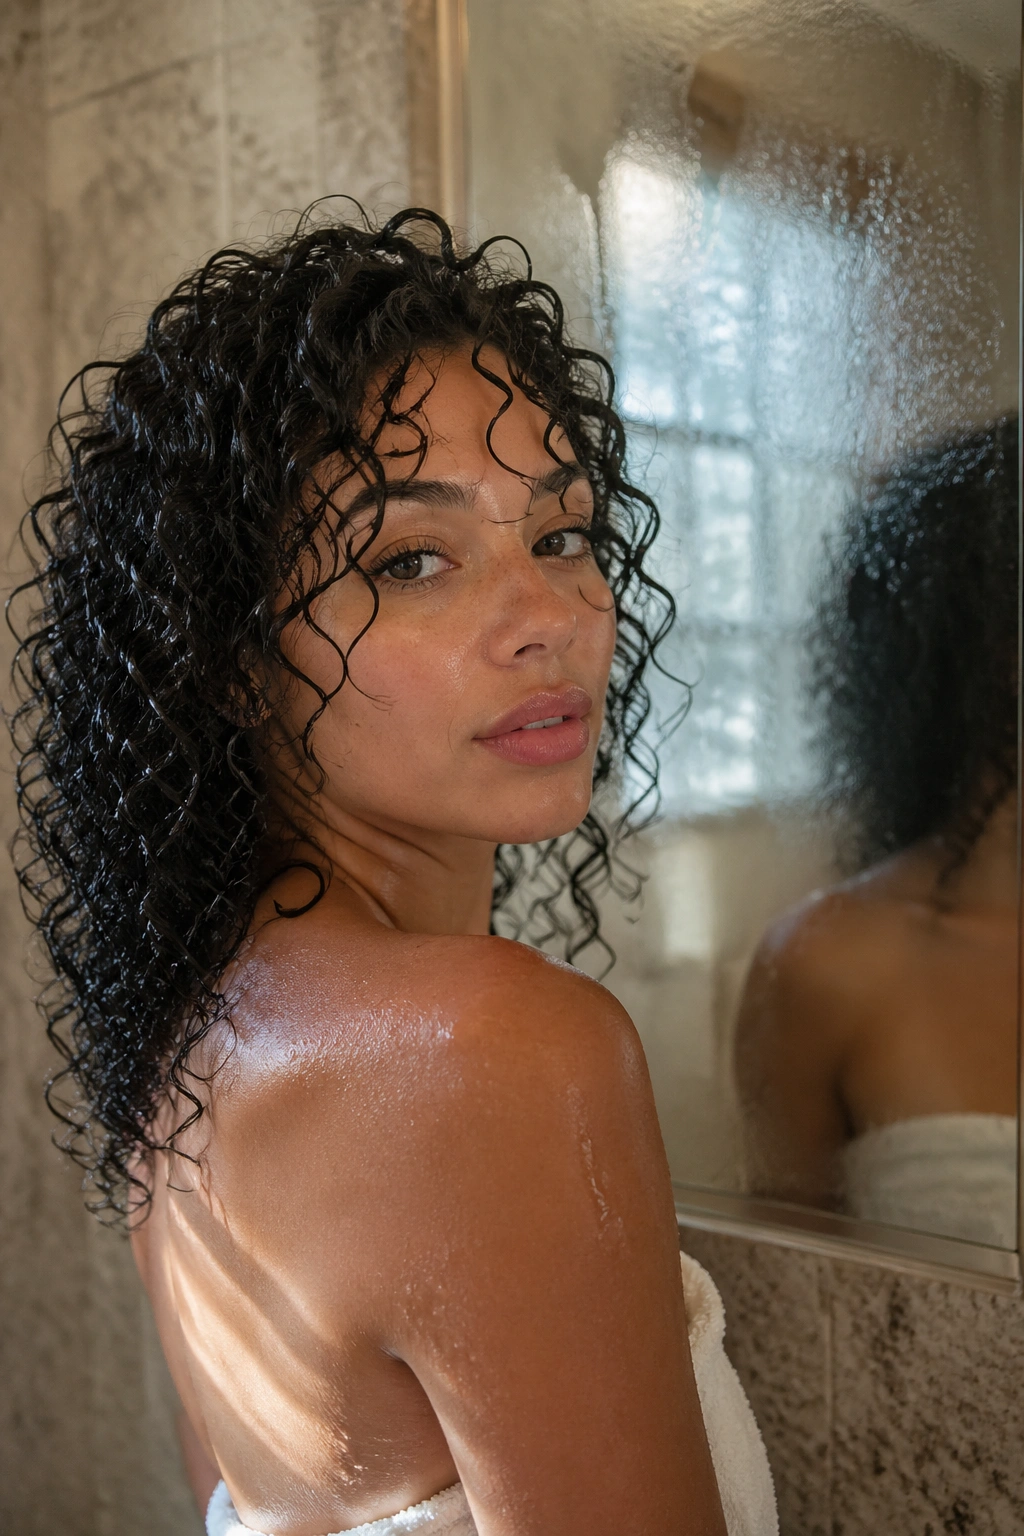
1. Soaking-Wet Wash-and-Go
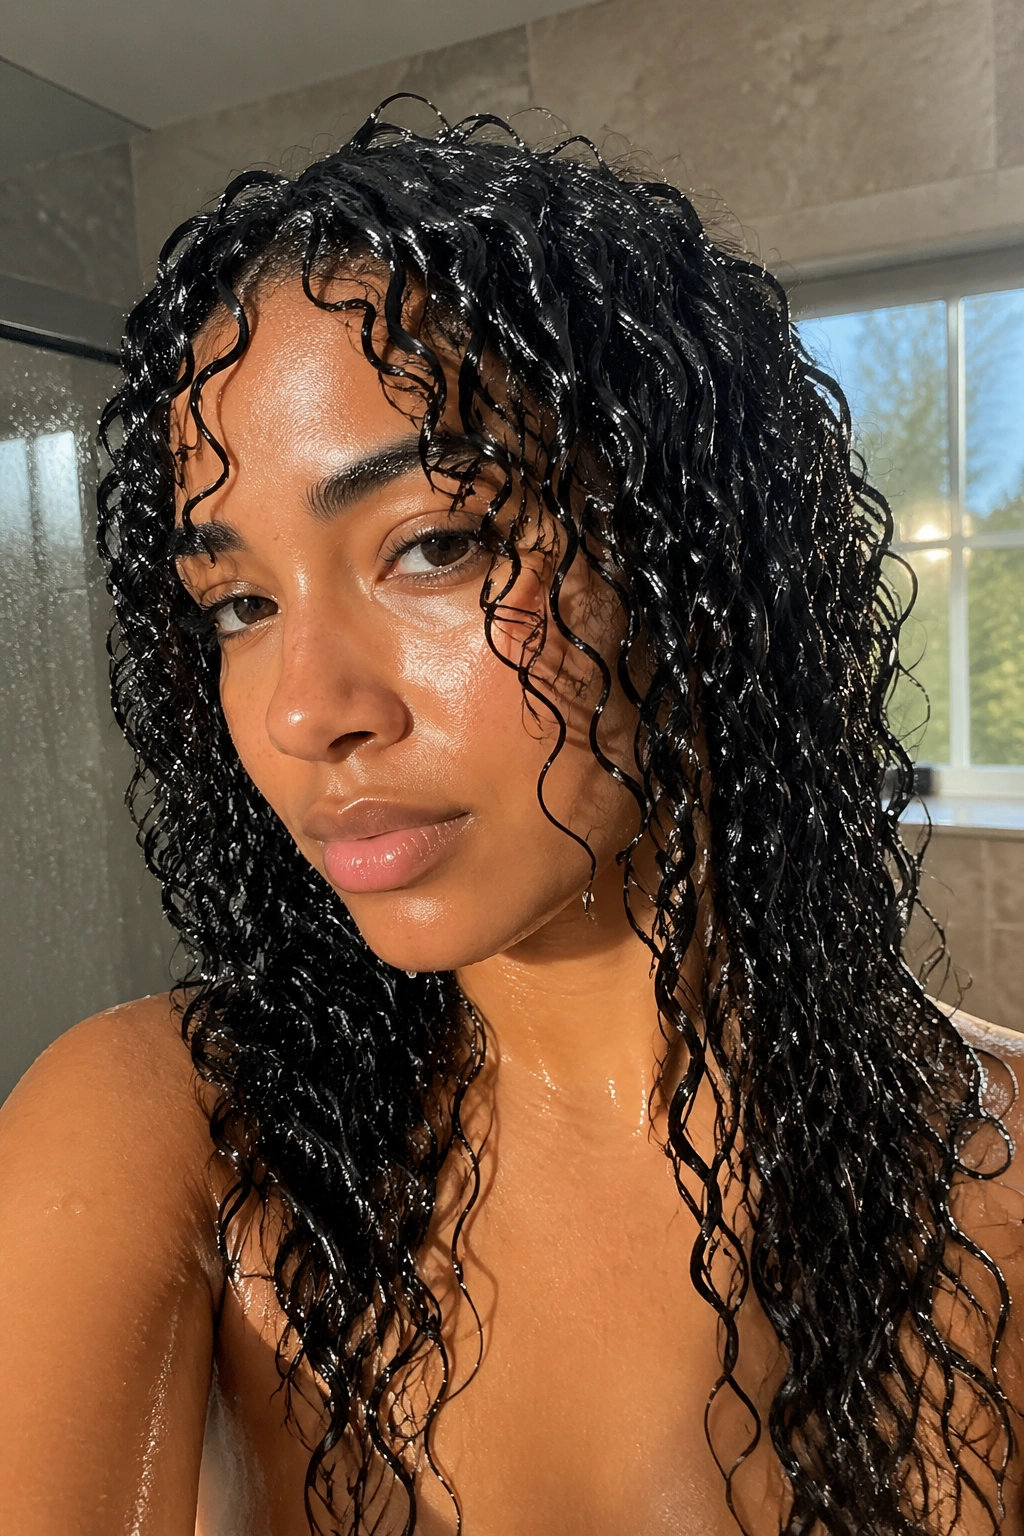
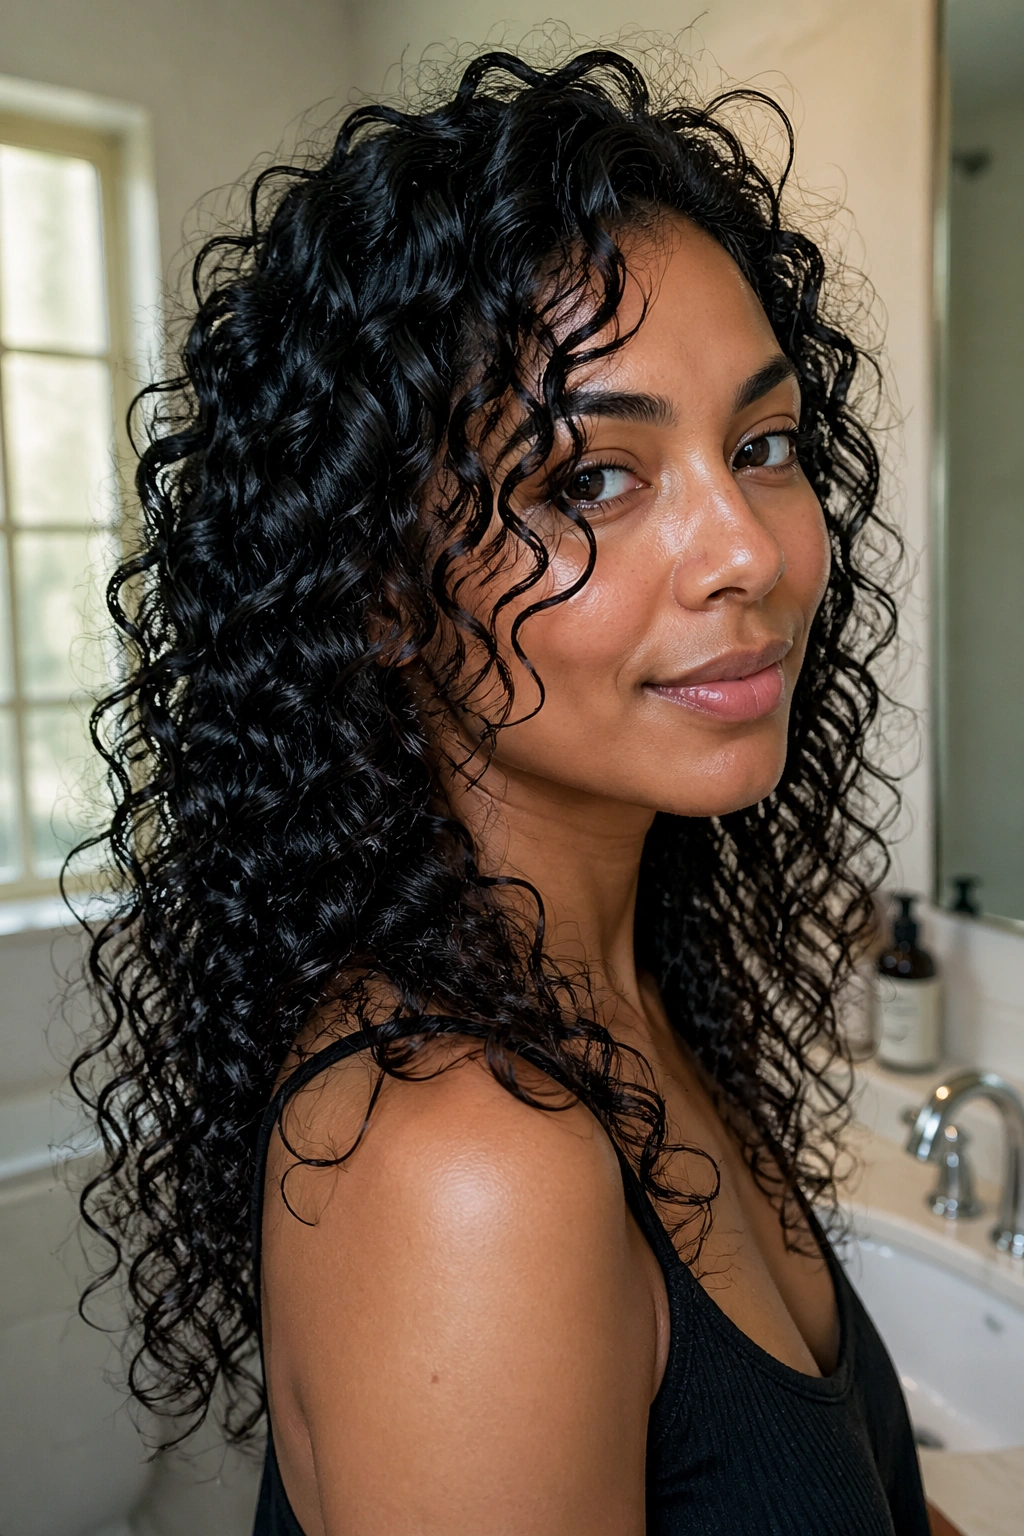
The most essential wet curly hairstyle. Apply leave-in conditioner and curl cream to every section while hair is dripping wet from the shower, scrunch, and allow to air dry with zero touching. The wet look lasts for the first hour or two, transitioning to a defined, polished dry curl by midday.
The key to keeping this looking polished rather than just wet: even product distribution and consistent curl clumping throughout the entire head. Thin spots and uneven sections are what make a wet wash-and-go look rushed. Take the extra three minutes to ensure every section is fully coated.
2. Slicked-Back Gel Style
All curls pulled back, smoothed flat to the head, and sealed with a strong-hold gel. The result is a sleek, graphic look — all your curl texture is visible but controlled, sitting close to the head and following its natural shape.
How to Get This Look
Apply a generous amount of gel to freshly washed, soaking-wet hair. Using a wide-tooth comb, comb all the hair straight back from the hairline. Smooth with your palms from front to back in long strokes. Repeat until the surface is uniform. Use an old t-shirt or microfiber cloth to lightly press — not rub — excess water from the surface.
Tie a satin scarf over the entire style for 15-20 minutes while the gel sets. When you remove the scarf, the curls should be pressed back against the scalp in a smooth, defined shape. Add a light shine serum over the top for extra polish.
3. Wet Finger Coils
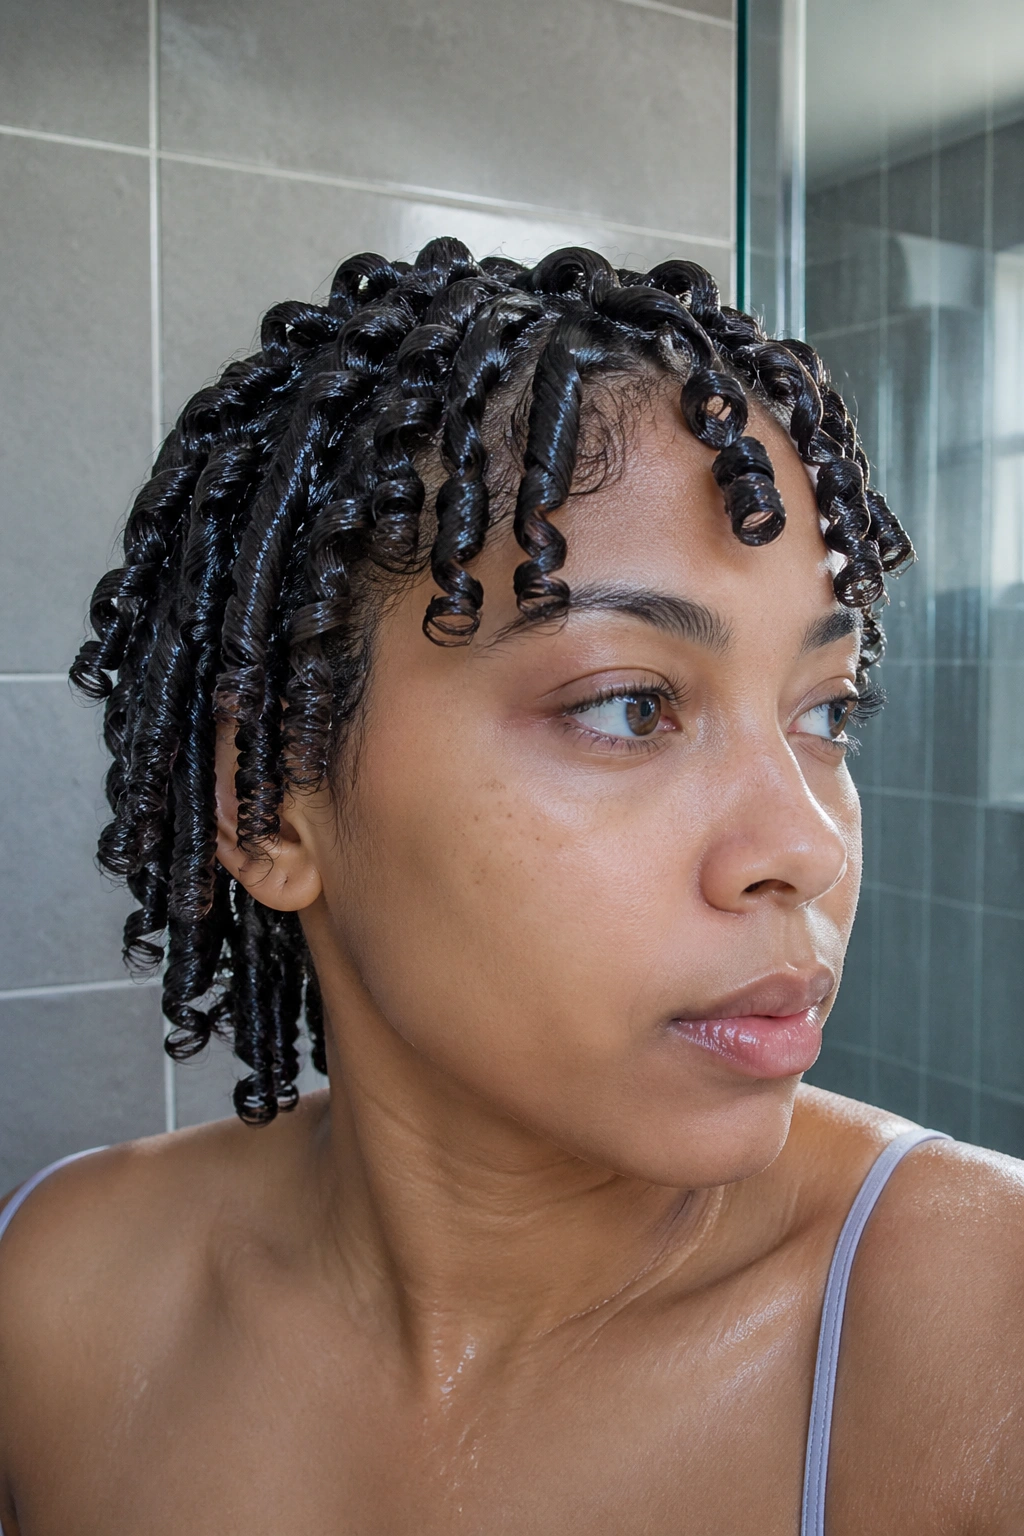
Work section by section while hair is soaking wet, applying gel to each section and winding it around your index finger from root to tip. The wet gel adheres immediately and helps each coil hold its shape. Allow to air dry without touching.
Wet finger coils produce the tightest, most defined version of coils — because the gel encases each strand while the hair is in its most elongated, wet state. The result, once dry, is a precise, sculptural coil pattern that looks like significant effort but is really just time (sitting under a dryer or waiting for air dry).
4. Wet Twist-Out Set
Setting a twist-out on soaking-wet hair rather than damp hair produces dramatically more defined results. The excess moisture means the twists absorb into the hair shaft fully before starting to dry, resulting in deeper wave pattern and more curl memory when you unravel.
Twist each section while it’s literally dripping — apply your product, form the two-strand twist tightly, and move on. Allow the full twist-out to dry before unraveling. Rushing this step is the most common reason twist-outs look frizzy rather than defined.
5. Wet Straw Set
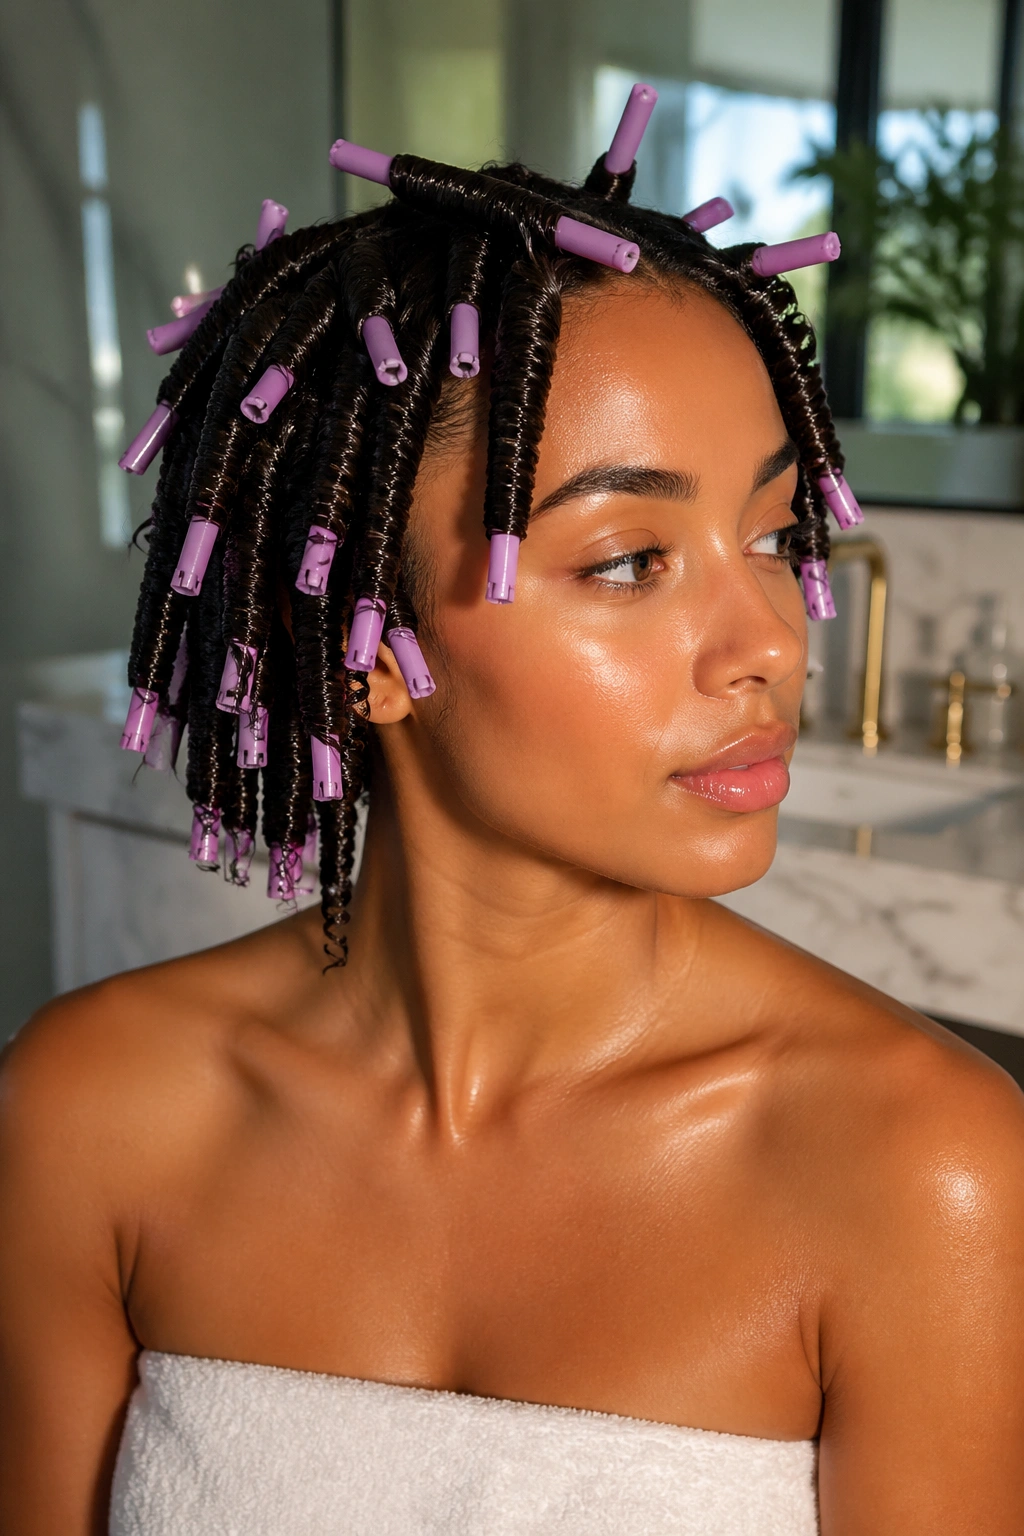
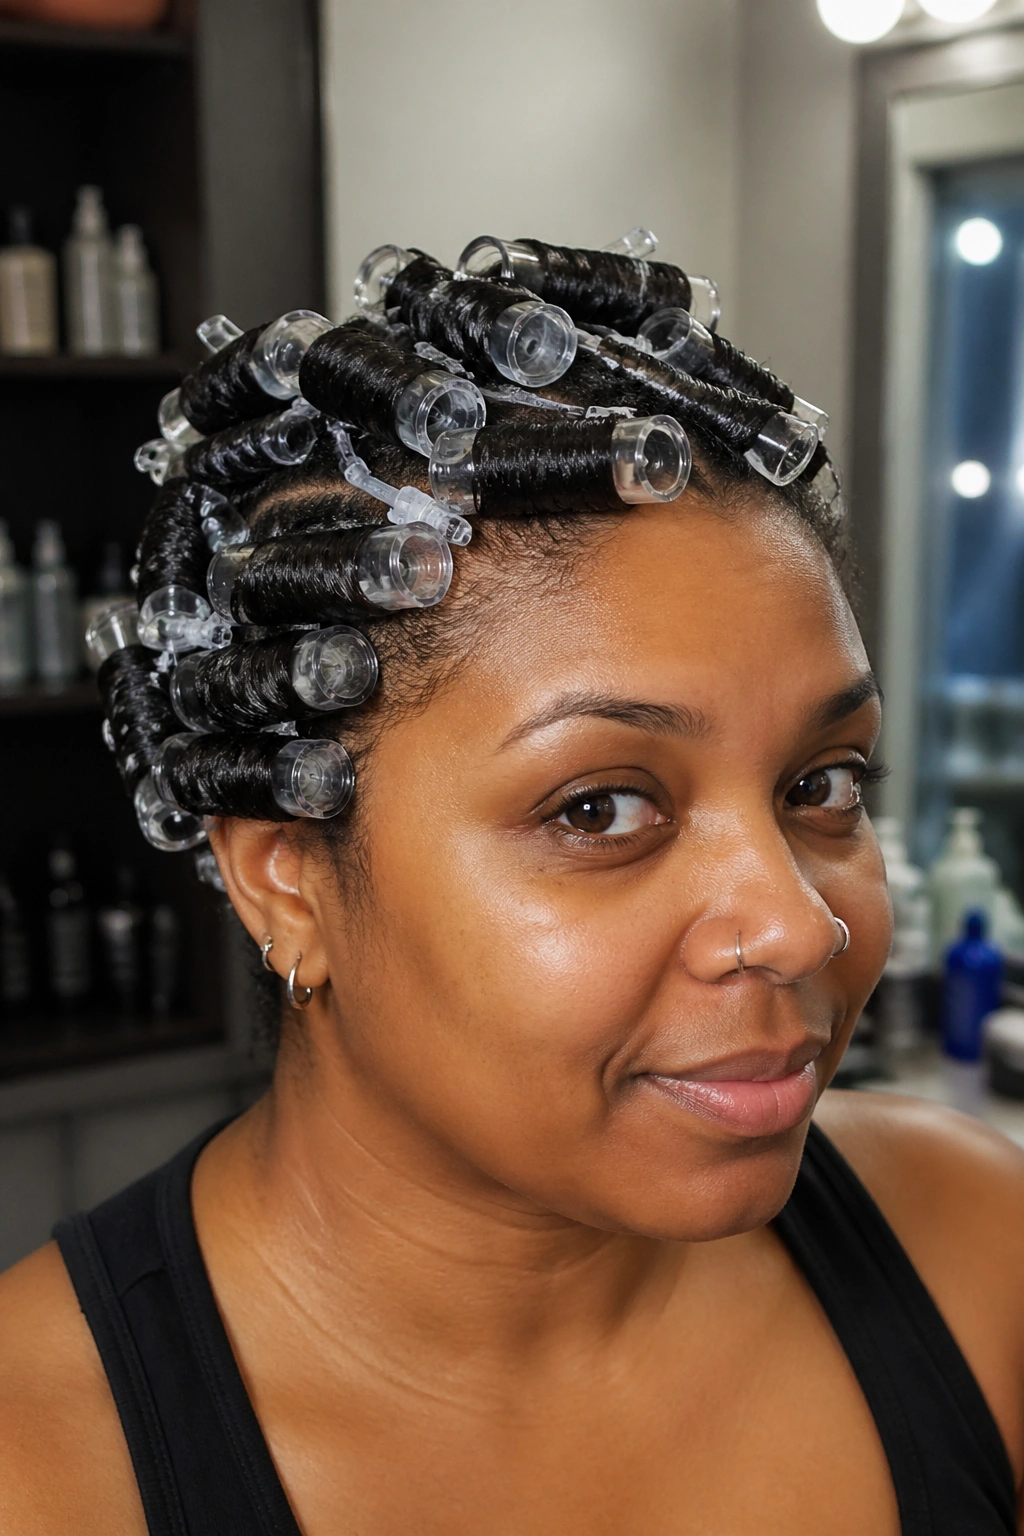
Wrap sections of soaking-wet, product-coated hair around drinking straws, rolling from tip to root and securing with a pin or roller clip. The wet hair wraps more smoothly and conforms more readily to the straw shape, resulting in tighter, more uniform ringlets once dry.
- Use a strong hold mousse or setting lotion on wet hair before wrapping
- Wrap each straw section tightly, going all the way to the root
- Sit under a hooded dryer for 45-60 minutes rather than air drying
- Allow to cool fully before removing straws
The wet straw set produces one of the most formally polished wet curly hairstyles on this list — tight, uniform spirals with a sheen that reads intentional and dressed up.
6. Defined Wet Puff
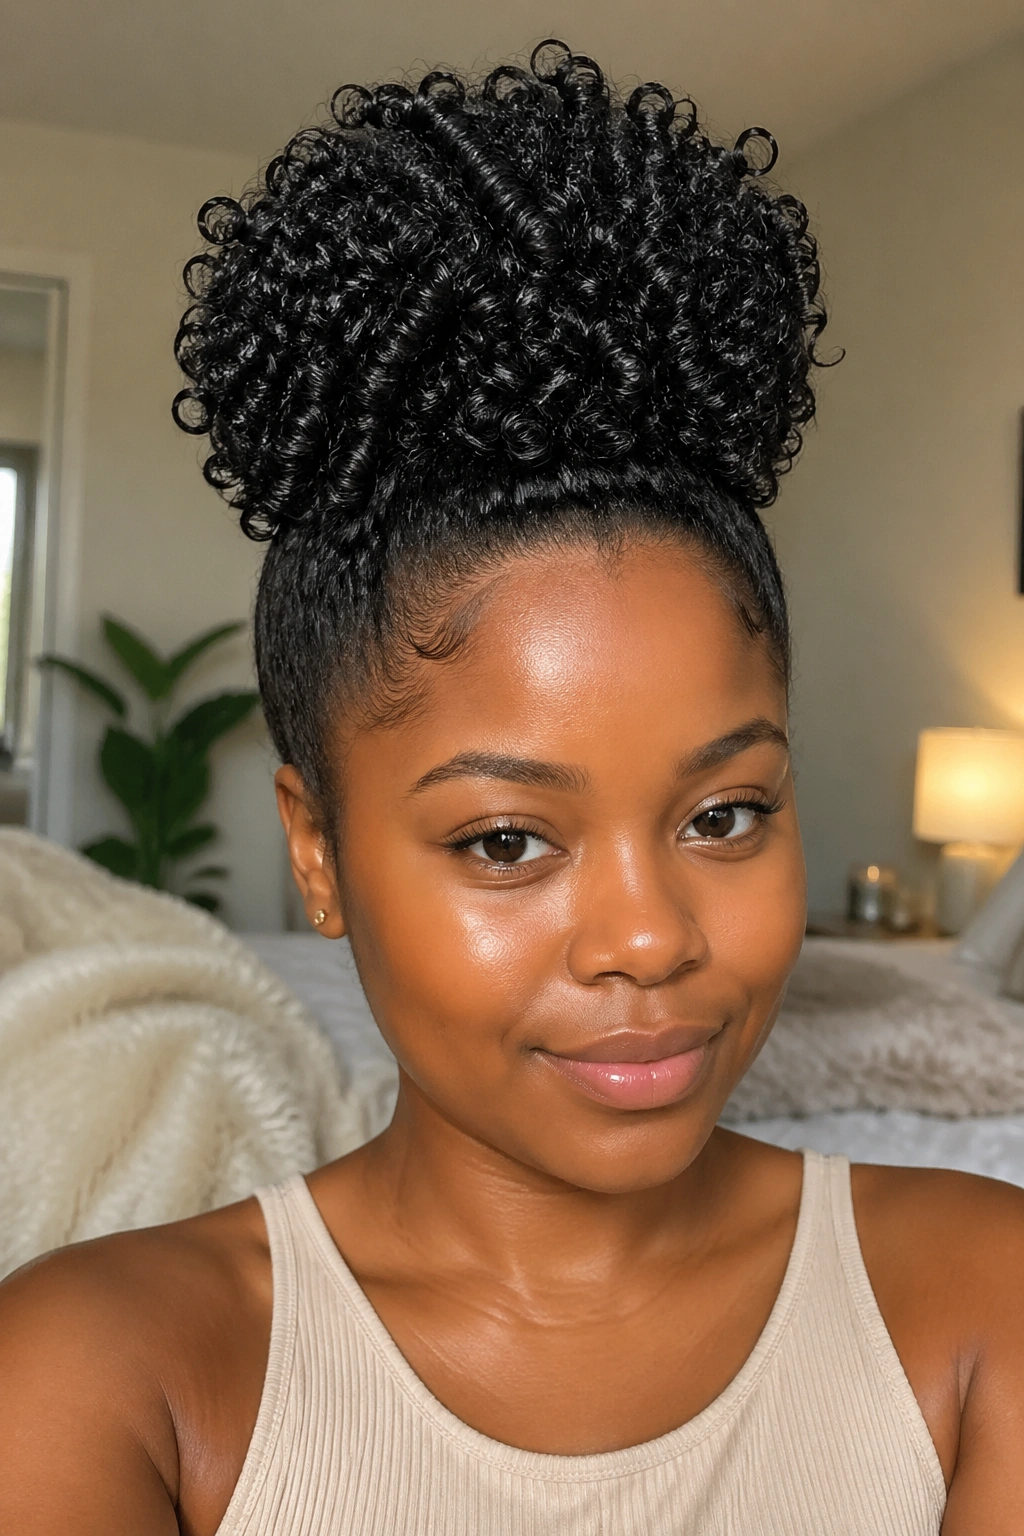
A puff made entirely of soaking-wet, freshly styled curls has a different quality than a puff made of dry hair. The curls are heavier, more defined, and catch light differently. Gather your freshly washed and product-coated hair into a puff while still wet, let it dry in that position, and the result is a puff with definition throughout rather than a puff of dry, undefined curls.
The wet puff is especially good on 4C hair that tends to shrink a lot when dry — the gathered wet curls hold more length than loose dry curls would.
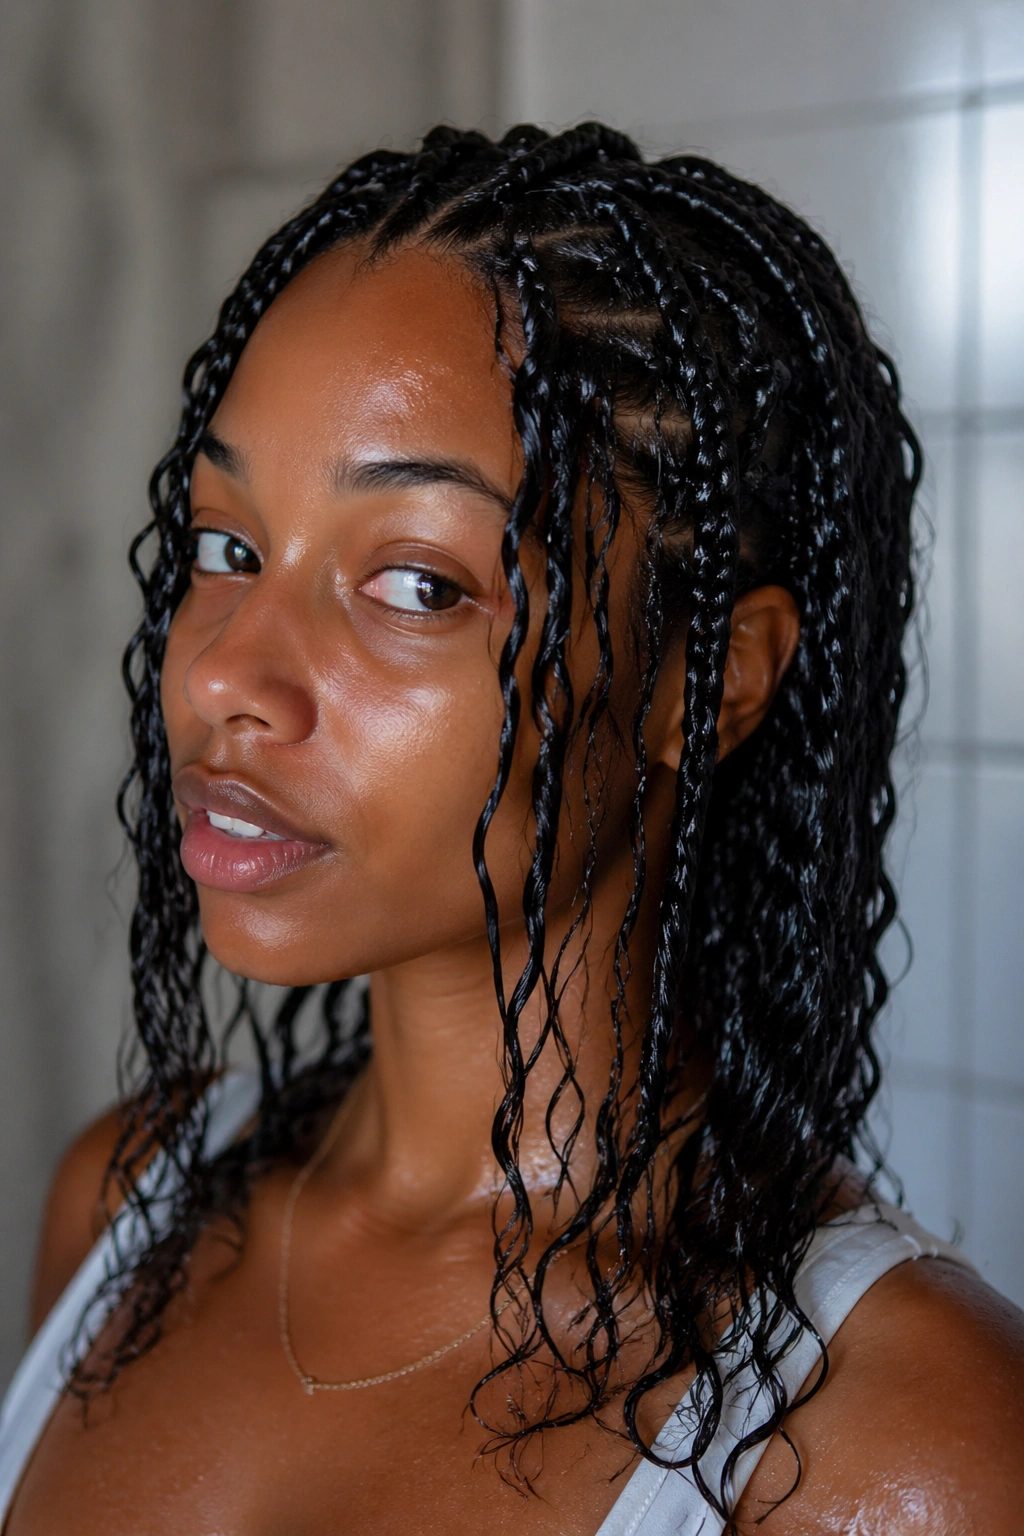
7. Wet Two-Strand Twists (Worn as a Style)
Two-strand twists worn as the finished style — rather than as a set for a twist-out — look especially polished when done on soaking-wet hair. The wet strands twist together more smoothly, the finished twist has more sheen, and the style has a clean, intentional look that’s distinct from dry-hair twists.
Wear wet two-strand twists to an event and they’ll look like a professional installation. The shine from the wet-applied product and the clean twist pattern together read very polished.
8. Wet Braid-Out Set
Set cornrows or three-strand braids on soaking-wet hair. Allow to dry completely — overnight is ideal — and release in the morning. Because the braids were set wet, the wave pattern that results is deeper and more defined than a dry braid-out, and the style holds better across the day.
Wet braid-out waves have a crimped, textured quality that’s distinct from twist-out waves — more angular, more geometric, with sharper definition at the root.
9. Slicked Side Part
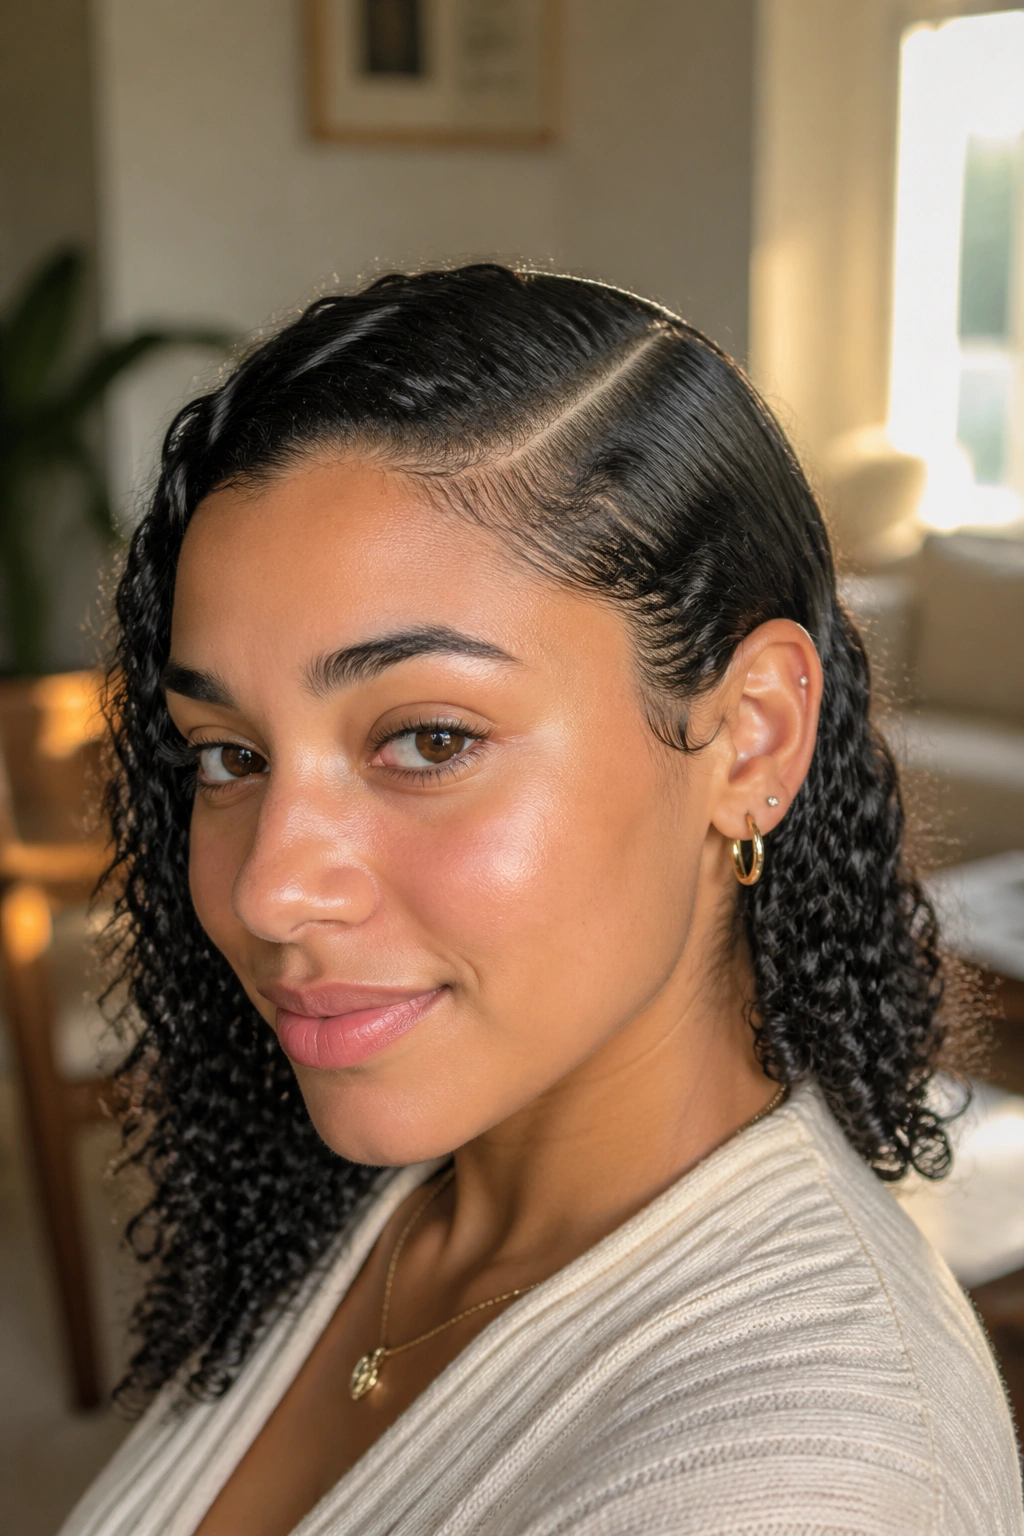
A wet, slicked-down side part is one of the most polished wet curly hairstyles for professional settings. Apply gel to soaking-wet hair and use a wide-tooth comb to create a clean part on one side. Comb the hair on each side of the part smoothly back and away, then smooth the entire surface with your palm and a scarf tie.
The contrast between the clean part line and the curly texture on either side creates a graphic, intentional look. Your natural curl pattern is fully visible — it’s just organized rather than free-floating.
10. Wet Defined Bantu Knots
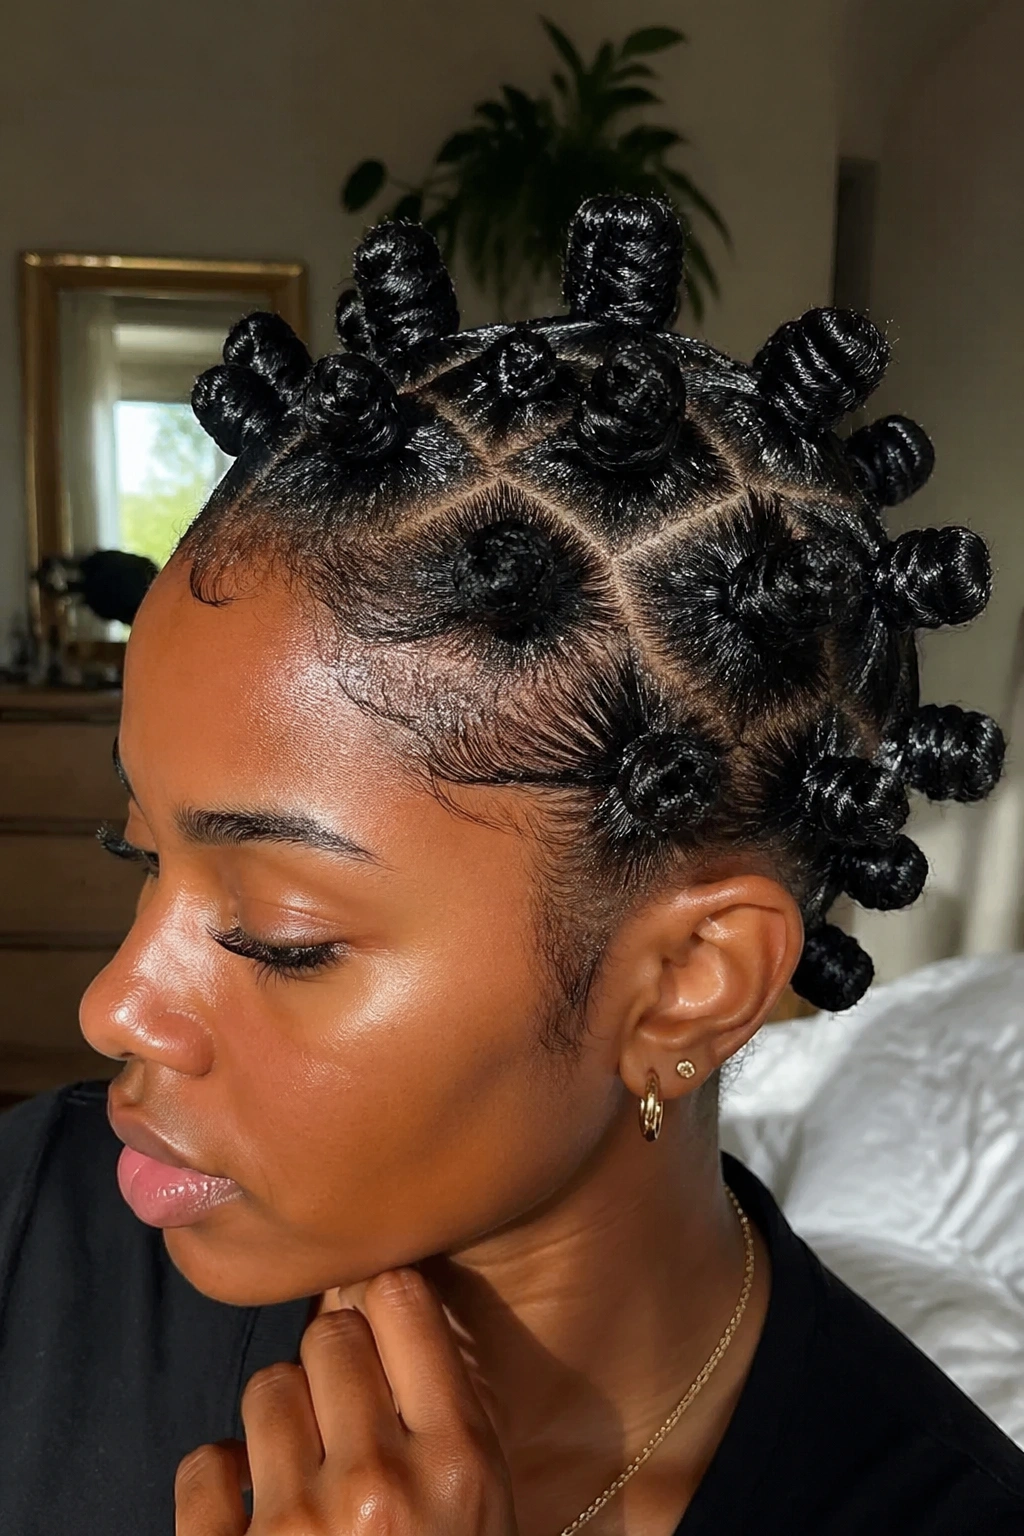
Bantu knots done on soaking-wet hair have more sheen and definition than those done on dry hair. Section the hair while wet, apply product, then coil each section tightly around itself and tuck the end under the knot. The wet hair cooperates more readily and sits flatter at the base, making the knots cleaner and more uniform.
Worn as a complete style rather than an overnight set, wet Bantu knots are striking — a sculptural arrangement of coiled sections that makes your whole silhouette interesting.
11. Wet Flat Twists
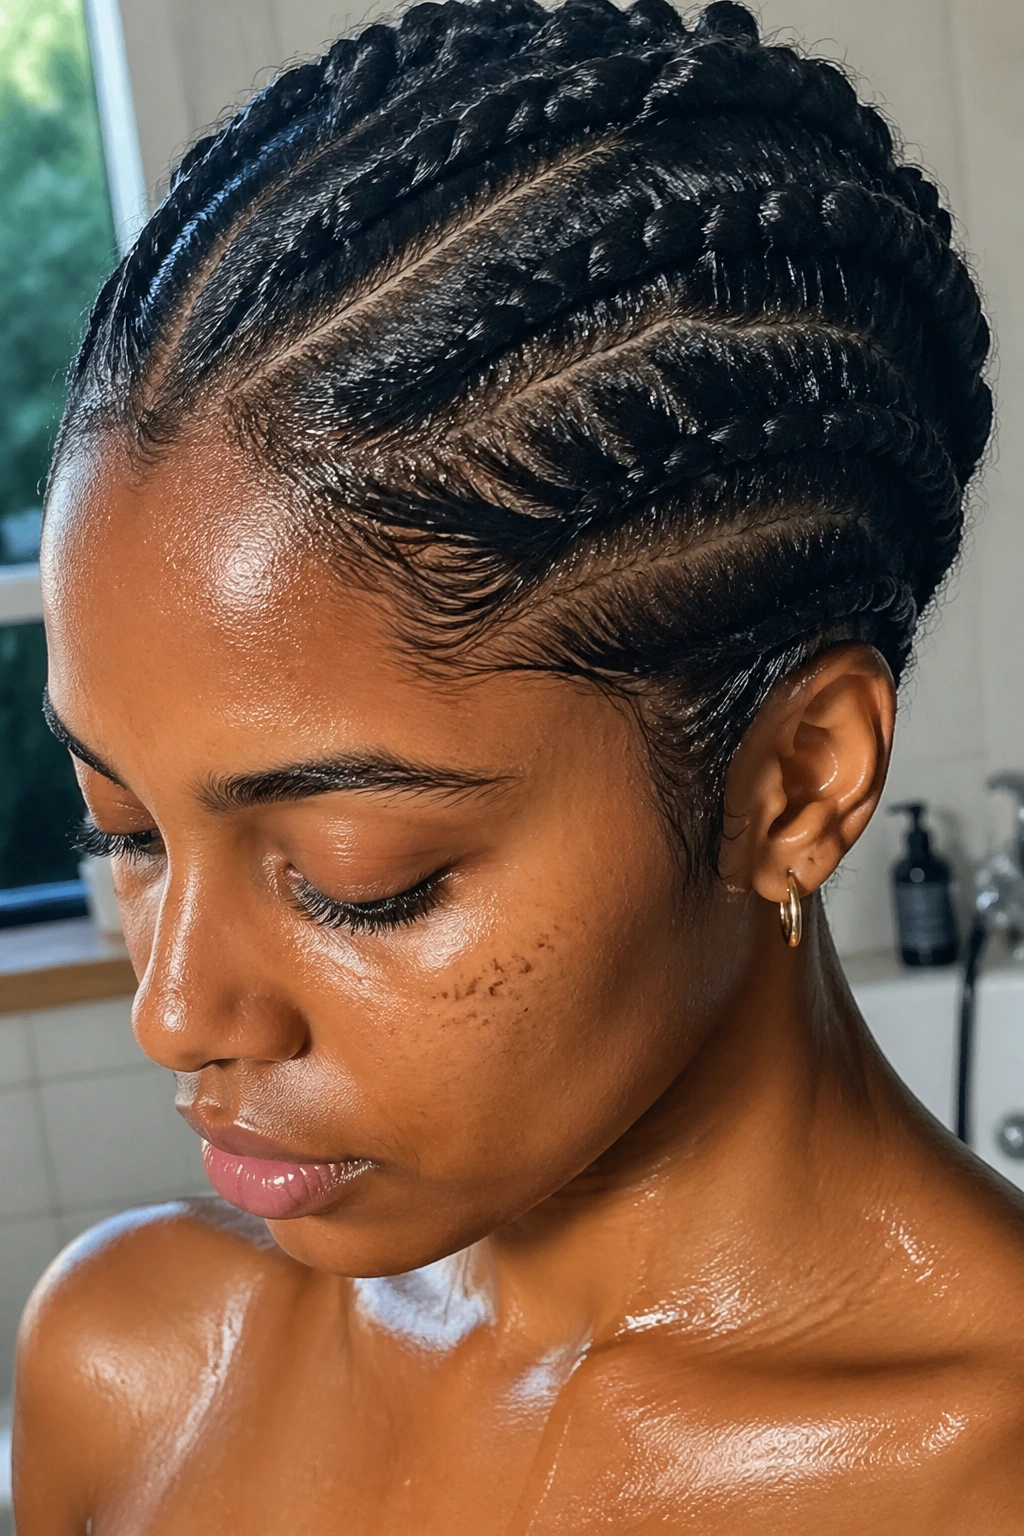
Flat twists done on wet hair hug the scalp more closely and look more precise than dry-hair flat twists. Apply gel or a setting lotion to wet, sectioned hair, then flat-twist each section along the scalp, keeping as much tension as the hair allows without stressing the roots.
Wet flat twists can be worn as a complete style in themselves — a series of neat, defined twists across the scalp leading to loose or untwisted ends — or they can be pinned into an updo for a more formal look.
12. Soaking-Wet Twist Updo
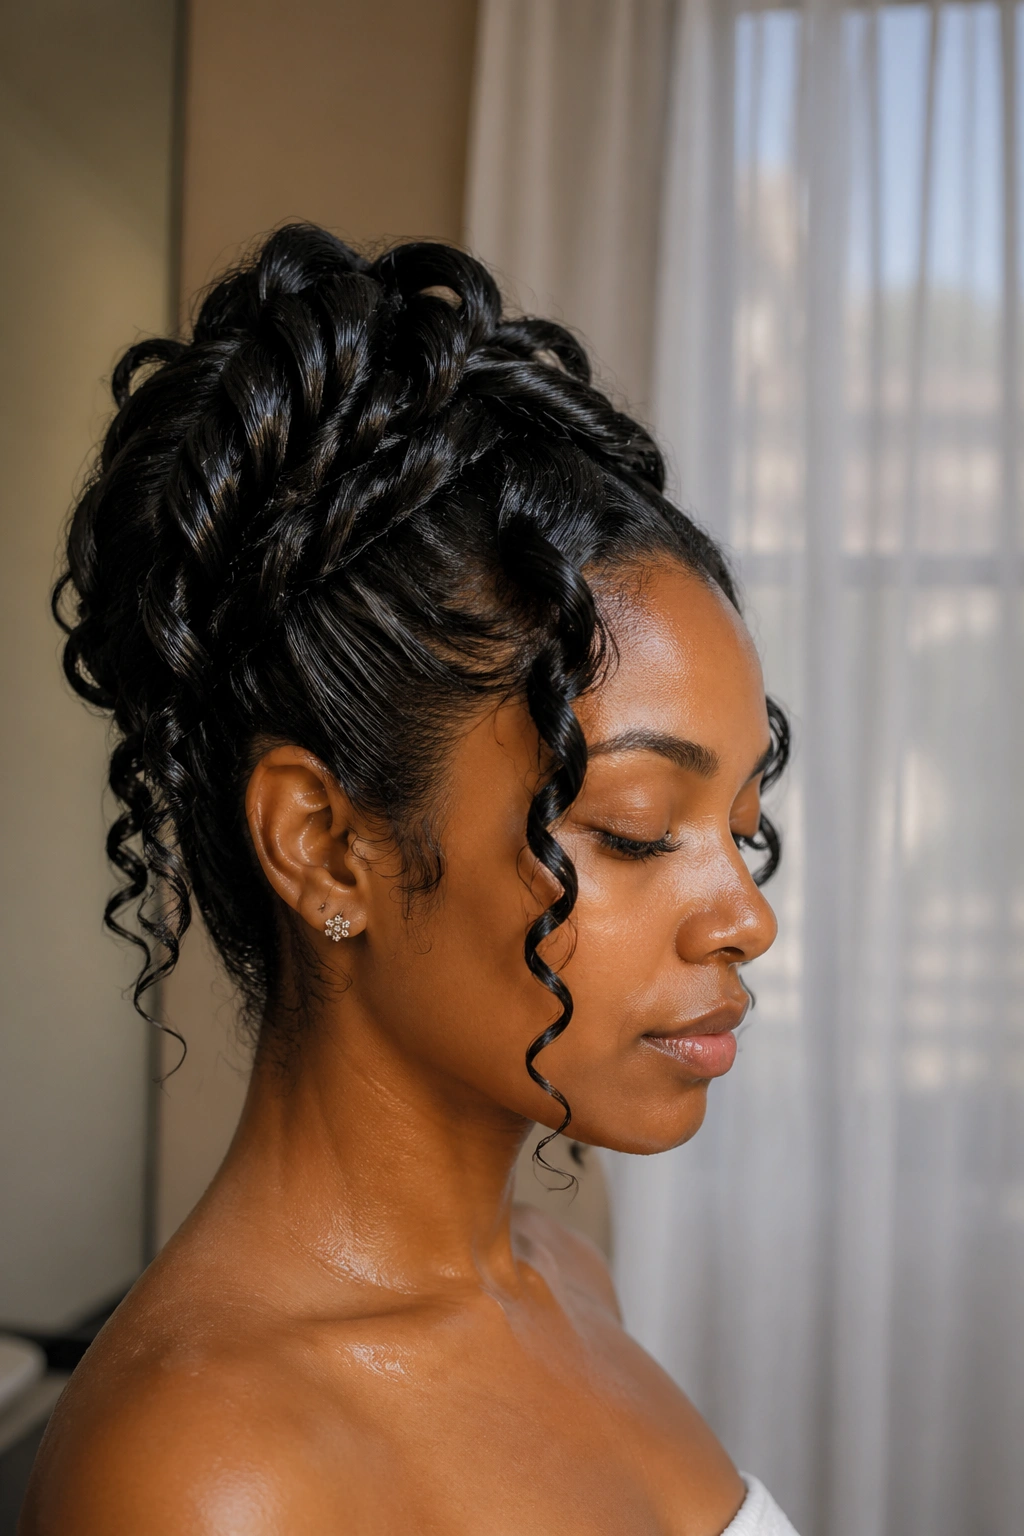
Apply product to all your hair while soaking wet, twist large sections loosely, and pile the twists at the crown or nape in an updo formation. Pin as needed. As the twists dry, they set in their updo position and the whole style becomes more defined and polished over the course of a few hours.
This style is particularly useful for busy mornings — do it in the shower or immediately after, leave for work, and your style improves as the day goes on.
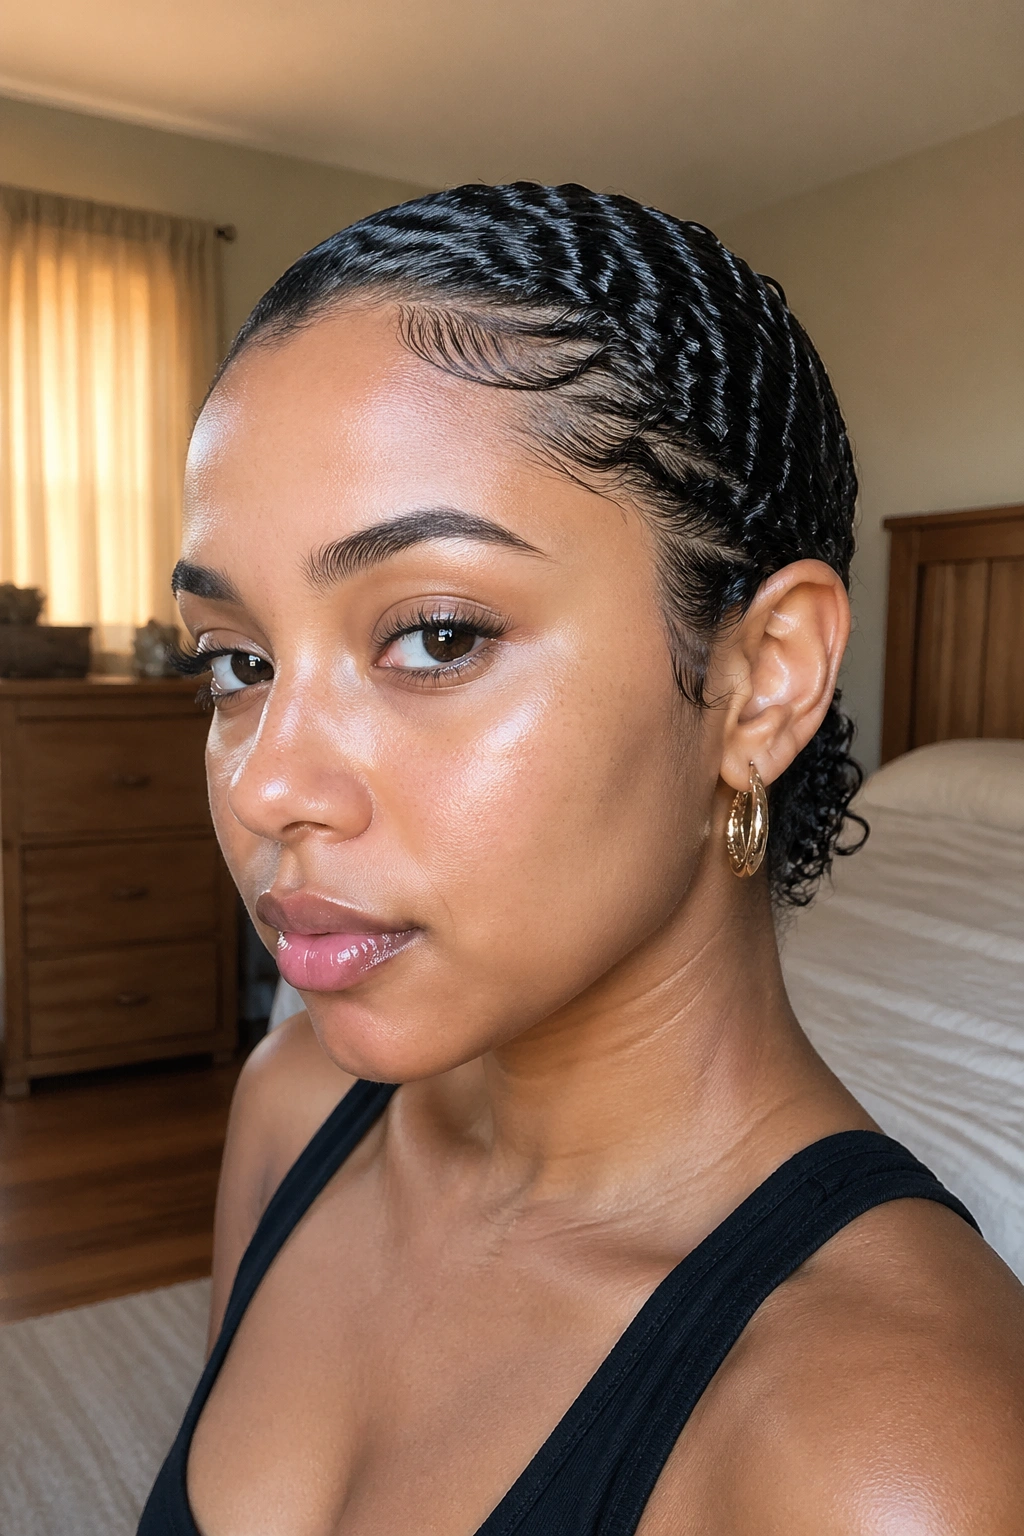
13. Wet Cornrows with Free Ends
Cornrow the first few inches from the hairline and scalp, then leave the rest of each section loose. The contrast between the scalp-flat cornrowed sections and the free, wet curls at the ends creates a polished hybrid style that’s structured at the roots and expressive at the ends.
Apply gel to the cornrowed sections while they’re wet to maximize hold and shine. The free ends can be styled with a curl cream for definition.
14. Wet Flexi-Rod Set
Wrap wet, product-coated hair around flexi rods — the thicker rods for loose curls, thinner rods for tighter ringlets. The wet hair wraps more smoothly around the rod and sets more precisely than damp or dry hair.
Sit under a hooded dryer for 45-60 minutes, allow to cool, then remove the rods. The resulting curls are shiny, defined, and incredibly bouncy. A wet flexi-rod set produces one of the most visually impressive natural hair results relative to the effort required.
15. Wet Shingled Curls
Shingling is a technique where you apply a substantial amount of gel or cream to each small section and smooth it from root to tip with your fingers, pressing the curl into its natural shape rather than scrunching. The result is curl-by-curl definition with a wet, glossy finish that’s unlike any other wet curly hairstyle.
Shingling works best on 3A through 4A curl patterns where the curl has enough natural definition to separate into clean sections. On very tight coils, shingling creates very small defined sections that, while beautiful, require more time to complete the full head.
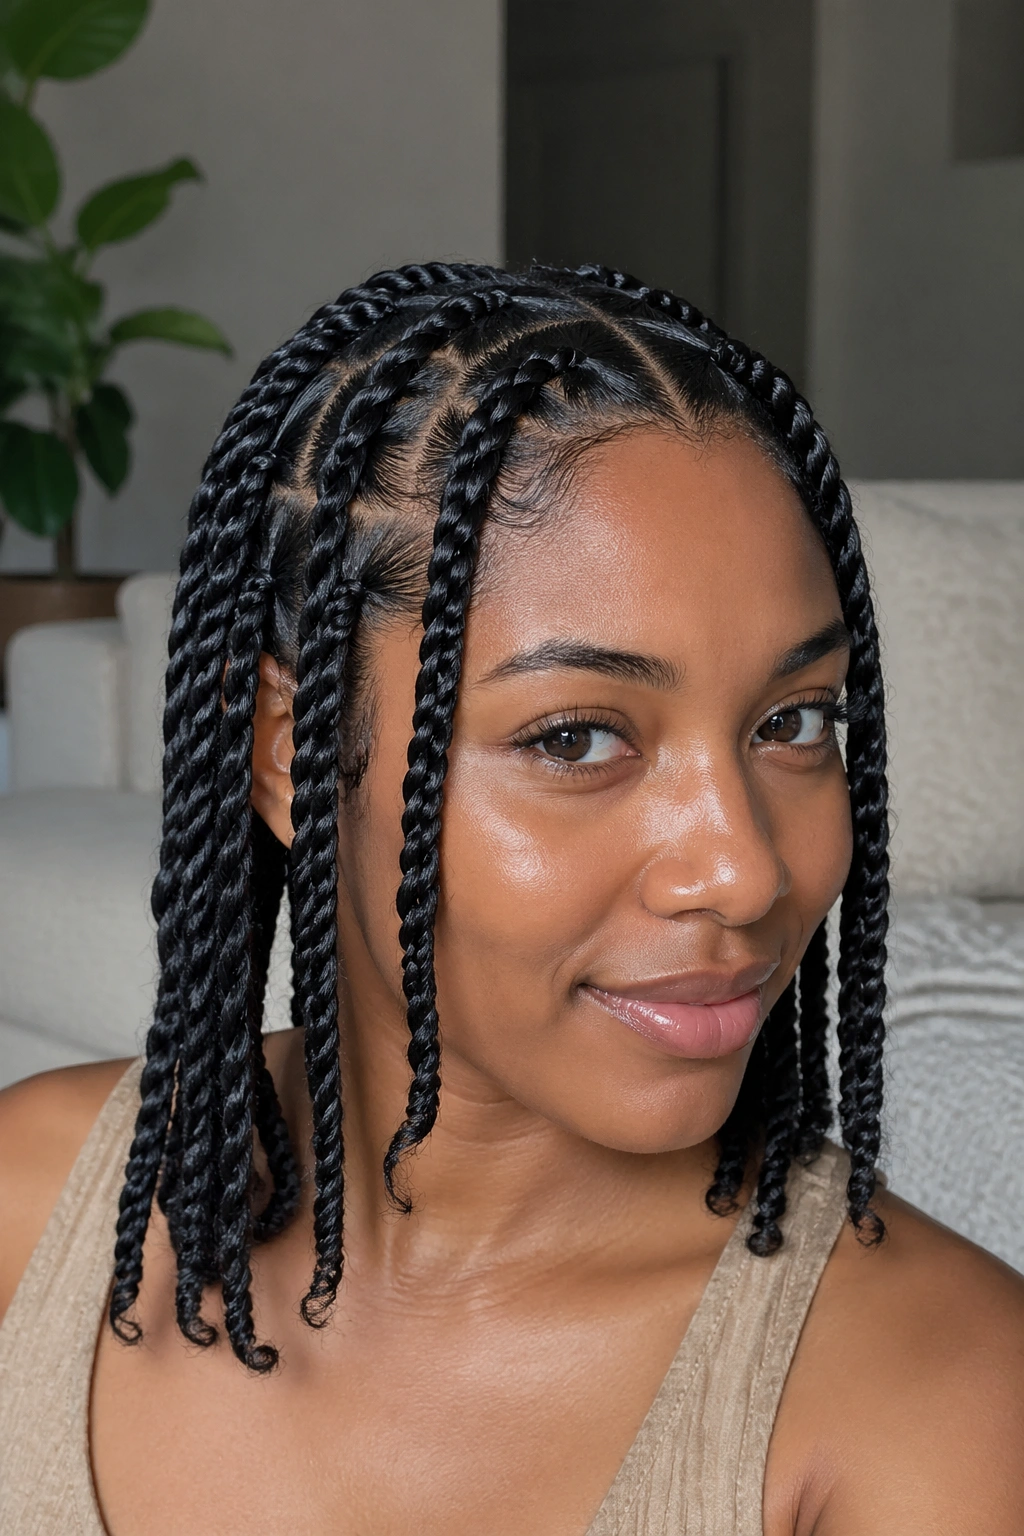
16. Wet Rope Twists
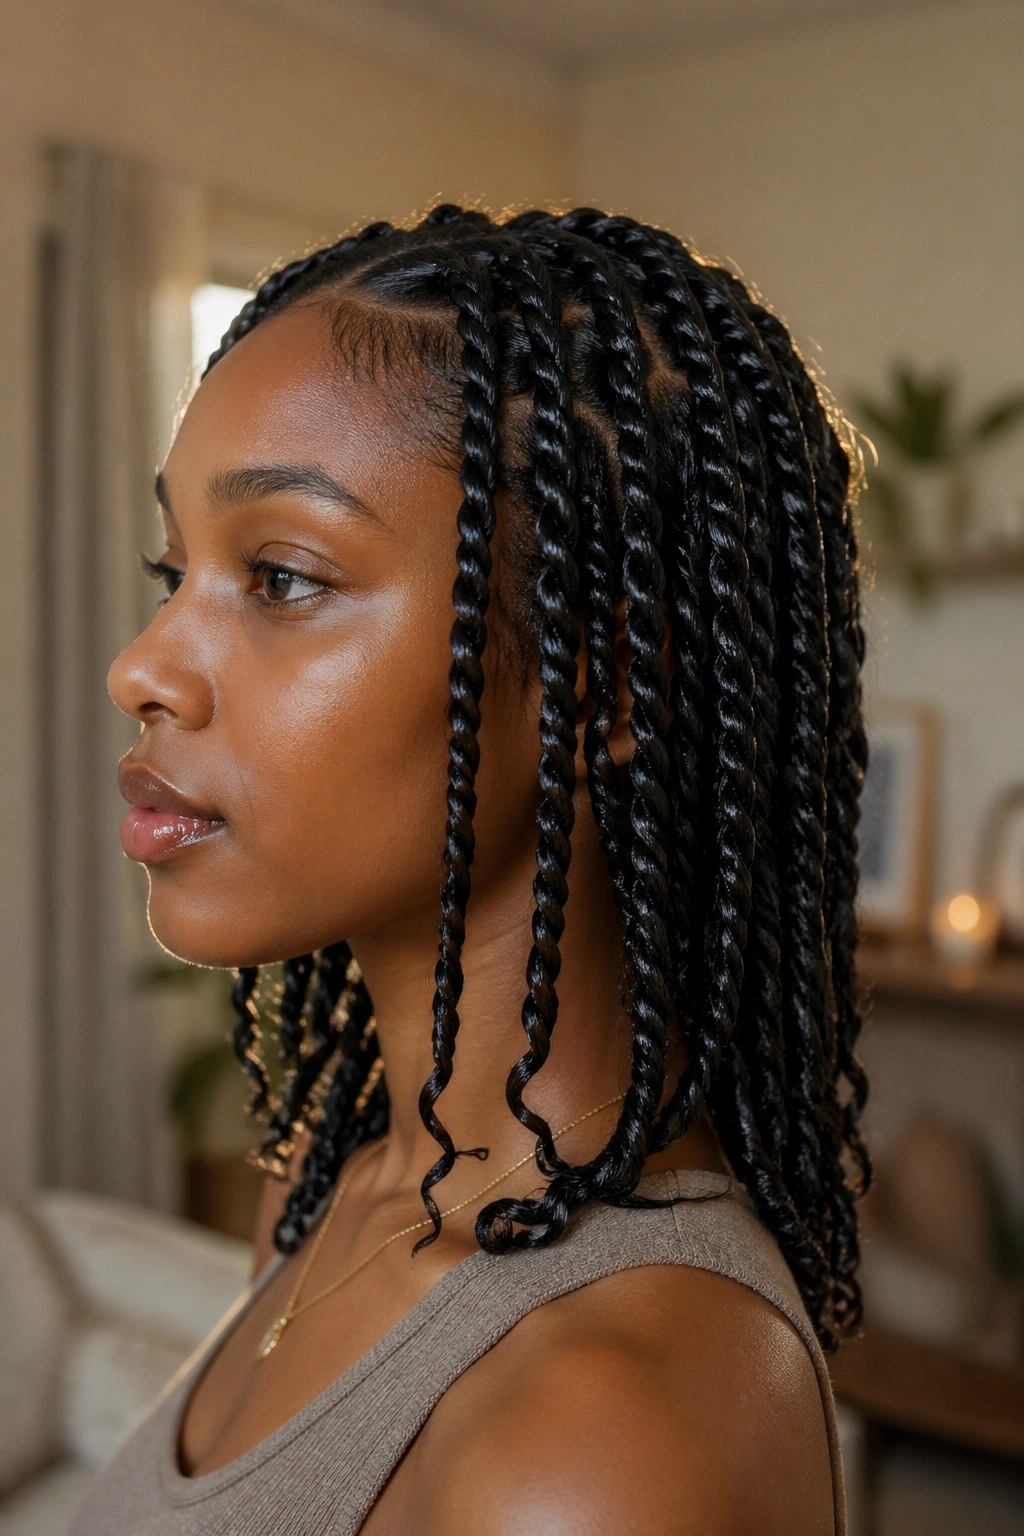
Rope twists — where two strands twist around each other in the same direction rather than around each other in opposite directions — have a different texture and sheen than standard two-strand twists. Done on wet hair with a generous amount of gel, rope twists look like they’ve been professionally set.
Wear them loose or gathered into an updo. Rope twists on wet hair stay neatly defined for several days with proper nighttime care.
17. Half-Up Wet Coils, Half-Down Loose
Take the top half of your hair and finger coil each section while still wet. Leave the bottom half soaking wet and loose, applied with curl cream for definition. The result is a half-up style where the top sections are precisely coiled and the bottom sections are freely curly — two textures that complement each other.
The coiled top provides structure and polish. The loose, wet-look bottom provides movement and expressiveness. This combination is particularly striking for events where you want your hair to make a statement.
18. Wet Hair with Accessories
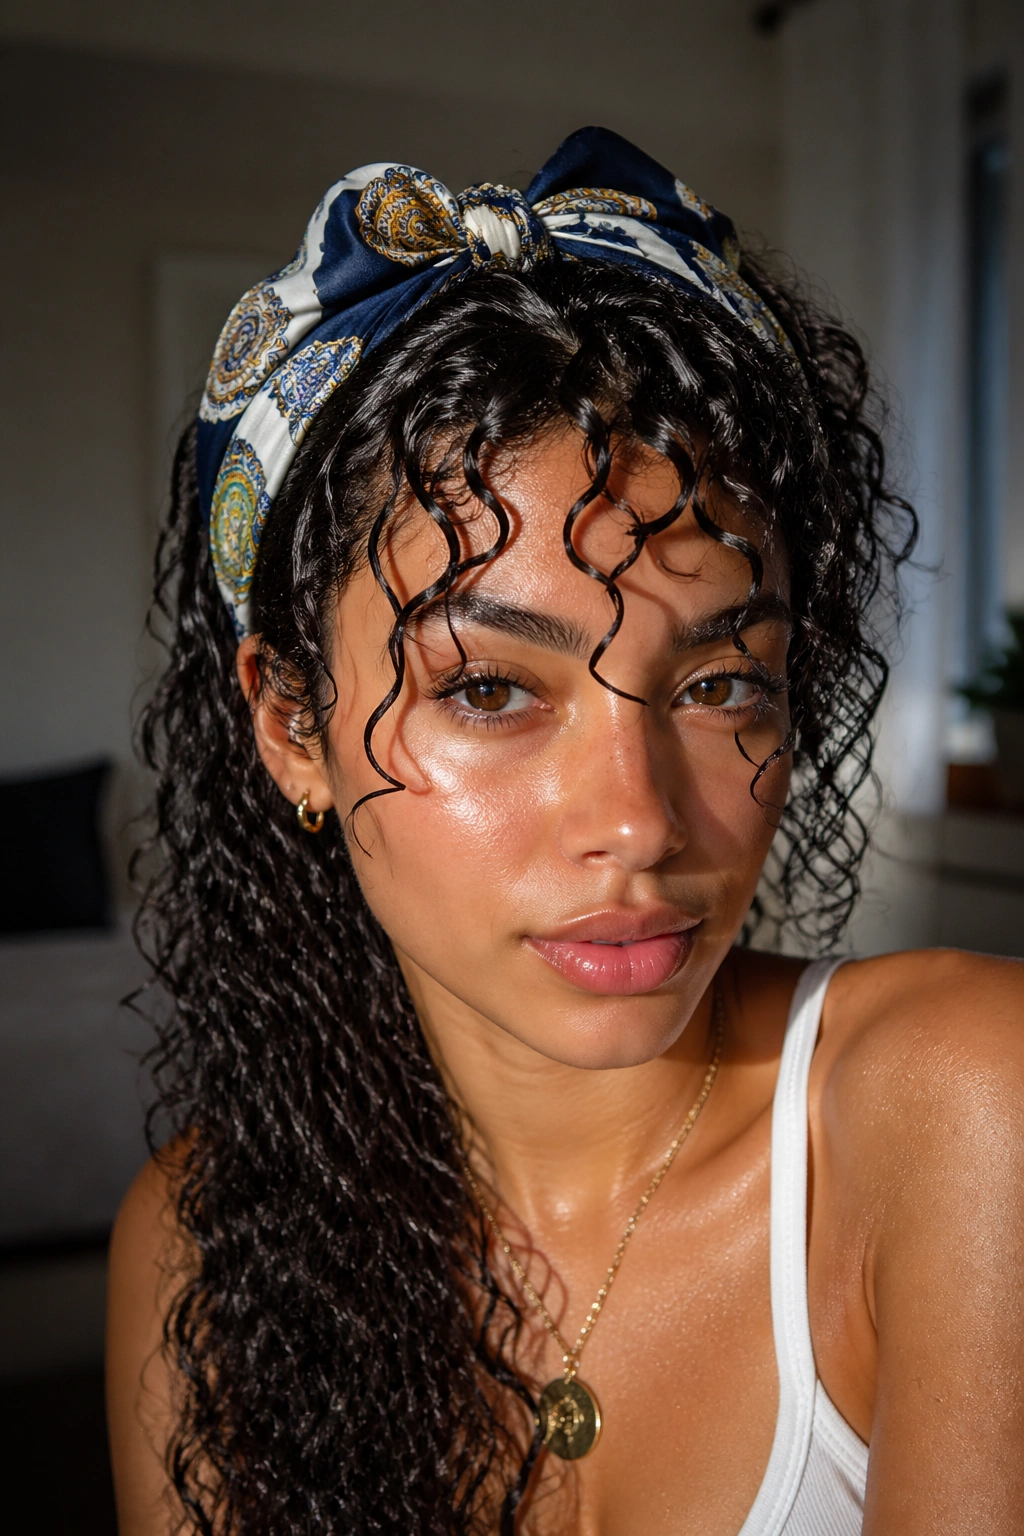
One of the fastest polished wet styles: do your full product application on soaking-wet hair, scrunch for definition, then immediately add an accessory — a silk scarf, a wide embellished headband, or decorative clips. The accessory provides the “finished” visual signal while your wet curls provide the texture and definition.
This works especially well when you’re short on time. The accessory does the styling work while your hair air dries into whatever shape it wants beneath it.
19. Wet Pineapple Updo
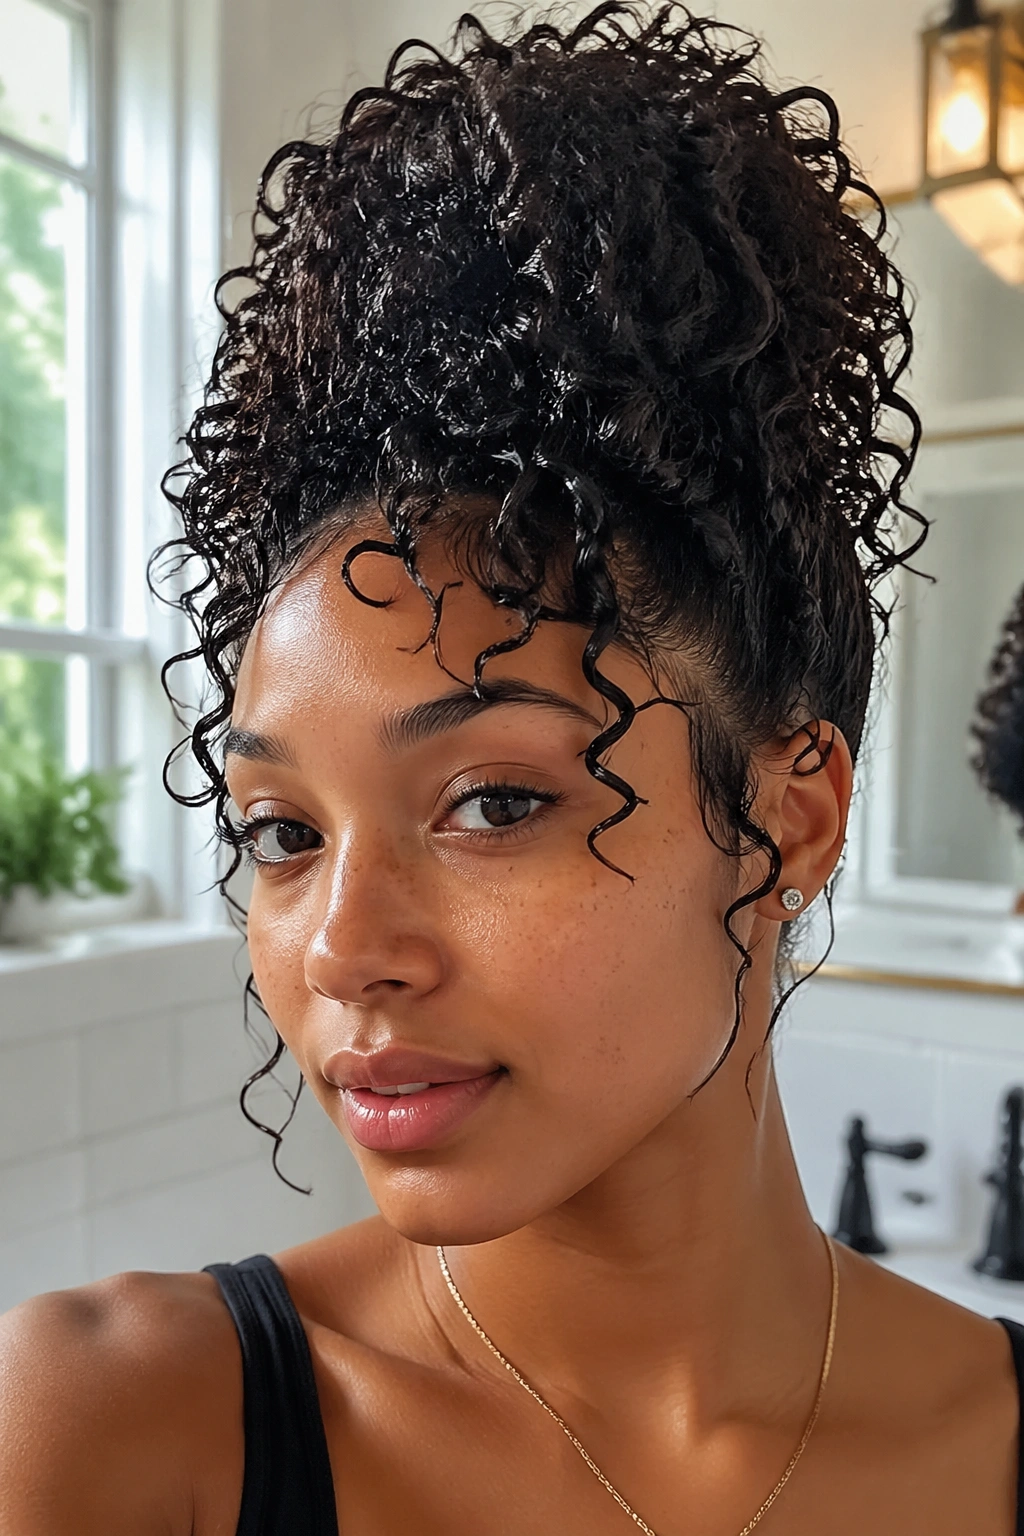
Gather your freshly washed, product-coated hair into a high pineapple while still soaking wet. The wet curls will drape and clump at the top of the pineapple in a different way than dry curls — more defined, more uniform in shape, with a sheen that makes the whole style look intentional. Allow to air dry in that position.
This is a style that looks better at hour two than it does at hour zero — let the drying process work for you.
20. Wet-Look Defined Mohawk
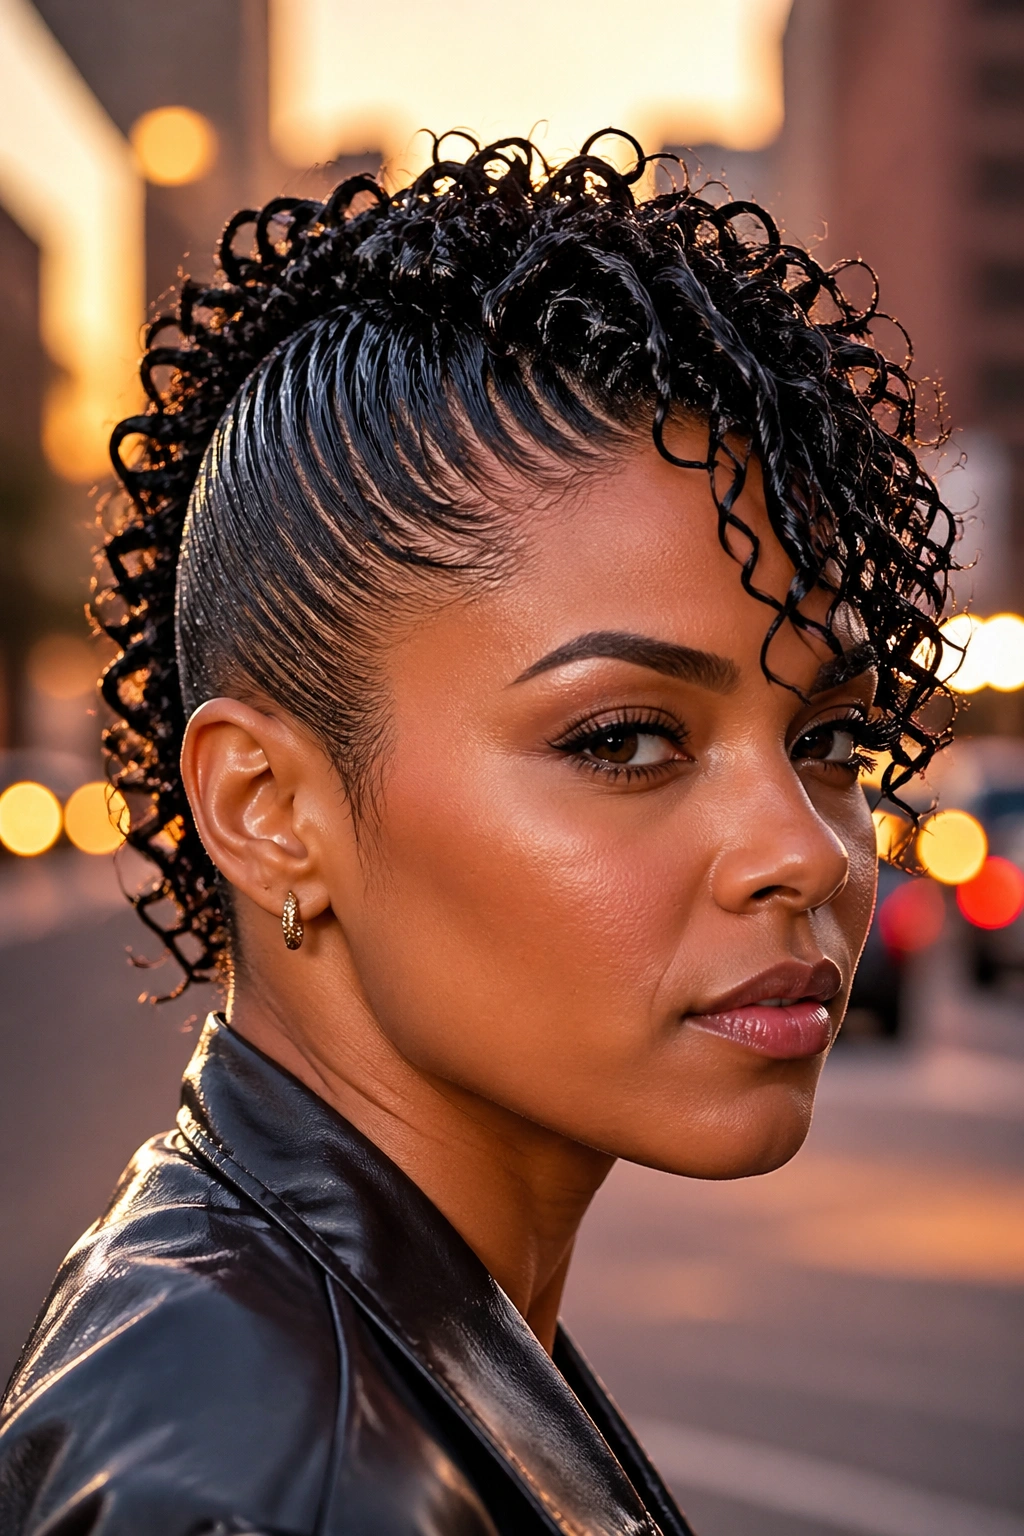
Section out the sides and braid or flat twist them close to the scalp with gel applied to soaking-wet hair. Leave the center section loose and apply gel or flaxseed gel for definition. Allow the center section to dry in its natural curl pattern — wet and defined.
The slicked, flat sides contrast with the free, defined center in a way that looks bold and intentional. The gel on the sides dries to a glossy finish that keeps the style looking wet even after the center section has dried.
21. Soaking-Wet Two-Bun Style
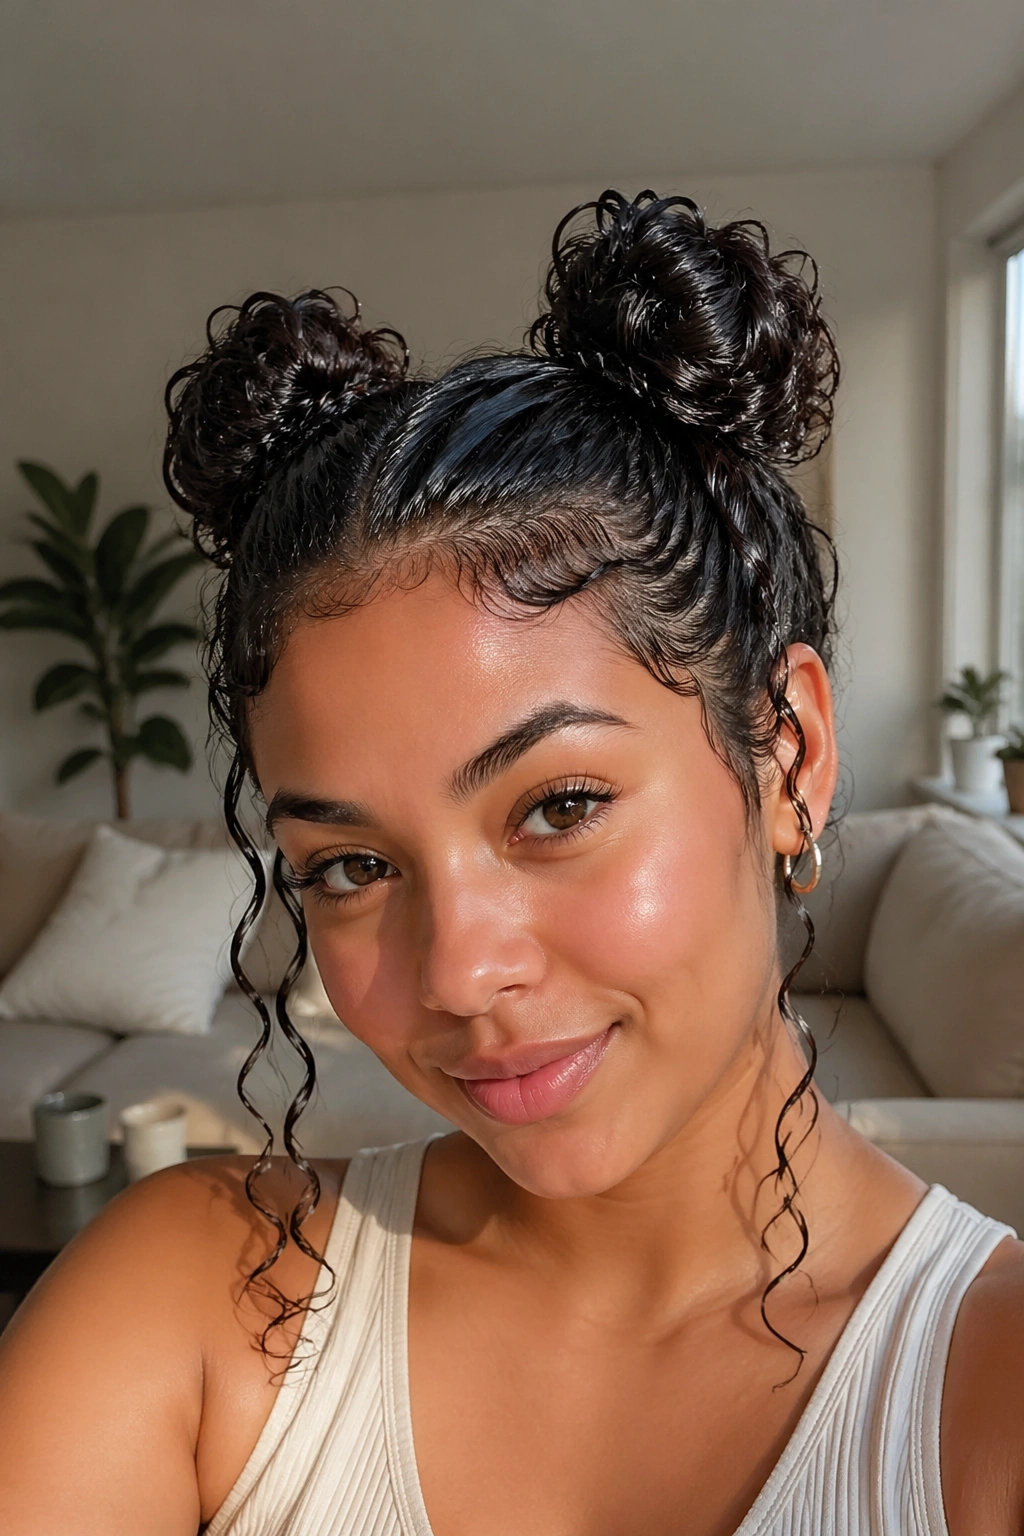
Divide your freshly washed hair into two sections, apply product to each section while still dripping wet, and form each section into a bun at the crown or slightly higher. Pin in place. As the hair dries, the buns hold their shape and the exposed curl edges at the base of each bun become increasingly defined.
This style works well on medium to long natural hair and produces a result that’s playful, defined, and completely polished despite the minimal technique required.
22. Wet Curl Refresh on Dry Hair
Not every wet style starts with freshly washed hair. A wet refresh — spritzing dry hair with water until it’s genuinely wet, then reapplying product and scrunching — can restore the wet-look definition of a wash-and-go that has dried out. Apply your refresh products over the dry-then-re-wetted curls and allow to re-dry.
The result mimics a fresh wash-and-go without the full wash process. This extends a wet curly style by two to three additional days.
23. Full Gel Cast Style
Apply a strong-hold gel — Eco Styler Black Castor Oil, Wetline Xtreme, or a similar firm gel — to every section of soaking-wet hair from root to tip. Do not scrunch yet. Smooth each section in one direction with your palms and allow the gel to begin setting before you scrunch. Then scrunch firmly and allow the hair to air dry completely.
The gel cast will make your hair feel crunchy and stiff when dry — this is correct. Once fully dry, scrunch out the crunch with a small amount of oil on your palms, breaking the cast and releasing the curls inside. What you’re left with is a full, defined curl pattern with zero frizz — polished in the most complete possible way.
Styling Wet Curls for All-Day Wear
The transition from wet to dry is what most people worry about, and it’s genuinely the make-or-break moment in any wet curly hairstyle. The style that looked stunning when you walked out the door might look frizzy and compacted by afternoon if the transition isn’t handled correctly.
Letting the hair dry completely is the most important step. Styles that are messed with before they’re fully dry never reach their maximum definition. If you can, let your hair air dry for at least two hours before touching it. If you need to leave earlier, diffuse on low heat until the hair is at least 80% dry before you start moving around in it.
Throughout the day, fight the urge to fluff, separate, or adjust your wet style before it’s ready. Touch it too early and you break the curl pattern. Leave it alone and it does the work itself.
The Misconception About “Wet Hair” Looking Unfinished
There is a persistent, unfair idea that wet hair is somehow less professional or less appropriate than dry hair. This idea has been applied to natural curls specifically — as if the most natural state of textured hair is somehow the least acceptable one.
Wet curly hairstyles that use deliberate products, intentional technique, and clean edges are as polished as any other style. The judgment about wet curls looking “undone” is a bias rooted in Eurocentric beauty standards, not any actual measure of grooming or care. A gel cast wash-and-go took time, skill, and product knowledge to achieve. A soaking-wet straw set is labor-intensive and technically precise.
Wear your wet curl style with the knowledge that you know exactly what you’re doing — and that you look exactly as polished as you intended.
Protecting Wet Styles Through Daily Activities
Wet curly hairstyles face a challenge that dry styles don’t: the drying process itself is part of the style’s development, and disruption during that process changes the outcome. Knowing how to move through your day while a wet style is setting can preserve the polished result you applied products for.
In the early hours of a wet style — the first hour or two after application — minimize touching the hair completely. Every contact redistributes product and disrupts the curl clumping that creates definition. If you need to drive, use a seatbelt that doesn’t cross the shoulder of your hair, or use a seatbelt cover to reduce friction. If you’re working at a desk, keep your hair away from the chair back so the weight of the damp hair doesn’t compress the style.
Wind is the enemy of wet curly hairstyles during the drying phase. It disrupts curl clumping and causes individual strands to dry in directions that don’t match the cluster they started in, creating frizz. When moving from one location to another with a wet style, a loose satin scarf draped over the hair — not tied tight — protects from wind without disturbing the product.
Once the style is at least 70% dry, it becomes more resilient. At this point, normal daily activity won’t significantly alter the outcome. But be aware that any style you’re planning to use diffuser heat on should be diffused before leaving, not during the wet phase while you’re already out.
Humidity and Wet Styles: What Actually Happens
Many people assume humidity makes wet styles worse — that additional environmental moisture disrupts the product coating and causes frizz. In reality, humidity and wet curly hairstyles have a more nuanced relationship.
Low humidity environments are actually harder on wet styles than high humidity ones. In dry air, the water in soaking-wet hair evaporates quickly, which can cause curl patterns to set unevenly — sections near the scalp take longer to dry than sections at the tips, and the uneven drying sometimes means uneven definition. Adding a humidifier to your styling environment, or diffusing in a bathroom with some residual shower steam, creates a more even drying environment.
High humidity slows drying time — which can be an advantage for air-drying styles, since the curls have more time to settle into their pattern before the product sets. The risk in high humidity is that hygroscopic ingredients in some products — particularly glycerin — attract too much moisture from the air and eventually over-swell the hair shaft, leading to frizz. In humid climates, use products with moderate glycerin content rather than very high amounts, and apply a light anti-humidity finishing product over your wet style once you’re done applying everything else.
The Difference Between Wet Styles on Different Curl Types
A soaking-wet wash-and-go on 3A hair looks different from the same process on 4C hair — both are wet curly hairstyles, both can look polished, but the visual result and the specific technique requirements differ in meaningful ways.
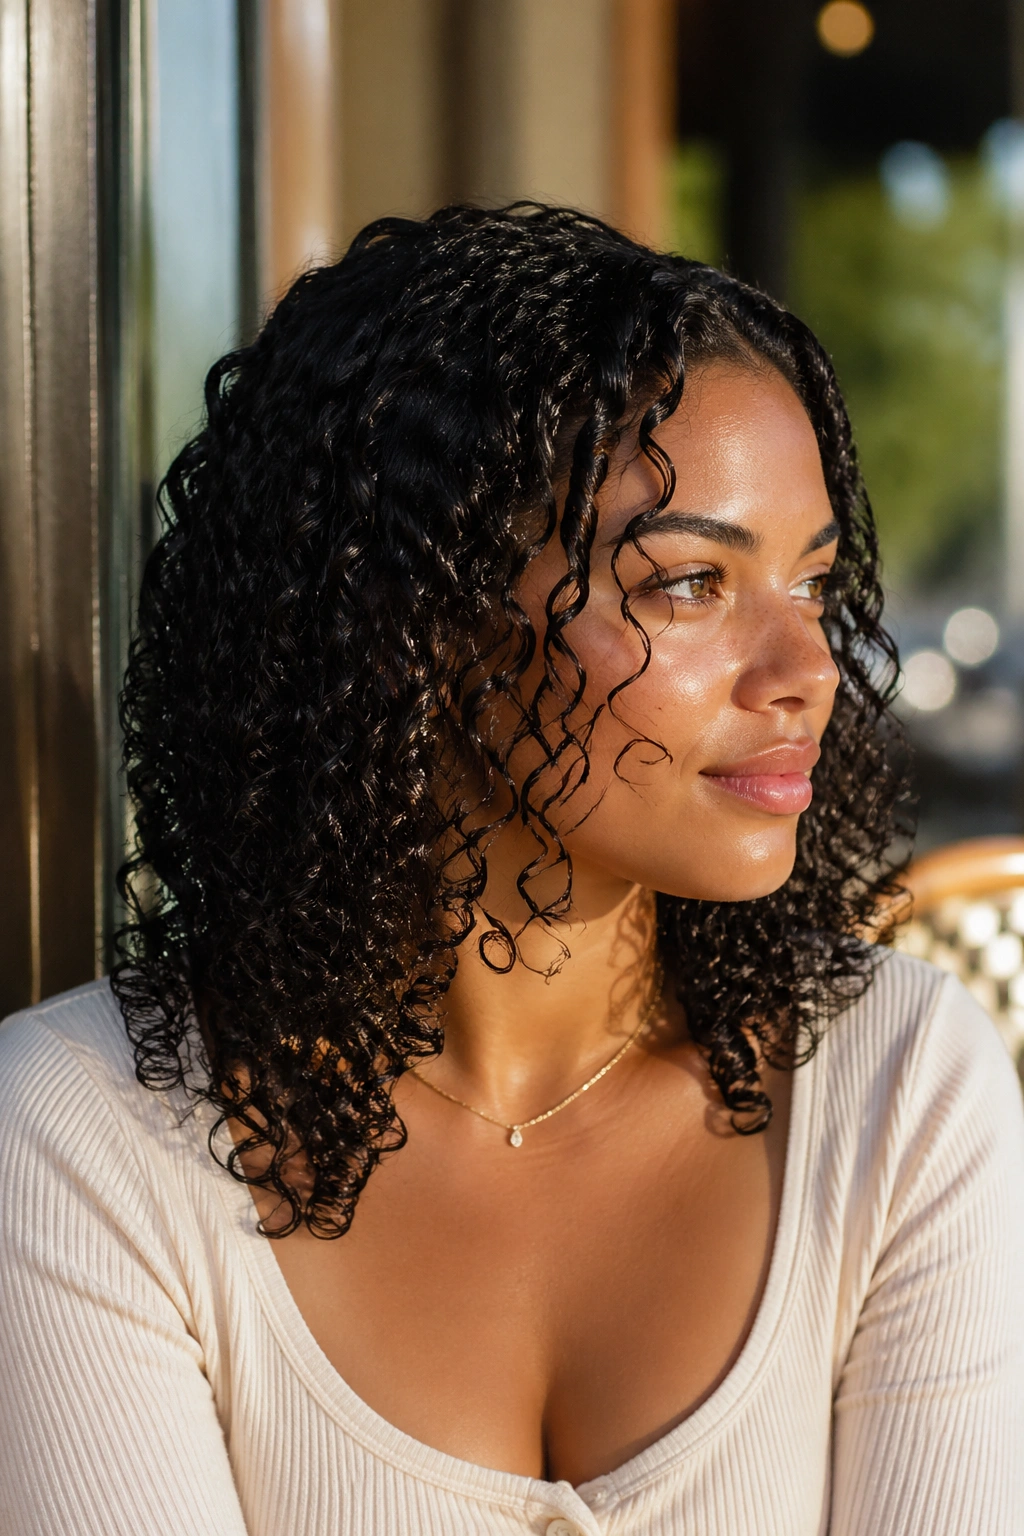
3A and 3B hair in a wet style tends to produce large, clearly defined waves and ringlets that separate into individual curls as they dry. The wet look on these curl types has a glossy, almost editorial quality. Products with lighter hold are often enough — heavy gel can weigh down the looser curl pattern and remove definition rather than add it.
3C and 4A hair benefits from a stronger hold product in wet styles because the coil is tight enough to need some encouragement to clump and stay clumped through the drying process. A medium-hold gel applied over a leave-in produces defined, glossy coils in the wet state that hold their shape well through the transition to dry.
4B and 4C hair needs the most product support for wet curly hairstyles to look polished rather than frizzy. The very tight coil structure wants to shrink and tangle as it dries, which means you need enough product to keep the curl clusters intact through the full drying process. Flaxseed gel, Jamaican castor oil-based curl creams, and strong-hold gels with moisturizing ingredients all perform well on 4B and 4C wet styles.
The amount of product you use scales with curl tightness. Loose curls need less; tight coils need more. When in doubt, use more — wet curly hairstyles on natural hair almost always look better with enough product than with too little.
Refreshing a Wet Style After It Dries
One of the most useful things to know about wet curly hairstyles is that they can be re-wetted and revived almost indefinitely. If your style has dried, defined, and looked polished but then compressed and dulled by the end of the day, a simple refresh restores the wet-look quality in under five minutes.
Mist the hair with water until it’s genuinely wet — not just lightly damp. Apply a small amount of your original product over the now-wet curls. Scrunch from the ends upward. Allow to re-dry with minimal touching. The refresh produces a style that’s very close to the fresh-application result, which is why many naturals who prefer wet curly hairstyles mist and refresh every two to three days rather than fully rewashing.
The refresh method works best when the original products are still present in the hair — when you re-wet, those products reactivate. If your hair has been shampooed since the last wet style, you’ll need to apply fresh product for the refresh to work correctly.