There is nothing quite like the crown of thick, beautiful, natural hair sitting atop a little girl’s head. Afro hairstyles for little girls are more than just practical choices — they’re one of the earliest ways a child learns that her hair is something to celebrate rather than manage, something to show off rather than tame. Getting those styles right matters, and it starts with understanding what actually works on young, delicate hair without causing damage or making wash day a dread.
If you’ve been searching for afro hairstyles for little girls that are genuinely different from one another, hold up long enough to matter, and don’t require a child to sit still for three hours — this is the list you’ve been looking for.
Understanding Little Girls’ Afro Hair First
Children’s hair is not just small adult hair. The scalp is more sensitive, the strands are often finer than they’ll become with age, and the hair density can vary wildly from year to year. Some girls come out of the womb with thick, coily 4C hair; others start with softer patterns that tighten as they grow. Both are normal. Both need moisture. And both need to be handled without the level of tension that damages adult hair over time.
The most common mistake adults make with little girls’ hair is using too much heat, too much tension, or too-tight braiding styles too young. Traction alopecia — hairline recession caused by repeated tight pulling — can start in childhood. A braided style should never pull so hard the child’s skin puckers at the root. If she’s saying it hurts, it’s too tight. Full stop.
Protective Styles vs. Everyday Styles — What’s the Difference?
Protective styles tuck the ends of the hair away, reducing friction and moisture loss. Braids, twists, cornrows, and some updo styles fall into this category. They’re ideal for extended wear — several days to a couple of weeks — and they give the scalp a rest from daily manipulation.
Everyday styles — puffs, wash-and-gos, free afros, defined curl looks — involve the hair in its open state. They’re easier to install but require more consistent moisture maintenance since the ends are exposed.
For school days, protective styles are often the practical winner. For special occasions and weekends, the free styles and more decorative options are worth the extra effort.
Moisture Is Always the Starting Point
No style holds well on dry hair. Before anything else, the hair needs moisture — a water-based leave-in conditioner applied section by section, sealed with a light oil like jojoba or coconut. On children’s hair, less product is usually better; you don’t want buildup on a fine, delicate scalp.
Wash day frequency depends on the child’s activity level. Active kids who sweat a lot may need washing every five to seven days. For those with drier scalp types, stretching to ten to fourteen days is fine as long as you refresh moisture mid-week with a light spritz and quick seal.
Detangling is its own step — never rushed, always done on damp or wet hair with a wide-tooth comb or fingers first, working from ends to roots. A good detangling session before any style makes the entire process smoother and less uncomfortable.
Products Worth Having in the Rotation
You don’t need a shelf full of products for children’s hair. The essentials: a sulfate-free shampoo, a moisturizing conditioner for detangling, a water-based leave-in, a light sealing oil, an edge gel that isn’t too firm, and a holding butter or cream for twist and braid styles.
Keep the products simple and the ingredients gentle. Children’s scalps don’t need heavy sulfates, heavy waxes, or alcohol-laden holding sprays. If you wouldn’t feel comfortable rubbing the product on sensitive skin, it probably shouldn’t go on a child’s scalp.
1. Two-Strand Twists Across the Whole Head
Two-strand twists are the foundational protective style for afro hair at any age, but they’re especially good for girls because they’re versatile, gentle, and beautiful. Once installed, they last a week or more with simple maintenance — a satin bonnet at night and a light moisture spritz mid-week.
Why It Works
The twist pattern holds moisture close to the hair, the ends are protected inside the twist, and there’s zero tension on the scalp if done correctly. The sections can be as large or as small as you prefer — chunky twists for a bold look, finer twists for longer wear and more detail.
Install on freshly washed, conditioned, and detangled hair. Apply a small amount of twisting butter to each section before twisting, working from root to tip. The butter helps the twist hold without being stiff. Two-strand twists on children’s hair usually last five to seven days before they start to unravel significantly at the ends.
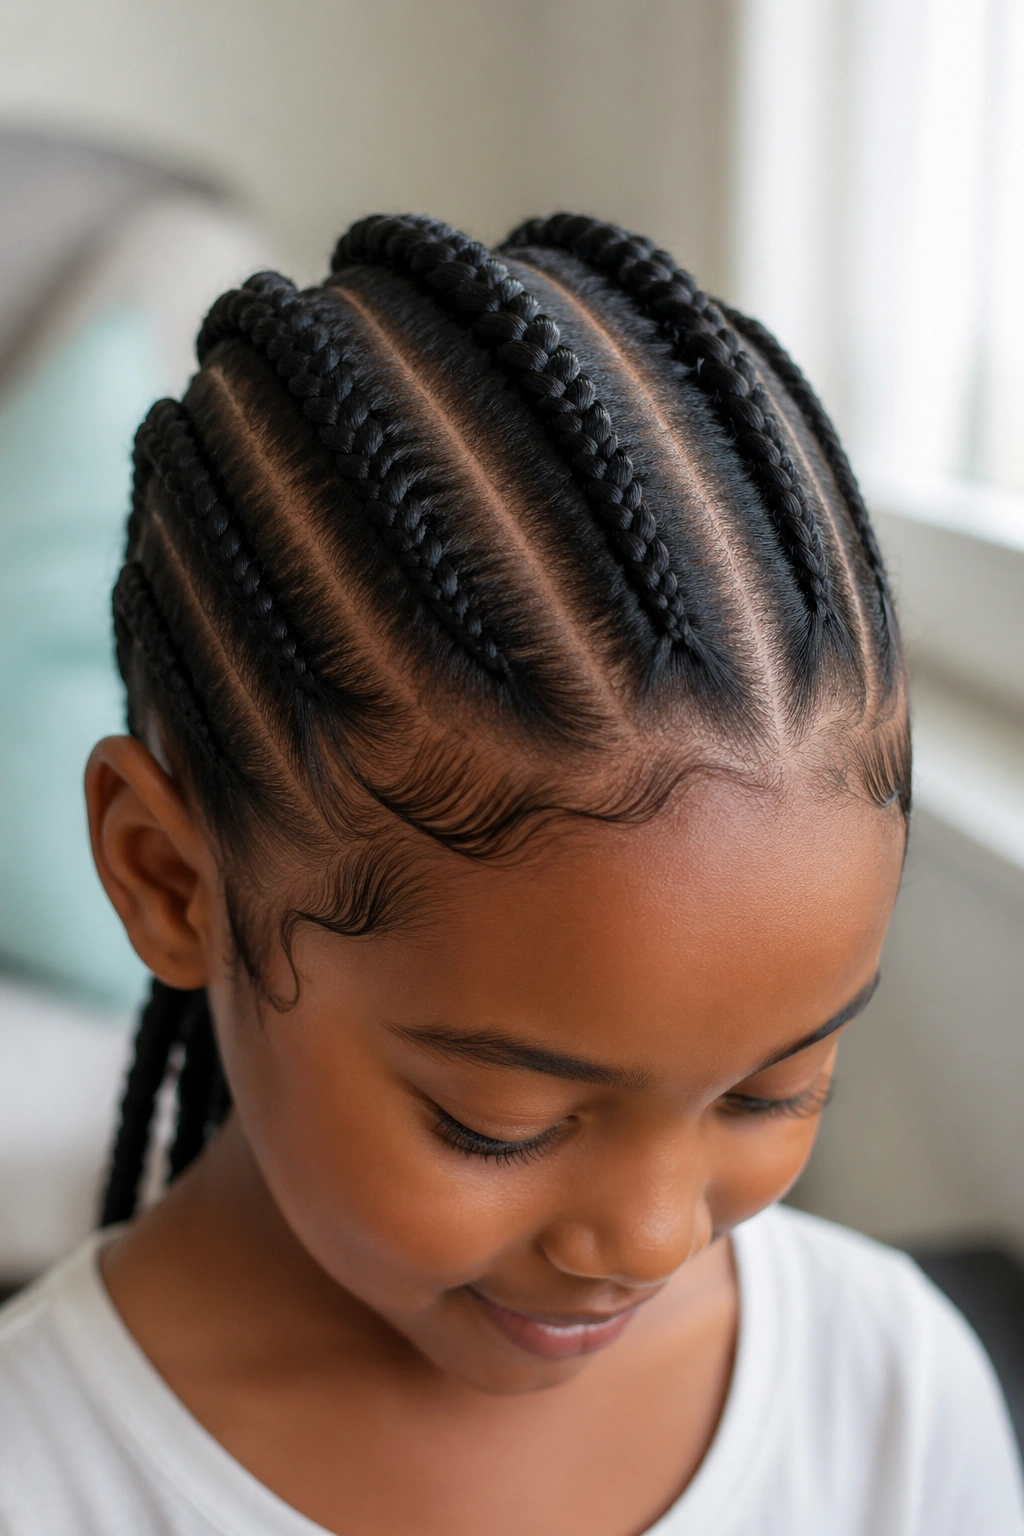
2. Three-Part Cornrow Set
Three large cornrows across the head — center, left side, right side — is one of the most practical and tidy styles for young girls. Simple to install, flat to the scalp, and comfortable to sleep in. The style holds up through physical activity, doesn’t require a lot of re-styling, and stays neat for seven to ten days.
What makes it different: Unlike individual braids or twists, cornrows are flat against the scalp and don’t bounce around during activity. For an active child, this matters enormously. No loose ends to frizz or catch. No bulk at the sides.
The center cornrow should be wide enough to show clearly as its own stripe. The side cornrows follow the natural curve of the head. Edge gel along the hairline and a quick smoothing with a soft brush completes the look.
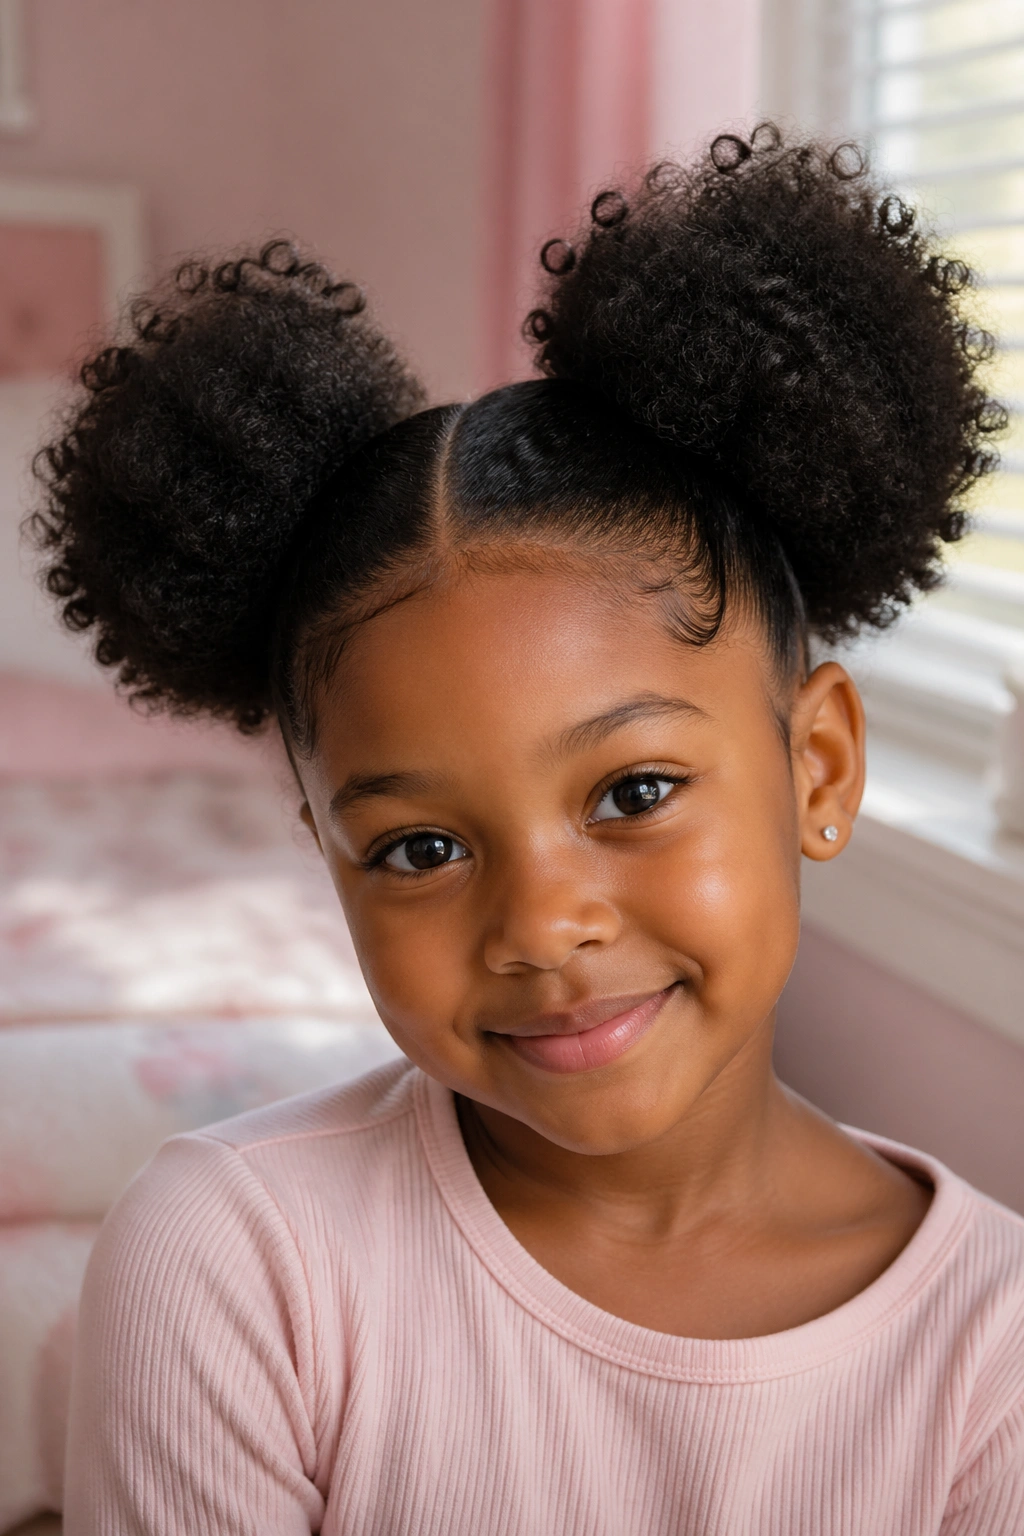
3. Puff Balls — Two or Four Sections
A classic for a reason. Puff balls — equal sections gathered into soft puffs across the head — are fast, cute, and infinitely customizable. Two large puffs (one each side) for a playful look; four puffs (two on top, two at the back) for something more detailed.
The technique is straightforward: part the hair evenly in your chosen number of sections, gather each section into a scrunchie or soft elastic, and fluff the puff upward from underneath. The rounder the better.
Keep the elastics gentle — no tight rubber bands directly on the hair, ever. Fabric-covered elastics or satin-lined bands do the same job without breaking strands.
H3: Adding Beads and Accessories
Where puff balls really come alive is with accessories. Thread a few beads onto the ends of the gathered puffs, or secure a ribbon at the base of each section. Small barrettes clipped into the afro part of each puff add color and sparkle for school picture days or parties.
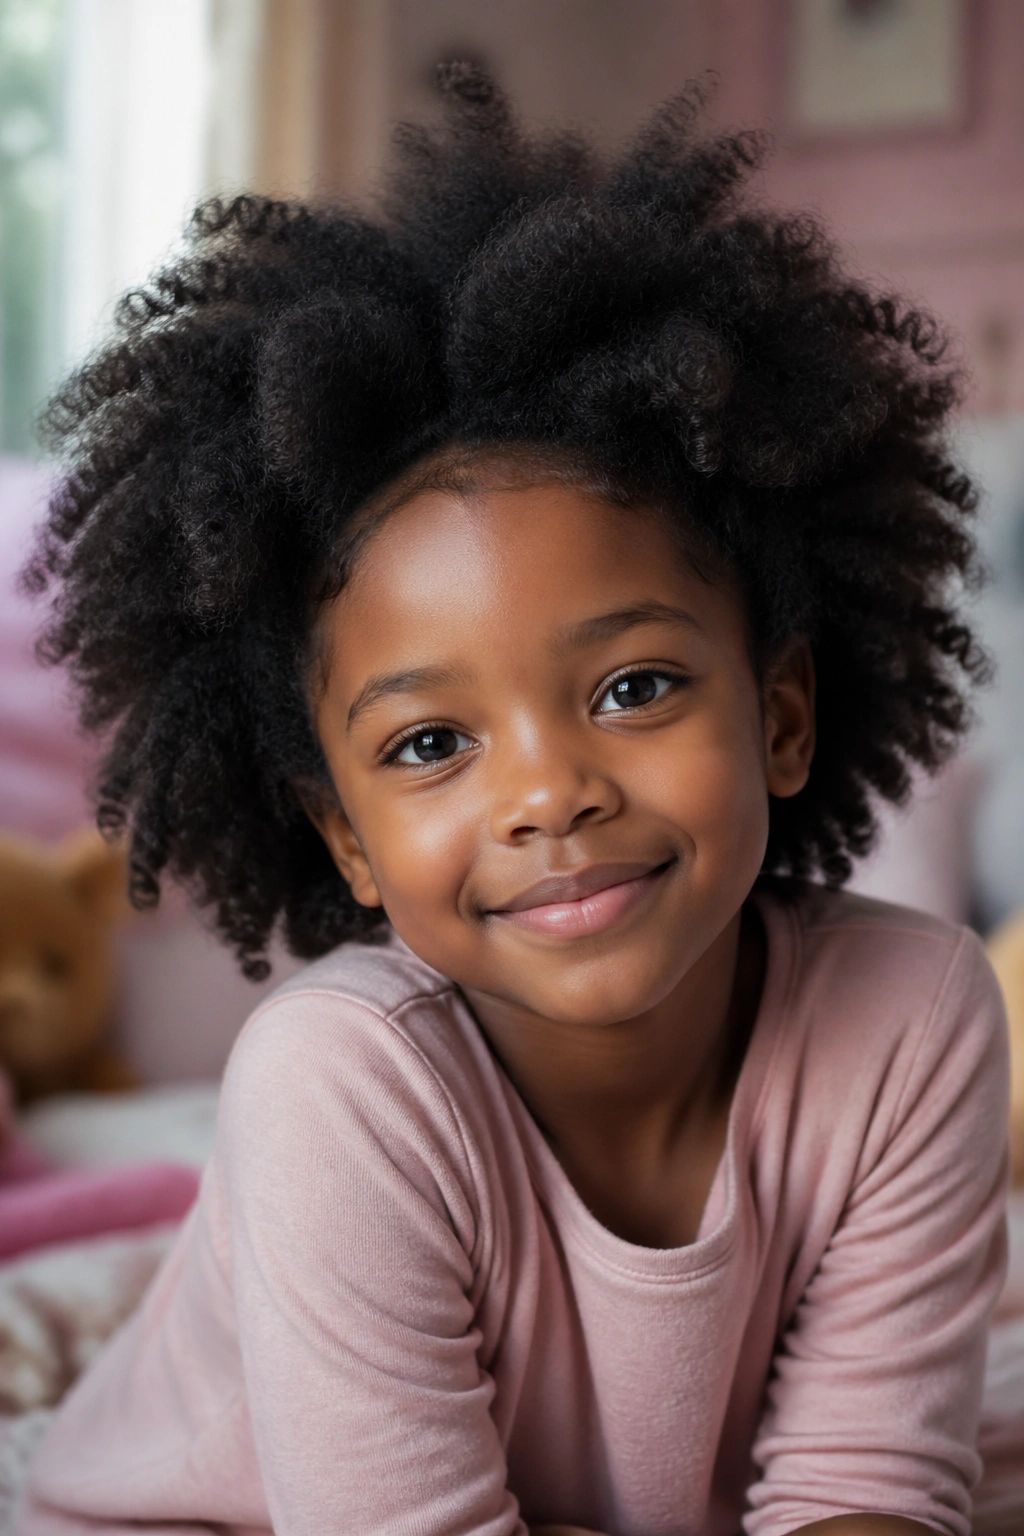
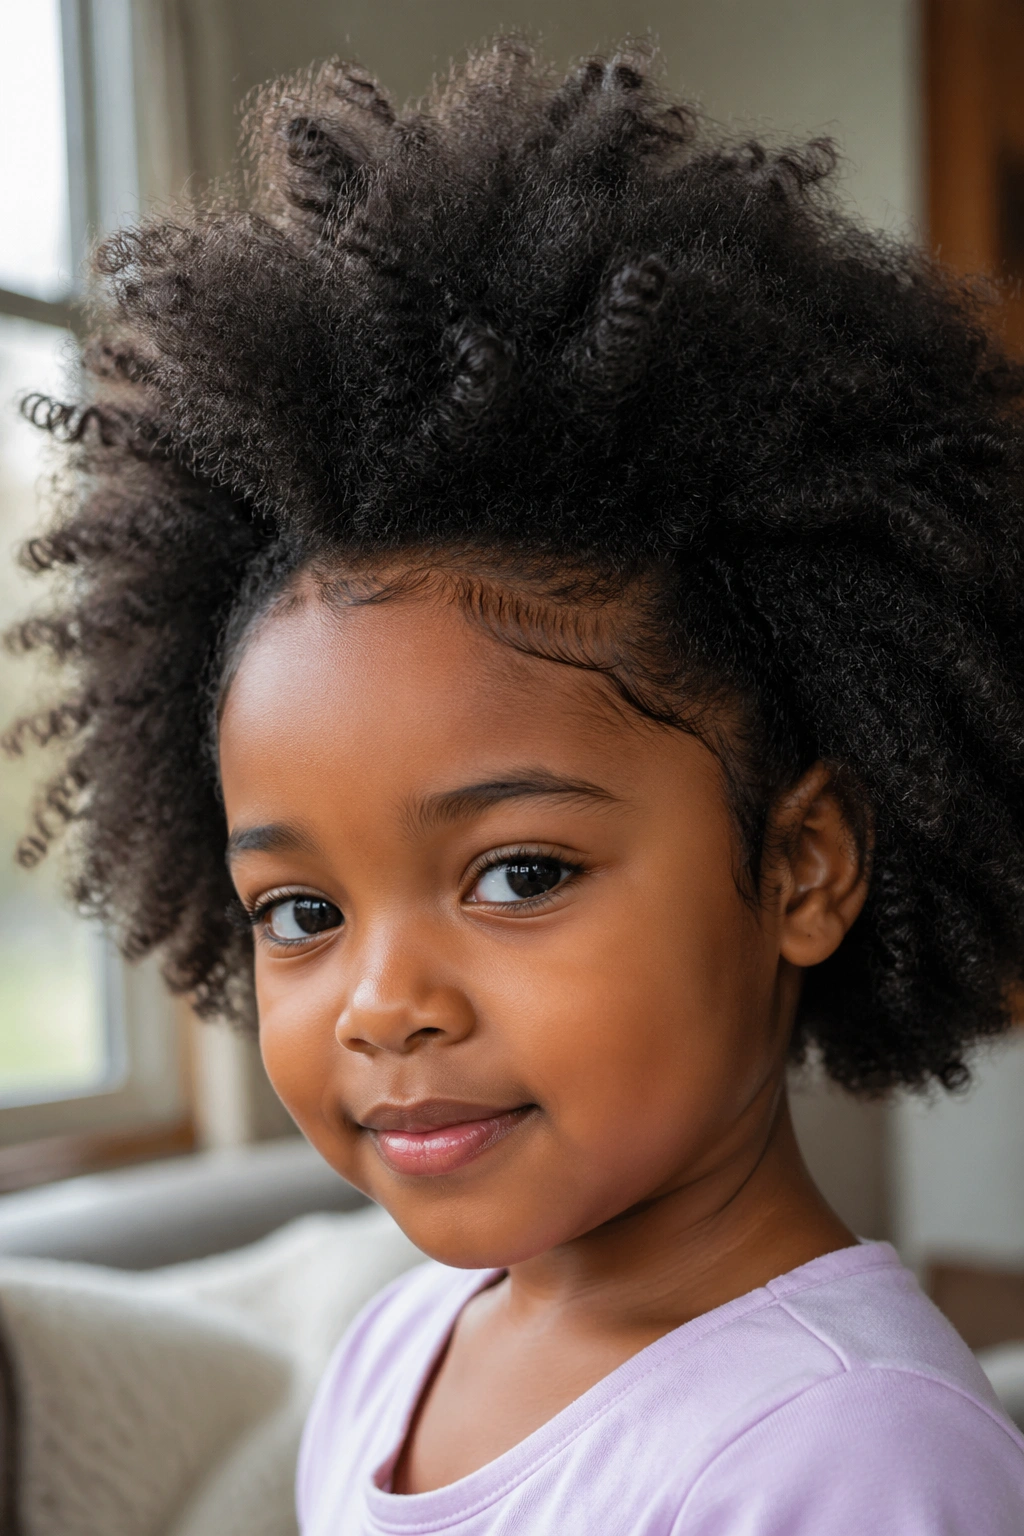
4. Simple Free Afro With Defined Edges
Sometimes the best style is no style at all — just a full, free, well-moisturized afro. Wash, condition, apply leave-in and seal, and let the hair dry in its natural state. Define the edges with a soft brush and a small amount of edge gel.
The result is the purest, most natural presentation of the hair. On a child with strong natural curl definition, this is genuinely striking.
The care: A free afro requires daily moisture refresh and a satin bonnet every night. Friction from pillows and play leads to tangles and breakage quickly. But for a day or two between protective styles, letting the hair be free is good for the hair’s health — and good for a little girl’s relationship with her own hair.
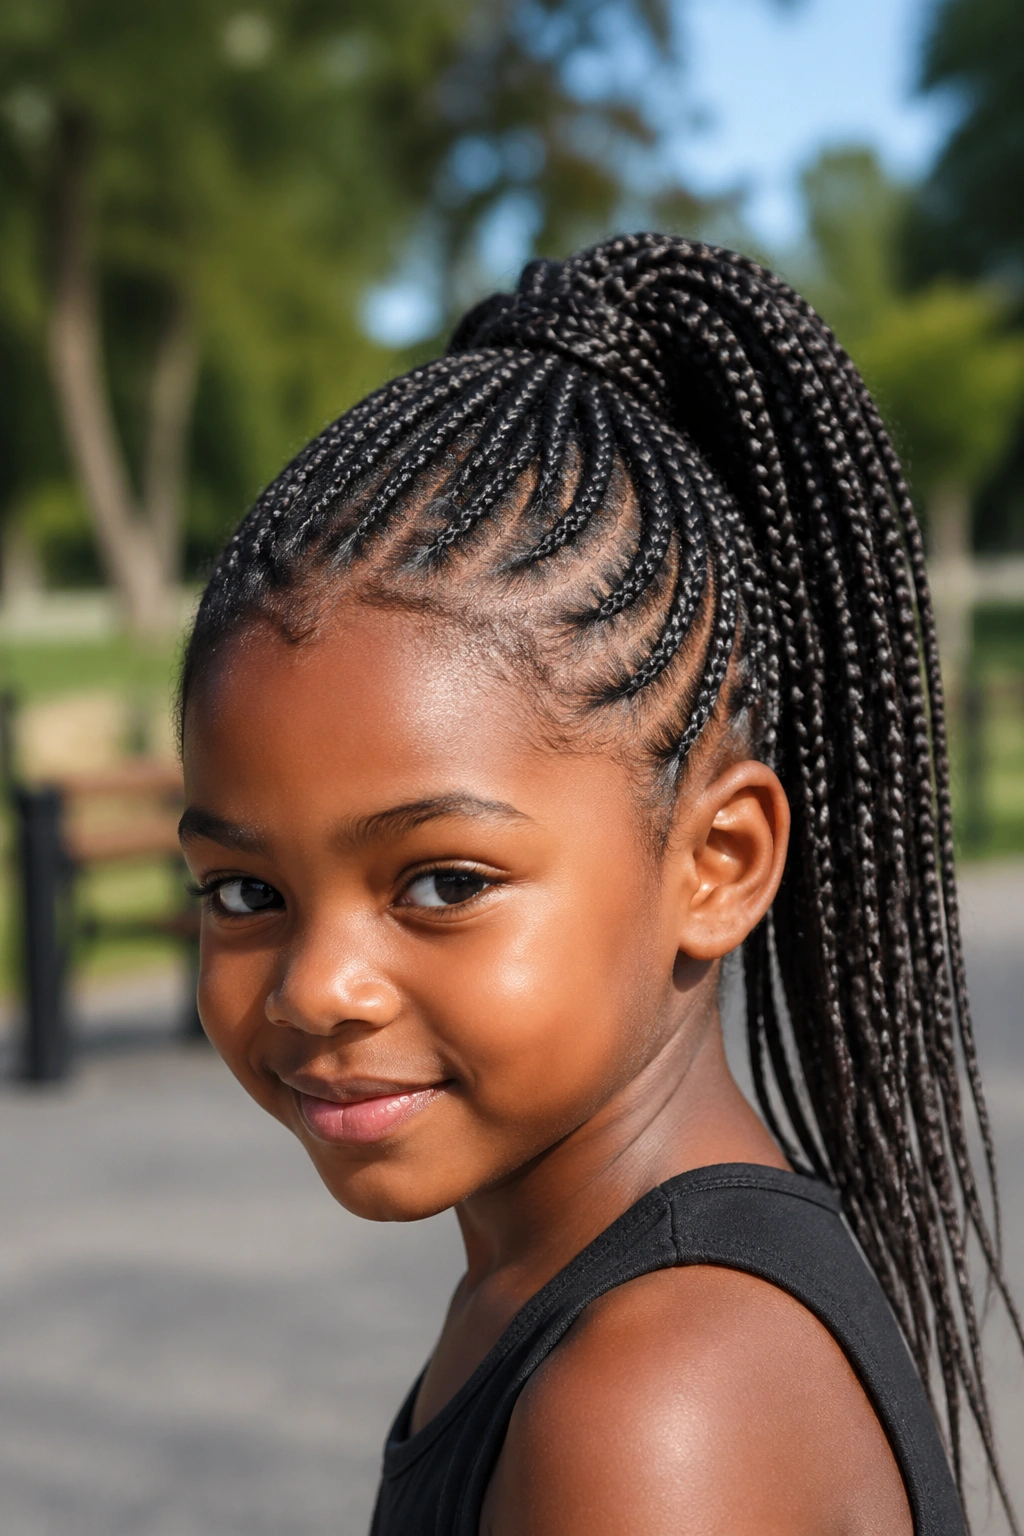
5. Cornrows Into a Ponytail
Cornrow the hair from the hairline toward the back, allowing all the rows to converge at the crown or nape and then flow into a single ponytail. The cornrowed sections keep everything flat and tidy at the scalp while the ponytail gives volume and movement at the back.
This style works beautifully for sporty kids — the cornrows keep hair off the face during physical activity while the ponytail stays out of the collar. It holds for up to two weeks if maintained properly, and the ponytail itself can be restyled into a bun or puff without redoing the cornrows.
Use a soft elastic for the ponytail, and re-twist the ponytail section every few days as it starts to loosen.
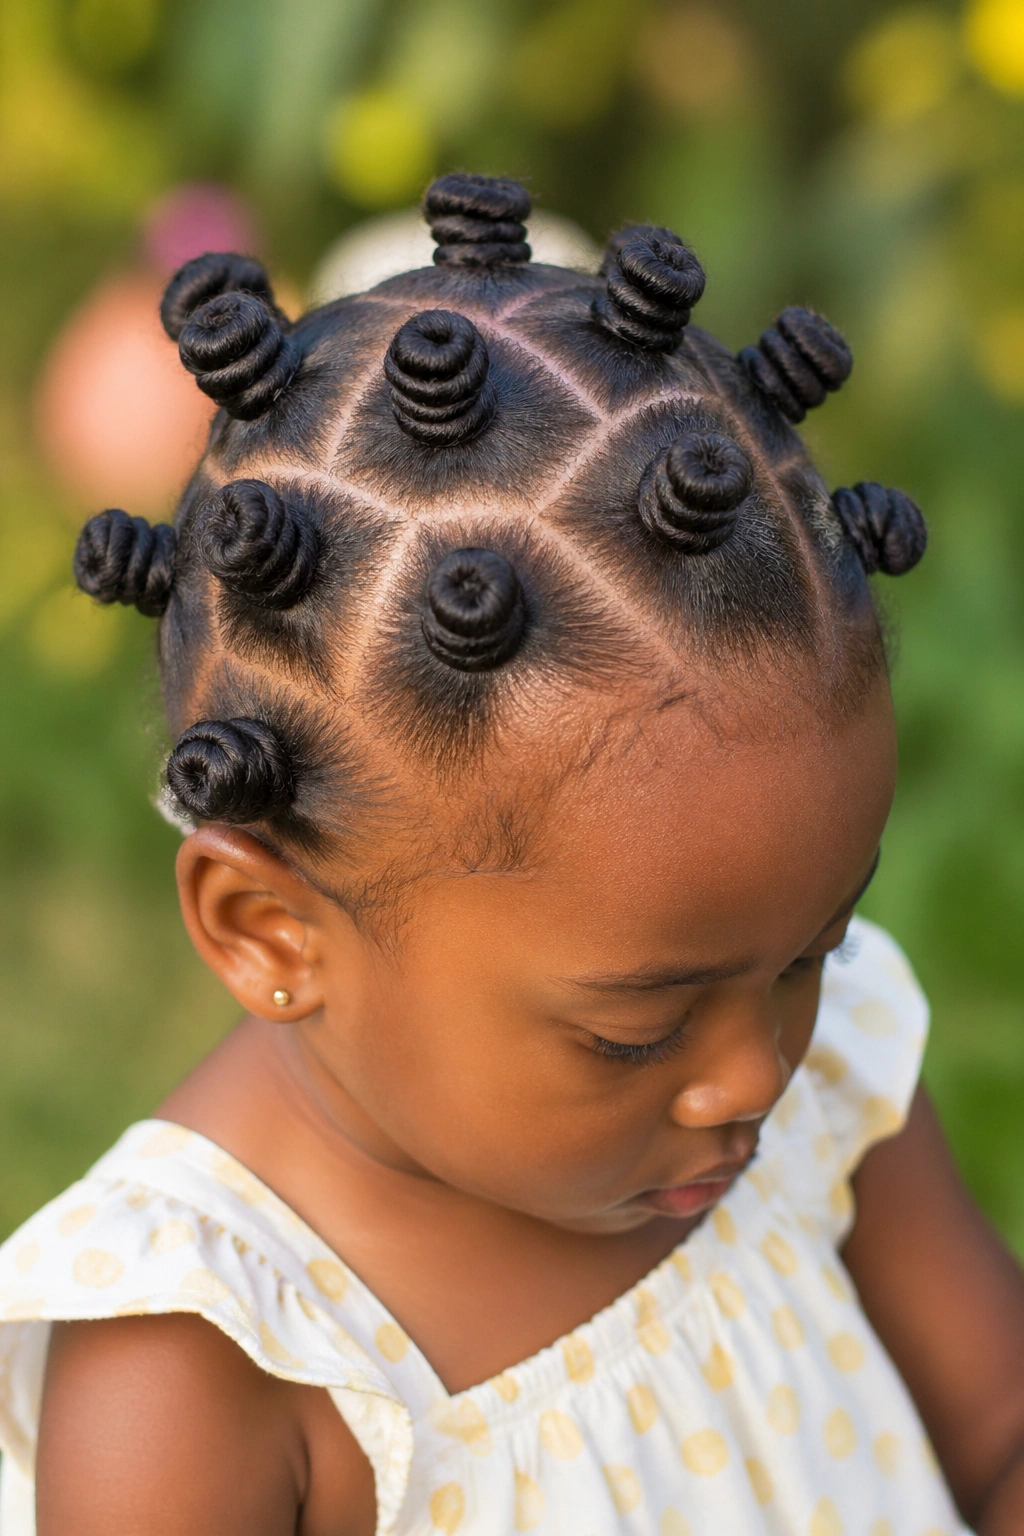
6. Bantu Knots
Bantu knots are one of the most visually striking styles for little girls and one of the most culturally significant. Small sections of hair are twisted and wrapped around themselves until they form a tight, coiled knot sitting on the scalp.
The more sections, the more dramatic the look. Four large knots for a bold statement; ten to twelve smaller ones for something more intricate.
What to Watch For
The knot should be firm enough to hold without pulling the scalp. If the skin around any knot is pulling visibly, it’s too tight. Loosen it. Bantu knots on children’s hair should feel secure but never uncomfortable.
Wear them for three to five days, then unravel for a Bantu knot-out — wide, soft spirals that fill out beautifully as a post-style bonus.
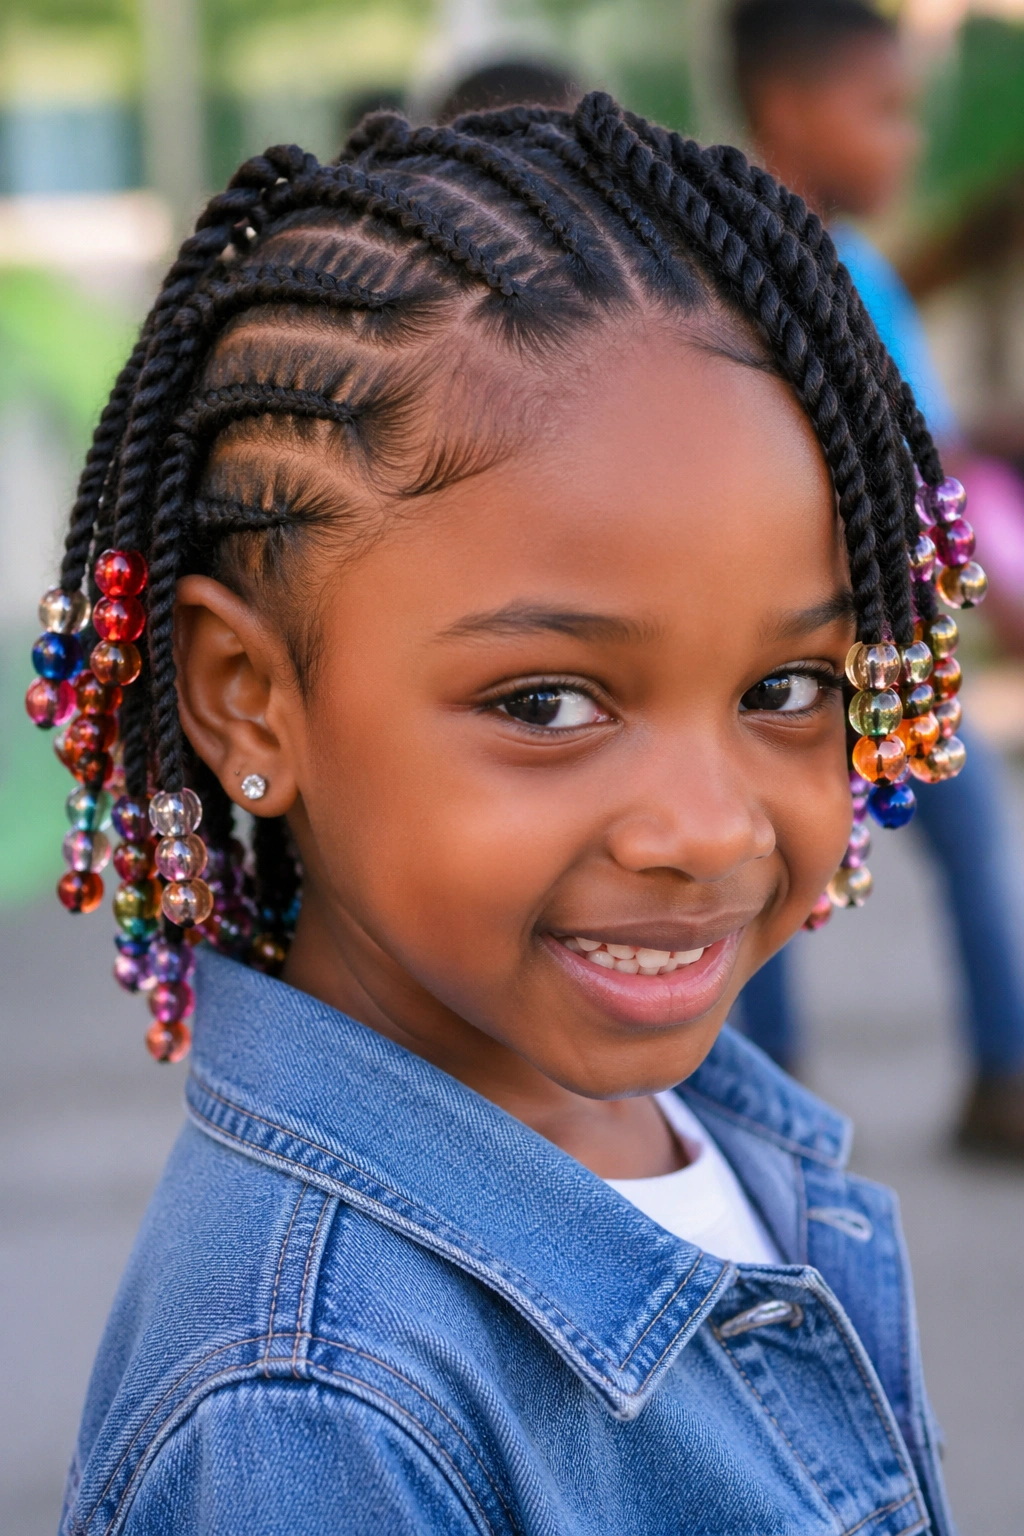
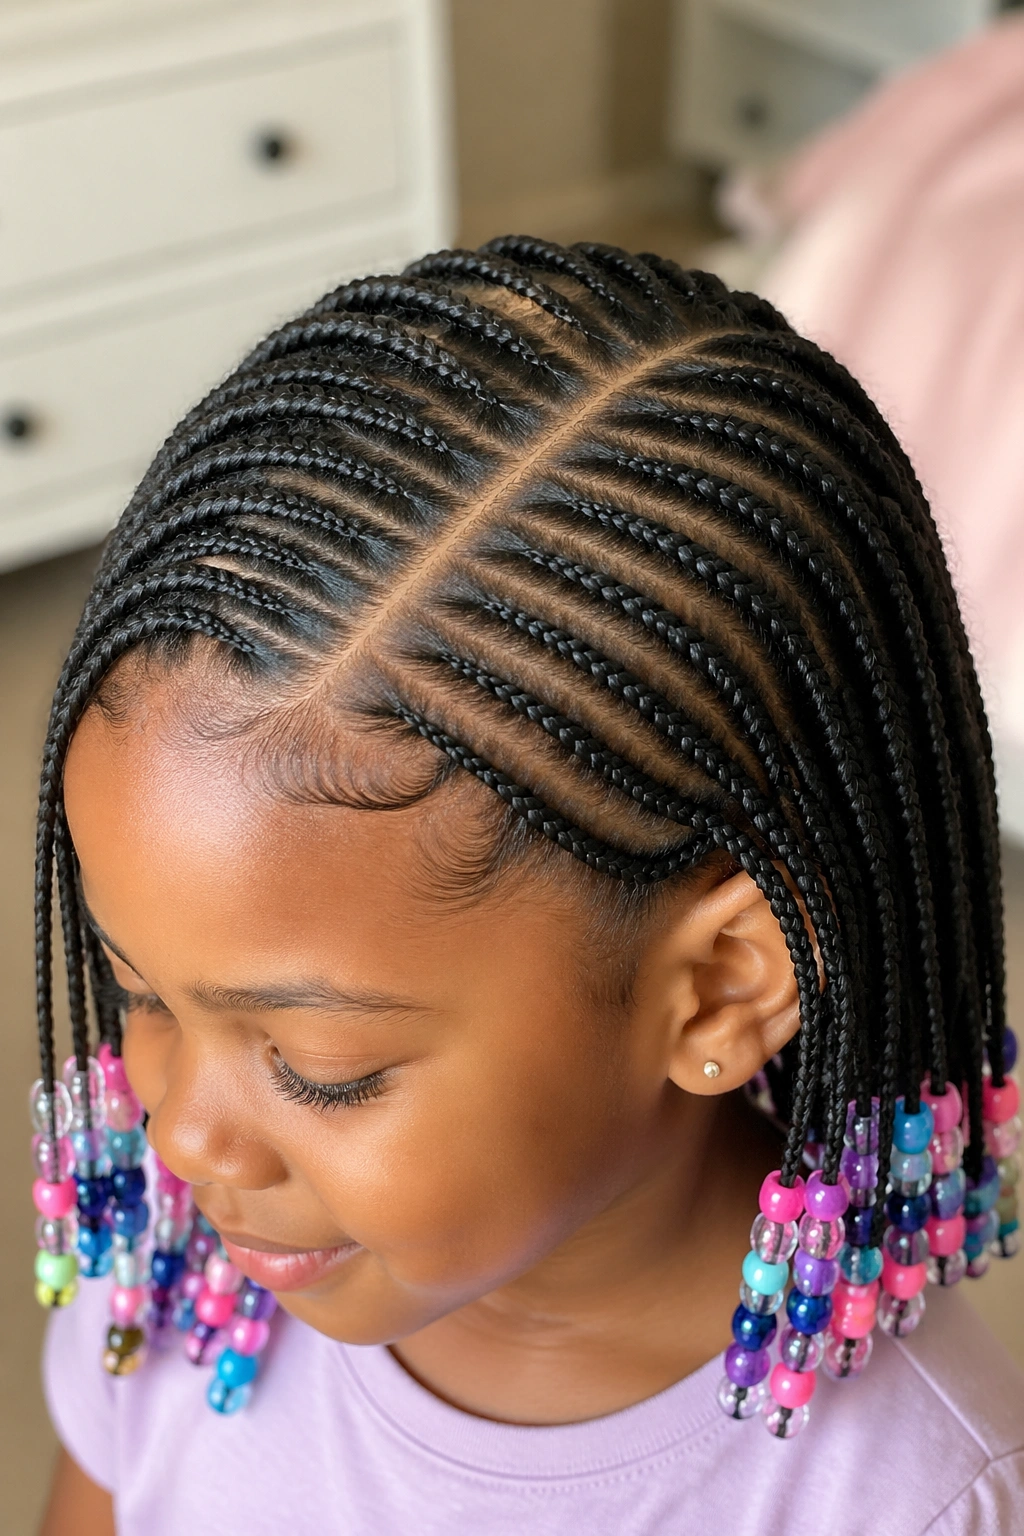
7. Flat Twists With Colorful Beads
Flat twists — two strands twisted flat against the scalp in the same way a cornrow sits — done in large sections across the top of the head, with beads threaded onto the ends. The beads add weight that keeps the flat twists from unraveling and a sound and movement that children find delightful.
Flat twists are gentler on the scalp than cornrows for some children, since the motion of twisting is less taut than braiding. They’re a good alternative for girls who find cornrow tension uncomfortable.
Thread the beads before you begin the section so they’re already on the strand, sliding up as you work. This is faster than threading them onto finished twists.
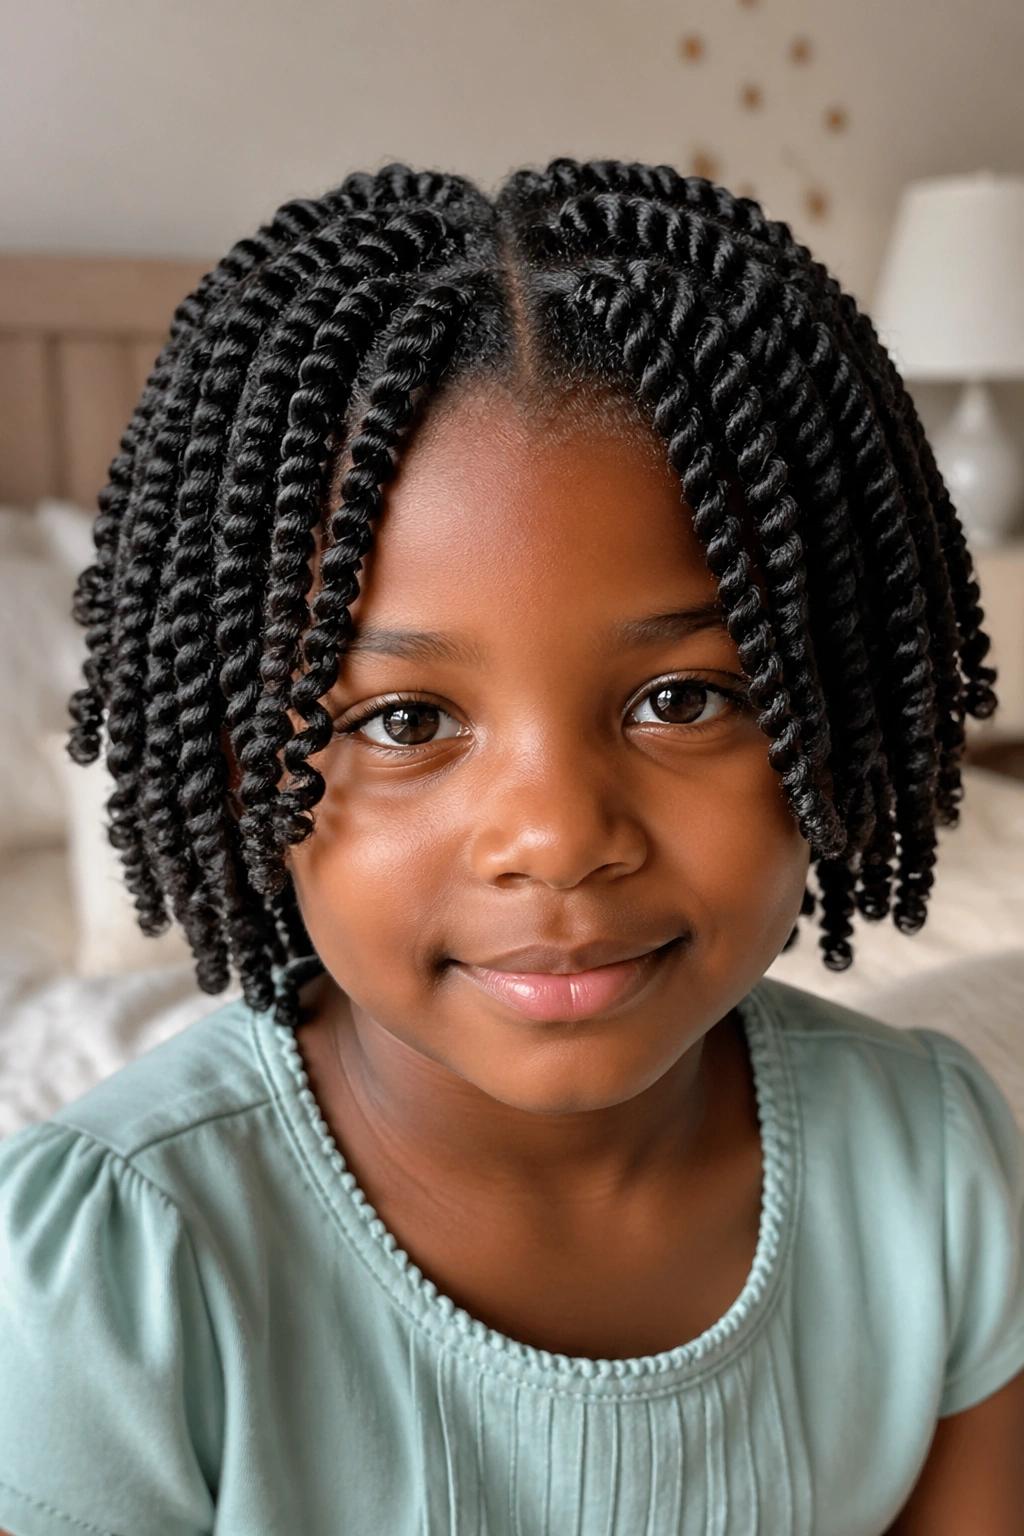
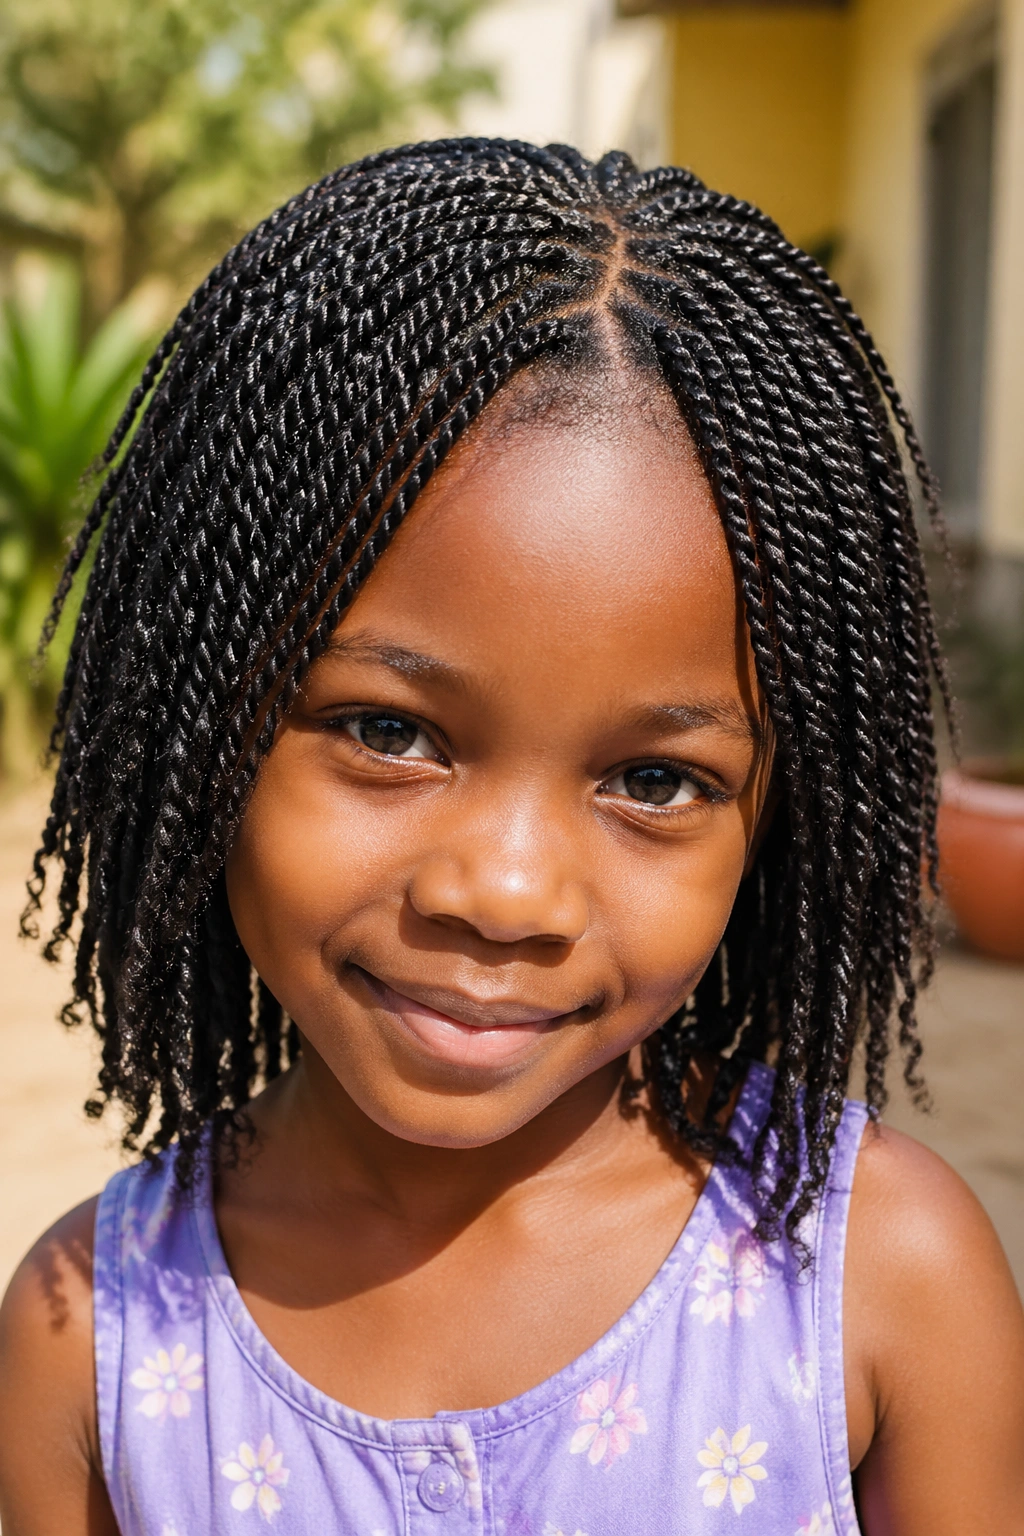
8. Mini Twists — High-Density Protective Style
Mini twists cover the whole head in small, individual two-strand twists — each section roughly the width of a pencil. The install takes time, but the result lasts two to three weeks and looks beautiful throughout.
Who this is for: Girls who need a long-wearing style with minimal daily maintenance. Once installed, mini twists only need a nightly bonnet, a mid-week moisture spritz, and a gentle re-twist of any sections that start to loosen at the root.
The ends of mini twists can be left natural or dipped briefly in warm water to seal — the warm water gently fuses the ends so they don’t unravel as quickly.
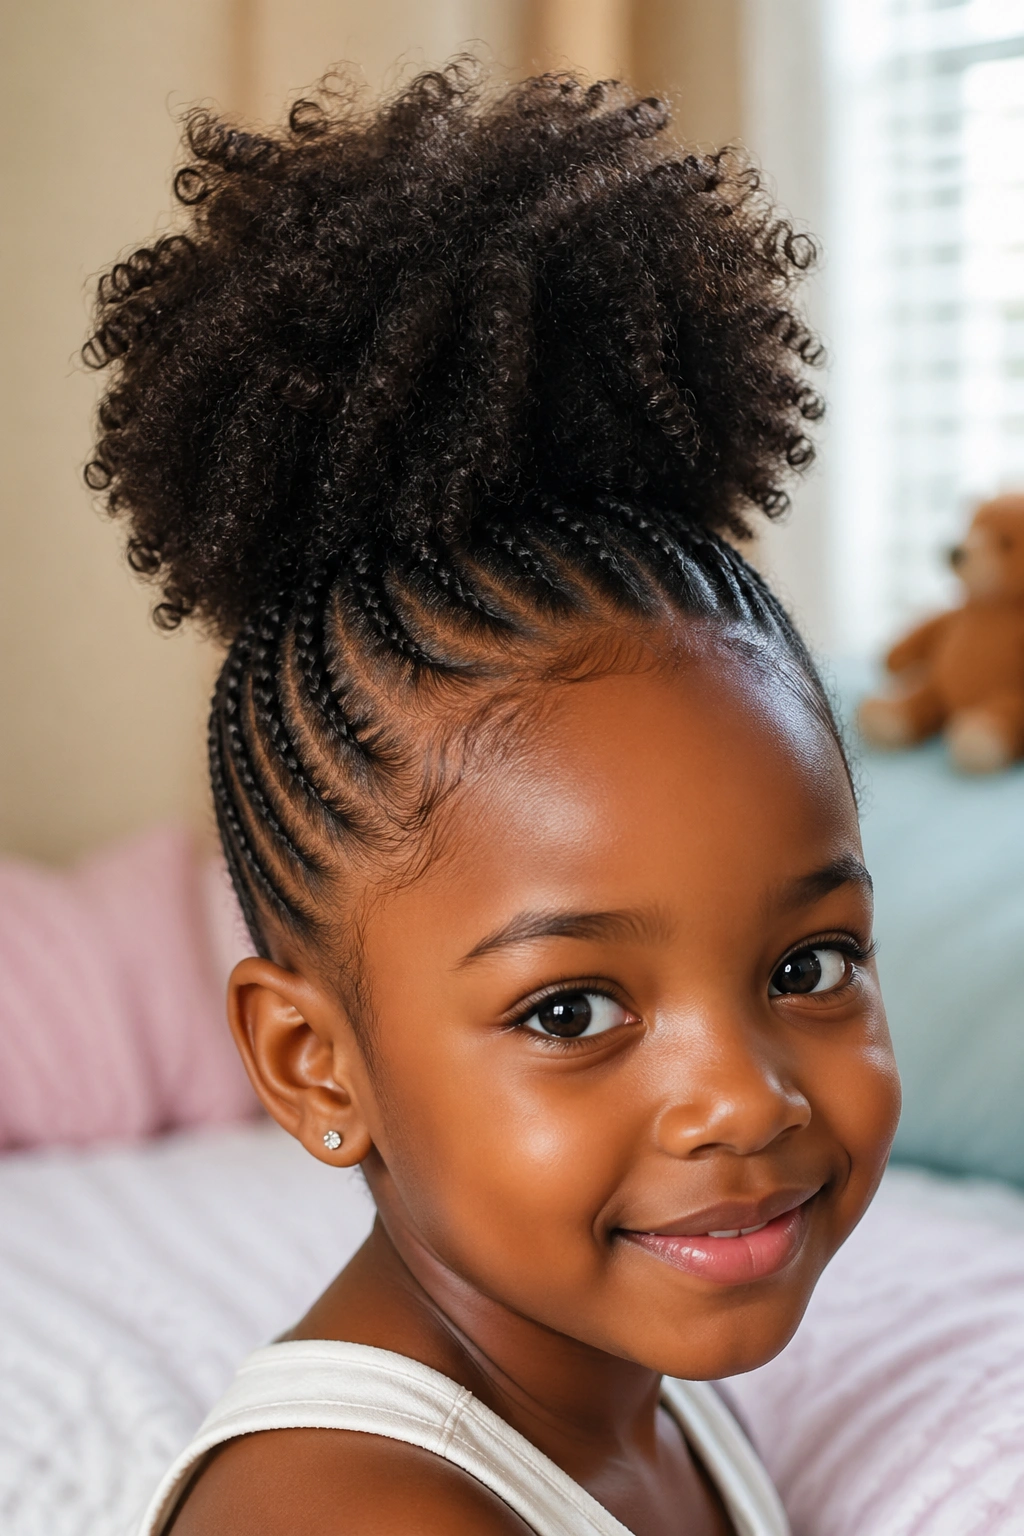
9. High Top Puff With Cornrowed Sides
Cornrow the sides and back of the head flat toward the crown, leaving the top section free as a full puff. The cornrowed sides keep the perimeter tidy and reduce bulk while the crown puff does the visual work.
This style is excellent for active children — the flat sides don’t get in the way during play, and the puff at the top can be re-fluffed daily without touching the cornrowed base. When the cornrows start to loosen after a week or so, the puff can still continue for another few days before a full re-do is needed.
It’s a style that extends itself naturally, which is a practical advantage.
10. Two Braids Into Puffs
Braid the hair in two sections — one each side — each braid starting at the scalp and running about two-thirds of the length of the section, then leaving the remaining third as a free puff at the end. The result is half braid, half puff: structured at the root, free and fluffy at the tip.
It’s playful and unusual enough to draw compliments at school without requiring a complicated install. Works on hair that’s at least four to five inches of length. The braided portion keeps the style from tangling during play while the puff at the end moves freely.
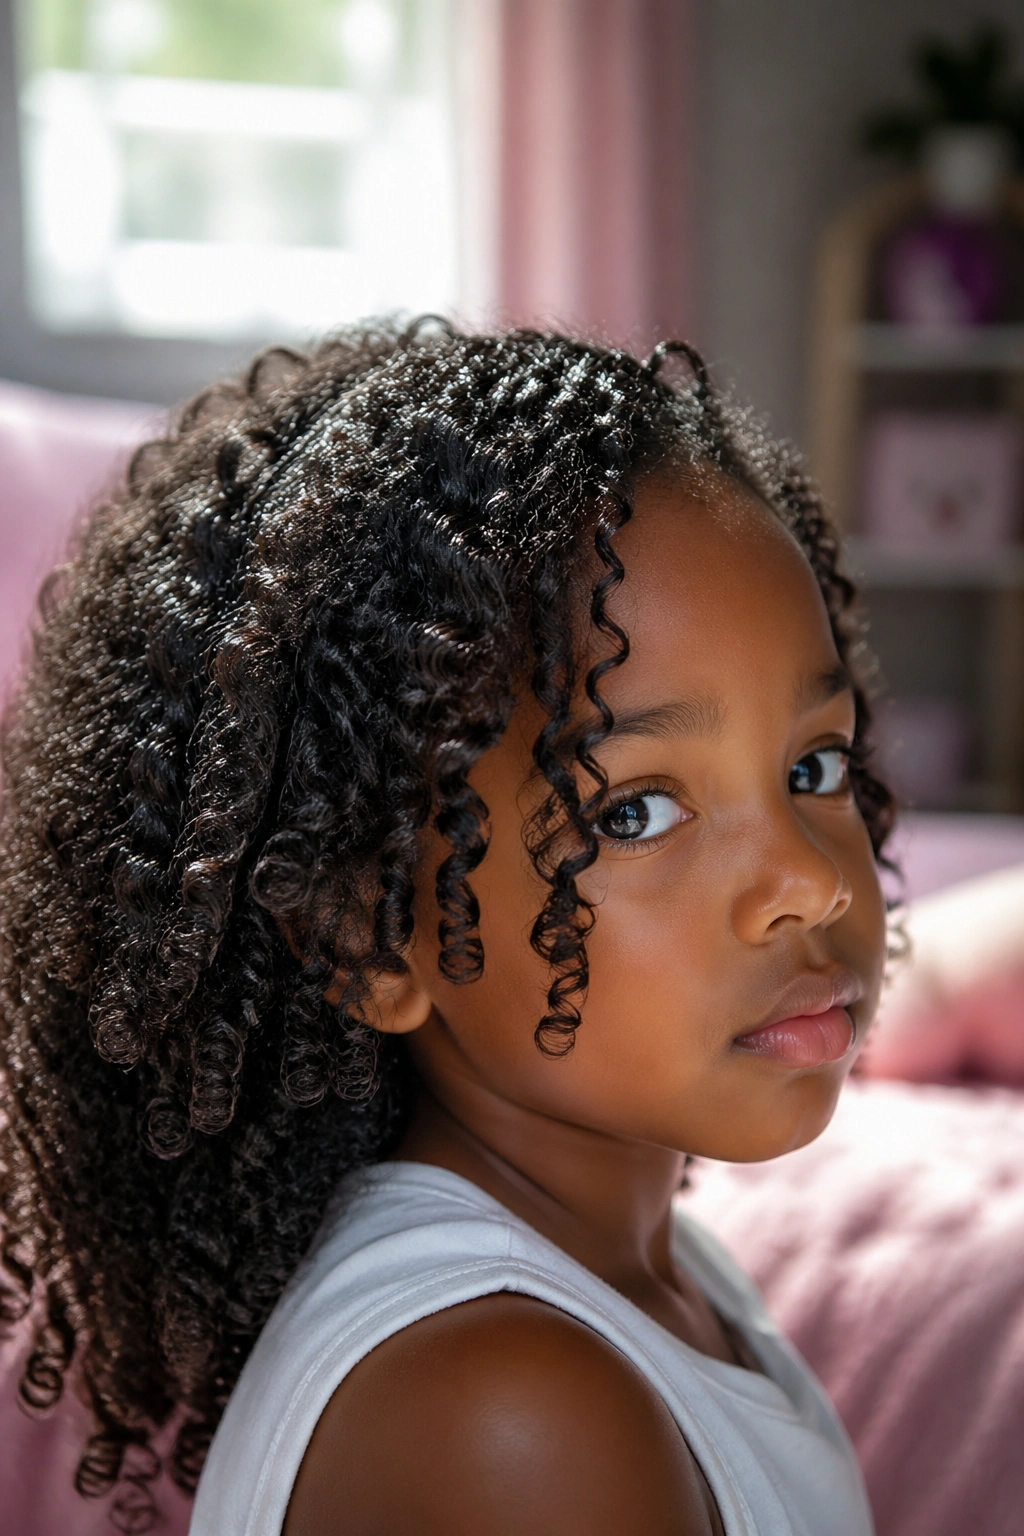
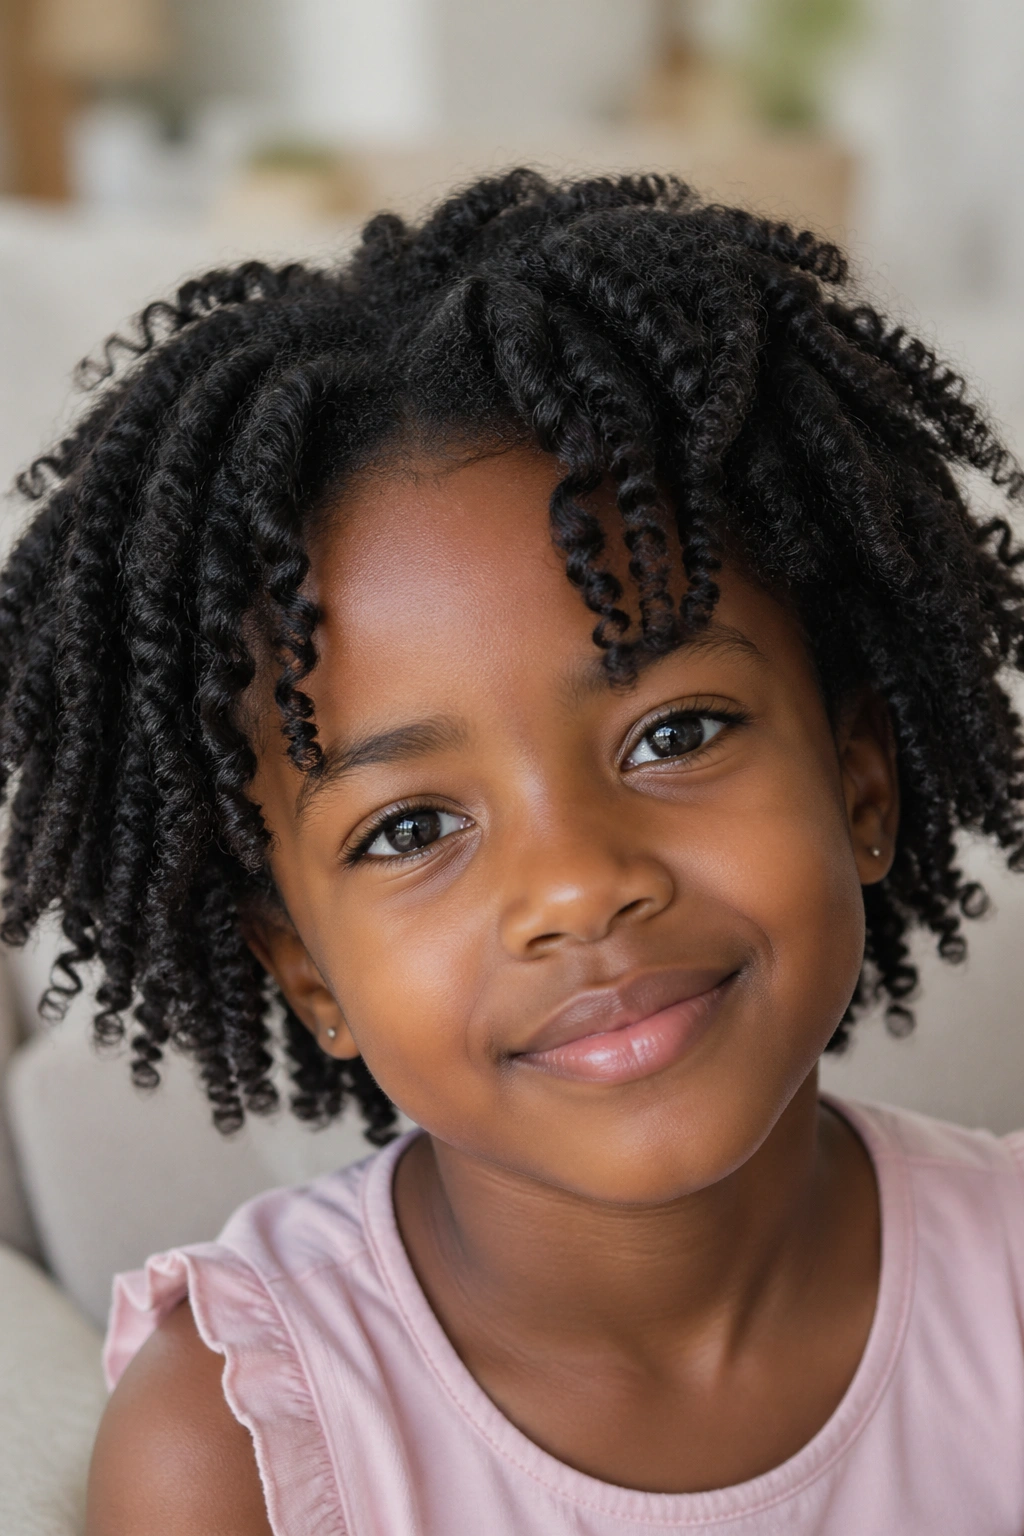
11. Twist-Out on Little Girls’ Hair
A twist-out — installing twists, letting them dry fully, then unraveling for a defined, coiled look — works on children’s hair just as it does on adult hair, but often with even better definition because children’s hair tends to have strong, consistent curl patterns.
Install the twists in large sections on freshly washed hair. Let them dry overnight. In the morning, unravel each twist carefully from the tip upward, separating the spirals gently with oiled fingers. The result is a full head of spiral curls with soft definition.
This style lasts two to three days before it starts to revert or frizz, making it perfect for special occasions or a long weekend.
12. Side-Part Cornrows With Beads
Cornrow the entire head in parallel rows following a clear side part. The rows on one side sit differently than the other, creating a slightly asymmetrical look that’s more interesting than a straight-across pattern.
At the ends, thread colorful beads — the classic finishing touch for this style. Wood beads, plastic beads, metallic beads — mix colors or keep them tonal. The beads click softly when the child moves, which little girls typically find satisfying.
The side part itself is defined with a rat-tail comb and smoothed with edge gel before braiding begins. It stays clean and visible for the life of the style.
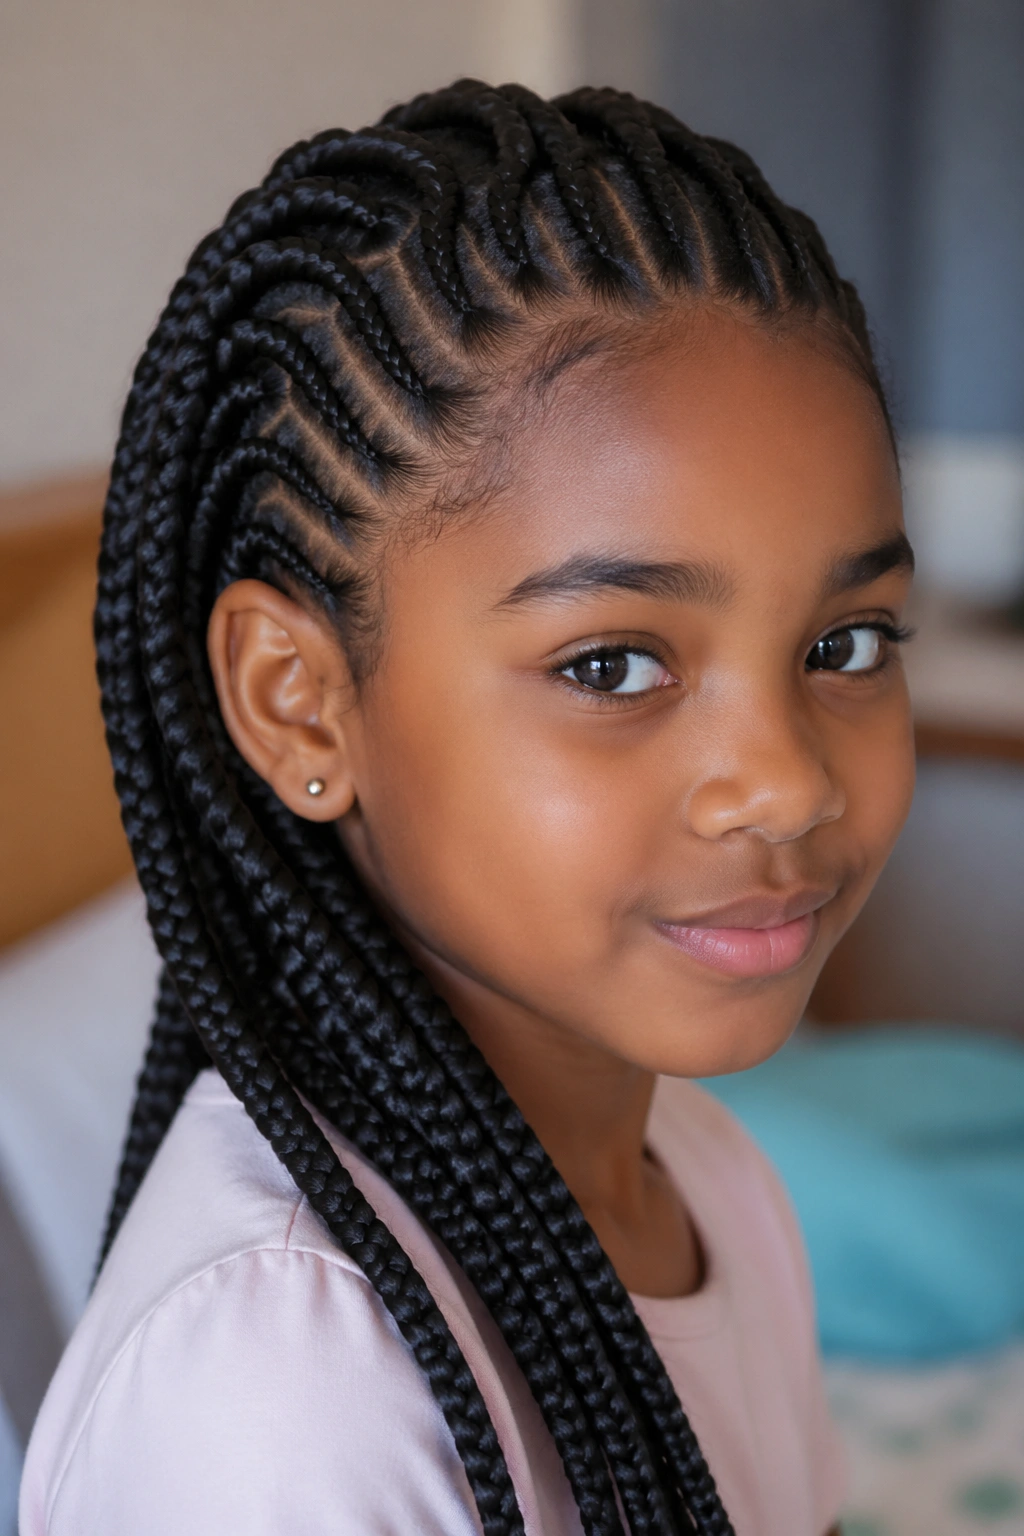
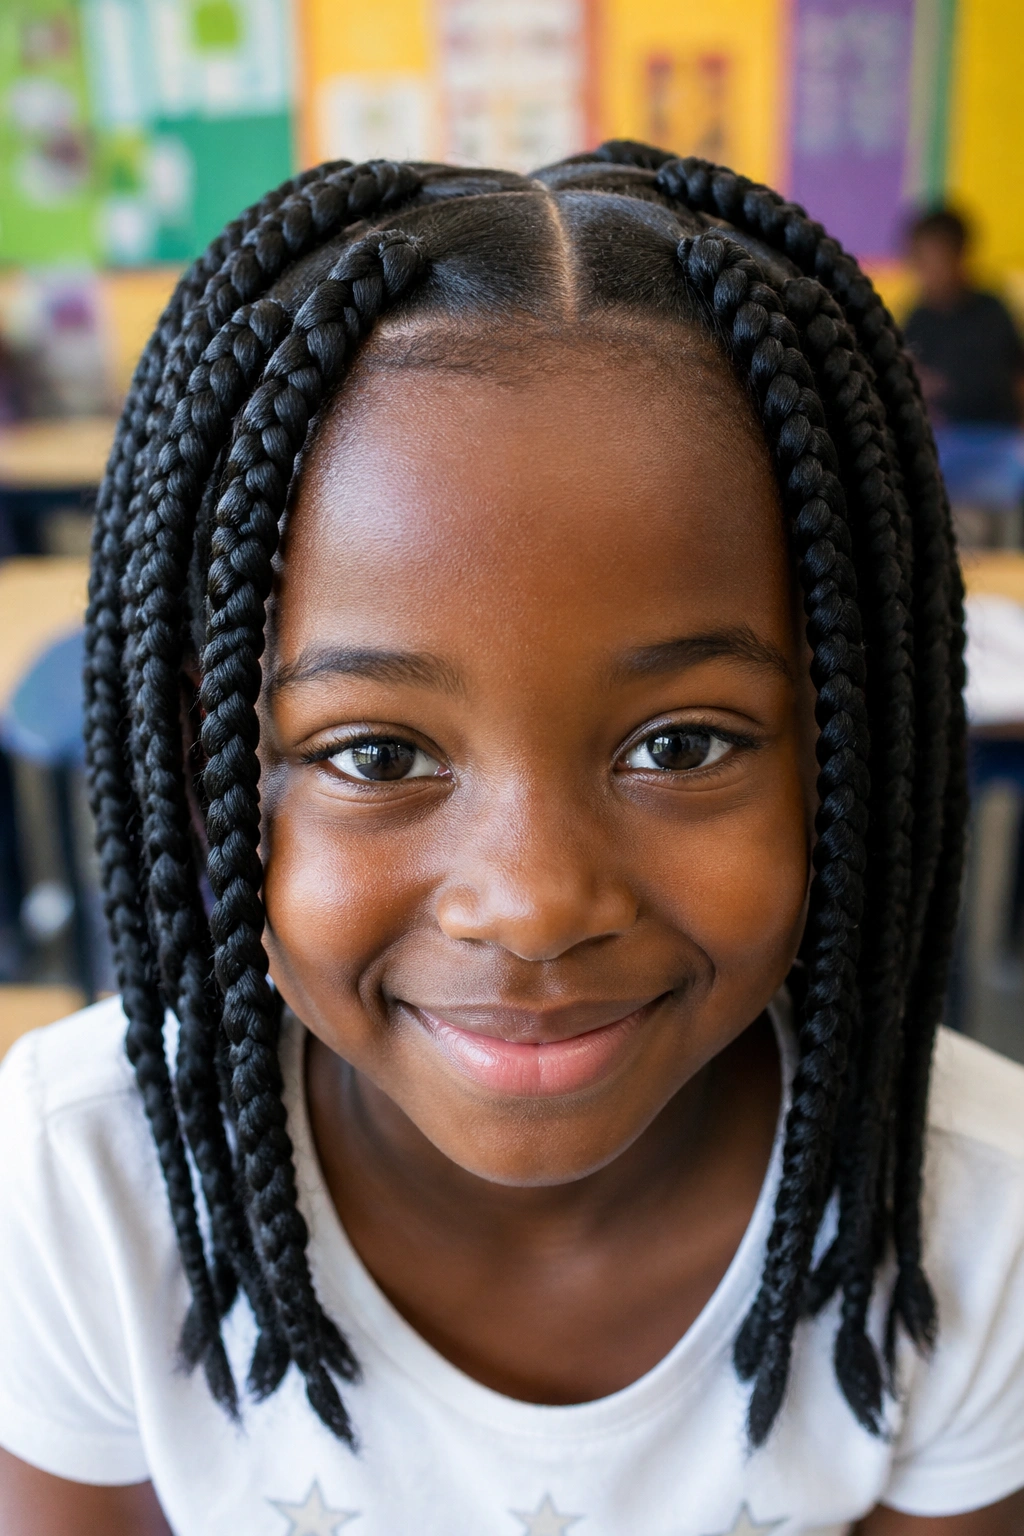
13. Box Braids — Junior Size
Box braids divided into sections with clean square parts, braided from root to tip. On children’s hair, the sections should be larger than adult box braids — fewer, thicker braids means less tension per section and faster install time.
The practical note: Resist the temptation to make them too thin or too long. On young scalps, many small braids add up to significant tension across the whole head. Eight to twelve large box braids are safer and more comfortable than thirty small ones.
Leave the ends natural rather than dipping them in hot water — hot water is unnecessary on natural-end box braids and can cause minor damage to young hair.
14. Afro Puffs With Ribbons
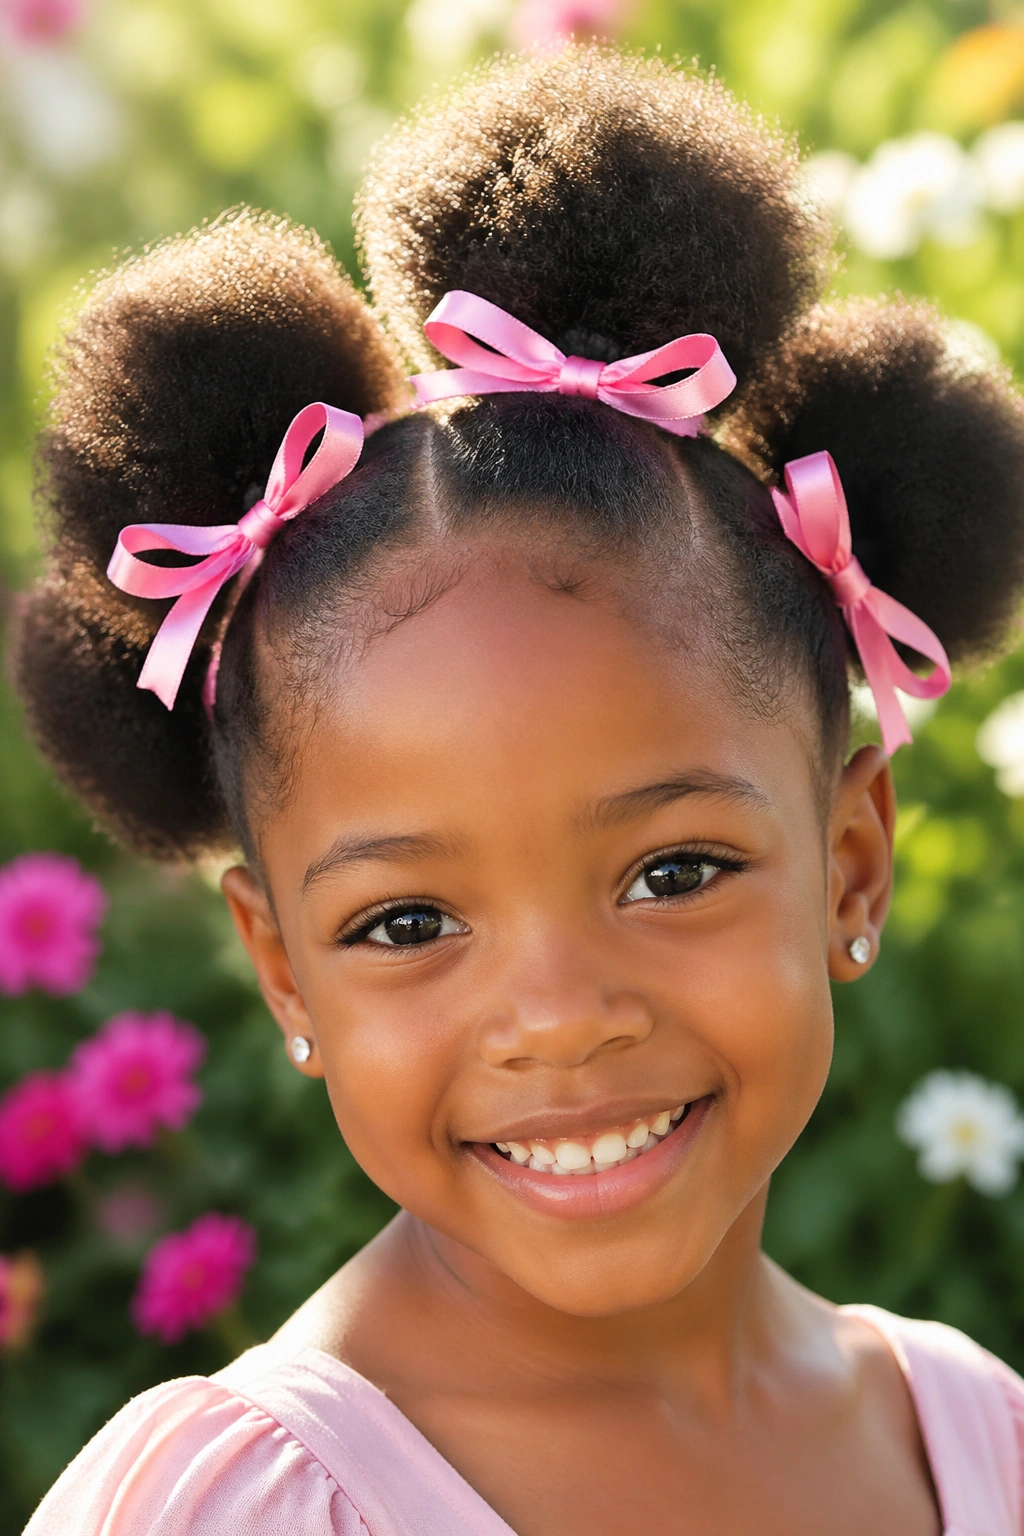
Same structure as puff balls, but with a ribbon tied at the base of each puff rather than just an elastic. The ribbon can match an outfit, tie into a bow, or be left trailing for a softer look.
The technique: gather each puff section with an elastic first, then wrap the ribbon around the base of the puff over the elastic, tying it into a bow or looping it into a knot. The elastic does the holding work; the ribbon does the decorating.
This is a five-minute style that photographs beautifully, holds comfortably, and can be refreshed in seconds by replacing the ribbon. Keep a few different colored ribbons in rotation to coordinate with different outfits through the week.
15. Crown Twist With Free Back
Flat-twist two sections from the temples across the crown of the head, meeting at the center and pinning. The rest of the hair at the back and sides stays completely free in its natural state. The two crown twists serve as a headband, framing the face and keeping hair off the forehead without confining the full volume.
The install takes about ten minutes. The result lasts two to three days depending on how active the child is and how the back sections hold up. It’s an excellent quick style for a morning when there isn’t time for a full re-do.
16. Cornrows With Triangle Parts
Standard cornrows braided from front to back, but with triangle-shaped parts rather than square or rectangular ones. The triangular sections create a pattern that’s more visually interesting than parallel rows and photographs beautifully.
How to Create Triangle Parts
Use a rat-tail comb to section each triangle before braiding begins. Diagonal lines forward from the point of the triangle converge at the braid base. Take your time with the parting — the geometry of the parts is the visual statement here, and uneven parts will show clearly once the braids are done.
Add a tiny amount of edge gel along each part line and smooth before braiding to keep the parts crisp.
17. Wash-and-Go With Finger Coils
A wash-and-go with a few deliberately finger-coiled sections at the front is the result of five extra minutes that make a big visual difference. The body of the hair dries in its natural pattern; the front sections are coiled finger by finger around the pointer finger and left to set.
The finger coils create deliberate definition at the face frame, drawing the eye and making the whole style look more finished. On children with strong natural curl patterns, the coils blend seamlessly with the rest. On children with looser patterns, they add a deliberate textural accent.
Add a few small barrettes or pins to the coiled sections to keep them in place during activity.
18. Chunky Flat Twists — Four Sections
Four large flat twists — one at the front left, one at the front right, one at the back left, one at the back right — is a simple, graphic style that covers the head cleanly without fussy detail. Each section is wide enough that the twists sit flat and broad against the scalp, creating thick, bold lines.
Unlike the more intricate cornrow or mini twist styles, this one installs in under fifteen minutes and still looks intentional and tidy. It works as a bridging style between wash days — install it on day four or five when the free style is starting to frizz, wear it for another four or five days, then wash.
19. Braid-Out for Little Girls
A braid-out works the same way as a twist-out but produces a slightly different texture — the crimped, angular pattern of unraveled braids rather than the smooth spiral of unraveled twists. On children’s hair, the result is fuller and fluffier with a more angular definition.
Install three-strand braids across the whole head on damp, product-loaded hair. Let dry completely overnight. Unravel by holding the base of each braid gently while releasing from the tip upward. Separate with oiled fingers. The result is a full, textured, high-volume look that’s distinctly different from a standard twist-out.
This style works beautifully for picture days and special events.
20. Halo Braid on Natural Afro Hair
A single braid encircling the entire head, following the hairline in a loop from front to back. On afro hair, the halo braid sits on top of the natural texture rather than lying flat, which gives it a slightly elevated, dimensional quality that’s more interesting than the same style on straight hair.
The hair inside the halo — everything not incorporated into the braid — can be left free as a contained afro, gathered into a bun, or left down. The halo itself frames the face and holds the perimeter of the hair in place.
This requires enough length to braid — at least four to five inches all around. Install time is roughly twenty to thirty minutes. It holds for five to seven days with a bonnet at night.
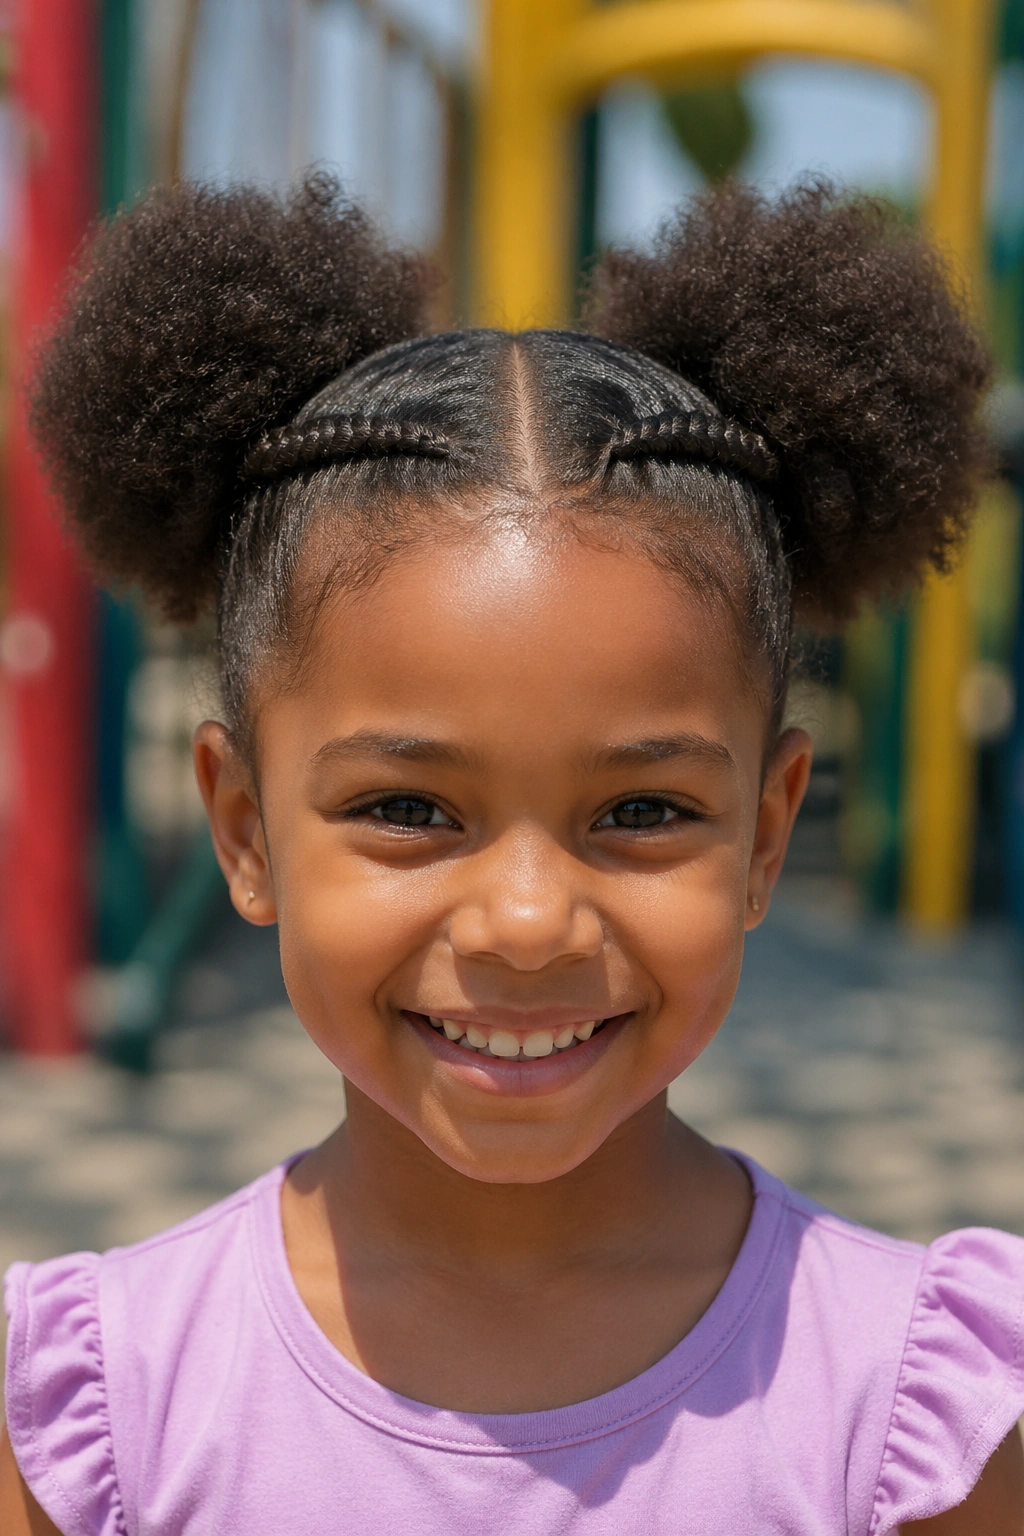
21. Space Buns — Afro Texture
Two buns gathered at the top corners of the head — positioned like ears — made from the natural afro texture rather than smooth, pulled-tight sections. Each section is gathered with a scrunchie, then the hair is wound loosely into a bun shape and pinned to stay.
The afro texture means the buns are full, soft, and slightly irregular — which is exactly what makes them look good on natural hair. Don’t try to make them perfect spheres. Let the texture show.
Secure each bun with three or four pins crossed in pairs, and re-fluff each morning by pressing upward on the base of the bun.
22. Pineapple Ponytail With Curly Ends
Gather all the hair into a high ponytail at the very top of the head — the pineapple position — and let the natural curls fan out and forward. On a child with strong curl definition, the curls at the ends fall forward over the forehead slightly, creating a cascading, playful effect.
The practical piece: A single hair tie at the pineapple base holds everything. Keep it loose enough that the hair doesn’t pull at the scalp. The forward-falling ends can be spritzed with water and scrunched to re-define them if they start to flatten.
23. Rope Twists — Two Sections
Rope twists — twisting two strands around each other in a single direction — are different from two-strand twists in texture. Where two-strand twists show the twist pattern, rope twists are smoother on the surface and tighter in structure.
Two large rope twists — one each side of the head — make a dramatic, clean style. The ropes are firmer than two-strand twists and hold their shape longer, often five to seven days. They work well on girls who find two-strand twists unraveling too quickly.
Use a good holding butter and ensure each rope is tight from root to tip before releasing.
24. Braided Headband Style
A single small braid taken from one temple, swept across the front of the head like a headband, and pinned or tucked at the other temple. The rest of the hair stays free — natural afro, loose puff, or whatever the base style is.
The braided headband takes about five minutes and transforms any base style into something more finished. It keeps hair off the face without an actual headband, and the small braid adds a detail that draws the eye.
On girls with thicker edges, start the braid right at the hairline for the cleanest headband effect. On finer edges, start a half-inch back to avoid thinning.
25. Yarn Twist Extension Style
Yarn twists — two-strand twists incorporating soft yarn rather than synthetic braid hair — are lightweight, colorful, and gentle on children’s scalps. Unlike heavy extension braids, yarn adds almost no extra weight, which reduces tension and makes them more comfortable to wear.
Choose chunky yarn in a color that complements the child’s natural hair — a matching black or brown, or something colorful for a playful look. The twists install the same way as natural two-strand twists, incorporating a strand of yarn alongside the natural hair from the root.
Why this works for children: The lightweight nature of yarn means even long twists don’t pull at the scalp. They’re also washable — the whole style can be refreshed by misting with water and a little conditioner without unraveling. And the color options are genuinely fun for kids who want something more expressive than natural hair alone offers.
Maintaining Afro Styles on Little Girls — What Actually Works
The most useful maintenance habit for any style is the nightly bonnet. A satin-lined bonnet or a satin pillowcase prevents the friction that leads to frizz, breakage at the ends, and styles coming loose early. Getting children into the habit of wearing a bonnet to bed from an early age saves significant frustration over the years.
During the day, a quick moisture spritz — plain water or a water-based leave-in in a spray bottle — refreshes any style that’s starting to look dry. Aim the spritz at the roots and scalp, not just the surface. Give it a moment to absorb, then smooth gently with your hands.
For styles with exposed ends, add a tiny seal of oil every two to three days. Shea butter, coconut oil, or a light hair oil applied to just the ends keeps them from drying out and splitting.
Detangling Without Tears — Practical Strategy
The goal is to make detangling as painless as possible, which means doing it correctly rather than quickly. Always detangle on wet hair — either freshly washed or thoroughly misted. Apply a generous amount of conditioner or detangling product first. Work in sections, holding the base of each section in one hand and working from the ends upward with a wide-tooth comb or your fingers.
Never start at the root and drag downward. The knots are at the ends; starting at the root drags them downward and makes them worse. Starting at the ends means you’re working with individual knots before they have a chance to accumulate.
If the child is consistently finding detangling painful, assess the frequency and moisture levels. More frequent moisturizing between sessions and more consistent protective styles reduce tangle accumulation significantly.
Letting Her Have a Say in Her Own Hair
This matters more than any specific technique. From about age four onward, including a child in decisions about her own hair — what style, what accessories, what color ribbons — builds a positive relationship with her hair that lasts far into adulthood. Children who feel like their hair is something that happens to them develop a very different attitude than children who feel like active participants in their own care.
Ask what she wants. Show her pictures. Let her pick the beads. Let her practice on a doll or on her own hair during play. The hands-on involvement is the foundation of lifelong hair confidence, and it costs nothing except a little extra patience.
School-Ready Styles — What Holds Up Through a Full Day
There’s a real difference between a style that looks great at 7 a.m. and a style that still looks great at 3 p.m. after recess, PE, lunch, and whatever else happens in a school day. For school, the most reliable styles are those that confine the hair rather than leave it completely free — cornrows, box braids, twists, or any combination that keeps ends tucked and hair contained.
Puffs held with satin scrunchies work decently well for active kids, but they need a mid-day refresh if the child has PE. A quick re-gather and fluff after activity keeps a puff looking intentional for the rest of the day. Styles with beads are excellent for school — the beads add weight to the ends of braids and twists, which actually helps the style hold its shape better since the weight keeps strands from splaying.
Avoid: styles with lots of loose bobby pins that can fall out during play. Styles with wire-based accessories that can poke or catch. And any style that requires touch-ups the child can’t do herself — because no matter how well you prep in the morning, things happen at school, and a child who can quickly tuck a loose section or re-puff her hair is in a better position than one who needs adult help to fix her hair mid-day.
Teach her the basics: how to re-gather a puff, how to smooth an edge with her hand if it’s lifting, how to tuck a loose braid end. Simple, practical, age-appropriate hair independence.
When to See a Professional Stylist — And When to DIY
Most of the styles in this list can be done at home by a parent or guardian with basic technique and the right products. The fundamental skills — parting, twisting, braiding flat against the scalp — are learnable with practice and genuinely don’t require professional training.
That said, certain situations call for a professional. If your child’s hair is severely tangled or matted beyond what you can manage at home, a professional detangling session is worth the cost — it saves you hours of frustration and saves the child the experience of a prolonged, painful detangle. If you want a specific intricate style — elaborate cornrow designs, very fine individual twists, crochet installs — a professional who specializes in children’s natural hair can do it faster, cleaner, and with less discomfort than a home attempt.
Look for stylists who work specifically with natural hair and have experience with children. A stylist who primarily does relaxed hair may not handle afro texture with the appropriate care. Ask specifically about their tension policy — any stylist worth working with will tell you upfront that they adjust based on the child’s comfort, not their own speed.
A professional session every six to eight weeks for a more complex style, with at-home maintenance in between, is a sustainable rhythm for most families.
Helping Children Build a Positive Hair Identity
Hair is often the first place children encounter commentary about their appearance — from classmates, from adults, sometimes from family members who mean well but say the wrong thing. “Your hair is so big.” “Why doesn’t your hair lie down?” “Can I touch it?” Children absorb these comments deeply, and how the adults around them respond shapes whether the hair becomes a source of pride or anxiety.
The most powerful thing you can do is normalize the hair as beautiful from the very beginning. Talk about the styles you’re doing with enthusiasm, not as a chore. Point out women with beautiful natural hair — in the child’s life, in media, in books — so she sees her hair type reflected as something to admire. When someone says something about her hair that doesn’t feel kind, give her the words to respond with dignity: “My hair is natural,” or simply “Thank you” said confidently with no apology.
Books about natural hair written for children make a real difference, especially for younger girls. So do natural hair dolls, YouTube channels, and community spaces where kinky, coily, afro hair is the default rather than the exception. The earlier and more consistently she sees her hair celebrated, the less damage other people’s opinions can do.
Hair pride is not vanity. It is an essential part of a child feeling at home in her own body.