Crochet braids get a bad rap from people who have never actually worn them properly. They hear the word “crochet” and picture stiff, wig-cap hair that looks plastic from across the street. That is a skill gap, not a technique problem. Done right, a crochet afro sits on your head like it grew there — soft, bouncy, with real movement when you turn your face into the wind. The method itself is simple enough that you can do it in your bathroom in three hours. What separates a good install from a forgettable one is almost entirely about prep, parting, and pattern choice.
I have been wearing crochet styles off and on for roughly a decade, and the ones that look like crochet are almost always installed on a cornrow pattern that was rushed. You can get away with cheap hair. You cannot get away with lazy braids underneath. That is the first thing I tell anyone who asks me about this.
The other thing I tell them is to stop thinking of crochet afros as one style. A crochet afro is a category. Inside that category live at least two dozen distinct looks, from tight springy coils that imitate 4B hair to loose, wavy, halo-style poofs that look closer to a wash-and-go. The length, curl pattern, installation method, and parting all combine into something the next person cannot replicate just by buying the same pack.
This piece walks through twenty-four crochet afro looks worth considering, along with prep details, tool suggestions, and the honest trade-offs of each one. Some are beginner-friendly. A couple require patience. None of them require a salon appointment unless you want one.
What You Actually Need Before You Start
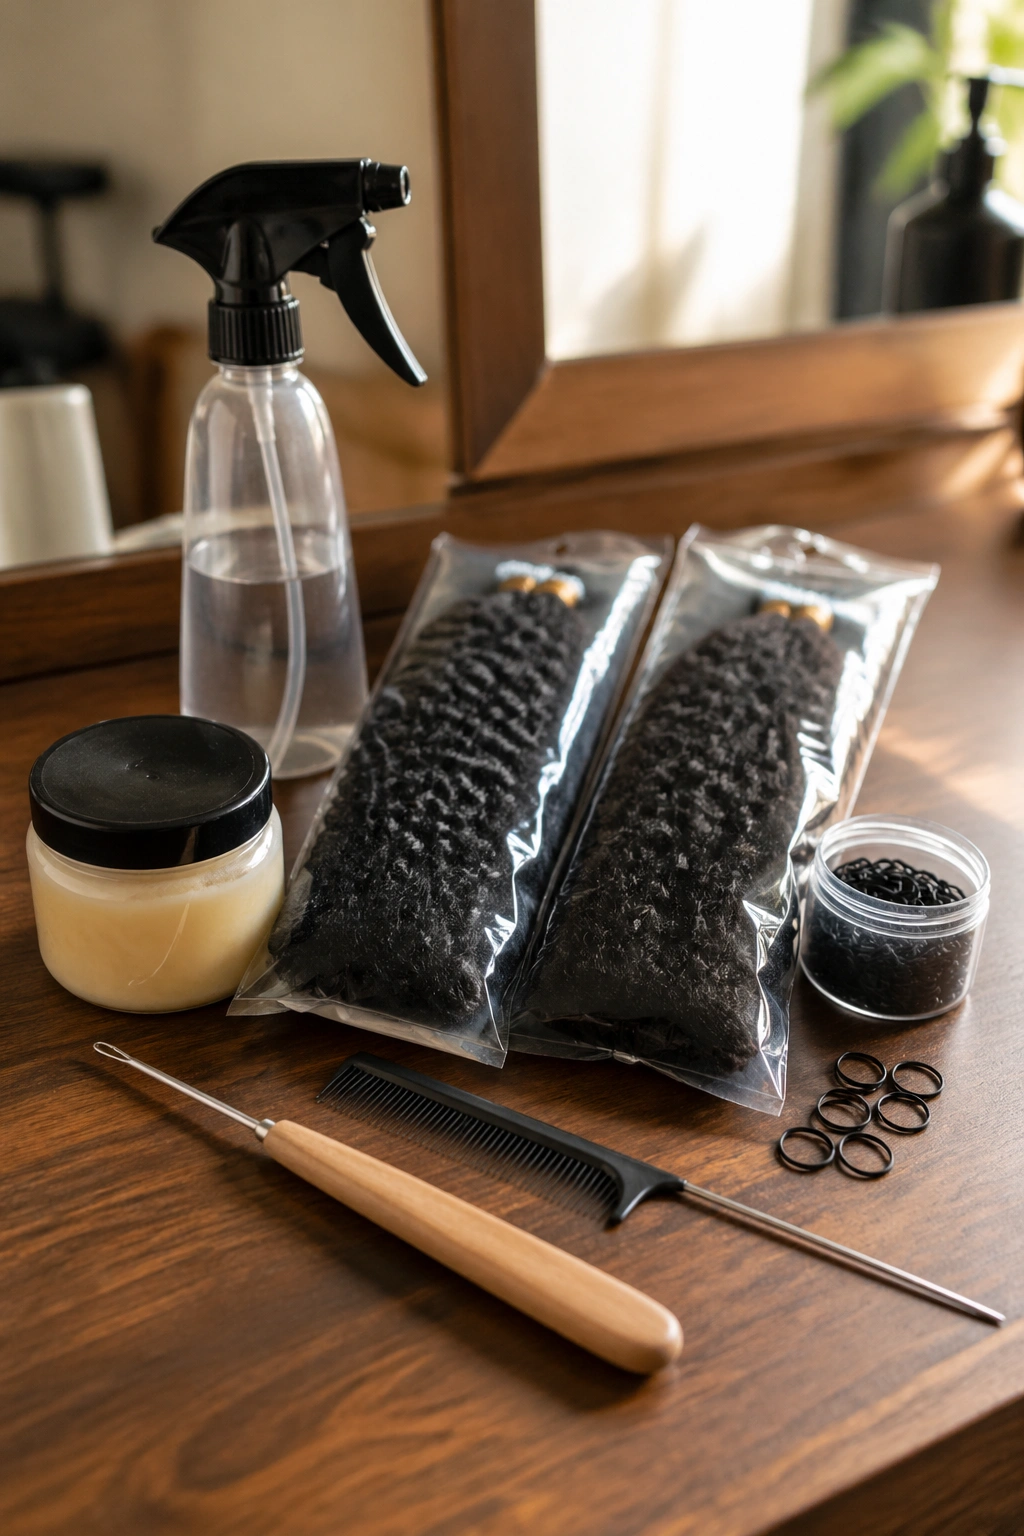
Crochet installs fail at the supply table more often than at the mirror. A standard install needs a crochet hook (the latch-style is easier for beginners, the bulk hook holds more hair per pull), a pack or two of preferred curl-pattern hair, small rubber bands or thread for securing the knot, edge control, a rat-tail comb, and sharp scissors for shaping. Scissors matter. Dull shears shred synthetic fibers and leave that frizzy, halo-less edge that screams fake.
For most afro looks, plan on 5 to 8 packs of hair depending on the density you want. Bigger afros drink hair. If you buy too few packs, you will end up spacing the install too wide and the cornrows will show through. If you buy too many, you can always return or save them for touch-ups later.
A good spray bottle filled with a 50/50 mix of water and leave-in conditioner will be your best friend once the hair is in. Dryness is the enemy of synthetic afro hair almost as much as it is for natural hair. Spray, scrunch, fluff, repeat.
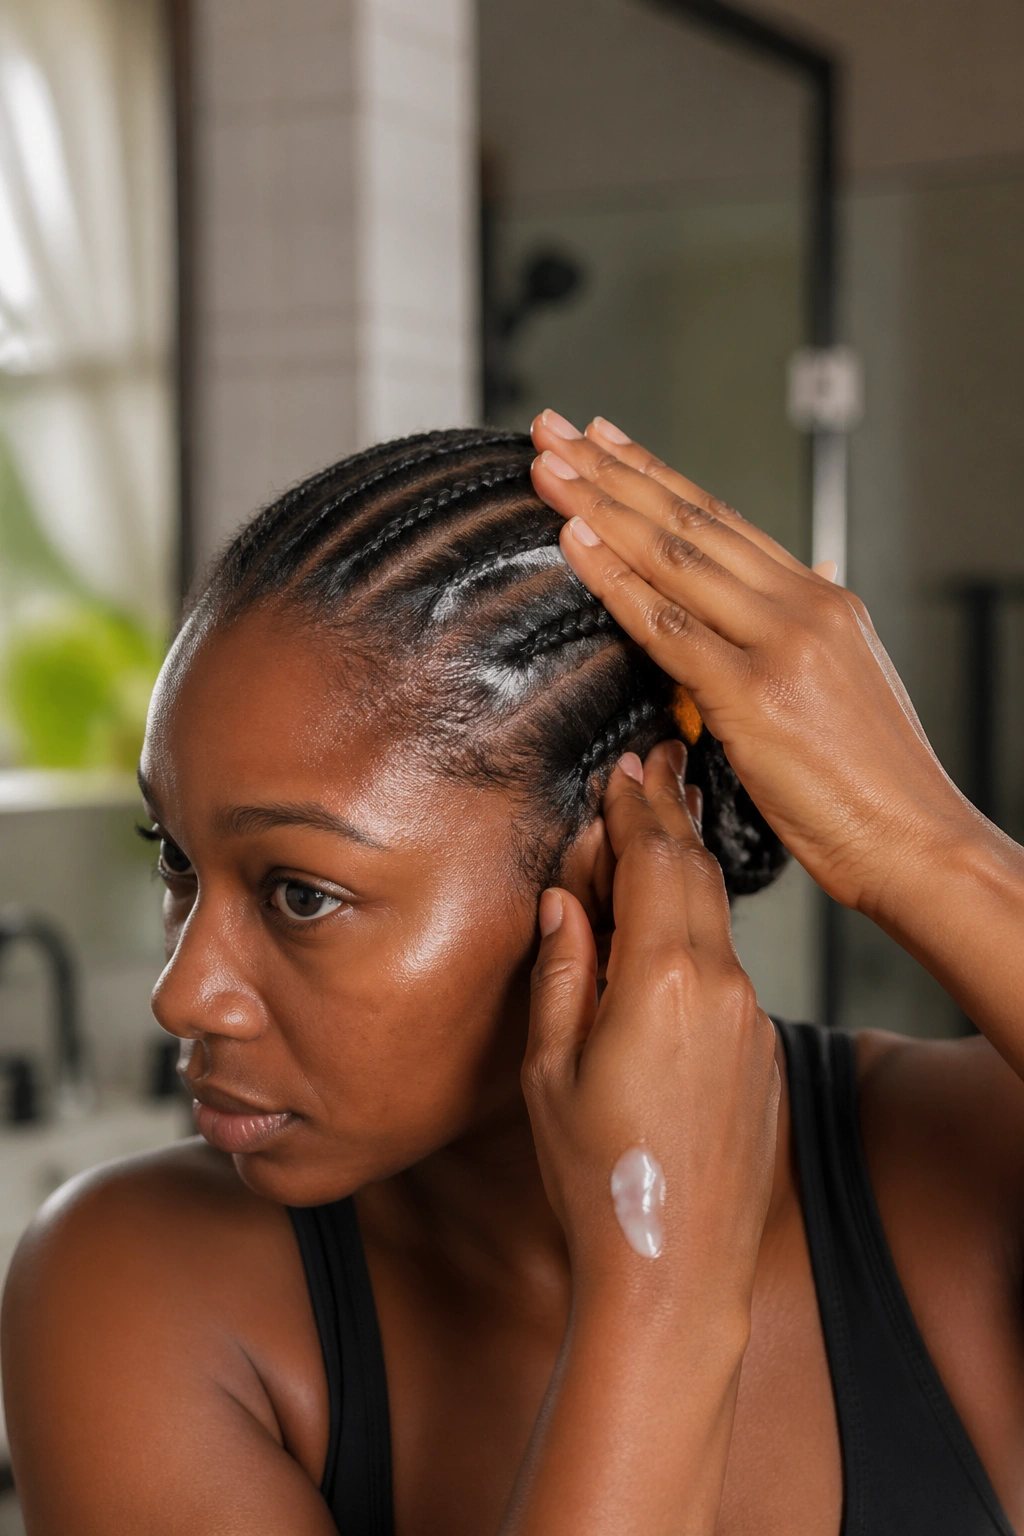
Prepping Your Natural Hair Underneath
Start clean. A clarifying wash forty-eight hours before installation strips buildup so the cornrows lay flat and the scalp does not itch by day four. Deep condition the same night — crochet is a protective style, but it only protects if your real hair is hydrated going in.
Moisturize and seal with an oil that does not leave residue. Grapeseed works. Jojoba works. Heavy butters can cause slippage on the cornrow base, so save them for the ends of your real hair only. Stretch your hair lightly, either with bantu knots overnight or a quick banding session, so it braids smoothly.
Cornrow pattern is the foundation. A basic beehive pattern — circular rows spiraling toward the crown — works for most afros because it distributes weight evenly and gives you 360-degree coverage. Straight-back rows work if you plan to part the finished afro anywhere specific. Do not use complicated zigzag patterns for afros; they create lumps under the install.
Choosing the Right Hair for Your Look
Not all synthetic afro hair is the same. Kanekalon is the base fiber in most brands, but the curl memory, texture, and frizz resistance vary wildly between brands. Some brands sell “afro kinky” that feels like doll hair. Others sell pre-curled packs that drop into a natural-looking pattern right out of the bag.
Pre-curled hair saves time but limits your customization. Straight or wavy bulk hair requires setting on perm rods or flexi rods, which adds an hour or two but gives you exactly the curl you want. If you are new, buy pre-curled the first time. On the second install, experiment with setting your own.
Length matters too. Hair is usually sold in 14-inch to 24-inch packs. For a shoulder-grazing afro, 14 to 16 inches is plenty. For a show-stopping halo, reach for 18 to 22 inches. Longer hair looks dramatic but also weighs more, which means more tension on your cornrows.
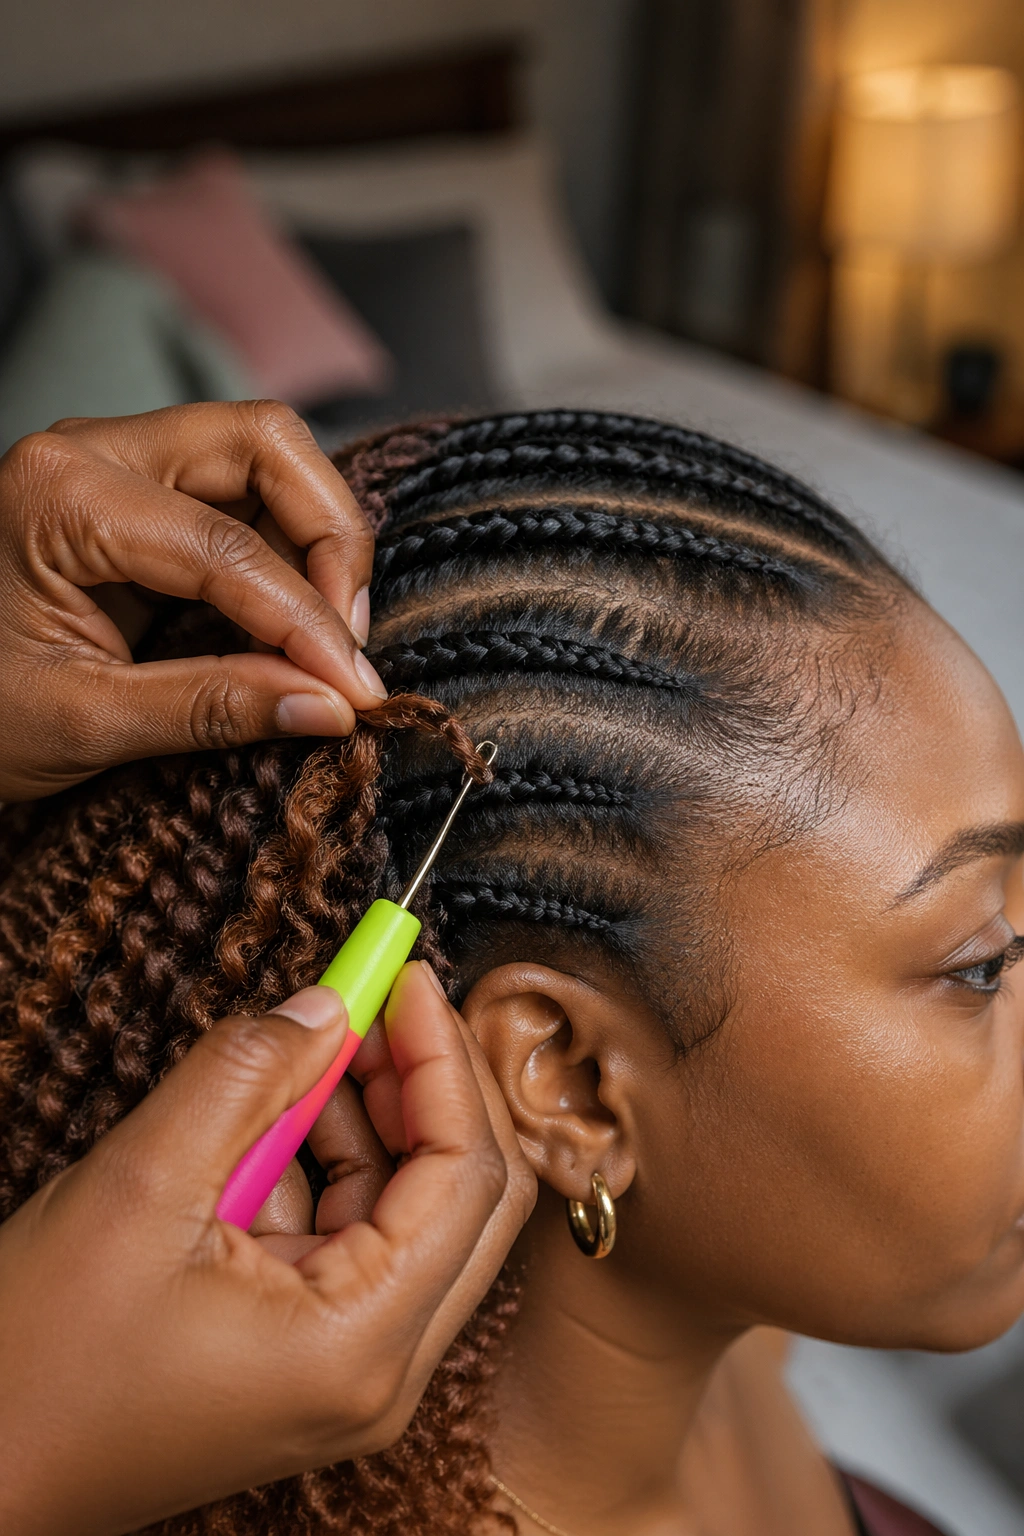
The Installation Basics You Should Master
Slide the latch hook under a cornrow, hook the folded piece of hair at its midpoint, pull the loop through under the braid, then thread the ends of the hair through the loop and tug. That is the core move. Everyone fancies it up with different knot-tying methods, but ninety percent of crochet installs come down to that four-step motion.
For afros specifically, you want the knots tight enough not to slip but loose enough to allow movement at the root. A knot that is yanked down too hard creates a flat spot. A knot that is too loose unravels by day three. Find the middle.
Cut loops with precision after installation. Never pull the loops apart with your fingers — that is what creates that crunchy, unnatural edge. A sharp snip right through the loop gives you soft tendrils that blend into the surrounding hair.
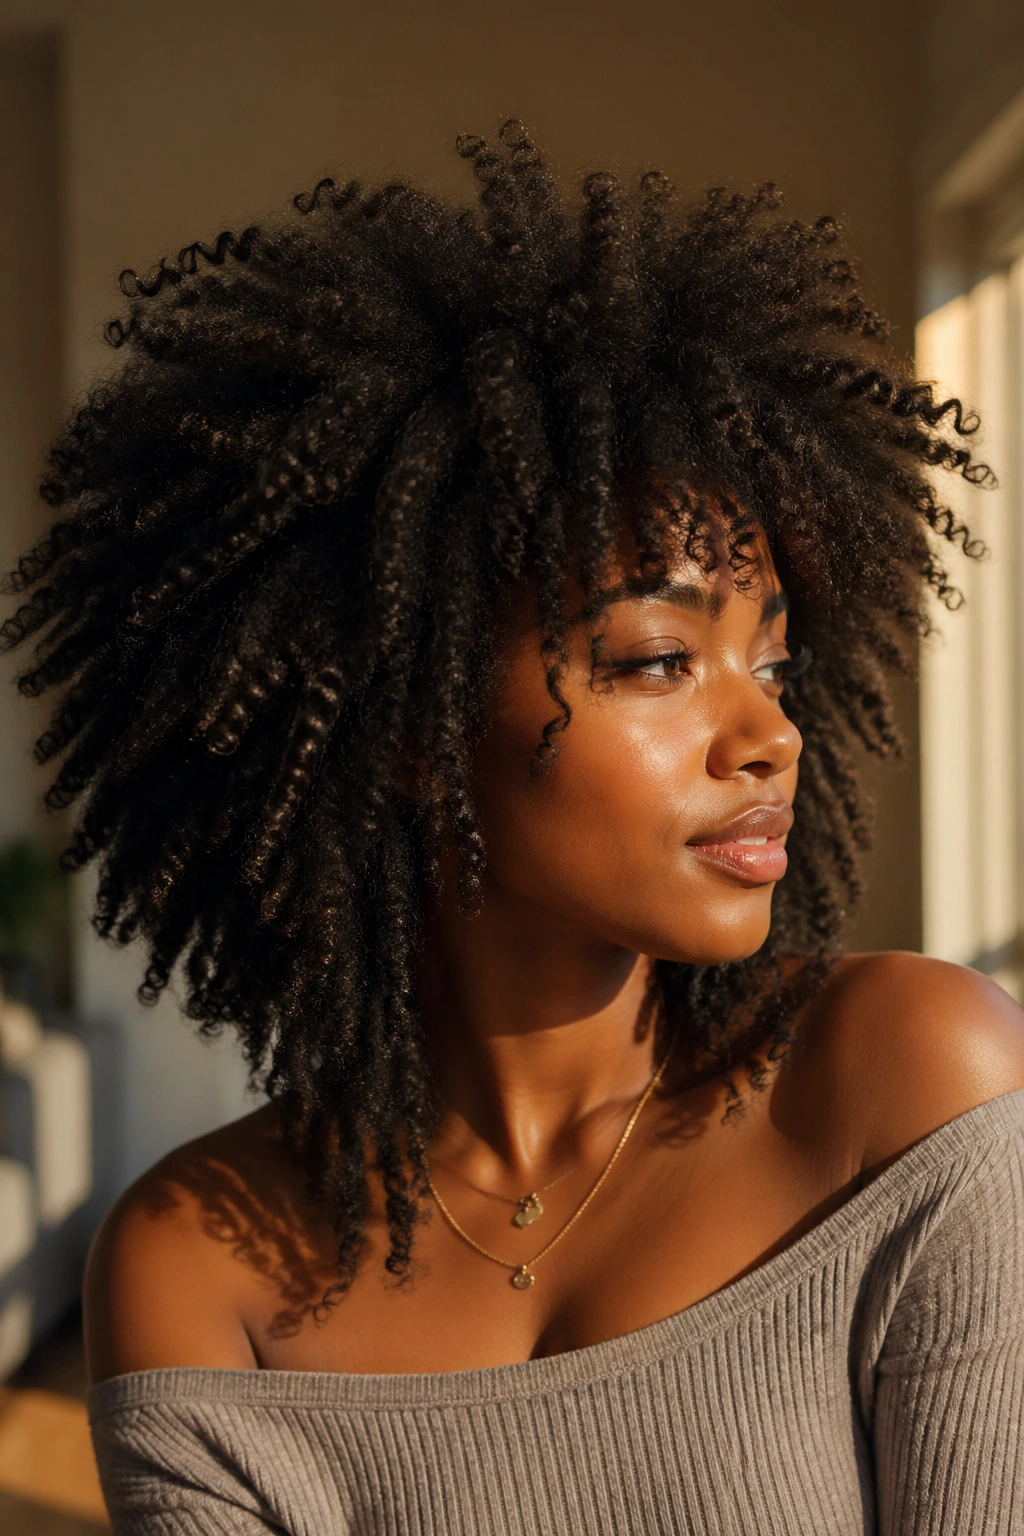
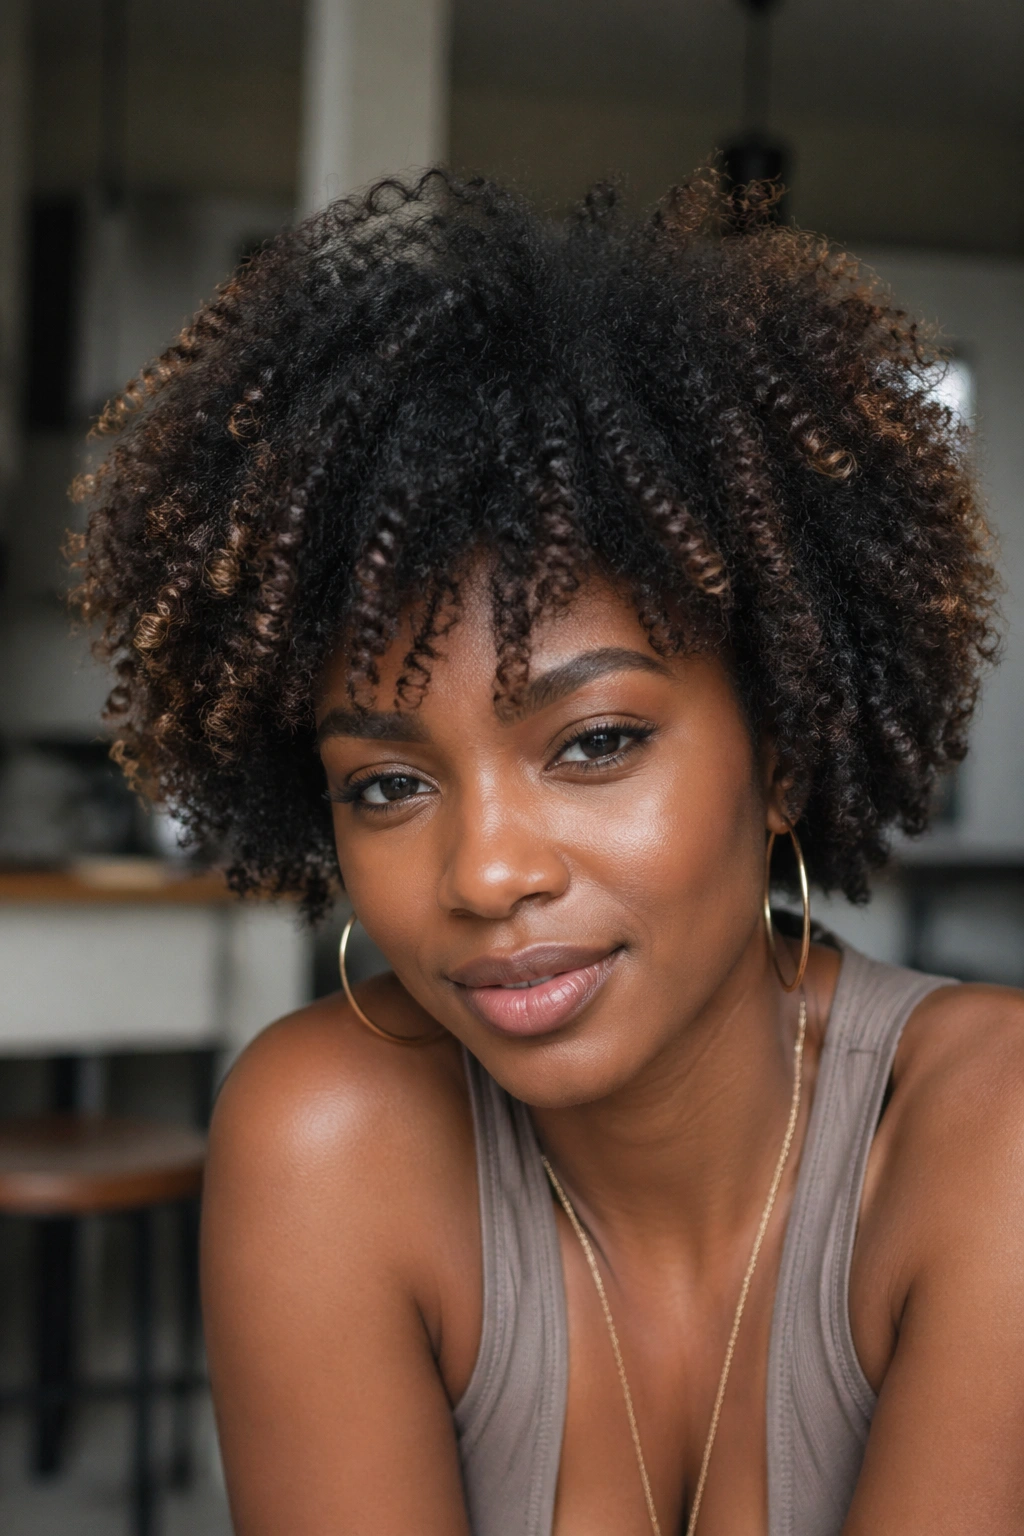
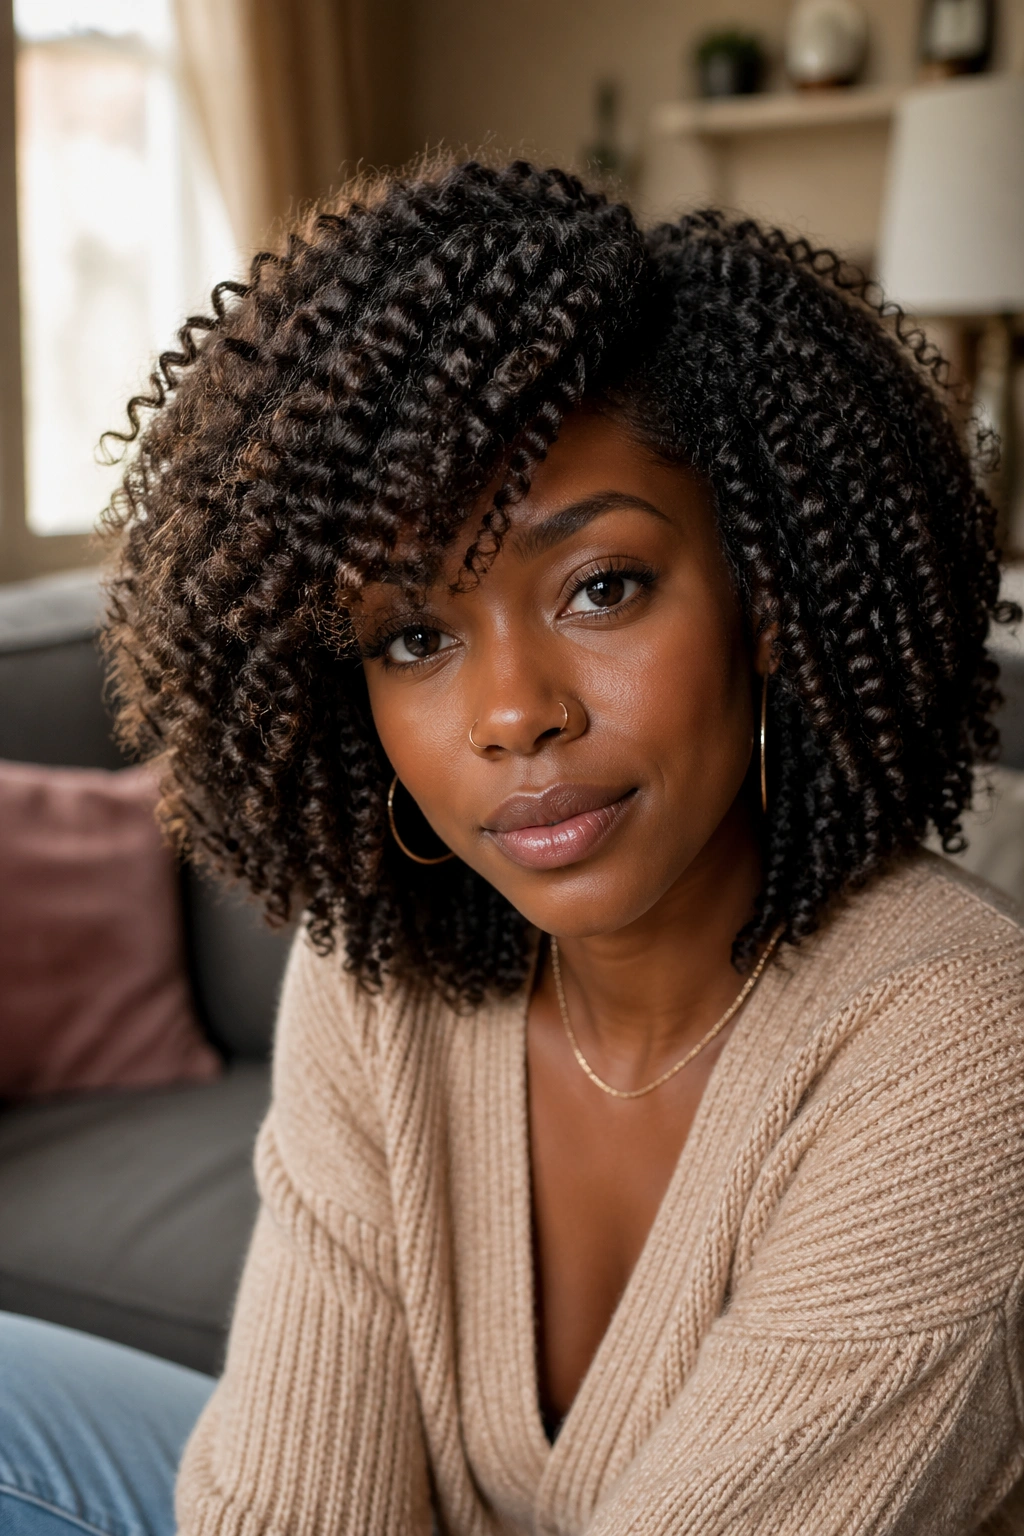
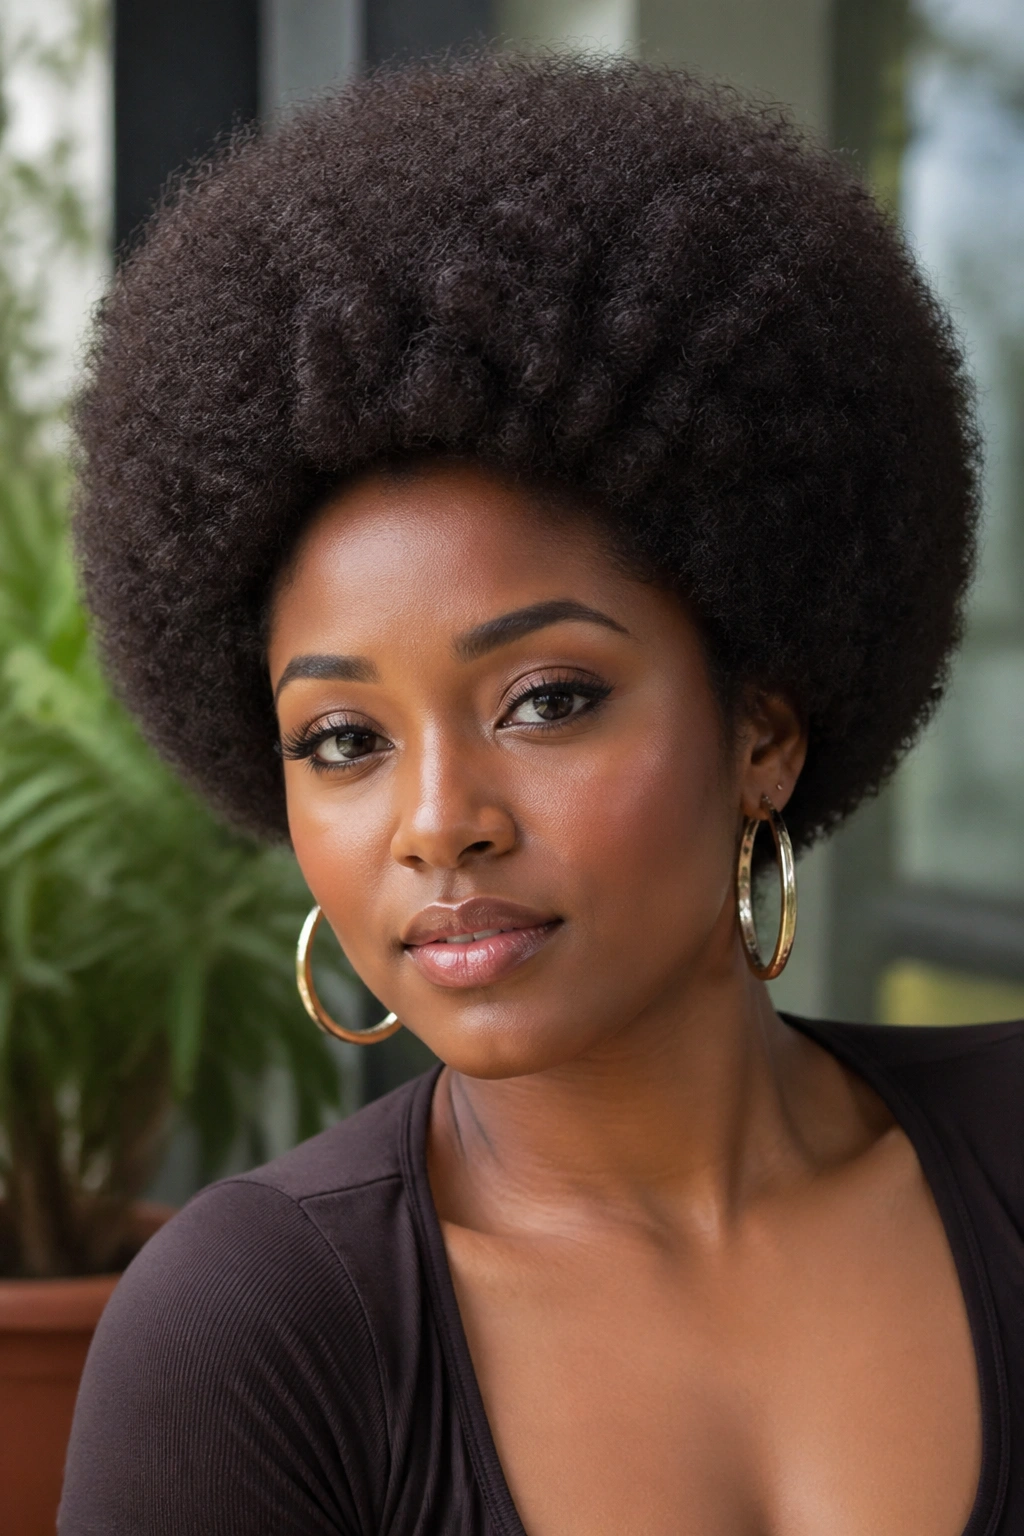
1. The Classic Springy Afro
This is the install everyone pictures when you say “crochet afro.” A tight 4A-ish curl pattern, pre-curled pack, installed on a beehive base, then fluffed out into a round halo that sits about four to six inches off the scalp in every direction. It reads as natural to anyone not staring at your hairline.
What Makes It Different
Most pre-curled packs in this category use a loose spring curl rather than a true coil, which means you get volume without the fiber fighting you. The curl unwinds slightly over the first week and the afro gets softer, not frizzier, if you treat it right.
- Use 6 packs for medium density, 8 for maximum density
- Fluff with a pick from the root, not the ends
- Refresh nightly with a water-glycerin mist
- Tip: Fluff upside down for the first minute, then right-side up — it lifts the roots without breaking the curl pattern at the ends.
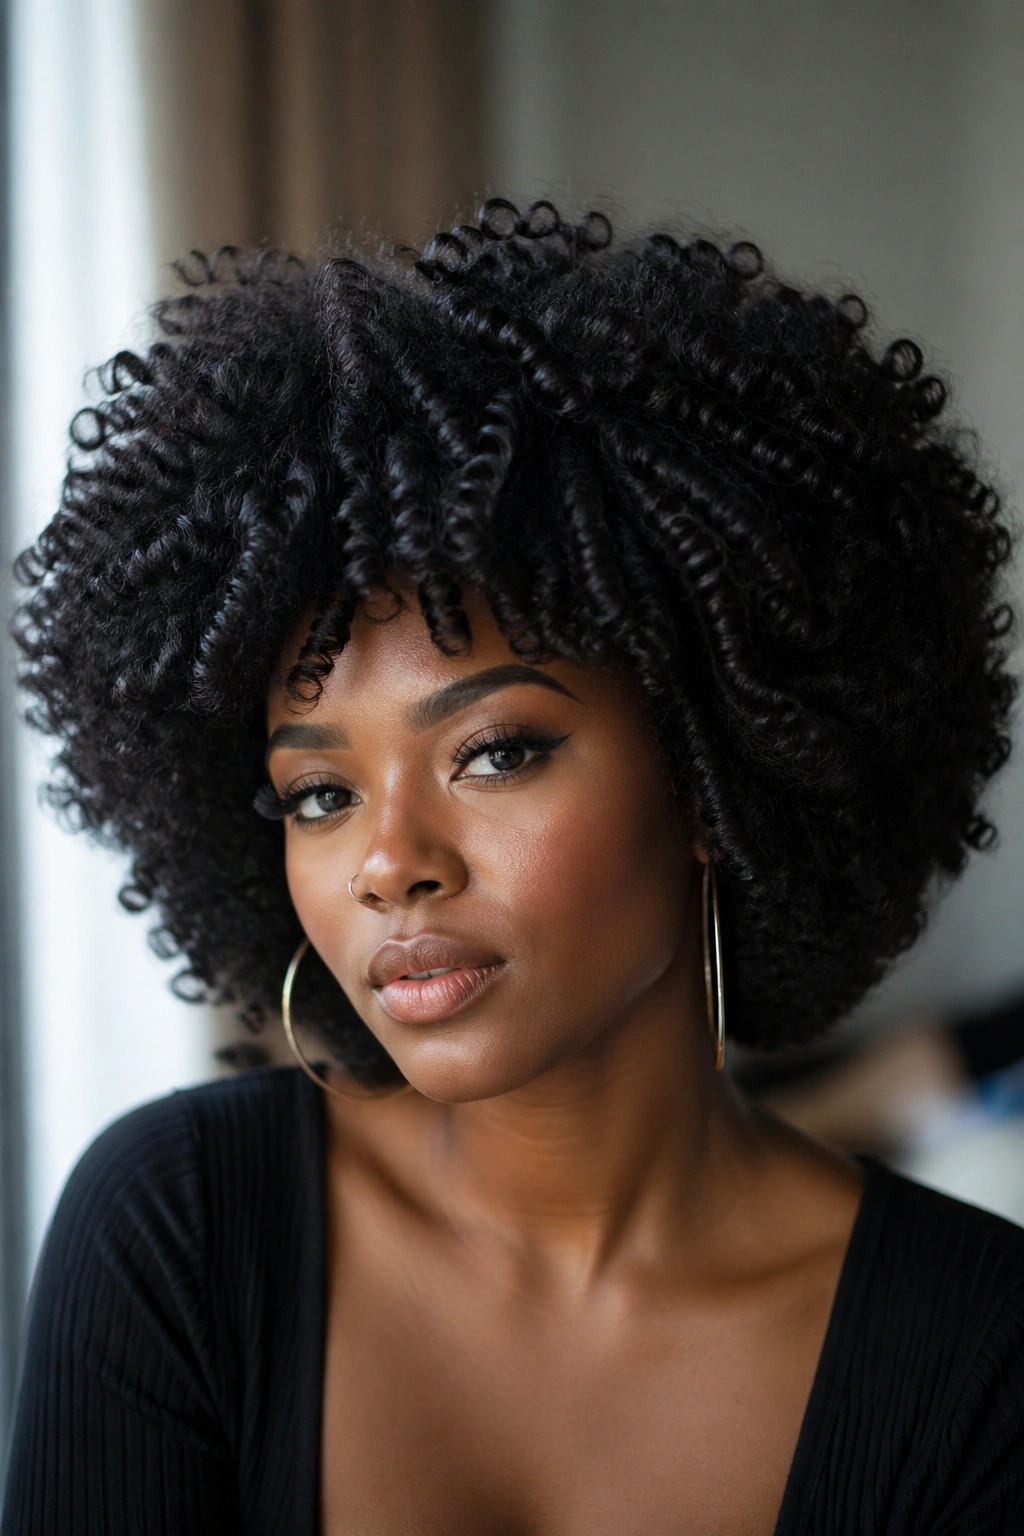
2. The Halo Afro
Ever looked at someone’s afro and wondered how the outline could be that perfectly round? That is a halo afro, and the trick is not in the hair — it is in the shaping. The installation is standard. The magic comes from carefully trimming the outer edge after the install is done, walking around yourself with a handheld mirror and snipping loose ends until the silhouette reads as a near-perfect sphere from every angle.
A halo afro works best on medium-length hair, somewhere between 14 and 18 inches, because anything longer drops under its own weight and loses the round shape. Shorter than 14, you risk looking like a TWA with a fade that never happened.
How to Shape It Right
Work in natural daylight. Indoor light lies. Stand in front of a wide mirror with a second handheld one behind you and trim in small motions, rotating your head a quarter turn between each pass.
3. The Side-Parted Afro With a Defined Edge
A side part turns a crochet afro from hairstyle into statement. Unlike the classic round install where the crown is the focal point, a deep side part shifts all the volume to one side and creates that cascading, architectural shape that photographs beautifully.
To get a clean part with crochet hair, you need a base cornrow pattern that leaves a flat strip of real hair exposed along the part line. That flat strip holds edge gel and controls where the fiber falls. Without it, the part line looks smudged and fake no matter how much product you use.
This look is best for people who like a polished, done finish. If you prefer the wild, free look, skip this one and go to number 5.
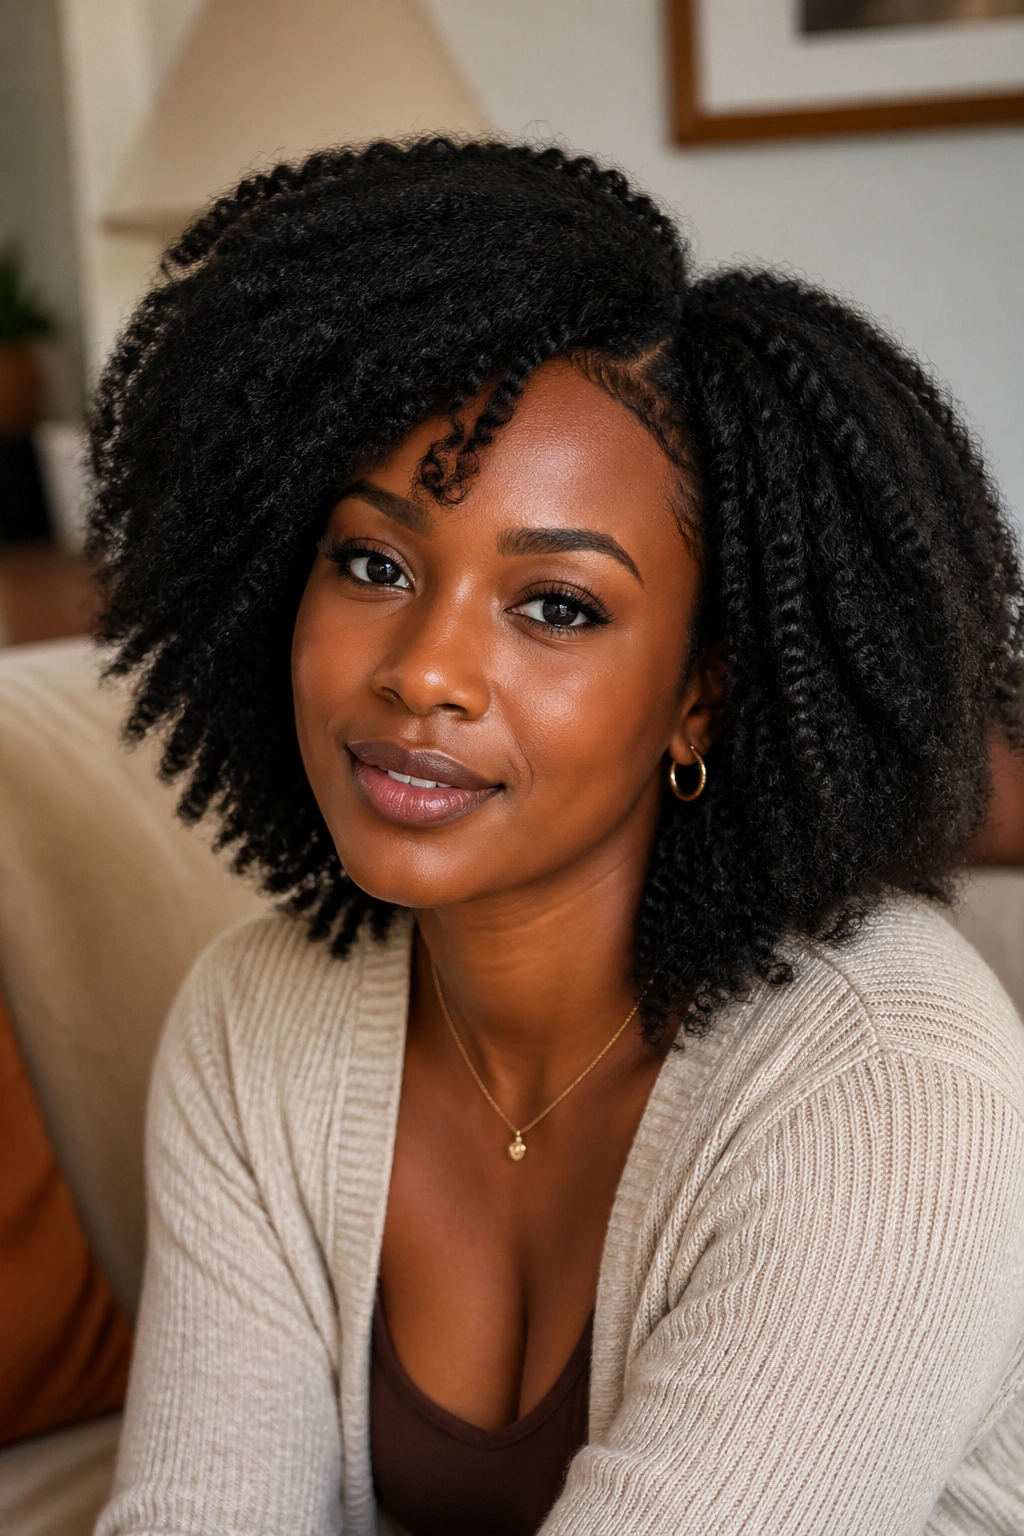
4. The Stretched Out Medium-Length Afro
Not every afro has to be round. A stretched afro — one that sits looser, with some directional fall — reads more like a blown-out natural style than a classic crochet look. It is also easier to maintain because it does not rely on precise shaping.
For this style, buy wavy or loose curl hair instead of tight spring curls. Install as usual, then stretch each section gently between your palms for a few seconds to elongate the pattern. The result is softer, lower-volume, and significantly lighter on your scalp.
This is my personal favorite for week-two of an install when I am tired of fluffing. You can also pull portions back into a loose low puff and still look intentional.
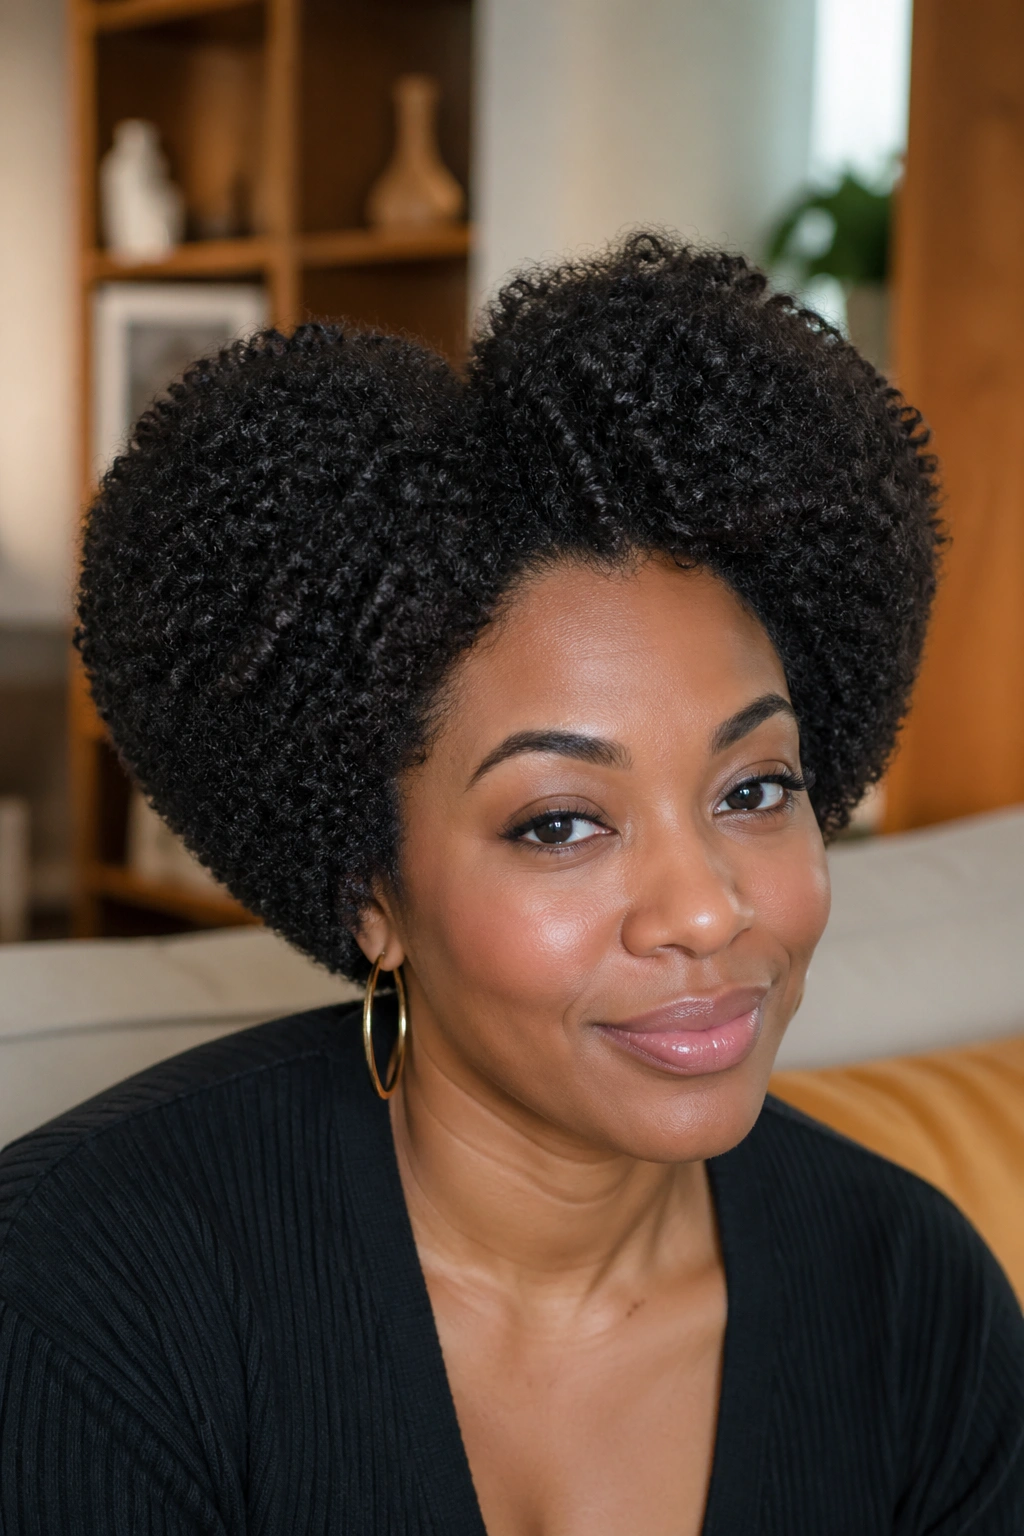
5. The Wild Full Afro

The wild full afro is not a mistake. It is a choice. People confuse the two, which is why they avoid this look. A deliberately unfinished, unshaped, free-form install says something entirely different from a rough DIY job — and the distinction lives in the density and the curl quality of the hair you picked.
To do this well, buy the fluffiest, highest-pack-count hair you can find, use eight or nine packs, install densely, and then refuse to shape it. Let the natural fall of the fibers dictate the silhouette. Fluff only from underneath to lift the roots. Do not touch the perimeter.
The look works best on people with round or oval faces because it softens rather than hides the facial outline. On a long face, it can add unwanted vertical weight. Test with a few fluff sessions before committing to a two-month install.
It is also the most forgiving style if you are installing crochet for the first time. No precise shape to achieve. No symmetry to maintain. You cannot really get it wrong.
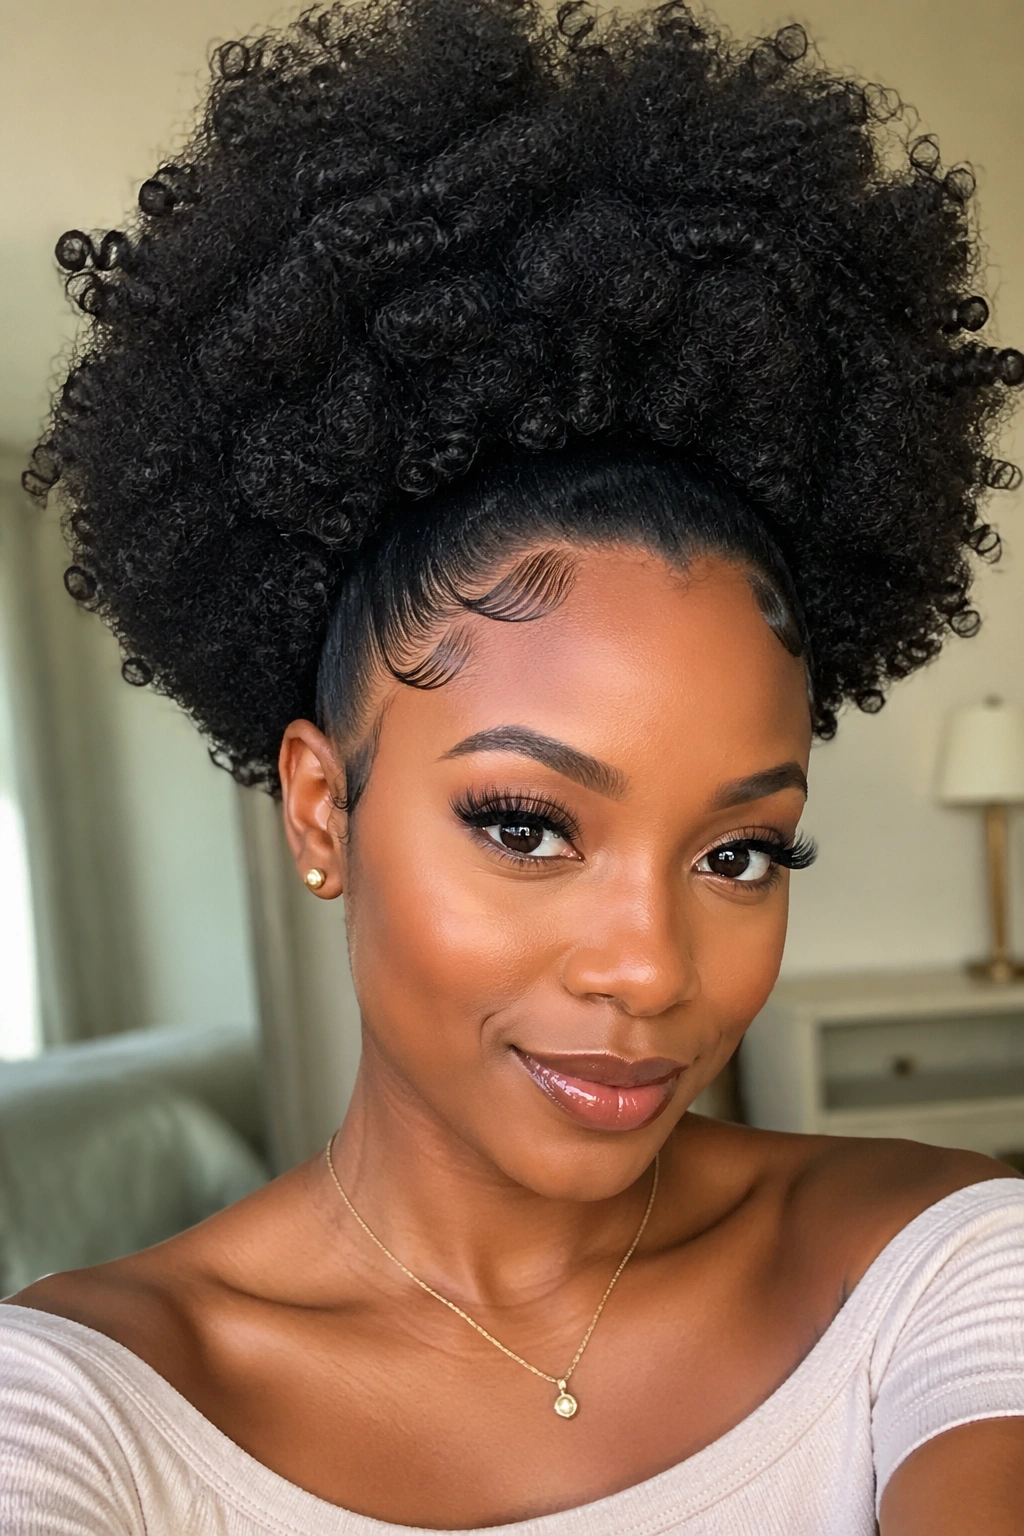
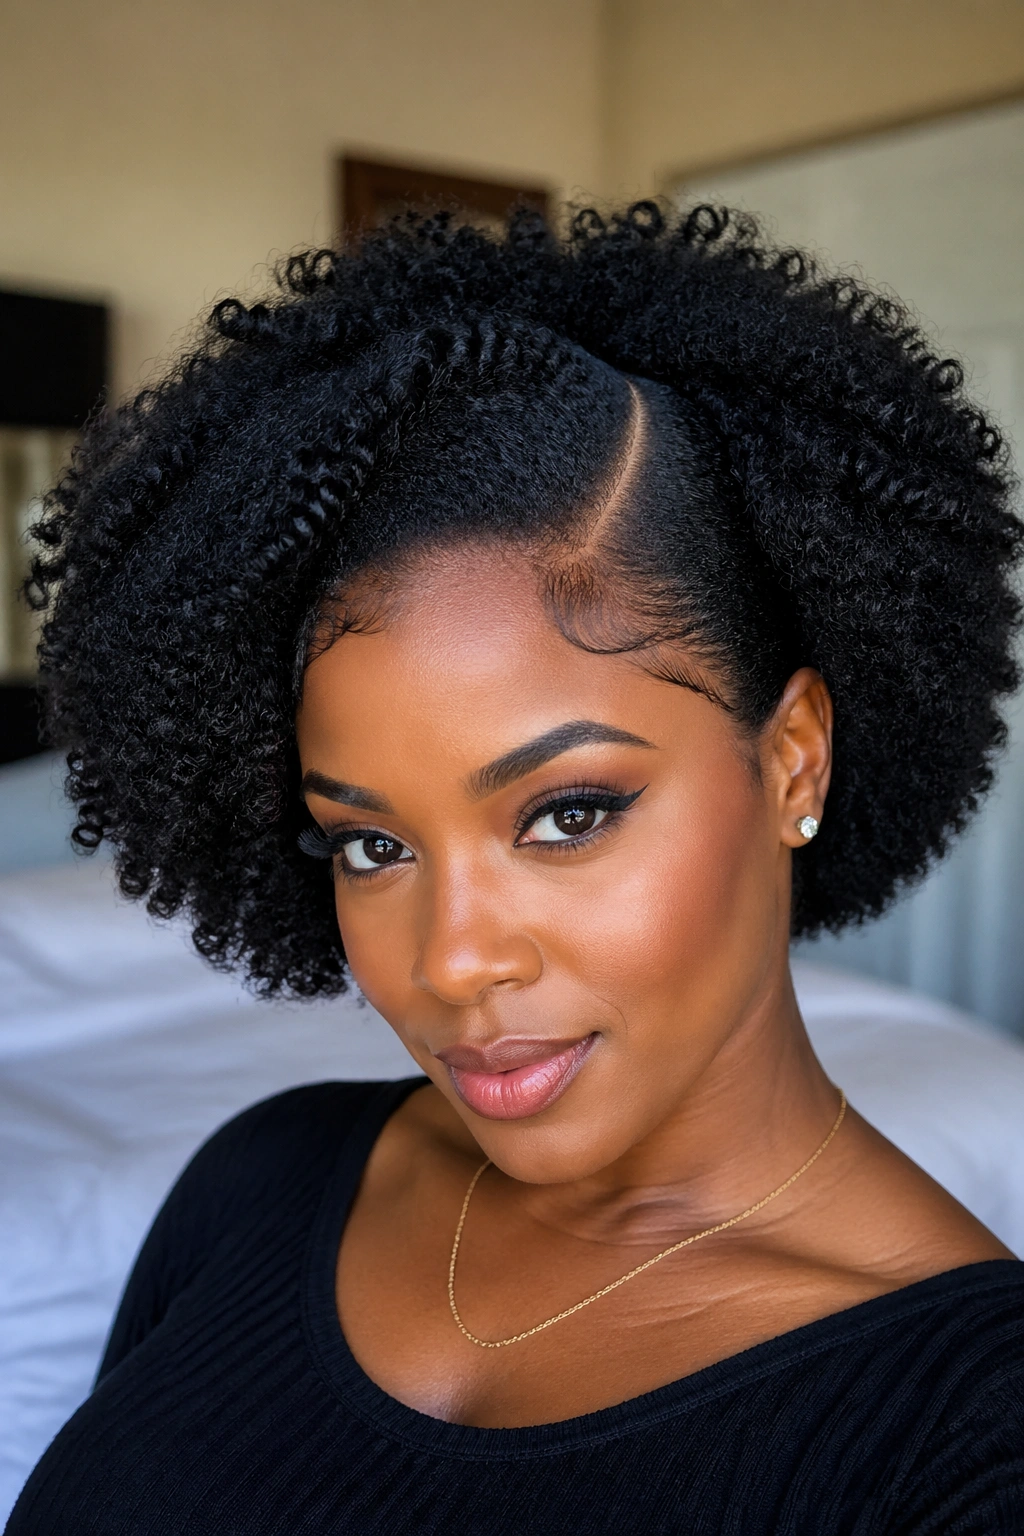
6. The Afro Ponytail
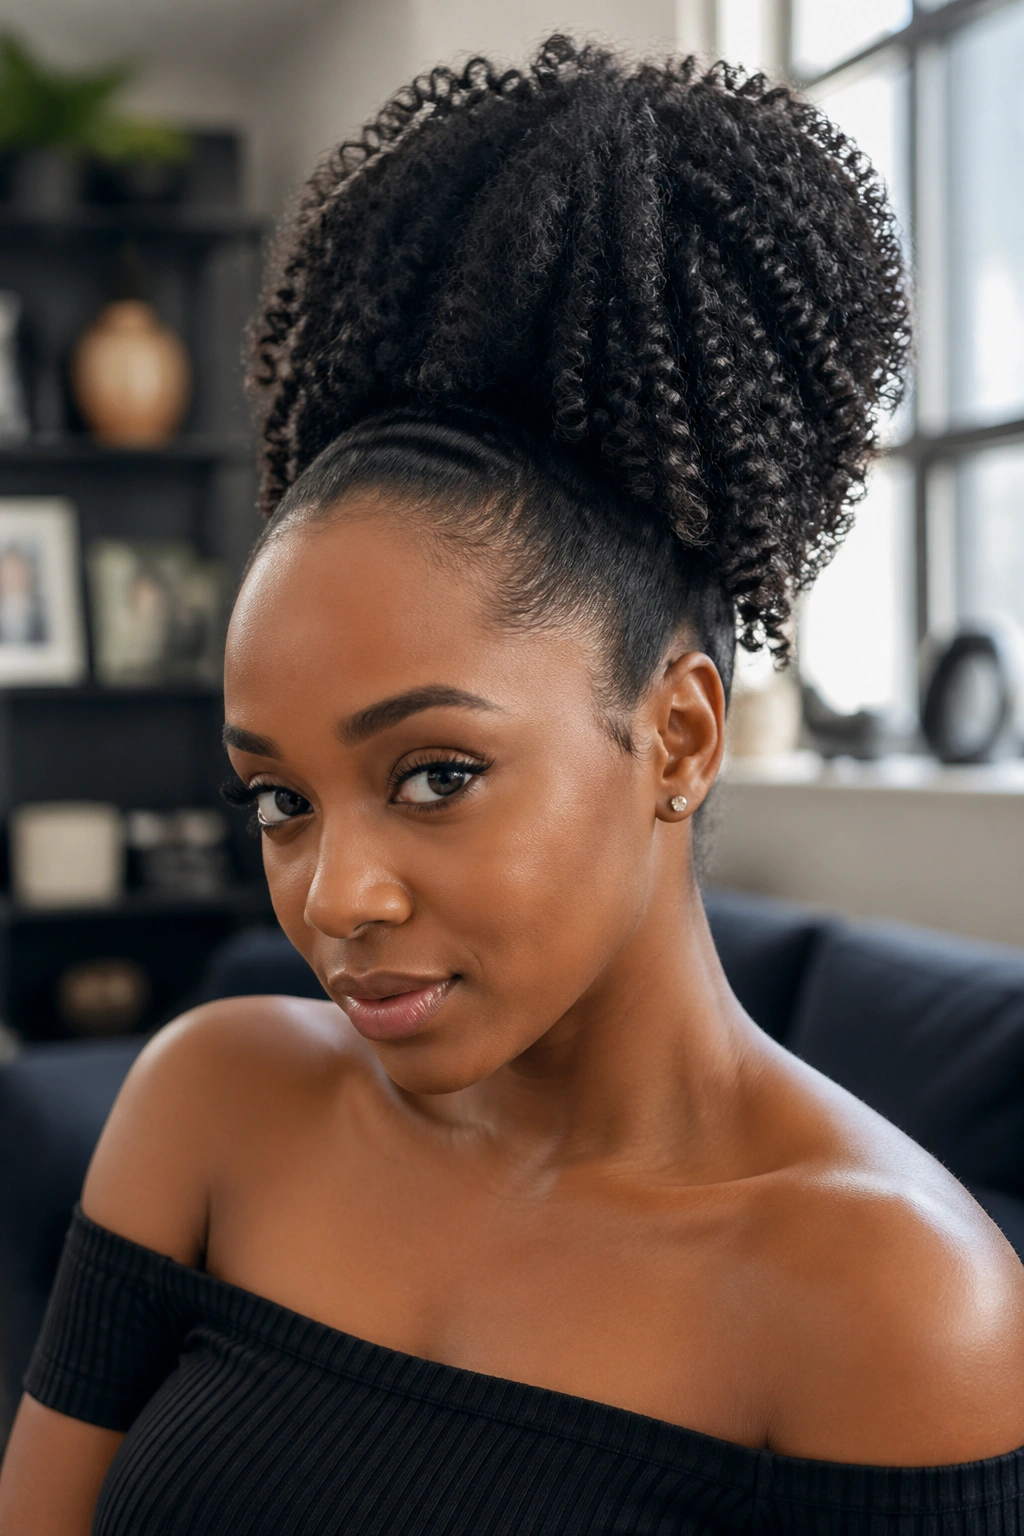
A crochet afro gathered into a high ponytail is one of the best-kept secrets of the style. It gives you the sky-high volume of an afro puff without the daily maintenance of keeping your own 4C hair stretched and picked out.
Why It Works
The secret is installing the crochet on a pattern that already braids the lower half of your head toward the crown. That way, when you pull the finished afro up, everything lifts cleanly. The base cornrows act like a built-in scrunchie.
- Install denser at the crown (where the puff will sit)
- Keep the nape section thinner so the gathered bun does not get lumpy
- Use a satin scrunchie, never an elastic that can snag fibers
- Tip: Leave a baby hair section at the front undamaged during cornrowing so you can lay edges cleanly when the puff is up.
7. The Low Bun Afro
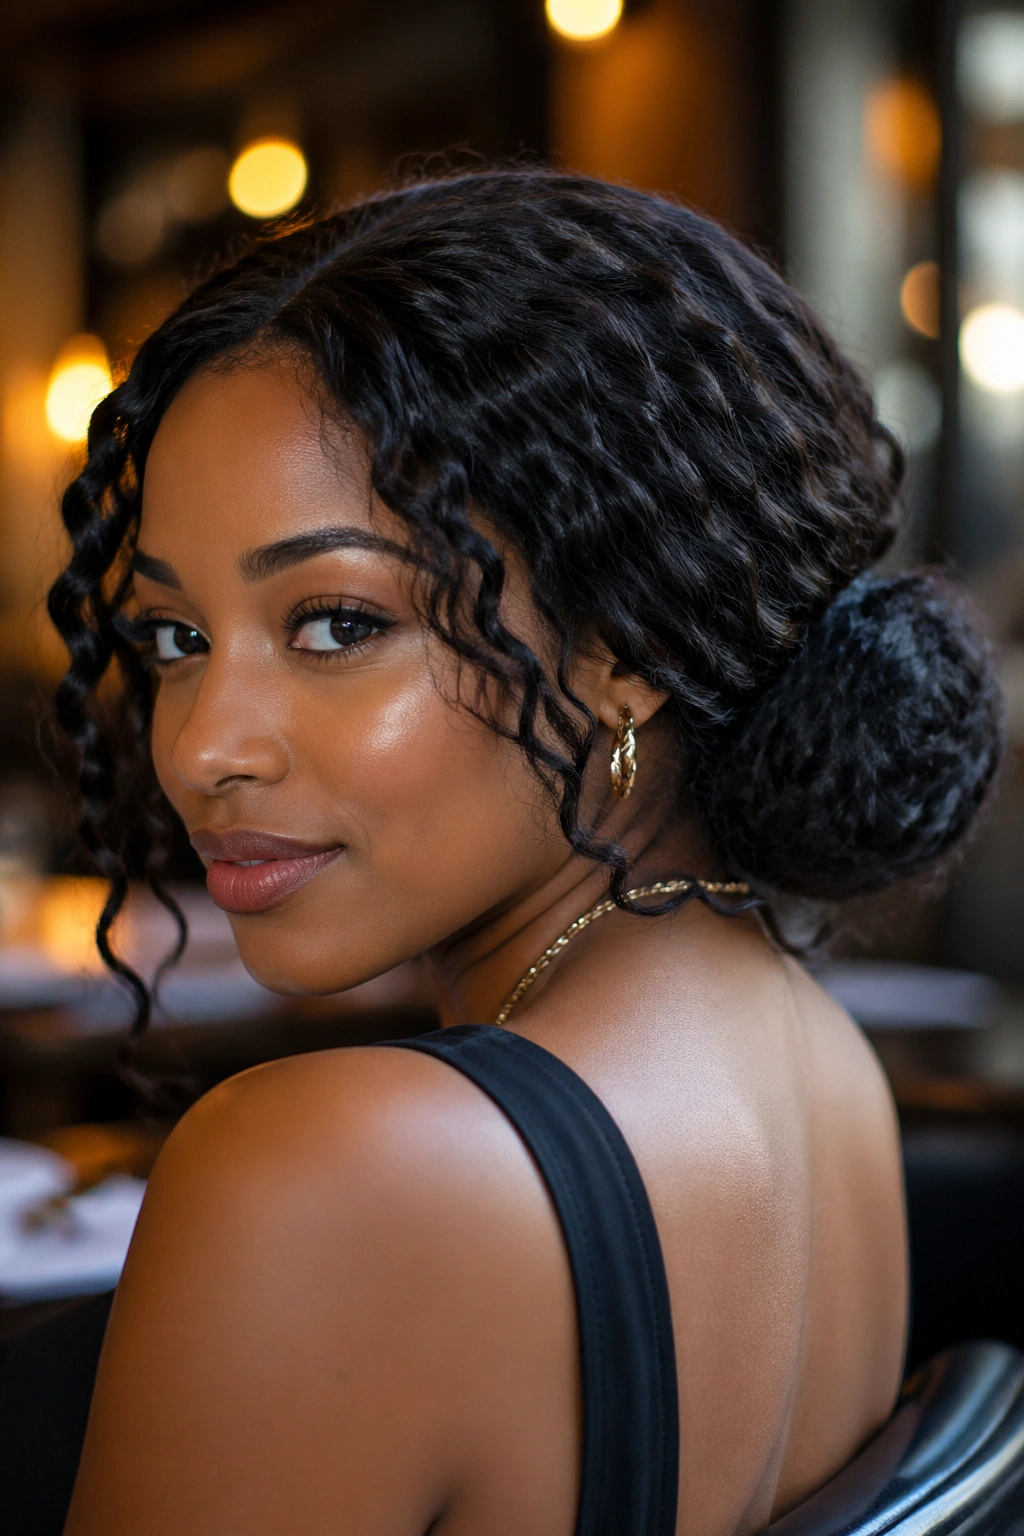
A low bun sounds contradictory with an afro, but if you install long wavy crochet hair and gather it at the nape, you get a soft cloud of a bun that still reads as natural hair texture. This works for weddings, work events, and anywhere you need a more buttoned-up version of yourself.
The key is hair length. You need at least 18 inches for the gathered bun to have enough body to hold its shape. Shorter lengths collapse into a sad little knot.
Use a jumbo hair tie and wrap in a figure-eight motion to bulk up the bun before pinning. Bobby pins slip in synthetic fiber — use the U-shaped hair pins designed for thick natural hair instead.
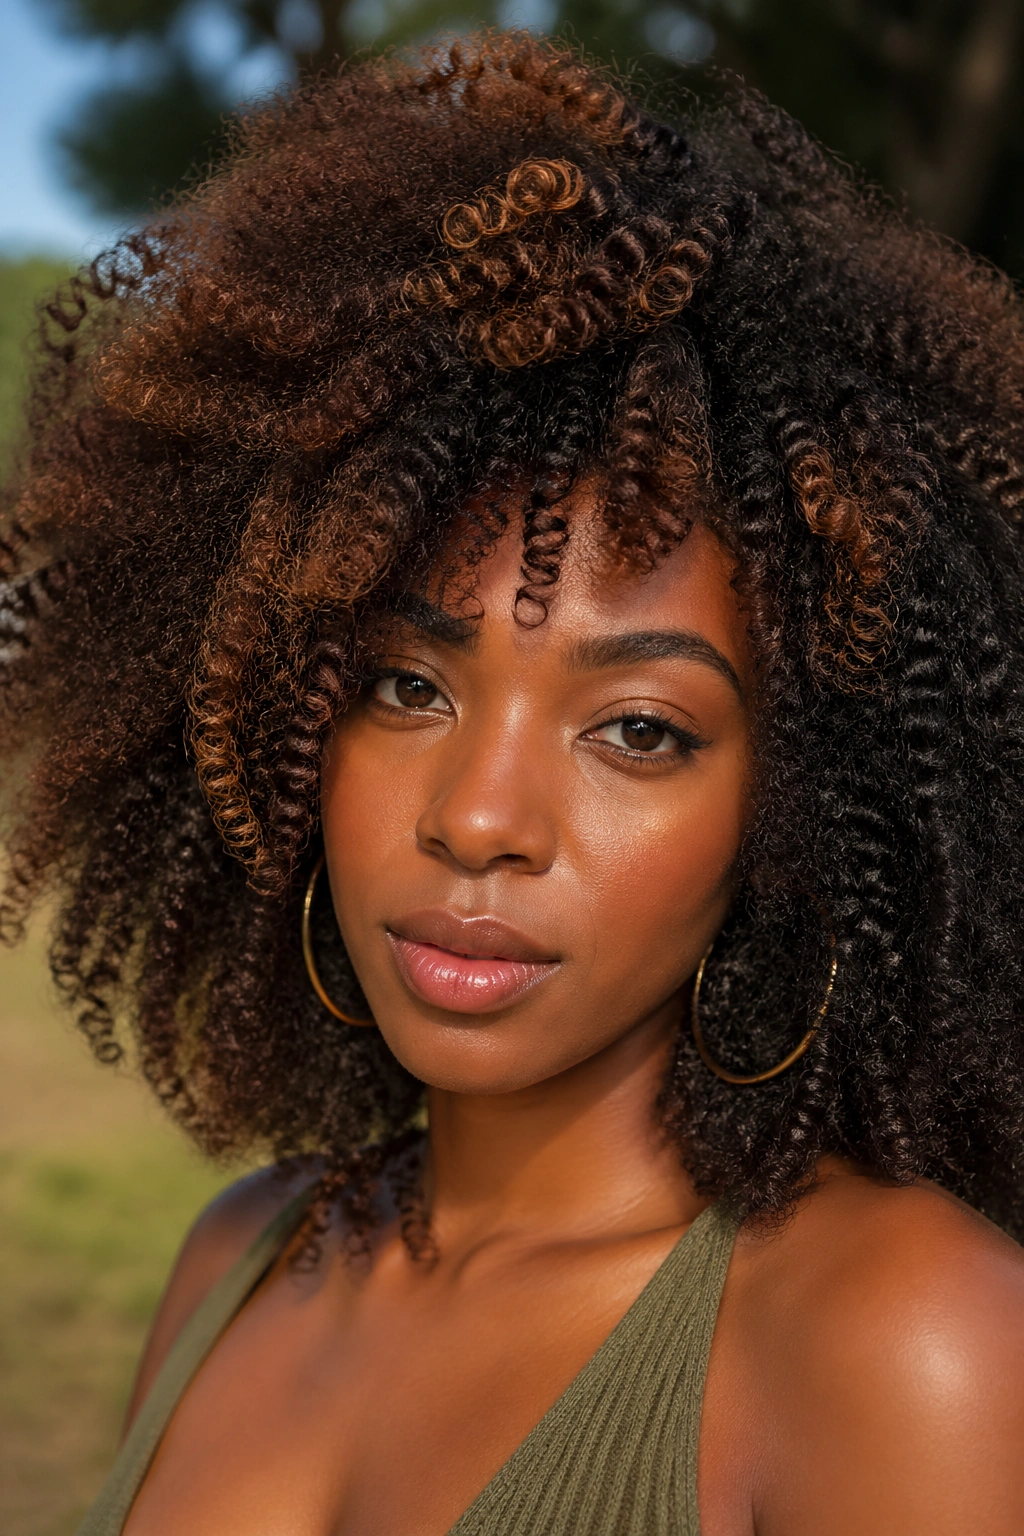
8. The Two-Tone Highlight Afro
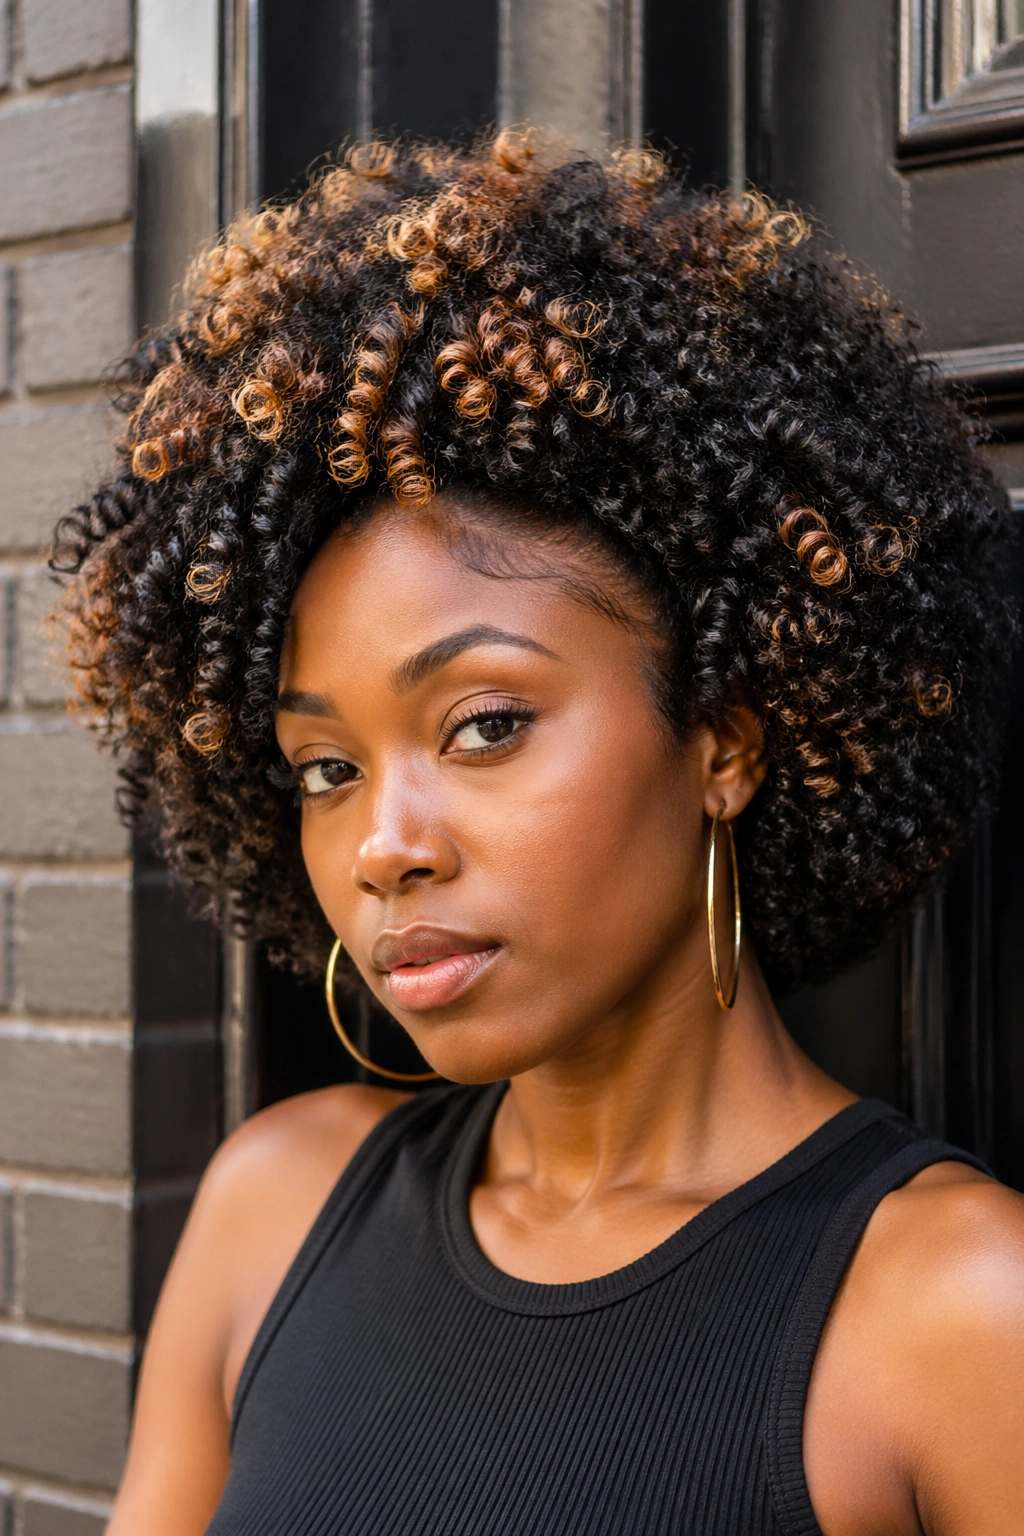
Highlights in a crochet afro are done by combining two packs of different colors during installation, not by dyeing the fibers afterward. Dyeing synthetic hair is a gamble at best and a melted mess at worst.
Pick a base color — most people do off-black or dark brown — and a highlight color two to three shades lighter. Warm honey, dark blonde, copper, or burgundy all read well. Mix the packs by pulling alternating sections and installing them side by side, not mixed within a single knot. This creates a dimensional ribbon effect rather than a muddy blend.
Install about seventy percent base color and thirty percent highlight for a subtle look. Fifty-fifty reads as chunkier, bolder, and more intentional. Under twenty percent highlight barely shows from across a room, so do not bother.
9. The Defined Curl Afro Using Perm Rods
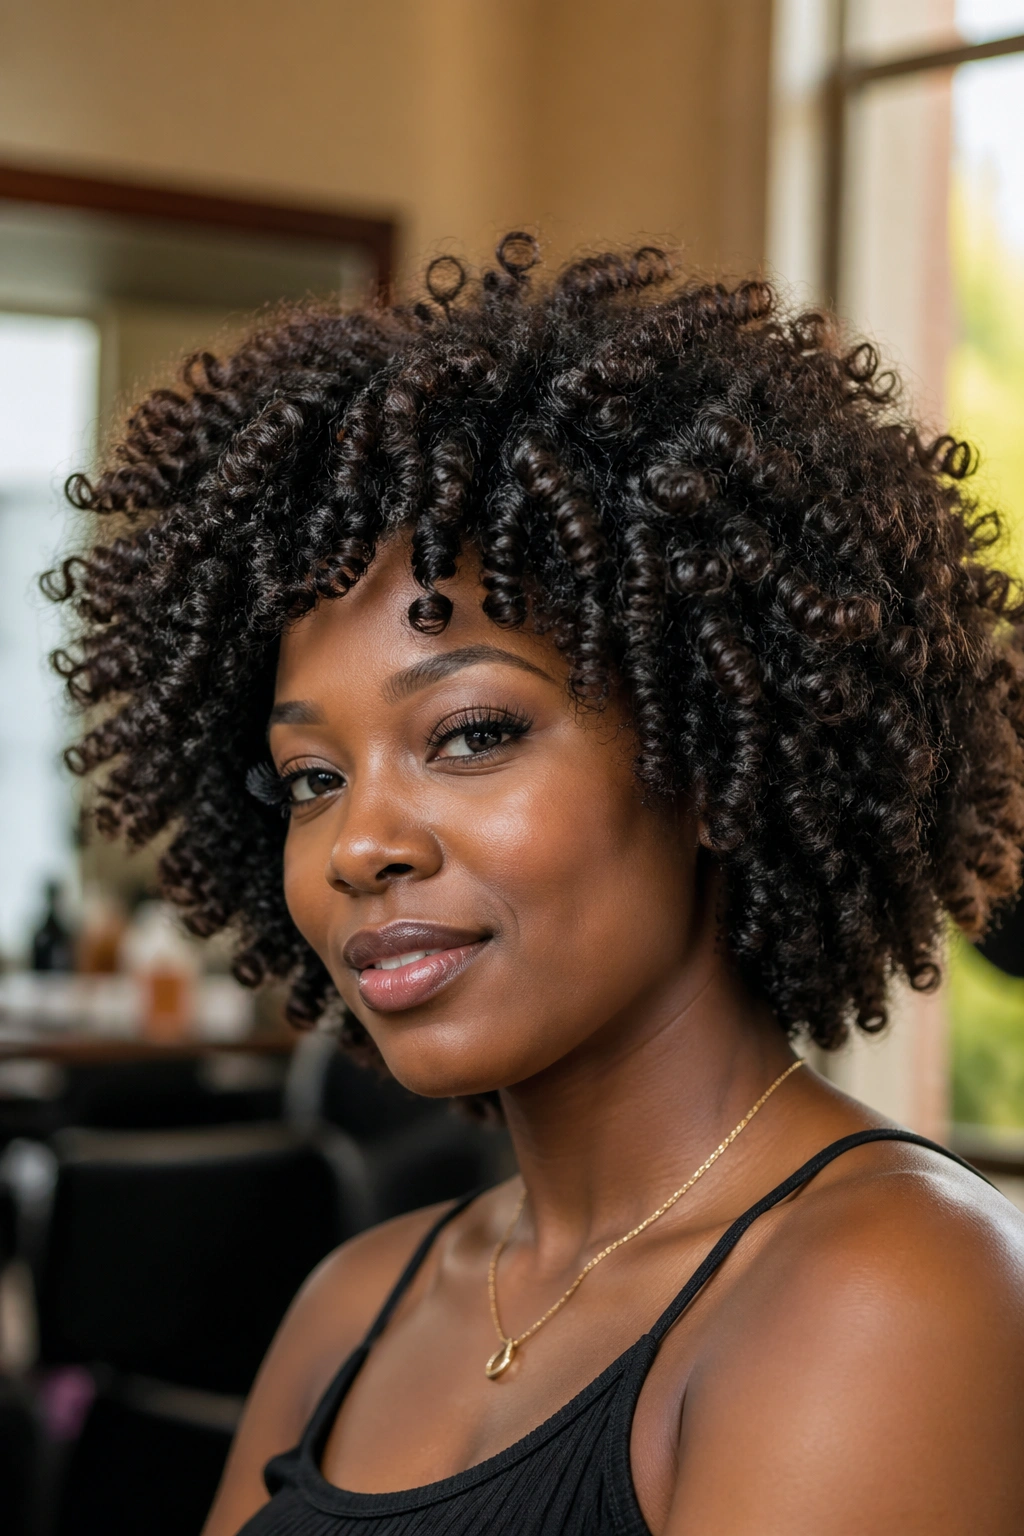
Buy straight bulk kanekalon, install it like a standard crochet afro, then dip each section in hot water after setting it on small perm rods. The heat locks the curl pattern into the synthetic fiber, giving you a perfectly defined, uniform curl that no pre-packaged hair can match.
This process takes longer — plan on four or five extra hours beyond a normal install — but the result is stunning. Each curl is a twin of every other curl. The structure is precise in a way that photographs beautifully.
Smaller perm rods give you a tighter, springier curl. Larger rods give you a soft wave. A mix of both, varied across sections of your head, produces the most natural visual effect. All-uniform curls can look wig-like.
10. The Afro With a Sleek Front
Imagine sleek baby-hairs and a flat, polished front melting into an explosion of afro volume from the crown back. That contrast is the whole look. It turns an otherwise casual crochet install into something editorial.
Leave out the front inch and a half of your real hair during cornrowing. Lay it down with edge gel and a stiff brush after the crochet is installed. The real hair in front reads as yours (because it is) and the crochet reads as extension (because it is). The visual honesty makes it work.
This look has a learning curve. Lay your edges gently — pressing too hard flattens them into helmet-hair within an hour. Use a soft-bristle toothbrush for the most control.
11. The Heart-Shaped Afro
A heart-shaped afro is what happens when you trim the silhouette to narrow at the jawline and flare wider at the crown. It is more common in vintage photography than in everyday wear, but that is exactly why it stands out. People do not see this shape often, and when they do, they pay attention.
Getting the heart requires deliberate trimming after installation, with the scissors working at a downward angle along the lower half and a flat, outward angle along the upper half. Practice on the back first, where a mistake is less visible.
This works best on medium-density installs. A super-dense afro is too heavy to hold the flared-crown shape. A sparse afro does not have enough material to sculpt.
12. The Mini Afro Crochet
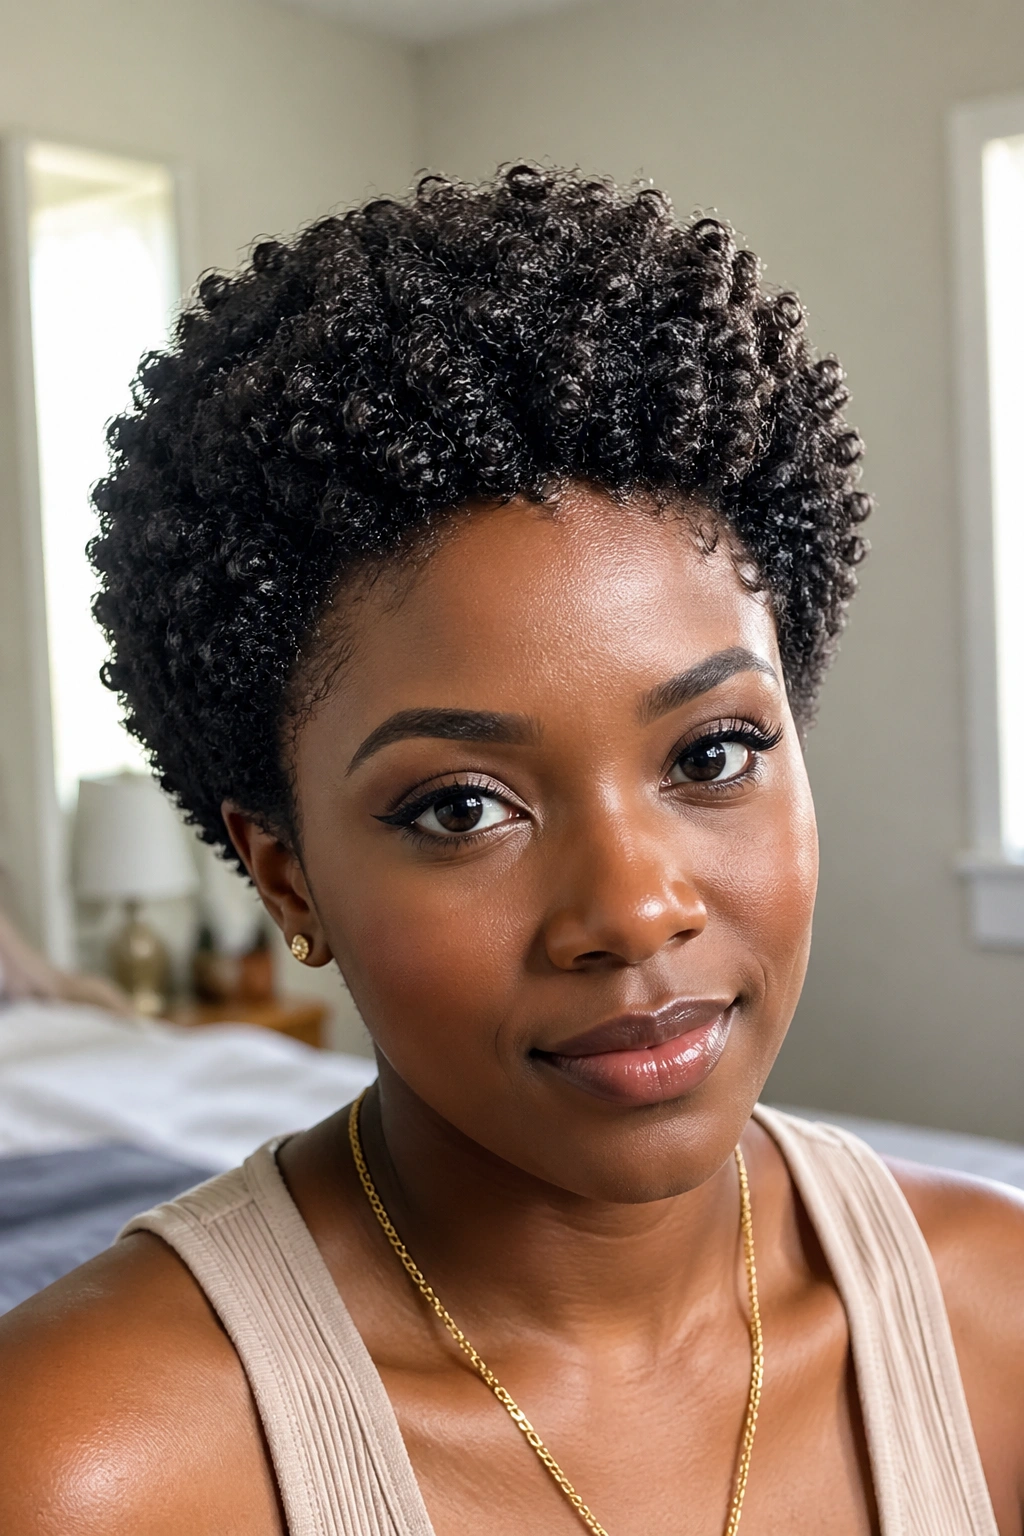
Short crochet afros are underrated. Most people think crochet means at least shoulder-length, but a four-to-six-inch crochet afro — what you might call a crochet TWA — is one of the cleanest, most manageable installs you can wear.
Who This Is For
Anyone who wants the look of a freshly-cut natural afro without the commitment of cutting their real hair. Anyone recovering from a bad trim who needs to look presentable for a few weeks. Anyone who hates heavy styles but still wants an afro silhouette.
Installation takes about ninety minutes instead of the usual three to four hours because there is so much less hair to place. Maintenance drops to almost zero. Fluff in the morning, cover at night, done.
13. The Afro With Chunky Twists Mixed In
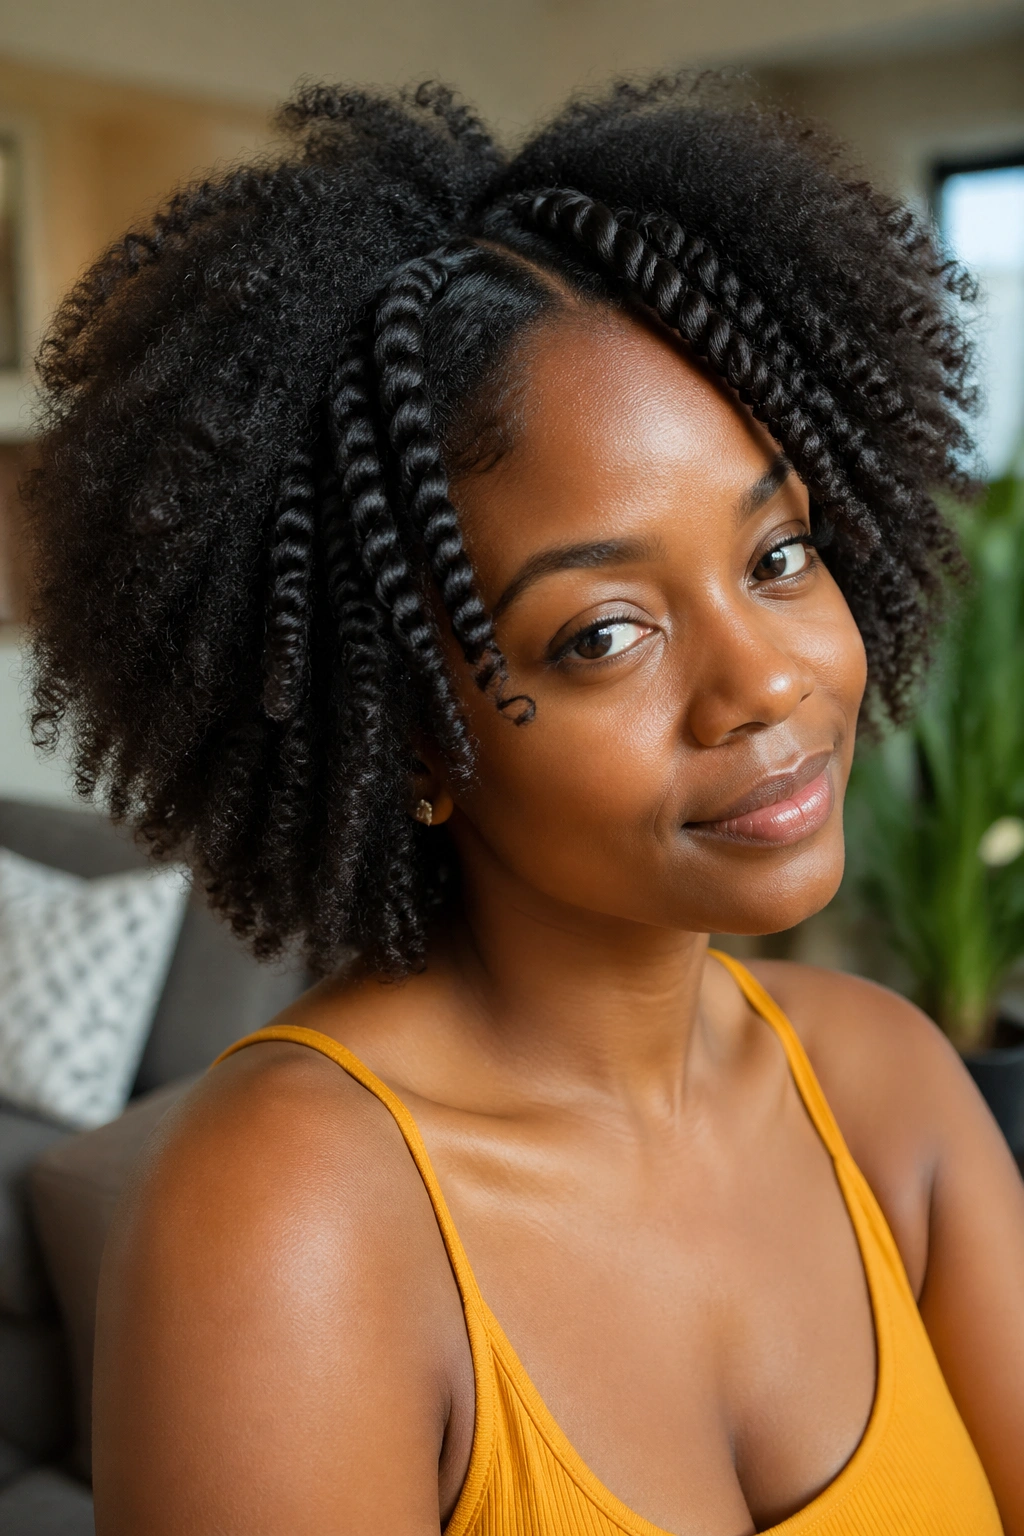
Break up the uniformity of an all-curl afro by twisting a few sections loosely after installation. You end up with a style that reads as a freshly unraveled twist-out — parts curled, parts still twisted, a sense of motion and in-between-ness.
Take roughly twenty percent of the sections and two-strand twist them, leaving the other eighty percent as loose curl. Do not be precious about which sections get twisted. Random placement looks more organic than symmetrical placement.
Unravel the twists two days in for maximum crimp definition, or leave them twisted for the entire install for a permanent contrast.
14. The Grown-Out Afro Look
Some people love an afro that looks like it has been growing for months — slightly uneven, a little wilder at the crown, softer at the temples. You can manufacture this look deliberately with a varied-length install.
Use three different hair lengths: 14 inches, 16 inches, and 18 inches. Install the shorter lengths around the perimeter and the longer lengths through the middle sections. Do not trim after installation. Let the natural variation do the work.
The result feels lived-in and unpretentious. It is the opposite of the perfectly sculpted halo afro — and for some people, that is exactly the appeal. This one is my go-to when I want to look effortless without actually putting in less effort.
15. The Red or Auburn Afro
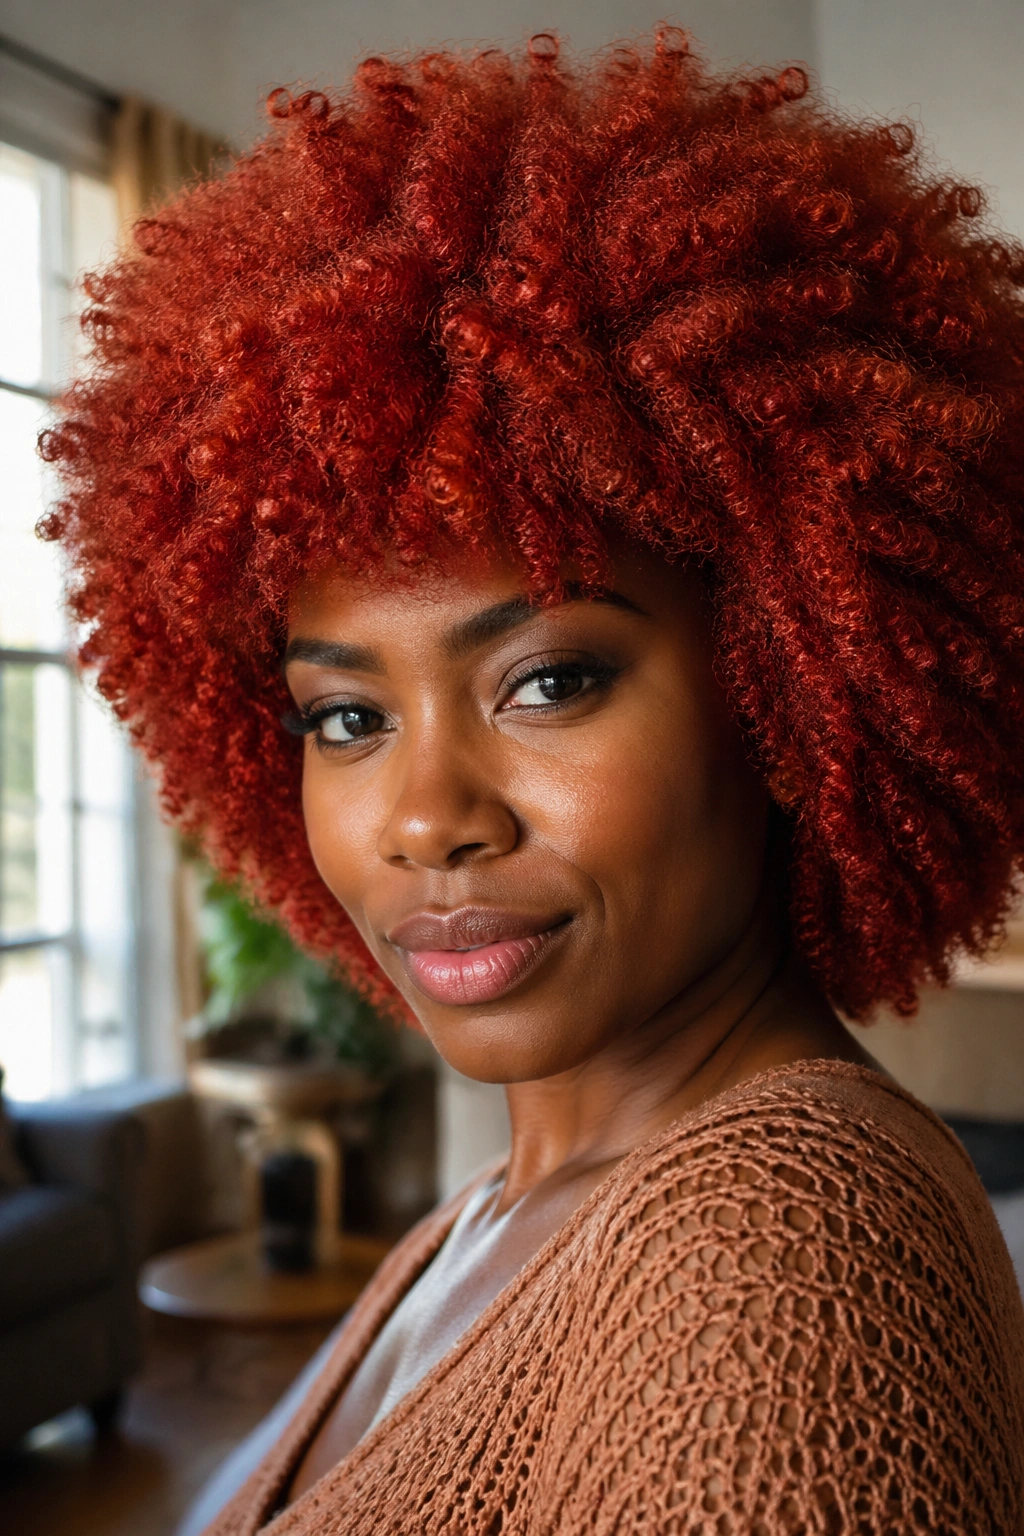
Color changes the entire read of an afro. A cool-black crochet install says classic. A warm auburn or red install says “look at me.” There is no wrong answer, but the warm-tone options dramatically increase the visual impact.
Dark auburn reads as intentional but not flashy. Bright red or copper reads as editorial and fearless. Burgundy sits in between — moody, rich, and complementary to most undertones. Order pre-colored packs rather than trying to dye synthetic hair yourself.
The pairing matters. Warm-toned skin works beautifully with auburn and copper. Cooler undertones pair better with burgundy or a true red-violet. If you are unsure, hold the pack up to your face in natural light before committing.
16. The Crochet Afro With Bangs
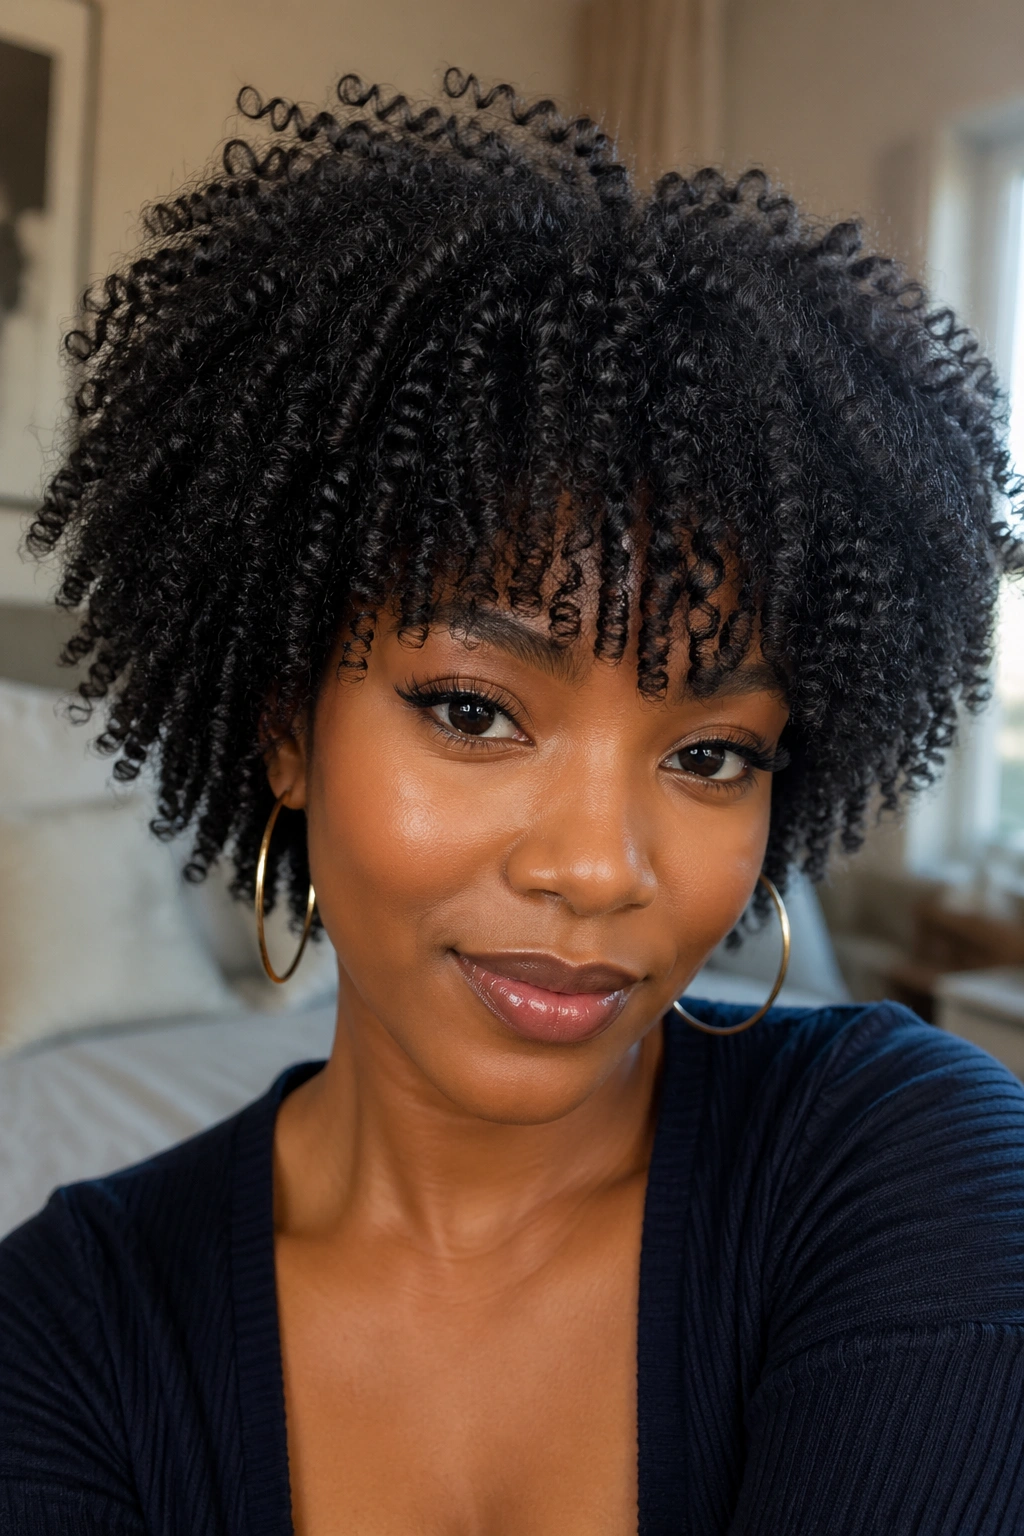
Yes, you can have bangs with a crochet afro. Install a slightly denser section across the front, then trim a fringe-style bang using sharp shears after everything else is shaped.
The Trick to a Clean Bang Line
Trim dry, not wet. Synthetic hair behaves unpredictably when wet and you will end up with a crooked line when it dries. Section the bang before trimming so you know exactly where the edges stop.
- Start with more length than you want — you can always trim more
- Cut in small snips, not long chops
- Use point-cutting (snipping into the hair vertically) for a soft edge
- Tip: A micro-fringe that barely grazes the brows looks intentional. A full thick fringe can overwhelm the face when paired with afro volume, so lean lighter.
17. The Pinned-Back Afro
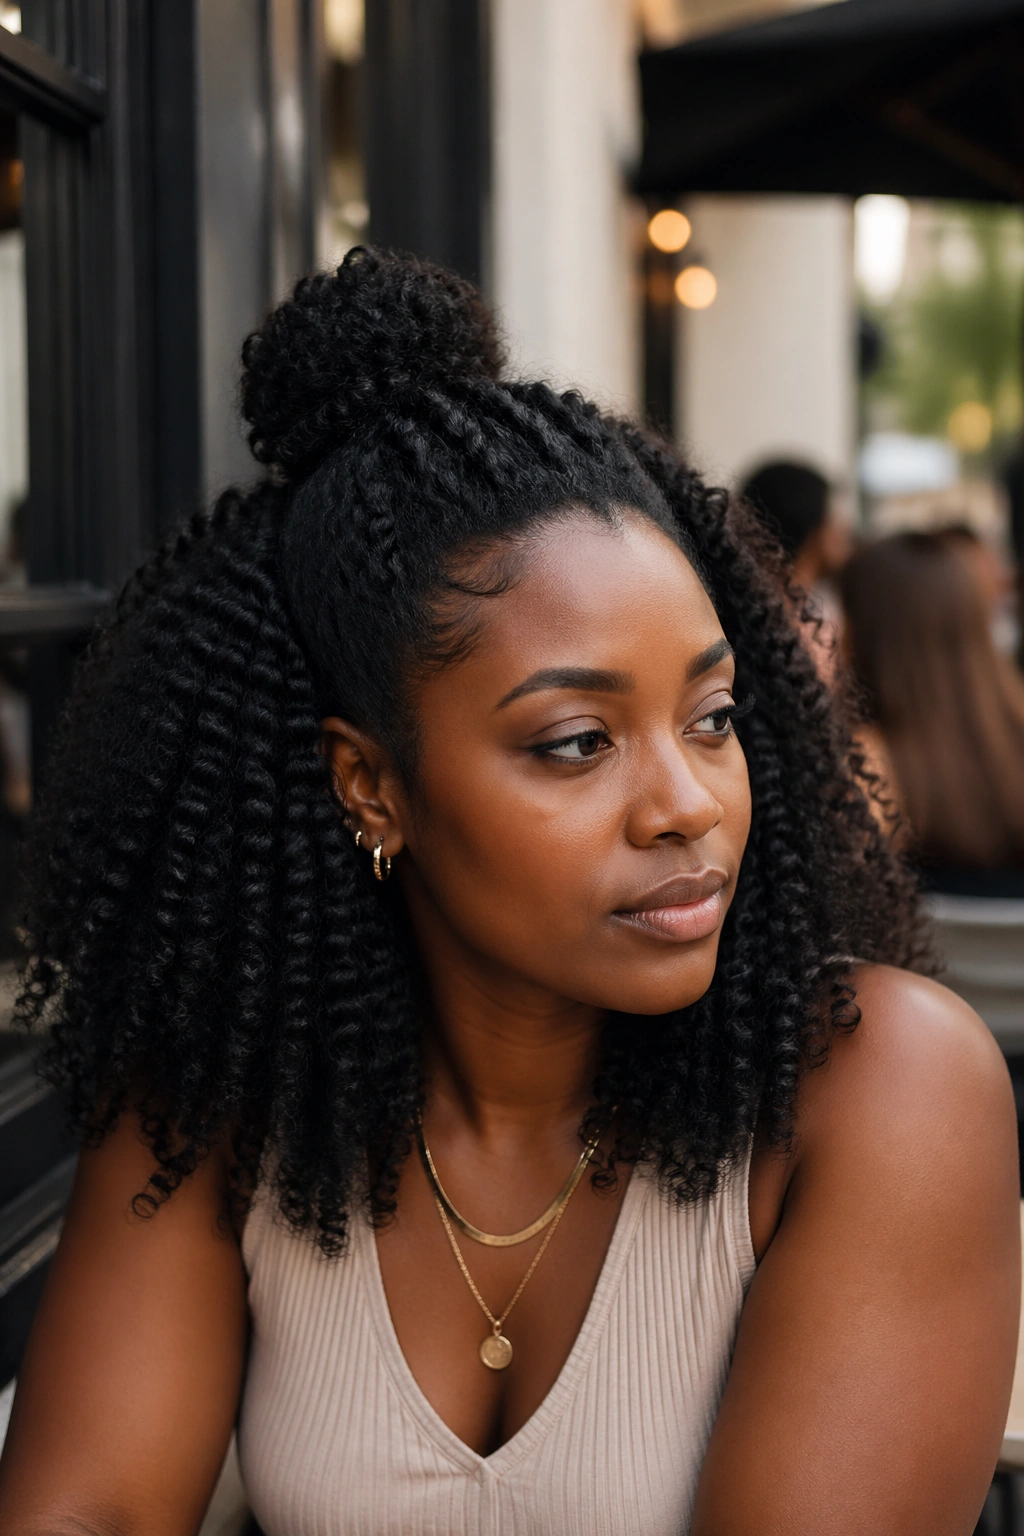
A half-up half-down variation where you pull the crown section of a crochet afro back into a small bun or twist and let the rest hang free. It is one of the most versatile installs because it gives you three looks in one — full down, half up, and (for weddings or events) all the way up.
You need longer hair for this, at least 18 inches, so the down portion still has enough presence after you remove the crown volume. The gathered-back portion creates visual breathing room around your face, which is useful if you want to highlight earrings or a neckline.
Use clear elastics to secure the back half — anything visible will stand out against the fiber.
18. The Afro With Highlights Only at the Tips
Picture an afro where the base is one solid color but the last inch of every curl catches the light in a totally different shade. That ombré tip effect is done at the factory with pre-dyed ombré hair, not with post-install dye.
Look for packs labeled “T1B/27” or “T1B/30” or similar two-tone codes. The T1B is the root color (off-black) and the second number is the tip color. Brands vary on how deep the ombré goes — some are just the last half inch, others blend across several inches.
This look translates especially well under indoor lighting. The ombré tips catch and reflect light in ways that a solid color never will.
19. The Undercut Crochet Afro
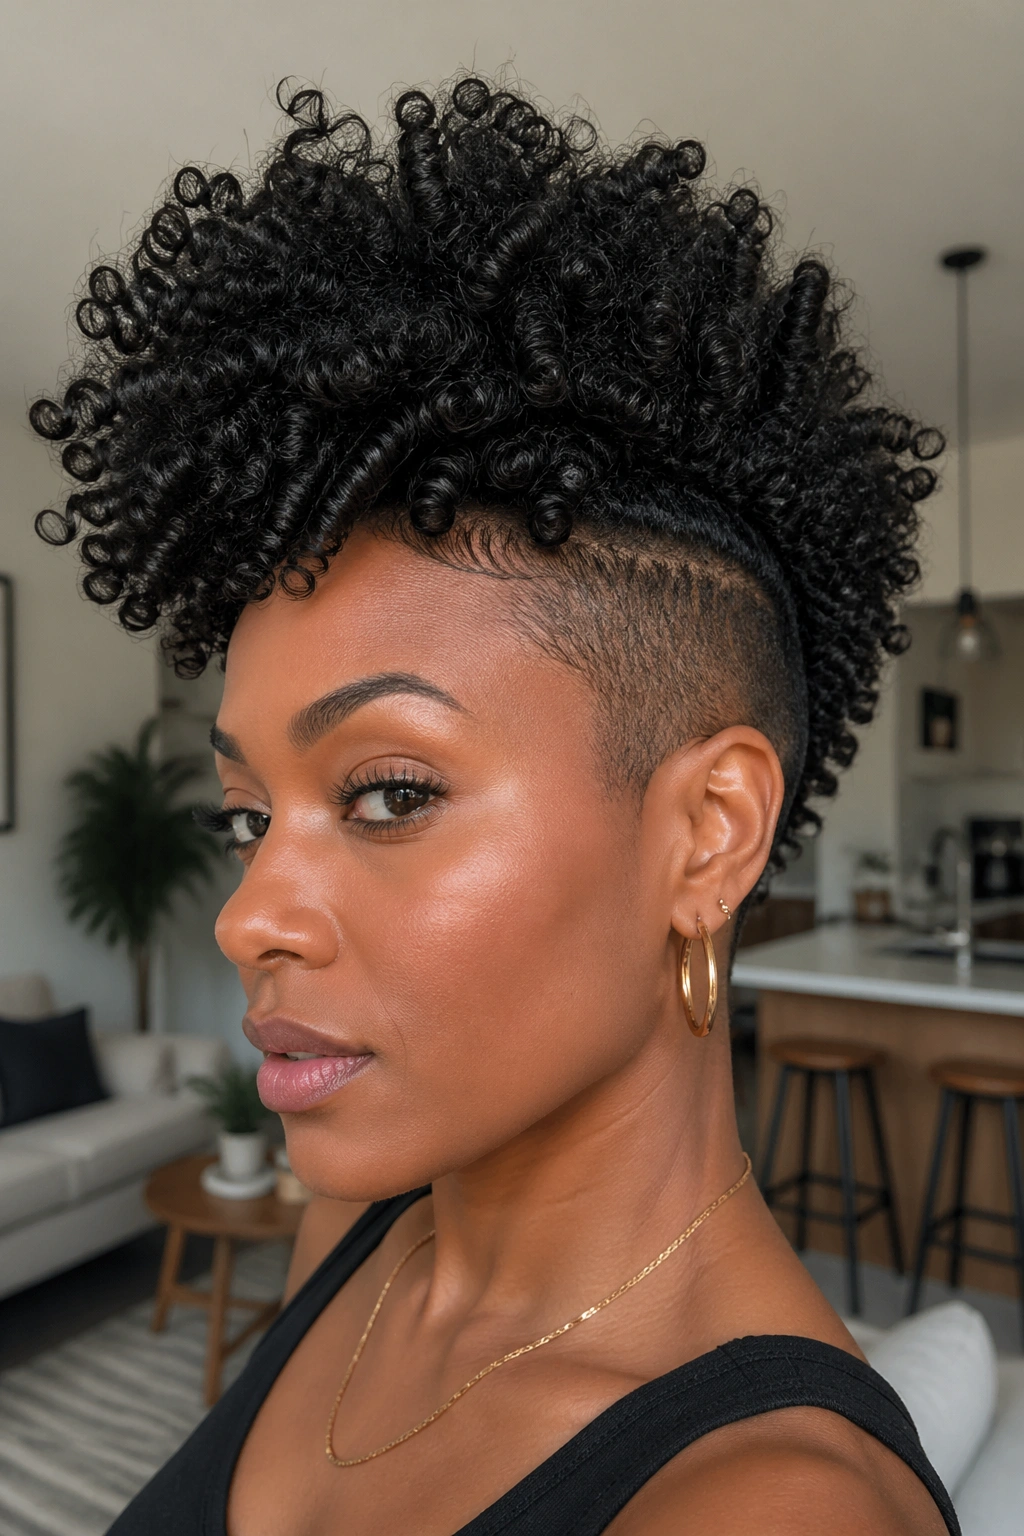
An undercut pairs crochet afro volume with shaved or closely-buzzed sides. The contrast is edgy without being subtle. You get the softness of the afro up top and the sharp lines of the buzz on the sides — two visual extremes on one head.
You do not actually have to shave your real hair. You can simulate an undercut by installing the crochet only on the top portion of your head and wrapping the sides with a matching-toned elastic band or scarf that reads as shaved from a distance.
For a real undercut, the sides need to be buzzed about one or two weeks before installation so they have a tiny bit of stubble — fully-shaved skin against crochet volume looks harsher than most people want.
20. The Textured Mixed-Pattern Afro
Not every afro has to be one uniform curl. Mix two or three different curl patterns in a single install — say, a tight 4A coil, a looser 3C wave, and a wavy 2C — for an afro that looks like it belongs to someone with naturally multitextured hair.
Install in alternating sections so the patterns intersect rather than stacking in clumps. The eye reads the mix as genuine variation rather than a styling mistake. This is particularly effective for people whose real hair has multiple textures and want their extension install to match that reality.
The mixed-pattern install also holds up better in humidity because the different curl types respond to moisture at different rates, meaning your afro never collapses uniformly. Some sections puff, some stay defined, and the overall shape holds.
21. The Classic Pick-Out Afro
An homage to the pick-out afros of the 1970s, this install uses loose, long hair that gets picked out dramatically after installation to create that tall, proud silhouette. The texture is softer and more flowing than a tight-coil afro, and the height is the whole point.
Pick it out from the root up, in small sections, lifting and teasing rather than combing through. A wide-tooth metal pick works better than a plastic one because it has more weight behind each stroke.
This is a statement style. It is not subtle, and it is not for everyone. But if you want an afro that turns heads from fifty feet away, this is the one.
22. The Sleek Frohawk
The frohawk — a faux mohawk made from afro hair — is a crochet staple because you can create it without actually shaving anything. Install crochet densely across the crown from forehead to nape, then flatten or pin down the sides so only the central strip reads as volume.
How to Pin the Sides
Braid the sides into tight flat cornrows before installing the central strip. The braids stay flat against your scalp, creating the “shaved look” sides, while the crochet strip rises tall and full down the middle.
- Keep the strip roughly three inches wide
- Taper the strip slightly narrower at the forehead and wider at the crown
- Tip: For maximum drama, install the central strip at least an inch longer than a standard afro install — the extra height sells the mohawk shape.
23. The Big Side-Swept Afro
An asymmetrical crochet afro where most of the volume falls to one side of the head rather than balanced evenly. It is dramatic, a little off-kilter, and works especially well for people who wear statement earrings or want to showcase their neckline on one side.
The install is not different from a standard afro. The trick is in the finger-combing and shaping afterward. Work all the fibers toward one side in small motions, then spray lightly with water and let them set in that direction for a few hours.
This is the one style in this list where the hair direction fights gravity, so expect to redo the shaping once or twice a day. If that sounds exhausting, skip it.
24. The Box-Braid Transition Afro
A niche look, but worth knowing. This install combines a box-braid base at the nape (for the first few inches) with crochet afro curls starting higher up, so the style reads as braids below and afro above. It is essentially two styles in one head.
The visual effect is striking because the eye registers two distinct textures. It is especially flattering for long faces because the vertical braid section elongates while the afro section balances the width at the top.
Installation requires some planning — you need to have the box braids finished before you start the crochet, and the transition row has to be placed carefully so neither style dominates the other. This is the install to try after you have done several standard ones. Not a beginner project.
Maintenance That Actually Keeps Your Install Looking Fresh
The average crochet afro lasts four to six weeks if you protect it at night. That requires a satin bonnet large enough to hold the volume without crushing it. A regular bonnet flattens the install into a distorted shape by the second week.
Refresh the curl pattern with a water-and-conditioner spray every other morning. Too much water invites matting at the base, so aim for damp, not soaked. Scrunch from the ends upward to reactivate the curl.
Wash only the cornrows underneath, not the crochet hair itself, using a diluted shampoo applied through the base with a squeeze bottle. Let the install air-dry fully before you put it under a bonnet.
Common Mistakes to Avoid
Skipping the latch cut. Most install failures come from pulling the loops apart by hand instead of snipping them cleanly. The snipped cut blends. The pulled tear does not.
Installing on dirty hair. Your scalp will itch by day three and you will be pulling out the install by day ten. Clean, moisturized hair is non-negotiable.
Overbuying or underbuying hair. Research the pack count for your target look before you shop. Showing up to an install without enough hair means compromising on density, which ruins the silhouette.
Pulling too hard on the cornrows. Tight cornrows feel secure but break your edges. Medium tension is the standard. If your scalp hurts when the braider finishes, it will hurt for the next four weeks.
Ignoring the nape. The nape cornrows take the most wear because they rub against collars and pillows. Refresh them weekly with a dab of edge gel along the braid line to keep them flat.
How to Pick the Right Style for Your Face Shape
Round faces benefit from taller, vertically-oriented afros — the frohawk, the classic pick-out, the heart-shaped afro. These add length to the silhouette and balance the roundness.
Oval faces are flexible. Almost any crochet afro style works. If you have an oval face, pick based on personal taste rather than balance.
Square and angular faces soften with round, halo-style afros that add curved lines to the frame. The wild full afro and the classic springy afro are both excellent choices.
Long faces need width, not height. The stretched medium-length afro, the big side-swept afro, and the two-tone highlight afro all add horizontal visual volume that balances out a longer face.
Final Thoughts On Making These Styles Your Own
Crochet afros are not a shortcut. They are a different path to the same destination — a beautiful, full, protective style that looks genuinely yours. Master the prep, pick a pattern that respects your real hair, and choose an install that matches your lifestyle instead of the one that looked coolest on Instagram.
And wear it with confidence. Half of any hairstyle is the way you carry it. The other half is whether you bothered to trim the loops.