Box braid styles for afro hair have a staying power that most styles never achieve. They’ve been photographed on runways, worn by grandmothers on front porches, pulled through decades of cultural shifts, and they come back — not because they’re trendy but because they work. Really work. Protection, versatility, length retention, and the ability to look completely different depending on size, length, color, and finish — no single style does all of that simultaneously at the same level box braids do.
And the variations. That’s what gets you. You can wear box braids in at least a dozen genuinely different configurations without touching a single braid to change them. How you carry them matters as much as how they’re installed.
Understanding Box Braids as a Protective Style
The protective mechanism here is straightforward: your natural hair is enclosed inside each braid, shielded from daily friction against clothing, pillowcases, and weather. Ends — the oldest and most vulnerable part of your hair — are tucked away for weeks at a time. This alone is why many naturals see their best length retention while in box braids. You’re not protecting the hair from breakage at the ends when it’s worn loose and open.
But protection only works if the installation is done properly. Braids that are too small put excessive tension on the root. Braids installed on dry, unprepped hair mean your strands are already stressed before they’ve been enclosed. And braids left in longer than 6-8 weeks start to cause their own problems — new growth tangles with the braid base, debris builds up on the scalp, and the weight of the braid puts strain on the follicle. Protective styles have parameters. Ignoring them turns a protective style into a damaging one.
Choosing the Right Braid Size
Size is one of the most impactful decisions you’ll make and one of the least discussed in terms of what it actually means for your hair health and styling range.
Micro braids — pencil-width or smaller — take 8-12 hours to install and put significant tension on small sections of hair. They look incredibly detailed and elegant, and they last longer than medium braids, but they’re also the most demanding on your scalp. Not ideal if your edges are already thin or if you’re prone to traction sensitivity.
Medium braids — roughly the width of a pencil or slightly wider — are the standard. Most installation times fall between 4-7 hours. They’re versatile enough to wear up or down, and the braid itself is large enough to hold styling products and accessories without looking cluttered.
Jumbo braids — thicker than a thumb — install quickly (sometimes under 3 hours), sit heavily on the scalp, and create a dramatically bold look. They’re not ideal for updos that require bending and pinning because the braid itself is too thick to wrap smoothly. But worn down, they’re stunning.
Box size also matters. The square “box” — the section of scalp hair from which each braid originates — should be clean and even. Rushed installations with uneven boxes create braids that pull in inconsistent directions and look disorganized even when freshly done.
Prepping Your Natural Hair Before Installation
The condition of your hair going in determines how it behaves coming out. That’s not a cliché — it’s literally true. Damaged, dry hair that gets braided for six weeks and then unbraided is going to break at those weak points. Hydrated, strengthened hair tolerates the installation and wear much better.
Two days before: deep condition for at least 30 minutes with heat (a processing cap and a warm towel or a hooded dryer). This saturates the hair with moisture before it’s enclosed. Don’t skip this. The day before: wash, apply a protein treatment if your hair feels mushy or stretchy — signs of moisture overload — or skip if your hair is balanced. The day of: apply a lightweight leave-in to your natural hair before braiding begins. Not a heavy butter — it’ll make the braiding process slippery and difficult. A spray leave-in or water-based cream is ideal.
Your scalp should also be clean. Product buildup on the scalp gets sealed in during installation and creates itching and potential buildup issues throughout the wear. Start clean.
The Hair Extensions That Change Everything
Most box braids use Kanekalon braiding hair. It’s synthetic, it’s smooth, it holds a braid cleanly, and it comes in almost any color imaginable. For standard box braids, 1-2 packs per braid section is typical. For medium braids done full-head, most people need 5-8 packs total, depending on density.
Flame-retardant Kanekalon is the safer choice if you’re going to use the hot water sealing method at the ends — dipping braids in hot water to seal and smooth the tip. Non-flame-retardant Kanekalon melts unevenly and can leave rough, sharp ends that scratch the skin.
Beyond Kanekalon, you’ve got options. Marley hair gives a more textured, matte finish that blends beautifully with 4B and 4C natural hair. Human hair extensions feel the most realistic but cost significantly more and require different styling care. Rubber-banded or bohemian pre-looped hair creates a loose, wavy end finish. Each material changes the look and the maintenance demands.
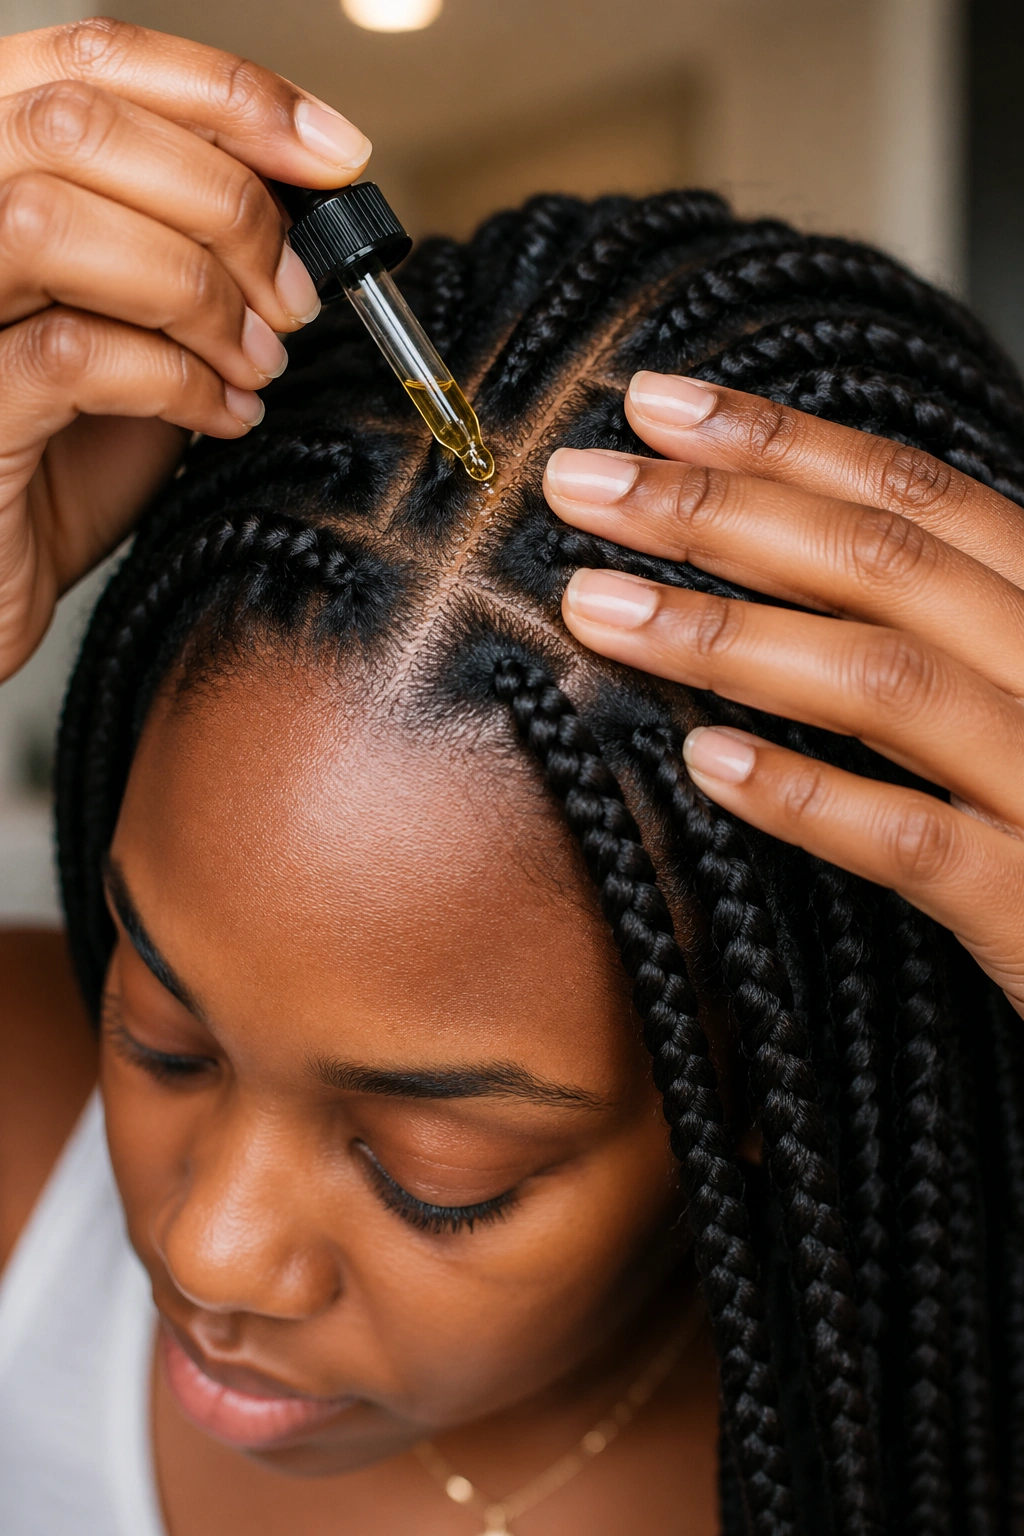
Scalp Care While Wearing Box Braids
Your scalp doesn’t stop producing oils because your hair is braided. It keeps working, and that sebum needs somewhere to go. Regular scalp care during wear is non-negotiable if you want to keep your hair and scalp healthy over the 6-8 week installation period.
Every 3-4 days, dilute a light oil — jojoba, tea tree diluted in a carrier, or a purpose-made scalp oil — into an applicator bottle and work it directly onto your scalp along each part. Tea tree is useful if you’re prone to itching or buildup because it has mild antifungal properties. Peppermint oil adds a cooling sensation that relieves scalp discomfort. Use whatever works for your scalp, but use something.
Don’t neglect your edges during wear. The hairline is the first place to show stress from braids. Massage the edges gently and check them weekly for signs of tension — if the skin around your hairline looks raised or feels tender, the braids in that area may be too tight.
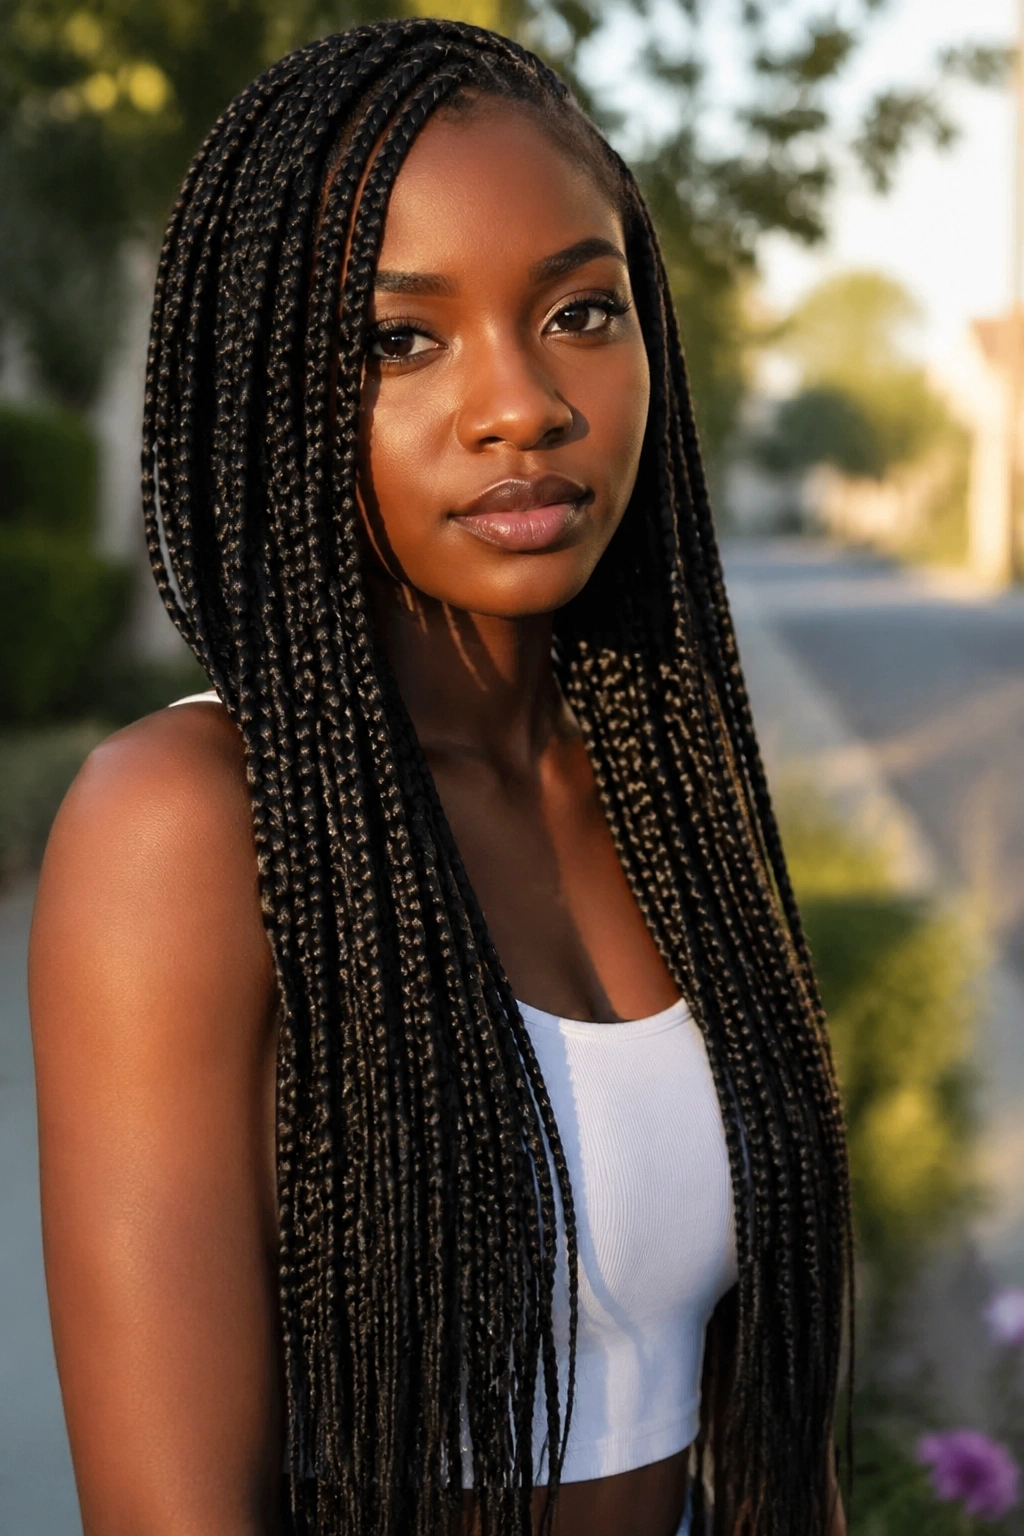
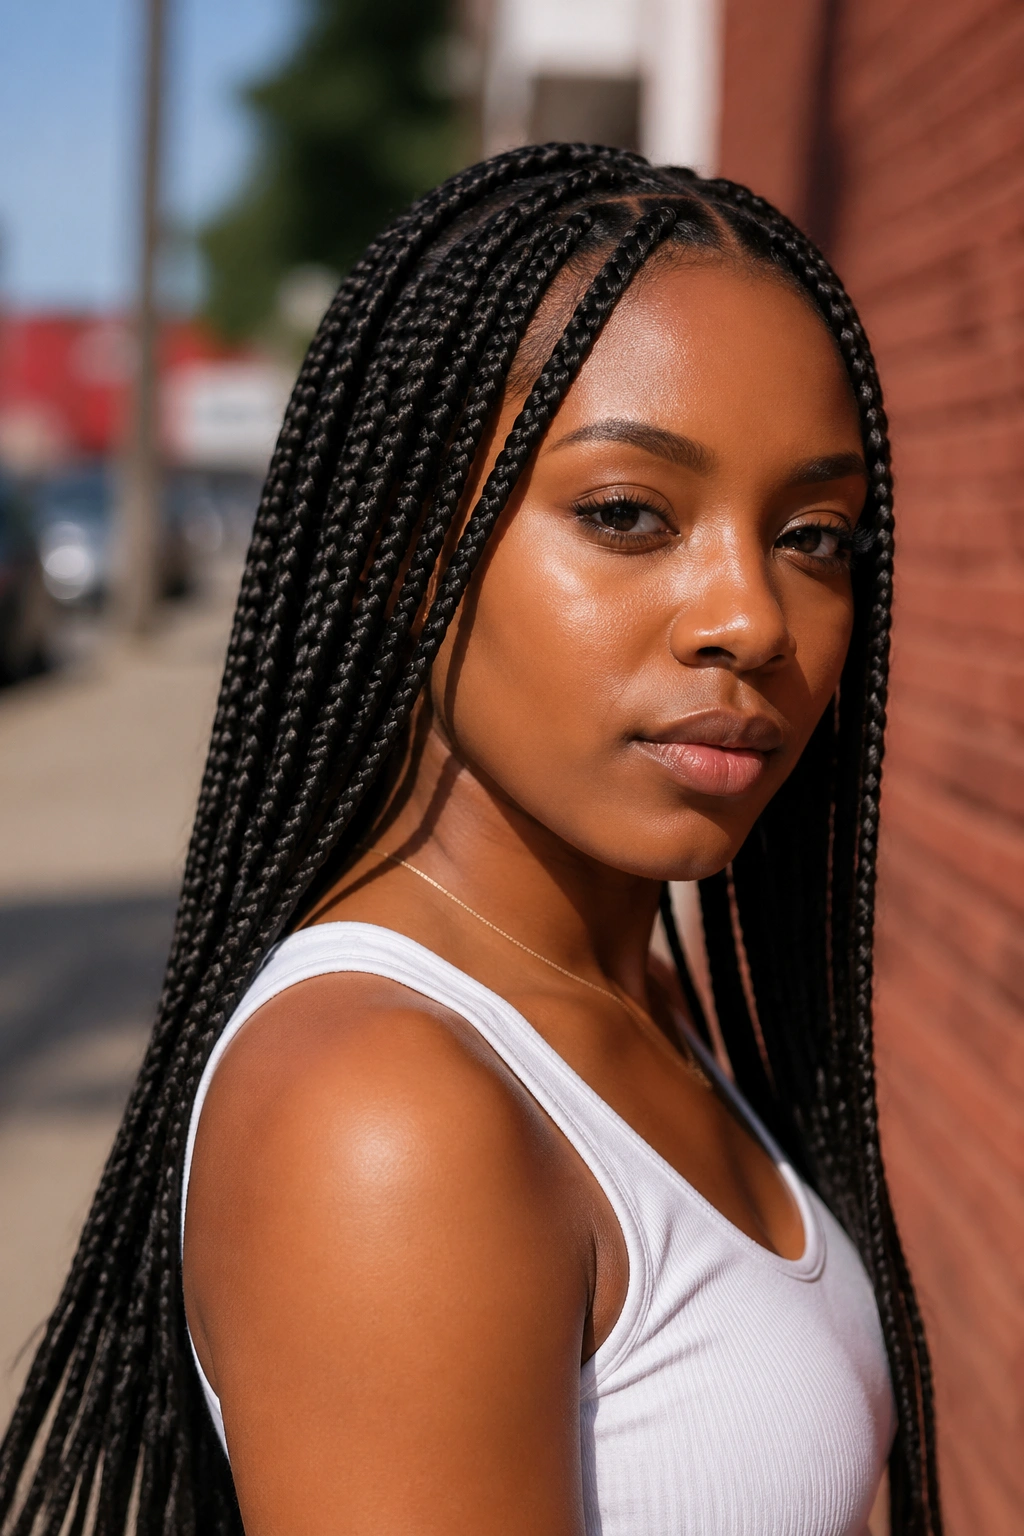
1. Classic Long Box Braids Worn Down
Hip-length or longer box braids, all the same size, worn fully loose. This is the foundation — everything else on this list is a variation on or departure from this.
Why It Works
There’s a reason this remains the most requested box braid style. It’s maximum impact with minimum daily effort. You wake up, run your fingers through the braids, and you’re done. The length adds drama. The uniformity adds elegance. The absence of styling decisions makes it practical for people who want to look put-together without spending time doing it.
For naturals with shorter hair, you simply add more extension hair to achieve the length. The starting length of your natural hair affects only the seamlessness of the blend at the roots — not the final result.
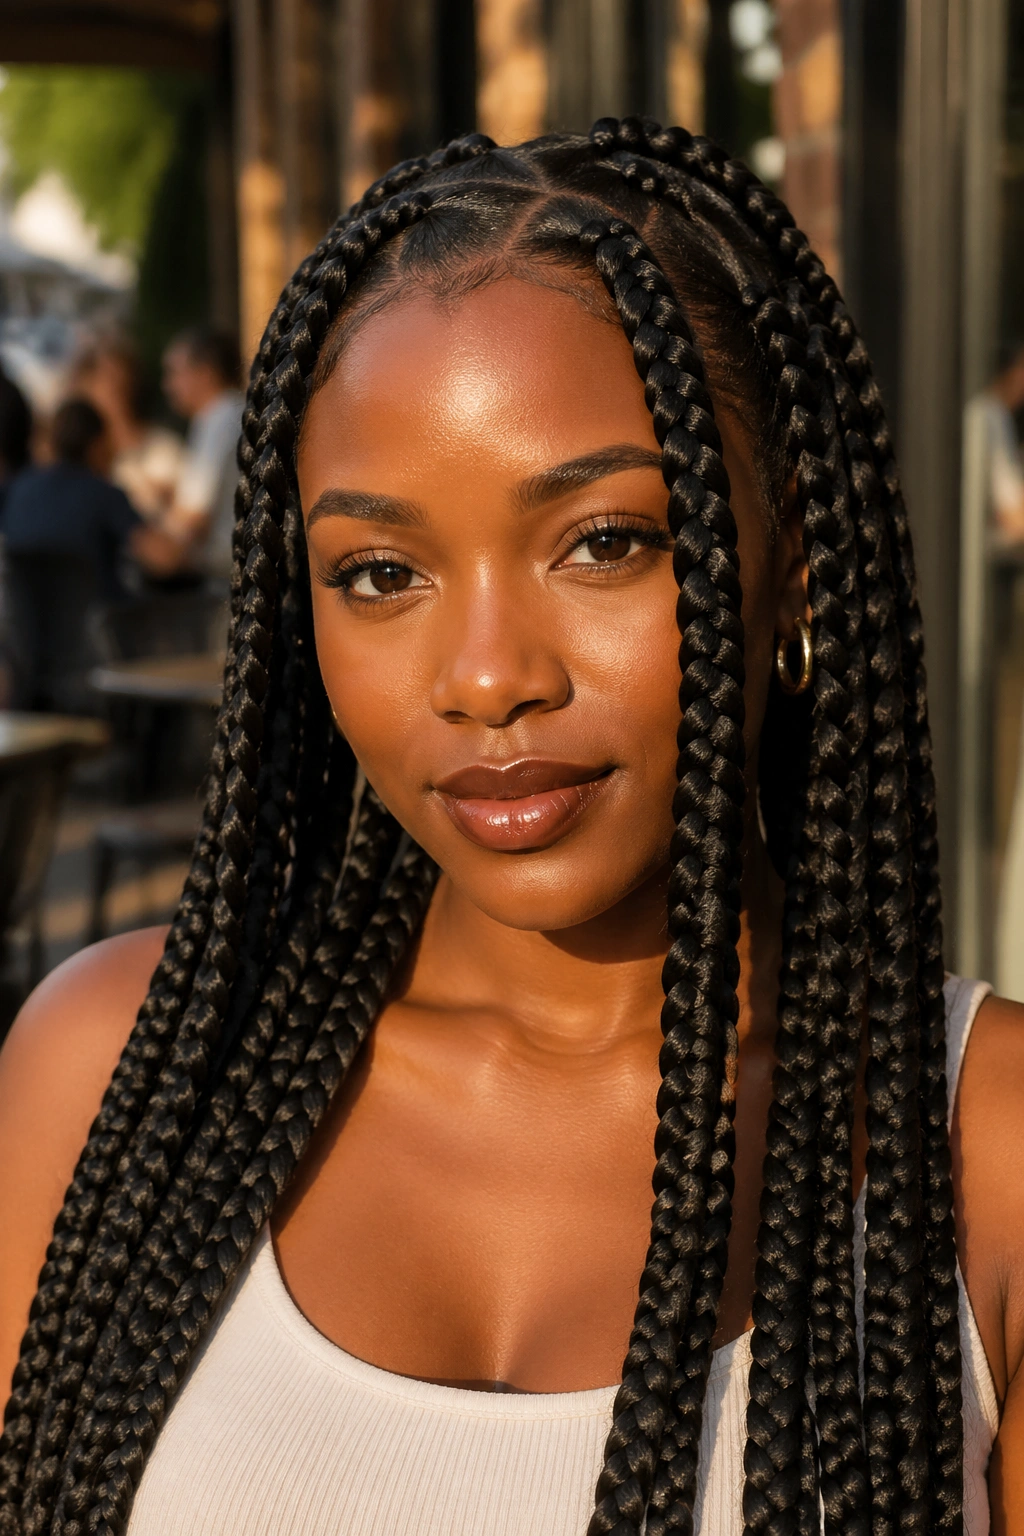
2. Jumbo Box Braids
Triple the width of a standard medium braid. Thick, bold, intentional. Jumbo braids make a statement that’s hard to match with any other size — they’re the visual equivalent of speaking loudly.
The installation is much faster than small braids — a full head in 2-3 hours is realistic. The trade-off is in versatility. Jumbo braids are too thick to pin easily or weave into intricate updos. But worn down or in a simple half-up, they’re visually dominant in the best way possible. They also feel lighter at the root than they look — the weight is distributed across fewer, thicker sections. Some people find them more comfortable than tighter, smaller braids for that reason.
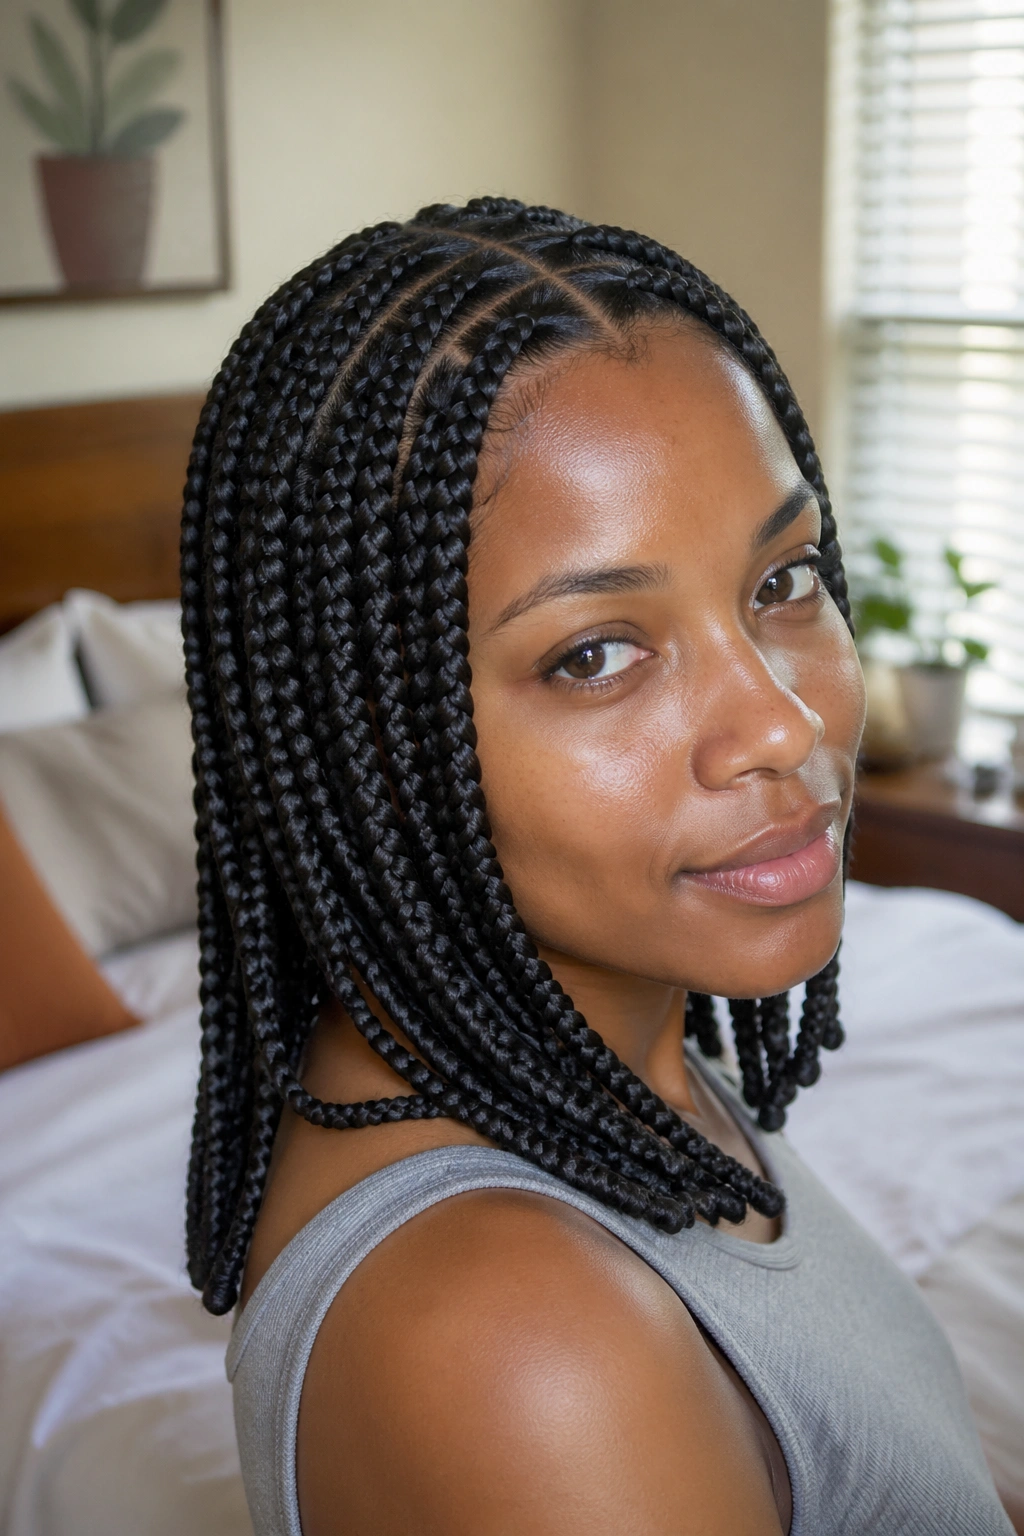
3. Bob-Length Box Braids
Cut or install your braids at chin or shoulder length — just long enough to frame the face without reaching the chest. Bob-length braids have a very specific energy. They’re edgier than long braids. More structured. And significantly easier to manage because you’re not wrestling with length all day.
What Makes It Different
The bob length means the braids don’t require gathering to keep them out of your face. They sit naturally. The ends land at a flattering point — chin-level braids emphasize the jawline; shoulder-length braids create a soft frame around the face. If you’re installing with extensions, you have full control over where the braids end.
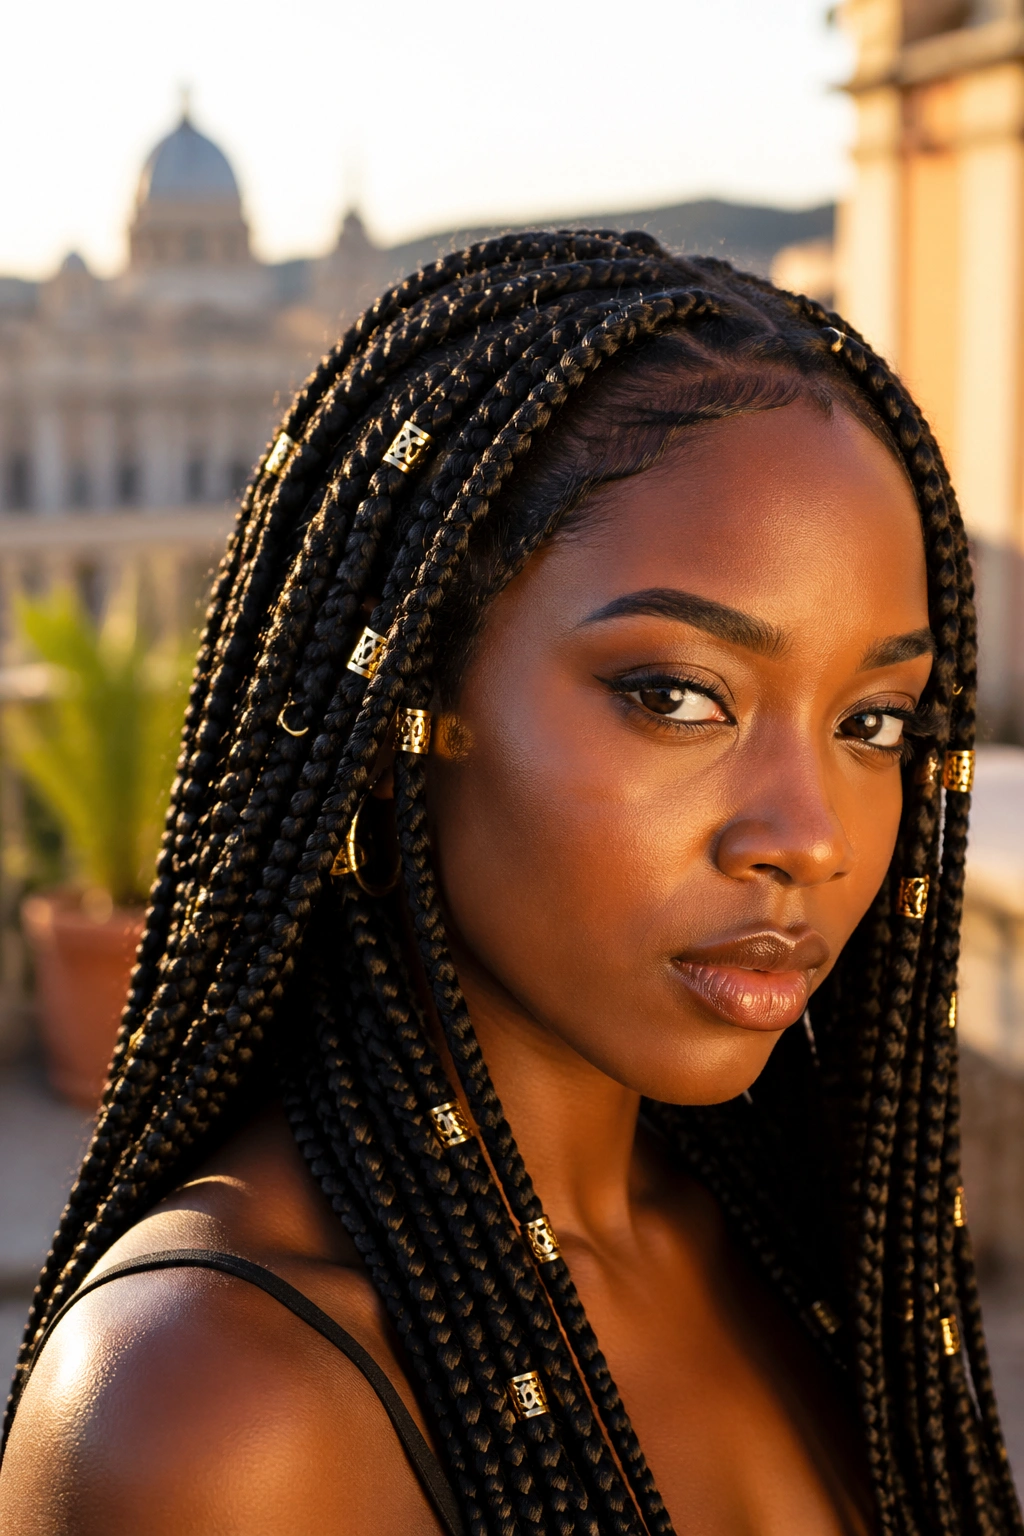
4. Braids with Cuffs and Rings
Take your existing box braids — any size, any length — and thread metal cuffs or rings onto individual braids at random or planned intervals. Slide them on before sealing the ends, or thread them on afterward with a thin needle-and-thread threading technique.
This is an addition, not a separate style. The braids don’t change — the accessorization does. But a box braid look with three or four gold cuffs on different braids reads completely differently from the same braids with nothing on them. More intentional, more personalized. The cuffs slide up and down so you can adjust their position based on how you’re wearing your braids that day.
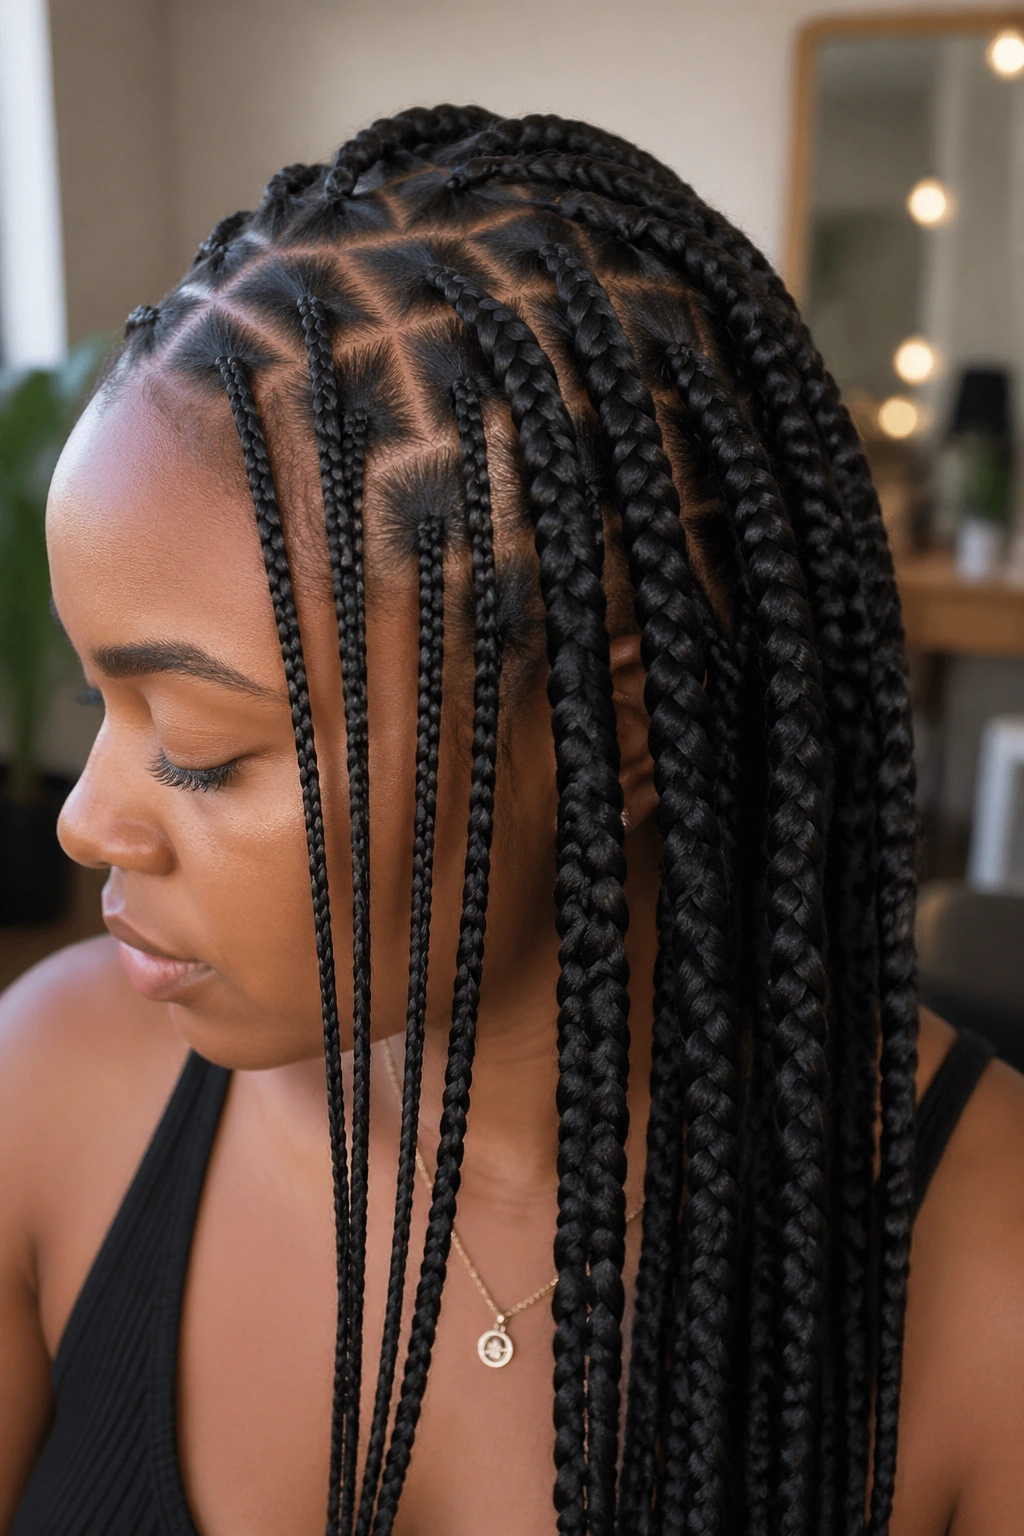
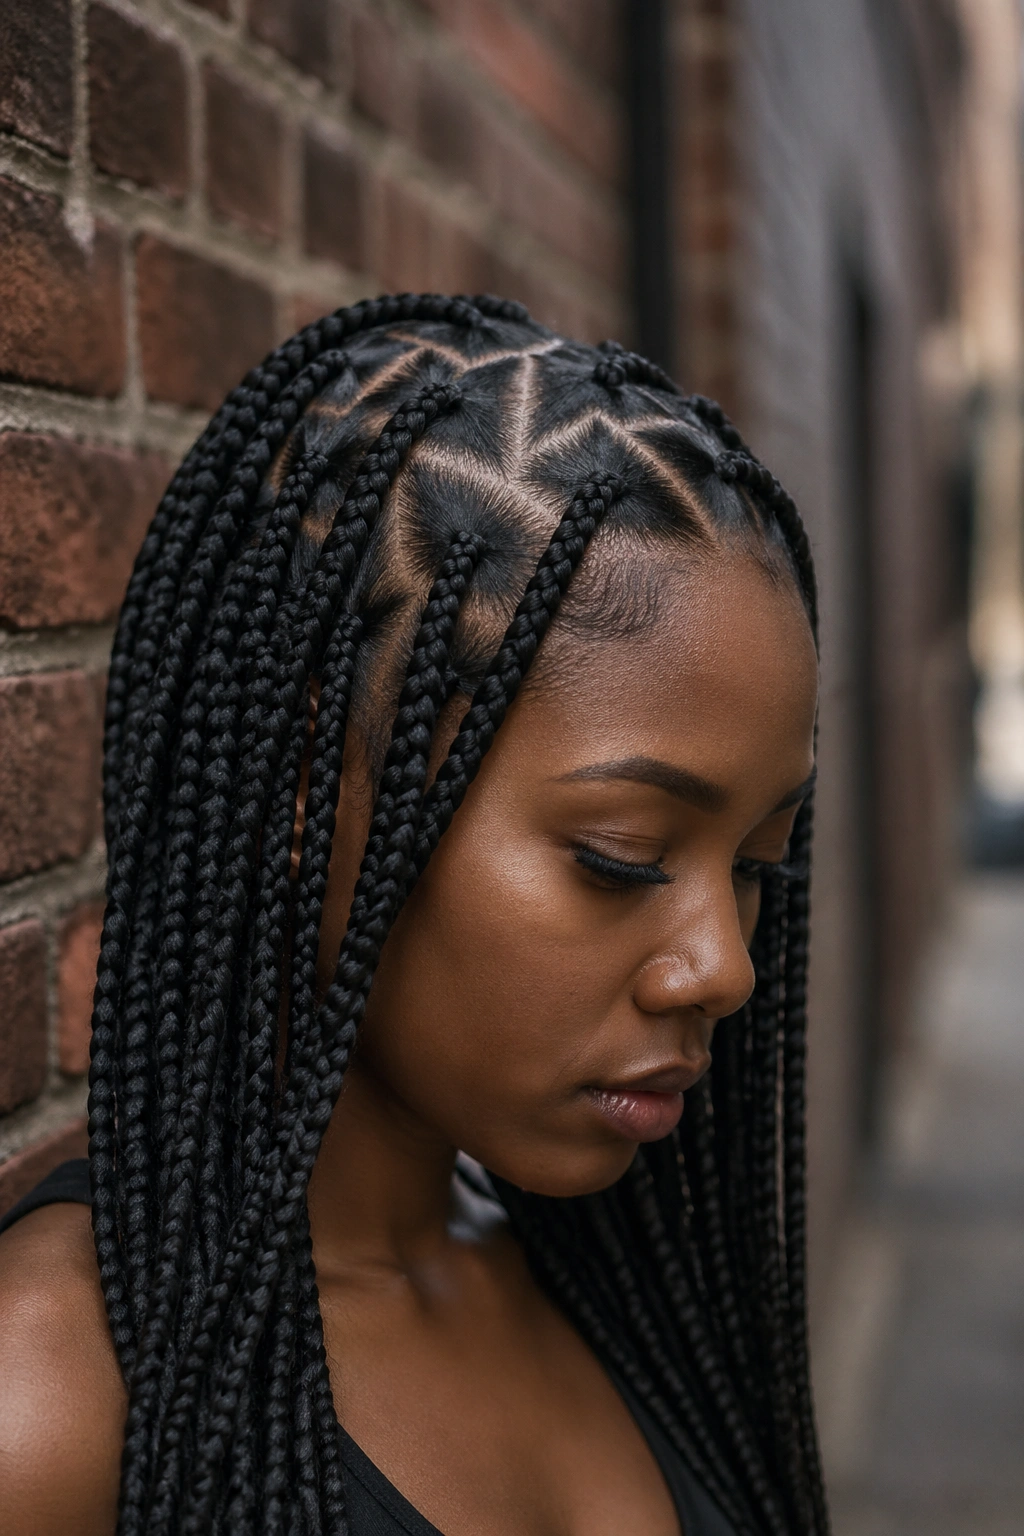
5. Triangle Box Braids
Instead of square sections, the hair is parted into triangular sections before braiding. The result is a distinct geometric pattern visible at the scalp when the braids are pushed back or pulled up. From a distance, it looks like standard box braids. Up close or in an updo where the scalp is visible — it’s a noticeably more intricate pattern.
The installation requires a more skilled braider because consistent triangular sections are harder to maintain than squares. The sections need to be genuinely triangular, not sort of triangular. If you’re looking for a way to make your box braids feel more customized without changing the braid itself, triangle parts are the answer.
6. Knotless Box Braids
The feed-in method. Instead of creating a knot at the root to attach the extension hair — which concentrates tension right at the scalp — knotless braids feed extension hair into the braid gradually as it progresses down the length. The root starts with your natural hair only, and the extension hair is added in small amounts over the first inch or two.
This is gentler on the scalp. Significantly. If you’ve ever had tight box braids that gave you a headache for the first two or three days, knotless might eliminate that entirely. They also lay flatter at the root, which some people prefer aesthetically. The installation takes longer because each braid requires more technique. But for scalp-sensitive naturals, the extra time at the salon is absolutely worth it.
7. Box Braids Bun
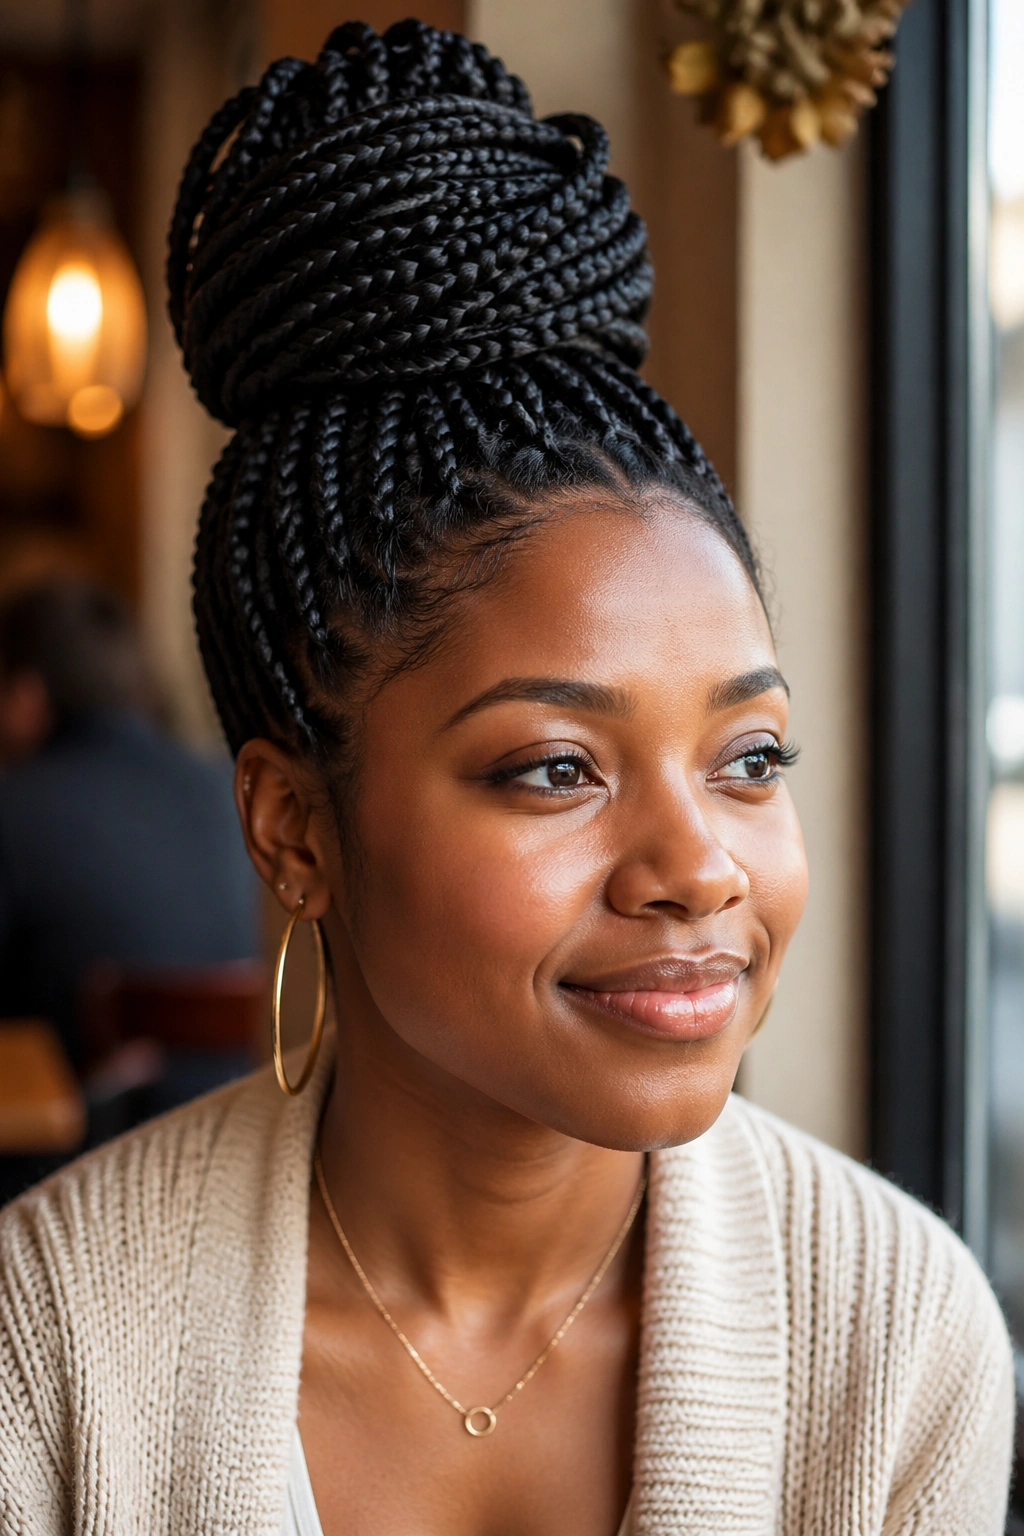
Gather all your braids at the crown and secure with a thick, fabric-covered elastic. Fan them out or let them pile on top — either way you’ve created a bun with texture and volume that you couldn’t replicate with non-braided hair. The braids stack on each other to form an architectural shape.
The real appeal: this works at any length and any size. Short bob braids gathered on top create a small, neat bun. Waist-length jumbo braids piled up create something that demands attention from across the room. And it takes under 60 seconds to achieve once your braids are installed. That’s the calculus that makes box braids worth the installation time — you get every easy style for free, every day.
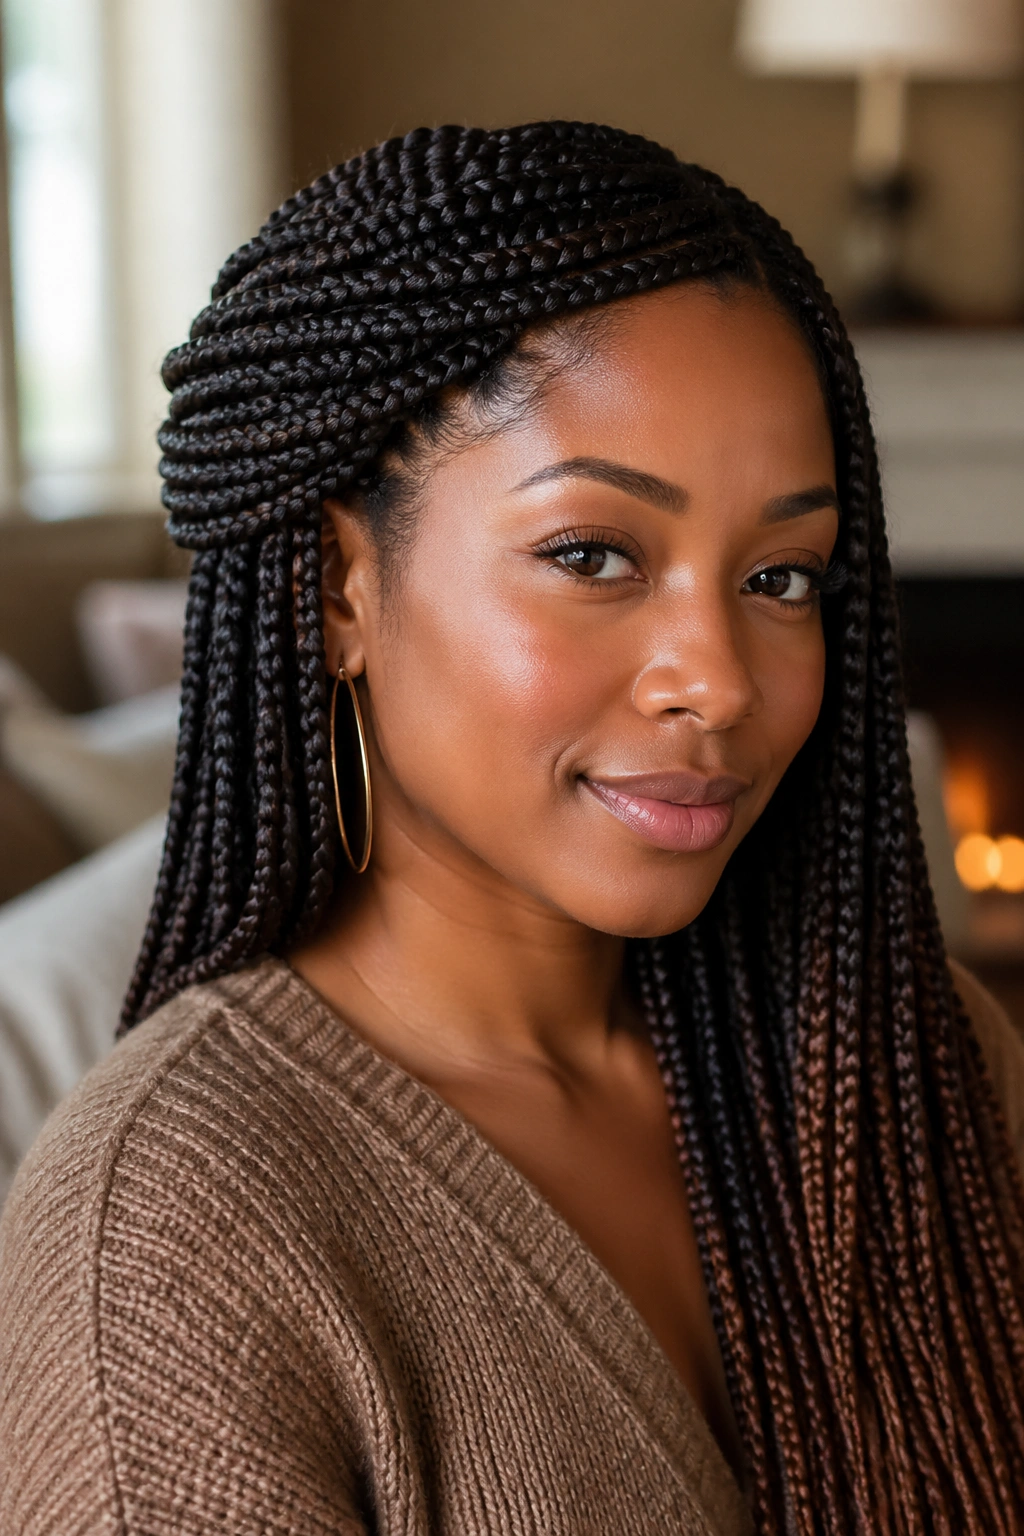
8. Half-Up Half-Down Box Braids
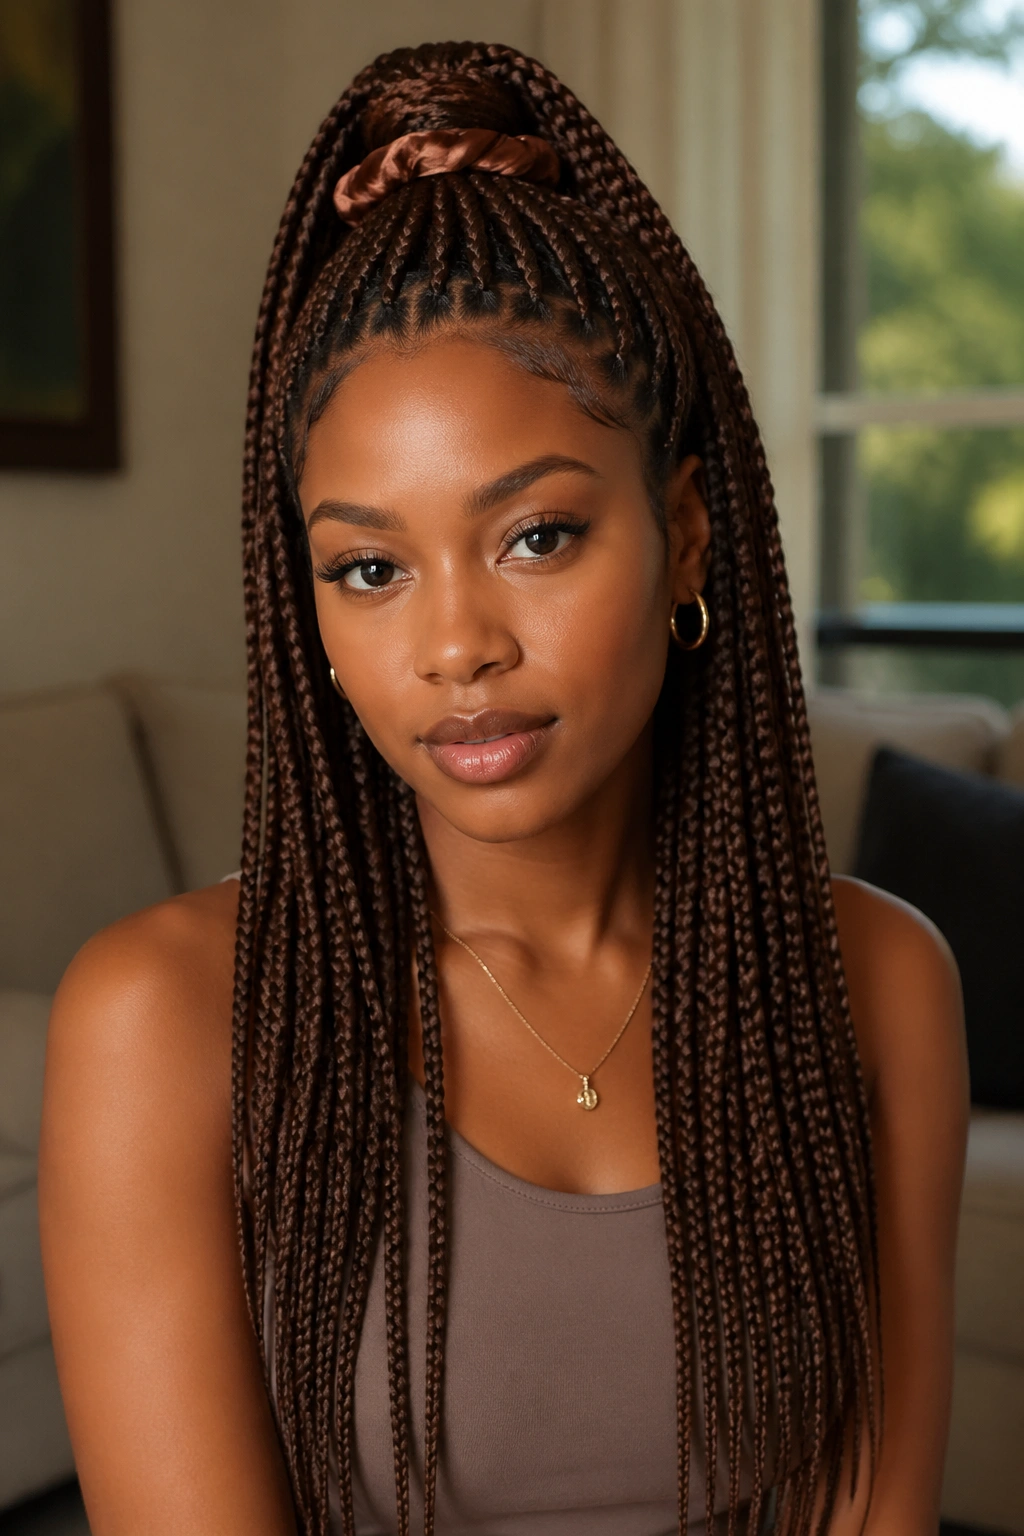
The top half — everything from roughly the temples up — gathered and secured, the bottom half loose. Classic. Practical. The kind of style you can wear to a meeting, change nothing, and wear to dinner that same night.
What makes this work is the visual balance. The top section being secured pulls the braids away from the face — useful if you’re at a computer all day or need your hair out of your way. The loose bottom half keeps the look from feeling too polished or corporate. There’s an ease to it.
Secure the top section with a satin scrunchie that matches your braid color so the elastic essentially disappears into the style.
9. Box Braids High Ponytail
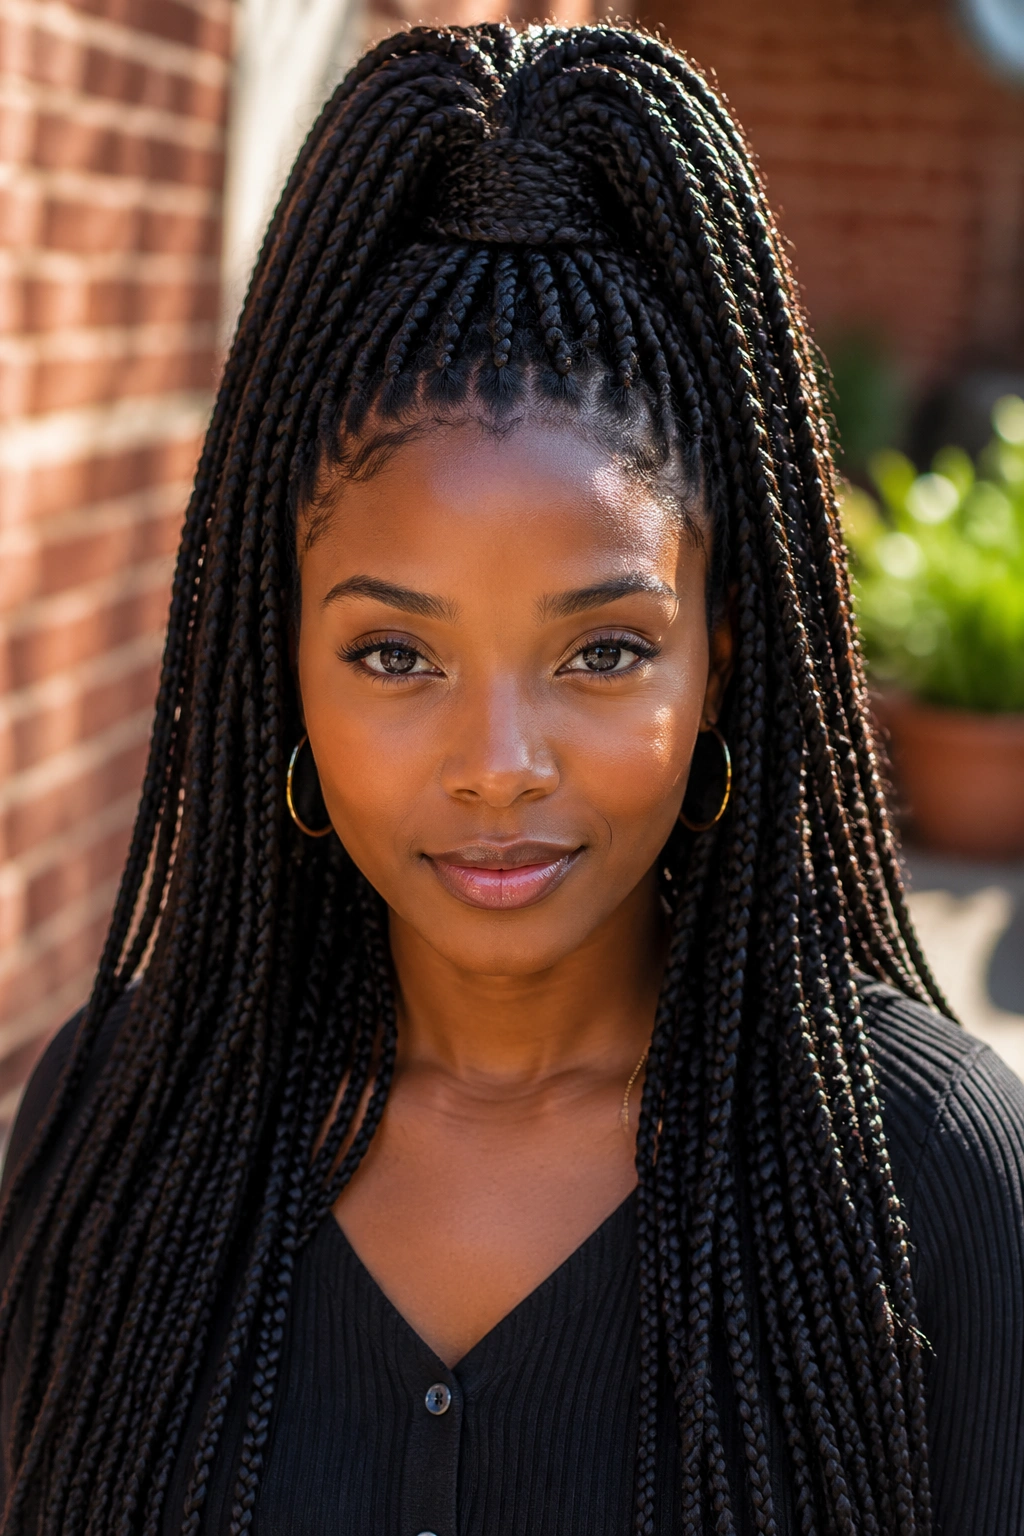
Gather all braids and pull them straight up to the very top of the head — higher than you think you need to go — and secure with a strong hair tie. The braids will cascade down from the gathered point. At full length, they’ll fall around the head in a dramatic waterfall. At shorter lengths, they’ll sit like a full, dense ponytail.
How to Get the Most From It
The higher you position the gather point, the more dramatic the effect. The lowest the gather point can go while still reading as a ponytail is roughly crown-level. Below that and it collapses into a standard low puff shape. Use multiple elastics stacked together if a single one isn’t strong enough to hold the weight of all your braids. And push the elastics toward each other rather than spacing them apart — this distributes the gathered section into a tighter, cleaner base.
10. Braids with Beads
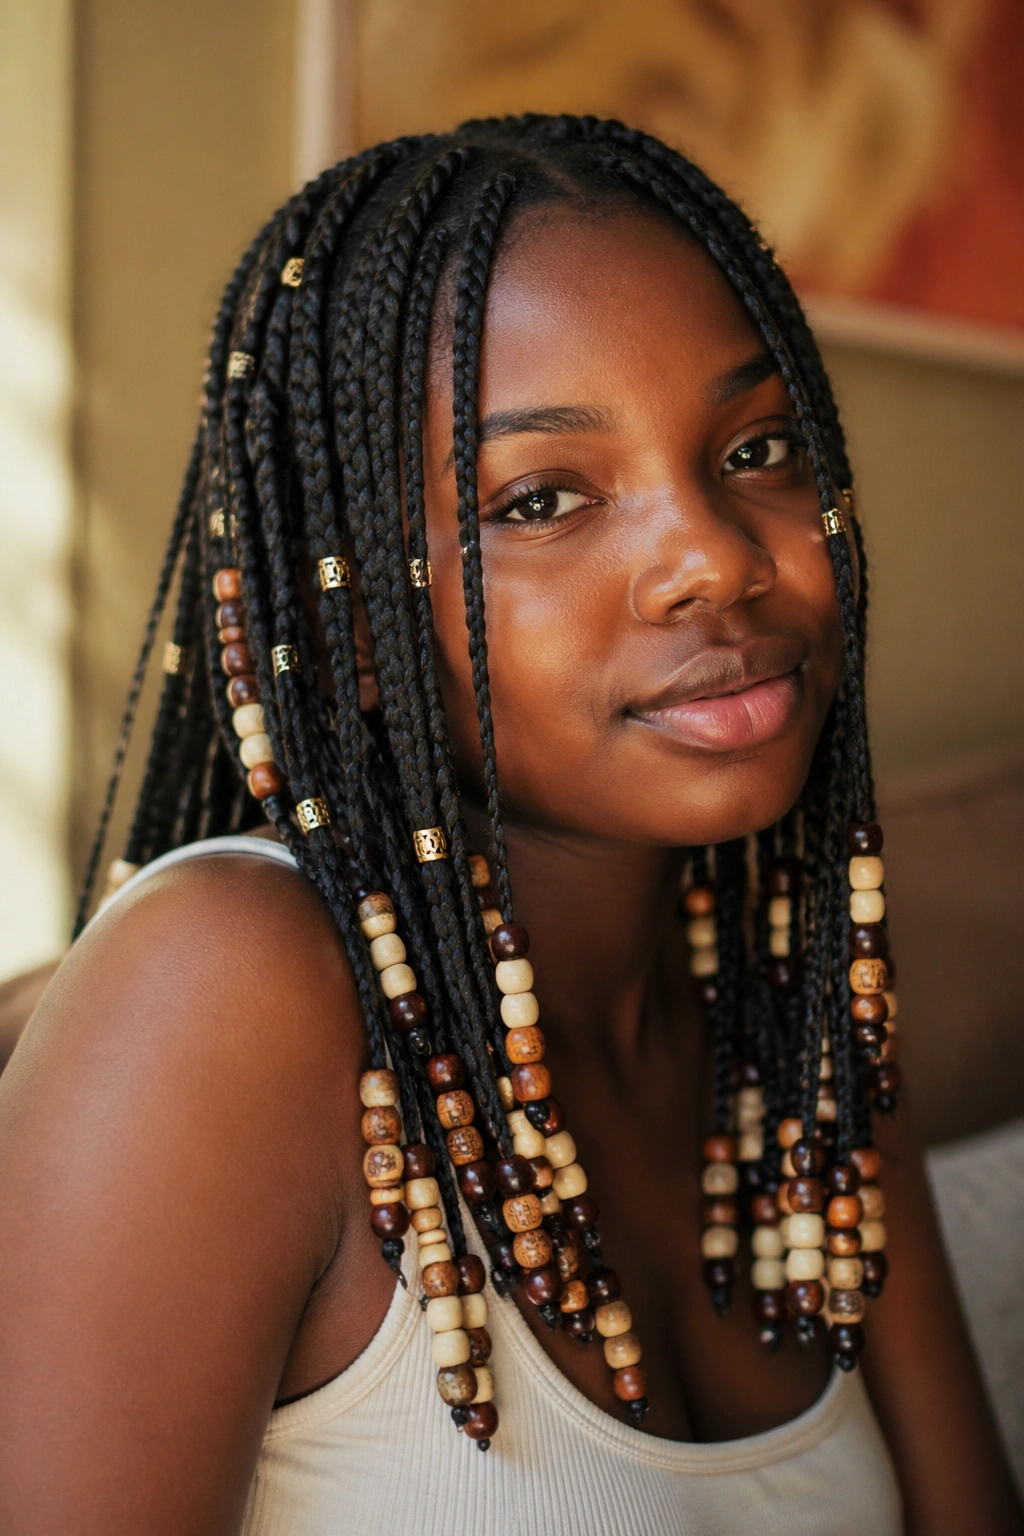
Slide wooden, acrylic, or metal beads onto individual braids and secure them by tying a knot at the end of the braid — or by using the bead’s own tight fit to hold it in place. Beads can go anywhere on the length of the braid.
This is one of the oldest braid accessories in the world and also one of the most personal. The beads you choose — their color, material, size, spacing — communicate something specific. Worn at the ends of braids, they click together when you move, which is a whole sensory experience. Worn clustered at a single point on the braid, they create a focal accent. Worn randomly across the whole head, they create a layered, maximalist effect.
11. Stitch Braids
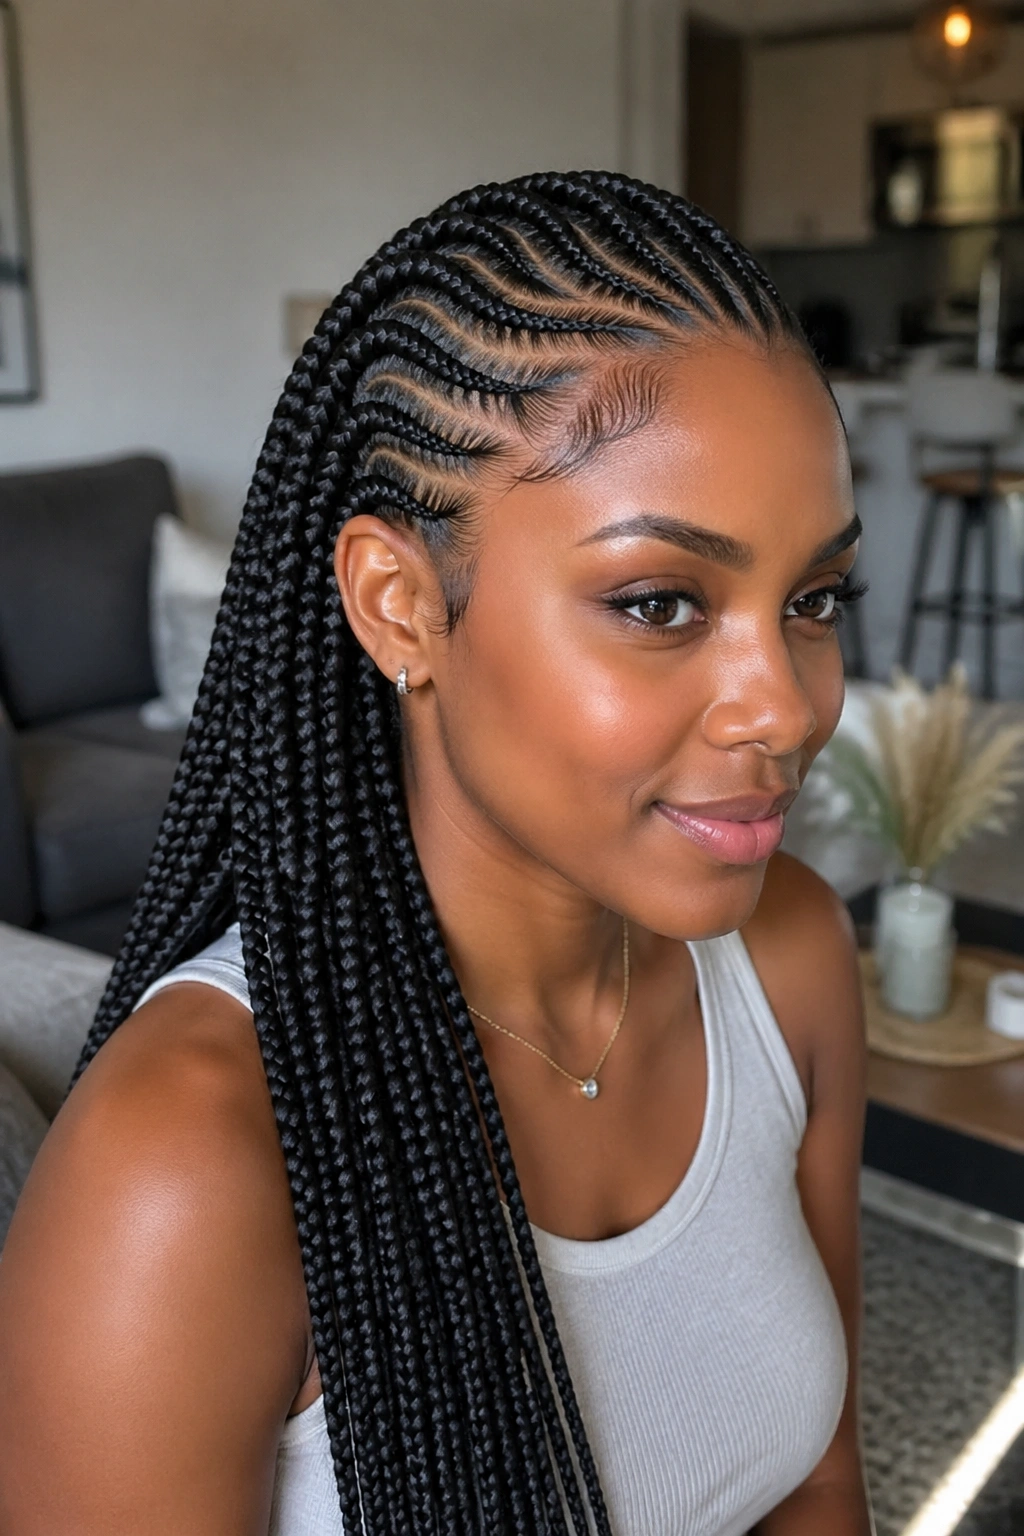
Feed-in cornrows along the front hairline or sides, connecting into or framing the box braids in the back. The “stitch” effect comes from the way the cornrow is done — with a slightly raised braid stitch that creates a visible ridge pattern along the part.
This is technically a hybrid style. It requires two techniques — cornrowing along the front and braiding for the main body of hair. But the visual result is a level of intricacy that sets it apart from standard box braids. The stitch cornrow pattern at the front creates a designed hairline that frames the face deliberately.
12. Braids with Curly Ends
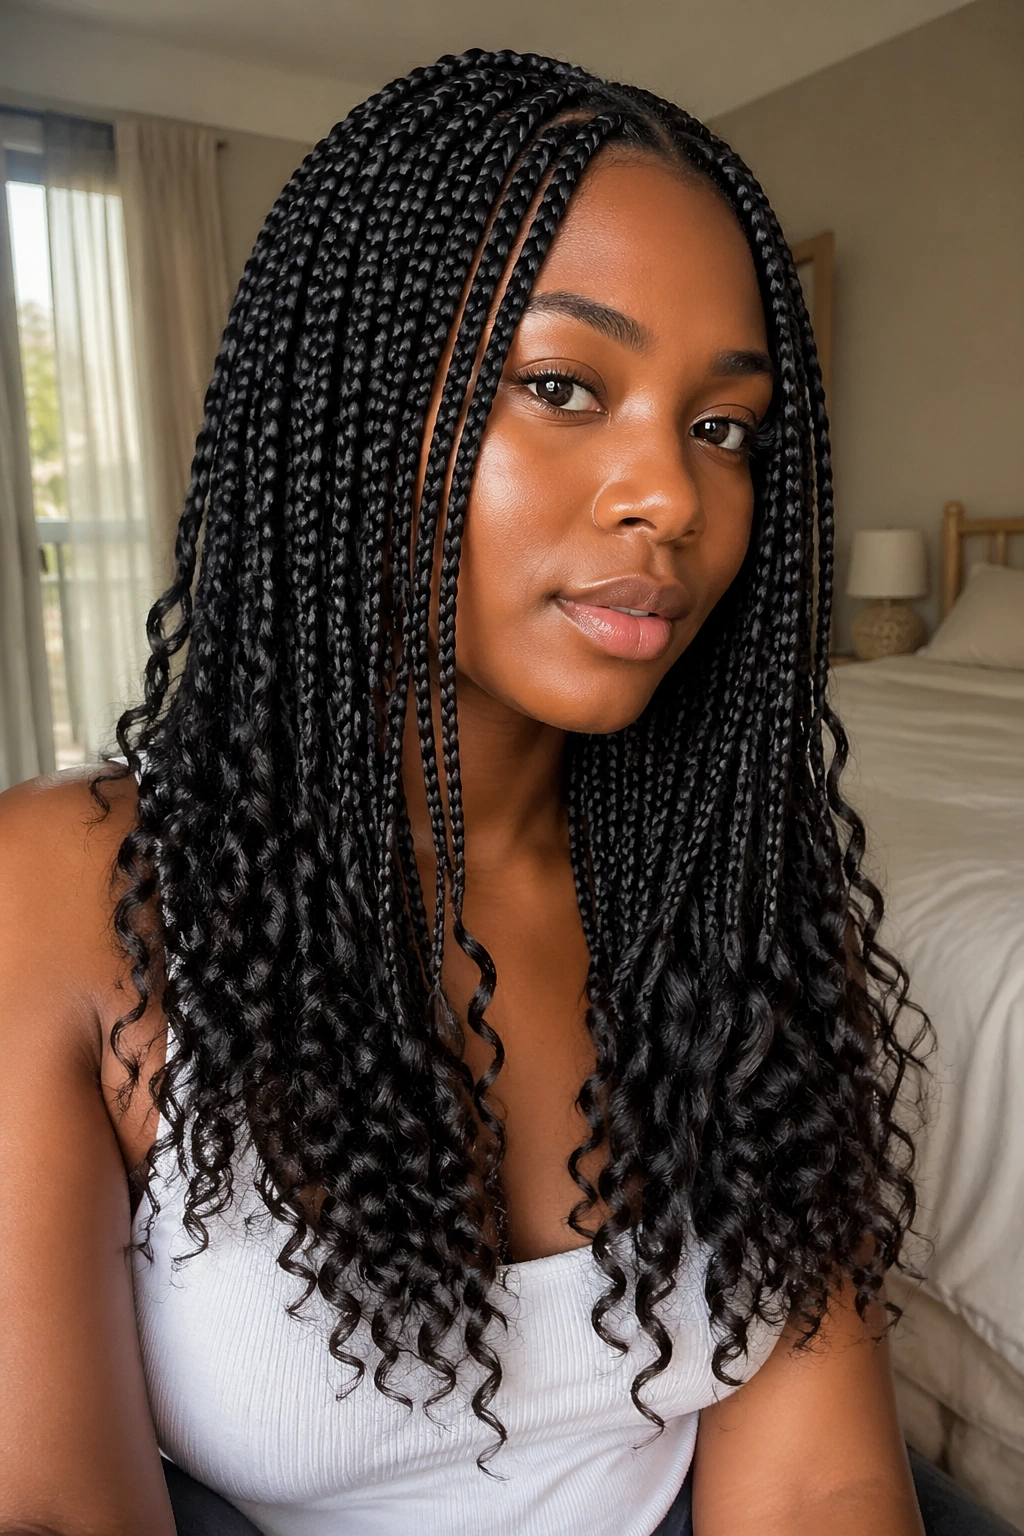
Instead of sealing your braids with the dip method for straight ends, braid only to about 80% of the extension hair’s length. Leave the remaining end loose. It curls or waves naturally — Kanekalon tends to kink slightly when left unbraided, and that kink reads as a soft wave. You can also add a separate piece of wavy or kinky hair at the end of each braid to create a deliberately textured finish.
The result is the “boho box braid” look — structured braid from root to near-tip, flowing texture at the ends. It softens the overall effect of the style. Full-length straight braids read polished and deliberate. Braids with curly ends read more relaxed, artistic. Both are great. Just different in character.
13. Color-Blocked Box Braids
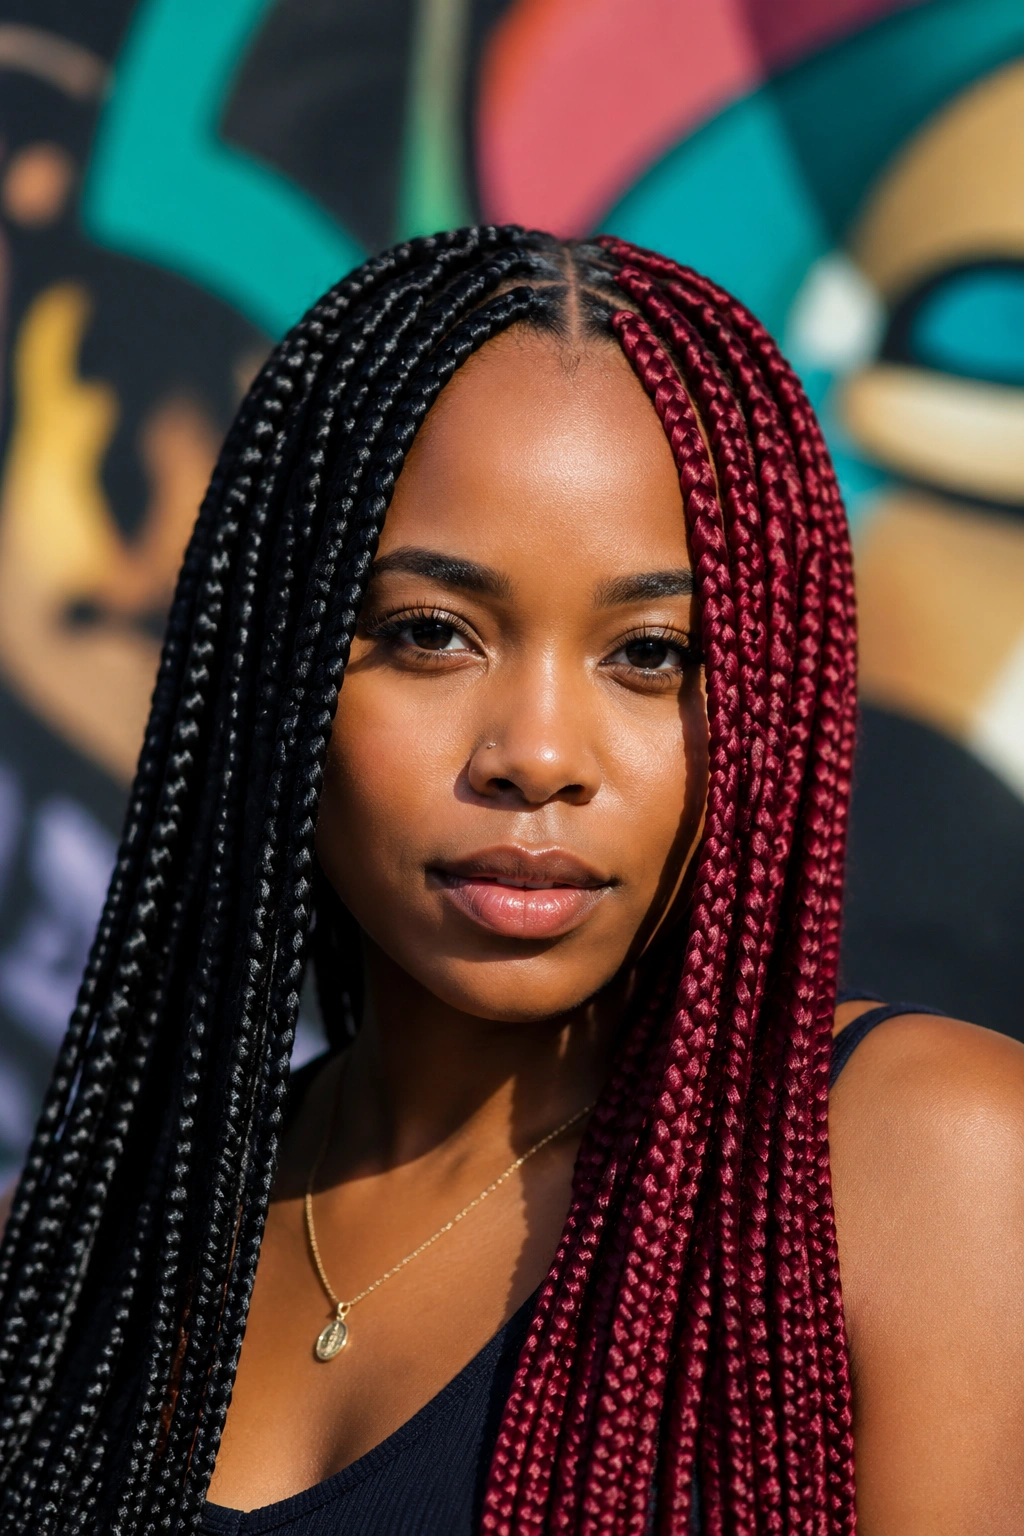
Instead of mixing colors throughout the entire head, assign different colors to specific sections. All braids on the left side are one color; all on the right are another. Or all braids on the front half are light; the back half is dark. Or the center section is highlighted while the sides stay natural.
This requires planning before installation. You tell your braider exactly which sections get which hair, and they work through it systematically. The result is a color story that’s deliberate — not random highlights but an actual design in color.
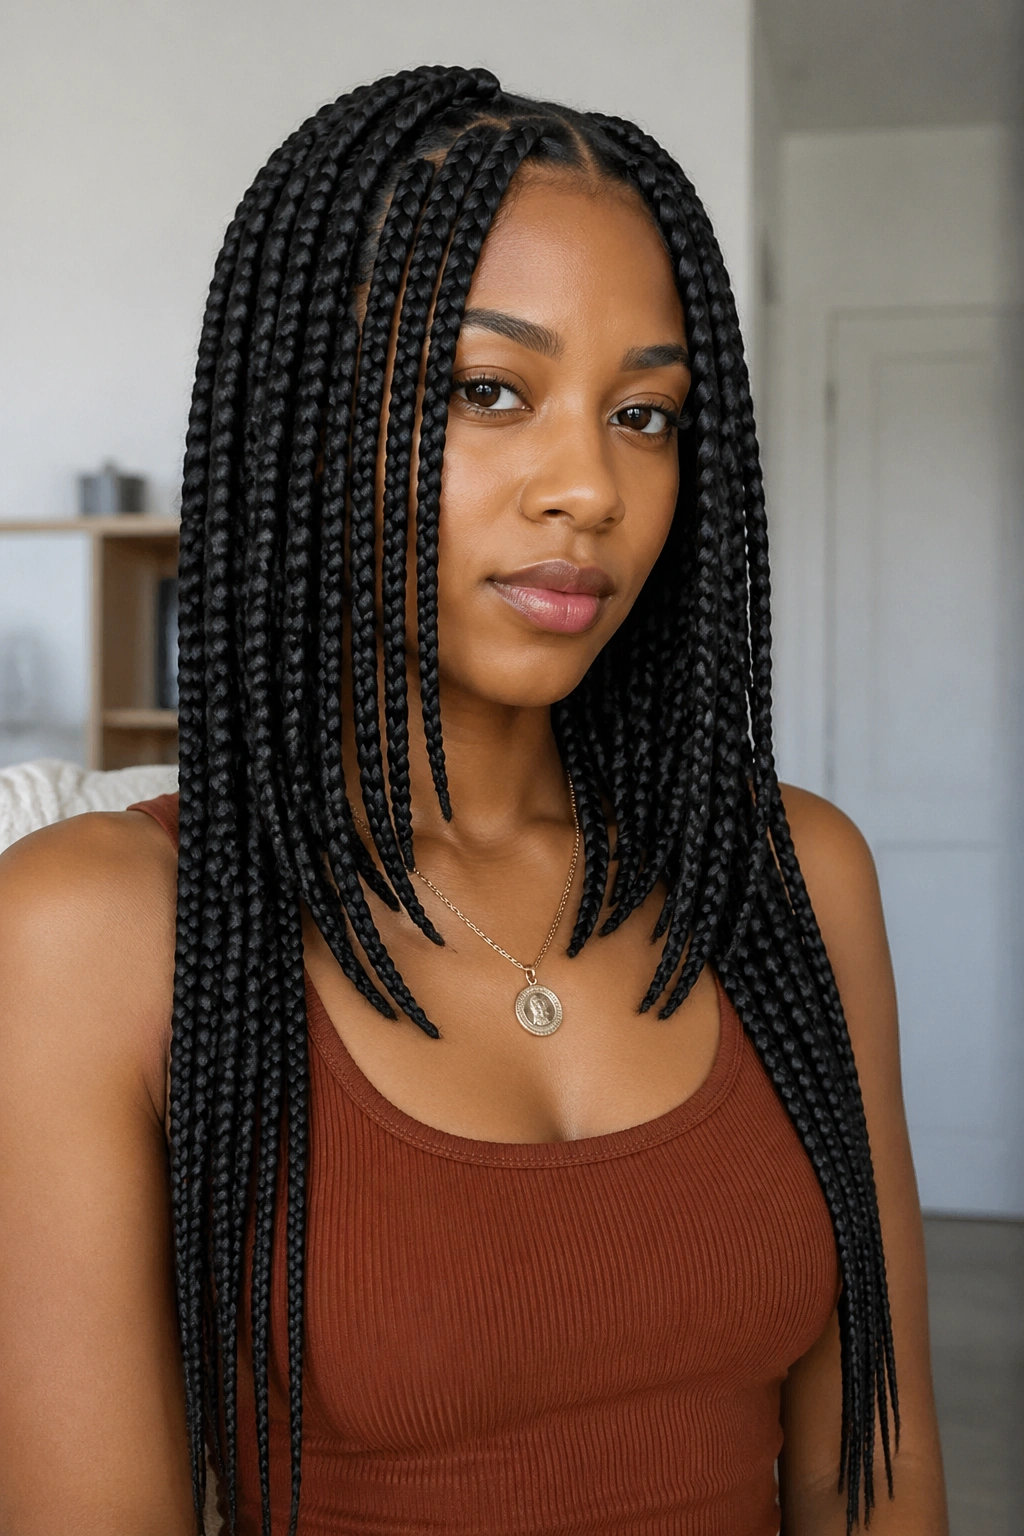
14. Small Box Braids with a Middle Part
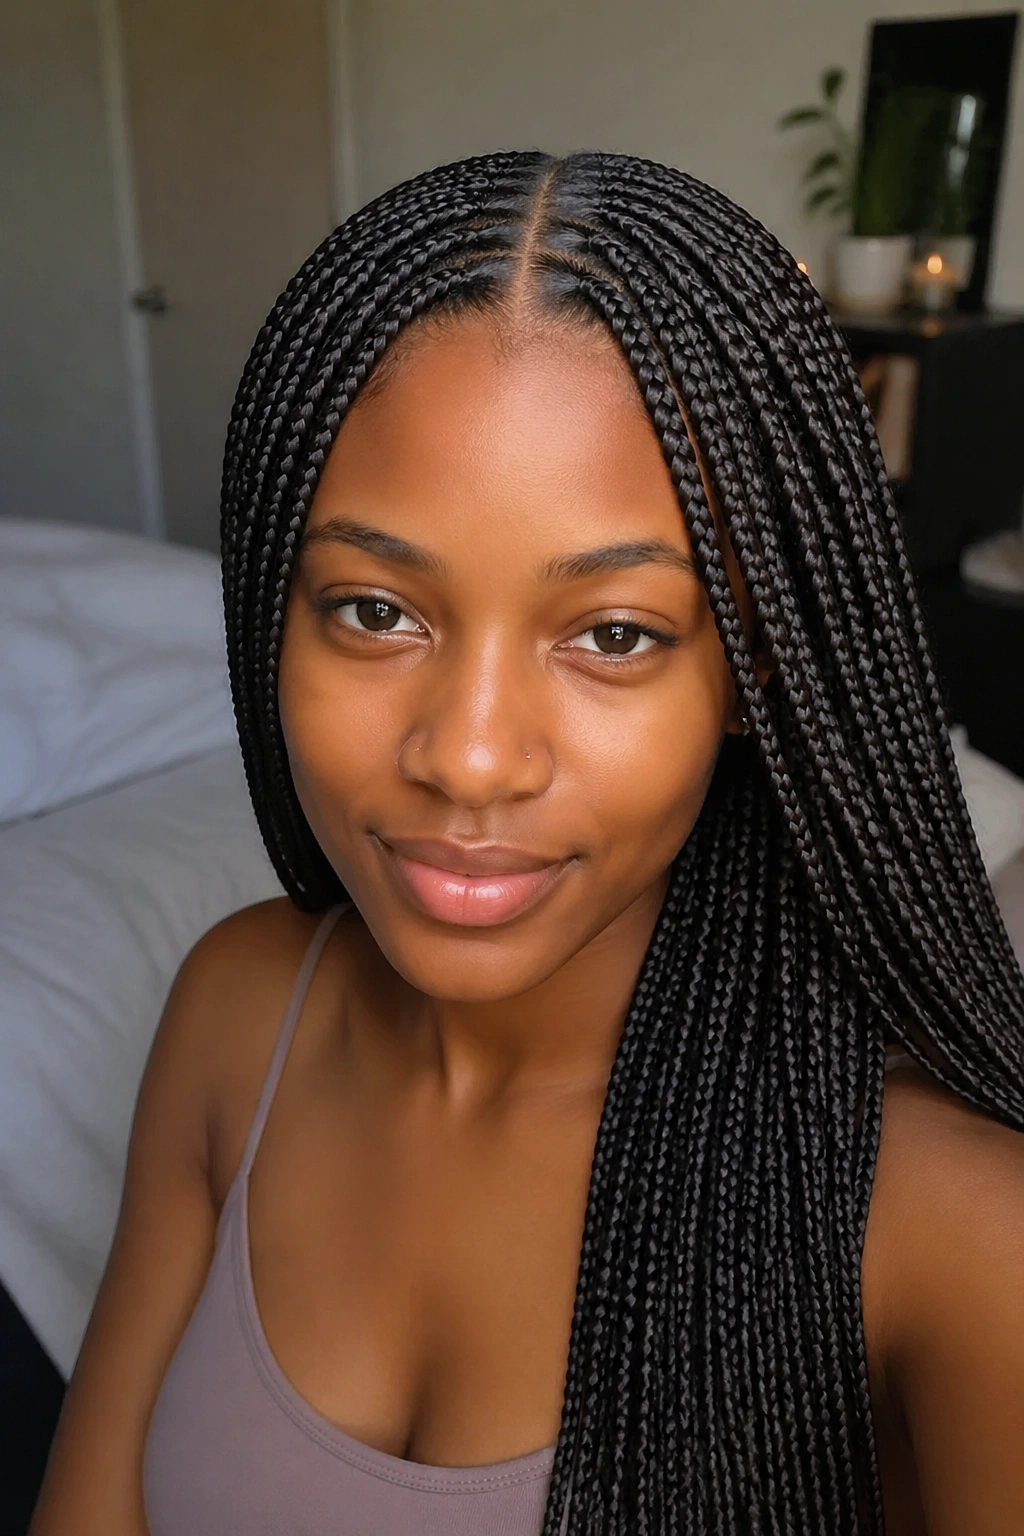
Part your hair down the center, and install small-to-medium box braids with that center part maintained all the way back through the installation. When the braids are worn down, the part is visible — a clean, symmetrical line through the center of the head. It frames the face differently than a side part — more symmetrical, more structured.
The Catch
A rigid center part only looks its best when the braids are worn fully down and forward. When you put a center-part installation into any updo, the part becomes irrelevant — you lose the feature entirely. This is specifically a “wear it down” style decision. Make sure that’s how you plan to wear your braids for most of the installation before committing to a deliberate center part.
15. Braids Tucked into a Low Bun
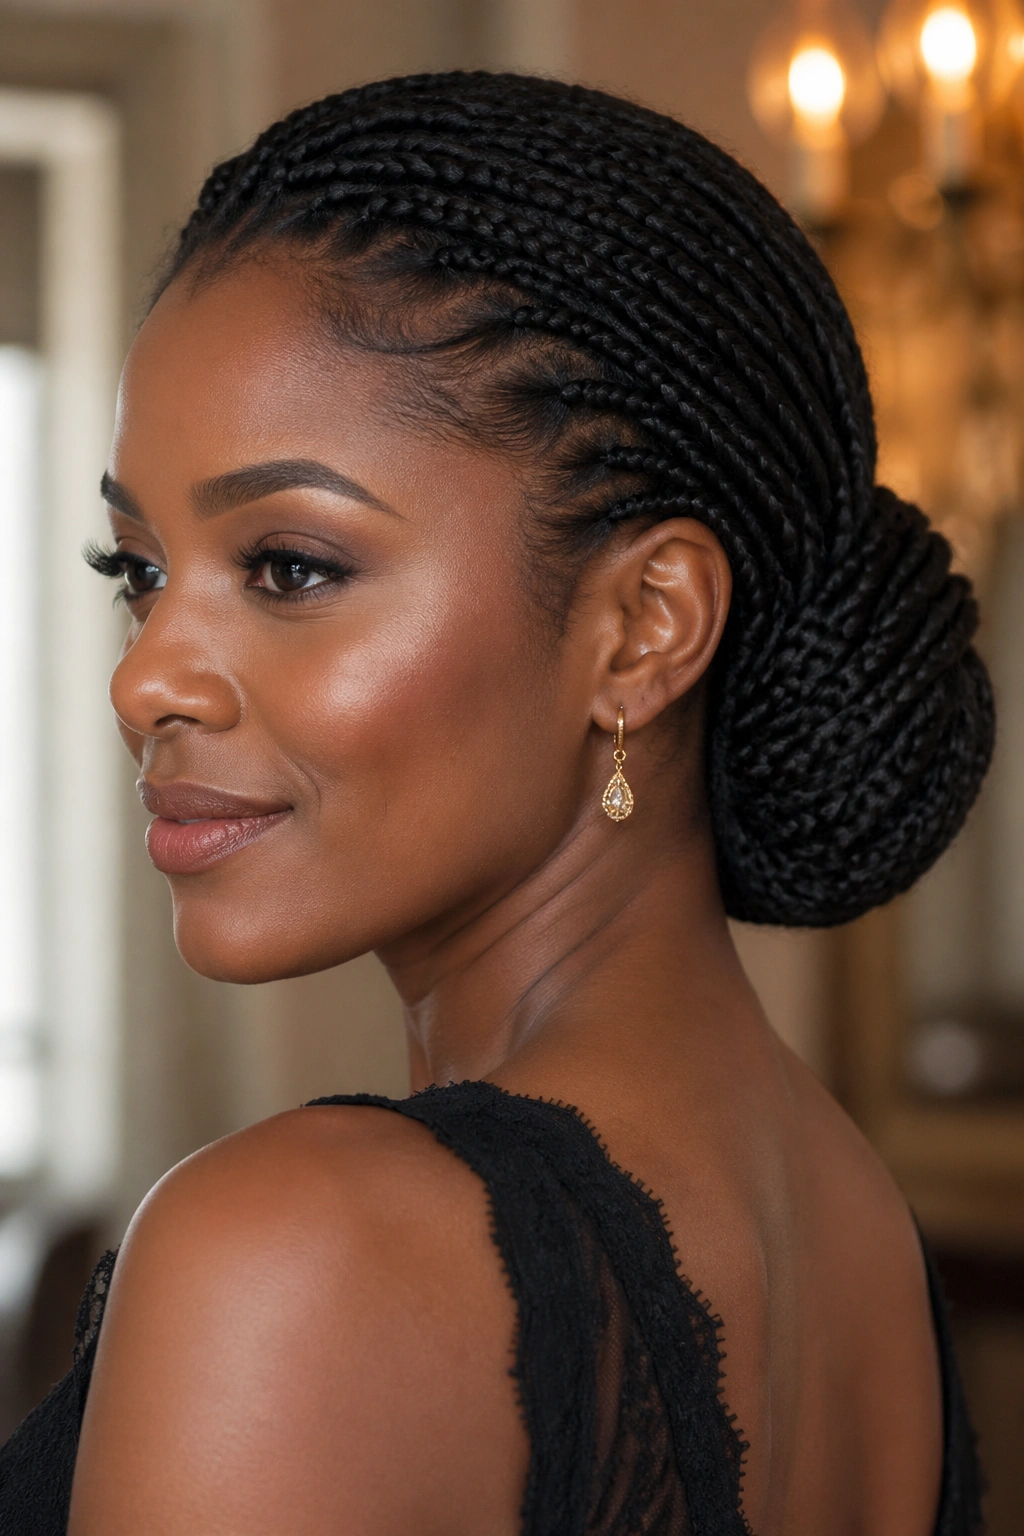
Gather all your braids at the nape of the neck and fold them — don’t twist, don’t wrap, just fold — into a low chignon shape. Secure with pins along the base. The end result is a low, full bun that sits at the nape and has the visual weight of a much more complex updo.
This is one of the more elegant options. It works for formal occasions, interviews, or any setting where you want the impact of an updo without the complexity. The braid texture adds visual interest that a smooth bun wouldn’t have.
16. Braids in a Half Crown
Take the braids from one side of your head, sweep them up and across to the opposite side, and pin them in place across the crown — like a crown braid effect but made with individual loose box braids rather than an actual cornrow. The other half of the braids remains loose.
The visual effect is a half-updo that frames the face without actually gathering the hair away from the face. The swept braids create an arch that reads regal without being stiff. This takes about 5 minutes and 4-6 bobby pins.
17. Layered Box Braid Lengths
Install braids of different lengths in different sections — longer braids in the back and shorter at the front, or a graduated length that decreases from center to sides. Layers in box braids create movement and depth that uniform lengths don’t. When you look straight on, you see length variation. When the braids move, they move at different rates, which creates a much more dynamic effect than a single uniform length.
This requires explicit planning with your braider before installation. Specify: which sections get what length. Map it out before you sit down.
18. Box Braids with Ombre Color
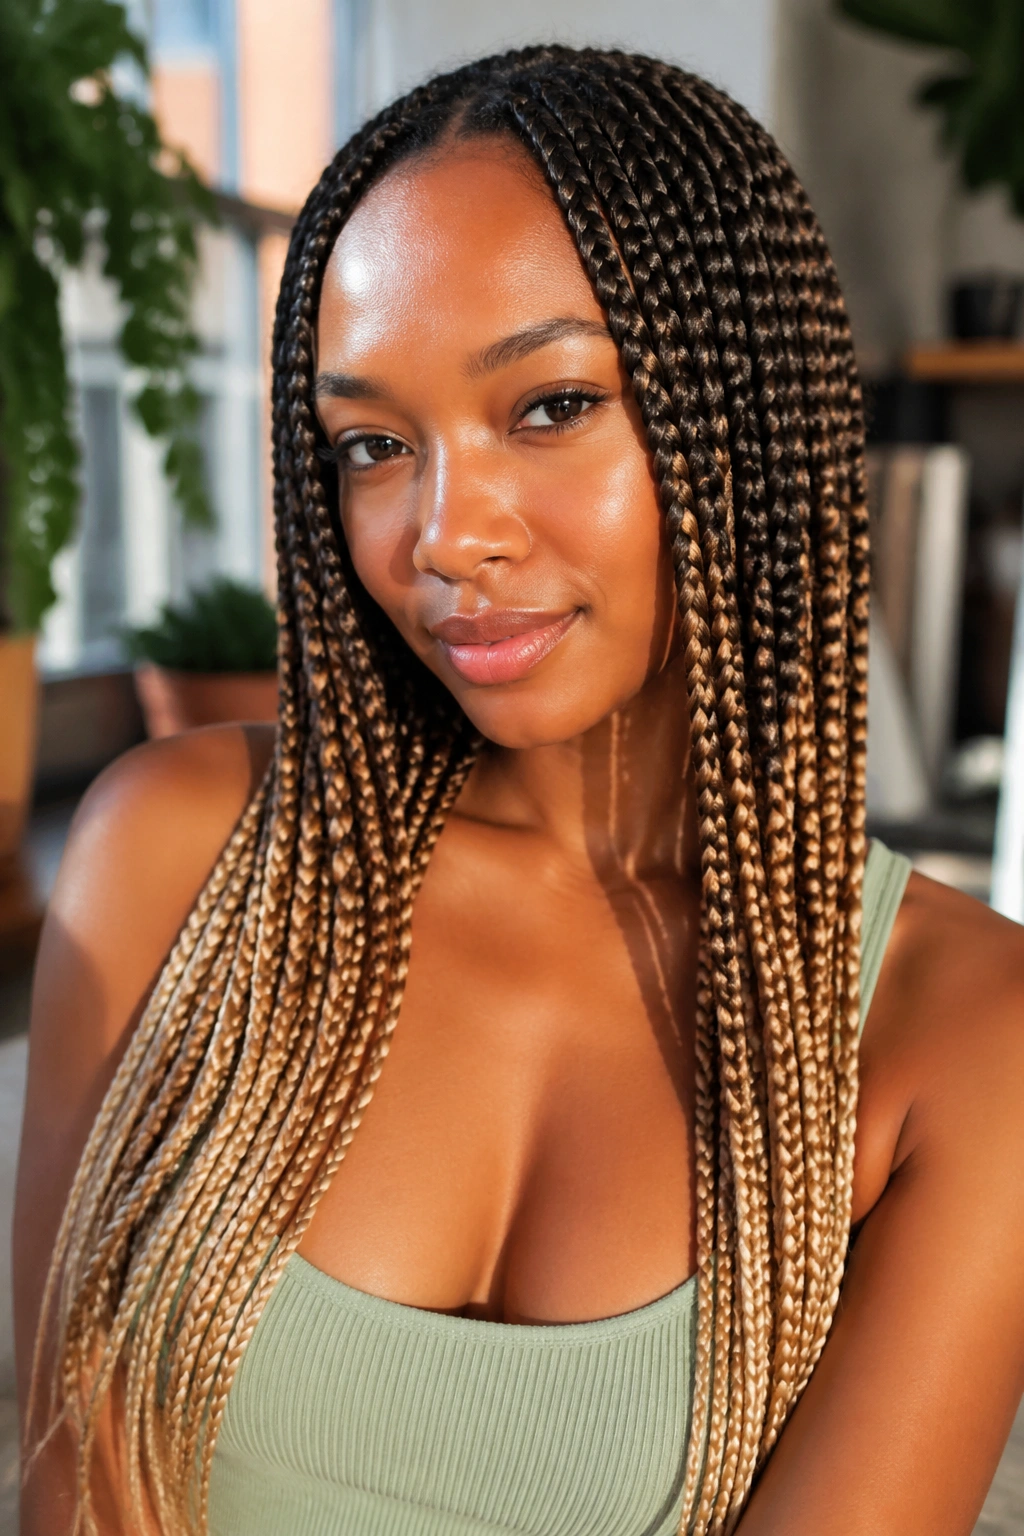
Each individual braid transitions from one color at the root to another at the tip. True ombre requires blending the extension hair gradually — starting with dark fiber and introducing lighter fiber as the braid progresses down. A skilled braider can do this with a gradual feed-in technique.
The result is dimension that changes as the braids move. In natural light, the color shift is subtle and blended. In direct sunlight, it’s dramatic. This is one of the most popular box braid color approaches because it doesn’t require bleaching your natural hair — all the color work is in the extension hair.
19. Braids Worn as a Space Buns Double
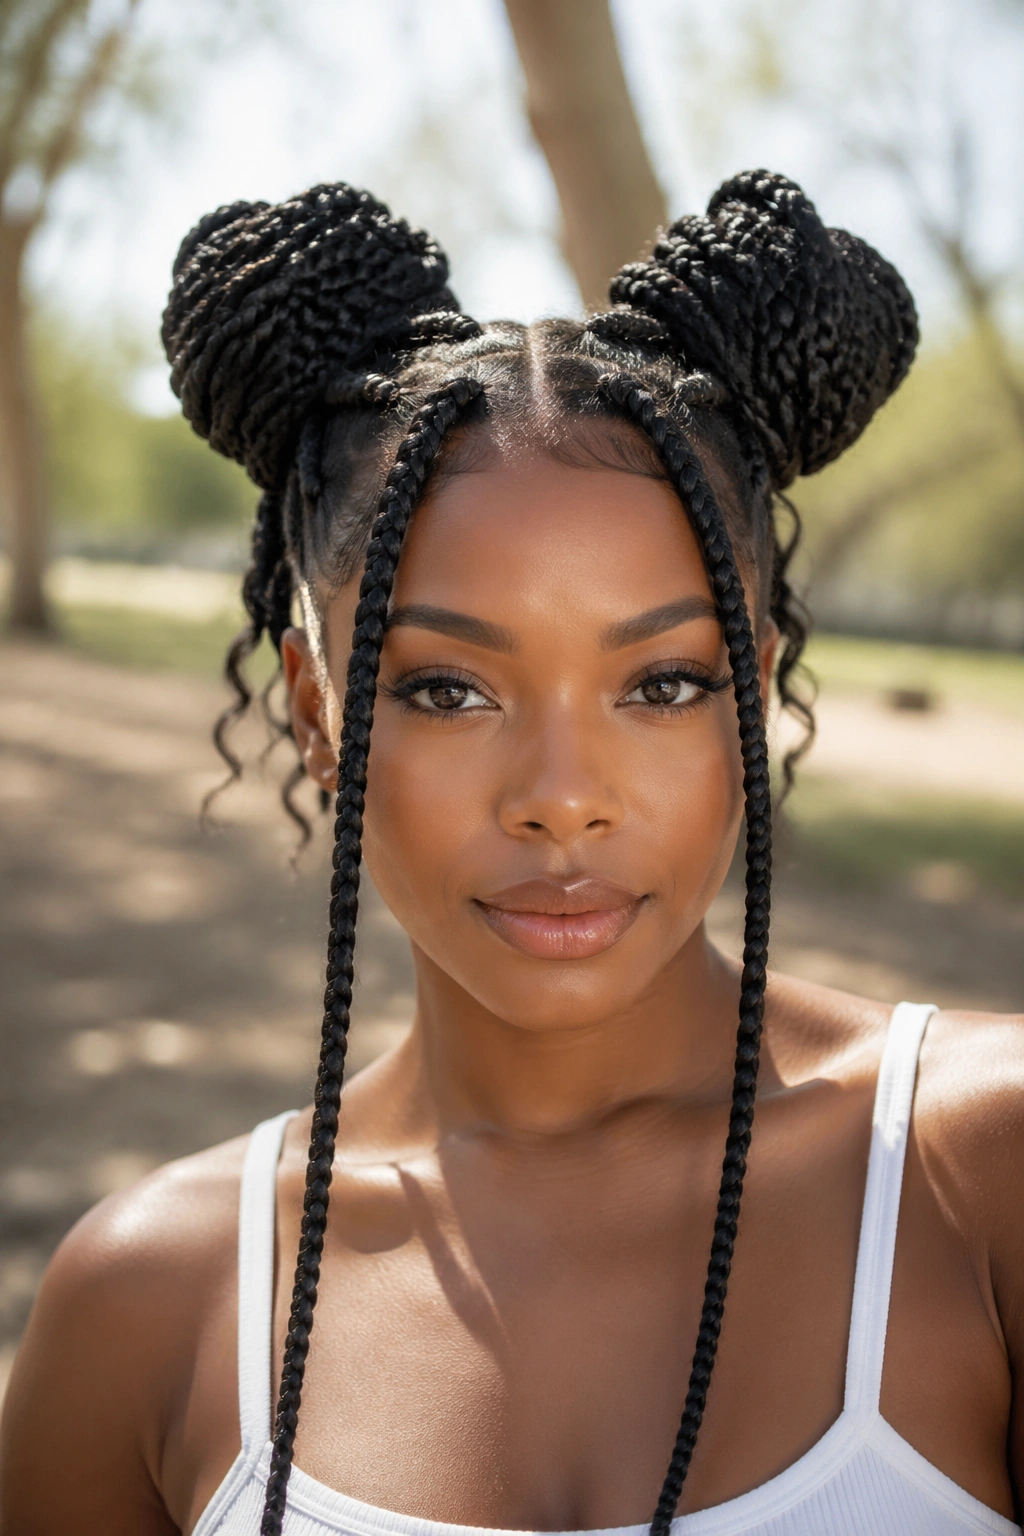
Pull half the braids up to the left side of the head, gather into a bun, and secure. Do the same on the right. Both buns sit high, symmetrically on either side of the head. The remaining braids that don’t reach the buns, or shorter side braids, frame the face.
This is a deliberately playful style. It’s not office-appropriate for conservative environments. But for events, casual days, or creative settings, it’s an enormously fun variation on the classic double bun — made more interesting by the texture and weight of the braids.
20. Single Braid Statement
Install just one large, thick braid — through the center of the head or off to one side — with the rest of the hair left in its natural state or in a simple puff. The single braid reads as a graphic element against the natural texture backdrop.
This is experimental. Not everyone will attempt it. But for the natural who wants to play with contrast between braided and unbraided texture, the single large braid is a legitimate artistic choice.
21. Goddess Box Braids
Goddess braids incorporate loose, wispy strands of hair along the length of each braid — pulled out from the braid slightly so they float loosely around it. These loose pieces can be your own natural hair, extensions, or a combination.
Why It Works
The effect softens what is usually a very clean-edged style. Goddess box braids look less architectural and more organic. They suit naturals who love the protection of braids but find the strictly defined look too rigid for their personal aesthetic. The floating pieces also move differently when you turn your head — it creates a visual effect closer to loose natural hair than standard braids do.
22. Braids with a Silk Wrap Accent

Take a long silk or satin ribbon — about half an inch wide — and weave it into several braids, wrapping it loosely around the braid body and tying it at the end. Not tight enough to change the braid shape, just wrapped loosely so the silk floats between the braid sections.
It sounds more complicated than it is. You’re literally wrapping a ribbon around a braid. The effect is an elegant, elevated detail that takes about 4 minutes to add to 4-5 selected braids. Do it to the braids that frame your face most prominently for maximum impact.
23. Box Braids with an Undercut or Fade

Keep the sides and nape of the hair either shaved or tapered very short, and install box braids only in the top and crown sections. The contrast between the fade or shave on the sides and the braids on top creates a mohawk-like effect — structured and bold.
This requires a two-step process: a barber for the sides and nape, then a braider for the top section. Both appointments need to be coordinated. But the result is a look that bridges natural hair and barbershop aesthetics in a way almost no other style does.
24. Feed-In Braids Along the Hairline
Rather than box braids from root to tip throughout the head, install feed-in cornrows along the hairline — from temple to temple across the front — and transition into box braids from the back of the crown backward. The cornrow hairline acts as a designed frame, and the braids behind it provide the main body.
The technique at the front is more intricate than standard box braids because cornrows require a different braiding motion. But the visual result is a cleaner hairline look — the cornrow front has no individual partings or boxes visible at the front, just a smooth, plaited line.
25. Braids Tied in a Knot
Take a thick section of braids from one side, loop them over themselves once, and pull through — exactly like tying a loose knot in a scarf. Position the knot at the nape or the side. Secure loosely with a pin if needed. The remaining braids hang free from below the knot.
This is a five-minute variation that creates a completely different silhouette. The knot itself becomes the focal point — a structured gathering that your eye goes to immediately. The loose braids below it provide visual balance.
26. Color Pieces at the Front
Leave most of your braids in your natural color — or in black — but install 4-6 braids at the front of your hairline or temples in a contrasting color. Blonde, red, copper, vivid colors. The effect is subtle when your hair is down but becomes the focal point when you pull your hair back into a puff or bun — those colored braids frame your face from the front.
This is a commitment to color without the full-head dye decision. You’re placing the color exactly where it has the most visual impact: the section that frames your face.
27. Braids Worn with a Silk Scarf Updo

Gather your braids into a puff or loose top knot and then tie a large silk scarf over the top — covering the hair completely or leaving the puff of braids visible above the tied scarf. The scarf becomes part of the silhouette. It changes shape, color, and character every time you use a different scarf.
This is as much about styling scarves as it is about the braids. A short, knotted headscarf with the braid ends peeking out is a very different look from a full wrap with a dramatic bow at the front. The braids are the foundation; the scarf is the design element. Master one scarf-tying technique first — there are dozens — and build from there.
How Long Box Braids Actually Last
The braids themselves can stay neat for up to 8 weeks in most cases. The practical limit is usually your scalp — new growth tightens the base of each braid, and after 8 weeks, the roots start to knot and tangle with the braid base. Removal at that point can cause breakage because the tangle is so dense.
The 6-week mark is generally the sweet spot. Braids are still neat, the scalp is still accessible for cleaning, and removal is straightforward. If you’ve maintained the scalp well and the braids still look clean, you can push to 8 weeks. Beyond that, you’re trading convenience for hair health.
Removing Box Braids Without Breaking Your Hair
Cut the end of each braid first if you sealed with extensions — cutting removes the extension bulk and makes unraveling easier. Then use your fingers to carefully unwind the braid, working from the bottom upward. Don’t pull. Don’t rush. Any time you feel resistance, add moisture — a spray of water with a few drops of oil — and work through the knot gently.
Expect some shed hair. Normal daily shedding accumulates inside braids over weeks. When you finally remove them, the shed hair that didn’t fall during wear comes out all at once. It looks like a lot. It’s mostly normal. If the hair is breaking — short pieces rather than long strands with visible roots — that’s actual breakage, and it signals the braids stayed in too long or were installed too tightly.
After removal, wait 3-4 days before any heat or chemical service. Your hair needs to recover. A deep condition immediately after removal, then another 4-5 days later, is the minimum recovery protocol.
Choosing the Right Style for Your Lifestyle
The style you choose should match how you actually live. If you’re very active — working out daily, swimming, playing sports — you need a style that can be put up easily, washed without unraveling, and won’t catch on equipment. Smaller braids in a secure updo, or knotless braids that sit flatter at the root.
If you sit at a desk most of the day and want maximum visual impact with minimum morning effort, longer braids worn down are ideal. If you’re constantly changing environments — formal office to casual evening to weekend outdoors — the styles on this list that translate easily across contexts are your best friends. The high ponytail, the half-up, the bun, and the scarf updo all transition smoothly.
Box braids are, ultimately, investment styling. The installation cost and time are upfront. Everything that follows — weeks of easy, flexible, protective styling — is the payoff.