



Big curl styles for natural hair are having a serious moment — and honestly, they never really left. There’s something undeniably powerful about a head full of voluminous, defined curls that command attention in every room. Whether your curl pattern is loose and bouncy or tight and coily, learning how to work with your texture instead of against it opens up a whole world of styling possibilities that are both gorgeous and protective.
Why Big Curl Styles Work for Every Natural Hair Type
One of the biggest myths in the natural hair community is that big, defined curls are only achievable on certain curl patterns. That couldn’t be further from the truth. With the right techniques and products, big curl styles for natural hair can work across 3a through 4c textures — it’s just about understanding what your hair responds to best.
Looser curl patterns (3a, 3b, 3c) tend to get natural volume with less effort, but they can struggle with definition and frizz control. Tighter patterns (4a, 4b, 4c) have the opposite challenge — they may need more help achieving stretch and visible curl formation, but once they get there, the volume is extraordinary. The key is matching your technique to your texture. A wash-and-go method that works brilliantly on 3c hair might fall completely flat on 4b without some adjustments — like using a shingling technique or rake-and-shake method instead.
Don’t let anyone tell you your hair “can’t” do big curls. It can. It just might need a different road to get there.
The Right Products Make or Break Big Curl Styles
You can have the best technique in the world, but if your product lineup is working against your hair, you’re going to struggle. Big curl styles live and die by moisture. Dehydrated natural hair doesn’t clump — it frizzes, shrinks unevenly, and falls flat before you’ve even finished styling.
Start with a solid hydrating shampoo and a deep conditioner you actually trust. From there, your leave-in conditioner is the foundation of every curl style. Apply it on soaking wet hair — seriously, dripping wet — and work it through in sections. Then layer your curl cream or gel on top while your hair is still wet. The “wet is best” principle isn’t just a saying; it’s genuinely the reason some people’s wash-and-gos look incredible and others’ don’t.
For extra volume and definition, a lightweight mousse can be your best friend. Apply it over your gel to boost volume without the crunch. And please — scrunch out the cast once your hair is fully dry. That’s what gives you soft, touchable, big curls rather than a crunchy helmet.
Heat-Free Methods for Getting Big Curls
Not every big curl style requires heat, and honestly, heat-free methods often produce the most stunning results on natural hair. Flexi rods, bantu knots, and twist-outs are the holy trinity of heat-free big curls, and each one produces a distinct look worth knowing.
Flexi rods give you that round, uniform curl with consistent size from root to tip. Use them on stretched hair — either air-dried after washing or braided out — for the most defined result. The thicker the rod, the bigger and looser your curl pattern will be. Leave them in overnight, and take them down gently in the morning by unwinding rather than pulling.
Bantu knot-outs are a favorite for volume. You get those distinct, zig-zag S-shaped curls that give serious bounce when you unravel the knots. The curl pattern from a bantu knot-out tends to be softer and more glamorous than a flexi rod set — perfect for occasions when you want your hair to look like it took effort (even when it barely did).
Twist-outs remain a staple for a reason. They’re forgiving, customizable, and the size of your sections controls everything. Small sections give you tighter, more defined curls. Larger sections give you that big, voluminous wave. Throw in some perm rods at the ends for extra bounce and definition.
Protective Styling That Still Shows Your Curls
There’s a common misconception that protective styling means hiding your curls. It doesn’t. Plenty of protective styles actually showcase your natural curl pattern while still keeping your ends tucked and reducing daily manipulation. Big curl styles can absolutely be protective — you just have to be intentional about how you approach them.
When you define your curls once and then maintain them for several days, you’re technically protecting your hair by not constantly re-styling it. Pineappling at night (gathering all your hair loosely at the top of your head with a satin scrunchie), sleeping on a satin pillowcase, and using a light refresher spray in the mornings keeps your style going for days without putting extra stress on your strands.
Styles like rod sets and flexi rod curls last longer and hold up better than air-dried wash-and-gos for most hair types, making them both beautiful and functional. You get the big, glamorous curl look and the benefit of less daily manipulation. That’s the sweet spot.
How Shrinkage Affects Your Big Curl Results
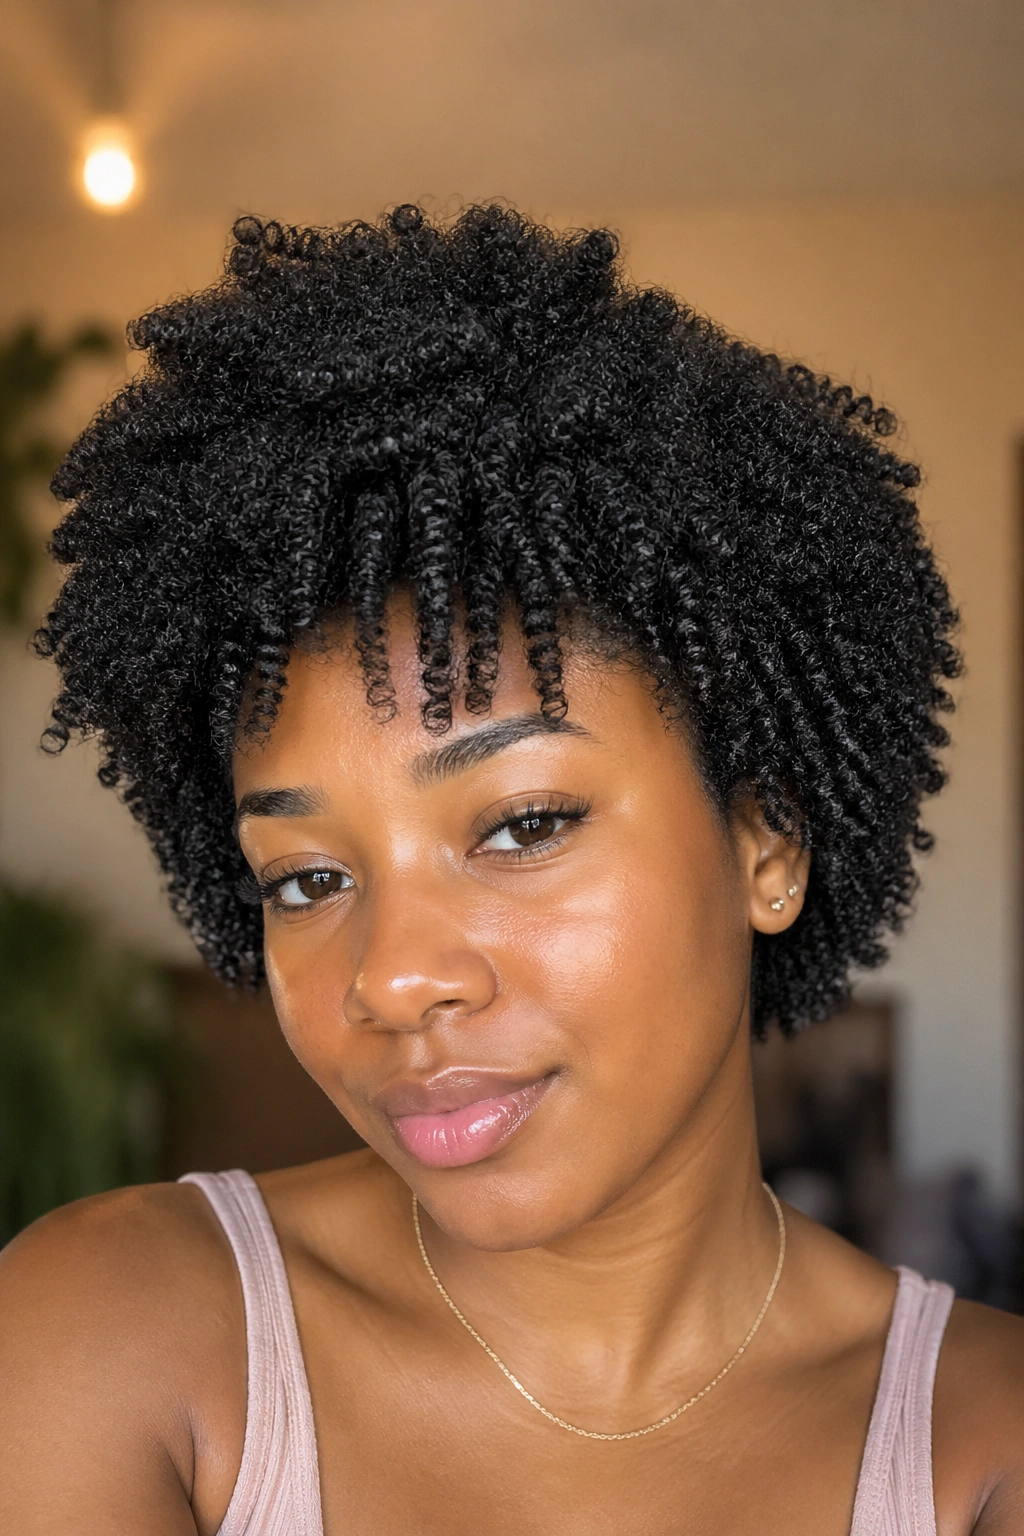
Let’s talk about shrinkage — because ignoring it sets you up for disappointment every single time. Natural hair, especially 4a through 4c textures, can shrink anywhere from 50% to 75% of its actual length when wet or in its natural state. That means if your hair is 8 inches long when stretched, it might only appear 2-4 inches when fully shrunk.
Big curl styles are actually one of the best ways to work with shrinkage rather than fight it. When you understand that your hair’s shrinkage is a sign of healthy elasticity — not something to be ashamed of — you start to see it differently. A highly shrunken afro that springs back when you touch it? That’s healthy hair. That’s something to celebrate.
The way to get “bigger” curls on high-shrinkage hair is through strategic stretching. You can stretch your wash-and-go by doing a banding method while it dries, setting on rollers, or doing a brief blown-out section before styling. Each of these adds length and reduces shrinkage so your curls show more of their true length. But if you decide to rock your fully shrunken curls? That’s a big curl style too — and it’s stunning.
1. Classic Wash-and-Go
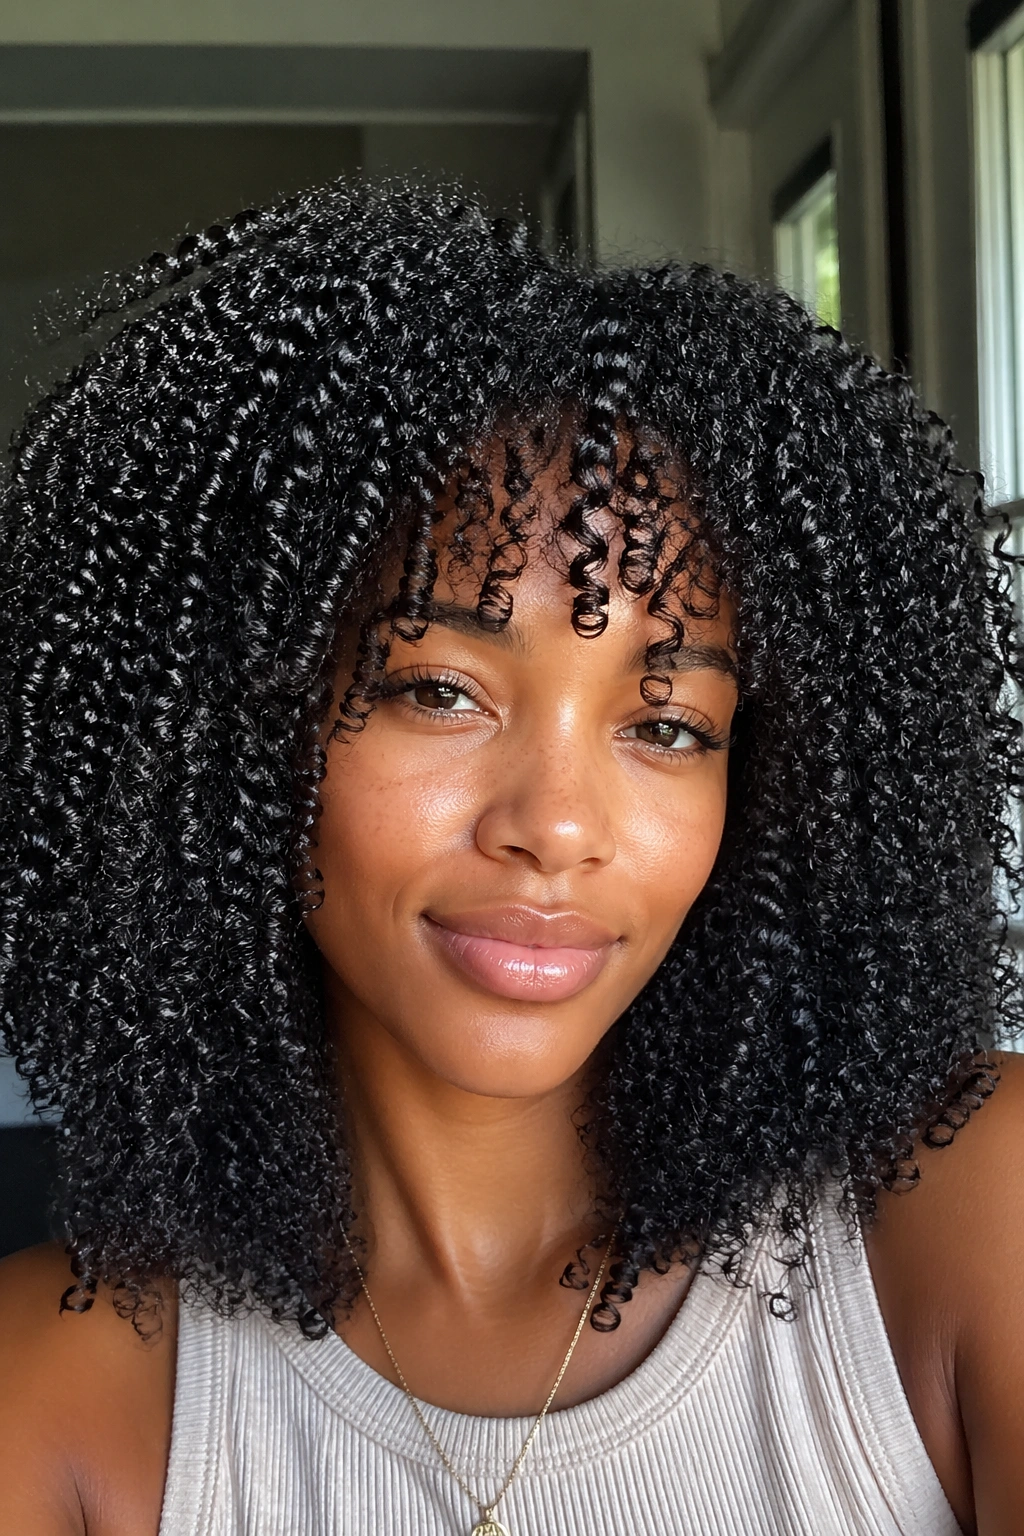
The wash-and-go is the most fundamental big curl style there is — and getting it right changes everything. Many naturals write it off after a few disappointing attempts, but the secret is usually in the application method, not the product.
Detangle first, always. Working in sections on wet, conditioned hair, rake your leave-in through from root to tip before adding any gel or curl cream. Then, apply your styler in small sections while the hair is still absolutely saturated with water. Rake or smooth the product through, then cup your curls upward toward your scalp to encourage clumping. The less you touch your hair as it dries, the more defined your curls will be. Diffuse on low heat for volume, or air-dry under a bonnet for a stretched, heat-free result.
Getting the Most Volume
- Apply product in the shower while still under water
- Use a microfiber towel or old T-shirt to scrunch out excess water (never rub)
- Diffuse upside-down for root lift
- Scrunch out the cast once hair is 100% dry
Pro tip: If your wash-and-go is consistently flat at the roots, try flipping your head upside-down while diffusing — it’s a simple change that adds enormous root volume.
2. Bantu Knot-Out Curls
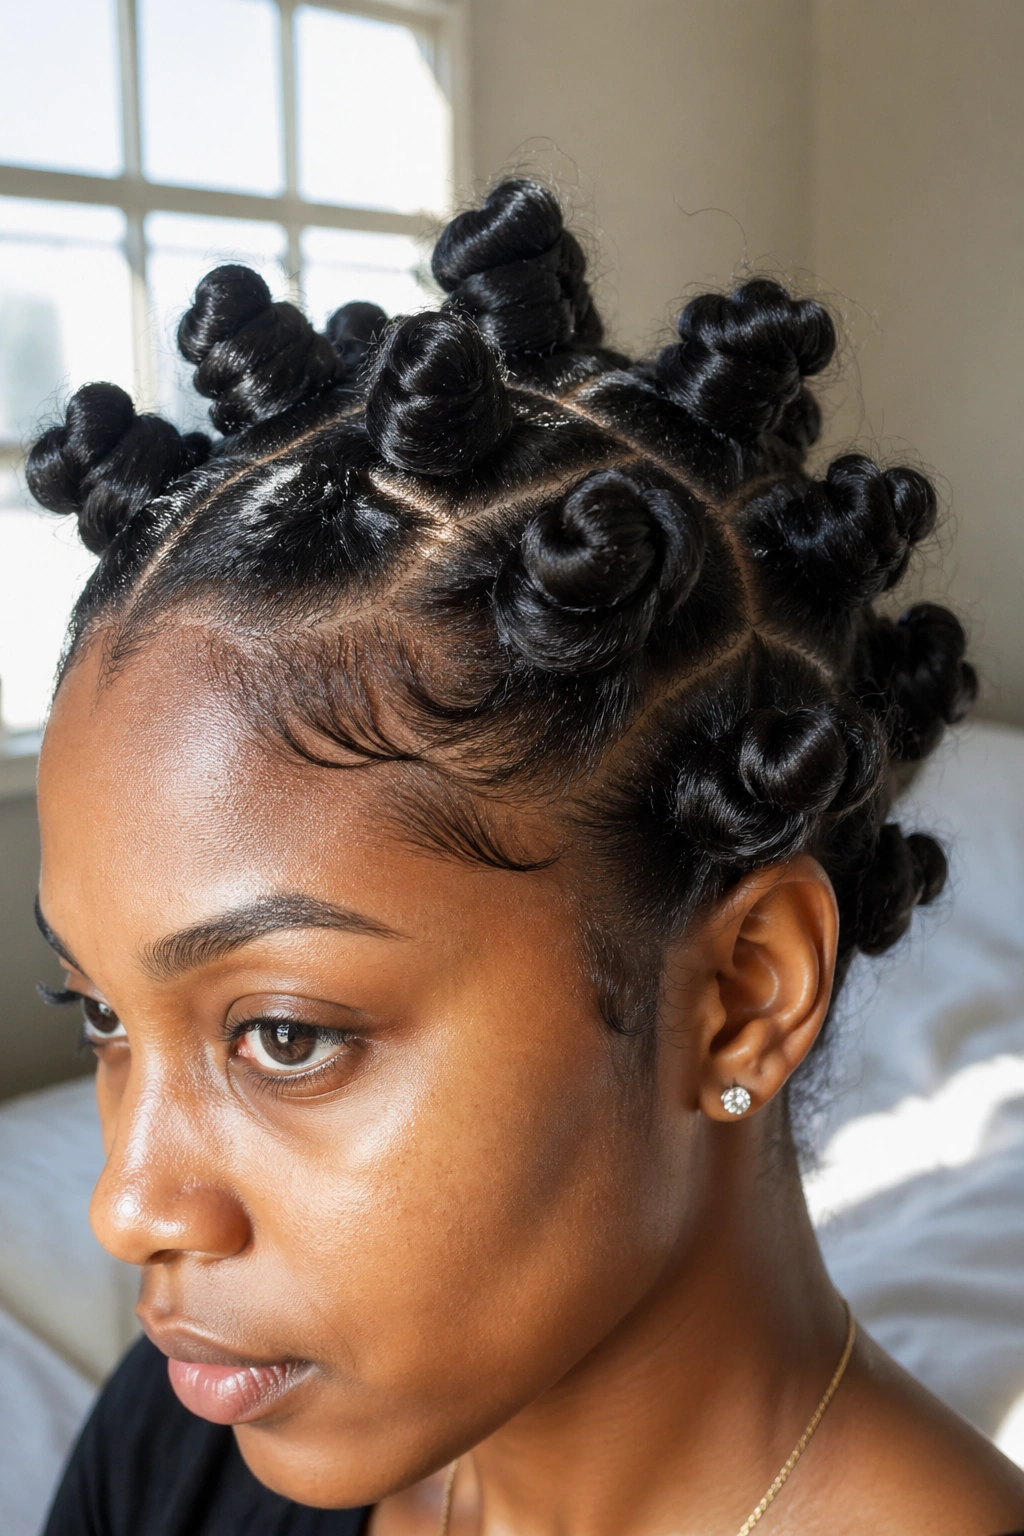
There’s a reason the bantu knot-out has been a staple in the natural hair community for decades. The curls it produces have a specific personality — structured, spiraling, and wildly voluminous when separated properly.
Section your hair into equal parts, the size of which determines your final curl size. Smaller sections equal tighter curls; bigger sections give looser, wave-like definition. Apply your curl cream to each section, two-strand twist it, then coil it around itself at the base and tuck the end under. Leave them in overnight or until completely dry, then gently unravel starting from the tip of each knot. Separate the curls by pulling them apart with oil-coated fingertips to avoid frizz.
How to Achieve the Best Bantu Knot-Out
- Start on freshly washed, well-conditioned hair
- Apply curl cream generously — more than you think you need
- Make sure knots are 100% dry before unraveling
- Separate gently, using a small amount of oil on your fingertips
The bantu knot-out also doubles as a two-for-one style: wear the actual knots for a sleek, sculptural look, then unravel them for a completely different big curl style. That’s two days of looks from one styling session.
3. Flexi Rod Set
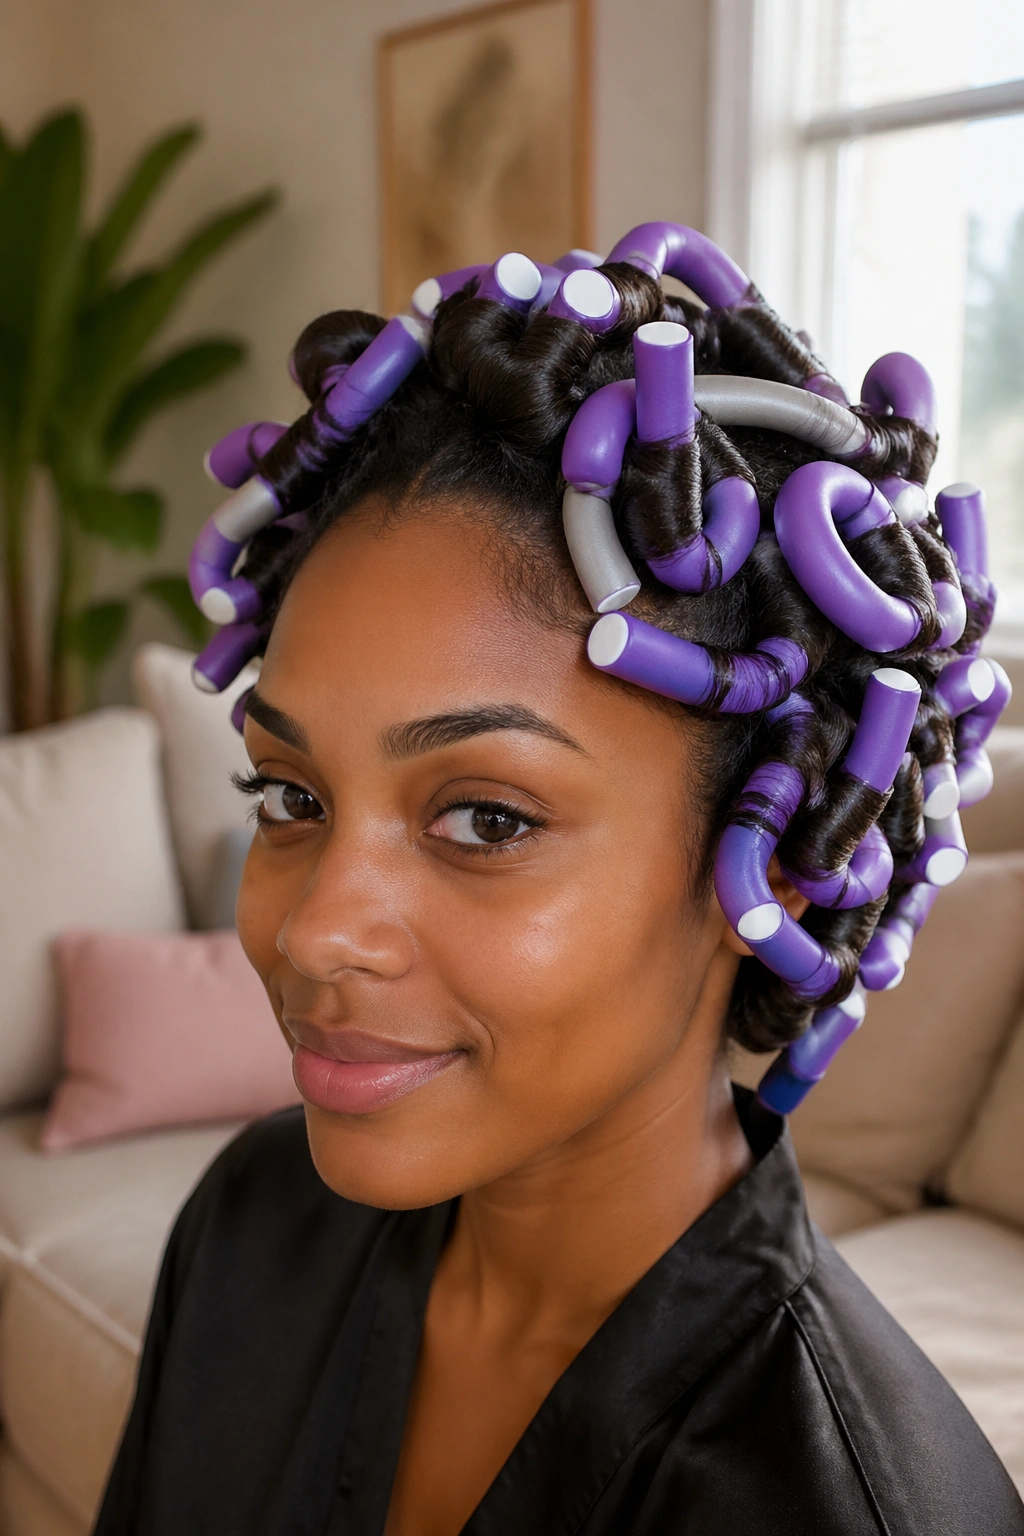
Flexi rods are the secret weapon for big, bouncy curls that hold their shape for days. Unlike heat-based curling methods, flexi rods work with your hair’s natural curl pattern to enhance and define it rather than override it.
The size of your rod determines everything. Large flexi rods (the thicker ones, usually purple or blue in standard packs) give you loose, voluminous ringlets. Medium rods give defined spiral curls. Smaller rods produce tighter, more coiled definition similar to a twist-out but rounder and more uniform.
Work on damp, stretched hair for the most defined result. Apply a mousse or setting lotion to each section before wrapping around the rod. Wind the hair around the rod from tip to root for a uniform curl, then bend the rod to secure it. Let your hair dry fully — overnight is best — before removing the rods. Unravel from root to tip, then separate very gently.
How to Achieve
- Use on blown-out or braid-out hair for maximum length and definition
- Avoid over-saturating with heavy products — mousse or light cream works best
- Always remove rods when hair is completely dry, never damp
- Fluff roots with a wide-tooth comb or pick for added volume
4. Twist-Out
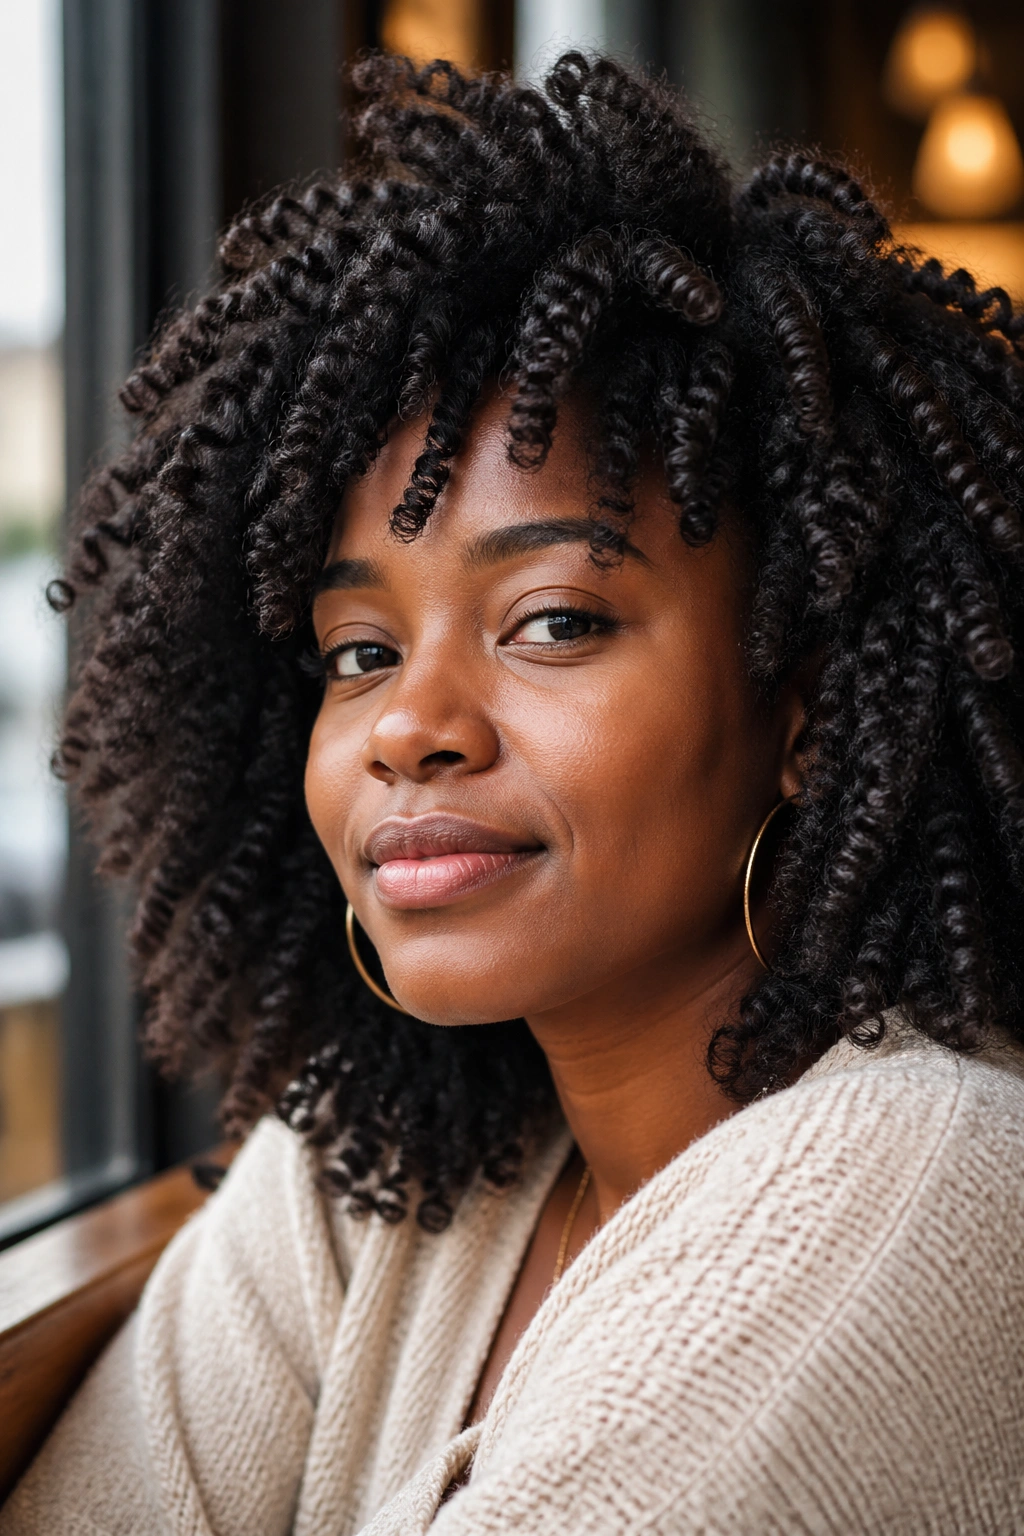
The twist-out might be the most versatile style in the natural hair playbook. It works across nearly every curl pattern, it’s genuinely forgiving, and the results range from defined and sleek to big, fluffy perfection depending on how you wear it.
Two-strand twists are the foundation. Part your hair into sections, apply your product, divide each section into two pieces, and twist them around each other from root to tip. The direction you twist (toward your face or away from it) affects how the curl falls, so experiment to see which you prefer. Let the twists dry fully — this part is non-negotiable — before unraveling.
The magic is in the separation. Unravel each twist gently from tip to root, then use your fingers to pull the curls apart at the base. The more you separate, the bigger and fluffier your twist-out becomes. Stop before it starts to frizz, though. There’s a sweet spot between defined and big — find yours.
5. Perm Rod Set
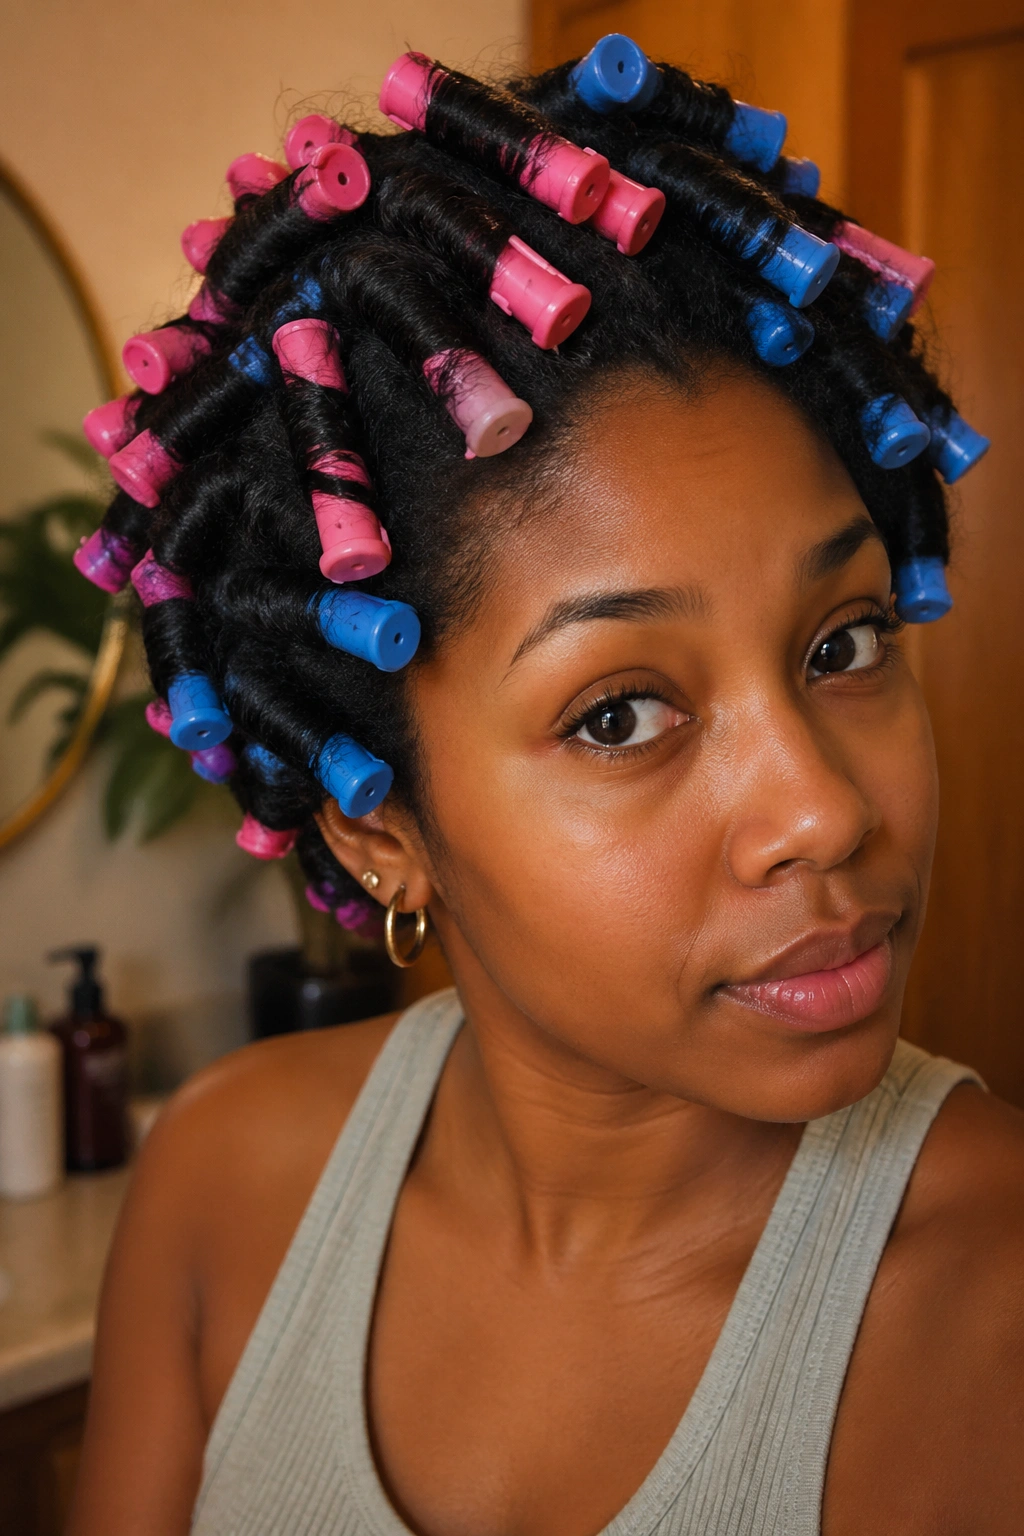
Perm rods produce one of the most stunning curl patterns you can achieve on natural hair without heat — tight, bouncy, spring-like curls that catch light and hold shape for days. They’re particularly beautiful on 4a and 4b hair types where the natural pattern works with the rod’s shape.
The smaller the perm rod, the tighter the curl. For big curls, reach for the larger pink or blue perm rods rather than the small gray ones. Apply a setting lotion or mousse to damp sections, then wrap each section around the rod, securing the ends first and rolling toward the scalp. Sit under a hooded dryer for the fastest, most even results, or air-dry overnight.
When taking them down, remove rods gently and separate each curl with oiled fingers. Shake your head and fluff the roots with a pick for maximum volume. Perm rod sets are known for lasting an entire week or more with proper nightly maintenance.
6. Braid-Out Curls
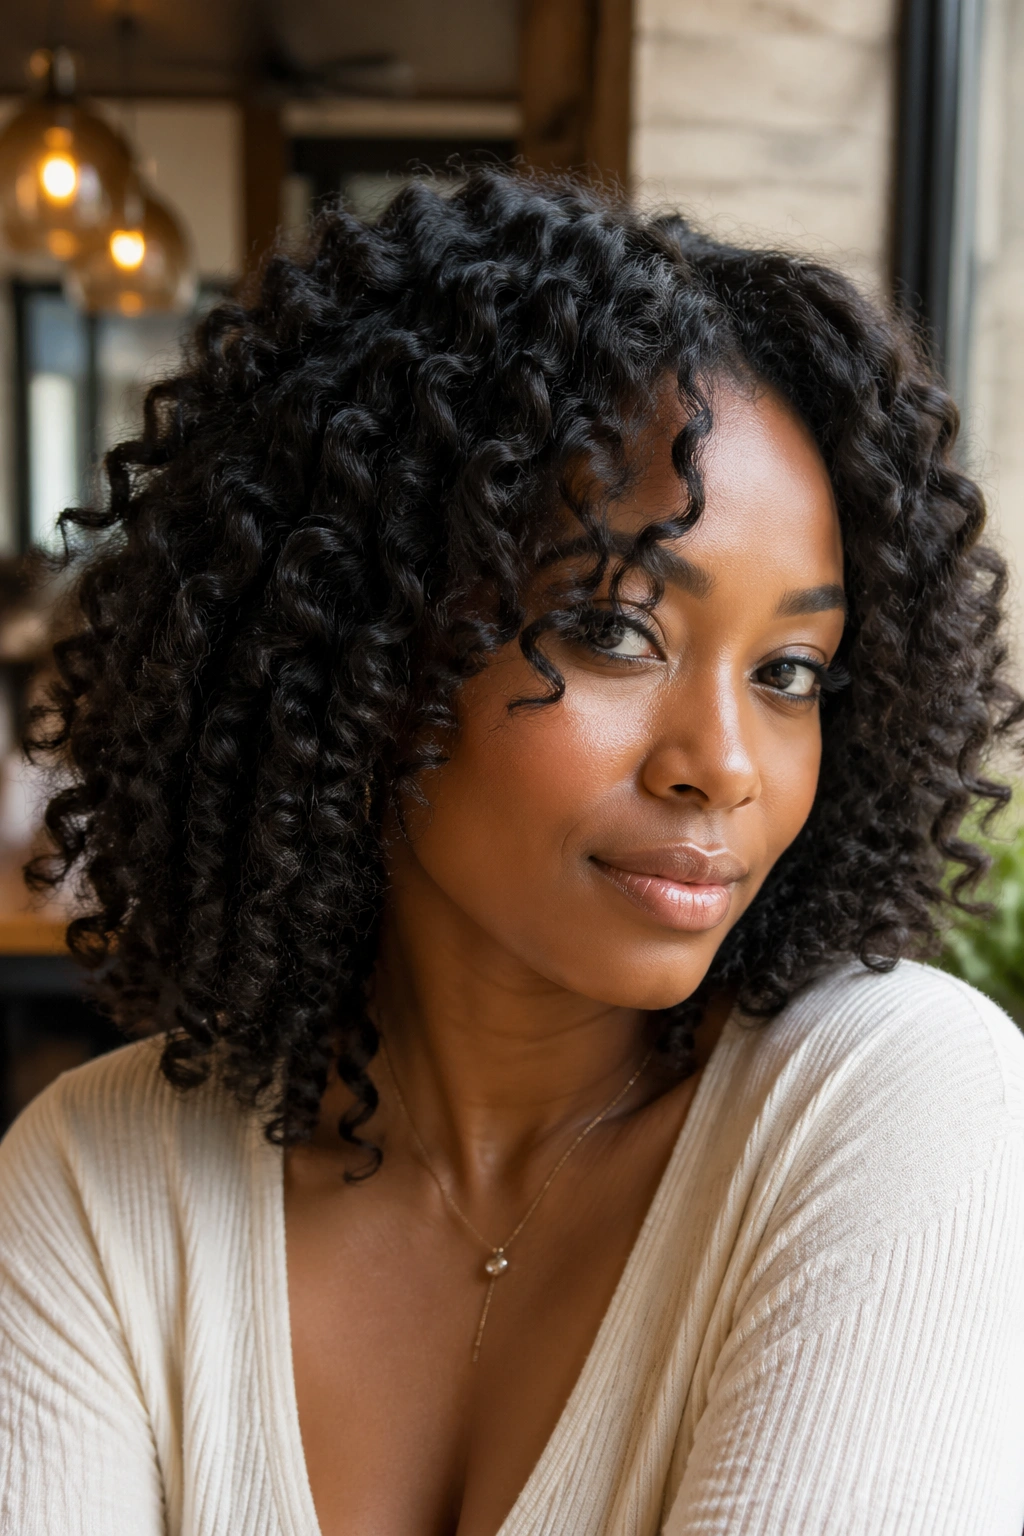
If twist-outs aren’t quite right for your texture, the braid-out might be your answer. Instead of two-strand twists, you braid your hair in sections and allow the braids to set overnight. The result is a wave-like, crimped pattern that gives a completely different big curl effect.
Braid-outs work especially well on 4b and 4c hair, where the two-strand twist can sometimes look undefined after drying. The braid sets a more distinct pattern into the hair, giving more grip and texture to the final result. For a looser, wavy look, use larger braids. For a more defined, wavy-curly pattern, use smaller sections.
Apply your curl butter or cream before braiding, braid tightly but not so tight it causes tension, then unravel gently in the morning. Separate with oiled hands and fluff. The braid-out wears beautifully for several days.
7. Finger Coils
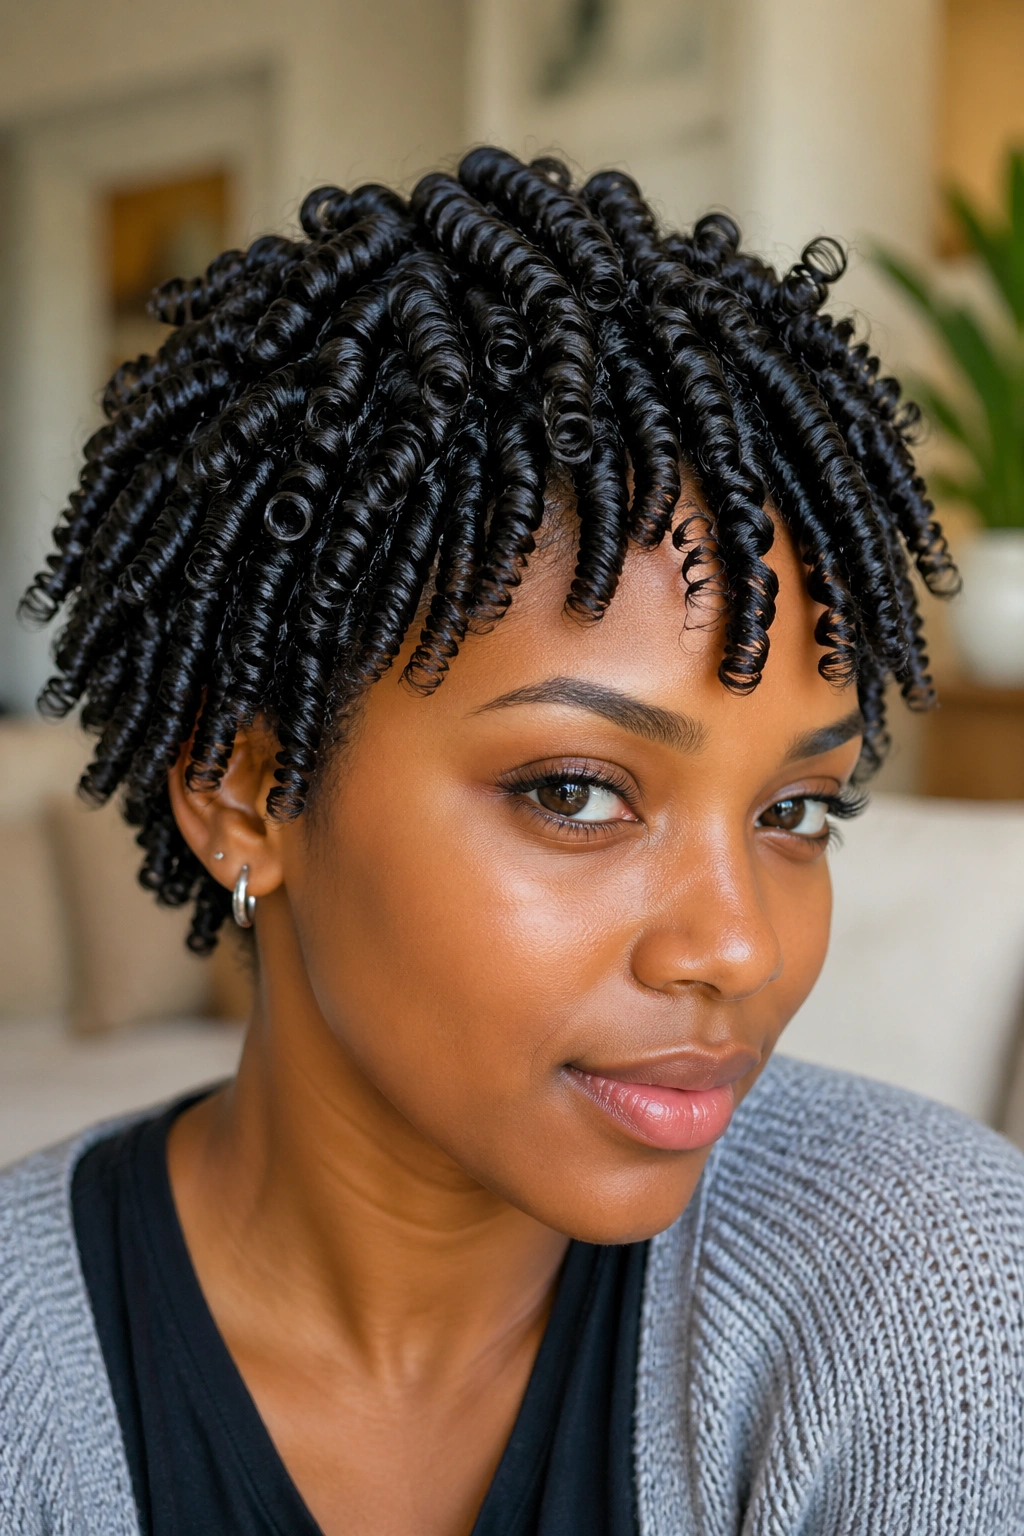
Finger coils are the definition of a time-consuming-but-totally-worth-it style. Each individual coil is formed by winding a small section of hair around your finger, from root to tip, creating a perfectly round, spring-like curl that looks almost too perfect to be real.
They’re most stunning on 4a and 4b hair, where the natural curl pattern grips the coil shape and holds it beautifully. The process is slow — plan for a few hours — but the result lasts for days, and the definition is unmatched by almost any other heat-free method.
How to Achieve
- Work on freshly washed, soaking wet hair
- Apply a defining gel or curl cream to each small section before coiling
- Wind the hair around your pointer finger from root to tip in one direction
- Slide your finger out carefully and let the coil spring up naturally
- Air-dry or diffuse on low — do not touch until fully dry
Separate finger coils very minimally for the most defined look, or pull them apart more aggressively for a curlier, less structured big curl effect.
8. Wash-and-Go with Shingling Technique
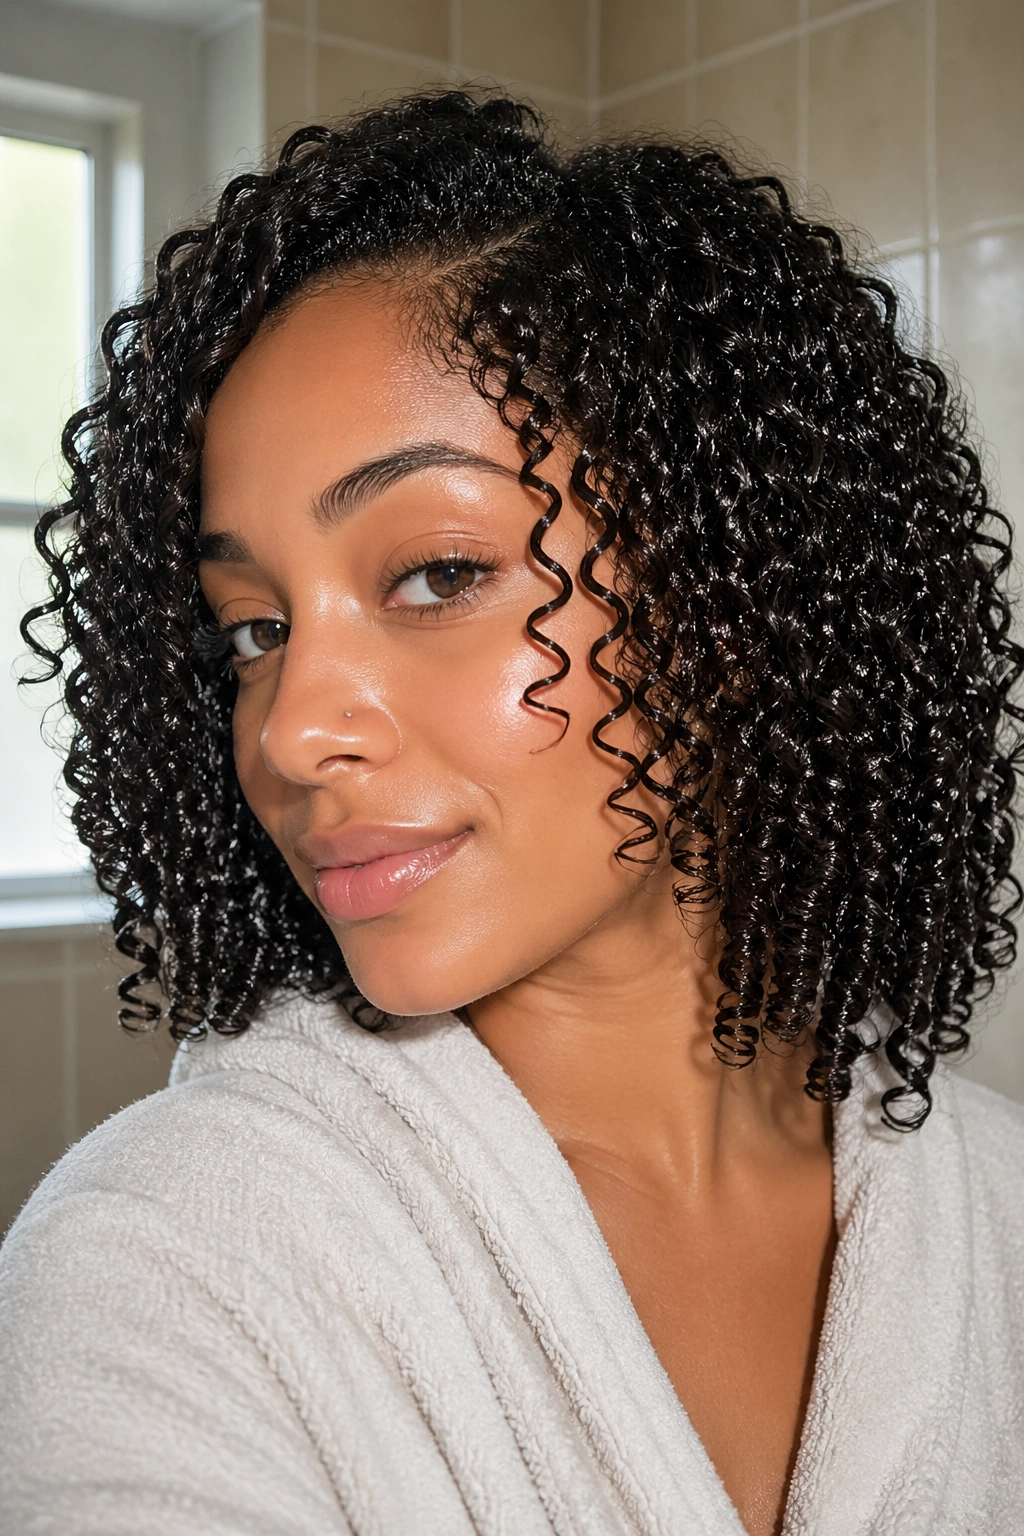
Shingling is a specific product application technique that takes the standard wash-and-go to another level. Instead of raking product through loosely, shingling involves smoothing small sections of product-coated hair strand by strand to encourage maximum curl definition and clumping.
This technique is a game-changer for naturals who struggle with frizz or undefined curl patterns. It’s time-intensive, but the payoff is a wash-and-go with visible, defined spirals that hold their shape even in humidity.
Work in small sections on soaking wet hair. Apply leave-in, then smooth your curl cream from root to tip in a downward motion, coating every strand. Then, without raking, smooth over the outside of the section to encourage the curls to clump together. Repeat across your entire head. Do not disturb your hair as it dries.
9. Stretched Wash-and-Go
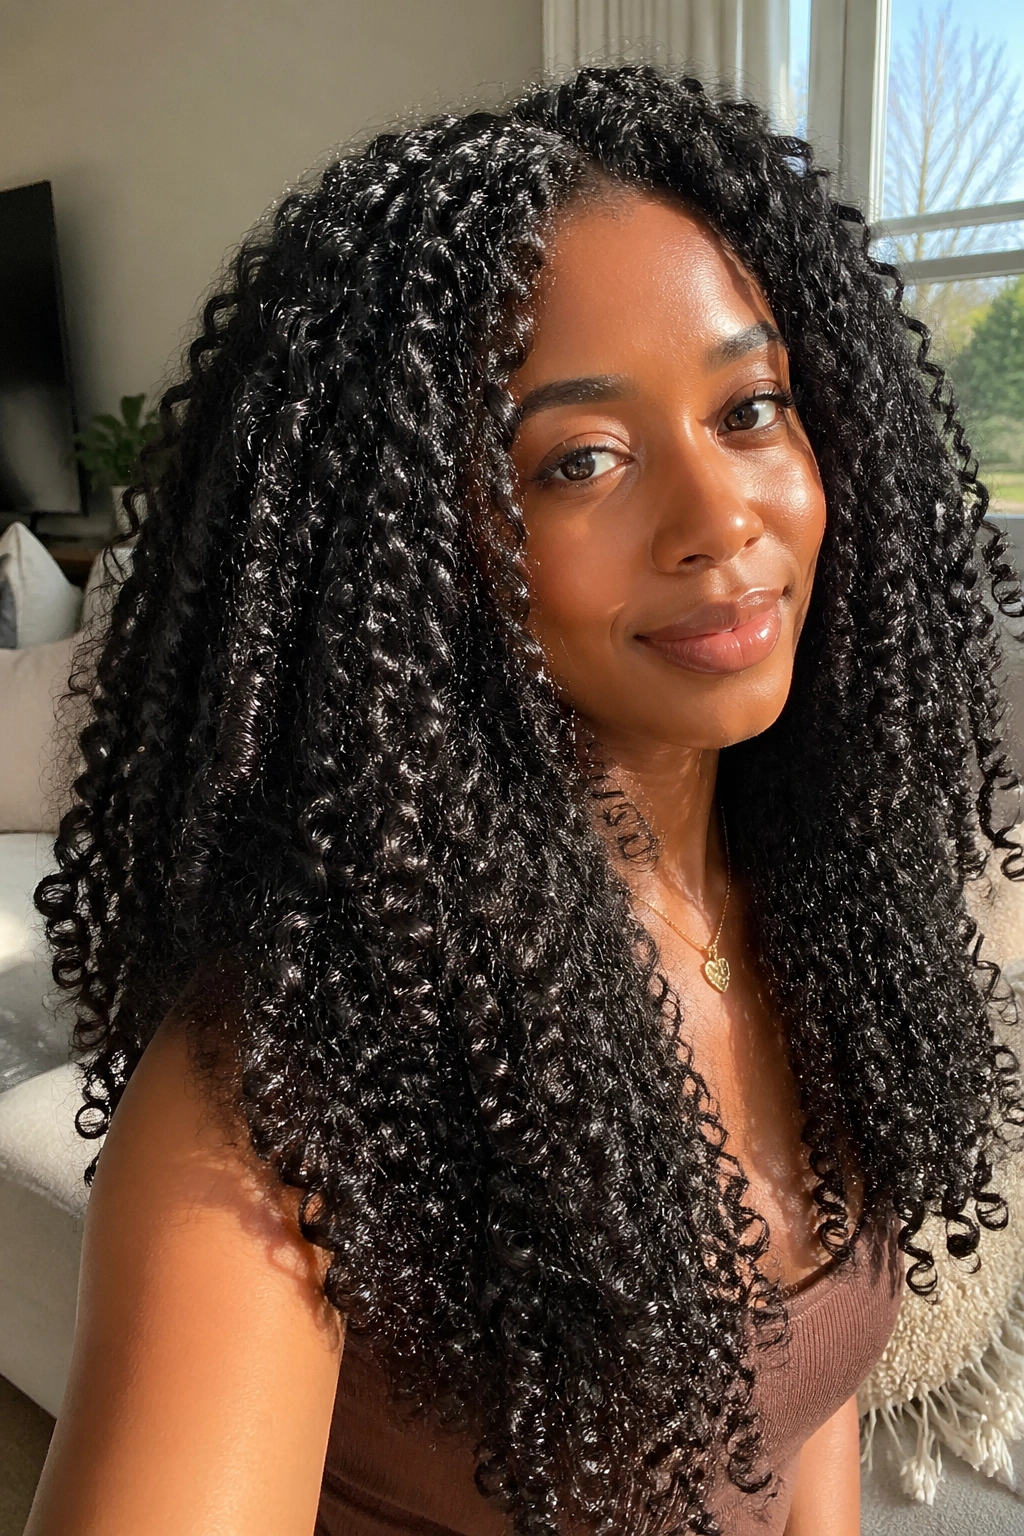
The stretched wash-and-go is for naturals who love their curl pattern but want more length and less shrinkage. By stretching your hair slightly during the drying process, your curls retain their shape and definition while appearing longer and more voluminous.
Banding is the most popular stretching method. After applying your products, divide your hair into sections and wrap small hair bands loosely down each section every inch or so. This prevents the hair from shrinking back on itself as it dries. Once dry, remove the bands and your curls will be elongated, defined, and significantly bigger-looking than a non-stretched wash-and-go.
Alternatively, you can air-dry in a loose puff or pineapple to achieve some natural stretch without banding. Both methods work — it just depends on how much length you want to show.
10. Roller Set with Mesh Rollers
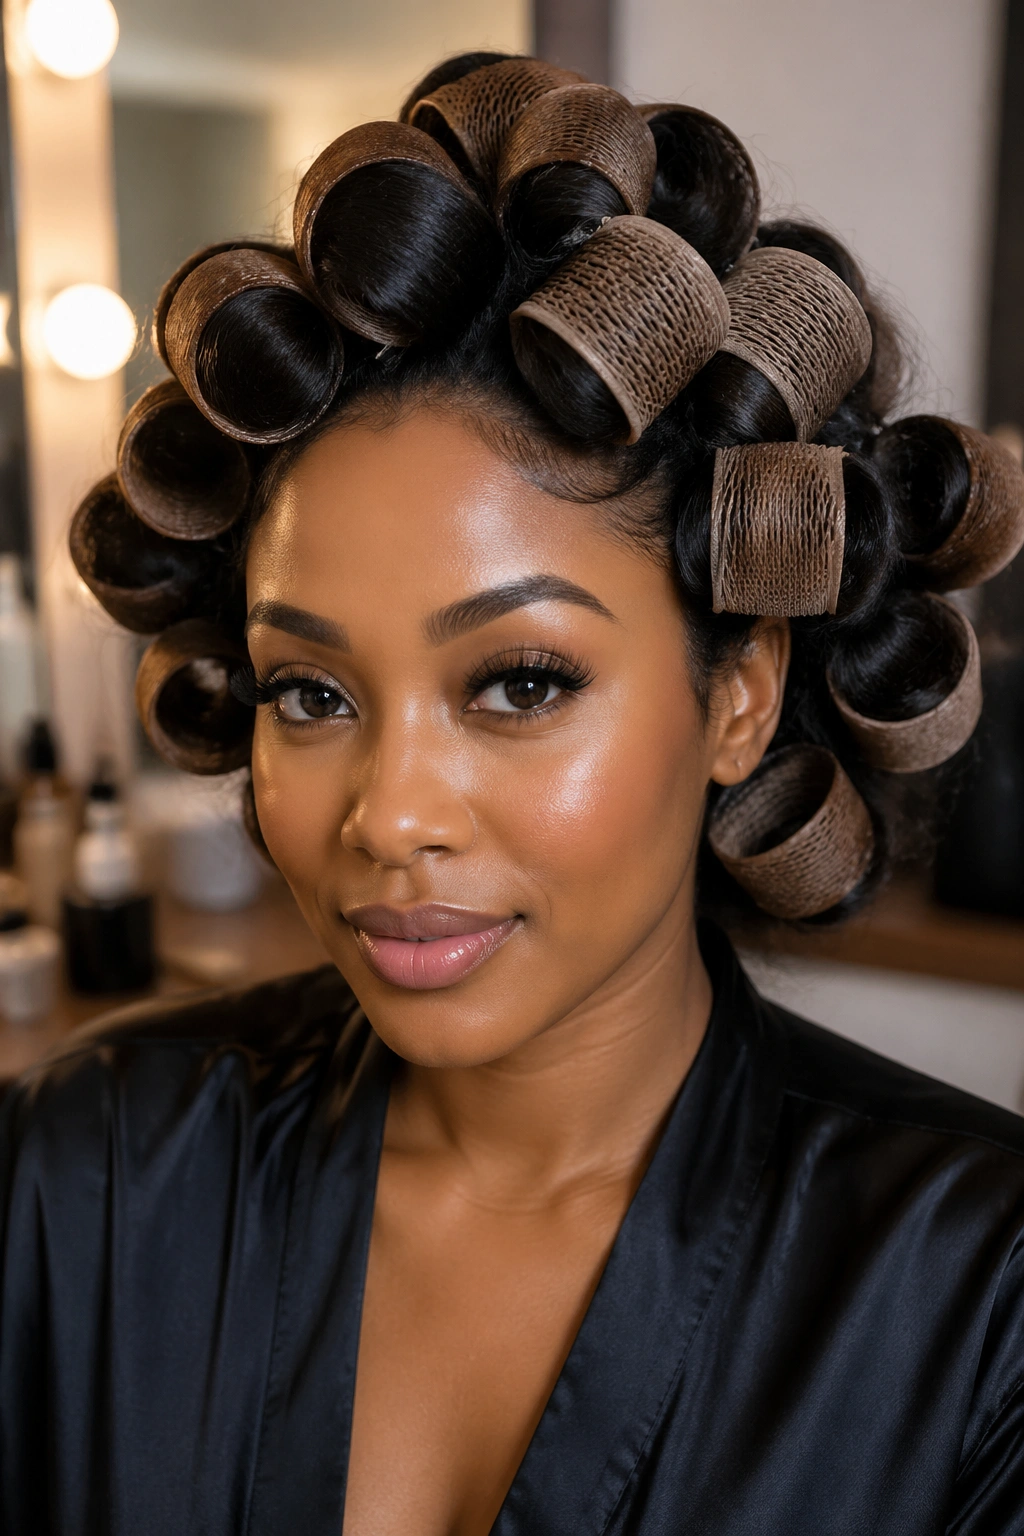
Mesh rollers are an underrated tool in the natural hair world. Unlike smooth rollers, the mesh texture grips the hair without slipping, making them ideal for achieving smooth, bouncy curls on natural hair with minimal frizz.
Set your rollers on damp, product-coated hair, rolling from tip to root. Secure with a roller pin and sit under a hooded dryer until completely dry. When you remove them, your curls should be smooth, round, and incredibly shiny. Separate gently with your fingers and fluff at the roots for volume.
This style mimics the look of a professional blowout-and-curl without the heat damage. It’s a great option for special occasions when you want defined, polished big curls that photograph beautifully.
11. Afro Puff with Defined Edges
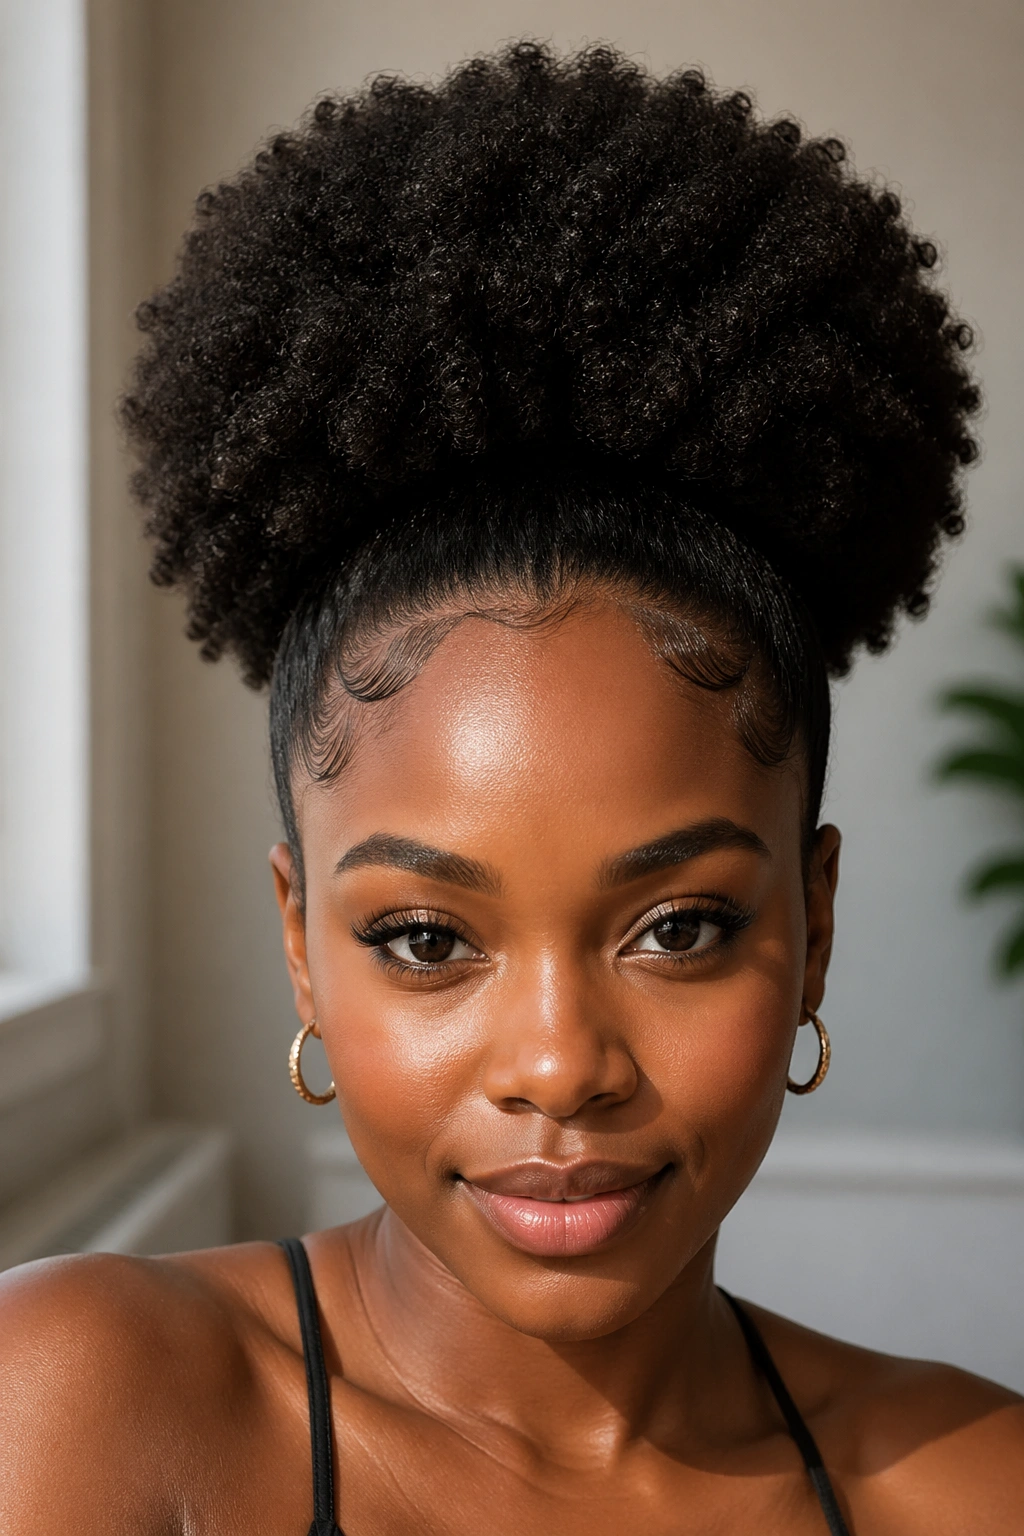
The afro puff is a classic natural hairstyle that’s both low-manipulation and stunning when done well. But when you pair it with defined, big curls left loose in the puff, it transforms into something truly bold.
Allow your hair to dry in its natural state, then gather it loosely at the crown or nape using a large satin scrunchie. The goal is to preserve as many of your natural curl clumps as possible rather than disrupting them into frizz. Smooth your edges with an edge control product and a soft bristle brush for a polished finish that contrasts beautifully with the voluminous puff on top.
This style works best as a day-two or day-three style when your curls have softened slightly but still have shape and definition.
12. High Puff with Curly Tendrils
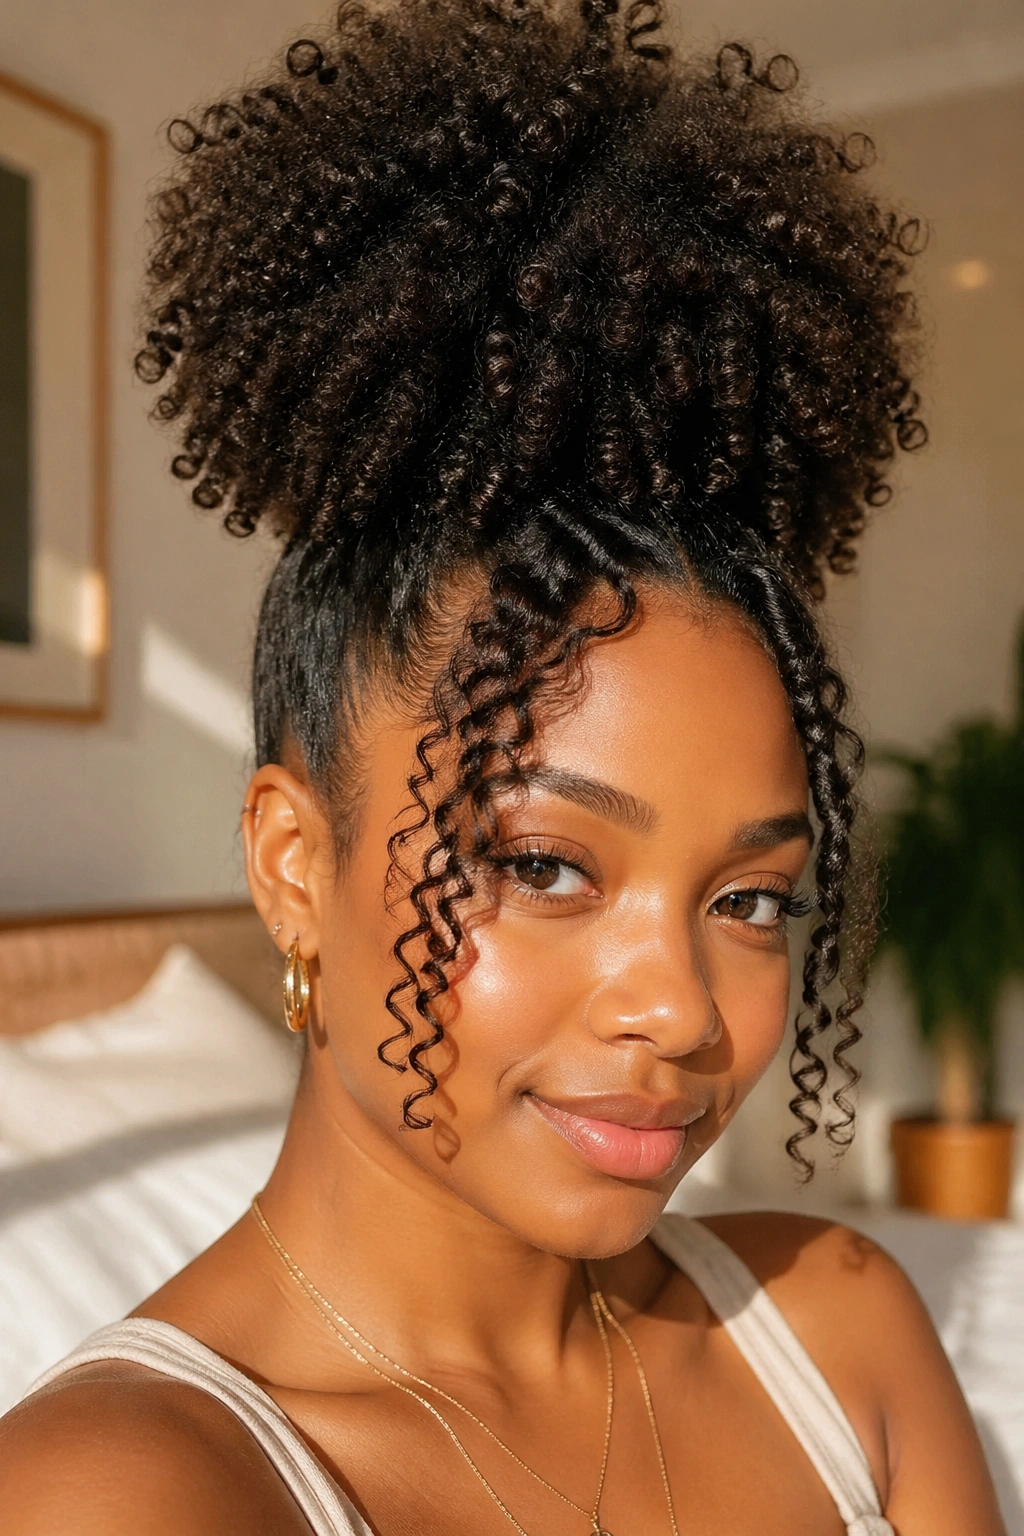
Take the classic puff up a level by letting a few curly sections fall free around your face as tendrils. This softens the look and makes it feel more intentional and styled rather than a basic ponytail alternative.
Pull most of your hair into a high puff, then release two sections at the front — one on each side of your face — and define them with a little extra gel or curl cream. You can coil them around your finger for extra definition or just let them fall naturally. The contrast between the big, voluminous puff and the delicate face-framing tendrils is incredibly flattering on almost every face shape.
13. Chunky Twist-Out
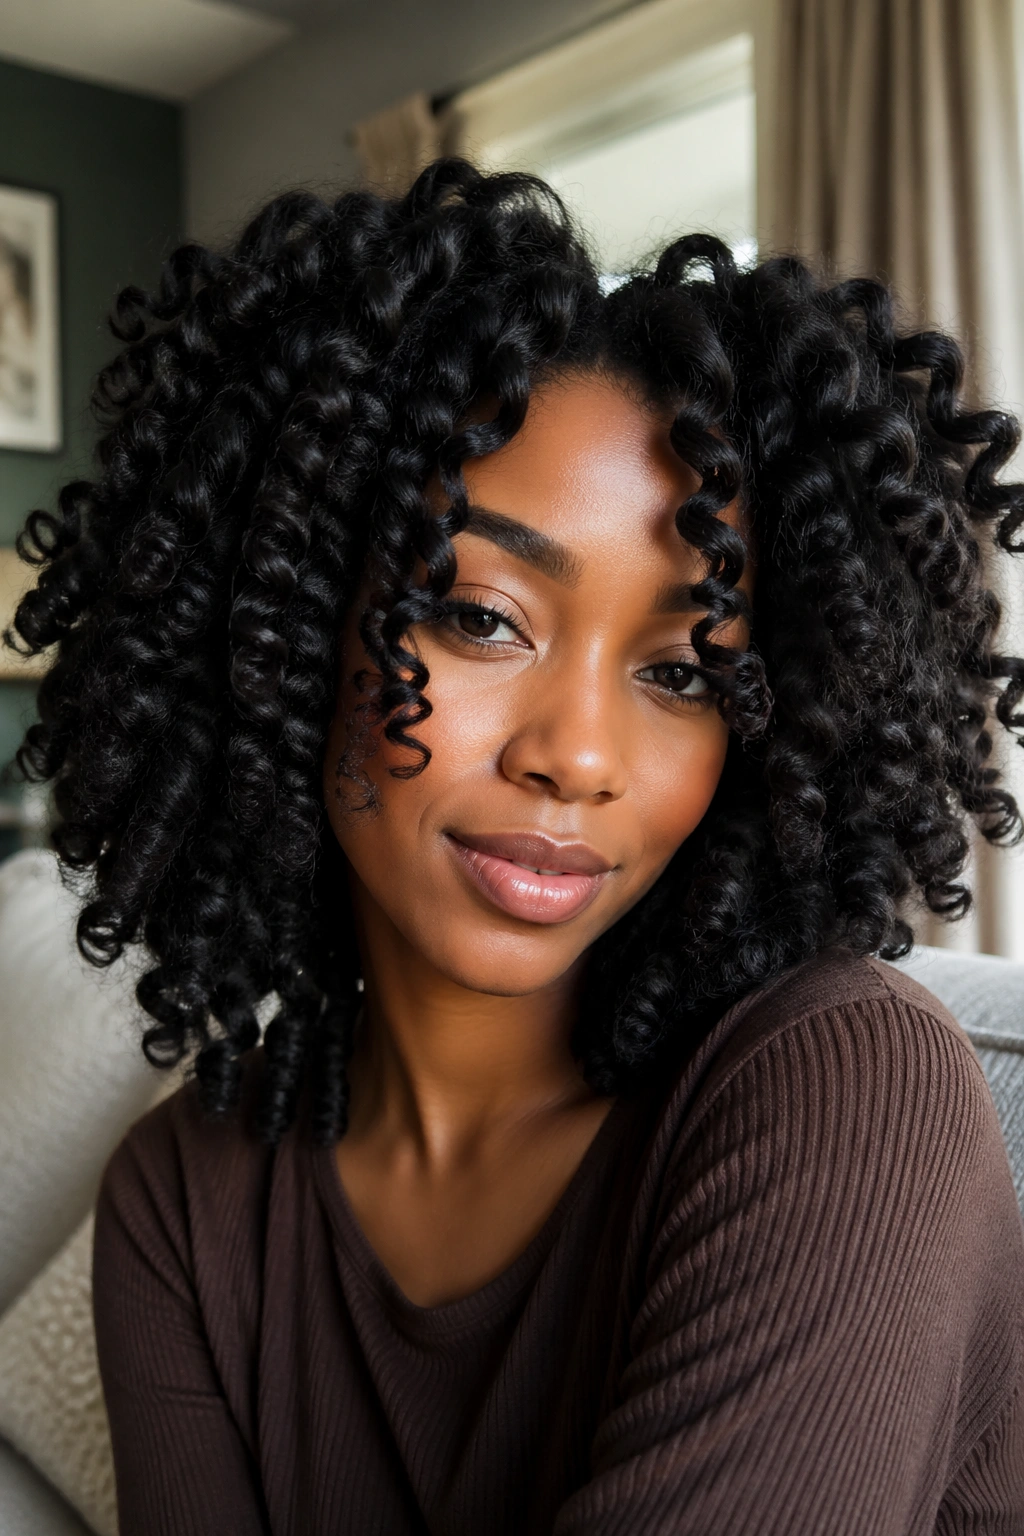
A chunky twist-out uses significantly larger sections than a standard twist-out, resulting in bigger, looser curls with enormous volume. This is one of the best styles for 4a and 4b hair types who want a defined curl pattern with serious size.
Divide your hair into 8-12 large sections rather than the 15-20 smaller sections you’d use for a standard twist-out. Condition generously, apply a thick curl cream, and two-strand twist each large section. Let them dry fully — ideally overnight — then unravel slowly and separate as much as you want. The size of the original twist translates directly to the size of the final curl. Big twists equal big curls.
Tips for Maximum Volume
- Fluff roots with an afro pick after separating
- Apply a small amount of oil to fingertips before separating to reduce frizz
- Shake your head gently to distribute volume evenly
14. Straw Set
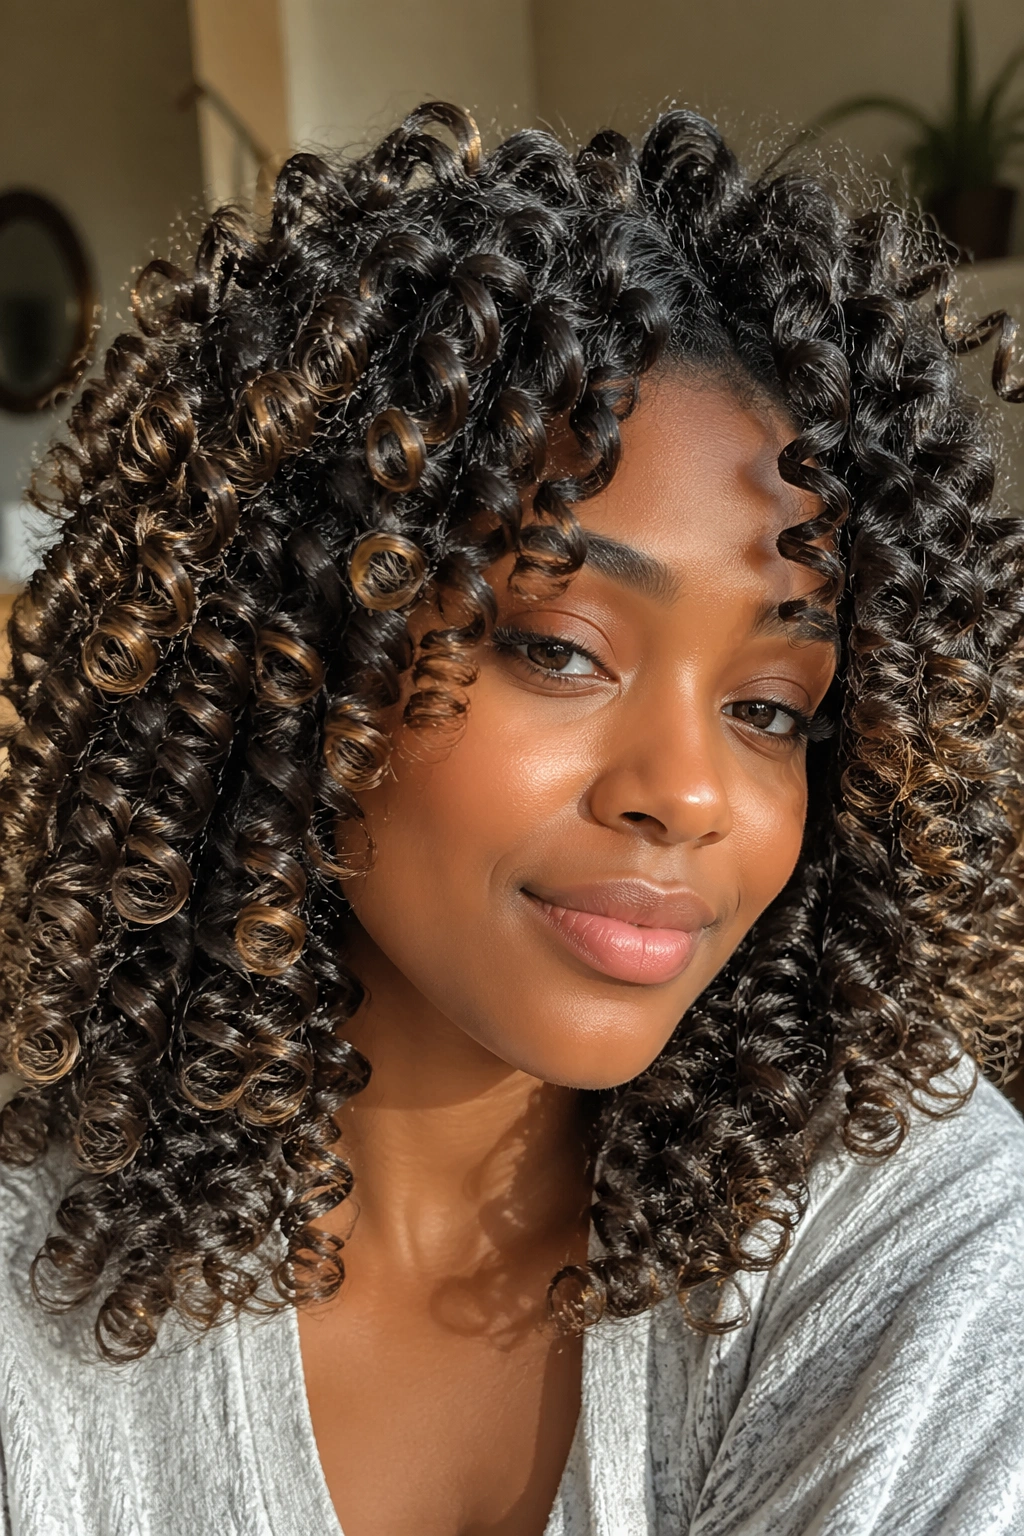
Straw sets produce some of the tightest, most defined spiral curls possible on natural hair without a curling iron. The technique uses actual drinking straws as tiny rollers, creating pencil-thin spirals that cluster together for a gorgeous, defined big curl effect when separated.
This style takes patience. Plan on wrapping anywhere from 40 to 100+ small sections of hair around individual straws depending on your hair’s density and length. Apply a holding mousse or setting lotion before wrapping each section from tip to root, then bend the straw to hold it in place. Sit under a dryer or air-dry overnight, then carefully remove the straws and gently separate the coils.
The result is extraordinary — a full head of bouncy, spring-like curls that have a distinct, romantic quality you just can’t replicate with any other technique.
15. Two-Strand Twist-Out with Curling Wand Ends
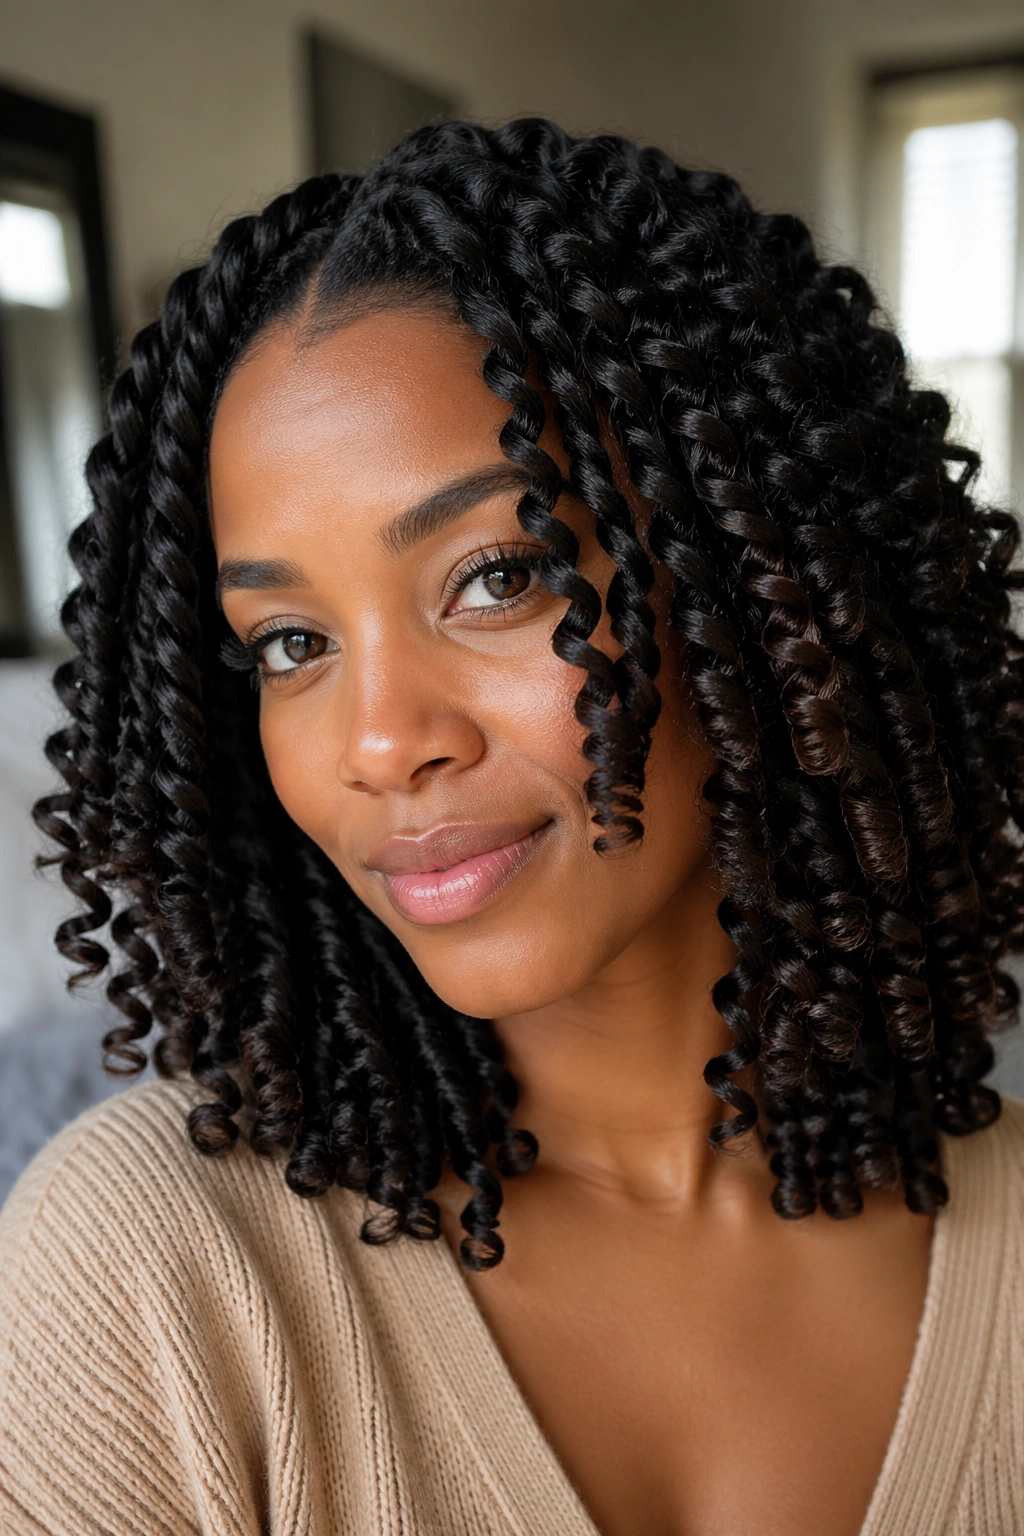
Combining a heat-free base with a touch of heat at the ends gives you the best of both worlds — the volume and texture of a twist-out with polished, bouncy tips that resist frizz.
Do your standard two-strand twist-out as normal, then once your twists are fully dry and you’ve unraveled them, use a curling wand to re-curl just the last inch or two of each section. This keeps the mid-section and roots free from heat damage while giving your ends that extra pop of definition and shine.
Use a heat protectant on your ends before touching them with any heat, and keep the wand away from your roots entirely. The result looks incredibly polished while the bulk of your hair remains completely heat-free.
16. Wash-and-Go with Diffuser Styling
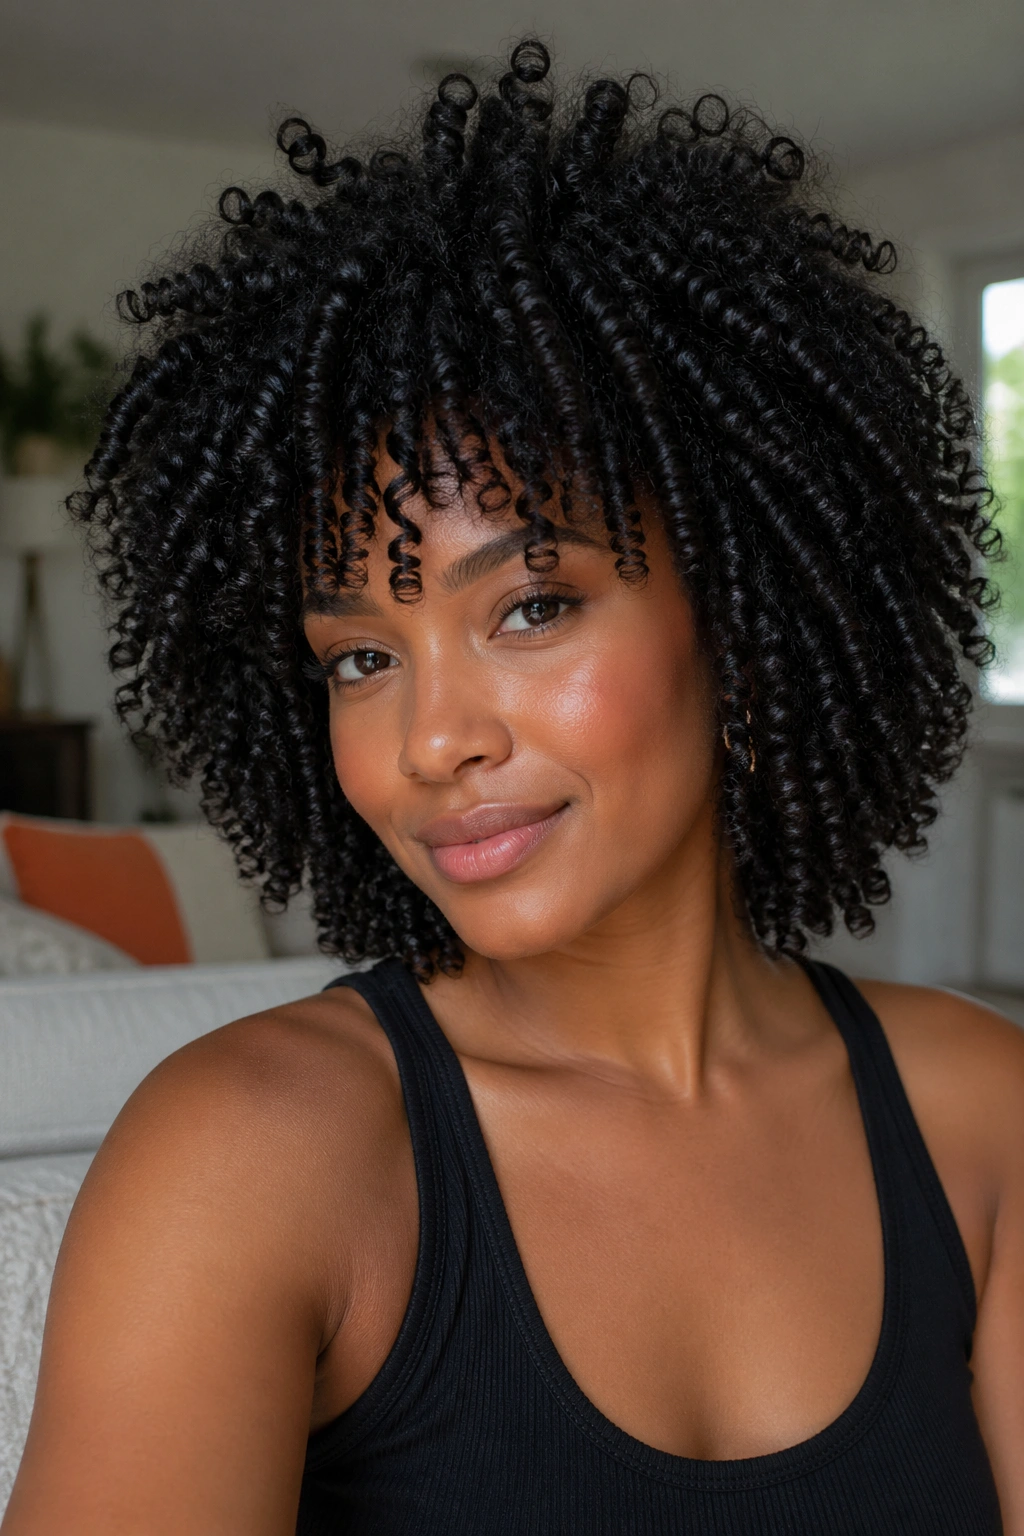
Diffusing is probably the single most effective way to add volume to a wash-and-go without sacrificing curl definition. The diffuser’s bowl shape cups your curls and lifts them at the root as the air dries them, creating natural-looking volume that air-drying simply can’t match.
Hover-diffusing — holding the diffuser close but not touching your curls — is the gentlest method. Scrunching your curls up into the diffuser bowl while the heat is blowing works faster. Or flip upside down and diffuse your roots first for maximum lift, then right yourself and diffuse the mid-lengths and ends.
Always start on the lowest heat setting, even if it takes longer. High heat on product-coated natural hair can cause frizz and disrupt your curl pattern mid-dry. Low and slow always wins.
17. Half-Up, Half-Down Curly Style
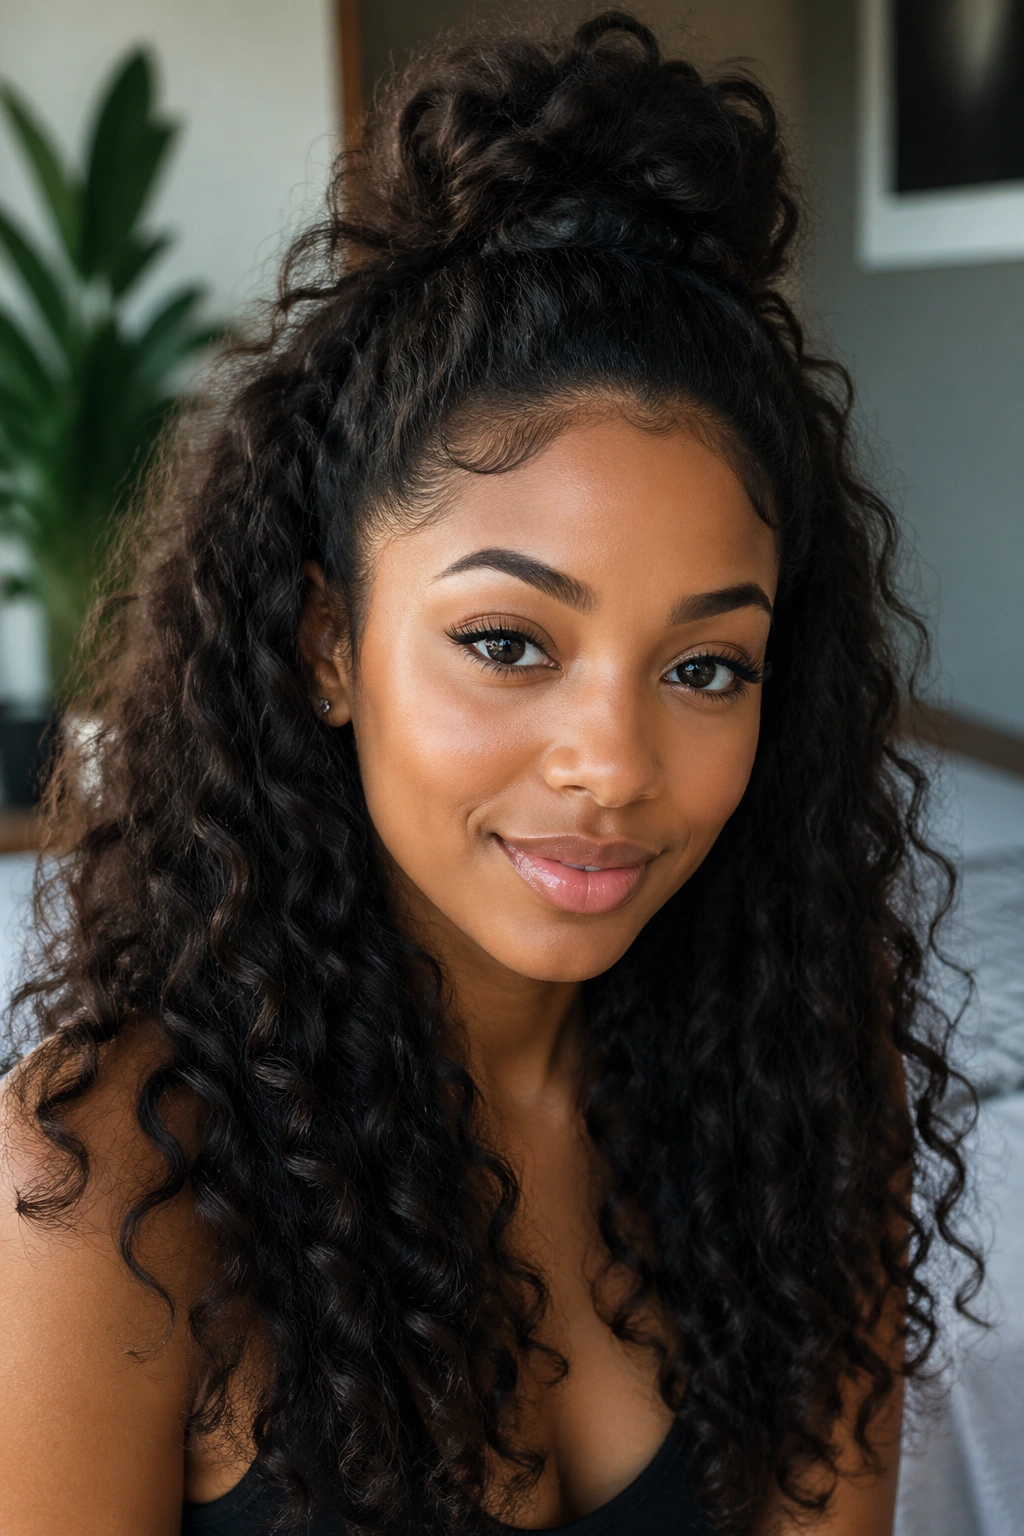
The half-up, half-down style is a beautiful way to show off big curls while keeping some of your hair away from your face. It’s incredibly flattering, works on almost every curl pattern and length, and takes about two minutes to execute.
Define your curls first using your preferred method — wash-and-go, twist-out, or rod set — then gather the top half of your hair into a loose, high pony or bun. The key word is loose. You don’t want to pull so tightly that you flatten the curls on the crown. Instead, gather them gently and secure with a large satin scrunchie that won’t crease your curls.
Let the bottom half hang free in all its curly glory. You can add a few hair accessories — a satin headband, pins, or flowers — at the point where the two sections meet for a more polished look.
18. Big Curly Frohawk
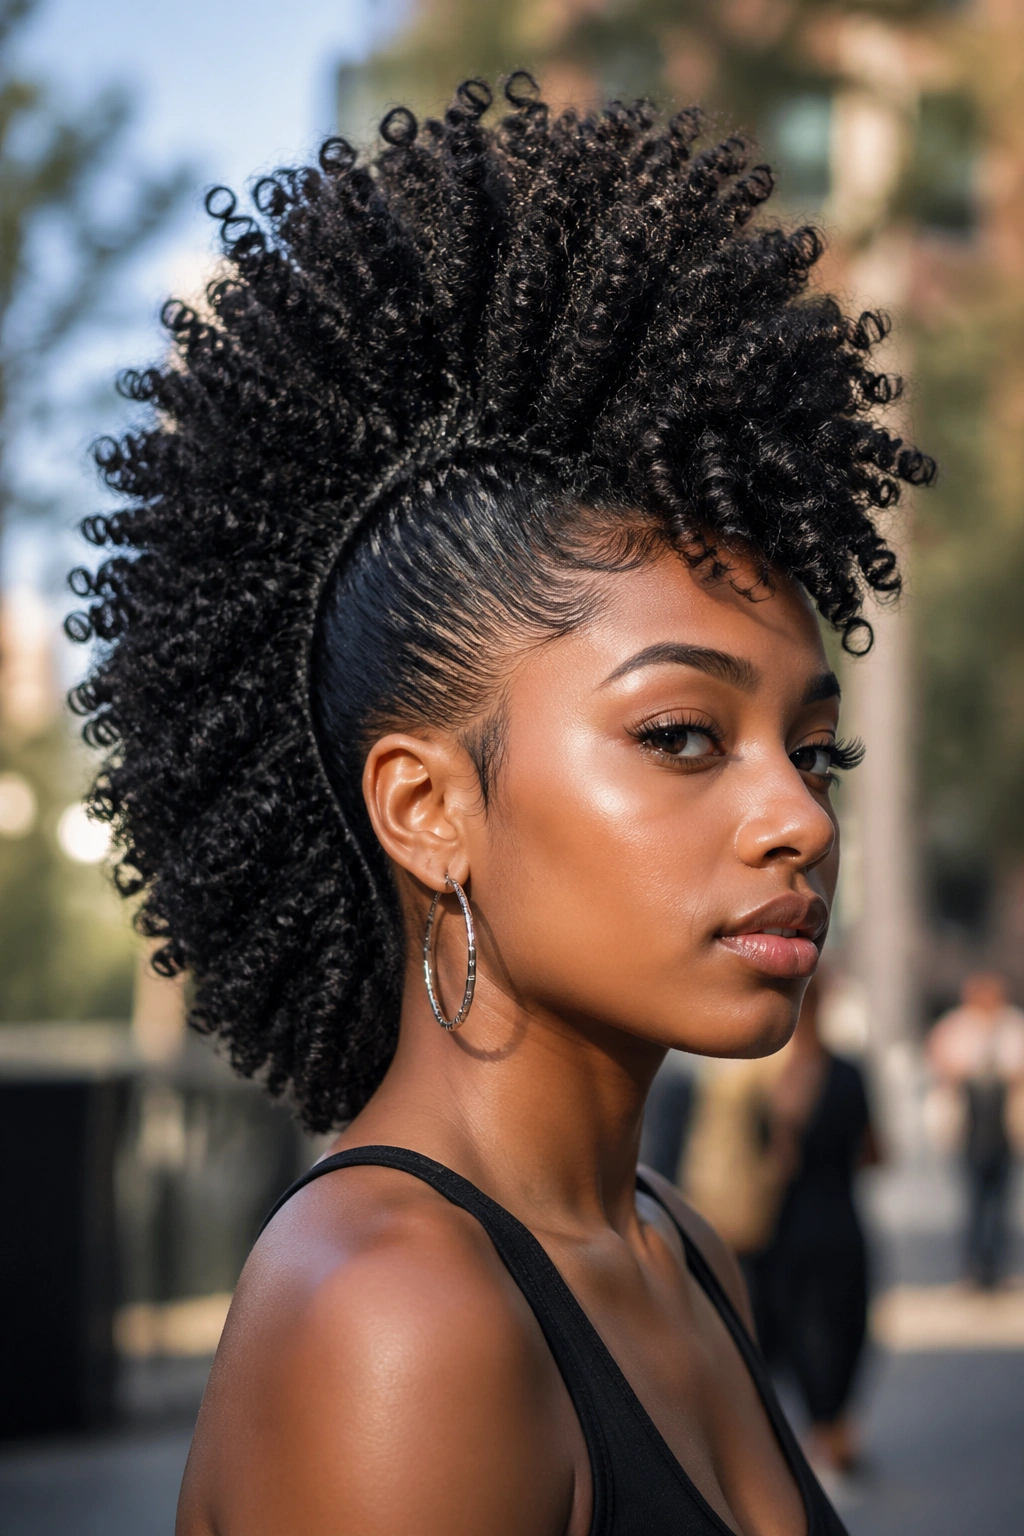
The frohawk takes the boldness of a mohawk silhouette and pairs it with natural curls for a style that’s edgy, beautiful, and unmistakably intentional. It works on natural hair by slicking or pinning the sides while allowing the curls at the center-top of the head to stand tall and full.
There are several ways to achieve the frohawk look without cutting your hair. You can pin the sides using bobby pins or small barrettes to fold them flat. You can use a light gel to smooth the sides close to your head. Or you can create a series of small flat twists along each side, leading up to the full curly section at the top and center.
The center curls should be at their most voluminous — diffused, fluffed, and picked out for maximum height and fullness. This style makes a serious statement.
19. Curly Updo with Loose Face-Framing Pieces
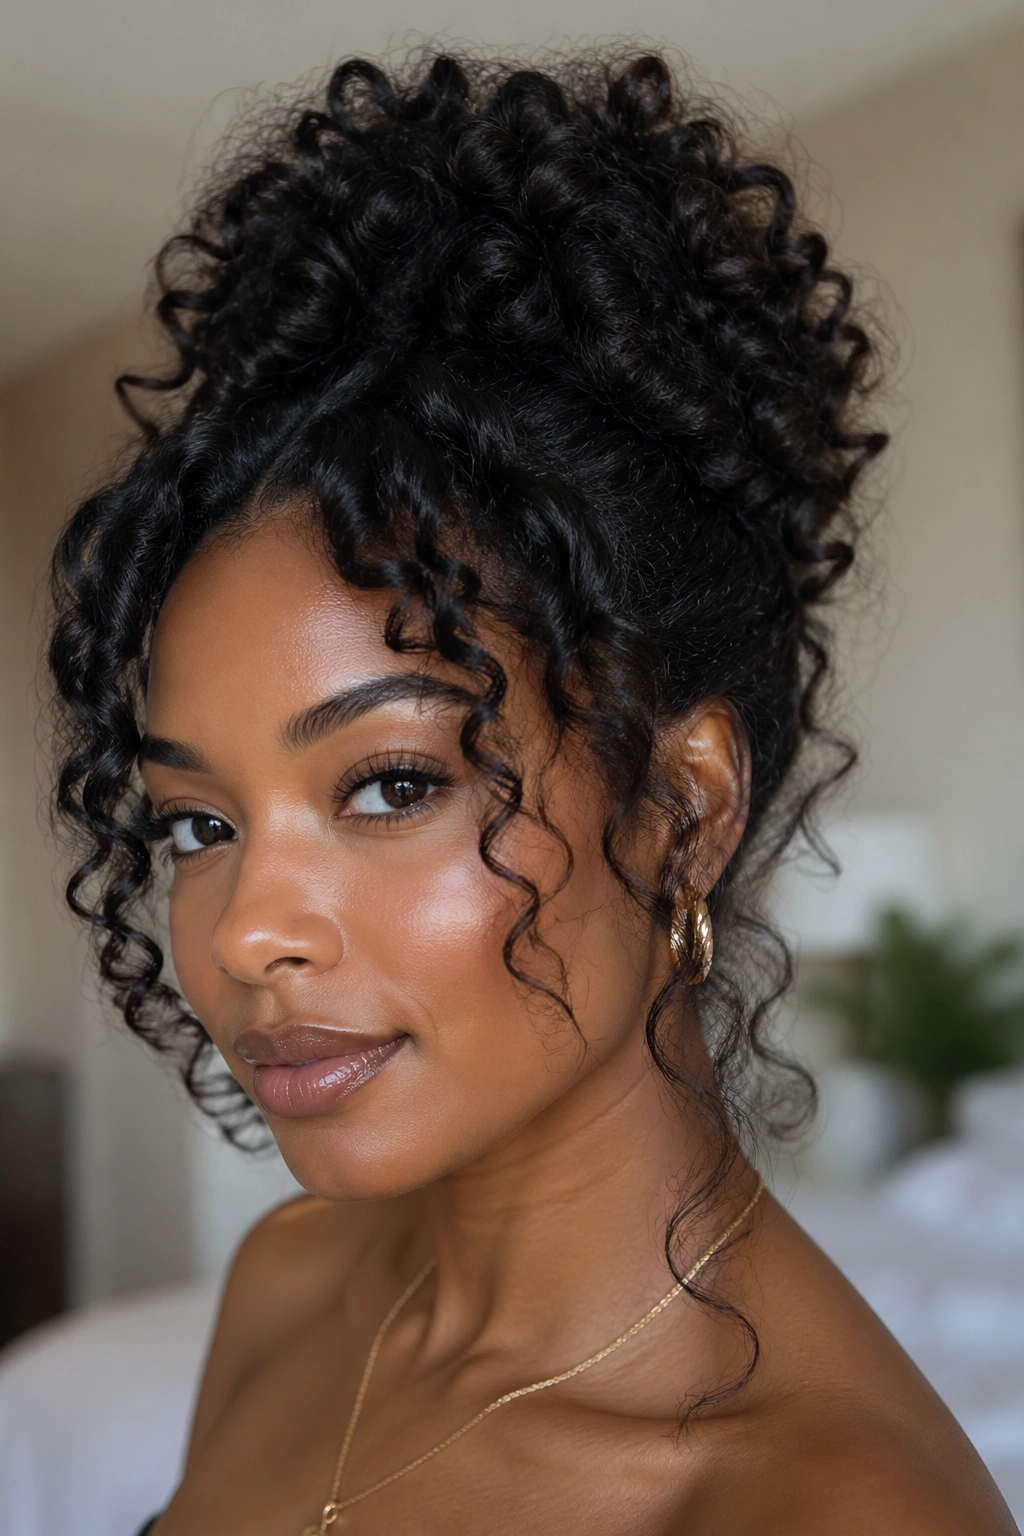
Updos don’t have to mean straight, slicked-back, or boring. A curly updo that piles your big curls up at the crown or nape while leaving a few spirals loose around the face is one of the most romantic and effortlessly beautiful styles for natural hair.
Gather your defined curls into a loose, messy bun or curly top knot, pinning sections in place with bobby pins. Deliberately pull a few smaller sections out at the front and sides, then re-coil them around your finger or a pencil to define them. The intentional imperfection is what makes this style look styled rather than sloppy.
Great for weddings, date nights, or any occasion where you want your hair up but still want to show off your curl pattern.
20. Fro-Hawk Braid Combo
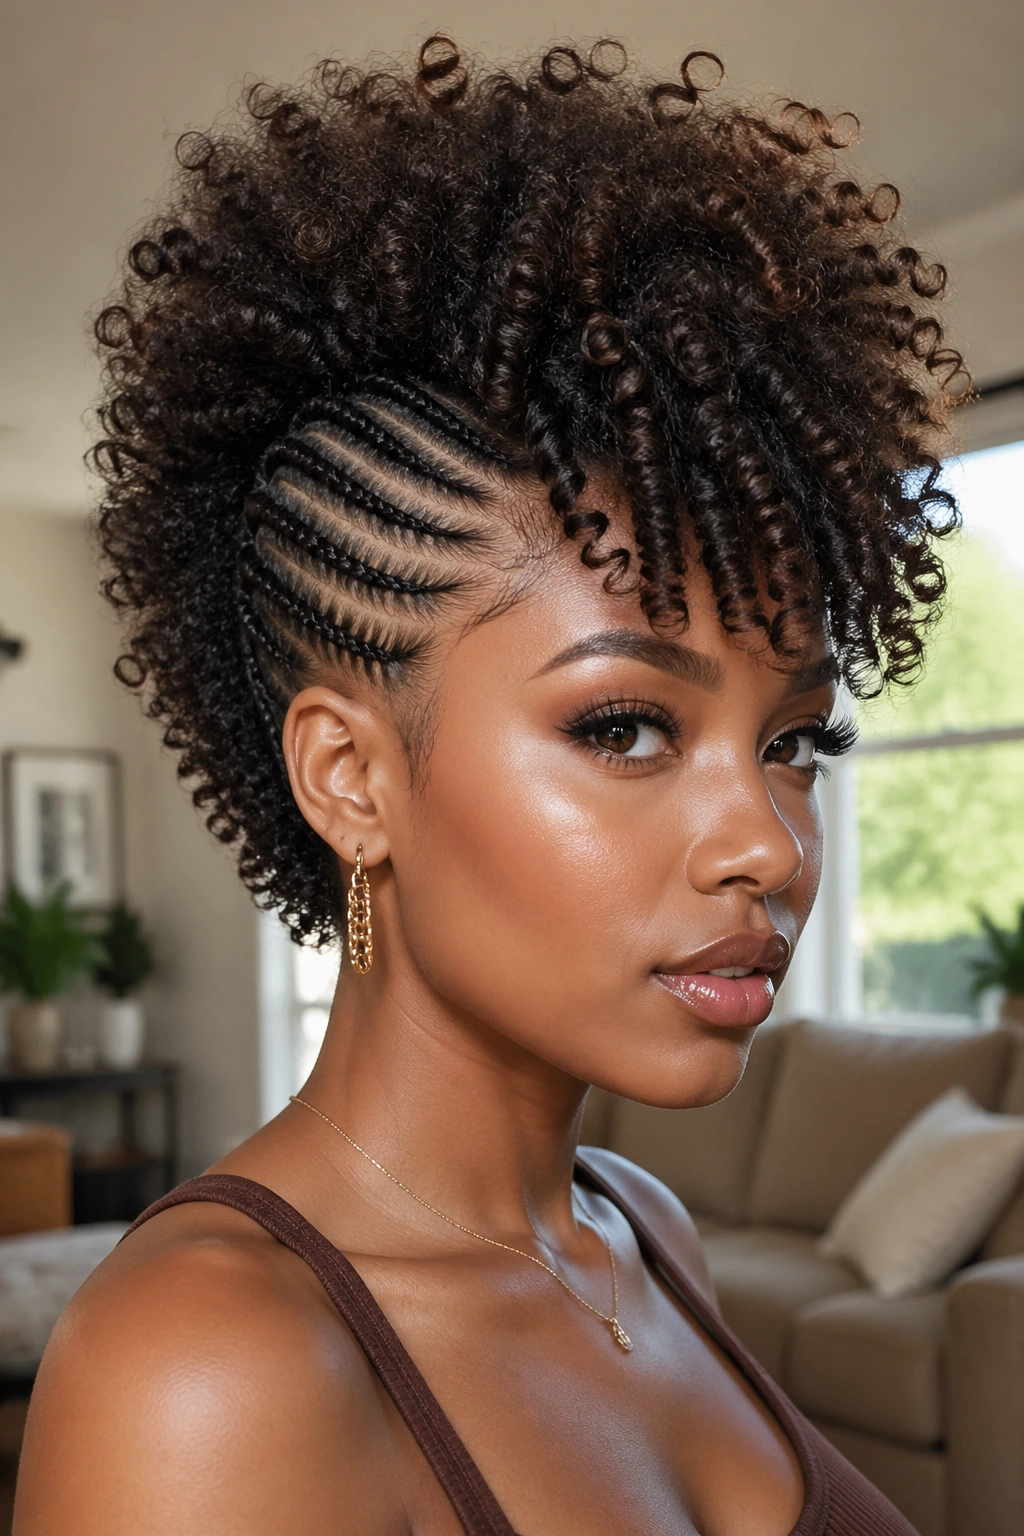
Elevate the standard frohawk by incorporating flat braids along the sides that feed into the big curly section at the top. The braids add structure and a sculptural element that makes the overall style look more intentional and complex — even though it’s not actually that difficult to achieve.
Flat braid (cornrow) the sides of your head leading toward the center, keeping the braids tight and close to the scalp. Leave the top section of your hair free and style it into your biggest, most voluminous curls using whatever method works best for you. The contrast between the sleek braided sides and the full, free curls on top is striking.
21. Curly Bob Effect
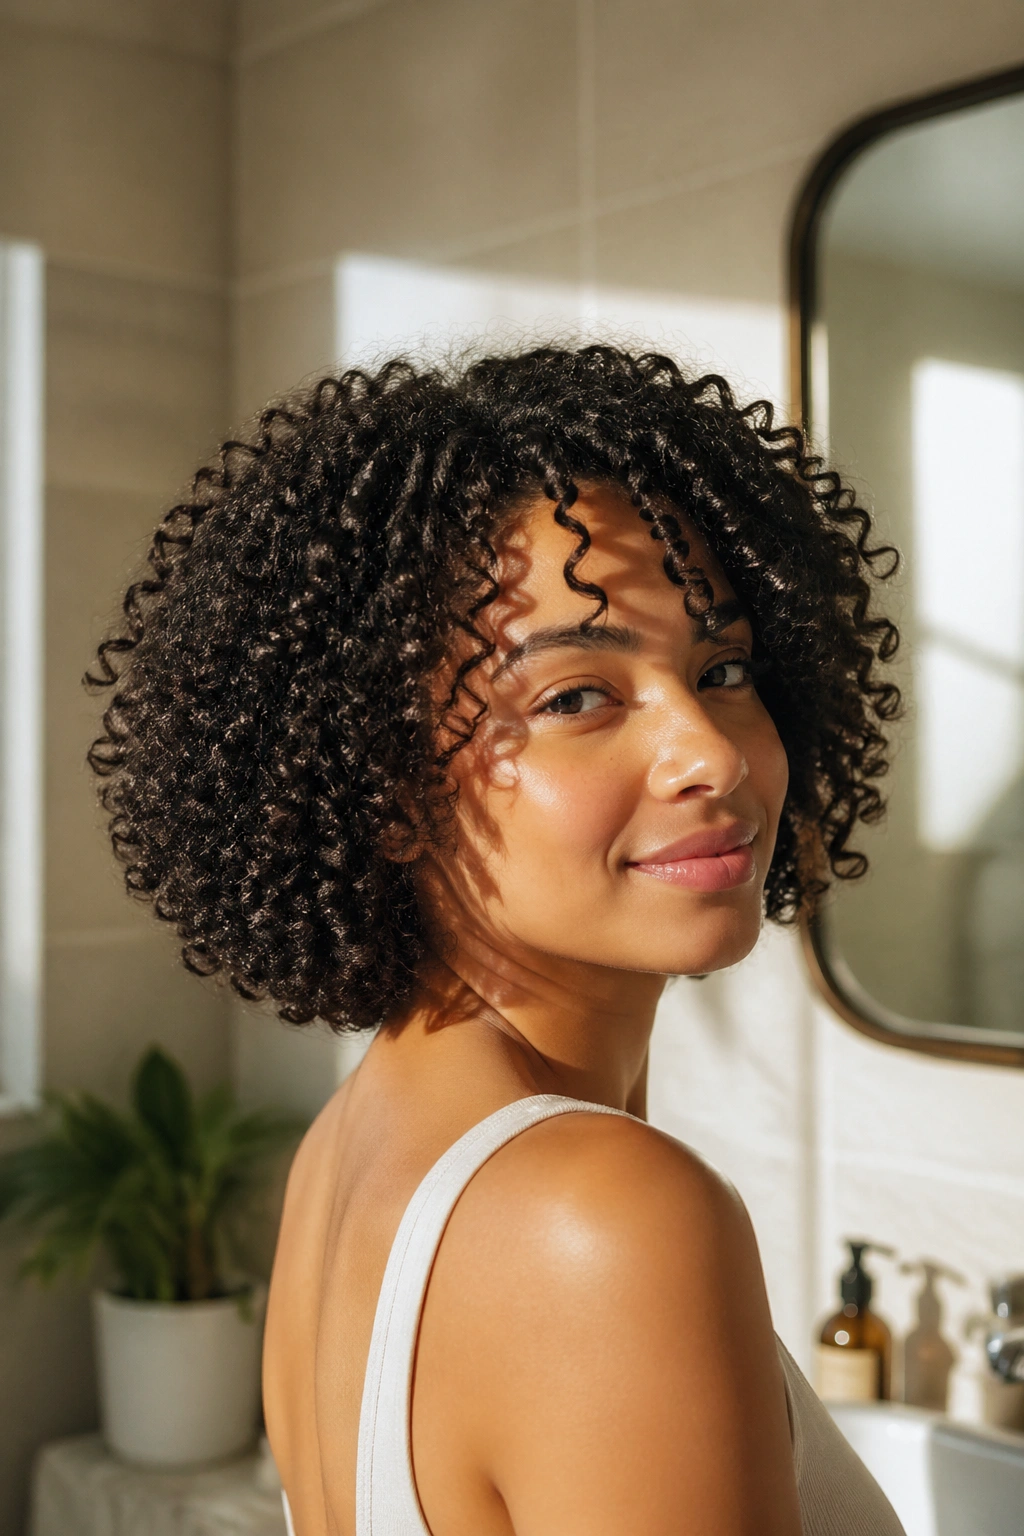
A curly bob look on natural hair isn’t achieved by cutting — it’s achieved by letting shrinkage work in your favor. If your hair is mid-length when stretched but shrinks to chin or shoulder length, congratulations: you already have a natural curly bob.
Style your wash-and-go or twist-out and let it do its thing. Don’t stretch. Don’t pull. Let the shrinkage bring your curls to that bob-length silhouette naturally. You can refine the shape slightly by trimming any stray longer pieces that fall below the bob line, but the shape largely takes care of itself.
This look is incredibly chic and photographs beautifully. It’s also a great option when you want to show off the full density and depth of your natural curl pattern without worrying about length.
22. Curly Side Sweep
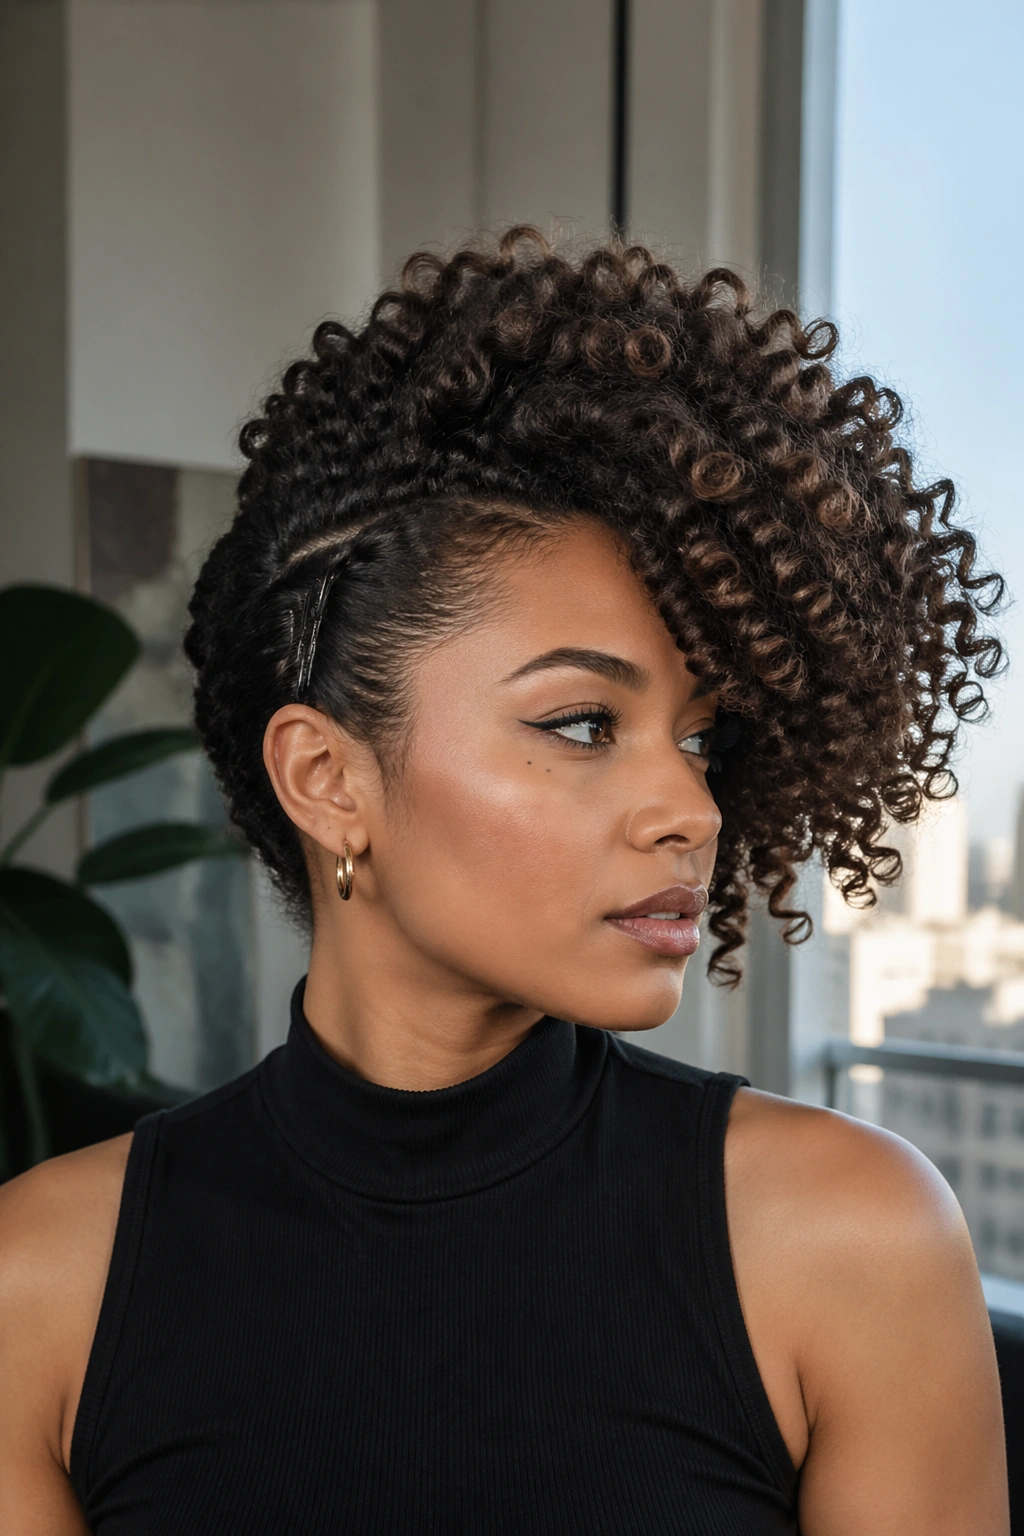
A curly side sweep plays with asymmetry to create a dramatic, editorial look that works on both short and longer natural hair. Rather than wearing your curls evenly on both sides, you sweep the bulk of them to one side and secure the other side close to your head.
Use a wide-tooth comb or your fingers to guide your curls toward one side of your face after styling. Secure the opposite side with pins, a sleek flat twist, or a jeweled barrette close to your head. The dramatic sweep of big curls to one side creates a silhouette that looks professionally styled and incredibly intentional.
23. Defined Coil-Out
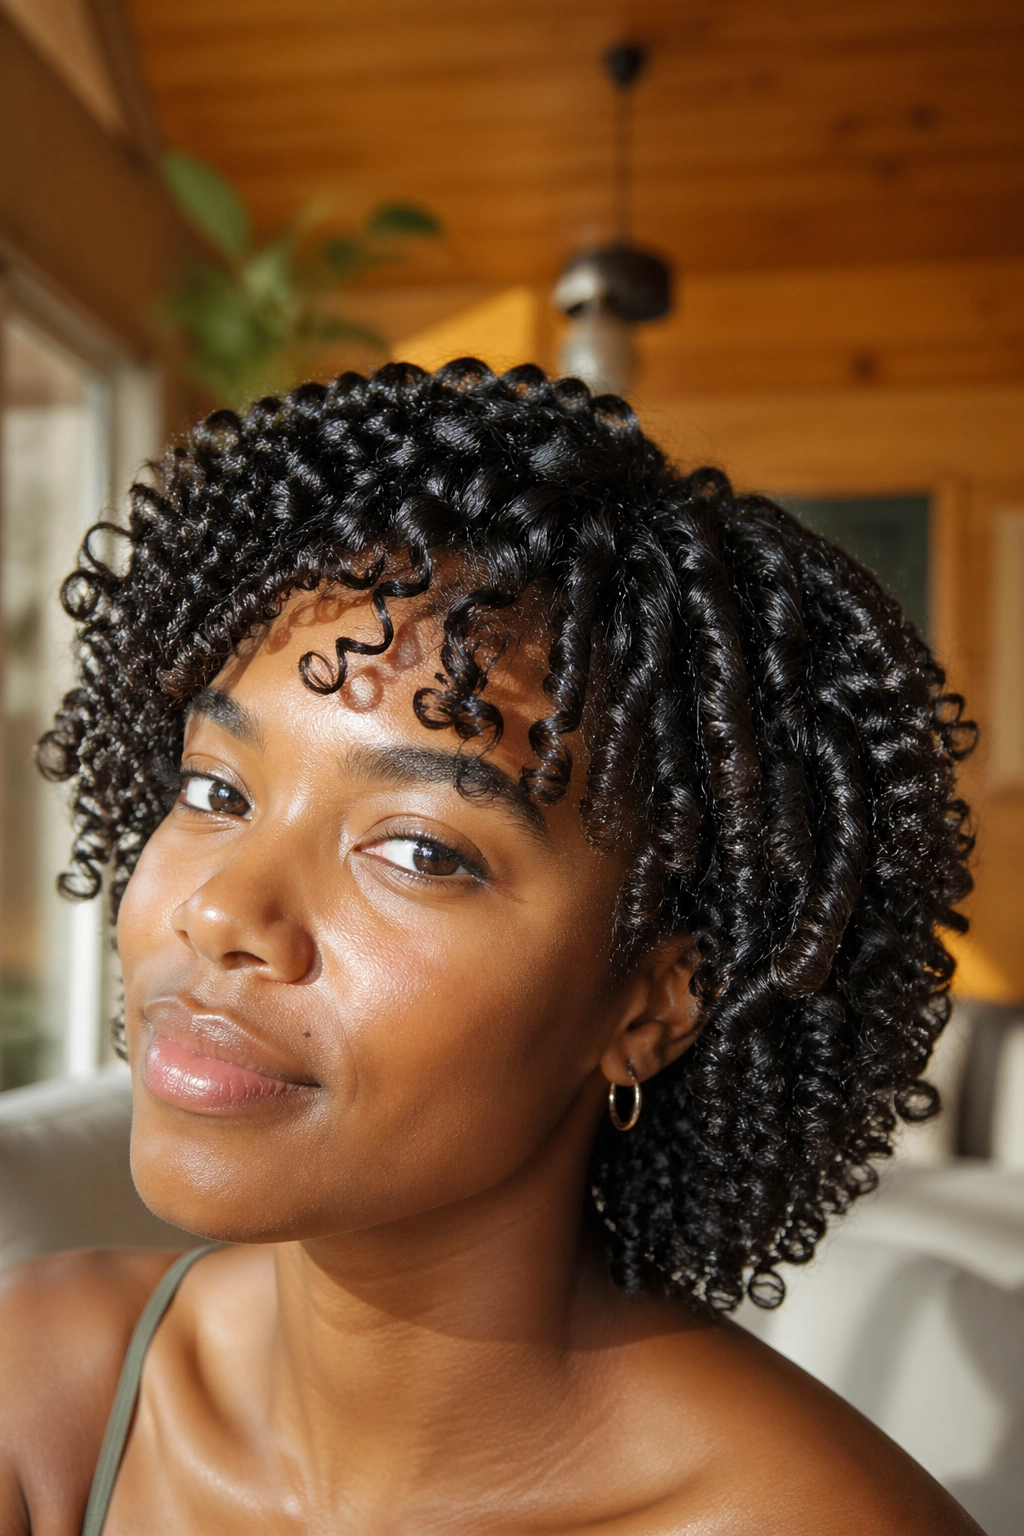
A coil-out is similar to a twist-out but uses single-strand coils rather than two-strand twists to set the pattern. Each section is coiled in one direction around your finger or a styling tool, creating a slightly different curl definition — rounder, more uniform, and often with more shine.
Apply a curl pudding or thick cream to each damp section, then coil the entire section around your index finger, sliding your finger out at the end. Leave the coils to dry fully before separating. The coil-out tends to have a tighter, more defined pattern than a twist-out, making it ideal for showcasing your natural curl shape.
24. Curly Mohawk with Flat Twist Sides
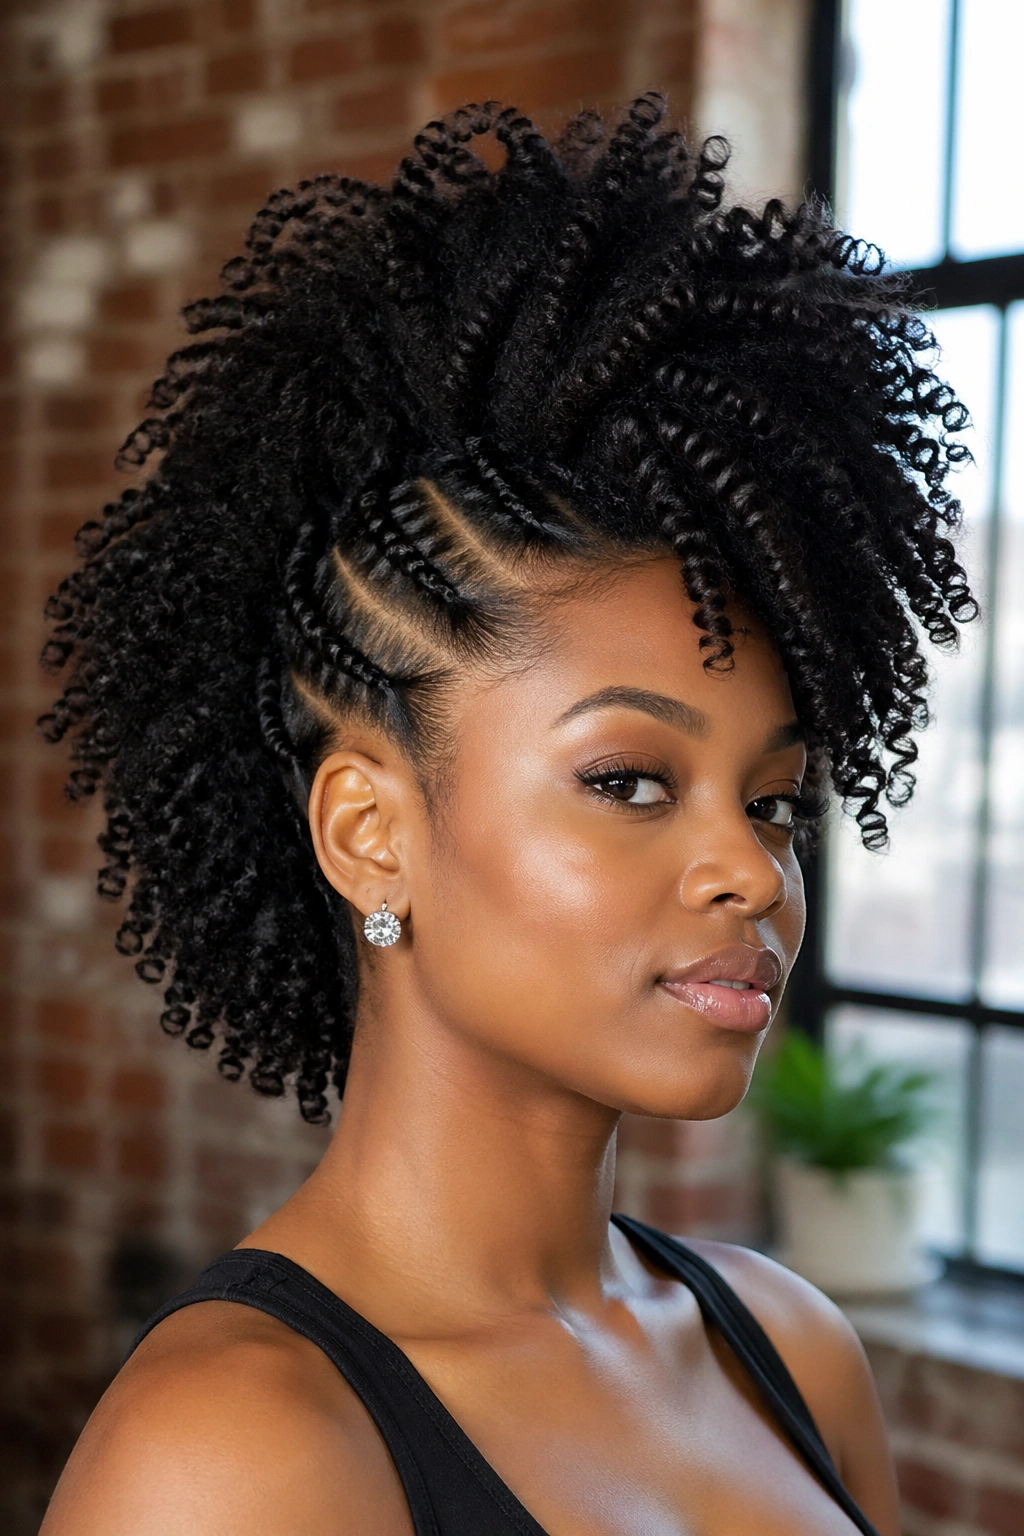
Rather than pinning the sides flat, a more polished version of the curly mohawk uses flat twists along the sides that lead up to the curly section. Flat twists lie close to the scalp and look incredibly neat, giving the style a professional finish.
Create two or three flat twists along each side of your head, angling them upward toward the center. Where they meet, the twists can be pinned or tucked under to blend into the free curly section above. The center curls should be styled for maximum volume — picked out, diffused, and fluffed to be as big as possible.
25. Big Curly Ponytail
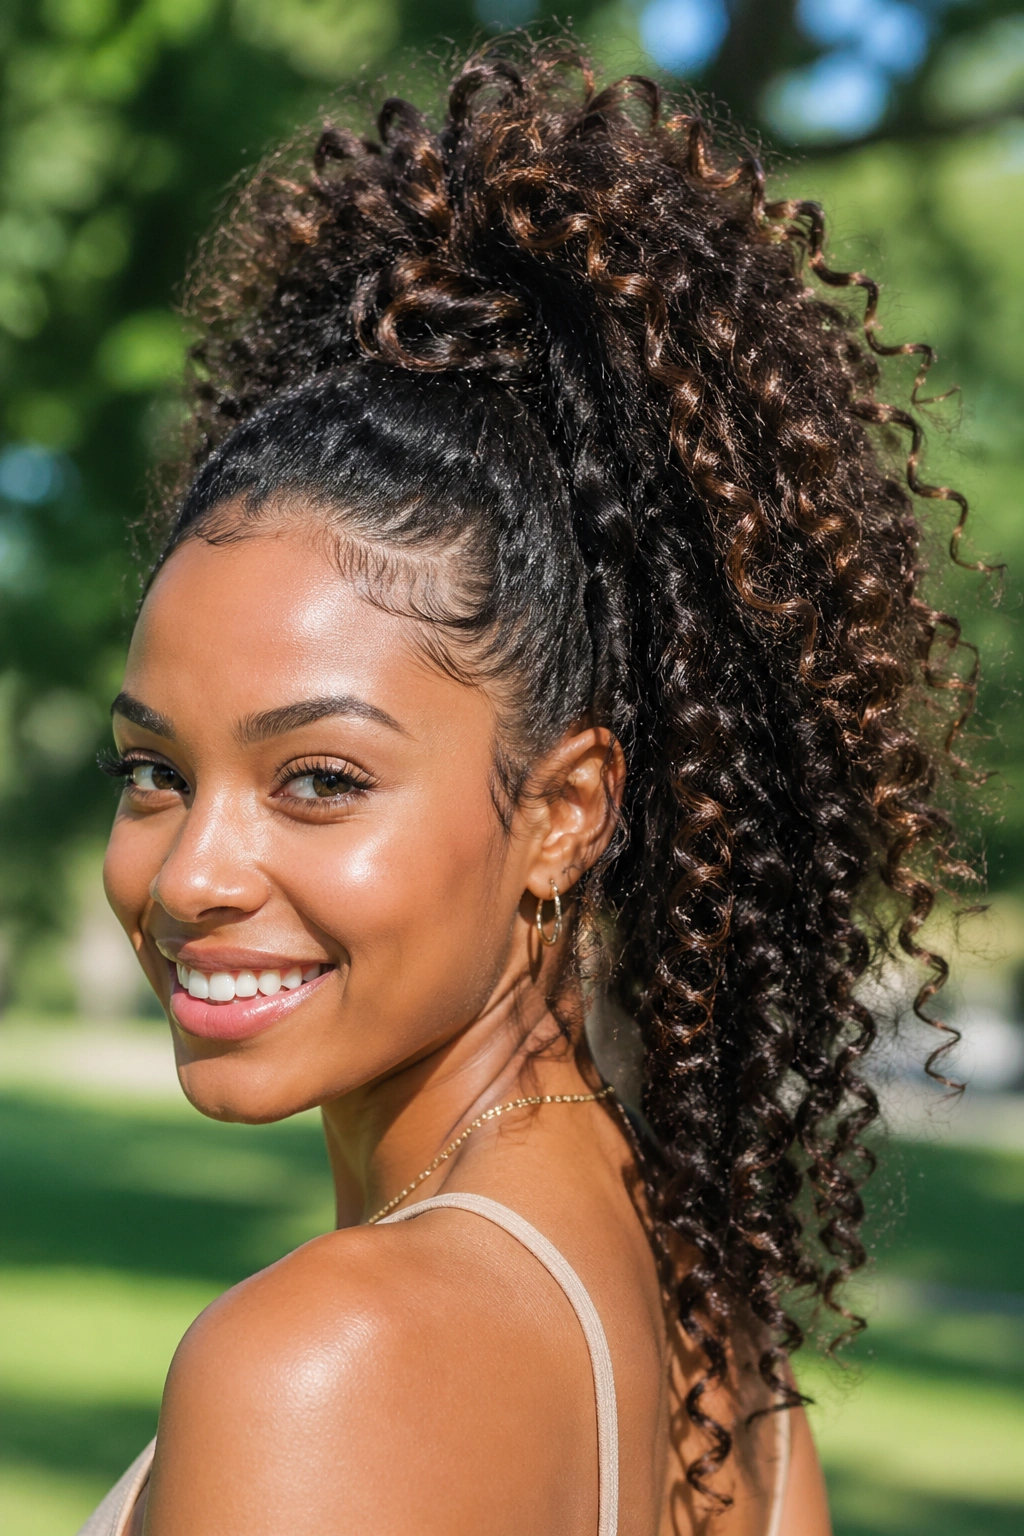
A big curly ponytail is the ultimate low-effort, high-impact style for natural hair. Gather your defined curls into a high or mid ponytail using a soft, wide hair tie or satin scrunchie. The key is positioning — a ponytail secured at the very top of your head creates a dramatic, palm-tree-like silhouette with your curls spilling out and downward. One secured at the back gives a more classic, sleek look.
Wrap one small curl around the base of the ponytail to disguise the hair tie for a polished finish. Smooth your edges for a put-together look, or leave them natural for a more relaxed vibe. Either way, the big, curly ponytail is one of those styles that works on a busy morning, a special occasion, and everything in between.
Maintaining Big Curl Styles Between Wash Days
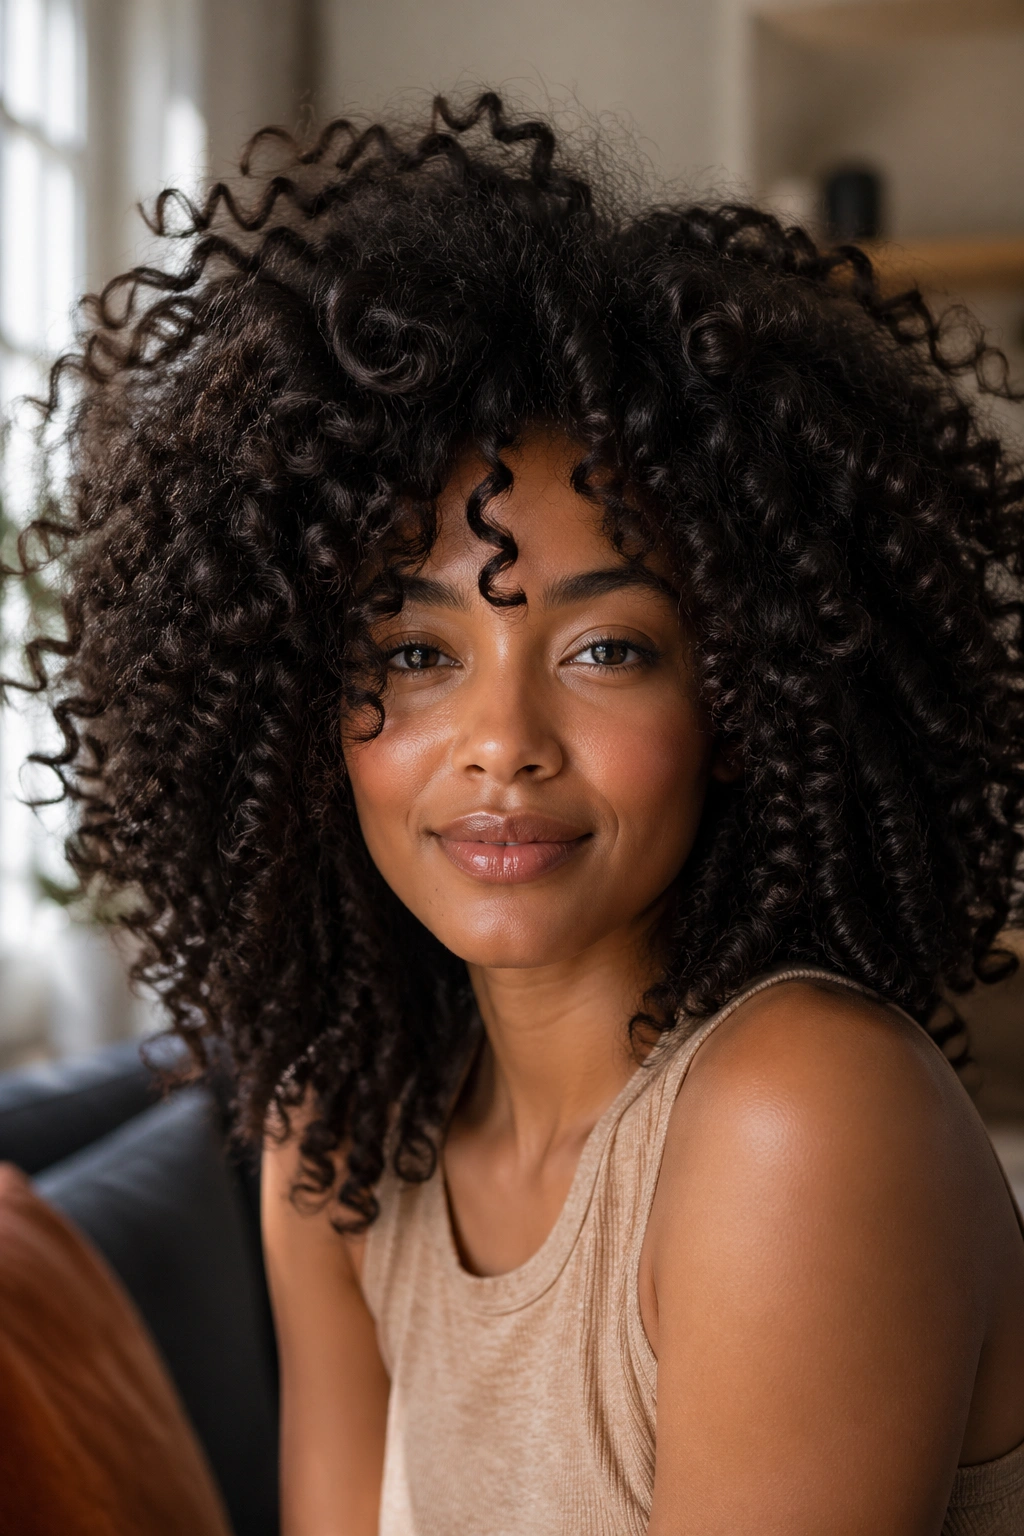
Big curl styles lose their magic fast if you don’t have a maintenance routine. The single most important habit is nighttime protection. Before bed, either pineapple your hair loosely at the top of your head with a satin scrunchie, use a large satin bonnet, or sleep on a satin pillowcase. Cotton absorbs moisture and causes friction — both of which destroy your curl definition overnight.
In the mornings, a simple refresher spray can revive curls that look flat or frizzy. Mix water, a small amount of your leave-in conditioner, and a drop of oil in a spray bottle, then lightly mist your hair and scrunch gently. You don’t need to re-wet your hair entirely every morning — just enough moisture to wake the curls back up.
For styles that last multiple days, avoid touching your hair unnecessarily throughout the day. Every time you run your hands through your curls, you’re introducing frizz. Less is genuinely more when it comes to maintaining big curl styles between washes.
Trimming and Hair Health for Big Curls
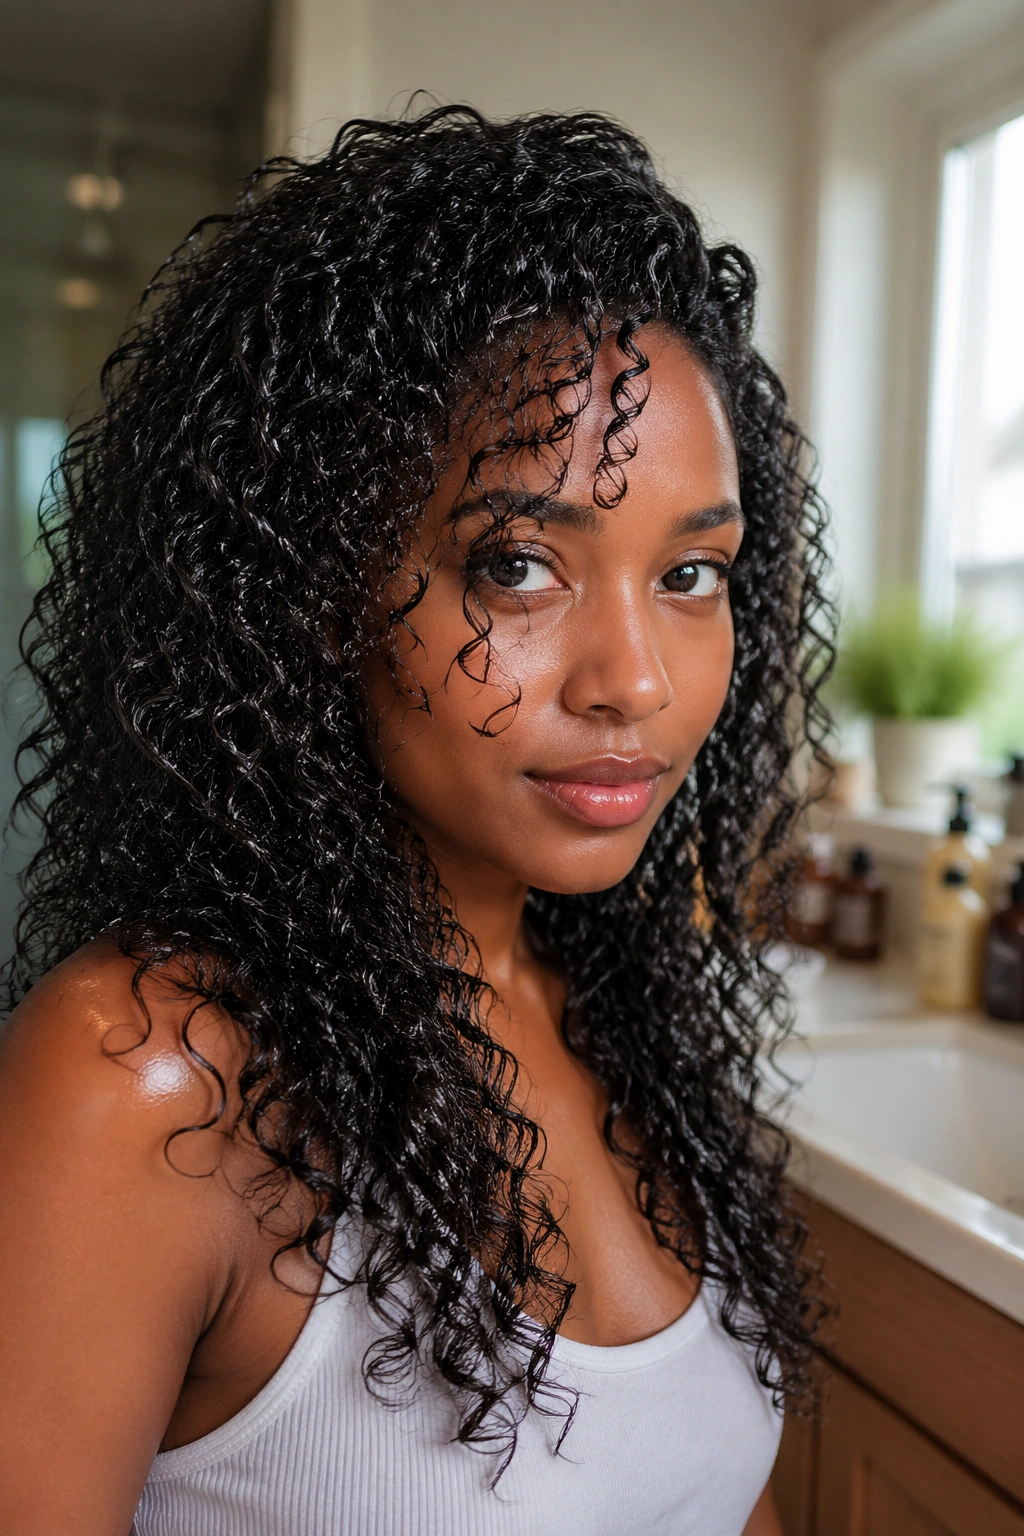
No styling technique in the world can fully compensate for damaged, split, or uneven ends. Healthy hair holds curl styles better, clumps more easily, and looks more defined with less effort. Trimming your ends regularly — even just a small dusting every few months — makes a noticeable difference in how your big curl styles look and how long they last.
Detangle carefully every single time. Rushing through detangling causes unnecessary breakage, which creates uneven ends that look frizzy and struggle to clump into defined curls. Use a wide-tooth comb or your fingers on fully wet, conditioned hair, working from tip to root. Take your time. Your curls will thank you.
Protective styling between big curl styles is also worth thinking about. Wearing your hair in braids, twists, or buns between wash days reduces daily manipulation and keeps your ends safe from environmental damage. The less friction and stress your hair experiences, the better your curl styles look when you do decide to wear them out.
Building a Big Curl Product Routine
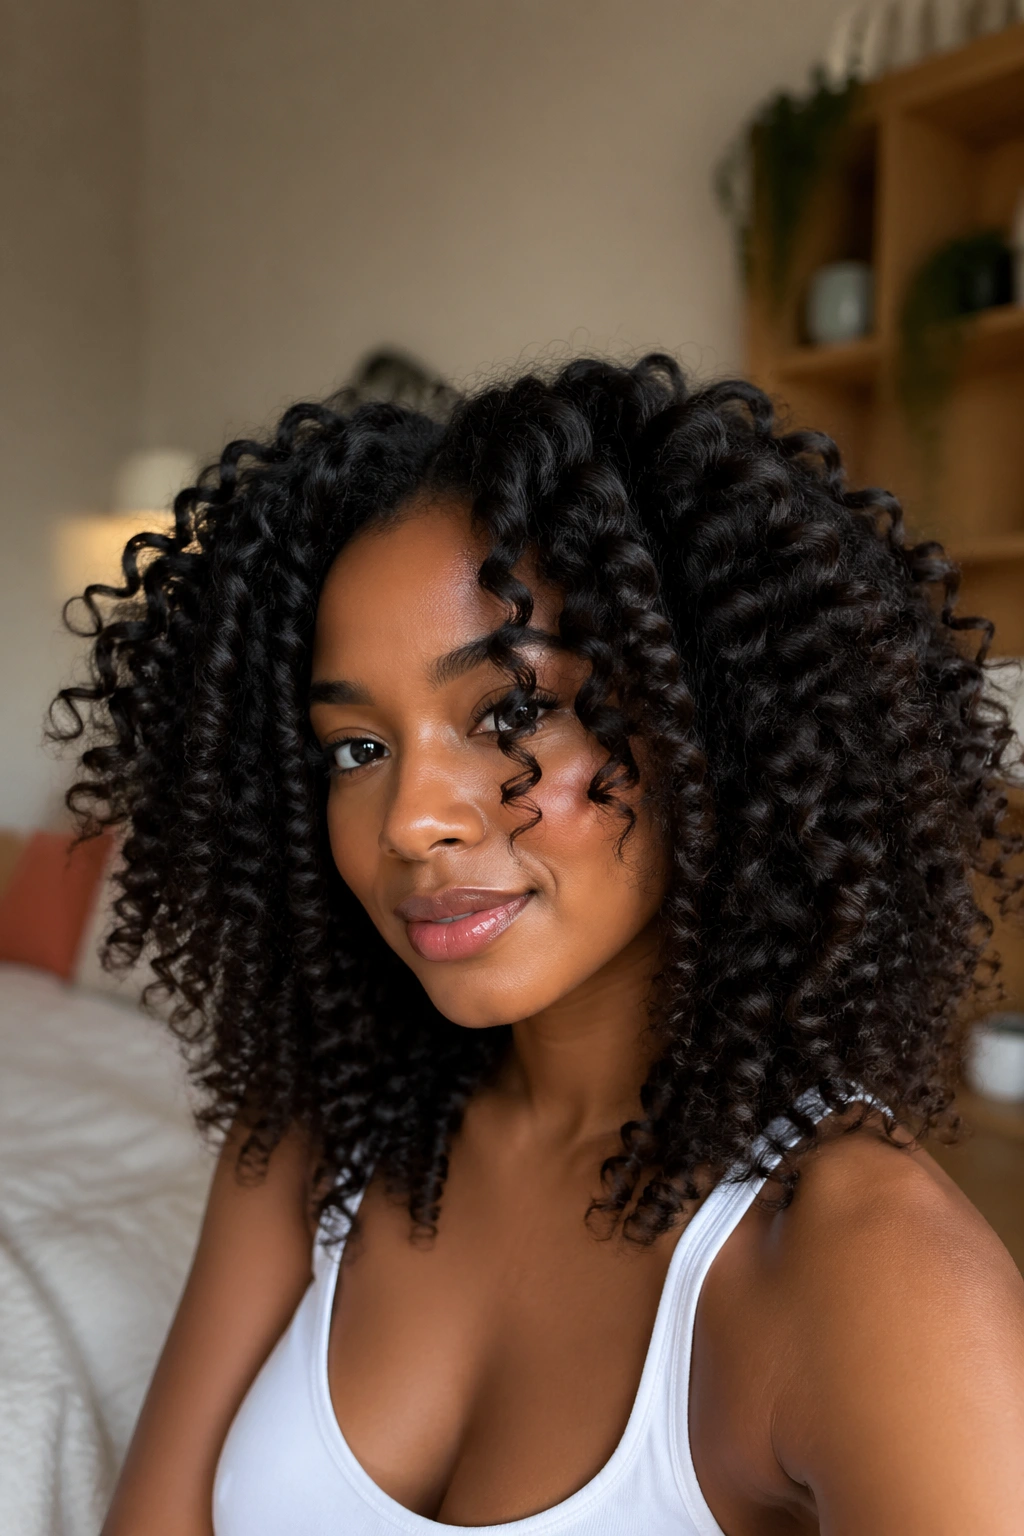
Building a consistent product routine is what separates naturals who get reliably beautiful big curl styles from those who are always chasing a good hair day. You don’t need a dozen products — you need a few that work well together for your specific hair texture and porosity.
If your hair is low porosity (tends to repel water and products), reach for lighter, water-based products over heavy butters. Warmth helps products penetrate — try applying your leave-in under a heat cap or in a warm shower. If your hair is high porosity (absorbs moisture quickly but loses it just as fast), you’ll benefit from heavier sealers like shea butter or a thick curl cream applied over your water-based leave-in.
Protein-moisture balance matters too. If your curls are limp, stretchy, or losing definition quickly, you might need more protein. If they’re brittle, stiff, or feeling hard after styling, ease off the protein and add more moisture. Your hair will tell you what it needs — you just have to pay attention.
Embracing Your Natural Curl Pattern
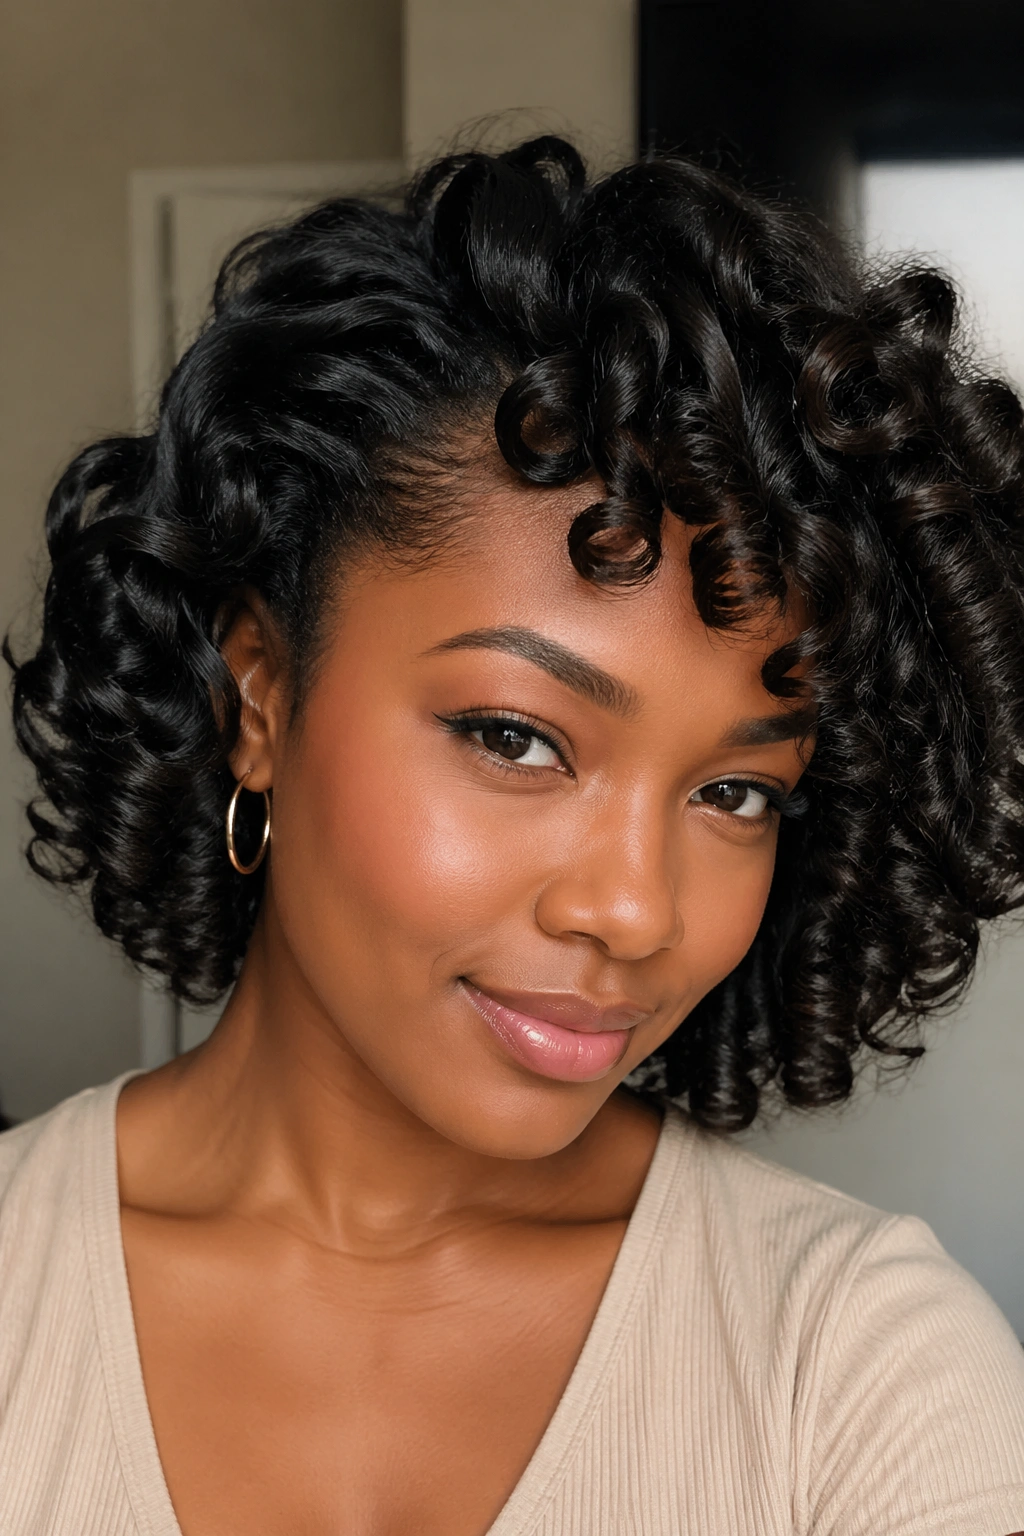
The best big curl style is the one that celebrates your actual, unique curl pattern rather than trying to replicate someone else’s. It’s easy to fall into the trap of comparing your 4b wash-and-go to a 3c influencer’s and feeling like yours is somehow less. It’s not. It’s just different.
Spend time learning your own hair’s specific behaviors. How does it respond to humidity? Does it clump naturally or need help? Does it prefer gels or creams? Does it love protein or hate it? The more you know about your specific texture, the easier it becomes to create consistently beautiful big curl styles without guesswork or disappointment.
And when all else fails — the humidity wrecked your twist-out, your wash-and-go isn’t clumping the way you wanted, your flexi rod set fell flat — remember that a full, natural afro is itself one of the most magnificent big curl styles ever. Sometimes the best style is simply letting your hair be what it naturally is.
