Thick hair and a high Dutch braid ponytail are a good match—if you stop trying to make the style tiny. Big hair wants structure, not shrink-wrap.
A braid that sits flat on dense hair usually starts with one of two mistakes: the sections are too skinny, or the crown is pulled so tight that the whole style fights back by puffing up in the wrong places. A rat-tail comb, a couple of strong elastics, and a little grip at the roots solve more problems than fancy styling ever does.
The styles below lean into thickness instead of wrestling it down. Some are sleek. Some are soft. A few are dressed up with ribbon, cuffs, or a cleaner part, because thick hair can carry detail better than fine hair ever could. Start with the simplest one if you want polish, or jump straight to the looser options if you like movement.
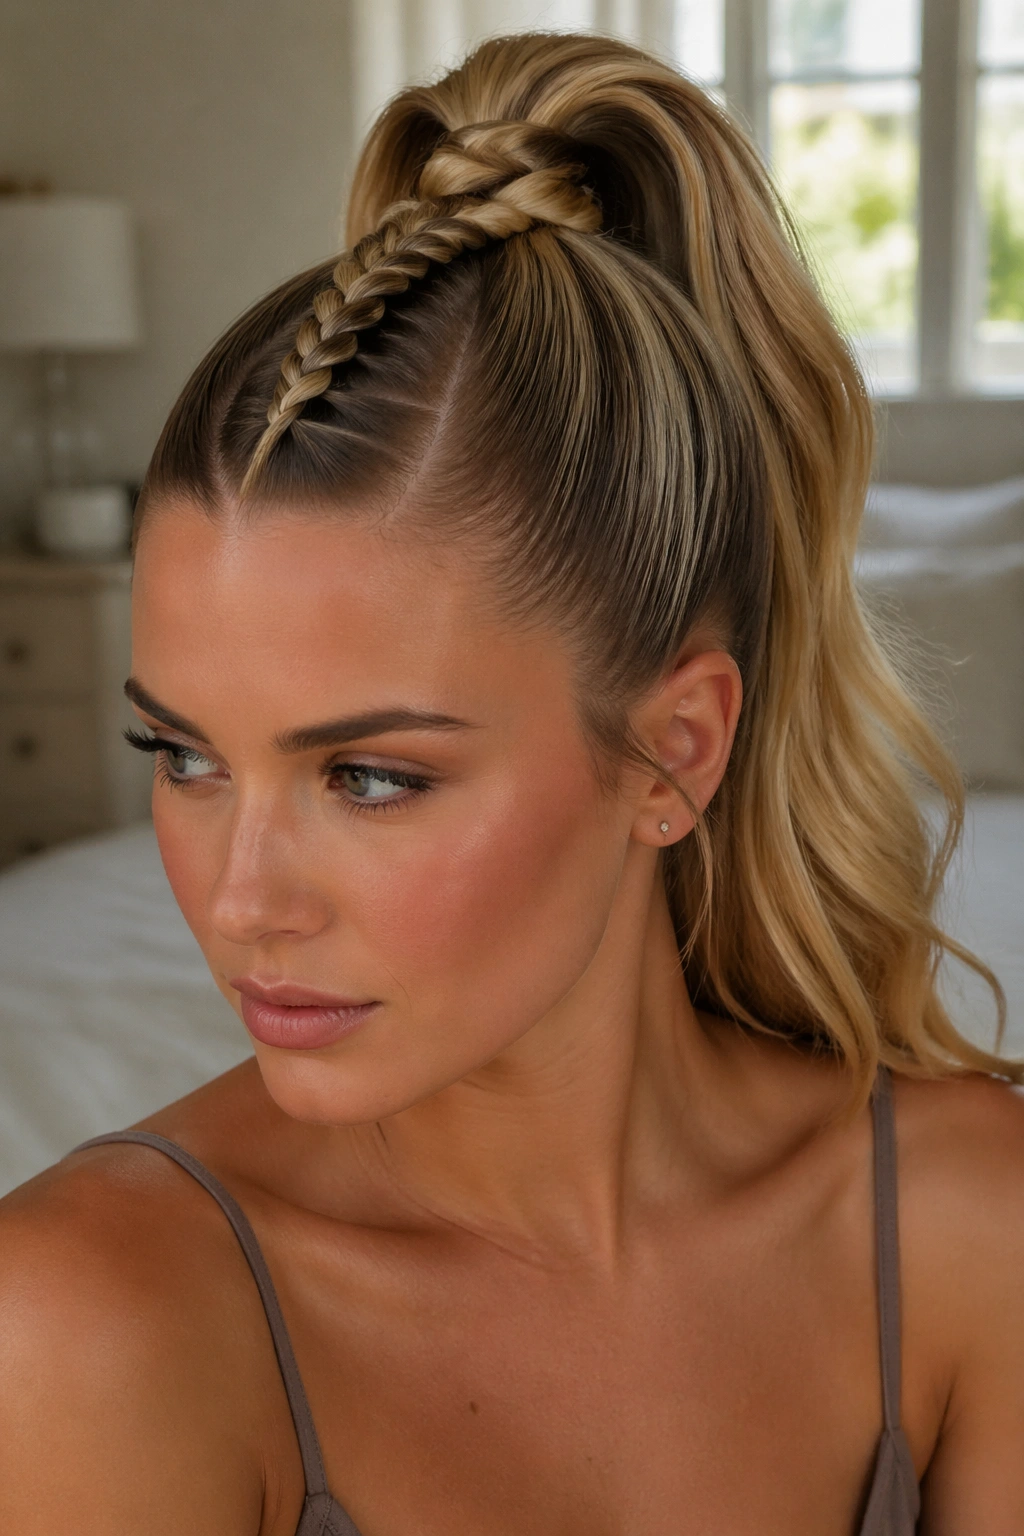
1. Center-Part Sleek Dutch Braid Ponytail
This is the version that makes thick hair look deliberate instead of bulky. A clean center part gives the braid a straight path from forehead to crown, and that symmetry helps the ponytail sit high without drifting to one side.
On dense hair, the clean lines matter more than people think. If the sections are even, the braid reads as crisp and controlled; if one side is heavier, the whole look tilts a little and the ponytail base starts to feel lopsided. A thin veil of gel at the hairline and a firm first pass of the braid usually keep that from happening.
Why it works on full hair
- The center part balances weight on both sides.
- A narrow braid at the front keeps the crown from feeling overloaded.
- One wrapped strand around the elastic hides the join and makes the finish look cleaner.
- Thick tails hang better when the base is centered, not off to the side.
Pro tip: braid the top section first, then gather the rest into the ponytail after the braid reaches the crown. That order keeps the base from getting too wide.
2. Side-Part Dutch Braid Ponytail
Why does a side part help so much? Because thick hair already has plenty going on. Shifting the part softens the forehead line and keeps the braid from feeling too stern.
The nicest thing about this version is the shape it gives the face. One side stays a touch sleeker, the braid rides over the fuller side, and the ponytail falls high without looking stiff. It works especially well if your hair has layers near the front, since those shorter pieces blend into the braid instead of sticking out.
How to wear it
- Make the part with the tail of a comb, not your fingers.
- Start the Dutch braid on the heavier side so it can carry the bulk.
- Keep the first two braid turns snug, then relax your grip a little near the crown.
- Leave the ponytail smooth, or add a soft wave to the length if you want movement.
This one looks good on hair that needs a little direction, not a total reset. That’s the whole point.
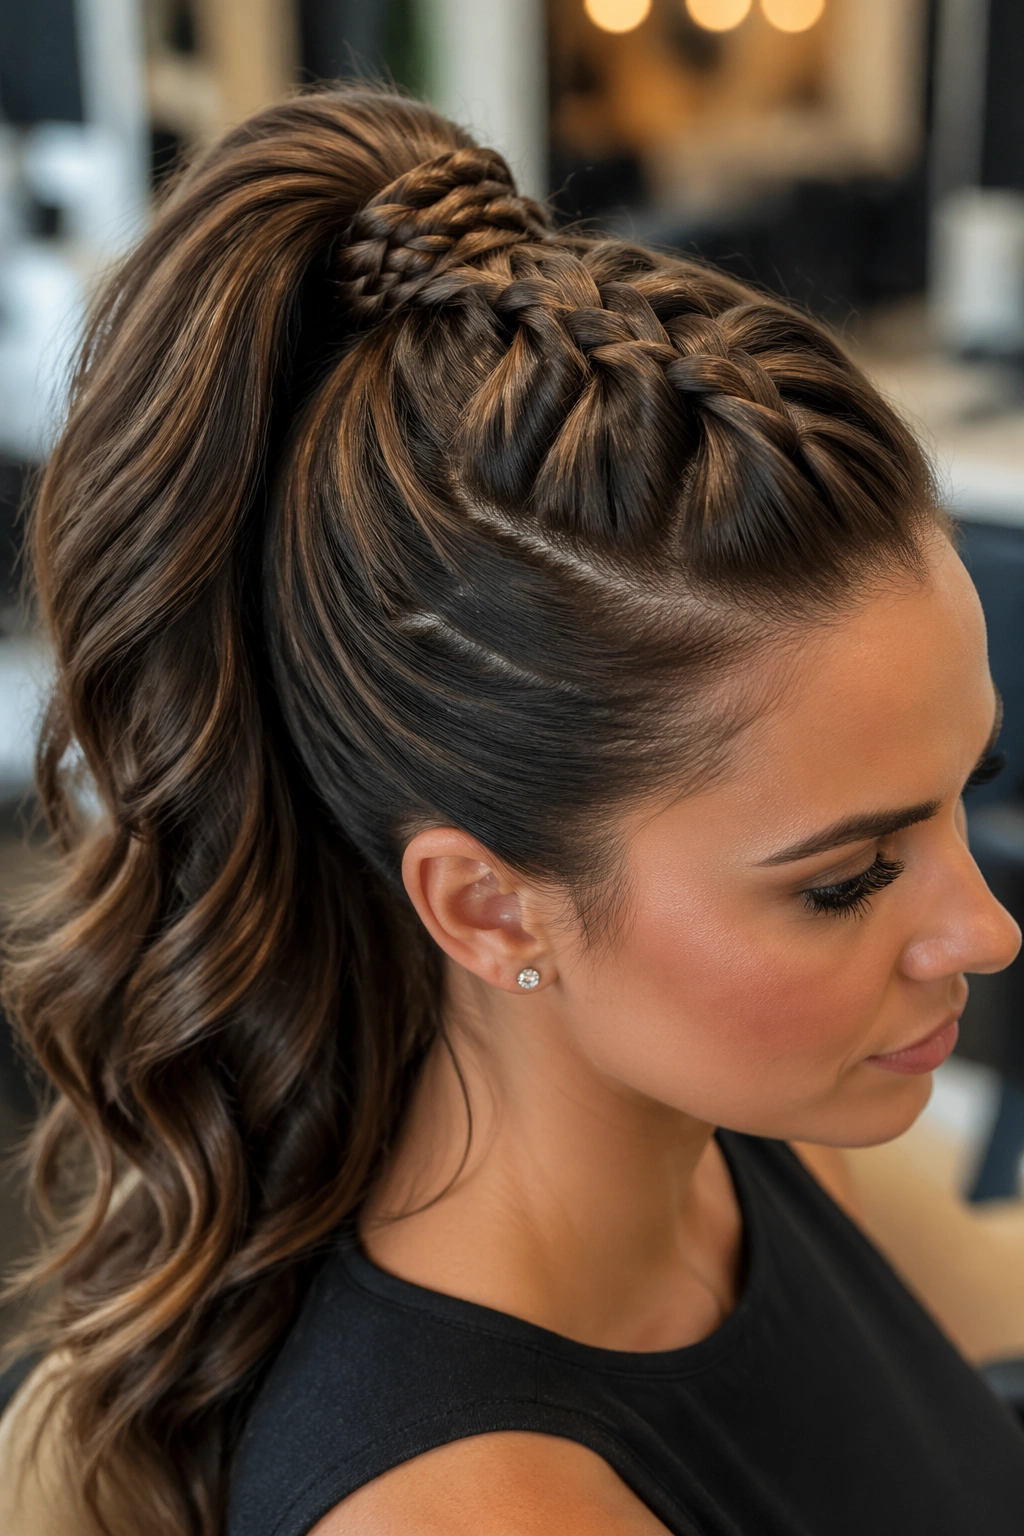
3. Twin Dutch Braids Into One High Ponytail
Picture two Dutch braids starting at each temple, meeting high at the back, then dropping into one thick ponytail. It looks like a lot of work. It isn’t, once you get the hands working in the same rhythm.
This style is a smart move for very dense hair because it splits the load. Instead of forcing one braid to swallow every strand at once, you build two smaller braids and let them meet where the ponytail begins. The result is a fuller crown, but with less pulling at the hairline.
What keeps it balanced
- Make both braids the same width from the start.
- Join them with one clear elastic at the crown.
- Hide the join with a small braided wrap or a strand of hair.
- If your hair is extra heavy, use a second elastic underneath the first.
The look is sporty, but not plain. That little bit of symmetry gives it polish.
4. Wrapped-Base Dutch Braid Ponytail
A visible elastic can make thick hair look unfinished. A wrapped base fixes that fast.
This version keeps the Dutch braid clean at the crown, then uses a thin strand from the ponytail to cover the elastic. On fuller hair, that tiny detail matters more than it does on lighter textures because the base can look chunky if left exposed. The wrap takes maybe thirty seconds, but it changes the whole finish.
A matte elastic works better than a shiny one here, especially if your hair is coarse or dry. The wrap strand should be about 1/2 inch wide, and you want it pinned underneath the ponytail, not stuck into the side where it can poke out.
Sleek, yes. Fussy, no.
5. Pancaked Dutch Braid Ponytail

A pancaked braid is the easiest way to make thick hair look even bigger without adding fake volume. You braid the hair in the usual Dutch pattern, then gently tug the outer loops wider once the ponytail is secured.
The key is restraint. Pull the braid edges out a little at a time. If you yank hard, the braid turns fuzzy and the crown can collapse. If you work from the bottom upward and stop before the front hairline, you get width without mess. Thick hair gives you a nice base to start with, so the “pancake” effect often looks better here than on finer textures.
What to watch for
- Pancake after the ponytail is tied, not before.
- Skip the first inch near the scalp so the braid stays neat.
- Use your thumbs, not your nails.
- Stop once the braid looks wide enough to hold its shape on its own.
Best use: soft glam, weekend plans, or any day you want the braid to look fuller than it already does.
6. Bubble Ponytail With a Dutch Braid Lead-In
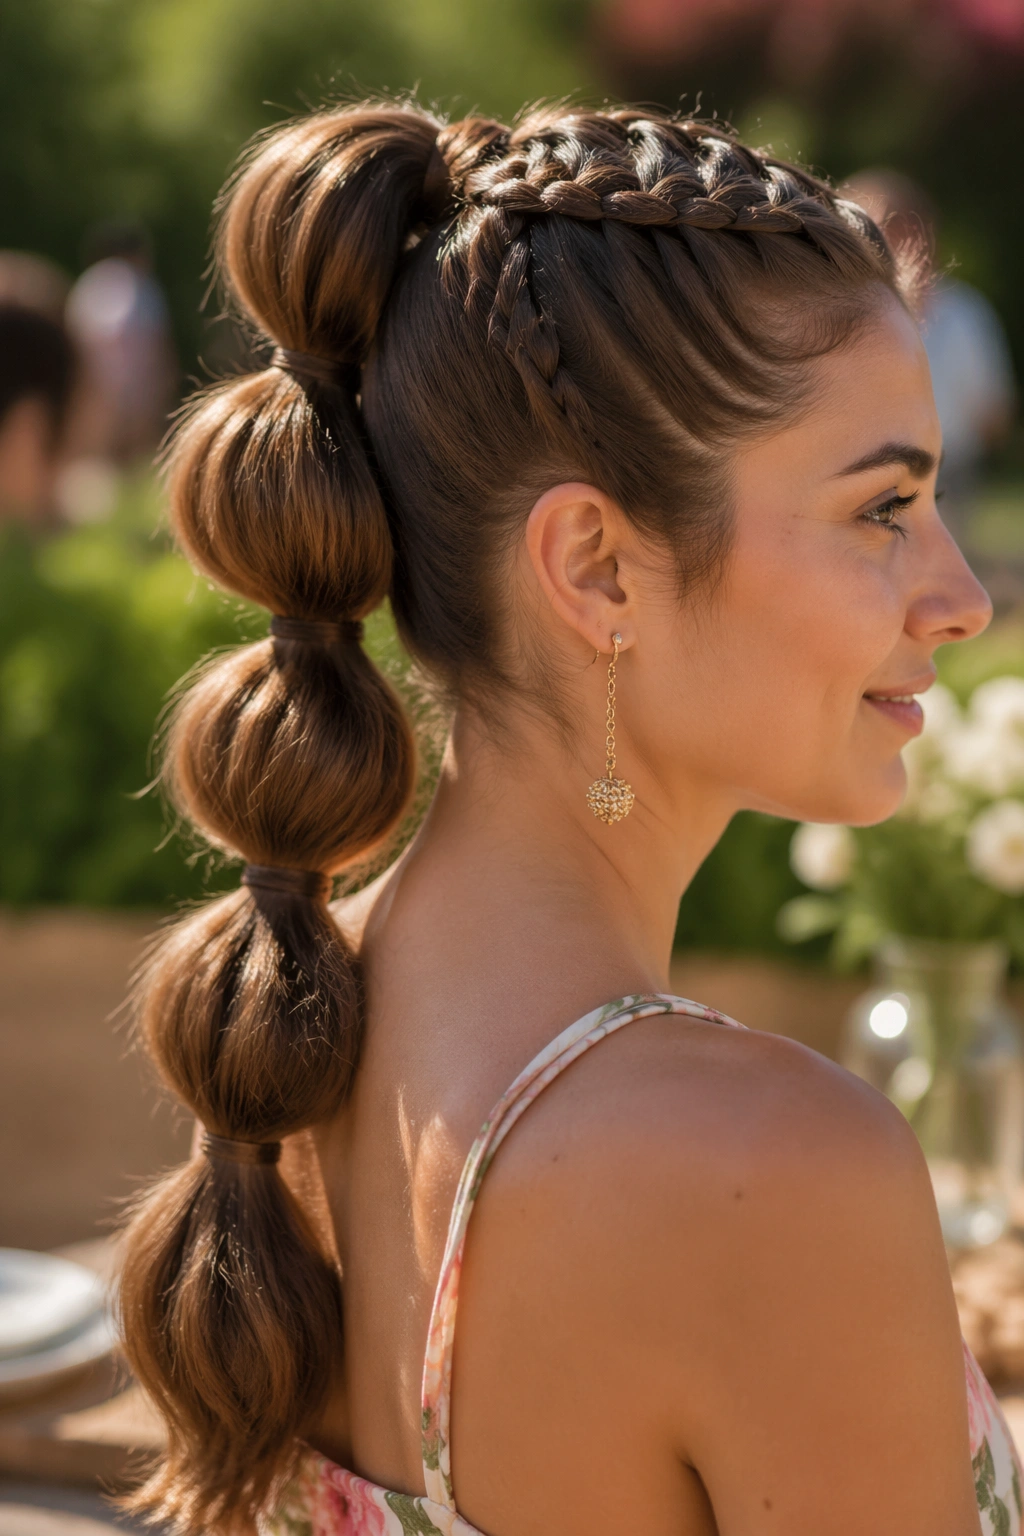
Unlike a plain high ponytail, this version breaks thick hair into sections, which keeps the length from looking like one heavy curtain. The Dutch braid at the front gives structure; the bubble tail gives movement.
Use small clear elastics every 2 to 3 inches down the ponytail, then gently pull each segment outward until it rounds out. Thick hair makes the bubbles look rich, not flimsy, and the braid helps the top half stay anchored while the tail gets playful. That contrast is why this style works so well.
It’s also a practical choice if your ends are a little frizzy. The bubbles hide uneven texture better than a straight, polished tail would.
A little shine spray on the bubbles helps. Don’t soak them. You want shape, not slip.
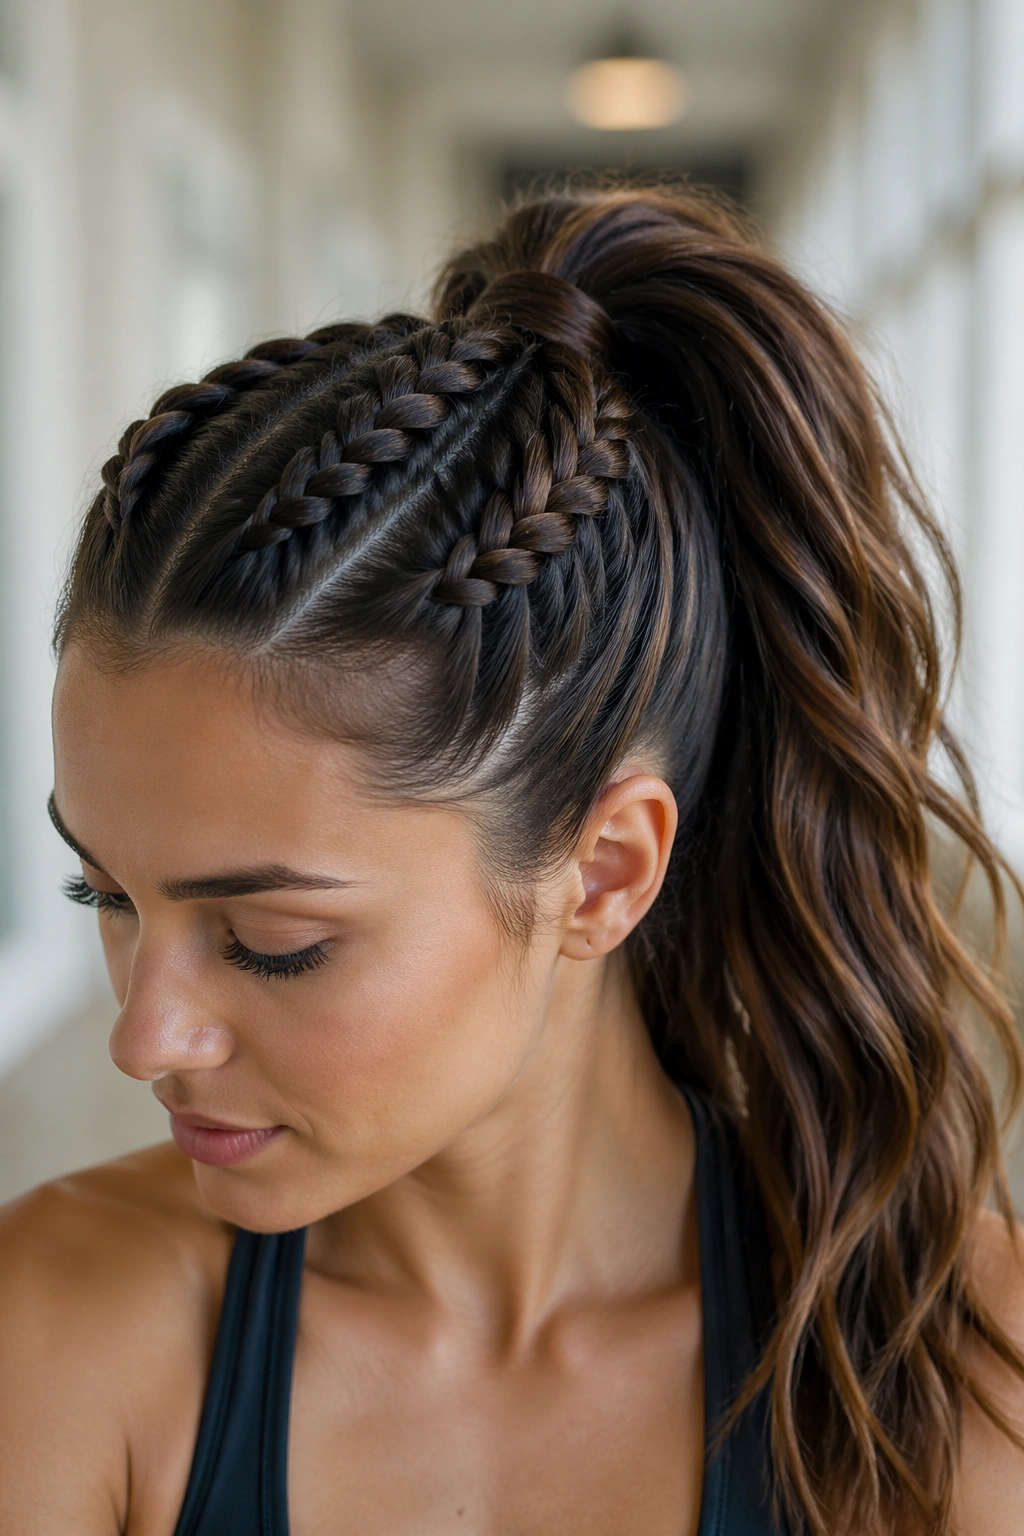
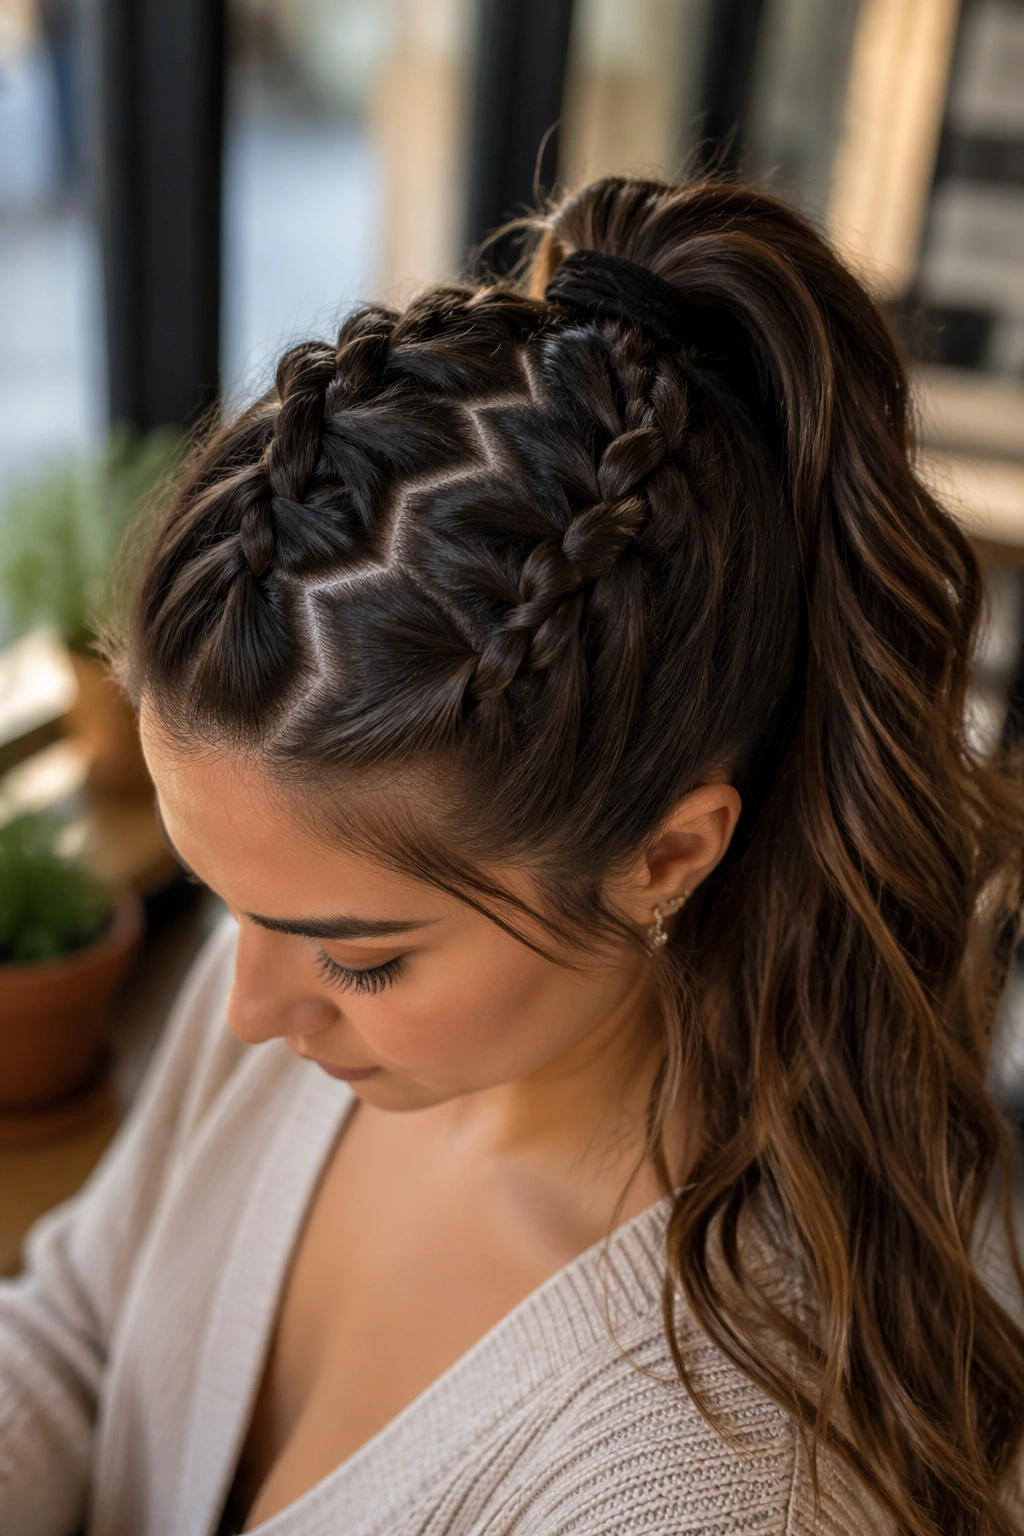
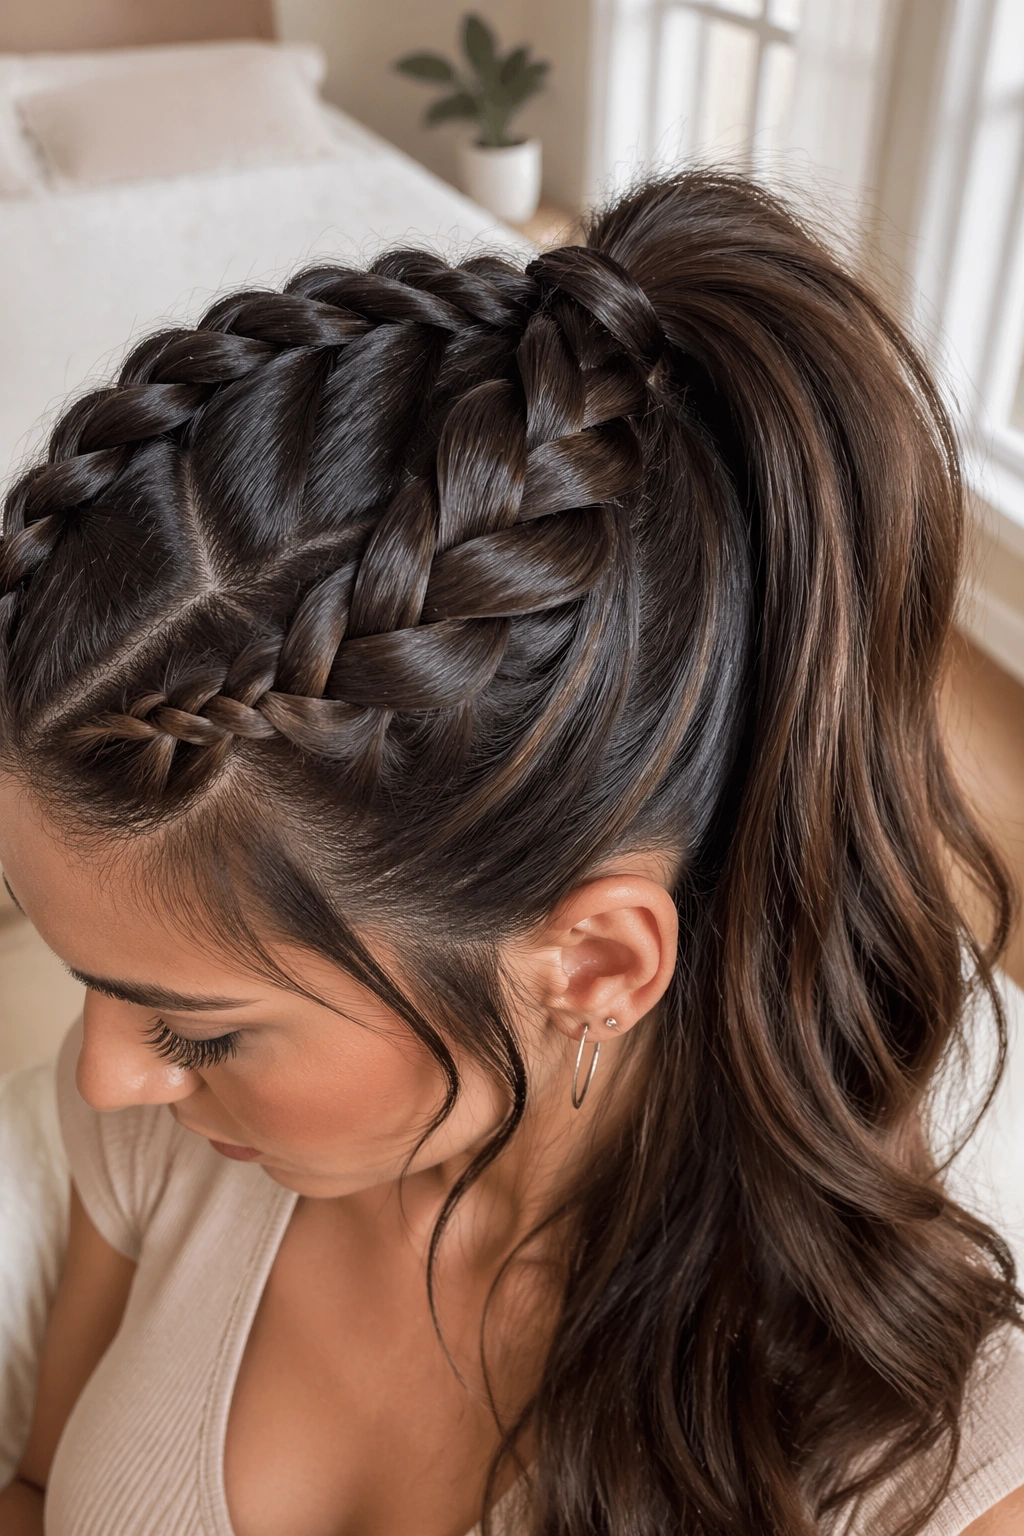
7. Crisscross Dutch Braid Ponytail
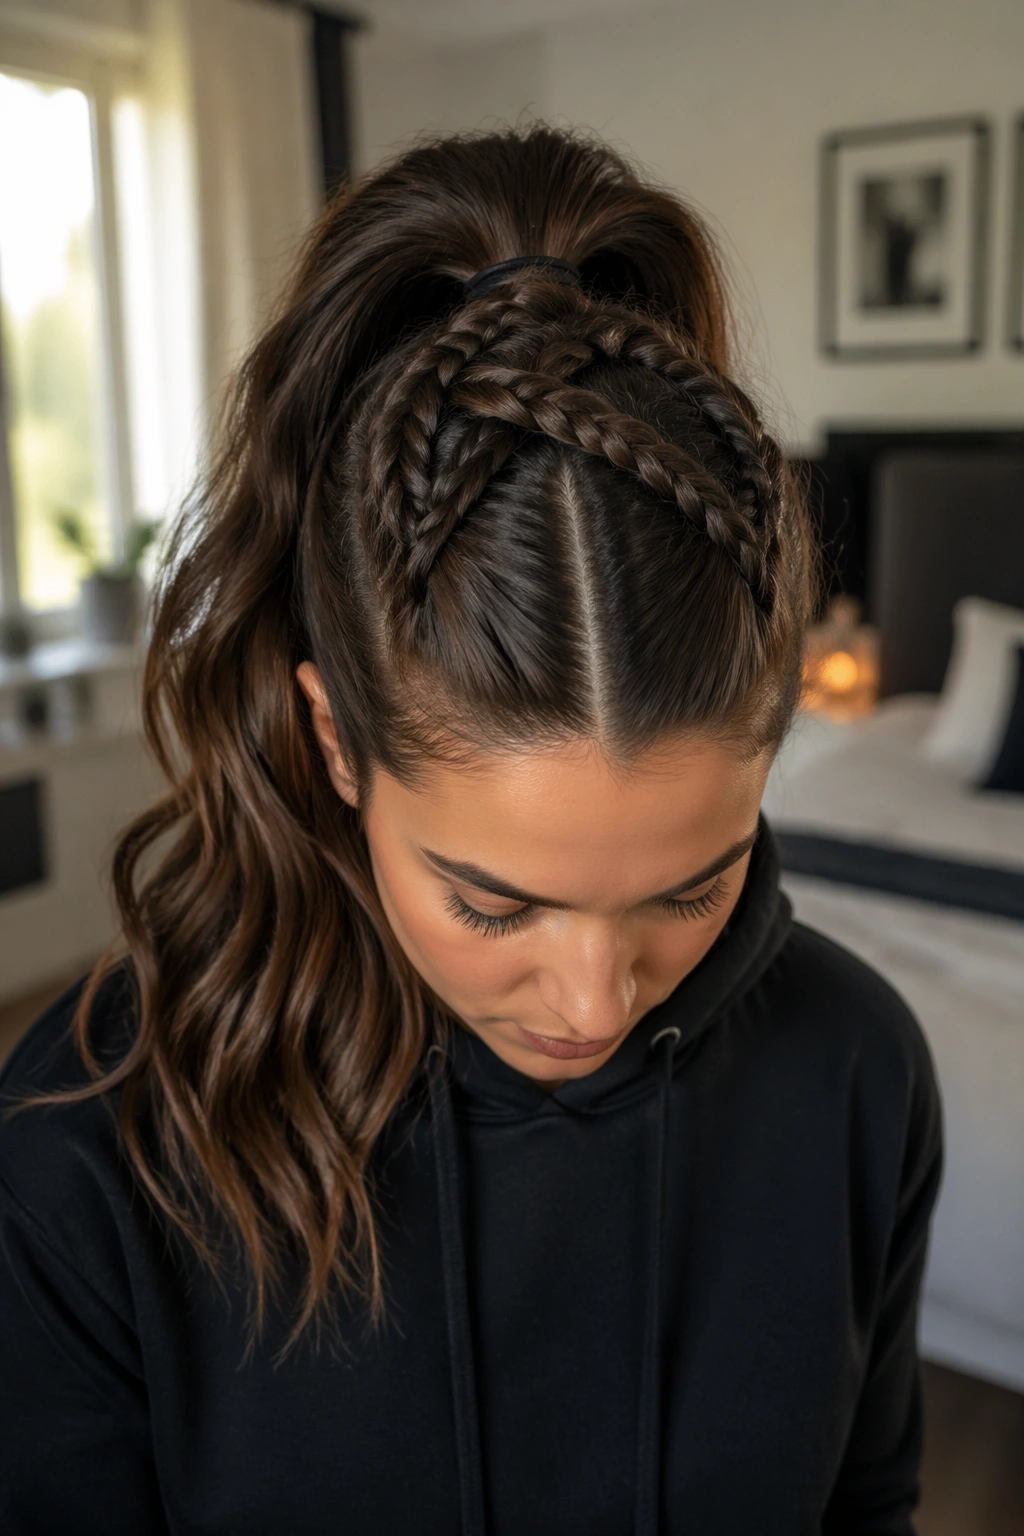
This one has attitude. Two braided sections cross over each other at the crown before they meet the ponytail, which gives thick hair a sculpted, almost harness-like look without any extra accessories.
The crisscross effect works because it uses the braid itself as decoration. Thick hair can handle the visual weight, and the crossing lines keep the style from spreading too wide across the head. If you usually feel like high ponytails make your hair “fan out” too much, this is one of the better fixes.
Try to keep the crossing point snug but not tight. That’s the tricky part. Too loose, and the style shifts during the day. Too tight, and the crown feels pinched.
A clean center section helps here, but a soft off-center part works too if your face shape likes a little asymmetry.
8. Mohawk Dutch Braid Ponytail
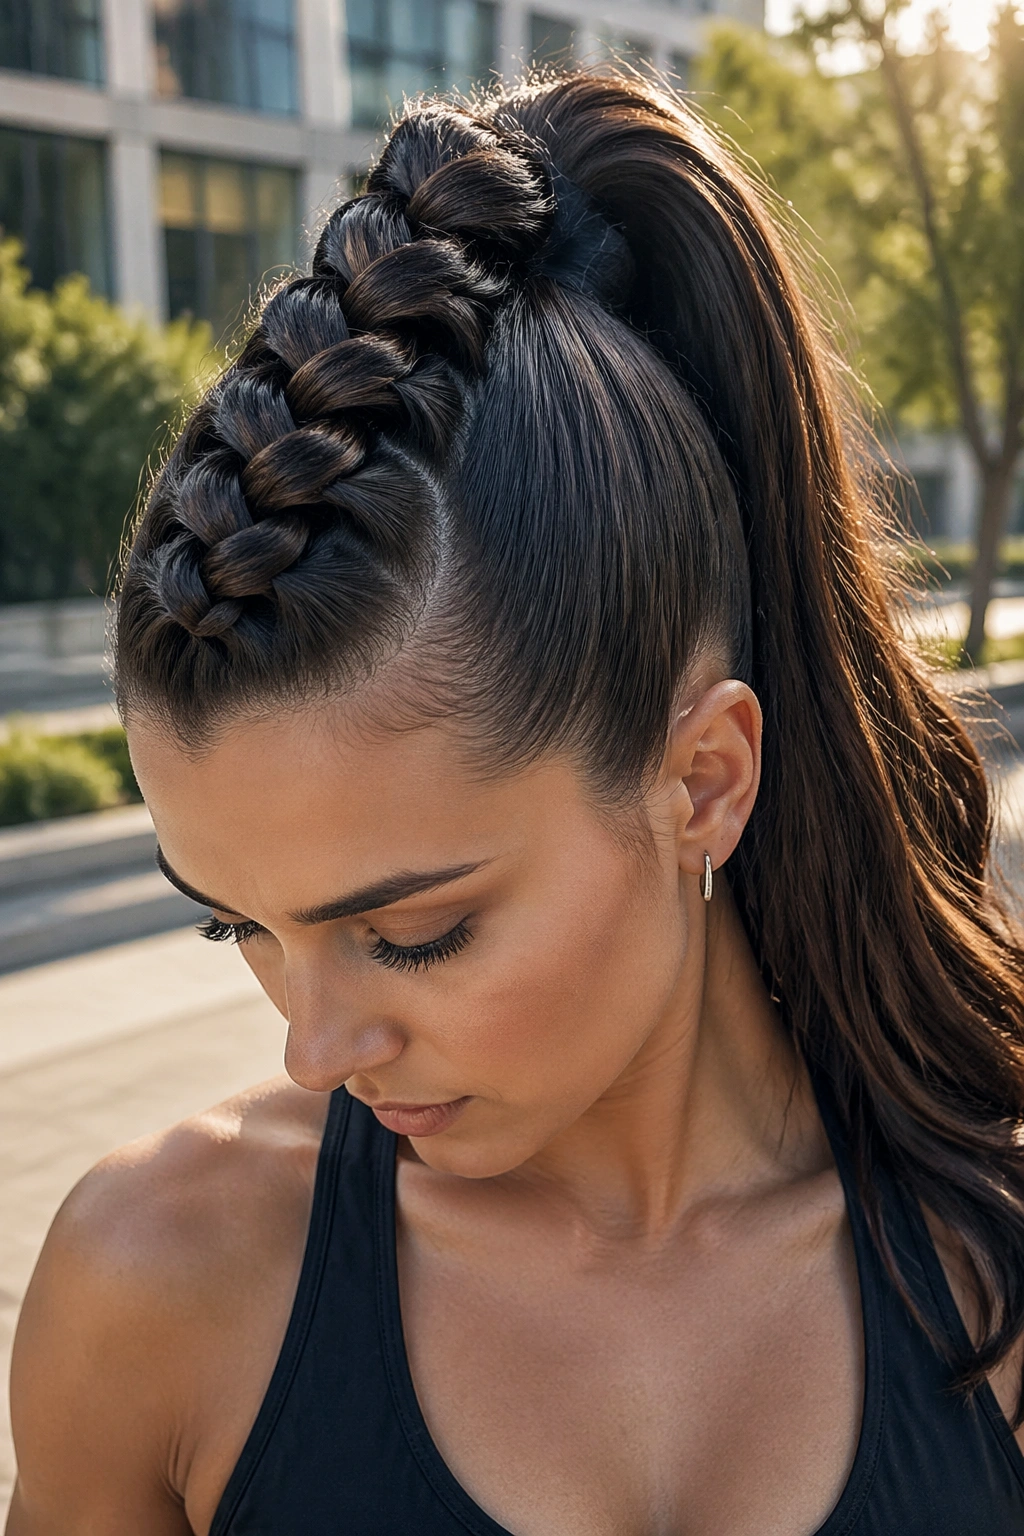
Can a mohawk braid still feel wearable? Yes, if you keep the sides sleek and let the center braid do the heavy lifting.
This style uses the thick middle section of the hair to create height from front to crown, while the sides are smoothed down close to the head. On dense hair, that ridge can look dramatic in a good way. The braid rises instead of spreading, so the ponytail feels lifted rather than weighed down.
How to keep it from going stiff
- Apply a small amount of gel or cream to the side panels.
- Clip the sides away before braiding the center.
- Keep the braid tight enough to hold shape, but not so tight that the scalp feels pulled.
- Finish with a ponytail that still has movement through the length.
This is the style I’d choose when I want the hair to make a statement before I even add earrings.
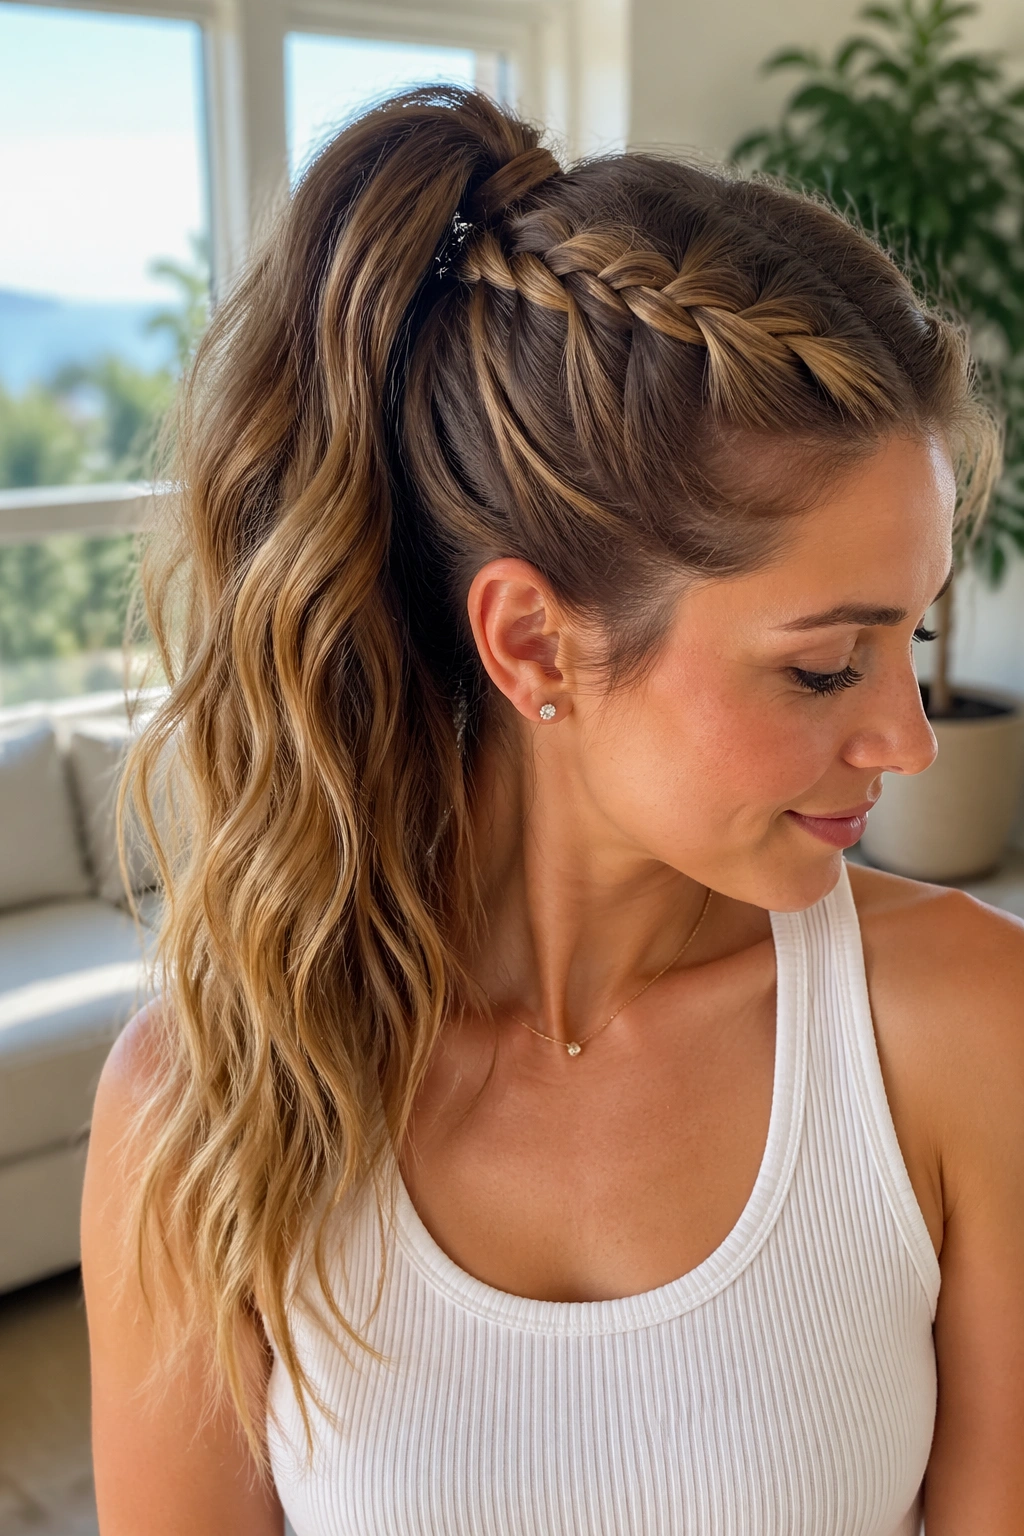
9. Soft Messy Dutch Braid Ponytail
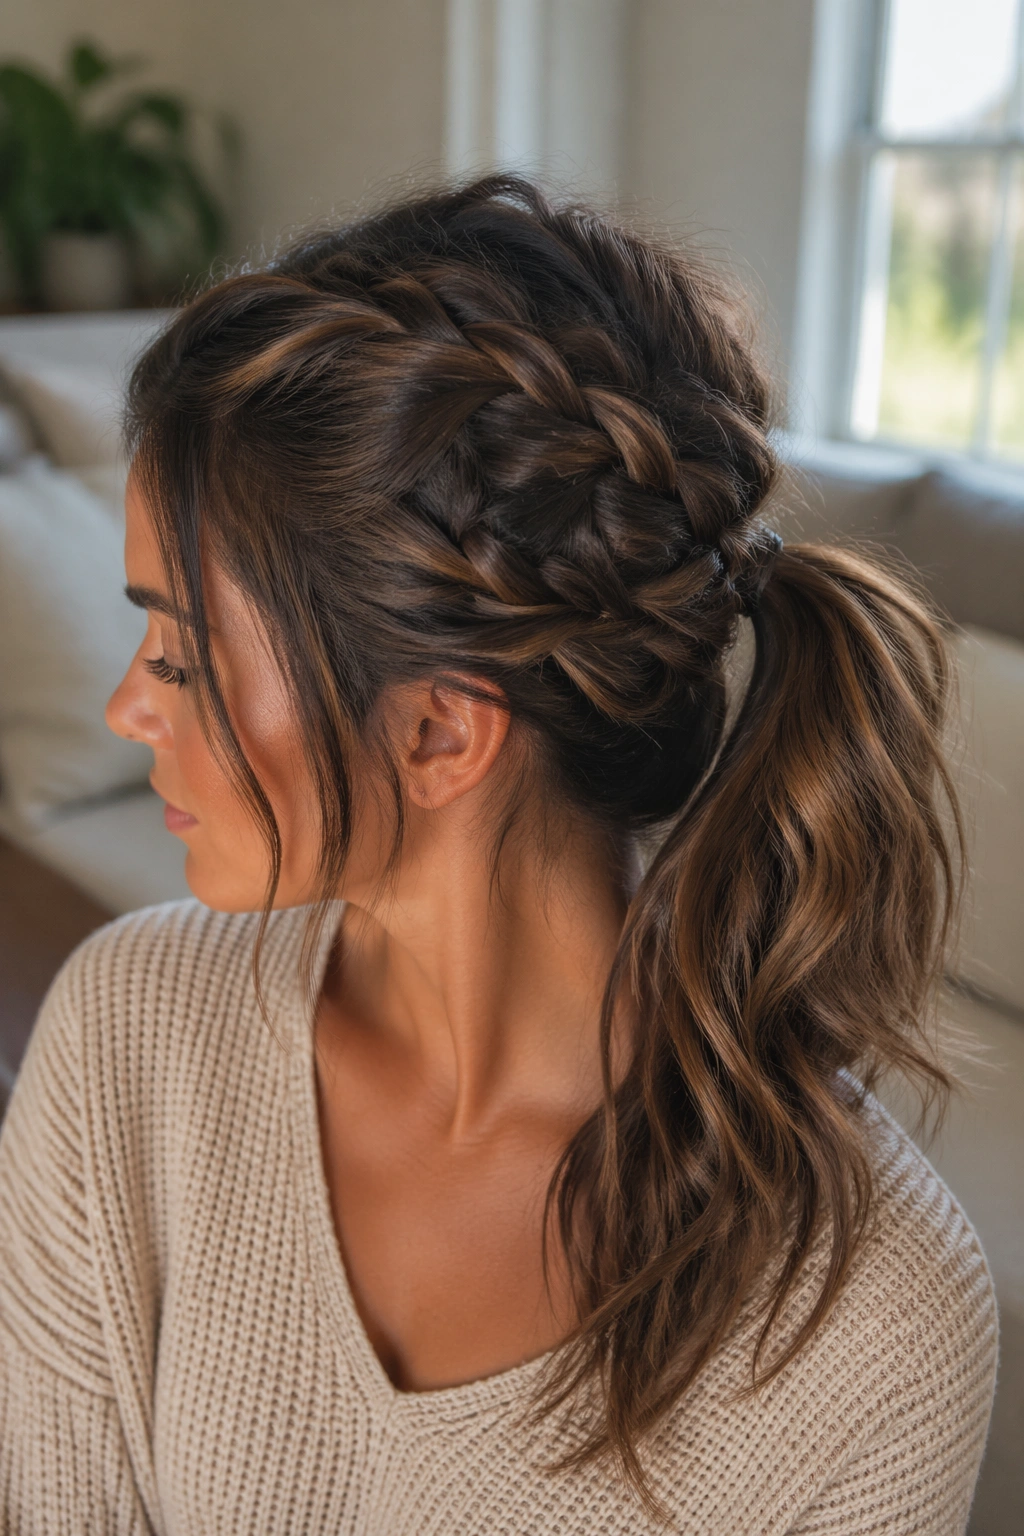
This is the braid you wear when you want your hair to look good after a long day, not only the minute you leave the house.
Thick hair is good at holding loose shape, which makes this version a natural fit. The braid starts neat near the front, then relaxes as it reaches the ponytail. A few face-framing pieces, a little volume at the crown, and soft tugging along the braid give it that lived-in feel without making it fall apart.
The one thing not to do: loosen the braid right at the hairline. That usually creates little fuzzy gaps that are hard to fix. Keep the front sections clean, then soften the braid from the middle down.
Texturizing spray at the mid-lengths helps if your hair is too slippery. If it’s already coarse, you may not need much at all.
10. Braided Ponytail With a Rope-Twist Finish
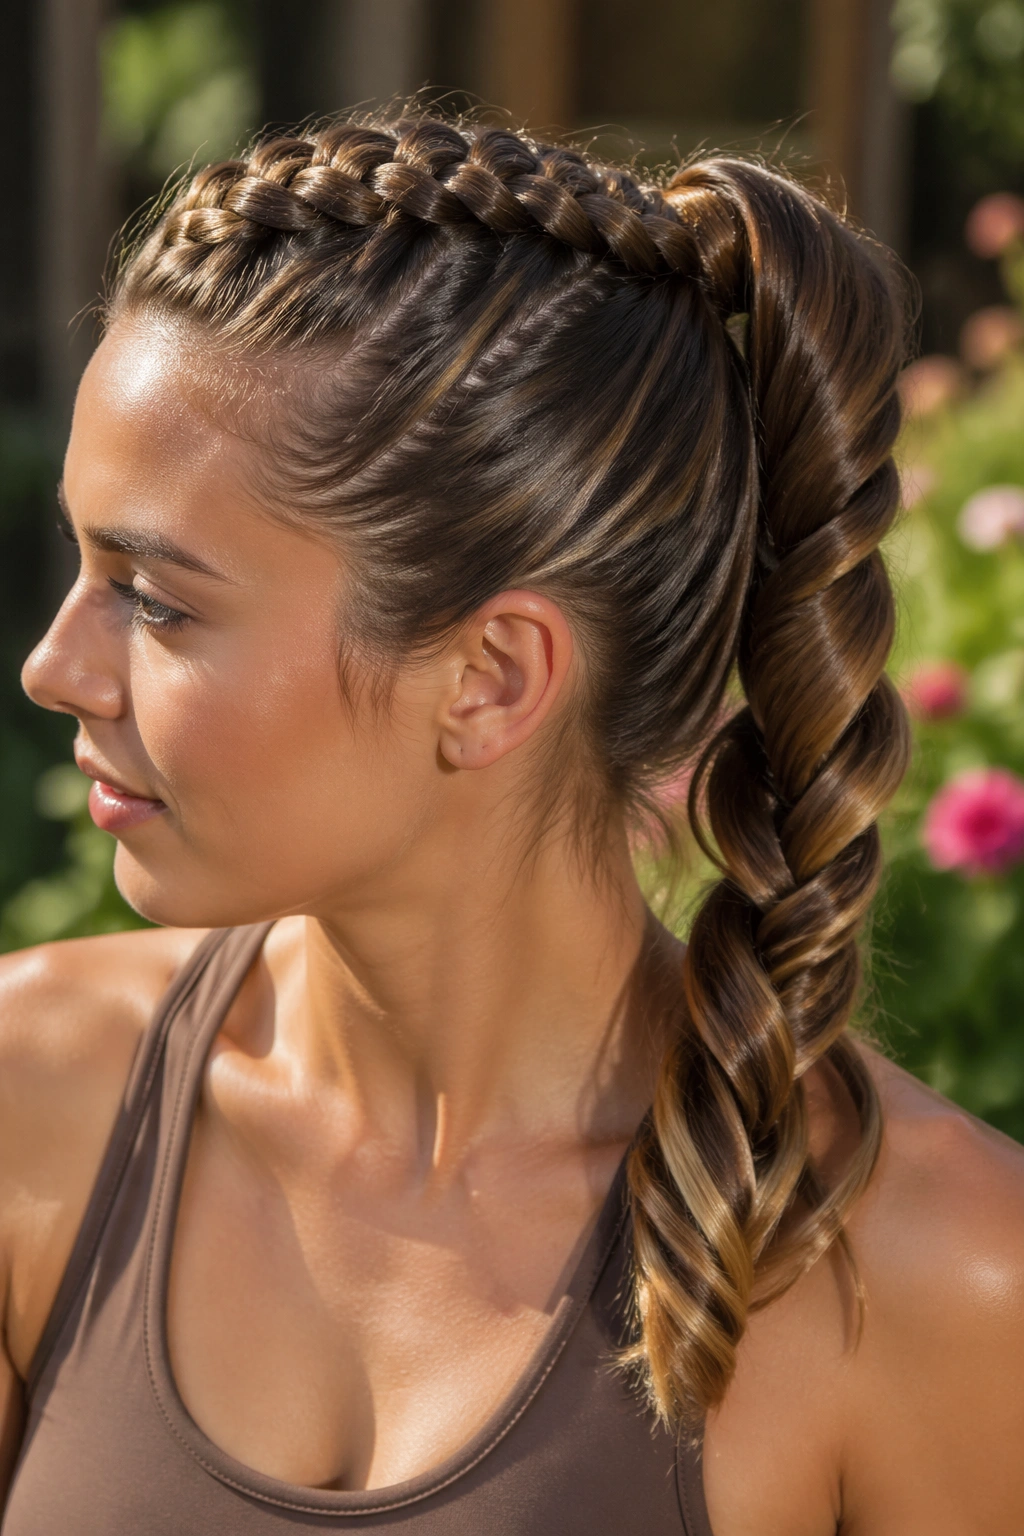
A Dutch braid up top and a rope-twist tail at the end sounds simple, but it changes the whole mood of the style. The braid gives structure near the scalp, while the twisted lengths keep thick ends looking controlled instead of bulky.
I like this one for hair that’s full but not always cooperative. The rope twist keeps the bottom half neat, and it’s faster than curling every section if you want a polished finish. Split the ponytail into two even pieces, twist each piece in the same direction, then wrap them around each other in the opposite direction. That counter-motion is what makes the twist hold.
If your hair is layered, mist the ends with a light spray wax before twisting. It helps the shorter pieces stay in line instead of springing out.
Clean, strong, and a little unexpected. Good combo.
11. Gym-Ready Tight Dutch Braid Ponytail

Some styles are about looking cute. This one is about not touching your hair for hours.
A tight Dutch braid into a high ponytail stays put because it starts with control at the roots and ends with a secure tie at the crown. Thick hair benefits from that extra hold, especially if you move a lot or if your hair tends to slide out of loose styles halfway through the day.
Why thick hair likes it
- The braid gathers density before the ponytail begins.
- A snug crown stops the style from sagging.
- Two elastics can help if the first one feels overworked.
- A little edge gel keeps flyaways from escaping at the temples.
The trick is not to overdo the tension. Tight does not mean painful. If your scalp hurts, the braid is too aggressive, and you’ll probably get a halo of frizz later anyway.
This is the one I’d pick for a workout, a long drive, or a day when I want zero maintenance.
12. Loose Dutch Braid Ponytail With Face-Framing Pieces
Unlike the tight gym version, this one keeps the braid softer and leaves two slim pieces out near the temples. Thick hair needs room to move, and this style gives it that space without losing the shape.
The face-framing pieces should be narrow. Think pencil-width, not chunky chunks. Anything wider starts to compete with the braid instead of flattering it. If you curl those front pieces slightly away from the face, the whole style opens up in a nice, easy way.
This version works especially well when your hair has layers around the front. The shorter bits blend into the braid and make it look fuller where it matters, rather than bulky at the crown.
A light mousse at the roots helps keep the loose sections from separating too much. You want softness, not slip.
13. Ribbon-Woven Dutch Braid Ponytail
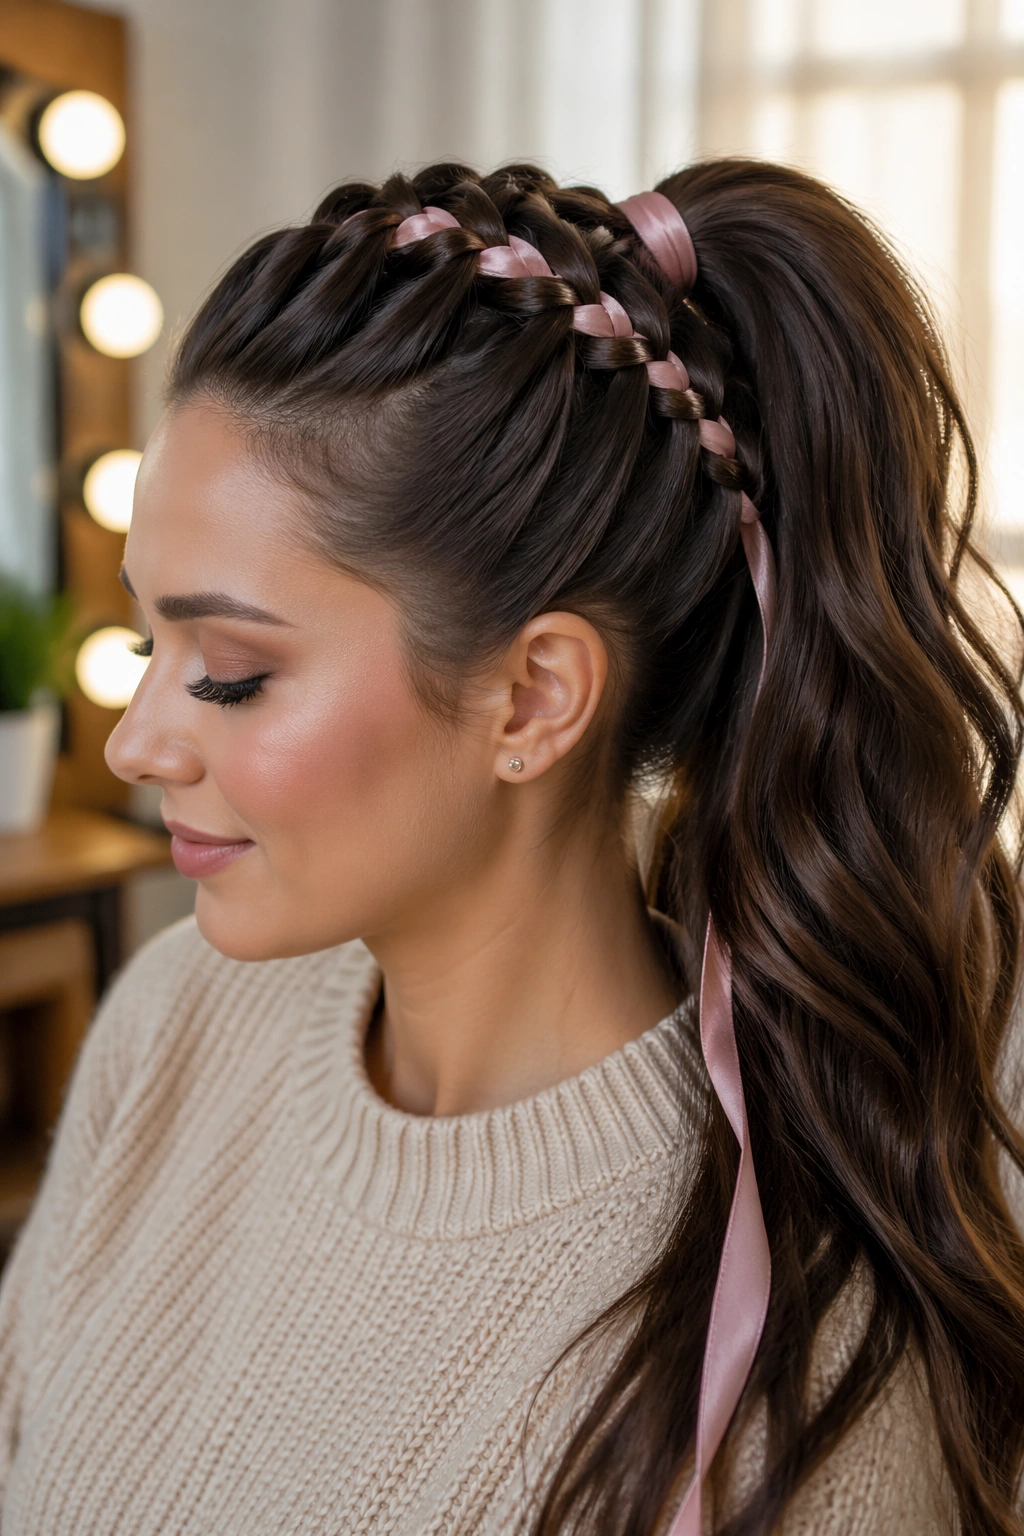
Add a ribbon and the whole style changes.
A ribbon-woven Dutch braid ponytail is one of the easiest ways to make thick hair feel dressed up without piling on extra pins or clips. The ribbon threads through the braid as you go, so it sits flat and becomes part of the structure instead of hanging on top of it. On dense hair, that woven look has enough body to feel balanced.
What to use
- 1/4-inch or 3/8-inch ribbon for a neat finish.
- Satin if you want shine.
- Velvet if you want a softer, fuller look.
- A ribbon that matches your outfit or contrasts on purpose.
Keep the ribbon narrow. Wide ribbon can fight the braid and make the crown feel crowded. Threading it through every few passes is easier than trying to feed it through after the braid is finished.
It’s a small detail, but it reads as thoughtful. And thick hair handles thoughtful details well.
14. Beaded Dutch Braid Ponytail
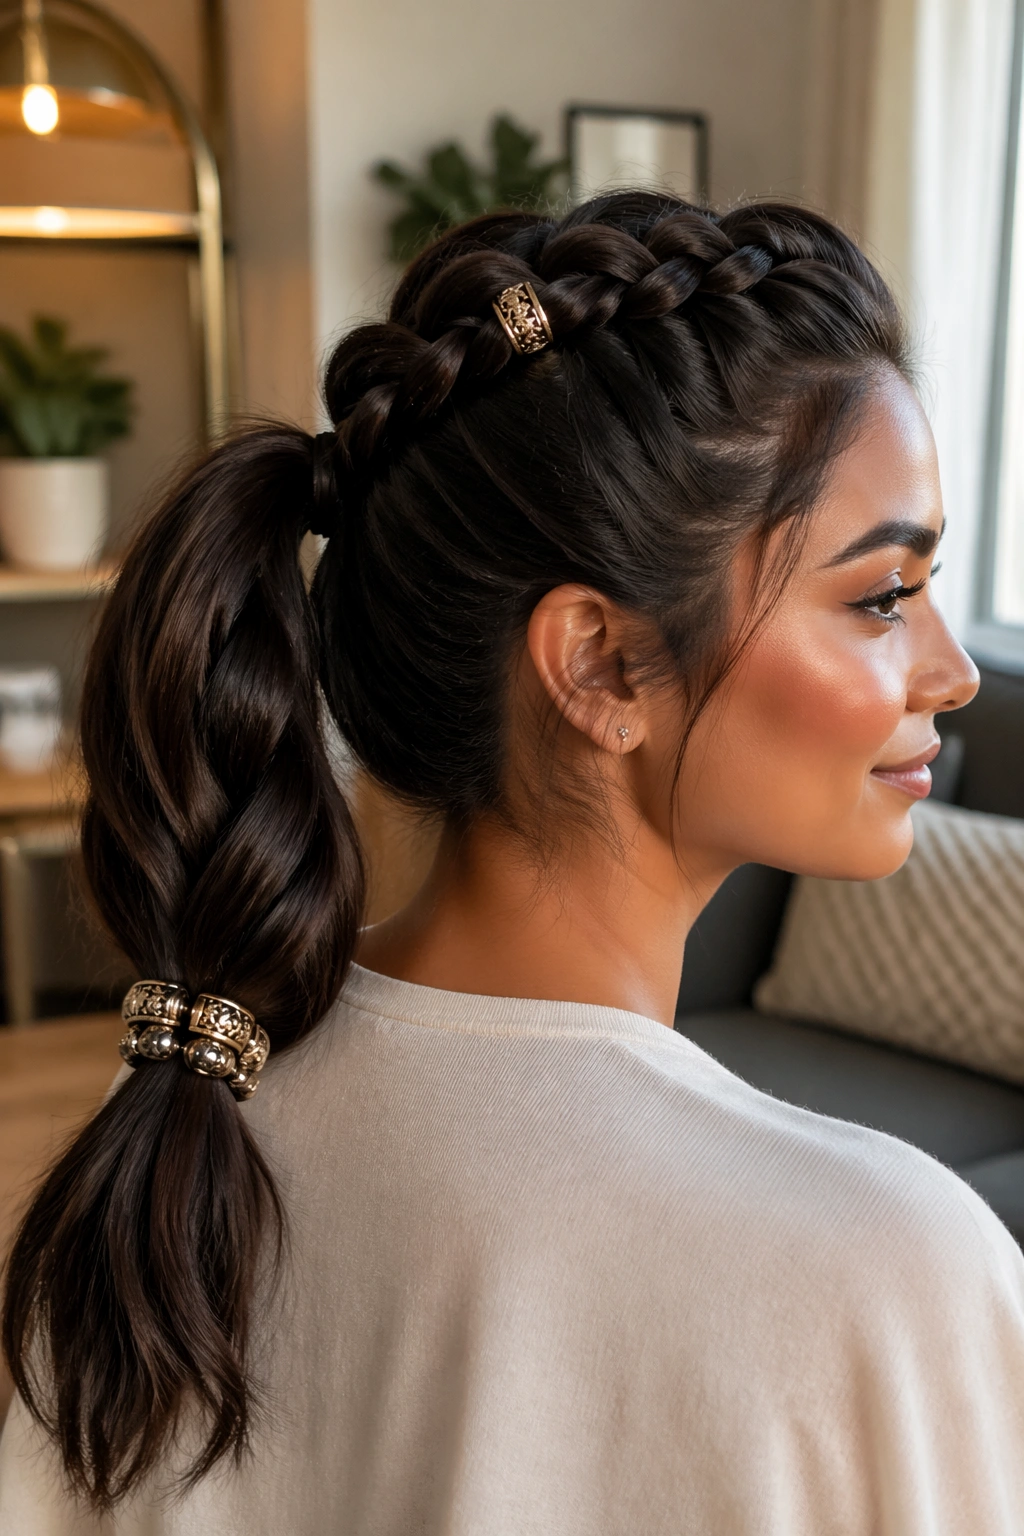
Do beads work on thick hair without looking costume-like? They do, as long as you place them with some restraint.
A beaded Dutch braid ponytail looks best when the beads sit near the tail or at one or two points along the braid, not all the way up the head. Thick hair gives the braid enough width to support the added weight, which means the beads don’t flop around as much as they can on finer hair. That makes the whole thing feel cleaner.
Where to place them
- Near the ends for a subtle finish.
- At the braid-to-pony transition for one focal point.
- In matched sets of two or three, not scattered everywhere.
Choose smooth bead openings so they don’t snag the braid. Cheap beads with rough edges are annoying fast, and thick hair catches on rough edges even more easily than fine hair does.
Keep the rest of the style simple. The beads should be the detail, not the whole story.
15. Dutch Braid Ponytail With Gold Cuffs
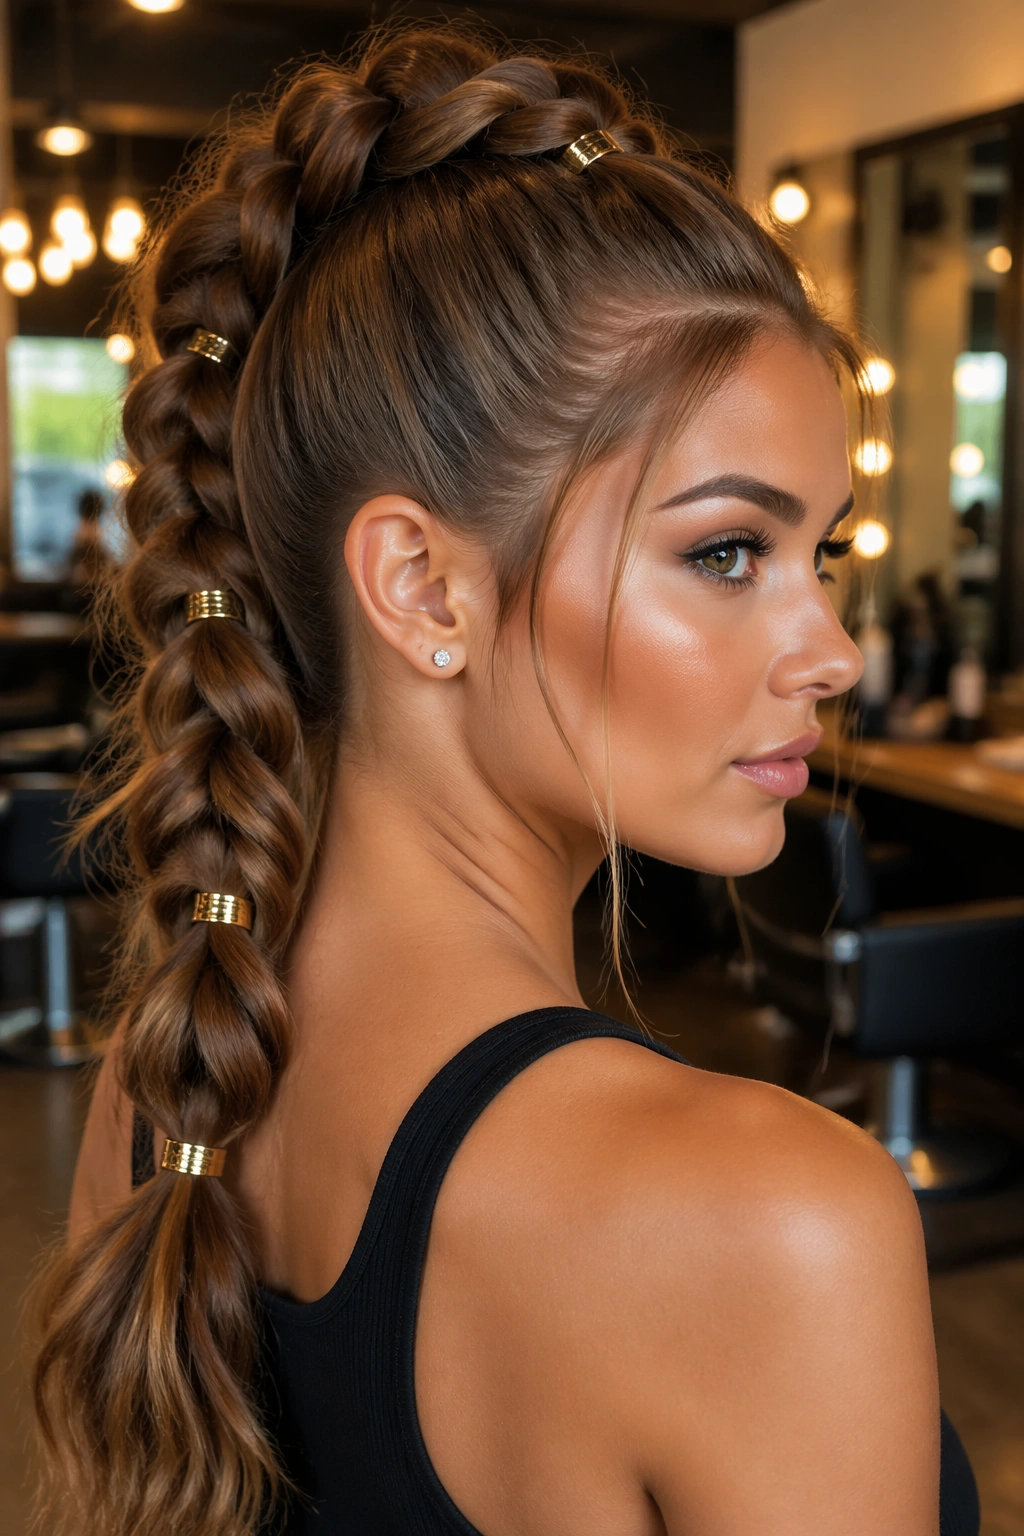
Gold cuffs make thick hair look expensive in the easiest possible way. The braid already has body, so the metal has something solid to sit against.
This version works best when the cuffs are spaced out. One near the crown, one mid-braid, maybe one lower down—three is usually enough. If you add too many, the braid stops looking intentional and starts looking crowded. Thick hair can hold the weight, sure, but your eye still needs room to breathe.
Use cuffs that close firmly. Loose ones slide, especially if your hair is smooth at the cuticle. A braid with a little texture gives the cuffs a better grip, so if your hair is slippery, a touch of dry shampoo at the roots can help.
This style has a nice balance: strong shape, a little shine, no fuss.
16. Zigzag-Part Dutch Braid Ponytail
A zigzag part changes the whole top of the head. Instead of one hard line, the part breaks into angles, which spreads thick roots in a way that feels softer and a little more playful.
The useful part is practical, not decorative. On dense hair, a straight part can look too severe, especially if the braid sits high and the ponytail adds more height behind it. A zigzag part cuts that visual block up. It also hides small root regrowth better than a clean line does, which is handy on days when the hair is not freshly washed.
Use the tail of a rat-tail comb and make shallow angles, not sharp ones. If the angles are too deep, the part reads as messy instead of purposeful.
This is a good choice for second-day hair. It gives the style some movement before the braid even begins.
17. Dutch Braid Ponytail With a Four-Strand Tail
A four-strand tail gives thick hair a woven finish that looks more intricate than a standard braid tail. The Dutch braid at the front does the setup work; the four-strand section gives the ponytail its texture.
Where the extra strand matters
- It looks fuller than a simple three-strand braid.
- It holds shape well in dense hair.
- It makes the tail feel more dressed up without needing accessories.
- It works best when the ends are the part you want to control most.
This style takes a little more hand work, so it’s not the one I’d reach for if I’m rushing out the door. Still, thick hair is forgiving here. The extra strand gives the tail enough structure to stay visible instead of collapsing into one heavy rope.
If your hair is layered, use a light smoothing cream on the ends before you start the four-strand section. It helps the shorter bits stay inside the braid instead of kicking out.
18. Asymmetric Dutch Braid Ponytail
Unlike centered styles, this one starts at one temple and curves toward the crown. That off-balance line can look sharper on thick hair because it cuts across the width of the head instead of adding more height in the same place.
The asymmetry makes the ponytail feel modern without getting fussy. If your hair is dense around the part line, this style gives that extra weight somewhere to go. It also looks good with statement earrings or a high-neck top because the braid doesn’t sit squarely in the middle and crowd the neckline.
Keep the braid tight through the first half, then relax a little as it approaches the crown. That curve is what gives the shape its personality.
A side-swept bang or a long face frame helps here, but it’s not required. The braid itself does most of the talking.
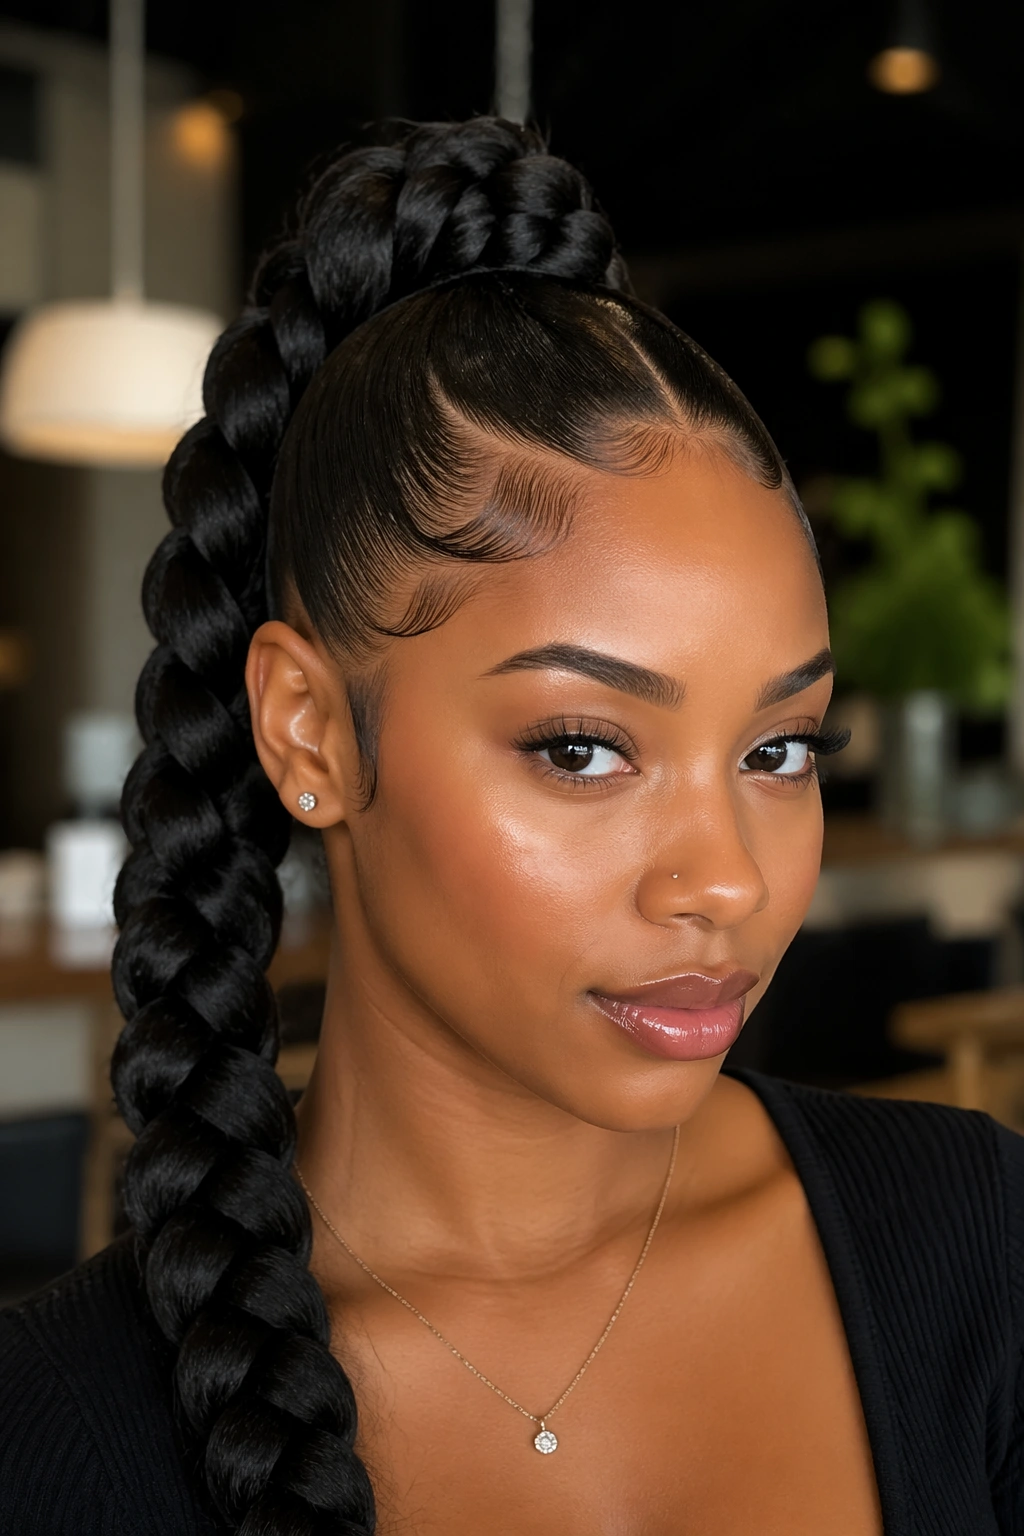
19. Dutch Braid Ponytail With a Braided Base Wrap
If you hate seeing the elastic, this is the fix.
A small Dutch braid wraps around the base of the ponytail and covers the tie from every angle. It’s a little more sculpted than the simple wrapped strand version, and thick hair gives it enough surface area to sit neatly without disappearing. That matters more than you’d think. On dense hair, the base is usually the first place things look bulky, so a braided wrap keeps the finish cleaner.
Pin the end of the wrap underneath the ponytail with two bobby pins crossed in an X. One pin often slips in heavy hair; two hold better. Choose pins that match the braid color so they vanish a little.
This style is handy for formal looks, but it also works on a plain black T-shirt. That’s the nice part. It’s tidy without being precious.
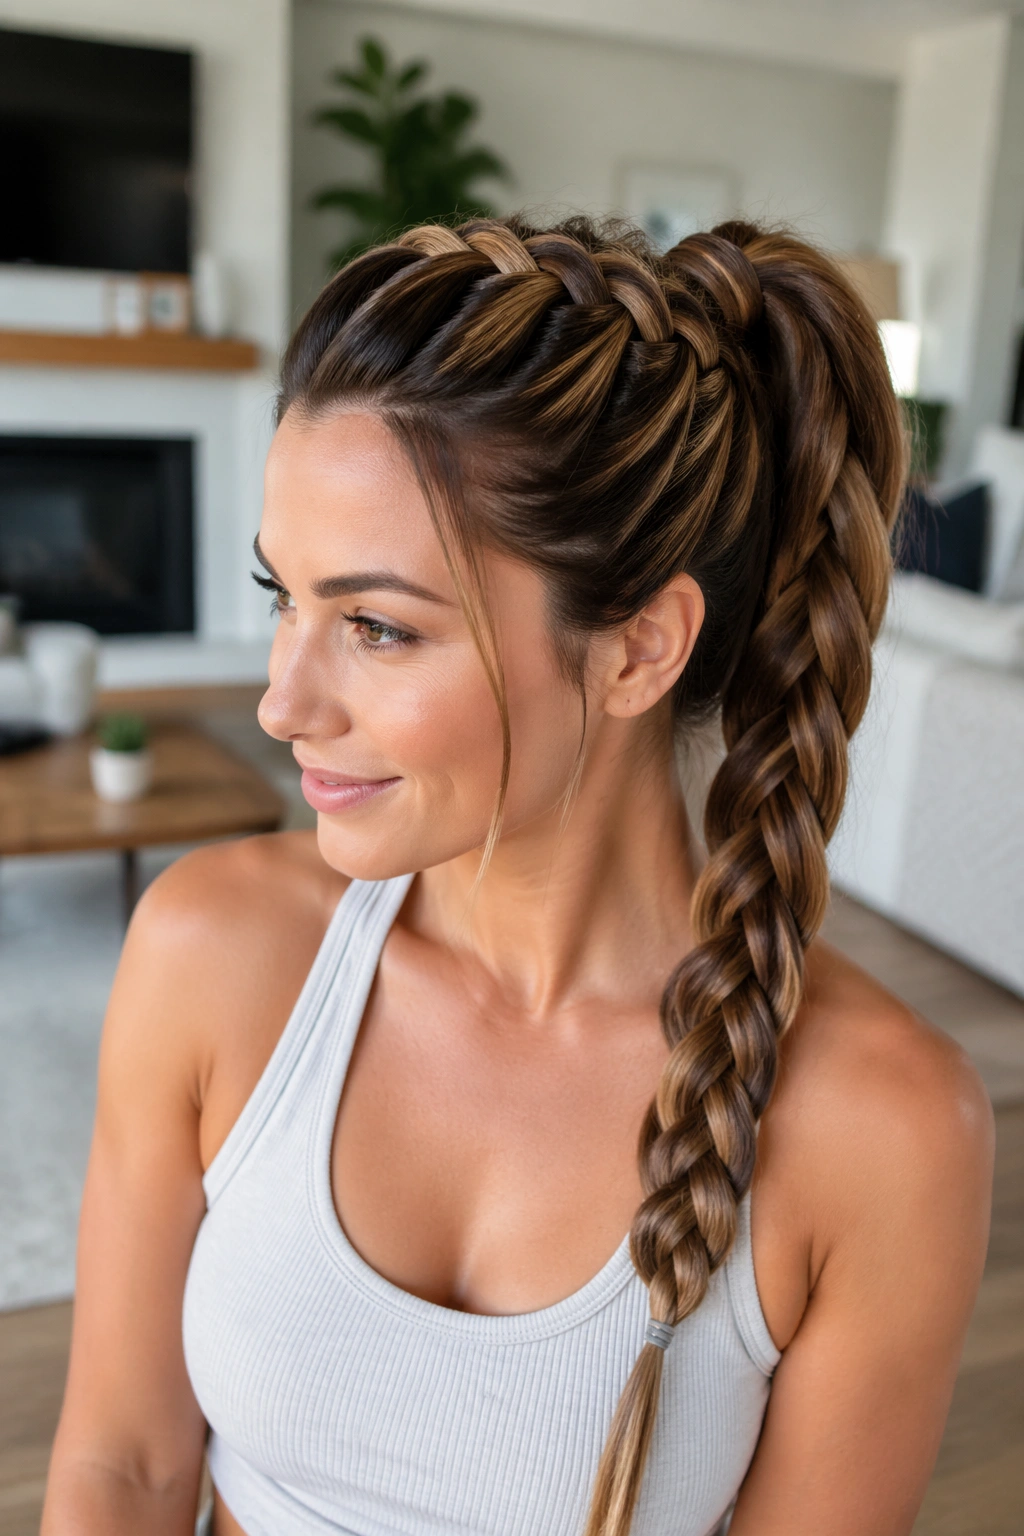
20. Dutch Braid Ponytail With a Fishtail Tail
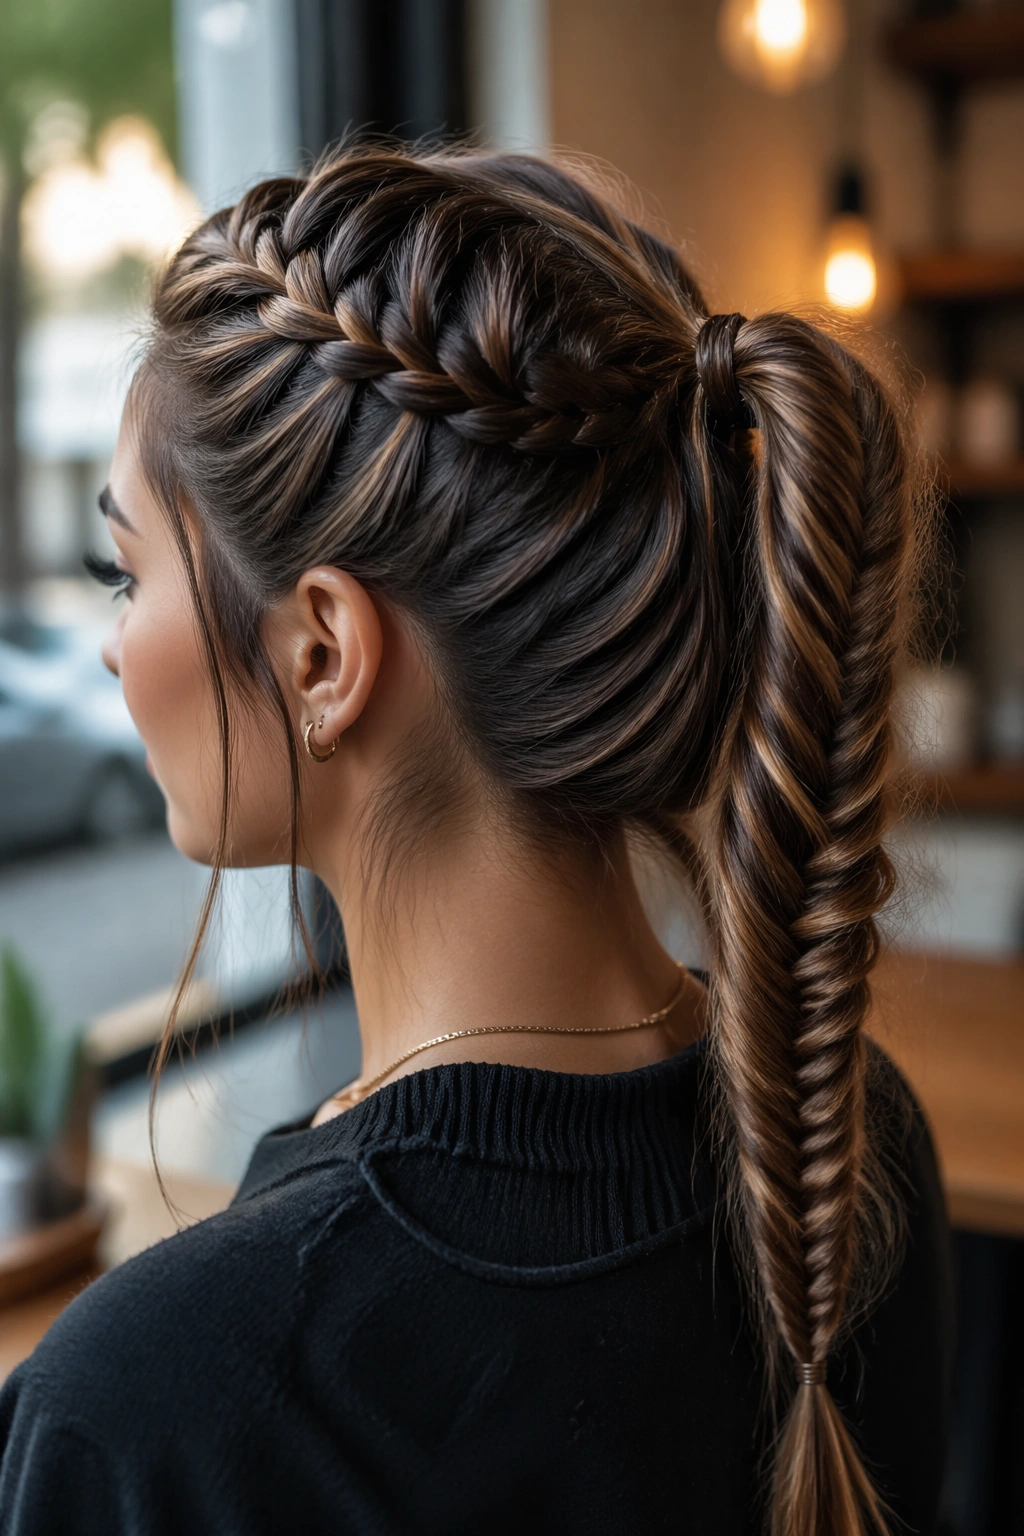
Why mix a fishtail in after the Dutch braid? Because the contrast makes thick hair look narrower through the ends.
The Dutch braid controls the front and crown, then the ponytail shifts into a fishtail braid once the hair is gathered high. Thick hair makes fishtails look full and textured, which is half the appeal. You get a strong top line and a tail that feels detailed instead of plain. It’s a good option when you want the hairstyle to hold up under a jacket or scarf and still look finished at the ends.
If your hair is layered, a tiny amount of styling wax on the tail helps the short pieces stay inside the fishtail. Don’t use too much. A little goes a long way.
This one takes patience, but the payoff is clean. And the tail photographs nicely without looking stiff.
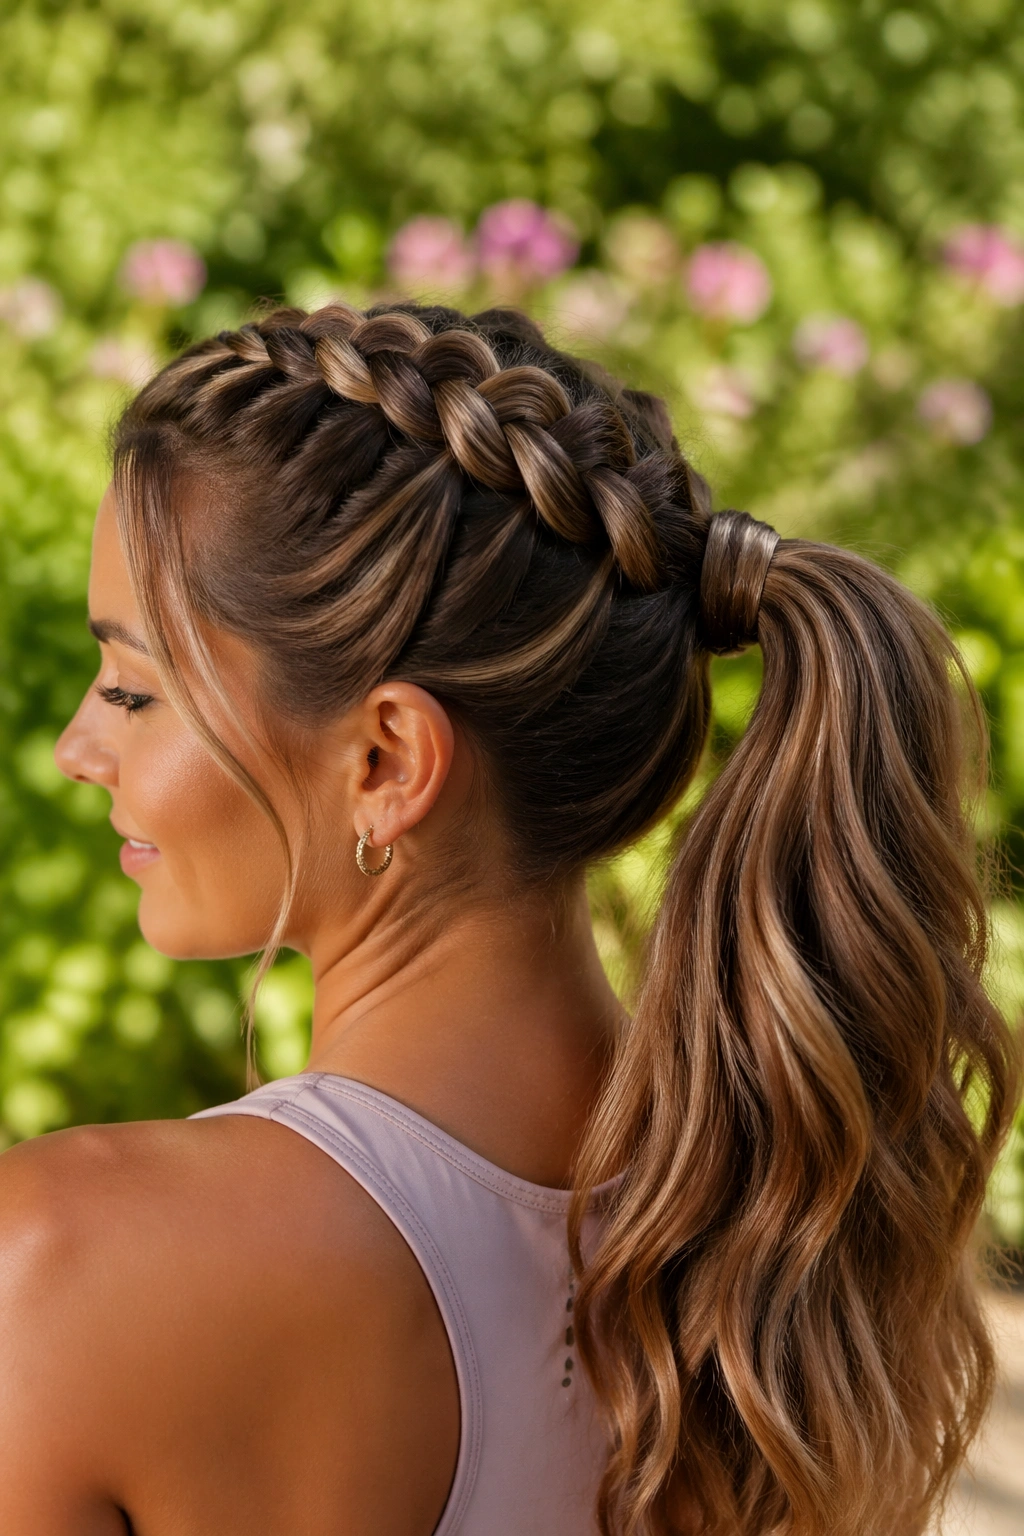
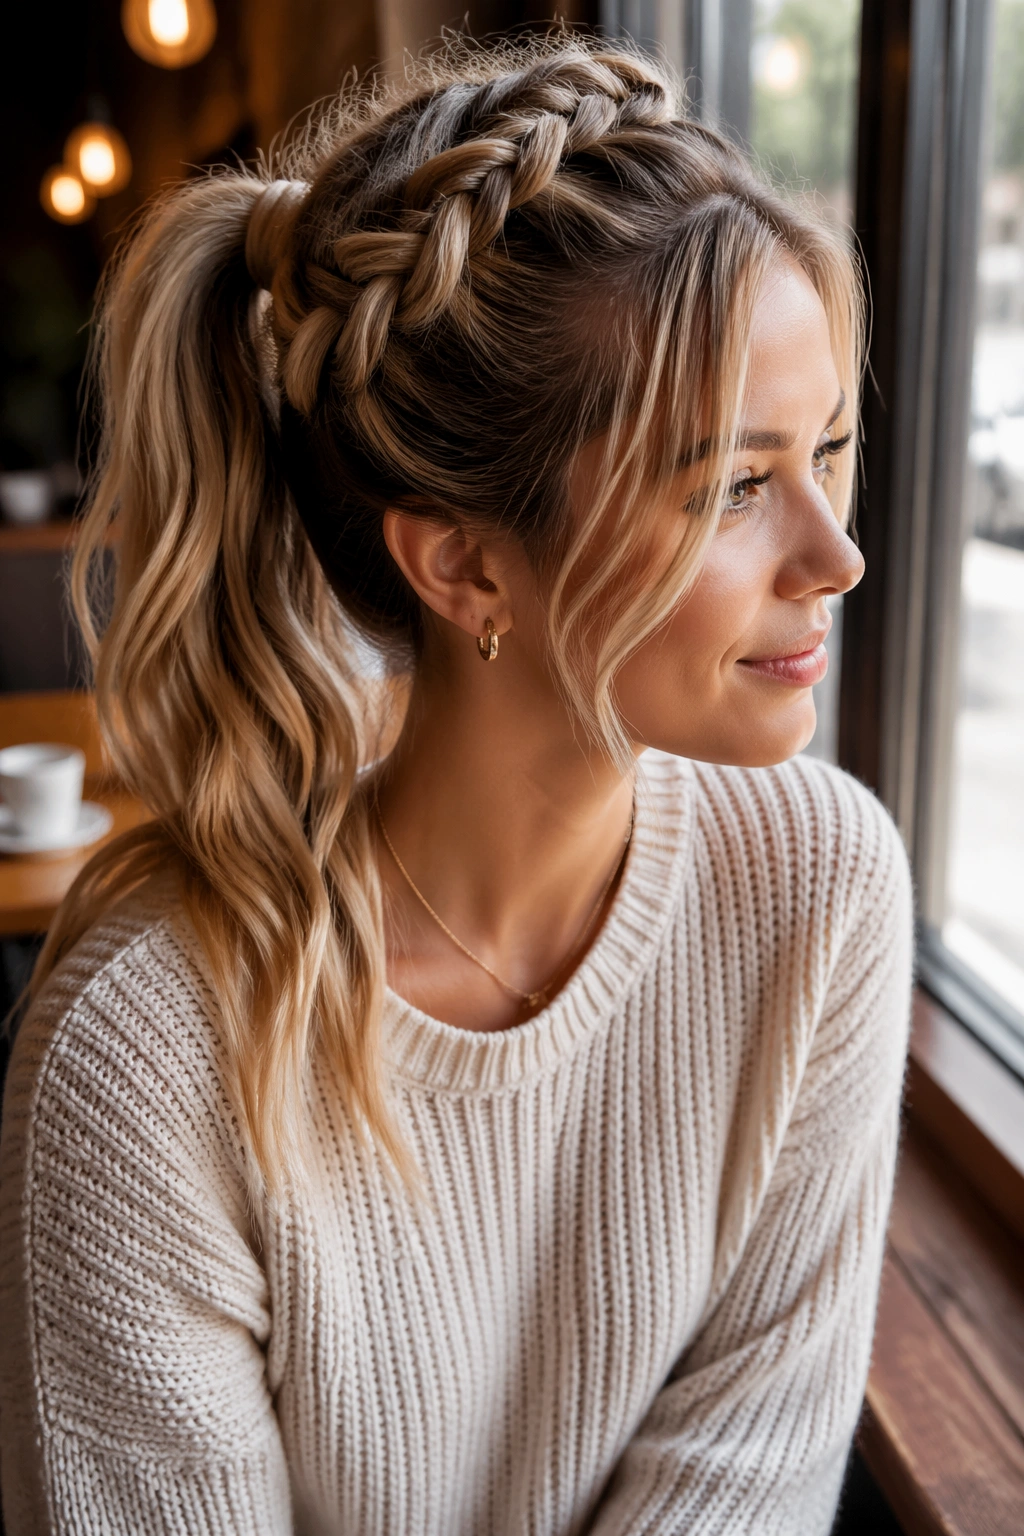
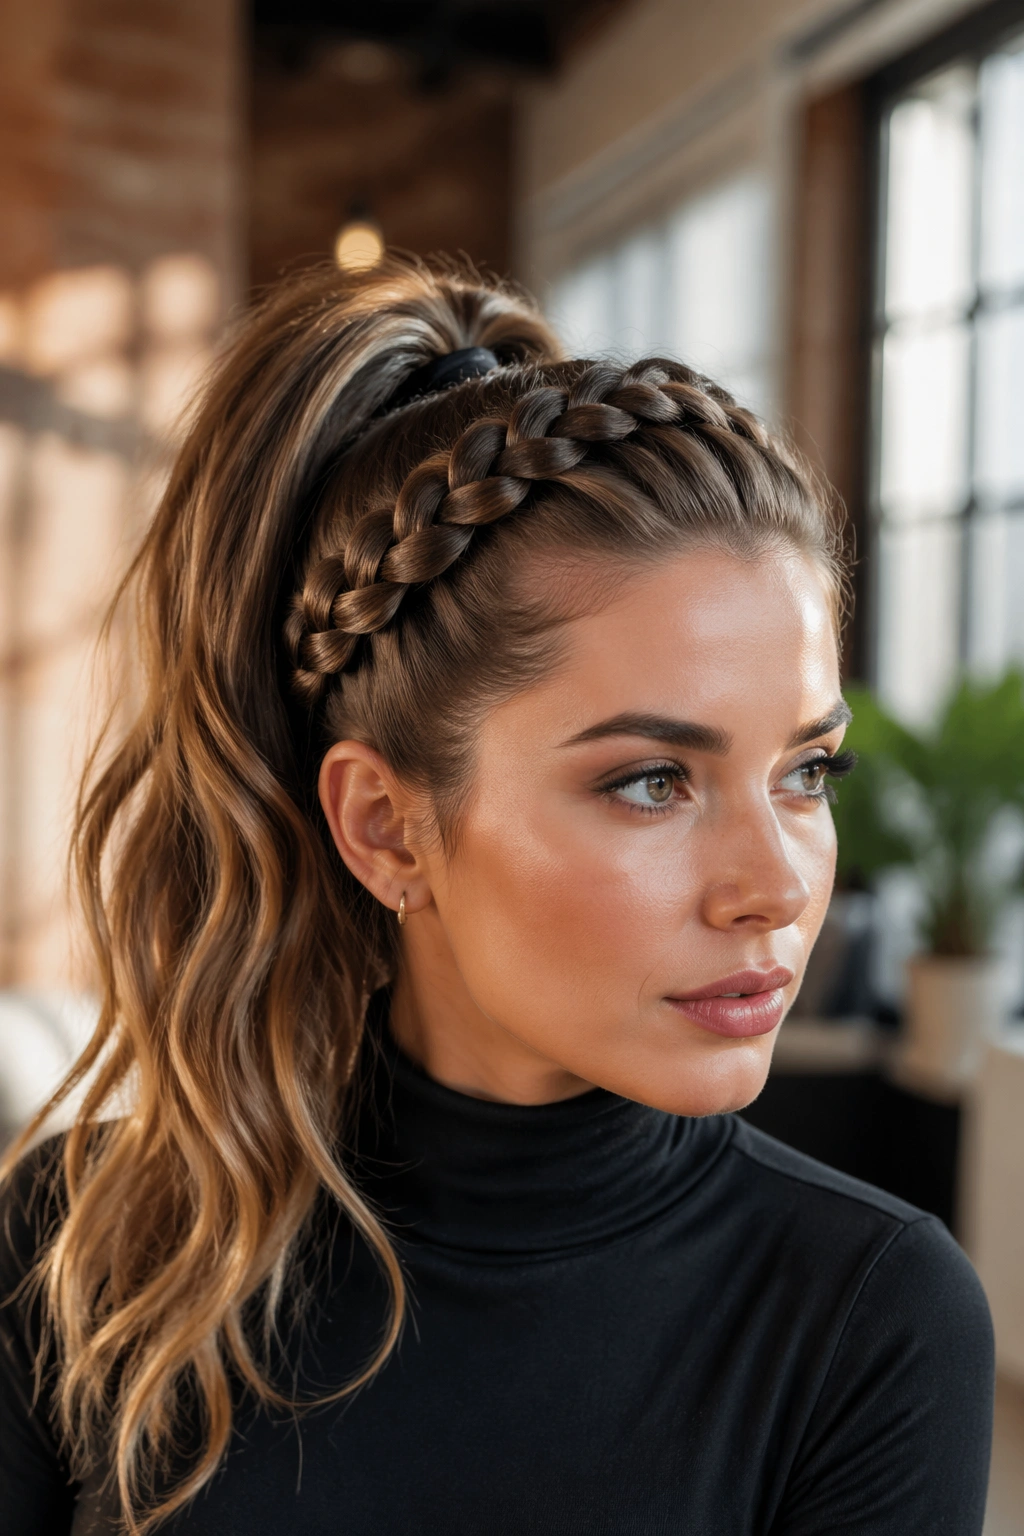
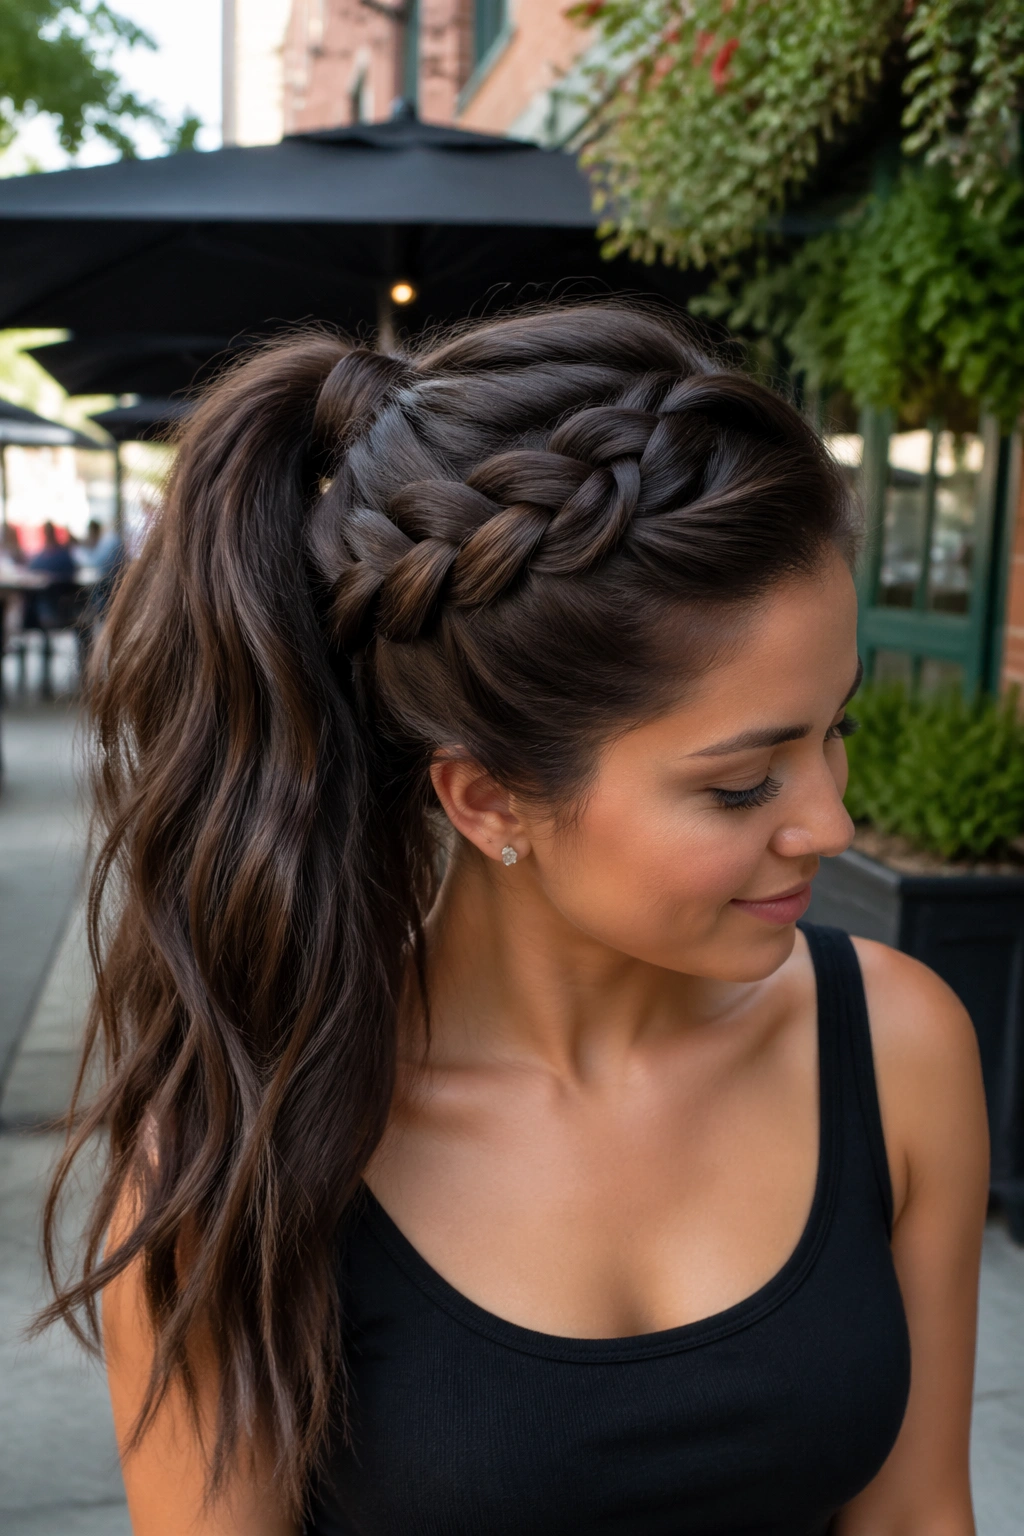
21. Braided Crown Into a High Ponytail
A braid that curves around the crown before it becomes a ponytail looks more dressed up than a straight-down center braid. Thick hair gives the crown enough body to make that curve look full instead of thin.
The braid starts near one side, travels across the top, and lands at the high ponytail point. That arched shape lifts the face a little and keeps the style from feeling flat at the hairline. It’s a smart choice when you want the braid to be the main event, not just a lead-in.
I like this one for open necklines because it keeps everything visually upward. The hair sits high, the crown feels secure, and the tail still moves.
Use a touch of shine serum on the ponytail length if your hair is coarse. The crown should stay grippy; the tail can be smoother.
22. High Dutch Braid Ponytail With Curly Ends
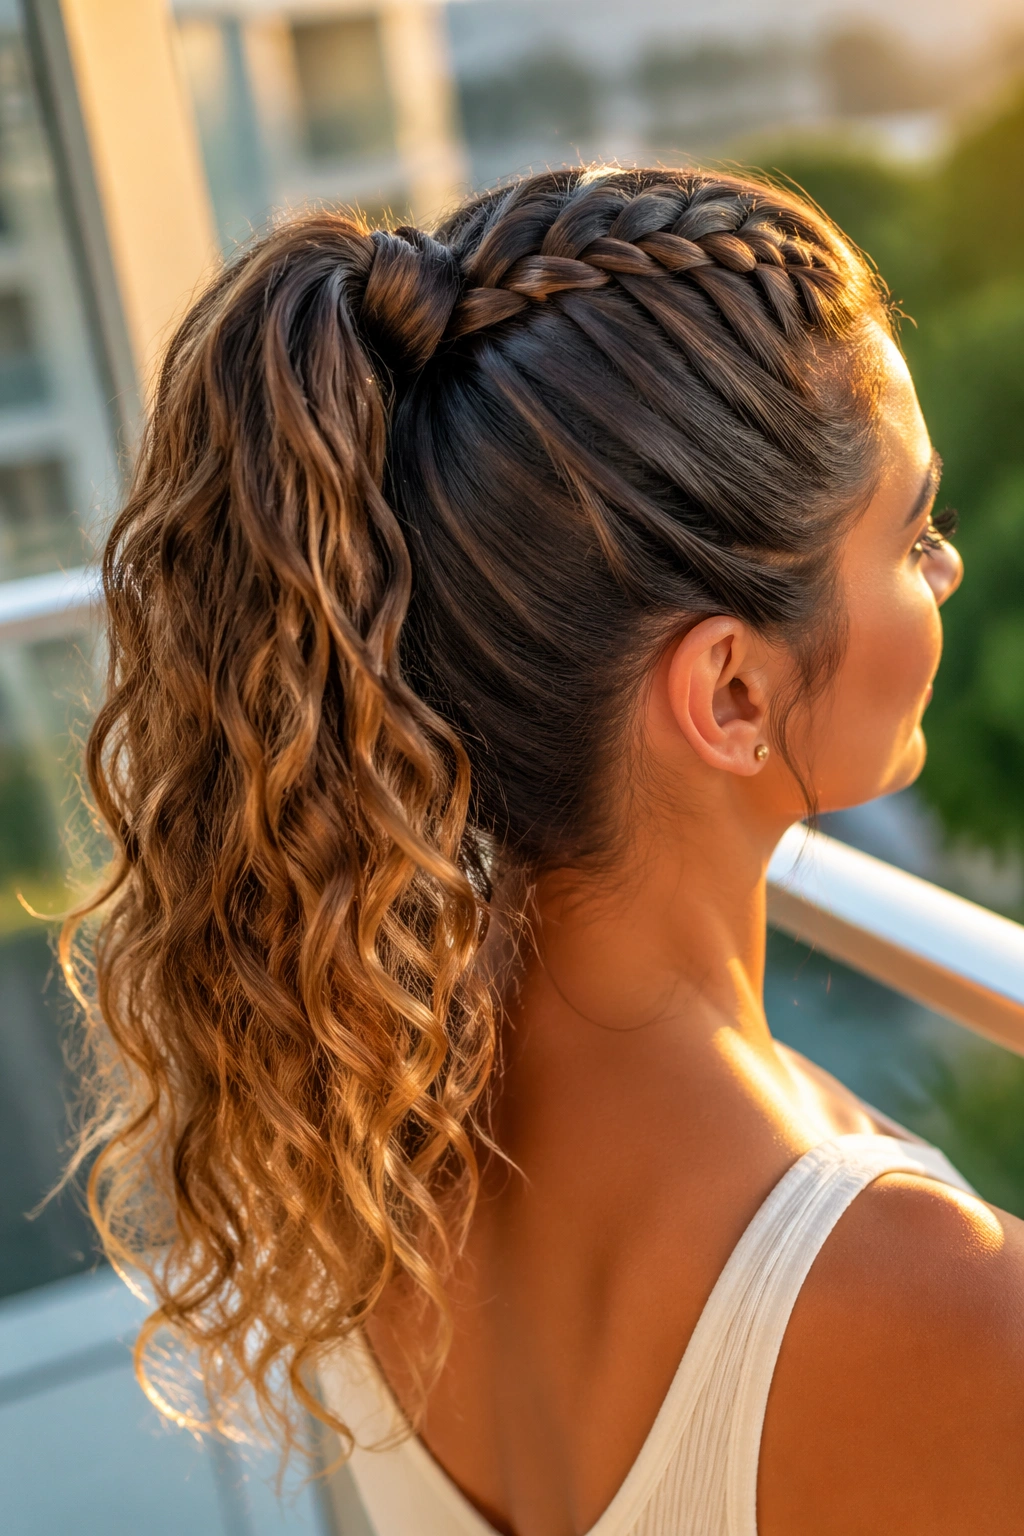
Curly ends soften the weight of thick hair in a way straight lengths never quite do. The braid controls the root area, then the curls bring some air back into the tail.
A 1.25-inch or 1.5-inch curling iron usually gives the best bend for dense hair. Smaller barrels can make the tail look too tight, which fights the braid’s structure. Curl the ponytail in medium sections, let them cool fully, then break the curls apart with your fingers instead of a brush. You want movement, not frizz.
This style is nice when your hair naturally falls heavy. The braid keeps the top tidy, and the curls stop the ponytail from looking like one long block. If your hair is coarse, the curl pattern usually holds longer too, which is one of the few little gifts thick hair gives back.
23. Sleek High Dutch Braid Ponytail With Edge Detail
This is the polished version that still has a little attitude. The braid stays sharp, the ponytail stays high, and the edge detail adds a bit of finish around the hairline.
What to smooth and what to leave alone
- Smooth the sides with a small amount of gel or edge control.
- Leave the braid itself a touch textured so it doesn’t look painted on.
- Use a soft brush, not a hard one, if your hairline is sensitive.
- Add shine spray only to the lengths, not the roots.
Thick hair can handle a glossy finish well, but the trick is not to flatten the braid too much. The braid needs some body or it starts to look like a helmet. The edge detail should frame the face, not outline it like a stencil.
This style is good when you want the cleanest possible version without losing personality.
24. Side-Swept Dutch Braid Ponytail
Unlike a straight-down ponytail, this one swings over one shoulder. That shift changes how thick hair sits against the body, and honestly, it’s kinder on the neck too.
The side sweep lets the braid remain visible from the front while moving the heavy tail out of the center of your back. If your hair is very dense, that can feel lighter fast. It also looks good with sweaters, high collars, and jackets because the ponytail isn’t pressed straight into the fabric.
Keep the braid anchored high, then guide the ponytail slightly to one side with a hidden pin if needed. Don’t force it too far across the body or the style loses its height. You want a soft diagonal, not a dramatic swing.
This is one of those styles that looks easy in the best way. It’s not lazy. It’s calm.
25. Chunky Statement Dutch Braid Ponytail
If your hair is thick, this is the style that finally stops pretending otherwise. The braid should be visibly chunky, the ponytail full, and the whole shape a little bold from the first glance.
Use your fingers instead of a fine comb once the braid is underway. Let the sections stay a little wider. Keep the ponytail high and let the length fall with real weight, because that’s what thick hair does best. Trying to shrink it down usually kills the appeal. A chunky braid on dense hair has a nice, almost rope-like look that feels strong without looking severe.
A touch of texturizing spray at the crown can help the braid hold its shape, especially if the hair is freshly washed. After that, stop fussing. The fullness is the point.