A high French braid ponytail looks more complicated than it is. That’s the whole charm of it. You get the lift of a high ponytail, the structure of a French braid, and just enough polish to make people assume you spent far longer in front of the mirror than you did.
The trick for beginners is not perfection. It’s placement, tension, and knowing which version of the style gives you breathing room while you learn. A rat-tail comb, a brush, a few small elastics, and some light hairspray will carry you through most of these looks, especially if your hair has a little texture from day-old washing or dry shampoo.
I like French braid ponytails because they solve a common problem: the top of the hair looks flat, the sides feel loose, and the ponytail itself feels ordinary. This style gives you shape at the crown and movement at the ends, which is why it works on straight hair, wavy hair, and thick hair that needs a little control. The sections below keep things beginner-friendly on purpose, so you can pick the version that fits your hands, your hair, and your patience.
1. Sleek High French Braid Ponytail With Tight Roots
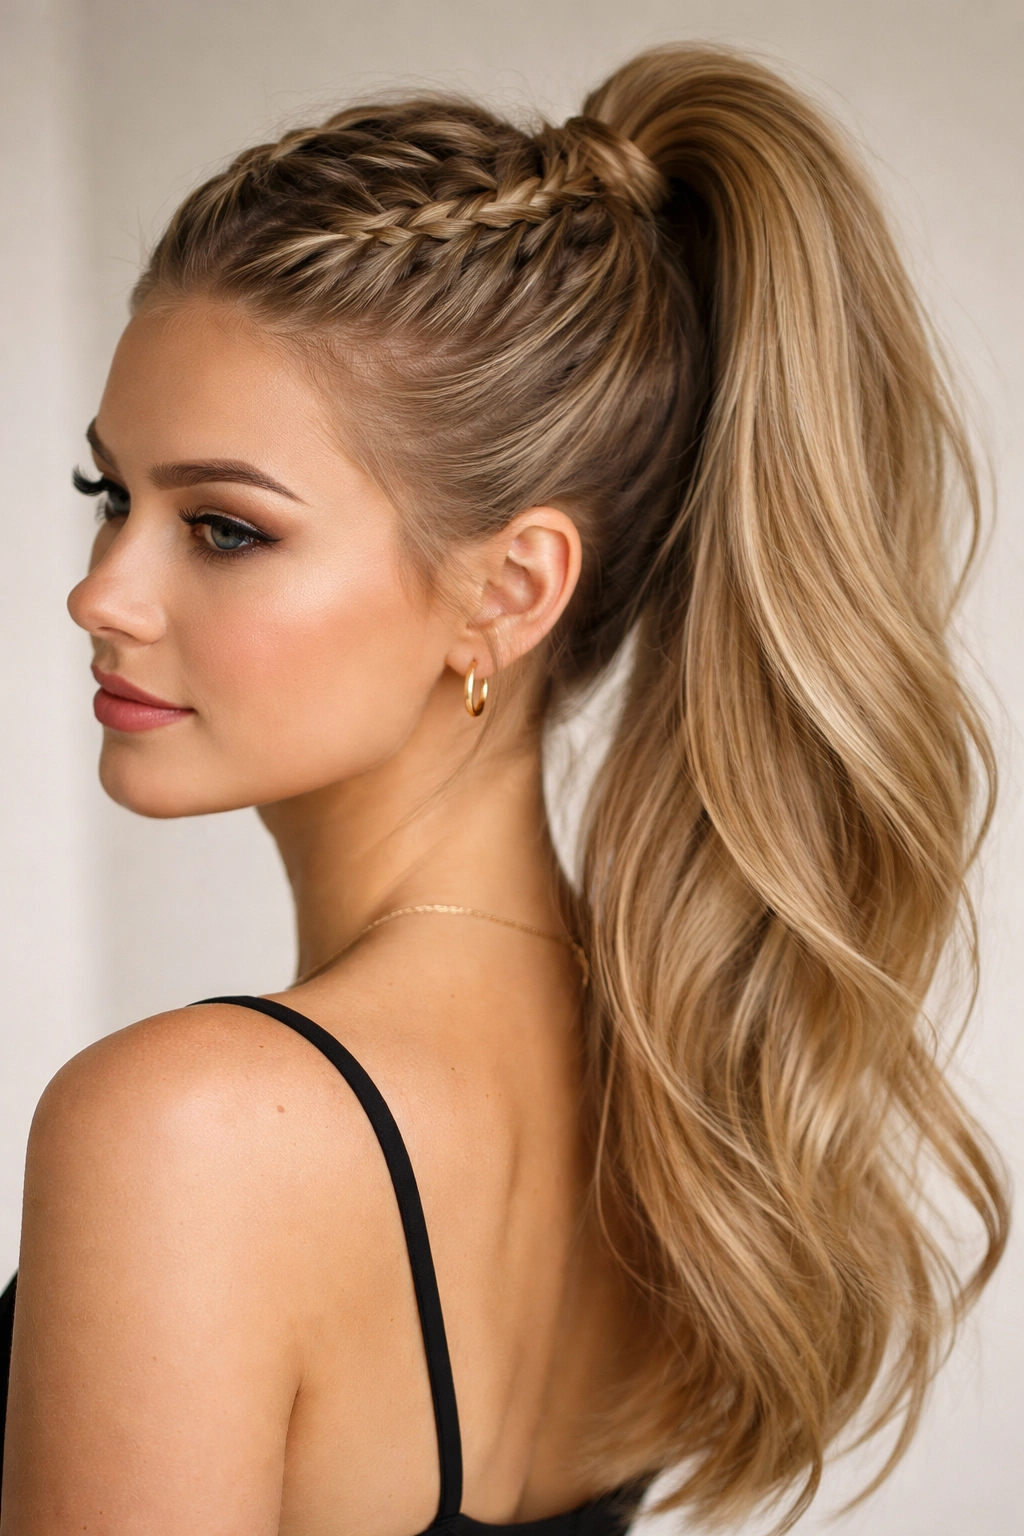
This is the cleanest place to start if you want a high French braid ponytail that stays put all day. The braid begins at the hairline, hugs the scalp, and feeds straight into a ponytail placed right at the crown. Nothing fussy. Nothing hiding behind layers of tricks.
Sleek roots make the braid look sharper. Brush the hair back first, then use a pea-size amount of smoothing cream or gel near the front sections. That gives the first few crossings a little grip, which matters more than people think. If your hair is slippery, this version will save you from constant redoing.
The best part is how forgiving it becomes once the ponytail is secured. A tiny bump at the temples disappears the second the length falls behind it. And if the braid feels a little uneven while you’re working, keep going anyway. Once the hair is tied high, the whole style reads as intentional.
Keep the tension firm, but don’t pull so hard that your scalp aches. That’s the line. Tight enough to stay neat, loose enough that you can wear it for a few hours without regretting your choices.
2. Loose Pancaked French Braid Ponytail
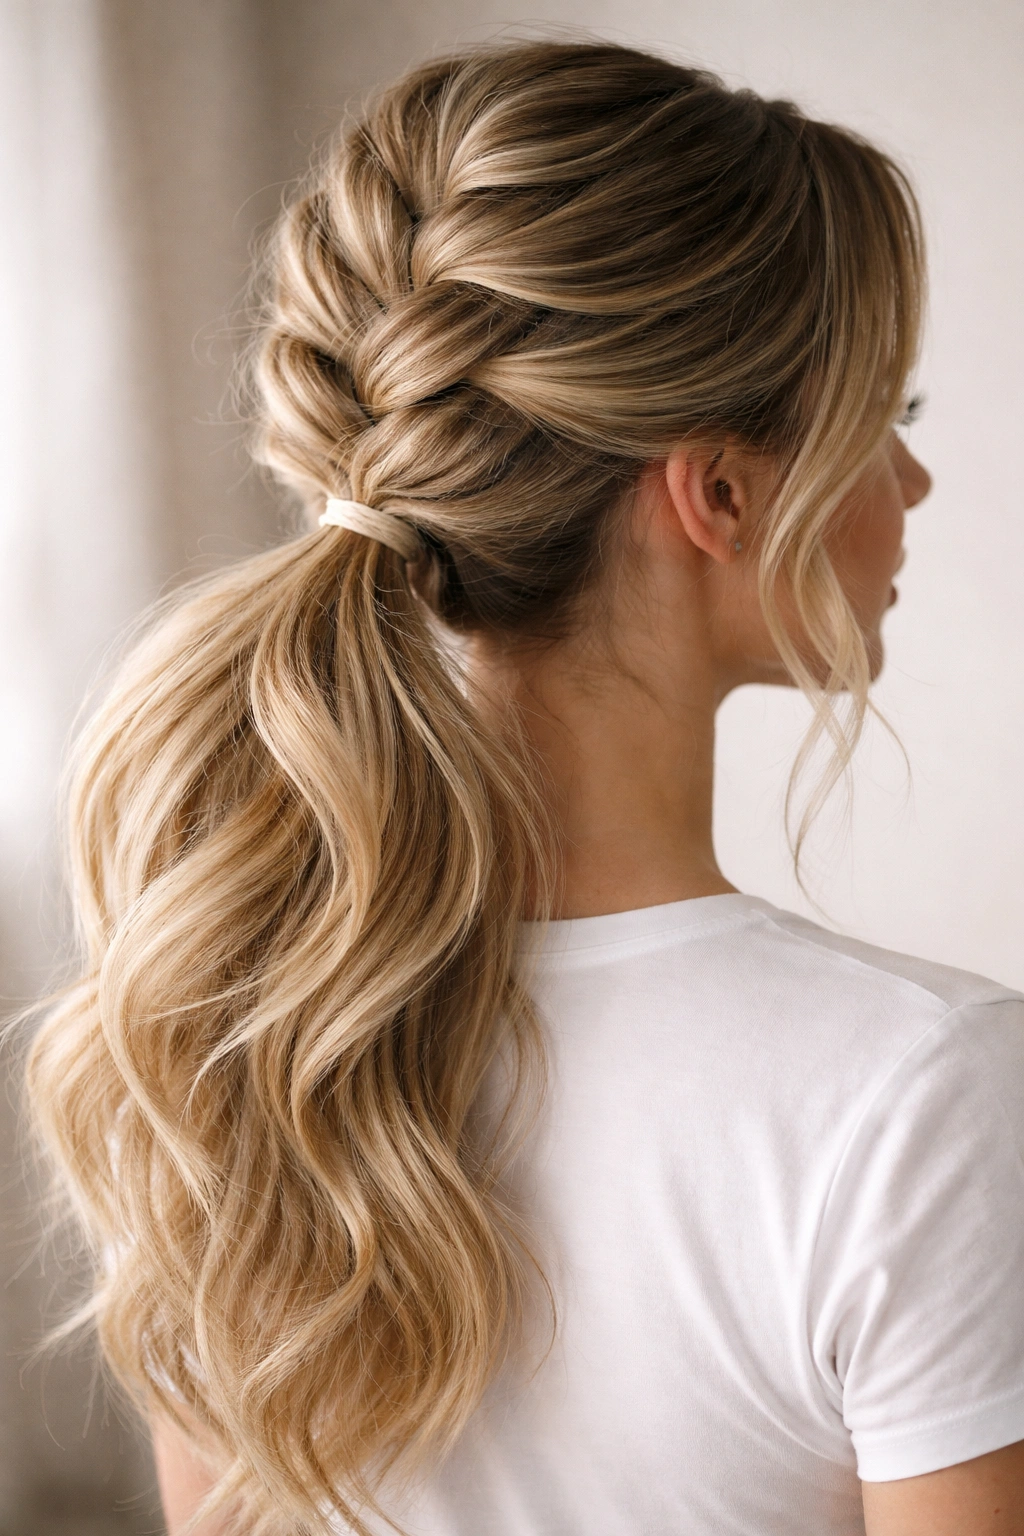
A little softness changes everything here. Instead of keeping the braid snug and narrow, you gently widen each braided section after it’s finished, which makes the braid look fuller and the ponytail feel less severe.
Why the Pancake Trick Helps
Pancaking works because it flattens the outer edges of the braid without unraveling the middle. You pinch each loop and tug it outward a touch, working from the bottom up so you do not disturb the braid’s base. The result looks more relaxed, but it still has shape.
- Best on medium to thick hair
- Works well with second-day texture
- Use a clear elastic at the base so the braid doesn’t look bulky
- Pull the braid outward in tiny steps, not all at once
- Stop before the braid turns fuzzy
A loose braid should still look controlled. If you tug too hard, the style starts to fray and you lose the clean French braid pattern that makes it pretty in the first place. I’d rather see a braid that is slightly narrow than one that looks chewed up.
This version is especially nice if your hair is long enough to swing. The wider braid balances the ponytail and keeps the style from looking top-heavy.
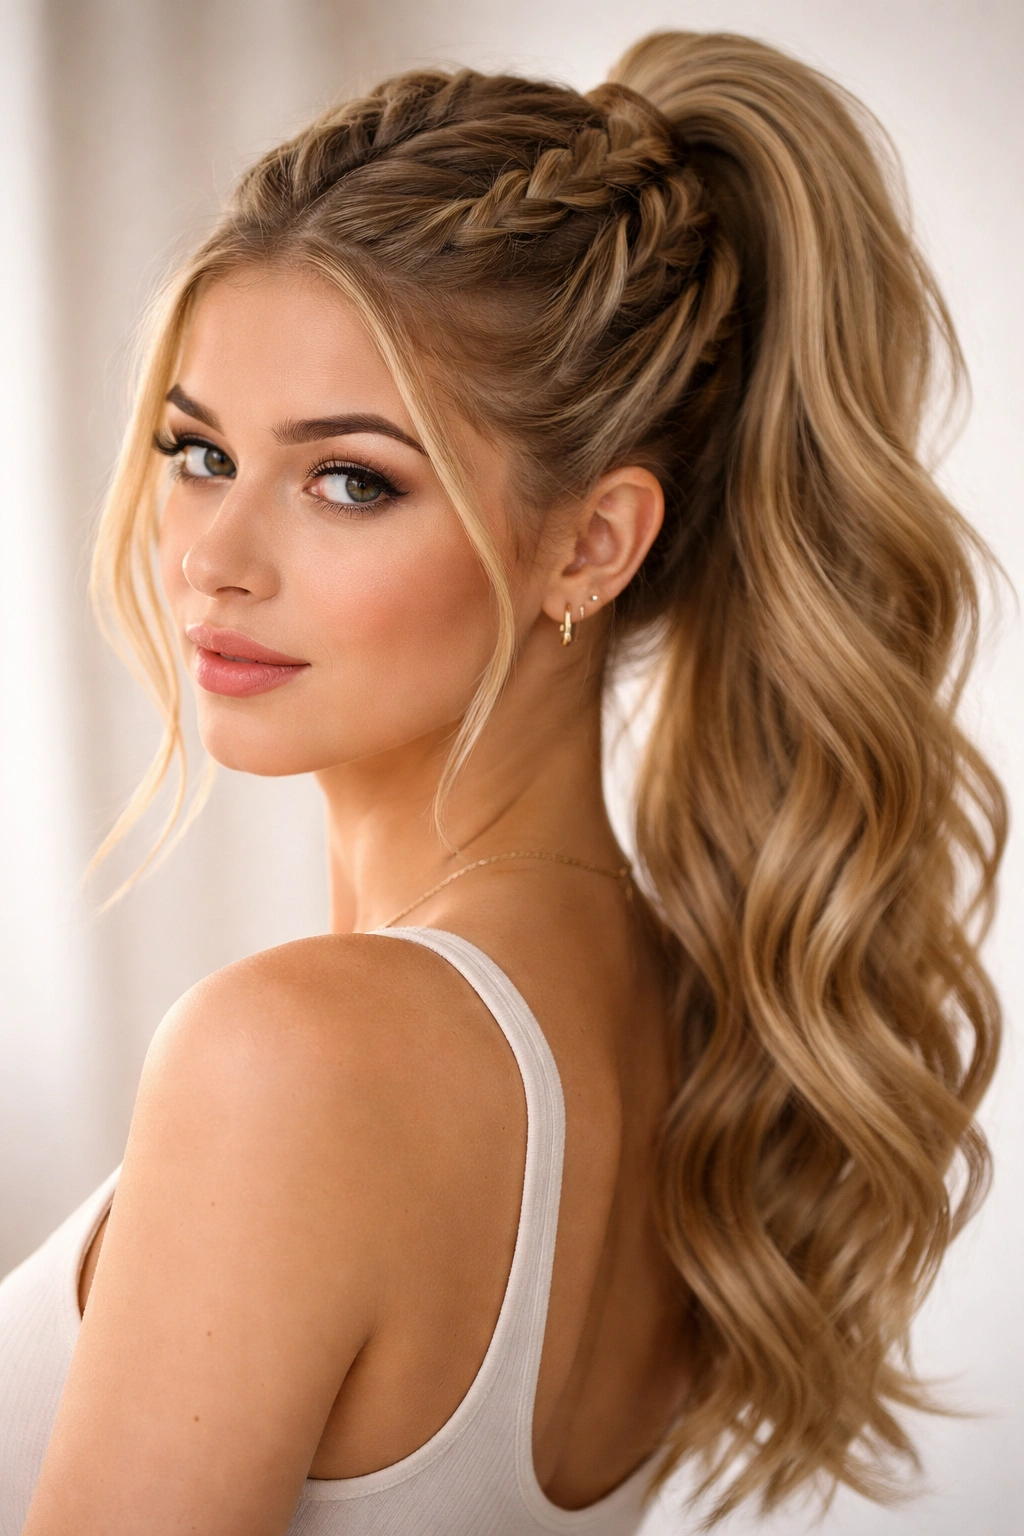
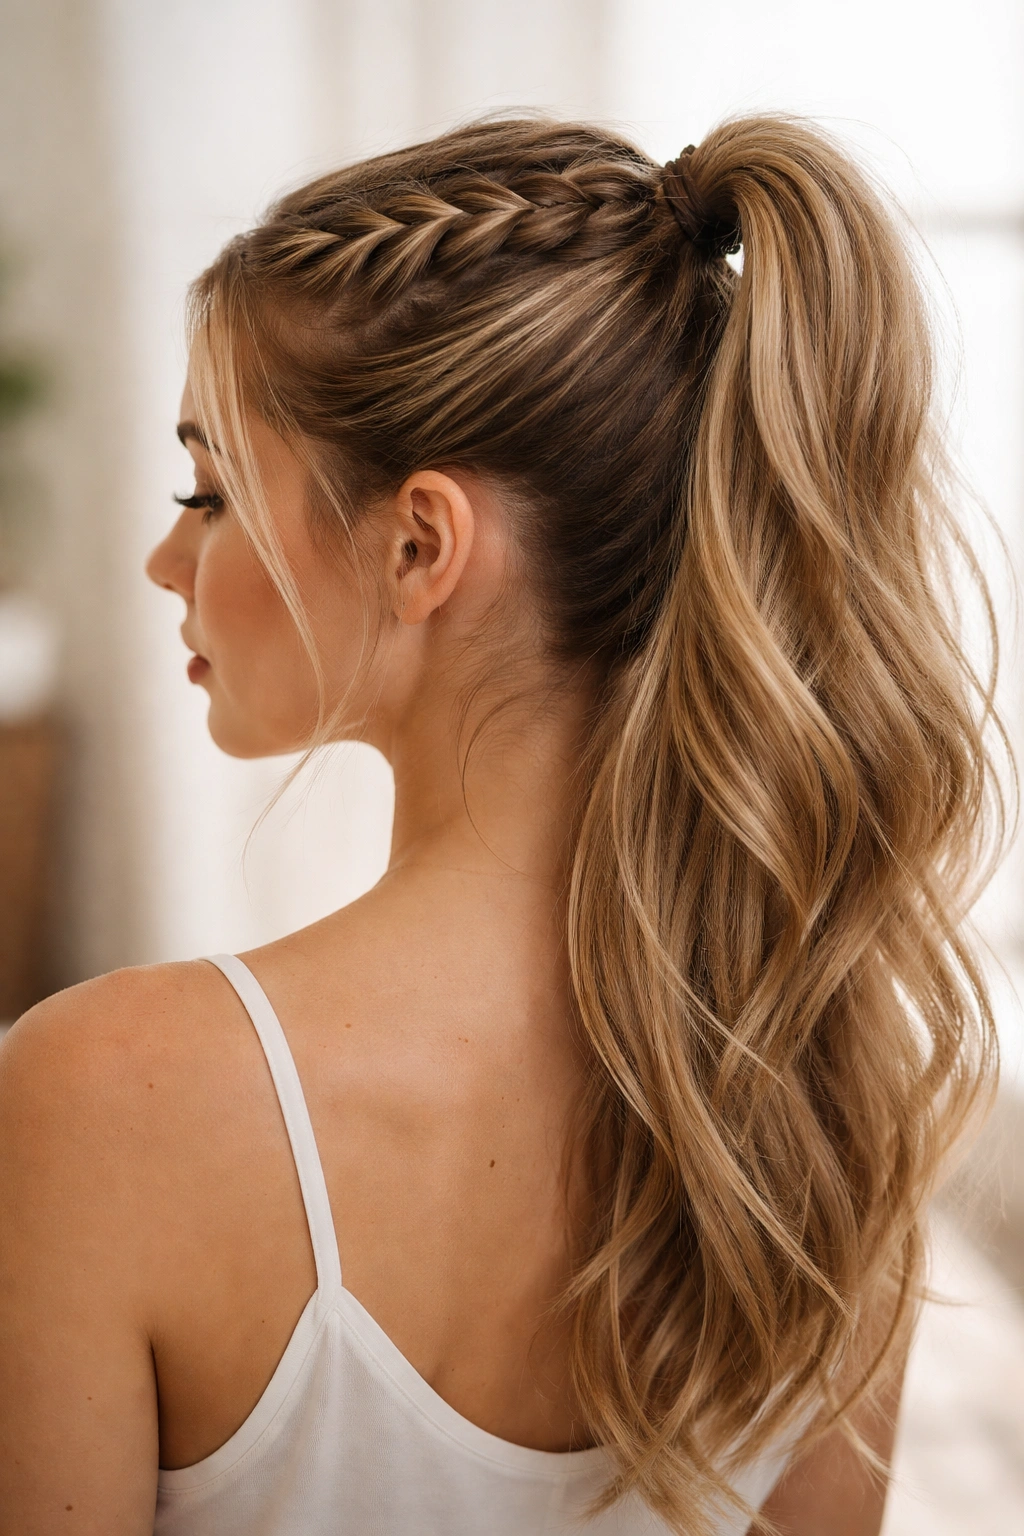
3. Side-Swept High French Braid Ponytail
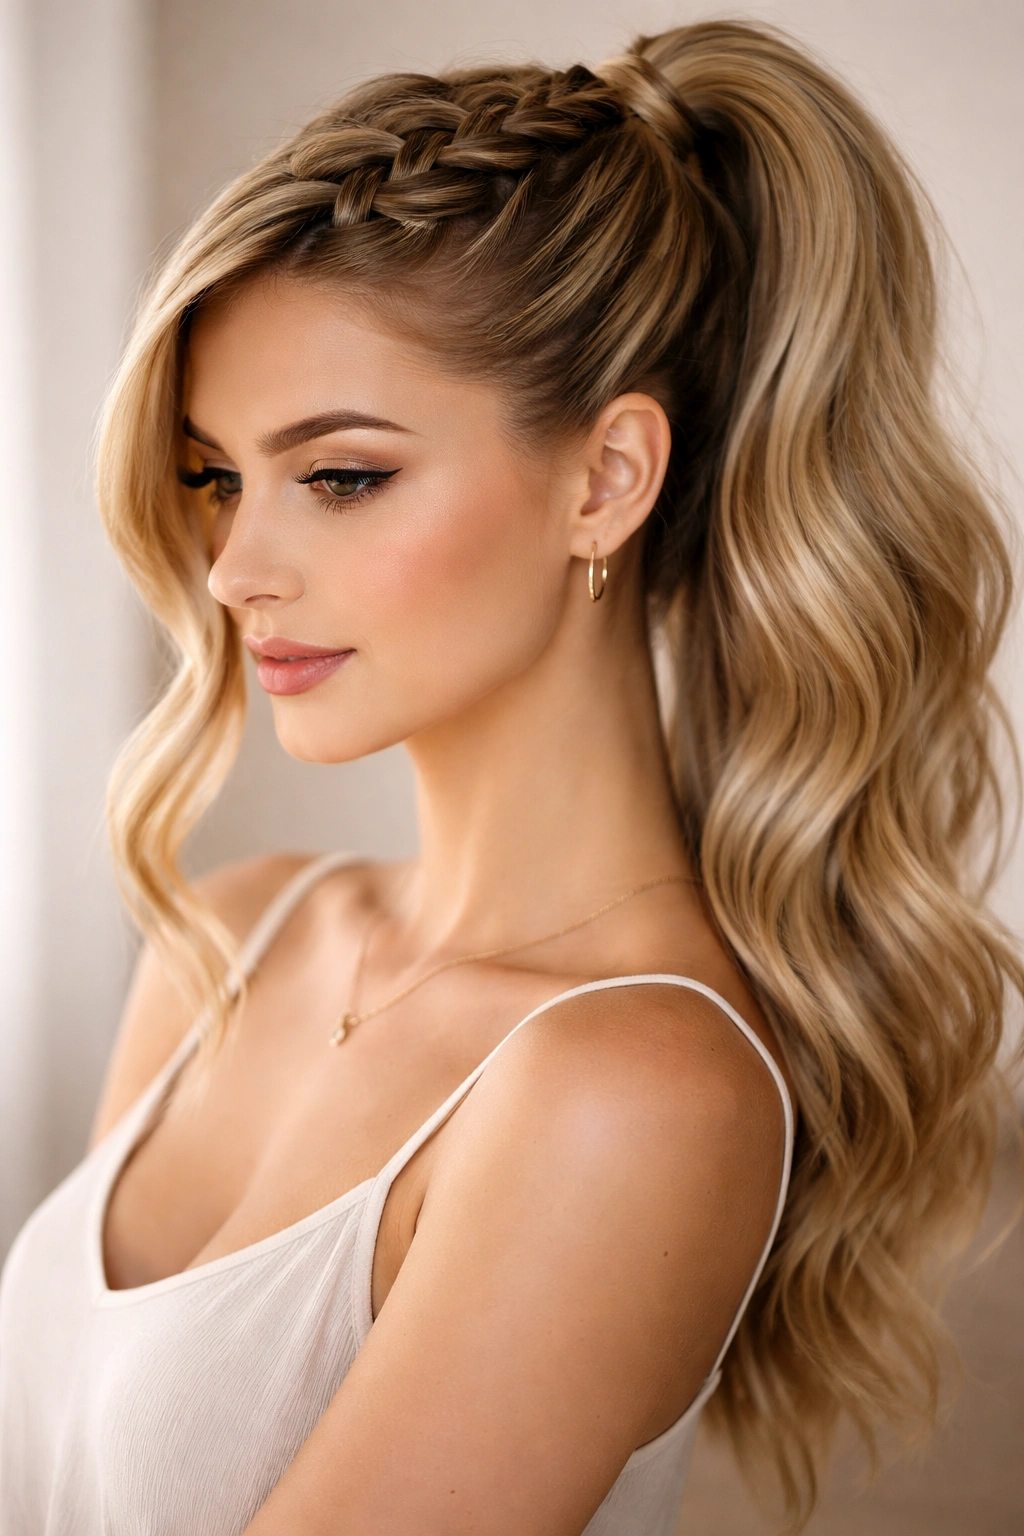
A side part changes the whole mood. Suddenly the style feels softer, and the French braid has a diagonal line that makes the crown look a little more lifted. If your face-framing pieces usually fall awkwardly in the middle, this is the fix.
Start the part above one eyebrow, then guide the braid across the top of the head toward the crown instead of straight back. That angle does two useful things: it gives the braid a more interesting shape, and it makes small uneven sections harder to spot. Beginners love that part. So do I.
The ponytail itself can stay high and centered, or you can let it sit slightly off to the side for a looser look. Either way, the braid does the visual work up top. You only need to keep the crossings even enough that the pattern stays clear.
This one looks good when hair has movement. Straight hair shows the diagonal line well, and wavy hair makes the side sweep look even softer. A light mist of hairspray near the temple keeps the shorter pieces from escaping early.
4. Double French Braids Pulled Into One Ponytail
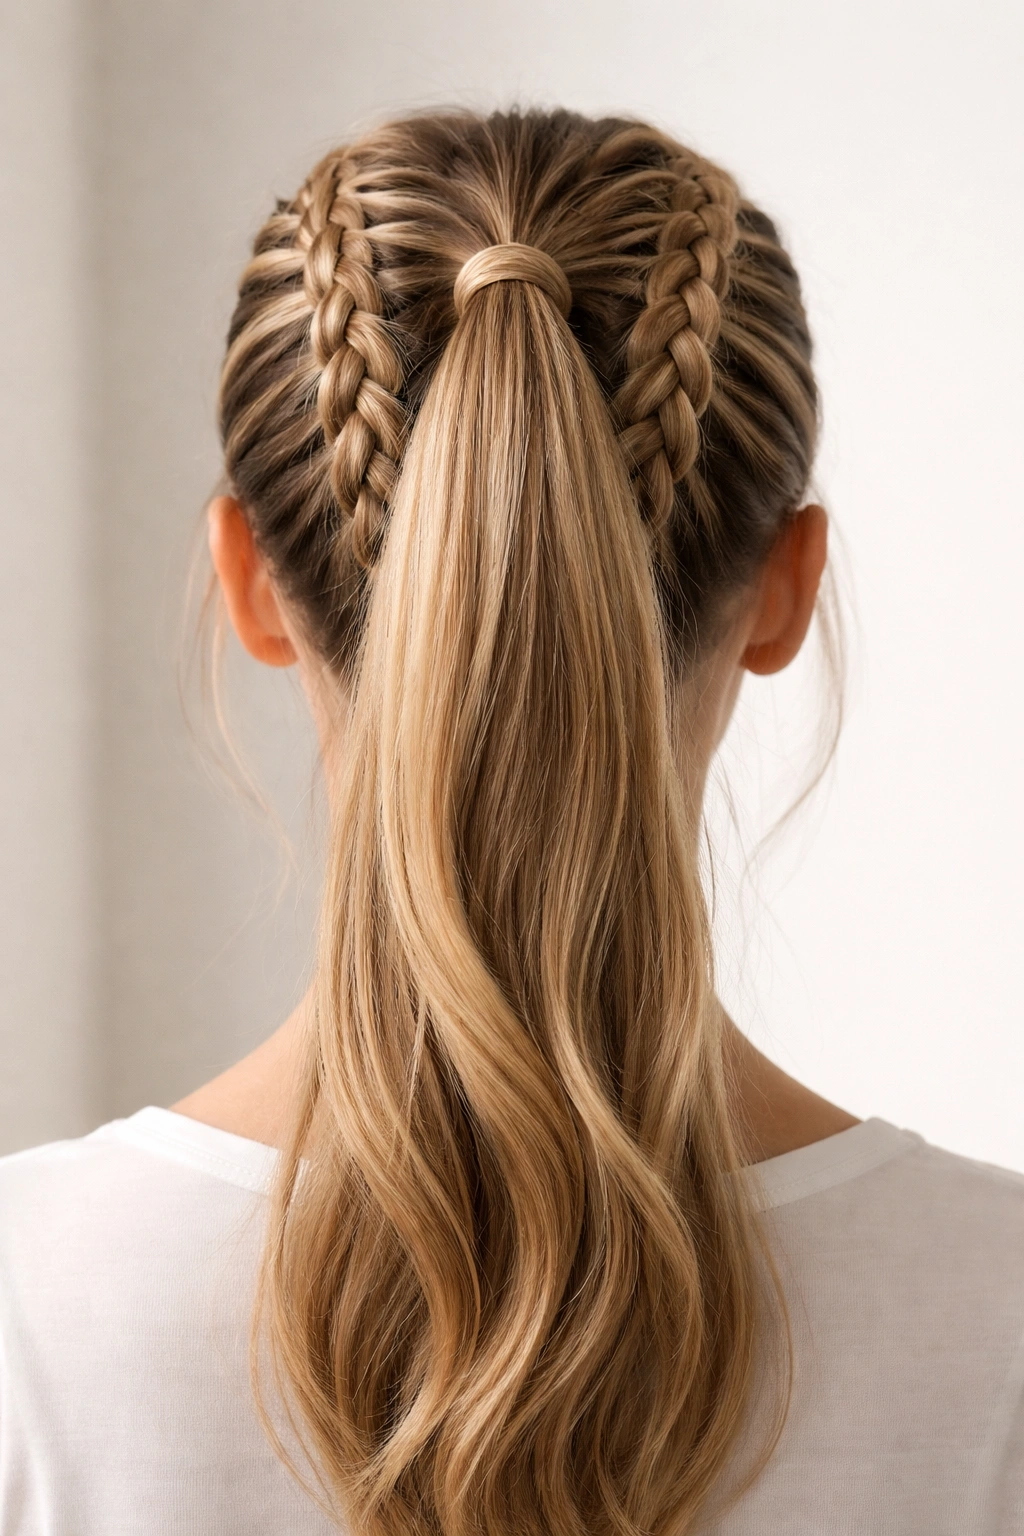
What if one braid feels too hard? Split the job in half. Two smaller French braids are much easier to handle, and beginners often do better with that because each side has fewer strands to track at once.
How to Keep the Join Neat
Braid each side from the front toward the crown, stopping when the two braids meet at the top. Then gather both into one high ponytail and secure them with a strong elastic. The join looks tidy if you match the braid thickness on both sides, but it does not need to be perfect.
- Use a center part for symmetry
- Keep each braid close to the scalp
- Tie both braids together at the same height
- Wrap one tiny strand around the elastic if you want a cleaner finish
This is one of the best beginner styles for hair that slips out of your fingers. Smaller sections are easier to control, and the two-braid setup gives you a built-in guide. If one side ends up slightly fuller, it still reads as balanced once the ponytail is tied.
I reach for this style when I want the braid to look deliberate, not precious. It has a sporty feel without being plain.
5. Wrapped-Base French Braid Ponytail
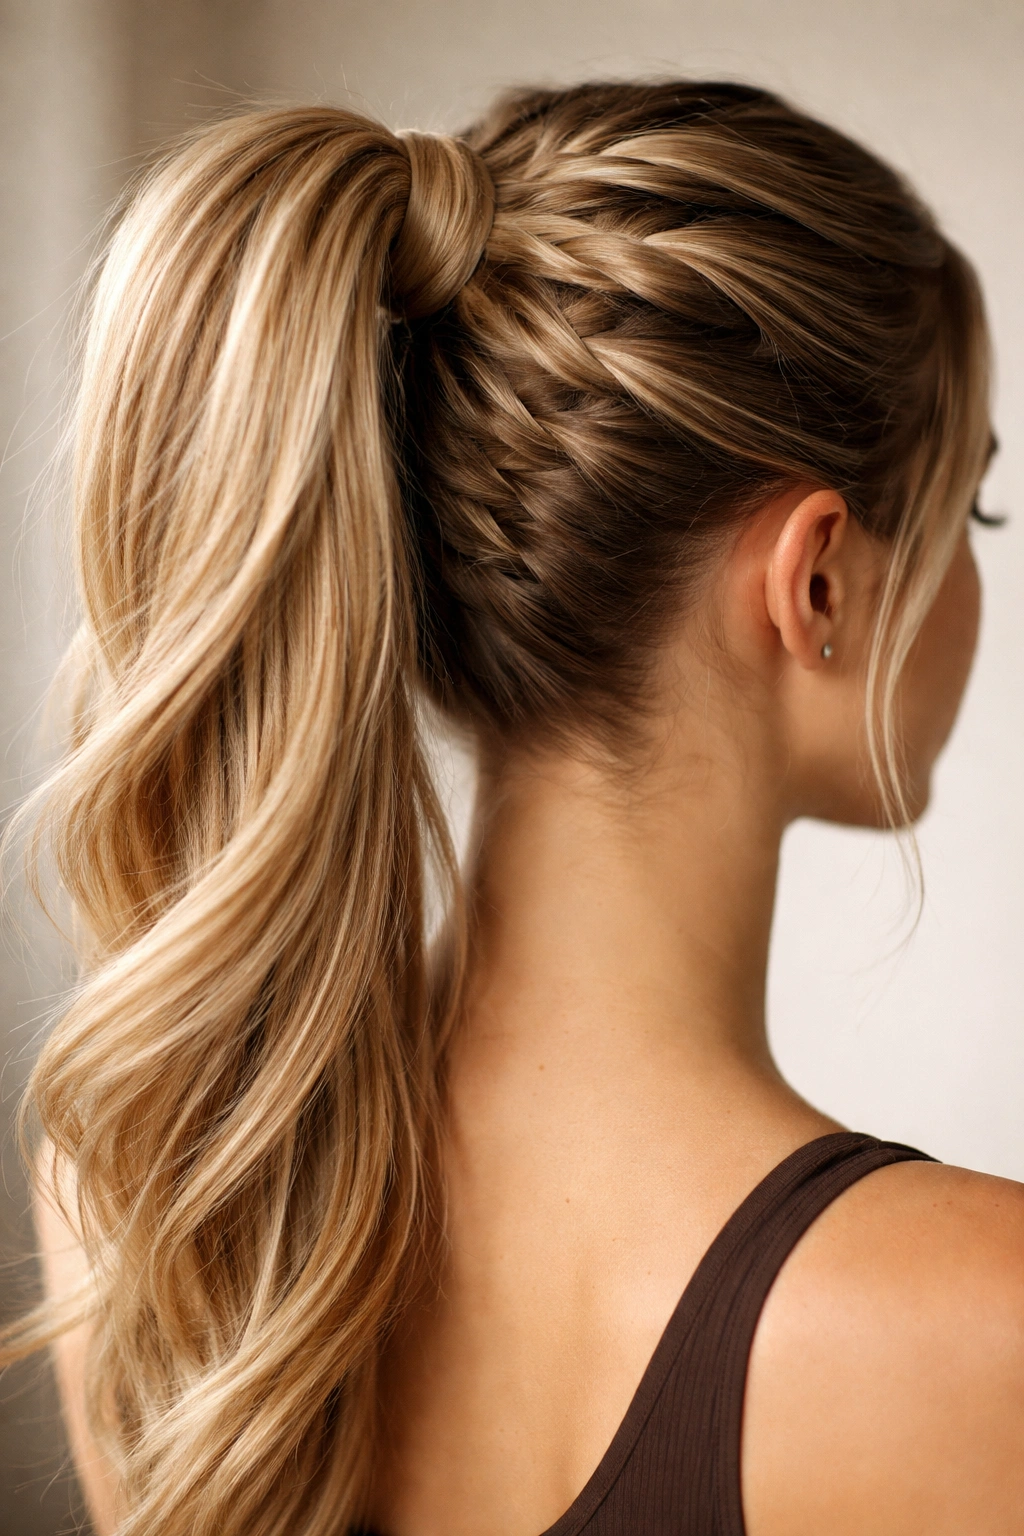
A hidden elastic changes the whole finish. The braid can be neat, the ponytail can be full, but if the band is covered, the style instantly looks more finished. That small detail matters more than people admit.
Once you secure the high ponytail, take a thin strand from underneath the tail and wrap it around the elastic. Pin it under the base with one bobby pin. If your hair is layered, choose a strand from the back instead of the front so the wrap hides better.
This style is useful when you want the braid to look polished without adding extra braiding steps. The actual French braid can stay simple and narrow. The wrap does the visual cleaning, which is helpful on days when your hands are not cooperating.
One caution: do not use a thick chunk of hair for the wrap. It gets bulky fast and makes the base look lumpy. A strand about the width of a pencil is enough. Clean and small always looks better here.
6. Curved Center-Part French Braid Ponytail

A straight middle part is fine. A curved one is better if you want the braid to feel softer and a little more thoughtful. Instead of splitting the hair in a perfect line, start at the center and let the part arc gently back toward the crown.
That curve gives the French braid a subtle shape before you even cross the first strand. It’s especially useful on rounder faces or when you want the top to feel less flat. The braid follows the head’s shape rather than marching straight down the center.
I like this version because it looks more complex than it is. The actual braiding does not change much. You still take small sections from each side and feed them into the center, but the curved part keeps the whole style from feeling severe.
If your mirror setup is awkward, use a hand mirror behind you or braid in front of a larger mirror where you can see the parting line from above. A slightly crooked curve is fine. A wobbly one is better than a dead-straight line that fights your natural cowlicks.
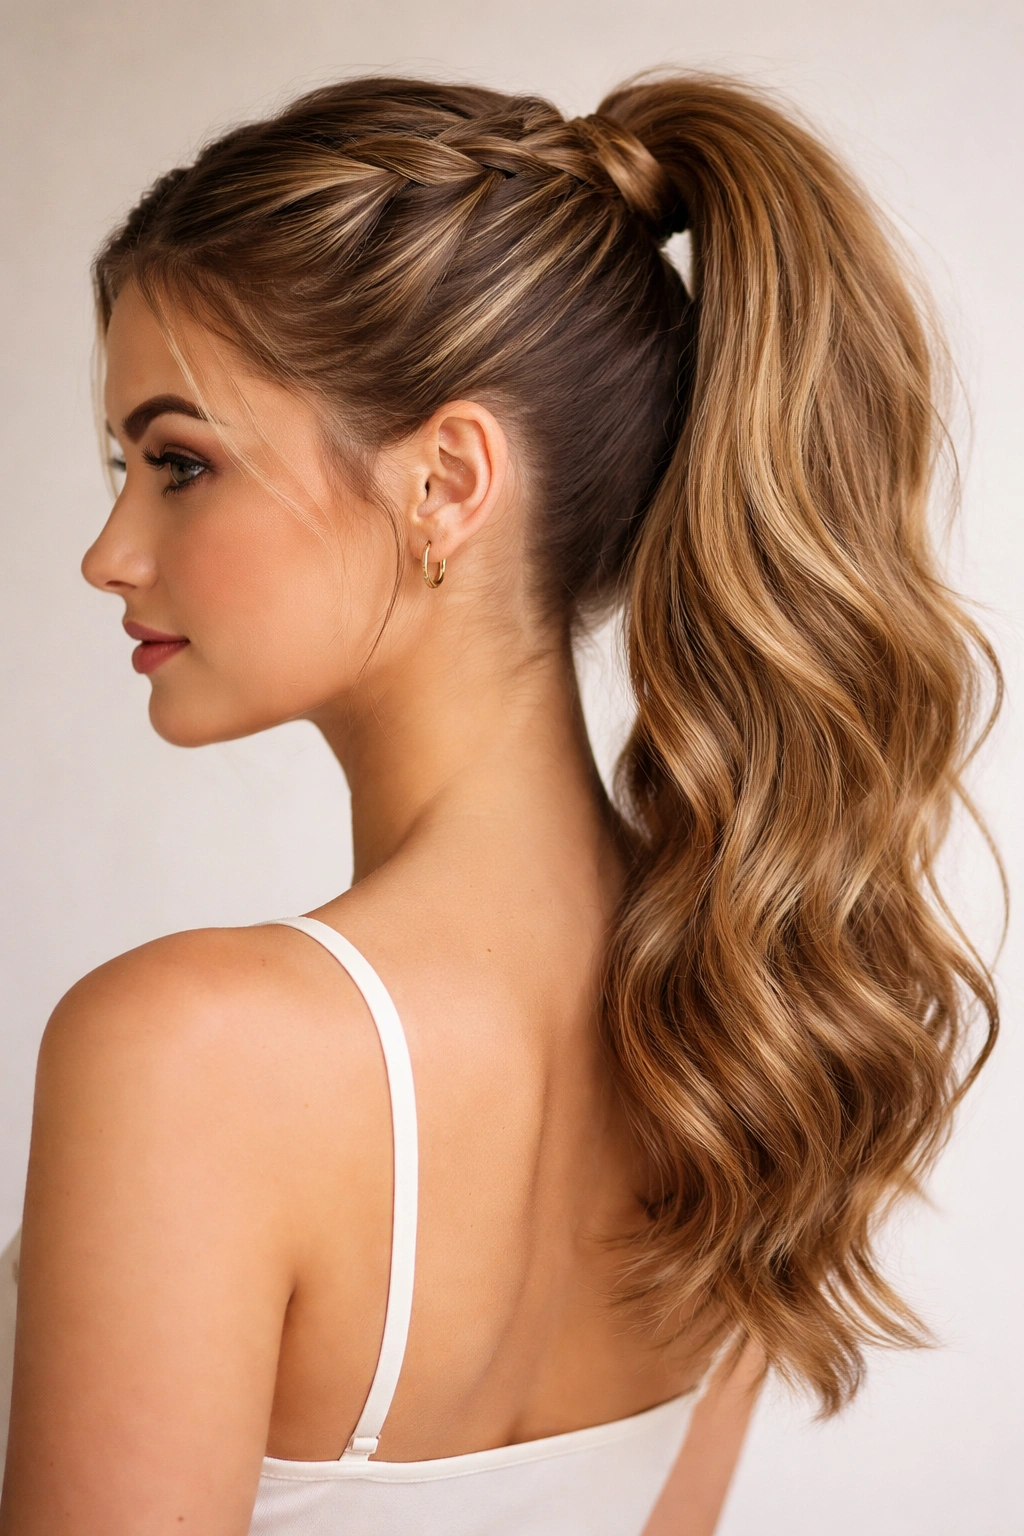
7. Crown French Braid Into a High Ponytail
Unlike a full crown braid, this version stops at the top and drops into a ponytail before the braid gets complicated. That makes it easier to wear and much easier to finish on your own.
The braid starts along the hairline, hugs the crown, and ends just before the highest point of the head. From there, you tie the remaining hair into a high ponytail. The lift at the top gives the style a bit of drama without requiring a long braid all the way around.
This is one of the best choices if your hair is long enough to bunch nicely but not so long that a full braid becomes tedious. It keeps the scalp neat and the ends free, which is useful when you want movement at the back but structure at the front.
If you want the crown to sit higher, lightly tease the root area before braiding. Not a lot. Just enough to give the hair some body. A little lift at the crown can keep the ponytail from sagging by the end of the day.
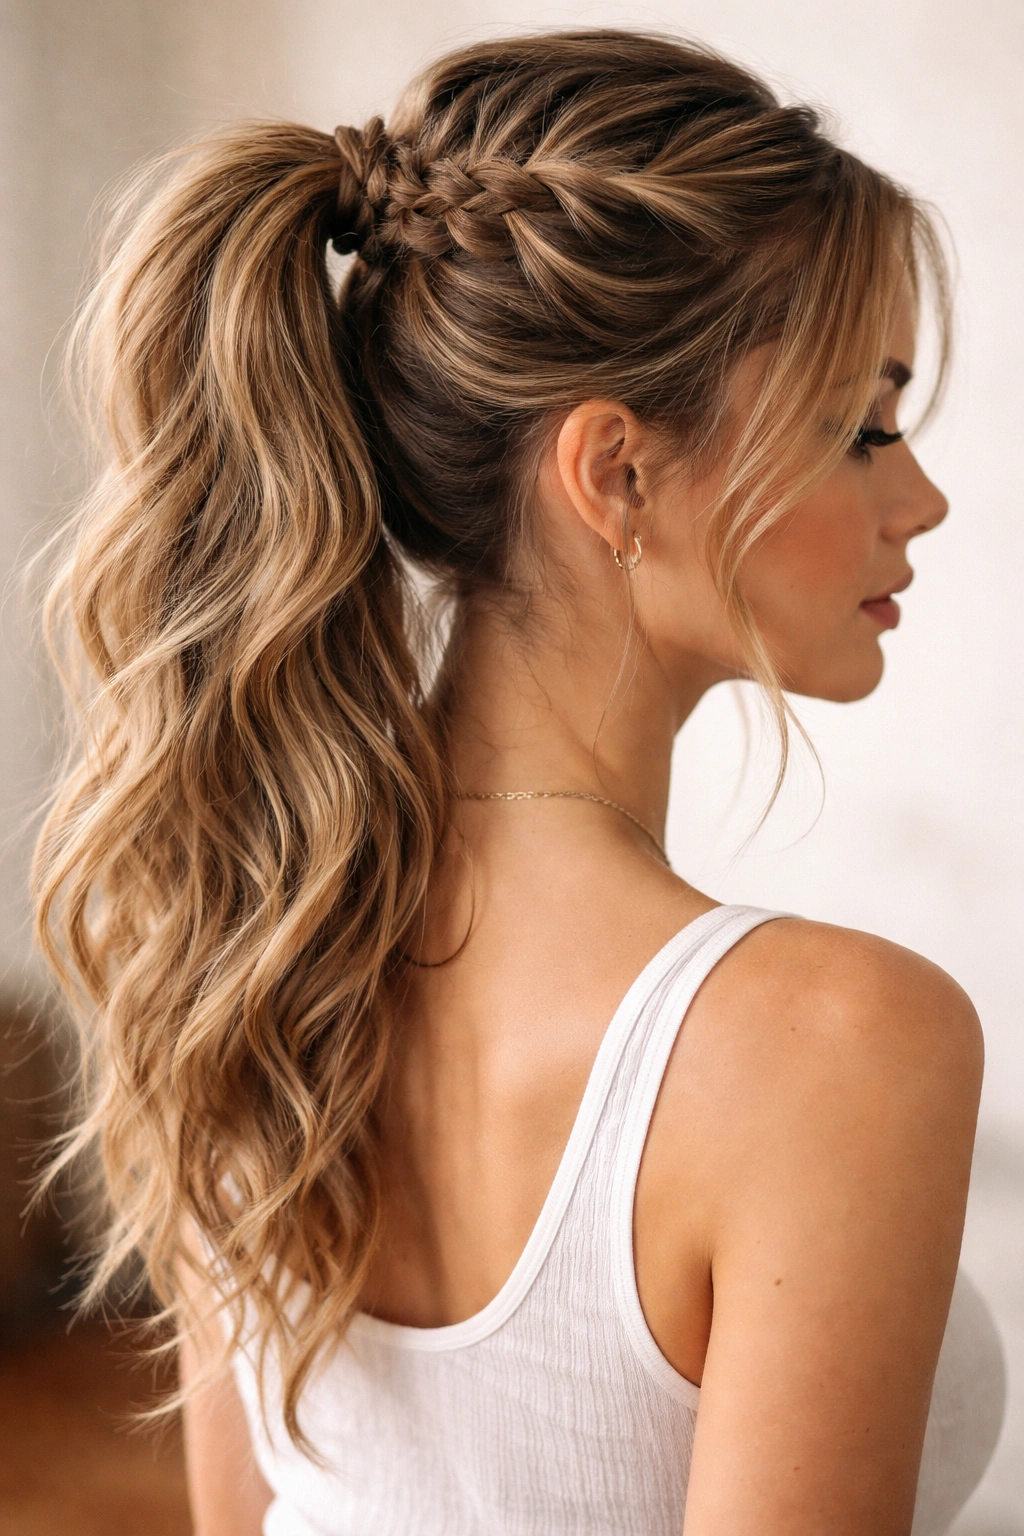
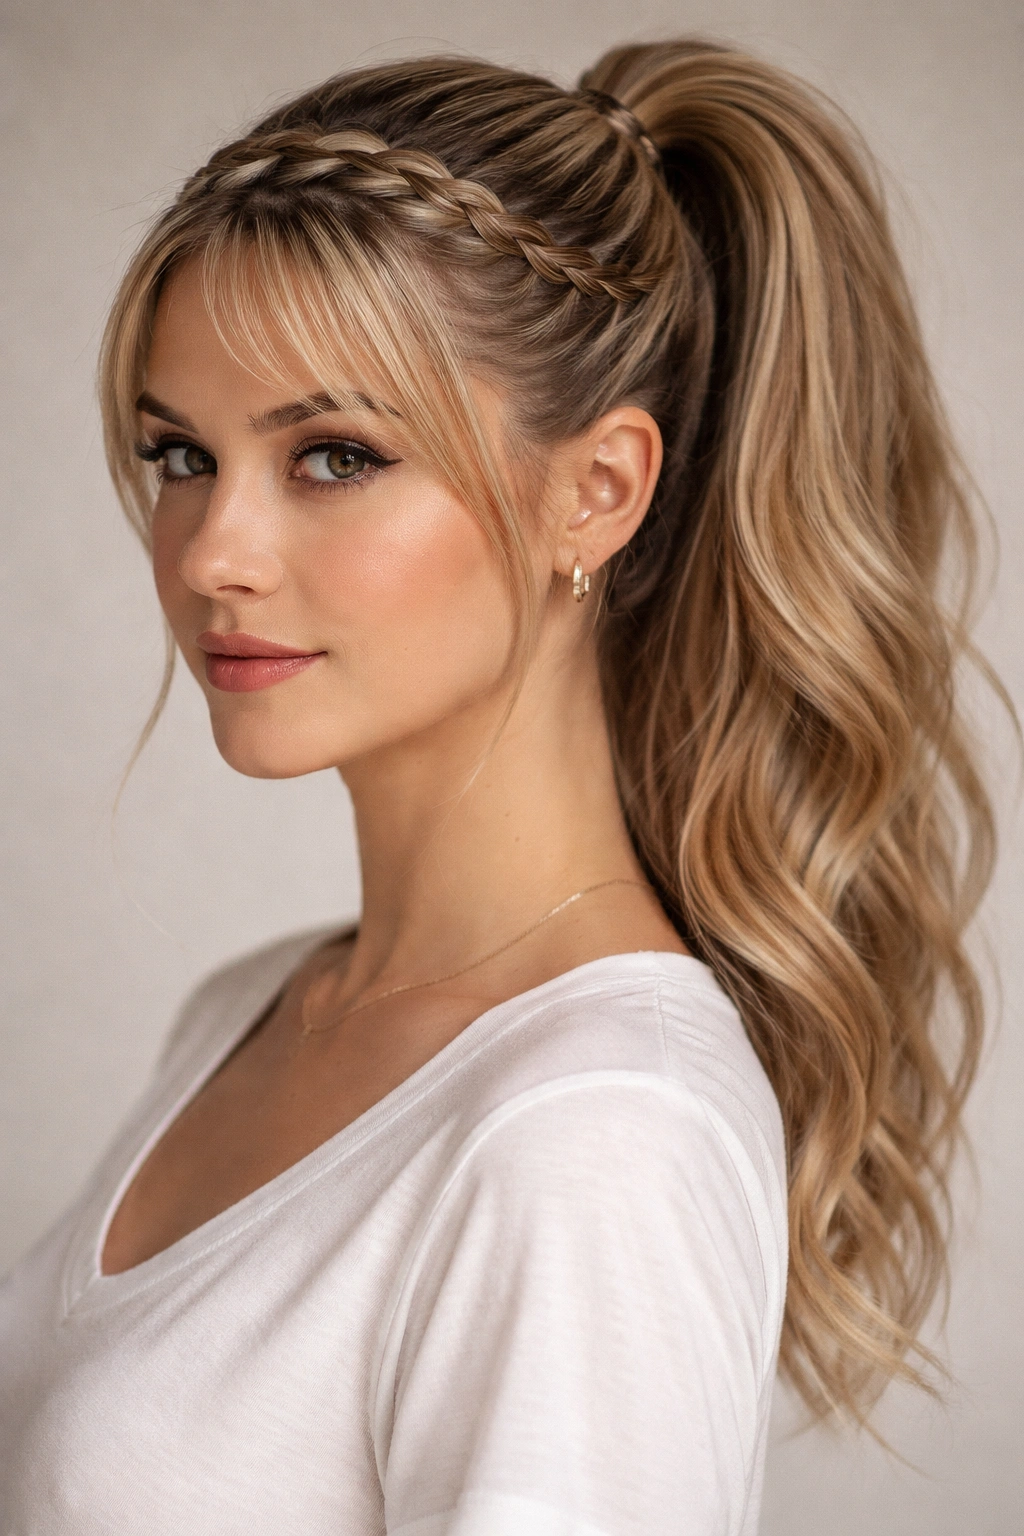
8. Face-Framing French Braid Ponytail
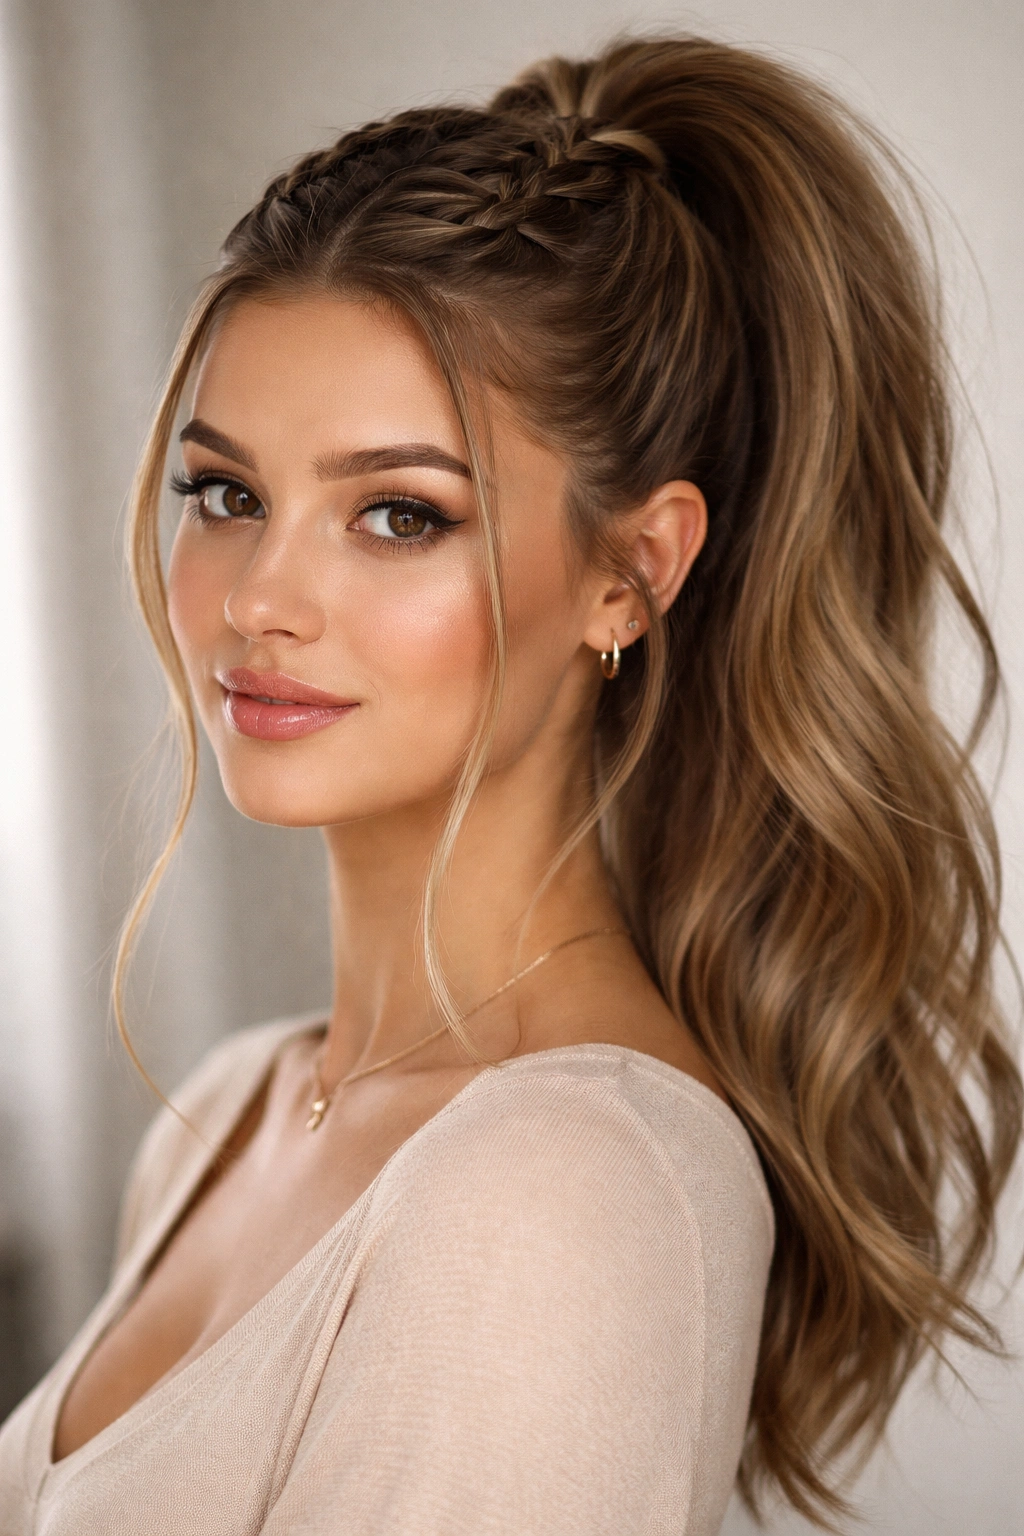
Leaving a few face-framing pieces out makes the whole style feel softer fast. It also helps if you dislike the look of every hair pulled straight back, which can be a little harsh on some faces.
The Pieces That Should Stay Out
Choose two slim sections near the temples, each about half an inch wide, and leave them loose before you start braiding. You can smooth them later with a curling iron or let them fall naturally if your hair already bends a bit at the front.
- Keep the pieces thin so they look intentional
- Curl them away from the face for a softer outline
- Tuck one side behind the ear if both pieces feel too heavy
- Spray only the roots, not the length, so they stay touchable
This version works especially well with layered hair because the front sections blend into the braid instead of fighting it. If the braid itself is tight, the loose pieces stop the style from feeling overdone.
I like this one for everyday wear because it’s forgiving. A few wispy pieces near the cheeks are not mistakes here. They are part of the shape.
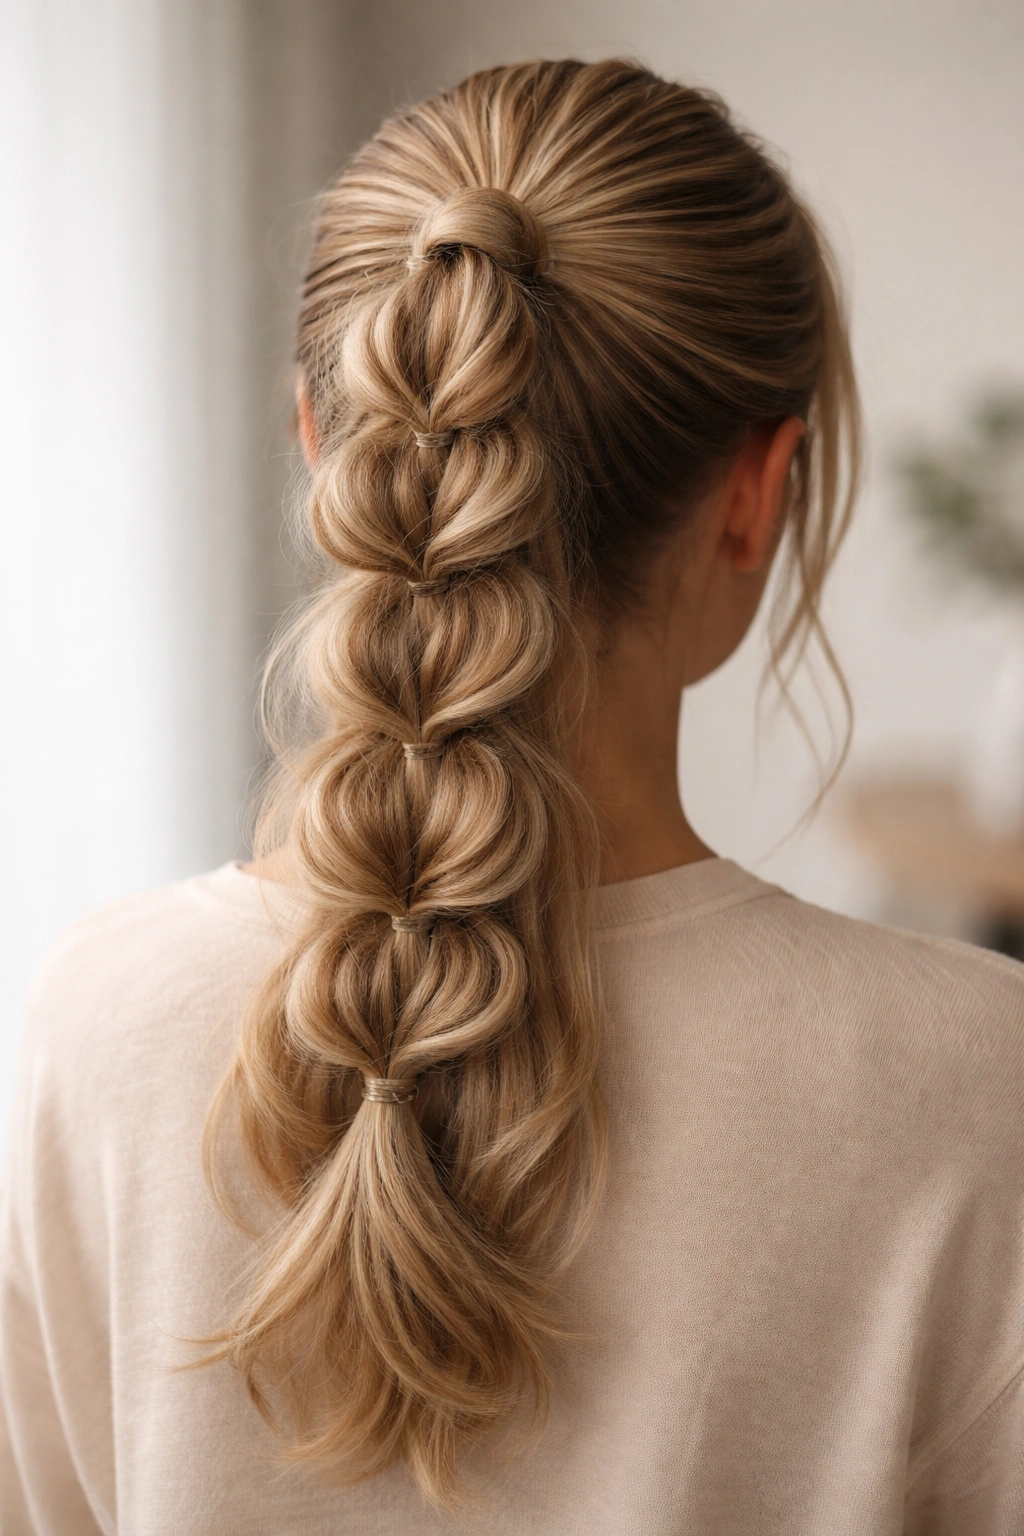
9. Bubble-Ended French Braid Ponytail
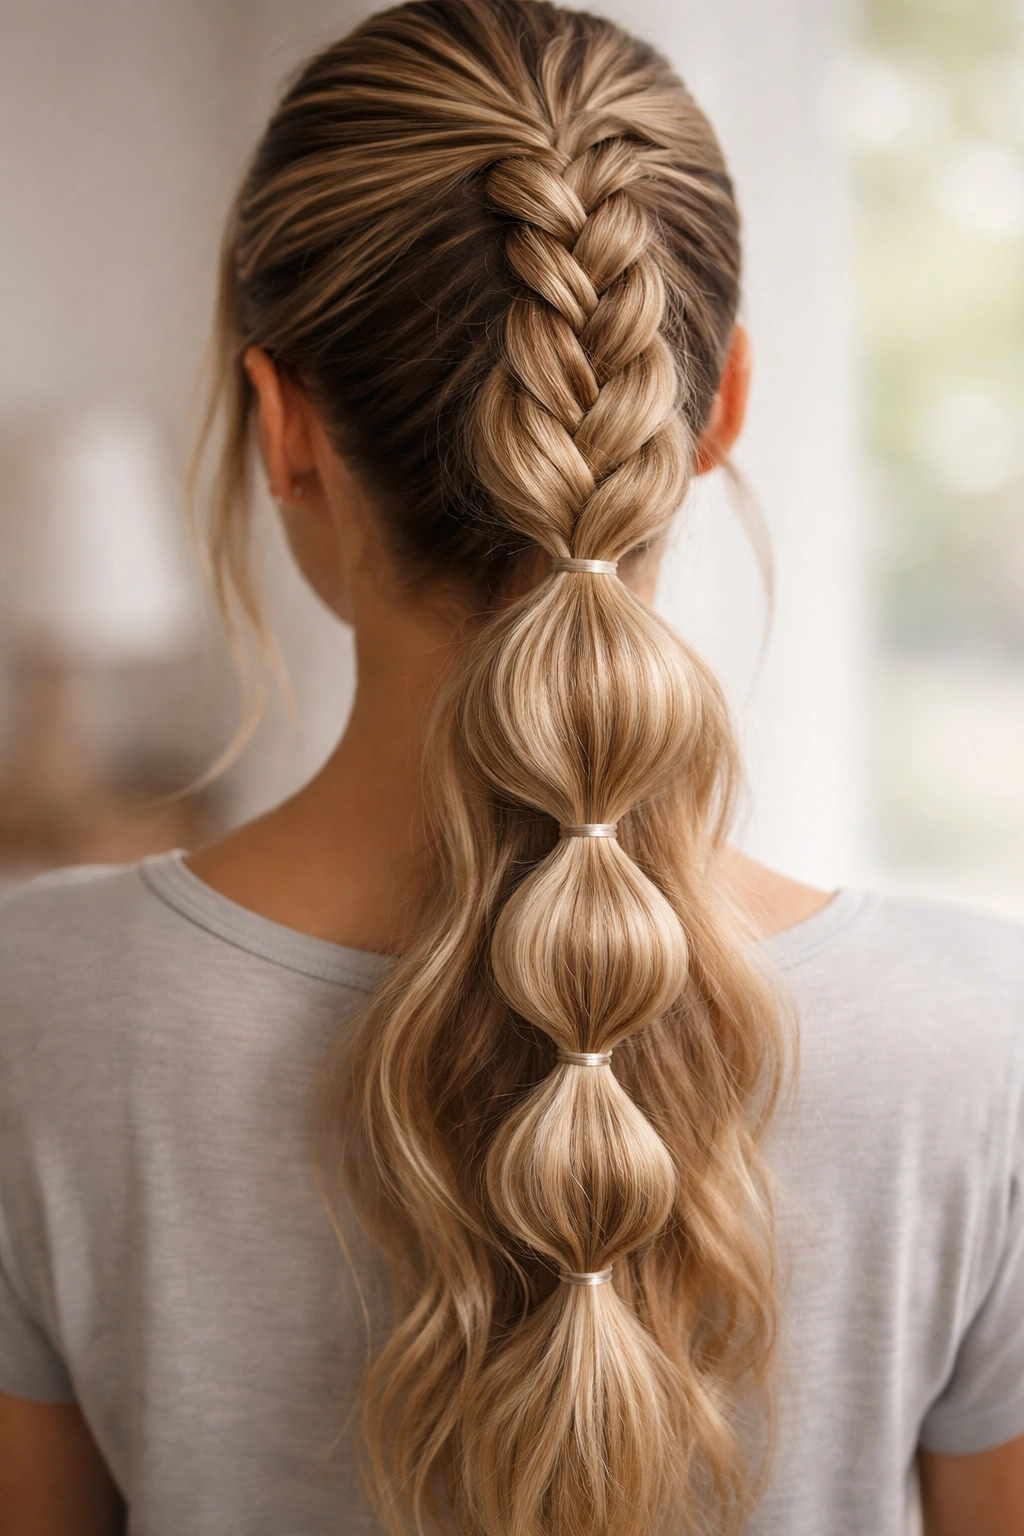
This is the easiest way to fake extra length. The braid handles the top section, and the ponytail tail gets turned into a line of soft bubbles using small clear elastics spaced a few inches apart.
Start with a French braid at the crown, then secure the tail high. From there, place elastics down the length of the ponytail, about 2 to 3 inches apart. Gently tug each section between elastics so it puffs out into a rounded shape.
The bubbles do a nice job of hiding uneven ends. If your hair is layered or a little frizzy, the sections between elastics distract the eye. That’s the trick. The style looks planned even when the hair itself is not behaving.
Keep the bubbles similar in size, but do not force them into exact twins. A slightly uneven bubble chain looks softer and more human. A precise one can feel stiff unless you’re aiming for a very sleek finish.
10. Sporty High French Braid Ponytail
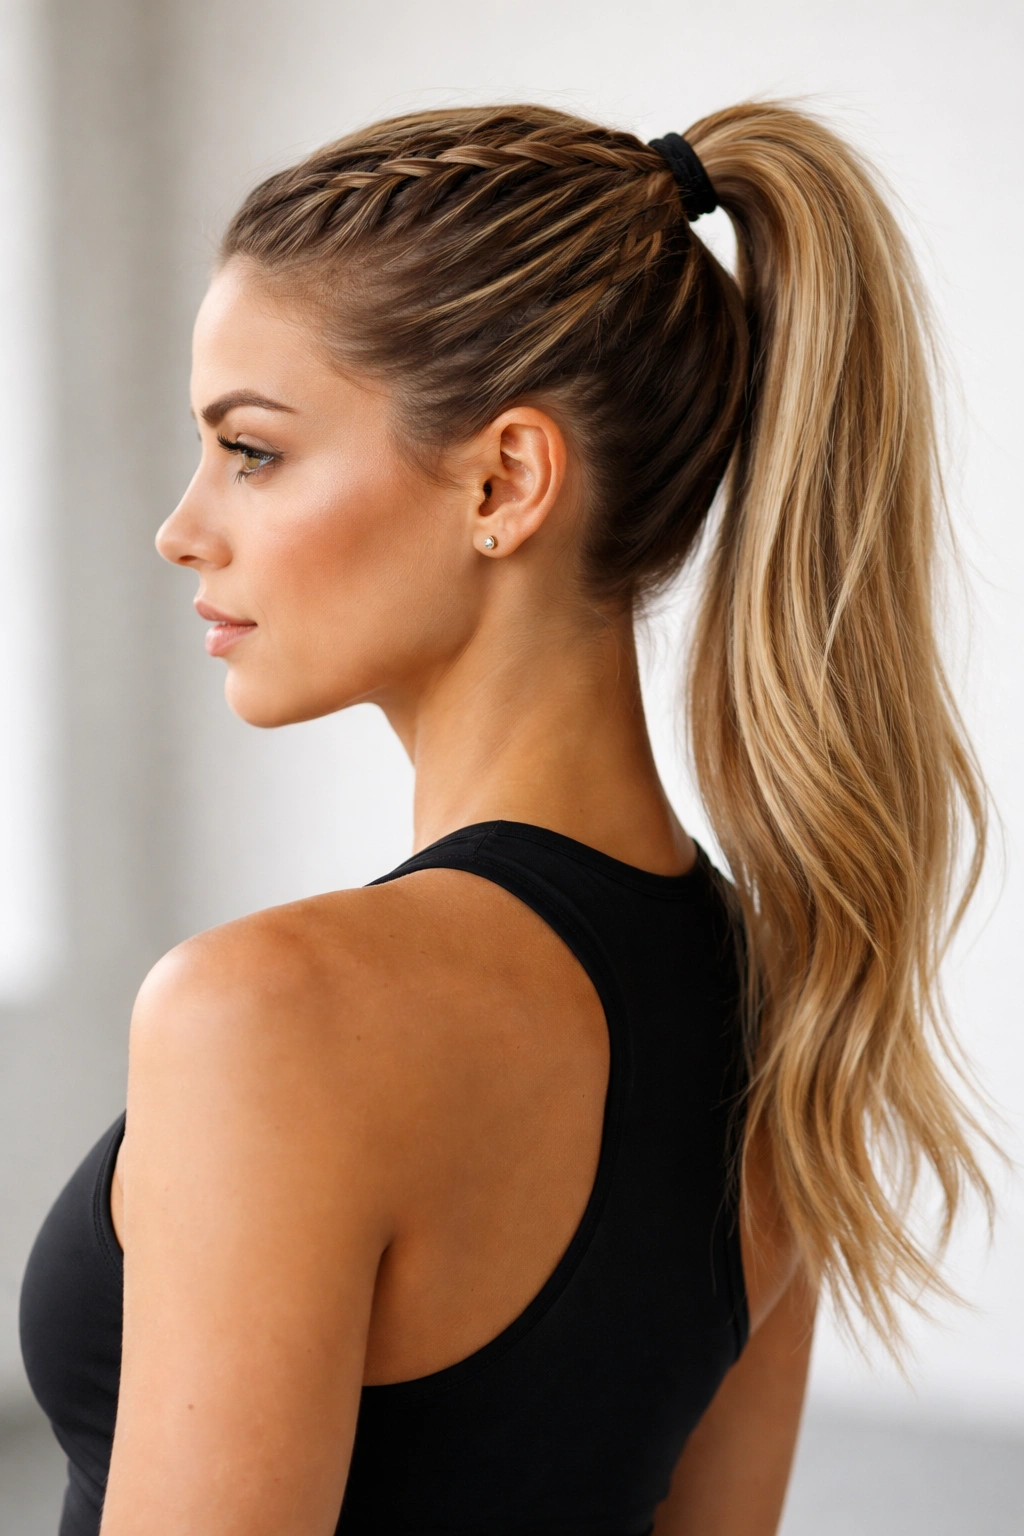
This is the version I’d choose if you need the hair to stay off your face and not collapse halfway through a busy day. It’s firm, practical, and easy to reset with a brush if a few flyaways appear.
A strong hold gel or edge control at the hairline helps, especially around the temples and nape. Braid close to the scalp, then pull the ponytail high and secure it with a strong elastic that doesn’t slip. If your hair is thick, use two elastics stacked together. No shame in that.
The sporty look works because it keeps the crown smooth and the tail moving. You get the clean front of a braid with the swing of a ponytail, which is probably why this style shows up in so many gym and dance rooms. It holds up well under motion and still looks neat when you stop.
If you want it to feel less severe, loosen just the very top section of the braid by a few millimeters. That tiny adjustment softens the line without turning the style loose.
11. Messy Textured French Braid Ponytail
Does every braid have to be perfect? Not even close. This version wants grip, texture, and a little bit of mess around the edges, which makes it a good choice if your hair is layered or slippery.
Start with dry shampoo or texture spray, then braid with medium tension instead of super-tight tension. Once the ponytail is secured, tug a few sections around the face and crown so the braid loses that too-precise look. The goal is movement, not chaos.
The nicest thing about this style is that small mistakes hide themselves. If one side of the braid looks fuller, the texture covers it. If a few pieces slip out, the softness becomes part of the finish. That kind of forgiveness is useful when you’re still learning your hands.
Just don’t push it too far. A messy braid can look stylish, but only if the braid pattern is still visible. Once the sections are so pulled apart that the structure disappears, the whole thing starts to look like you gave up.
12. Low-Tension Beginner French Braid Ponytail

Some braids pull so hard they make you want to rip them out halfway through the afternoon. This one is the opposite. It keeps the shape but softens the pull, which makes it a smart first braid for a tender scalp or fine hair.
Use larger sections when you braid, and keep your hands closer to the head than you think you need to. The braid will look a little broader, which is fine. Broader often looks better on hair that is not packed with volume.
Your head should not ache. If it does, the braid is too tight or the ponytail is sitting too high for your hair length. Shift the elastic down a half inch and re-braid with gentler tension.
I especially like this version for people who are still learning to coordinate their fingers. You can slow down without ruining the style because the braid itself is not asking for a razor-sharp finish. It’s calm. That matters.
13. Fauxhawk French Braid Ponytail
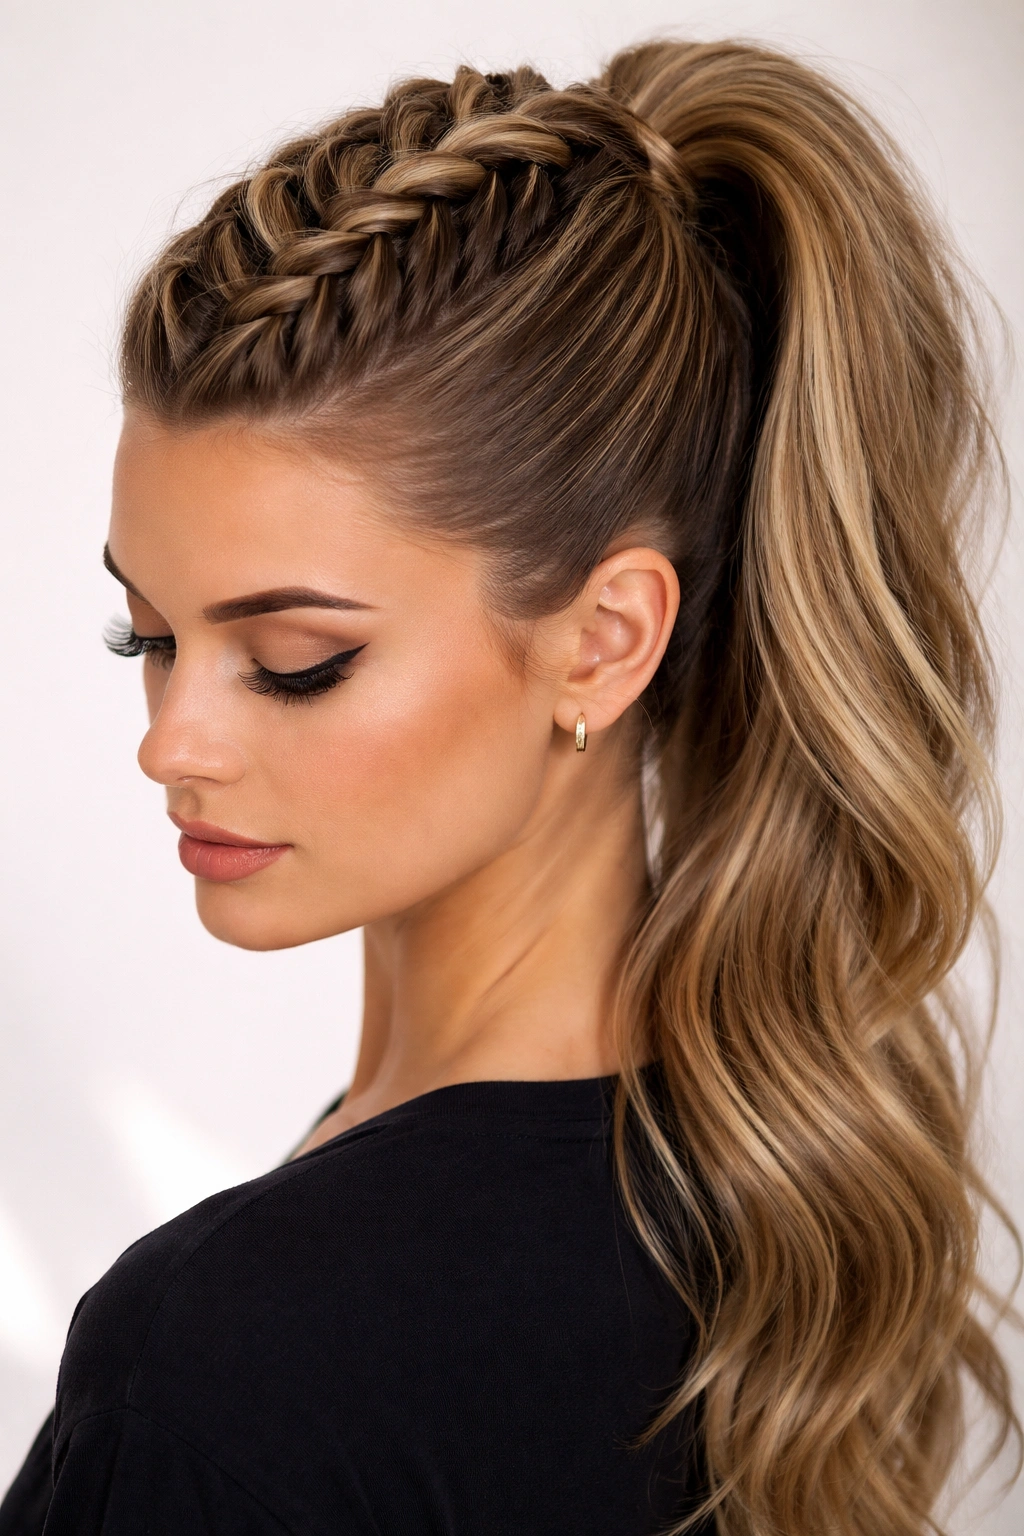
A center braid with sleek sides gives you that fauxhawk look without needing a dramatic haircut or any complicated tricks. The braid runs down the middle of the head, and the sides stay close to the scalp before everything gathers into a high ponytail.
This style looks bolder than the regular high braid ponytail because it creates a stronger line down the top of the head. If you have thick hair, that line can look especially good. It makes the braid feel taller and the ponytail feel more lifted.
The trick is not to overthink the sides. Smooth them back with a brush and a little gel, then keep the French braid narrow enough that it reads like a ridge rather than a wide panel. If the braid gets too fat, the shape loses its edge.
I’d call this a good middle ground between sporty and styled. It has energy, but it still feels wearable. A lot of people avoid it because they think it looks hard. It doesn’t, not if you keep the braid centered and the sides tidy.
14. Ribbon-Tied French Braid Ponytail
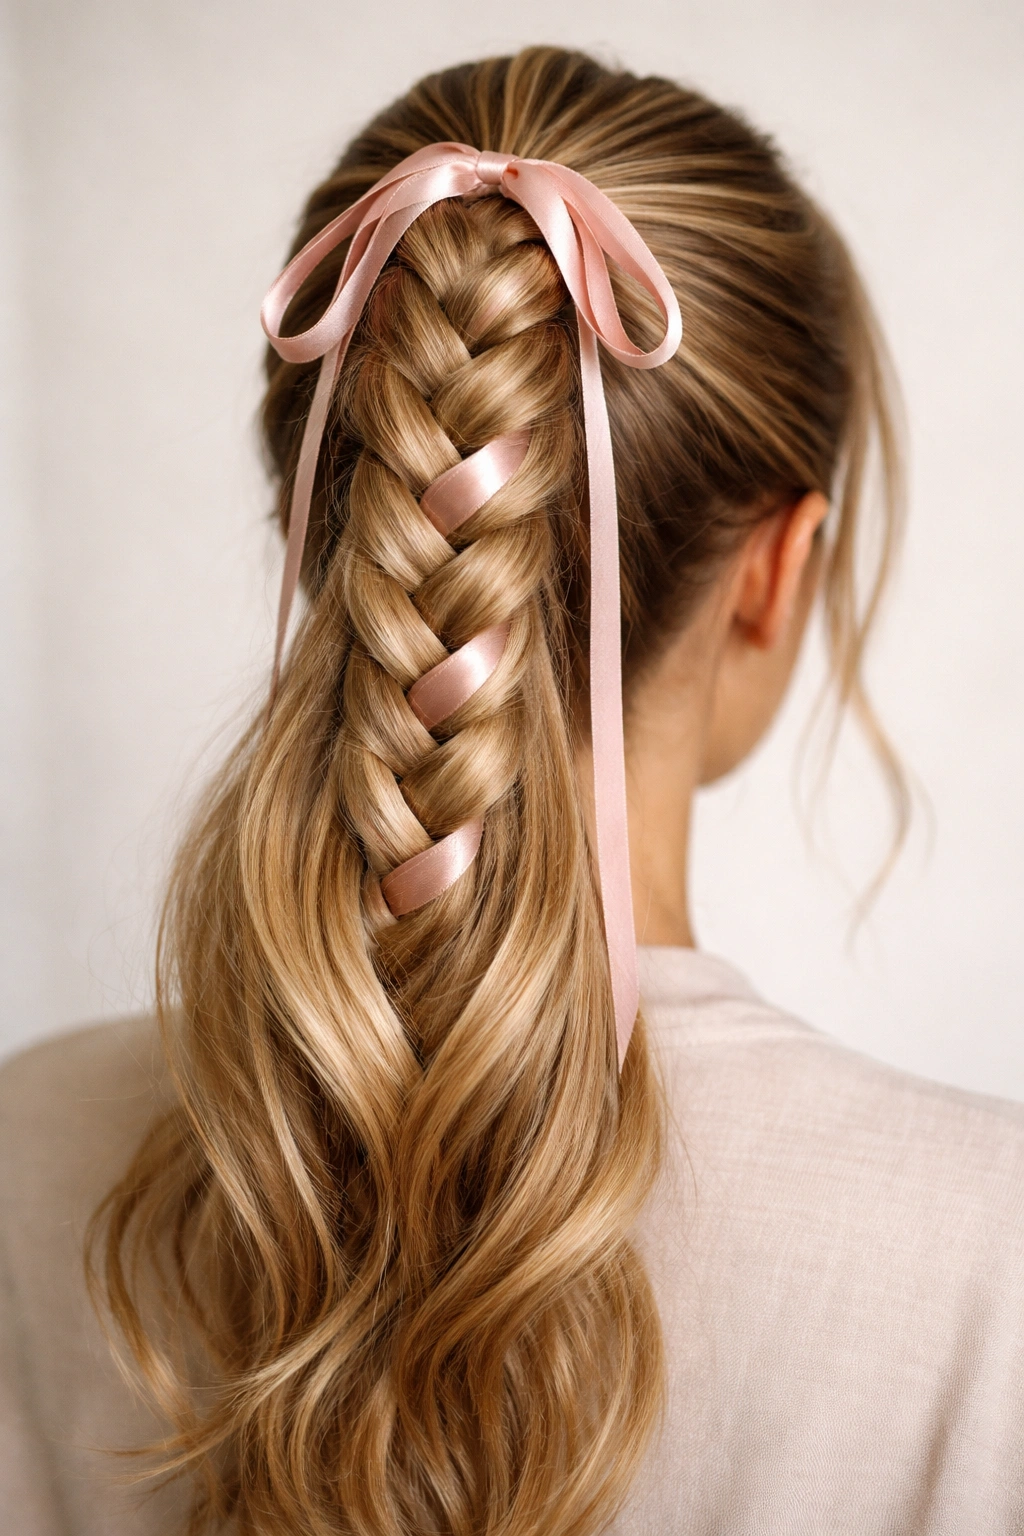
A ribbon can rescue a braid that feels too plain. It adds color, yes, but it also gives the style a softer finish because the eye lands on the bow or tail instead of the elastic.
How to Use the Ribbon Well
Choose a ribbon that is about half an inch wide. Satin looks dressier, while grosgrain holds shape better and doesn’t slide around as much. Tie it around the base of the ponytail or weave it through the braid if you want a more decorative line.
- Keep the ribbon ends at least 4 inches long
- Match the ribbon color to your outfit or earrings
- Tie it after the braid is done so it sits flat
- Use a small clear elastic underneath the ribbon for support
This works nicely for beginner braiders because the ribbon hides tiny imperfections at the base. If one side of the braid looks slightly looser, the ribbon pulls the eye away from the wobble. Clever, honestly.
I like this for parties, dinners, and any time you want the braid to feel a little more playful. It does not need much else. The ribbon is the detail.
15. Crisscross French Braid Ponytail

This style has a bit more motion in it, which makes it look more intricate than a straight-back braid. The sections cross over each other in a way that gives the top of the head a woven feel before the hair is gathered into the ponytail.
What Makes the Cross Pattern Work
Instead of feeding the side pieces straight into the center at the same angle every time, bring them in from slightly different directions. That creates a visual crisscross, almost like the braid is folding over itself on purpose.
How to Keep It Beginner-Friendly
Work slowly and use small sections at first. If the braid starts to wobble, stop, smooth the loose hair back with your fingers, and continue. The structure does not need to be mathematically exact. It just needs to repeat cleanly.
This is a good style for someone who has already done a few simple French braids and wants something with a little more shape. It still lands in beginner territory, but it looks more deliberate than a basic braid.
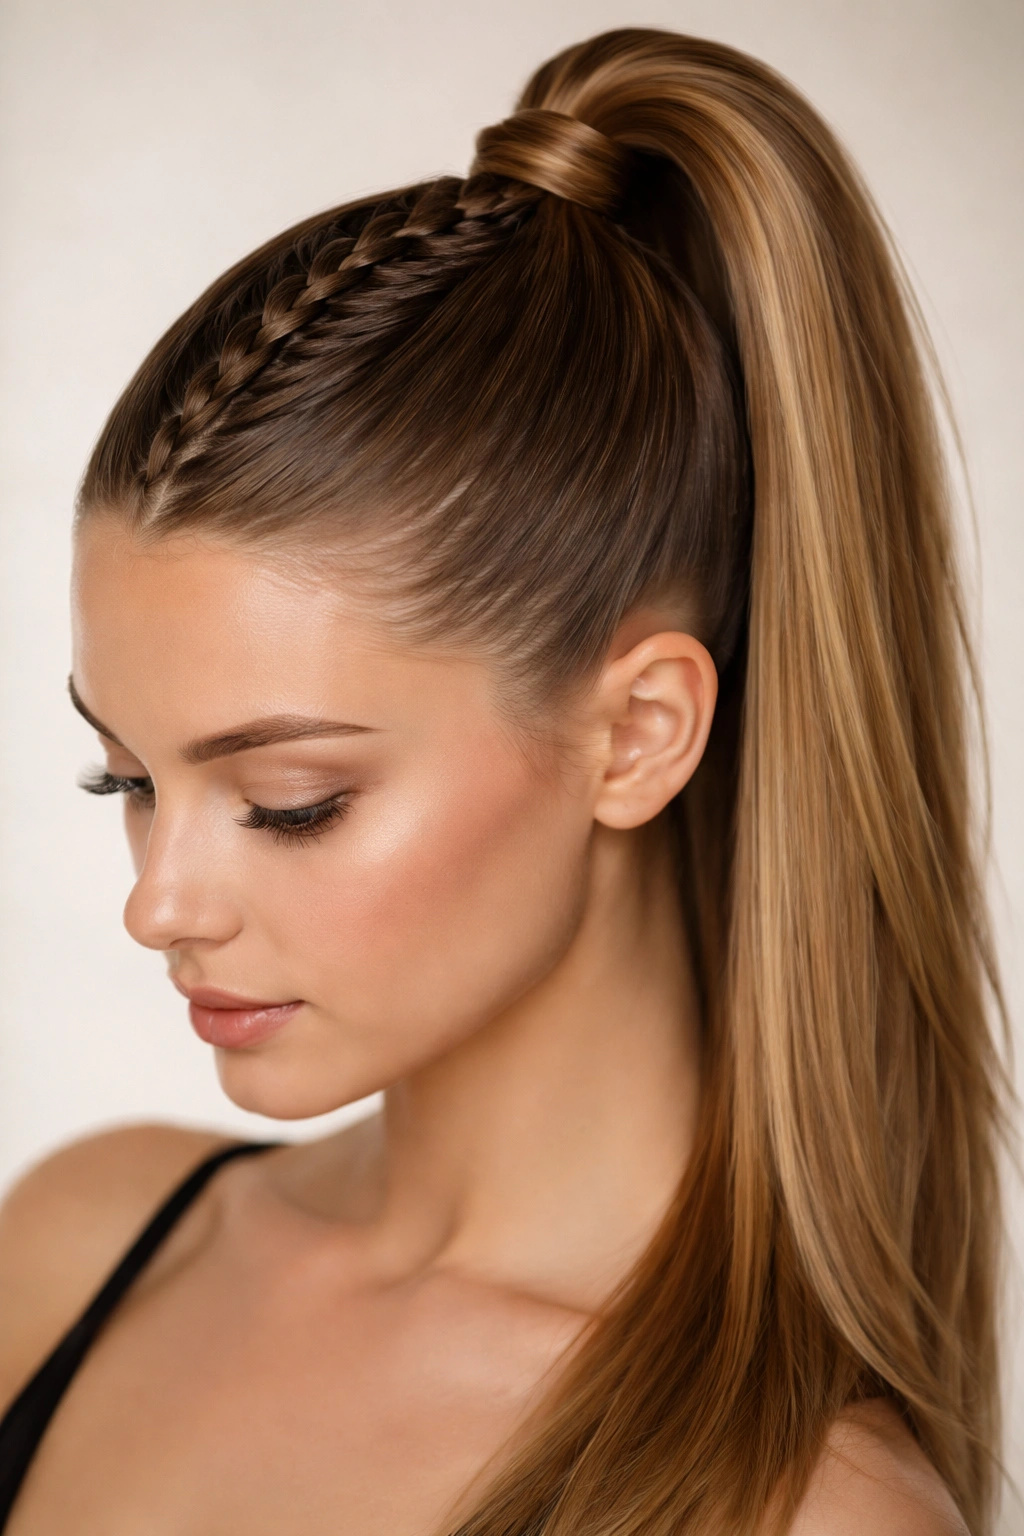
16. Skinny Accent French Braid Ponytail
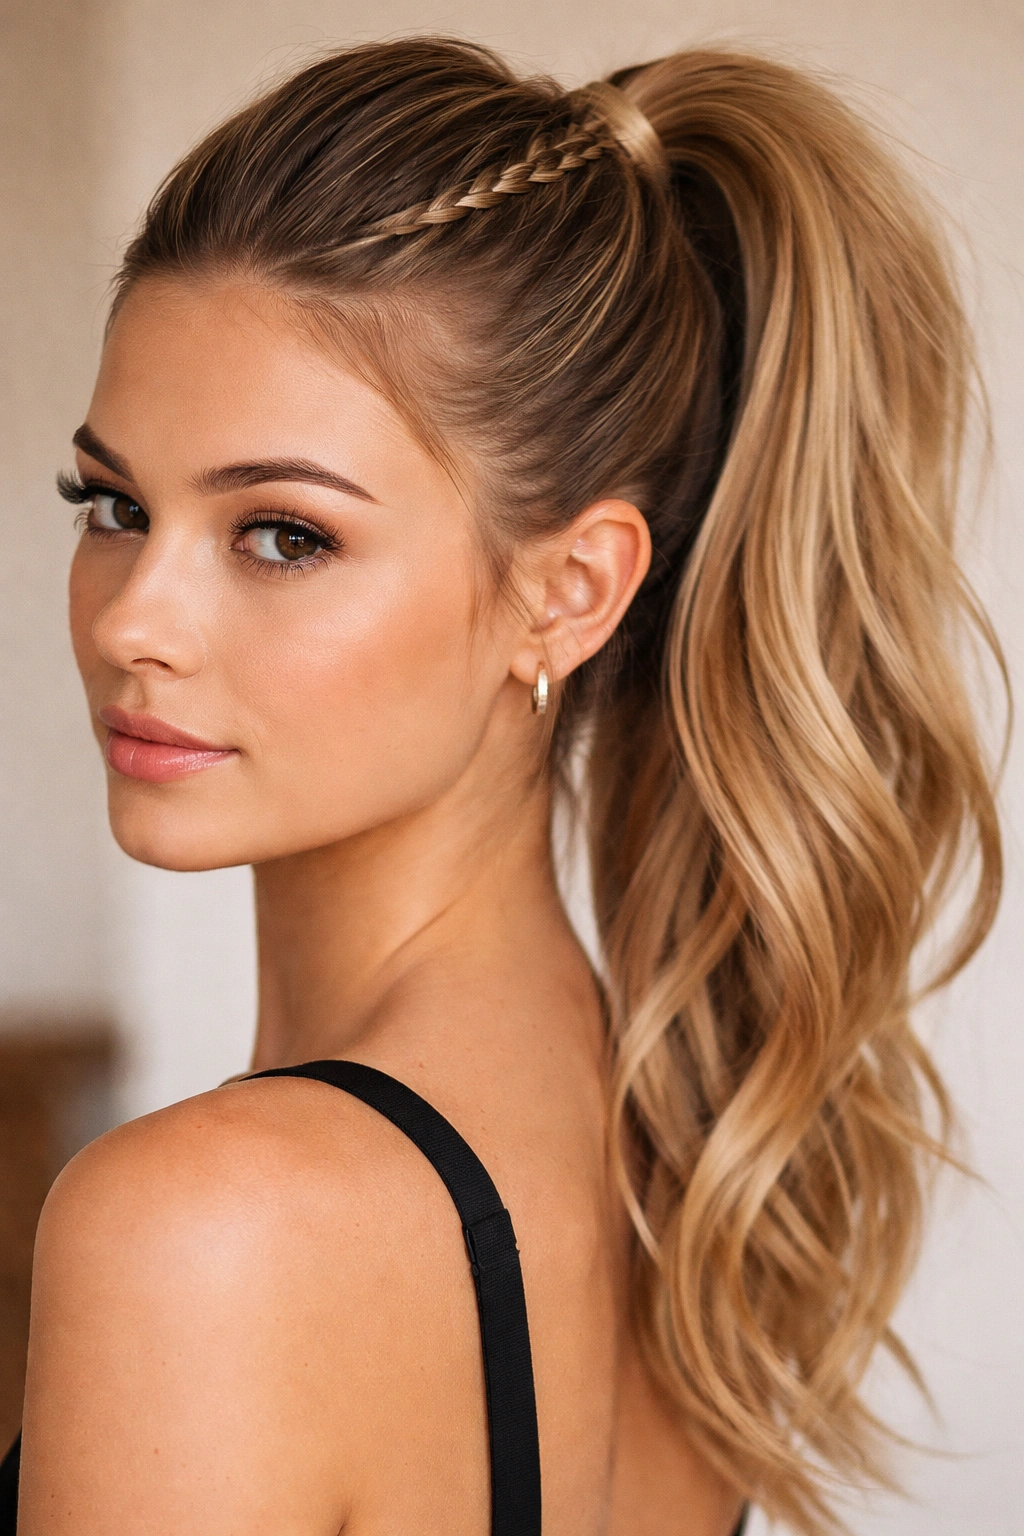
Sometimes less hair is more. A skinny French braid running into a high ponytail adds detail without taking over the whole head, which is useful when you want a light touch.
The braid starts narrow at the hairline and stays slim all the way to the crown. From there, the rest of the hair goes into a ponytail. That contrast is the whole point. The braid gives you a line of interest, while the tail keeps the style easy.
This is one of the easiest versions for someone with limited braiding confidence because smaller sections are less intimidating. You can see the pattern sooner, and if you miss one feed-in, the braid still looks fine.
It’s also a good fix for flat roots. A skinny braid can lift the top enough to make the ponytail look fuller without asking your hair to do too much. Quiet, simple, useful. I’d call that a win.
17. Thick Pancaked French Braid Ponytail
A thick braid makes a statement fast. If your hair has volume, or if you just want the braid to look fuller from across the room, this is the version to try.
Unlike the skinny accent braid, this one uses larger sections from the start. Once it’s done, you gently pancake the outer edges so the braid looks wide and plush. The shape becomes more visible, and the ponytail feels anchored by the size of the braid.
This style is especially good on hair that tends to flatten by noon. The broad braid gives the crown more presence, so the ponytail doesn’t look like it’s hanging off the back of the head. That matters on longer hair, where weight can drag everything down.
One warning: thick braids can get bulky around the base if you keep feeding in too much hair too soon. Keep the first few crossings neat, then widen the braid after it’s tied. That gives you size without the lump.
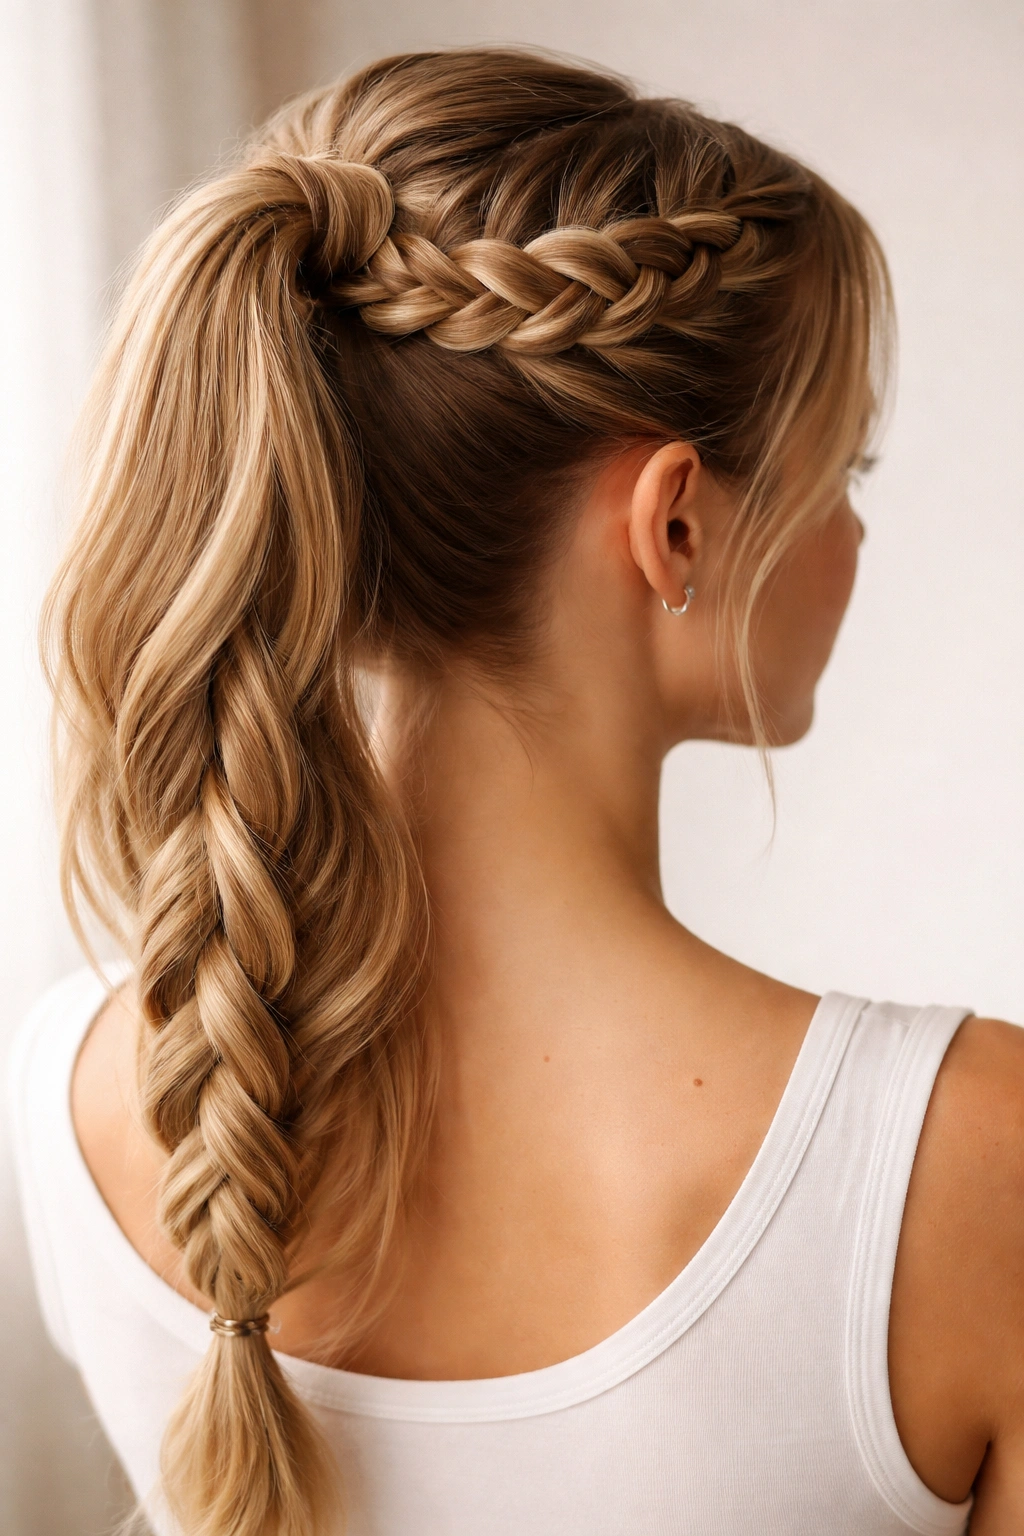
18. Twisted-Side French Braid Ponytail
If braiding both sides feels like one move too many, start with twists at the temples and let them feed into the French braid. It softens the look and makes the front easier to manage.
A twist is simpler than a full braid because you only rotate two sections instead of crossing three. That means less finger confusion and less chance of losing your place. Once the twists meet the central braid, the style turns into a regular French braid and eventually a high ponytail.
I reach for this version when my hands are tired or when the hair at the sides is extra slippery. The twists give you a little control before the braid even starts. They also frame the face in a gentler way than a severe front braid can.
This style looks good with earrings, by the way. The twisted sides keep the attention up top, so a small hoop or a simple stud does more than it would with loose hair.
19. Coiled Braid-Into-Ponytail
What if the braid didn’t stop at the ponytail base, but curled around it first? That small coil makes the style feel tucked in and finished without asking you to learn a whole new technique.
Braid the top section into a high ponytail as usual, then take a thin strand from the tail and wind it once around the elastic in a neat coil before pinning it underneath. The coil acts like a little frame around the base. It’s subtle, but it changes the finish a lot.
This is a good option if you want the style to feel neat from every angle. The coil hides the elastic and gives the ponytail a cleaner start, which is helpful when the braid itself is simple. You get the visual payoff without extra complication.
Keep the coil slim. A fat wrap looks clumsy. One small strand, tucked tightly with a bobby pin, is enough.
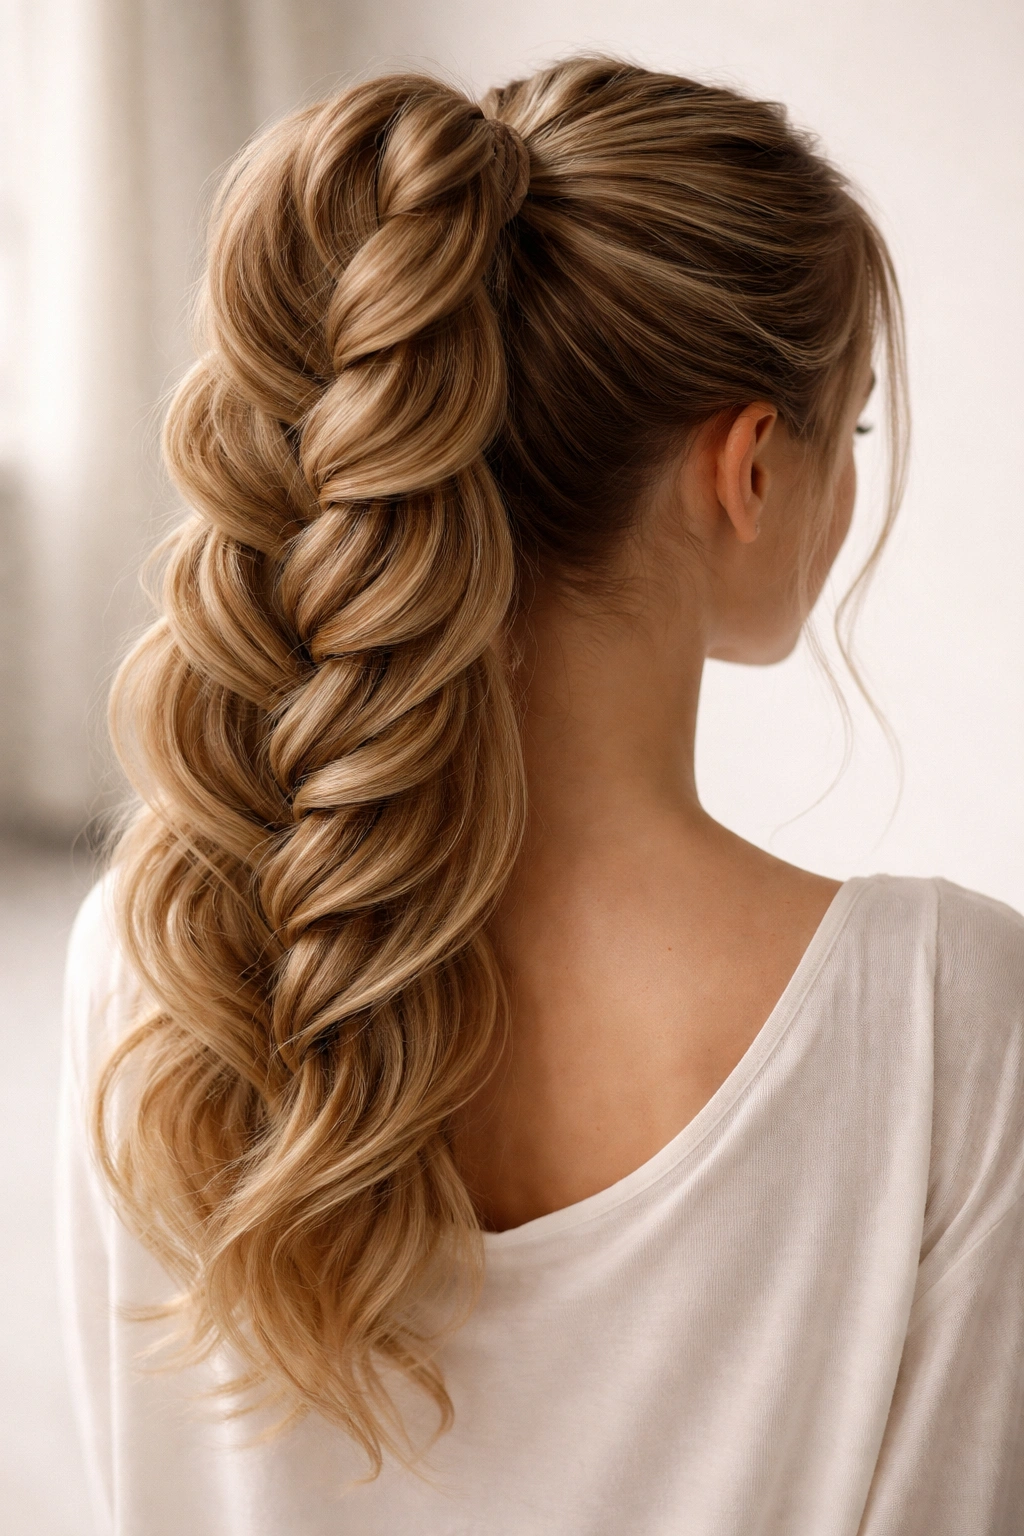
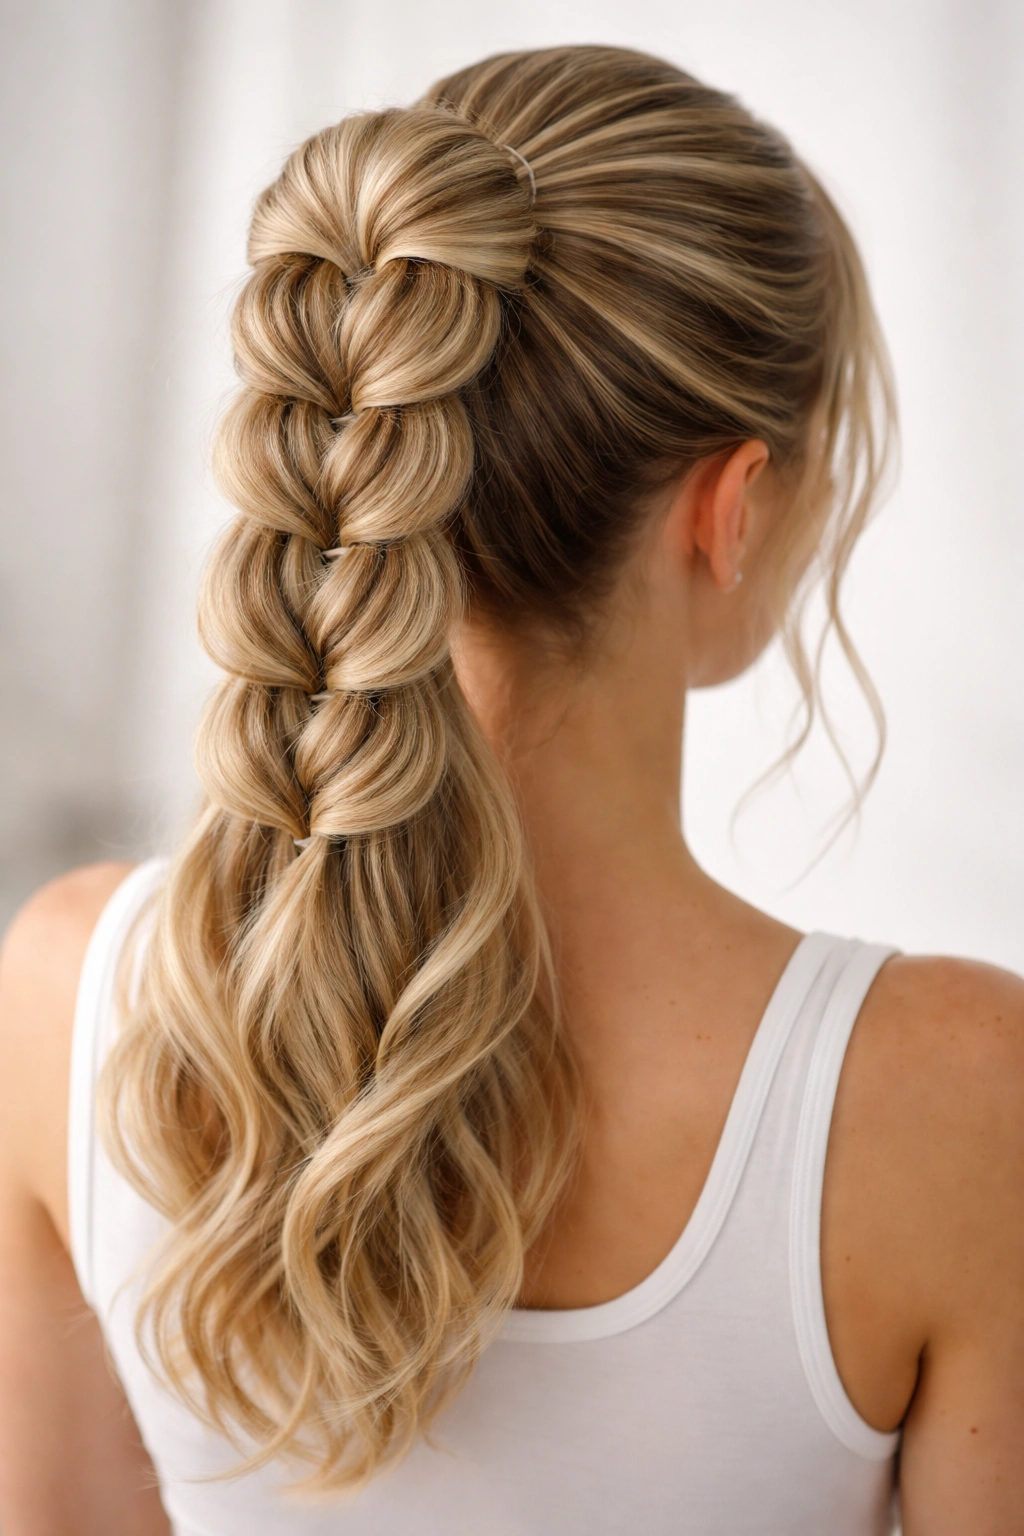
20. Rope-Braid Tail With French Braid Crown
This one starts like a French braid ponytail, then shifts into a rope braid for the length. The crown gives you the structure, and the rope twist keeps the tail easy to control.
Where the Rope Twist Belongs
Once the high ponytail is secured, divide the tail into two equal sections and twist each one in the same direction. Then twist those two twisted sections around each other in the opposite direction. That rope-braid movement keeps the tail compact and tidy.
How to Stop It from Unraveling
Use a small elastic at the end, and if the hair is layered, add a light mist of hairspray before the twist starts. Rope braids can loosen faster than French braids if the hair is silky, so a little grip helps.
This style is a nice step up for beginners who can already do the top braid but want the length to look more interesting. It feels organized, and the rope finish keeps the ponytail from turning into a plain swing of hair.
21. Glossy Event-Ready High French Braid Ponytail
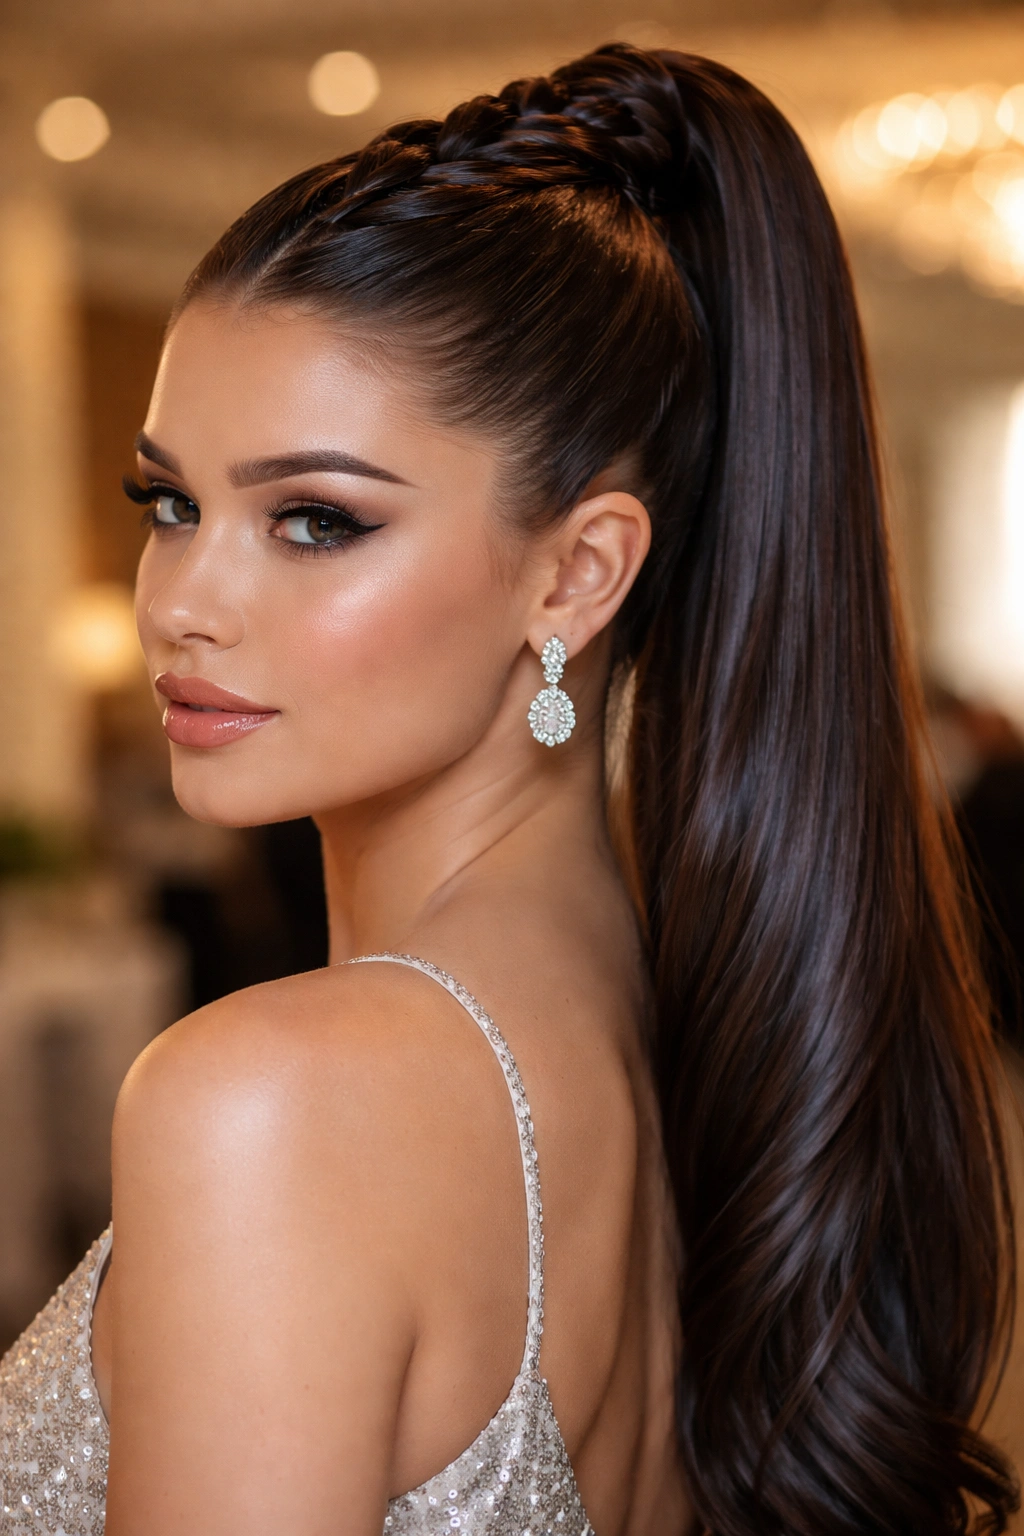
Shine matters more than braid size here. A sleek, glossy finish makes the whole style look cleaner and more formal, even if the braid itself is straightforward.
Use a small amount of serum or lightweight oil on the palms, then smooth the top and the braid surface before securing the ponytail. If your hair is straight, a flat iron pass on the front sections can make the braid sit flatter. If it’s wavy, a brush and light gel usually do enough.
I like this version for evenings because it looks intentional from the front and dramatic from the back. The ponytail can be full and long, but the glossy crown keeps the style from feeling too casual. It also photographs well under indoor lighting, where shine shows up fast.
Do not overload the hair with product. A pea-size amount at a time is plenty. Too much serum makes the braid slide, and that is the last thing you want when the elastic needs to hold.
22. Braided Bang French Braid Ponytail
If hair in your eyes drives you crazy, braid the front section like a built-in fringe control system. It keeps the front neat and turns a practical fix into part of the style.
Start by taking a front panel from temple to temple, or just the section that usually falls into your face. French braid that piece back into the crown, then gather the rest of the hair into a high ponytail. The braid acts like a headband with better staying power.
This is especially useful for layered cuts. Shorter front pieces can be tucked into the braid while the longer hair stays loose in the tail. If your bangs are too short to braid, pin them to the side and let the braided section sit just behind them.
A small detail helps here: keep the braid slightly narrower than the rest of the ponytail. That contrast keeps the front from looking heavy. The whole style feels lighter when the braid is doing one clear job instead of trying to run the whole show.
23. Half-Up High French Braid Ponytail
This is the friendliest place to start if a full ponytail feels like too much hair in your hands. You only braid the top half, which means less tension, less pulling, and fewer strands to lose track of.
Unlike a full French braid ponytail, the lower section stays free. That gives the style a softer shape and leaves the length to move on its own. It works especially well on thick hair, where a full high ponytail can feel heavy.
I like this version because it’s easy to fix if you make a mistake. You can undo a single side section and re-braid it without taking apart the whole head. That matters when you’re learning and your fingers are still figuring out the rhythm.
If you want the half-up section to sit higher, place the ponytail at the upper back of the crown rather than directly at the midpoint. That tiny shift makes the style look lifted instead of collapsed.
24. Pull-Through French Braid Ponytail
This is the cheat code for anyone who likes the look of a French braid but keeps getting tangled in the handwork. A pull-through braid mimics the layered pattern with elastics, and it’s a lifesaver for beginners who want a cleaner result fast.
You section the hair into stacked ponytail loops, then split and feed each loop through the next elastic to create a braid-like pattern. It sounds fussy when described in words, but in practice it is easier than a real French braid because you’re tying sections instead of crossing them.
The best part is the control. You can stop, smooth, and re-tie one section without destroying the whole style. That is a gift when your braiding hand is still learning where the strands belong.
From a few feet away, the finish reads like a French braid ponytail. Up close, it looks a little different, and I actually think that’s fine. If the goal is a beginner-friendly high ponytail with braid texture, this one earns its spot.
25. Softly Looped French Braid Ponytail
The last style in the set is the gentlest one visually. A French braid leads into a high ponytail, then the length gets gathered into loose loops instead of hanging straight down. It feels airy, not stiff.
This works well on medium-length hair, especially if the ends are blunt or slightly uneven. The loops hide that and give the ponytail some shape. Use clear elastics every few inches, then fan each section out a little so the loops sit softly rather than puffing into hard bubbles.
I like this version for people who want something pretty without a lot of tension at the crown. The braid does the work at the top, the loops keep the tail light, and the whole style has an easy rhythm to it. It’s one of those looks that seems delicate but holds together better than you expect.
If you want a little extra polish, wrap a small strand around the first elastic at the base. That tiny move keeps the start of the ponytail looking neat, which matters when the rest of the style is loose and airy.
Final Thoughts
If your hands are new to braiding, start with the styles that give you room to breathe: the sleek version, the double-braid option, the low-tension braid, or the pull-through look. Those are the ones that teach you control without making the process feel punishing.
Texture helps more than people expect. A little dry shampoo, slightly lived-in hair, or a touch of smoothing product at the front can make a high French braid ponytail easier to finish and easier to wear. Clean hair is lovely, but glassy clean hair can be slippery in the worst way.
Pick one version and practice it twice. Not ten times. Twice is enough to show you where your hands get stuck, and that’s usually the real lesson. After that, the style stops feeling like a puzzle and starts feeling like a habit.