The sleek ponytail bun is the ultimate sartorial paradox. It requires intense precision and a firm hand to create, yet it radiates an effortless, minimalist cool that suggests you barely spent five minutes in front of the mirror. We have all seen that woman in the coffee shop or at the office—the one whose hair looks like it was sculpted by a master architect, every strand locked into place with military-grade discipline. It is a look that screams competence. It is also the perfect savior for second-day or third-day hair when a wash feels like a chore, but you still need to present a put-together front to the world.
Creating a bun that truly looks sleek rather than just greasy requires more than just pulling your hair back and wrapping an elastic around it. You need technique, the right tools, and a bit of honest-to-goodness patience. If you rush the brushing process, you will inevitably end up with bumps, bubbles, and stray flyaways that ruin the entire effect. This is about smoothing the cuticle, controlling the tension, and finishing with a shine that looks intentional, not oily.
Whether you are heading into a boardroom presentation, attending a black-tie gala, or simply running errands while keeping your hair off your neck, there is a version of this style that works for you. Let’s break down the mechanics, the variations, and the specific tricks to getting that polished, high-gloss finish every single time.
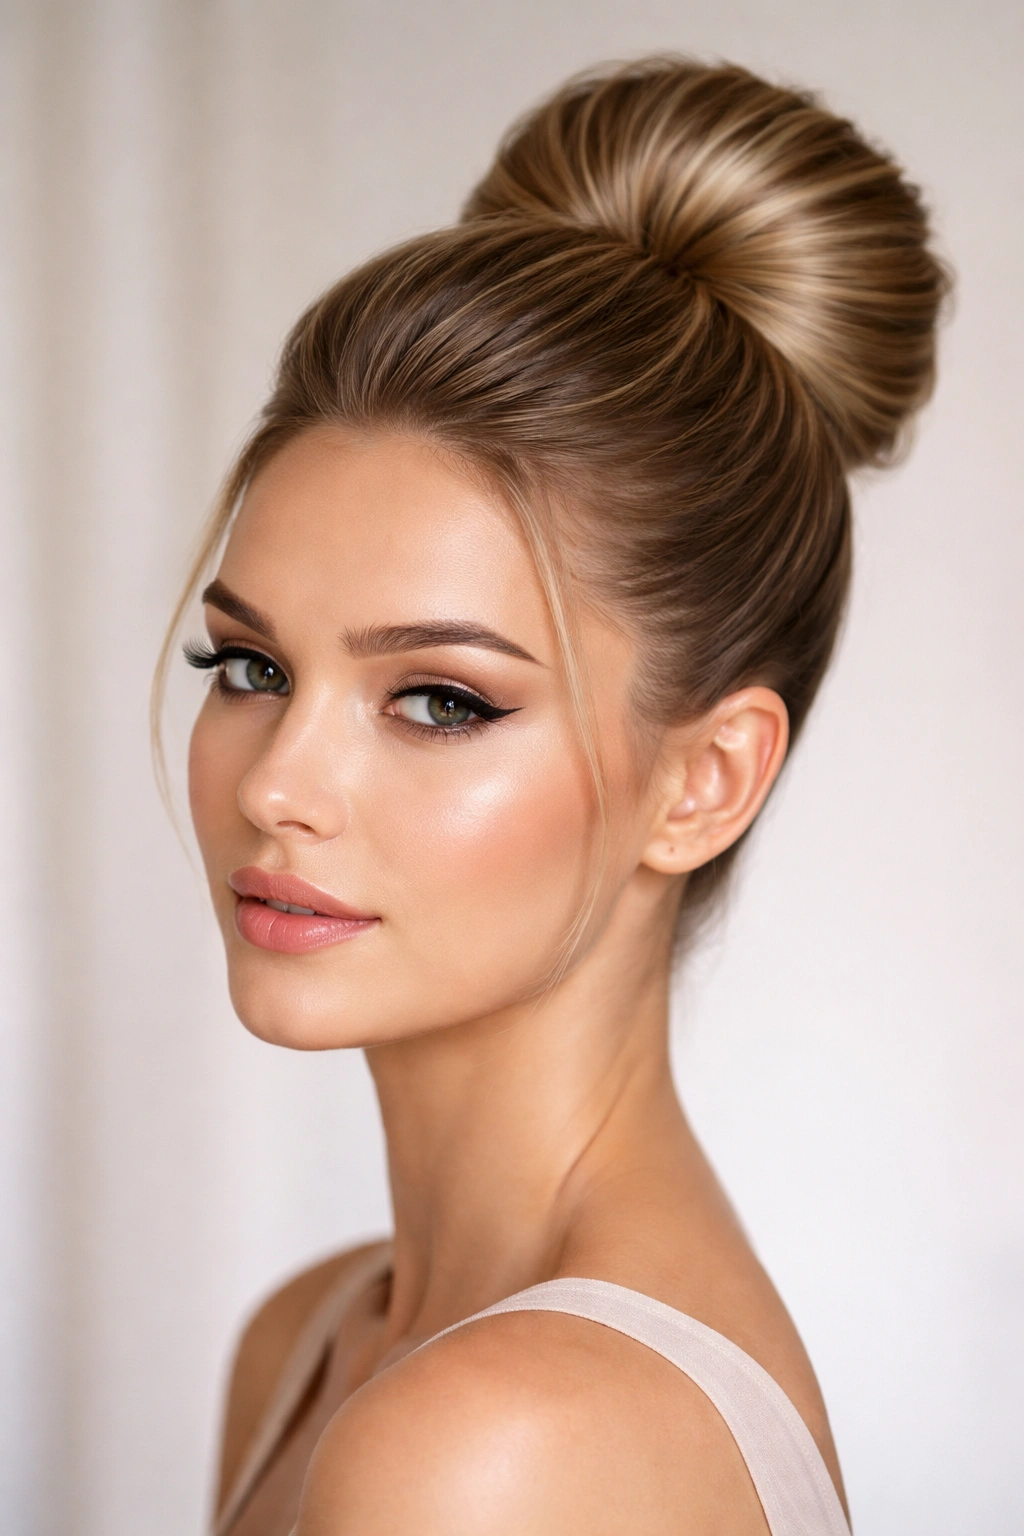
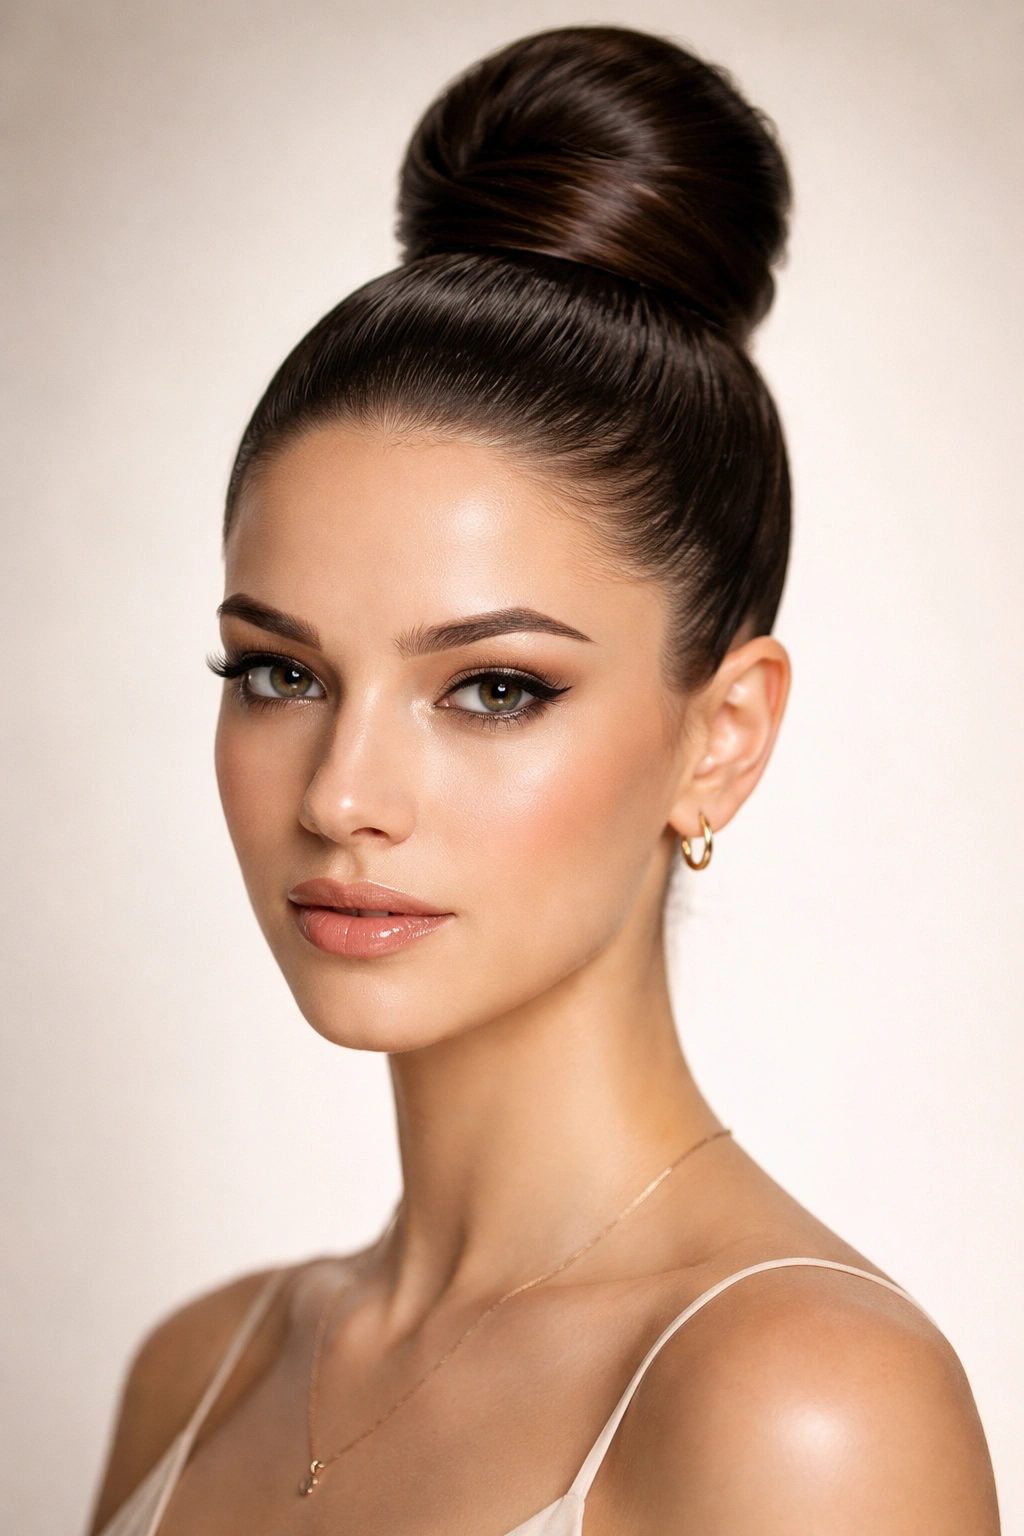
1. The Classic High Sleek Bun
This is the gold standard. It is the style that people visualize when they hear “sleek bun.” It requires gravity-defying height and a mirror-like finish on the crown. To get this right, you cannot rely on just any hairbrush; you need a boar bristle brush. The natural fibers grab onto individual strands, smoothing them down against the scalp in a way that synthetic bristles simply cannot match.
How to Achieve Maximum Height
Start by flipping your head upside down and brushing all your hair toward the crown of your head. Use a small amount of pomade or styling cream—not gel, which can get too crunchy—at the roots to manage any shorter hairs. Gather the hair into a ponytail, holding it securely with one hand while you use your other hand to smooth the surface of the hair from the hairline toward the elastic. Once it is perfectly smooth, tie it off with a snag-free elastic.
Pro tip: For that extra bit of height, use two elastics stacked together. It gives the ponytail more structural support, preventing it from drooping after an hour of wear.
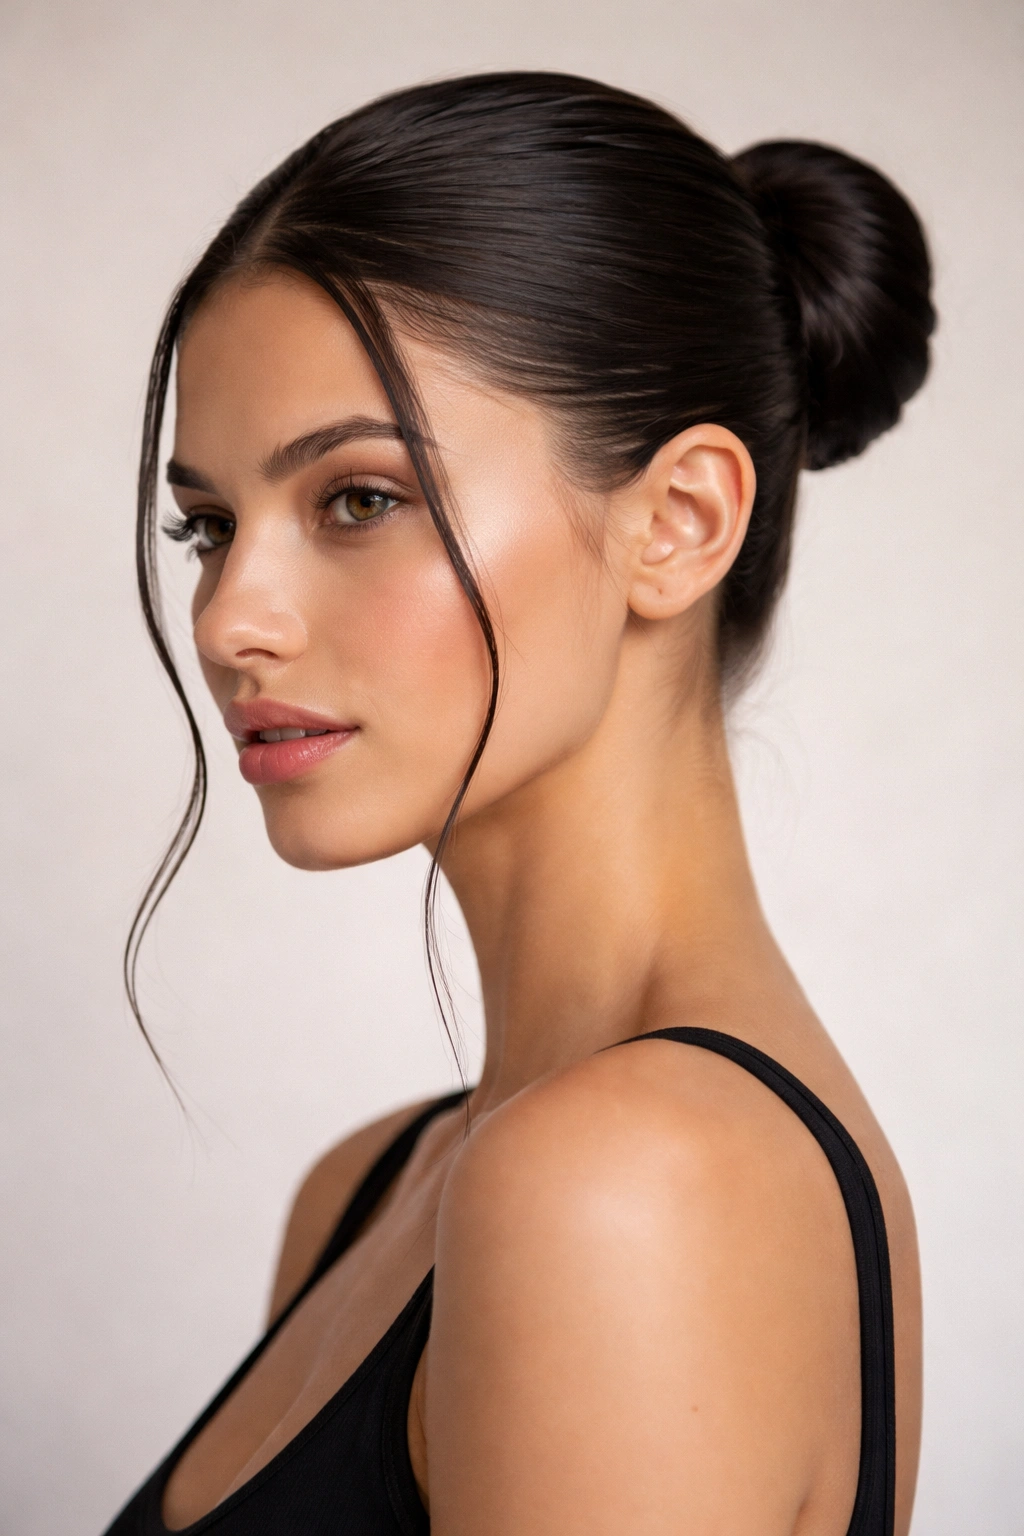
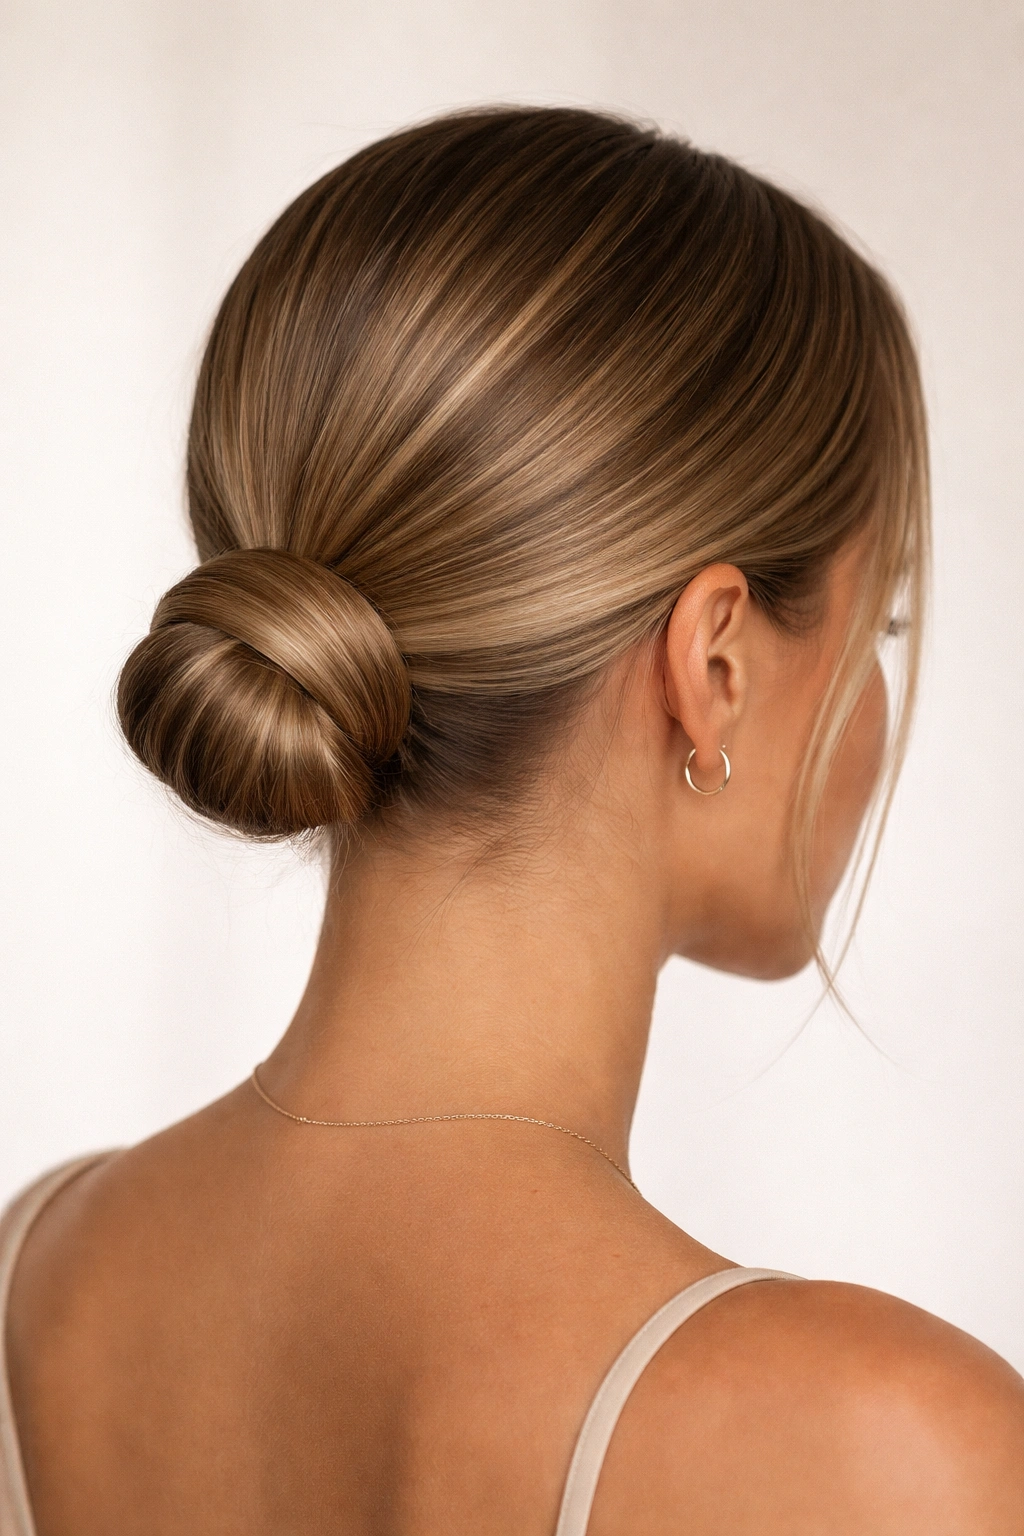
2. The Low-Nape Minimalist Knot
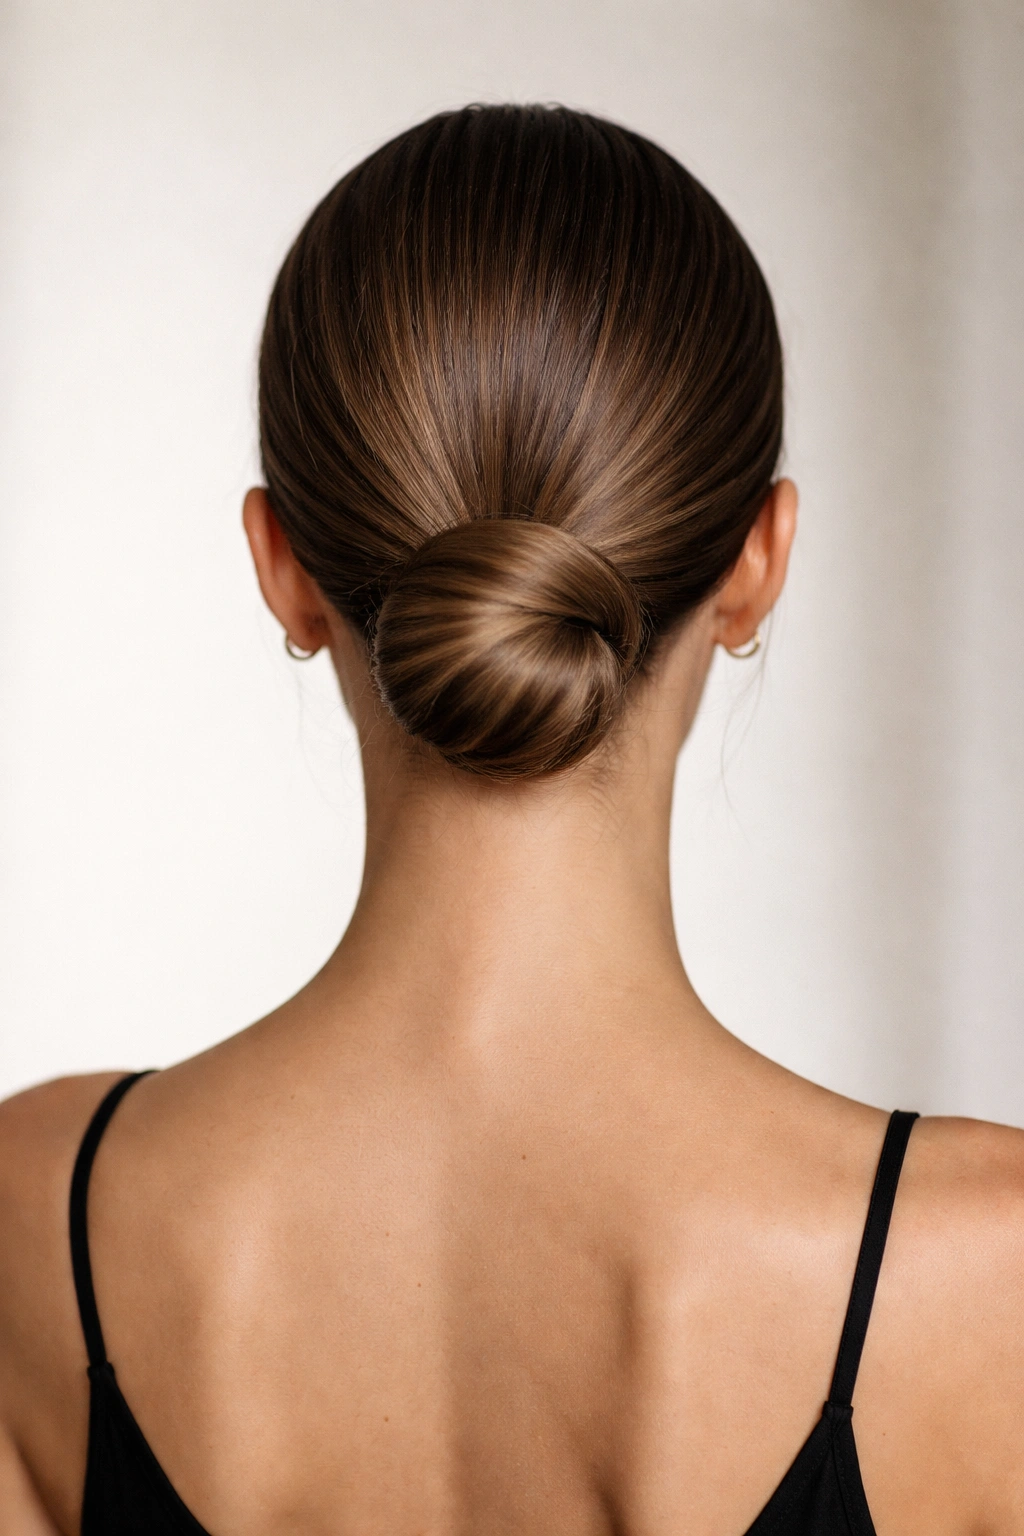
Sometimes, less is significantly more. The low-nap bun moves the focus away from the face and toward the elegance of the neckline. It is sophisticated, quiet, and works particularly well with high-collared shirts or intricate jewelry. You want this bun to sit right at the base of the skull, tucked neatly against the neck.
The secret here is a deep, clean part. Whether you choose a middle part or a side part, it must be razor-sharp. Use the handle of a rat-tail comb to trace your part, ensuring it is perfectly straight. If the part is crooked, the entire look falls apart. Once the part is set, apply a light-hold smoothing cream to your palms and flatten the hair against your head, tucking it behind your ears before securing it at the nape.
3. The Middle-Part Sleek Loop
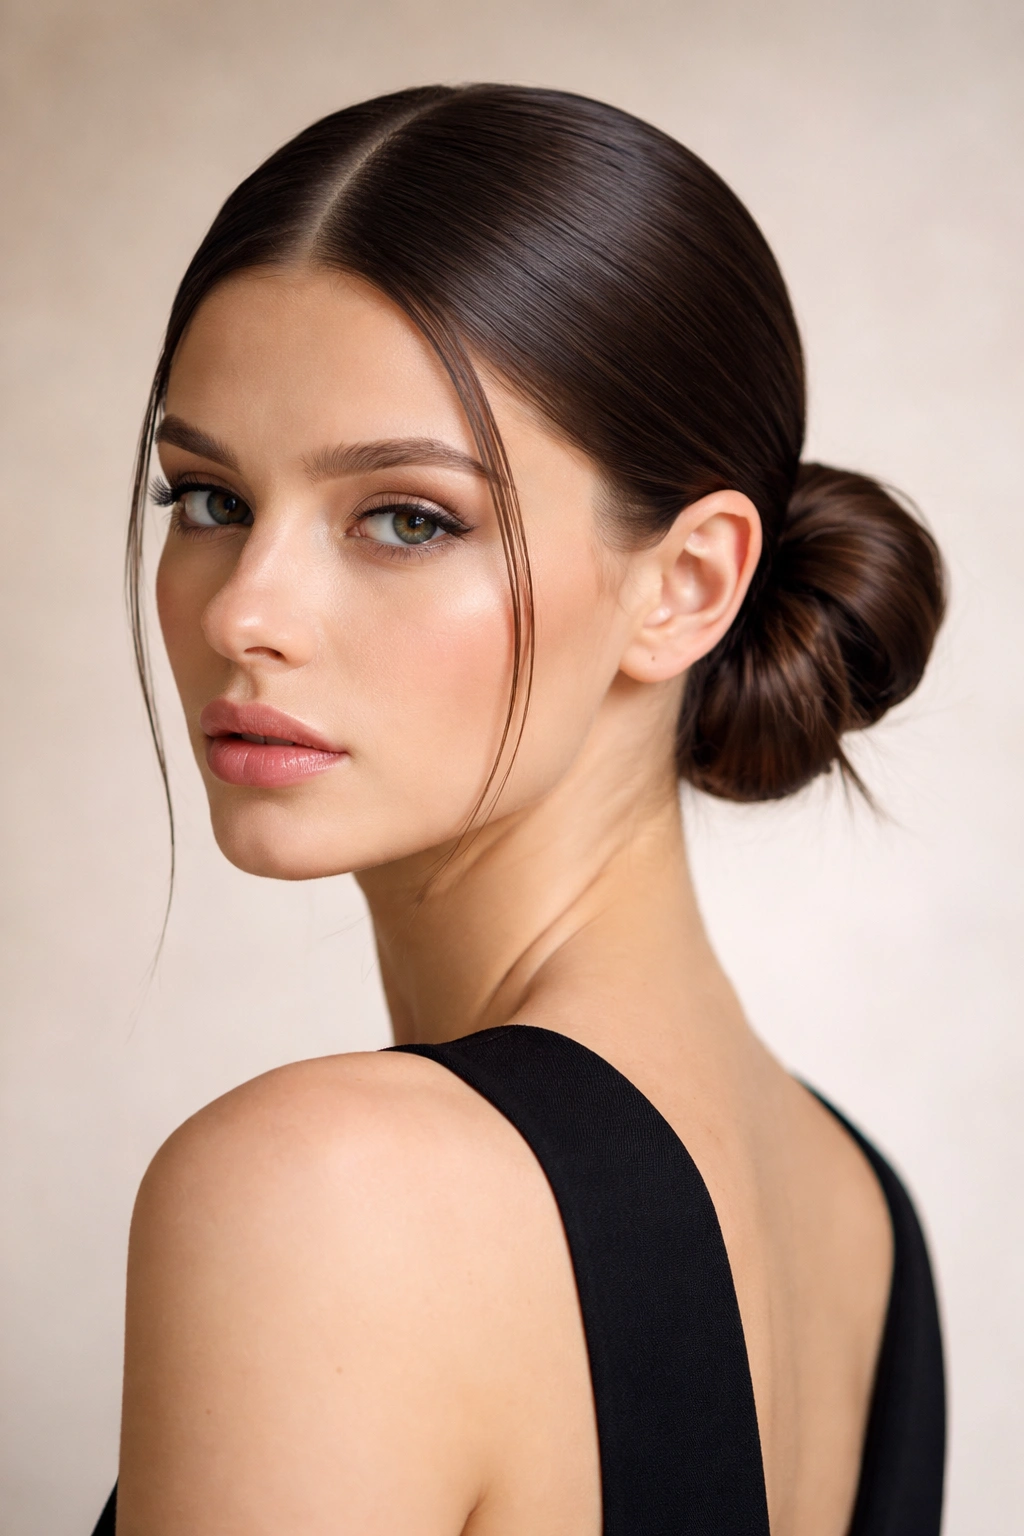
This look leans into the modern, editorial aesthetic often seen on fashion runways. The middle part creates a frame for the face, while the bun itself stays simple and structural. It is a fantastic option if you have a rounder face shape, as the vertical line created by the part helps to elongate your features.
You should aim for a “loop” style bun here, where the ends of the hair are not wrapped entirely around the base but are left slightly exposed or tucked into a small, tight loop. It feels artistic rather than overly groomed. Use a medium-hold gel to lock the hair down, then run a fine-tooth comb through the roots one last time before the gel sets. Do not touch it again until it is fully dry; messing with the hair while it is wet creates frizz.
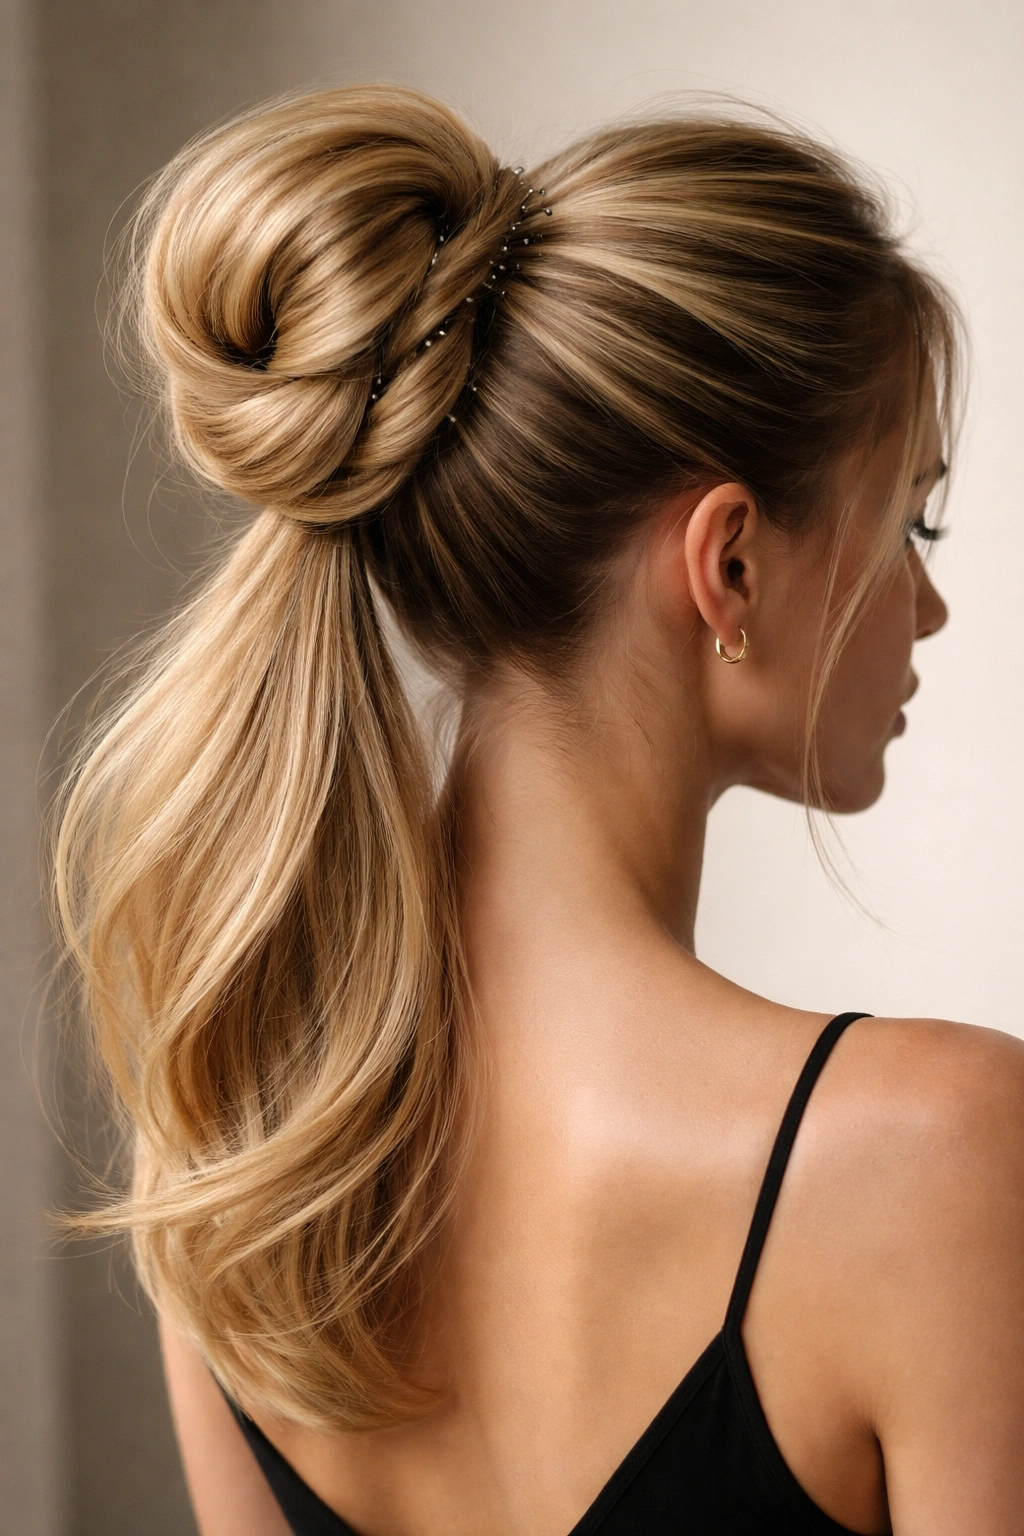
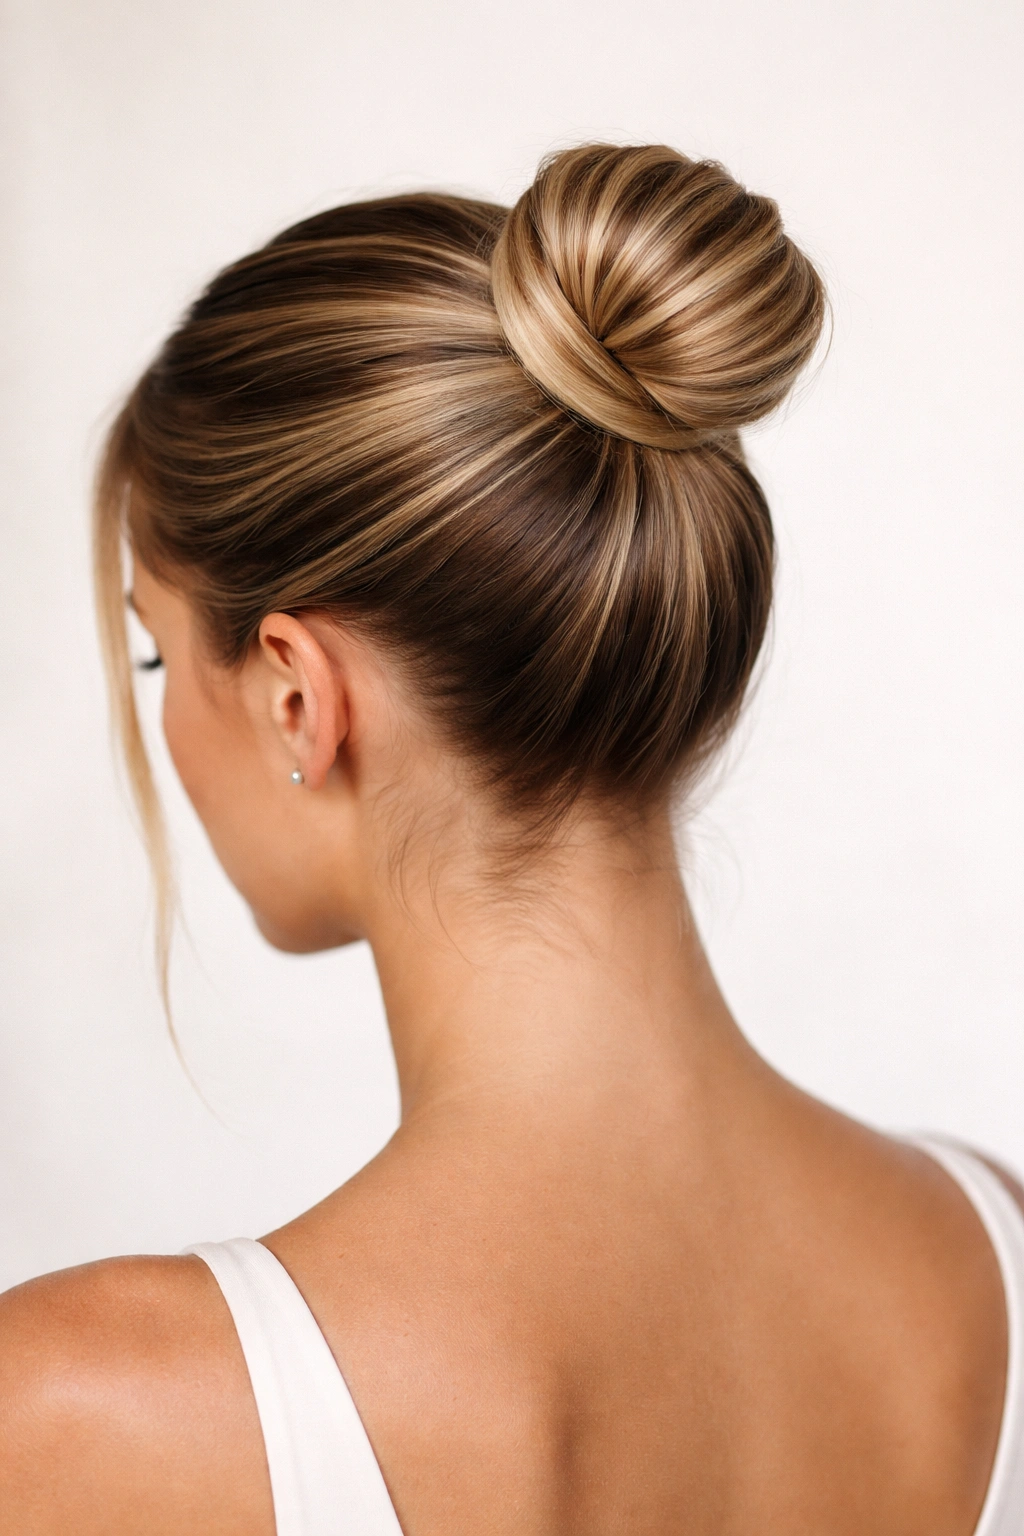
4. The Wrapped-Base Polished Chignon
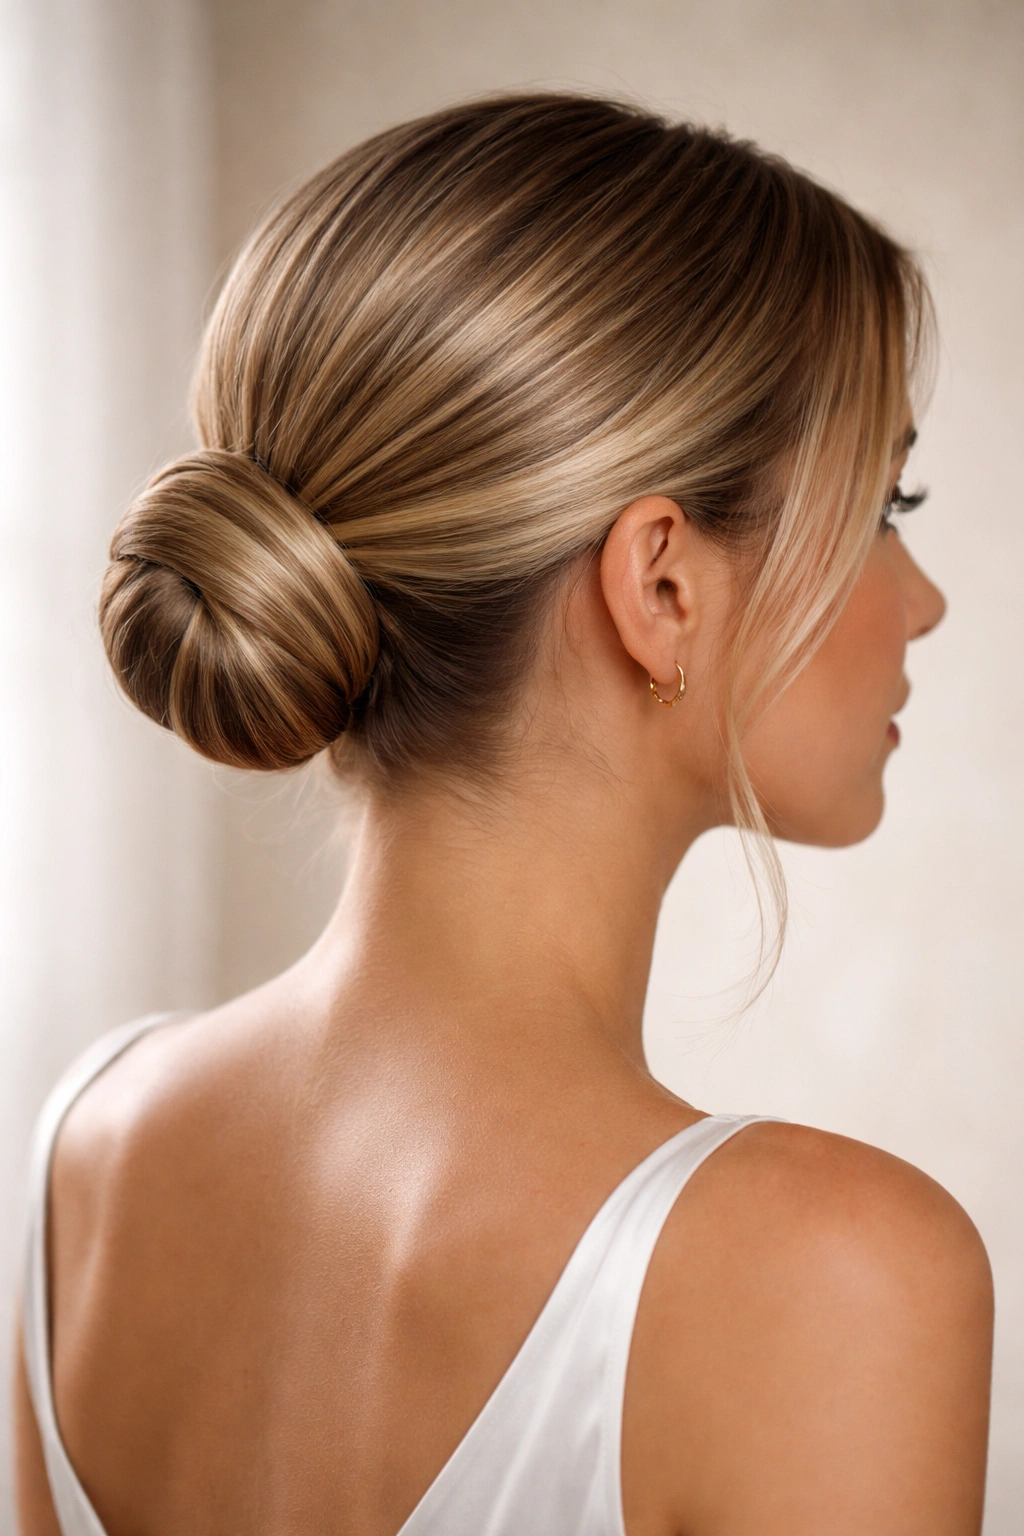
If you want to dress up a basic bun, the wrap is your best friend. It hides the elastic and makes the style look like a professional updo rather than a quick fix. You take a small, thin section of hair from the underside of your ponytail and wrap it continuously around the base, covering the hair tie entirely.
Why This Detail Matters
It turns a casual hairstyle into a finished look. It suggests you took the time to craft your appearance. When you reach the end of the section you are wrapping, secure it with a small bobby pin. Make sure you slide the pin in against the grain of the bun so it stays invisible. If the pin is poking out, you lose the polish.
5. The Deep Side-Part Glossy Bun
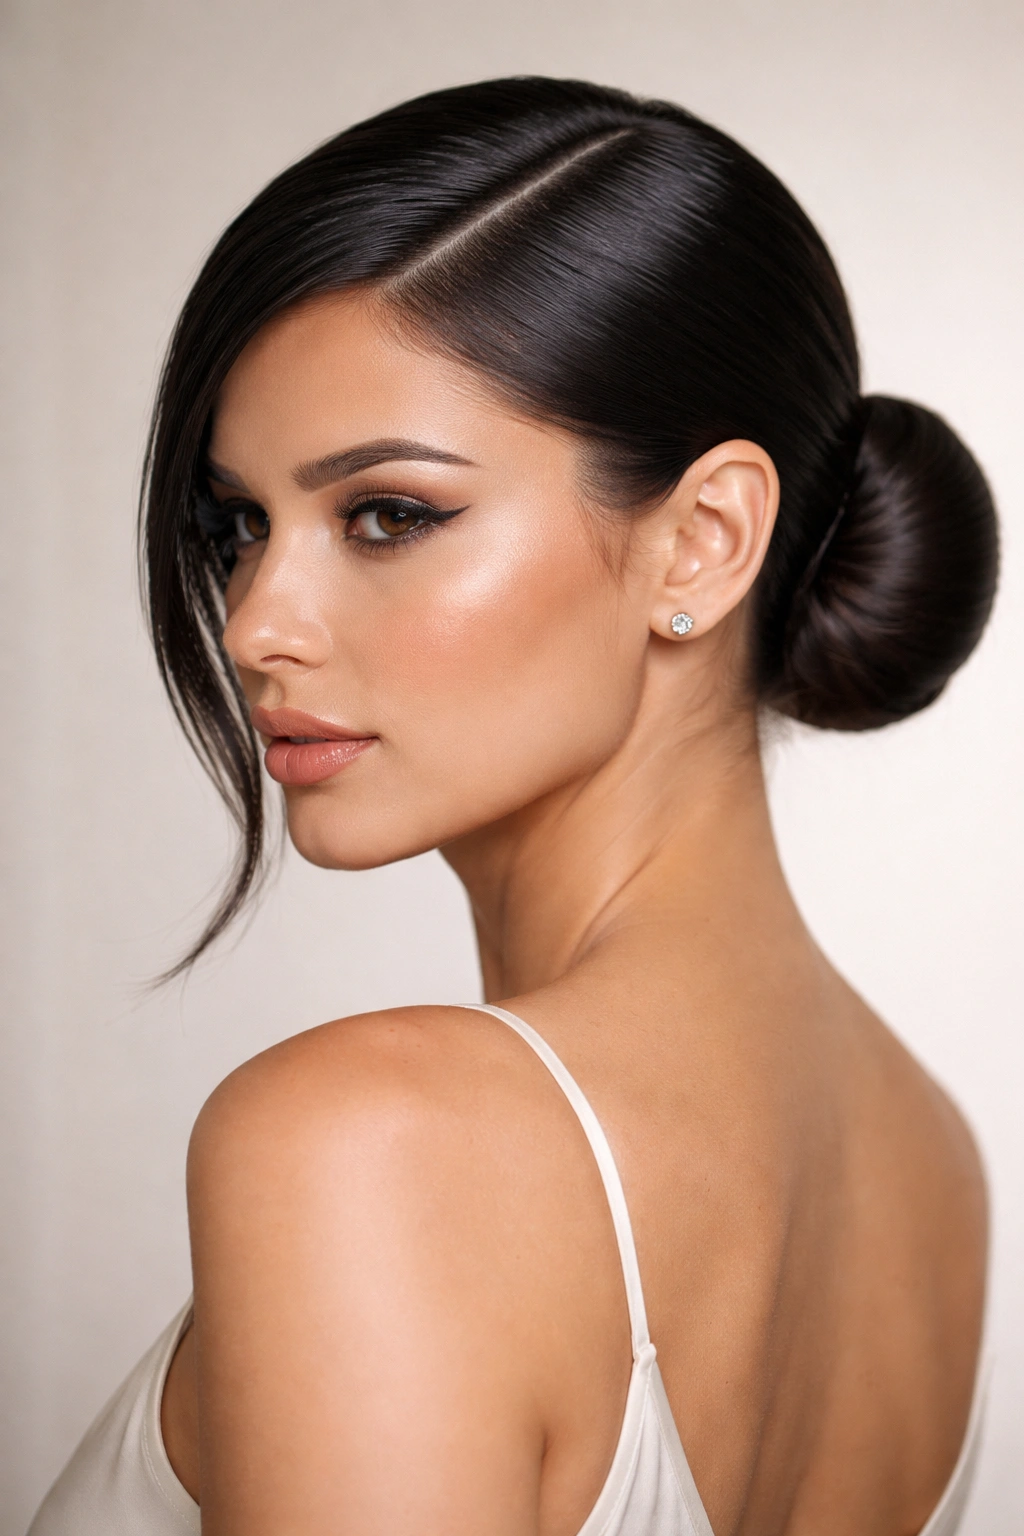
A deep side part adds an instant layer of drama and asymmetry that can make a standard bun feel brand new. It is surprisingly effective at softening the face. By sweeping more hair across one side of the forehead, you create a diagonal line that draws the eye toward your cheekbones.
Technical Application
Use your comb to create a part that starts deep, usually in line with the arch of your eyebrow. Apply a high-shine pomade or serum to the hair before you even begin the ponytail. You want that hair to look liquid, almost like glass. When you gather the hair, keep the tension firm but not so tight that you pull your eyelids upward. You want a smooth drape, not a facelift.
6. The Bubble-Detail Sleek Updo
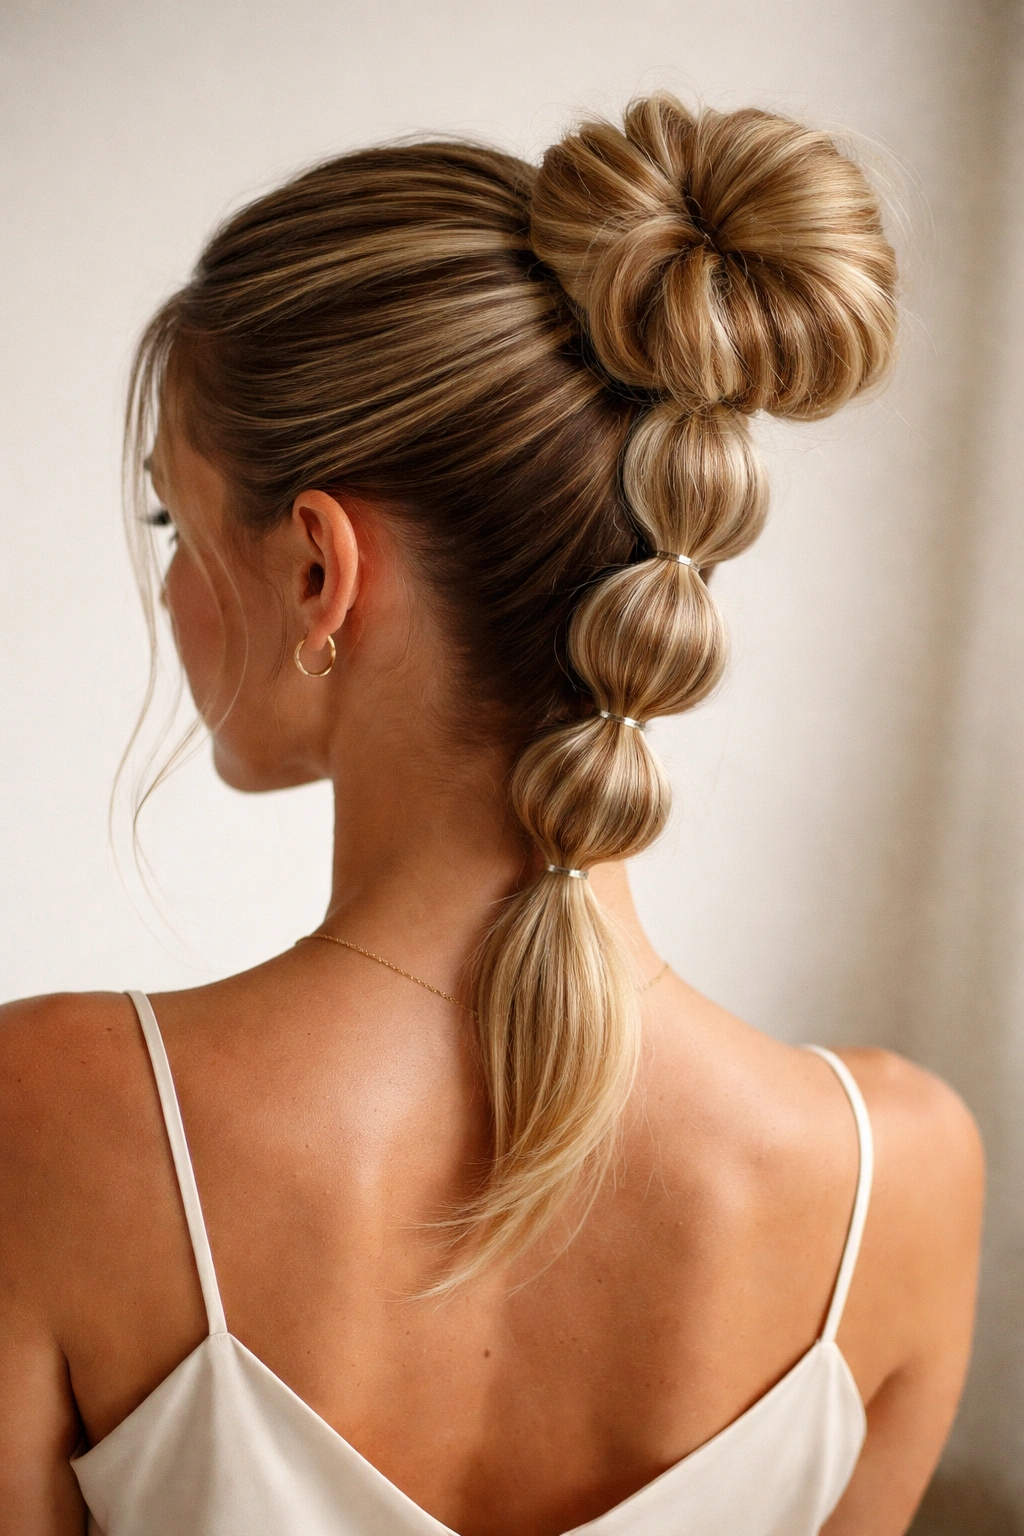
This is a playful, texture-heavy variation that is actually quite easy to execute if you have the right products. You create a sleek, high ponytail first. Then, you place small clear elastics down the length of the ponytail at two-inch intervals. Once you have the “bubbles,” you gently pull at the sides of each section to puff them out. Finally, you pin that bubble-ponytail into a loose, structured bun.
It creates visual interest without requiring heat styling. It is an excellent choice for hair that has a bit of natural wave or texture, as the bubbles play into that instead of fighting against it. Just be sure to use clear elastics that are specifically designed for hair; rubber bands will snap your strands and create damage.
7. The Double-Braided Sleek Base
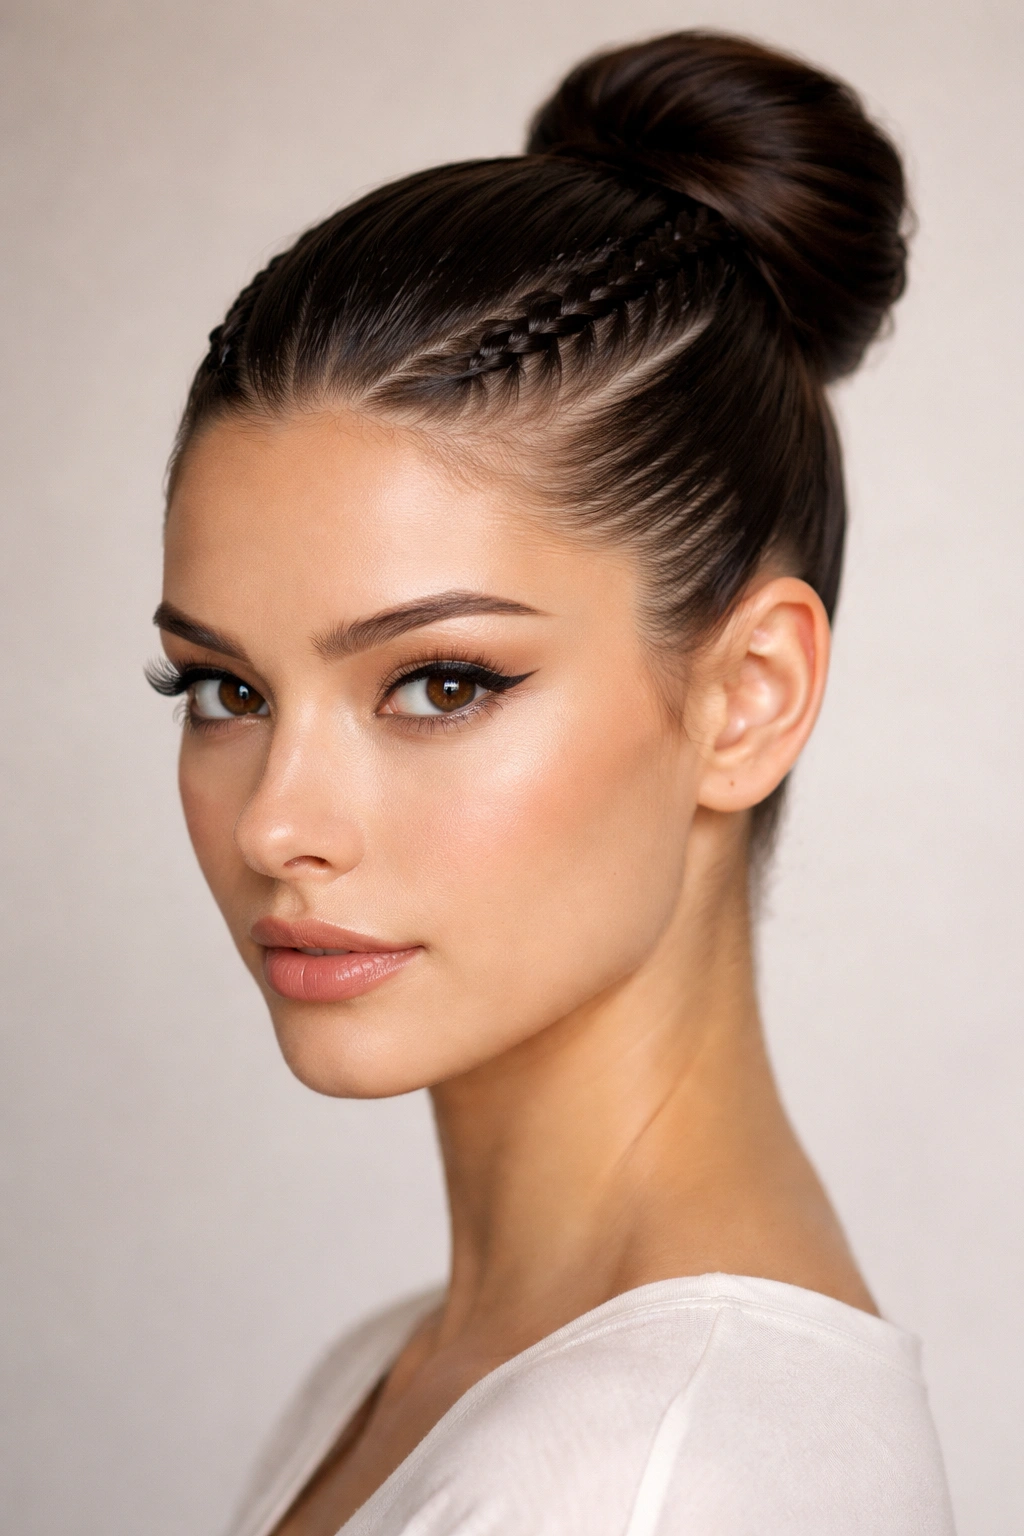
Adding braids to a sleek style sounds like it might add too much bulk, but when done correctly, it creates a stunning frame. You create two small, tight French braids along the scalp, starting from the hairline and leading back to the crown. The rest of the hair is then pulled into a high, sleek ponytail.
This look effectively separates the hair, creating a “caged” or “grid” effect on the scalp before it transitions into a smooth bun. It is intricate and requires steady hands, but it is incredibly durable. This is a great choice for windy days or active situations where you need your hair to stay put for twelve hours or more.
8. The Tendril-Framed Sleek Bun
Sometimes, a total face-pull is just too harsh. If you feel like your features get lost in a fully pulled-back style, leave two thin sections of hair out at the front. These are your face-framing tendrils. They should be sleek, not messy.
Apply a tiny dab of styling wax to your fingers and run it through these tendrils to make them look deliberate and polished. You do not want them to look like you forgot to pull them back; you want them to look like you styled them that way on purpose. Keep the rest of the bun tight and glossy to create a contrast between the structured back and the soft front.
9. The High-Volume Sculptural Knot
If you have thick or curly hair, fighting the volume is a losing battle. Instead, embrace it by creating a sculptural, high-volume knot. You pull the hair into a high ponytail, but instead of smoothing it completely flat, you allow a bit of lift at the crown.
The bun itself becomes a work of art. You can twist the ponytail into a tight rope and coil it around itself, securing it with multiple bobby pins in a radial pattern. This style is meant to look substantial. If you have fine hair, you can fake this look by using a donut-shaped hair filler, which provides the volume needed to make the knot look thick and intentional.
10. The Twisted Rope-Braid Bun
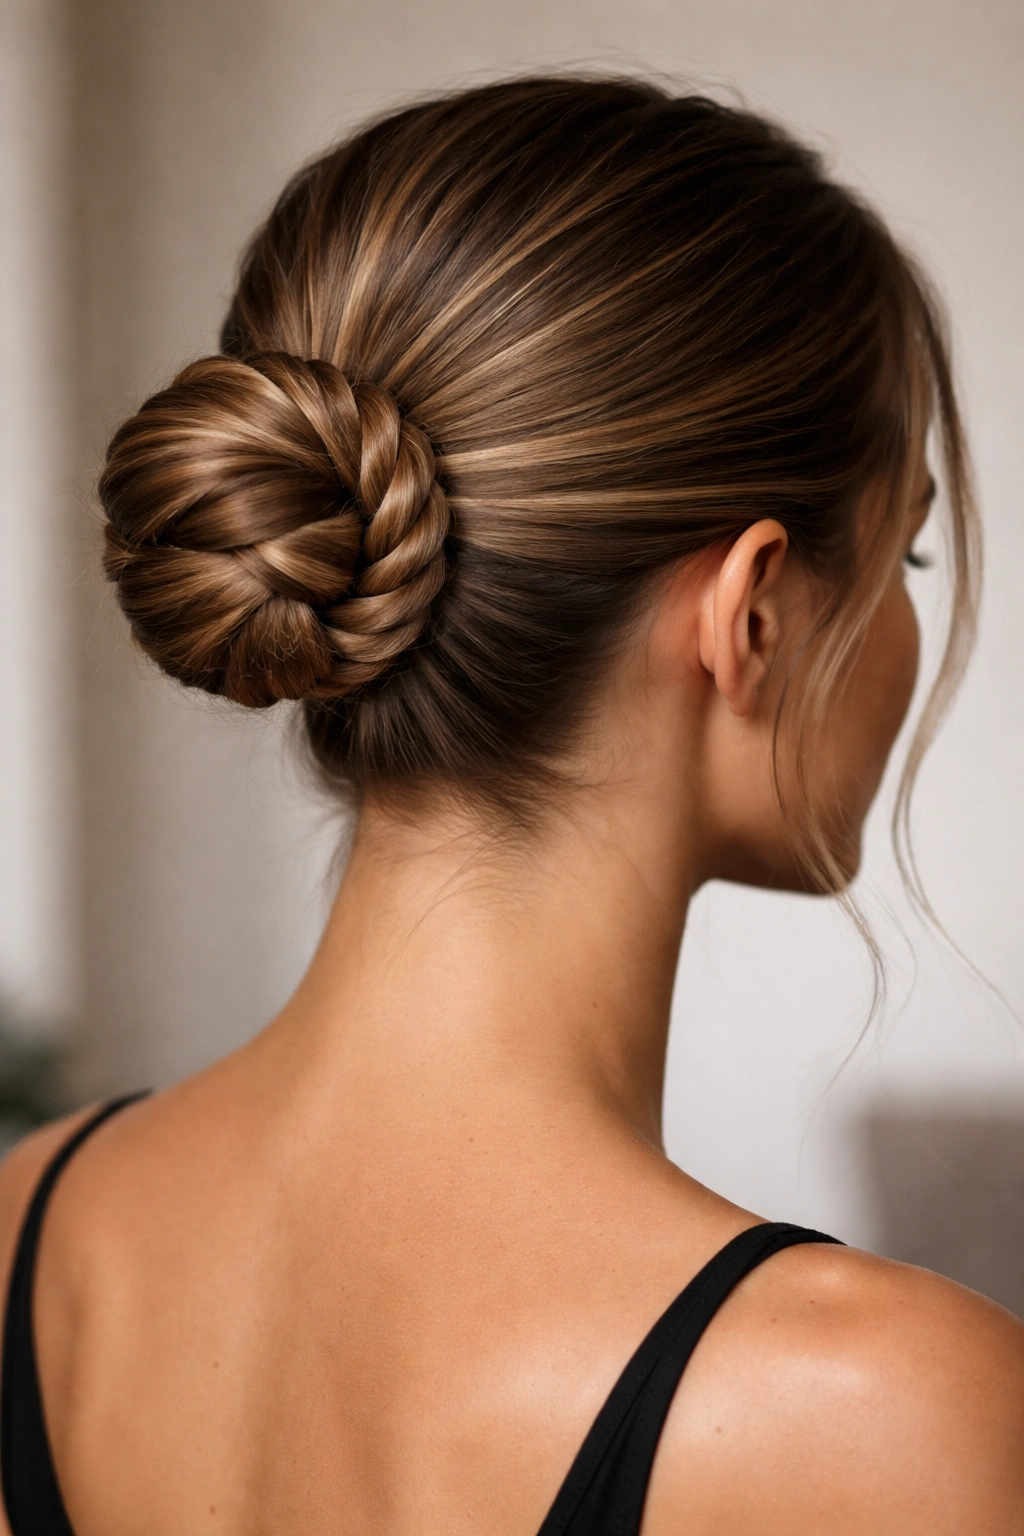
This technique adds incredible texture and interest to the back of the head. After securing your ponytail, divide it into two equal sections. Twist each section tightly in the same direction, then cross them over each other to form a rope braid.
Once the rope braid is secure, wrap it around the base to form the bun. Because the hair is already twisted, the bun will have a distinct, rope-like appearance that catches the light differently than a flat wrap. It looks much more complicated than it actually is, which is the hallmark of a great hairstyle.
11. The Wet-Look Slicked Back Bun
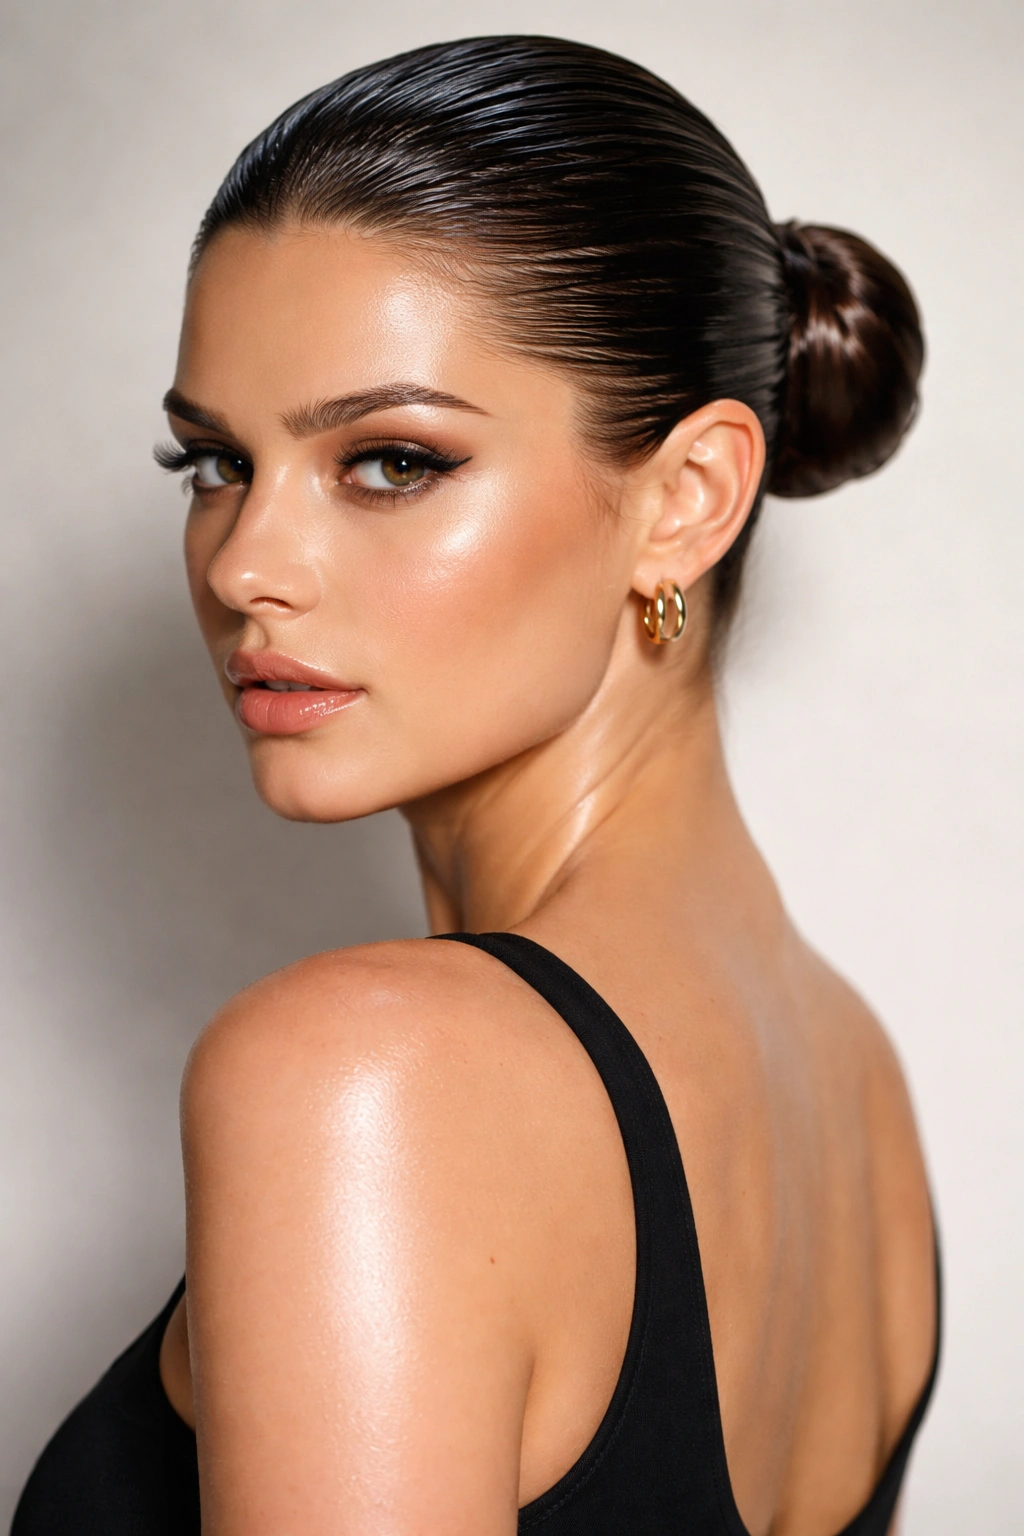
This is an edgier, high-fashion take on the sleek bun. It is best achieved with a heavy-duty styling gel that has a wet-look finish. The goal is to make the hair look like you just stepped out of the ocean or a shower, but with total control.
The Application Process
Apply the gel generously to the roots, focusing on the hairline. Use a boar bristle brush to work the product all the way through, ensuring every strand is coated. Pull the hair tight. Secure it, and then apply a little extra gel to the bun itself to give it that same glossy, wet appearance. This style is unapologetically bold and pairs perfectly with a bright lip color or dramatic eyeliner.
12. The Ribbon-Accented Sleek Bun
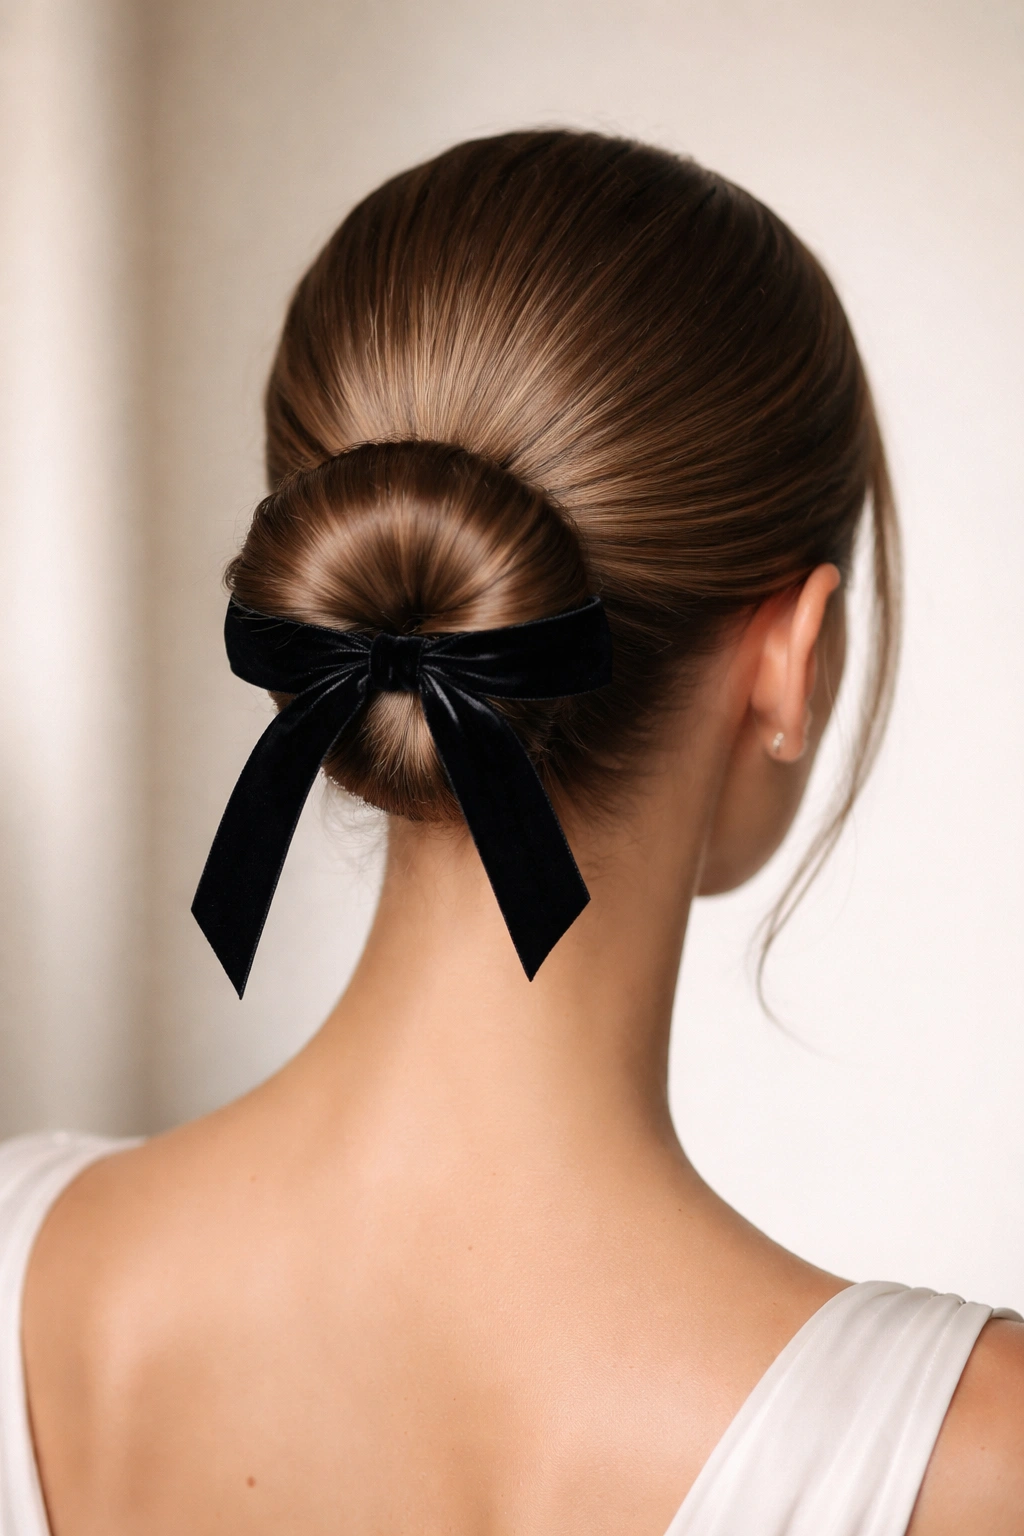
Sometimes the sleekest bun needs a little touch of softness to elevate it. A velvet or silk ribbon tied around the base of the bun can make the look feel finished, feminine, and expensive. You want to choose a ribbon that complements your outfit—black velvet is timeless and sophisticated, while a satin ribbon can add a pop of color.
Make sure you secure the bun first with a discreet elastic, and then tie the ribbon over it. This prevents the ribbon from sliding off or losing its shape throughout the day. It is a simple addition that pays dividends in style points.
13. The Minimalist Gold-Cuff Bun
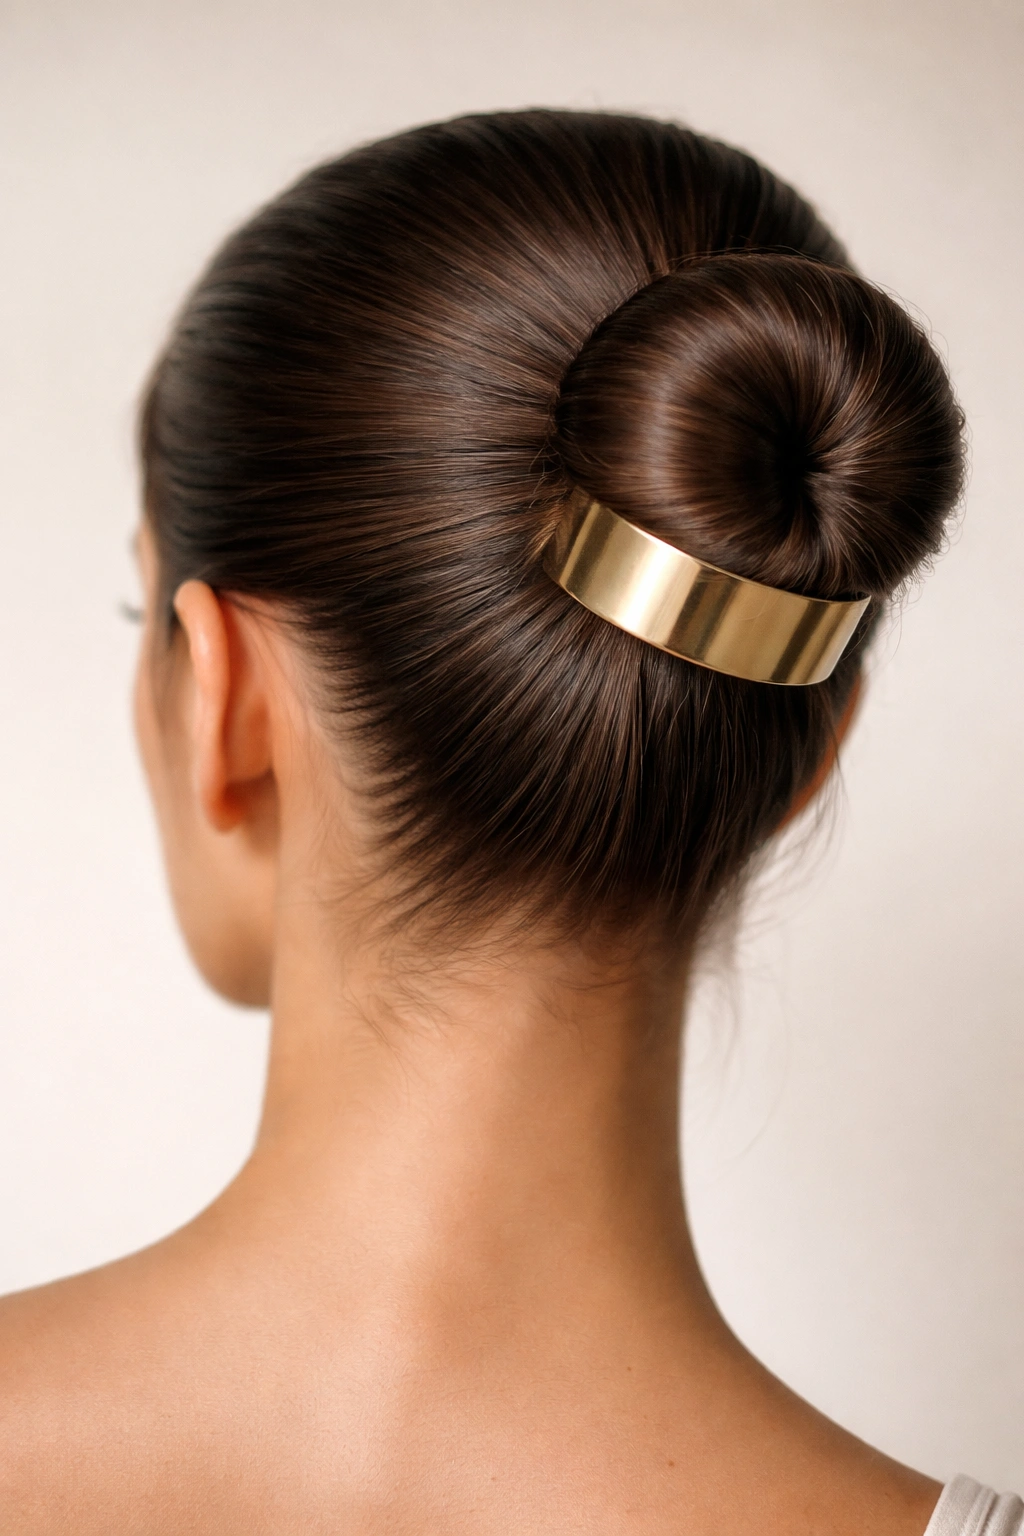
Hair accessories have come a long way from neon plastic claws. A gold or metallic hair cuff is a structural piece of jewelry for your hair. It replaces the hair tie entirely or sits over the top of it, creating a clean, metallic accent that breaks up the monochromatic look of the hair.
When using a cuff, make sure your ponytail base is tight. If the base is loose, the heavy cuff will pull the hair down and create a saggy, uneven look. Cuffs look best on very dark or very blonde hair where the metallic finish can truly pop against the contrast.
14. The Scarf-Wrapped Sleek Bun
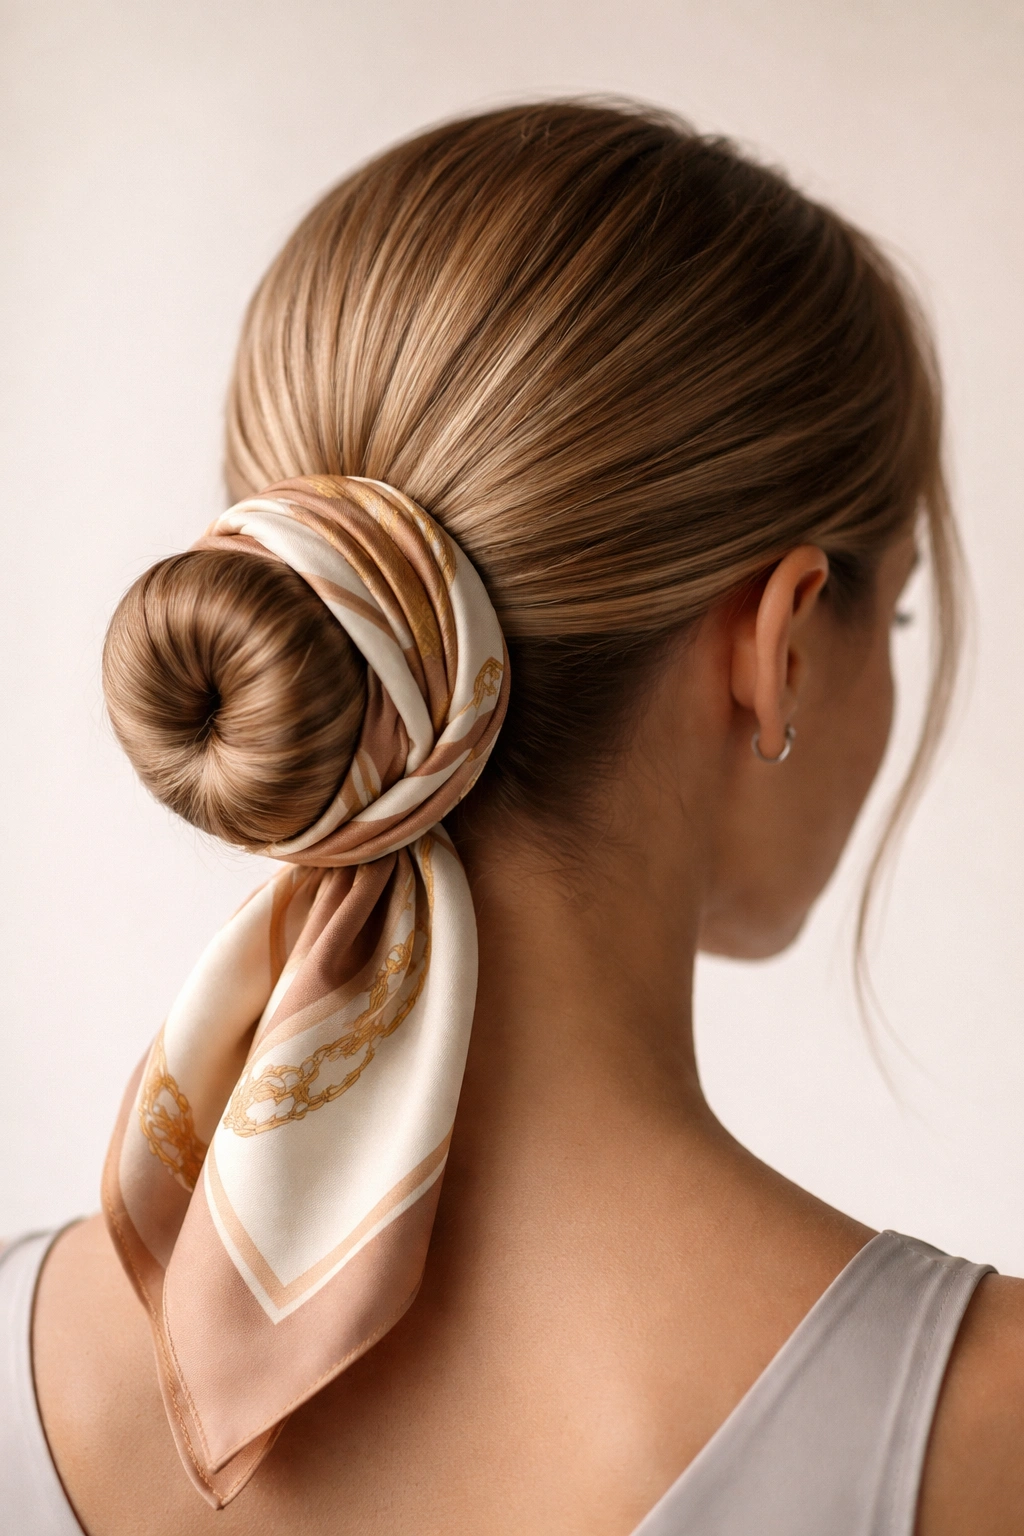
For a look that feels slightly bohemian but still retains that essential polish, try wrapping a silk scarf around the bun. You can either incorporate the scarf into the ponytail before twisting it into a bun, or you can tie it around the finished bun like a headband or a wrap.
The key to keeping this sleek is the fabric choice. Use silk or satin. Cotton scarves are too bulky and will make the bun look messy and large, rather than intentional and polished. A sleek scarf wrap is perfect for summer days or travel when you want your hair to look styled without needing a suite of hair products.
15. The Off-Center Sleek Twist

Instead of a standard bun, consider a twist. This is a classic French twist variation, but adapted for a bun format. You pull the hair into a low ponytail, twist the entire length of the hair tight, and then coil it, but you tilt the base slightly to one side.
This slight asymmetry makes the style look much more dynamic and interesting than a perfectly centered bun. It’s an “if you know, you know” kind of detail that suggests you are paying attention to the silhouette of your style, not just the function.
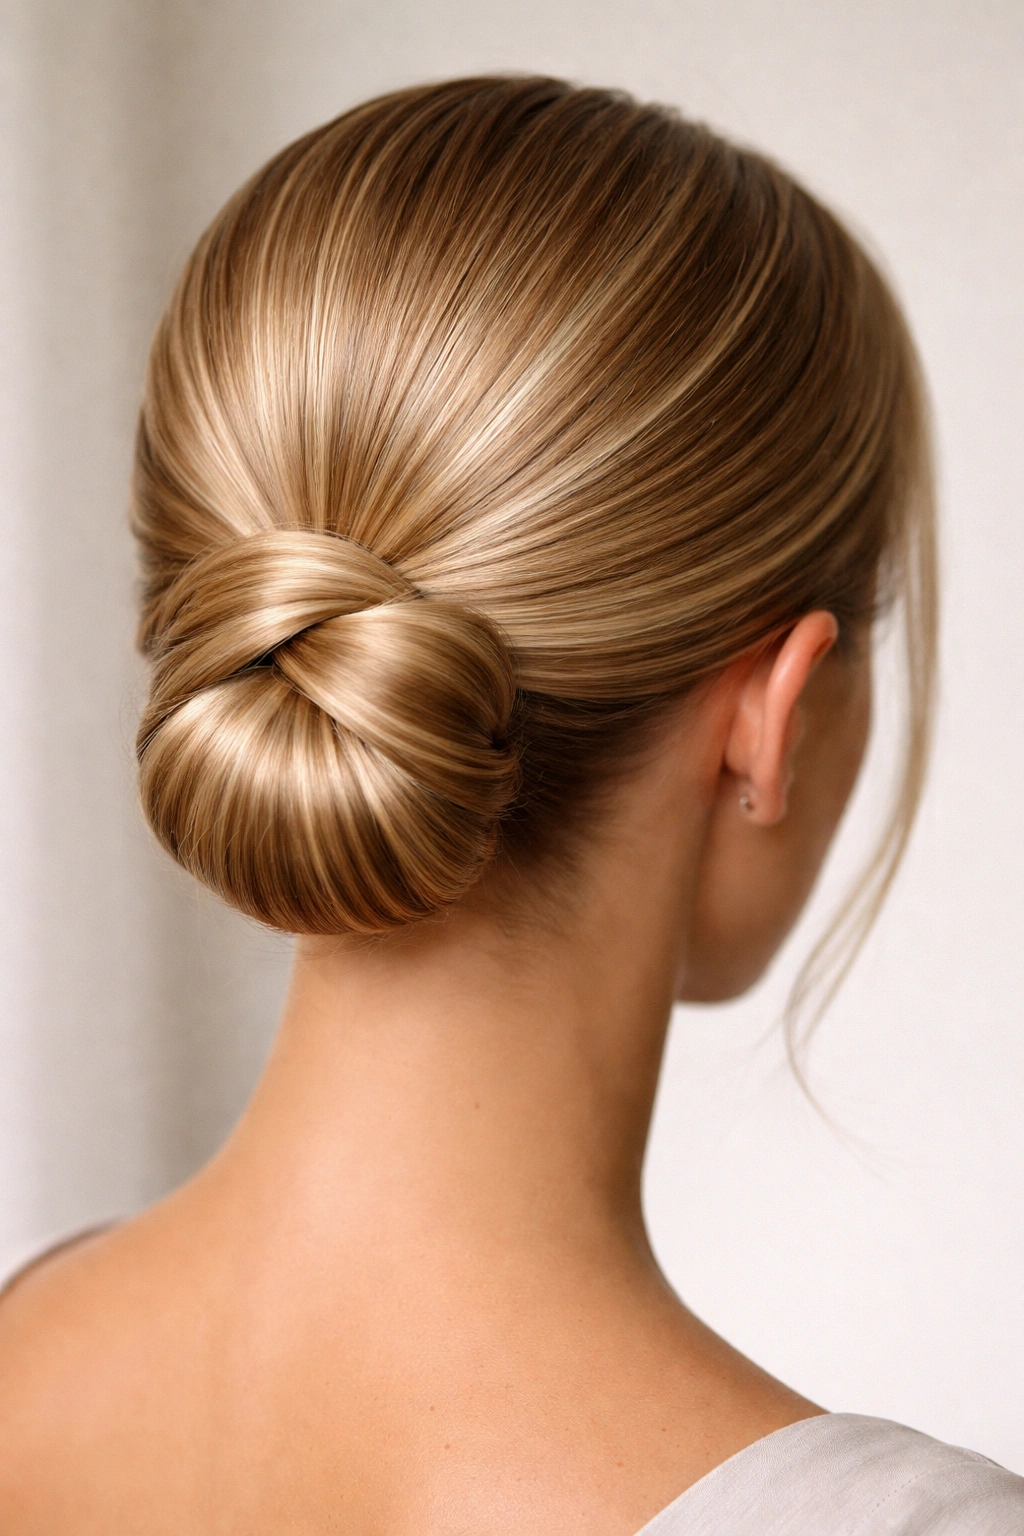
16. The Sleek Low Bun with Hidden Hair-Tie
The cleanest of all looks. This is about total invisibility. You create your low ponytail, but instead of using a standard elastic, you use a small, clear polyurethane band. Then, you take a tiny, thin section of hair from the underside of the ponytail, wrap it around the band to hide it, and secure it with a tiny pin.
There is no bulky knot, no colorful elastic, and no visible hardware. It looks like your hair is holding itself in place by magic. This level of minimalism is the hallmark of professional styling and looks stunning in photos because there are no distractions.
17. The Sleek Top-Knot with Face-Framing Bangs
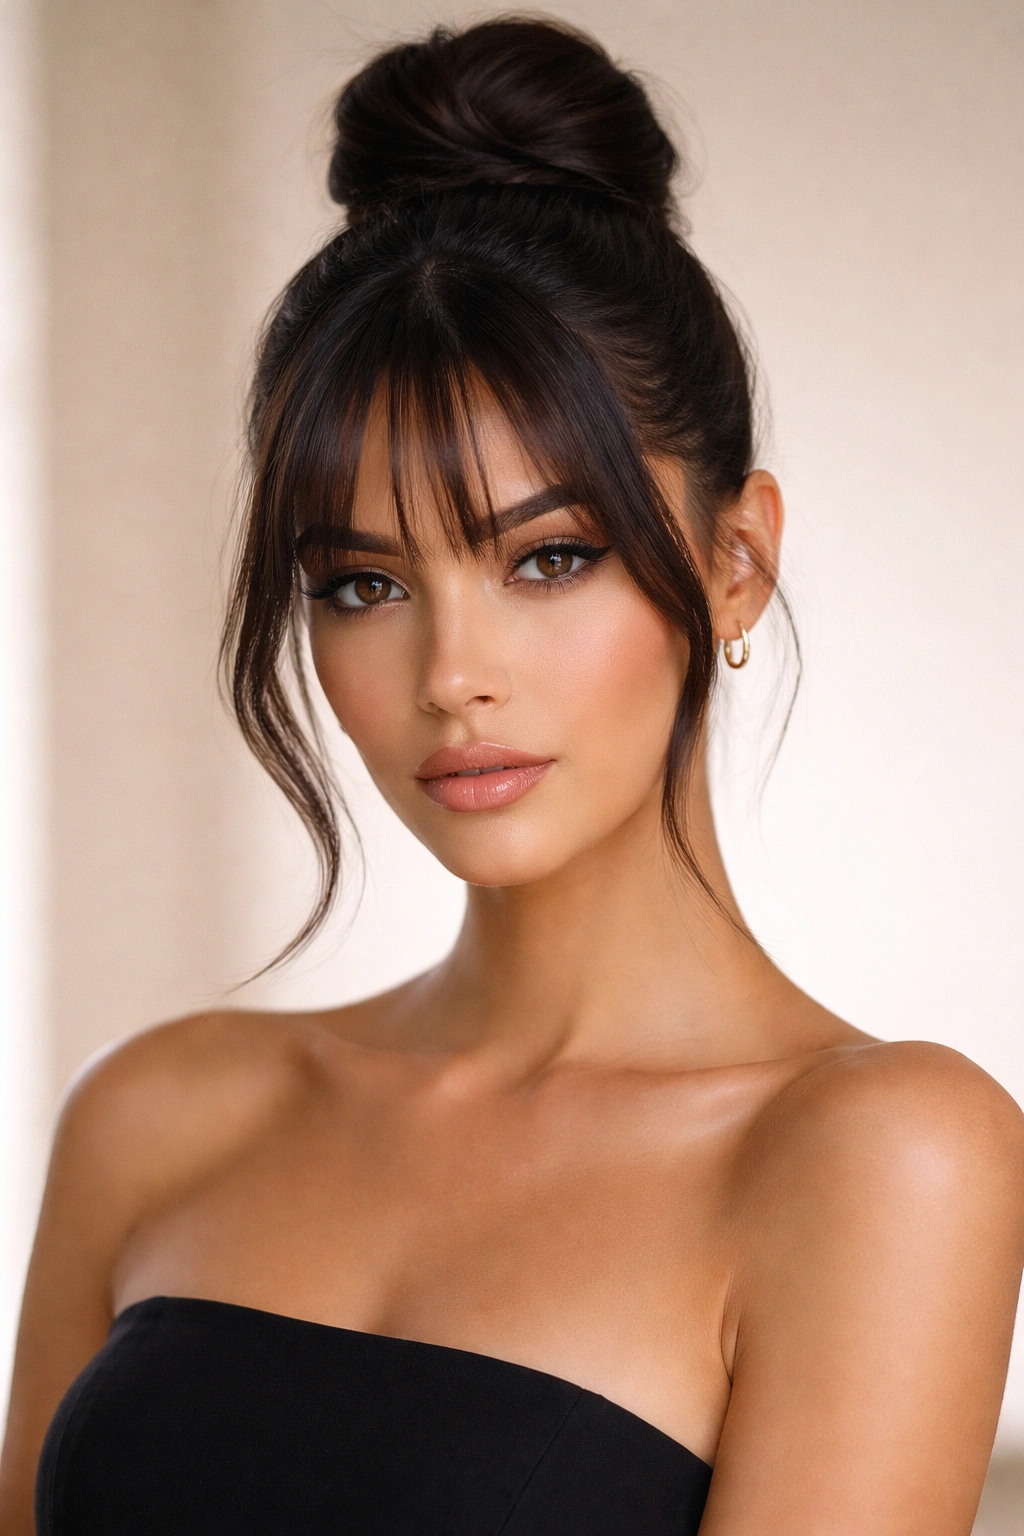
If you have fringe, you can absolutely rock a sleek bun. The key is in the product management. You need to keep the bangs separate from the rest of the hair. Pin the bangs aside while you pull the main section of hair into a high, sleek ponytail.
Once the bun is secure, release the bangs and style them with a round brush or a straightener to give them a smooth, gentle curve. The contrast between the gravity-defying, high-tension bun and the soft, face-framing fringe is incredibly flattering and versatile.
18. The Infinity-Loop Sleek Bun
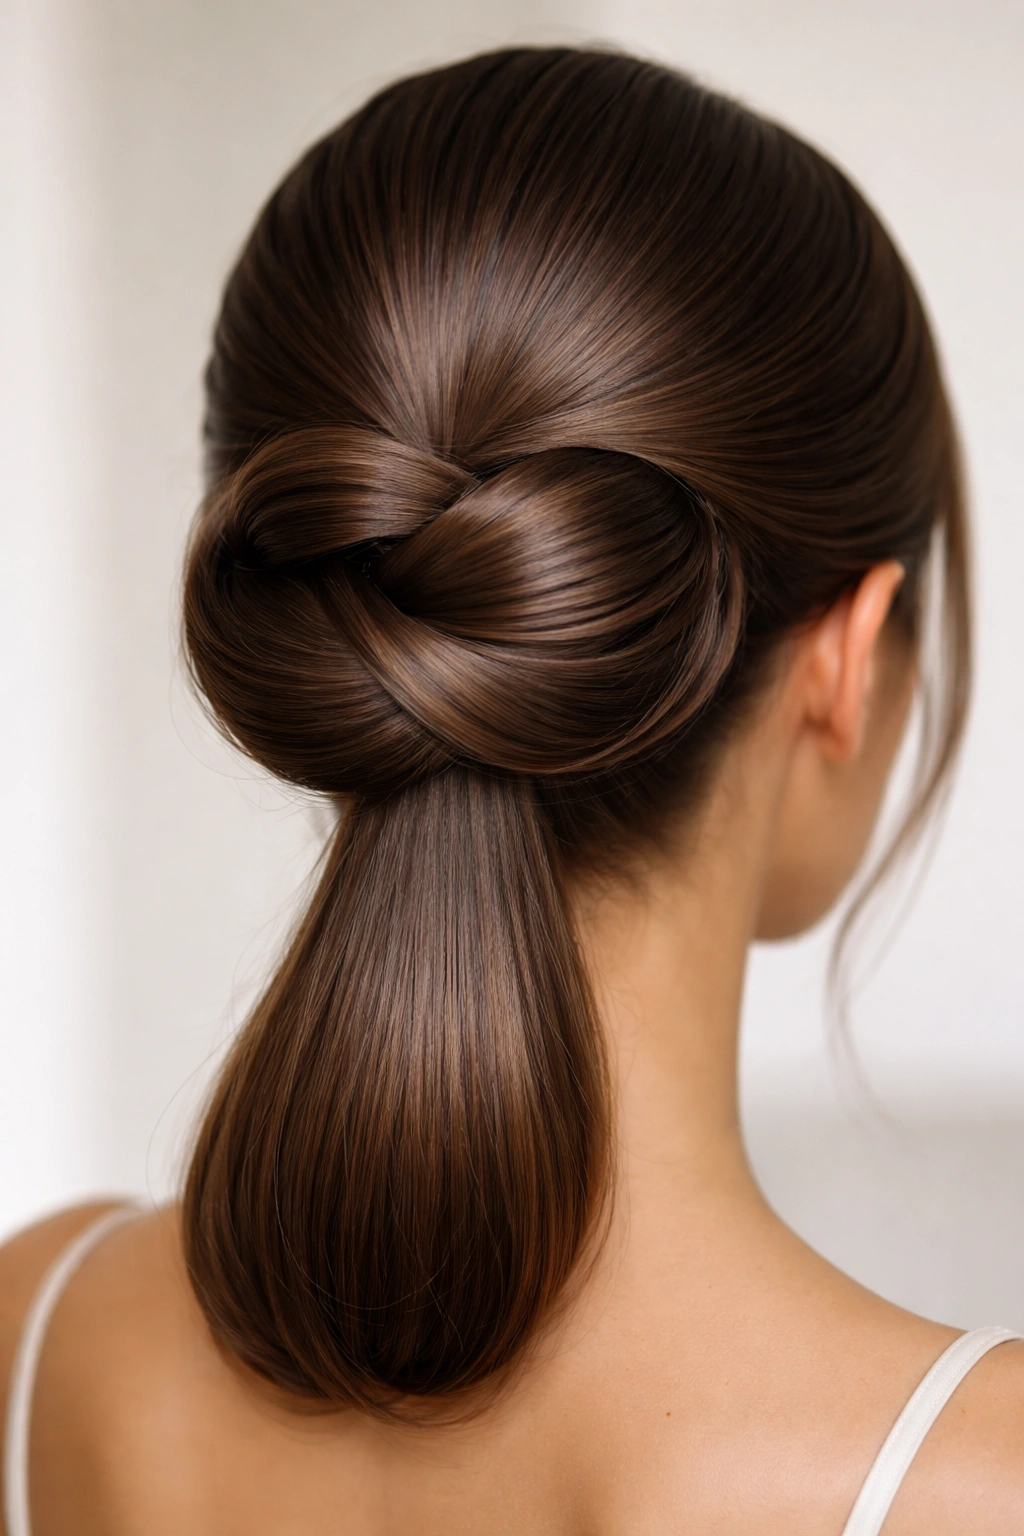
This is a geometric take on the bun. After securing your ponytail, fold the length of your hair in half so the ends meet the base, creating a loop. Then, take the remaining tail and wrap it around the loop in a figure-eight pattern.
It creates an “infinity” shape that is much more interesting than a standard coiled bun. It holds incredibly well because the structure is balanced, and it works perfectly for medium-to-long hair. If you have layers, you might need a bit of texturizing spray to keep the ends from poking out of the loops.
19. The Sleek Bun with Pearls
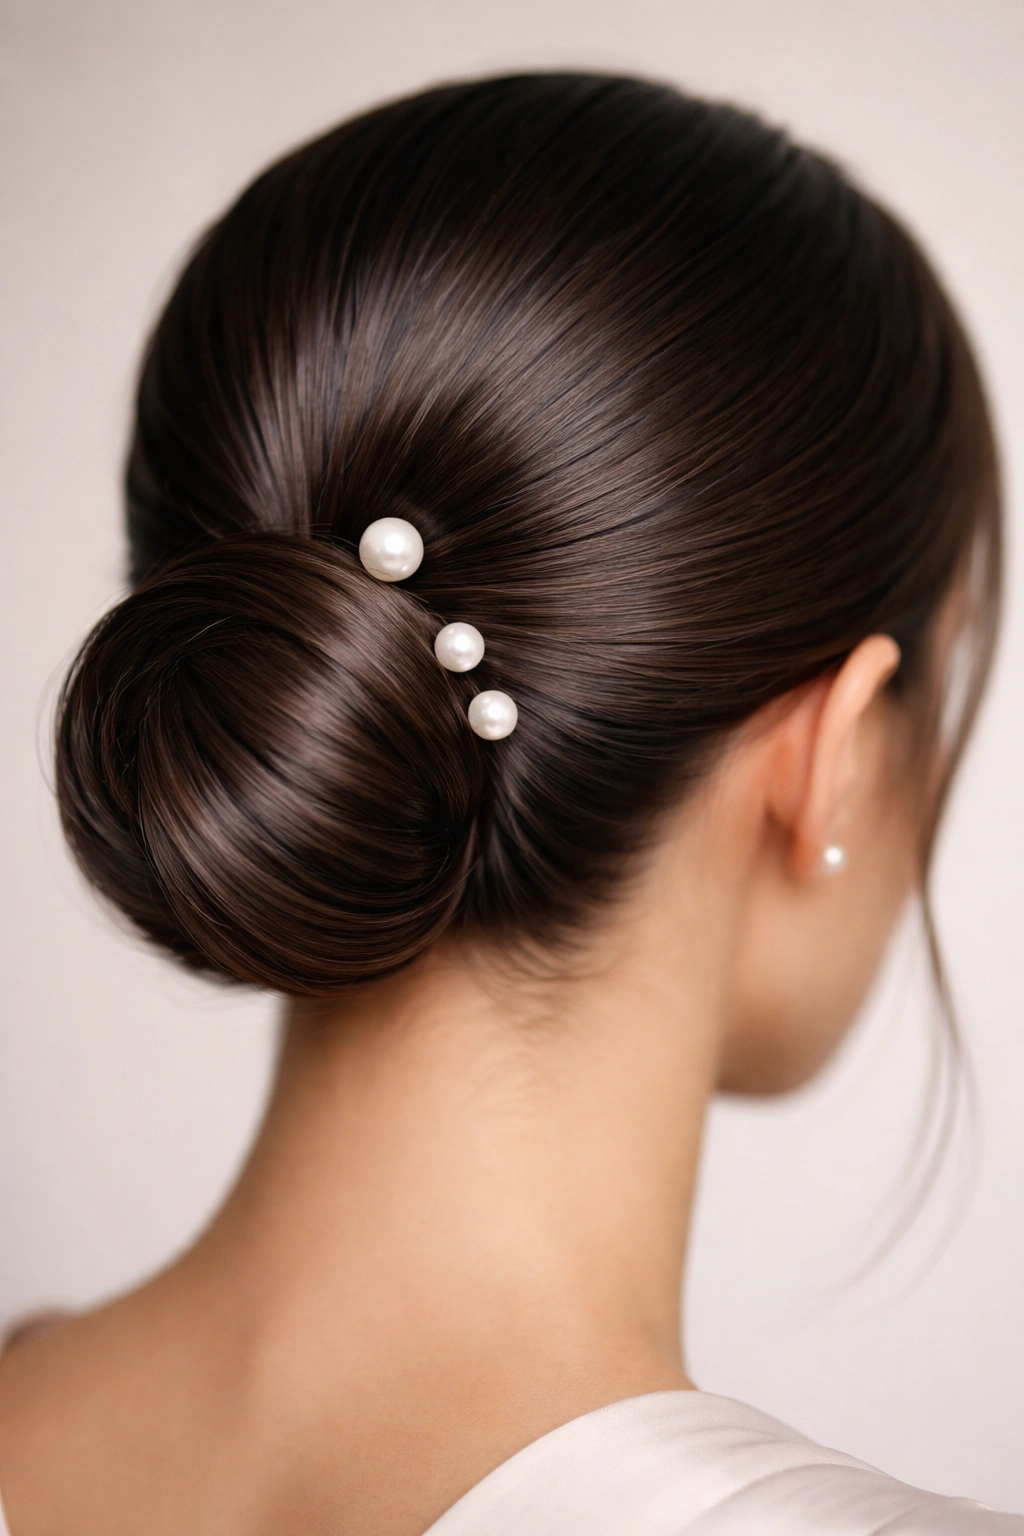
Pearls are back, and not just on your grandmother’s necklace. Pin-on pearls or hair pins with pearl accents can be strategically placed into a sleek bun to add immediate sophistication. This is a fantastic option for weddings, galas, or any formal evening event.
Do not overdo it. The sleekness of the bun is the canvas, and the pearls are the punctuation. Two or three pins scattered across the bun are sufficient. If you use too many, the style becomes cluttered and loses that sharp, clean edge that makes a sleek bun so desirable.
20. The Braided-Halo Sleek Bun
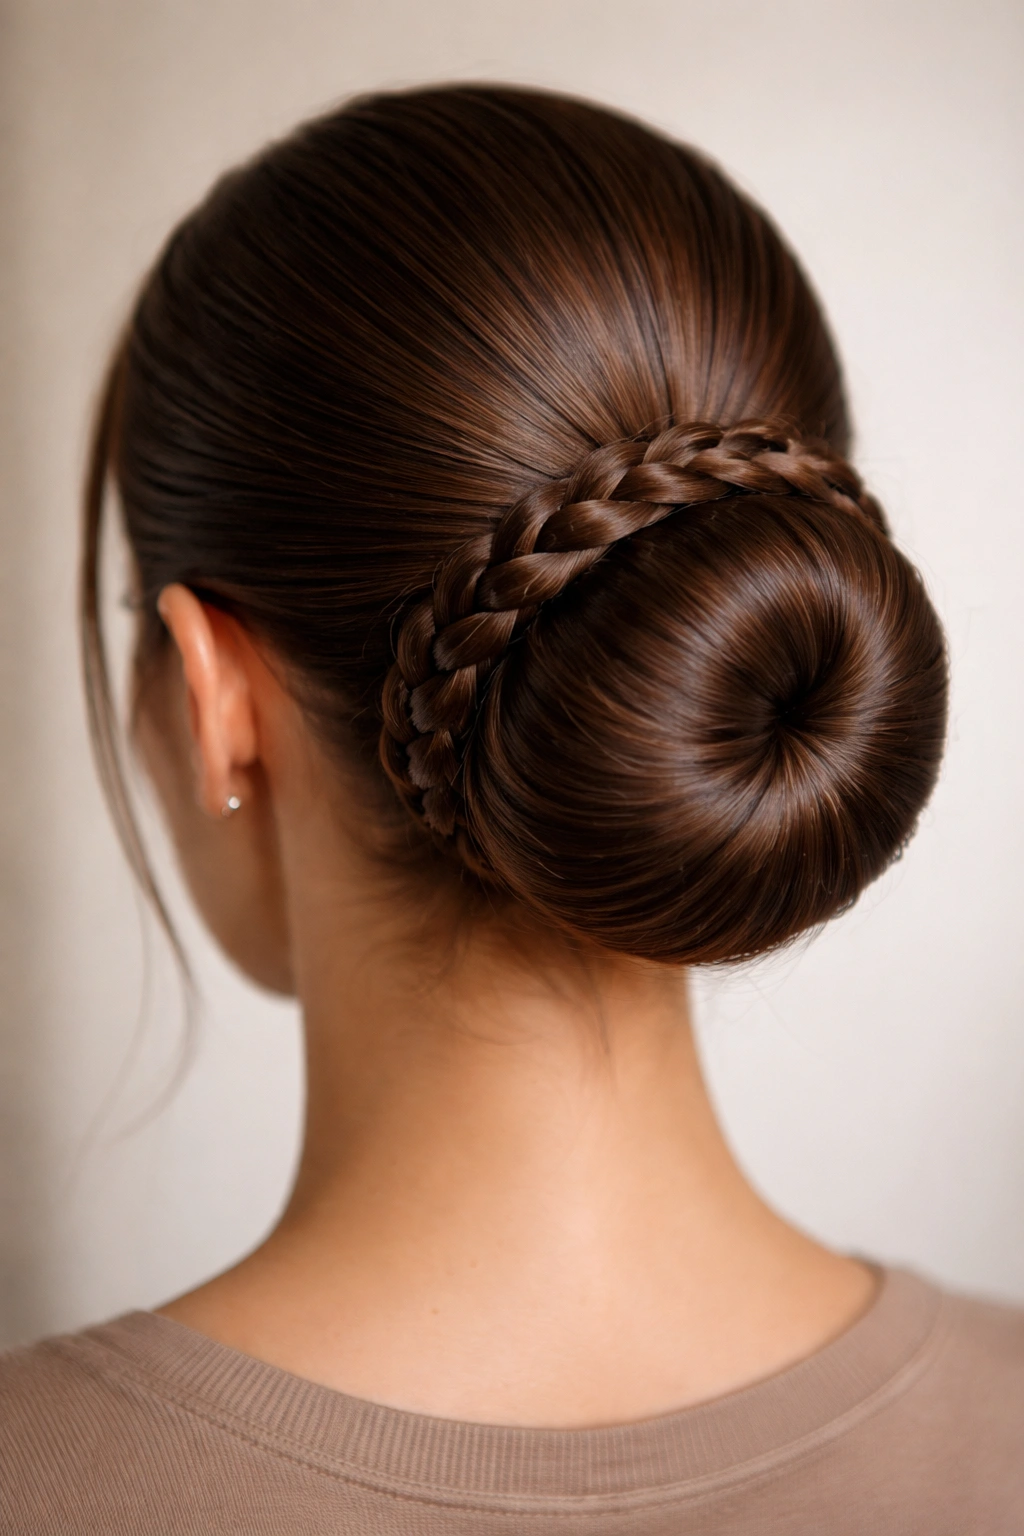
This style involves braiding the length of the ponytail into a tight, three-strand braid before wrapping it into a bun. The braid provides a built-in texture that prevents the bun from looking flat. It is an excellent choice for hair that is very long, as it contains the length and prevents it from unravelling.
Ensuring Smoothness
The braid must be tight. If you have loose, fluffy braids, the bun will look messy. Comb the ponytail before you start the braid, and use a tiny bit of wax on your fingers as you weave the braid. This tames any frizz or flyaways that might spring out of the braid structure.
21. The Sleek Bun with Zig-Zag Parting
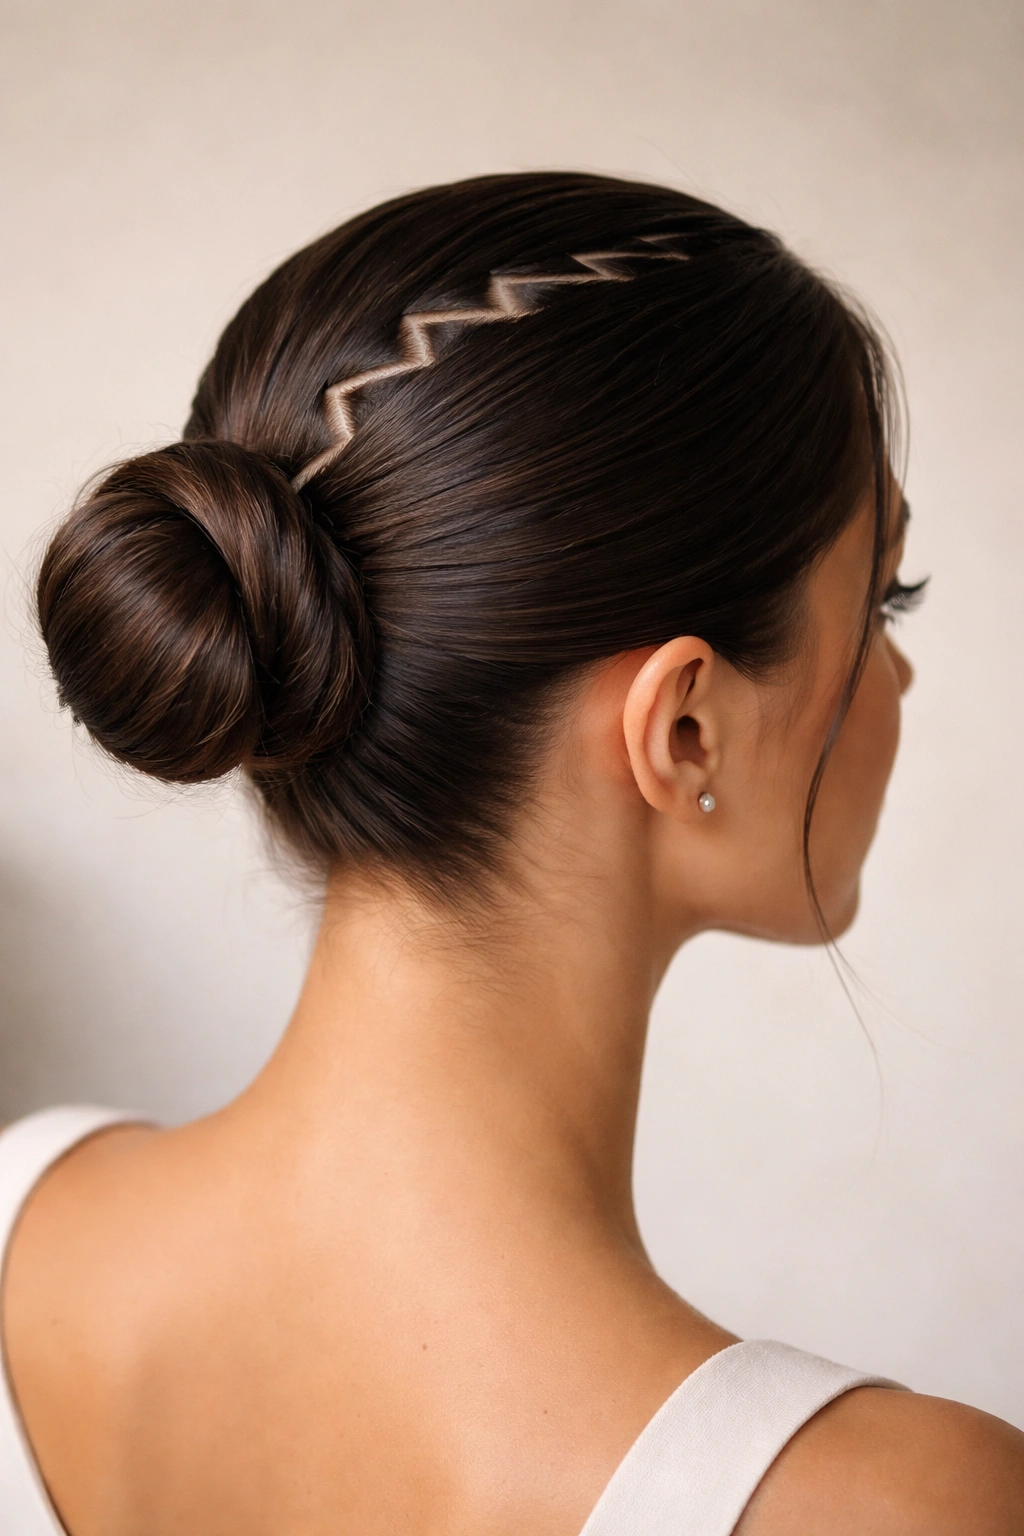
For a touch of retro flair that feels intentional, try a zig-zag part. It creates a subtle, unexpected visual line that breaks up the monotony of a straight, sleek head of hair. Use the tail of a metal comb to carve out the zig-zags before you brush the hair back.
Keep the rest of the look very minimalist to ensure the part looks like a style choice rather than a mistake. This works best with a mid-height bun. It’s fun, it’s a little bit bold, and it shows you have a sense of humor about your style.
22. The Knotted Sleek Chignon
Instead of wrapping, you are essentially tying your hair into a knot. This is best for hair that has a bit of slip to it. You divide the ponytail into two sections, tie them into an overhand knot, wrap the ends around the base, and pin them securely.
The knot creates a beautiful, architectural texture at the base of the bun. It’s an understated detail that people will notice upon closer inspection. It is sophisticated, clean, and holds very tightly, making it a great option for a long day of meetings or events.
23. The Sleek Bun with Volumized Crown
You can have a sleek look while still maintaining volume. This is the “beehive-adjacent” bun. Before you pull your hair into the ponytail, take the crown section and tease it gently at the roots. Then, smooth the top layer over the teasing to create a sleek, elevated surface.
Pull the hair into a bun as usual. You get the polish of the sleek bun with the added bonus of height and lift. This is a classic trick for elongating the face and creating a more dramatic, red-carpet-worthy silhouette.
24. The Double-Bun Sleek Stack
If you have very long or thick hair, a single bun might feel heavy or disproportionately large. A double-bun stack distributes the weight and creates a unique, cool-girl aesthetic. You create two smaller buns, one stacked vertically above the other.
It sounds complicated, but it’s just a matter of splitting your hair into two sections—a top section and a bottom section—and pulling them into two smaller ponytails before wrapping each into a bun. It’s modern, it’s edgy, and it’s surprisingly easy to manage.
25. The Extra-Long Sleek Wrap

If your hair is on the shorter side but you covet that long, heavy, wrapped bun look, do not be afraid to use a clip-in extension. Secure your natural hair into a small, tight bun. Then, wrap a high-quality synthetic or human hair extension piece around it.
You can create a bun that is as large or as sleek as you want. The trick to making this look real is blending your natural hair color with the extension. Ensure the extension is a dead-on match or creates a deliberate, intentional highlight effect. This is the secret behind almost every “perfect” bun you see on social media.
Final Thoughts
The beauty of the sleek bun lies in its versatility. It is not just one look; it is a framework that you can adapt based on your hair texture, your mood, and the occasion. The common denominator across all twenty-five styles is discipline—the discipline to brush thoroughly, the discipline to use the right amount of product, and the discipline to secure your base firmly.
Do not get discouraged if your first attempt is not runway-ready. Getting the tension right is a learned skill. You will inevitably deal with a rogue hair or a bump in the back, but with a bit of practice and the right boar bristle brush, you will soon be able to execute these styles in minutes. Treat your hair like the accessory it is, give it the structure it needs, and you will find that a polished bun is one of the most reliable, chic tools in your style arsenal.