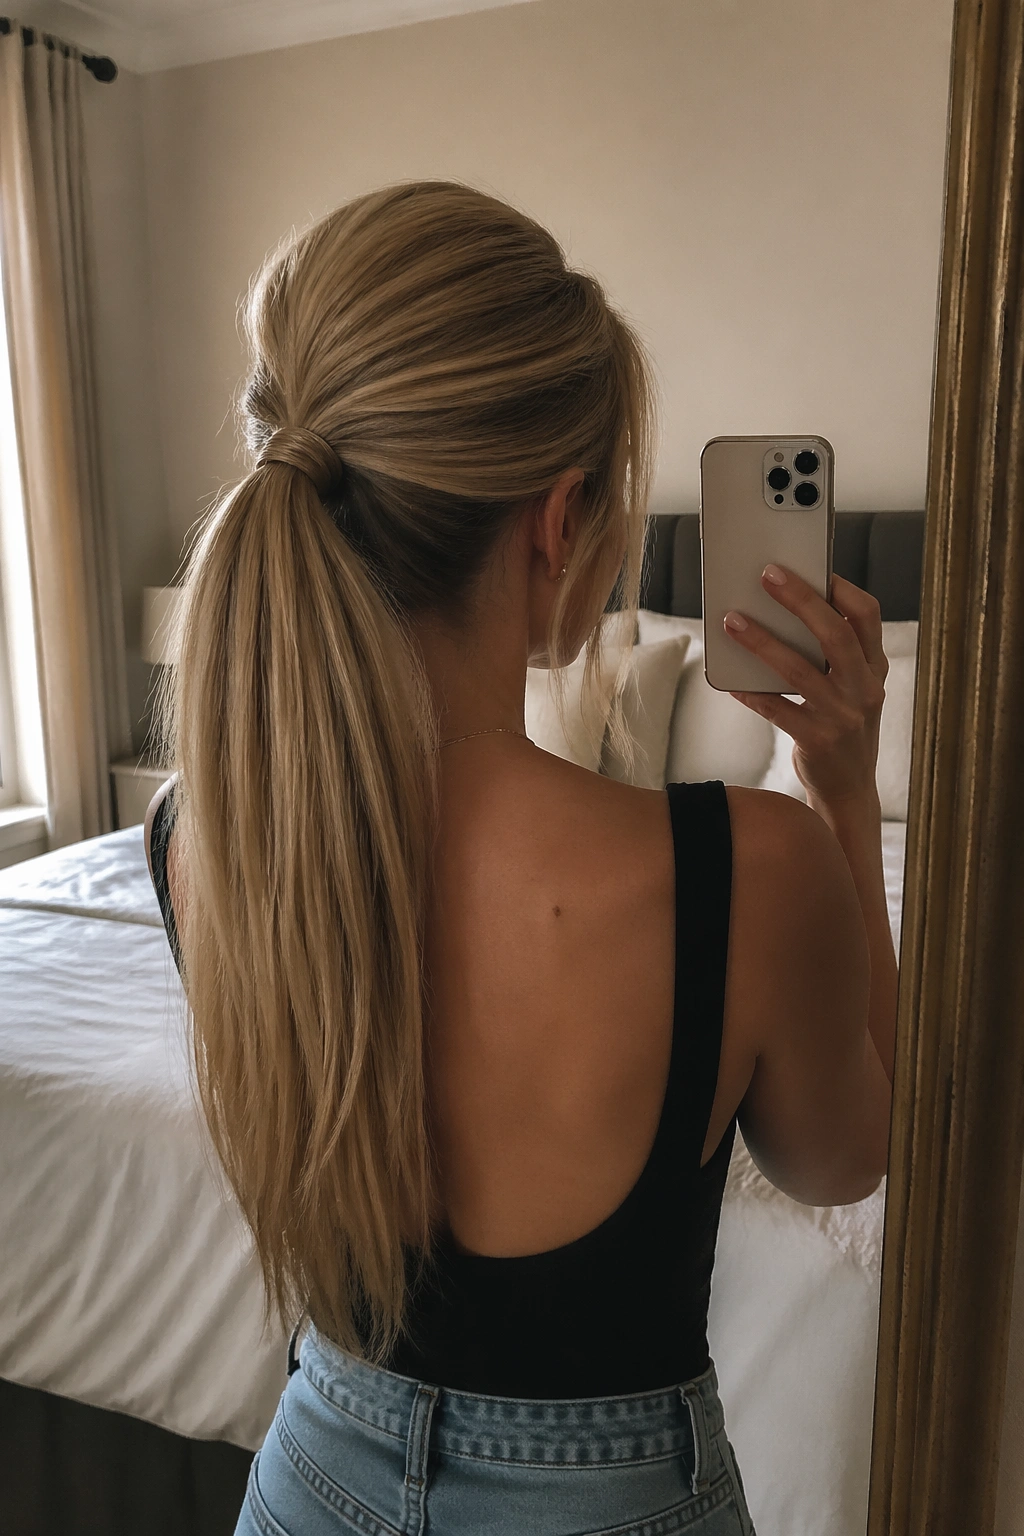
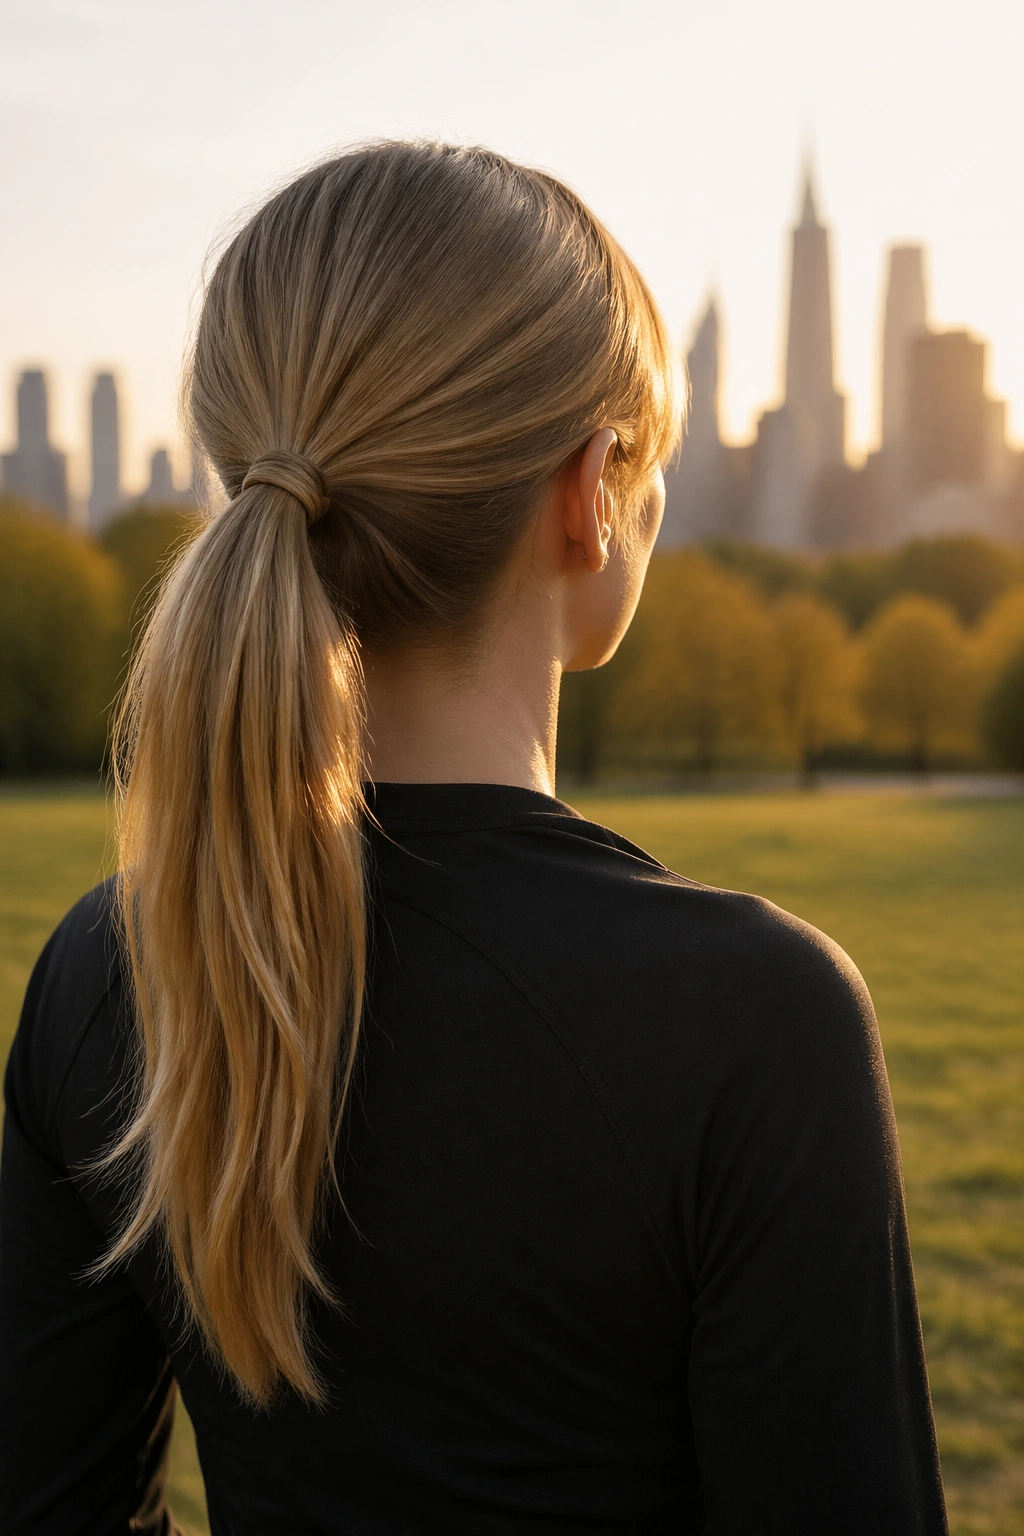
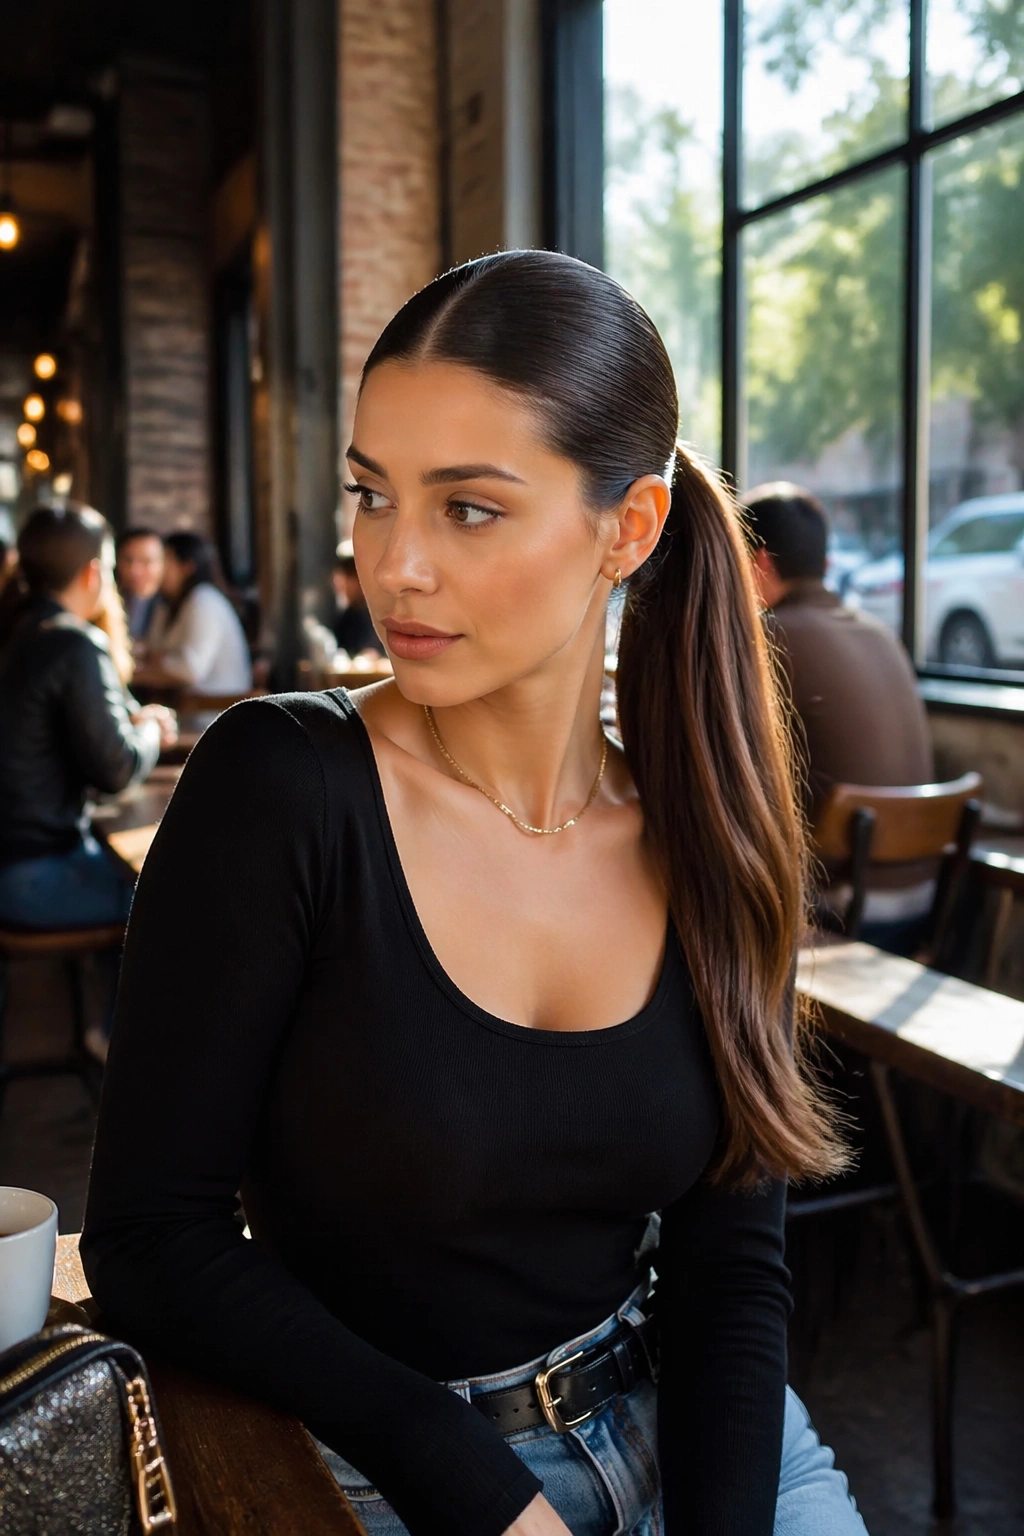
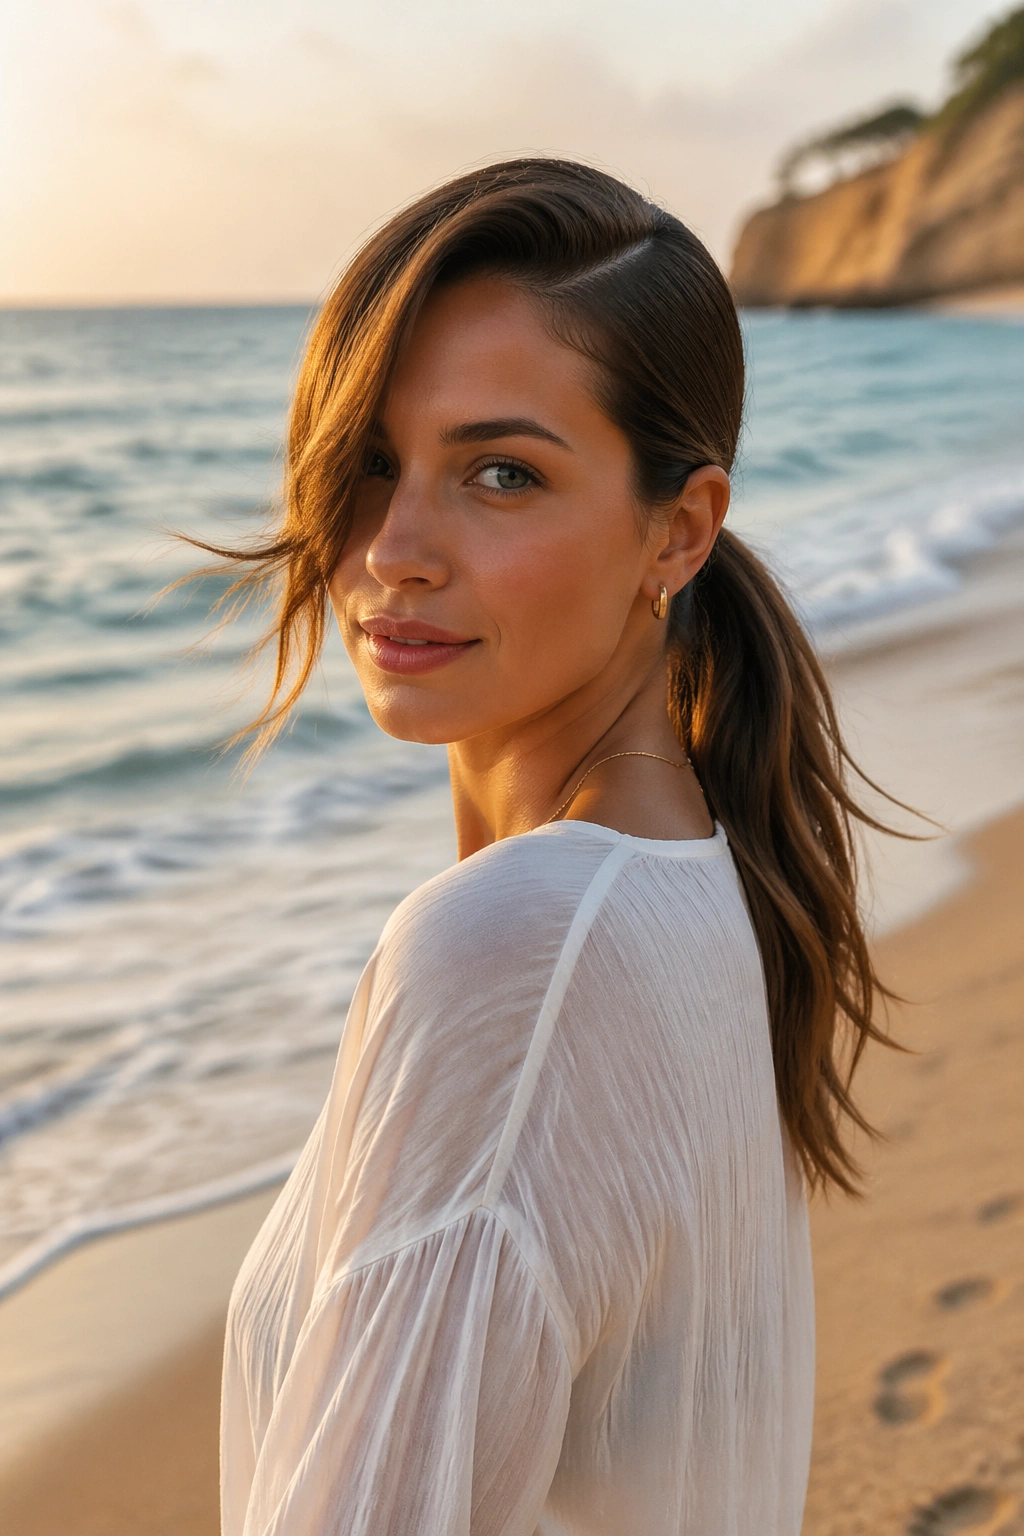
Straight hair makes a mid ponytail look honest. If the tie sits a little too low, the whole thing can slide into “I threw my hair back and left the house” territory. If it sits too high, the shape loses that easy, mid-back balance that makes this style so useful in the first place.
That honesty is a gift, though. Straight strands show clean lines beautifully, and they also show every bump, crease, and uneven part. So the trick with mid ponytails for straight hair is not to fight the texture. Work with it. Use the smoothness, keep the crown controlled, and decide what kind of finish you want before you even reach for the elastic.
A mid ponytail can look sharp, soft, sporty, dressy, or somewhere in between. Same base. Different choices. A center part gives one mood, a side sweep changes the face shape, and a wrapped elastic can make the whole thing feel finished in a way a plain hair tie never does. One small detail can change the read completely.
Straight hair tells the truth.
That is why the styles below matter. Some are sleek enough for a blazer, some are loose enough for weekend errands, and some do that useful in-between thing where you look polished without looking fussy. The placement is mid, but the personality can go in a dozen directions from there.
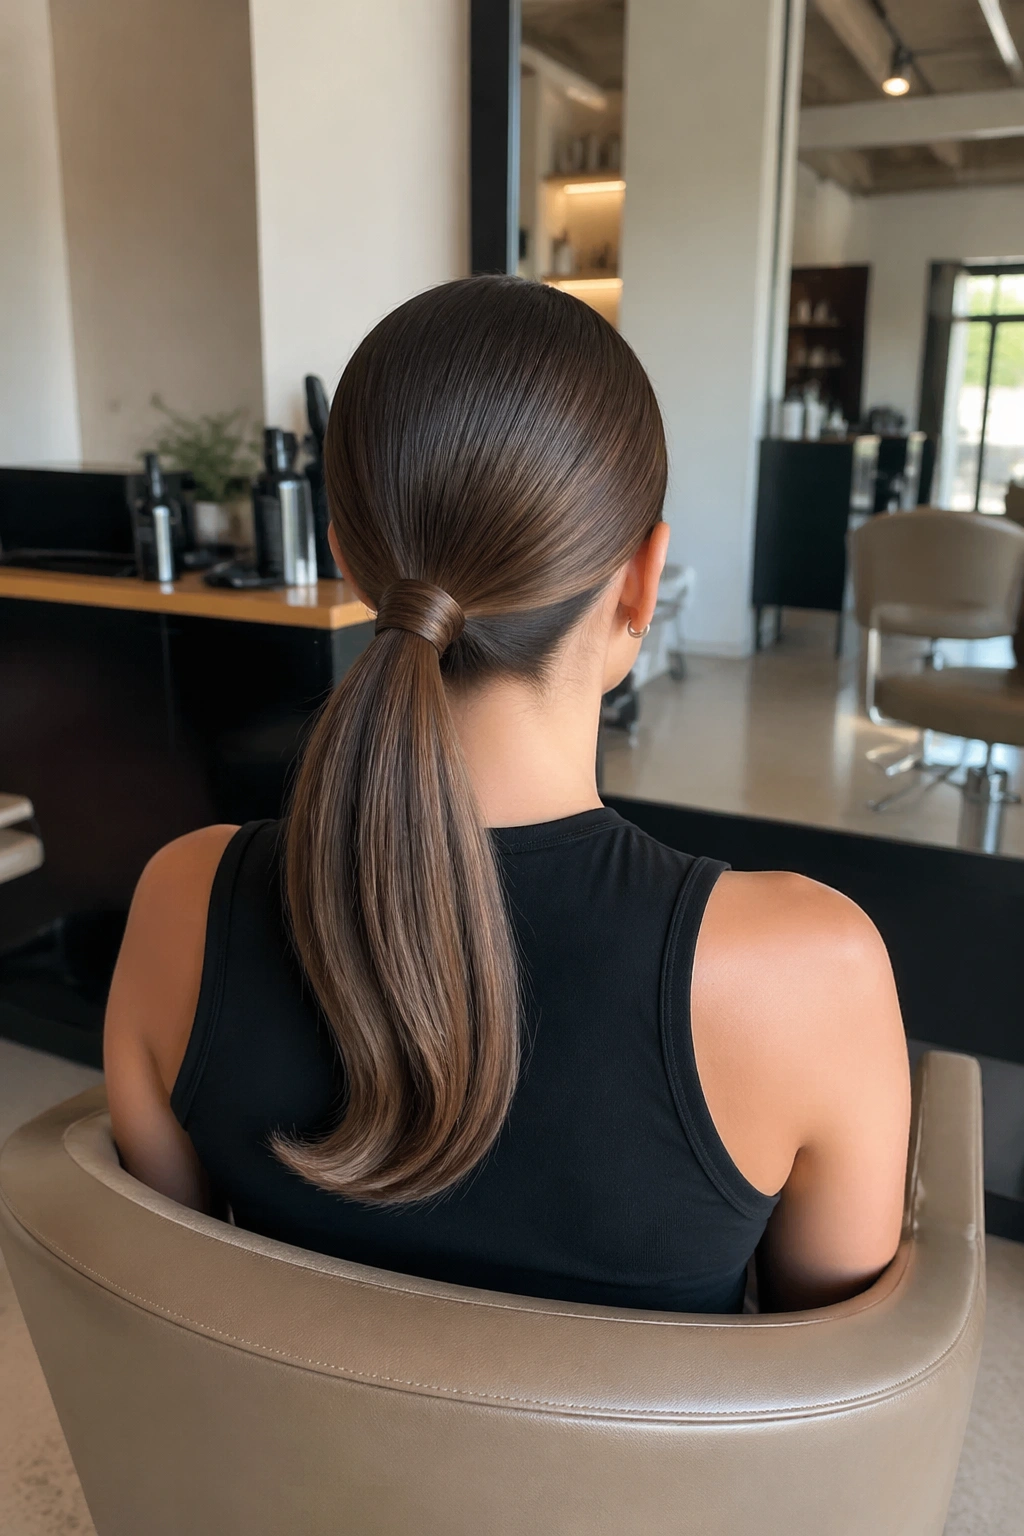
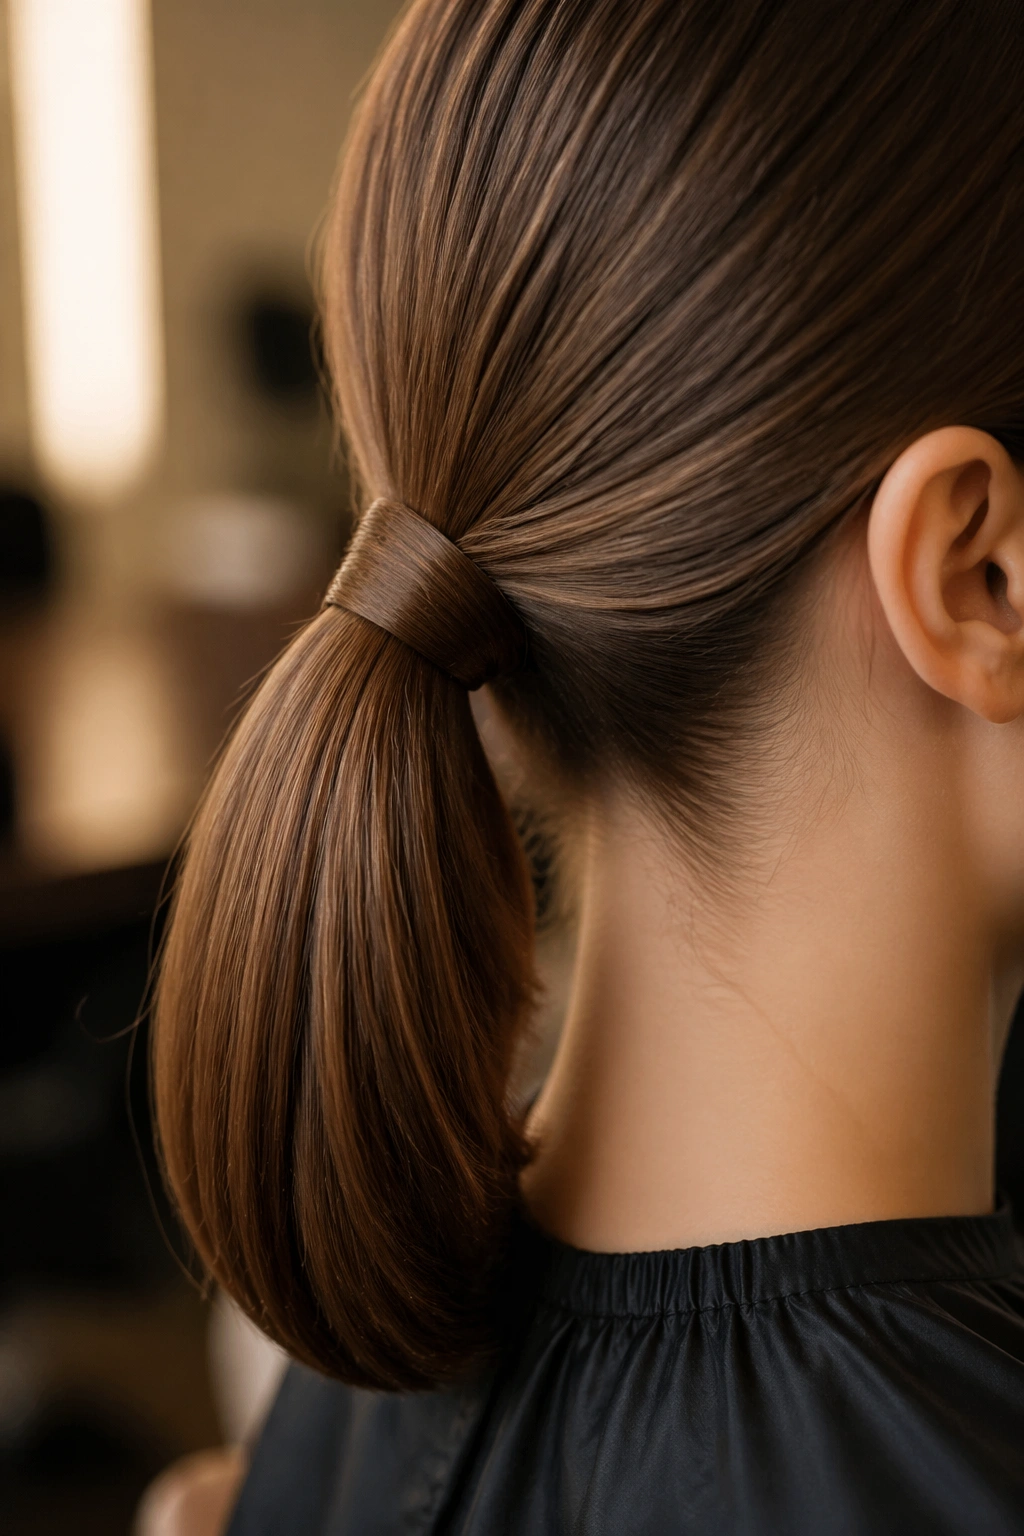
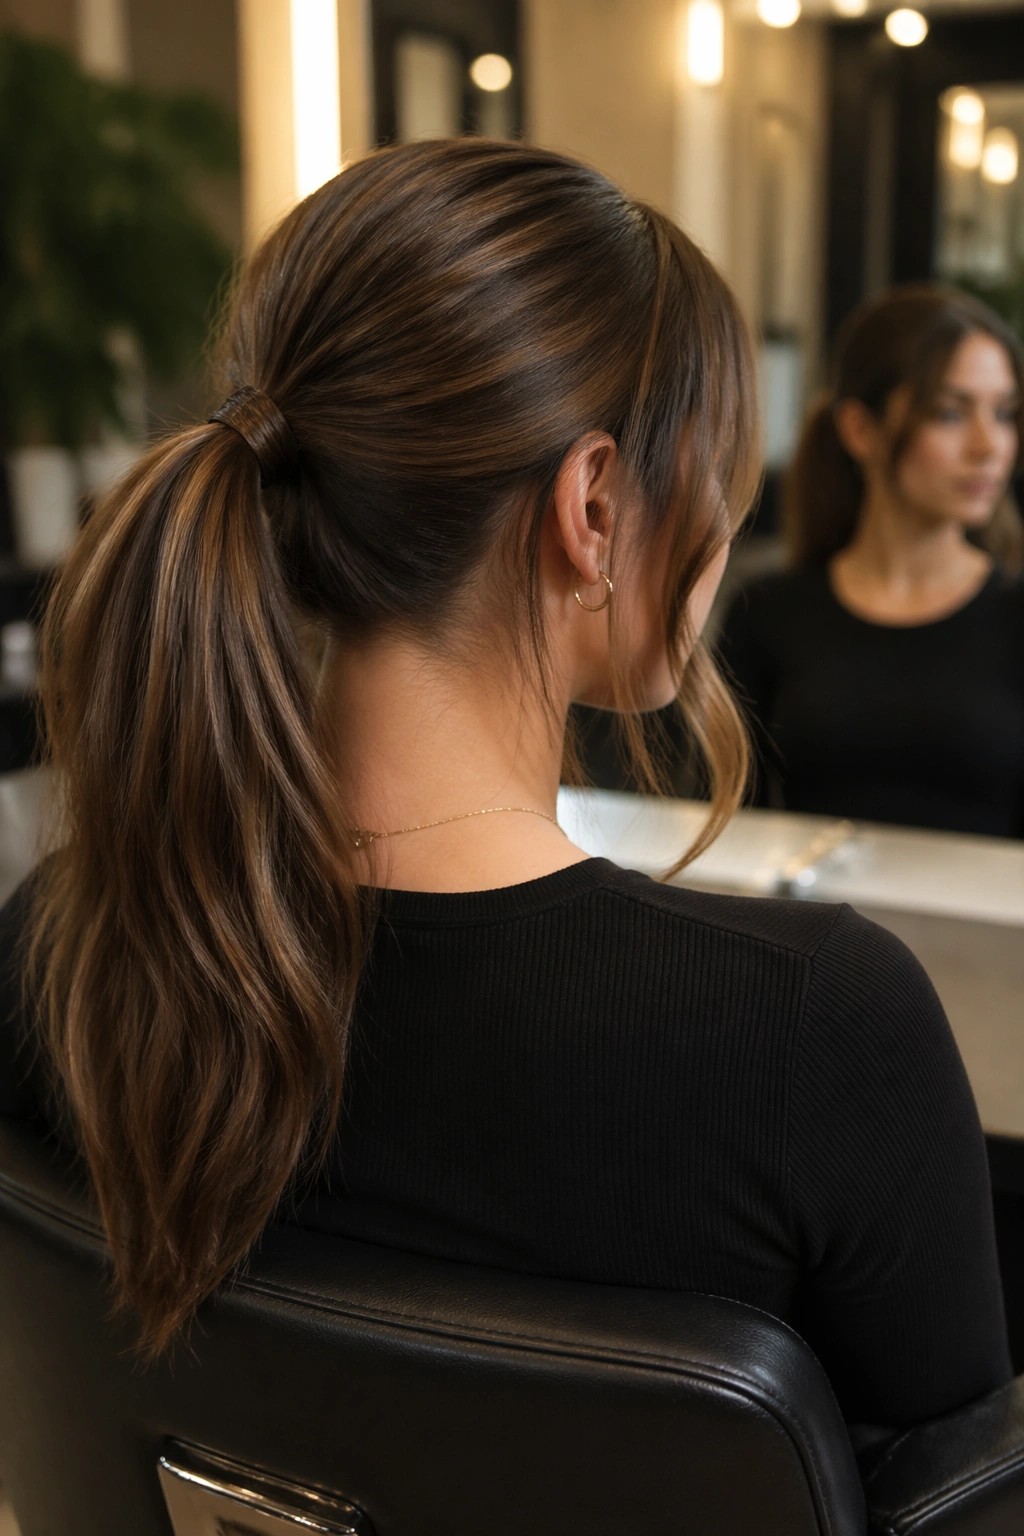
1. Sleek Wrapped Mid Ponytail
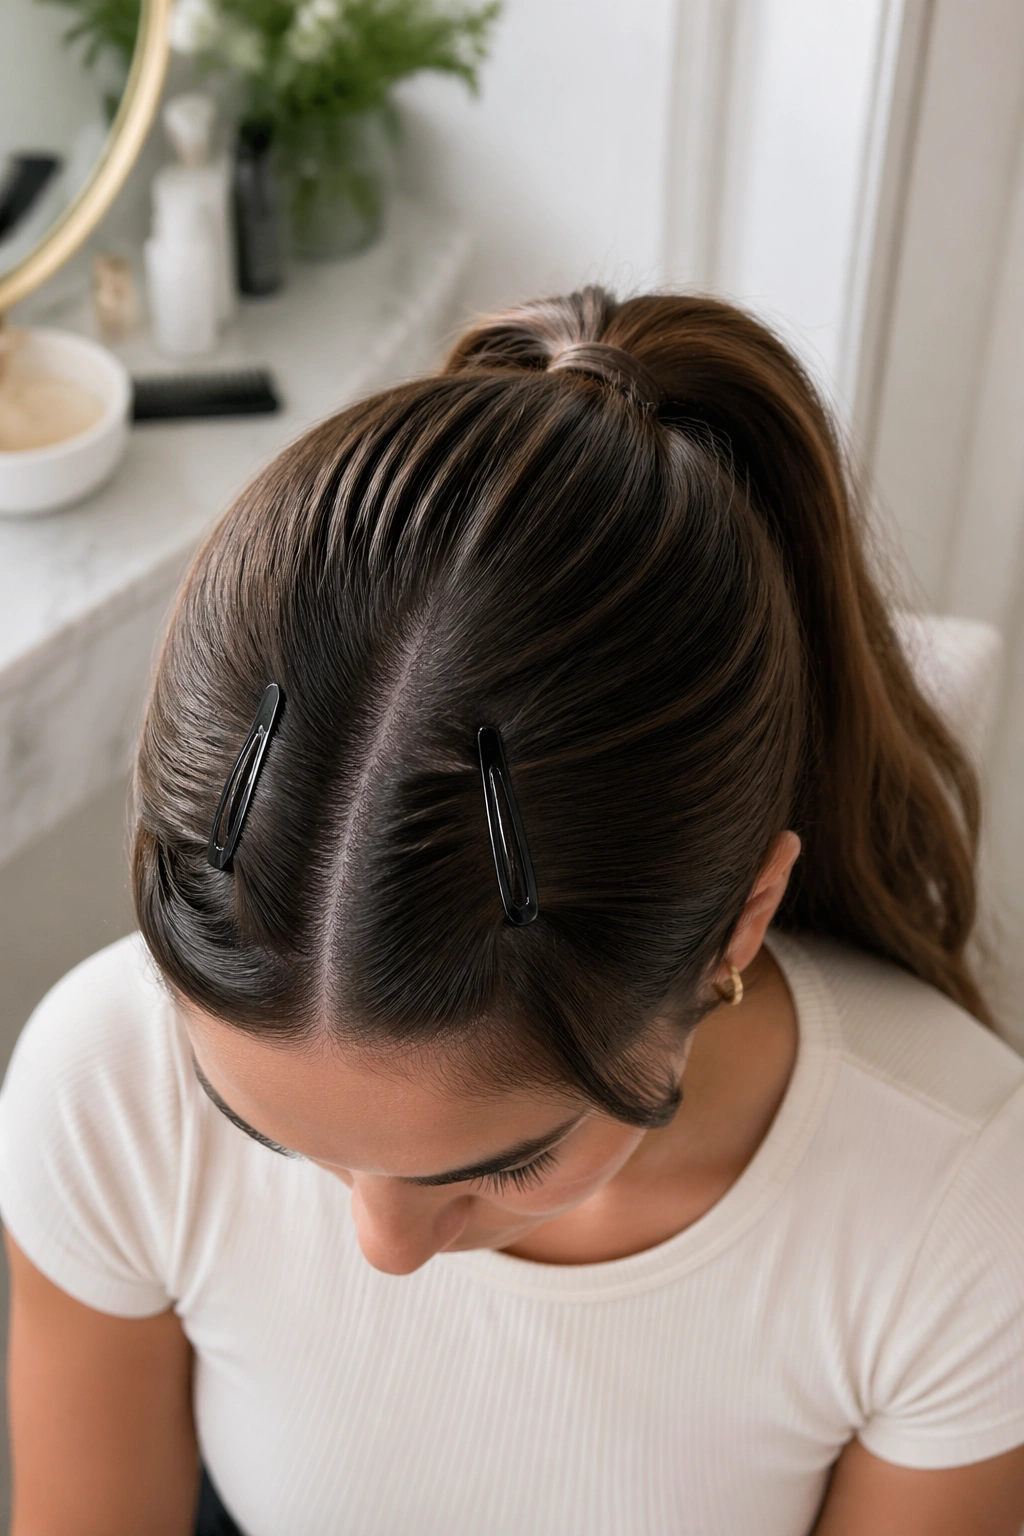
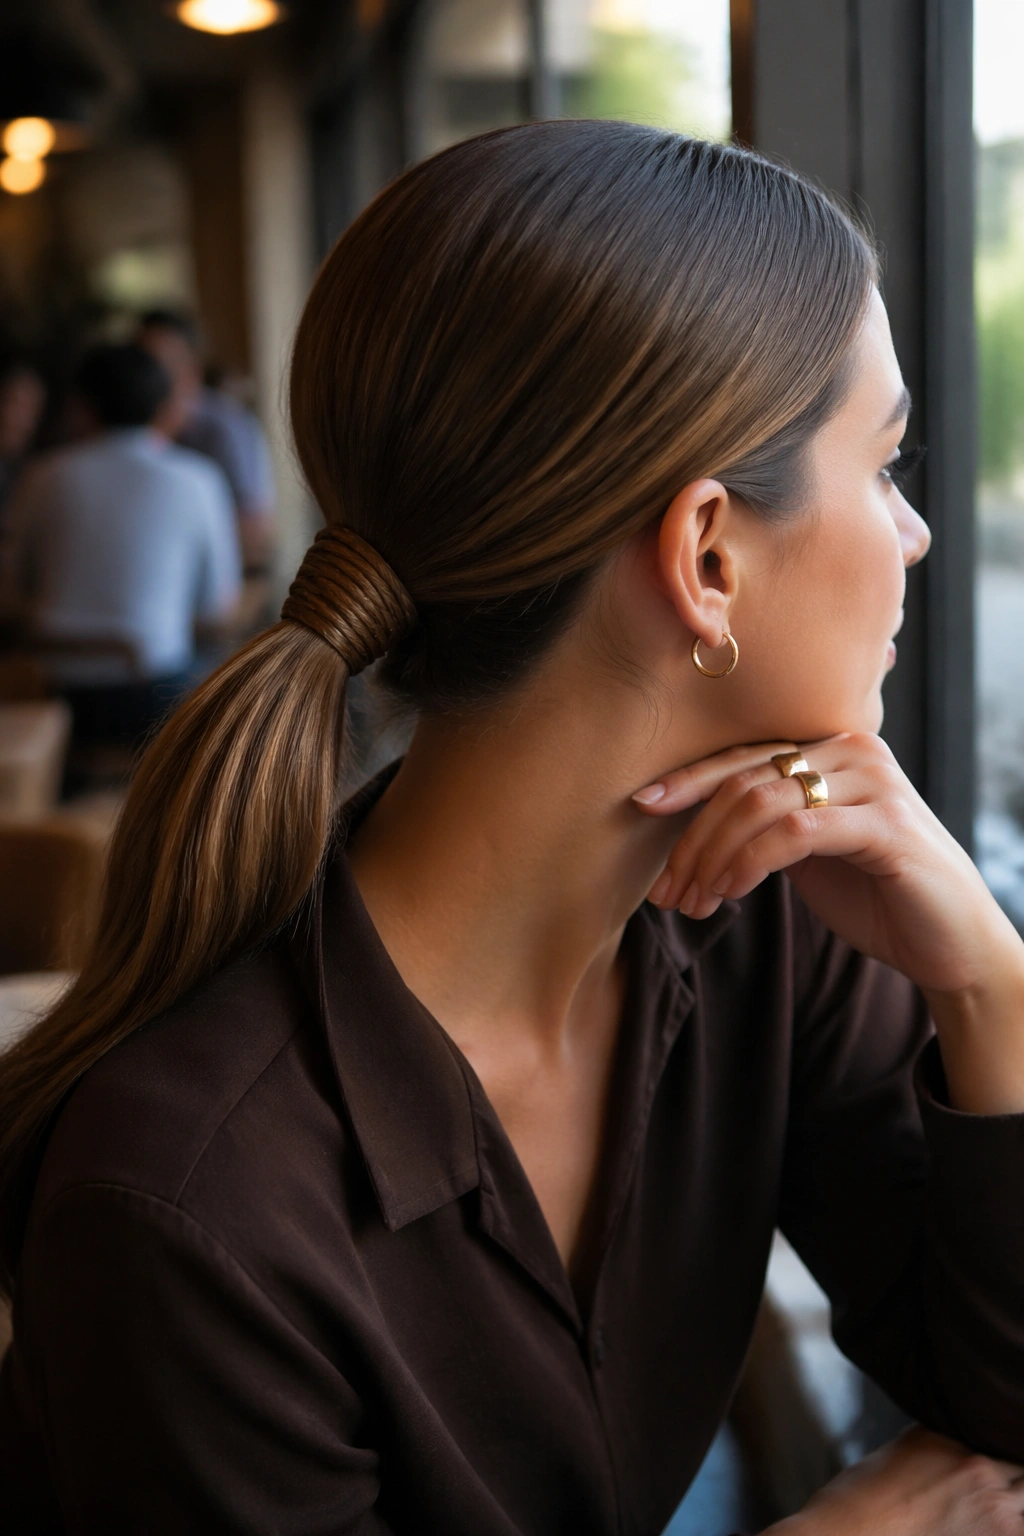
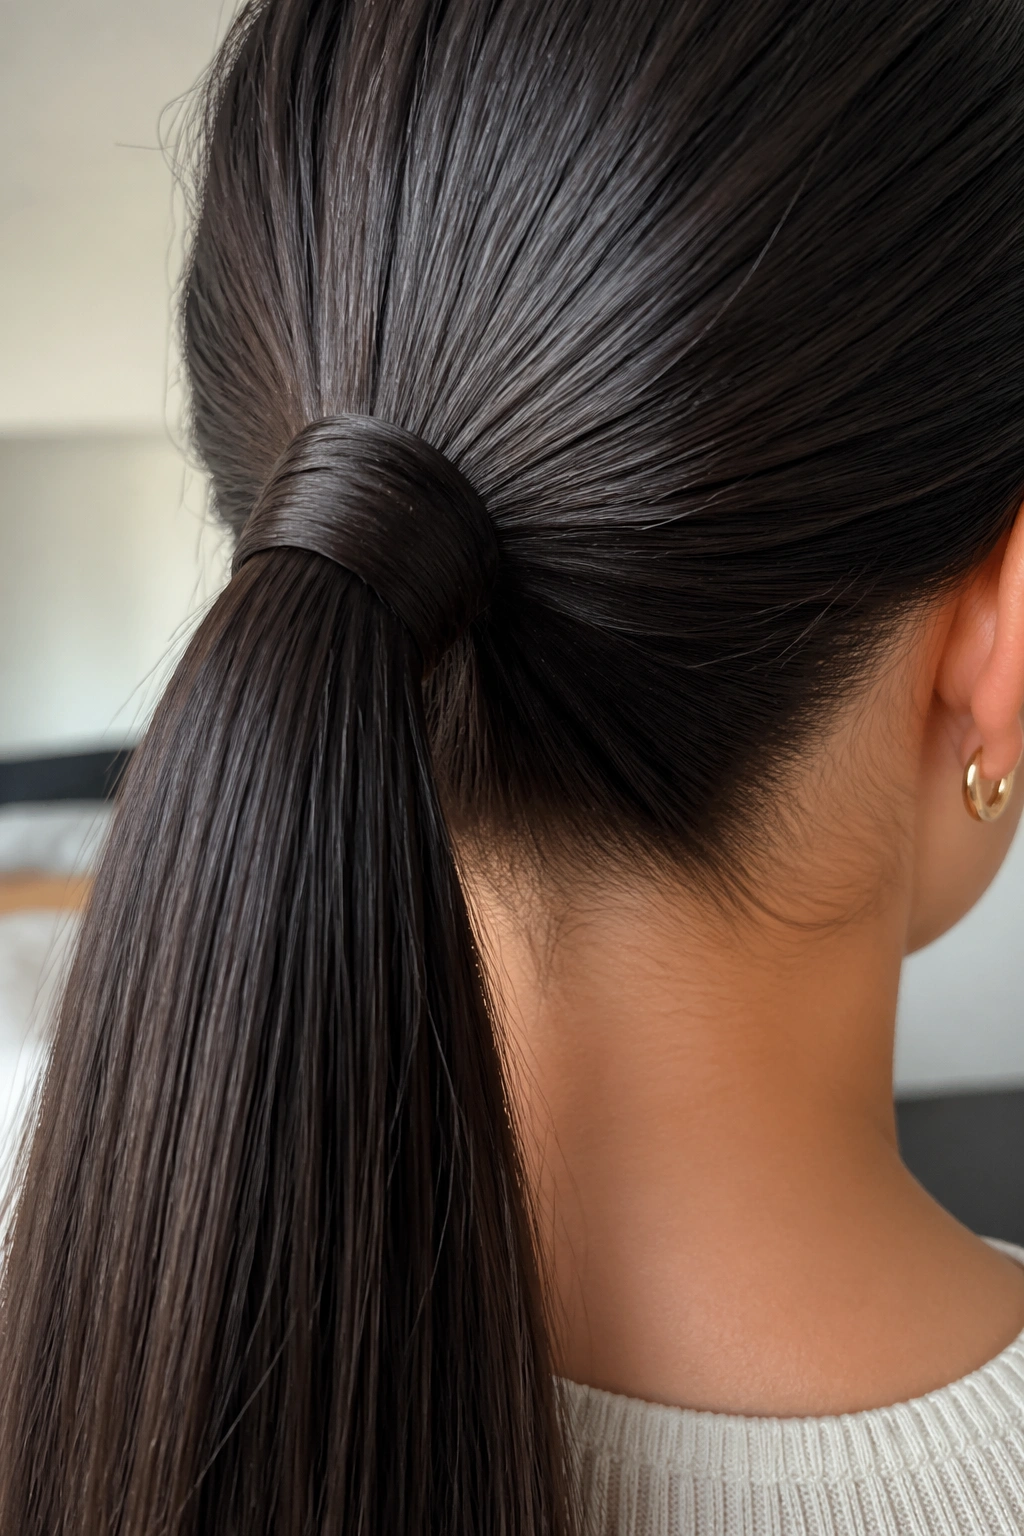
A sleek wrapped mid ponytail is the cleanest place to start because straight hair already wants to behave this way. The base sits at the middle of the back of your head, the crown stays flat, and a thin section of hair hides the elastic so the style looks finished instead of accidental.
Why It Works on Straight Hair
Straight hair gives you a crisp outline, which is half the battle. Use a fine-tooth comb to smooth the top, gather the ponytail at the midpoint between your ears and the nape, and secure it with a clear elastic first. Then take a 1/2-inch strand from underneath the ponytail, wrap it around the base, and pin it with a bobby pin pointed upward so it disappears.
- Best with hair that is freshly brushed and lightly smoothed with serum.
- Looks strongest when the part is centered or only slightly off-center.
- Works well for fine hair because the wrapped section adds visual fullness at the base.
- Holds a little longer if you mist the crown with flexible-hold hairspray before tying.
Tip: Keep the wrap thin. A thick wrap looks bulky fast.
2. Center-Part Mid Ponytail With Glassy Finish
A middle part and straight hair are a strong pair when you want the ponytail to look deliberate. The center line gives the style structure, and the smooth finish does the rest. What makes this version work is restraint; every strand is tucked into the same direction, and nothing fights the shape.
A pea-sized amount of smoothing cream on damp hair helps, but don’t pile it on. Too much product makes straight hair separate in an odd way and can leave the ponytail looking greasy near the ears. Blow-dry with a nozzle attachment, directing the airflow straight down the shaft, then run a flat iron lightly over the surface if your hair tends to puff or bend at the ends.
The part should be neat, but not so severe that it looks drawn on. Use the tail of a comb, set the ponytail at the middle of the head, and keep the tie snug without pulling so hard that the crown lifts into a ridge. One last pass with a soft brush over the surface is enough.
A glassy finish is pretty unforgiving in bright light. That’s the point. If the surface is smooth, the whole style reads expensive without trying to look fancy.
3. Soft Face-Framing Mid Ponytail
If your straight hair tends to look a little severe when it is pulled back, this is the fix. Leave out two slim front pieces, about the width of a finger on each side, and let them fall around the cheekbones. The rest of the hair stays neat, but the face gets a little movement.
I’ve seen this rescue hair that looked too flat for a dinner out. It’s one of those styles that takes ten minutes, tops, and somehow changes the whole mood. The ponytail itself stays mid-level and tidy, while the front sections soften the line near the jaw.
- Leave the front pieces straight for a sharp look.
- Bend the ends of those pieces slightly with a flat iron if you want a softer shape.
- Keep the ponytail base tidy so the loose pieces feel intentional, not forgotten.
- A light mist of texture spray on the front sections helps them stay separate.
The nice part is that this works whether your hair is fine, medium, or thick. It does not need curls. It only needs a tiny break in the outline.
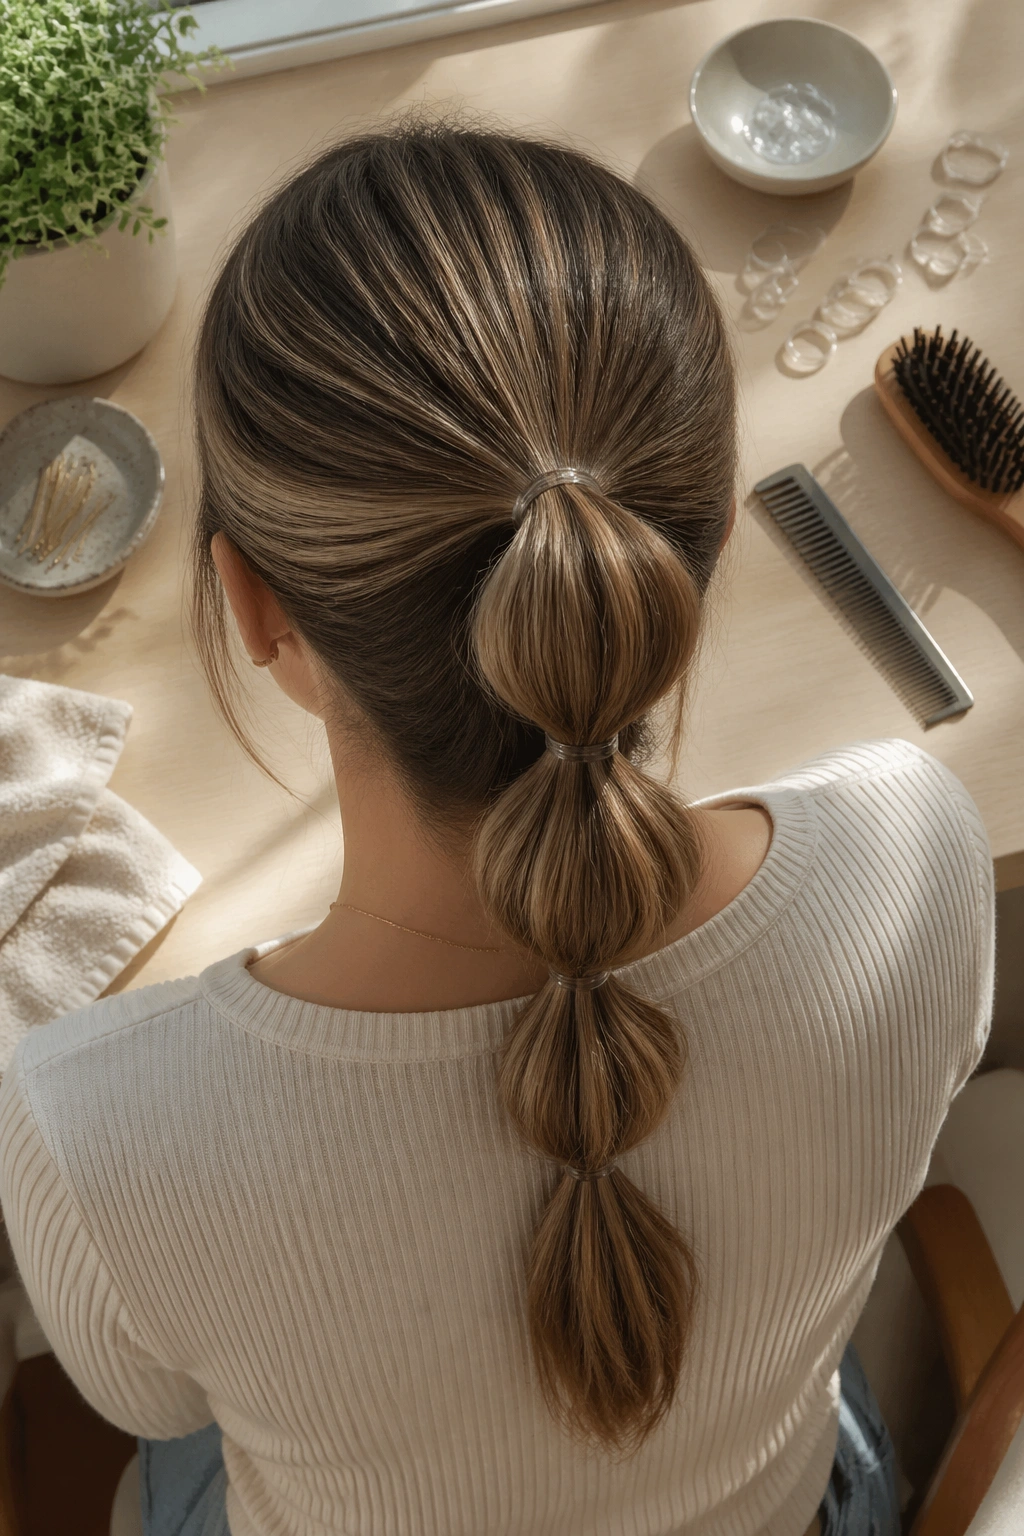
4. Bubble-Section Mid Ponytail
A bubble ponytail is one of the few styles that can make very straight hair look playful instead of flat. The bubbles break up the long line of the ponytail, which matters if your hair tends to hang in one smooth sheet and lose interest by noon.
Start with a mid ponytail secured tightly. Then add small clear elastics every 2 to 3 inches down the tail. Gently tug each section outward from the center until it puffs into a rounded bubble. Don’t yank. You want shape, not frizz.
The key is spacing. Too much distance between elastics makes the bubbles sag. Too little and the style just looks cramped. If your hair is fine, tease each section a little before you puff it out. If it is thick, you can usually shape the bubbles with your fingers and stop there.
This is one of those styles that looks more complicated than it is. It also survives wind better than a plain ponytail, which is probably why people keep coming back to it.
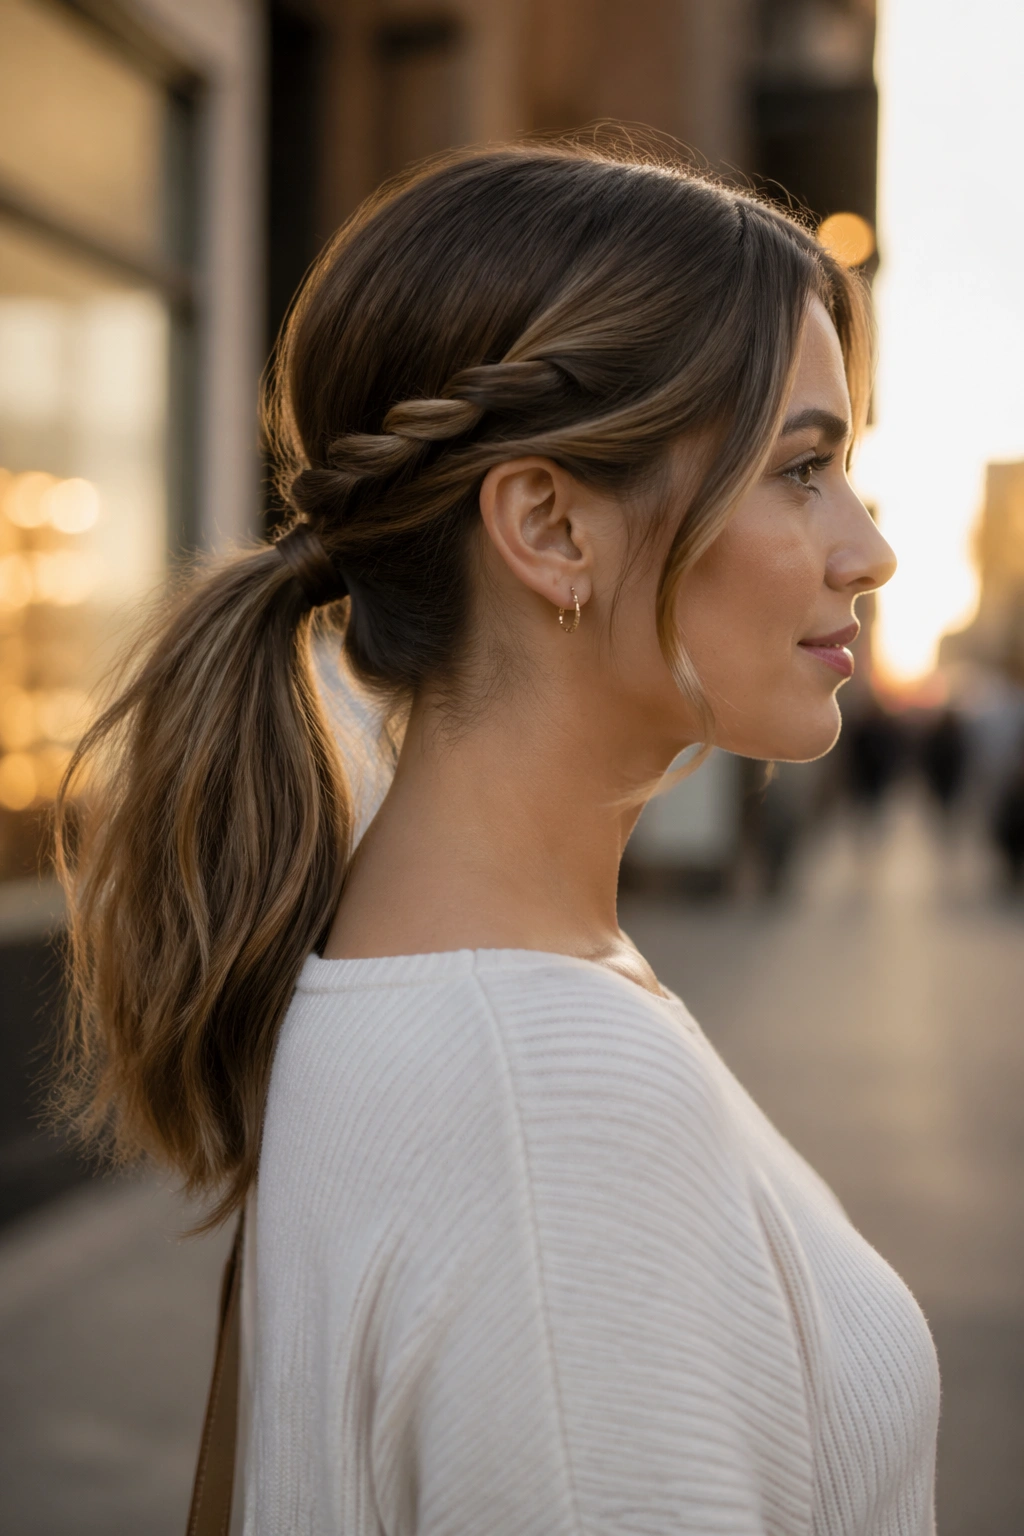
5. Twisted-Side Mid Ponytail
Why does a small twist change everything? Because straight hair shows twists clearly, even when the rest of the style stays simple. A pair of side twists draws the eye toward the base and gives the ponytail a bit of shape without needing braids or extra accessories.
The idea is straightforward. Take a section from each temple, twist it back along the side of the head, and secure both pieces into a mid ponytail. The twist should lie close to the scalp, not float away from it. If the hair slips, pin the twist once before the elastic goes in. That gives it grip.
How to Use It
- Make each twist no wider than 1 to 1.5 inches at the front.
- Twist back toward the crown so the direction feels clean.
- Keep the ponytail base at the middle of the head, not too low.
- Use a small bobby pin under each twist if your hair is silky.
This version looks especially nice with straight hair that has blunt ends. The twists break up the severity at the front, and the ponytail stays sleek at the back.
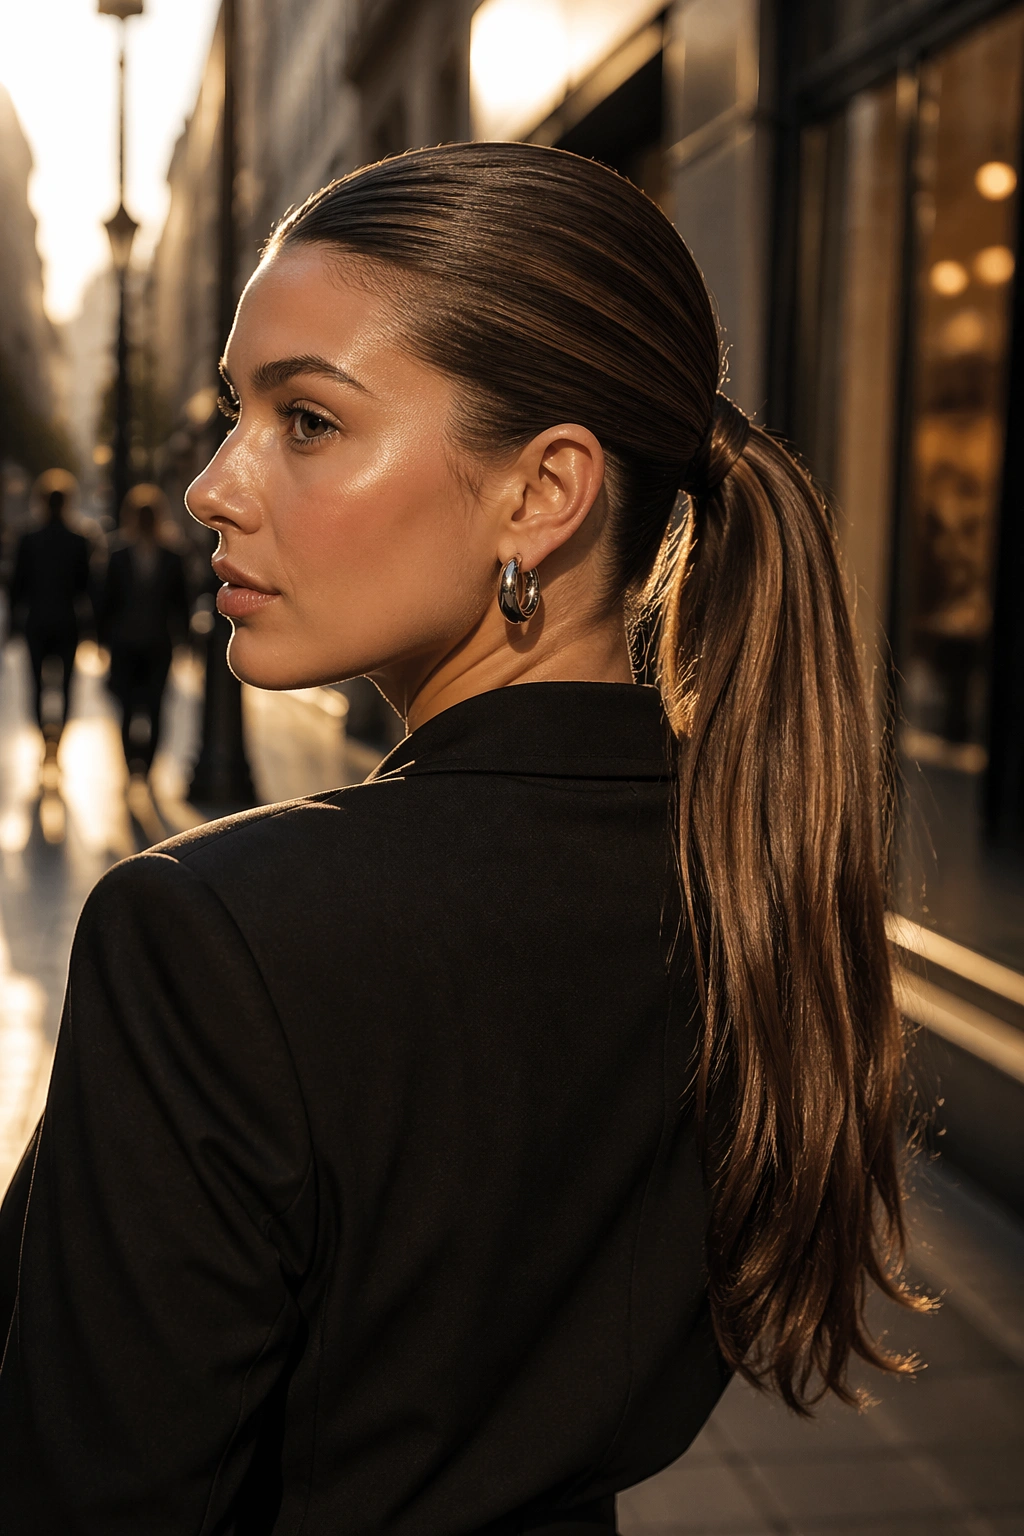
6. Low-Mid Ponytail With Deep Side Part
Unlike a center-part ponytail, this one shifts the whole look to one side. The part is deep, the hair sweeps across the forehead, and the ponytail still sits at mid height rather than dropping all the way to the nape. That slight lift keeps it from looking sleepy.
This style is good when you want something polished but a little less expected. Straight hair loves the smooth sweep because the part line stays visible and the side volume does not collapse as quickly as it can with waves or curls. A side part also helps if one side of your hair naturally falls flatter than the other. You can use that asymmetry on purpose instead of fighting it.
Pull the heavier side across the crown with a brush, then secure the ponytail slightly behind the ear line rather than centered dead back. That tiny shift matters. It changes the silhouette from school-gym simple to something more tailored.
A small amount of shine spray on the sweep keeps the front from looking dull. Don’t spray the whole head. Just the surface.
7. Knotted Mid Ponytail
A knotted mid ponytail gives straight hair a little texture without needing curls, and that is the appeal. You use the hair itself as the decoration, which feels smarter than piling on extras. It’s neat, a little architectural, and easy to wear.
Take two small sections from either side of the head, bring them behind the crown, and tie them into a loose knot before gathering the rest into a ponytail. If your hair is slippery, secure the knot with one hidden pin before adding the elastic. The knot should sit flat and centered, almost like a built-in wrap.
Quick Details
- Works best when the side sections are smooth and detangled.
- The knot should be snug enough to hold, but not so tight that it puckers.
- A clear elastic under the knot keeps the base from loosening.
- Thin hair benefits from a light texturizing spray at the roots.
The finished look has shape right where straight hair often goes limp. It’s subtle, but not plain.
8. Mid Ponytail With Hidden Elastic and Flat-Iron Bend Ends
Straight hair can look blunt in a ponytail, and sometimes that bluntness is the problem. Hiding the elastic cleans up the base, then adding a soft bend at the ends keeps the tail from hanging like a ruler. That little curve matters more than people think.
After you tie the ponytail, take a narrow section from underneath and wrap it around the elastic. Pin the end underneath the ponytail so it stays tucked. Then use a flat iron to put a gentle inward bend in the last 2 to 3 inches of the tail. Not a curl. Just a bend.
The bend should be soft enough to keep the line moving without making the style look styled to death. If your hair is very straight, set the iron on a lower heat setting and move quickly. Hold too long and the ends can flip in a way that looks stiff instead of natural.
One nice side effect: the ponytail feels less sharp around the shoulders, which makes it easier to wear with sweaters, coats, and high collars.
9. Half-Polished Mid Ponytail With Crown Lift
This style is for straight hair that sits too flat at the top unless you force some shape into it. The ponytail stays mid-height, but the crown gets a small lift, which gives the whole style a little body without turning it into a teased mess.
Backcomb a 2-inch strip at the crown very lightly, then smooth the top layer over it with a brush. You are not trying to build height you can spot from across the room. You just want enough lift that the top of the head stops clinging to the scalp. That’s the difference between “pulled back” and “put together.”
The ponytail itself should stay smooth. If the crown is textured and the tail is flat, the contrast looks intentional. If you add too much teasing, straight hair starts to fray at the top and the style loses its clean line. Keep the lift under control.
A mist of flexible hairspray under the lifted section helps it stay in place, especially if your hair is heavy and tends to settle fast.
10. Braided Base Mid Ponytail
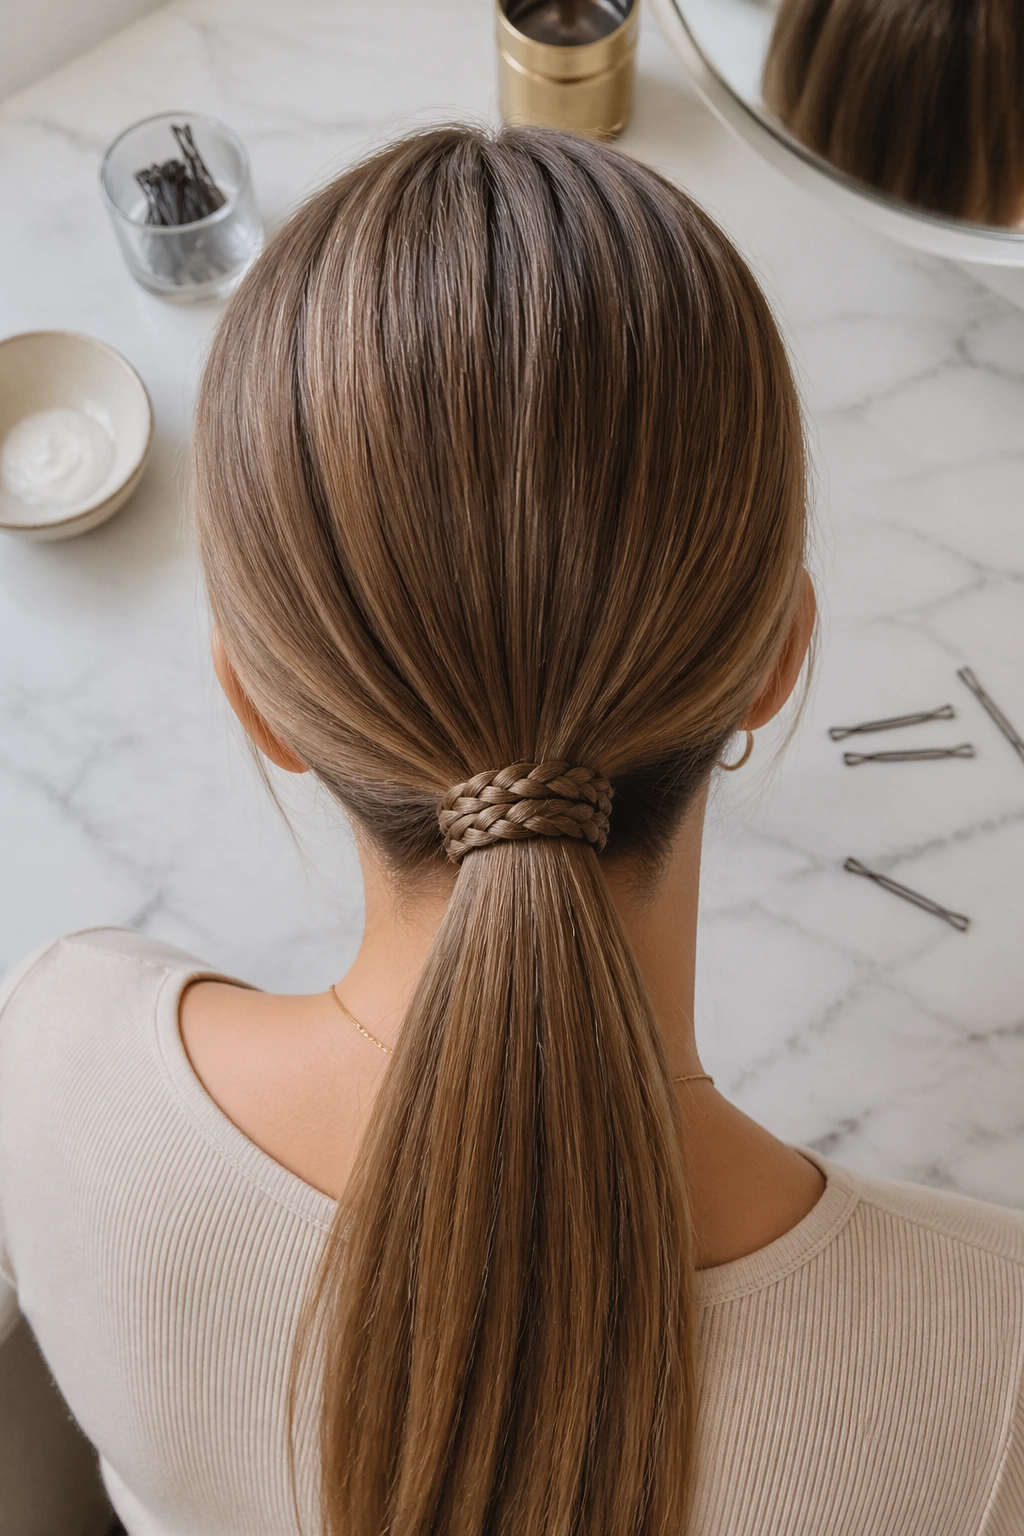
A braided base works well when the ponytail needs a little detail near the tie but not a full braid through the tail. That’s the nice part. The braid lives at the base, where straight hair tends to look plainest, and the rest of the ponytail stays smooth.
You can braid a small section from one side, wrap it around the elastic, or braid two thin side sections and join them behind the head before tying everything into a ponytail. Keep the braid tight and narrow. If it gets too wide, it starts to compete with the ponytail instead of supporting it.
- Choose a 3-strand braid for a classic look.
- Use a French braid only if you want the detail to start higher at the scalp.
- Pin the braid under the ponytail so the end does not peek out.
- A tiny dab of styling cream on the braid keeps flyaways down.
This style is a good middle ground when you want something more detailed than a plain ponytail but less precious than a full updo.
11. Ribbon-Tied Mid Ponytail
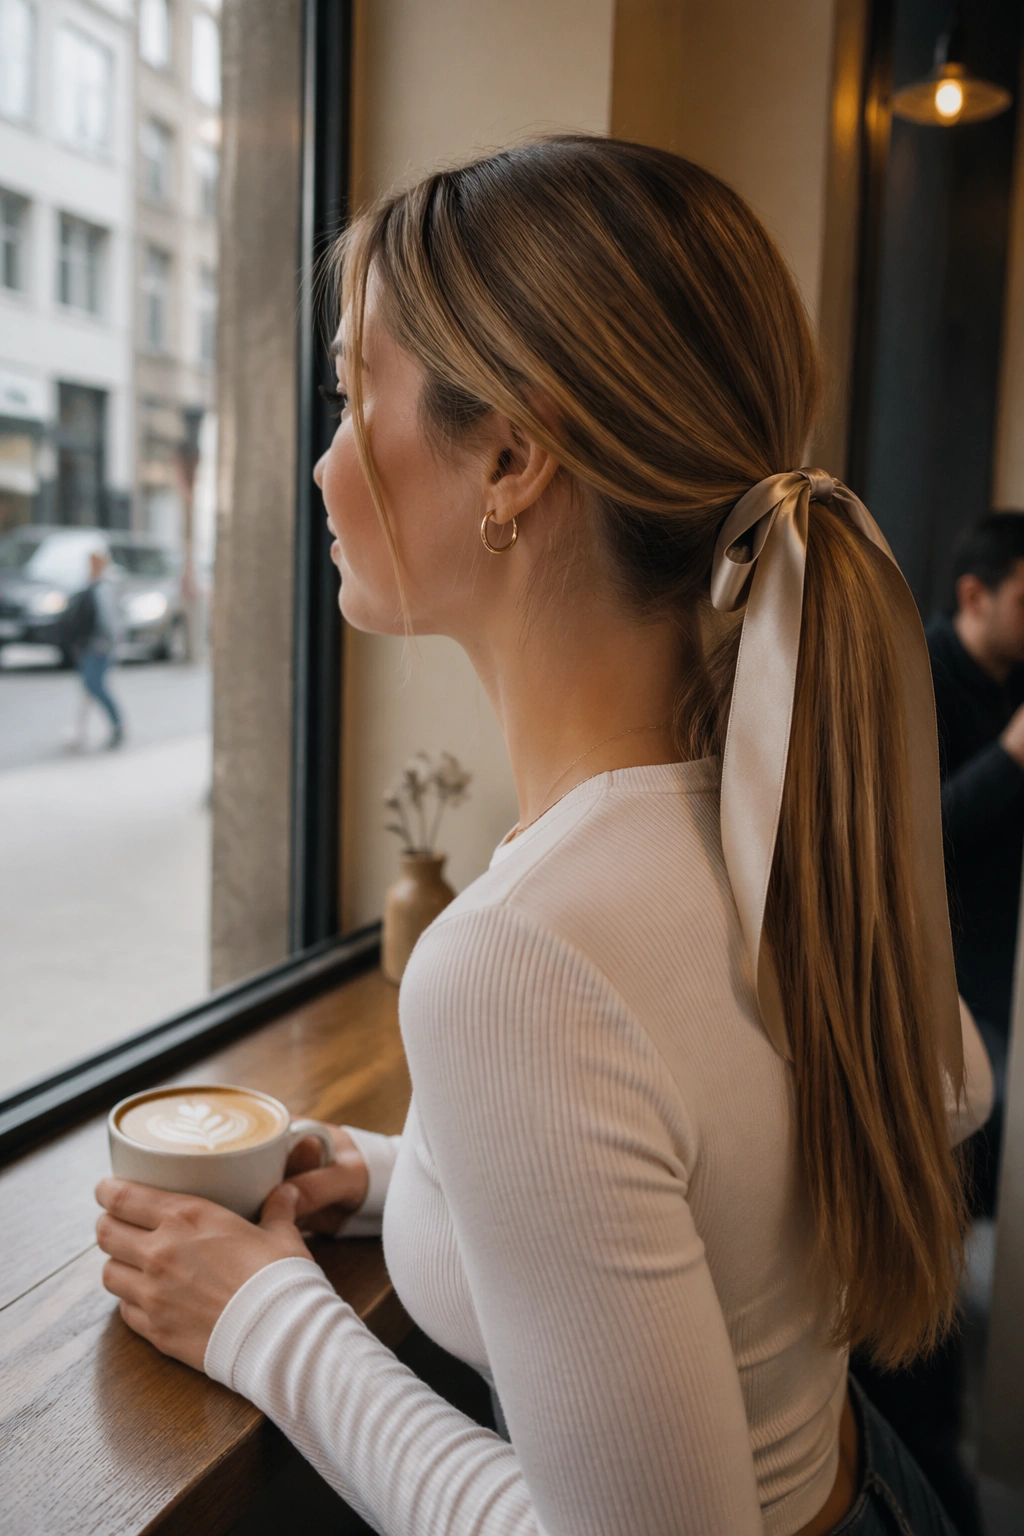
Can a ribbon make a mid ponytail feel more finished? Yes, if the ribbon is the right width and tied with a little care. On straight hair, a ribbon gives the base a softer outline than an elastic alone. It also adds color or contrast without changing the shape of the style.
Use a 1-inch satin or grosgrain ribbon and tie it over the elastic after the ponytail is secured. Leave the tails long enough to hang 4 to 6 inches below the knot. If the ribbon is too narrow, it disappears. If it is too wide, it can swallow the base and make the ponytail look costume-y.
How to Use It
The ribbon should sit flat against the head, not twist around itself. Tie the knot off-center if you want a more relaxed look, or centered if you want the style to feel neat. For very straight hair, a ribbon also helps distract from the fact that the tail itself may be blunt at the ends.
A satin ribbon feels dressier. A matte one feels a little more casual. Pick the mood first, then the color.
12. Double-Secure Mid Ponytail for Fine Straight Hair
Fine straight hair has one annoying habit: it can slide. A double-secure ponytail handles that without loading the style up with product. You use two elastics, placed a short distance apart, so the base gets grip before the tail takes over.
Unlike a single tie, this version gives the ponytail more staying power and a slightly thicker look at the base. Tie the first elastic at the mid point, then add a second elastic about 1 inch below it. The top elastic keeps the crown pulled in; the lower one keeps the tail anchored.
This works especially well when the hair has a clean, slippery finish and refuses to hold a single tie for long. It also helps if your ponytail tends to sag as the day goes on. The second elastic keeps the shape from sinking.
If you want the setup to disappear, take a tiny strand from the tail and wrap both elastics together. That way the extra support is there, but nobody sees the hardware.
13. Tucked-Under Mid Ponytail
A tucked-under ponytail has a neat, almost retro feel, and straight hair makes the shape easy to see. The ends disappear under the base, so the whole style becomes about the silhouette rather than the tail length. That’s handy when your hair is blunt or a little uneven at the bottom.
Why the Tuck Matters
When the ends are tucked under, the ponytail reads cleaner from the side. It can also make shoulder-length straight hair look thicker because the tail is folded into itself instead of hanging thin and flat. A small looped elastic or a couple of pins under the base usually do the job.
- Gather the ponytail at mid height and secure it tightly.
- Fold the tail upward or inward before pinning it beneath the base.
- Hide the pins under the hair so they don’t catch the light.
- Keep the surface smooth so the tuck looks deliberate.
Tip: If your ends are dry, use a touch of cream only on the last few inches. Too much product near the base can make the whole style slip.
14. Wet-Look Mid Ponytail
A wet-look ponytail is one of the boldest ways to wear straight hair because the texture already has the right sleekness. You’re not trying to fake softness here. You want shine, separation, and that slick surface that looks a little dramatic in the best way.
Work a mix of styling gel and a small amount of cream through damp hair from roots to ends. Use a comb to create the part and brush everything back into a mid ponytail before the product starts drying. If the hair starts to set too fast, mist it lightly with water and keep going. The finish should look glossy, not crunchy.
The trick is to keep the crown smooth while letting the tail stay wet-looking without clumping into one hard rope. Straight hair does this better than textured hair because it already lies close together. That also means you need less product than you think.
One warning: don’t overload the roots. Wet-look hair should feel controlled, not greasy.
15. Messy-Polished Mid Ponytail
This is the style for straight hair that needs a little looseness around the edges. The ponytail stays mid-level and clean, but the crown gets a few soft pulls, and the front pieces are left just imperfect enough to keep it from looking severe.
I like this one because it avoids the fake “undone” thing that can look forced on straight hair. You still need a tidy base. You still need a good brush. You just don’t smooth every strand until it looks sealed shut.
Pull the ponytail into place, then use your fingers to loosen a half-inch of hair at the crown and at the temples. Pinch the top of the ponytail near the elastic so it sits a little fuller. If the ends are too flat, bend them once with a flat iron and stop there.
The result is balanced. The hair looks touched, not fussed over. That’s usually the sweet spot.
16. Mid Ponytail With Clipped-Back Front Pieces
A pair of small clips can do what a lot of styling product can’t: make straight hair stay out of your face without changing the whole shape. This style is especially useful when the front pieces are too short to join the ponytail cleanly or too slippery to stay tucked.
Clip the front sections back about 1 to 2 inches behind the hairline, then gather the rest into a mid ponytail. Use flat barrettes, small metal clips, or slim pins that lie close to the head. Big clips can overwhelm the style fast. The point is to show a little hardware, not turn the hair into a display case.
The clipped sections create a small frame around the face and keep the crown tidy. On straight hair, they also help the hairline stay flat without needing a ton of gel. That matters if you want a neat finish without the stiff, wet look.
Choose clips that match the mood of the rest of your outfit. Simple makes the most sense here.
17. Fishtail-Wrapped Mid Ponytail
Why do a fishtail wrap instead of a plain strand wrap? Because the tiny woven texture gives straight hair a little interest right at the base, where it usually needs it most. The ponytail stays mid-height and smooth, but the wrap makes the finish feel more considered.
Take a thin section from the tail, split it in two, and make a tiny fishtail braid just long enough to circle the elastic. It does not need to be dramatic. Three or four inches is enough. Wrap it around the base and pin the end underneath so the braid becomes a hidden accent rather than the star of the show.
How to Get the Most From It
The fishtail should be narrow. If it’s too wide, it looks bulky on straight hair. Keep the rest of the ponytail brushed smooth so the tiny braid stands out by contrast. That contrast is the whole point.
This version works especially well if the ponytail itself is poker-straight. The braid adds a small amount of surface detail without taking away the clean line.
18. Sleek Gym-to-Dinner Mid Ponytail
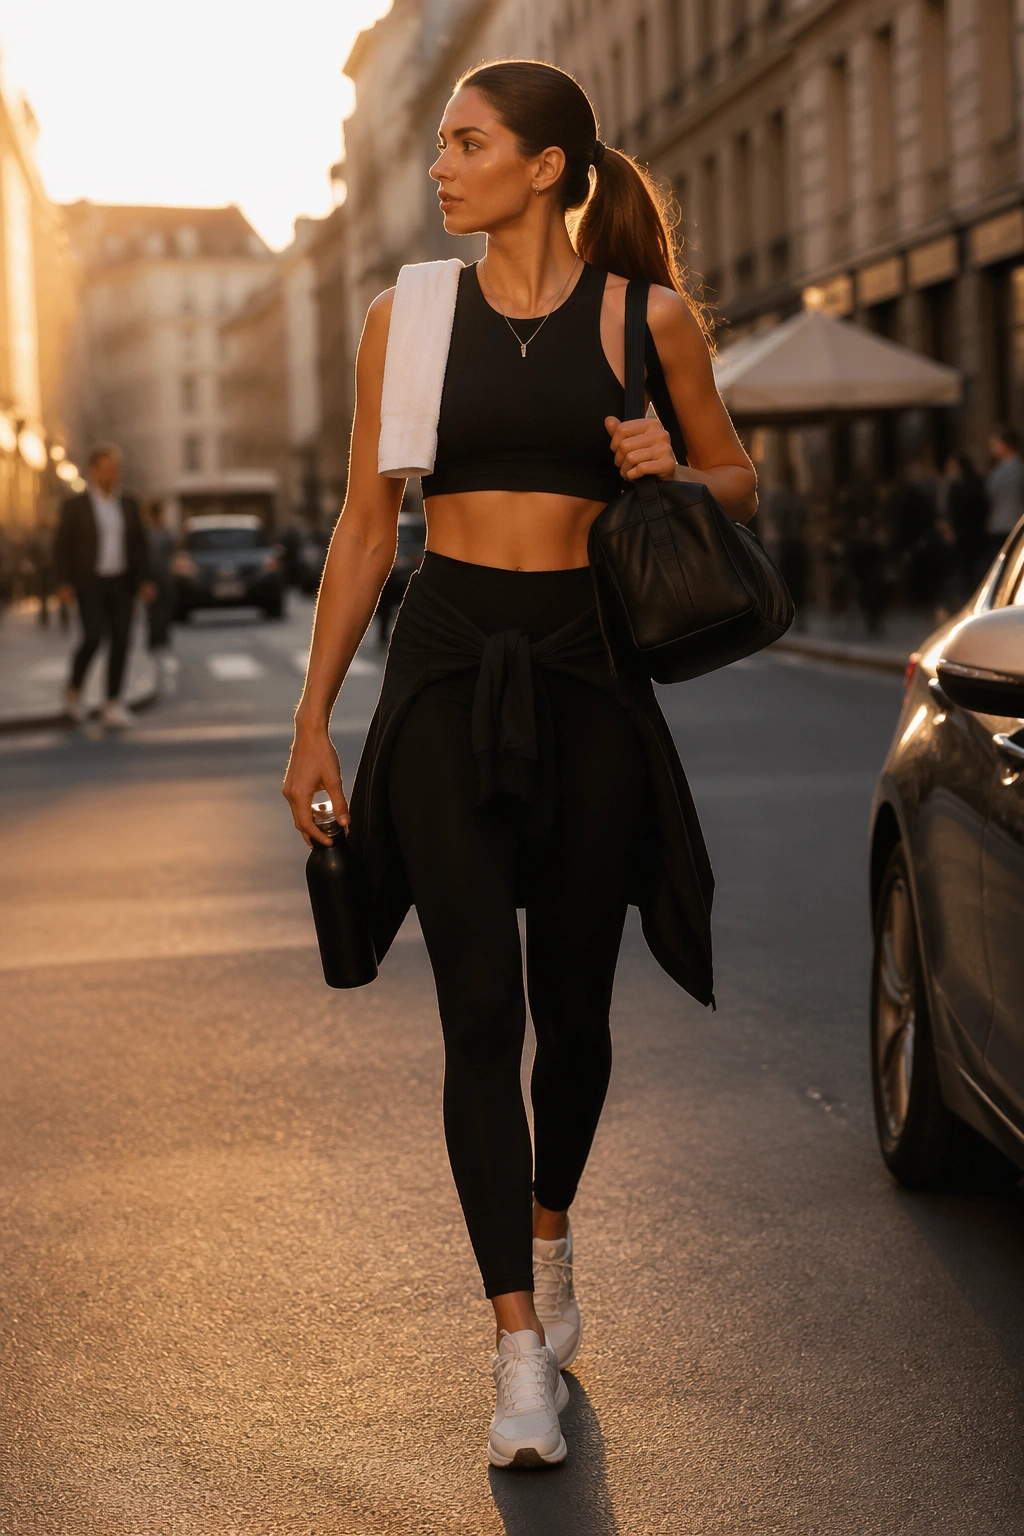
A lot of ponytails try to be too many things at once. This one keeps it simple. It’s the straight-haired ponytail that can survive a workout, then still look decent once you change clothes and put on earrings. The base is firm, the crown is smooth, and the ends are left with enough movement to keep it from looking stiff.
Unlike a super-polished office ponytail, this version can tolerate a little lived-in texture. In fact, it looks better with a tiny bit of root separation. Use a brush to gather the hair at the middle of the head, secure it with a strong elastic, and leave the tail slightly bendy rather than iron-flat.
That small bend matters because it makes the style feel less formal. If you’re starting from sweaty or second-day hair, a little dry shampoo at the roots helps refresh the lift without making the hair chalky.
I’d reach for this version when I want one ponytail to do two jobs. It’s practical, but not boring.
19. Mid Ponytail With Scrunchie Volume
A scrunchie does more than look cute. On straight hair, it creates a cushion around the elastic, which makes the base feel fuller and a little softer. That matters if your ponytail is on the thinner side or if you want a friendlier shape than a bare tie gives you.
Why a Scrunchie Helps
The fabric pushes the hair outward a bit, so the base reads thicker. It also hides small irregularities better than a skinny elastic, which is useful when straight hair slips out of place. Pick a scrunchie with enough body to hold its shape — thin, floppy ones tend to disappear.
- Velvet scrunchies give the ponytail a heavier base.
- Silk ones feel softer and are gentler on smoother hair.
- Cotton versions look more casual and can grip well.
- Oversized scrunchies make a statement; smaller ones stay subtle.
Tip: Keep the rest of the ponytail smooth. If the base is fluffy and the tail is wild, the style gets messy fast.
20. Inward-Flicked Mid Ponytail
Straight hair can look almost too straight in a mid ponytail, and the easiest fix is a gentle inward flick at the ends. It changes the line of the hair just enough to keep it from hanging like a stick. The shape is small, but it makes the tail feel finished.
Use a flat iron or a medium-barrel iron to turn the last inch or two of the ponytail slightly inward. The movement should be subtle. You want the ends to curve toward the neck, not curl up like a throwback pageant style. A tiny bend near the tips is enough.
This works well on shoulder-length hair, where the ponytail ends sit close to the collarbone. The inward turn keeps the hair from brushing the shoulders in a stiff way. It also makes the style look intentional when you’re wearing a blazer or a high-neck top.
A drop of serum on just the ends can help them look smoother after the bend. Keep it off the roots.
21. Mid Ponytail With Mini Braids at the Temples
Small temple braids are a good choice when straight hair needs detail near the face but you do not want to braid the whole head. Two narrow braids, one on each side, tuck the front pieces back and give the ponytail a little edge.
I’ve always liked this version on hair that is very straight and very glossy, because the braids interrupt the blank surface in a useful way. They also hold short front layers better than a clip sometimes does. Each braid can be tiny — half an inch wide is plenty — and they join the ponytail just before the elastic goes in.
Key Details
- Keep the braids tight so they lie close to the scalp.
- Place them slightly behind the temple, not right at the hairline.
- Tie the ponytail at mid height so the braids blend into the base.
- Use a small elastic or clear band at the braid ends if needed.
The look lands between sporty and decorative, which is a good place for straight hair to live when you want something a little different.
22. Teased-Crown Mid Ponytail
A teased crown is the fastest way to keep straight hair from collapsing at the top. The ponytail stays mid-level, but the crown gets a controlled lift that gives the style a bit of shape. Not huge shape. Just enough.
Backcomb a section at the crown with a fine-tooth comb, then smooth the top layer over it with the brush so the surface still looks clean. The trick is to tease underneath, not across the top where it can show through. Straight hair that’s too sleek at the root often needs this tiny bit of internal support.
The finished look is useful when you want your ponytail to stay visible from the front. Without the lift, the head can look flat and the ponytail can disappear into the back of the neck. A teased crown fixes that in under five minutes.
A light hairspray on the underneath section before tying helps the lift hold longer. Don’t spray the top layer hard or it will go stiff.
23. High-Gloss Side-Swept Mid Ponytail
Can a side-swept ponytail still count as mid? Absolutely, if the base sits in the middle of the back of the head and the front sweeps off to one side. This one has a bit more drama than a center-part version, but it stays polished because the surface is smooth and the tie is placed with care.
Brush the front section across the forehead and over one temple, then gather everything into the mid ponytail slightly behind the sweep. The direction matters. You want the hair to move in one line, not split into separate pieces. A small amount of shine spray on the sweep gives it that glossy finish straight hair does so well.
How to Use It
This style works best when you want face-framing without loose tendrils. It’s cleaner than a soft-framed ponytail and less severe than a tight center part. If your hair parts naturally to one side, lean into that instead of forcing a new line.
A flat brush is your friend here. Fingers alone tend to leave small ridges.
24. Mid Ponytail With Scarf Wrap
A scarf wrap changes a ponytail fast. It gives straight hair color, texture, and a little bulk around the base, which is useful if the elastic itself looks too plain. A ribbon is narrow; a scarf is broader and softer, so the effect feels different right away.
Fold a lightweight scarf into a strip, then wrap it around the elastic once or twice and tie it off to the side. The tails can hang long, or you can tuck them back under the wrap if you want a cleaner finish. Silk scarves give the style a smoother look. Cotton ones feel more casual and hold a knot more firmly.
The scarf also helps disguise a ponytail that needs more visual interest near the base. Straight hair can look a little severe when it is simply tied back, and this is one of the easiest ways to warm it up.
I would reach for a scarf when the rest of the outfit is plain and the hair needs one clear focal point. It does the job without asking for much else.
25. Clean, Straight-Across Mid Ponytail

There’s something satisfying about a mid ponytail that does almost nothing extra. No wrap, no braid, no clip, no soft piece left out on purpose. Just a clean line, a neat midpoint, and straight hair showing off what it already does well.
This version depends on precision. The part should be tidy, the crown should lie flat, and the elastic should sit at the exact middle of the back of the head, not drifting up or down. If the ponytail sits too low, it starts to feel accidental. Too high, and you lose the balanced shape that makes a mid ponytail useful in the first place.
Straight hair is good at this style because it keeps the outline sharp. Use a brush, hold the hair snug as you secure it, and smooth the surface once more with your hands before you walk away from the mirror. That last pass matters more than people think. It catches the little bumps that always show up after the tie is in.
Sometimes the plain version is the strongest one.