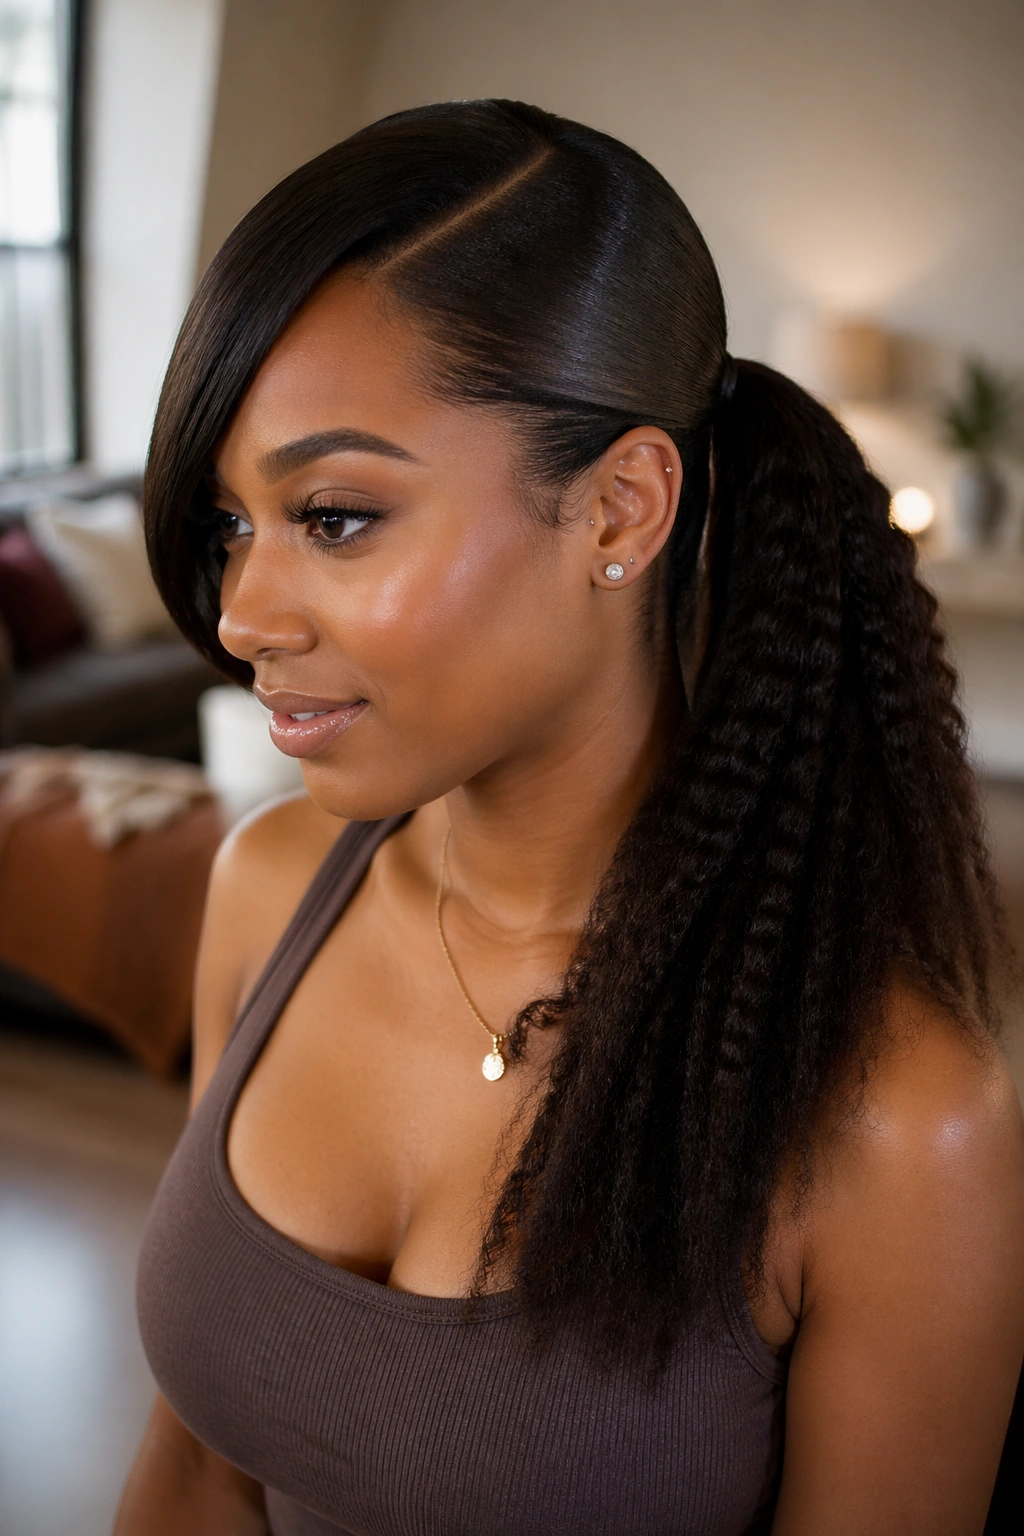
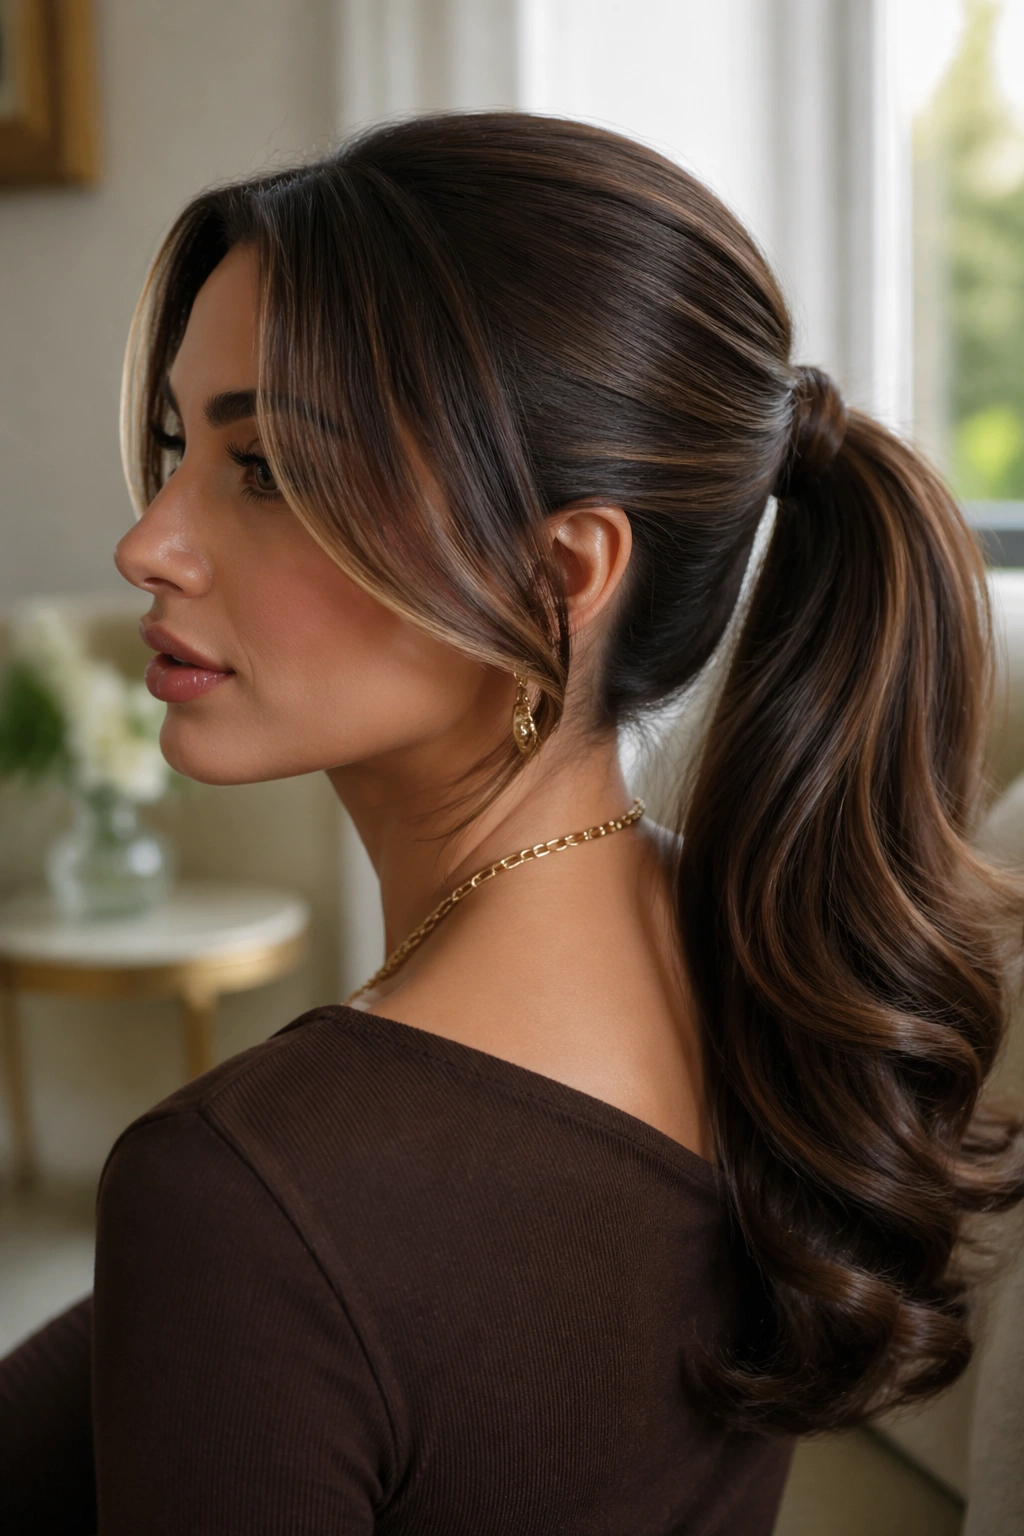
A mid swoop ponytail solves a problem most ponytails never touch: it brings the face in without flattening the whole style.
Too high, and a ponytail can feel sharp. Too low, and it can drag the face down. The mid swoop sits in that middle ground where the front piece softens the hairline while the ponytail still gives lift through the crown. That is why it works so well on ponytail hairstyles that need a little more shape and a little less fuss.
I like this look because it does not depend on one hair type or one mood. Straight hair can wear it sleek. Curly hair can wear it fluffy. Coils can wear it stretched and sculpted. The details change, but the idea stays the same: a clean sweep at the front, then a ponytail that feels deliberate instead of thrown together.
The difference is in the front section. Get that right, and even a basic ponytail looks finished. Miss it, and the whole style starts to feel off by a mile.
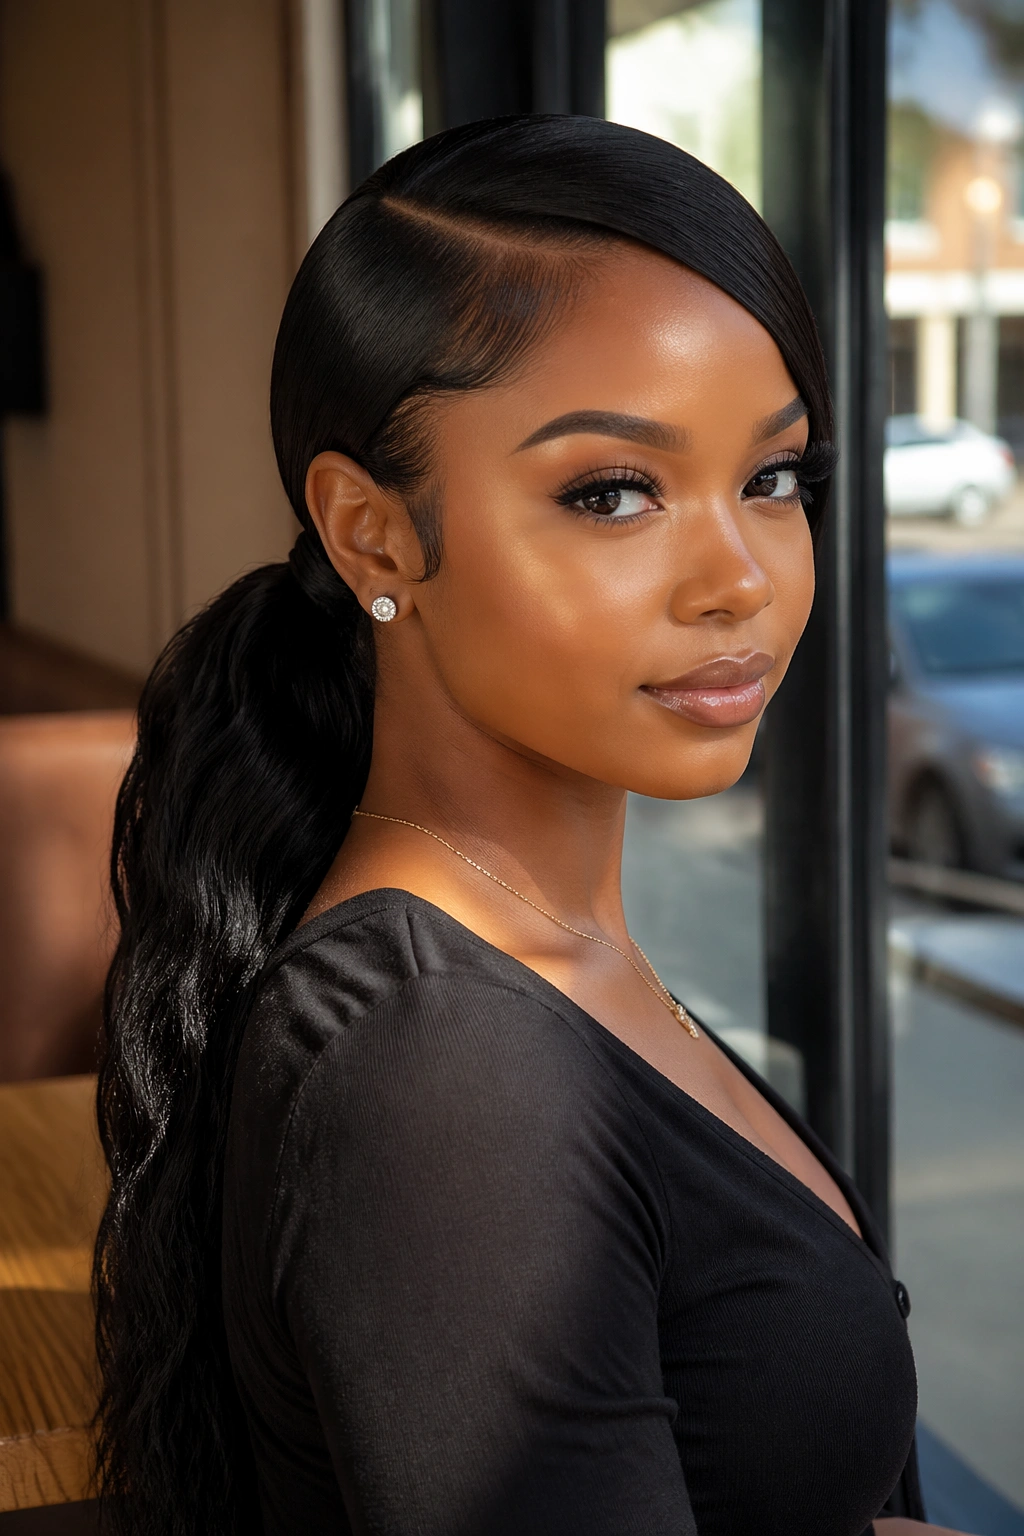
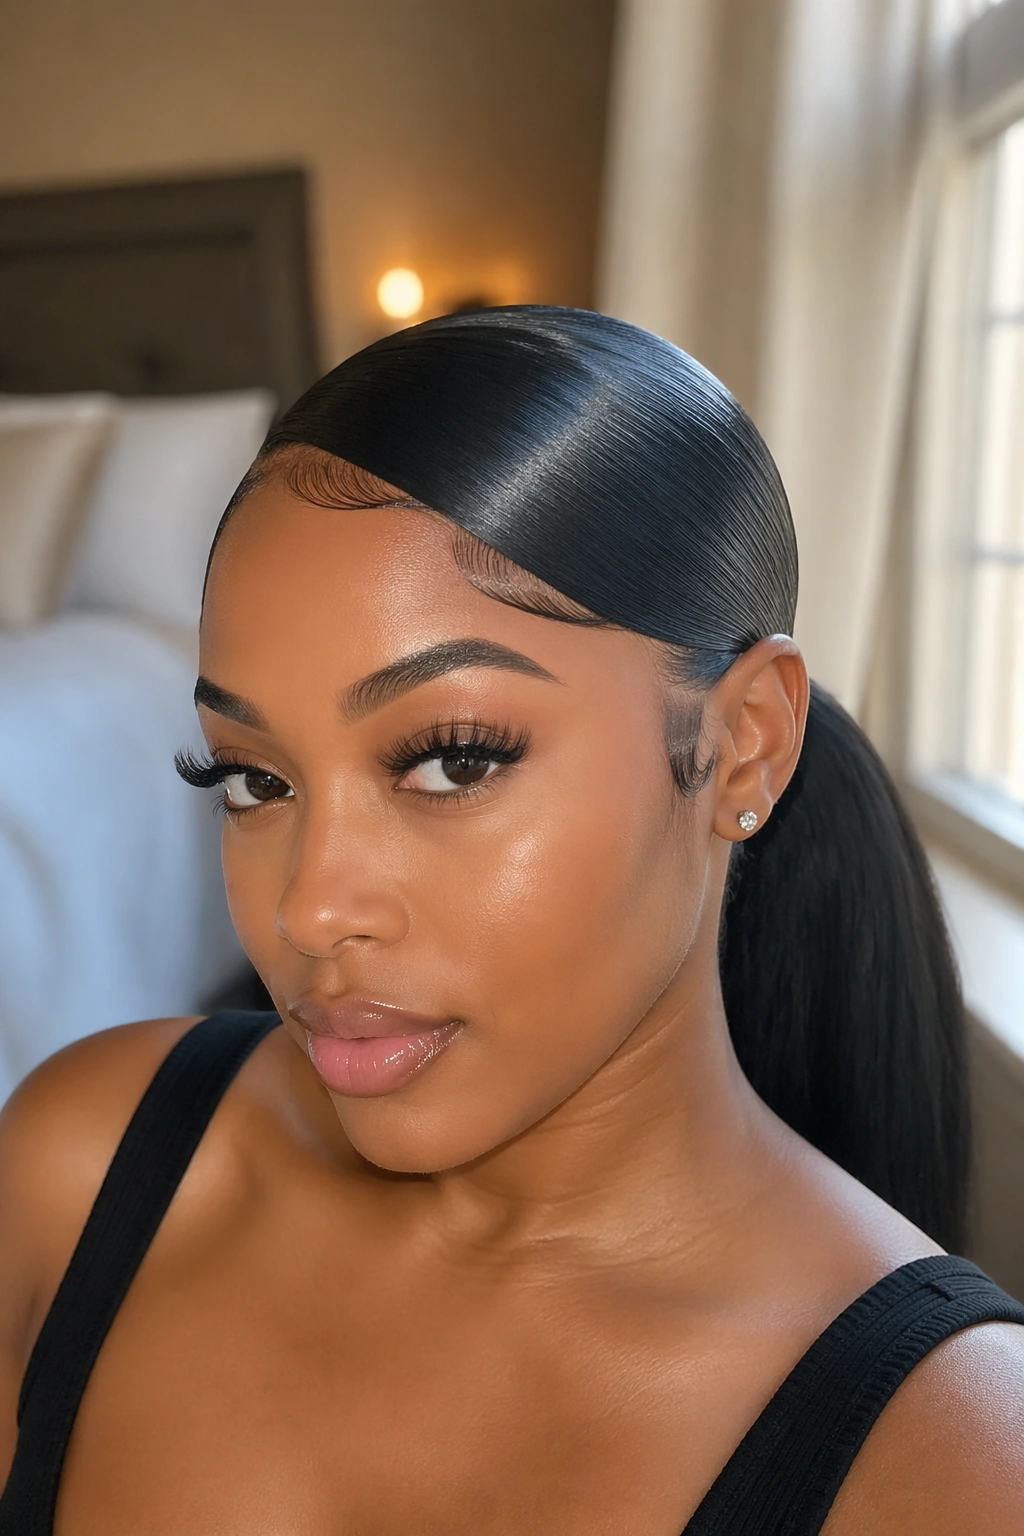
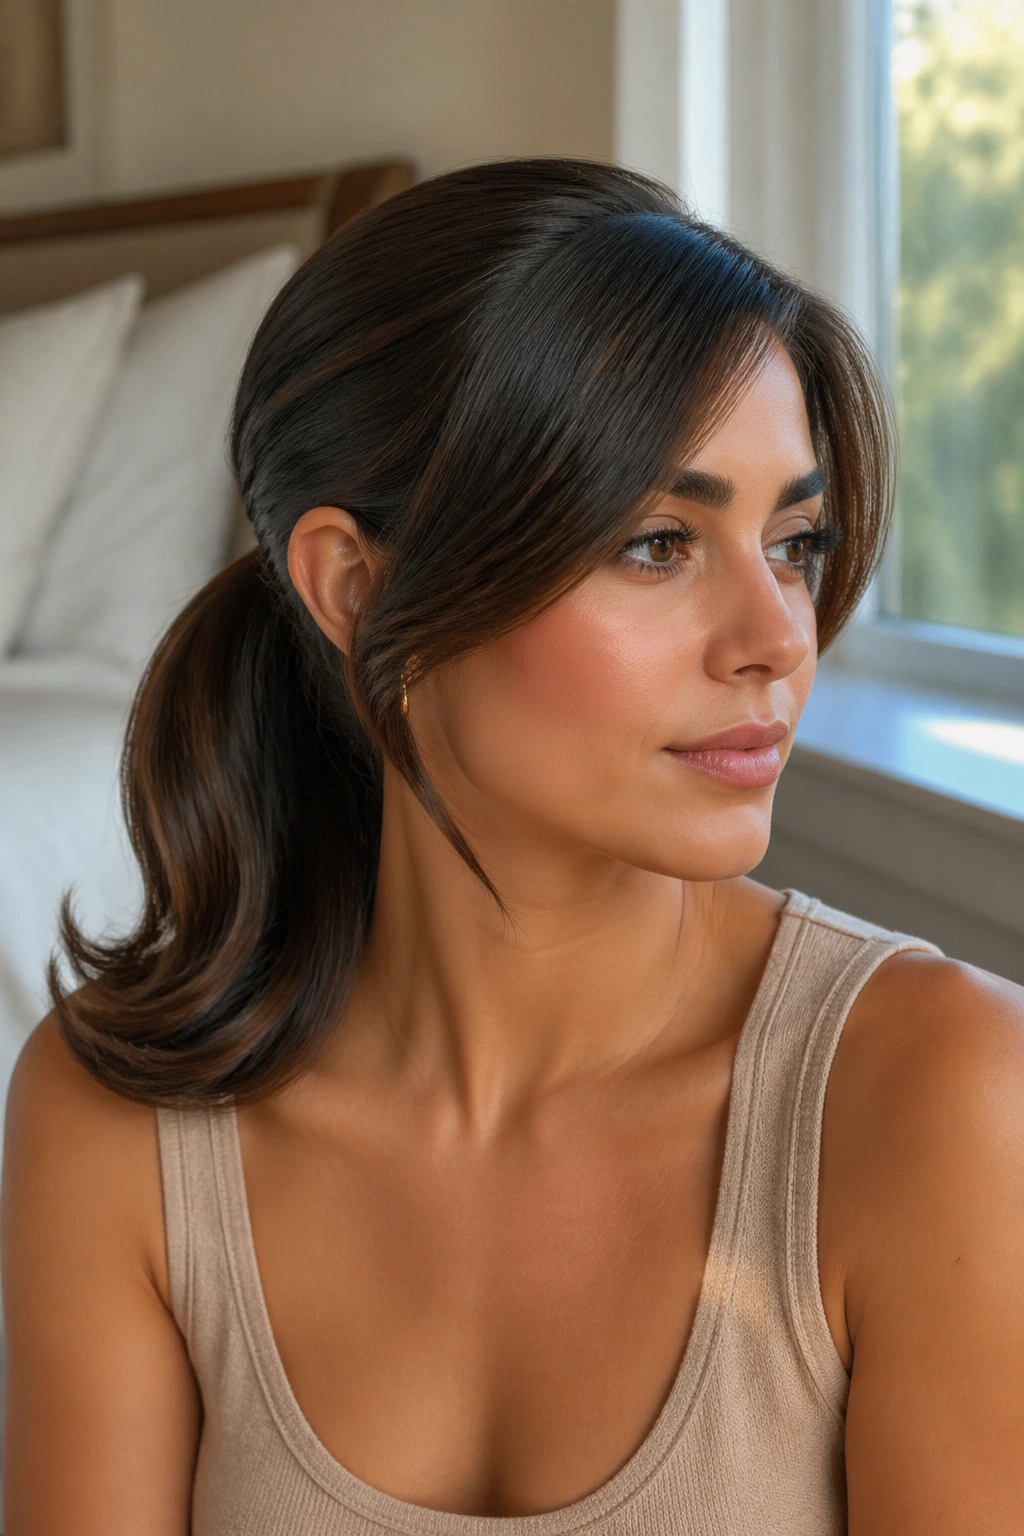
1. Sleek Center-Part Mid Swoop Ponytail
A center part gives this version its calm, even shape. The front sweep starts with symmetry, then softens just enough as it curves into the ponytail, which is why this one flatters rounder faces and longer faces alike.
The trick is to keep the roots flat without making the hair look pasted down. Work a light mousse or styling cream through damp hair, comb the part clean with a fine-tooth comb, and direct the front sections backward at a slight angle. If you press the front too hard against the head, the swoop loses its lift. If you leave it too loose, the whole style falls apart.
Use this when you want the cleanest possible finish. It looks sharp with hoops, a blazer, or a simple tank. A thin strand wrapped around the elastic keeps the base from looking unfinished, and that tiny move matters more than people think.
2. Deep Side Swoop With Glassy Edges
Why does a deep side swoop change the whole face shape? Because the line of the hair pulls the eye diagonally instead of straight down the middle, and that little shift makes the style feel softer and more sculpted at the same time.
Why It Flatters
A deep part gives one side more weight, which helps if your features feel very even and you want a little movement. It also works well when the ponytail sits at the mid-back of the head, since the front sweep and the back tie balance each other instead of competing.
For the edges, keep the product light. A toothbrush or edge brush gives better control than your fingers, and a pea-size amount of gel is usually enough unless your hair is very coarse. Too much product turns the edges stiff and shiny in a bad way.
- Keep the part clean and straight.
- Brush the swoop back while the hair is slightly damp.
- Set the front with clips for 5 to 10 minutes if your hair slips easily.
- Smooth the base with a small amount of serum, not a heavy coat.
The best side swoops look calm, not frozen. That line is what separates polished from stiff.
3. Curly Mid Swoop Ponytail With Lifted Roots

If your hair already has curl, don’t fight it. Let the crown stay a little full, shape the front into a controlled swoop, and keep the ponytail itself soft so the whole style feels alive instead of overworked.
This version looks especially good when the curl pattern is strong at the ends but looser near the root. A bit of mousse at the front and a diffuser at low heat help the swoop stay in place without flattening the curl texture out of the rest of the ponytail. The root lift matters here. Without it, the style can look too tight around the hairline, and nobody wants that.
How to Keep the Root From Puffing
- Apply leave-in conditioner to damp hair first.
- Use a curl cream only where the ponytail length needs definition.
- Brush the front section in the direction you want the swoop to sit.
- Pin the front in place while you shape the rest.
- Dry on low heat or air-dry if your pattern holds well.
A curly mid swoop is one of those styles that looks better the more the texture shows. That is the point.
4. Braided Swoop Feeding Into a Ponytail
Unlike a simple twist, a braid gives the front piece real structure. The sweep stays visible, the section holds longer, and the ponytail base looks more built-in than slapped on.
That makes this style a smart move for thick hair or for anyone who wants the swoop to last through a long day without constant touching. A loose French braid from the temple into the ponytail base works well, but a three-strand braid can be enough if the hair is already cooperative. The key is not to braid so tightly that the front goes flat. You want shape, not a helmet.
What Makes It Hold
- Start the braid at the temple, not too far back.
- Keep the tension even from root to end.
- Pancake the braid slightly if you want it wider.
- Secure the braid into the ponytail with a second elastic before wrapping hair over the base.
This one is especially good when the front layers are shorter than the rest. The braid catches them. No fighting, no constant pins.
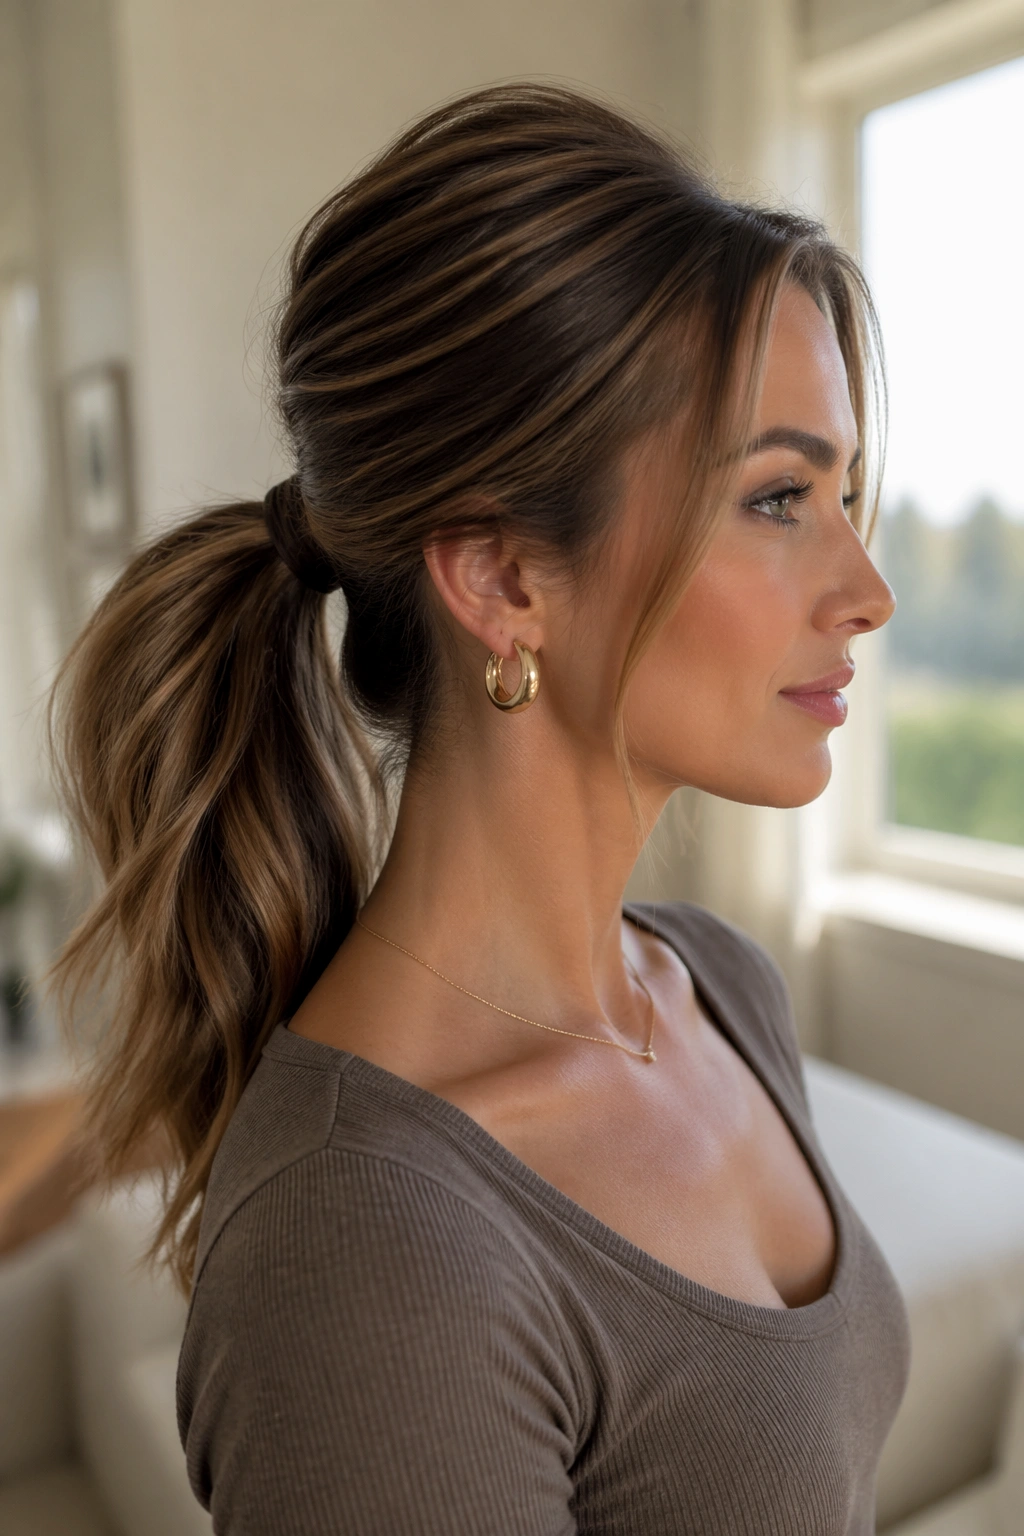
5. Wrapped-Base Mid Swoop Ponytail
A wrapped base fixes the one thing that makes ponytails look unfinished: the elastic. Hide that band, and the whole style reads cleaner, even if the rest is simple.
This version works on straight, wavy, and stretched curly hair because the finish lives in the base, not the texture. Pull the hair into a mid ponytail, take a thin section from underneath, and wrap it around the elastic twice or three times before pinning it flat beneath the ponytail. If the hair is fine, use two elastics stacked close together so the ponytail does not sag before lunch. If extensions are in play, wrap the hair over the track line so the join disappears.
That little cover changes everything.
The style feels more dressed up with almost no extra work, which is why I keep coming back to it when the rest of the hair is behaving and the base needs a cleaner line.
6. Soft Textured Mid Swoop for Everyday Wear
Not every mid swoop needs to be slick enough for a mirror selfie. A softer texture gives the style a friendlier shape, and on most people it’s easier to wear because it doesn’t demand perfect edges or a perfect part.
Start with dry shampoo or texturizing spray at the roots, especially if the hair is on day two or day three. That bit of grit helps the front section stay lifted while you sweep it back. Then bend the ends of the ponytail with a large barrel iron or leave them as they are if your natural wave already does the work. The point is movement, not precision.
This version is forgiving. That is why it works so well for school, errands, workdays, and any moment when you want your hair up but not severe.
The best part? It still looks intentional. Just softer.
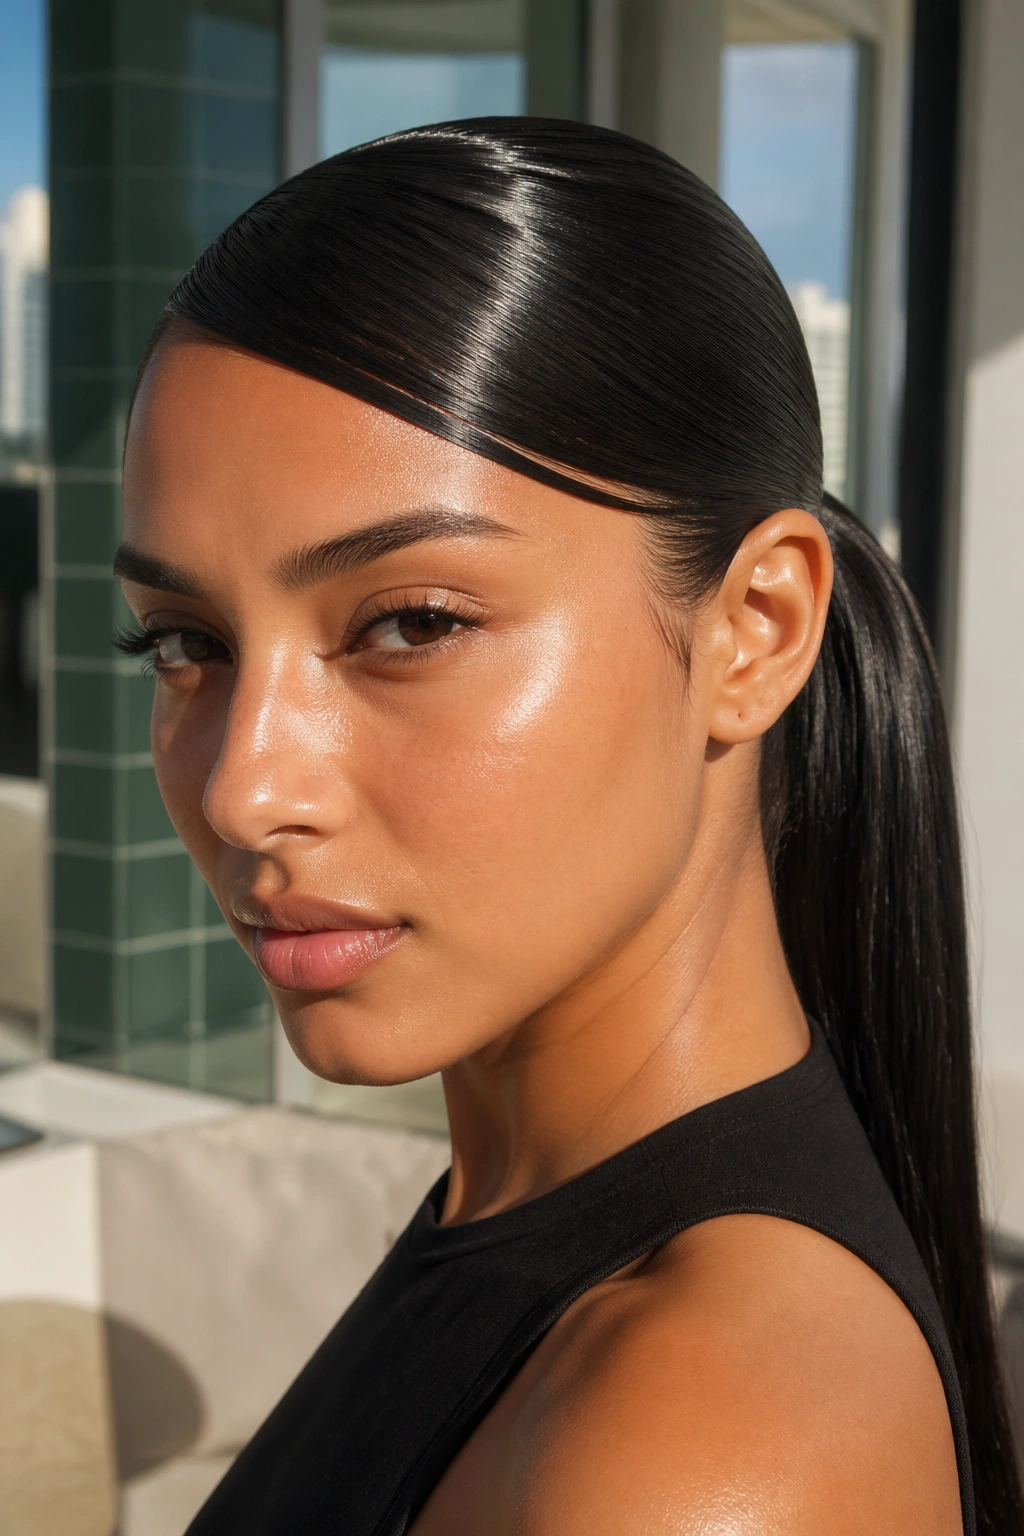
7. High-Shine Flat-Pressed Finish
If your hair is fine, this is the version that gives the most visual density. If your hair is thick, it gives the most control. Either way, the high-shine finish makes the swoop look deliberate from the first glance.
Use a heat protectant before any flat ironing, then press the front sections in small 1-inch passes. Don’t overdo the heat. Two smooth passes are better than five frantic ones. Once the front lies flat and the ponytail is gathered, smooth a tiny amount of serum over the top layer only. Too much product on the lengths can make the tail hang limp, and that’s the opposite of what you want.
Keep the ends blunt if you can. They hold the line of the style.
A flat-pressed mid swoop looks best when the part is sharp, the crown is smooth, and the ponytail has enough body to keep the style from feeling too stark.
8. Natural-Hair Mid Swoop With Brushed Front Lift
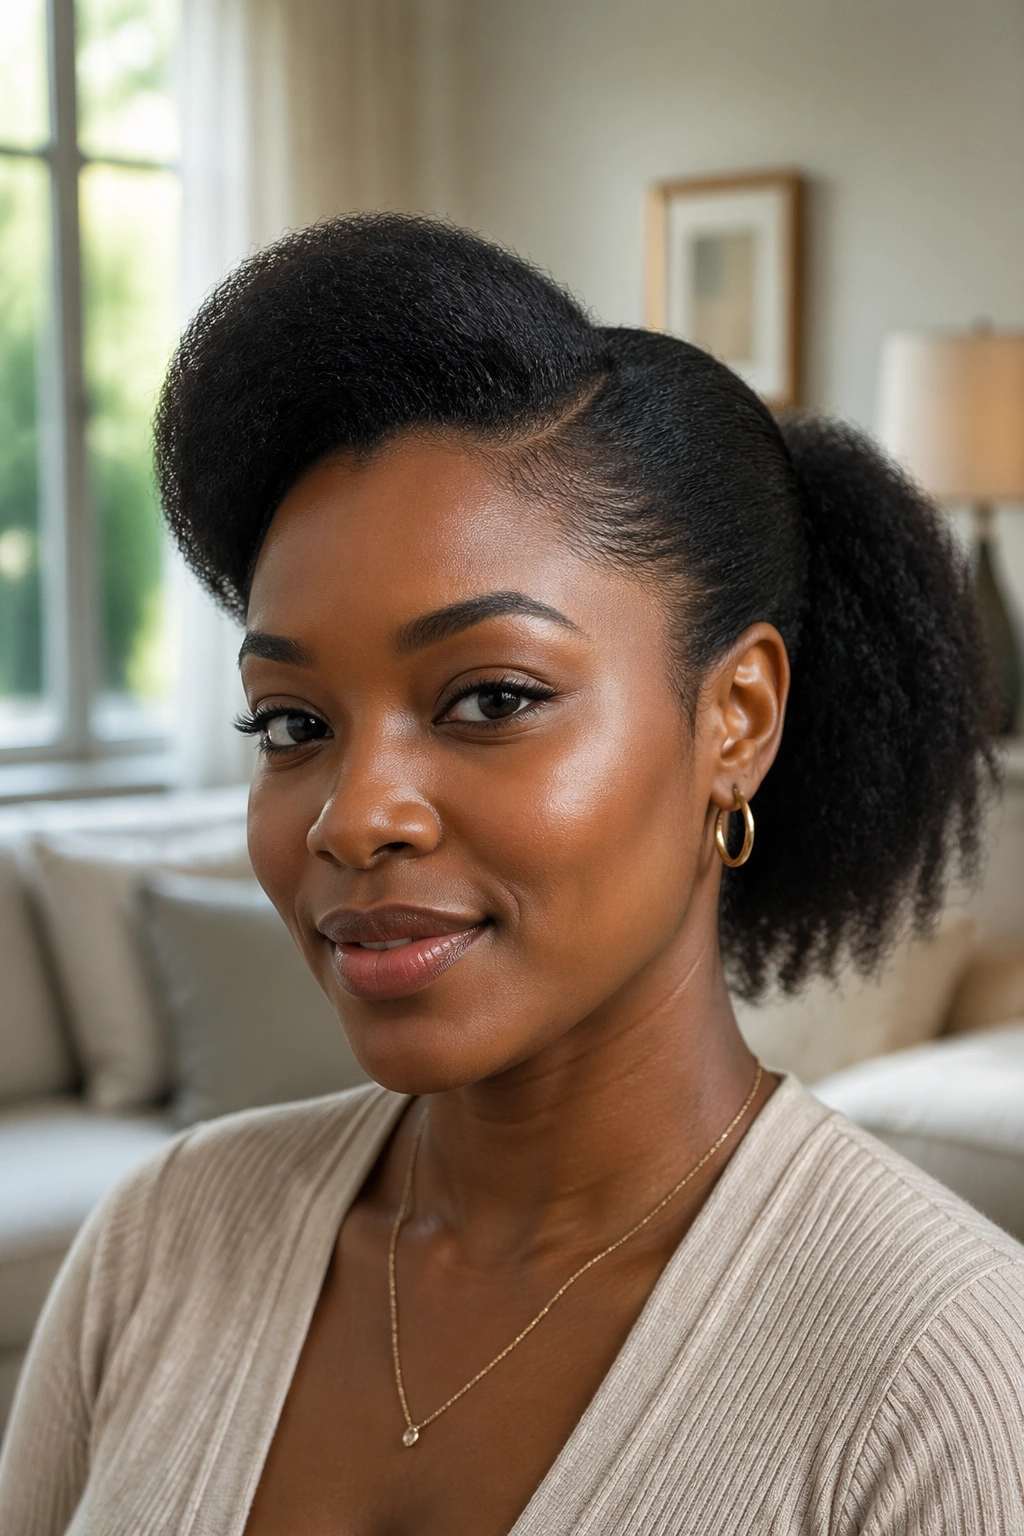
The hair should feel stretched, not scraped. That’s the line I keep in my head with a natural-hair mid swoop, because the style works best when the front is controlled but the overall shape still has life.
Start with a moisturizing cream on damp hair, then add gel only where the front needs hold. A soft brush or denman-style brush can guide the swoop without making the hairline look overhandled. The ponytail itself can stay puffier, which is part of the charm. A little fullness at the back balances the sleeker front and keeps the look from feeling too severe.
What to Do Before the Ponytail Goes Up
- Stretch the roots with banding, braiding, or a low-heat blow-dry if shrinkage is strong.
- Smooth the front in one direction before you secure the ponytail.
- Use a satin scarf for 10 to 15 minutes if the front slips.
- Add edge control only where needed, not all over the hairline.
This version gives shape without erasing texture. That’s the whole point.
9. Crimped-Length Mid Swoop Ponytail
Crimping the tail changes the personality of the whole style. The front stays smooth and sculpted, then the ponytail suddenly has all this texture and movement hanging from the back.
That contrast keeps the mid swoop from looking flat. It also helps if your hair is medium density and needs a little visual bulk. You can crimp the full ponytail with a narrow crimper, or braid the lengths overnight and undo them once the hair is dry. The first method gives a tighter, more graphic look. The second feels looser and a bit softer.
- Keep the front sleek so the crimped tail stands out.
- Start the crimping a few inches below the elastic.
- Mist lightly with flexible spray after shaping.
- Don’t brush it out unless you want a frizzier finish.
This one has a little attitude. Not a lot. Just enough to keep people looking twice.
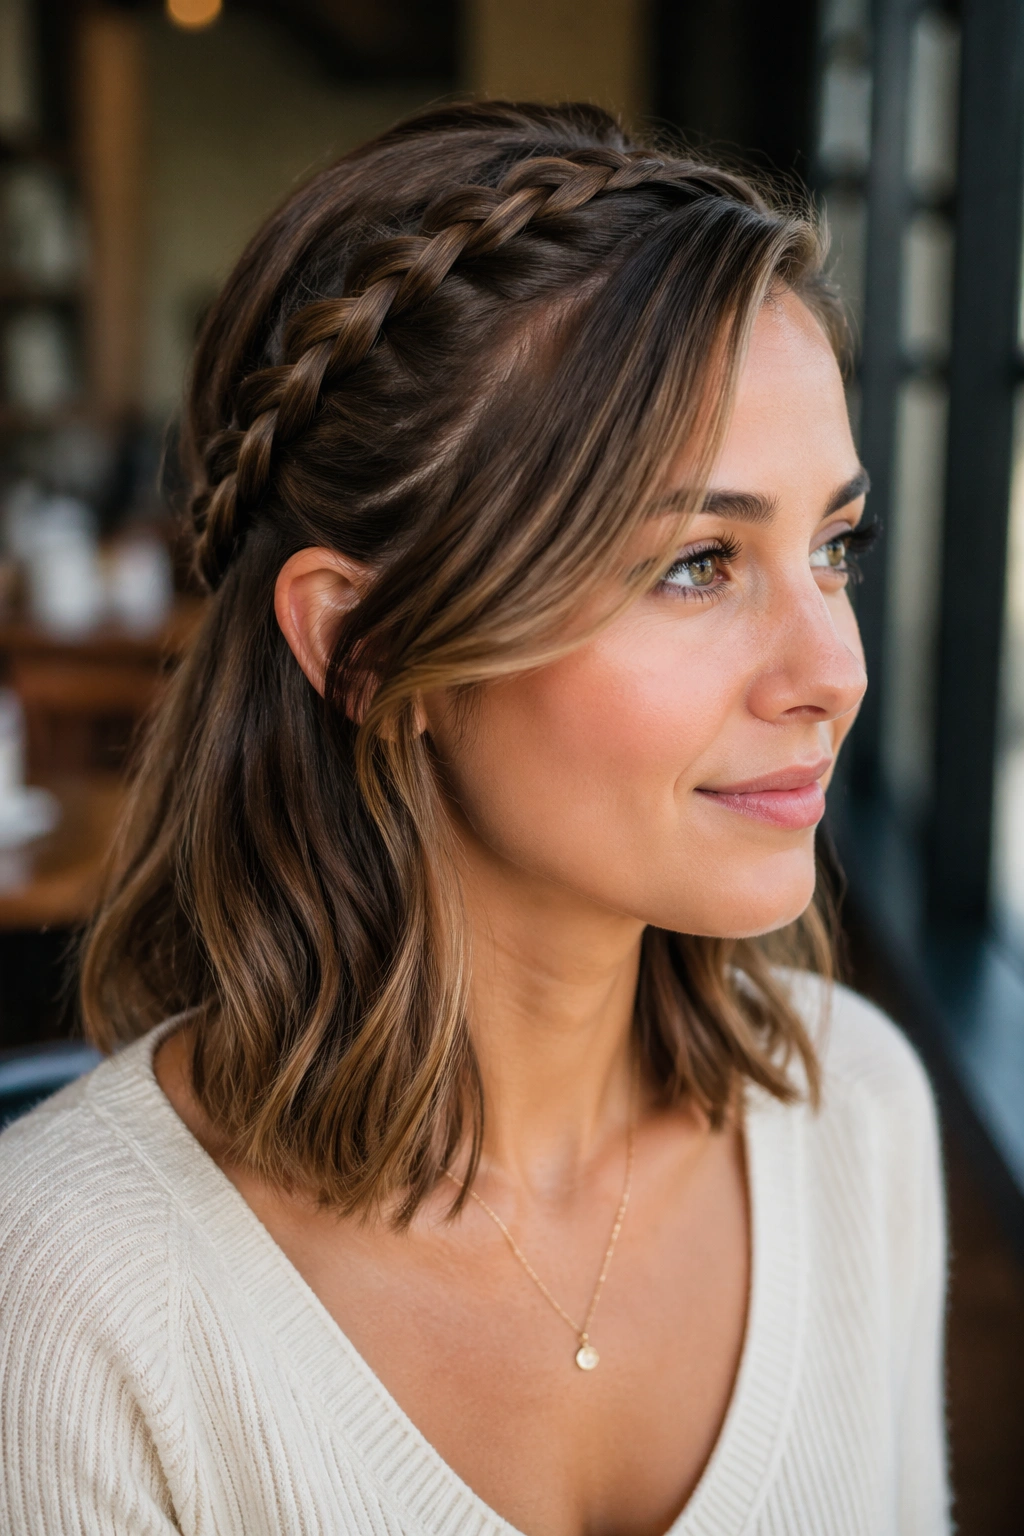
10. Side-Bang Swoop Ponytail
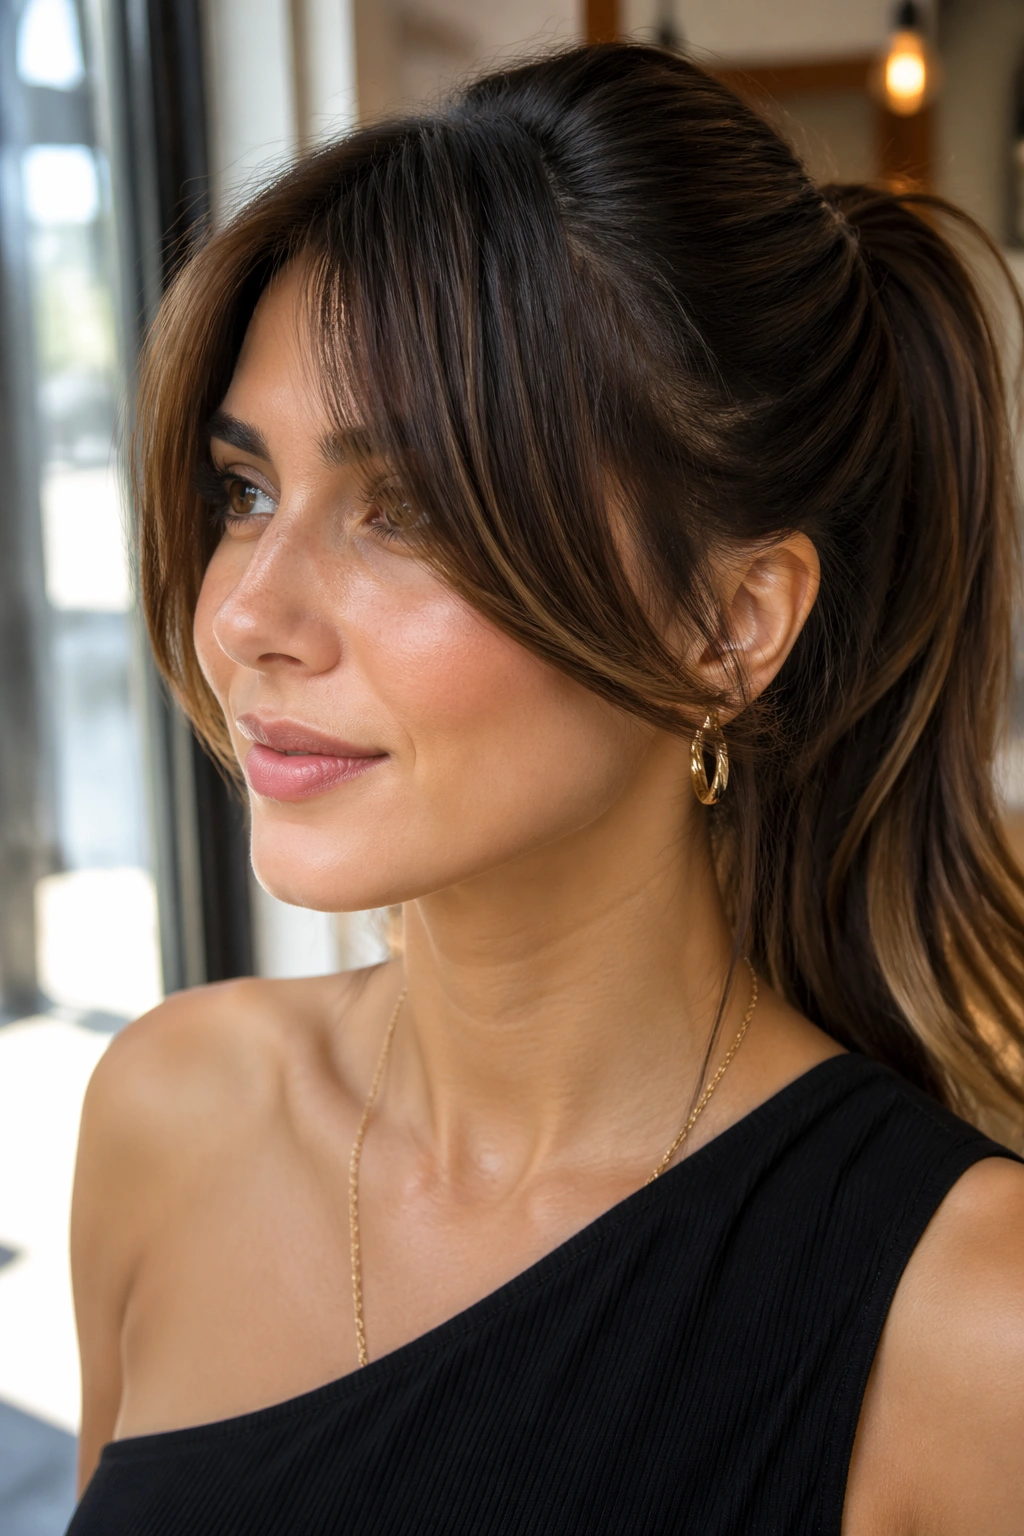
A side bang is not old-fashioned when the cut hits the cheekbone instead of floating around the eyebrows. Placed right, it gives a mid swoop ponytail a face-framing line that feels fresh and balanced instead of nostalgic in a bad way.
Where It Helps Most
This version is useful if your forehead feels wide, if your face shape needs diagonal movement, or if you simply don’t like the look of hair pulled straight back from the temples. The bang doesn’t have to be heavy. In fact, the lighter it is, the better it blends into the ponytail.
I like this on medium layers because the front can drop into the swoop without needing a lot of pins. If your hair is finer, tuck the bang under the side sweep with a small bobby pin underneath the top layer so the hold stays hidden.
There’s a reason this style keeps showing up. It solves the awkward in-between feeling that some ponytails have at the front. That’s a real problem, and this fixes it neatly.
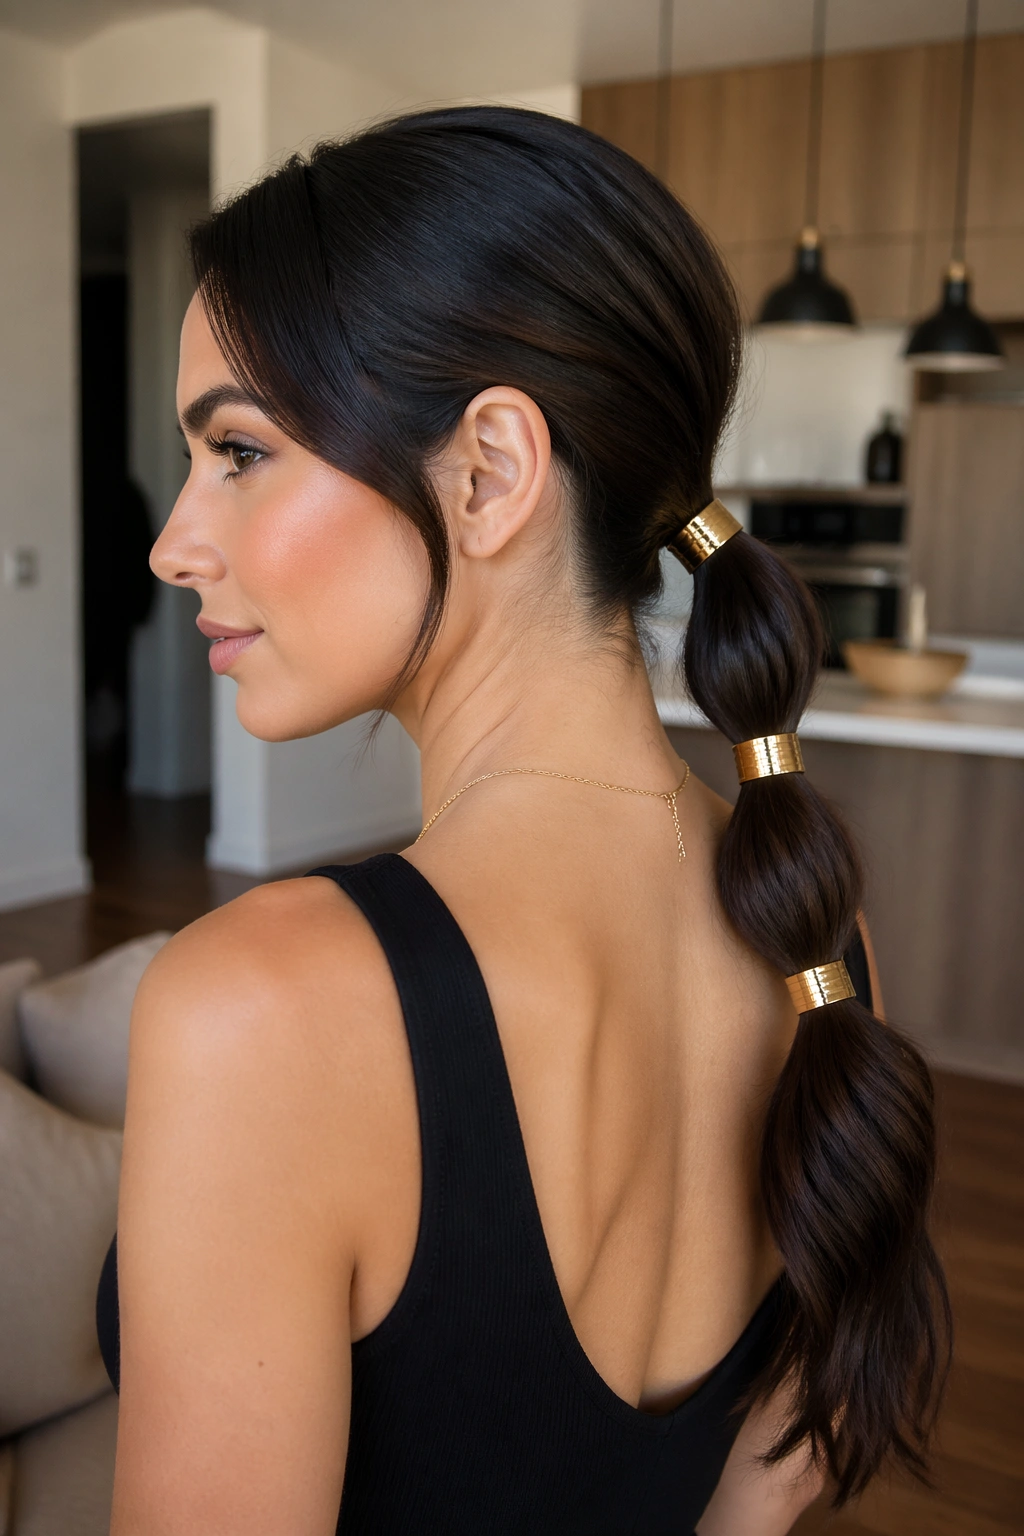
11. Bubble Mid Swoop Ponytail
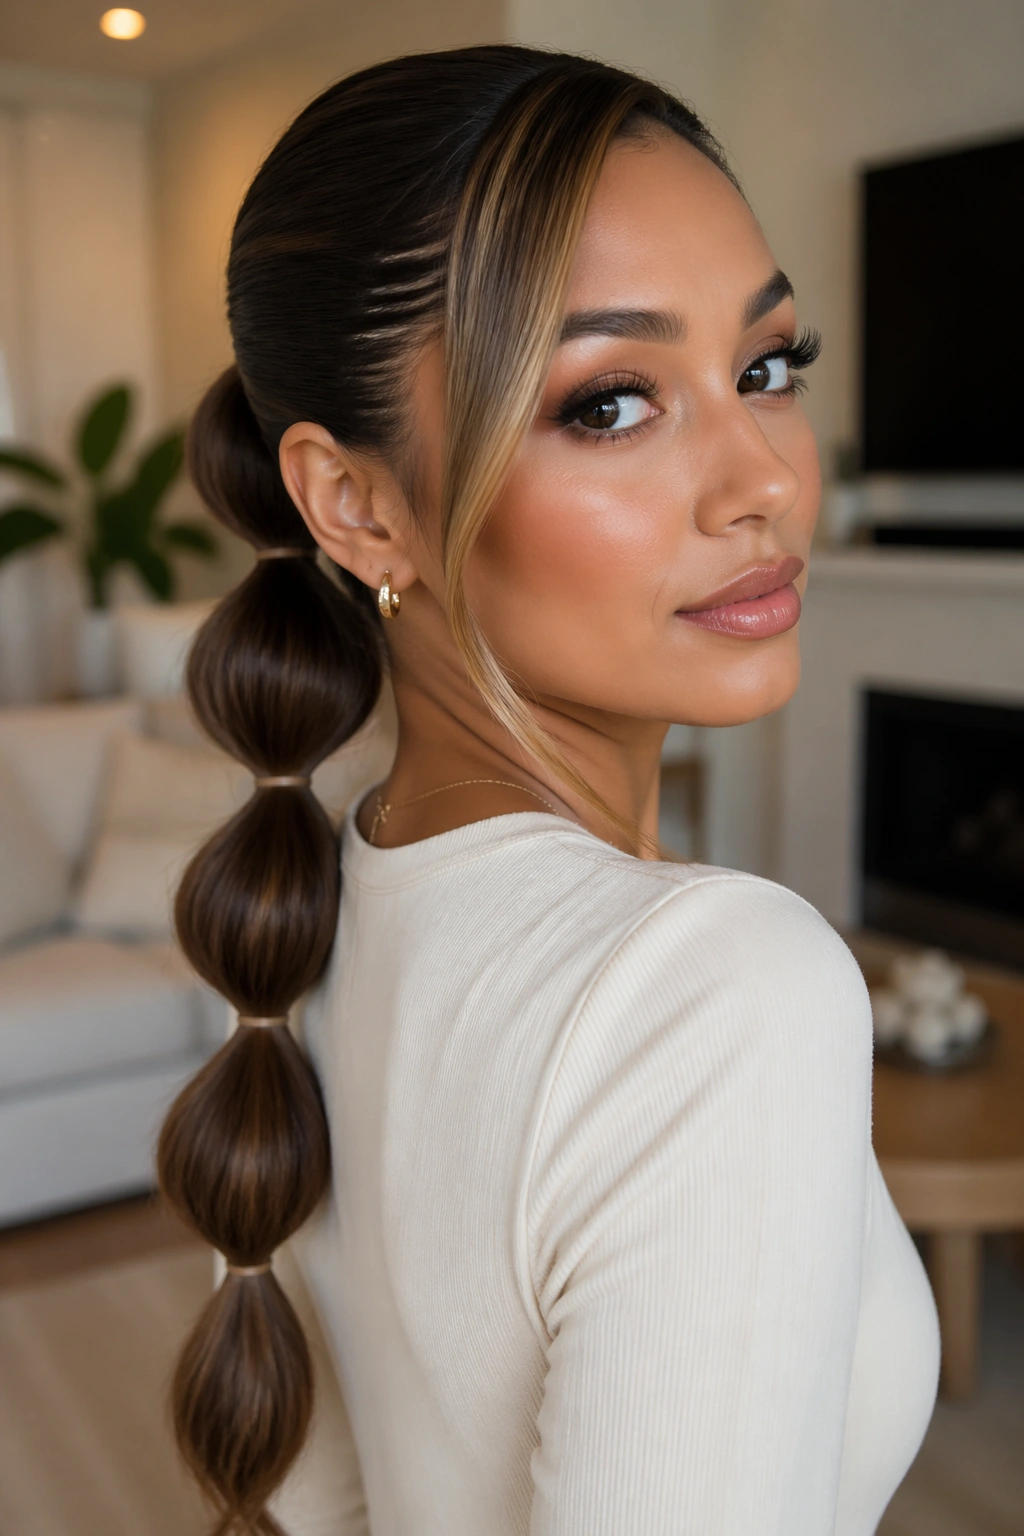
Picture a mid swoop tied at the crown, then broken into round little sections down the back. That is the bubble ponytail version, and it gives the style more structure without making it fussy.
Use clear elastics or small covered bands every 2 to 3 inches, then gently pull each section outward to make the bubbles round. The front swoop should stay smooth and close to the head so the shape reads cleanly from the side. If the top is too airy, the bubbles can look disconnected. If the top is too tight, the whole thing loses charm.
- Best on medium to long hair.
- Works well with straightened or lightly waved lengths.
- Looks sharper when the bubbles are evenly spaced.
- Needs a little hairspray on the outer layer so the sections stay defined.
This is one of the easiest ways to make a ponytail feel styled. It has shape from top to bottom, which is the whole job here.
12. Twisted Front Mid Swoop Ponytail
What if you want the softness of a swoop without the time a braid takes? A front twist is the answer. It gives the front section movement and keeps the hair from sliding off your face all day.
Take a side section from each temple, twist them toward the back, and secure them into the ponytail base. The twist can be loose and chunky, or neat and tight if you want a more polished finish. I prefer loose when the hair has natural wave and tighter when the hair is straight. Either way, the twist sits flatter than a braid and feels softer around the face.
When It Beats a Braid
A twist wins when the hair is layered, when the front pieces are too short for a clean braid, or when you want a style that looks finished in about five minutes. It also leaves less bulk at the temples, which matters if you wear glasses or earrings that need room.
Simple. Fast. Useful.
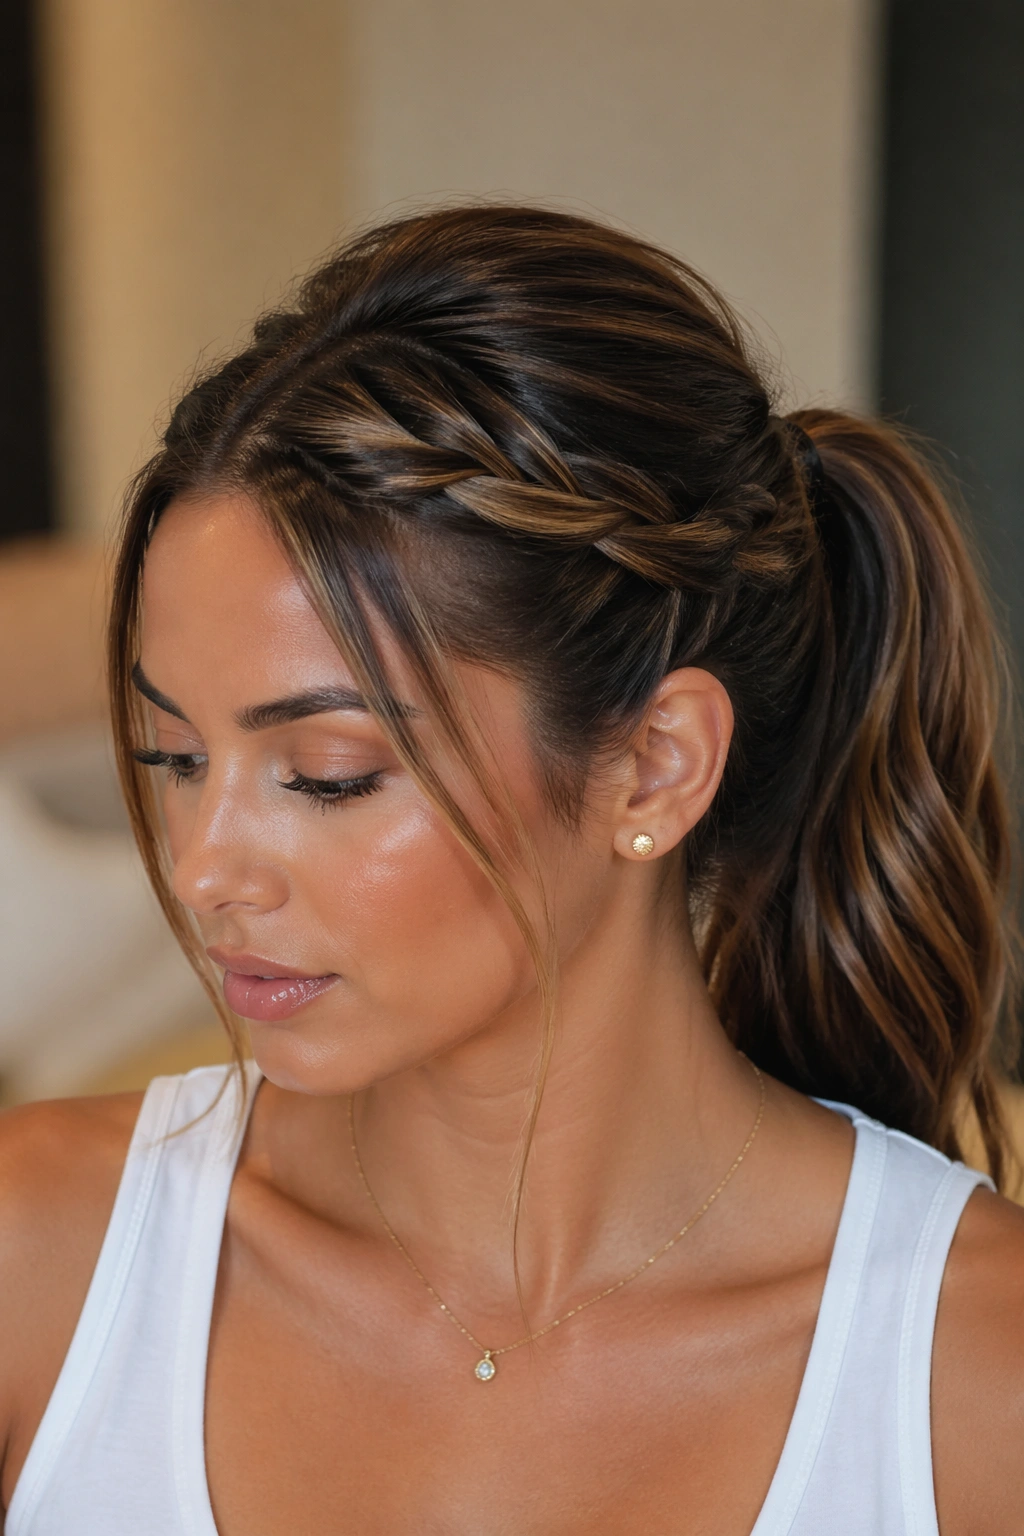
13. Half-Braided Crown With a Swooped Front
Unlike a full head braid, this keeps the face open. That’s the appeal. You get the grip of braiding near the crown, but the front swoop still has room to soften the hairline and frame the face.
This version is smart for medium-length hair because the braid doesn’t need to travel far before it meets the ponytail. A small braid on each side, or one braid starting at the temple and stopping near the crown, gives the style enough detail without crowding the head. If the hair is layered, the braid also helps trap the shorter pieces that would otherwise spring loose.
It feels a little more built than a plain swoop ponytail, but not so decorated that it stops being wearable. That middle lane is where this one lives.
I’d pick it for brunch, a casual wedding guest look, or any day when a standard ponytail feels too plain and a full updo feels like too much work.
14. Low-Mid Ponytail With Crown Lift
The crown should feel lifted, not puffy. That is the whole point of this version. You want height at the top, then a smooth drop into a ponytail that sits between the nape and the back of the head.
Backcomb only the root area if your hair is slippery, and keep the teasing under the top layer so the finish stays clean. A small clip at the crown can help the lift hold while you gather the ponytail. Once the hair is secure, smooth the surface with a soft brush and a light mist of spray. Too much teasing shows. Too little and the style goes flat fast.
- Good for round faces that benefit from a little vertical lift.
- Good for long faces when the crown lift is subtle, not tall.
- Good for thick hair that needs a controlled outline.
- Less good if your hair is very short at the layers, since those pieces can poke out.
This is one of those styles that looks calm from the front and fuller from the side. That’s the charm.
15. Ribbon-Tied Mid Swoop Ponytail
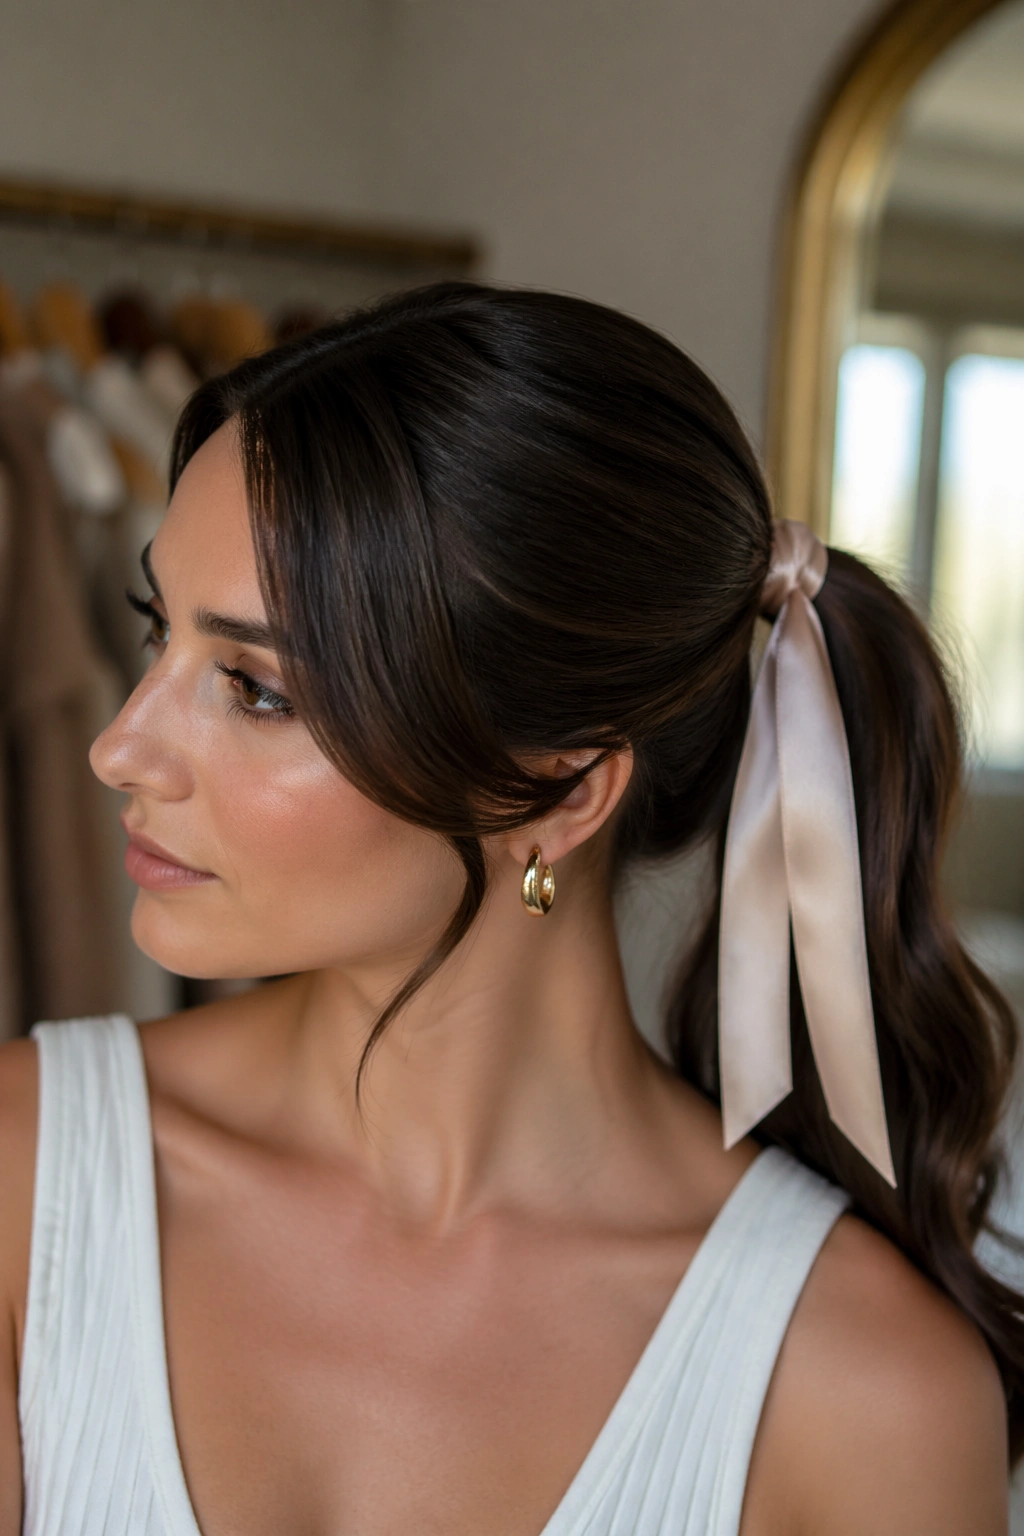
A satin ribbon can soften a mid swoop faster than another layer of hairspray. It adds finish, color, and a little movement at the base, which makes the ponytail feel cared for without looking overloaded.
Pick a ribbon about 18 to 24 inches long if you want tails that trail neatly down the ponytail. Matte satin feels more expensive than shiny craft ribbon, and it sits better against smooth hair. Tie it under the elastic so the knot stays hidden, then let the ends fall alongside the tail or wrap them around a section near the base if you want a tighter look.
This one is good when the outfit needs a soft detail. A black ribbon sharpens the style. A cream or blush ribbon makes it gentler. A narrow velvet strip feels richer in person than it does in photos, and that surprises people.
My rule: keep the ribbon narrow if the hair is already big, and wider if the hair is sleek. Otherwise the accessory starts bossing the ponytail around.
16. Cuffed Mid Swoop Ponytail
I like this one when the ponytail itself is thick enough to carry hardware. A few hair cuffs or tube beads can turn the lengths into a strong visual line, and the mid swoop at the front keeps the style from feeling too busy.
Where the Metal Goes
Place the cuffs along the tail, not at the elastic, unless the base is already simple. Two to four cuffs is usually enough. If you stack more than that, the eye starts following the accessories instead of the shape of the hair. That can be fun, but it changes the balance.
This version works especially well with braids feeding into the ponytail or with straightened lengths that need a little sparkle. The front should stay smooth so the cuffs have room to shine. Otherwise, the style can start to look crowded.
A cuffed ponytail is one of those looks that benefits from restraint. Pick the right number, then stop.
17. Blowout Mid Swoop With Full Ends
If you want the tail to move when you turn your head, curl it away from the face with a round brush and a blow-dryer. That’s the cleanest way to get a blowout finish without making the ponytail itself feel puffy.
A 1.5-inch round brush works well on medium to long hair. Smaller brushes give too much bend. Bigger brushes can be awkward unless the hair is already long and dense. The front swoop should still be controlled, but the ponytail ends can have bounce, a soft flick, or a little inward roll depending on what flatters your face most.
This one is good when you want the ponytail to look expensive in the old-fashioned sense of the word: full, smooth, and cared for. The shape reads from a distance. No one has to study it to get the effect.
A blowout mid swoop can also rescue hair that has lost its shape by the second or third day. It turns tired lengths into something that looks on purpose.
18. Wet-Look Mid Swoop Ponytail
Wet-looking hair is unforgiving, and that’s the appeal. Every line shows, every part shows, and every curve at the front has to be placed with some care. The result is sharp and clean.
Start with damp hair, comb in a generous but even layer of styling gel or gloss cream, and smooth the front swoop in the direction you want before the hair dries. Once the ponytail is in place, add a little shine serum over the surface only. Don’t saturate the ends. Too much product there makes the tail look greasy instead of sleek.
Less is more here.
This style works best with simple clothes, bold earrings, or makeup that has a bit of edge. It also photographs well under strong light because the shine is part of the design, not an accident. If your hair is porous, use a bit more product at the crown and less at the ends so the finish stays even.
19. Flicked-End Mid Swoop Ponytail
One small bend at the ends can make the whole ponytail feel lighter. That is why the flicked-end version works so well with a mid swoop. The front stays smooth and grounded, then the ends kick out and loosen the shape.
Use a flat iron or a large barrel to turn the last inch or two of the ponytail slightly outward. You do not need a full curl. A small flick is enough. If the hair is layered, the flick can hide uneven lengths and make the tail look more finished. The front swoop should keep a steady curve into the ponytail base so the line doesn’t break halfway down the head.
How to Keep the Ends Moving
- Work on dry hair only.
- Heat each section for a few seconds, then release.
- Let the ends cool in your hand before touching them again.
- Mist lightly with flexible spray so the flick stays soft.
It’s a small detail. It changes everything.
20. Protective Mid Swoop Ponytail With Braids
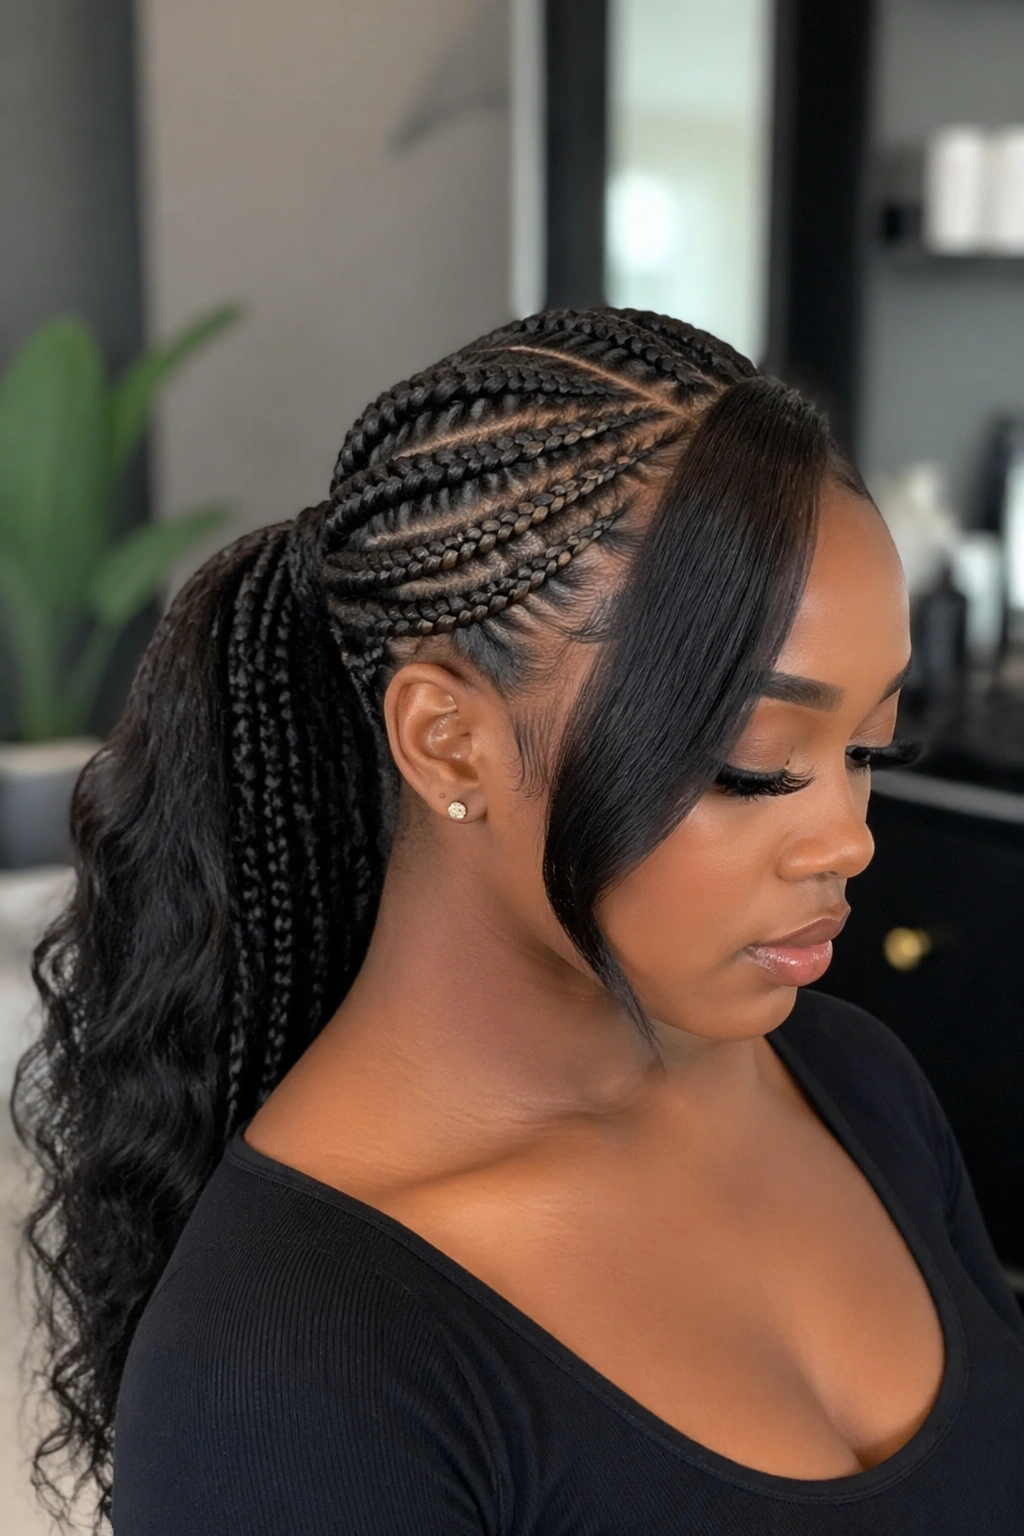
Can a swoop live with braids? Yes, and it can look polished if the parting stays clean and the tension stays reasonable. A protective mid swoop ponytail gives you that front sweep while keeping the rest of the hair tucked into a style that lasts longer than a loose gather.
Knotless braids, feed-in braids, or even small cornrows can feed into the ponytail base. The swoop usually comes from the front or side sections, which are smoothed over the braids before they meet at the back. What matters most is the tension. Too tight at the hairline, and the style stops being protective. That is a bad trade.
What to Ask For
- A mid placement that sits above the nape, not at the very bottom.
- A front section left out for the swoop.
- Clean parting through the crown so the style lays flat.
- Enough room at the edges so the scalp does not feel pulled.
This one is practical, polished, and kinder to your hair than a lot of elaborate updos.
21. Sculpted Mid Swoop Ponytail for Dressy Events

When the occasion asks for polish, a sculpted mid swoop with a carved part is hard to beat. The shape looks intentional from every angle, and the mid placement keeps it elegant without pushing the ponytail too high or too low.
The front section should curve smoothly into the crown, then settle into a ponytail that has enough body to hold the shape. A wrapped base helps. So does a light mist of finishing spray on the top layer after everything is set. If you want more drama, add a little crown lift before you secure the ponytail, then smooth the surface back so the height looks built, not teased.
- Clean part.
- Flat front.
- Controlled curve.
- Full tail.
That’s the formula, and it works because every piece has a job.
This version is the one I reach for when I want the hair to look dressed up without becoming stiff. It has line, shine, and movement all at once.
Final Thoughts
Mid swoop ponytails work because they fix the shape before the ponytail even gets a chance to speak. That front curve changes the face, softens the hairline, and gives the whole style a better balance than a plain pull-back ever could.
The best version depends on your hair, but the main idea stays steady. Sleek if you want sharpness. Textured if you want softness. Braided, wrapped, or ribbon-tied if you want a little more character.
Keep the swoop a touch softer than you think you need. That small bit of looseness is usually what makes the style feel wearable instead of overworked.