



The shoulder line is where wavy hair starts arguing with your haircut. A blunt lob can puff out at the sides, a shag can go thin at the ends, and random short layers can turn day-two texture into a fuzzy triangle. The best shoulder length wavy butterfly cuts fix that problem by lifting the shape around your face while keeping enough weight through the bottom so your waves still look full.
That balance is harder than salon photos make it seem. On straight hair, a butterfly cut can lean hard on airy layers and still look clean. On wavy hair, every snip changes spring, width, and shrinkage. Cut the front too short and the cheeks get swallowed. Leave the interior too heavy and the whole thing sits like a helmet by lunchtime.
I’ve always thought the shoulder-length version is the one that separates a good stylist from a casual layer enthusiast. When waves hit the shoulder, the ends want to flick, buckle, or puff depending on density, porosity, and where the shortest layers start. A cheekbone layer on 2A hair can add swing. The same layer on dense 2C hair can kick out twice as wide if there’s too much bulk left behind it.
Get the map right, though, and the cut starts doing half the work for you.
The shoulder-grazing shape that keeps waves from turning into a triangle
A butterfly cut isn’t one haircut so much as a layering strategy. You’ve got shorter face-framing pieces up top and longer layers underneath, which gives movement without tossing away all your length. On shoulder-length wavy hair, that matters because the outline can get bottom-heavy fast.
Here’s the useful part: the shoulder line already wants to create motion. Hair brushes the collar, bends outward, then settles. If the perimeter is cut with intention, that small bend reads as bounce. If the perimeter is too blunt and the interior is too thick, it reads as bulk.
Waves also expose sloppy texturizing faster than straight hair does. Over-thin the ends and they start looking stringy after one wash. Remove weight in the wrong spot near the crown and the top turns fuzzy while the bottom hangs there doing nothing. Good shoulder-length butterfly cuts keep the density where you need it and release weight where you don’t.
That’s why this style can look soft and airy without feeling flimsy.
The salon consultation notes that save you from random layering
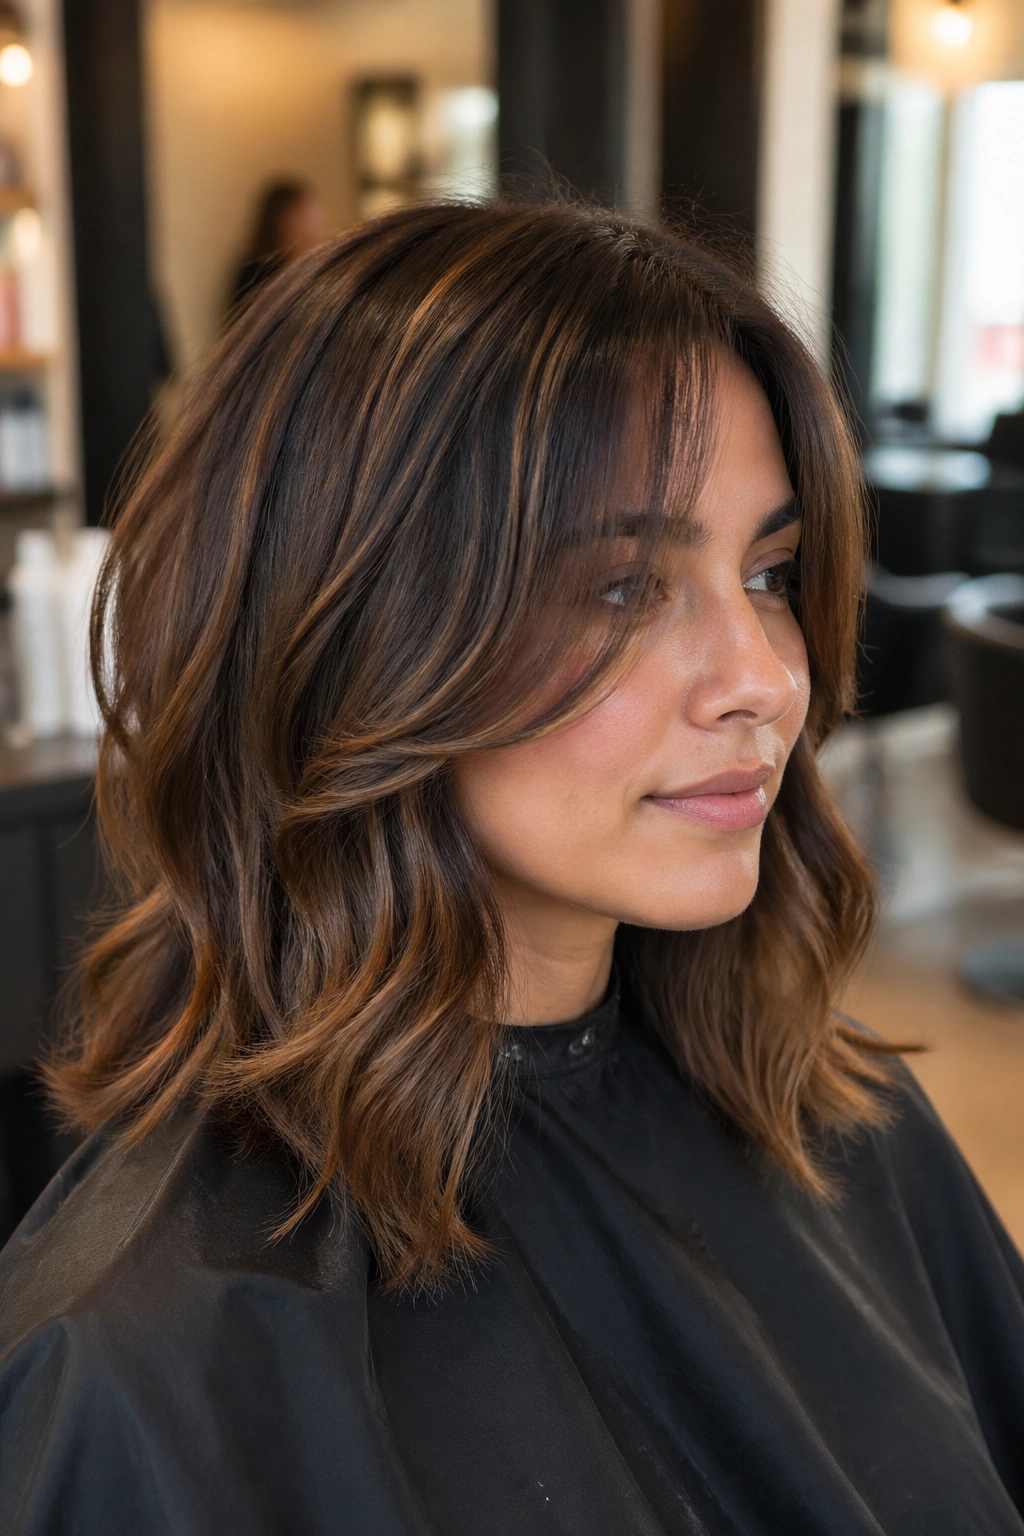
Before your stylist reaches for shears, give them a map. Not a mood board full of ten different haircuts. A map.
Tell them these things clearly:
- How you wear your hair most days — air-dried, diffused, blow-dried smooth, clipped back, half-up, all of it matters.
- Where your waves start — at the cheek, ear, jaw, or lower. This changes where face-framing layers should begin.
- What your hair does at the shoulders — flips out, goes flat, puffs wide, or bends under.
- How short you can tolerate around the face — lip, chin, cheekbone, collarbone.
- Whether you need ponytail length left in the back — shoulder cuts can lose that fast if the back is over-layered.
Ask for dry refinement at the end if your stylist offers it. On wavy hair, that finishing step catches the odd bulky corner or the piece that springs up more than the rest once the hair is fully dry.
One more thing. If you hate styling bangs, say that out loud before you get them.
Diffuser, mousse, and trimming habits that keep the layers looking intentional
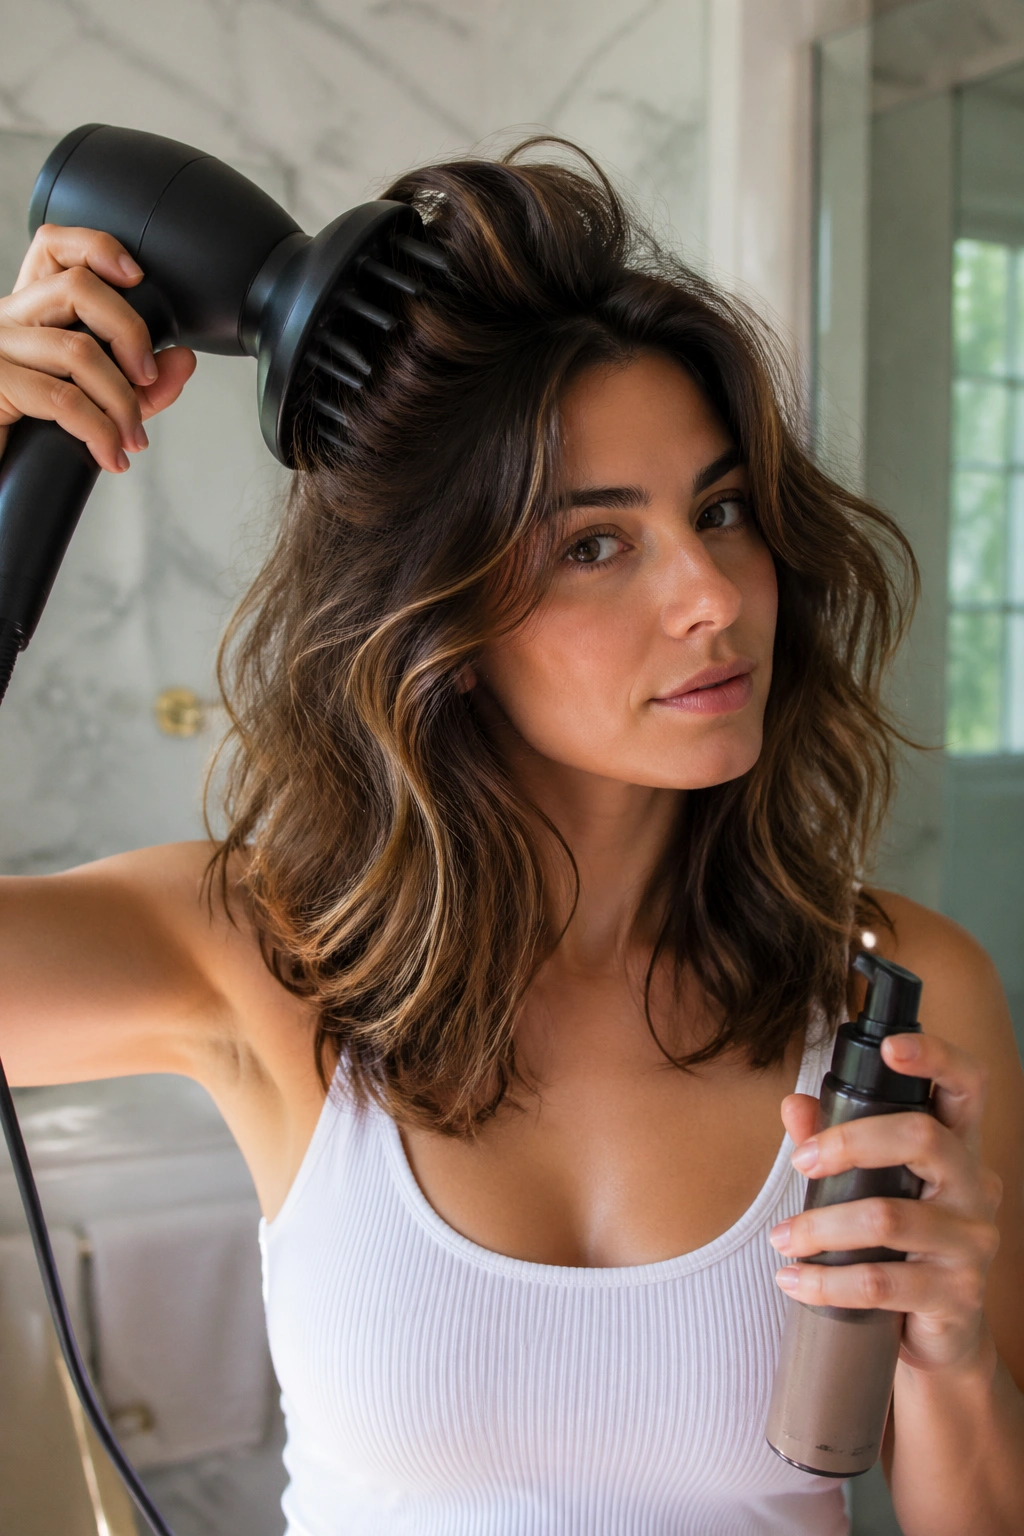
Products can’t rescue a bad haircut, but they can either show off a good one or bury it. Butterfly layers on waves usually look their best with light hold at the root and soft definition through the mid-lengths. That often means mousse near the scalp, curl cream only on the driest ends, and a mist of texture spray once the hair is dry.
The product mix that usually makes sense
Use a golf-ball-sized amount of mousse on damp roots and upper lengths if you want lift. Scrunch a pea-size amount of cream or lotion into the front pieces if they frizz first. Then diffuse until the hair is about 80 to 90 percent dry before you touch it too much.
Air-drying is fine too, but don’t keep raking your fingers through it while it sets. That’s one of the fastest ways to blur the layer pattern.
Heat matters more than people think
Hair-fiber research has been clear for a long time: repeated high heat roughs up the cuticle, especially on the oldest ends. On a butterfly cut, that damage shows up first because the ends are exposed and moving. Keep hot tools near 300°F to 350°F for fine or fragile hair, a bit higher only if the hair is coarse and healthy, and use a heat protectant every time. No exceptions.
Trim timing
If the shape starts feeling thick behind the ears or wispy at the front, you’ve waited too long. Most shoulder-length butterfly cuts look sharpest with a cleanup every 8 to 12 weeks, depending on how fast your hair grows and how much heat you use.
Now for the fun part.
1. The Classic Shoulder Length Wavy Butterfly Cut With Curtain Fringe
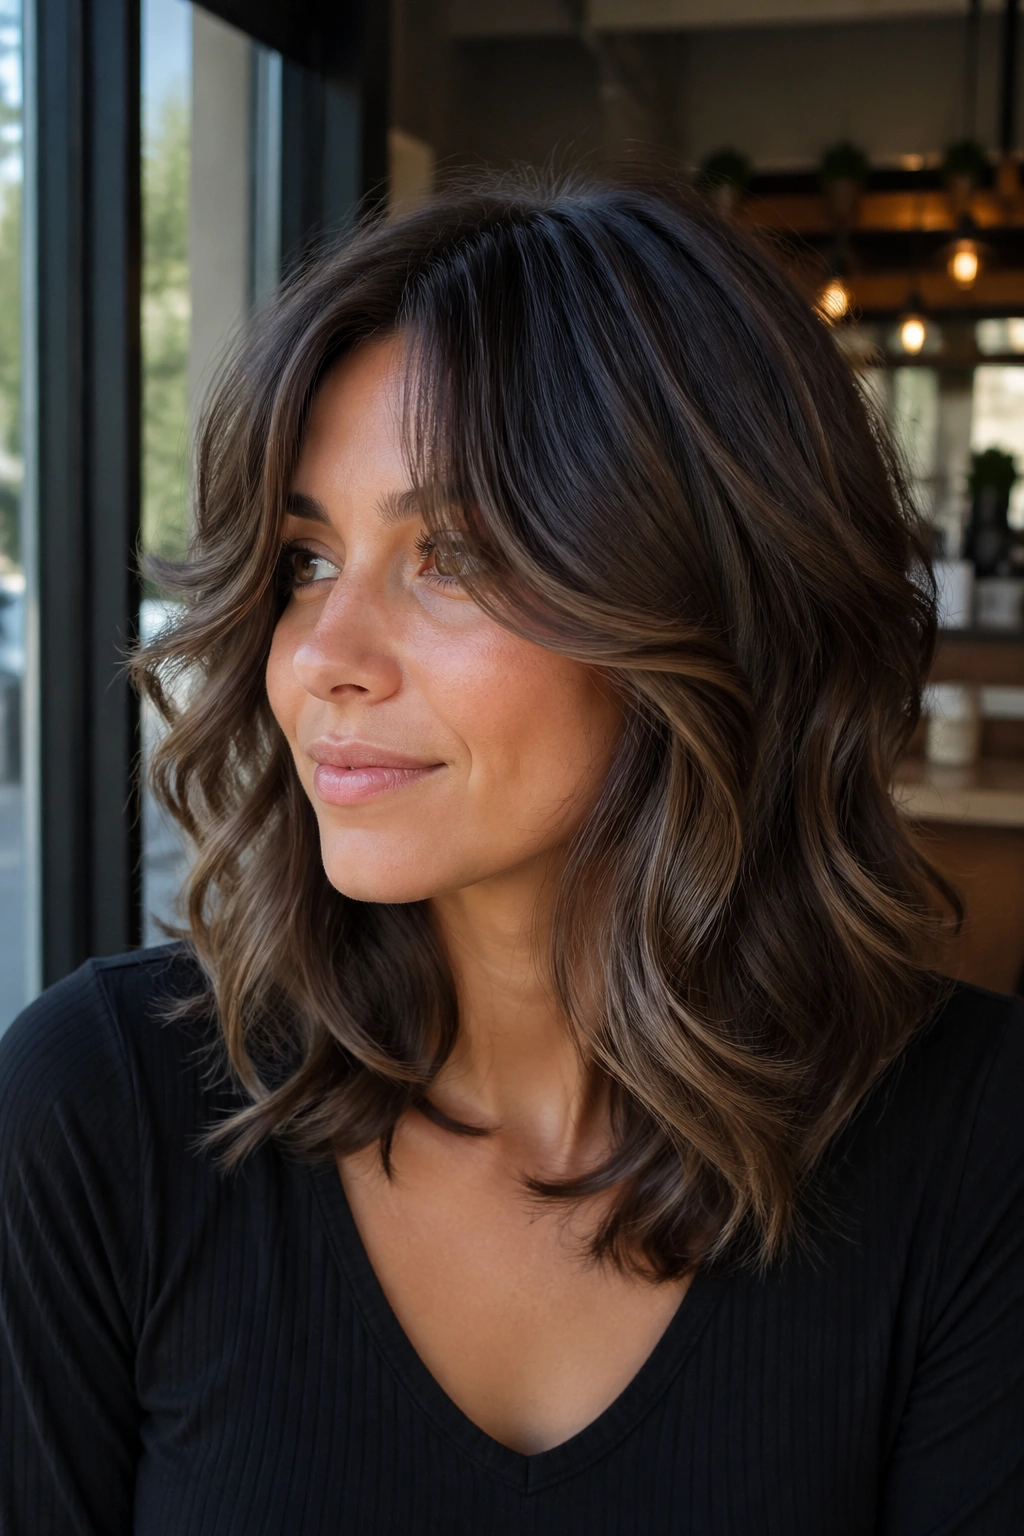
This is the version most people mean when they save a butterfly cut photo. You get soft face-framing layers, a shoulder-skimming baseline, and curtain fringe that opens around the cheekbones. It has movement without veering into shag territory.
Why it works on waves
The curtain fringe breaks up the weight at the front, which keeps wavy hair from looking blocky around the cheeks. The longer lower layer still anchors the shape, so you don’t lose fullness through the ends. If your wave pattern sits in the 2A to 2C range, this is usually the safest place to start.
Quick fit check
- Best for: medium-density waves that need shape around the face
- Ask for: shortest layers near the cheekbone and longer layers that still brush the collar
- Style note: a round brush on the fringe and a diffuser on the rest gives the cleanest split
- Watch for: bangs cut too thick can swallow your forehead and fight your wave pattern
Best move: keep the curtain fringe thin enough that you can still push it fully off your face on lazy mornings.
2. The Center-Parted Butterfly Lob With Cheekbone Layers
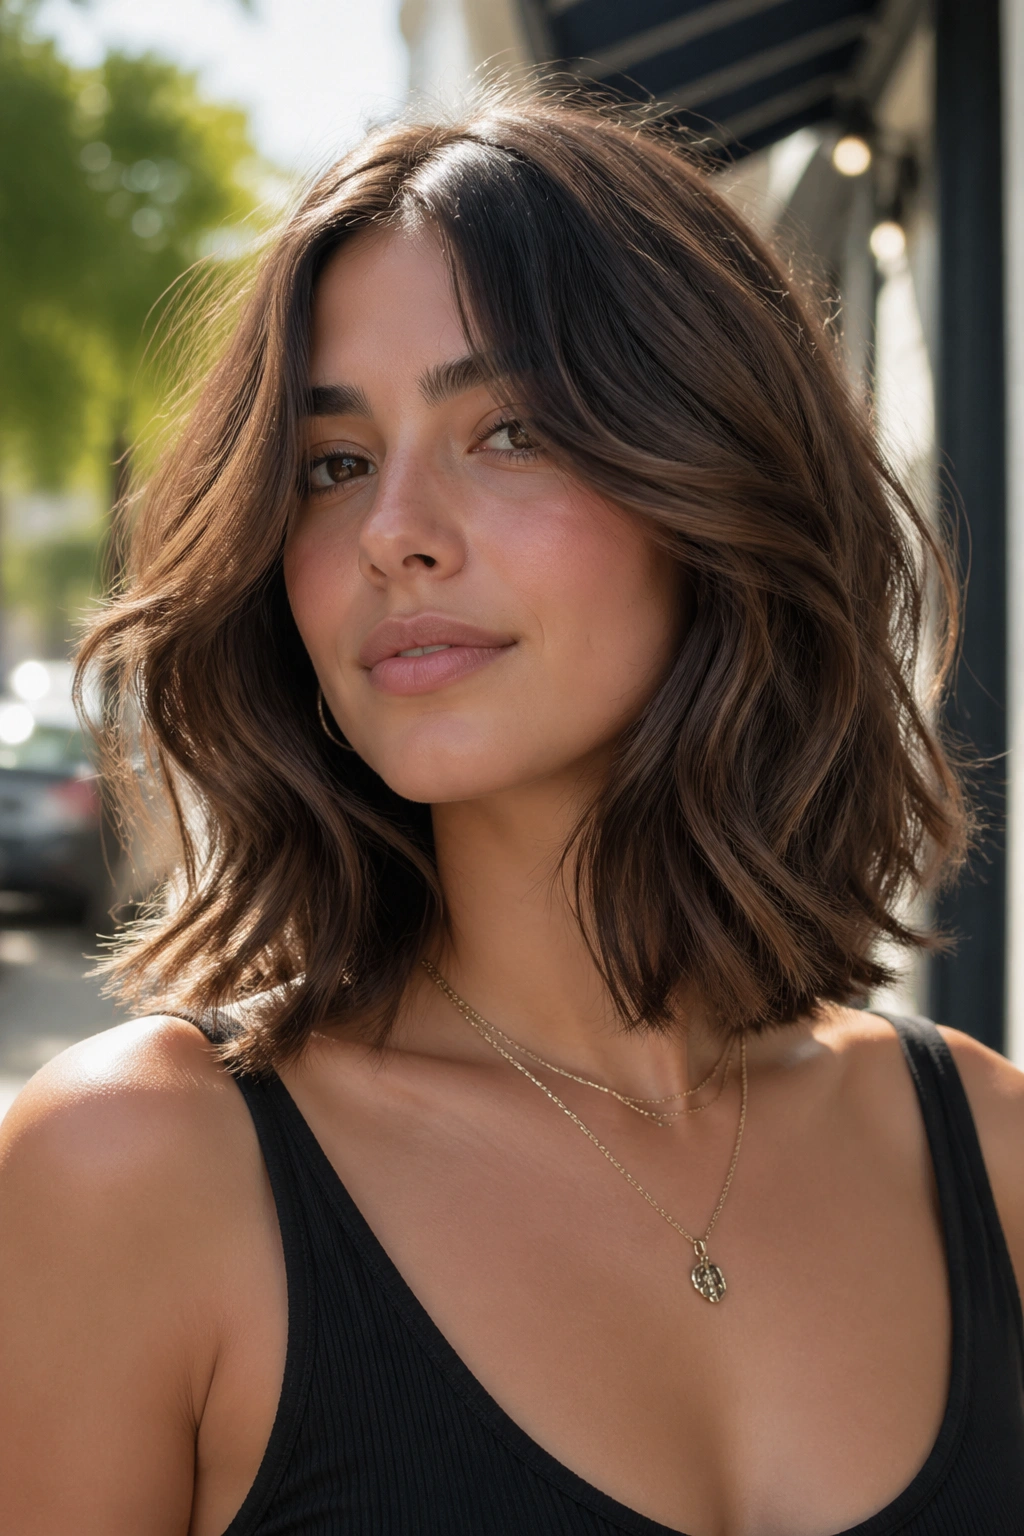
If you want your waves to look polished instead of accidental, start here. A center part paired with cheekbone layers gives the cut symmetry, and that clean middle line keeps the airy texture from drifting into mess.
I like this one on oval, heart, and softly rounded face shapes because it frames both sides evenly. The layers lift the upper half of the haircut, while the lob length keeps the bottom from going wispy. You still get that feathered butterfly feel, only the outline stays calmer.
There’s a catch, and it matters. Middle parts can expose flat roots fast, especially on fine hair. If your crown falls limp by noon, work mousse into the first 2 inches near the scalp and diffuse with your head tilted side to side, not straight down. That keeps the roots from plastering themselves flat against the part.
The cheekbone layer placement is the part worth protecting. Too low, and the cut loses its spark. Too high, and the front puffs wider than you planned.
3. The Side-Part Shoulder-Skimming Butterfly Cut for Extra Lift
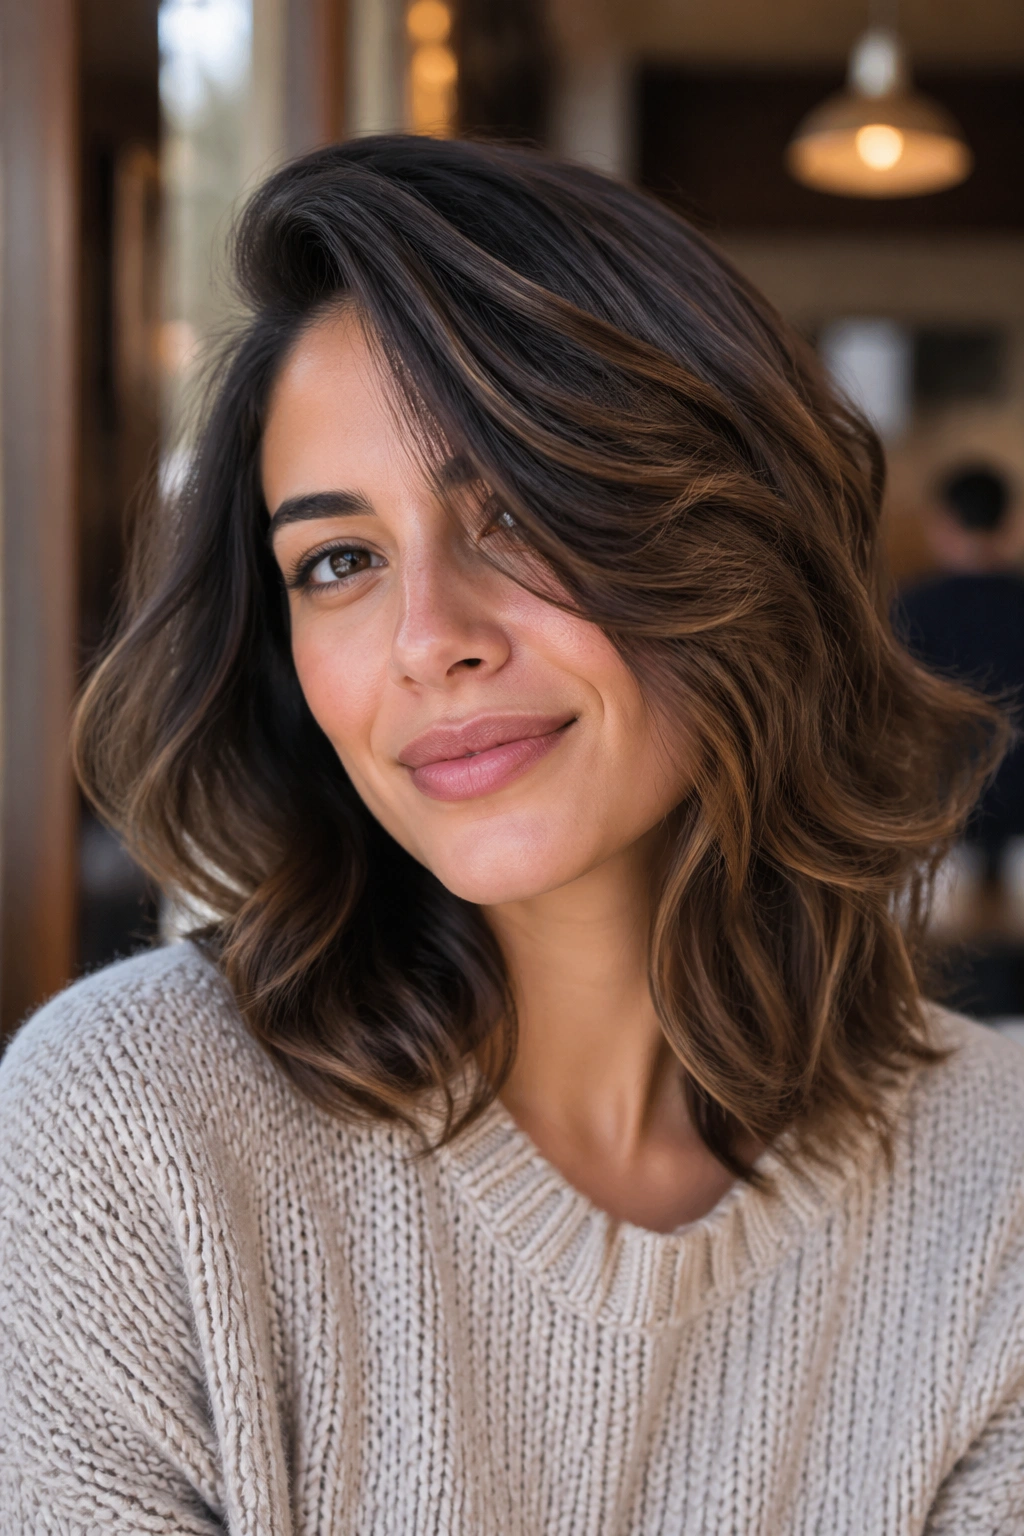
Flat at the roots? A side part changes the whole mood in under ten seconds.
This version keeps the same butterfly layering idea, though the part does extra work by building height on one side. Fine or low-density wavy hair often needs that help because shoulder-length cuts can sit close to the head if the top layers are too cautious.
The side part also softens a broad forehead and gives looser waves more shape. I’d pick it over a center part if your hair tends to separate into one stronger bend pattern on one side of the face.
How to keep the lift from collapsing
Blow-dry or diffuse the roots in the opposite direction of the part first, then flip them back once dry. That tiny trick gives you more lift than piling on extra spray.
Ask your stylist to keep the heavier side slightly longer through the front. It sounds small. It is small. It also stops the deep side sweep from shrinking up and looking lopsided after wash day.
4. The Collarbone Butterfly Cut With Airy Bangs
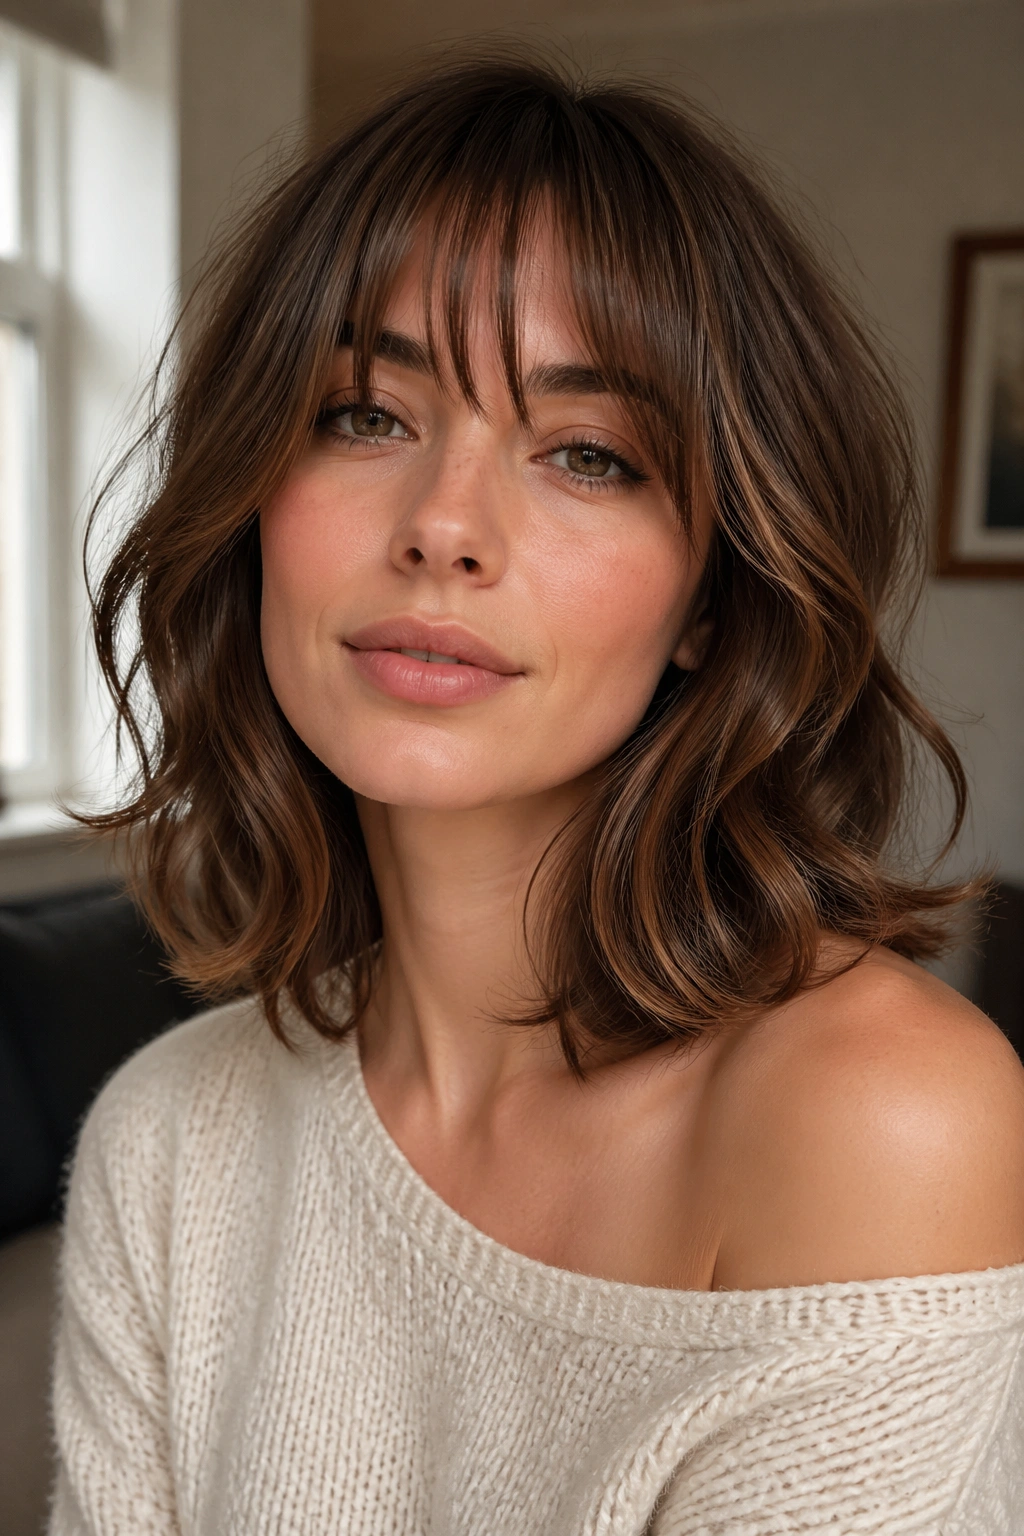
Picture the person who wants bangs but not bangs-bangs. That’s this haircut.
Airy bangs sit lighter across the forehead, with more separation and less weight than a full fringe. Paired with a collarbone butterfly shape, they give the front of the cut motion without locking you into daily round-brush duty.
The longer length helps too. When the baseline sits right at the collarbone instead of squarely on the shoulder cap, the ends tend to kick less aggressively, which makes the whole haircut feel softer.
A few details matter here:
- Best on: hair with a gentle S-wave or mixed wave pattern
- Face effect: softens a longer forehead without closing off the eyes
- Styling shortcut: wrap the bangs around a medium Velcro roller for 5 to 8 minutes while the rest air-dries
- Main risk: if the bangs are cut too short while wet, they can dry ½ to 1 inch higher than expected
I’d skip this one if you hate any hair touching your forehead. You’ll spend the week pushing it aside.
5. The Wavy Butterfly Cut With Long Curtain Bangs and Soft Ends
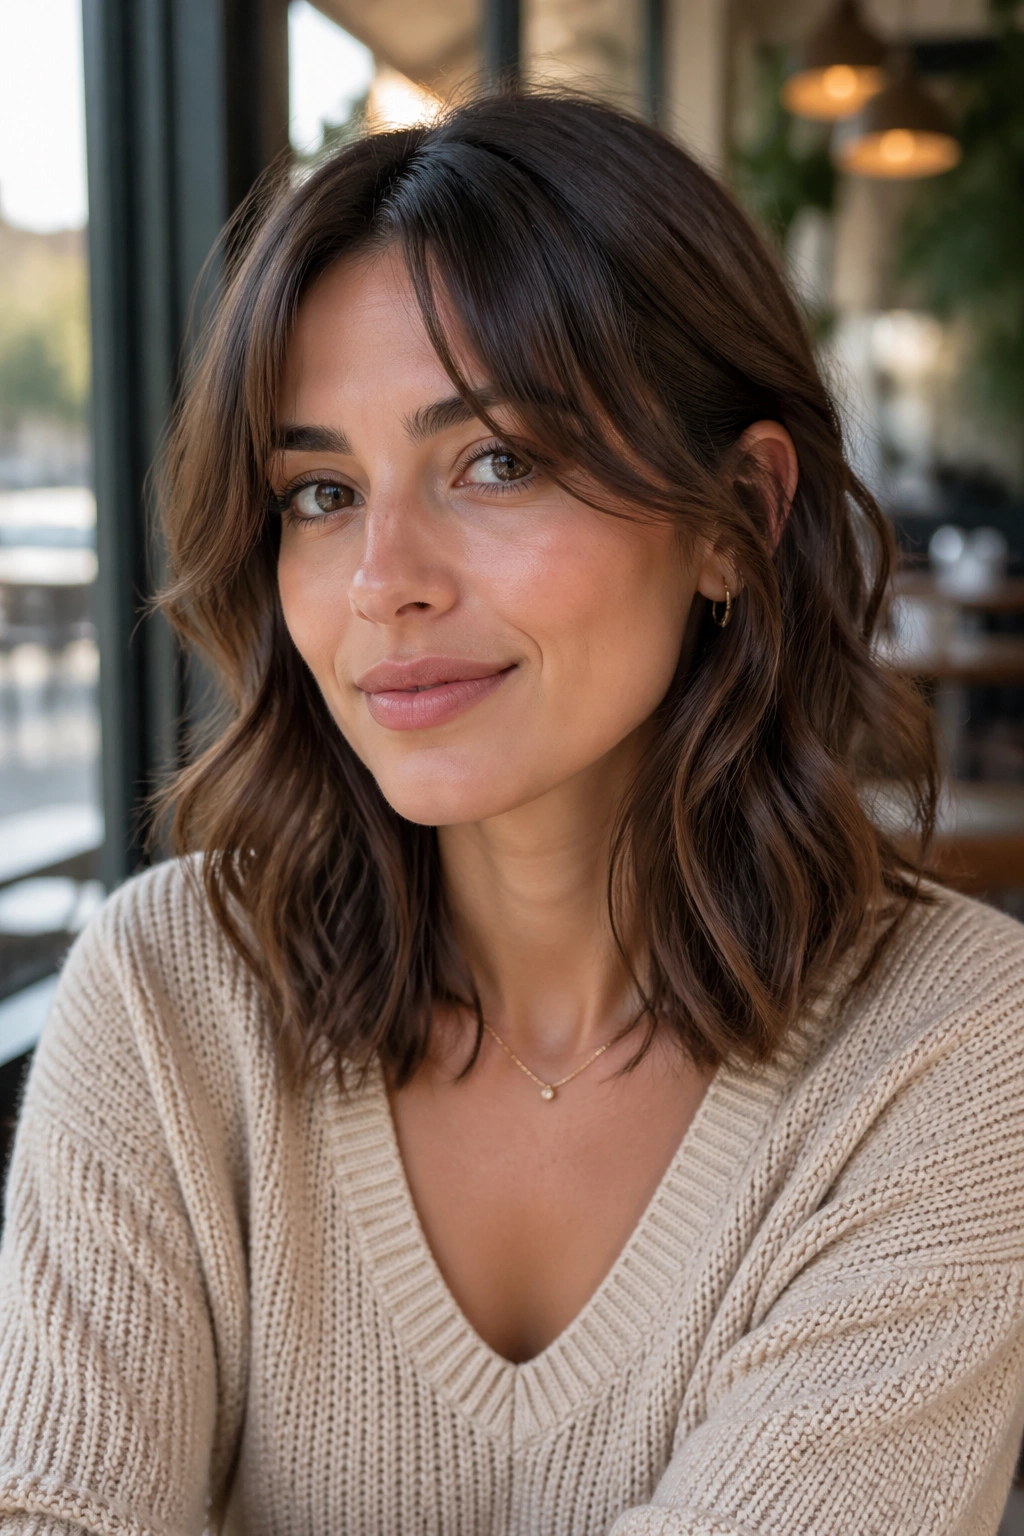
This one has a romantic feel, though I don’t mean fussy. I mean the kind of haircut that still looks good after the breeze gets to it. The curtain bangs start long enough to tuck behind the ears, then fall back into the cheek area in a loose arc. That shape makes waves look intentional even when they’re slightly uneven from side to side.
Soft ends are the whole point. Not shredded ends. Not razor-thin ends. Soft means the perimeter still looks present, but it doesn’t sit like a hard line across your shoulders. On wavy hair, that slight blur at the edge can make the cut look lighter without costing you fullness.
I keep coming back to this version for people who wear glasses. Short, choppy front pieces can compete with the top of the frame and crowd the face. Longer curtain bangs leave more breathing room around the temples.
It also grows out with less drama than shorter fringe. That alone sells a lot of people on it.
6. The Rounded Shoulder-Length Butterfly Cut for Fine Waves
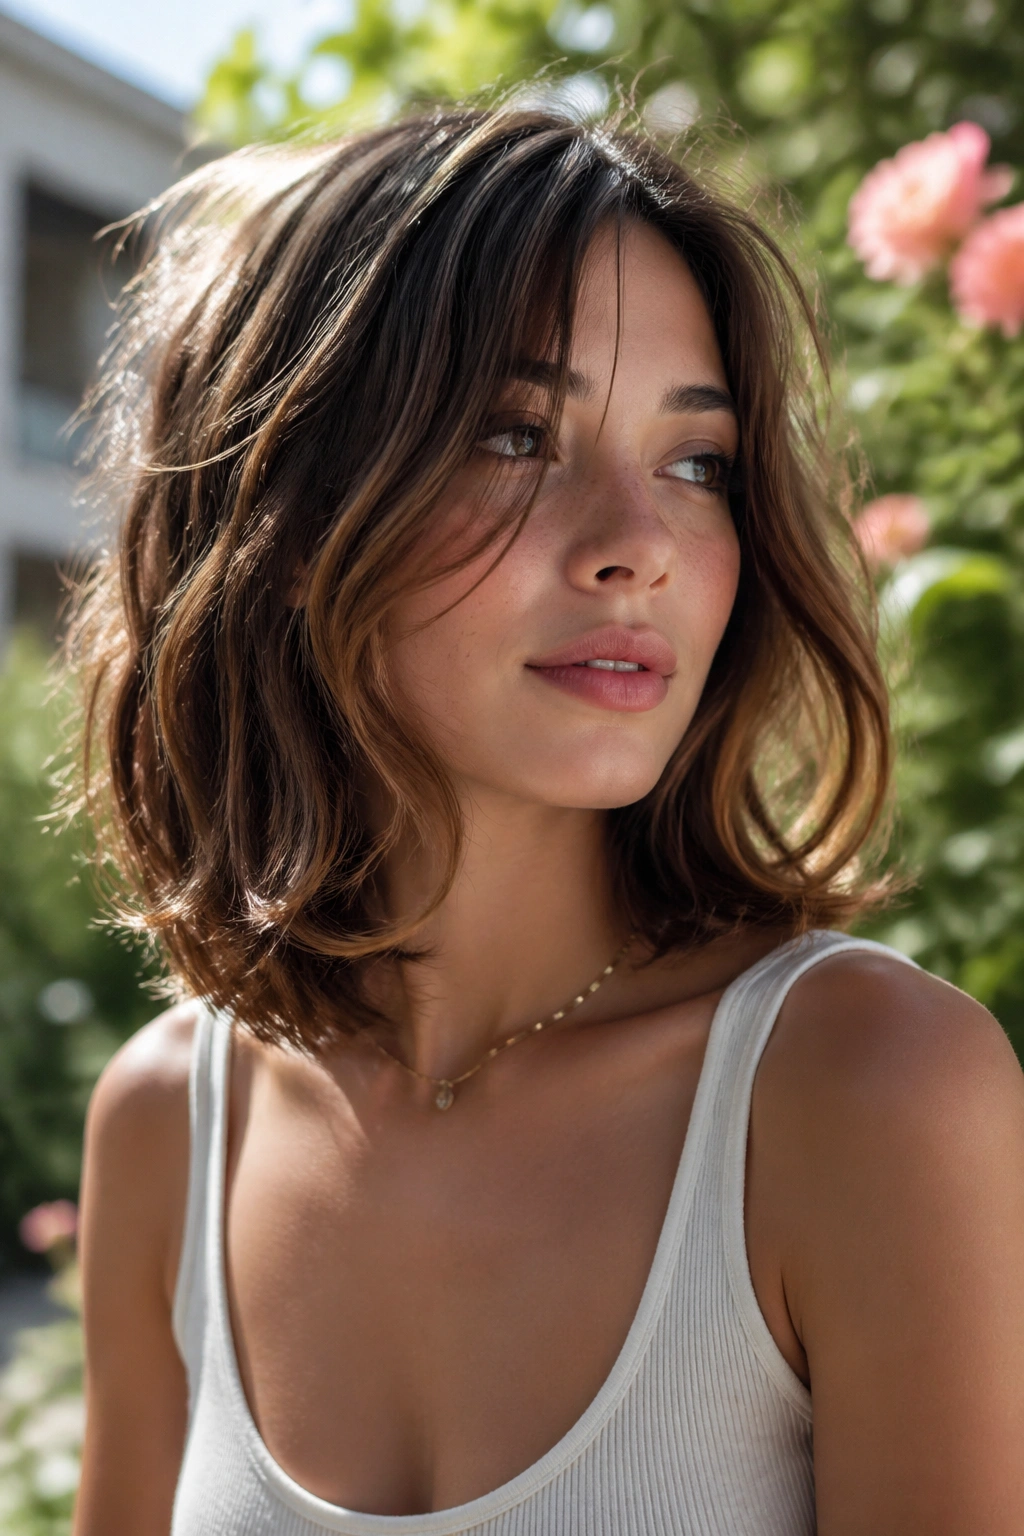
Unlike the choppier butterfly shapes, this one protects what fine hair needs most: density through the bottom edge. The outline is rounded, not hollowed out, so the ends still look full even with face-framing layers around the front.
That rounded shape helps fine waves in two ways. First, it keeps the haircut from looking stringy once the texture separates. Second, it encourages the wave pattern to bunch together instead of breaking into thin little ribbons.
Who suits it? Anyone with hair that looks airy at the crown and sparse at the ends after layering. That includes a lot of natural 2A and 2B hair, especially if it’s color-treated.
Ask for long interior layers, not aggressive thinning. Texturizing shears can remove bulk fast, though on fine wavy hair they often leave the surface frizzier and the ends weaker. A clean point-cut into the perimeter is usually the smarter move.
I’m blunt about this one: if your hair is fine, keep the drama in the face frame, not the bottom half.
7. The Piecey Butterfly Cut With Textured Ends
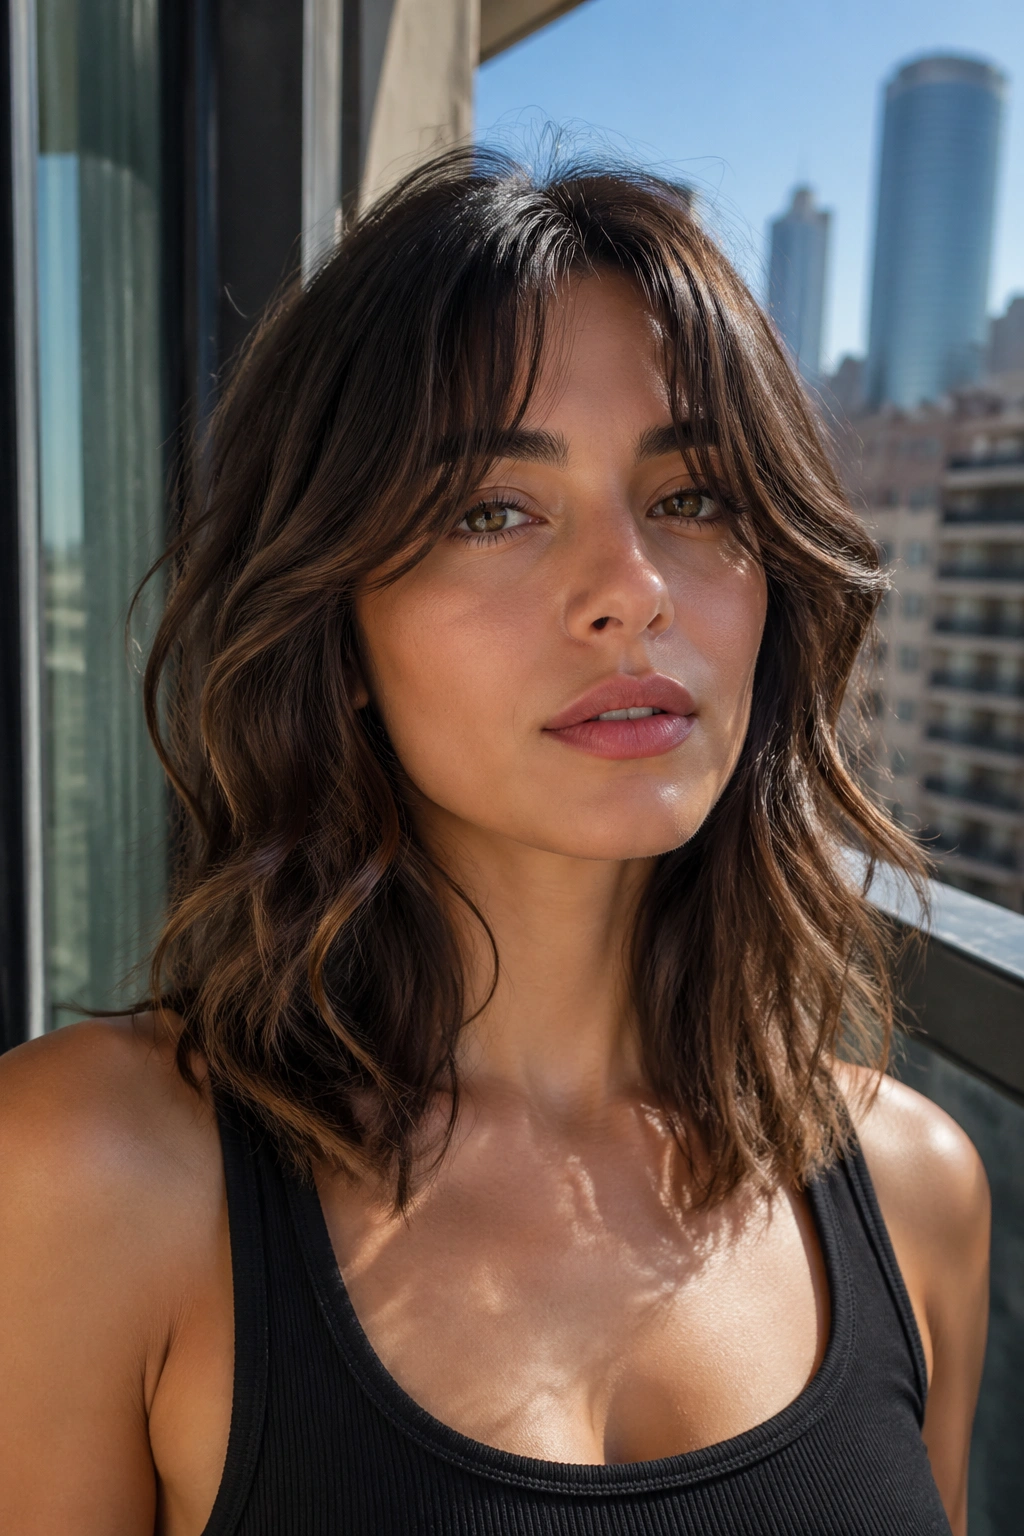
If you want a little grit in the shape, this is the one. A piecey butterfly cut uses separated front layers and lightly chipped ends so the waves break apart in a lived-in way instead of forming one solid block.
Where the texture should sit
The best version puts texture in the last 1 to 2 inches of the cut and around the face, not all over the head. That keeps the movement visible without making the whole haircut look hollow.
Quick notes before you commit
- Good match for: medium to thick hair that feels heavy at the ends
- Looks best with: sea salt spray or dry texture spray added after the hair is fully dry
- Skip if: your ends already split fast or bleach has made them fragile
- Salon wording: ask for “piecey ends, not thin ends”
Pro tip: sleep with the front pieces loosely clipped upward so the separation survives into day two.
8. The Dense-Hair Butterfly Cut With Hidden Interior Layers
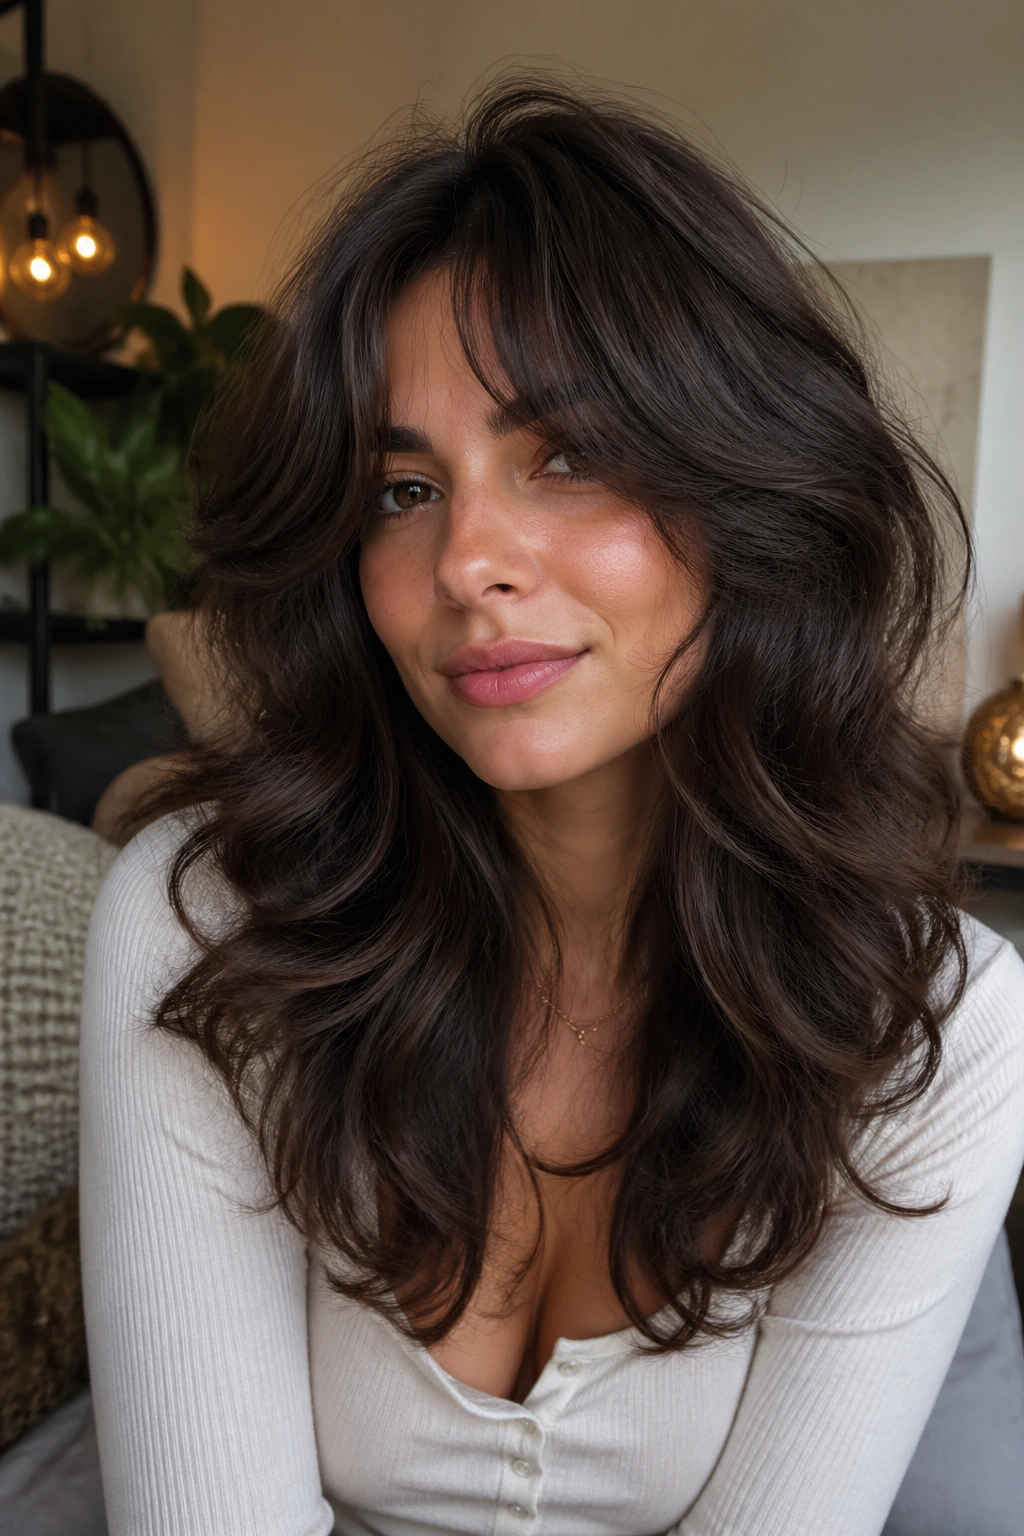
Thick wavy hair needs weight removal, though not where most people think. The top layer often looks fine already. The trouble lives underneath, behind the ears, and around the occipital bone where the hair stacks into a shelf.
Hidden interior layers take bulk out of those packed sections while leaving the surface smooth. From the outside, the cut still reads soft and full. Underneath, there’s breathing room, which means the waves can spring without forcing the whole outline wider.
I like this approach much more than hacking a thick butterfly cut full of short top layers. Too many visible layers on dense hair can make the crown go puffy while the lower half turns triangular. Hidden layering keeps the movement inside the haircut, where it belongs.
Ask your stylist to preserve a solid perimeter and remove weight selectively. If they start talking about taking a razor through the ends from mid-length down on coarse waves, I’d get more specific before they proceed. Dense hair can handle a lot, though shoulder-length waves still need an anchor.
9. Shoulder Length Wavy Butterfly Cut With a Deep Side Sweep
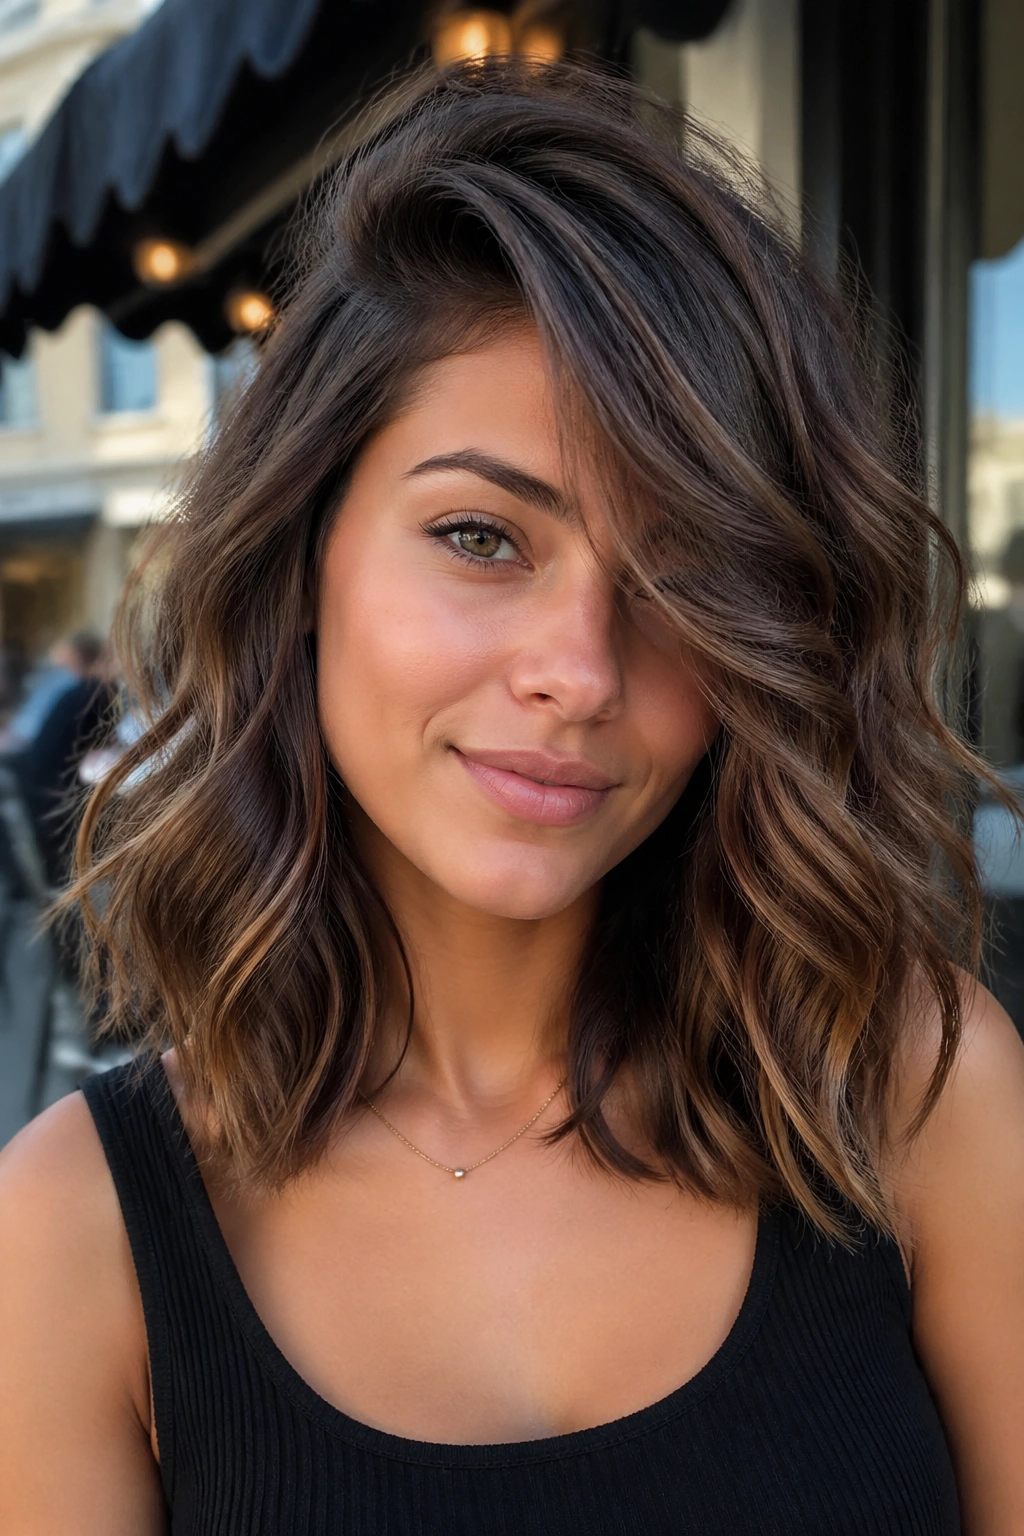
Want the cut to feel a little dressed up without losing wave? Try a deep side sweep.
This version uses the butterfly framework, though the front is styled to drape farther across one side of the face. It gives instant glamour, sure, but the practical win is that it adds width only where you choose. One side stays open. The other gets that soft bend skimming the cheek.
The look can be especially good on hair that refuses to part neatly down the center. Why fight your natural fall pattern when you can use it?
How to style it so it stays put
Set the front section with a 1¼-inch iron or a medium round brush, curving away from the face through the ends. Let it cool in place before you comb it through with your fingers. If you brush it while it’s still warm, the sweep drops flat.
A light mist of flexible spray at the roots on the heavy side helps. Skip shellac-level hold. You want the piece to move, not sit there like a helmet visor.
10. The Shag-Leaning Butterfly Cut With Broken Fringe
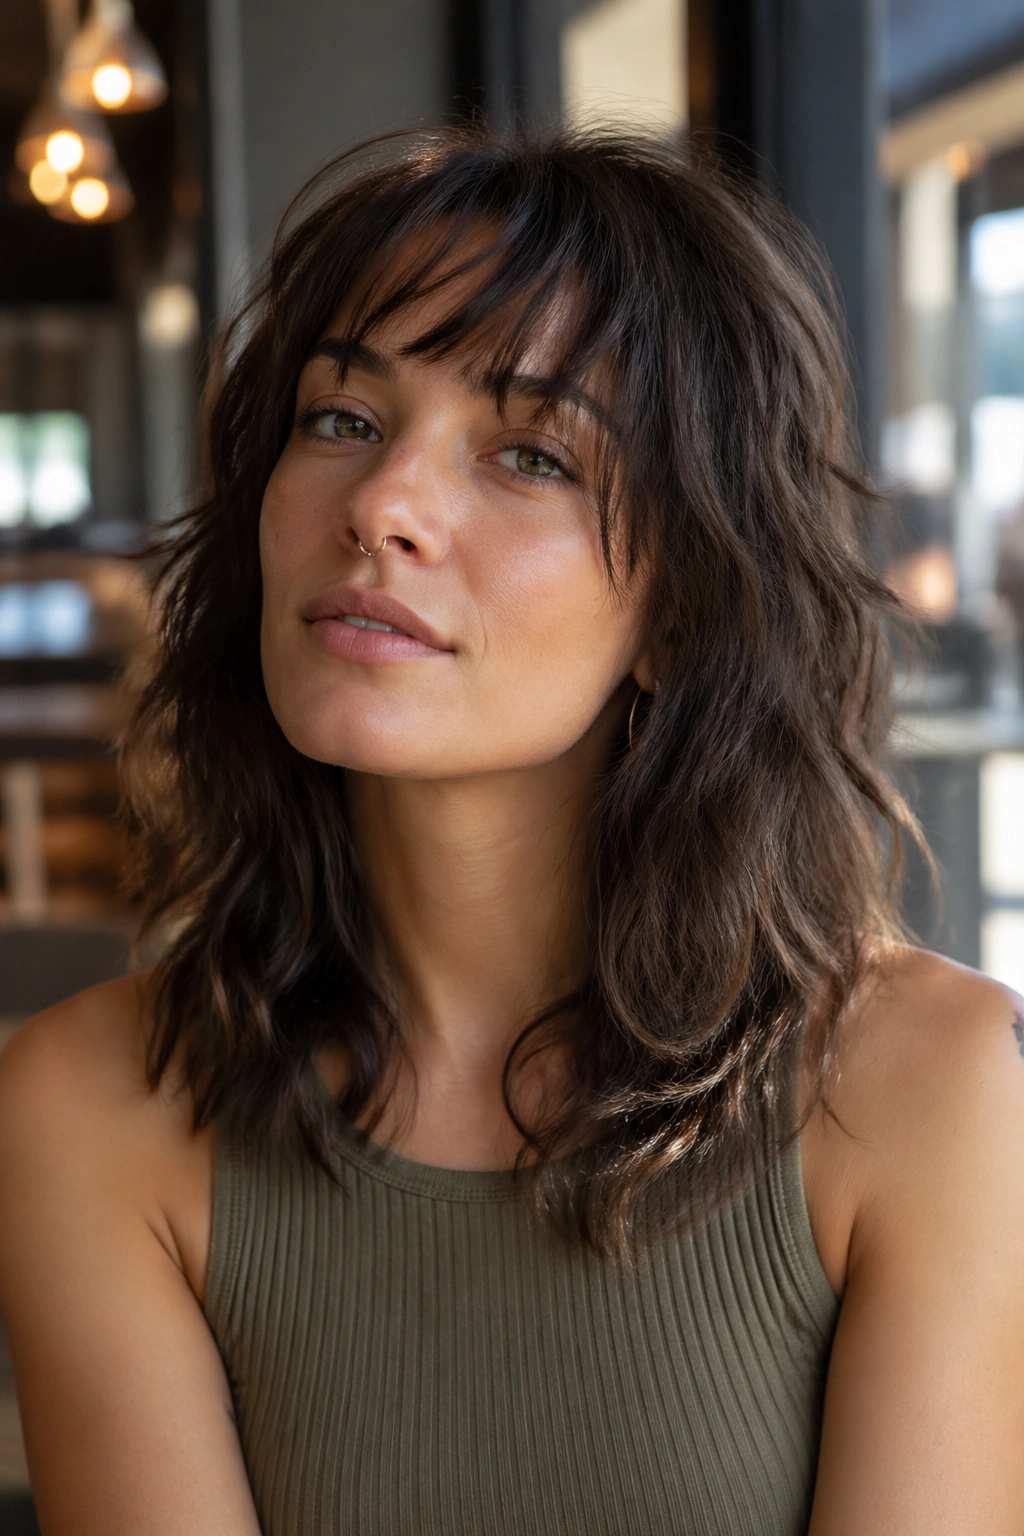
Somewhere between a shag and a butterfly cut sits this choppier, more rebellious version. The crown has extra movement, the fringe is broken up instead of smooth, and the ends look less polished on purpose.
You need the right texture for it. On loose waves with a bit of natural grit, it looks effortless. On hair that’s fluffy but not defined, it can tip into frizz unless the stylist reads your density well.
A few markers separate a good one from a messy one:
- The fringe should be irregular, though not hacked short
- The lower perimeter still needs length at the shoulders
- There should be visible lift around the crown without mushrooming at the sides
- Dry styling matters more here than precision blowouts
I’d put this on someone who likes a worn-in leather jacket more than a pressed blazer. Same family of haircut. Different attitude.
11. The Blunt-Perimeter Butterfly Cut With Floating Layers
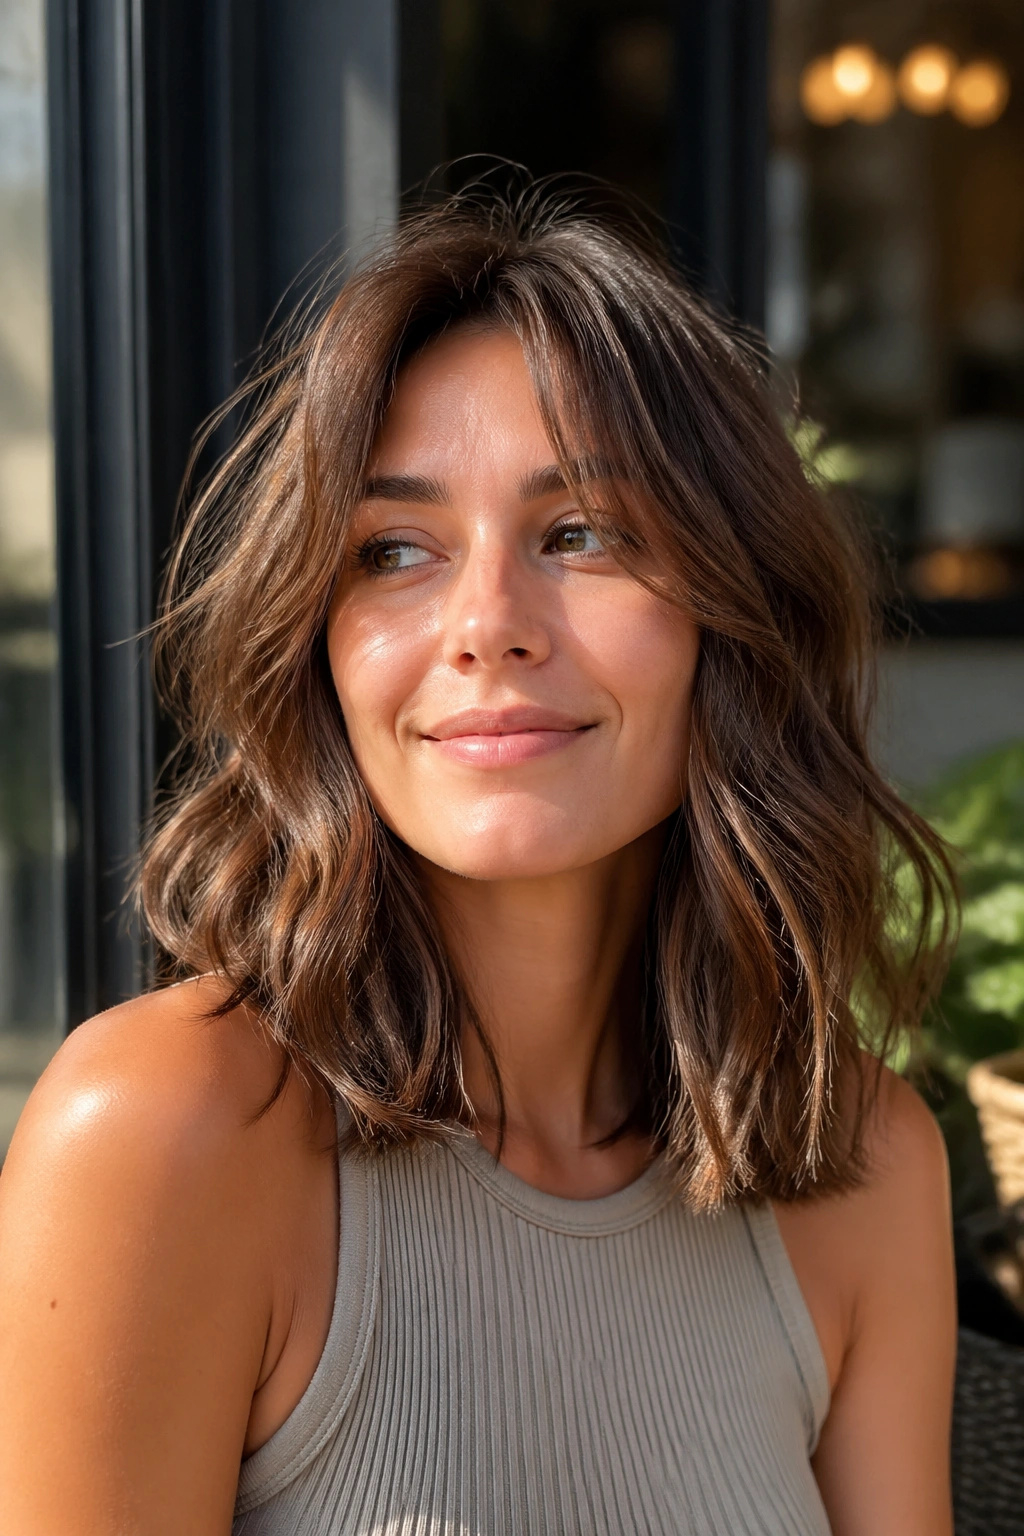
This haircut does two jobs at once. The perimeter is cut blunt enough to look strong, while the upper layers float over it and keep the shape light. You get movement around the cheeks and collar without losing that clean line through the bottom.
That contrast is why it works. Wavy hair can look too soft if every edge is feathered. A blunt baseline gives the eye somewhere to land. Then the butterfly layers interrupt that line in a controlled way, which makes the cut feel sharper and fuller.
I like it on hair that frays easily. When the ends are fragile, a wispy perimeter can make the entire haircut look tired by week two. A stronger bottom edge buys you more visual density even before you add styling.
Ask for the ends to sit thick, then have the face frame and top layers softened. That order matters. If the stylist starts by taking too much out of the bottom, they can’t put it back. And yes, I know that sounds obvious. People still walk out with airy ends they never asked for.
12. The Face-Framing Butterfly Cut for Square Jawlines
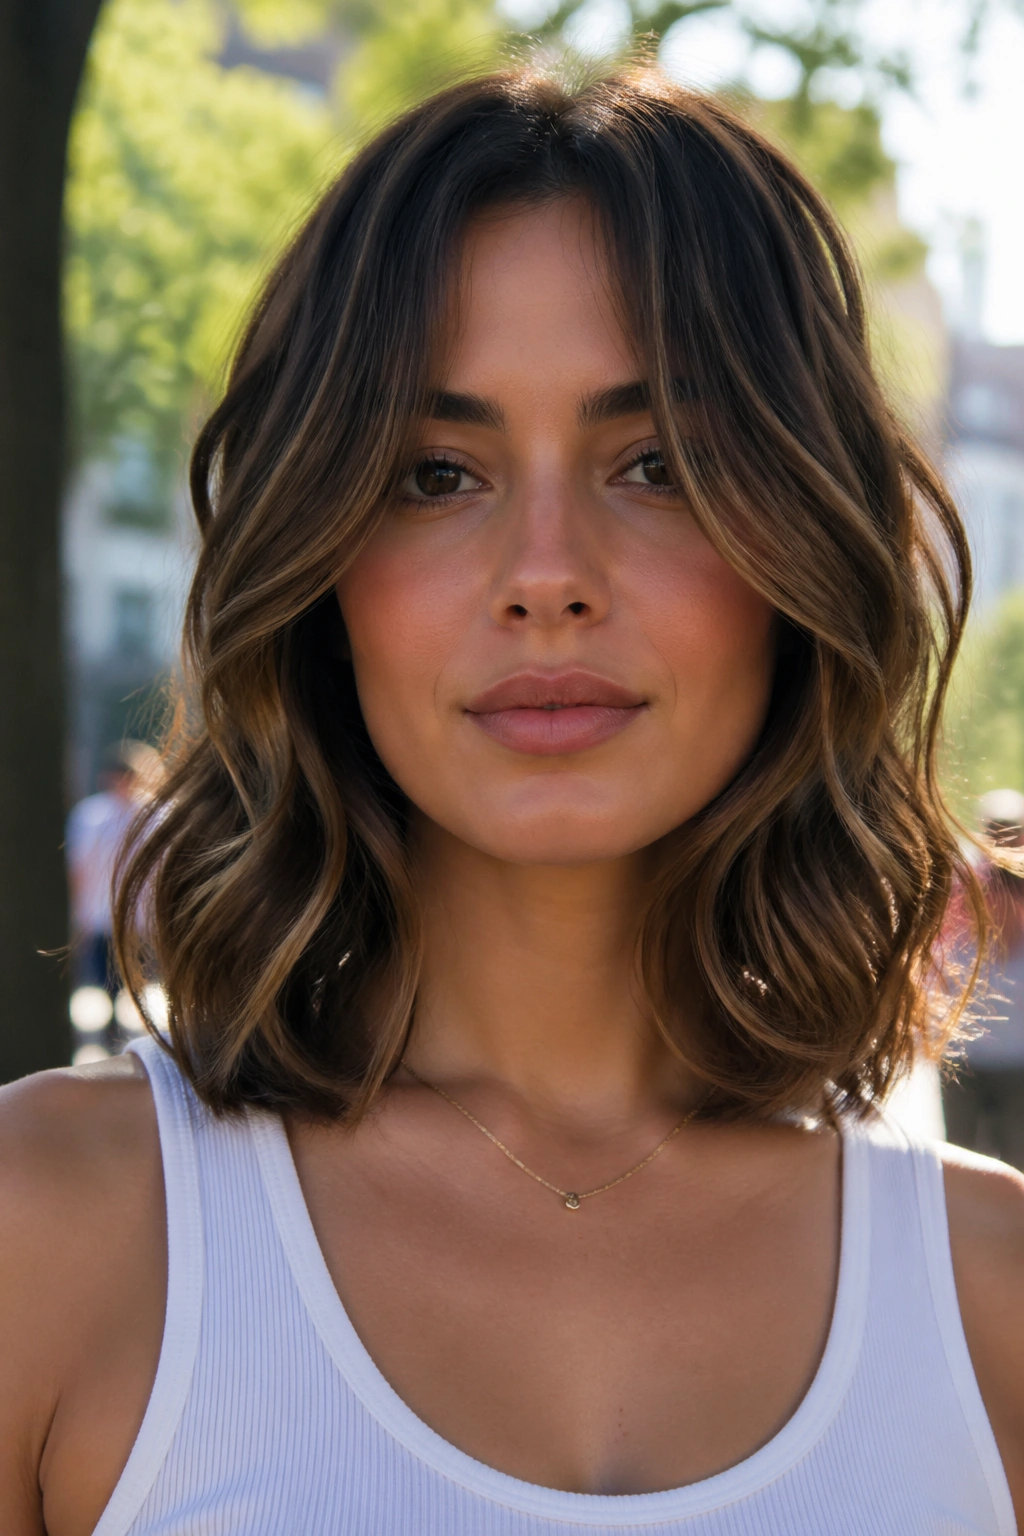
Unlike chin-length framing, which can stop right at the broadest point of the jaw, this version places the shortest noticeable movement above or below that line. That shift changes the whole balance of the face.
Square jawlines often look best with softness near the cheekbones and swing around the collarbone. The butterfly cut helps because it layers the front without forcing a hard edge beside the jaw. Waves make that effect stronger; they bend and blur the outline in a way a flat blunt cut won’t.
If I were giving this note in a salon chair, I’d ask for front pieces that open near the cheekbone, skim past the jaw, and reconnect around the collarbone. That gives shape without spotlighting the widest point.
Who is this for? People with strong bone structure who still want movement, not hiding. That distinction matters. A good cut shouldn’t erase your face shape. It should support it.
13. The U-Shaped Butterfly Lob for Fuller Movement
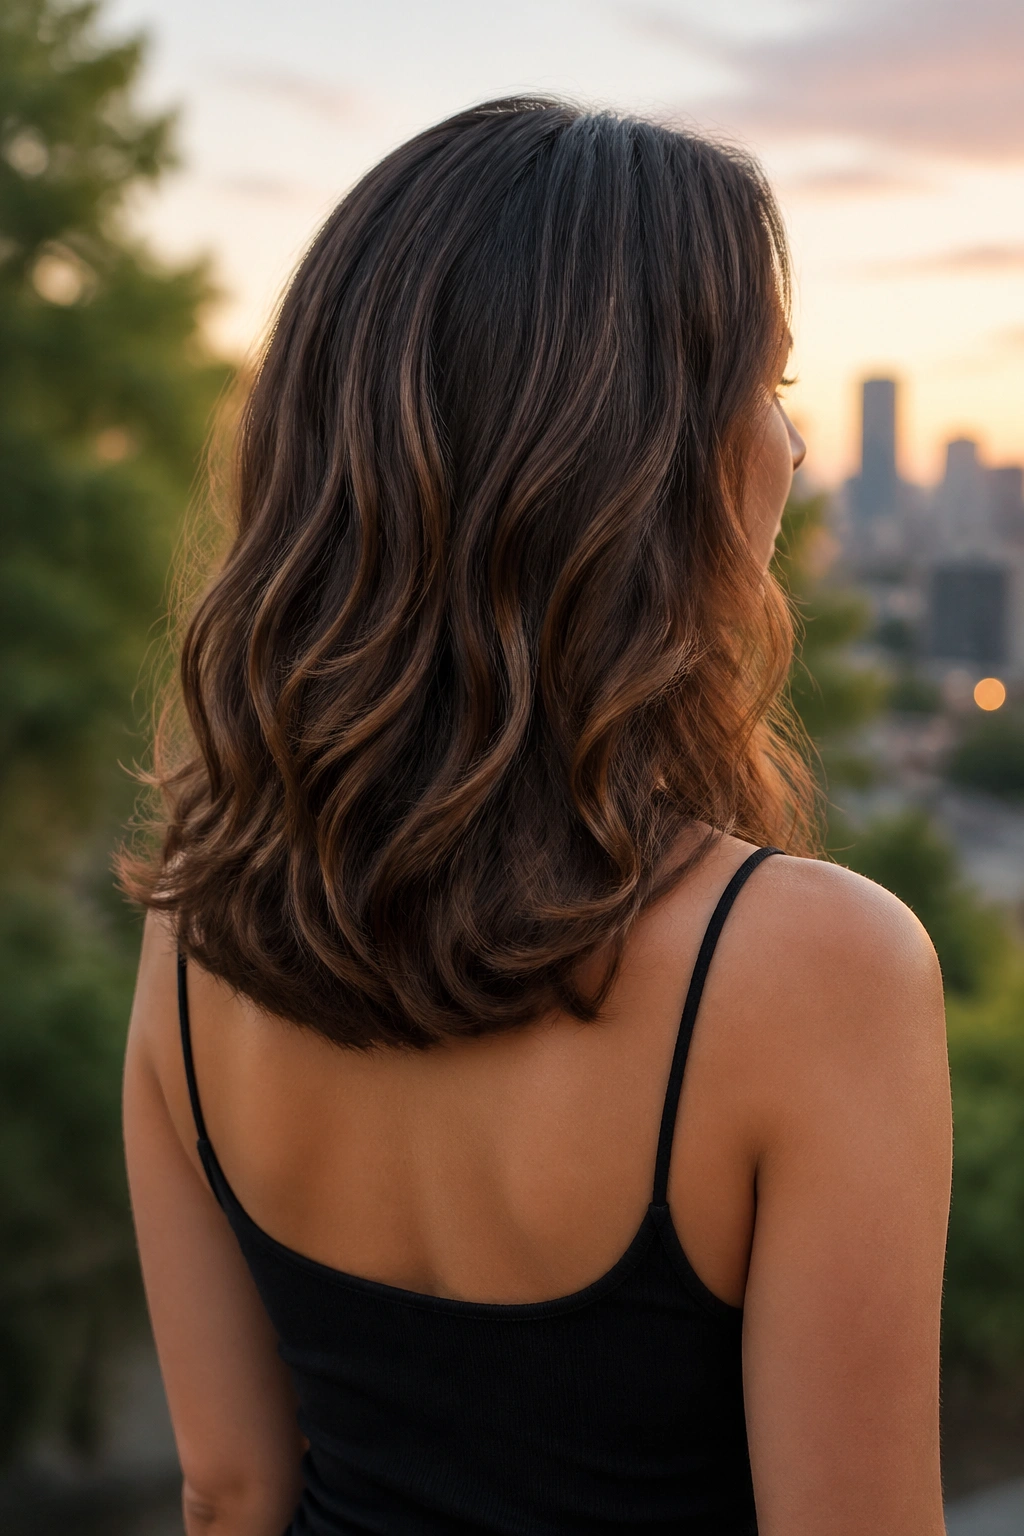
The back of the haircut matters more than most people realize. A U-shaped baseline makes the center back a touch longer, with the sides curving upward toward the front. On wavy hair, that little curve helps the cut move instead of sitting like a shelf.
Why the back shape changes the whole feel
Straight-across ends can look heavy at shoulder length, especially from behind. The U-shape removes that blocky line and lets the lower layers fall in a softer arc. It’s one of my favorite fixes for hair that feels thick in the back and flat on the sides.
Quick fit notes
- Great for: medium to thick hair with a lot of buildup at the nape
- Ask for: a subtle U, not a dramatic V
- Styling bonus: the curve makes half-up styles look better because the back doesn’t jut out
- Watch for: too much graduation can make the sides feel shorter than you wanted
Best use: choose this if your current cut looks square from behind and you’re tired of it.
14. Shoulder Length Wavy Butterfly Cut With Wispy Bottleneck Bangs
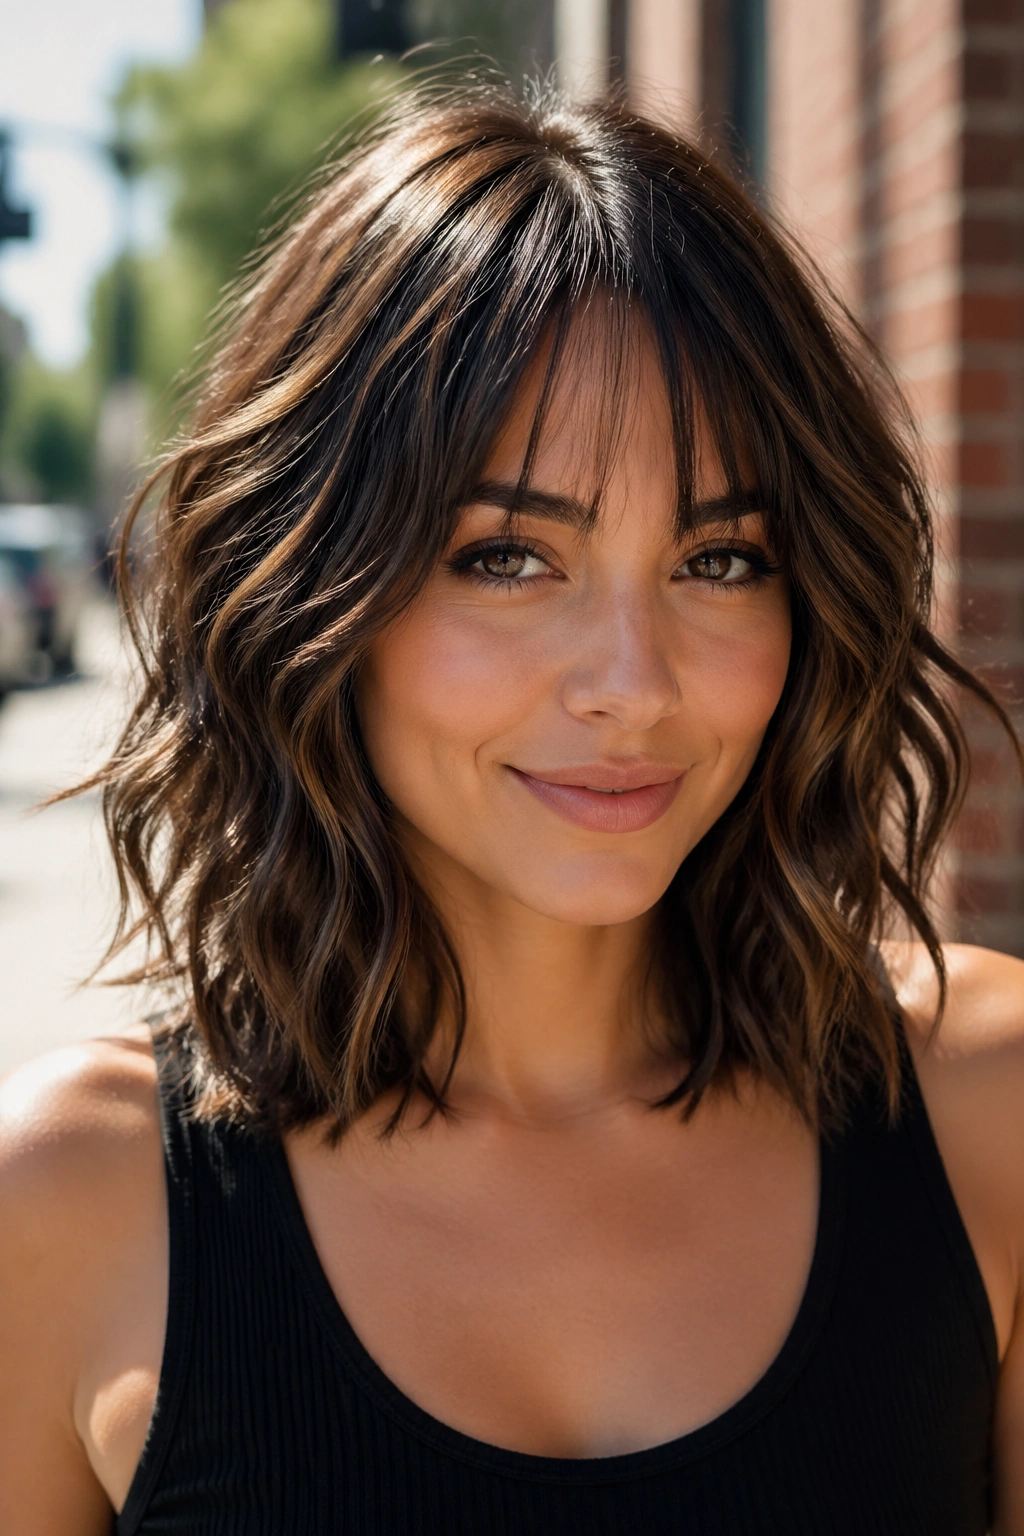
Bottleneck bangs are clever. They start narrow at the center of the forehead, widen around the brows, then stretch longer toward the cheekbones. On a shoulder-length butterfly cut, that shape melts into the front layers with less of a hard stop than classic bangs.
This one suits longer face shapes and foreheads that feel a little open, since the center fringe shortens the visual length without making the whole front heavy. The wispy finish keeps it light enough for waves, which already add their own width.
The thing to watch is shrinkage. Wavy bangs can spring up faster than the rest of the cut because they’re shorter and often sit on finer hair near the hairline. Your stylist should cut them with that bounce in mind, ideally after seeing how your fringe behaves when dry.
I’d style these with a small round brush or two fingers and a blow-dryer nozzle, then leave the rest of the hair looser. If the bangs are polished and the lengths are too polished too, you lose the contrast that makes bottleneck fringe look good.
15. The Low-Maintenance Air-Dried Butterfly Cut
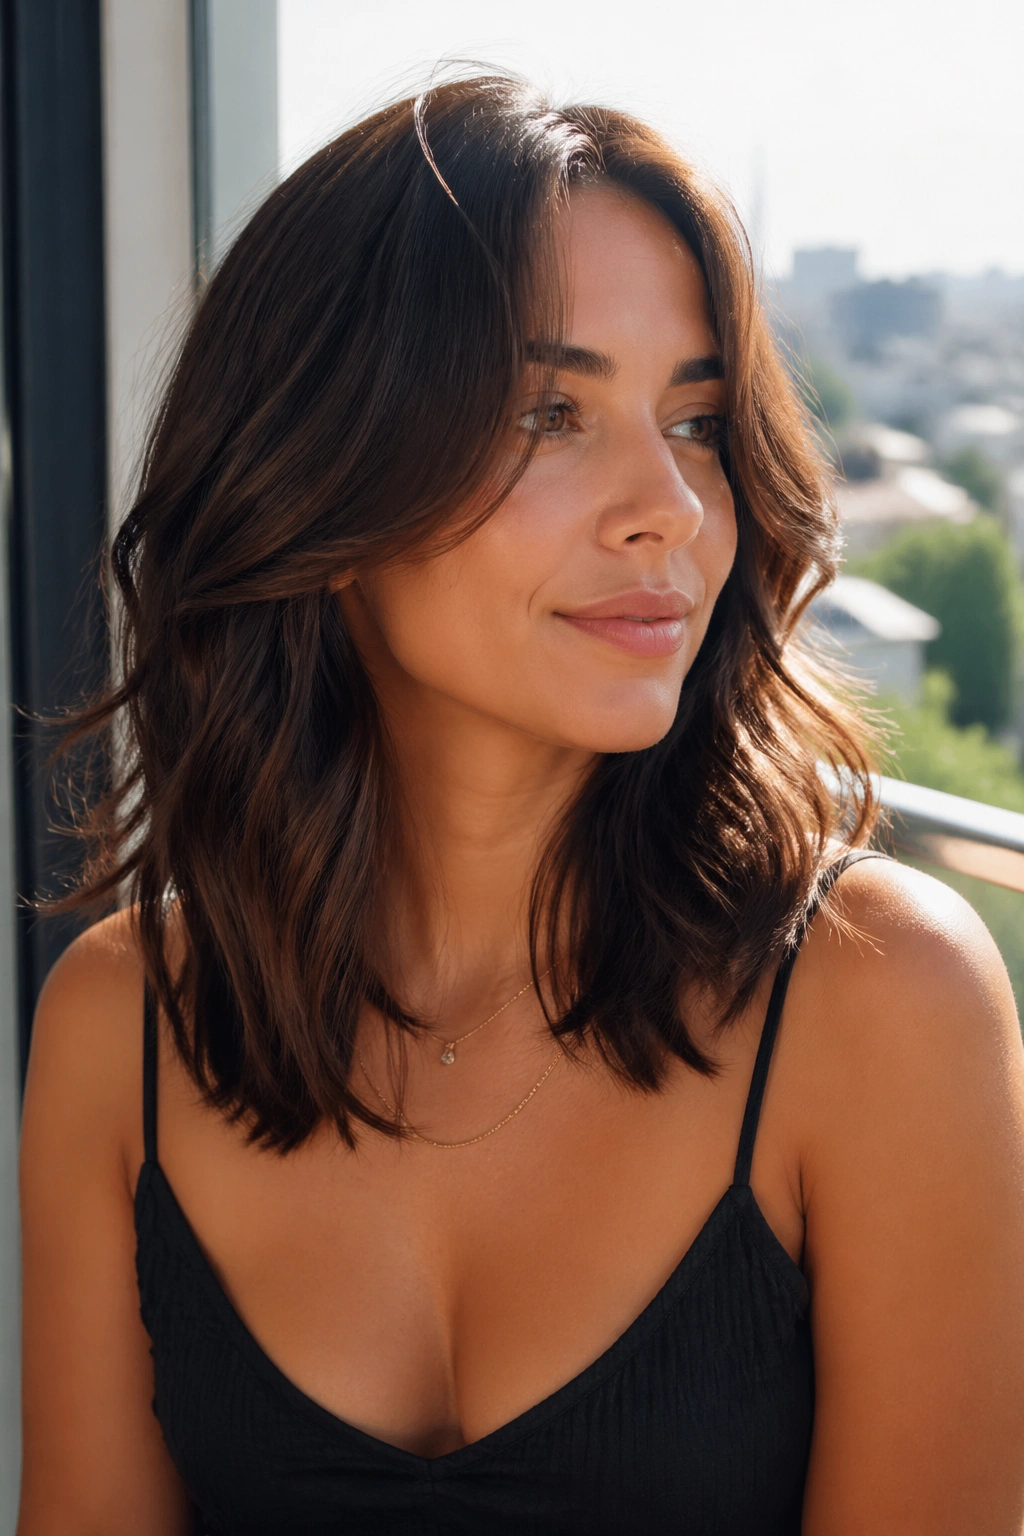
Can a butterfly cut work if you almost never touch a dryer? Yes — if the layers are restrained.
The low-maintenance version uses longer front pieces, fewer short layers around the crown, and a perimeter with enough weight to settle on its own. You still get movement around the face, though the haircut isn’t relying on a blowout to reveal the shape.
This is a smart pick for 2B and 2C waves that already form on their own. Hair with that pattern doesn’t need much encouragement. It needs a cut that stops bulk from piling up while leaving the wave free to bend.
What to ask for
Ask for a butterfly shape that looks good air-dried first and styled second. That sentence alone changes the approach. Your stylist is more likely to leave stronger ends, cut with your natural pattern in mind, and avoid fragile, fluffy top layers.
You may still need a little product. A curl cream the size of a blueberry and a light gel scrunched through the front usually beats a whole ritual you’ll never keep up with.
16. The Diffused Butterfly Cut With Rooty Volume
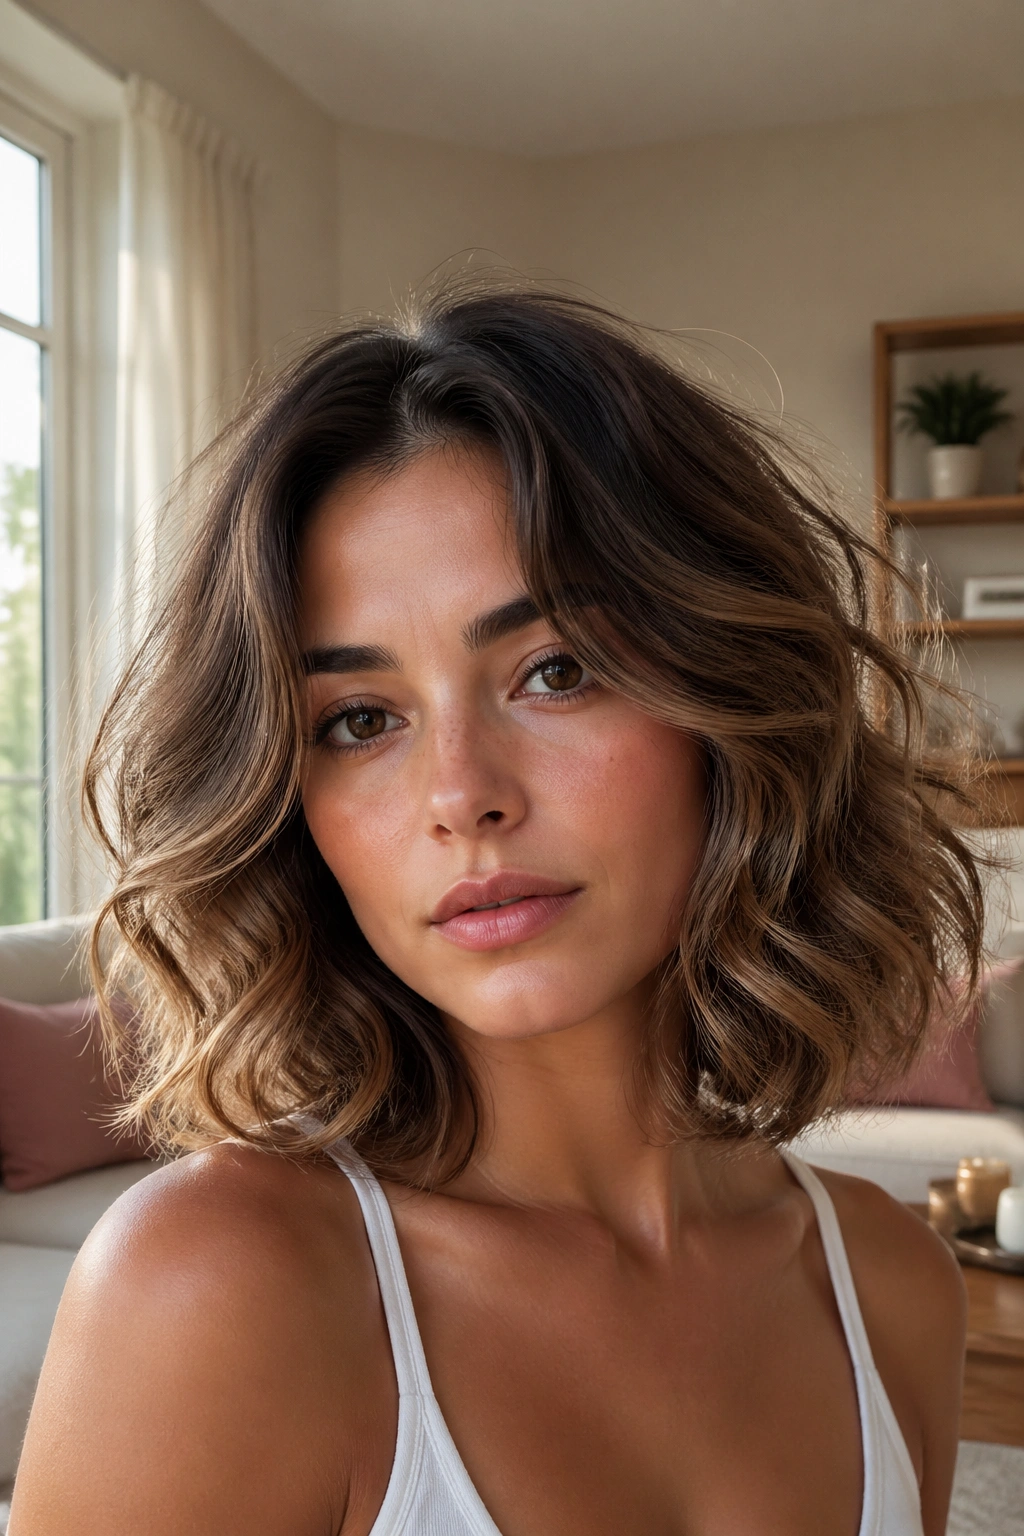
This one is less about the cut map and more about the finish. A diffused butterfly cut pushes the roots up, keeps the mid-lengths springy, and lets the face-framing layers fan outward in a soft halo — a controlled halo, not a cloud.
It’s a strong choice if your waves fall flat when air-dried but come alive with a diffuser. The haircut should support that lift by keeping shorter layers around the crown and cheeks, though not so many that the ends disappear.
Here’s the diffuser pattern I’d use:
- Apply mousse at the roots and a light cream through the front pieces
- Hover diffuse for 2 to 3 minutes first to set the cast
- Cup sections upward only after the surface starts drying
- Flip your head side to side instead of upside down the whole time
- Stop at about 90 percent dry, then let the rest finish in the air
That last step keeps the shape softer. Over-diffuse and shoulder-length waves can go fuzzy, which makes even a well-cut butterfly shape look bigger than planned.
17. The Sleek-to-Wavy Butterfly Cut for Heat-Styled Flexibility
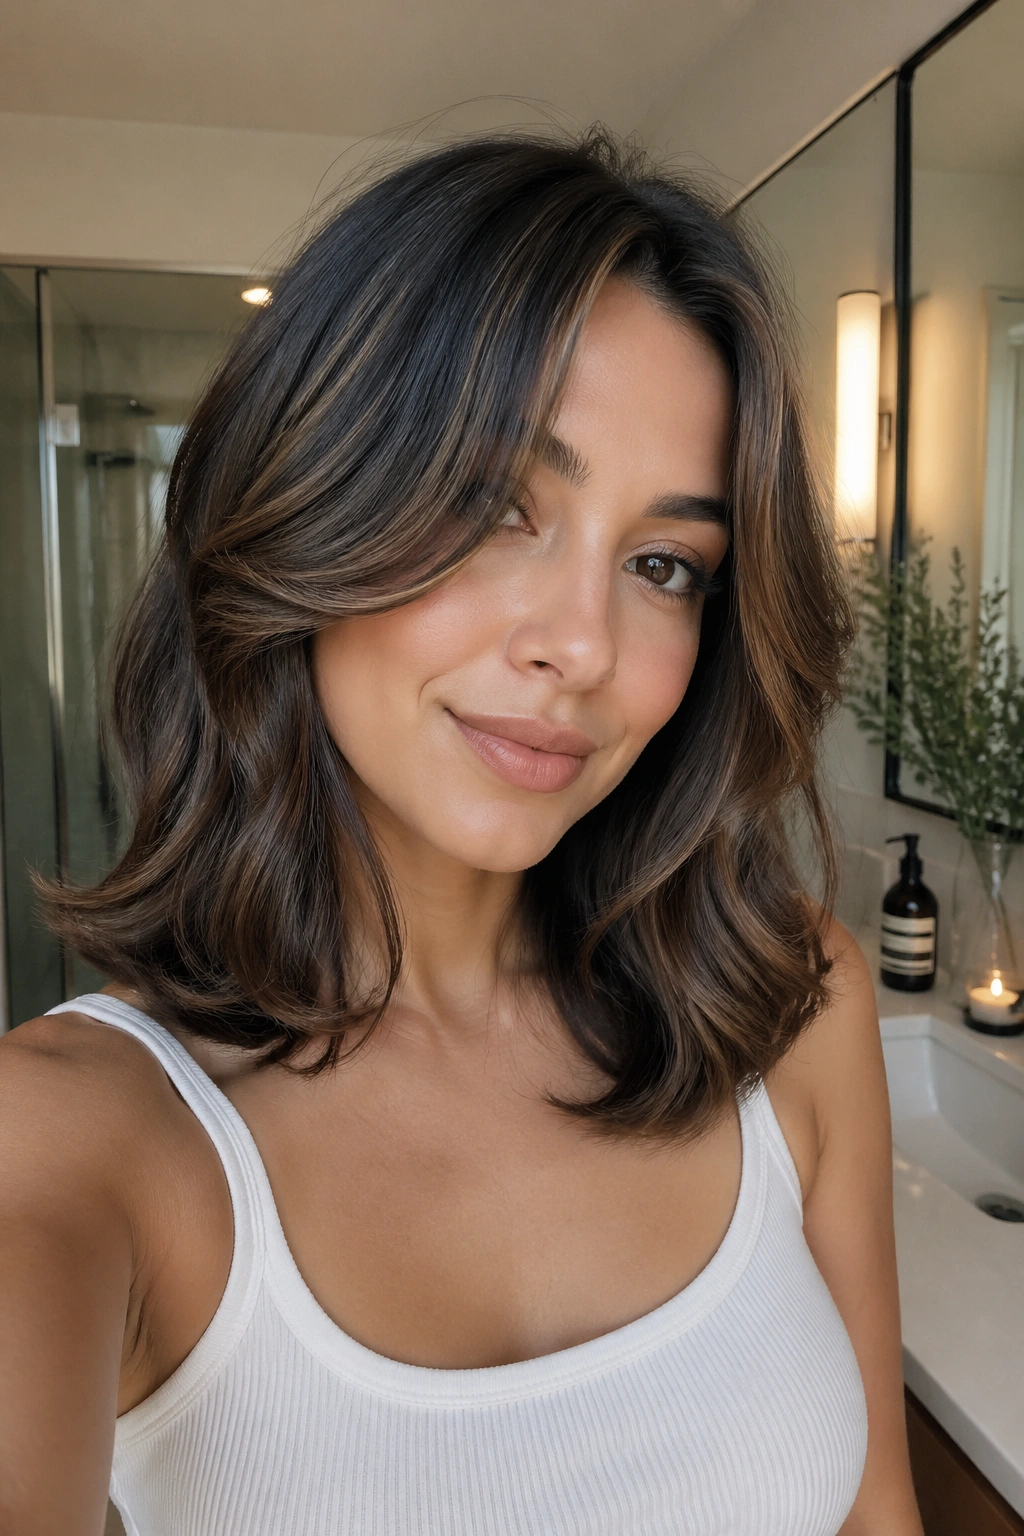
Some people want one haircut that can do two things: sit smooth on blowout days and still look full when the natural wave comes back. This version is built for that split life. The layers stay a little longer, the perimeter stays cleaner, and the front framing doesn’t start too high.
That restraint is what makes it useful. If the top layers are chopped short for maximum wave, the haircut can look disconnected when straightened. If the whole thing is too blunt for smoothing, the natural texture returns looking heavy. A flexible butterfly cut lands in between.
I’d use this on hair that swings between polished and undone during the same week. Maybe you smooth it for work, then wash and diffuse for the weekend. Maybe you’re trying to cut back on heat but not ready to give up the option.
Watch your tool temperature here. Repeated ironing on layered ends can rough them up fast, and once those ends go crisp, the cut stops reading soft no matter how good the shape is.
18. The Butterfly Cut With Longer Front Pieces for Round Faces
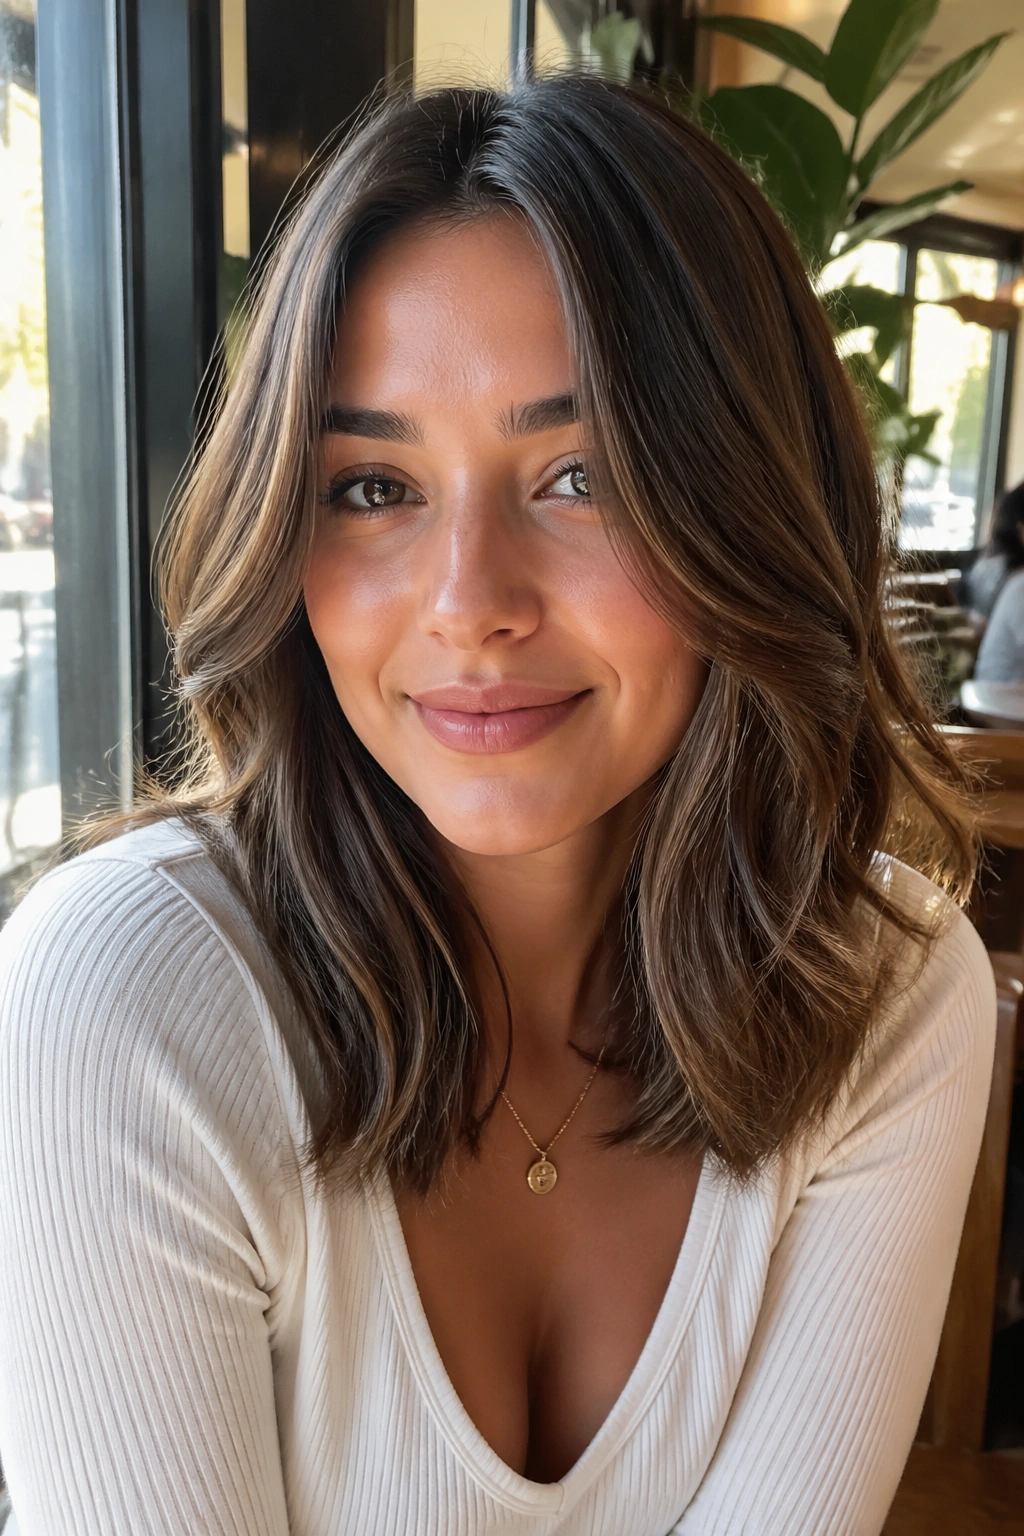
Unlike short, fluffy face-framing layers that add width beside the cheeks, this butterfly cut keeps the front pieces longer and more vertical. The movement starts lower, often around the cheekbone or even between cheek and jaw, then falls toward the collarbone.
That longer front line helps draw the eye downward. Round faces usually benefit from that kind of length, especially when paired with a center part or a soft off-center part. The waves still add shape, though they don’t bunch up right at the widest part of the face.
I would also keep the crown layers gentle here. Too much lift high up plus lots of width at the cheeks can make the whole silhouette look rounder, not longer.
Who should ask for this? Anyone who likes the airy feel of a butterfly cut but hates the way short front pieces can make the face look fuller. Keep the frame longer, let the texture start lower, and the cut feels more balanced right away.
19. The Soft Wolf-Butterfly Hybrid at the Shoulders
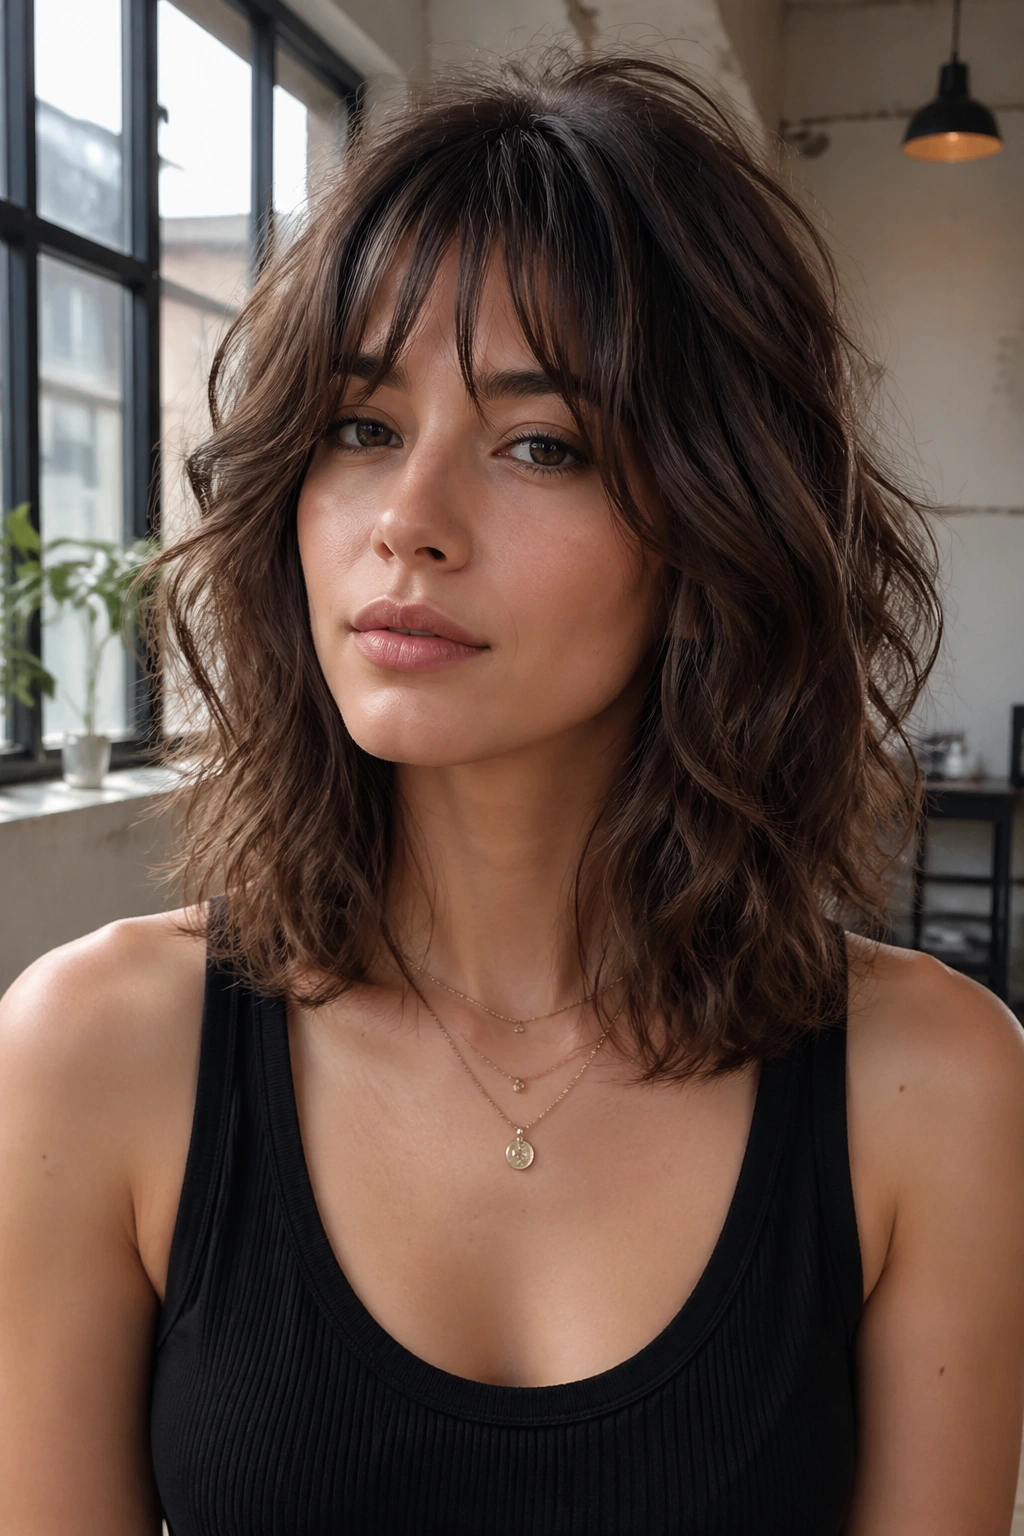
This is the cooler cousin. You get some crown movement and a touch of wolf-cut edge, though the ends stay softer and more connected than a true wolf shape.
What keeps it from going too wild
The shoulder length saves it. Once the perimeter stays present, the extra texture near the top doesn’t look chaotic. It looks intentional, with a little grit and lift.
Before you ask for it, know this
- Best on: medium to dense waves with natural texture and some root lift
- Needs: styling paste or texture spray on the ends after drying
- Avoid if: your hair already gets fluffy at the crown with no effort
- Salon wording: “wolf influence up top, butterfly softness through the bottom”
My take: this cut is fun, though it needs a bit more attitude from the wearer than the classic butterfly versions.
20. The Butterfly Cut With Flipped-Out Ends
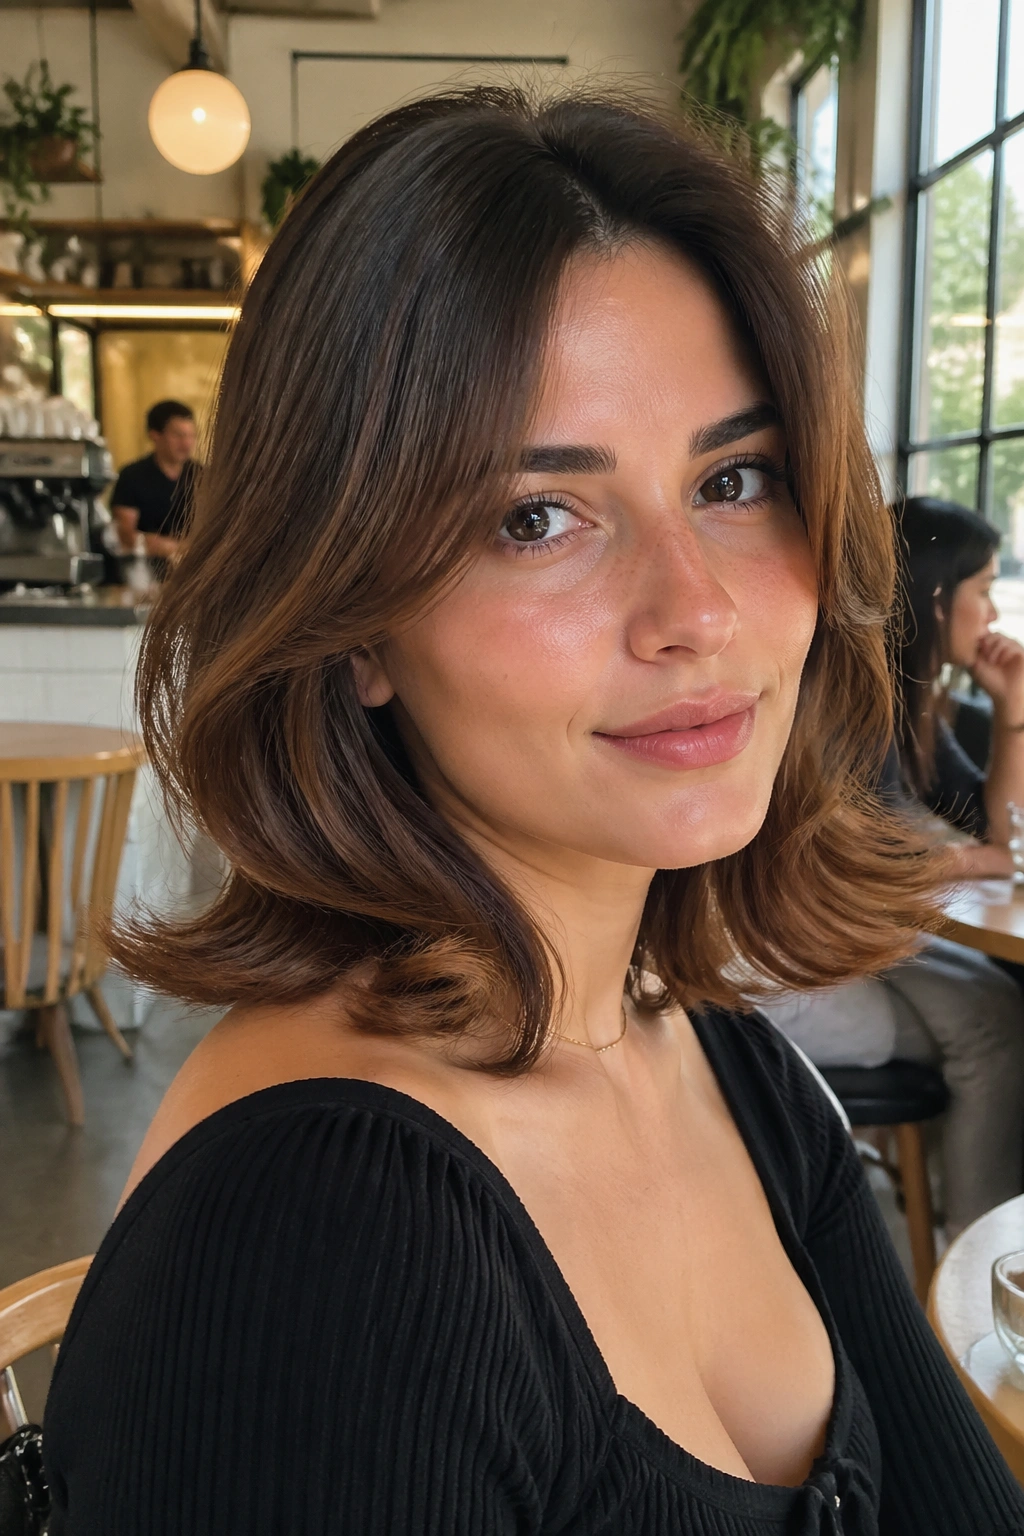
Shoulder length already wants to flip. You can fight that bend with a flat iron every morning, or you can lean into it and make it the point of the cut.
A flipped-out butterfly shape keeps the layers feathered around the face, then lets the ends kick outward with a deliberate little swing. The result has a retro feel, though not in a costume way. More sharp than sweet.
This one needs a clean perimeter. If the ends are too ragged, the flip looks accidental. A strong line through the bottom lets the outward bend read as style instead of bedhead.
I prefer this on finer waves and medium-density hair because the flip stays light. On thick, coarse hair, the ends can flare wider than intended unless the interior is shaped well. Use a medium round brush or a flat iron turned outward during the last inch only. Don’t curl the whole section. You want a flick, not a barrel wave.
21. The Minimal-Layer Butterfly Cut for Thick, Coarse Waves
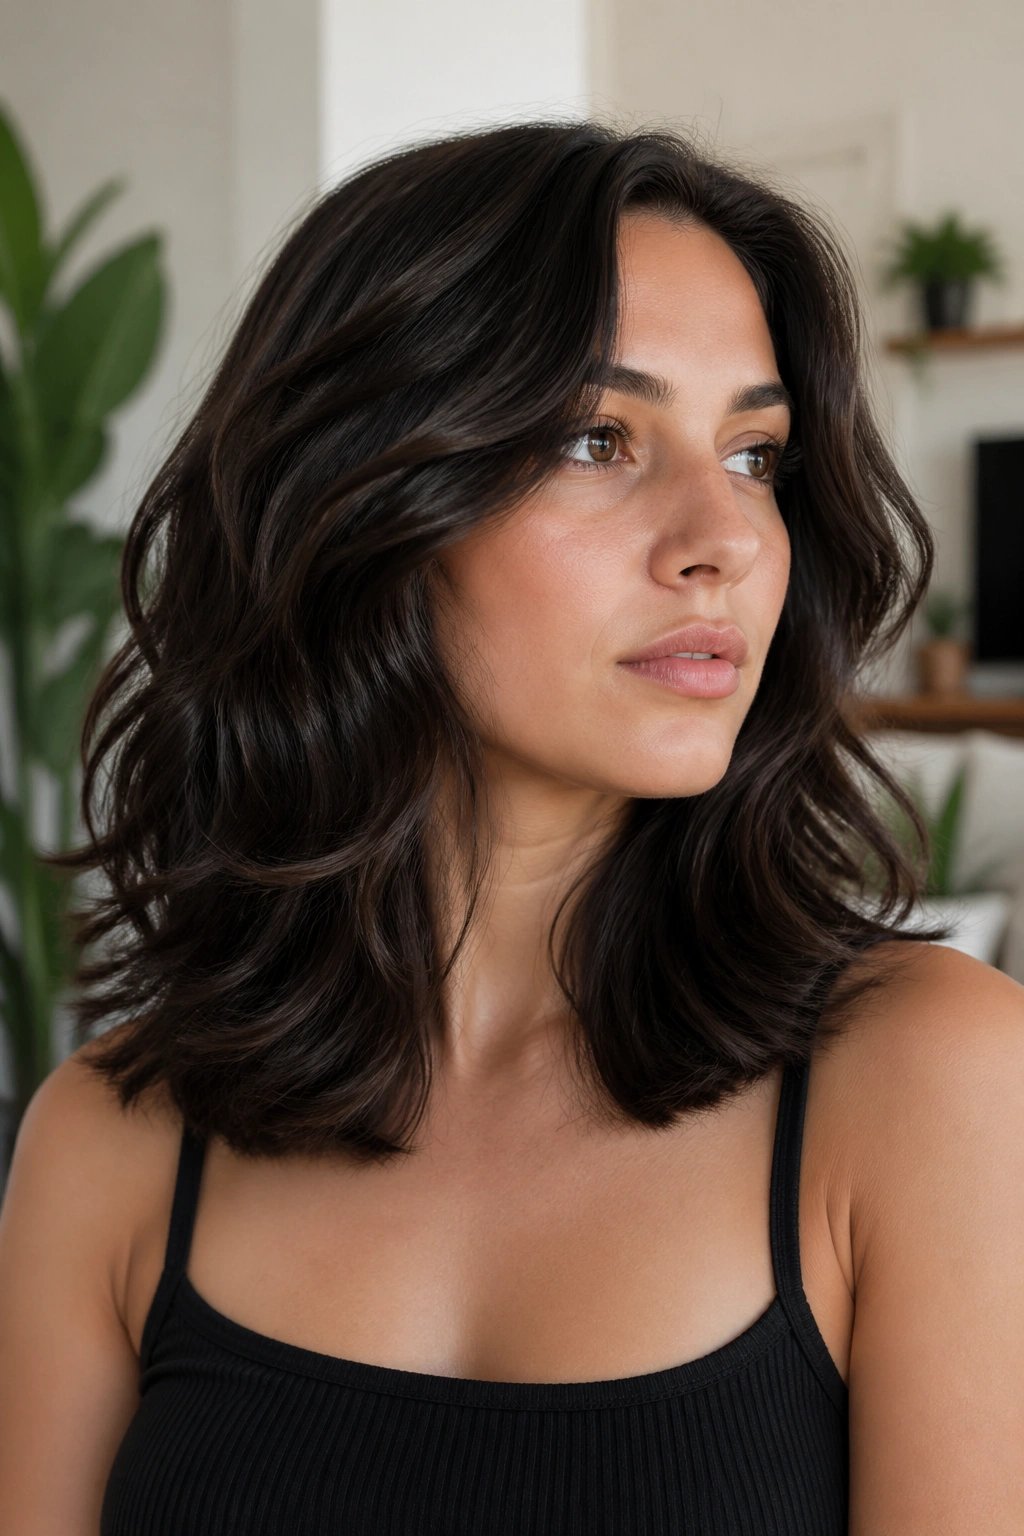
If your hair balloons the minute someone says “more layers,” you need this calmer version. A minimal-layer butterfly cut keeps the signature face-framing effect, though the rest of the haircut stays controlled and weighty.
Coarse waves often have enough natural body already. Stack too many layers into them and the haircut grows sideways. Then people wonder why their “airy” cut suddenly feels twice as wide. The answer is simple: the hair did what coarse hair does when over-layered.
What to ask for instead
Request front movement, internal bulk removal only where needed, and a strong lower outline. Your stylist can carve shape into the front and sides while leaving the bottom half more solid. That gives you the butterfly feel without the puff.
A cut like this often looks best after a smoothing cream and diffuser combo rather than salt spray. Salt can make coarse ends expand, which is the last thing this shape needs.
Short version? Thick, coarse waves rarely need more excitement. They need editing.
22. The Beachy Shoulder-Length Butterfly Cut With Invisible Layers
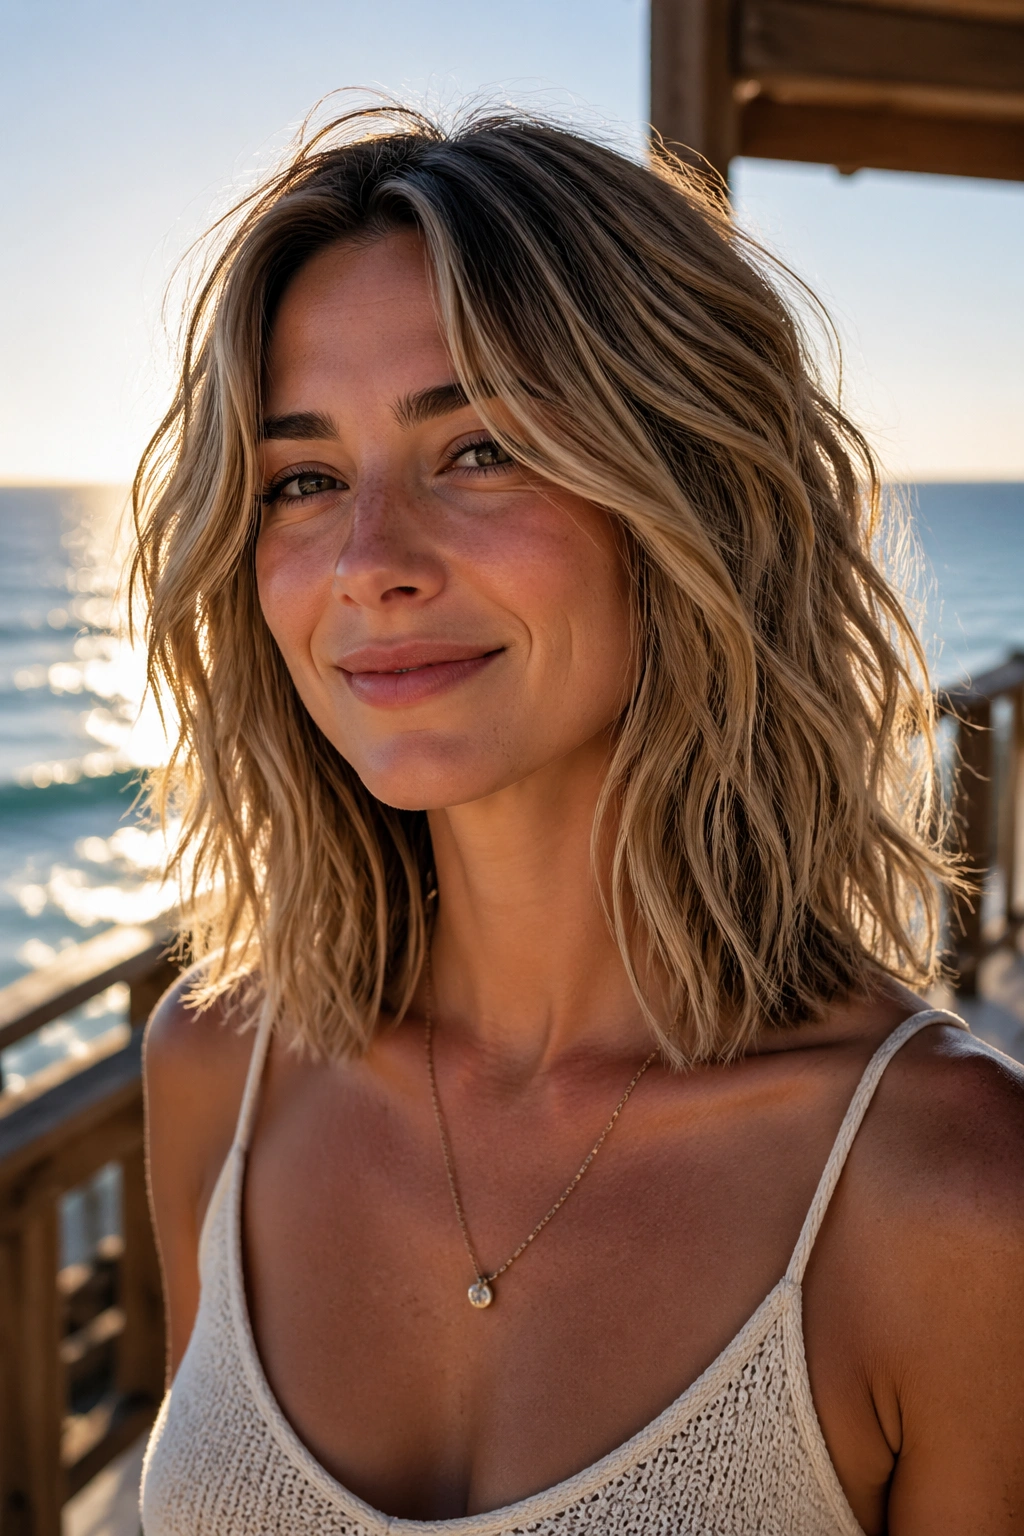
Not everyone wants the layers to announce themselves. Invisible layering is subtler; it removes weight and adds movement without leaving obvious step marks when the hair air-dries.
This is one of my favorite options for people who like a beachy finish but hate seeing chunky, disconnected front pieces. The cut still has the butterfly idea — shorter influence near the face, longer movement through the lower half — though the transitions are softer and harder to spot.
The map usually looks like this:
- Face frame that starts between cheekbone and jaw
- Interior layers blended through the mid-lengths
- Perimeter left strong enough to survive salt spray
- Dry detailing to check where the waves separate naturally
The styling should stay loose. Mist texture spray through the mid-lengths, scrunch once, and leave it alone. Invisible layers lose their charm when you overwork them.
23. The Chin-to-Collarbone Cascading Butterfly Shape
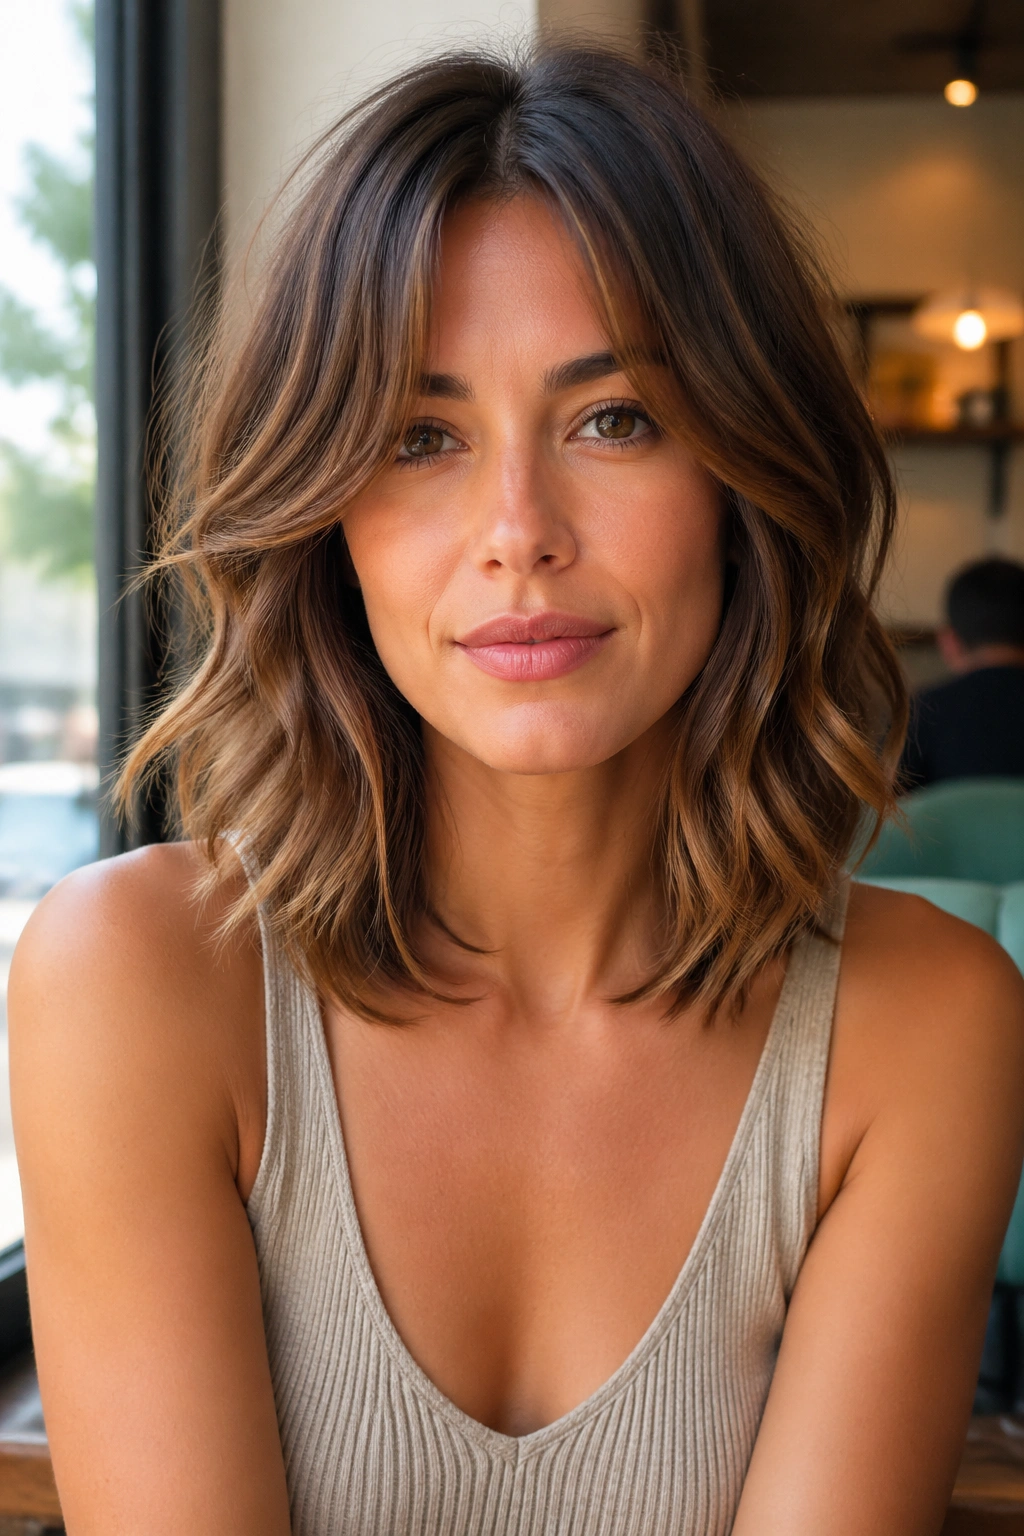
This shape uses a clear front progression: shorter pieces near the chin, then longer pieces dropping toward the collarbone in soft steps. When it’s done well, the layers seem to pour forward instead of sitting in shelves.
That cascading effect can be a lifesaver on hair that feels heavy around the jaw. The shorter front pieces break up that density and guide the eye down through the rest of the haircut. Waves make the transitions even softer because each bend interrupts the line in a different place.
I especially like this on hair that gets worn tucked behind the ears. Once you release it, the front sections fall out in a way that looks built-in rather than random. It gives the cut a lot of life around the face without needing bangs.
The danger is stacking those front steps too close together. Leave enough room between the chin piece and the next longer section, or the whole front starts puffing into one wide wedge.
24. The Romantic Butterfly Cut With Full Curtain Bangs
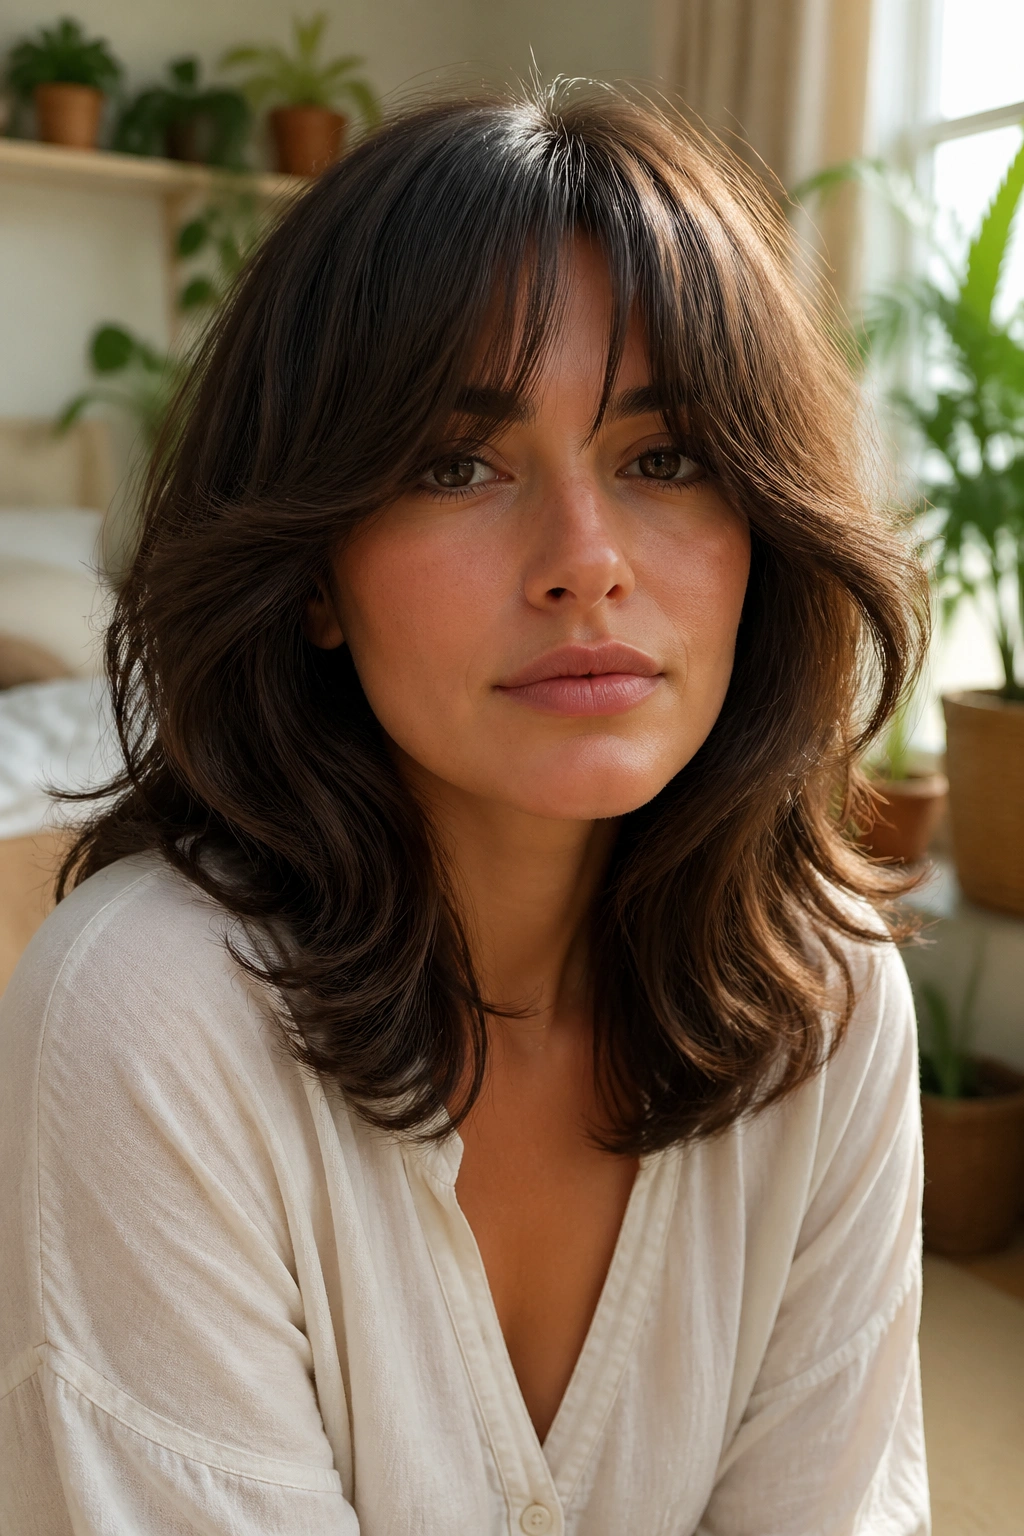
Unlike wispy bottleneck bangs, full curtain bangs bring more presence. They start thicker, sweep outward from the center, and create a stronger frame around the eyes and cheekbones. On a shoulder-length wavy butterfly cut, they can make the whole haircut feel softer and richer.
I’d steer this toward medium-density hair first. If the hair is too fine, the fuller fringe can rob too much from the sides. If the hair is dense, it can carry the weight easily, and the rest of the cut still looks balanced.
The styling is a bit more hands-on than with long curtain bangs. You’ll want the bangs dried early, before they set in odd directions, then curved away from the face with a round brush or roller. The rest of the waves can stay more relaxed.
Who suits it best? Someone who likes their haircut to read feminine, face-framing, and a touch dramatic — not severe, not flat, and not hiding behind the ears all day.
25. Polished Shoulder Length Wavy Butterfly Cut With Tucked Layers

This is the clean, grown-up version I suggest when someone wants movement but still needs the haircut to behave in meetings, on camera, or with a blazer collar rubbing the nape all day. The layers are placed so the front can tuck neatly behind the ears without half the haircut falling out.
Why the tucked detail matters
Some butterfly cuts look good only when every piece is loose and styled. This one is built to survive real life. The front sections are long enough to tuck, the shortest layers aren’t too choppy, and the perimeter stays smooth at the shoulders.
What to ask for
- Long face-framing layers that start below the cheekbone
- A polished perimeter with light softening at the ends
- Enough internal movement for waves, not enough to turn wispy
- Front pieces tested both loose and tucked during the cut
Best move: if you wear this one smooth one day and wavy the next, keep a tiny bit of serum on the ends so the tucked sections don’t fray and puff.
Final Thoughts
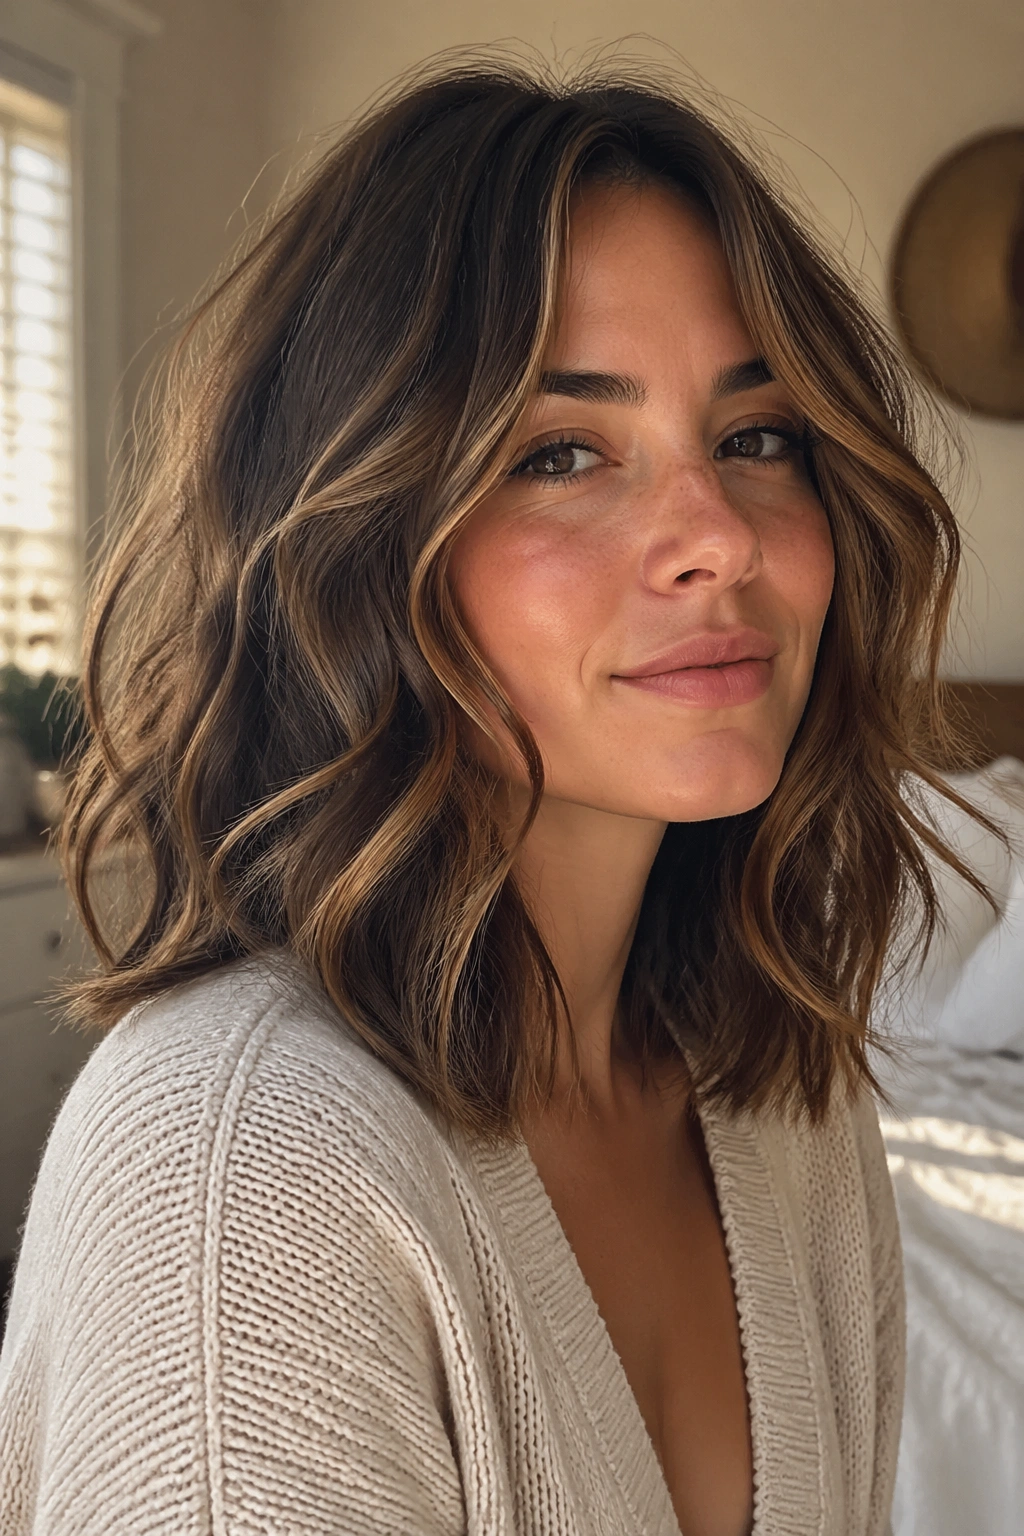
The best shoulder-length wavy butterfly cut is rarely the one with the most layers. It’s the one with the right layers in the right places — enough lift around the face, enough weight at the bottom, and enough respect for how your own waves bend when nobody is standing there with a round brush.
If you’re stuck between two versions, choose the calmer one first. You can always add a little more fringe, a little more texture, a little more crown movement at the next trim. Growing out over-layered wavy hair is a longer, stranger process.
And if your stylist nails the shape, protect it. Diffuse with some patience, stop scorching the ends, and book the trim before the front turns stringy. That’s when a good cut keeps looking like a good cut.
