Curly hair updos for natural hair occupy a special place in the world of Black hair styling — they’re the styles that balance protection with presentation, practicality with pure beauty. An updo keeps your ends tucked, reduces daily manipulation, and manages volume on the days when you just need your hair contained. But the best ones do all of that while also making you feel like you deliberately chose something gorgeous. That’s the whole point.
The History and Power Behind Natural Hair Updos
Updos have always meant something in Black hair culture. Long before they appeared on fashion runways or natural hair influencer feeds, Black women were creating intricate, gravity-defying updos as expressions of artistry, community, and identity. The practice of building a style upward — pinning, twisting, braiding, and shaping hair into architectural forms — is rooted in African hair traditions that stretch back centuries.
What’s changed over the years is the tools, the products, and the range of options available. What hasn’t changed is the intention behind the style. Whether you’re pulling your hair up for a wedding, a professional presentation, or a hot summer day, a natural hair updo is a deliberate act. It’s a choice to say: I am not hiding my texture. I’m framing it.
That’s a powerful thing to understand when you’re standing at your mirror deciding what to do with your hair.
What Makes a Curly Updo Work
Not every gathered hairstyle counts as a successful updo. The difference between a style that looks intentional and one that looks like an afterthought often comes down to three things: moisture, structure, and finish.
Moisture first. Dry, brittle curls don’t behave when you try to manipulate them into an updo — they snap, frizz, and resist. Always start with moisturized hair. A light leave-in and a touch of cream or oil over your curls creates the pliability you need to work with the hair rather than against it.
Structure means the updo has a clear shape — there’s a defined top, sides that are controlled, and a finish that holds. This doesn’t mean everything has to be smooth or slicked down. Textured, voluminous updos have structure too — it’s just more organic, more free. But there’s a difference between a deliberately full, rounded updo and hair that’s just piled and pinned without intention.
Finish is what separates amateur from polished. Edge control along the hairline, a light holding spray over the finished style, and any stray pieces pinned or smoothed — these small finishing steps take five minutes and make an enormous visual difference.
Best Curl Patterns for Updos
The beautiful truth is that every curl pattern produces stunning updos. The approach changes, but the results are all compelling in their own way.
Type 3 curls tend to be cooperative in updos — they’re long enough to gather, defined enough to look intentional, and light enough that updos don’t feel too heavy. The challenge with looser curls is frizz control, especially in humidity.
Type 4A hair is a sweet spot for updos. It’s dense enough to create volume, defined enough to look textured and interesting, and strong enough to hold pins and accessories without slipping.
Type 4B and 4C hair creates the most visually dramatic updos because of the sheer density and volume of the texture. A 4C updo doesn’t just sit on your head — it fills space. That volume, managed intentionally, is genuinely spectacular. The trade-off is more product, more pins, and sometimes more prep time. Worth it.
Tools You’ll Need for Natural Hair Updos
You don’t need a salon’s worth of equipment to create a great updo. But you do need the right tools. A wide-tooth comb for detangling, sectioning clips to keep your hair organized as you work, a soft-bristle brush for smoothing any sections you want controlled, and a good supply of bobby pins that match your hair color — these are the basics.
Beyond the basics: a rattail comb for clean parting, hair ties without metal clasps, flexible holding spray that doesn’t make hair stiff or flaky, and a good edge control product. For more intricate updos involving braiding or twisting, a good hair cream that provides slip is essential.
Accessories are optional but transformative. Decorative pins, satin scrunchies, gold cuffs, silk ribbons, and jeweled barrettes can turn a basic updo into something genuinely special with minimal additional effort.
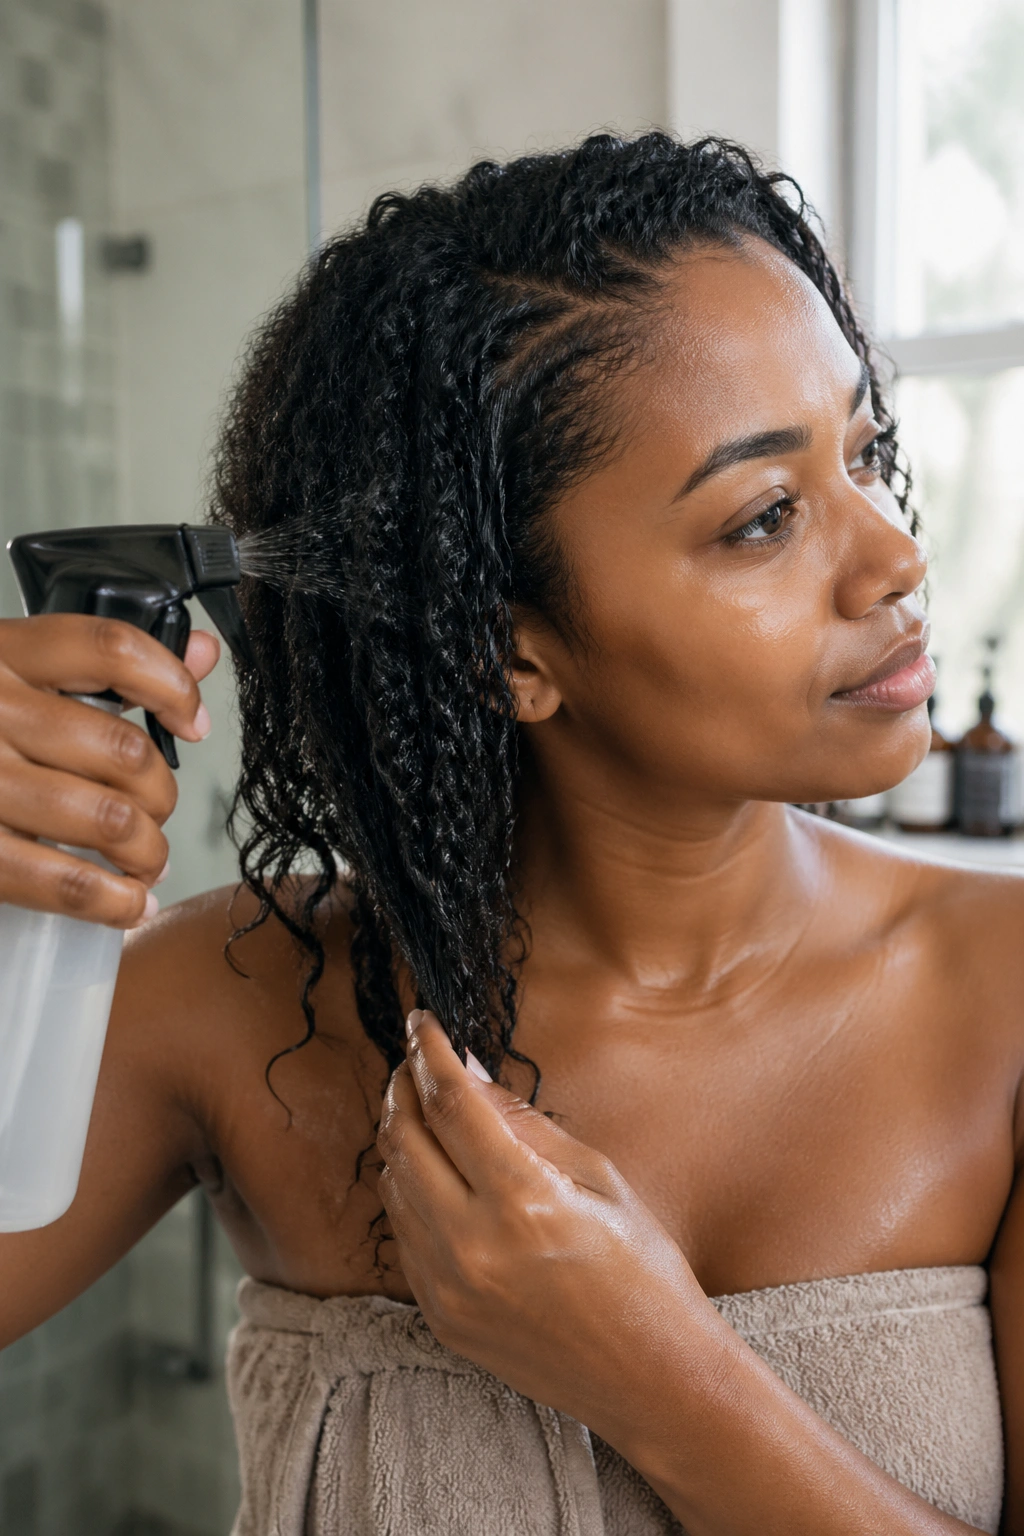
Moisture and Prep Before the Updo
Attempting an updo on completely dry, unmoisturized hair is asking for breakage. Always start with some degree of moisture in your hair. For many naturalistas, this means working with freshly washed, conditioned hair. For others, a good refresh — spray with water and leave-in, let it absorb for a few minutes — is enough to make the hair cooperative.
If you’re doing an updo that involves flat twisting or braiding against the scalp, you’ll also want to make sure your scalp is oiled lightly. A dry, itchy scalp under a style you’re wearing for multiple days is deeply uncomfortable and doesn’t need to happen.
1. The Classic High Puff
The high puff is the reigning queen of everyday natural hair updos — simple, fast, and reliably cute. The key to making it look elevated rather than just thrown together is in the details: the smoothness of the base, the roundness of the puff, and the neatness of the edges.
How to Get This Look
Apply edge control along your entire hairline. Use a soft-bristle brush to smooth hair backward and upward. Gather everything at the crown, securing with a thick satin scrunchie. Fluff the puff outward to maximize volume, working with your fingers from the roots upward. Lay your edges with a small brush, using an edge control product that holds without flaking.
- Use a large satin scrunchie for maximum comfort and hold
- Wrap with a satin scarf for ten minutes after smoothing edges to set them
- Add decorative pins or a jeweled clip to the base for an elevated look
- Key: The rounder the puff, the more polished it looks
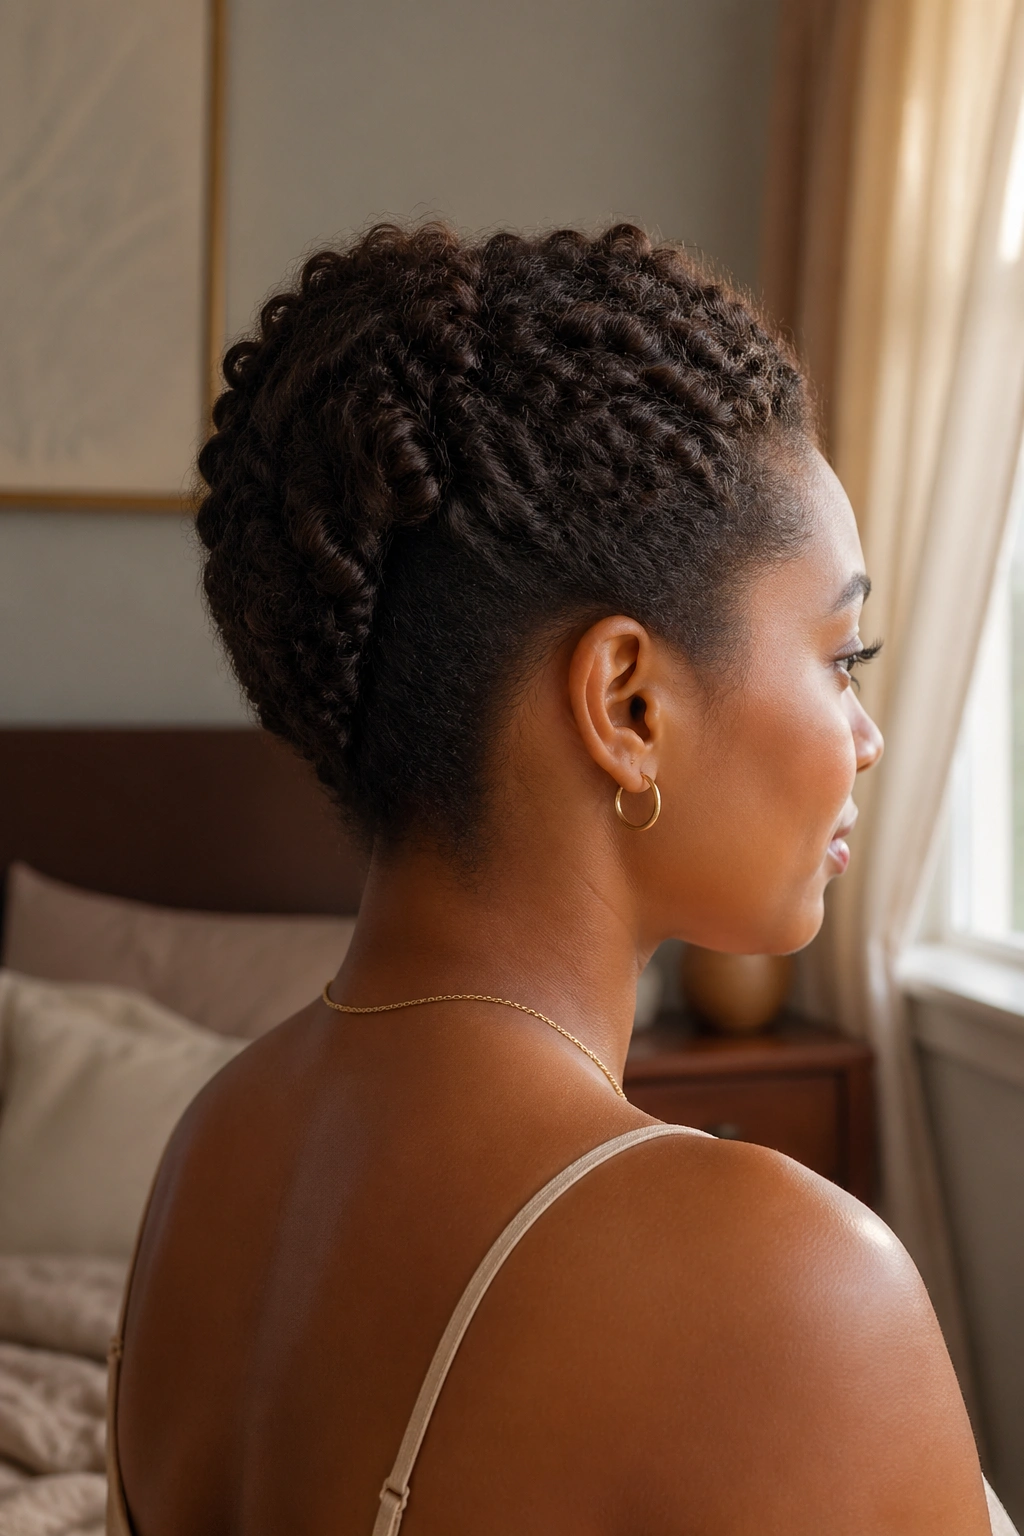
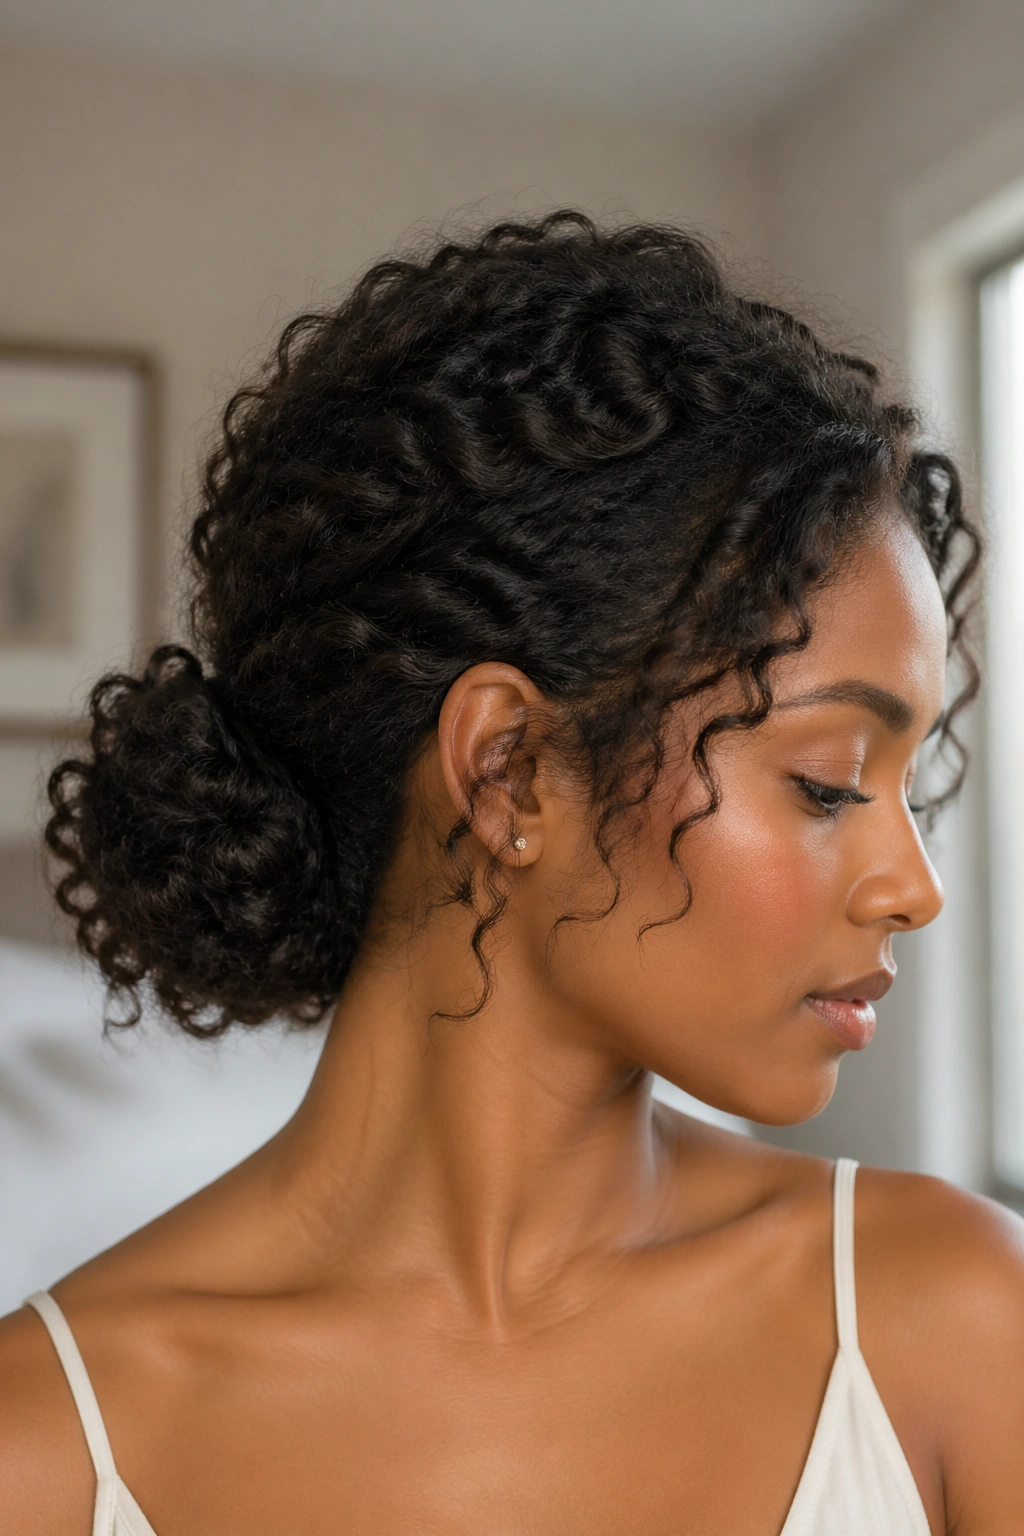
2. Low Bun With Textured Volume
A low bun sits at the nape of the neck and works beautifully for professional settings, formal occasions, and everyday wear alike. On natural hair, the textured volume inside the bun is the visual interest — you’re not going for the sleek, polished bun of relaxed hair styles. You’re going for something that shows the curl.
Gather hair loosely at the nape, secure with a scrunchie, and tuck and pin any trailing pieces. The bun doesn’t need to be perfectly round — a slightly loose, organic shape is actually more flattering on most face shapes than a perfectly tight ball. Add a few bobby pins to keep it secure and finish with a light holding spray.
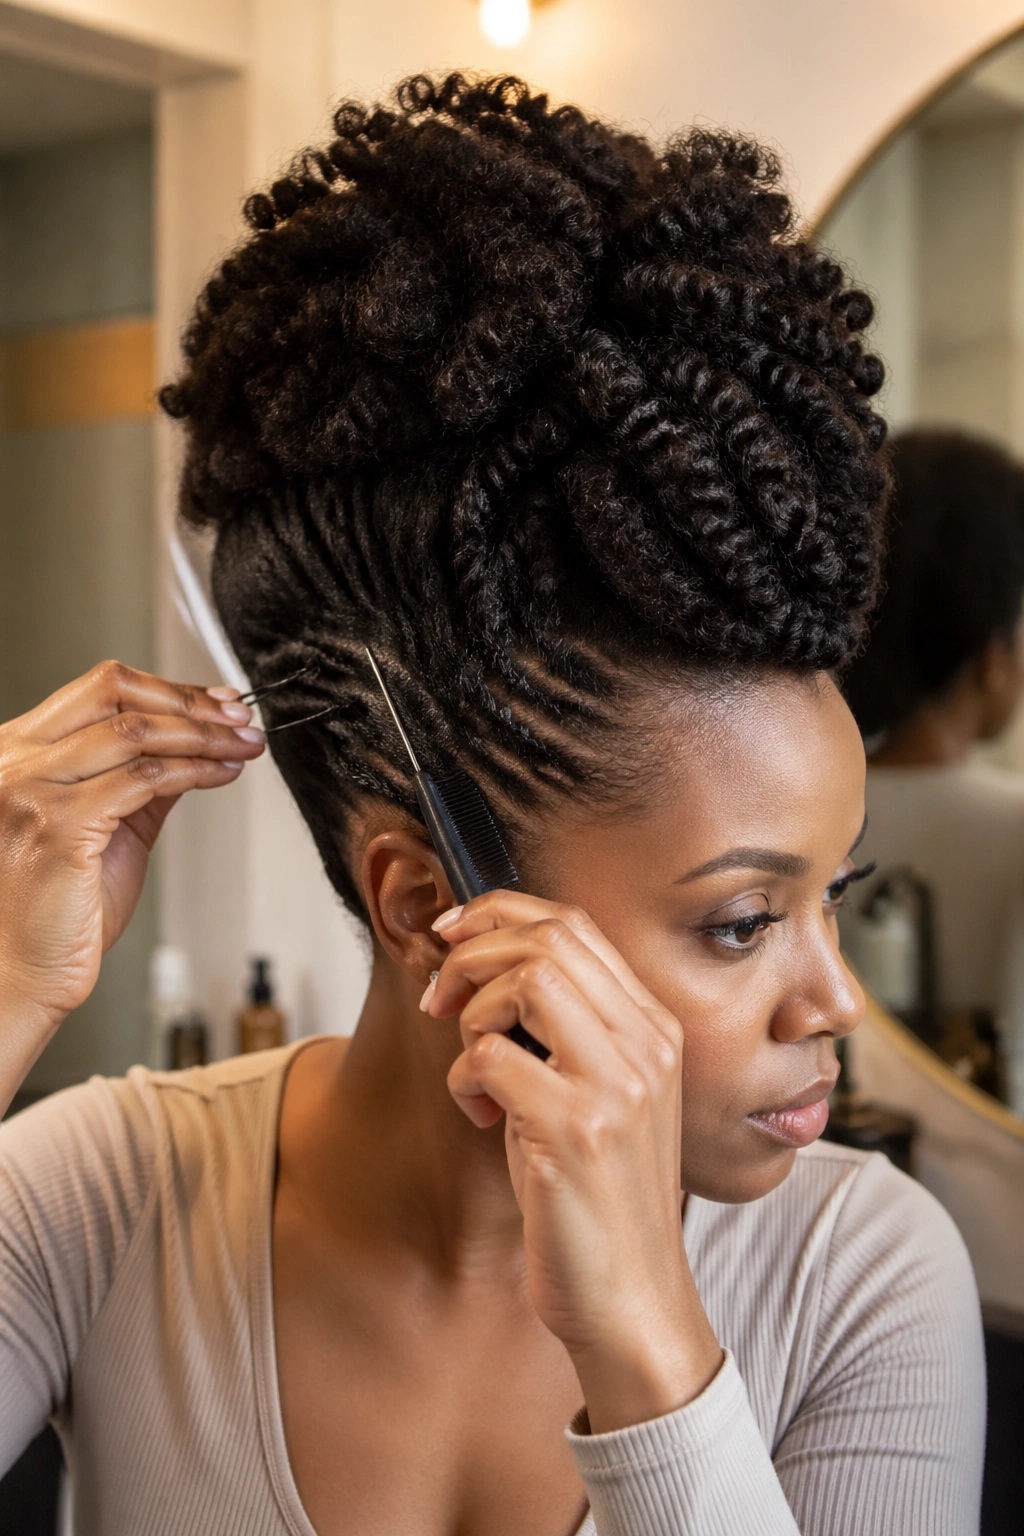
3. Flat Twist Updo
Flat twists are two-strand twists done flat against the scalp — similar in technique to cornrows but with only two strands instead of three. They’re gentler on the scalp, easier to do on yourself, and create a beautiful, textured pattern along the scalp.
A flat twist updo combines the technique with an upswept finish. Start flat twists at the hairline on each side, working them back and upward toward the crown. When you run out of scalp to work along, continue the twist off the scalp and pin the ends upward into the center of the style. Gather the remaining hair from the top and back into a puff or bun. The flat twists frame the style like a crown.
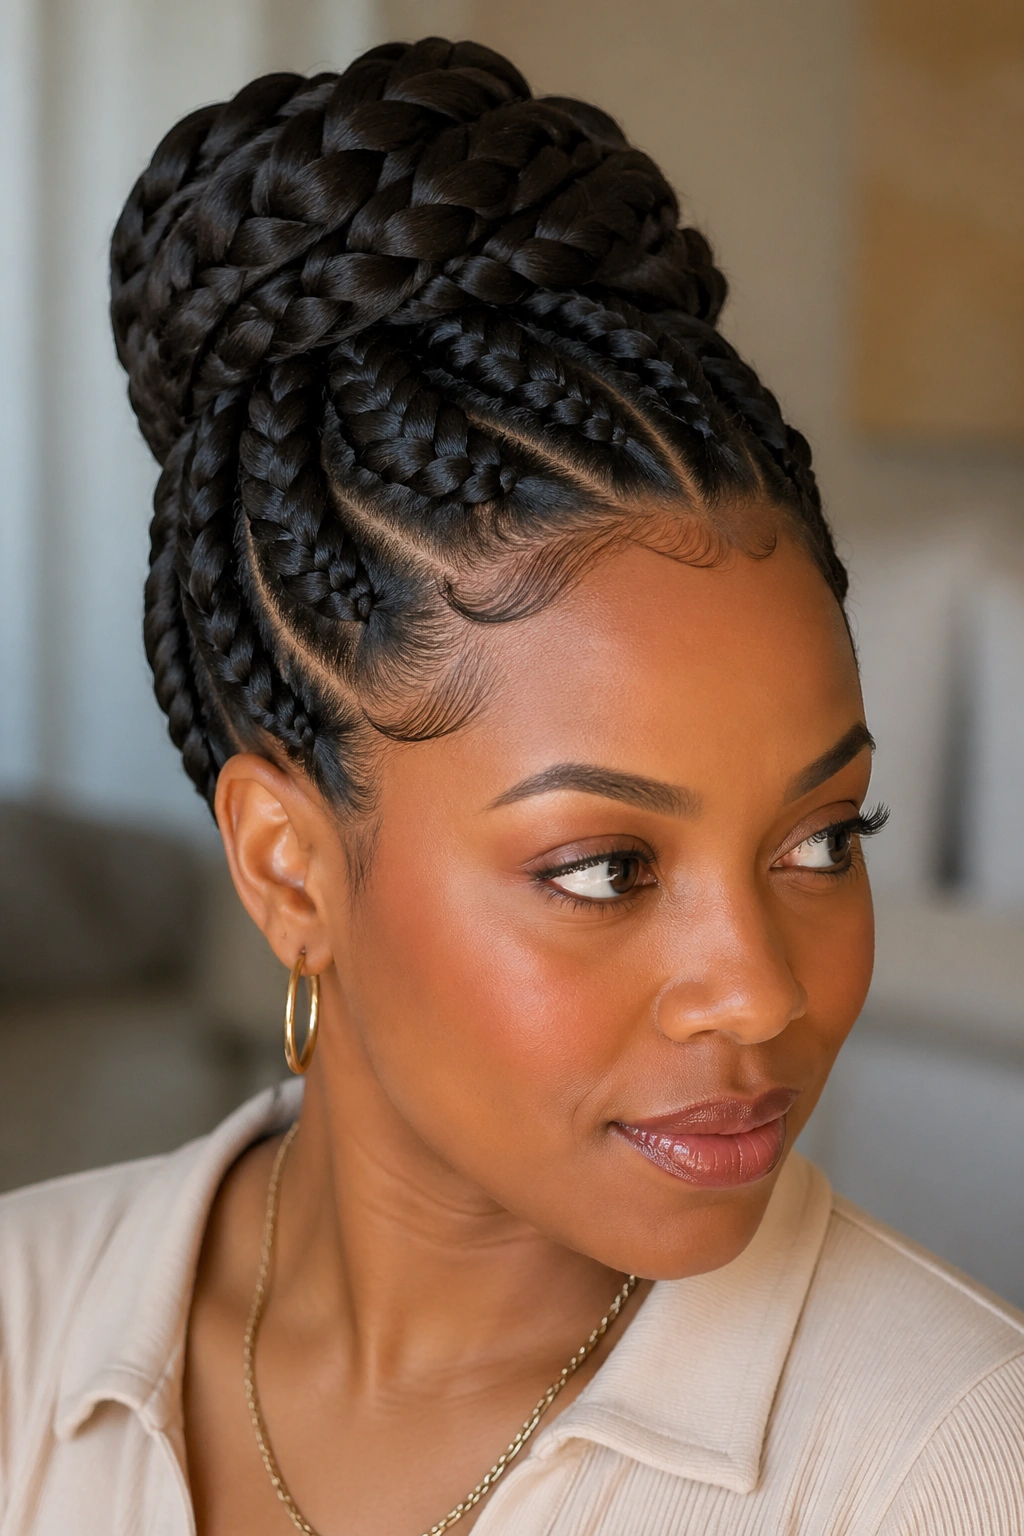
4. Braided Updo
A full braided updo — whether knotless box braids gathered upward, cornrows styled into a structured silhouette, or individual braids pinned into a chignon — is one of the most enduringly beautiful styles in natural hair. The braiding technique itself creates structure, so the updo holds its shape without needing extensive pinning.
For a DIY braided updo, start with the braids installed (either freshly done or an existing set), then manipulate them into the updo shape you want. Large braids can be wrapped around a bun shape. Smaller braids can be pinned in overlapping layers for a more intricate look. Secure well and finish with a holding spray.
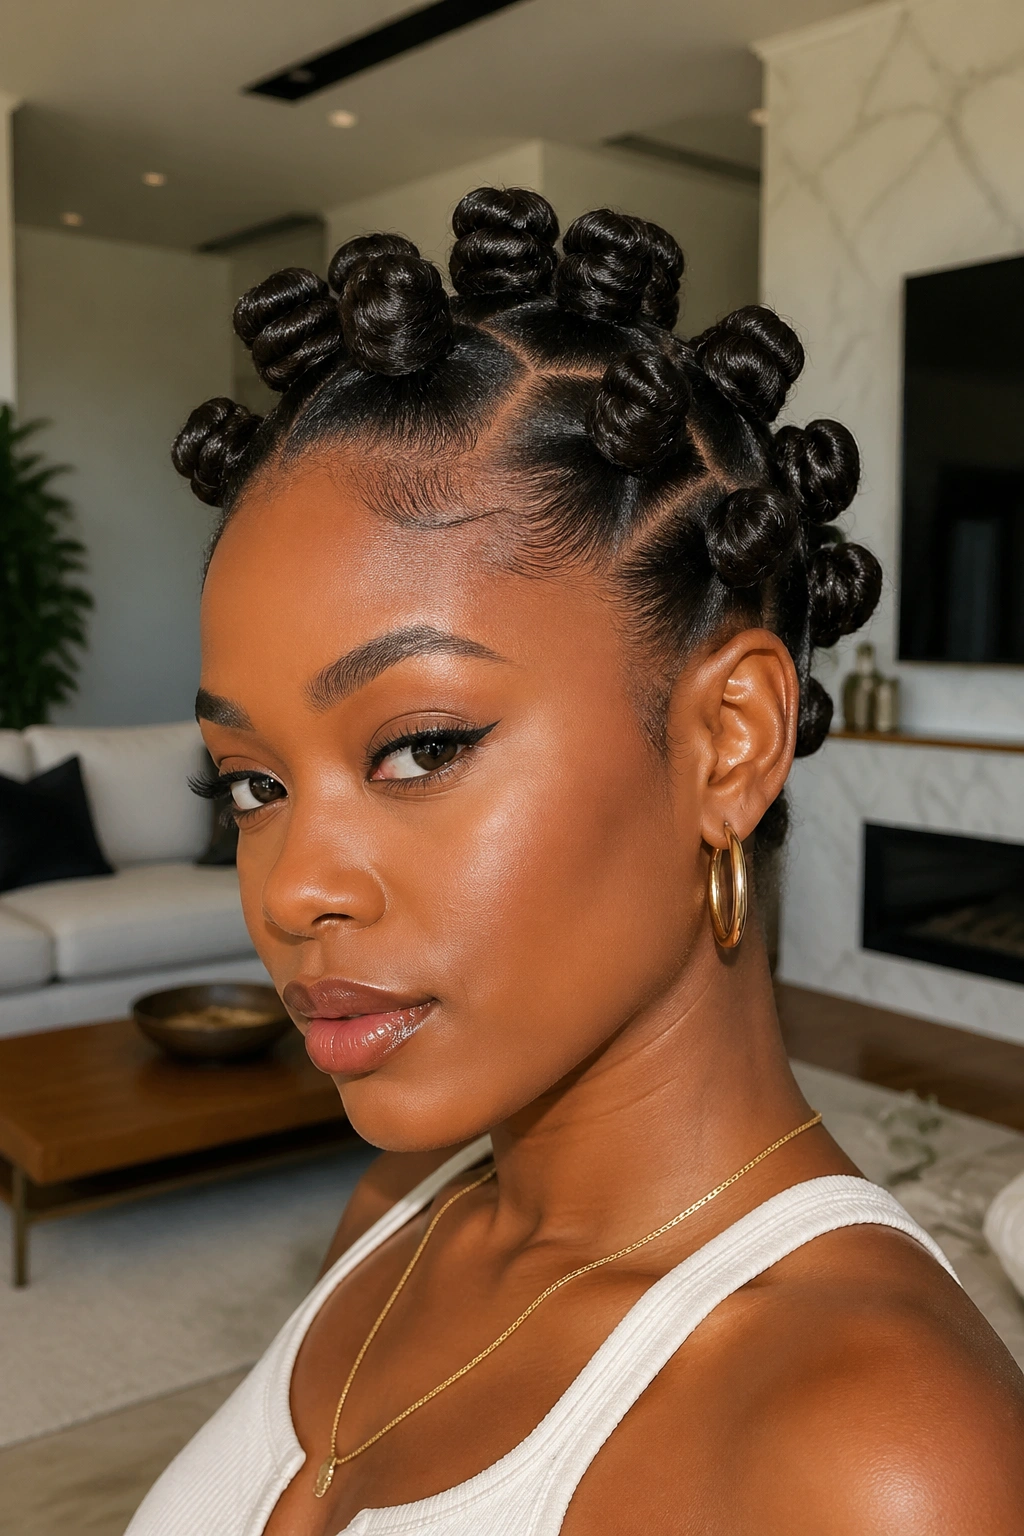
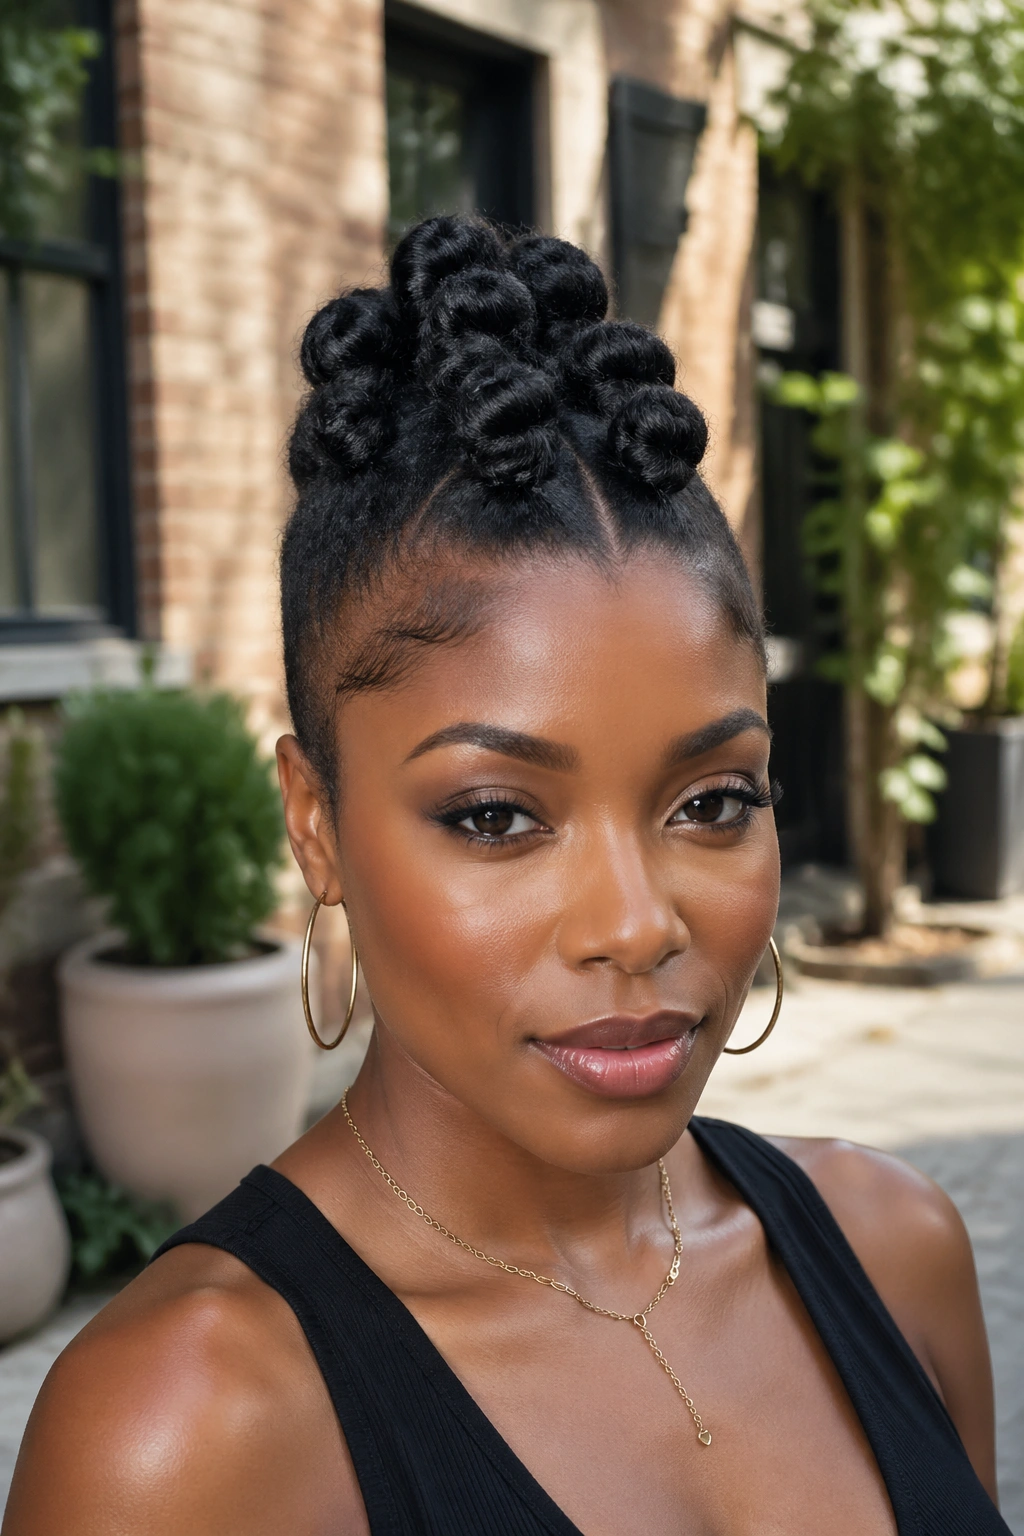
5. Bantu Knot Updo
Bantu knots worn as an updo — meaning the knots are placed specifically to create an upswept silhouette — combine cultural tradition with genuine style versatility. The knots sit flat against the scalp in neat, coiled formations, and arranged with intention, they create a structured updo that looks architectural.
How to Get This Look
Section hair cleanly into a grid pattern. Twist each section tightly and coil it clockwise, flattening it against the scalp. Tuck the end beneath the base of the knot and secure with a bobby pin. The placement of the knots determines the shape of the updo — keep all knots above the ear line for a high, crown-like effect.
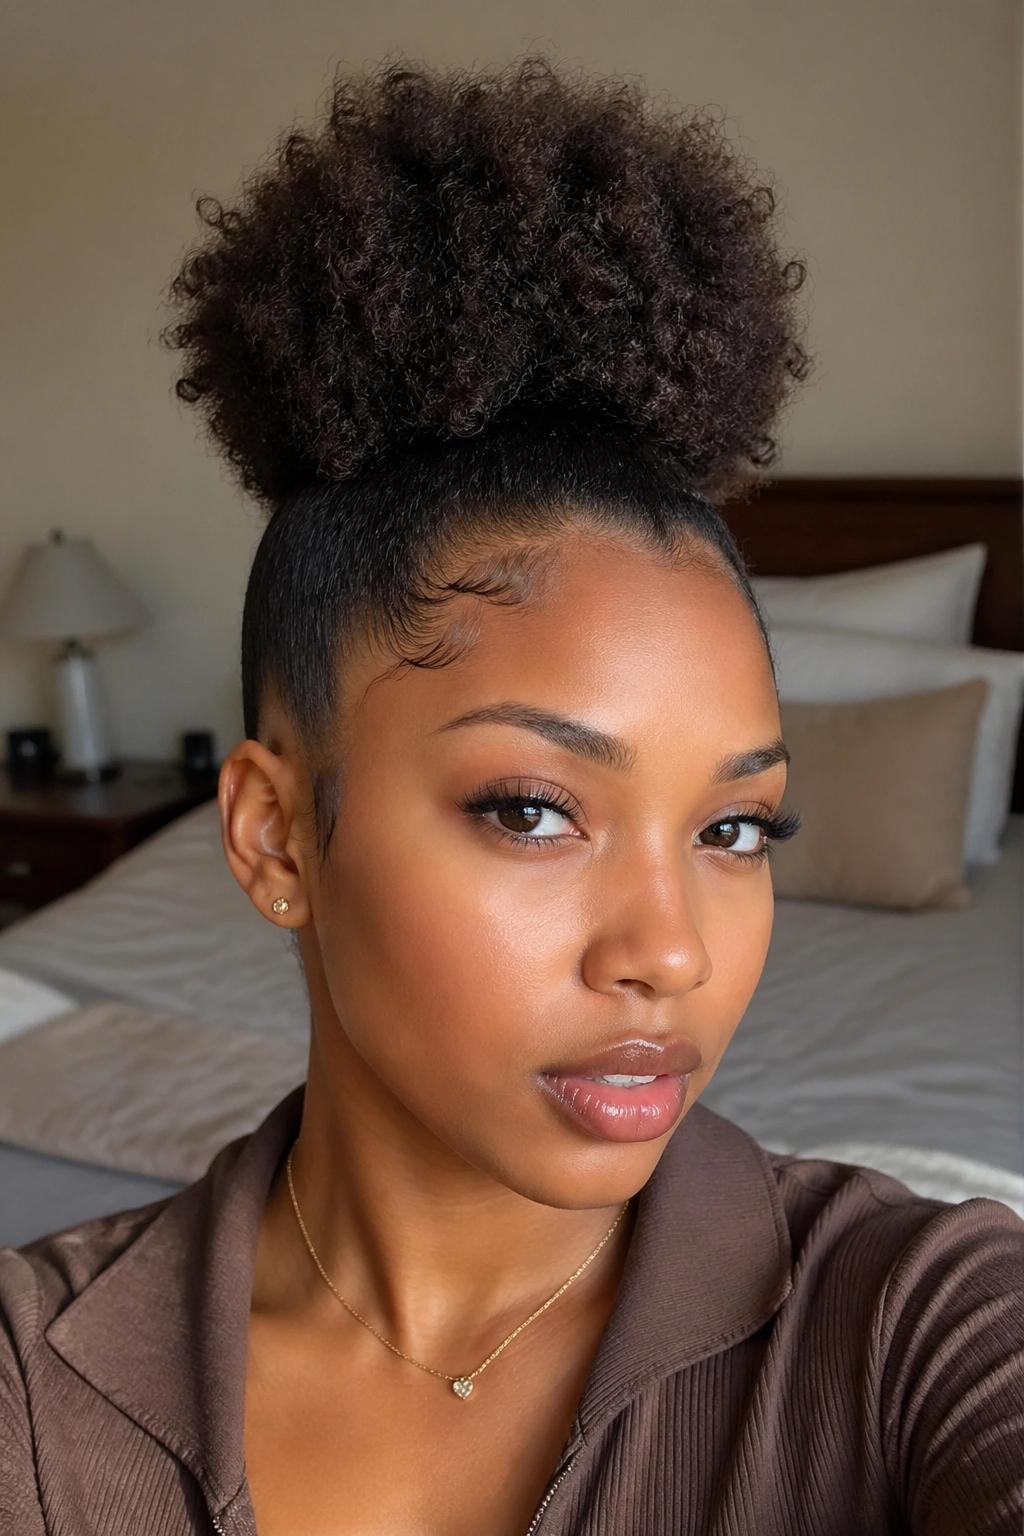
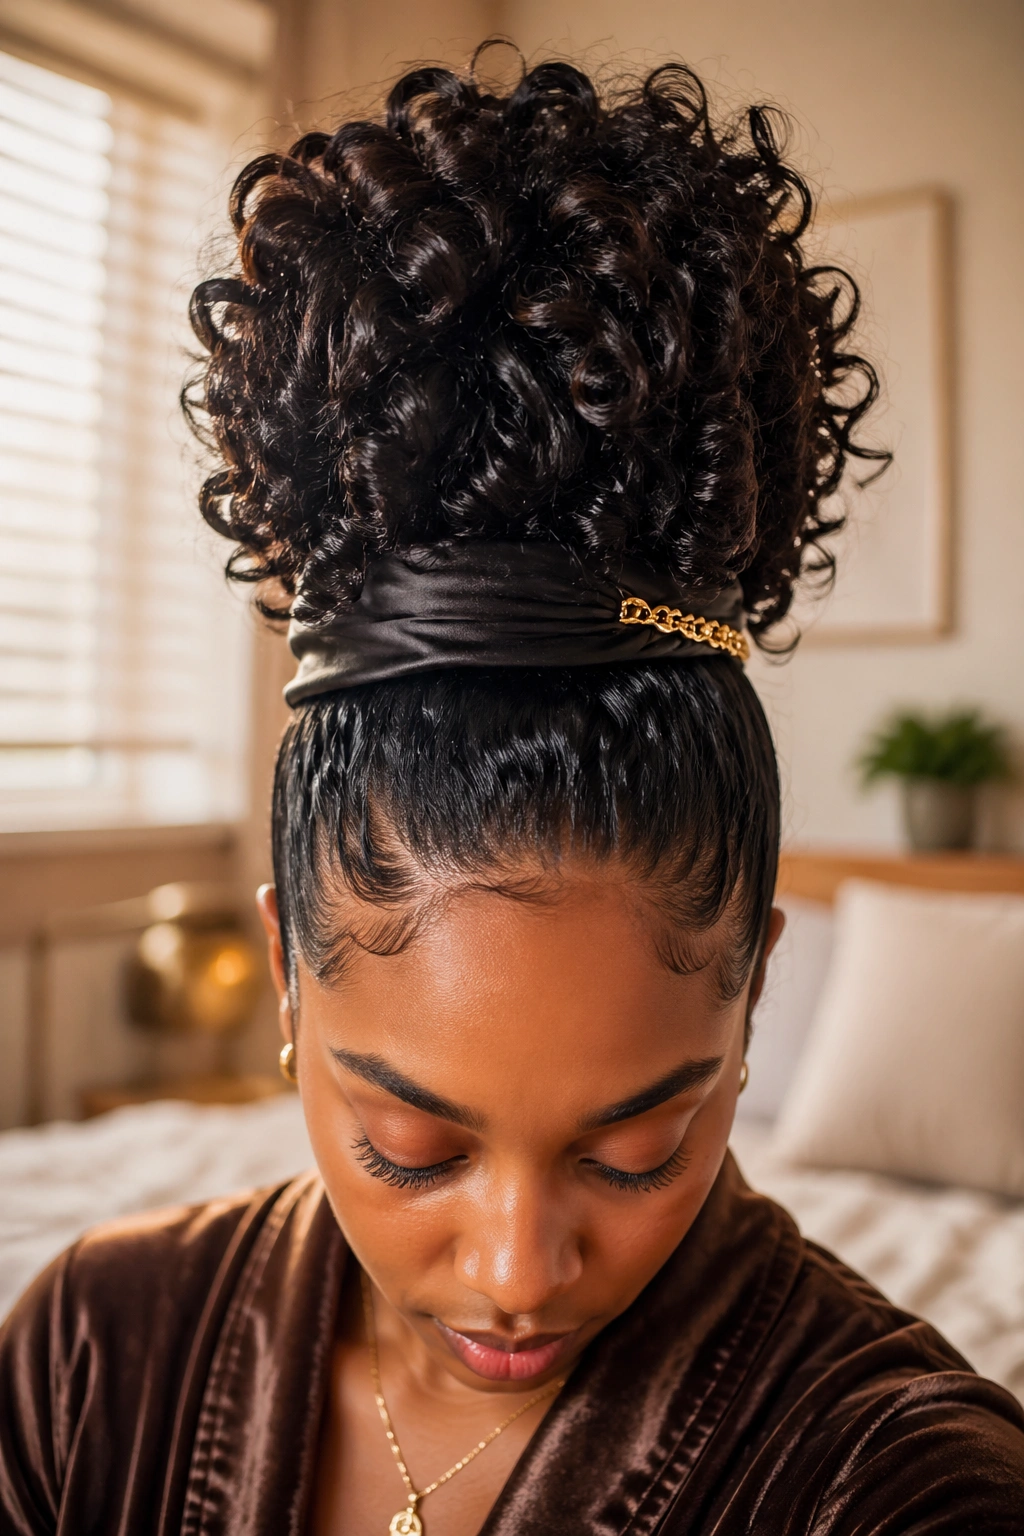
6. The Pineapple Updo (Elevated)
The pineapple — gathered high at the crown with a scrunchie — is often treated as a casual or sleep style, but with the right details, it’s a legitimate updo. High, loose, and voluminous, an elevated pineapple with smooth edges and a decorative element at the base is a style that stands entirely on its own.
The key distinction from a daytime pineapple is the finish. Lay edges flat and smooth. Add a wide satin headband or a jeweled clip at the base. Pull the front section to a precise point rather than letting it fall haphazardly. These details transform the pineapple from sleep prep into an intentional, wearable style.
7. Twisted Halo
A twisted halo is created by doing two flat twists — one starting at each temple — and directing them around the crown of the head like a halo, meeting at the back. The hair below the halo can hang loose or be gathered into a bun. It’s elegant, symmetrical, and looks more complex than it actually is.
The halo works best on hair long enough that the twists can travel all the way around the head. For shorter hair, even two sections that meet at the nape create a partial halo that’s equally lovely.
8. Two-Bun Updo (Space Buns)
Two buns, divided by a center part and positioned high on each side of the head — this style has a playful, youthful energy that’s distinctly different from more formal updos. On natural hair, the textured, curly buns look full and lush rather than flat, which is one of the biggest advantages of this style for curl textures.
Divide hair with a center part. Gather each half at the top of its respective side. Secure with a scrunchie. Fluff each bun outward for volume. For an evening version, add jeweled pins or wrap satin ribbon around each bun’s base.
9. Twisted Updo With a Cascade
Take multiple sections of hair, twist each one, and then gather all the twists upward and pin them into a loose cascade at the back of the head. Unlike a tight bun, the cascade lets individual twists fall naturally from the pin point, creating movement and texture. It’s the natural hair equivalent of a French roll — structured at the base, organic at the top.
10. Faux Hawk Updo
A faux hawk on natural hair is created by pinning the sides upward and leaving a central strip of hair standing freely from front to back. For an updo version, gather the central strip into a series of small buns or twists along the top, creating a structured, architectural line of texture down the middle of the head.
This is a bold choice. It reads as confident and artistic — the kind of style that makes a statement before you say a word.
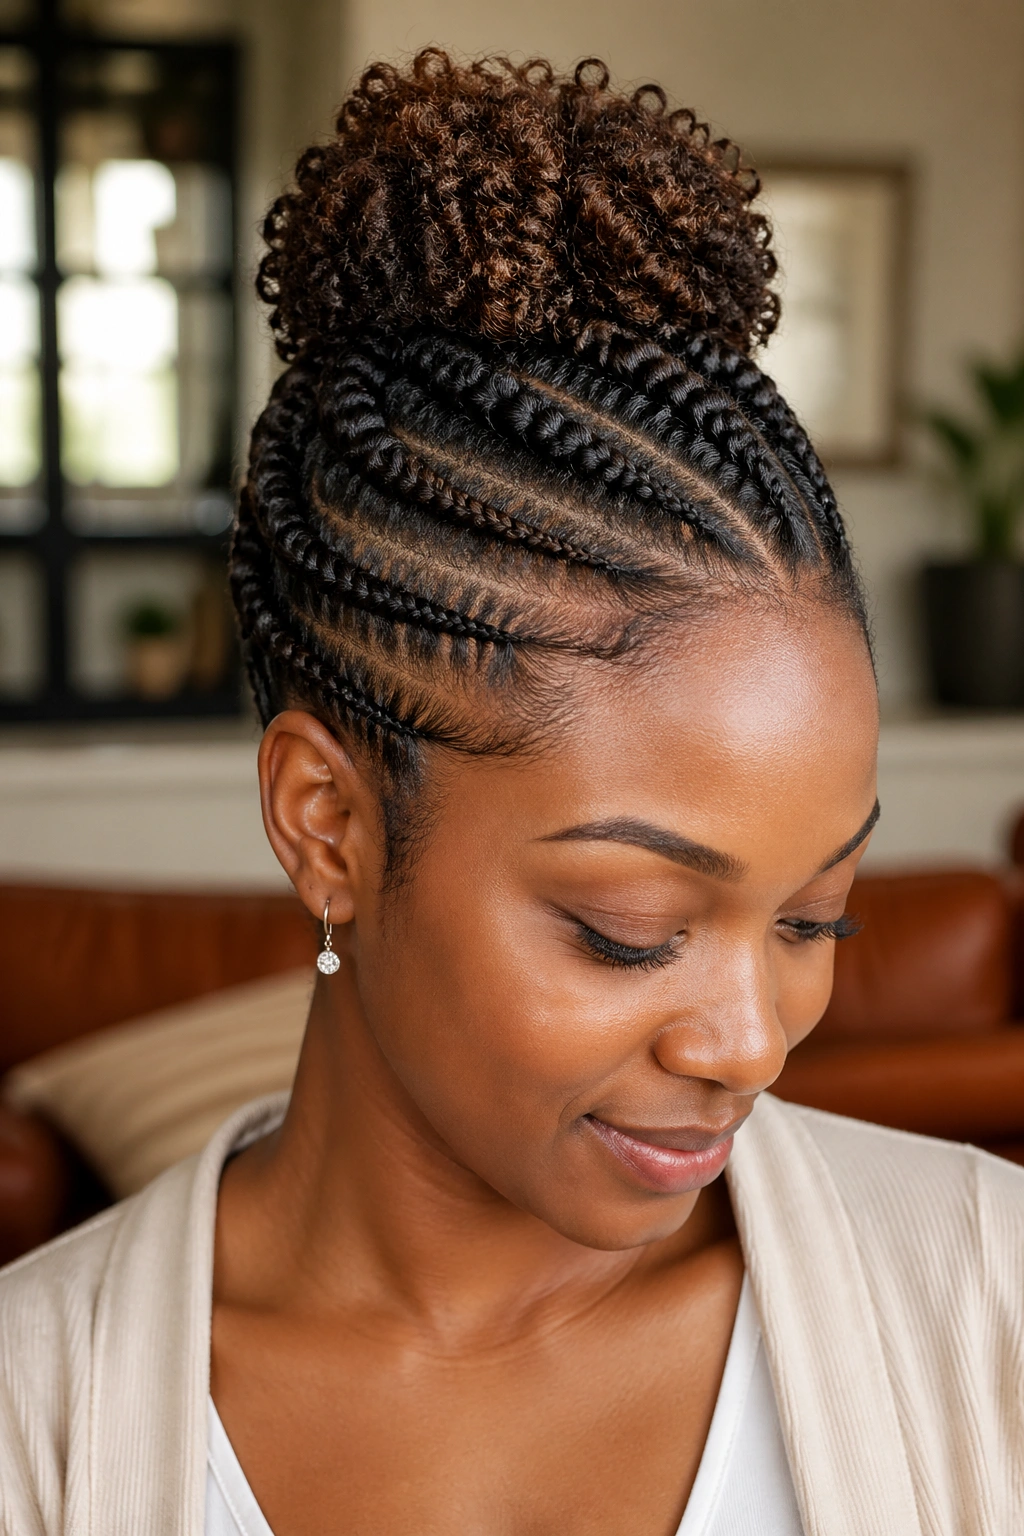
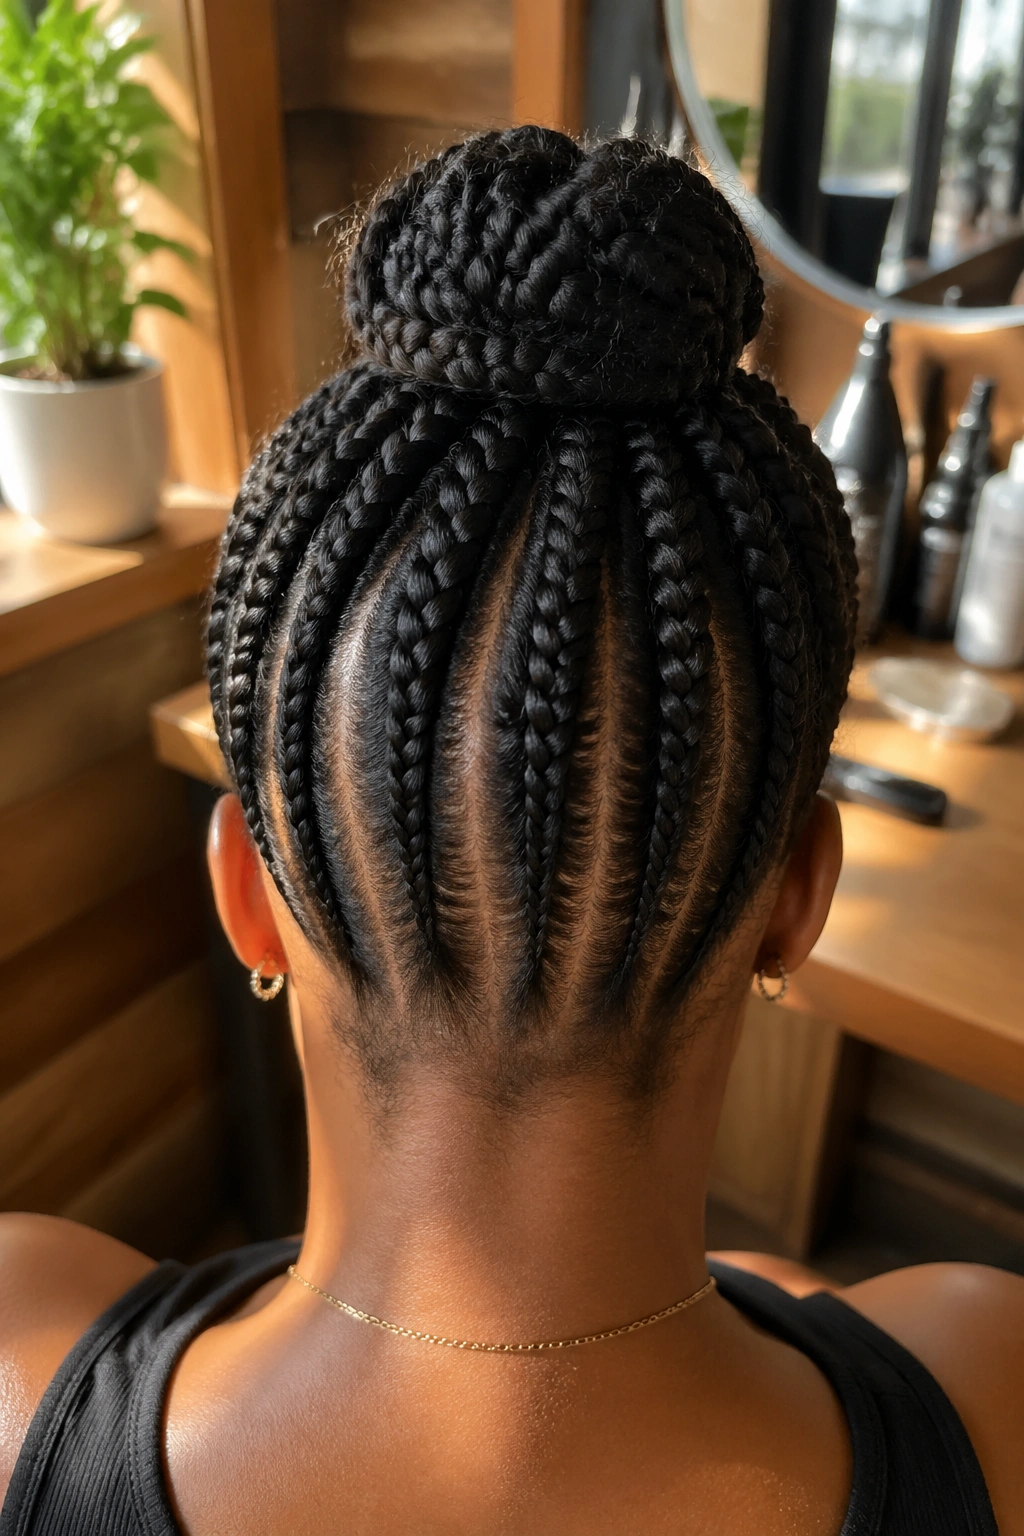
11. Cornrow Updo
Cornrows styled into an updo — rows that run upward from the nape toward the crown, or rows that converge into a central bun — are a protective and beautiful choice. The scalp remains visible between the rows, which some women find helpful for scalp care access during a longer-wear style.
A cornrow updo installed by a skilled braider can last two to three weeks, making it one of the longest-lasting updo options.
12. Roll and Tuck
The roll-and-tuck technique requires no products, no pins, and almost no skill. Gather your hair into a high ponytail. Then roll the ponytail upward and tuck it under the base, creating a flat roll against the back of your head. Secure with bobby pins. For natural hair, the curly texture makes this roll look full and interesting rather than flat.
13. Finger Coil Updo
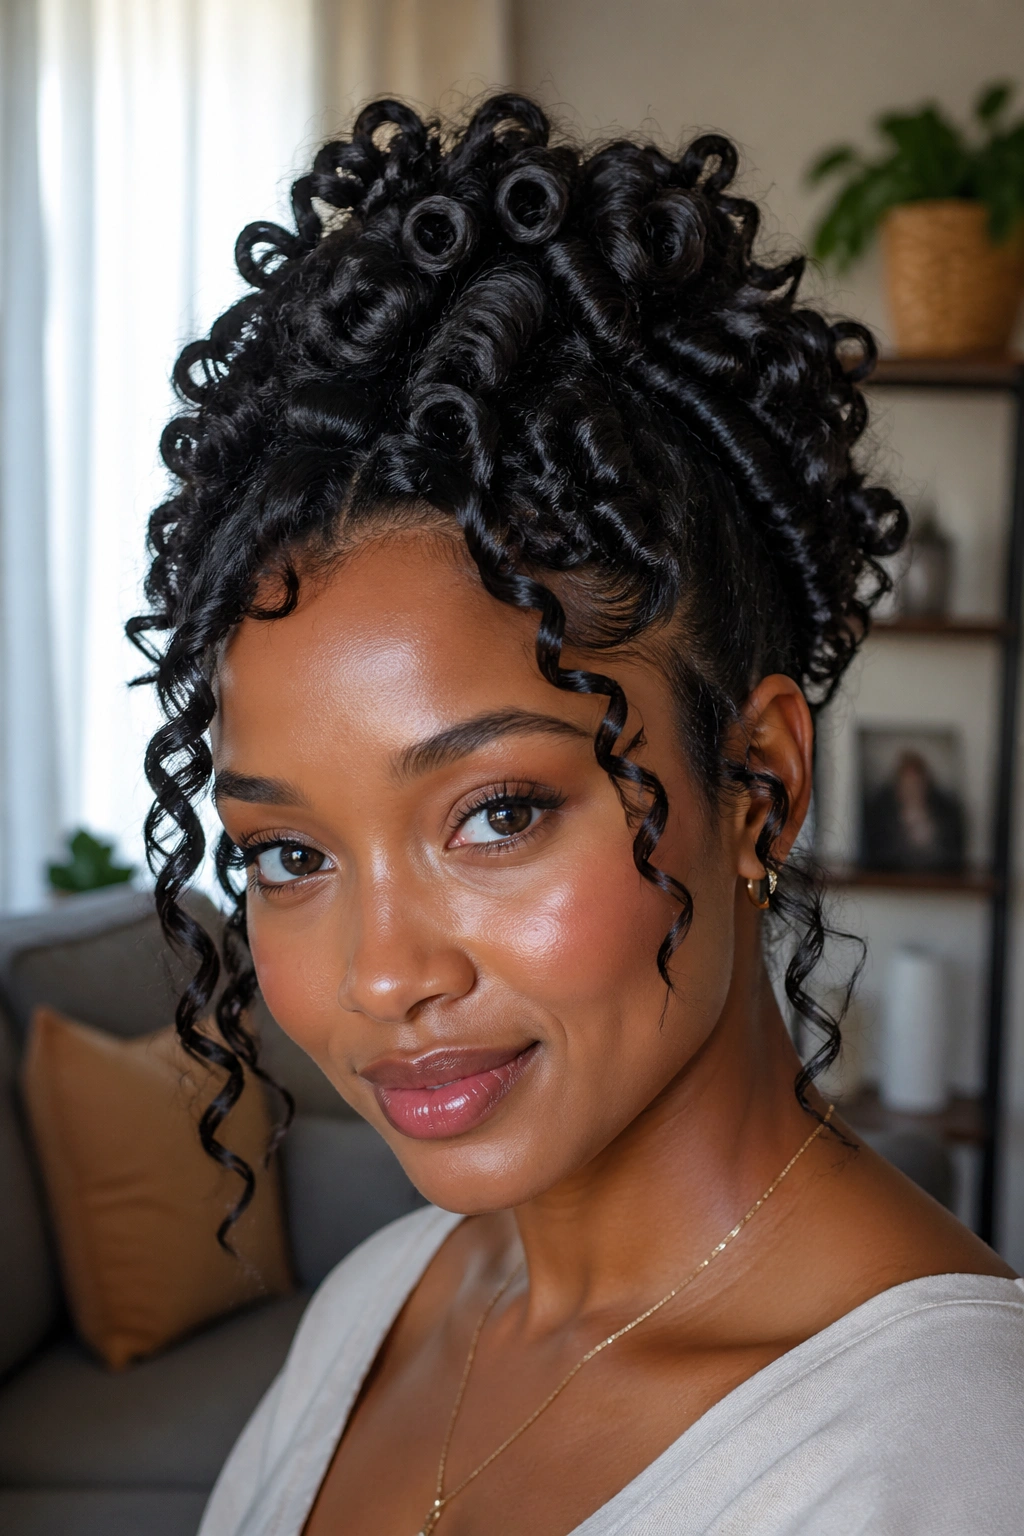
Set finger coils across the entire head, then gather them upward and pin them into a loose updo shape at the crown. The coils retain their shape even while pinned, creating a textured, structured updo that looks like deliberate artistry. Leave a few coils loose around the face for a romantic, soft frame.
14. Knotless Braid Bun
Knotless braids don’t start with a tight knot at the scalp — they begin with your own natural hair and gradually incorporate extension hair, which dramatically reduces scalp tension. A knotless braid bun gathers all the braids upward into a high or low bun, creating a large, voluminous shape that’s a step up from the classic box braid pony.
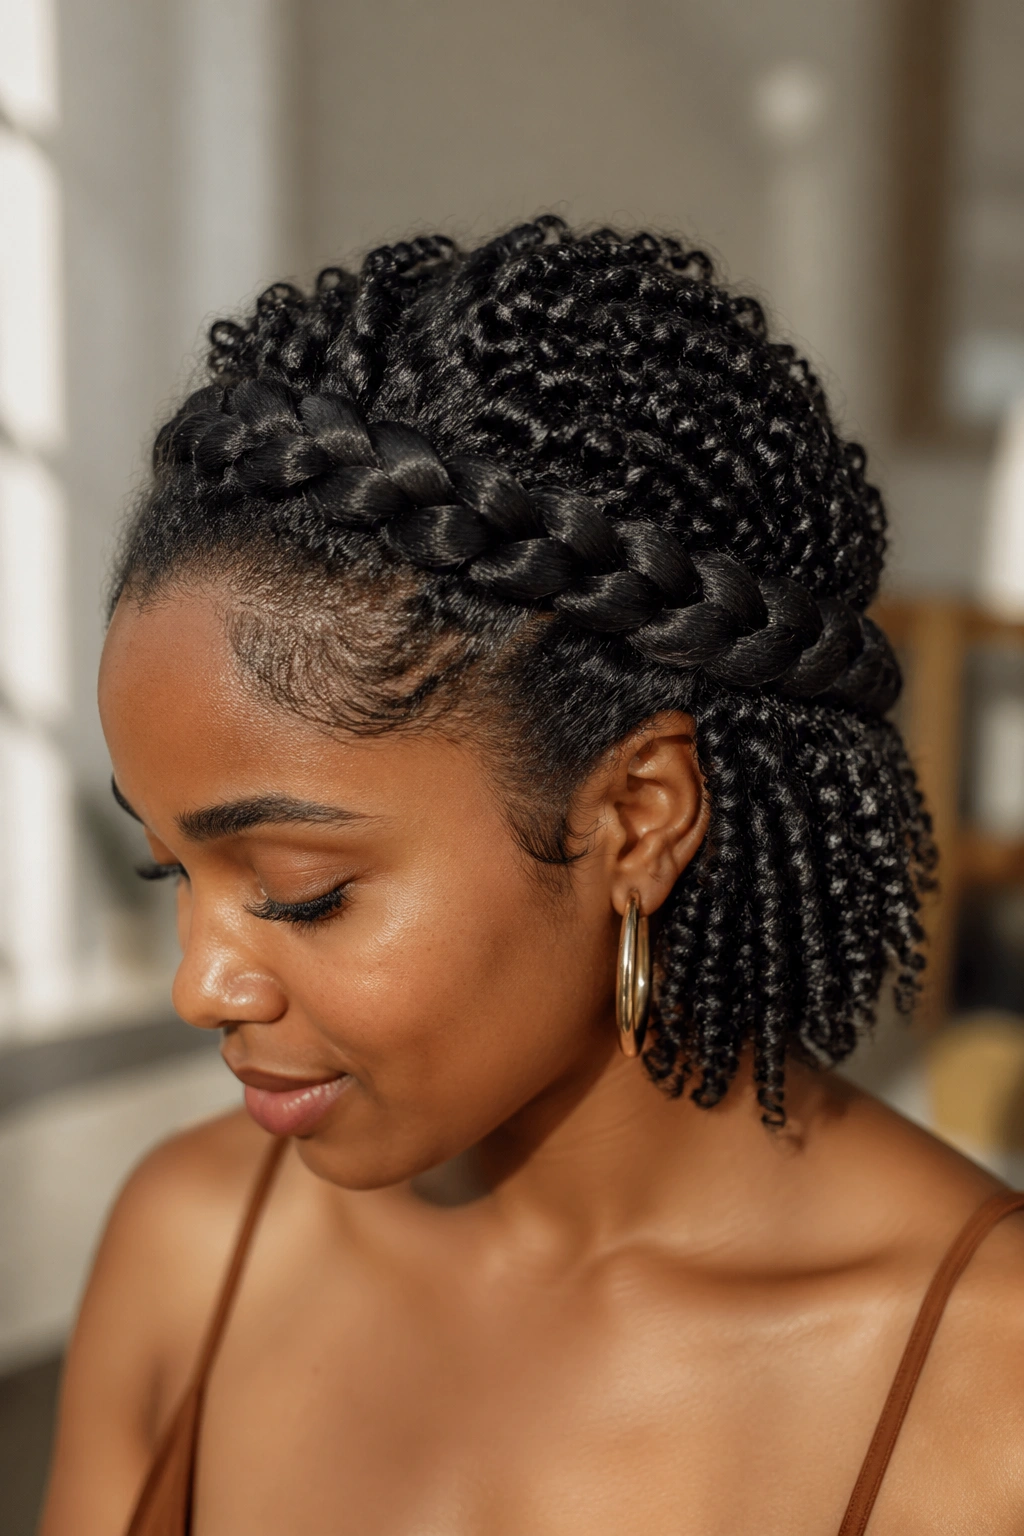
15. Crown Twist

A single large flat twist or two-strand twist that wraps around the crown of the head like a wreath — leaving the rest of the hair tucked underneath or in a bun at the back — is called a crown twist. It creates a regal, structured look with minimal product and tools.
How to Get This Look
Leave a section of hair loose around the entire perimeter of your head. Gather the interior hair into a flat bun at the back. Starting at one temple, twist the perimeter section, picking up more hair as you go and directing the twist around the head. When you return to the starting point, pin the end beneath the twist. The result is a crown of twisted hair framing a flat center.
16. The Swoop Bun

The swoop bun features a deep side part with the front section swept dramatically to one side and pinned, while the back gathers into a low bun. The asymmetry is intentional and flattering — the swept front section adds drama and frames one side of the face beautifully.
17. Threaded Updo (African Threading)
African threading uses thread — traditionally black thread — wrapped tightly around sections of hair to stretch and manipulate them without heat. A threaded updo uses this technique to create structured, elongated shapes that sit upward on the head. The threading process stretches the hair while protecting it, and the visual result is striking — slender, wrapped sections arranged into sculptural forms.
18. The Fluffy Bun
The fluffy bun is the opposite of a sleek bun. It’s all about size, softness, and volume. Gather your hair loosely, secure it, and then loosen it back out — pulling individual sections slightly outward from the bun to create a larger, fluffier silhouette. The finished shape should look like a soft cloud sitting on your head.
This style works best on Type 4 hair with maximum density. The fluffier the natural texture, the more spectacular the finished bun.
19. Pinned Curl Updo
Take individual curl clusters or small sections of your hair and pin them upward in overlapping layers across the back of the head. Unlike a standard bun where all hair is gathered into one point, the pinned curl updo distributes hair across a wider area, creating a flatter, more spread-out updo that works beautifully for formal occasions.
20. Top Knot
A top knot sits right at the very top of the head — higher than a high puff, more structured than a pineapple. It’s the tallest possible position for an updo and creates maximum height. This is the style that makes everyone in the room notice you first.
Secure with a sturdy scrunchie and then use a light holding spray to tame any pieces that want to fly outward. The height is the whole point — don’t minimize it.
21. Rope Twist Updo
Rope twists are created by twisting two strands in the same direction before wrapping them around each other — the tension of the twist creates a tight, rope-like texture. Gathered upward and pinned, rope twists create an updo with a distinctly textured, artisanal quality.
22. Side-Swept Updo
Gather all your hair to one side and sweep it across the back of your neck, securing it with pins into a low bun or roll positioned behind the opposite ear. The sweep creates a graceful diagonal line from one side of the head to the other. It’s an elegant, asymmetrical updo that photographs beautifully.
23. Locs Updo
If you have locs — whether traditional, sisterlocs, or faux locs — updos are some of the most creatively rich styles available to you. The structure of the locs themselves makes pinning and arranging easier than with loose natural hair. A locs updo can range from a simple high bun to an elaborately pinned arrangement with individual locs coiled, crossed, and layered in sculptural patterns.
24. Braided Mohawk Updo
Cornrows running up the sides of the head converge at the center, where additional braids or natural hair is gathered into a vertical strip. It’s a dramatic updo that combines structure at the scalp with volume at the crown, and it wears beautifully for weeks at a time.
25. French Roll on Natural Hair
The French roll is traditionally associated with smooth, straight hair — but it works on natural curls when done with enough moisture and a few strategic pins. Gather the back section of hair and fold it upward, securing with vertical bobby pins along the fold. Tuck the remaining hair inside or let it fan outward at the top. The curly texture at the top of the roll creates a naturally textured finish.
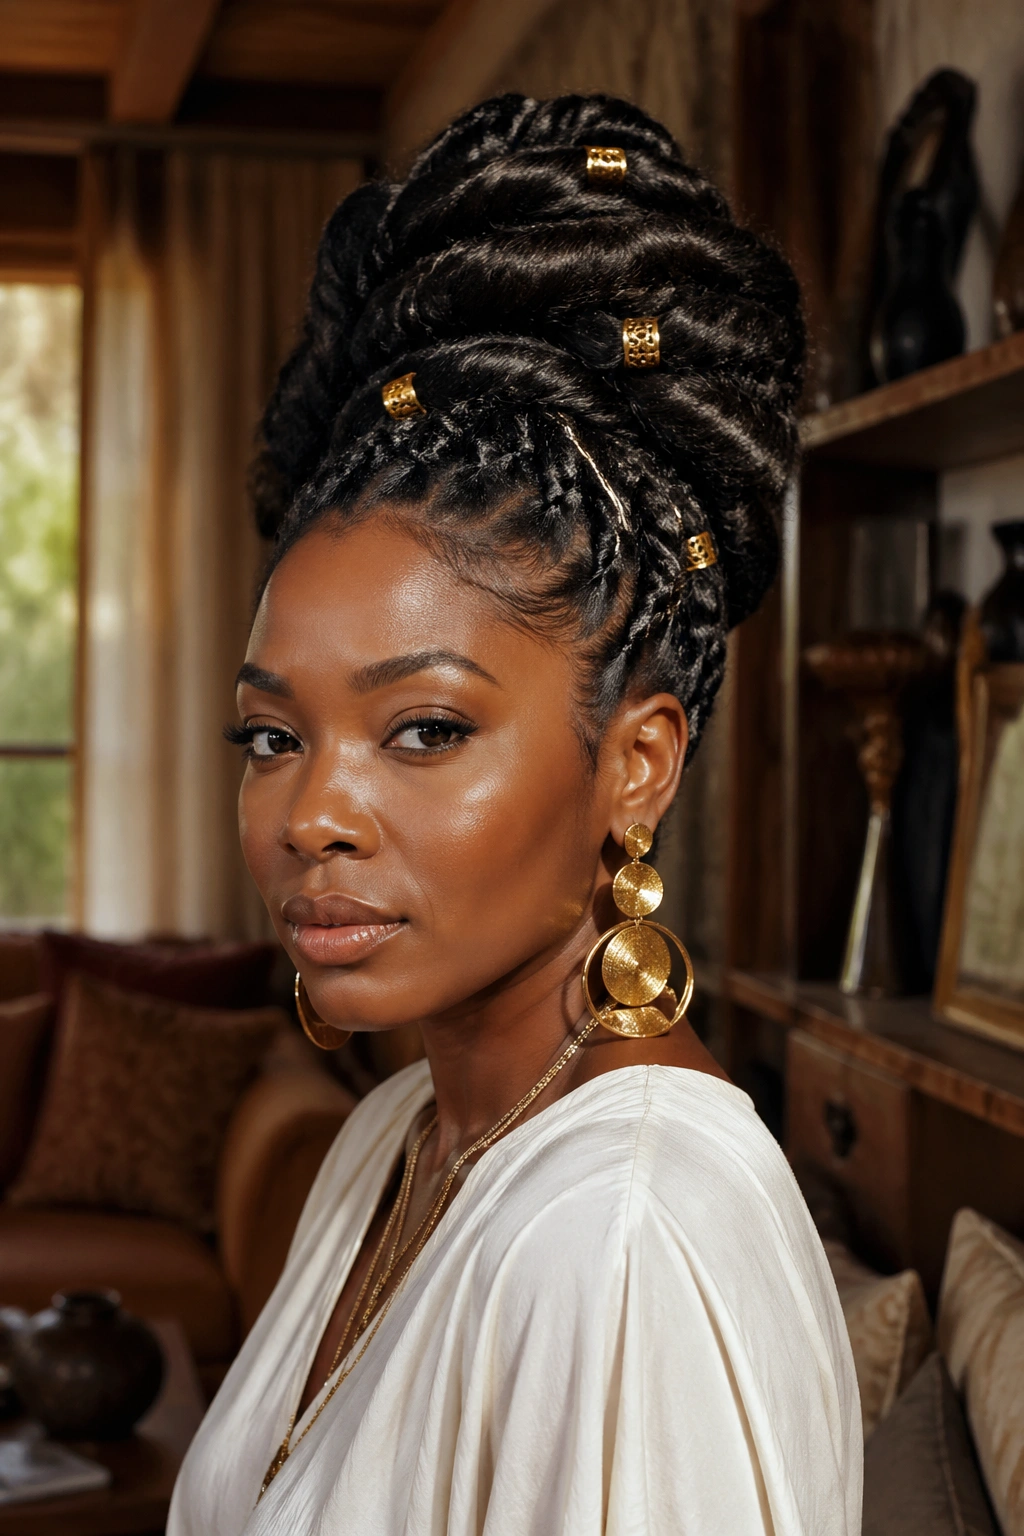
26. Jewel-Embellished Updo

Any updo elevated with intentional jewelry — gold rings on individual sections, pearl pins scattered throughout, rhinestone clips at the base — becomes something formal and striking. This isn’t really a technique on its own so much as it is the finishing layer on any of the styles above. But it’s worth naming separately because the transformation is that significant.
A basic puff with the right pins in it looks like a jewelry box come to life. Don’t underestimate what accessories can do.
Caring for Your Hair While Wearing an Updo

Just because your hair is up doesn’t mean it stops needing care. Scalp health is especially important during longer-wear updos. Use a cotton swab dipped in a light oil to moisturize your scalp between wash days. Don’t let product buildup accumulate — this blocks follicles and can cause irritation or slowed growth.
At night, protect your updo with a satin bonnet or a satin-lined cap that’s large enough to cover the entire style. Sleeping on a satin or silk pillowcase is the fallback option if your updo is too large for a bonnet. The goal is to prevent friction, frizz, and moisture loss while you sleep.
If you’re wearing an updo for more than a few days, take it down before it starts to cause tension at the hairline. Any style that pulls consistently at the edges creates traction alopecia over time — and that’s damage that accumulates slowly, is hard to notice until it’s significant, and takes a long time to reverse.
Common Mistakes When Attempting Natural Hair Updos
Starting with dry hair is mistake number one. Dry hair breaks instead of bending, and it frizzes the moment you try to manipulate it. Always add moisture before attempting an updo.
Mistake two is securing too tightly. An updo that pulls at your scalp from the moment you put it in is an updo that’s damaging your hair. The tension required to hold an updo in place should be minimal — products and pins do the work, not tension. If your scalp hurts immediately after styling, redo it looser.
Using the wrong type of hair tie is a consistent, avoidable error. Regular elastics with metal clasps snap the hair shaft at the point of contact. Coil-less elastics, fabric-wrapped ties, and satin scrunchies are all better alternatives.
Finally: not finishing the edges. Smooth, laid edges are the detail that takes an updo from rushed to refined. Even two minutes on your edges makes the entire style look more considered and complete.
How to Make an Updo Last
The longevity of a natural hair updo depends on a few factors: how well you moisturized before styling, how secure your pins and ties are, and how well you protect the style at night. A properly executed updo — one done on moisturized hair with quality products, secured with the right tools, and protected overnight — can last anywhere from three to seven days depending on the style.
Use a light holding spray to lock everything in place once the style is finished. Keep a few extra bobby pins and a travel-size edge control in your bag for touch-ups. And commit to the nighttime protection routine — the bonnet or satin pillowcase is not optional if you want your style to still look good on day four.
An updo is an investment of time. Protect it.