There is a specific kind of confidence that comes with a perfectly executed ponytail. It’s not just a hairstyle; it’s a structural statement. Whether you are running errands or heading out for a formal event, the quick weave ponytail offers a level of versatility that is hard to match with natural hair alone. You get the sleek, polished finish of extensions without the long-term commitment or the high cost of a sew-in installation.
Achieving the look starts long before you pick up the edge control. The foundation of any great quick weave is the mold. If your natural hair isn’t lying flat beneath the cap, no amount of product will fix the bumpiness later. You need to focus on a smooth base, a protective cap, and the precise placement of your tracks to create a seamless transition between your hairline and the extensions.
When you master the technique, you can switch up your style in an afternoon. This list breaks down the most effective ways to style quick weave ponytails, focusing on everything from the classic sleek look to more textured, layered variations. These styles rely on high-quality straight extensions, the right adhesive, and the patience to let your base set properly.
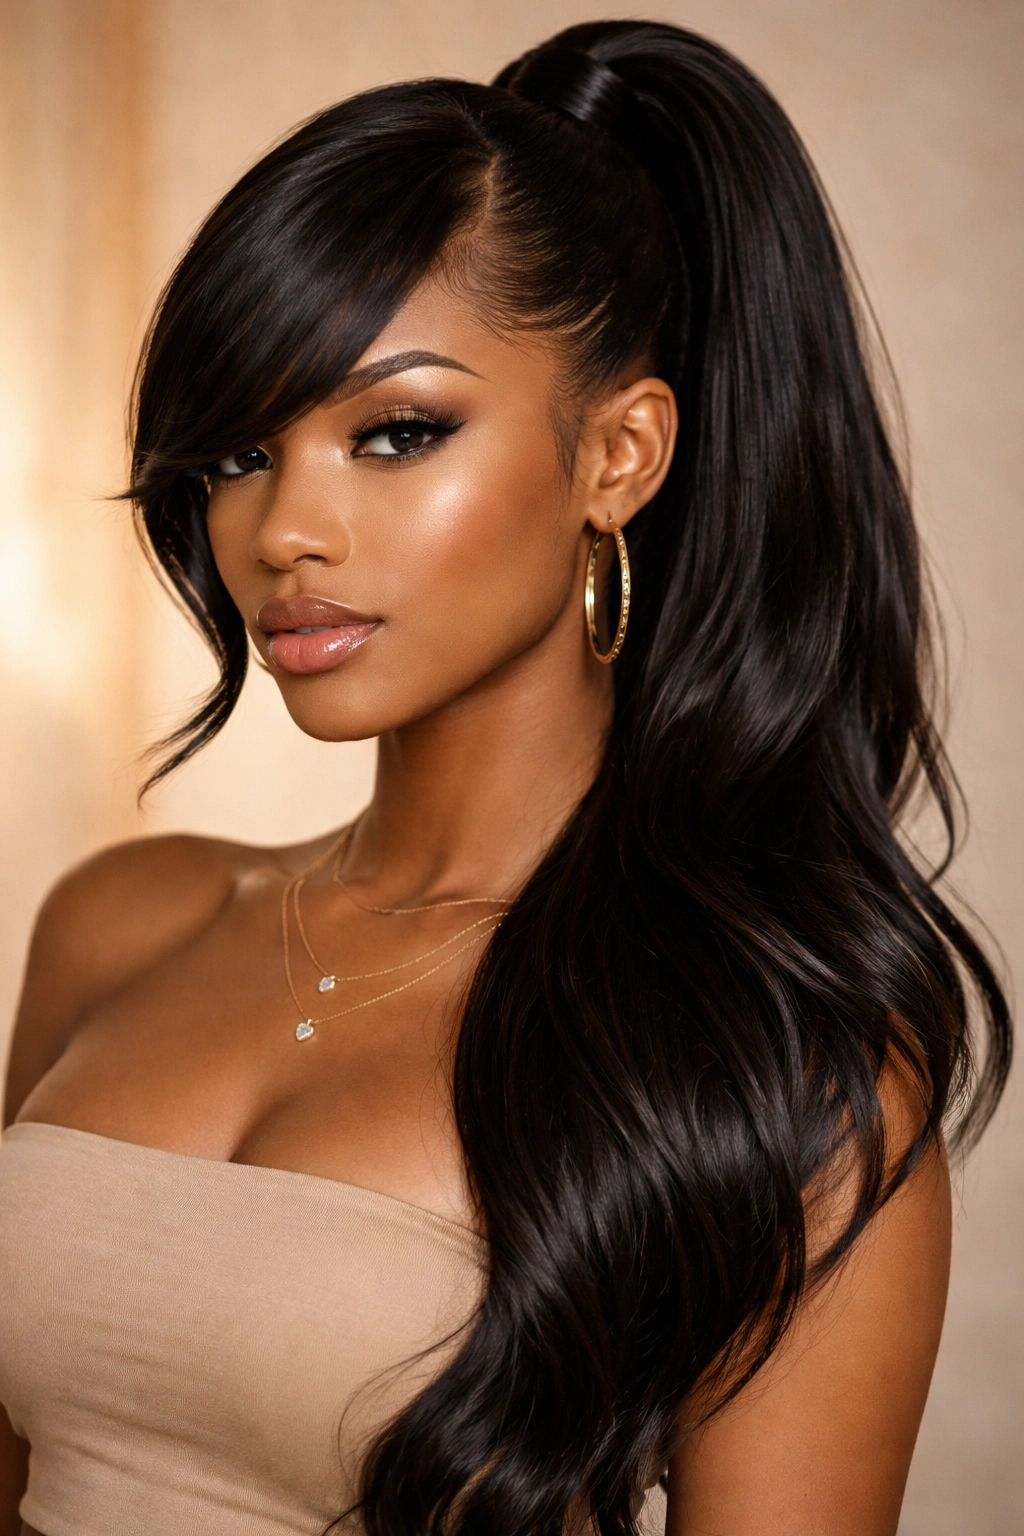
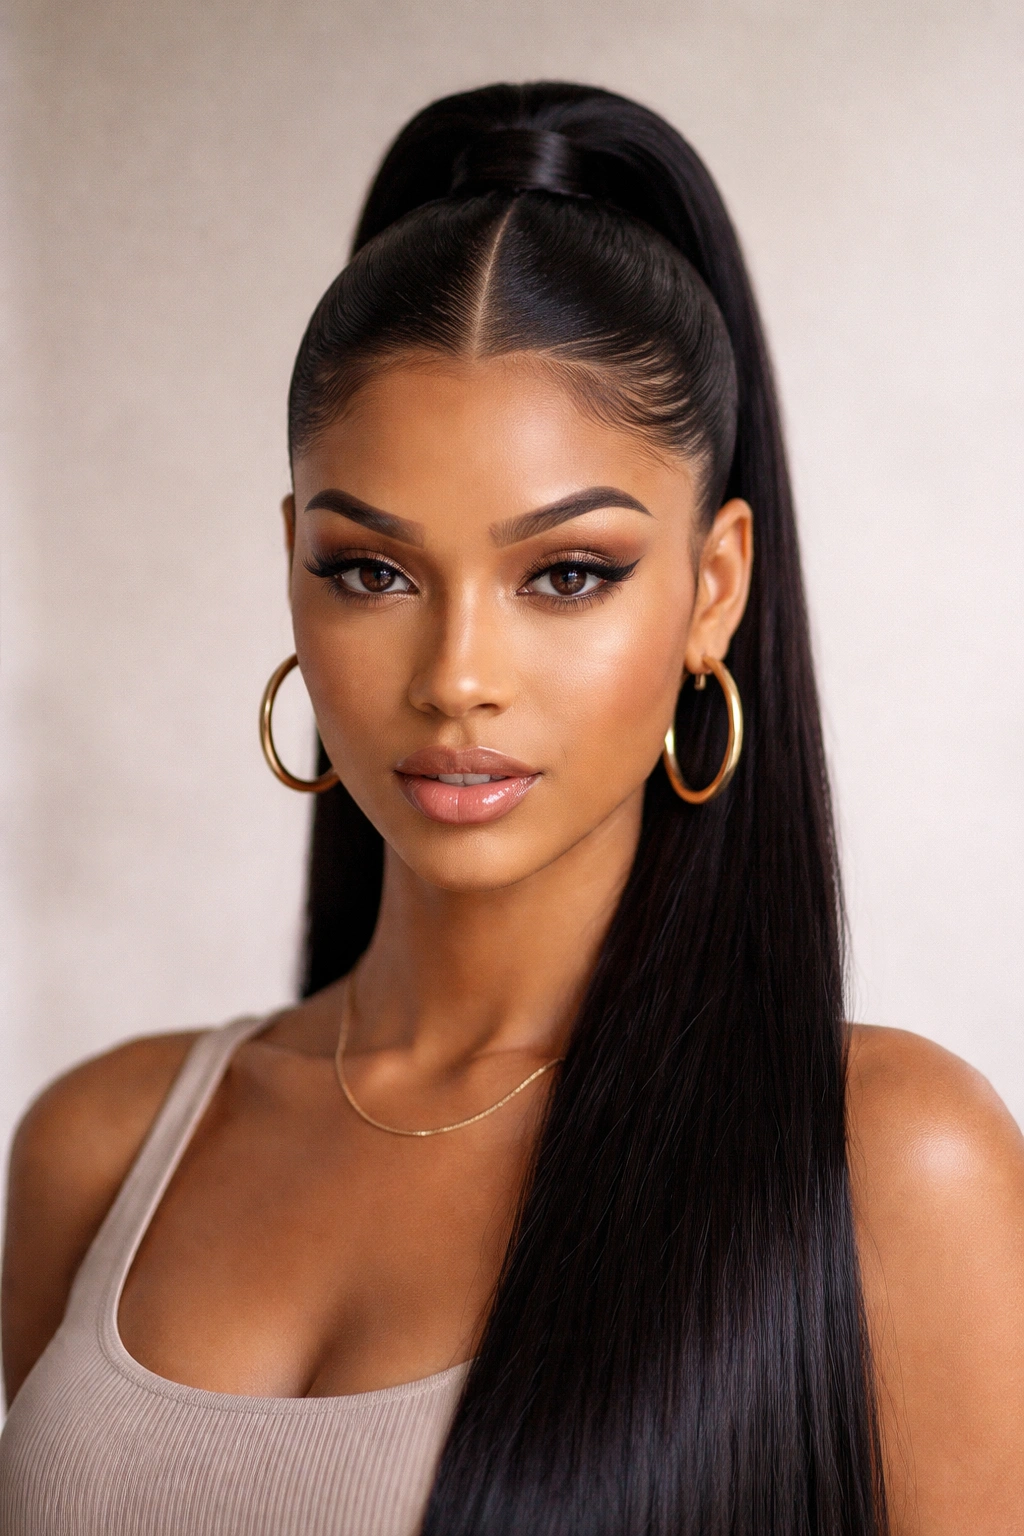
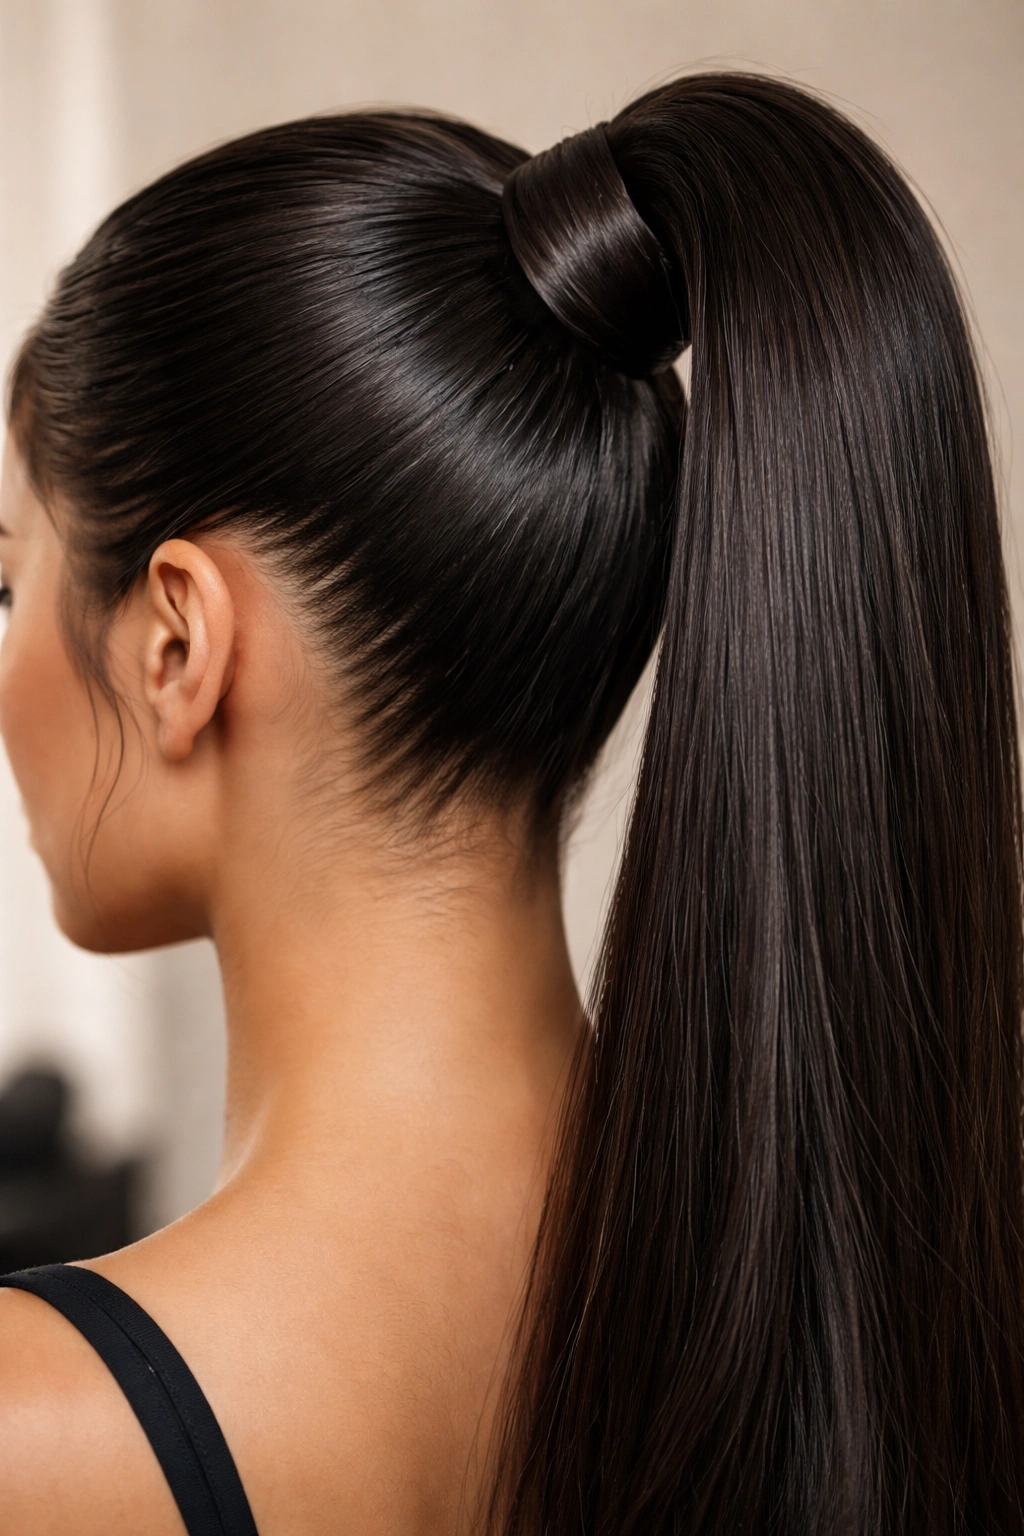
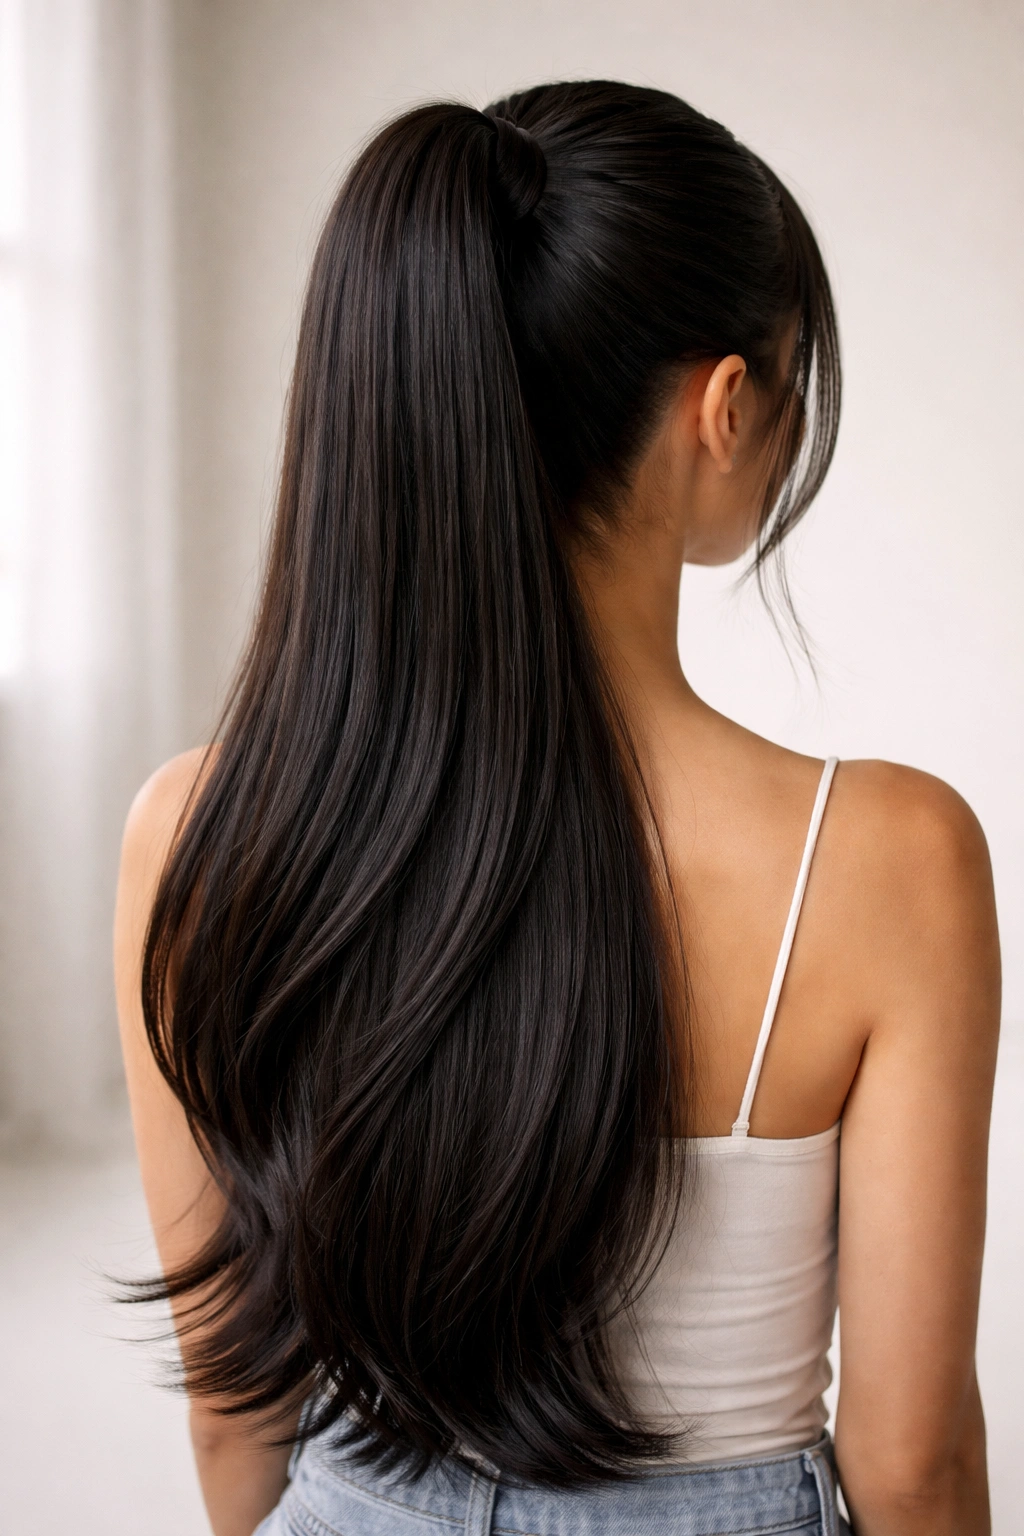
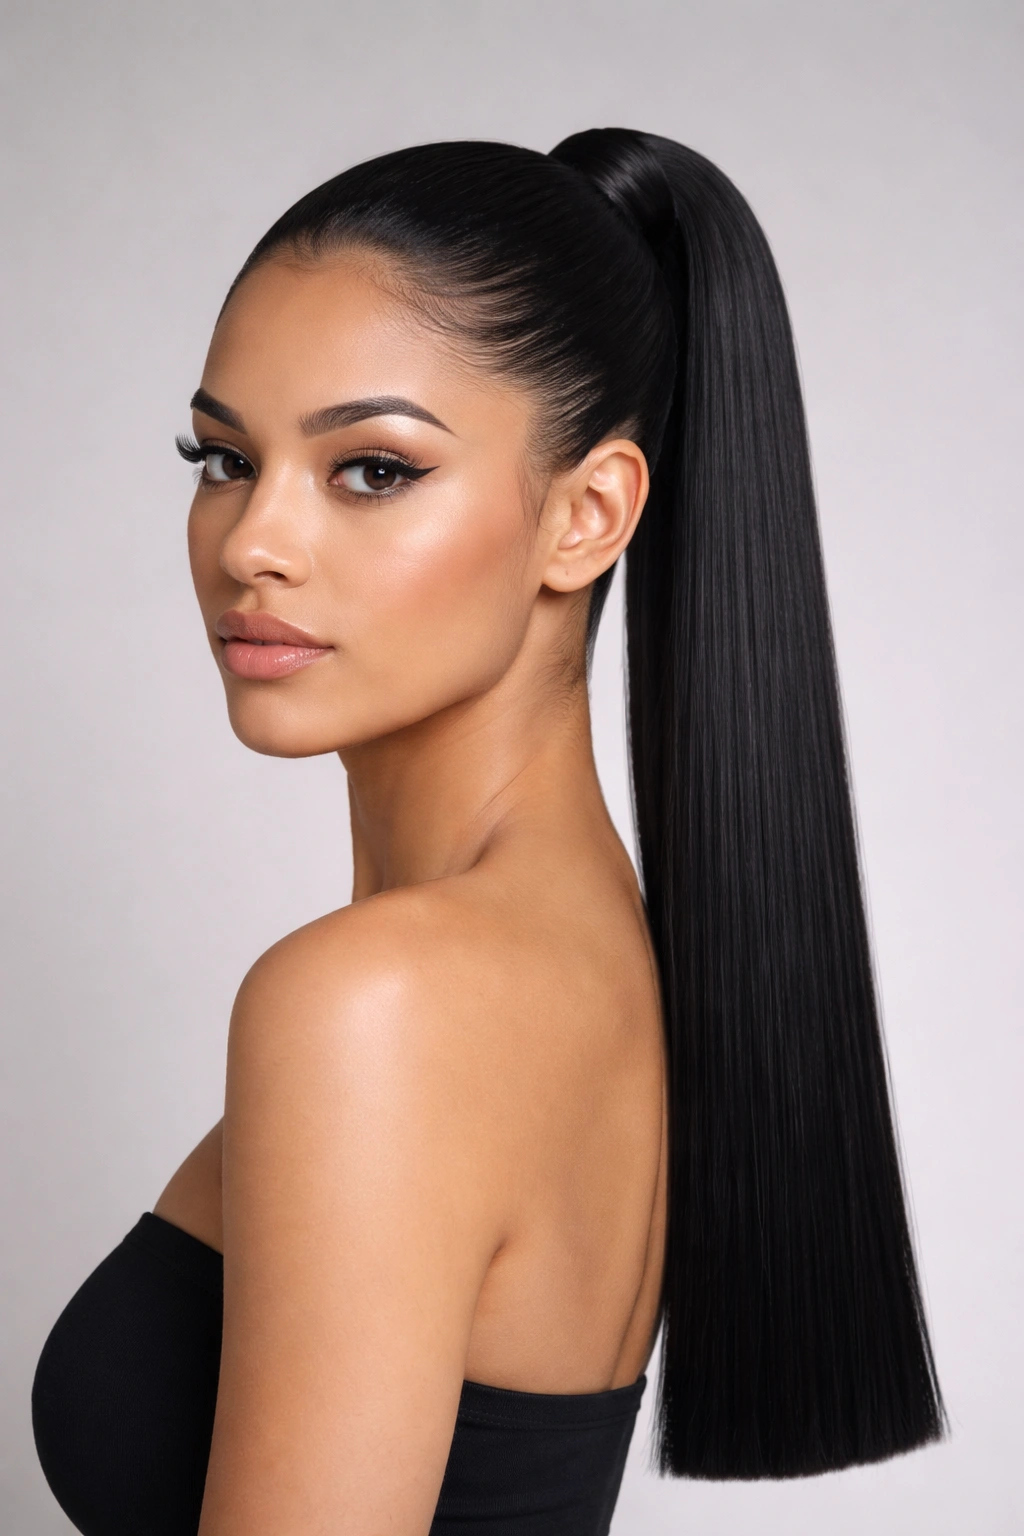
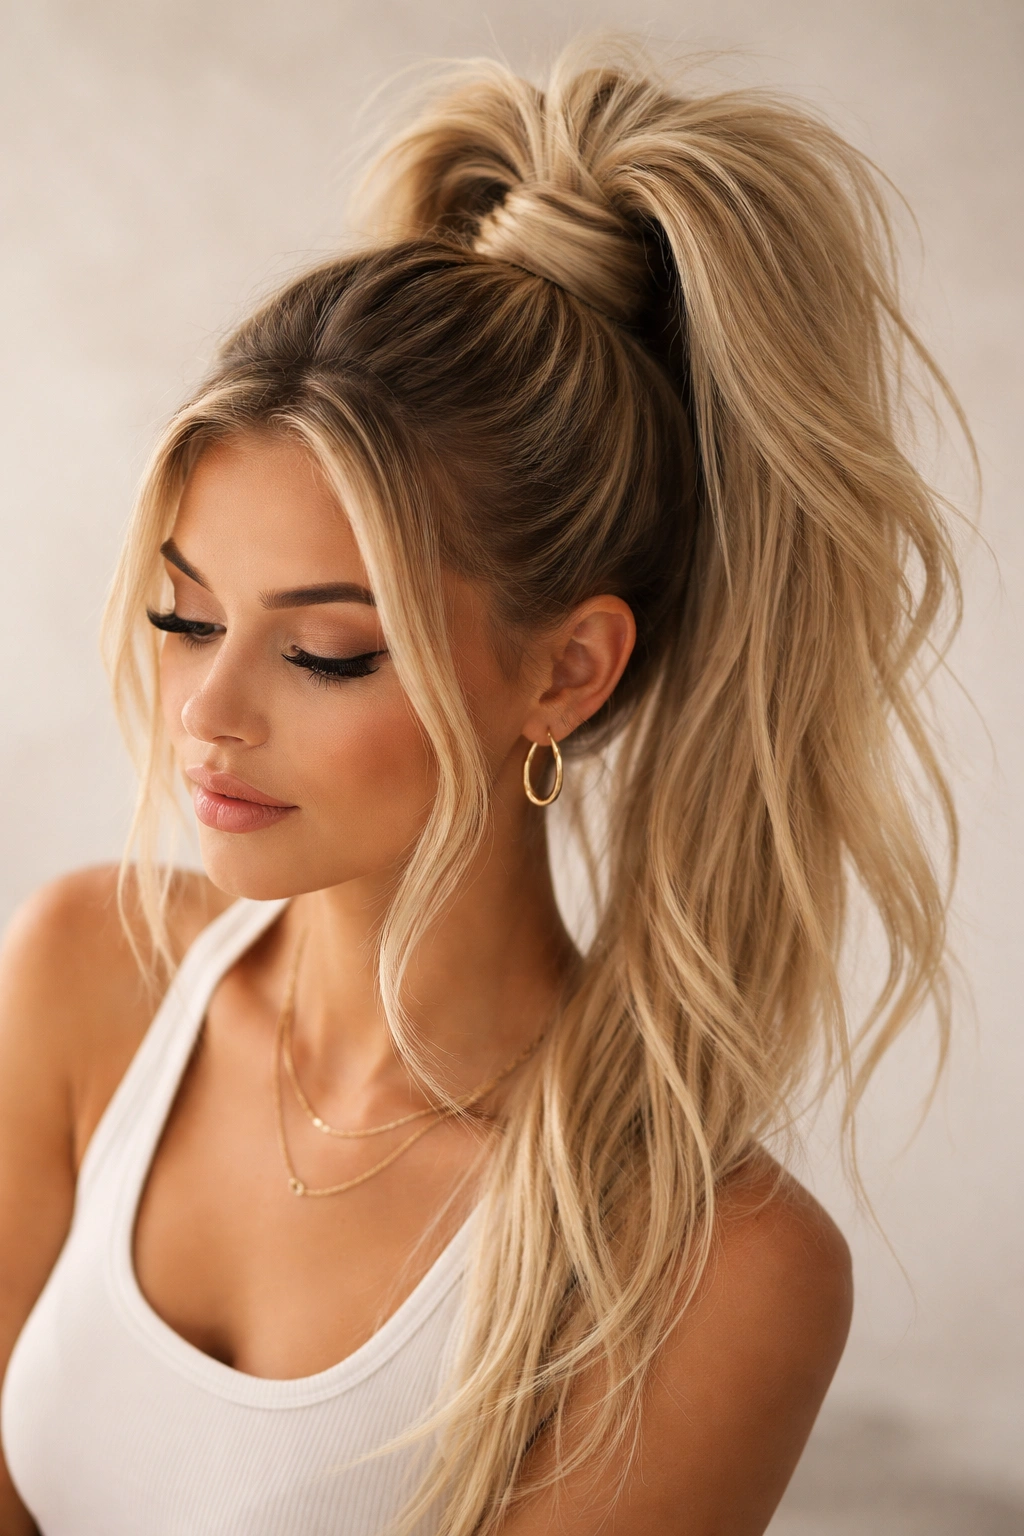
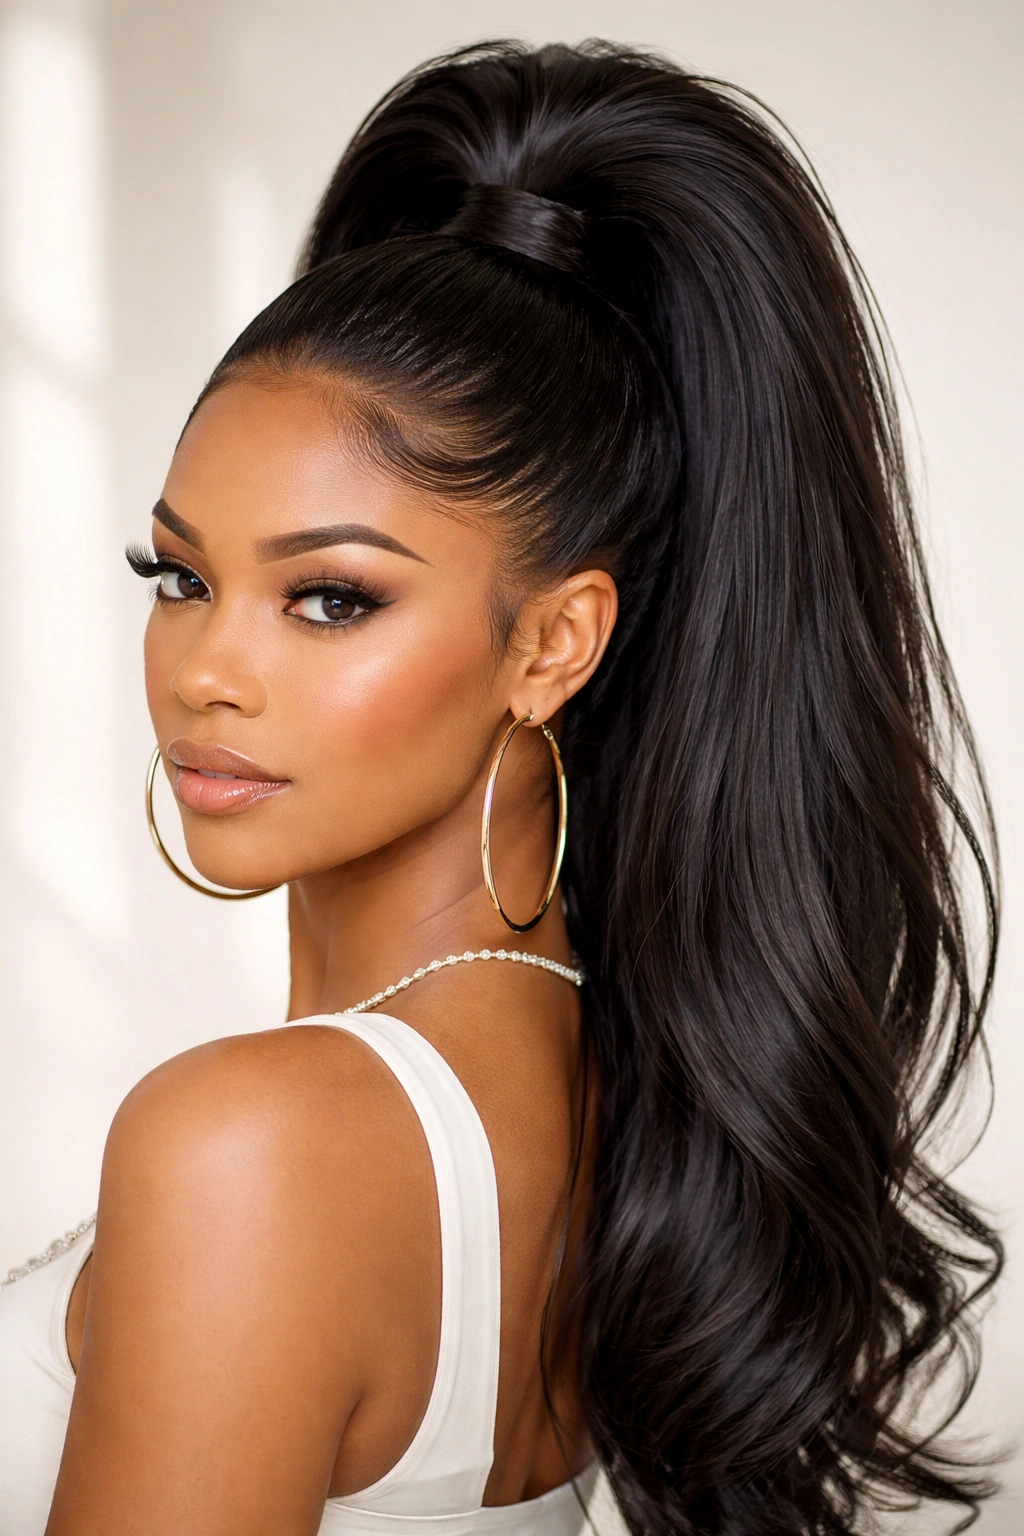
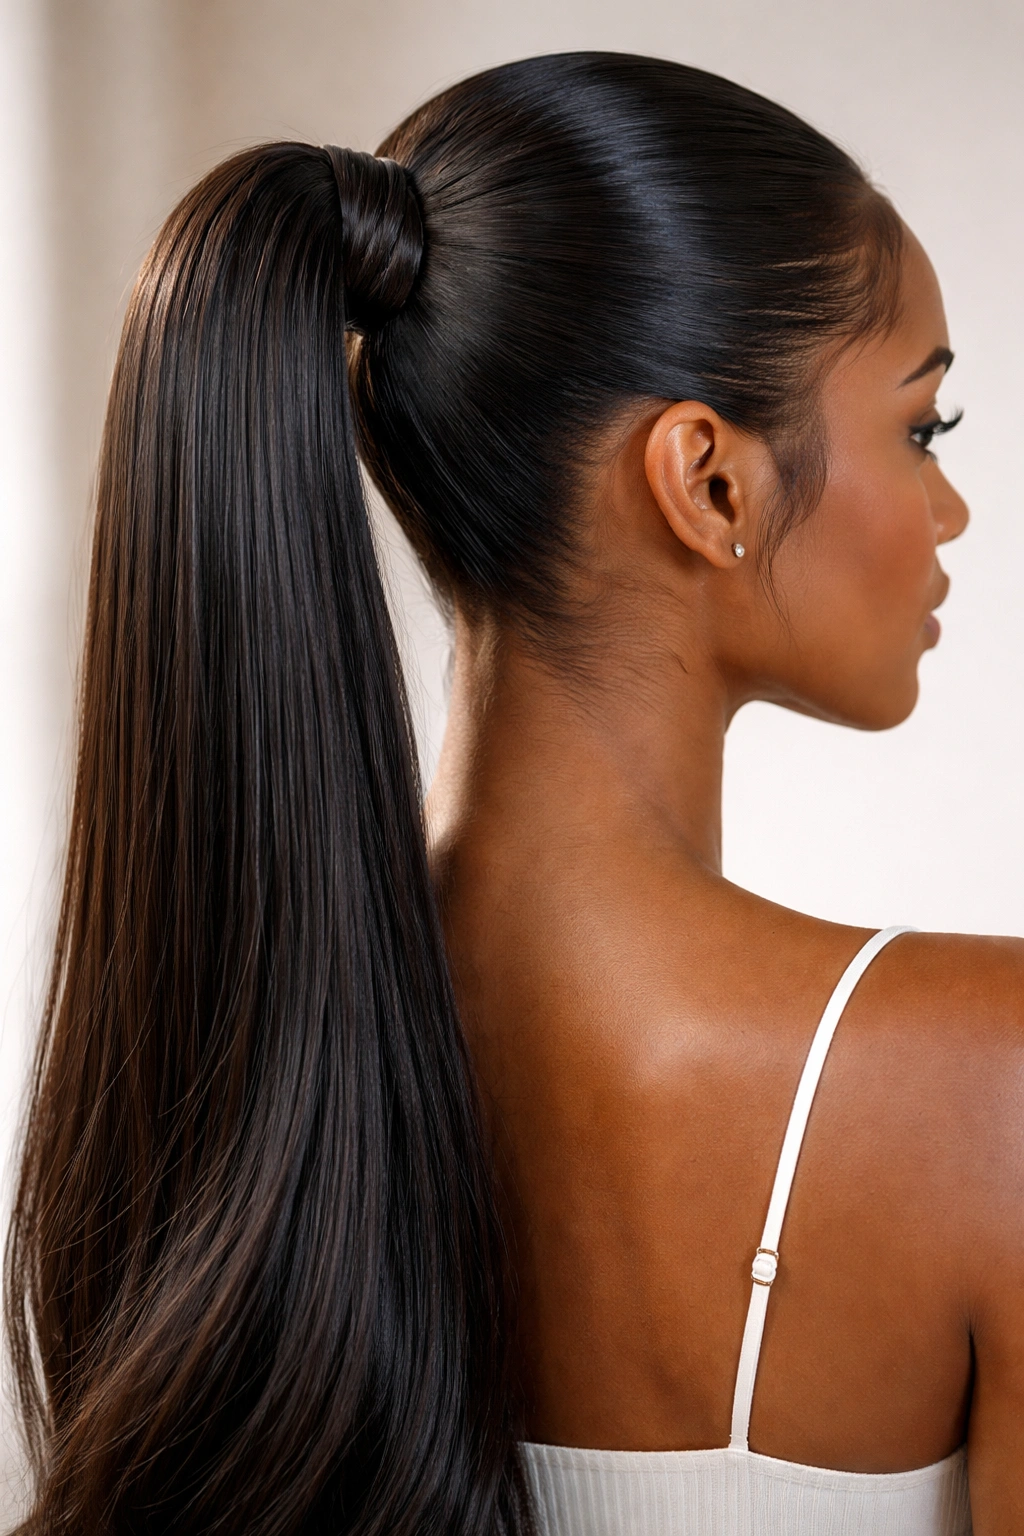
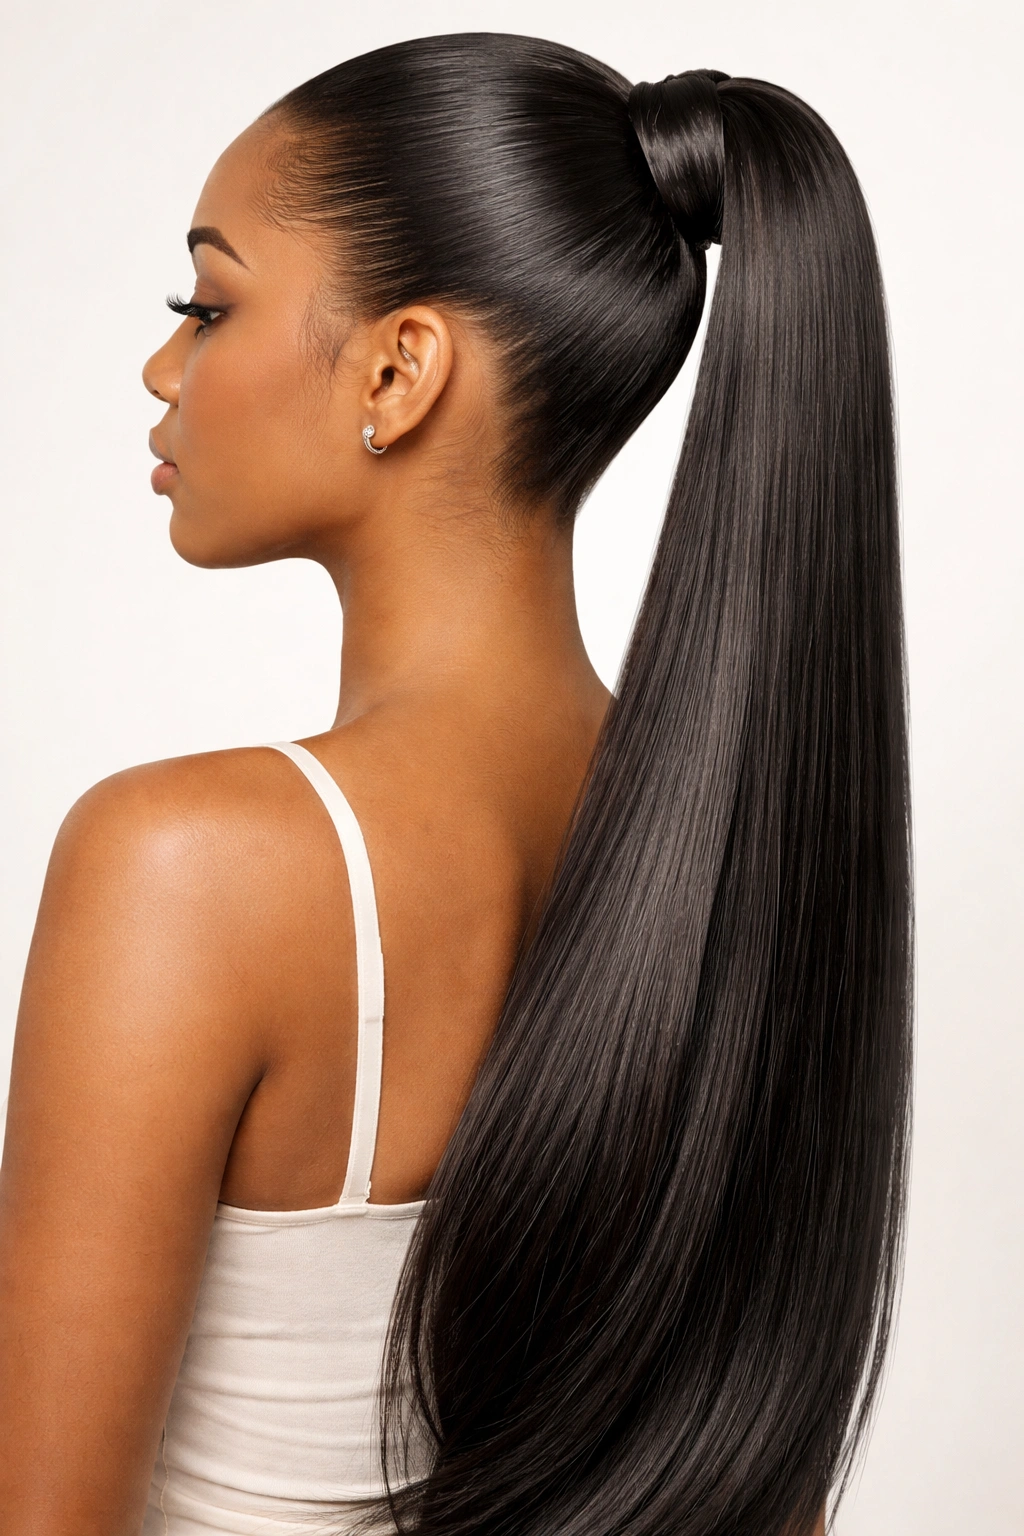
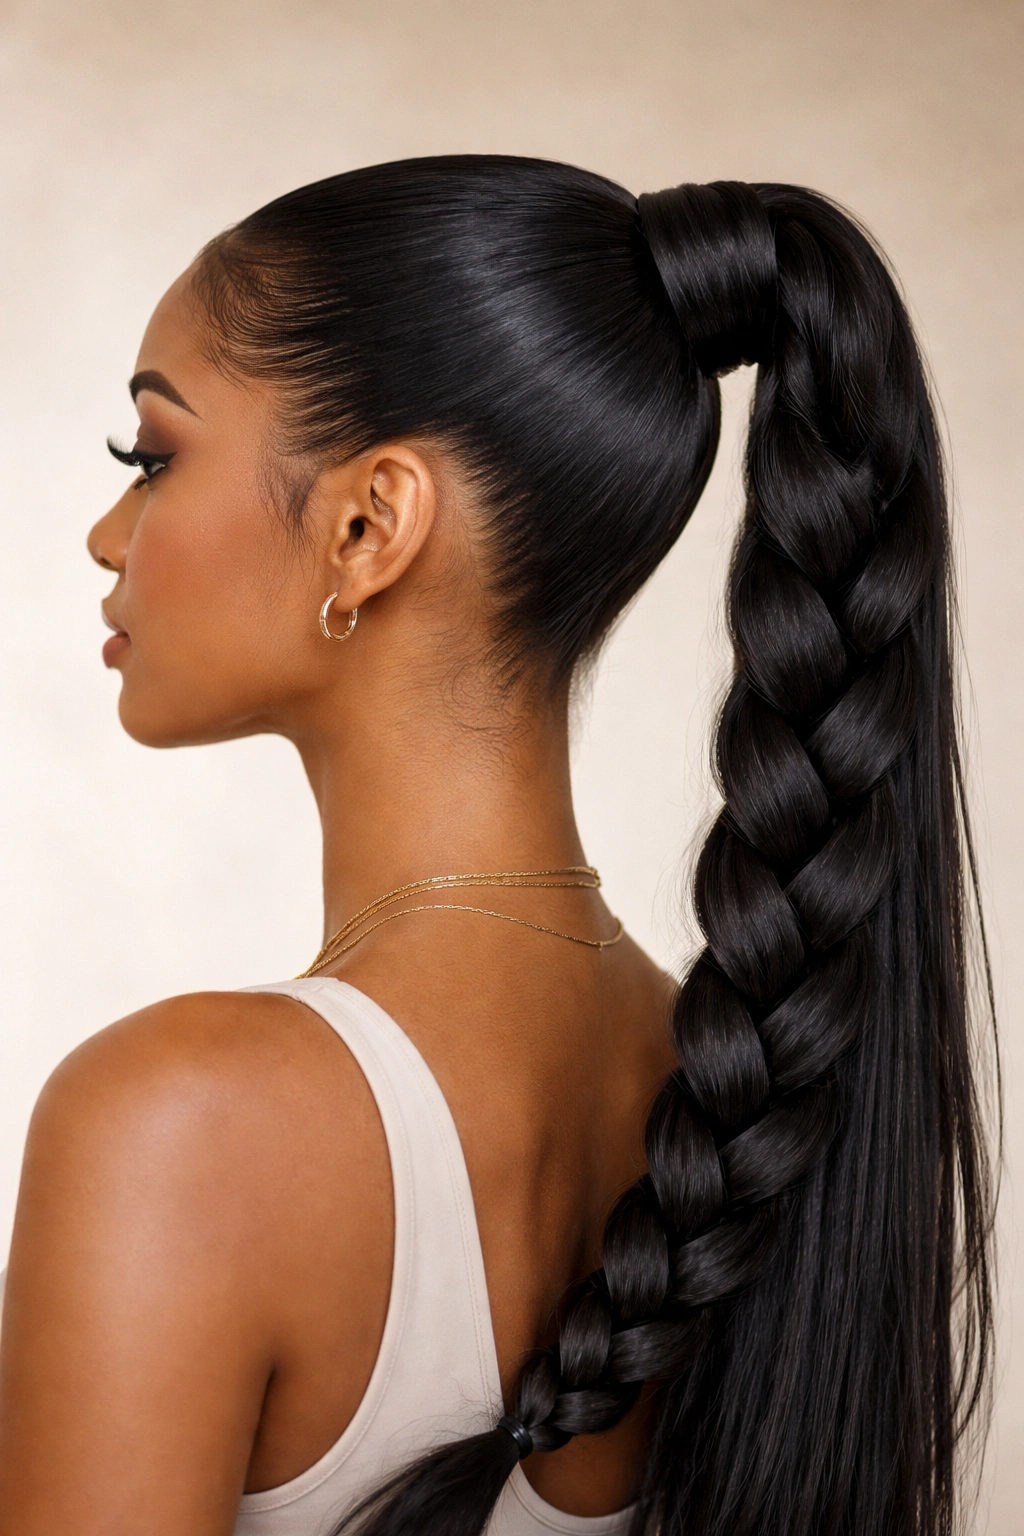
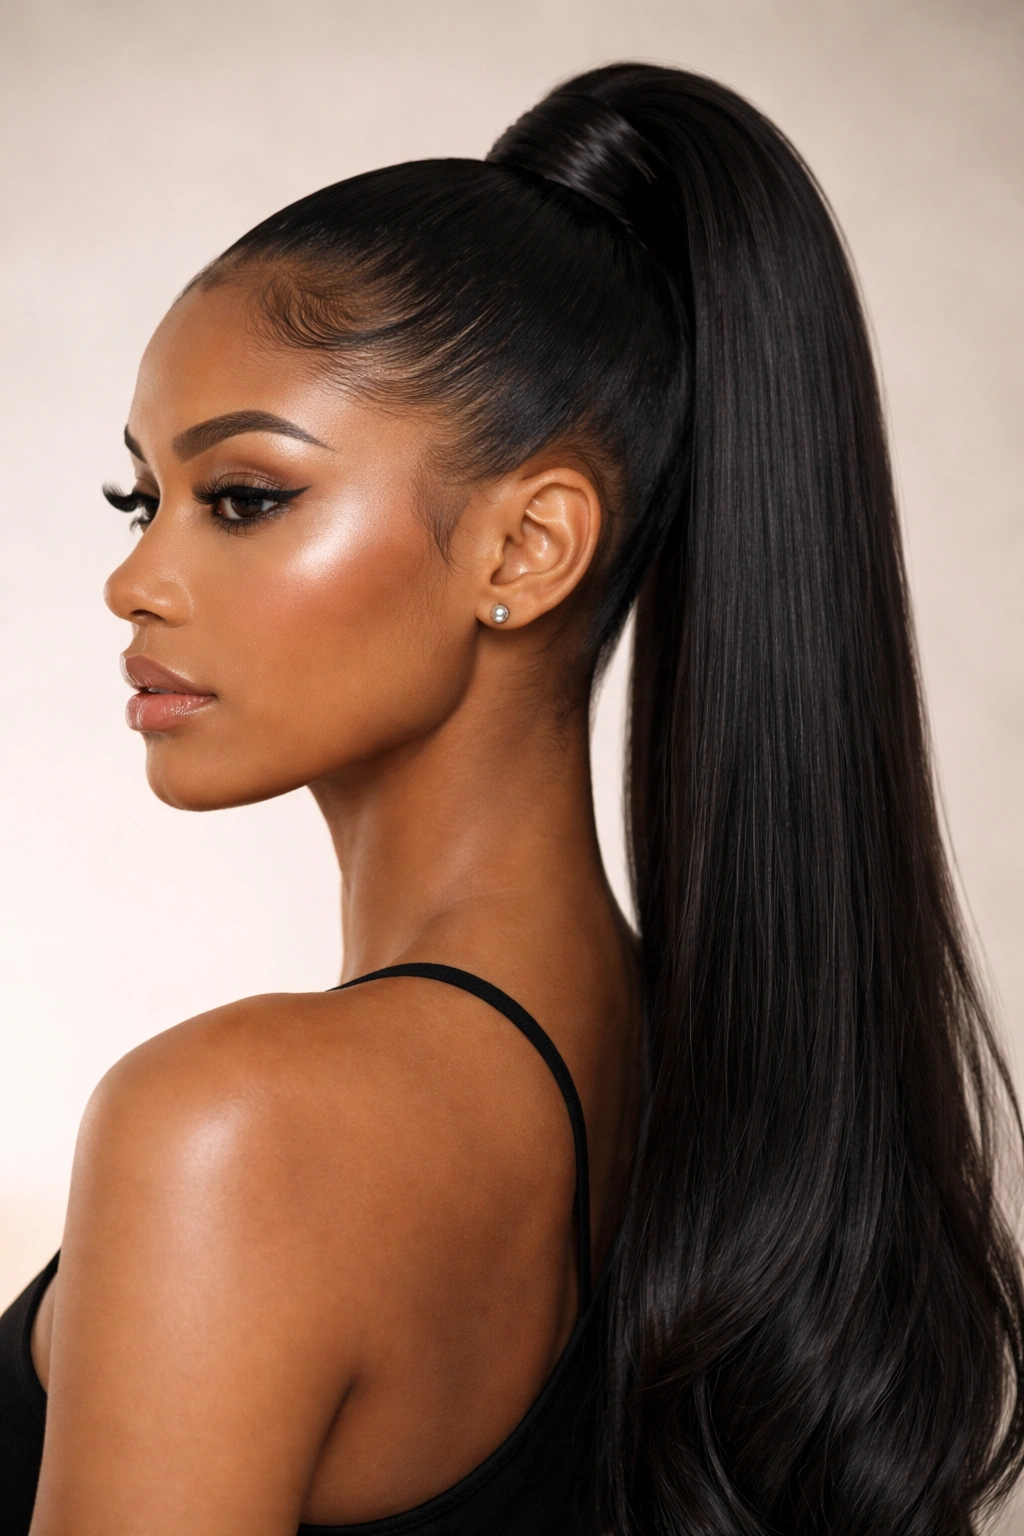
1. The Classic Sleek High Pony
This is the standard-bearer for a reason. It is clean, sharp, and pulls everything back to create an instant face-lift effect. The key here is the tension. You want the ponytail to sit high enough on the crown to show off your jawline, but not so high that it creates discomfort or pulls at your edges.
Construction Tips
- Use a firm hold styling gel or edge control to lay down your natural hair.
- Ensure the tracks are bonded close together on the cap to build density at the base.
- When wrapping the hair around the base, keep the tension consistent so the wrap doesn’t loosen throughout the day.
Pro tip: Use a small amount of heat from a blow dryer to “lock in” the gel once the pony is secured. It prevents the hair from frizzing or lifting later in the day.
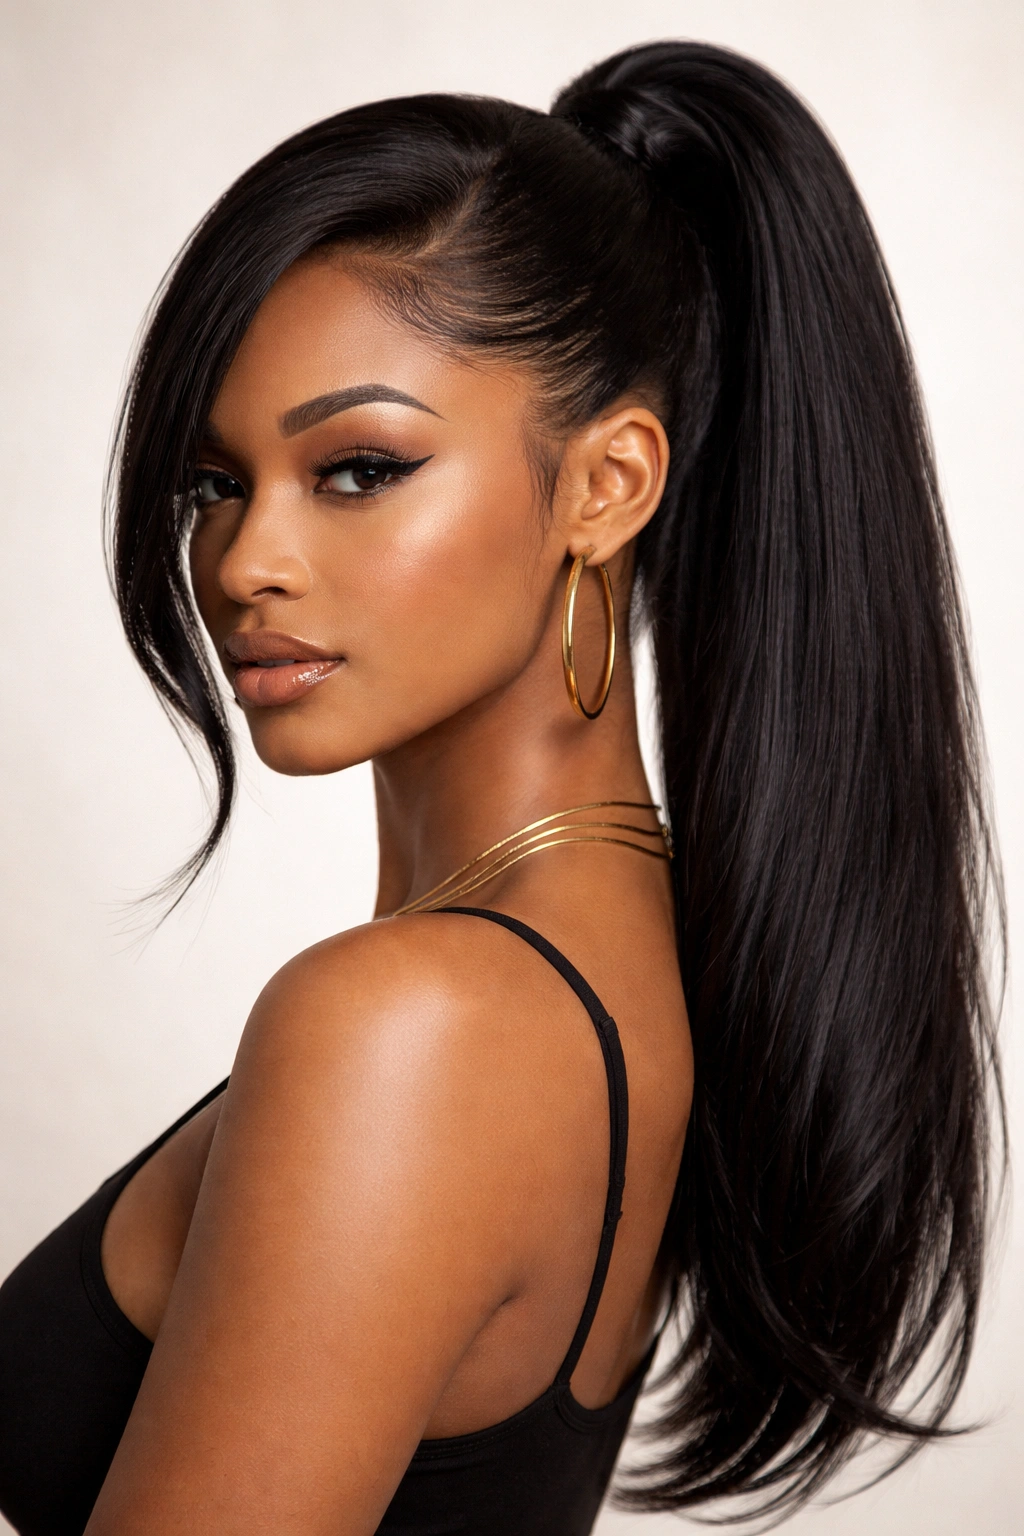
2. Side-Swept Bangs Pony
Adding a bang changes the entire geometry of the face. For a quick weave, you don’t need to cut your real hair. You can create a side-swept bang by leaving a small section of your tracks free at the front or using a separate piece of wefted hair bonded to a small, curved cap piece.
The goal is to create a seamless swoop that mimics natural layering. If the bang is too thick, it looks artificial. If it is too thin, it doesn’t hold its shape. Aim for a medium density that allows the hair to fall softly across the forehead without looking like a helmet.
This style pairs exceptionally well with a high ponytail because it balances the drama of the height with the softness of the hair across the face.
3. The Wrapped Base Pony
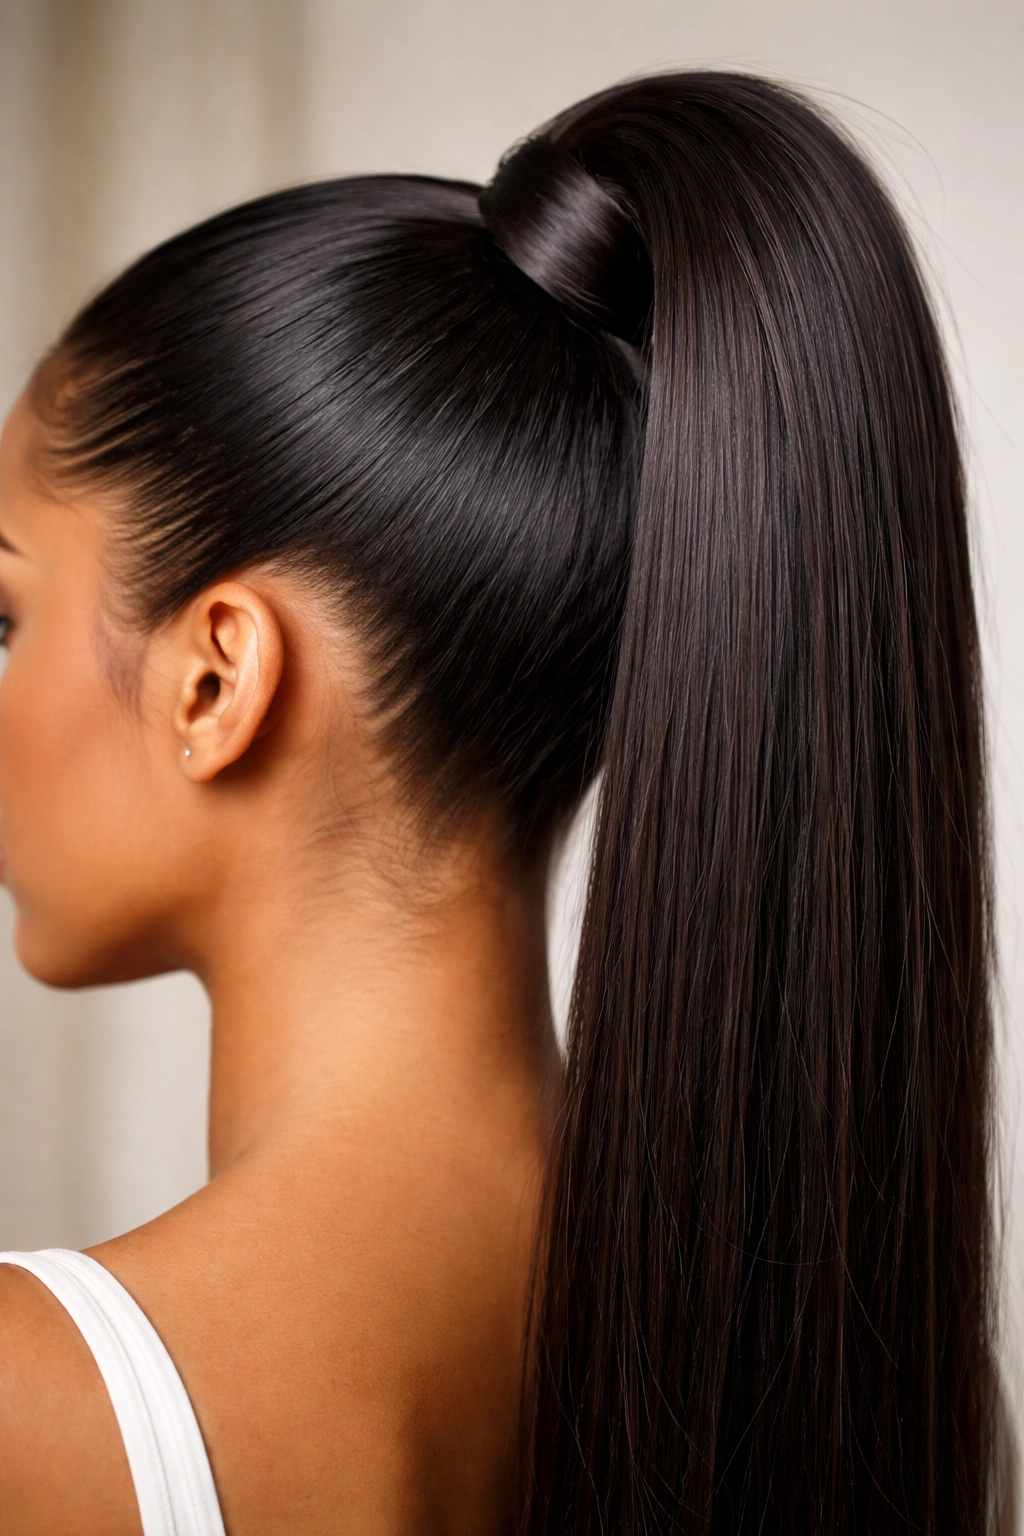
Sometimes the simplest details make the biggest difference. Instead of just using a standard hair tie, take a small section of your straight extensions and wrap it around the base of the ponytail to cover the band completely.
This small step upgrades the entire aesthetic. It makes the ponytail look like it is growing directly from your scalp.
- Take a 1-inch section of hair from the underside of your ponytail.
- Apply a tiny bit of bonding glue or a bobby pin to the end.
- Wrap it tightly around the base.
- Secure the end with a small, discreet pin or a touch of adhesive.
4. Middle Part Sleek Pony
A middle part is architectural. It cuts the face into two symmetrical halves and forces the hair to lay incredibly flat. This style is not for everyone, but when it works, it is the definition of polished.
The challenge with a middle part quick weave is the “seam.” You have to make sure the tracks are laid perfectly straight at the part. If there is a gap or a slight overlap, it will be visible.
Why It Works
- It provides a clean, professional aesthetic.
- It elongates the face visually.
- It keeps hair out of your eyes while maintaining a sophisticated silhouette.
Important: Spend extra time brushing your natural hair into the part. If your natural hair is too bulky, consider using a flat iron on your roots before applying the gel to get that “pressed” look.
5. The Deep Side Part Pony

This is the moodier, more romantic cousin of the middle part. A deep side part creates a natural swooping motion that covers one side of the forehead and adds volume to the crown. It’s perfect if you want to soften a square jawline or add some interest to a simple outfit.
Unlike the middle part, which is rigid and symmetrical, the side part allows for a bit more “play.” You can sweep the hair behind your ear or let it drape over the side of your cheek.
When constructing this on a quick weave cap, map out your side part before you start bonding the tracks. Bonding tracks in a curved pattern to mimic the natural growth of a side part ensures that the hair falls in the right direction without you having to fight it with heat tools.
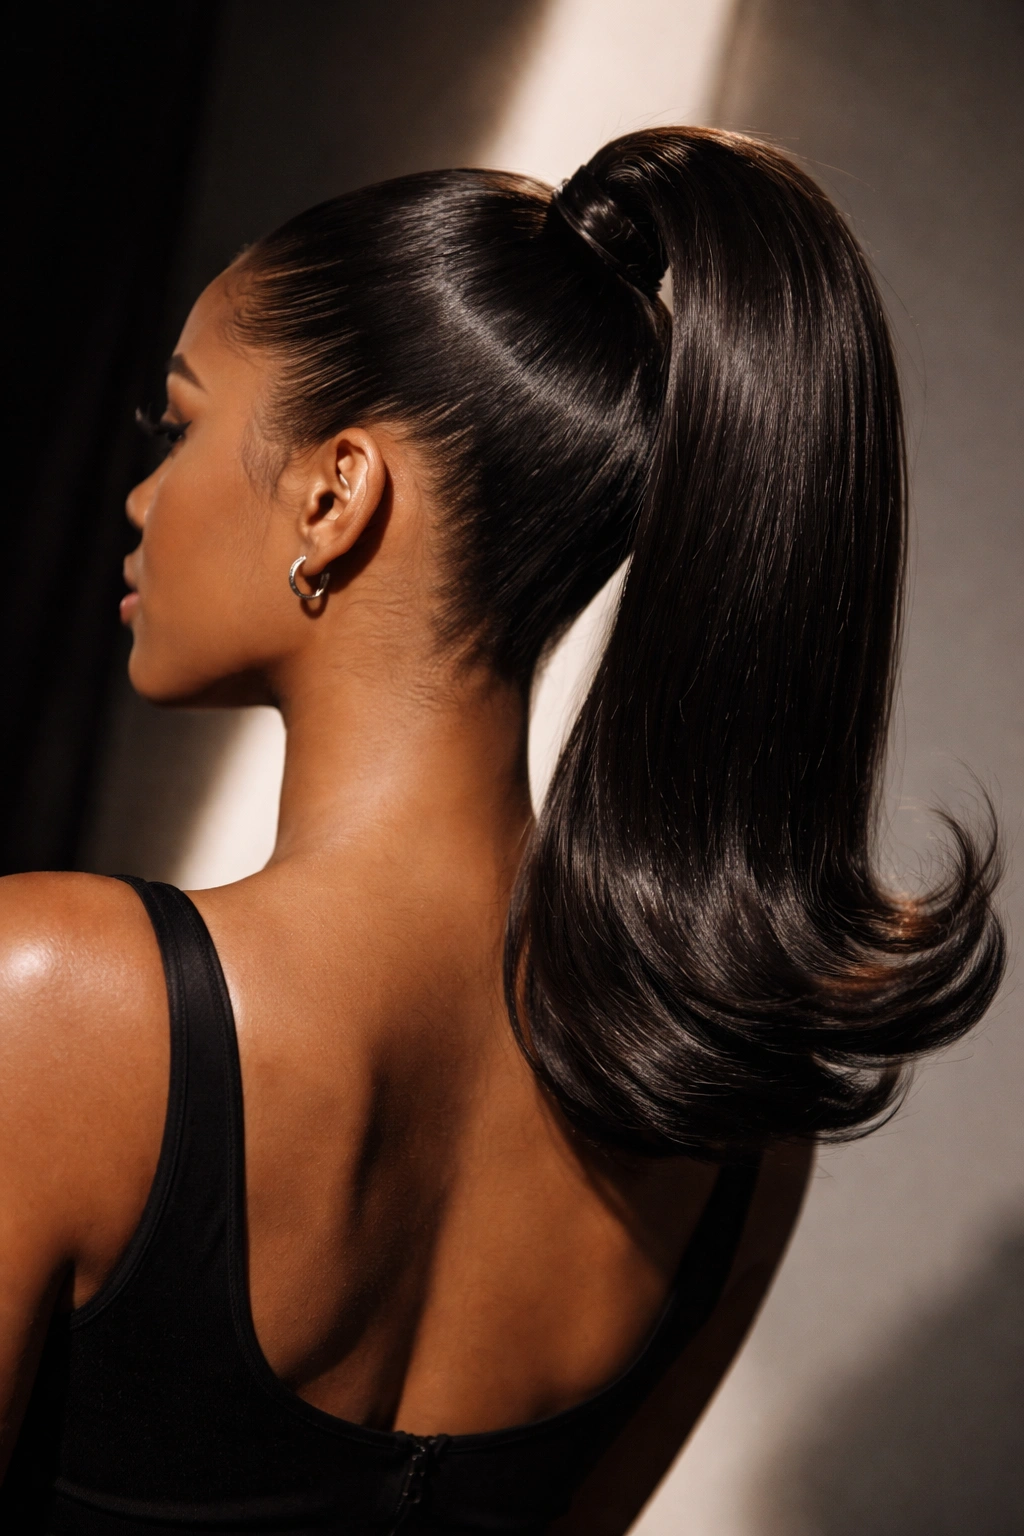
6. The Low Sleek Pony
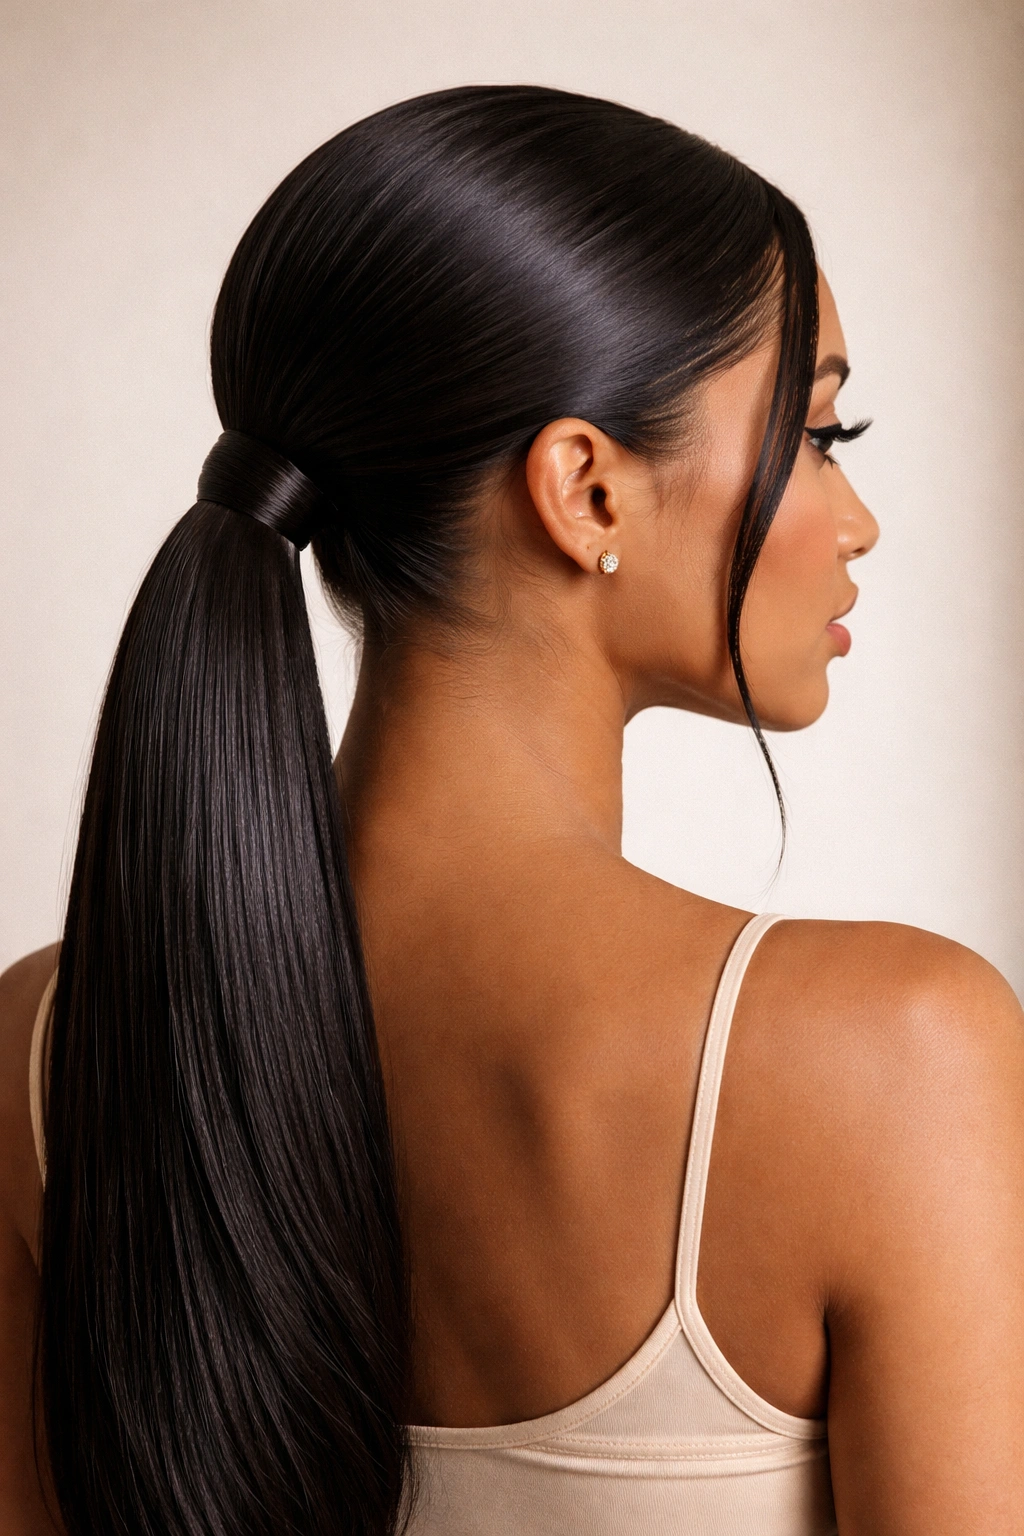
The low ponytail is the understated choice. It sits at the nape of the neck and feels significantly less aggressive than a high, tight pony. It’s ideal for days when you want to avoid tension on your hairline but still want a put-together appearance.
I have found that the low pony often lasts longer than the high pony because it requires less pulling. There is less weight dragging on your natural roots.
How to Style
- Brush your hair down toward the nape rather than upward.
- Secure it with a sturdy band.
- Use a shine serum on the ponytail itself to ensure the extensions look healthy and glossy.
7. The Bubble Pony
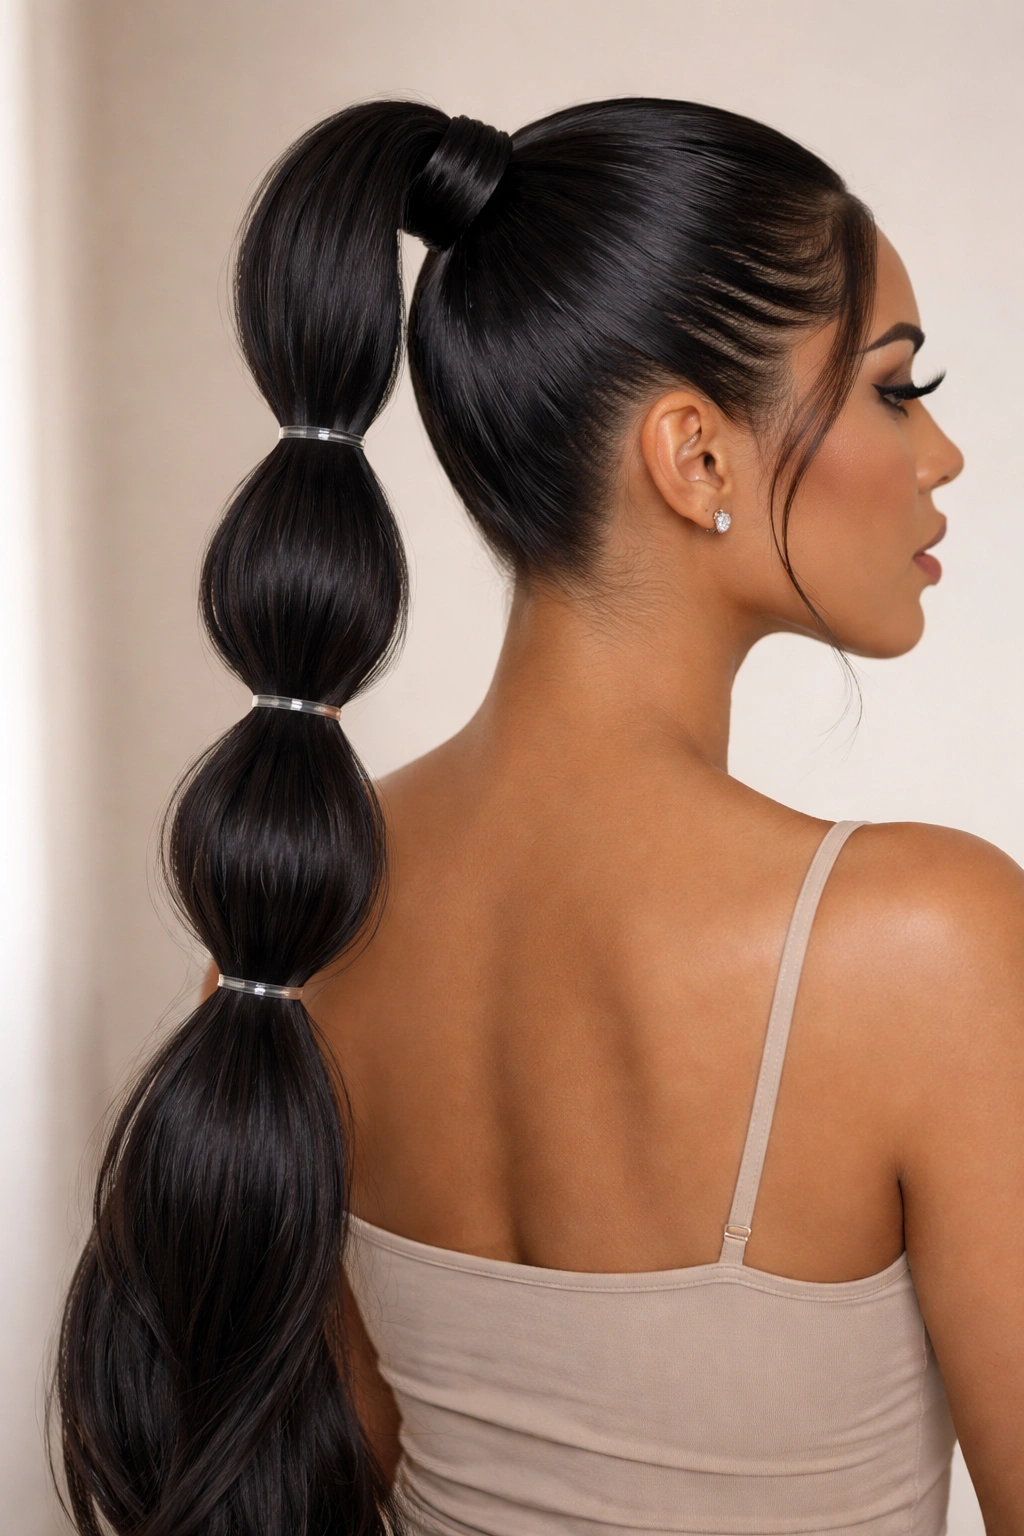
This style is playful and adds significant length to the look. It’s not just about a straight pony; it’s about segmenting the hair to create “bubbles.” You start with a base high ponytail and then place elastic bands every few inches down the length of the extension, pulling the hair between the bands to create volume.
The trick is to use clear elastics or elastics that match your hair color perfectly. If the bands are visible, the magic is gone.
This style is great for people who have thinner extensions and want to create the illusion of thick, voluminous hair. The “bubbling” process naturally fluffs out the hair, making it look fuller than it actually is.
8. High Braided Wrap Pony
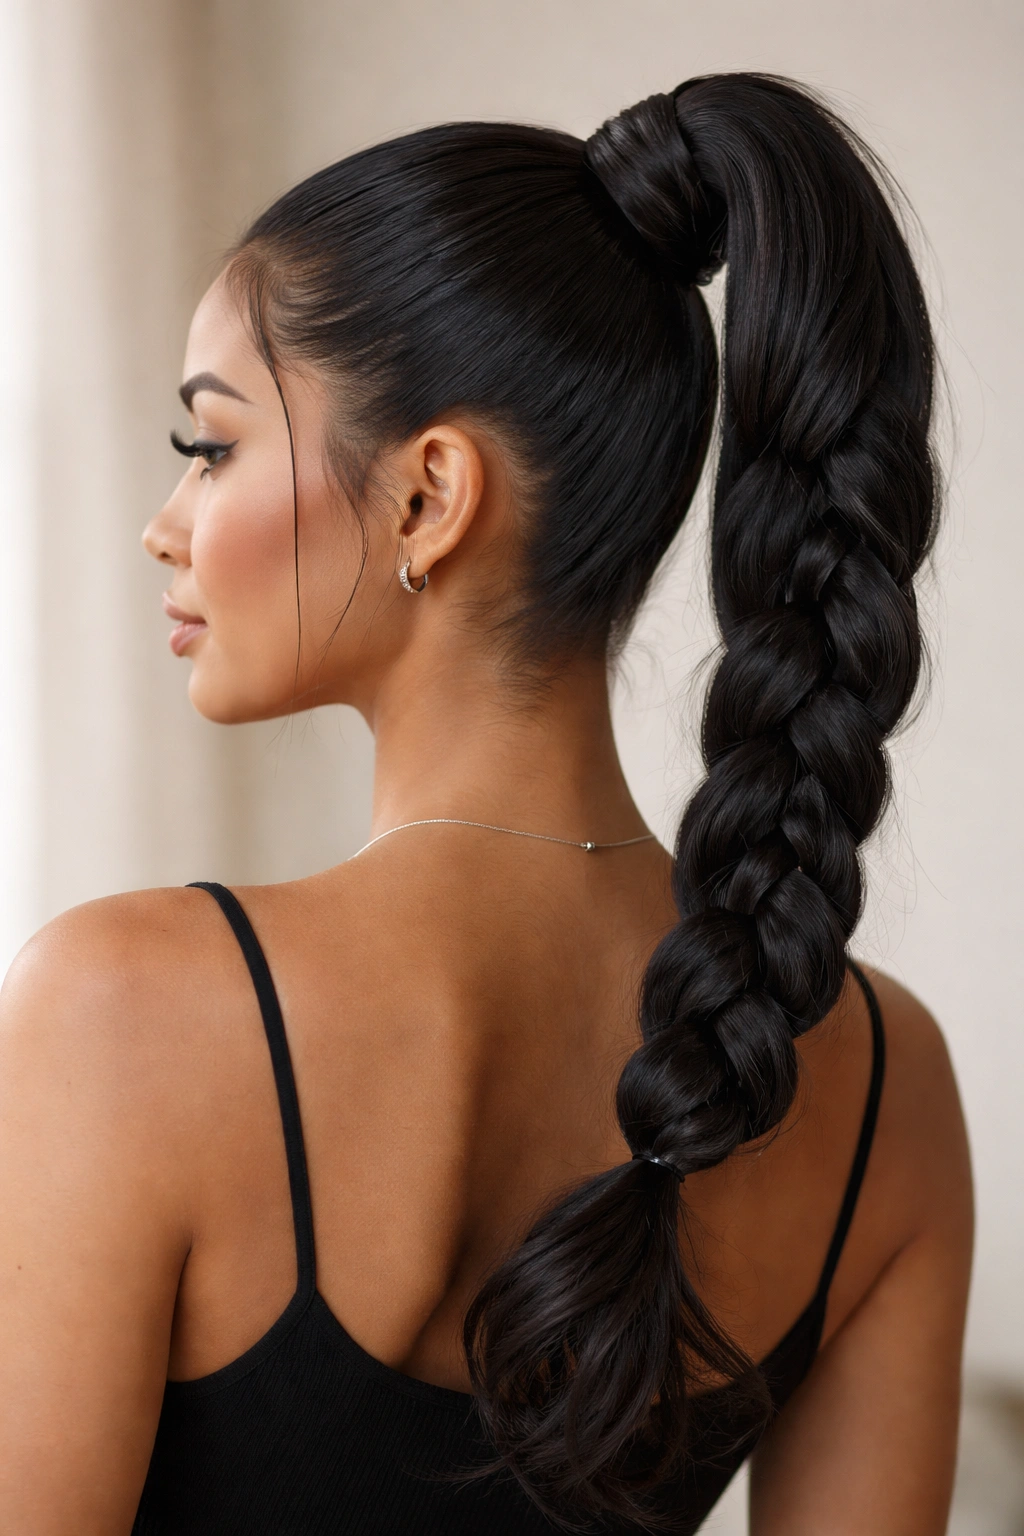
This combines the sleekness of a ponytail with the intricate detail of a braid. After you have secured your high ponytail, you don’t just leave it hanging straight. Instead, you braid the length of the ponytail—either a standard three-strand braid or a fishtail—and wrap the base.
Alternatively, you can integrate a braid into the ponytail itself, leaving the ends loose. It adds texture to a look that can sometimes feel too plain. It takes an extra five minutes, but the result looks like you spent an hour at a salon.
Maintenance note: Braided ponytails hold up very well in windy weather, making them a practical choice for outdoor events.
9. Double Wrapped Base Pony
If you like the “wrapped base” look, take it a step further. Use a double-wrap technique. This involves taking two distinct sections of hair to cover the base.
The first section is wrapped around the band to hide it. Then, a second, slightly smaller section is wrapped in the opposite direction or braided and wrapped around the first layer. It adds thickness to the base and prevents that “tiny ponytail” look that can sometimes happen when you run out of hair to wrap.
It’s a small detail, but it makes the ponytail look like it’s made of thicker, more substantial hair.
10. Face-Framing Tendrils Pony

If you have a straight ponytail but feel like it’s too severe, face-framing tendrils are the fix. Simply leave out two small, thin sections of hair at your hairline before you brush your hair back into the ponytail.
You can leave them straight or use a curling iron to put a soft, face-framing wave in them. This softens the entire look and makes it feel more “lived-in” and less “done.”
Styling Tip
- Use a fine-tooth comb to pull out the tendrils.
- Be careful not to pull too much, or you will lose density in the ponytail itself.
- A little goes a long way. Two thin pieces are better than two thick chunks of hair.
11. Crimped Texture Pony
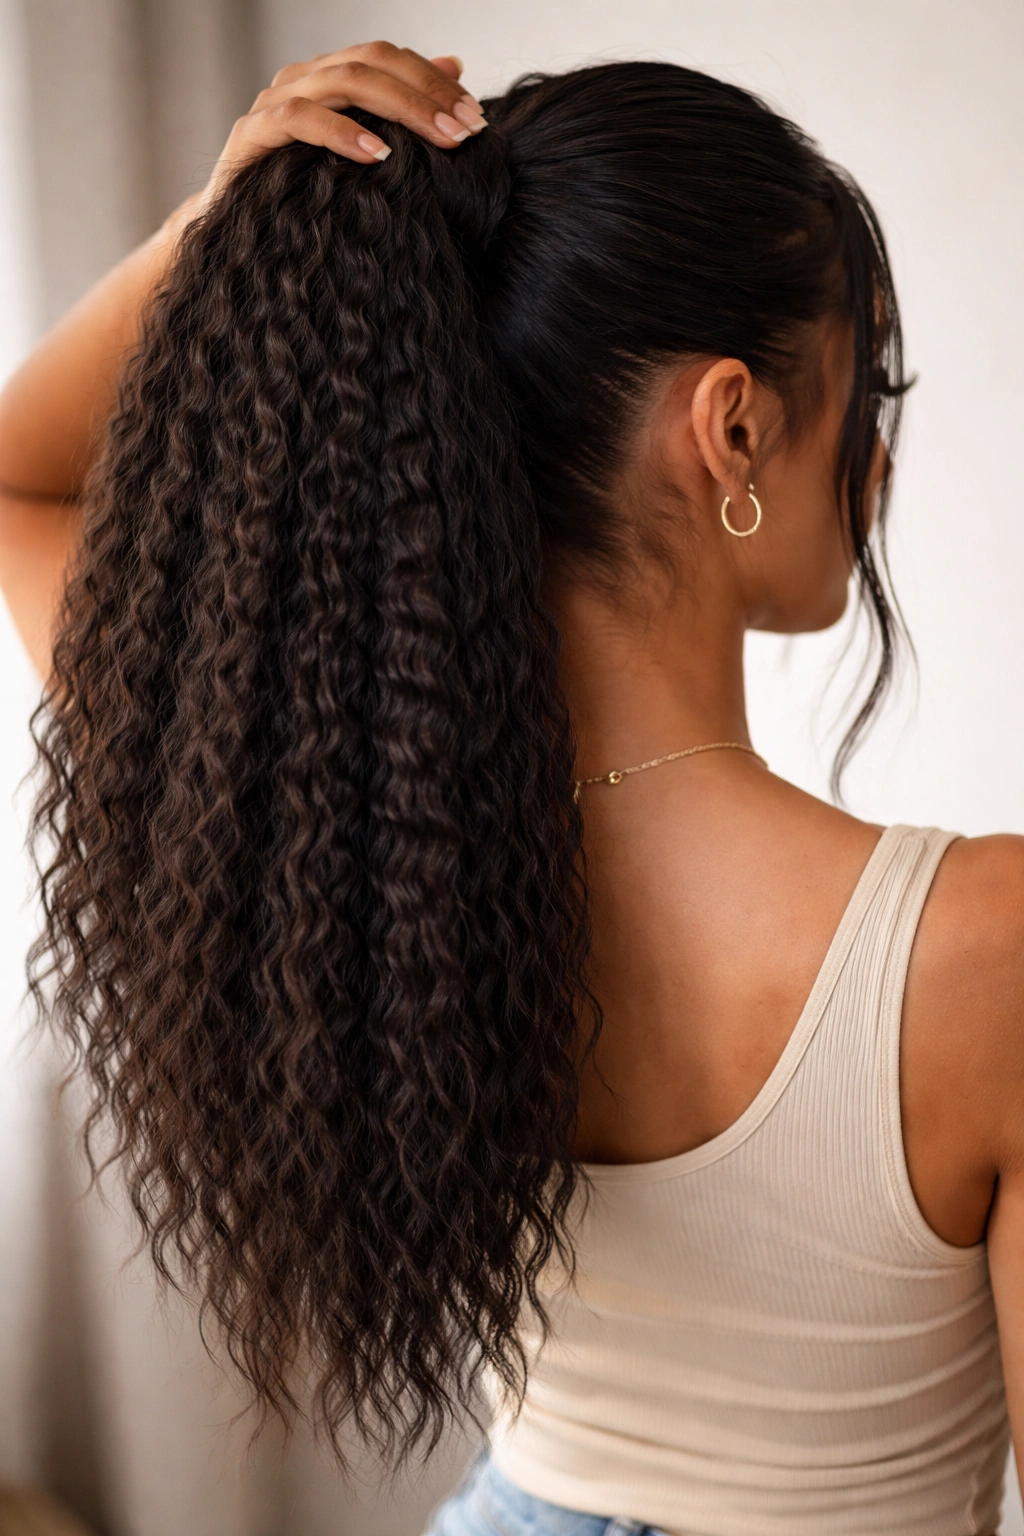
Not every quick weave ponytail needs to be bone-straight. Using a crimping iron on your straight extensions changes the personality of the hair instantly. Crimping adds width, volume, and an 80s-inspired vibe that is both retro and modern.
The best part? You don’t have to crimp the hair perfectly. A messy, uneven crimp actually looks better than one that is too uniform.
After you crimp the hair, run your fingers through it—do not brush it. Brushing will turn crimped hair into a frizzy mess. The goal is separated, defined ridges.
12. Half-Up Half-Down Pony
This is for when you can’t decide between wearing your hair down and wearing it up. A half-up, half-down quick weave allows you to frame your face while still getting the volume of a full head of hair.
You will need to construct the cap slightly differently for this. The top section (the ponytail) needs to be dense, while the bottom section (the loose hair) needs to have enough tracks to cover the back of the head.
It’s a bit more construction work, but the result is a beautiful, cascading style that feels effortless.
13. Minimalist Sleek Pony
Sometimes, less is truly more. A minimalist ponytail is about perfection in the execution rather than accessories. There is no wrapped base, no tendrils, and no braids.
It is just the hair, pulled tight, secured, and left to hang.
This style relies entirely on the quality of your extensions. Since there is nothing to hide behind, make sure your tracks are blended well and the ends of the hair are trimmed straight. If you have any dead ends, they will stand out immediately in this style.
14. Asymmetrical Pony
An asymmetrical ponytail is positioned slightly to one side rather than directly at the top or the back of the head. It’s a subtle shift, but it adds a lot of personality.
It gives the hair a natural, effortless tilt that looks great in photos. You can pair this with a deep side part for maximum effect. The weight of the hair falling over one shoulder is a classic look that never goes out of style.
Construction advice: When bonding your tracks to the cap, angle the tracks toward the side where you want the ponytail to sit. This helps the hair flow naturally in that direction.
15. Pony with Gold Accessory Accent
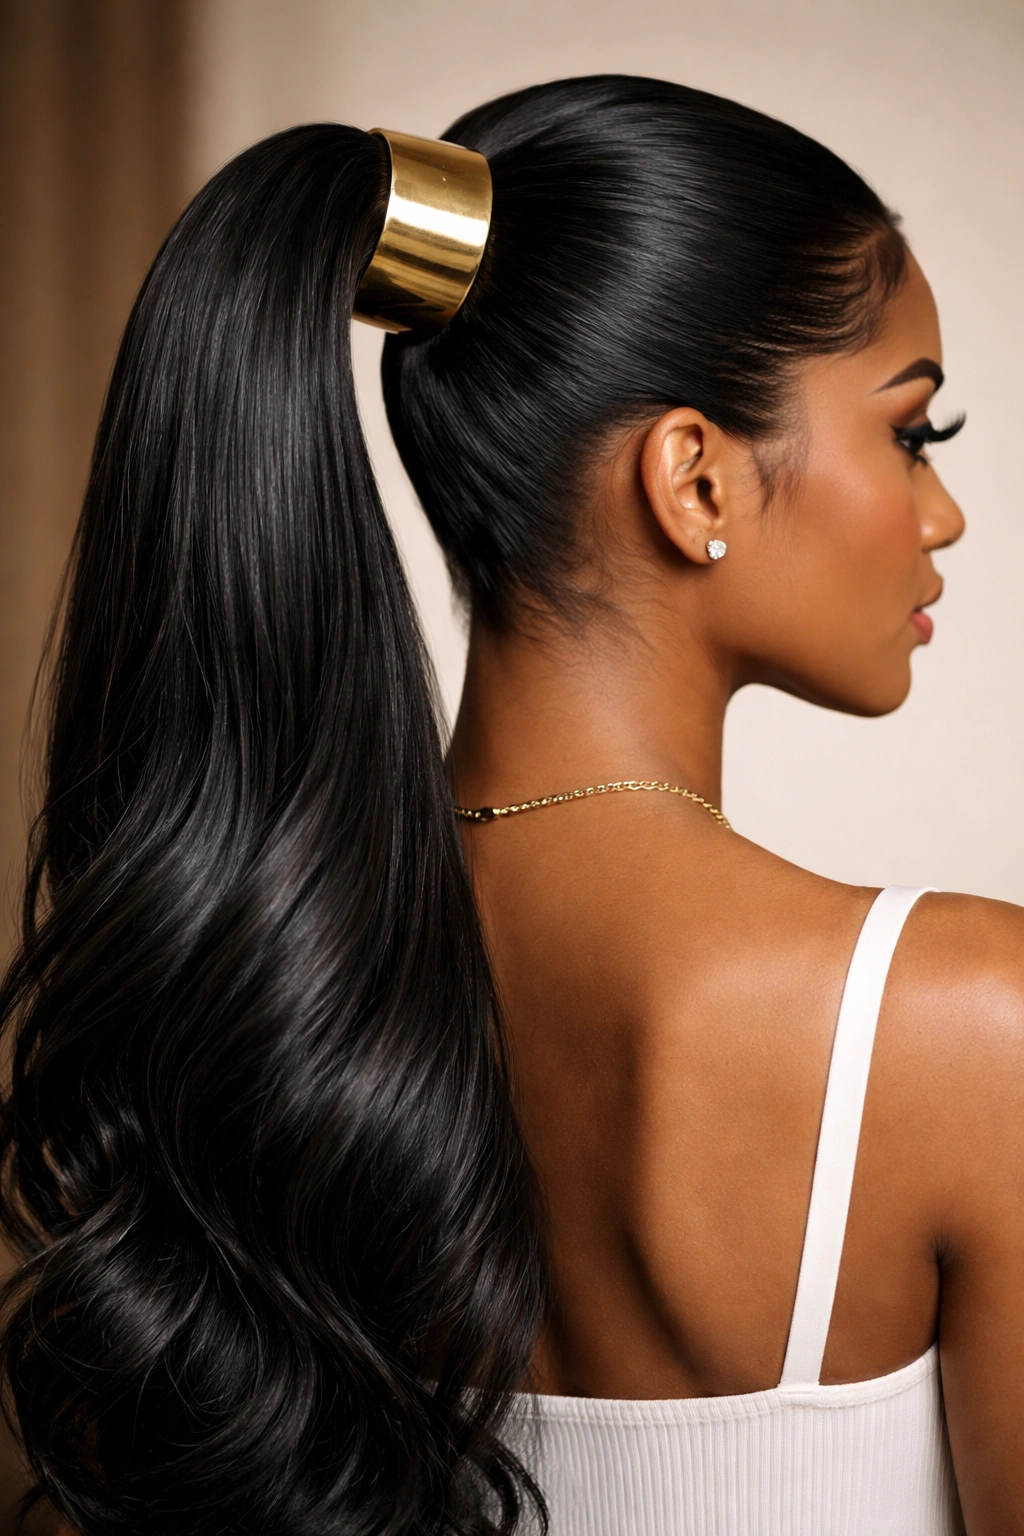
Sometimes the hair itself isn’t enough. Adding a gold cuff, ring, or ribbon to your ponytail can transform it from a basic style to an event-ready look.
Gold accents work particularly well against dark extensions, creating a striking contrast. You can place the cuff at the base of the ponytail to hide the elastic, or place several small rings down the length of the pony for a more futuristic look.
The key is to avoid cheap-looking plastic accessories. Real metal—or high-quality plated metal—is heavy enough to stay in place and looks polished.
16. Messy Top Knot/Pony Hybrid
Not everyone wants a long, sleek tail. Sometimes, you want the volume of a ponytail but the compact nature of a bun. This style pulls the hair into a high ponytail but then wraps the hair into a loose, slightly messy knot at the crown.
It’s the ultimate “model off-duty” look. It’s polished enough for work but cool enough for the weekend.
Because it’s a quick weave, you can build the “knot” part with extra tracks bonded in a circular motion on the cap before you even put it on your head. This makes the knot look massive and full without you having to struggle with your own hair.
17. Slicked-Back Low Pony with Deep Part

This is a very specific, high-fashion aesthetic. It requires a lot of product. You want the roots to be wet-looking and extremely flat.
The deep part is the star of the show here. You want a razor-sharp part that runs from the hairline back to the crown.
Why It Works
- It creates a very dramatic, severe, and powerful look.
- It highlights your bone structure.
- It is incredibly low maintenance once it is set—it won’t move until you wash it out.
18. Voluminous Root Pony
If your flat hair makes you feel self-conscious, this style is the solution. The technique here is to backcomb the roots of your natural hair slightly before slicking it back into the ponytail.
This creates a “poof” or volume at the top of the head, which prevents the hair from looking glued to your skull. It’s a very 60s, retro-glam silhouette.
You can achieve this with a quick weave by strategically placing your tracks on the cap so that the base of the ponytail has extra hair bonded underneath. This acts as a hidden cushion, lifting the ponytail and giving you that extra height.
19. Sleek Pony with Beaded Accents
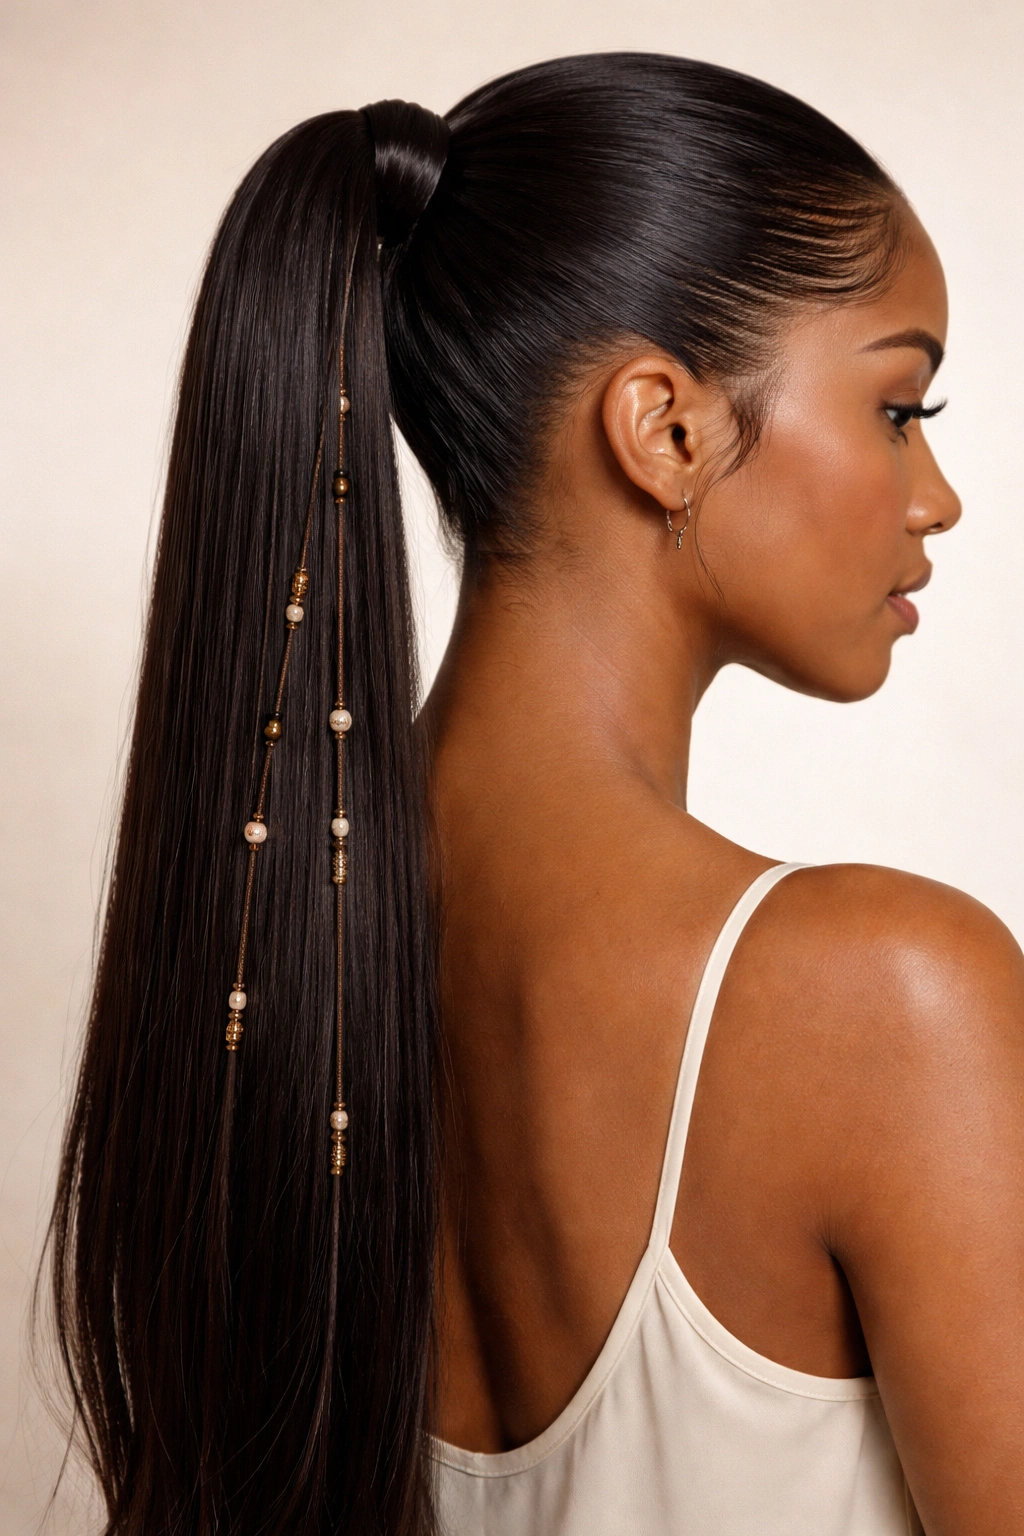
This is a fun, whimsical take on the ponytail. Using small hair beads—either wooden, plastic, or metallic—on individual strands within the ponytail adds texture and sound.
You don’t need to put beads everywhere. Just placing three or four beads on random strands creates a custom, bohemian feel.
If you use clear elastic bands to secure the beads, you can switch them out every day. It’s a great way to personalize your extensions and make a basic straight ponytail feel like a completely new style.
20. Sleek Pony with Statement Scrunchie
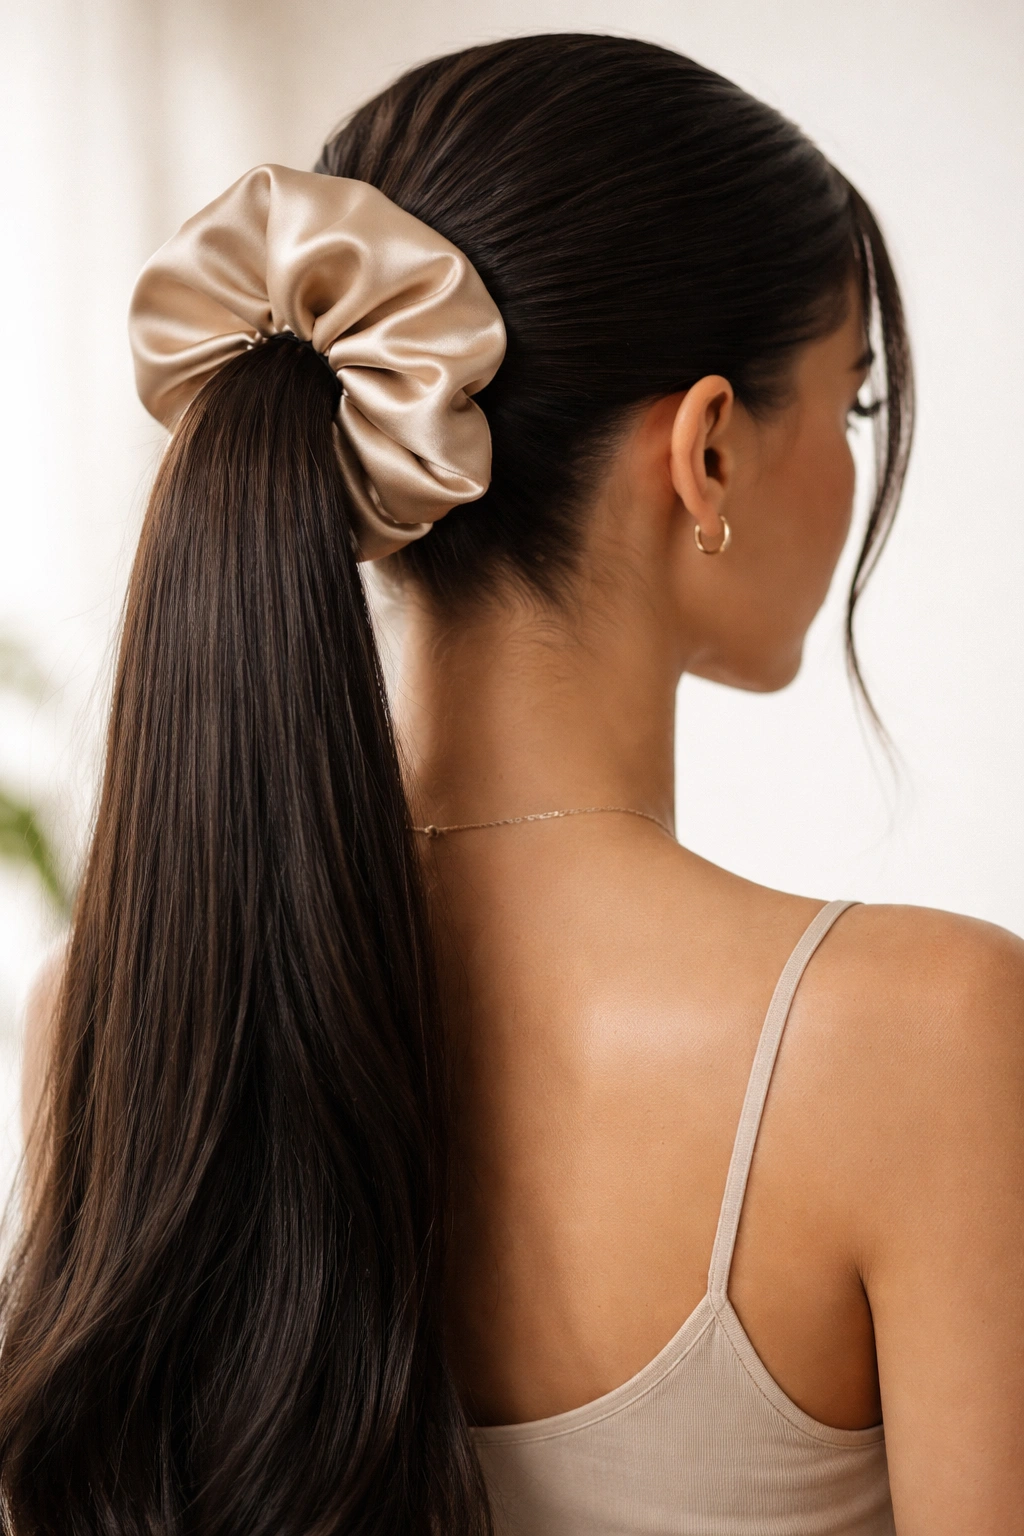
The scrunchie has made a permanent comeback. For a quick weave, a large, silk or velvet scrunchie can hide the base of the ponytail and add a pop of color or texture.
This is the easiest style to execute. Even if your base wrap isn’t perfect, a large scrunchie covers it entirely.
- Choose a fabric that complements your outfit.
- A silk scrunchie is better for the hair, reducing friction and preventing breakage on your natural hair strands.
- Go for “oversized” rather than “mini”—the drama of the size is what makes it look intentional.
21. The “Wet Look” Sleek Pony

The wet look is achieved by using a high-shine pomade or a specific “wet look” hair gel. You want the hair to appear as if you just stepped out of the pool or shower, but with a perfectly controlled shape.
This look is extremely popular for evening events. It has a high-fashion, editorial quality.
Application Tips
- Use a generous amount of shine-enhancing product.
- Avoid products that dry stiff or flaky; you want a flexible hold.
- Keep the hair combed through while the product is wet to ensure no clumps form.
22. Twisted Base Pony
Instead of a simple wrap, try a twist. Take two sections of hair from your ponytail, twist them around each other to form a rope, and then wrap that rope around the base.
It adds a different kind of visual interest. It looks more complex than a standard wrap, but it takes roughly the same amount of time.
This style is perfect for straight hair because the twist is very visible. The way the light catches the twisted hair makes the style look expensive and well-designed.
23. The “90s Flip” Pony
This is a very specific style that is currently having a major moment. You take the ends of your ponytail and use a flat iron or a large curling iron to curl the ends upward, creating a “flip.”
It’s cute, it’s retro, and it makes the ponytail feel bouncy and fun rather than severe.
- The flip needs to be consistent. If one piece flips out and the rest hangs straight, it looks like a mistake.
- Use a strong-hold hair spray to ensure the flip stays up throughout the day.
- Keep the roots slick and the ends bouncy for the best contrast.
24. Sleek Pony with Hidden Track
If you want the ponytail to be extra long, but your bundle length is limited, you can create a “hidden track” at the base.
Before you secure the ponytail, take a long piece of extension hair (or an extra track), fold it, and bond it inside the ponytail so it hangs with the rest of the hair.
It adds instant length and volume right at the point where the ponytail starts, which creates a more dramatic waterfall effect. This is the secret to those hyper-long ponytails you see on social media—they aren’t just one bundle; they are carefully layered tracks added for maximum density.
25. Layered Sleek Pony
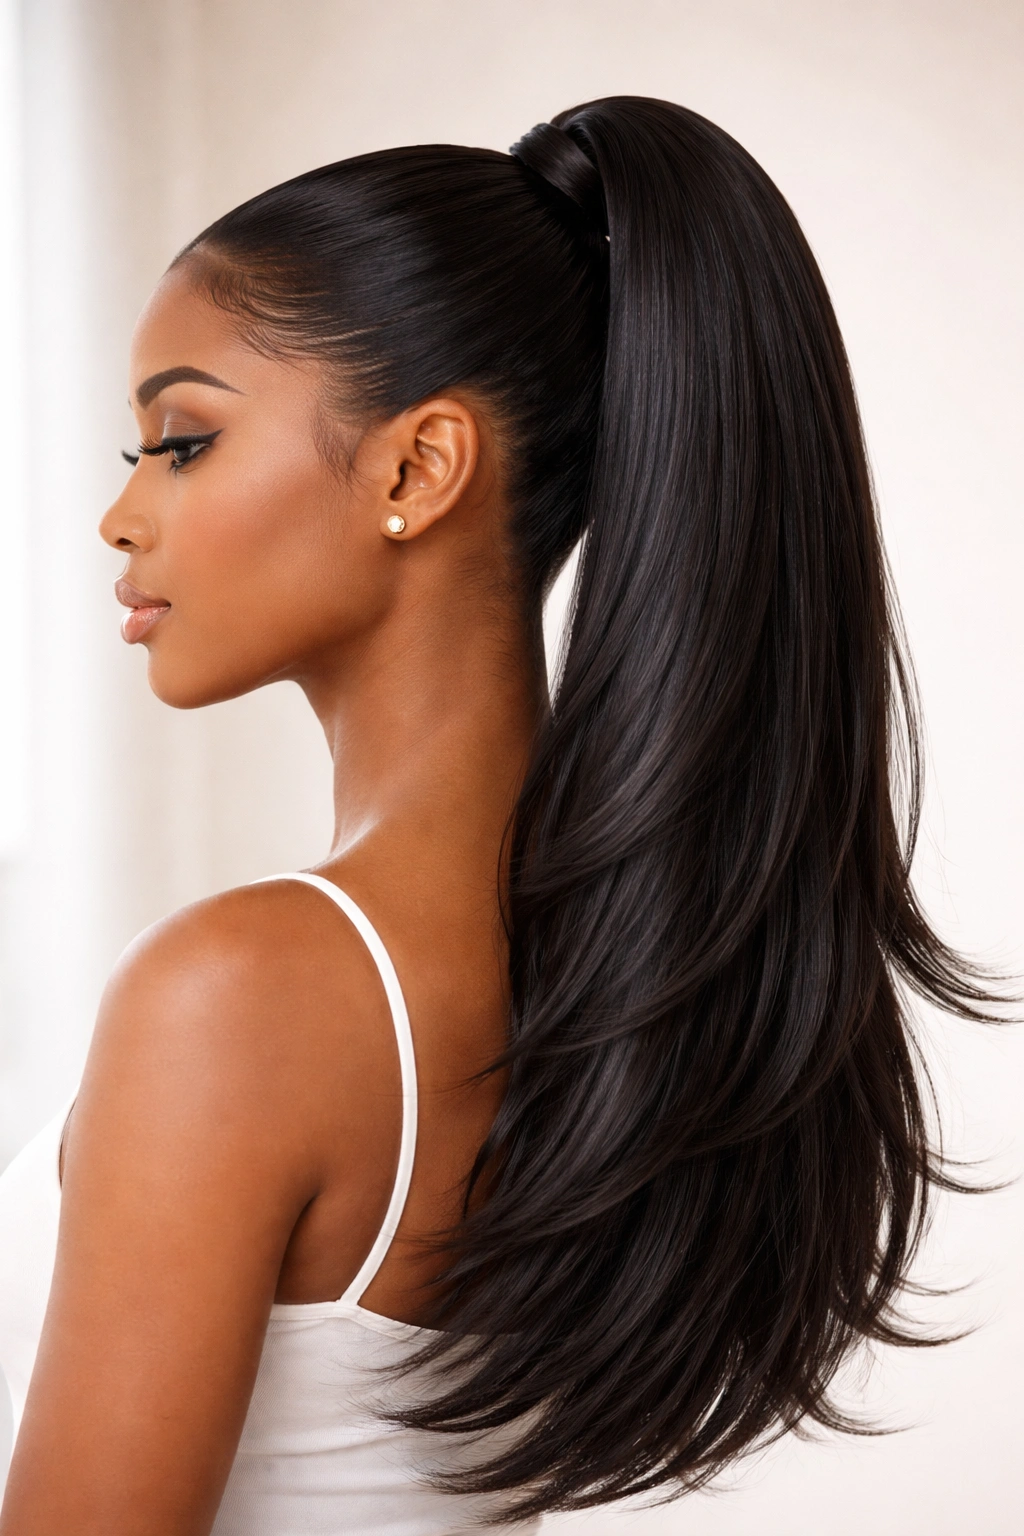
If you want your ponytail to look like a haircut, you need layers. Most quick weave ponytails are one length because they come from bundles. But you can give them a haircut.
Yes, you can cut your extensions.
After you construct the ponytail, use a pair of hair-cutting shears to create face-framing layers or shorter layers throughout the length of the pony. This breaks up the bluntness of the ends and makes the hair look more natural and “human.”
Caution: Measure twice, cut once. You cannot grow extensions back. Start with a very small trim until you are confident in your layering technique.
26. The “Swoop” Bang Pony

The “swoop” is different from a regular bang. It involves a very deep side part where the hair is smoothed diagonally across the forehead, creating a dramatic, slanted line.
It’s often paired with a sleek, low ponytail. The bang should be thick and smooth, with no flyaways.
Essential Tools
- A rat-tail comb for the perfect part.
- A boar-bristle brush to pull the hair tight.
- Strong-hold edge control for the “swoop” itself.
The key to the swoop is the curvature. You want it to follow the natural arch of your eyebrow, not just fall across your eye.
27. Braided Wrap Pony
This is a variation where the entire ponytail is one giant braid, but the base is wrapped with a separate piece of hair.
It is very secure, very low-maintenance, and looks excellent. It’s essentially a “protective” ponytail. Because the hair is braided, it won’t tangle, it won’t frizz in humidity, and it will look just as good at the end of the day as it did at the beginning.
It’s the ultimate “set it and forget it” style for busy days.
Final Thoughts
A quick weave ponytail is the ultimate tool in your style kit. It allows you to experiment with length, volume, and texture without altering your natural hair. The secret to all of these looks is not necessarily the expensive products or the most expensive extensions, but the foundation.
Take your time with the mold. Ensure your hair is flat. Protect your natural edges with a good adhesive shield. When the base is secure and smooth, the rest of the styling becomes a matter of preference. Whether you choose a sleek, high-fashion look or a textured, playful variation, remember that the best ponytail is the one that stays secure and makes you feel comfortable. Don’t be afraid to trim, customize, and accessorize—that is where the real style happens.