Half up ponytail buns have a useful trick that a lot of ponytail hairstyles don’t: they make hair look done without locking every strand into place. You get lift at the crown, movement through the lengths, and enough softness around the face that the style still feels like hair, not a helmet.
That’s why they work on short hair, shoulder-length cuts, long layers, and curly textures that usually refuse to sit still. The trick is placement. Too low, and the bun disappears. Too high, and shorter layers fall apart. Right in the middle, though, you get a shape that feels easy, modern, and a little bit playful.
I’ve always liked styles like this because they solve a real problem. You want your hair off your neck, but you do not want the full commitment of a high ponytail or a tight chignon. A half-up bun gives you that middle ground, and with a few bobby pins, a small elastic, and a bit of texture, it can look polished or messy, depending on your mood.
The best part is how much room there is to adjust it. You can make it sleek, soft, braided, looped, twisted, or clipped. You can keep it tiny on a bob or build it bigger on thick hair. That flexibility is why this style keeps showing up in real life, not just in polished photos, and the first version is the cleanest place to start.
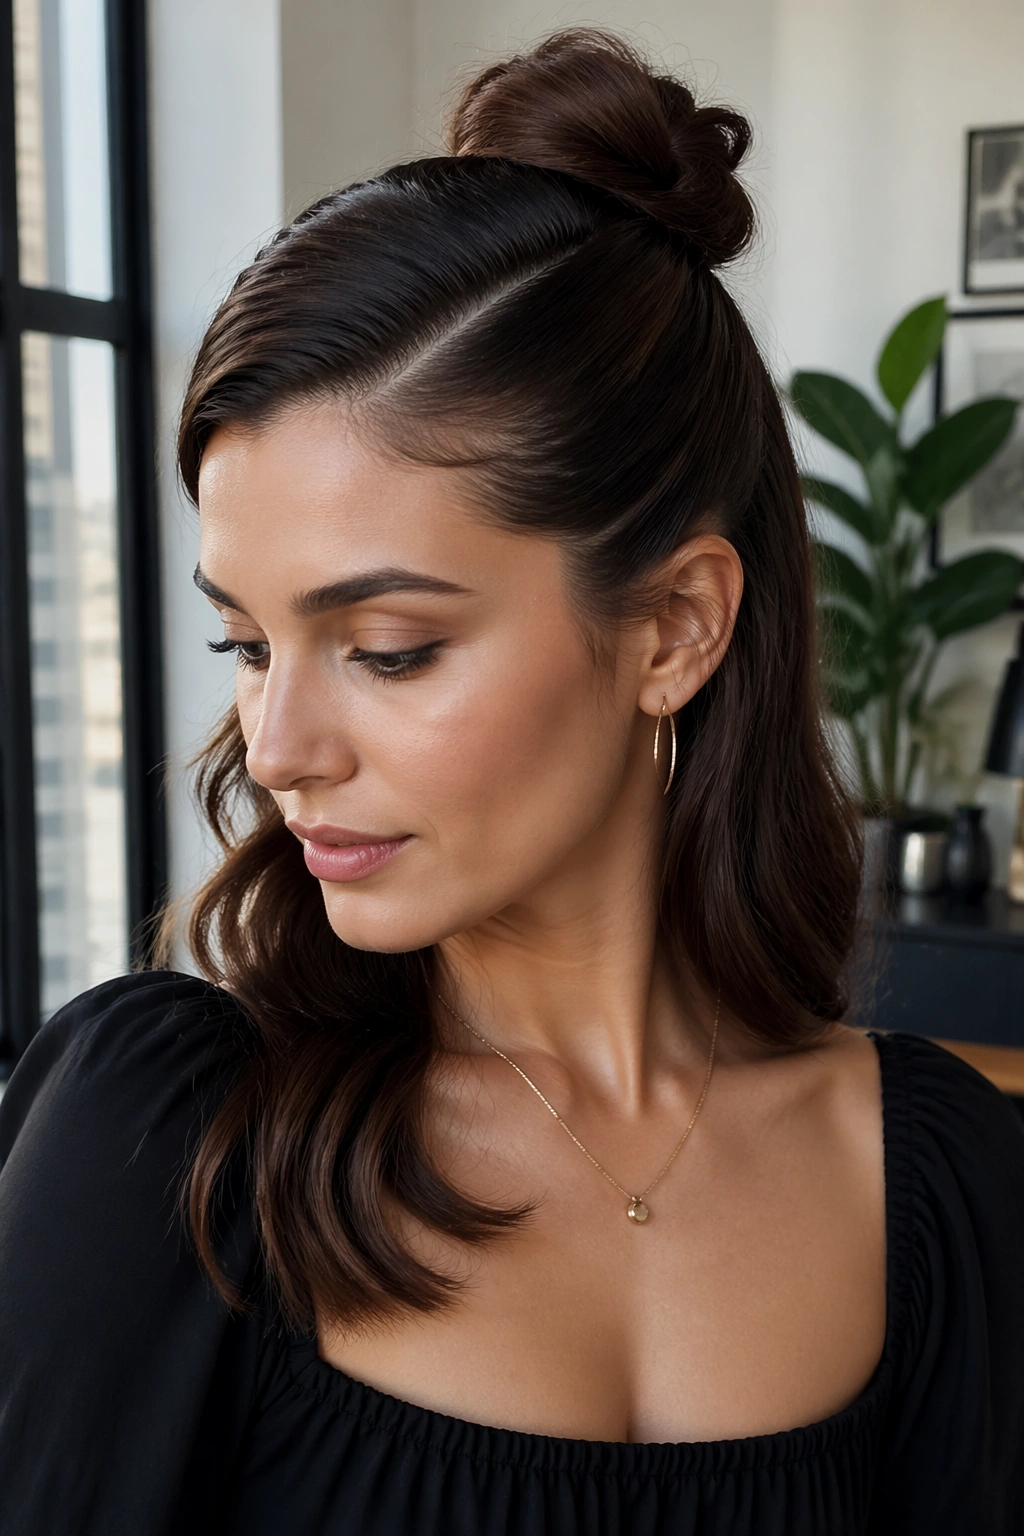
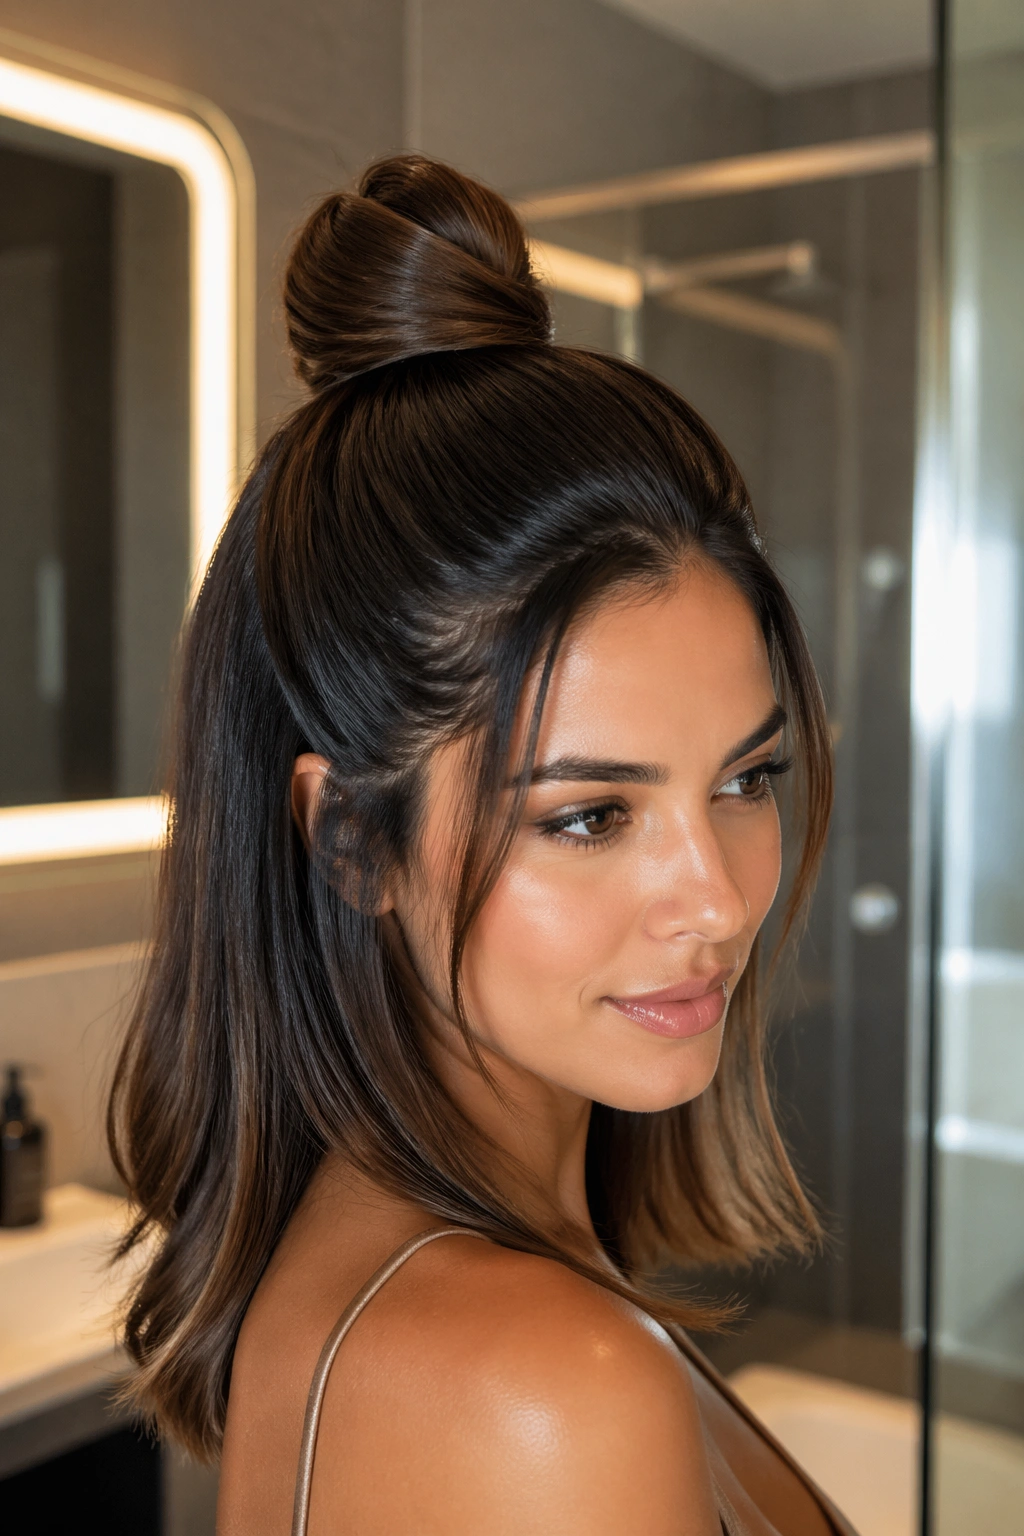
1. Sleek Wrapped Half Up Bun
This is the version I reach for when I want clean lines without a full updo. The top section gets smoothed back, the bun sits at the crown, and one thin strand wraps around the elastic so the whole thing looks finished instead of rushed.
Why It Stays Sharp
The smooth surface is doing most of the work here. Use a fine-tooth comb or a boar-bristle brush, then gather hair from the temples back to the crown. If your hair slips easily, a touch of lightweight cream on the top section keeps flyaways down without making the roots greasy.
A wrapped bun also hides the elastic, which makes the style look more deliberate. I like this on straight hair, but it works on wavy hair too if you brush only the top section and leave the lower half loose. The contrast is nice.
- Use a small clear elastic to secure the top section first.
- Wrap a 1/2-inch strand around the base and pin it underneath.
- Finish with flexible-hold hairspray, not a stiff shell.
- Keep the bun no wider than your palm if your hair is fine.
Tip: If the bun starts to wobble, add a second pin in an X shape under the wrap. It’s boring, yes. It also works.
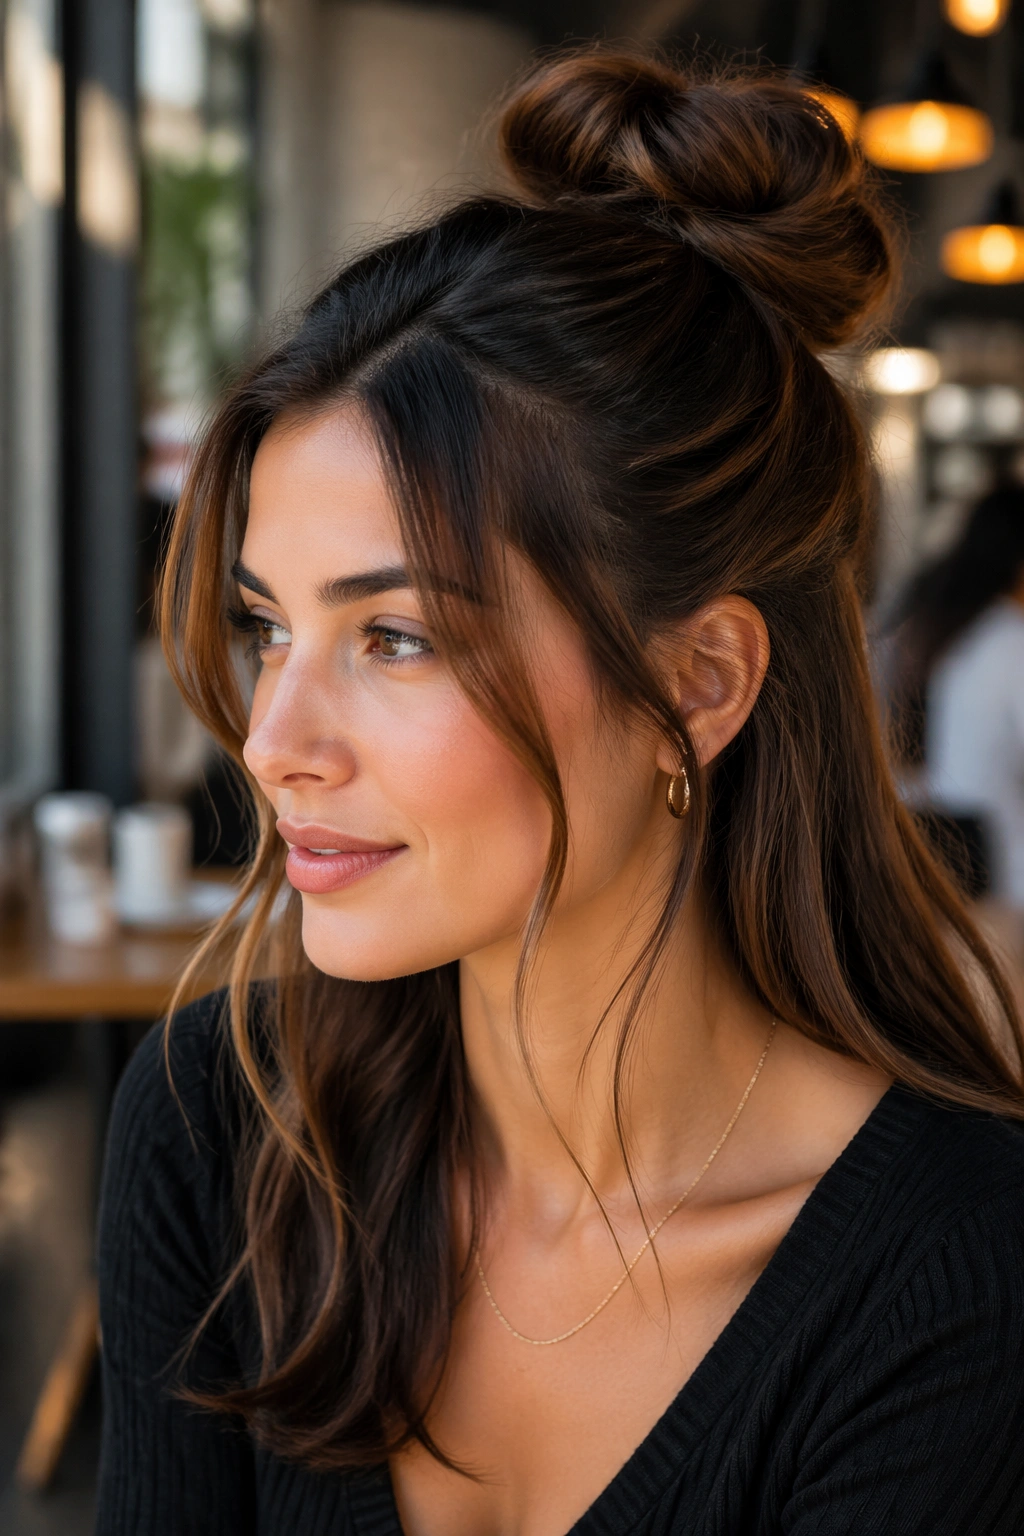
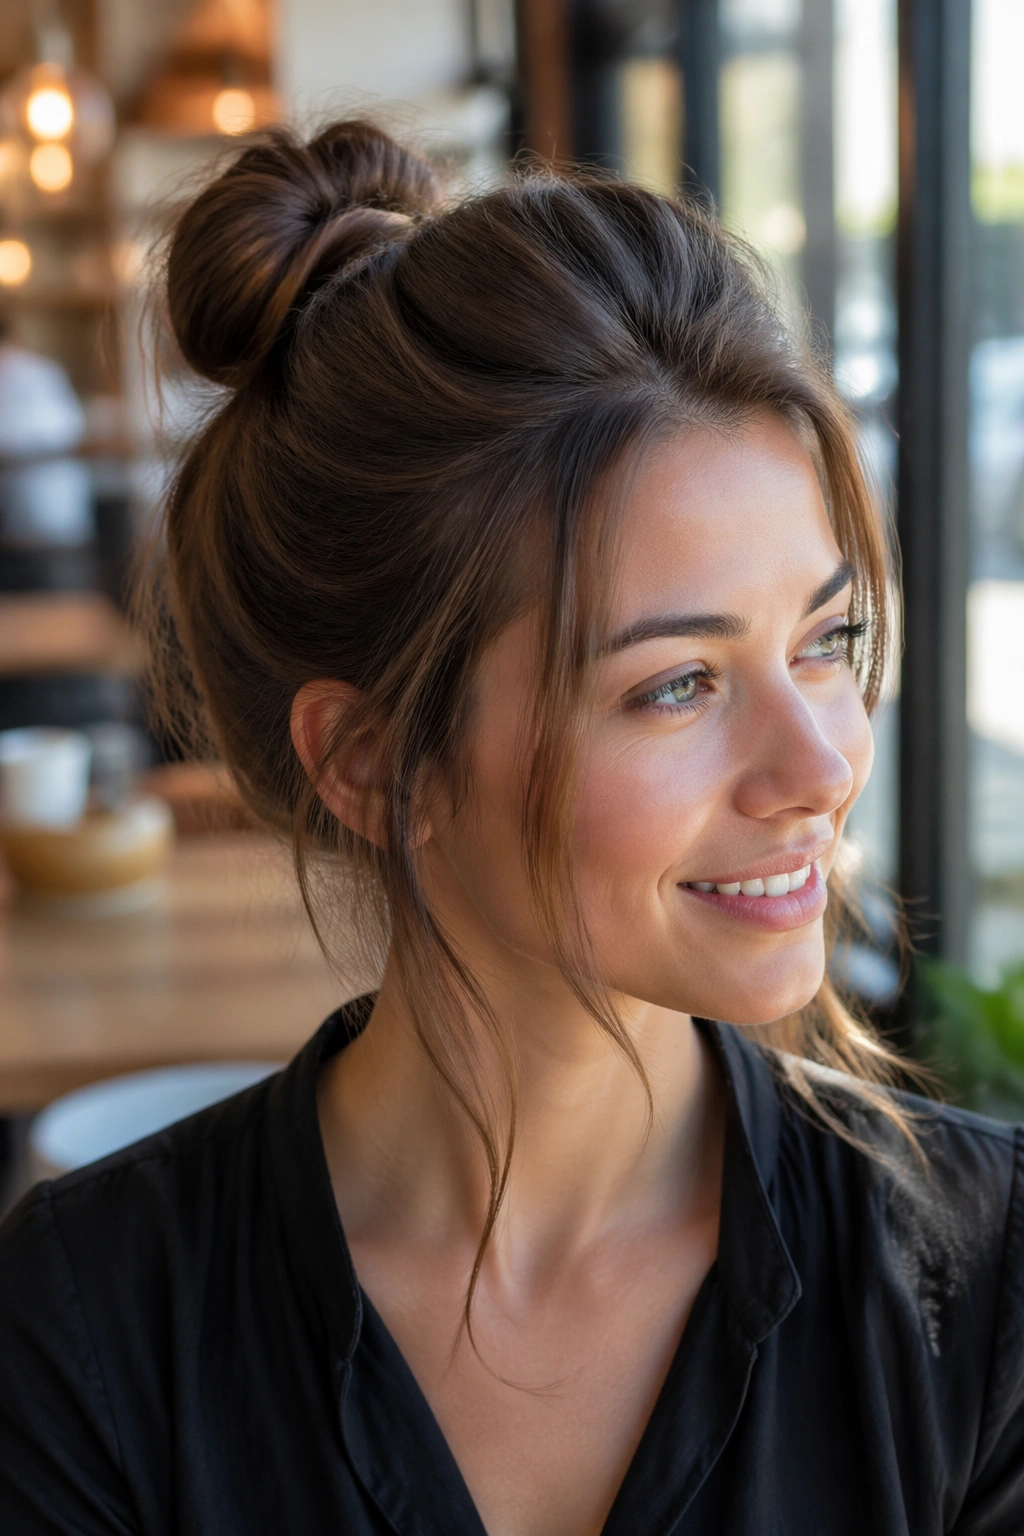
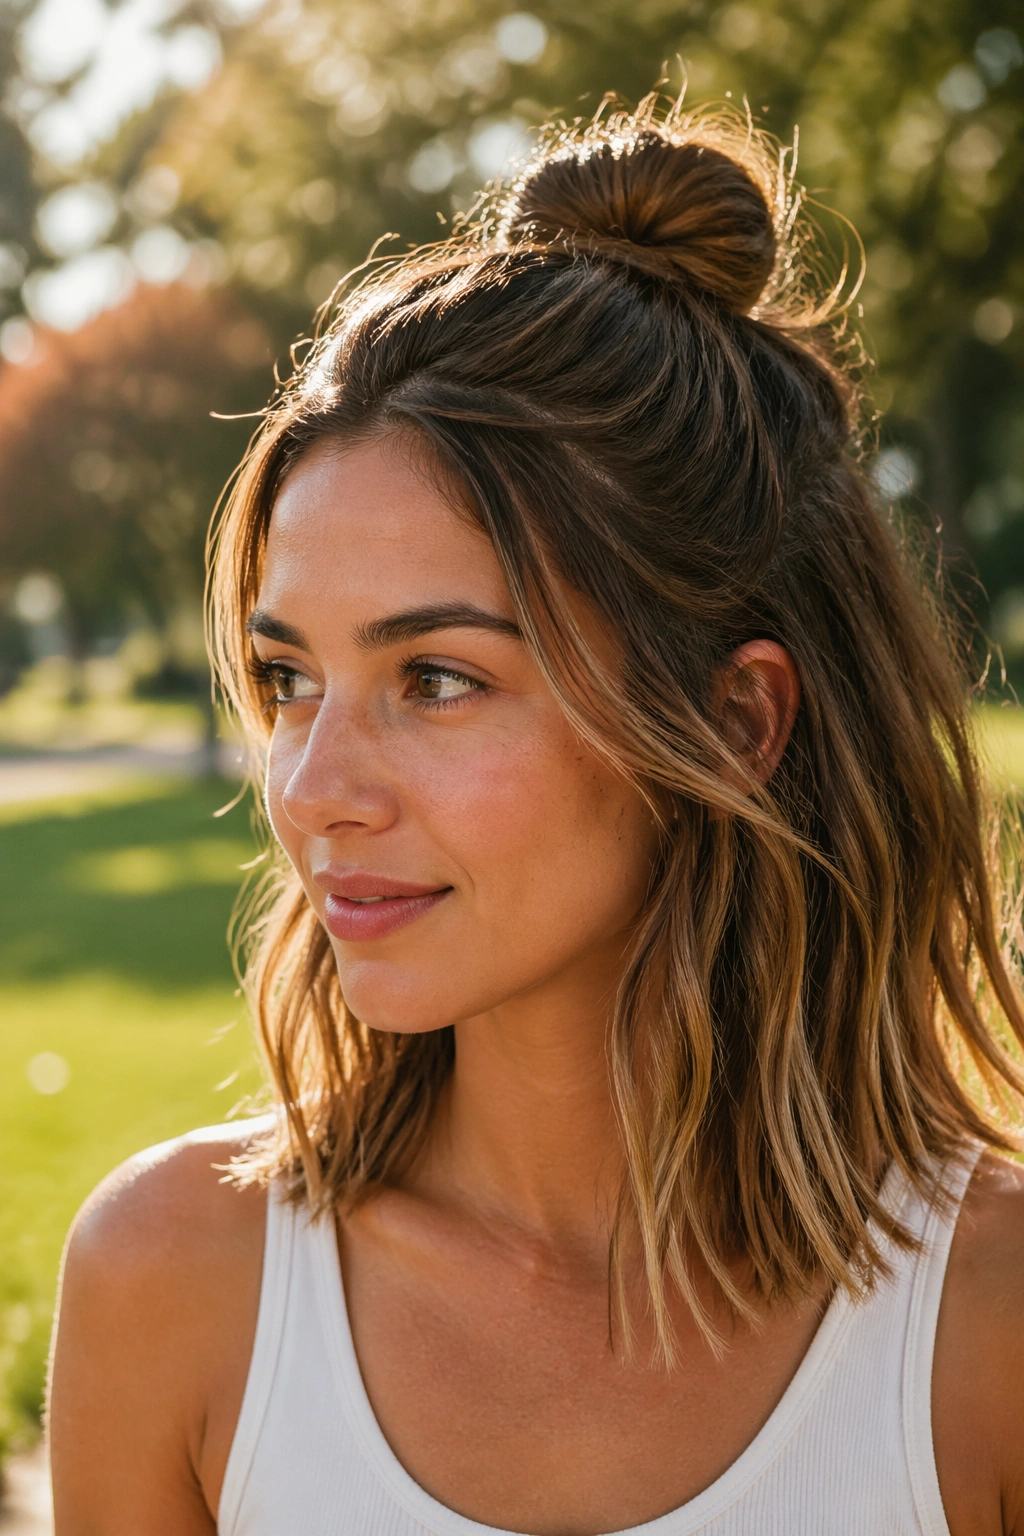
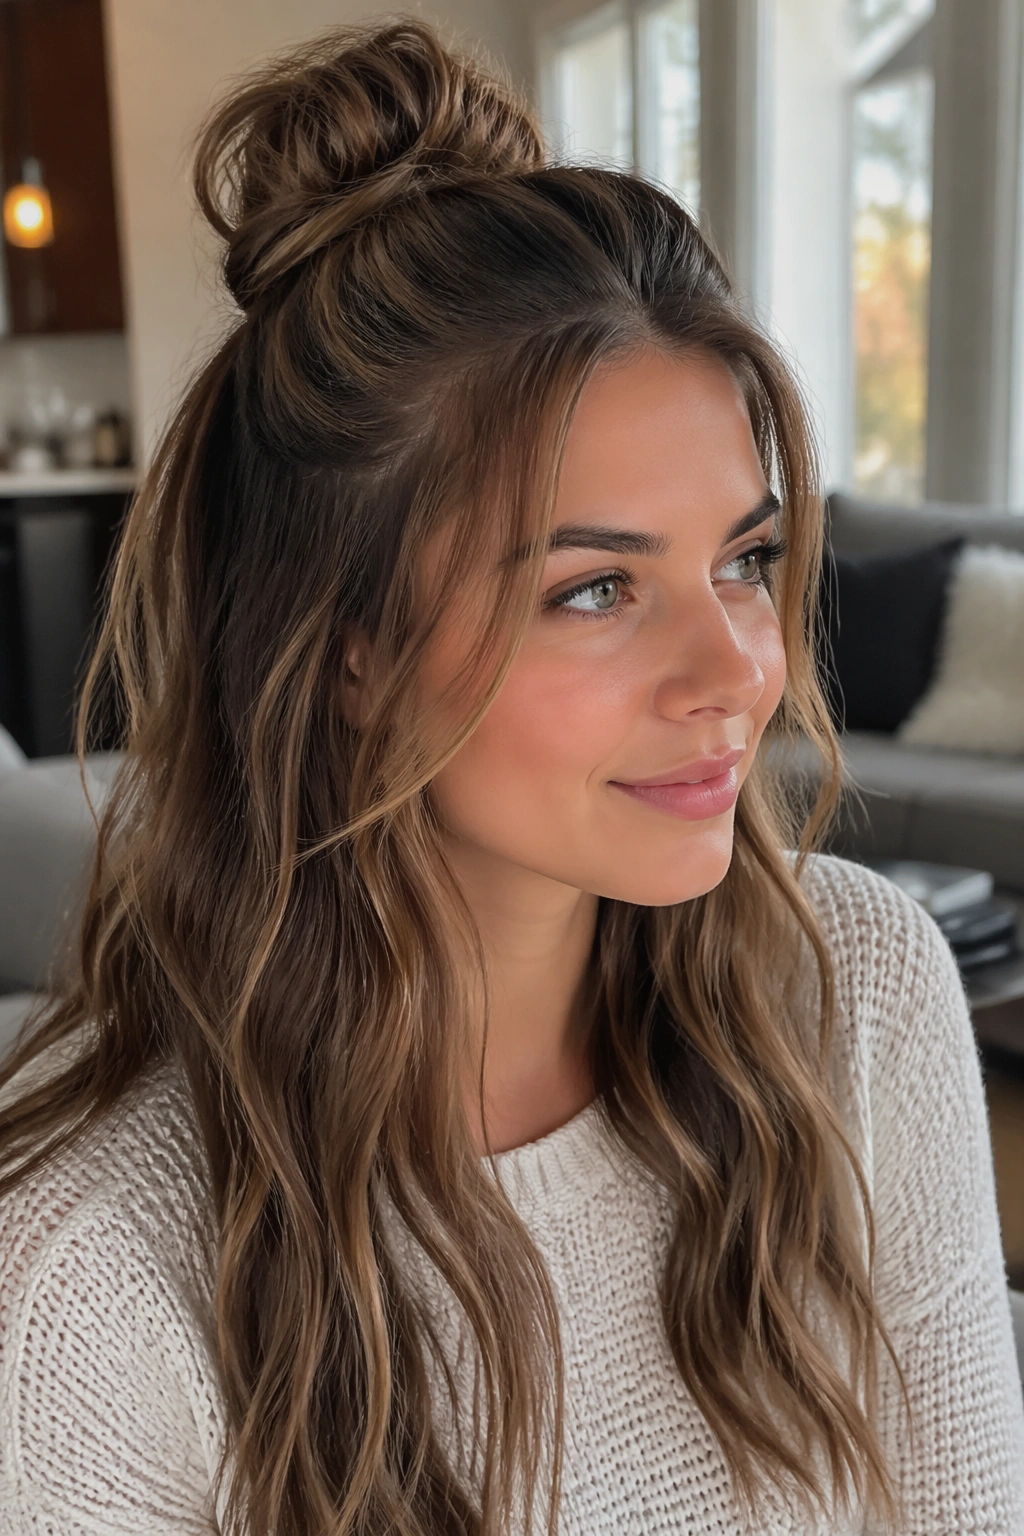
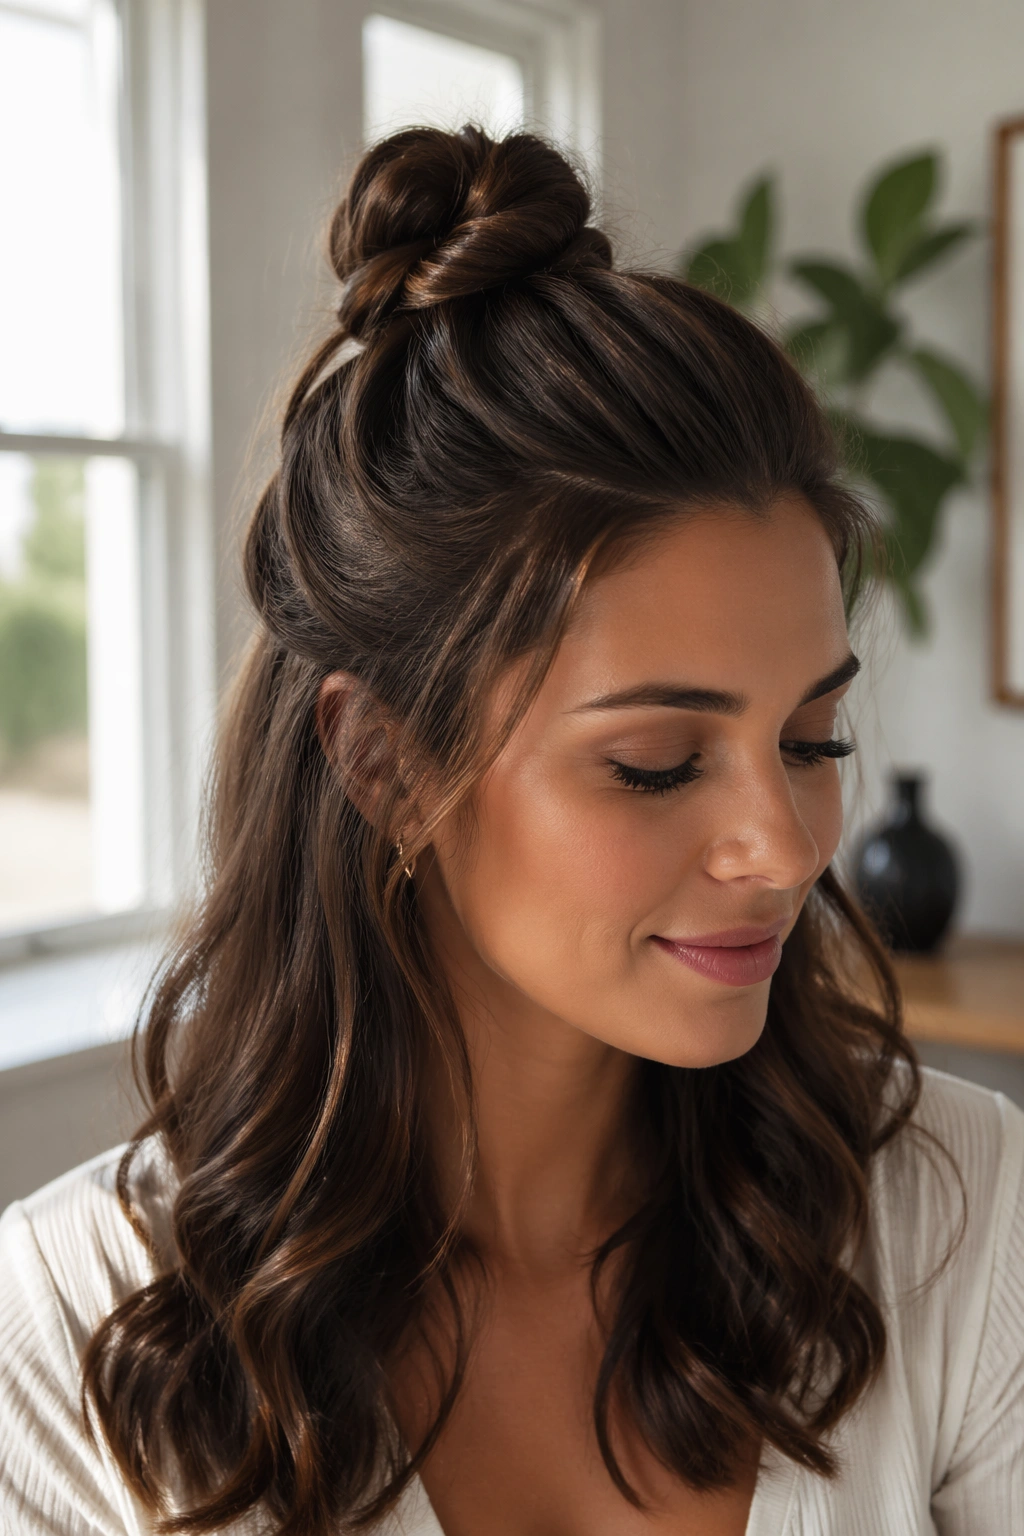
2. Soft Messy Half Up Top Knot
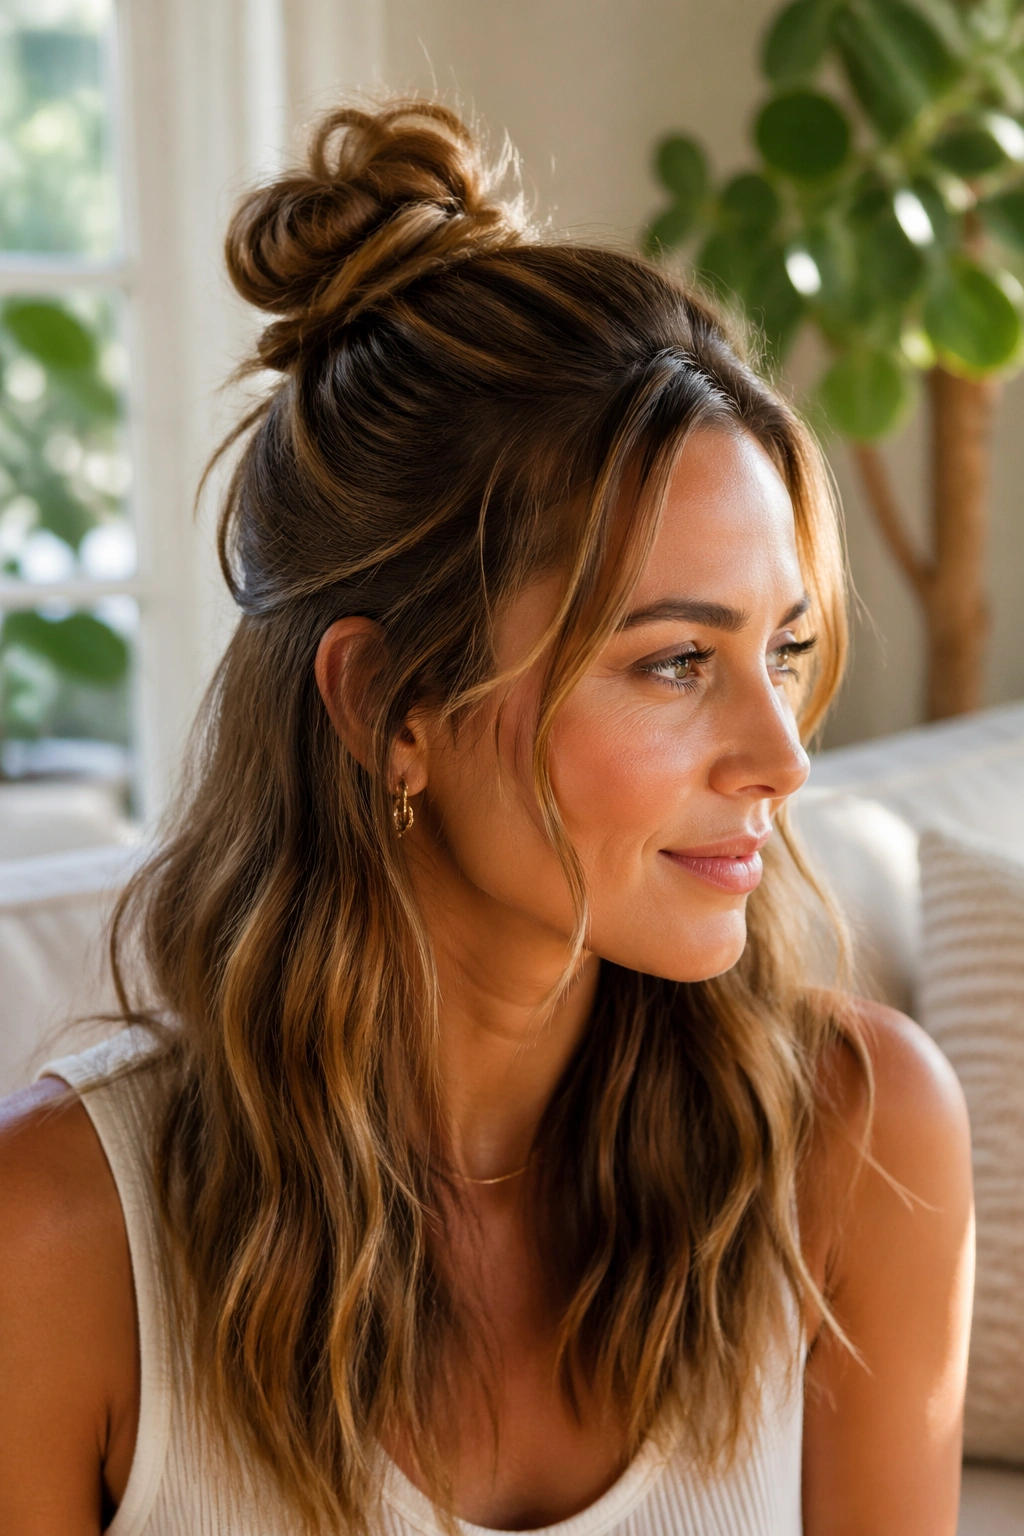
Why does a messy half up ponytail bun look better when you stop trying to make it perfect? Because the looseness gives the style shape. A little bend in the crown and a few loose ends around the bun make the whole thing feel airy instead of forced.
Pull the top half back with your fingers, not a brush, especially if your hair has any natural wave. Twist once or twice, coil it loosely, and let the ends poke out on purpose. That tiny bit of disarray is what keeps it from looking like a gym knot.
I like this version on second-day hair because the extra grip helps the bun stay put. Fresh hair can work too, but it needs a little dry shampoo at the roots. Otherwise it slips.
If you want the style to last, keep the elastic snug but not tight. A bun that is over-tightened gets small and stiff. A bun that has a little breathing room looks fuller and wears better by midday.
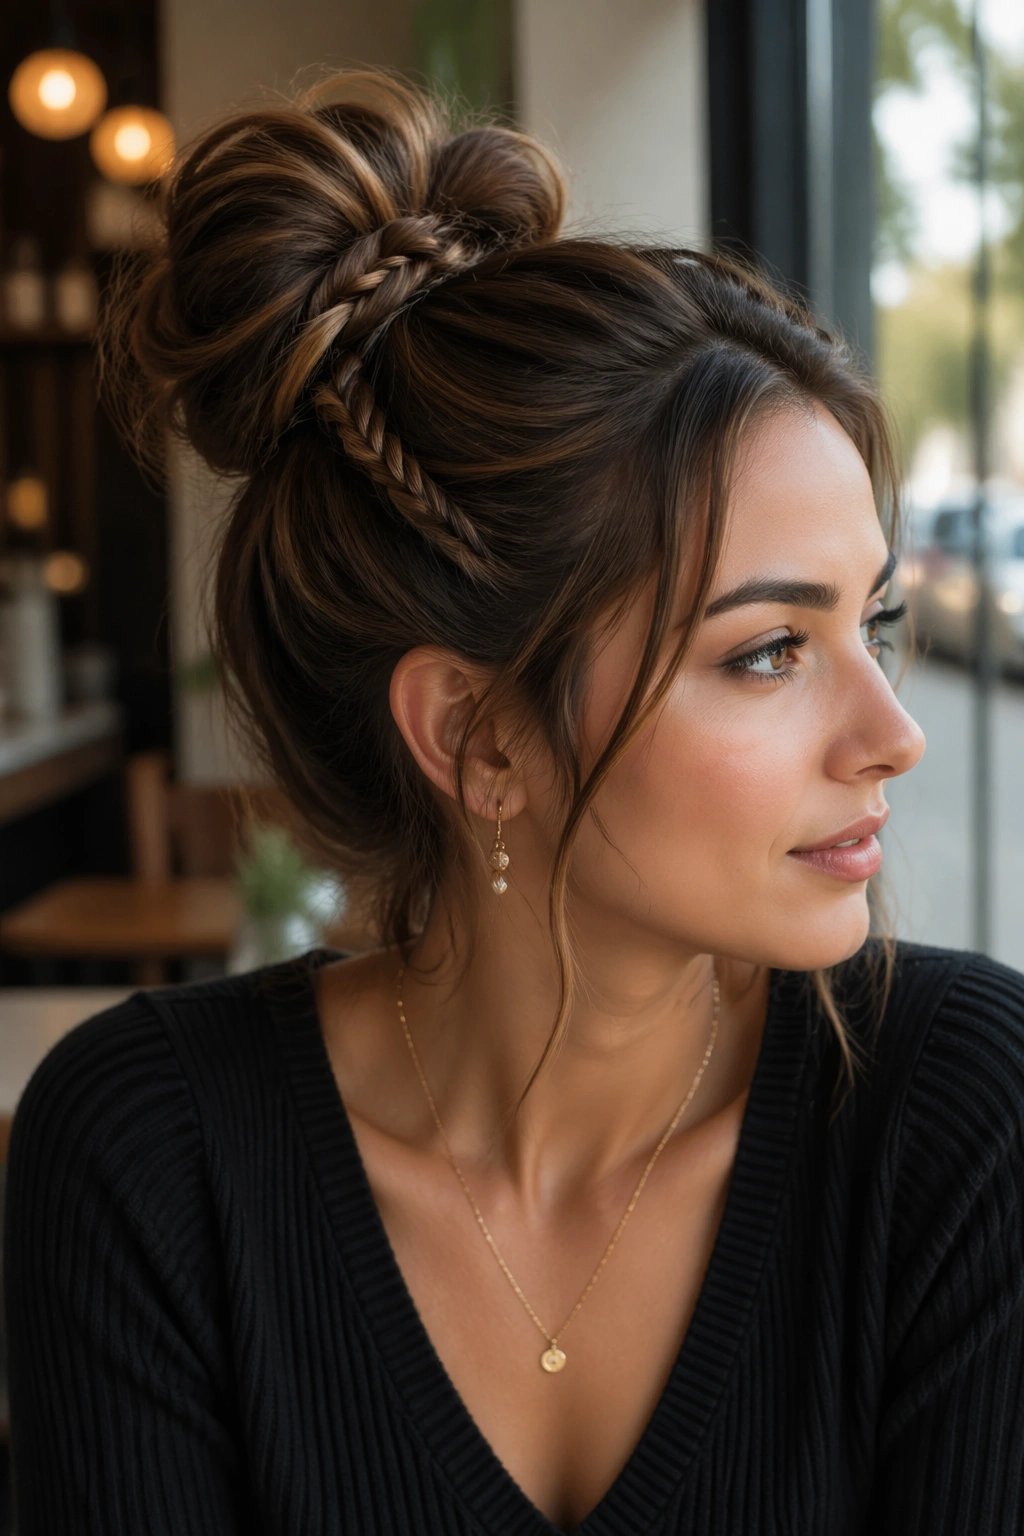
3. Braided Half Up Bun
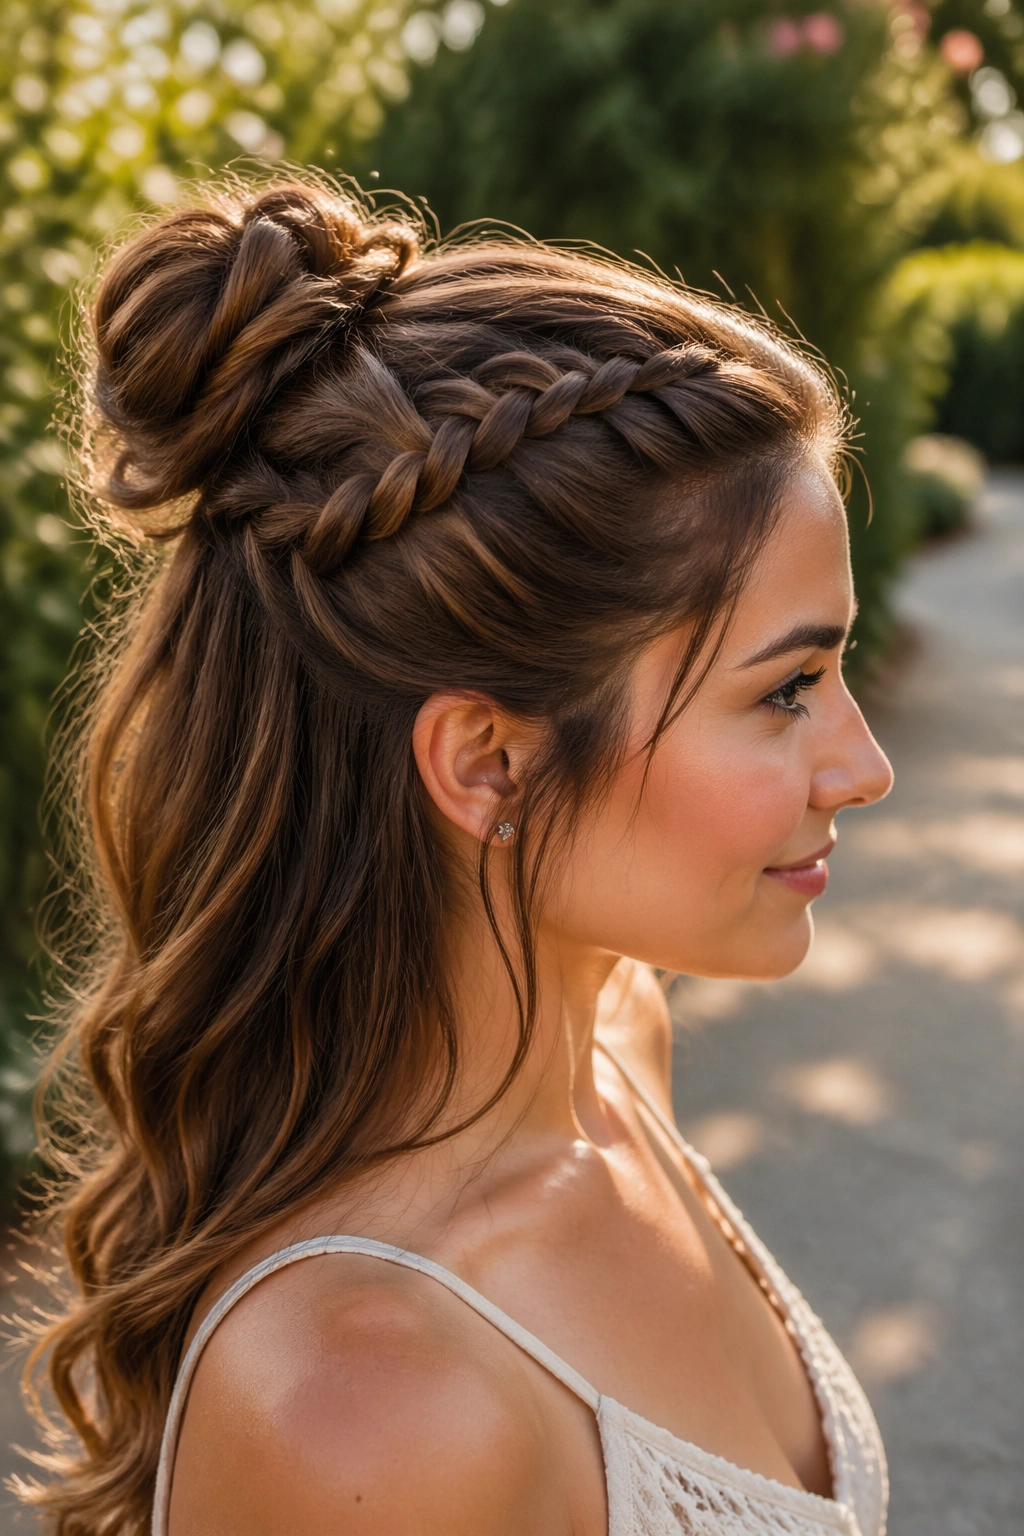
The braid is the part that gives this style its backbone. You start at one temple or at both temples, depending on how much detail you want, then braid the top section and coil it into a bun at the back of the crown.
What Makes It Different
A braid gives short layers something to cling to. It also helps long hair hold shape because the woven section stays together better than a plain twist. If your hair is slippery, this is one of the easiest ways to keep a half up bun from collapsing.
I prefer a braid that is not too tight. Leave it just loose enough that the strands look soft when they fold into the bun. If you overdo the tension, the braid can make the top of the head look flat.
- A three-strand braid is the easiest starting point.
- A Dutch braid gives more height if you want the bun to sit up.
- A small hair tie at the end makes pinning easier.
- Two bobby pins crossed under the bun usually hold better than one.
Small detail, big payoff: pancake the braid a little with your fingers before wrapping it. That wider shape reads softer and fills space better.
4. Twisted Crown Half Bun
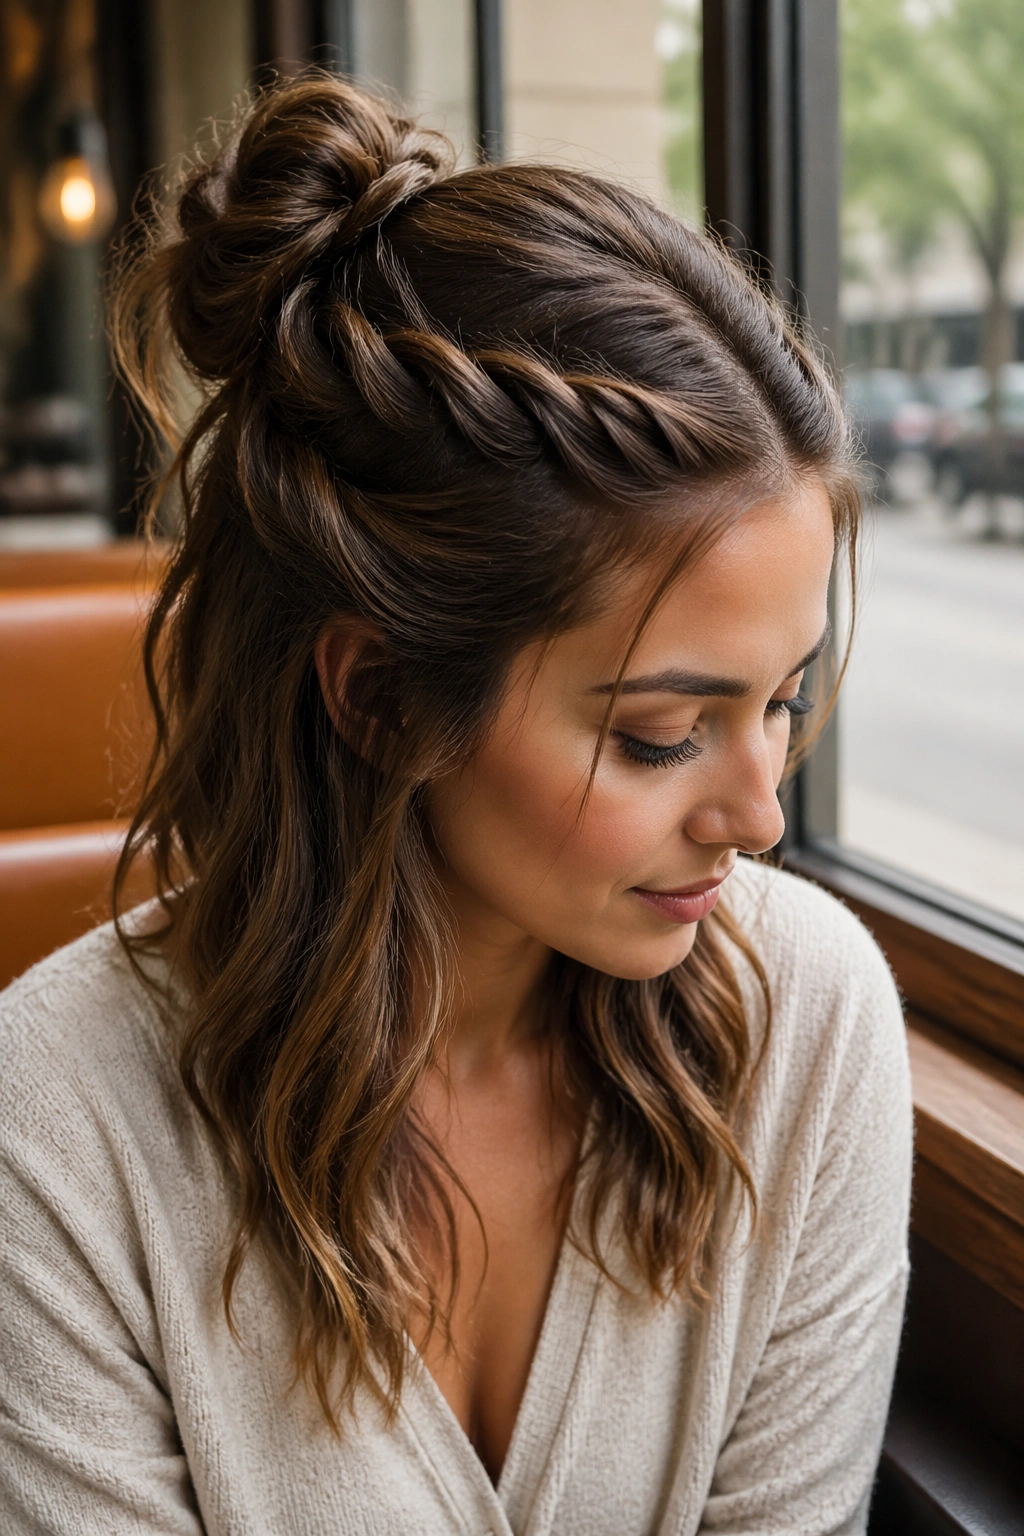
A twisted crown half bun feels like the kind of style you throw on for work and end up keeping through dinner. The reason is simple: the twisted sides hold the eye, and the bun gives the style a point to land on.
Start by taking two sections from the front, one from each side of the head. Twist them back toward the crown, meet them at the center, and gather the remaining top hair into the bun. The twist hides a lot of unevenness, which makes this one forgiving if your layers are behaving badly.
How to Keep the Twist Clean
The sections should be about two fingers wide if you want the style to stay neat. Wider sections create a thicker rope, which works well on thick hair. Narrower pieces are better on finer hair because they don’t overpower the bun.
You can pin the twists separately before joining them, or merge everything into one tie. I usually pin first if the hair is slippery. It gives more control, and the bun ends up sitting where you want it instead of drifting backward.
This is also a good place to use a little smoothing serum on the ends only. Don’t coat the roots. That’s where styles like this go flat.
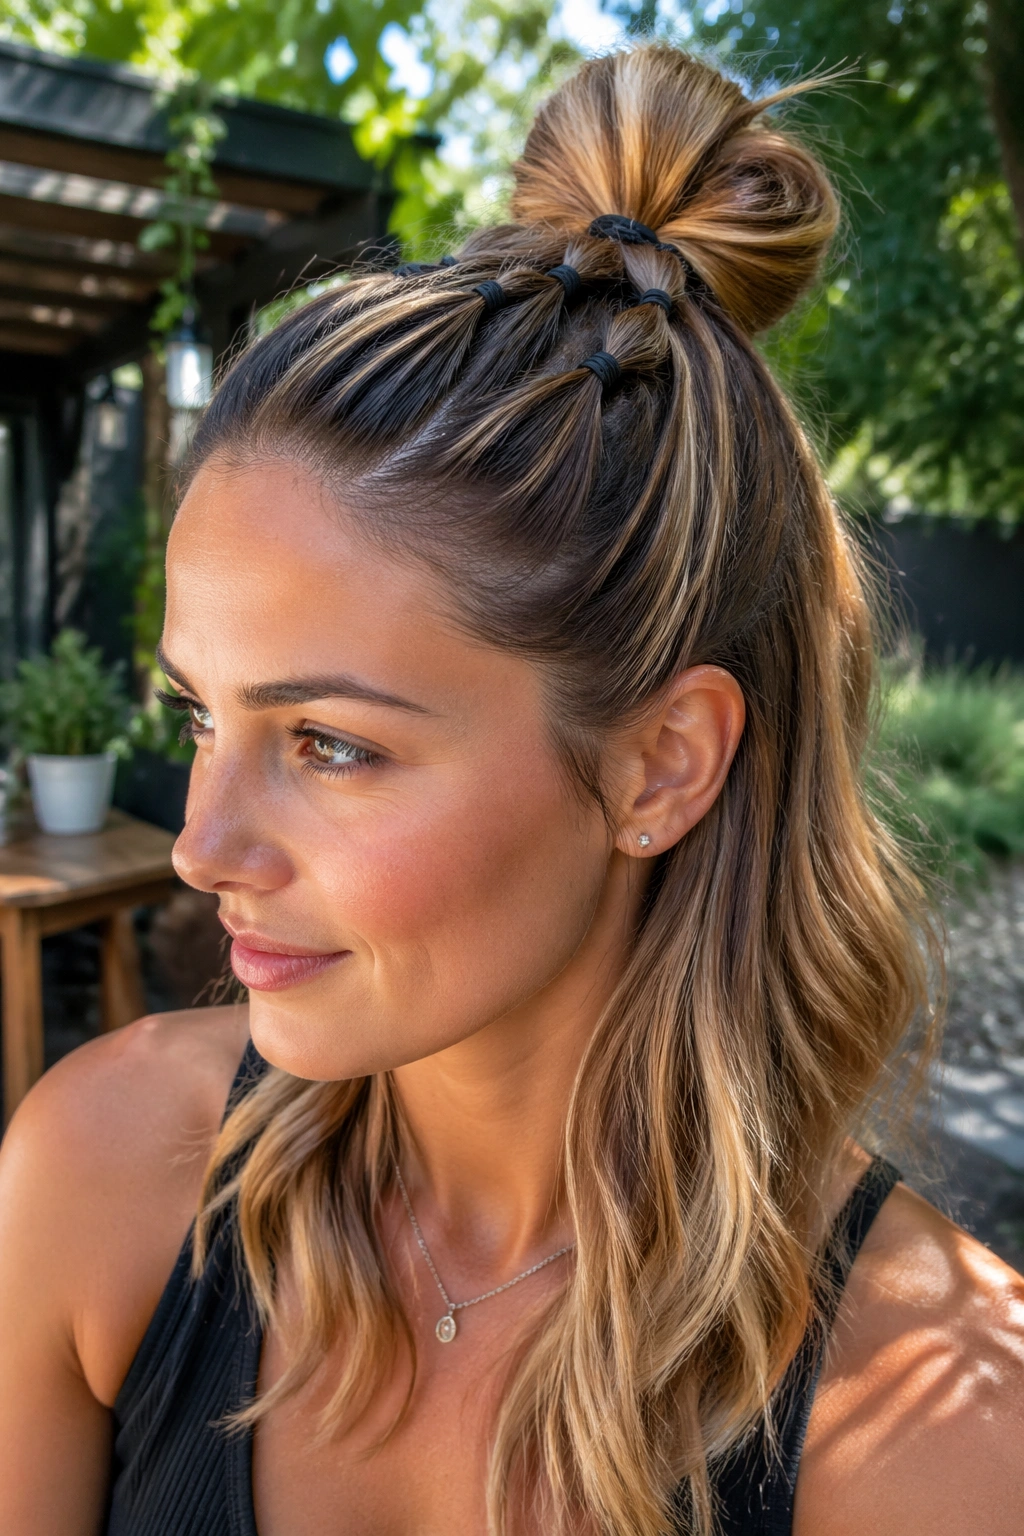
5. Bubble Half Up Ponytail Bun
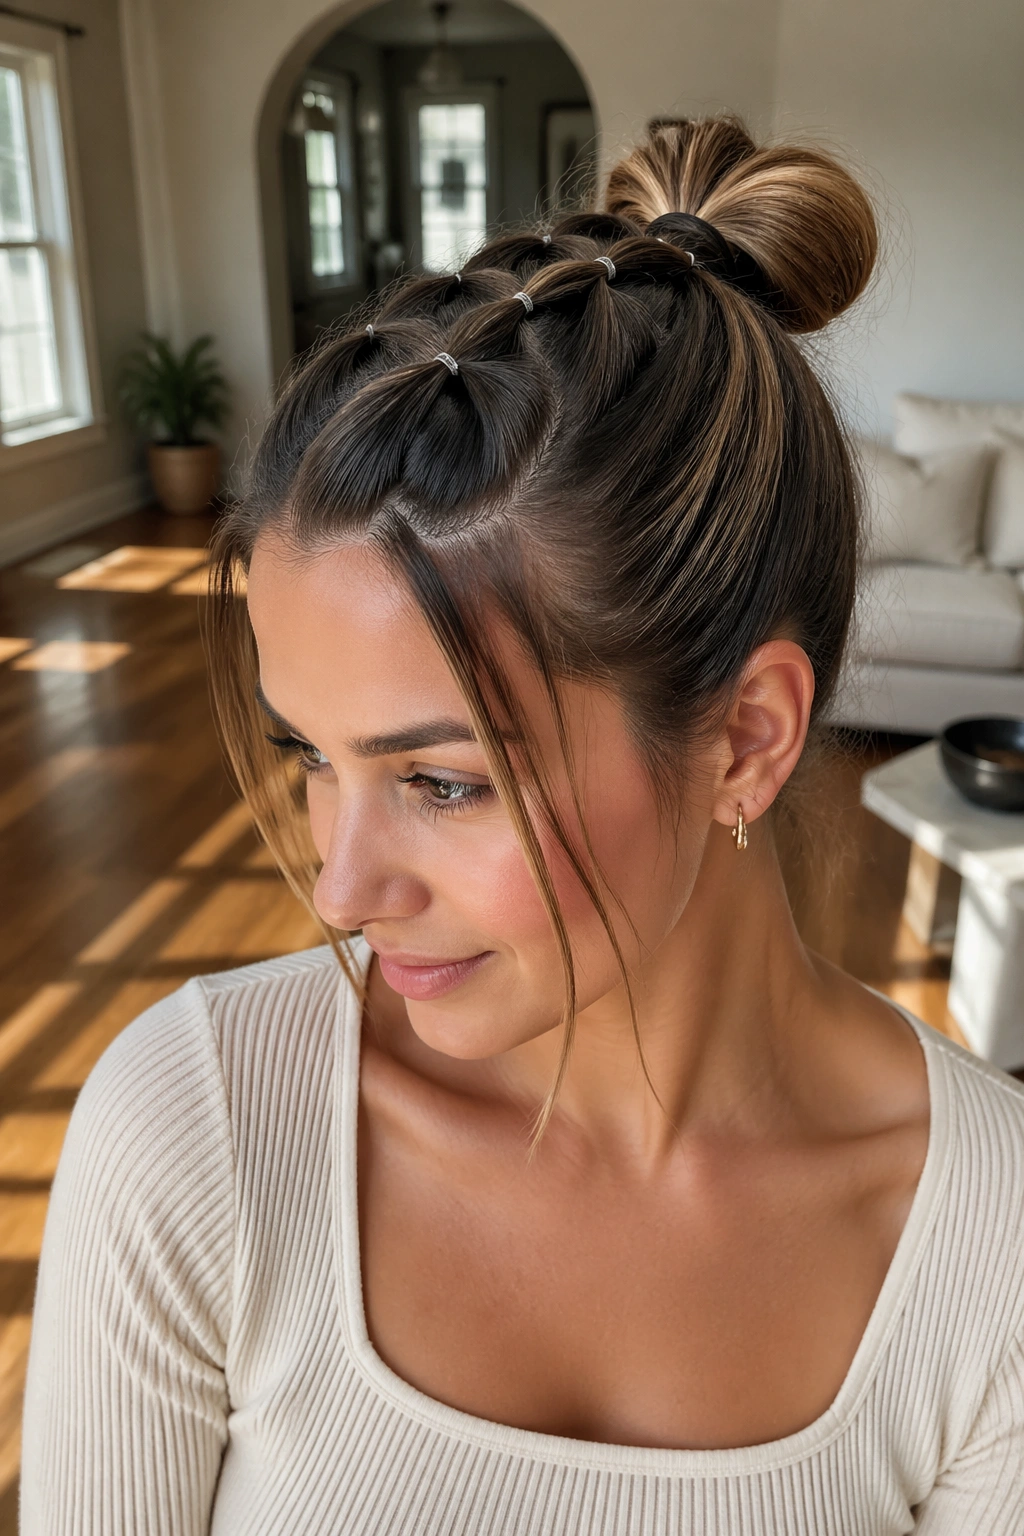
A bubble half up ponytail bun sounds playful, but it can look surprisingly polished if the sections are even. The shape matters more than people think. Each little bubble builds volume, and the bun at the end gives the whole style a stop point.
Make a half ponytail first, then place tiny elastics every 1 1/2 to 2 inches down the length of the top section. Gently pull each gap outward so the “bubbles” puff up. Fold the tail into a small bun and pin it where it feels balanced.
This works especially well on medium and long hair because there is enough length to show the bubbles before the bun. On shorter hair, you can still do it, but the look becomes more compact. That can be cute, too.
If your hair is layered, the bubbles help disguise the layers. They break up the line, which is useful when the ends want to slip out of a regular twist.
6. Half Up Space Buns
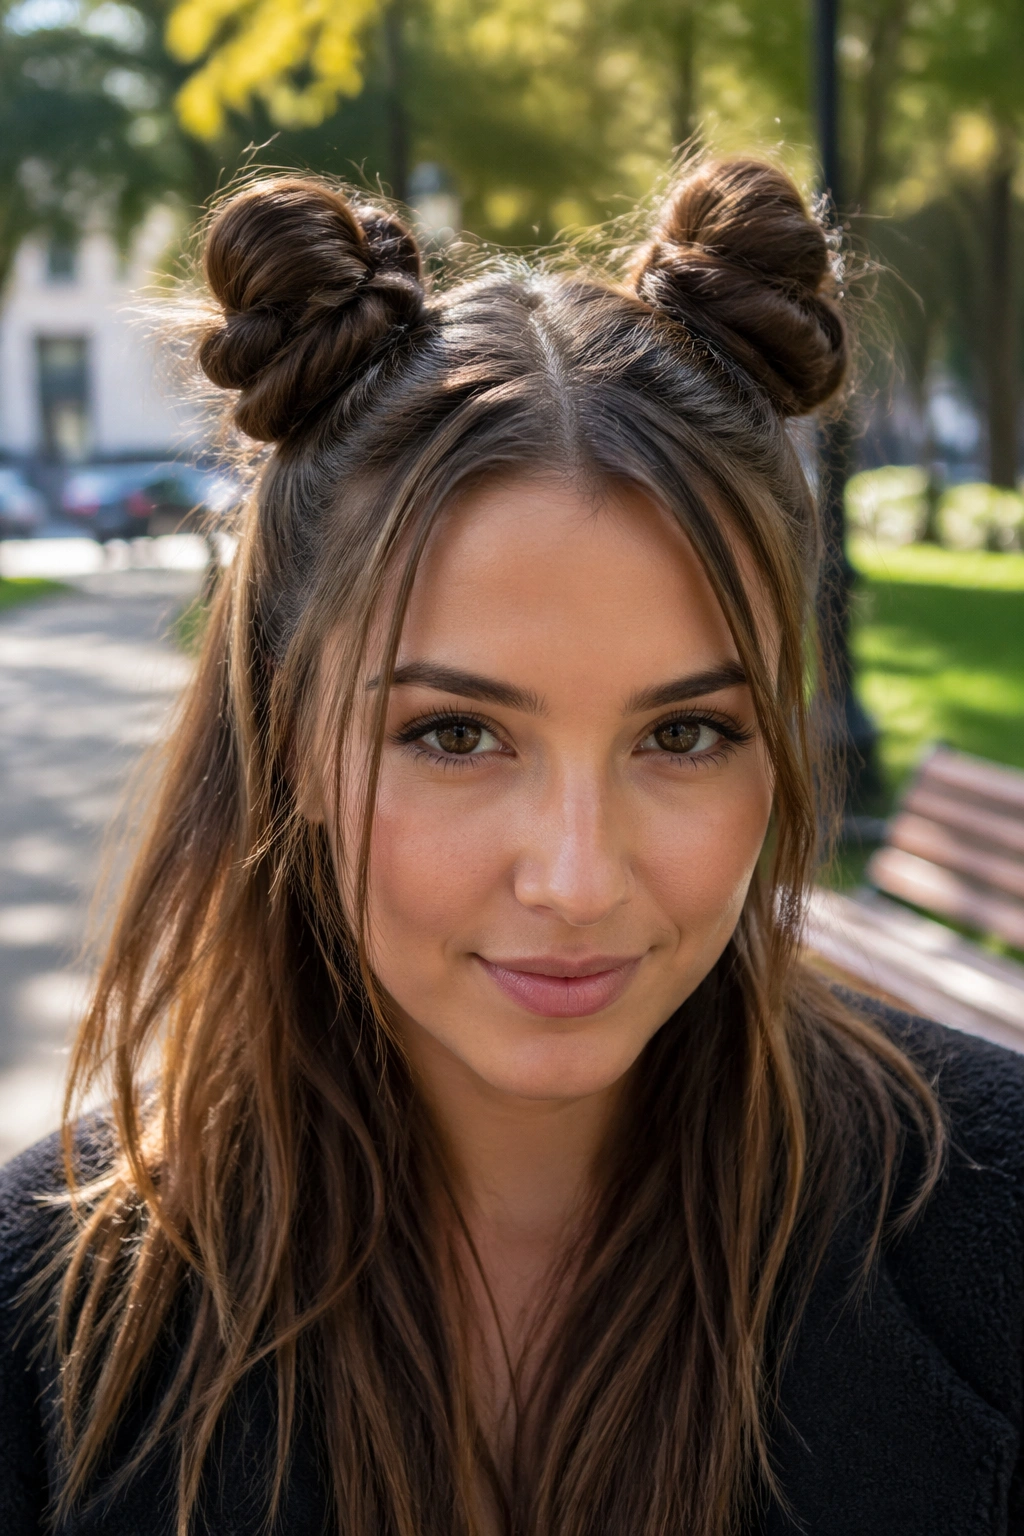
Unlike a single center bun, half up space buns spread the weight across the head. That makes the style easier on thick hair and a little more stable on layered cuts that tend to sag in the back.
Part the top half down the middle, then make two small buns above the ears or just behind them. Keep them even, but not identical to the millimeter. Human hair never behaves that neatly, and the style looks better when it has a little softness.
Space buns are a good option when you want something more playful than a single bun. They also help if one side of your hair has more volume than the other, which happens more often than people admit. The split layout balances that out.
I’d use this style when:
- the hair is thick and needs weight distributed
- you want a stronger silhouette from the front
- you like a style that can lean casual or edgy
- your top layers are long enough to wrap once or twice
A light mist of texture spray helps the buns grip. Skip heavy cream here. It tends to make the buns sink.
7. Low Half Up Bun

Low half up buns are underrated. They sit closer to the back of the head, which gives the style a softer outline and makes it easier to wear with hats, coats, and high collars.
Pull the top section back only to the point where your thumbs hit the back of your head, not the crown. That lower placement keeps the bun from looking too young or too stiff. It also works well on shorter bobs because the hair does not need to travel as far.
Why I Like the Lower Placement
The lower position gives the style a little more weight. On long hair, that keeps the bun from looking like it is trying too hard. On short hair, it helps the top section stay secure because the elastic sits where the hair has more natural support.
A low half up bun is also a nice fix when the top of your hair is a little flat. The bun creates shape without asking for a lot of teasing. Add a side part or leave a few wisps loose, and it stops feeling severe.
- Use a soft elastic if your hair breaks easily.
- Hide the band with a wrapped strand if you want a cleaner finish.
- Keep the bun close to the head so it does not flop.
8. Claw-Clip Half Up Bun
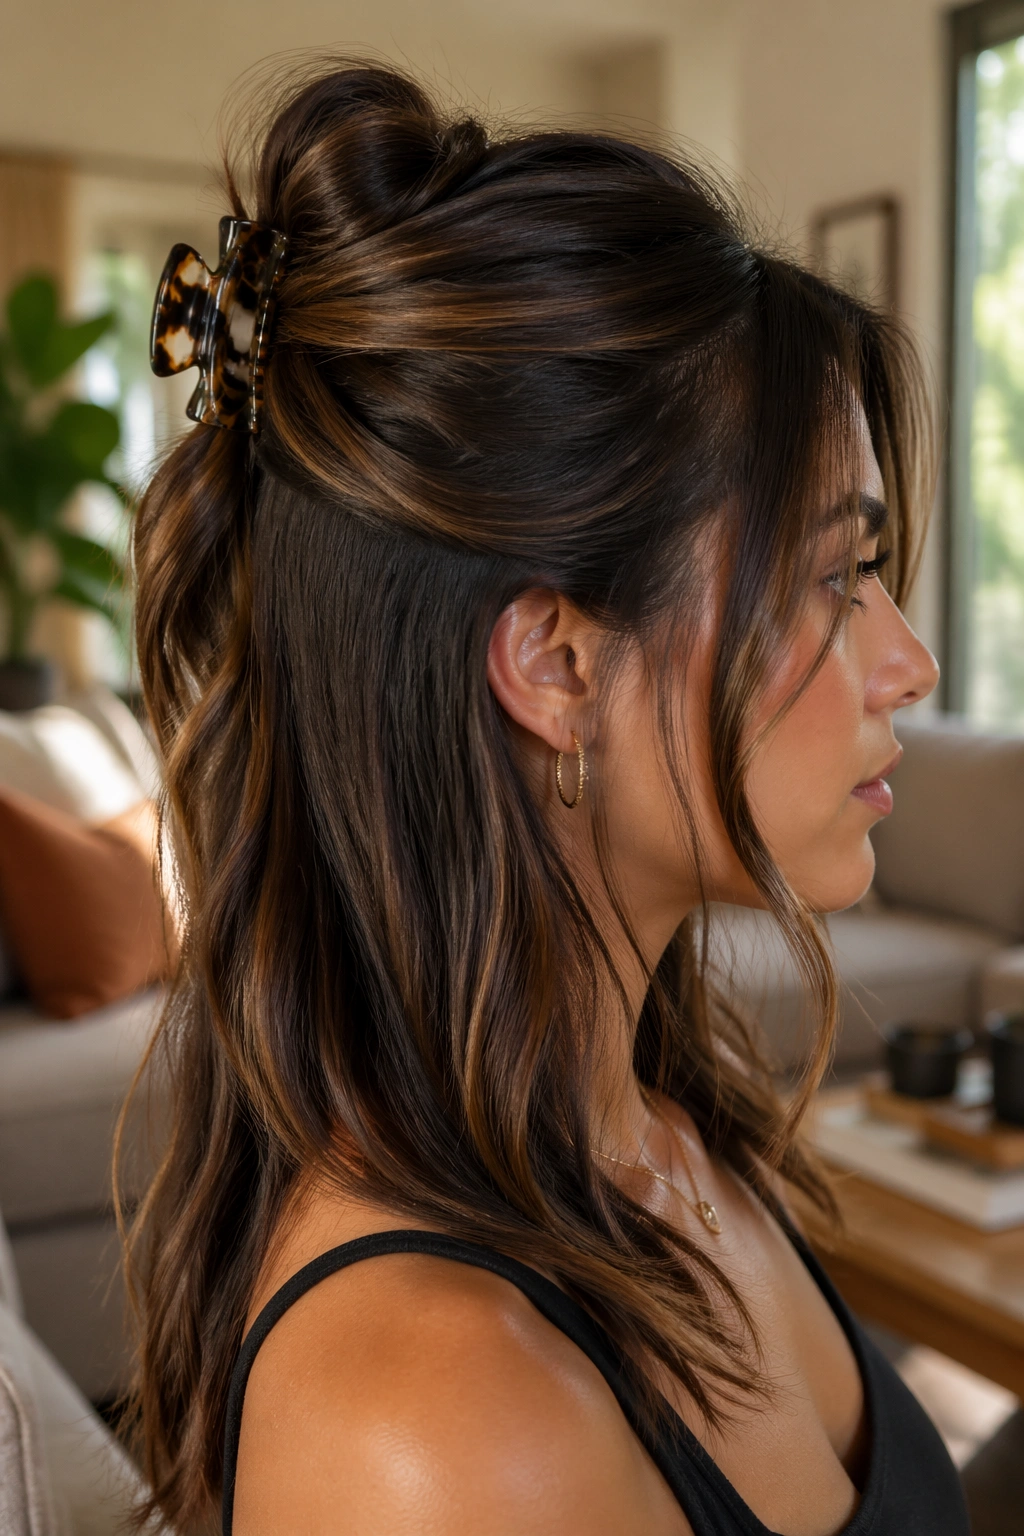
A claw-clip half up bun is what I call a “real life” style. It looks like you made a choice, not like you fought your hair into a submission. That matters on mornings when time is short.
Gather the top section as if you were making a half ponytail, twist it once, fold the twist upward, and clip it in place. The ends can fan out a little or tuck in depending on the length. On medium hair, the shape is usually neat. On long hair, it gets a bit more dramatic.
How to Keep the Clip from Sliding
The grip of the clip matters more than the size. Fine hair often does better with a smaller claw that bites harder. Thick hair usually needs a wider clip with more teeth. If the clip keeps slipping, add one bobby pin underneath the fold so the weight is shared.
This style is useful when you want the look of a bun without the pressure of tying one. It’s also a good halfway style for people growing out bangs or layers, since the front pieces can be left soft.
I like this one because it never feels overworked. A little undone is the whole point.
9. Ribbon-Tied Half Up Bun

Can a ribbon keep a half up bun from looking too casual? Absolutely. A ribbon changes the tone fast, and it does it without making the style feel fussy.
Make a regular half up bun first, then tie a satin or grosgrain ribbon around the base. A ribbon that’s about 1/2 inch to 1 inch wide usually looks balanced. Too narrow, and it disappears. Too wide, and it starts to take over the whole hairstyle.
This version works well on straight hair because the smooth surface lets the ribbon sit cleanly. It also looks nice with waves, especially when the ribbon color echoes something in your outfit. That sounds small. It makes a difference.
How to Place It
Tie the ribbon just off-center if you want a softer look. Centered bows feel more classic, almost school-uniform clean. Off-center bows feel a little more relaxed.
A ribbon also helps hide a small elastic on fine hair, which is useful when the bun itself is tiny and needs a little visual weight. The ribbon becomes part of the architecture, not just decoration.
10. Curly Half Up Bun
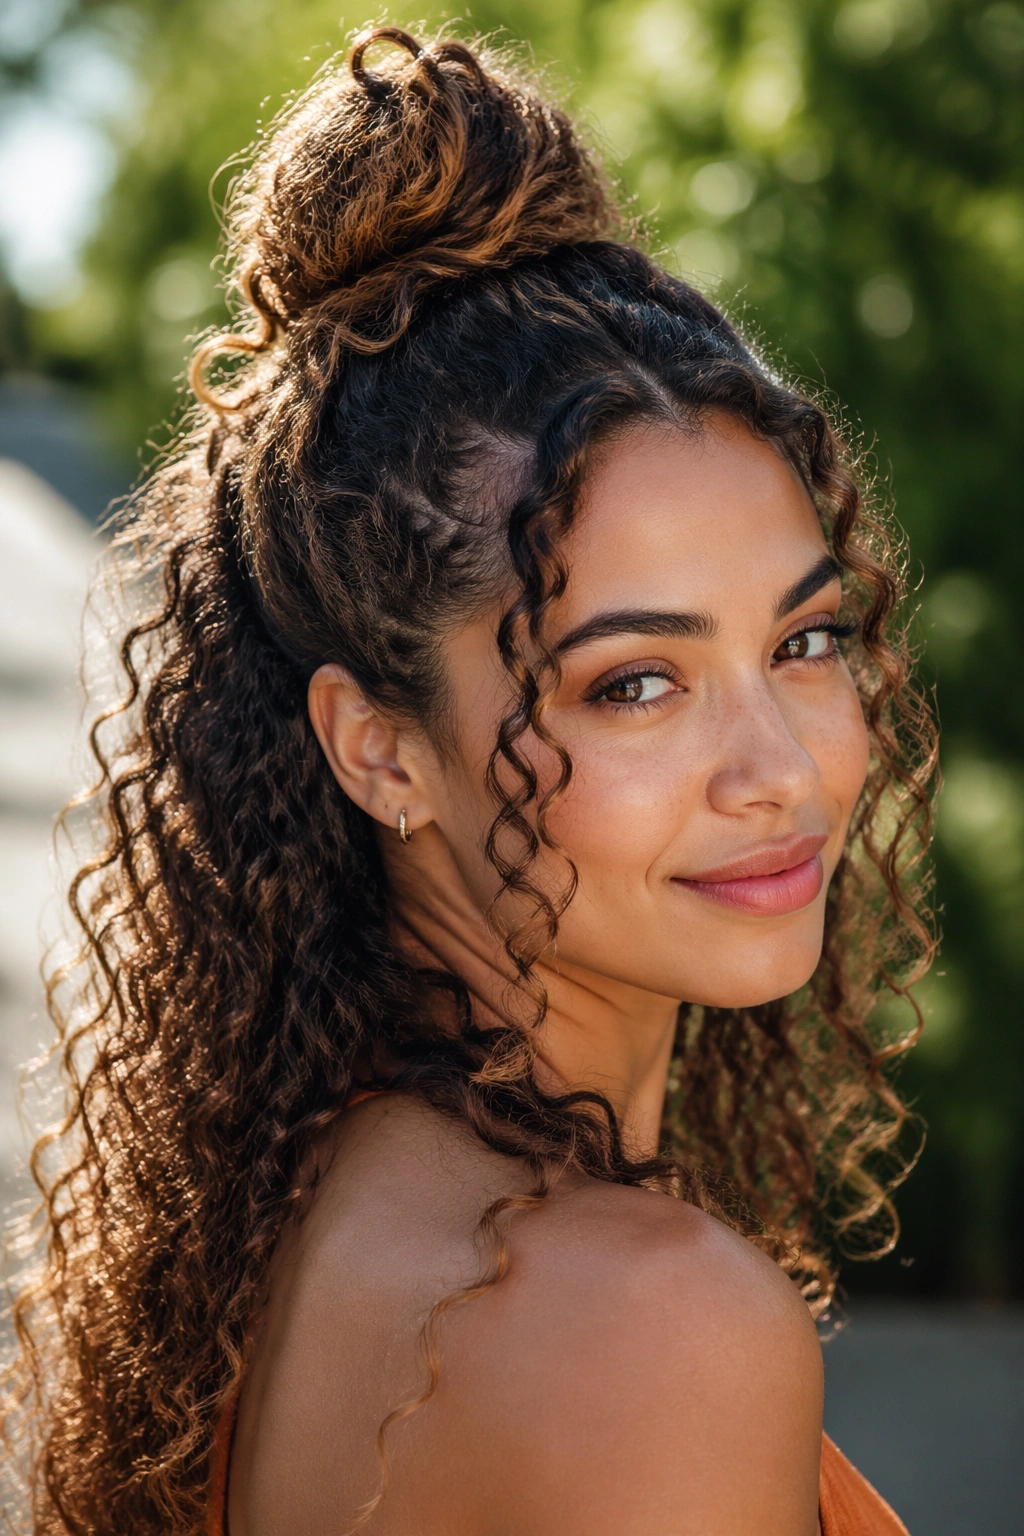
Curly hair gives half up buns their best shape. The curls build volume on their own, so the bun can stay small and still look full. That is a rare advantage, and I never take it for granted.
Do not brush the curls out unless you want a soft cloud of texture. Instead, gather the top section with your hands or a wide-tooth comb, letting the curl pattern stay intact. The bun should feel like a lifted version of your natural shape, not a flattened one.
A few pins are usually enough. Curly hair has memory, which means it can hold itself in place if you do not disturb it too much. Use a light curl cream or a drop of oil on the ends only if they look dry.
The nice thing here is that the style can lean polished or loose without changing much. A tighter bun reads cleaner. A looser one feels casual. Either way, the curl does the heavy lifting.
11. Textured Half Up Knot for Fine Hair
Fine hair does better with texture than with extra product. That sounds backward until you’ve watched a sleek fine-hair bun slide straight out by lunch.
Start with dry shampoo or texturizing spray at the roots, then gently rough up the top section with your fingers. You want a little friction, not a tangled mess. Gather the hair, twist it into a tiny knot, and secure it with two pins instead of one.
Why Texture Helps So Much
Texture gives the strands something to cling to. Without it, the hair tends to slip against itself, which is why fine hair can feel slippery even when it looks clean. A bit of grit solves that faster than piling on more hairspray.
I like this style slightly off-center on fine hair because the asymmetry makes the bun look fuller. A centered knot can look too small if the hair is thin. Moving it just an inch to one side gives it more presence.
- Use powder or dry shampoo at the roots.
- Tease only the top section, not the whole head.
- Keep the bun compact so it supports itself.
- Pin underneath, not through the top.
12. Half Up Bun with Face-Framing Pieces
Leave two thin pieces out at the front, and the whole hairstyle softens. That one choice changes the mood more than people expect.
The face-framing strands can be straight, waved, or lightly curled. I like them about 1/4 to 1/2 inch wide each. Any thicker and they start to compete with the bun. Any thinner and they disappear into the hairline.
Where to Leave the Pieces
Pull them from just in front of the ears if you want a classic look. If you want the style to feel more relaxed, take the pieces from a little farther back so they fall closer to the cheekbones. That placement matters more than the curling iron.
This version is useful when a half up bun feels too severe for your face shape or outfit. It breaks up the line around the forehead and jaw, which helps on days when you want softness without losing structure.
A small detail like this can make the style feel easier to wear. And yes, sometimes that’s the difference between keeping your hair up and taking it down ten minutes later.
13. Rope Twist Half Up Bun
A rope twist gives the hair a smoother, tighter look than a braid, and the effect is cleaner than people expect. The strands wrap around each other in a way that shows off shine, which is nice on medium to long hair.
Take two sections from the top half, twist each one in the same direction, then wrap them around each other in the opposite direction. That’s the whole trick. Once the rope is built, coil it into a bun and pin it flat against the head.
The tension should feel snug when you hold it, but not so tight that the twist looks stiff. If you twist too hard, the rope gets ropey in the wrong way. A little slack makes the pattern more visible.
This is one of my favorite half up ponytail buns for layered hair because the twist disguises uneven ends. The structure hides the mess, which is often what you need. Not a miracle. Just a good hair trick.
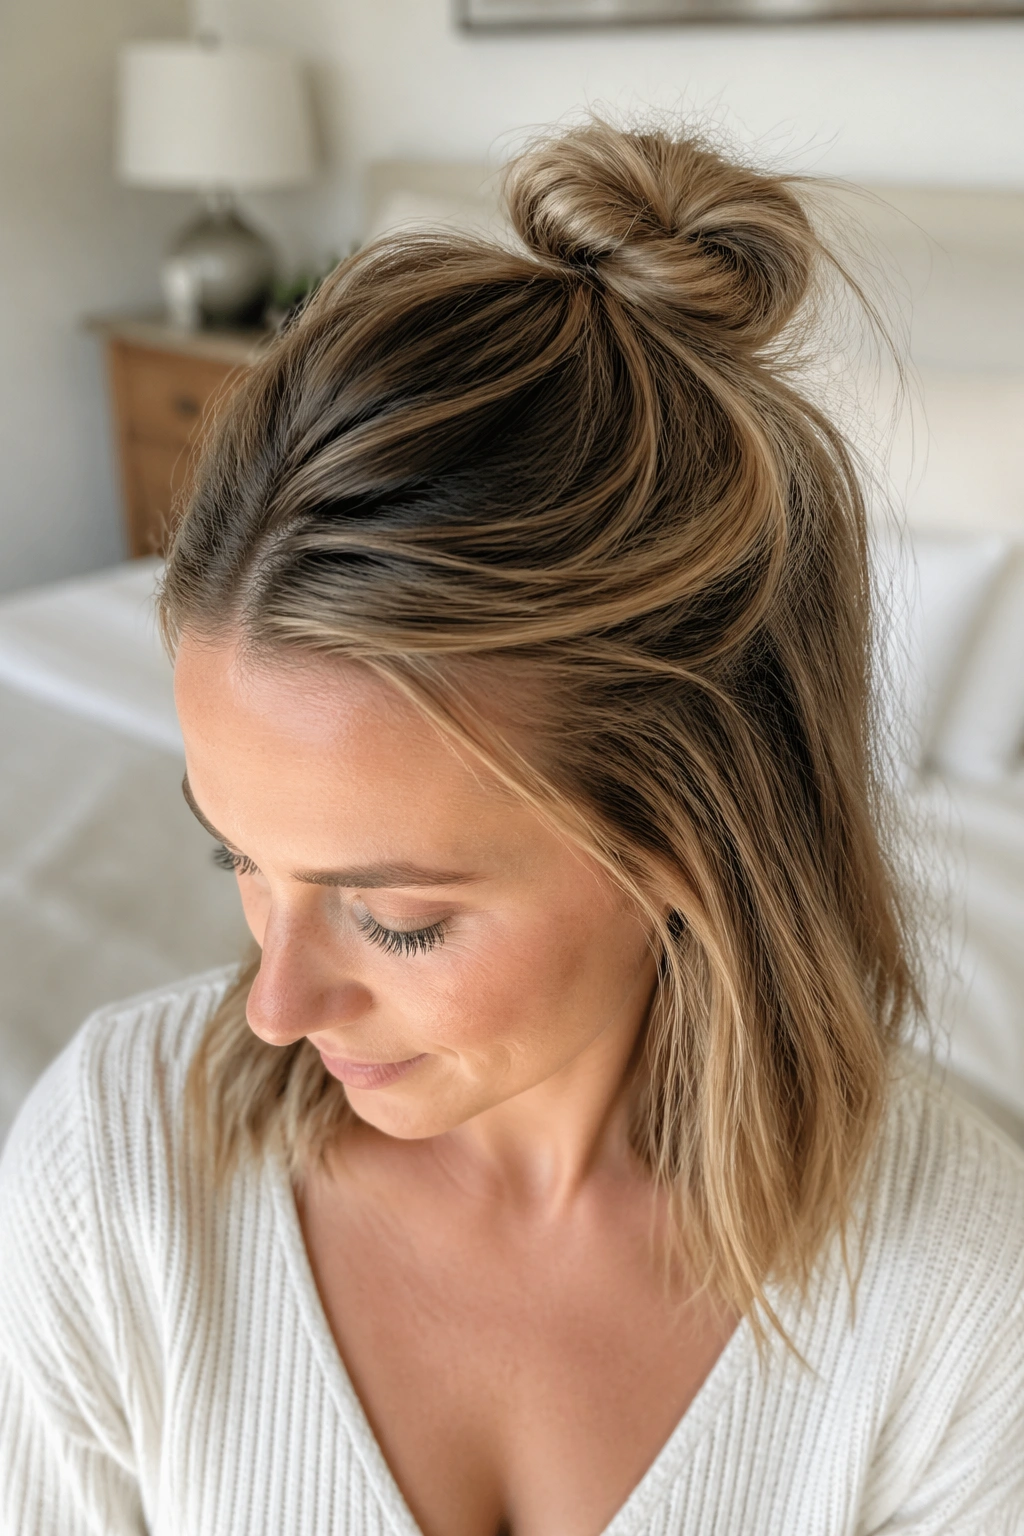
14. Mini Puff at the Crown
Want height without a full tease-back? A mini puff at the crown gives you that lift and keeps the rest of the style simple.
Backcomb the roots in a small section right at the crown, smooth the surface over lightly, and secure the top half in a tiny bun just behind the puff. The bun should sit above the lift, not crush it. That relationship is the whole point.
How to Build It Without Overdoing It
Use a tail comb to lift a thin layer of hair, then tease underneath with two or three short strokes. You do not need a nest. You need enough root support that the top section doesn’t lie flat the second you let go.
This style suits straight and fine hair especially well because the lift adds shape fast. It also works on longer faces where a little height balances the profile. On curly hair, the puff can get too big, so go lighter with the teasing.
A tiny puff can make a half up bun look more deliberate, even if the bun itself is small. That contrast is what gives it charm.
15. Half Up Bun for Short Hair
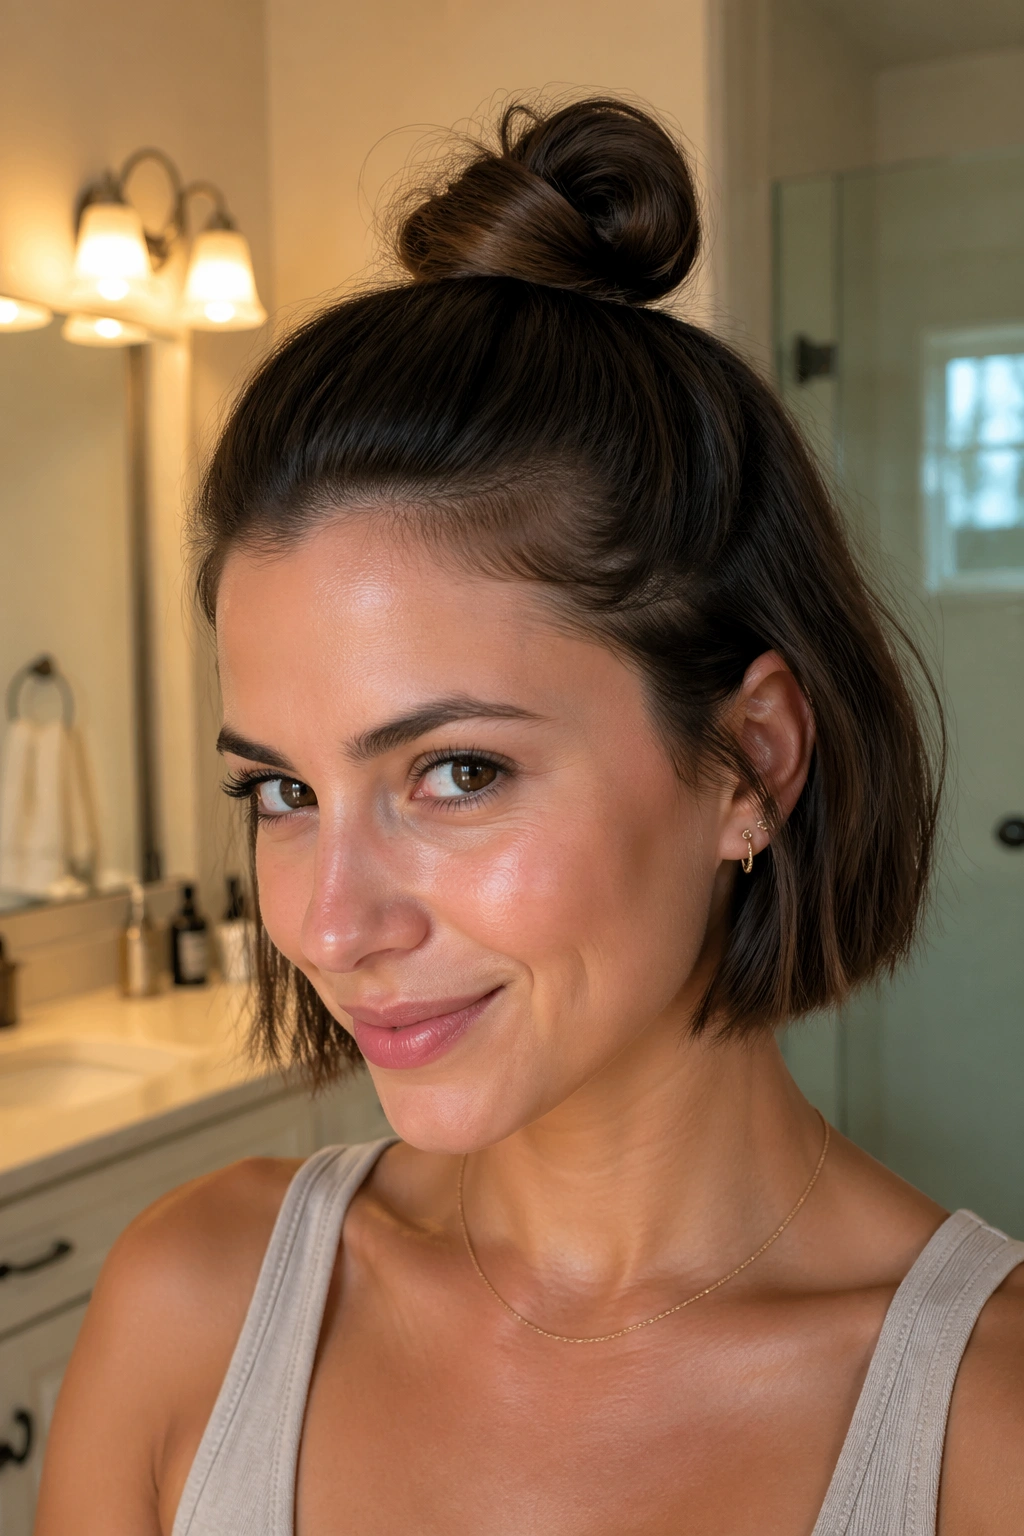
Short hair is not a problem; it just changes the size of the bun. On a bob or lob, the half up bun tends to sit smaller and closer to the head, which can be more flattering than trying to force a big knot.
The key is to take only the top third or top half, depending on length. If you grab too much, the lower layers start pulling loose. If you grab too little, the bun disappears. You want a section that has enough weight to make a shape but not so much that it drags.
A micro elastic helps here, along with two bobby pins that grip under the bun rather than across it. Short hair often slips because there isn’t enough length to wrap around the base. That’s fine. A twist and pin method usually works better than trying to mimic long-hair buns.
This style is especially good when the ends at the back are flipped under or lightly waved. It keeps the whole shape from feeling too straight and plain.
16. Half Up Bun for Shoulder-Length Hair
Shoulder-length hair is the sweet spot for a lot of half up ponytail buns. There’s enough length to twist, coil, and pin, but not so much that the bun becomes heavy and starts pulling down.
I like this length for a soft knot because the bun can sit with a natural curve instead of fighting gravity. You can make it sleek, messy, braided, or wrapped, and most of the versions behave better than they do on very long hair.
Why This Length Is So Easy to Work With
The ends are usually long enough to secure cleanly, but short enough that the bun does not feel bulky. That means fewer pins, less weight, and fewer weird dips at the base. If you have layers, this length also gives you enough movement around the face without too much escape.
A shoulder-length cut is a good place to try half up buns with texture spray or soft waves. The style reads casual, but not sloppy. That balance is harder to get on hair that is much shorter or much longer.
If you’ve ever felt like your hair sits in the awkward middle, this is where it finally starts to cooperate.
17. Half Up Bun for Thick Hair
Thick hair needs a plan. If you try to gather all of it at once, the bun gets heavy, the elastic strains, and the style slides backward. Split the work into smaller sections and the whole thing gets easier.
Start by dividing the top half into two parts and making a small ponytail with the first part. Add the second part on top or beside it, then twist the combined length into a bun. This reduces bulk at the base and spreads the pressure more evenly.
Use stronger pins here, and don’t be shy about crossing them. Thick hair often needs at least four points of hold, especially if the style sits high on the head. A single pin is wishful thinking.
Little Things That Help
- Use two elastics if one feels stretched out.
- Pin in layers, not all at once.
- Let the bun be slightly wider instead of forcing it tight.
- Smooth only the top surface so the style doesn’t look puffed out.
I prefer this approach because it respects the hair instead of trying to flatten it. Thick hair looks best when it has room.
18. Half Up Bun with a Sleek Side Part
Does a side part make a half up bun look softer? Yes, and it also gives the style a cleaner line across the face. A center part can feel a bit formal here. A side part feels easier.
Create the part first, then gather the top section starting from the heavier side. Let the bun sit just behind the part line so the shape feels balanced. The part draws the eye diagonally, which is flattering on a lot of face shapes and especially useful when you want the bun to look less symmetrical.
Keeping the Part Sharp
Use the tail of a comb to draw the line, then press it down with your fingers before gathering the hair. If you brush too much after the part is made, it softens right away. That can be fine, but not if you want the clean edge to stay visible.
This is one of those styles that can go either office-neat or dinner-soft depending on the finish. Keep it sleek with serum and a wrapped base. Leave it looser with a few face pieces. Same bones. Different mood.
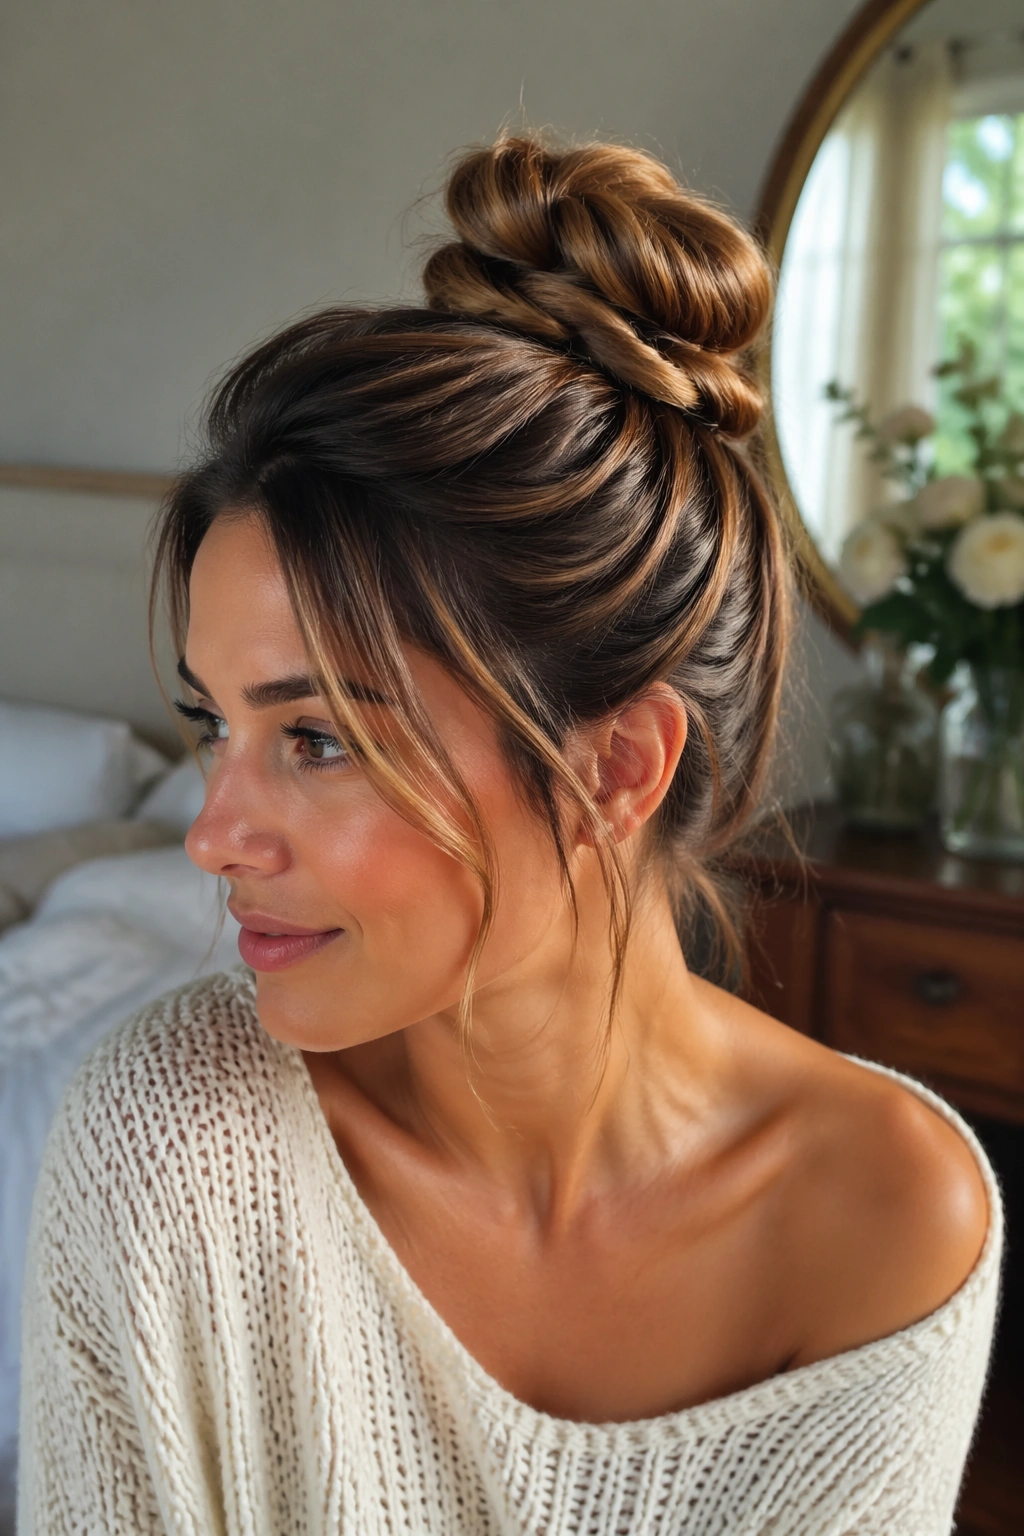
19. Half Up Bun with High Crown Lift
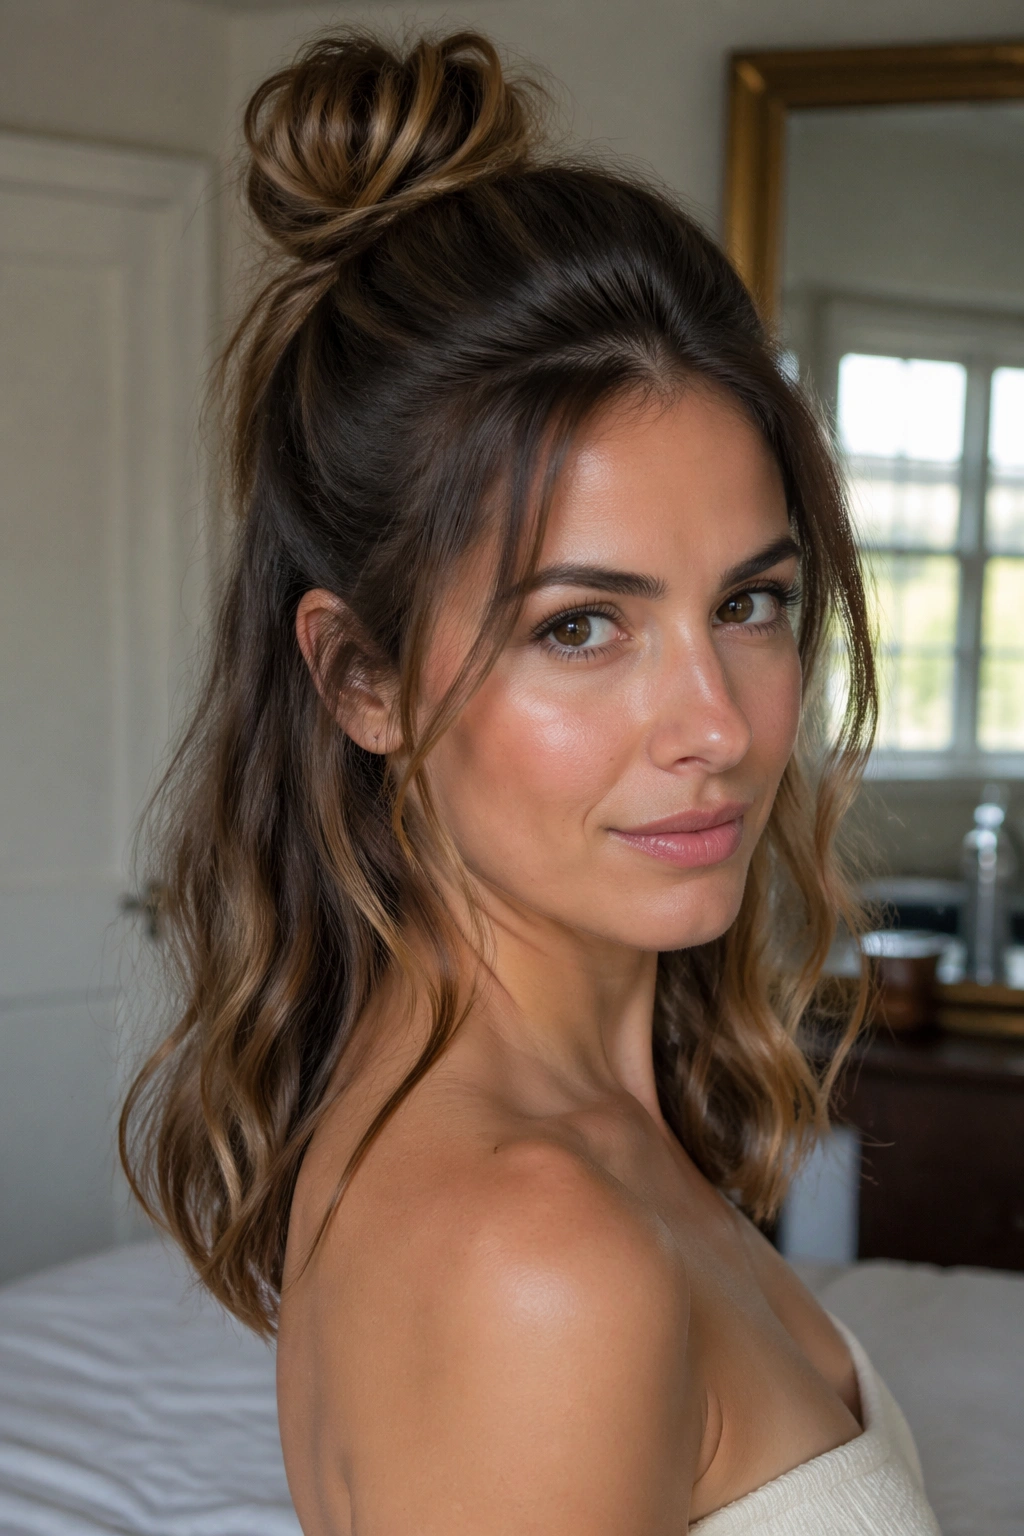
If the low bun feels sleepy, raise it. A higher crown lift gives the style more energy and makes the face look a little more open.
Tease the top section lightly at the root, then smooth only the outer layer. Secure the bun a bit higher than you normally would, usually on or just above the crown. That higher placement gives the style a lifted shape from the front and a little more attitude from the side.
The nice thing about the elevated version is that it works on straight and wavy hair without much effort. Straight hair gets more visual height. Wavy hair gets a bit of structure. Curly hair can do it too, though you may want a looser hold so the top does not shrink too much.
I reach for this when I want the hairstyle to show up in a room. Not loud. Just present.
20. Half Up Bun with a Fishtail Accent
A fishtail accent is one of those details that looks more complicated than it is. You only need a small section of hair, but the weave gives the half up bun enough texture to feel special.
Take the top section from one side or from the center, fishtail braid it loosely, then wrap it into the bun. You do not need a full fishtail down the back. A short accent braid is enough to change the look.
How to Keep It From Getting Fussy
Keep the fishtail section narrow, about an inch wide. Wider than that, and it starts taking over the style. Looser weaving helps too; the braid should show the pattern, not lock the hair down so hard that it becomes stiff.
This version works best when the rest of the hair is kept simple. Loose waves or straight lengths let the braid stand out. If everything is heavily textured, the braid gets lost. Too much happening at once is the usual mistake.
- Start with a small, clean section.
- Weave loosely so the pattern stays visible.
- Pin the braid under the bun, not around it.
- Leave the lower lengths soft.
21. Half Up Bun with Multiple Tiny Elastics
Tiny elastics are a cheat code for layered hair. They divide the tension, which makes the style easier to control and keeps short pieces from slipping out at the sides.
Instead of building one big half ponytail, make two or three tiny sectioned ponytails across the top half, then gather them together into a bun. The result looks more structured and often lasts longer. It also keeps the bun from leaning to one side when the hair has a lot of layers.
Why This Beats One Big Tie
A single elastic can let the top section stretch and sag, especially if the hair is slippery. Multiple small ties create anchor points. That makes sense physically, and you can feel it when you pin the bun. It stays where you put it.
This is a good move for people with collarbone-length layers or hair that was cut with a lot of movement. The style can look a little more technical up close, but from a normal distance it just reads as neatly held together.
If you ever feel like the hair is slipping out before you even finish, this is the version to try first.
22. Half Up Bun with Scarf or Bandana
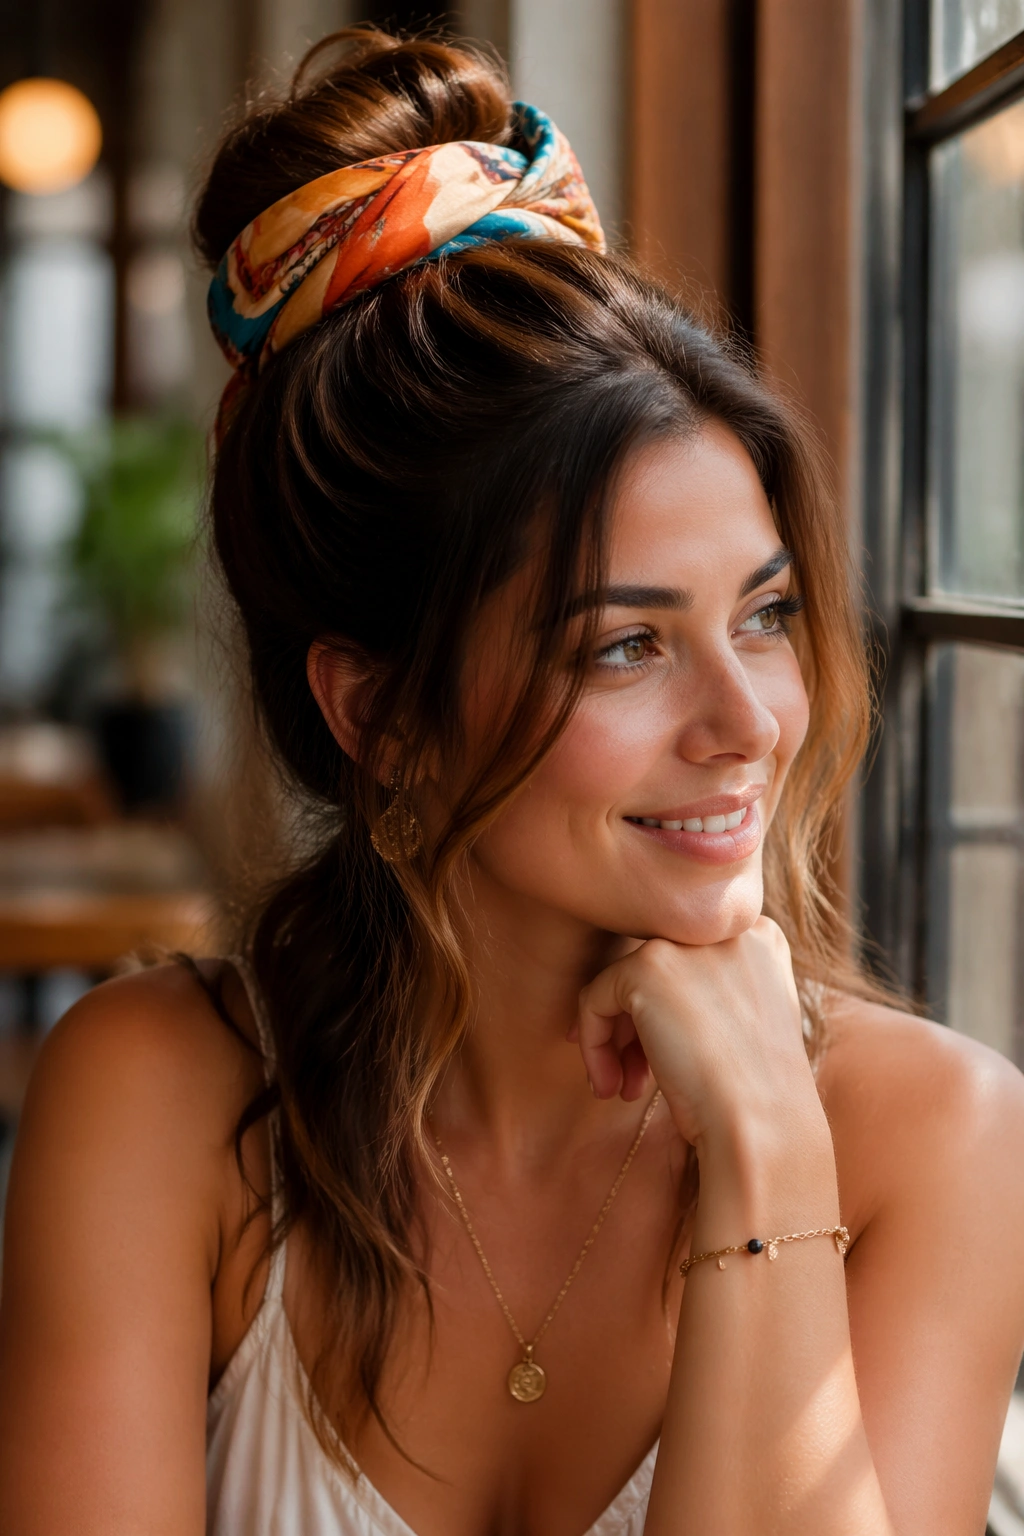
A scarf changes the whole personality of a half up bun. It adds color, softens the shape, and gives the style a bit of volume without needing more hair.
Tie the top section into a bun first, then loop a folded scarf around the base or weave it through the bun itself. A bandana works well if you want a more casual look, while a silk scarf feels a little smoother and dressier.
Where the Scarf Helps Most
The scarf is useful on hair that feels flat at the roots. It gives the top half more visual size. It also hides elastic bands, which is handy when the bun is small or the hair is fine. A folded scarf about 1 1/2 to 2 inches wide is usually enough; you do not need a giant knot.
This version works with straight hair, waves, and curls, but the placement changes. On straight hair, the scarf becomes the focal point. On textured hair, it becomes one more part of the shape. Either way, it keeps the style from looking too plain.
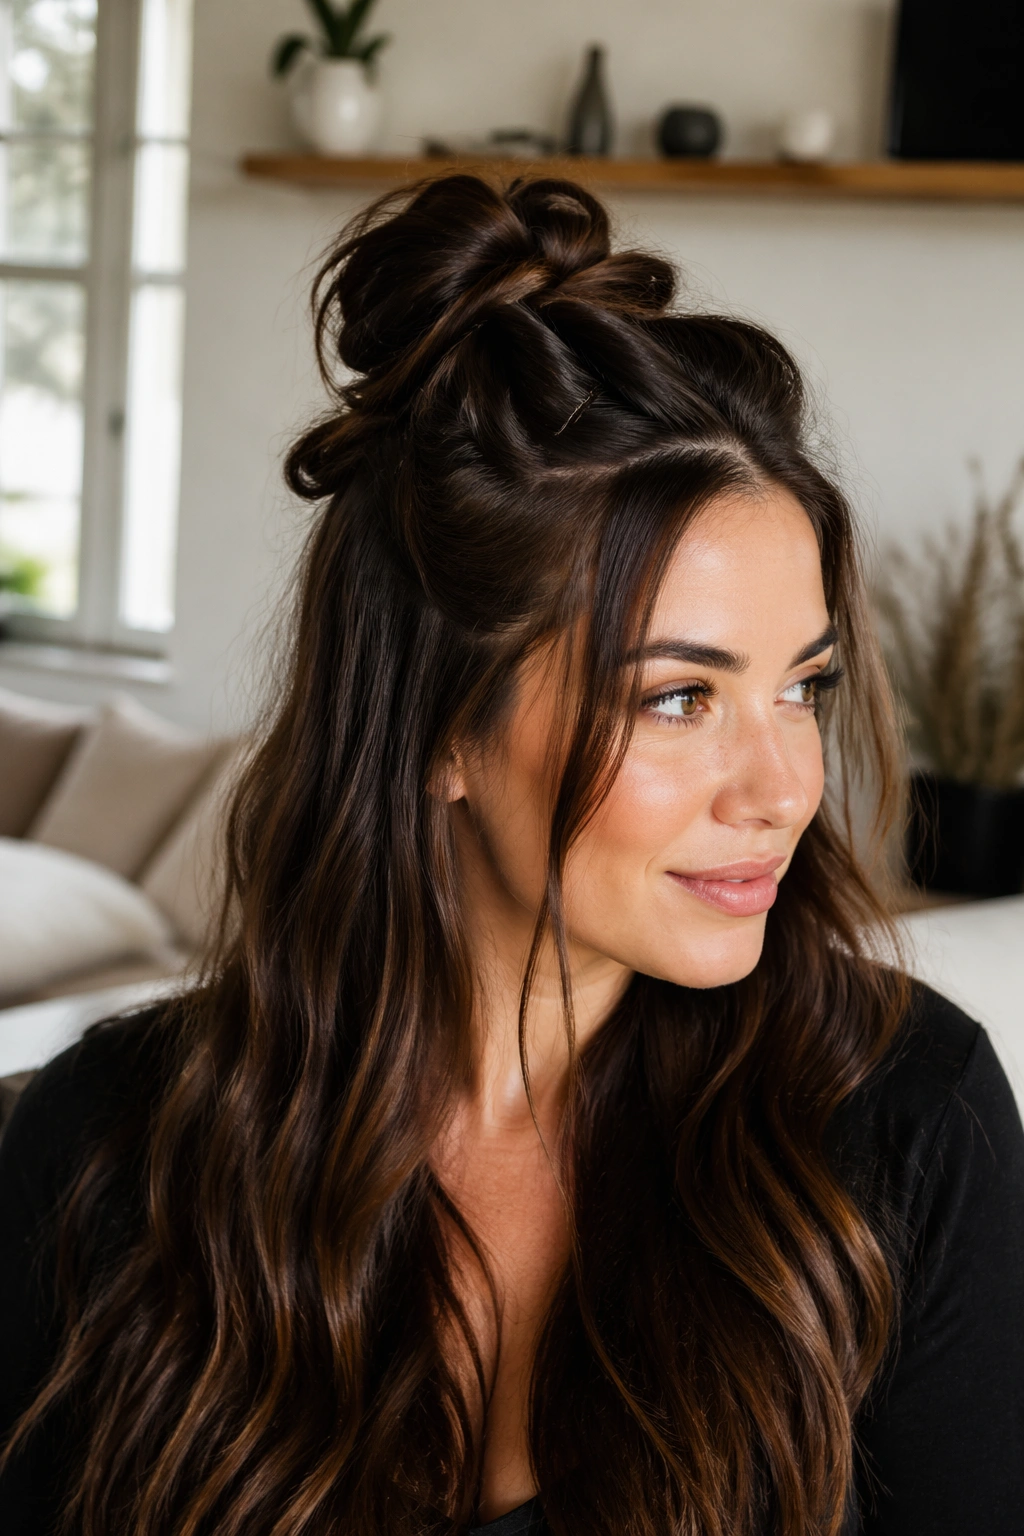
23. Half Up Bun with Loose Waves
What if the half up bun is just the anchor and the waves do the rest? That’s the whole idea here. The bun keeps hair off the face, and the waves carry the softness through the rest of the style.
Create the half up bun first, then wave the remaining hair with a 1-inch curling iron or a flat iron bend, depending on the finish you like. Leave the waves a little imperfect. If every bend is the same, the style starts looking too set.
A loose-wave version works on almost any length that reaches the shoulders and beyond. On shorter hair, the waves may sit closer together, which is fine. On longer hair, the movement gives the bun a lighter look so the top half doesn’t feel too heavy.
This is one of my favorite easy styles because it refuses to look overdone. The bun is small, the waves are soft, and the whole thing feels lived-in without being sloppy.
24. Half Up Bun with a Knotted Finish
A knotted finish gives the style a little structure without asking for a full twist or braid. The shape feels neat, almost like tying a shoe and turning it into a hairstyle.
Gather the top section, split it into two strands, then knot them once and tuck the ends under. Secure the knot with pins so it sits flat against the crown. The knot itself becomes the decoration, which is useful if you do not want to add clips or ribbons.
What to Watch For
The knot should sit snug, not squeezed. If it is too tight, the ends poke out in awkward directions. If it is too loose, it unravels. You want the middle ground where the hair folds over itself and stays there.
This style is especially good for shoulder-length or layered hair because the knot can hide uneven ends better than a smooth bun. It also reads a little modern without getting too severe. I like that. It has shape, but it does not act precious.
A few strategically placed pins are usually enough. More than that, and the knot starts to lose its shape.
25. Half Up Bun for Day-Old Hair
Day-old hair is often the best hair for this style. It has grip, texture, and enough movement to keep the bun from sliding apart before lunch.
Work in a little dry shampoo at the roots, then flip the top section back with your fingers. If the ends feel dry, mist them lightly with water or a leave-in spray so they don’t fray while you twist. Build the bun, pin it, and tug the crown just a little for shape. Not much. Just enough.
This version is useful when your hair feels too soft for a sleek bun and too flat for a messy one. Second-day texture bridges that gap. It gives the half up ponytail bun a little grit, which is usually what the style needs.
If the front pieces are a bit bent or imperfect, leave them. That irregularity makes the whole look feel easier and more natural, which is usually the better finish anyway.