There is something inherently confident about a mid-height ponytail. It occupies that perfect middle ground where you get the face-framing benefits of a high, snatched look without the potential tension on the hairline, and the effortless, cool-girl vibe of a low pony without it resting against your neck. For Black women with curly and coily hair, the mid-ponytail is more than just a quick fix on a wash-day-delayed morning; it is a versatile canvas that celebrates our natural texture, whether that means a sleek, mirror-finish straight style or a voluminous, wild-curl celebration.
Finding the right style is about understanding your hair’s unique personality. Some days call for rigid, hair-sprayed precision where not a single strand dares to move. Other days, you need something that gives you room to breathe, letting your curls do their own thing while you just provide a little structure to keep them off your face. The secret, as any seasoned stylist will tell you, lies in the prep work. A great ponytail starts with the base. If your foundation isn’t smooth—or properly textured, depending on the look—the rest of the style won’t hold the way you want it to.
It is easy to get caught up in the idea that these styles require endless hours in the chair, but many of the most striking looks are achievable at home with a few quality products and the right technique. You do not need a professional stylist to achieve a clean base. All you really need is a reliable, non-flaking edge control, a boar bristle brush for smoothing, and a ponytail holder that won’t snag your ends. Whether you are working with blown-out hair, extensions, or your natural coils in their raw state, the mid-ponytail remains a timeless choice that feels as relevant today as it did decades ago.
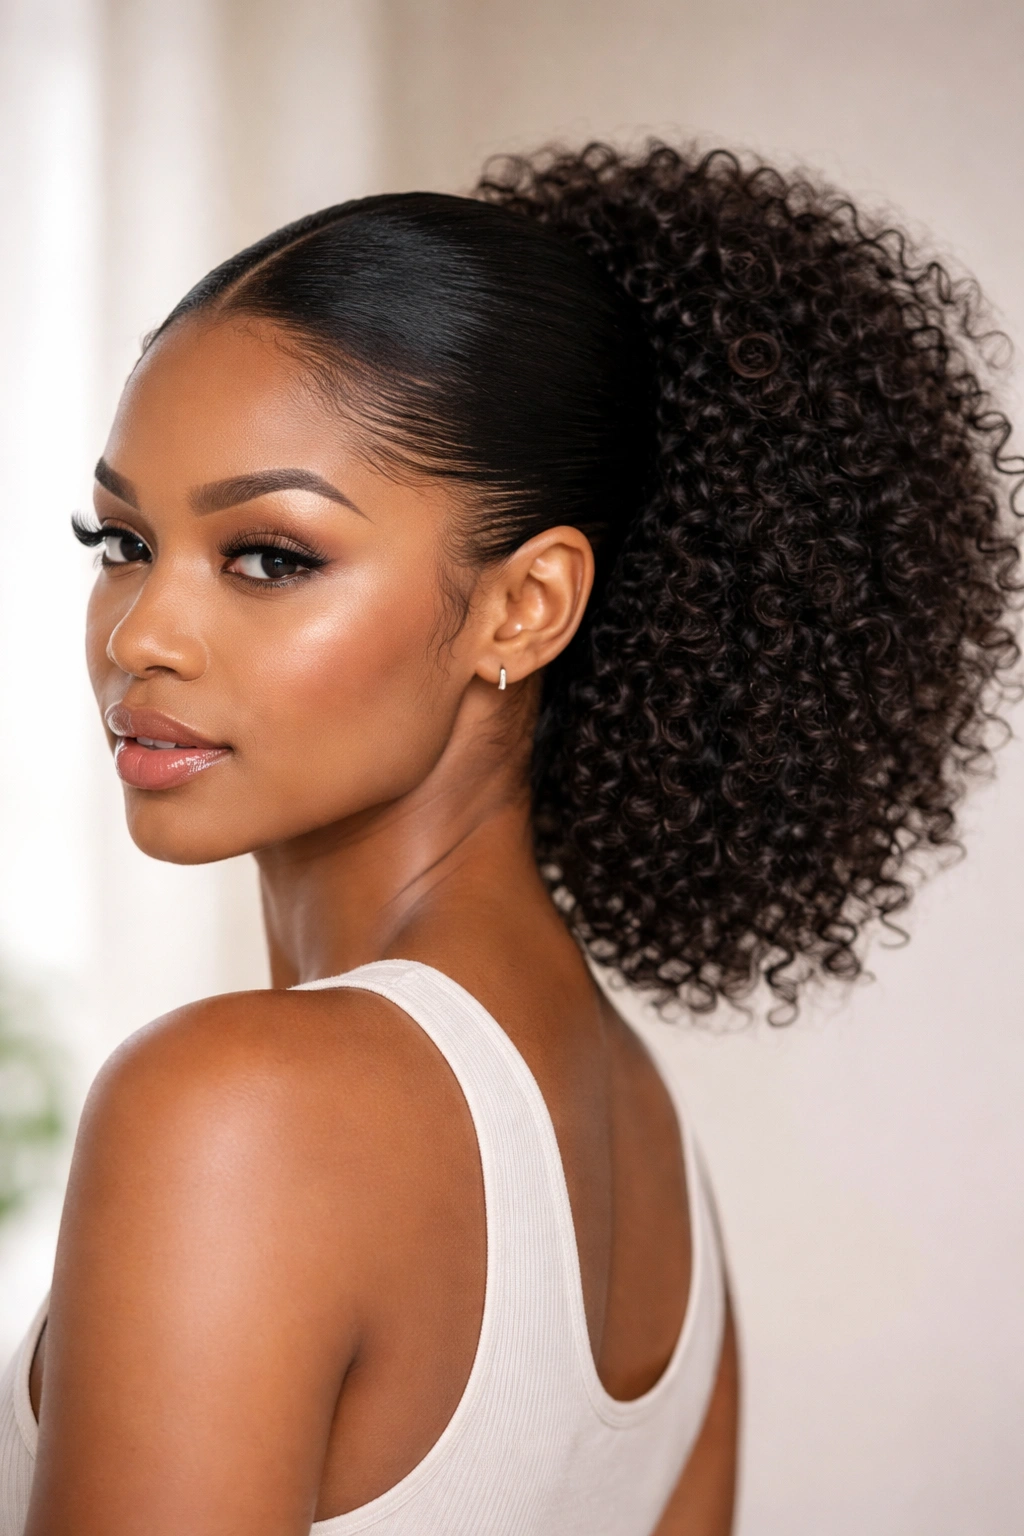
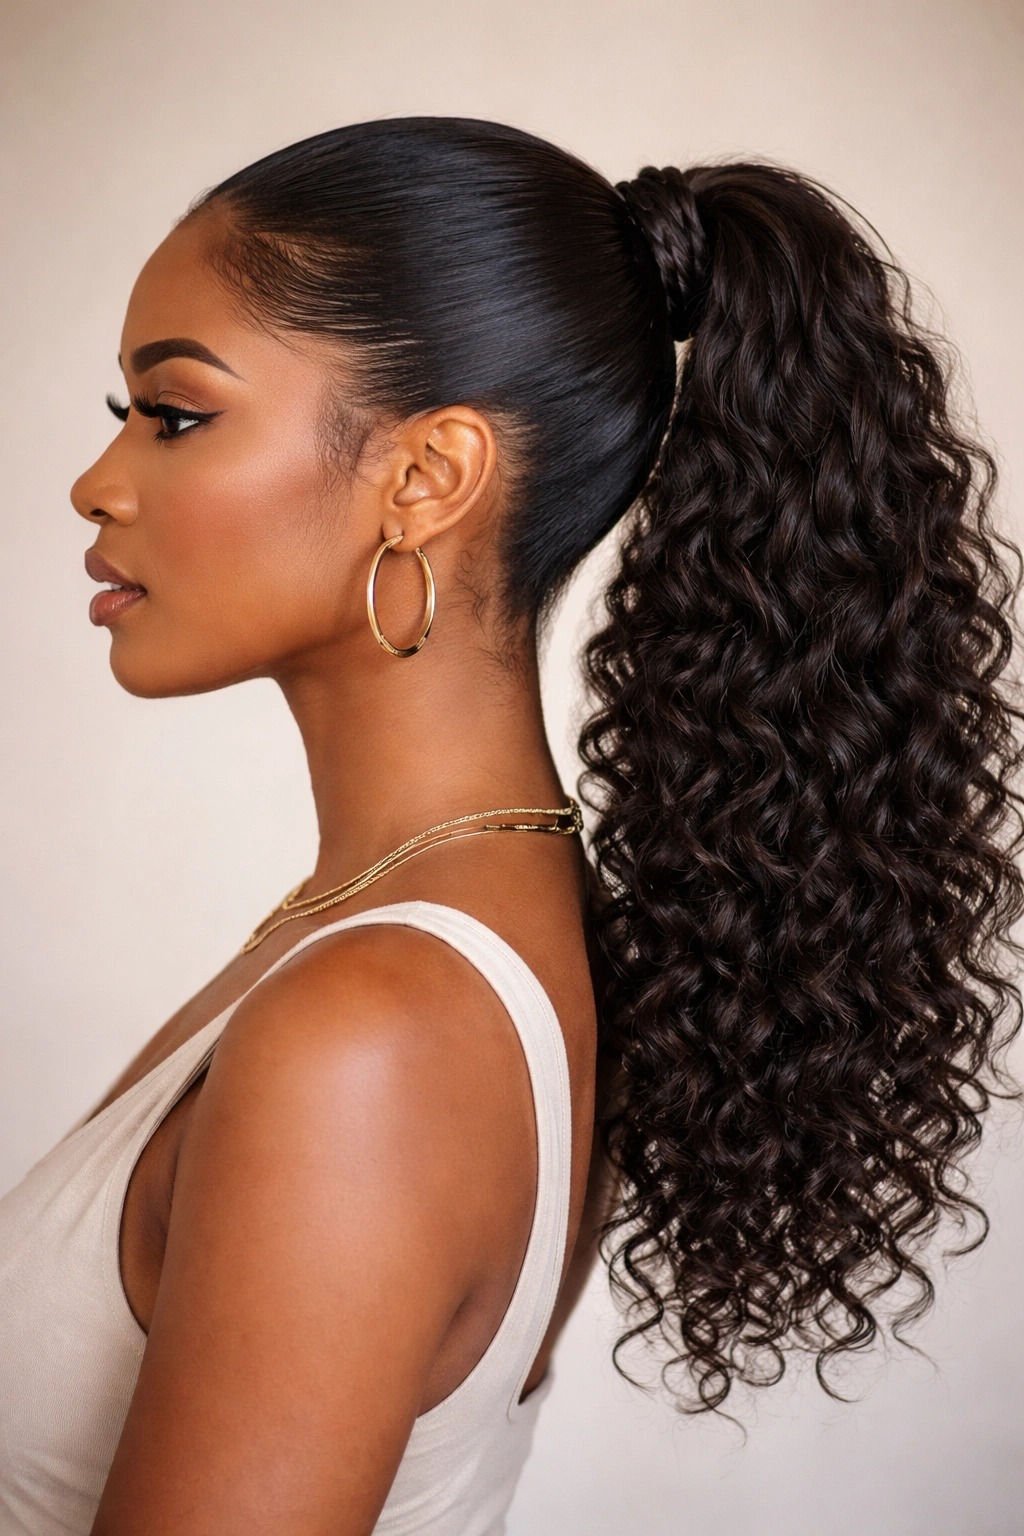
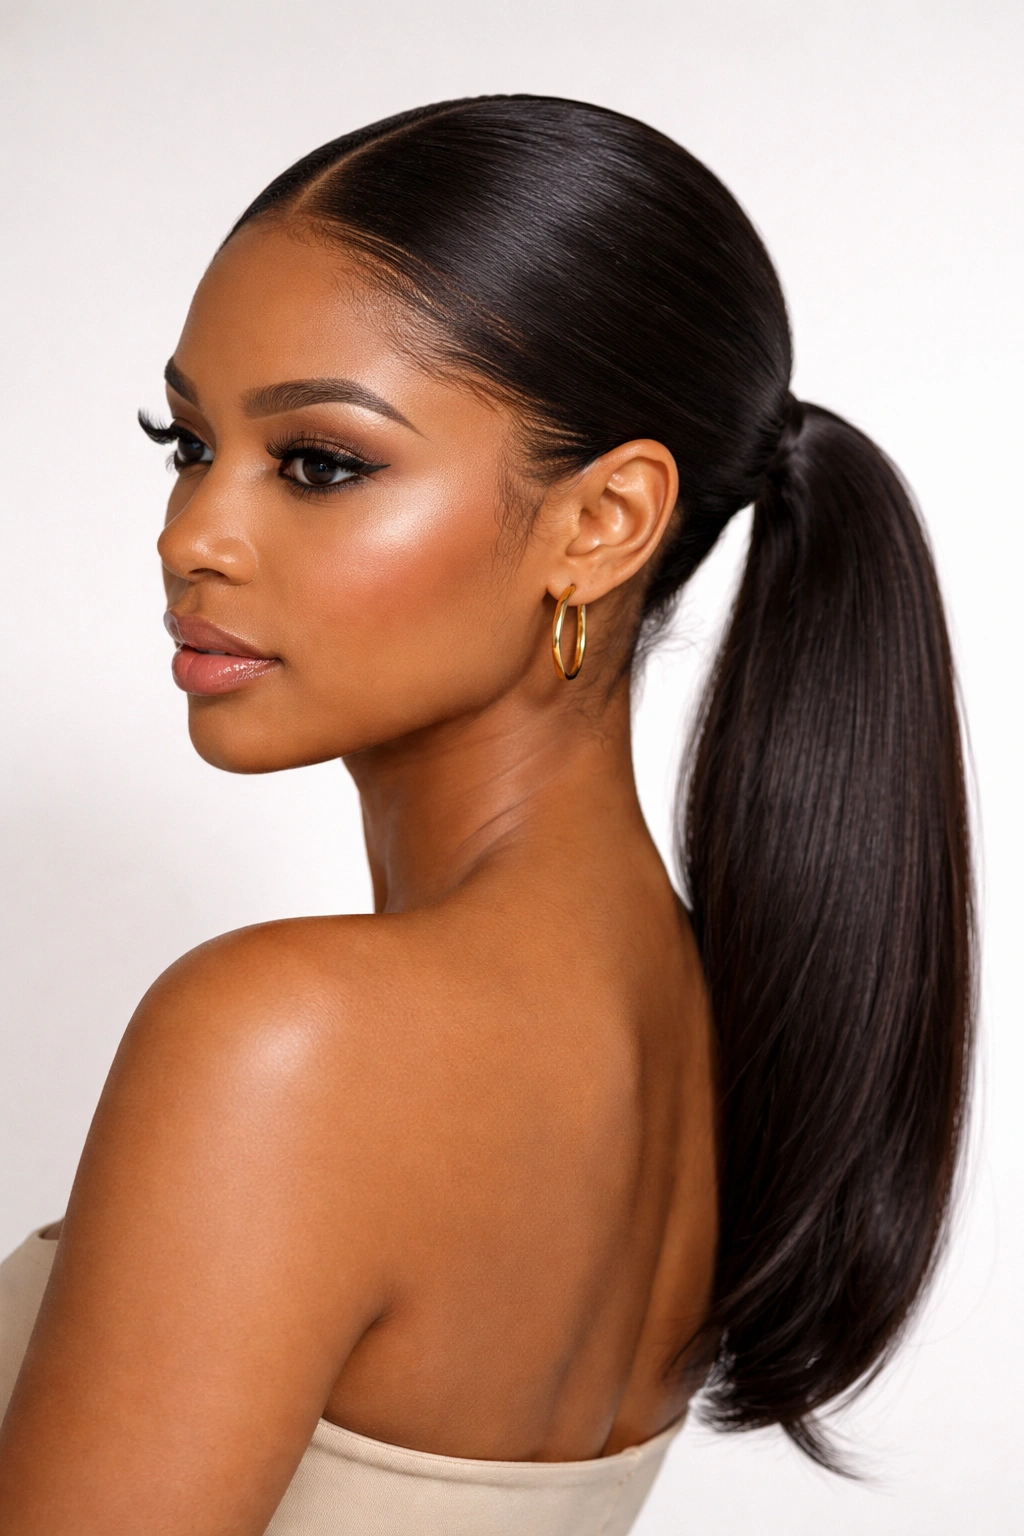
1. The Sleek Center-Part Mid Pony

This is the standard-bearer for sophisticated styling. It relies entirely on the precision of the part and the smoothness of the hair leading up to the crown. To get this right, you have to be meticulous with your rat-tail comb, as any wobbliness in that center line will show.
Achieving the Perfect Line
The key is to define your part while the hair is damp. Use a bit of leave-in conditioner to provide slip, then use the tail of your comb to carve a crisp line straight back to the crown. Work in small sections, applying your styling gel from the root to about an inch down the shaft. Once you have the hair gathered, use a boar bristle brush to work the gel into the hair, pulling it tight against the scalp to eliminate bumps.
Why It Works for Texture
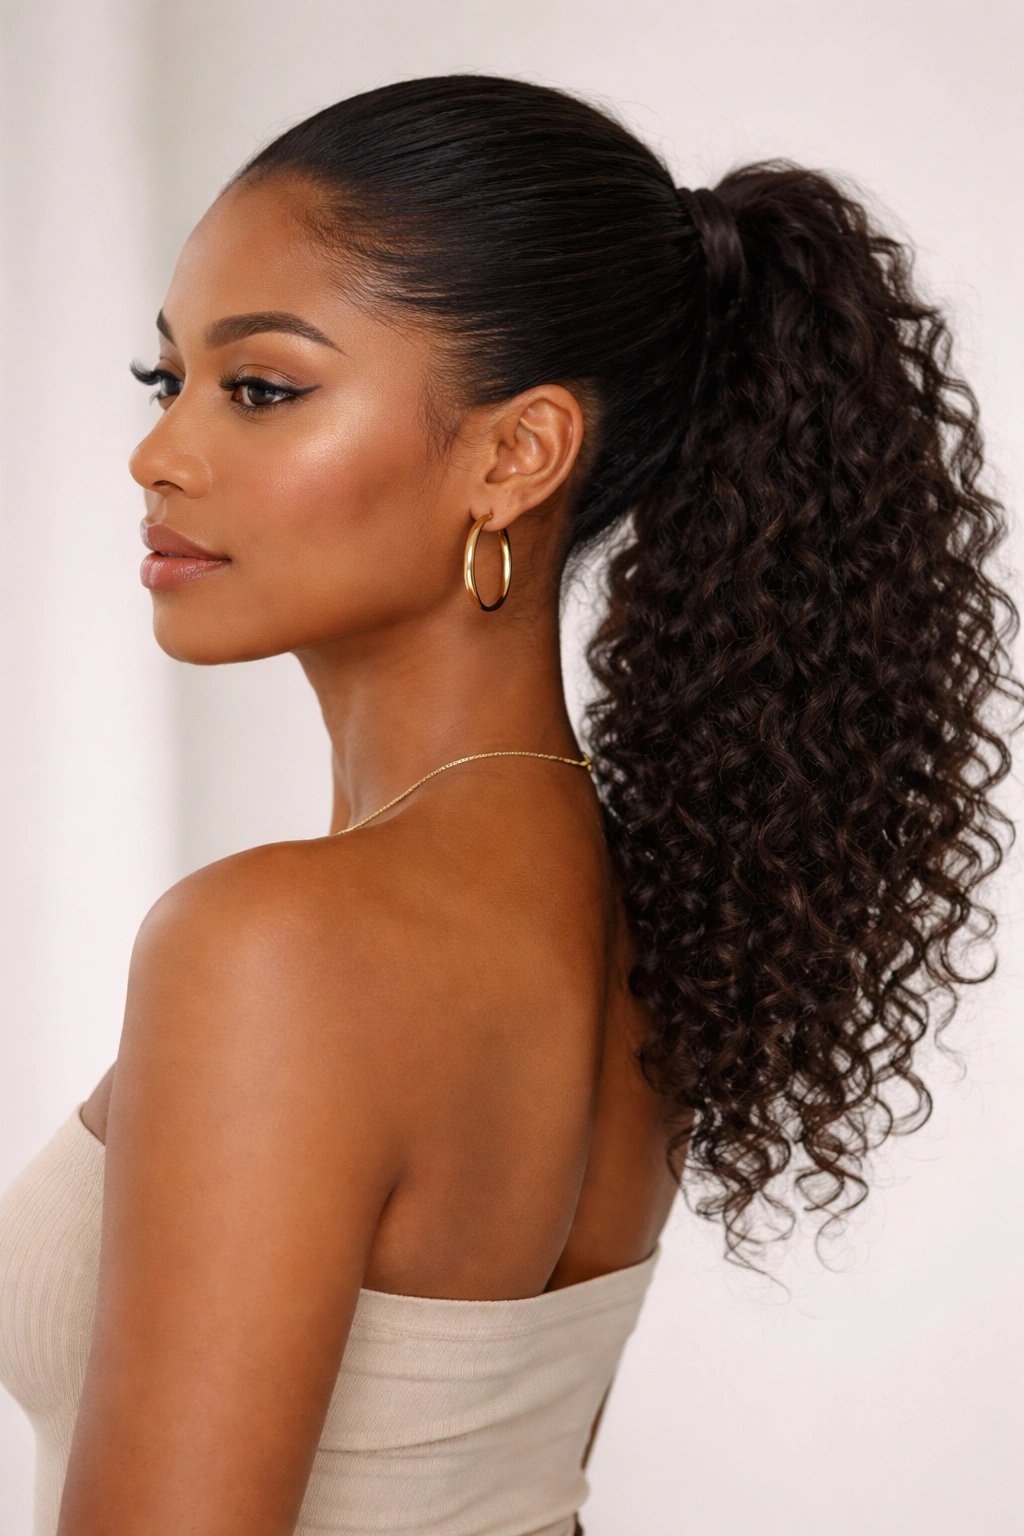
This style is effective because it creates a contrast. By keeping the roots extremely flat and sleek, the volume of the curly ponytail—whether your natural texture or an added extension—becomes the focal point. It’s polished enough for a formal event but clean enough for a casual day out. Remember to use a silk or satin scarf to “set” the base for at least 15 minutes before you head out the door. This little extra step ensures that the hair stays glued down and prevents flyaways from popping up as the gel dries.
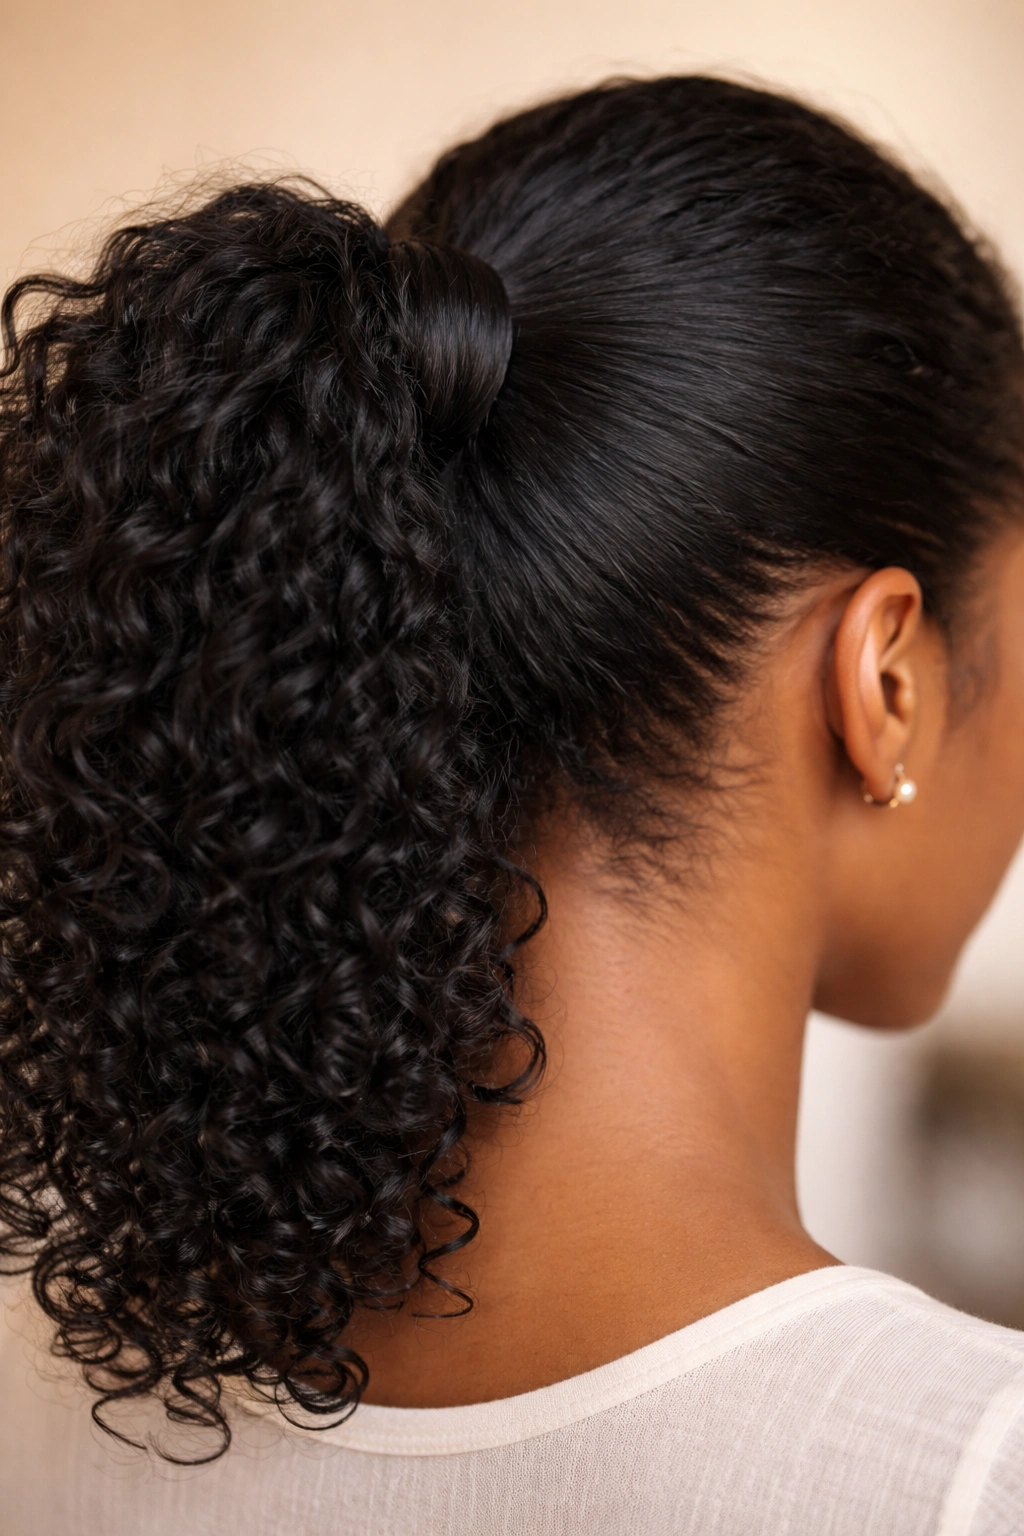
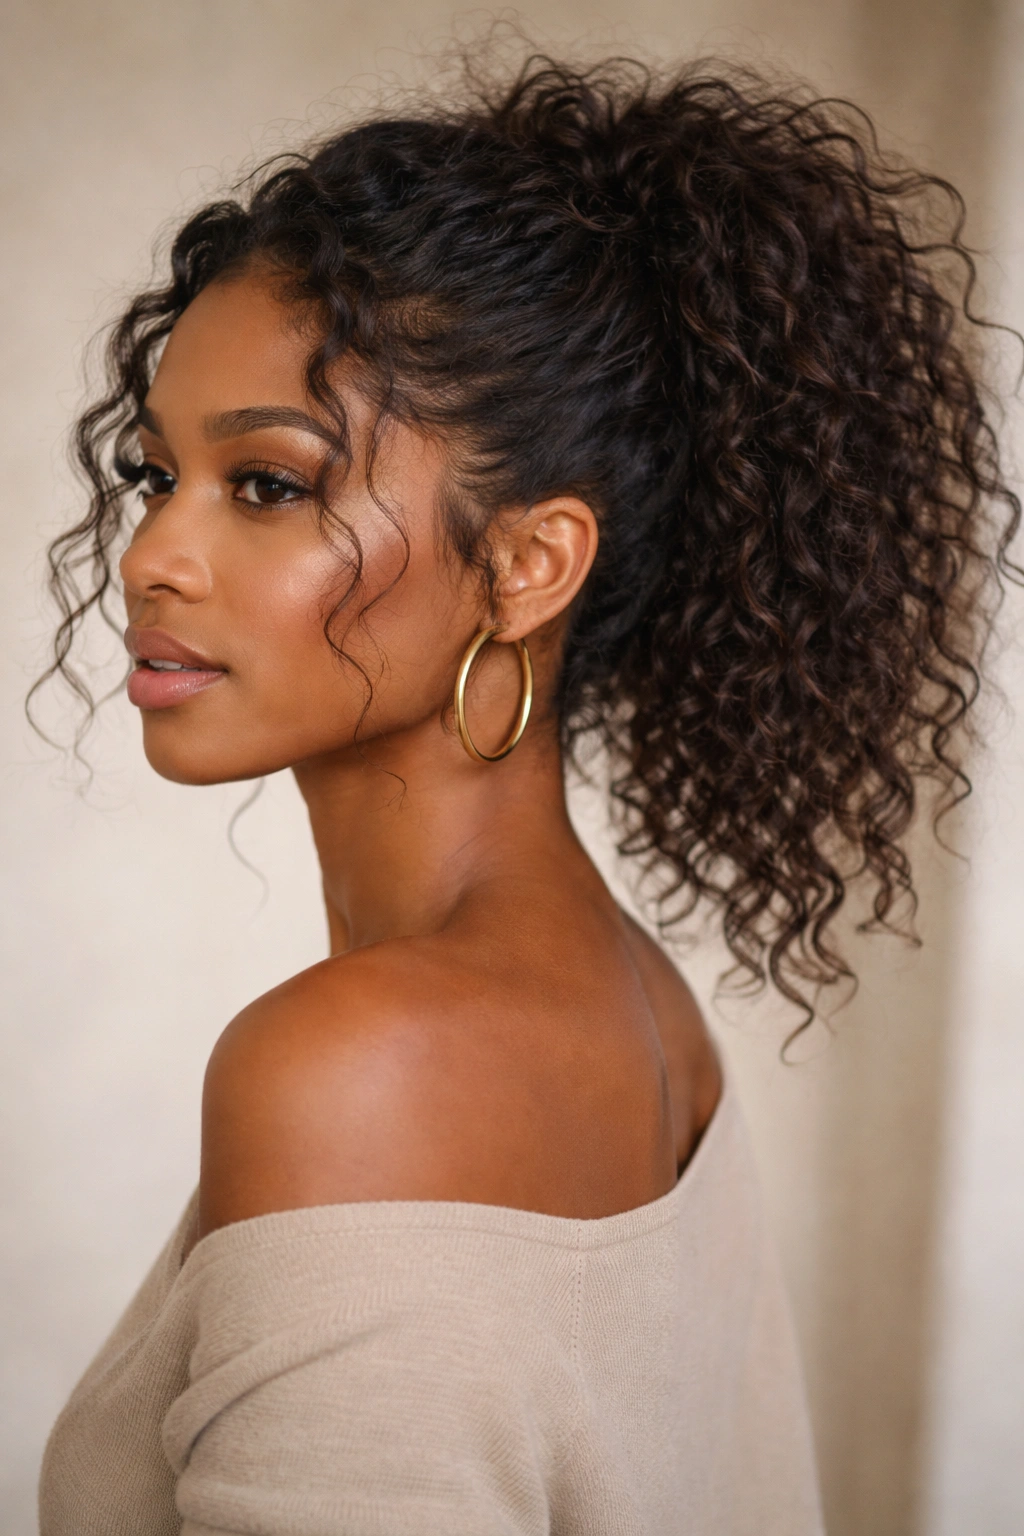
2. Natural Textured Mid-Puff
Sometimes, you just want to let your hair breathe. This style keeps the sleekness at the front while allowing your natural curl pattern to explode in the back. It is arguably the most “hair-friendly” option because it minimizes the amount of manipulation required for the ponytail section itself.
Working With Your Pattern
Instead of trying to force your hair into a uniform shape, you are aiming for a structured puff. Start by defining your curls with a lightweight styling cream. You want the hair to have definition but also softness. When you secure the ponytail, use a snag-free elastic—one of those satin-lined ones is a lifesaver—to avoid catching your delicate ends. Once the base is secure, use a pick or a wide-tooth comb to gently tease the hair in the ponytail until it reaches your desired volume.
Pro Technique for Balance
The goal here is to balance the smooth, controlled front with a high-volume back. If your hair is on the shorter side, you can fluff the roots of the ponytail to create the illusion of more length and fullness. If you have tight coils, don’t be afraid to pull small pieces out around the base of the ponytail to soften the transition from the gelled-down roots to the natural texture.
3. The Swoop Bang Mid Pony
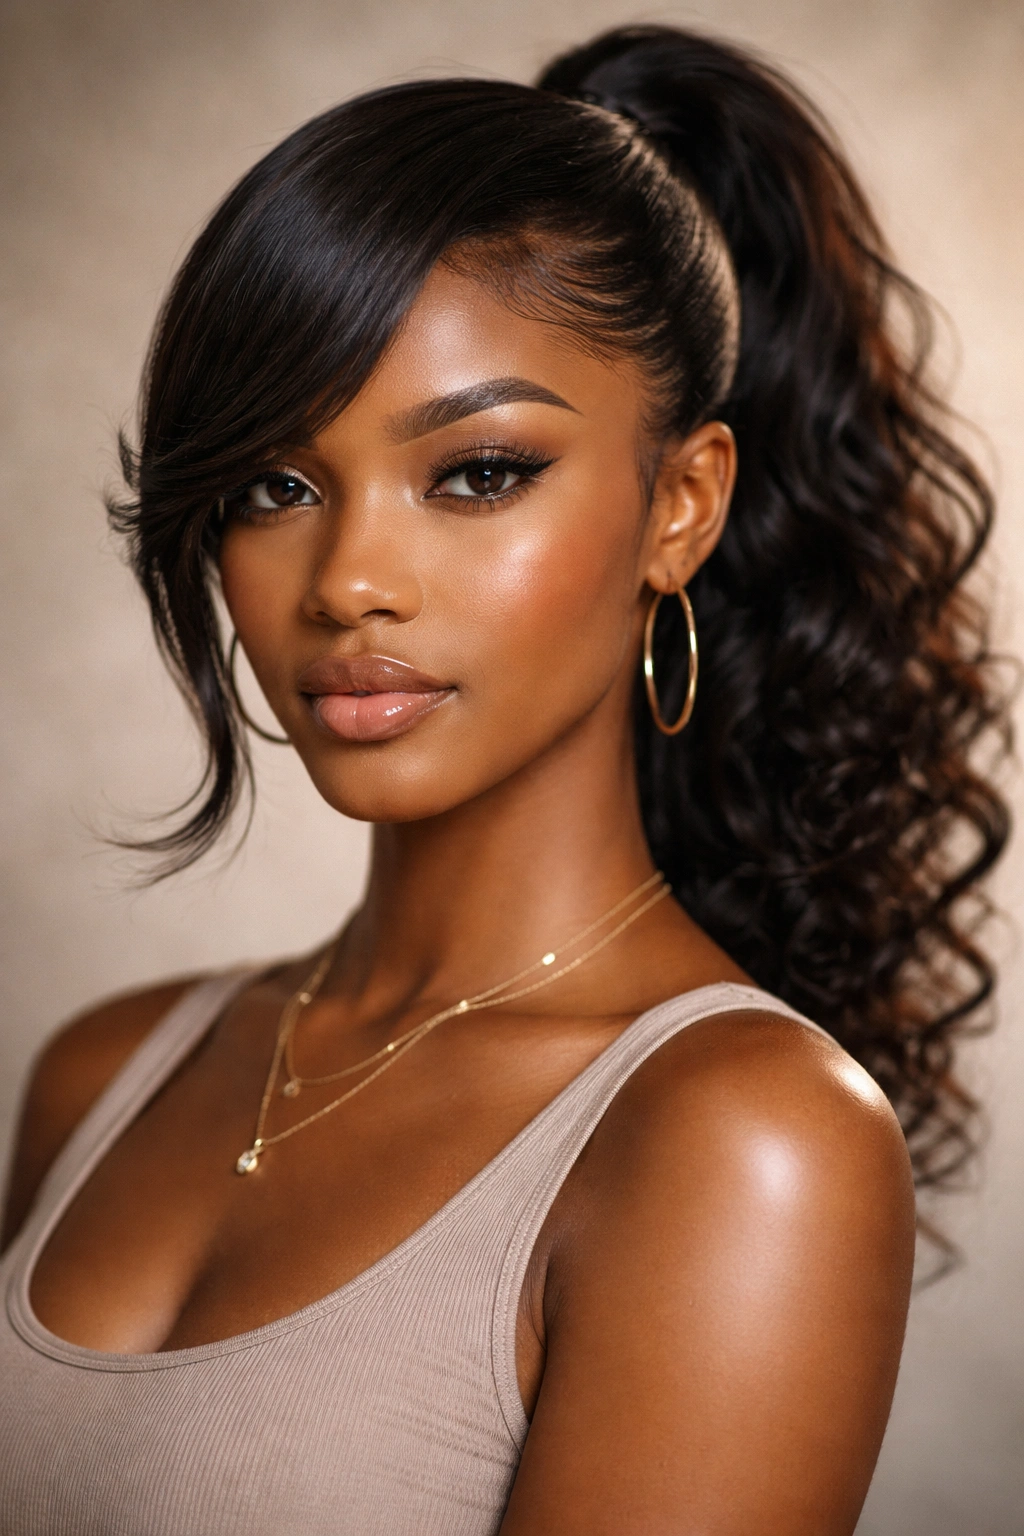
The swooped bang is a classic for a reason—it creates an instant, elegant frame for your face. It adds a touch of retro glamour, reminiscent of styles that have cycled through hair culture for generations.
The Art of the Swoop
The secret to a good swoop is the angle. You want to sweep the hair across your forehead in a deep, exaggerated curve. Apply a firm-hold styling wax or edge control to the section of hair you intend to swoop. Don’t just pull it flat; you want to create a slight arc. Use a fine-tooth comb to brush it into place, securing the end of the swoop with a tiny bit of gel behind your ear before you gather the rest of your hair into the ponytail.
Managing the Tension
Because you are pulling a significant amount of hair to one side, it is easy to accidentally pull too tight. Check your hairline throughout the process. If you feel any pulling or pain, loosen the swoop slightly. It should look intentional, not painful. This style pairs beautifully with bold earrings, as it keeps one side of your face completely clear and open.
4. Bubble Mid Pony
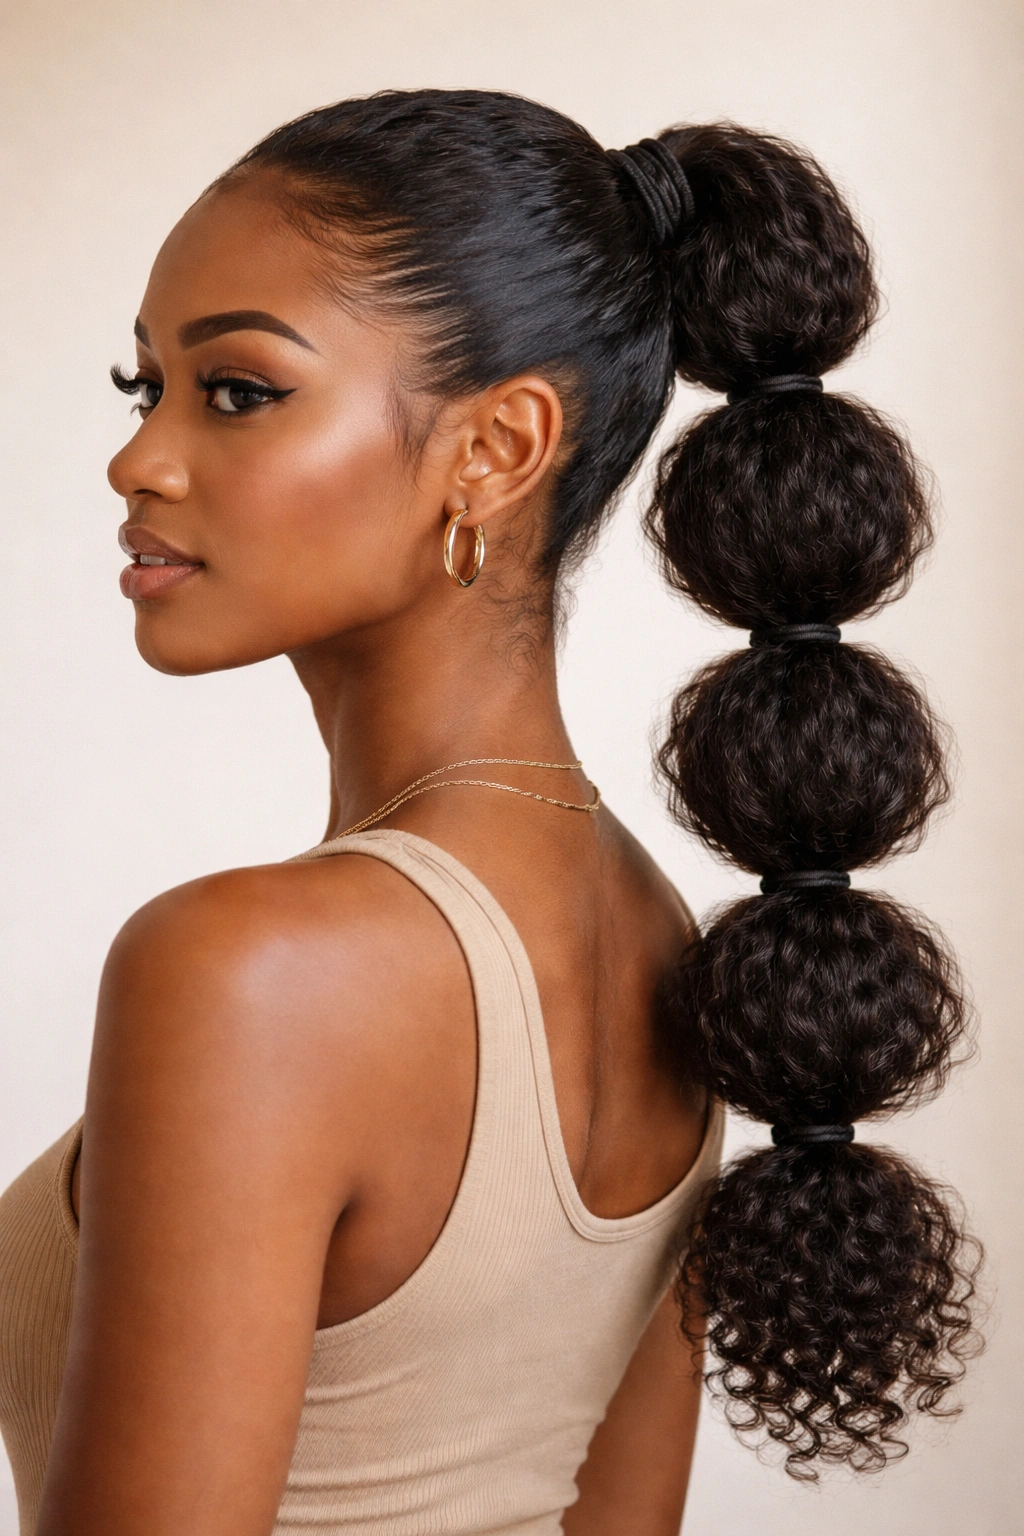
If you want to add a playful, graphic element to your look, the bubble pony is the answer. It requires multiple hair ties, but the result is a structural, eye-catching style that looks much more complex than it actually is.
Creating the Segments
Once you have your hair gathered at the mid-point, place an elastic about two inches down the length of your ponytail. Gently pull the hair between the two elastics outward to “puff” it up, creating the first bubble. Repeat this process as many times as your length allows. If your hair isn’t long enough, you can attach a clip-in extension to your base ponytail to give yourself the extra real estate needed for those bubbles.
Preventing Tangling
One common mistake with the bubble ponytail is neglecting to detangle the sections in between the elastics. If your curls are prone to tangling, make sure you thoroughly detangle the ponytail before you start the bubble process. Use a tiny bit of oil on your fingers when fluffing the bubbles—this adds shine and helps the hair fibers separate neatly without turning into a fuzzy mess.
5. Bohemian-Inspired Curly Mid Pony
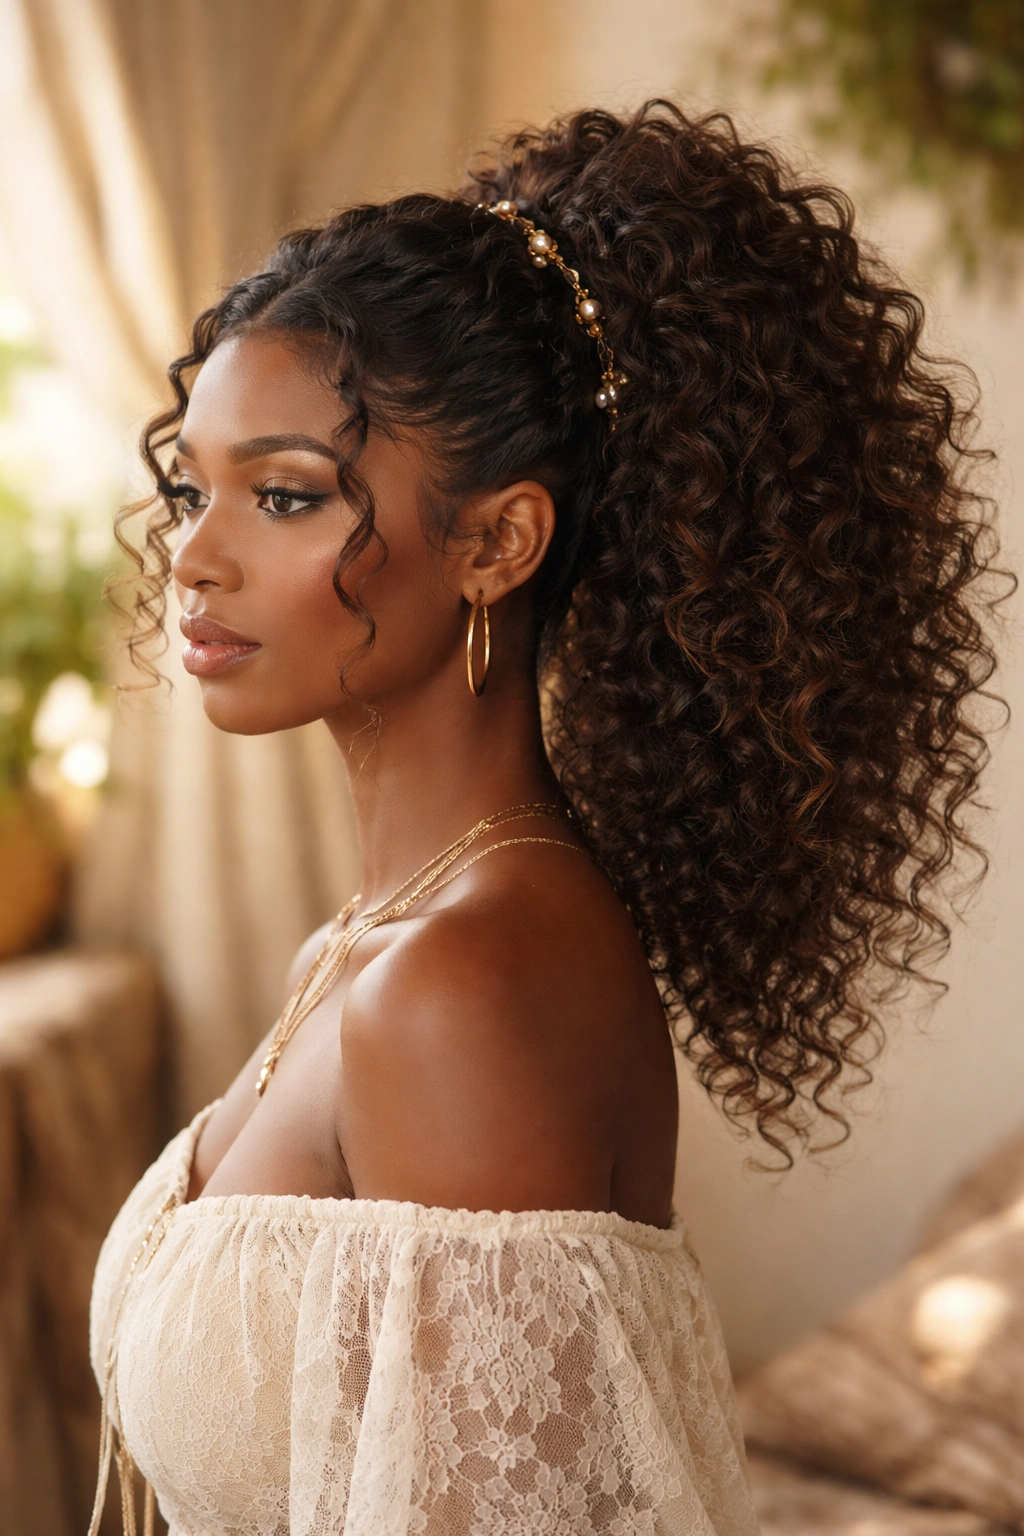
Boho styles are all about softness and intentional imperfections. This isn’t about being snatched or perfectly smooth; it’s about a loose, romantic aesthetic that looks great with curls of any length.
Softening the Base
Instead of using a hard gel that dries crunchy, opt for a medium-hold curling mousse or a soft-hold gel. You want the roots to be secured, but you don’t need them to look like painted glass. Let a few curls fall naturally around your temples and the nape of your neck. You are going for that “I woke up like this” vibe, even if you spent 20 minutes getting it perfect.
Incorporating Texture
If you are using extensions for this look, opt for a kinky-curly or wand-curled texture rather than a straight blow-out. The goal is a uniform, cloud-like texture throughout the entire ponytail. Accessories are your best friend here—think small gold rings, decorative hair cuffs, or even a few strands of ribbon woven into the base.
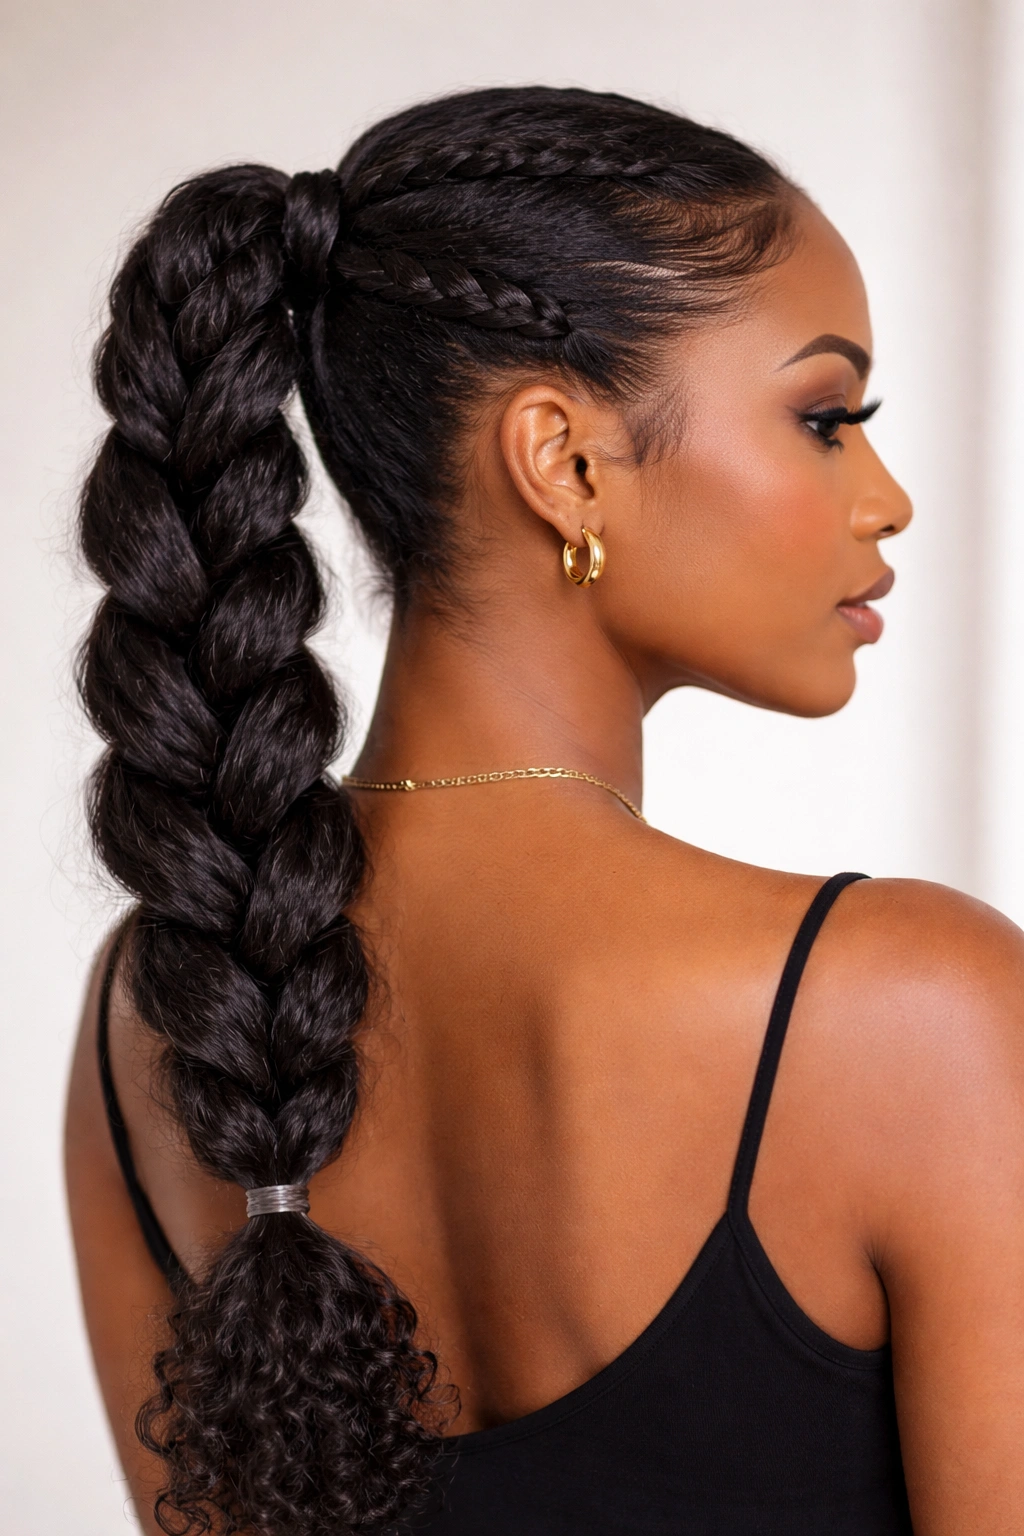
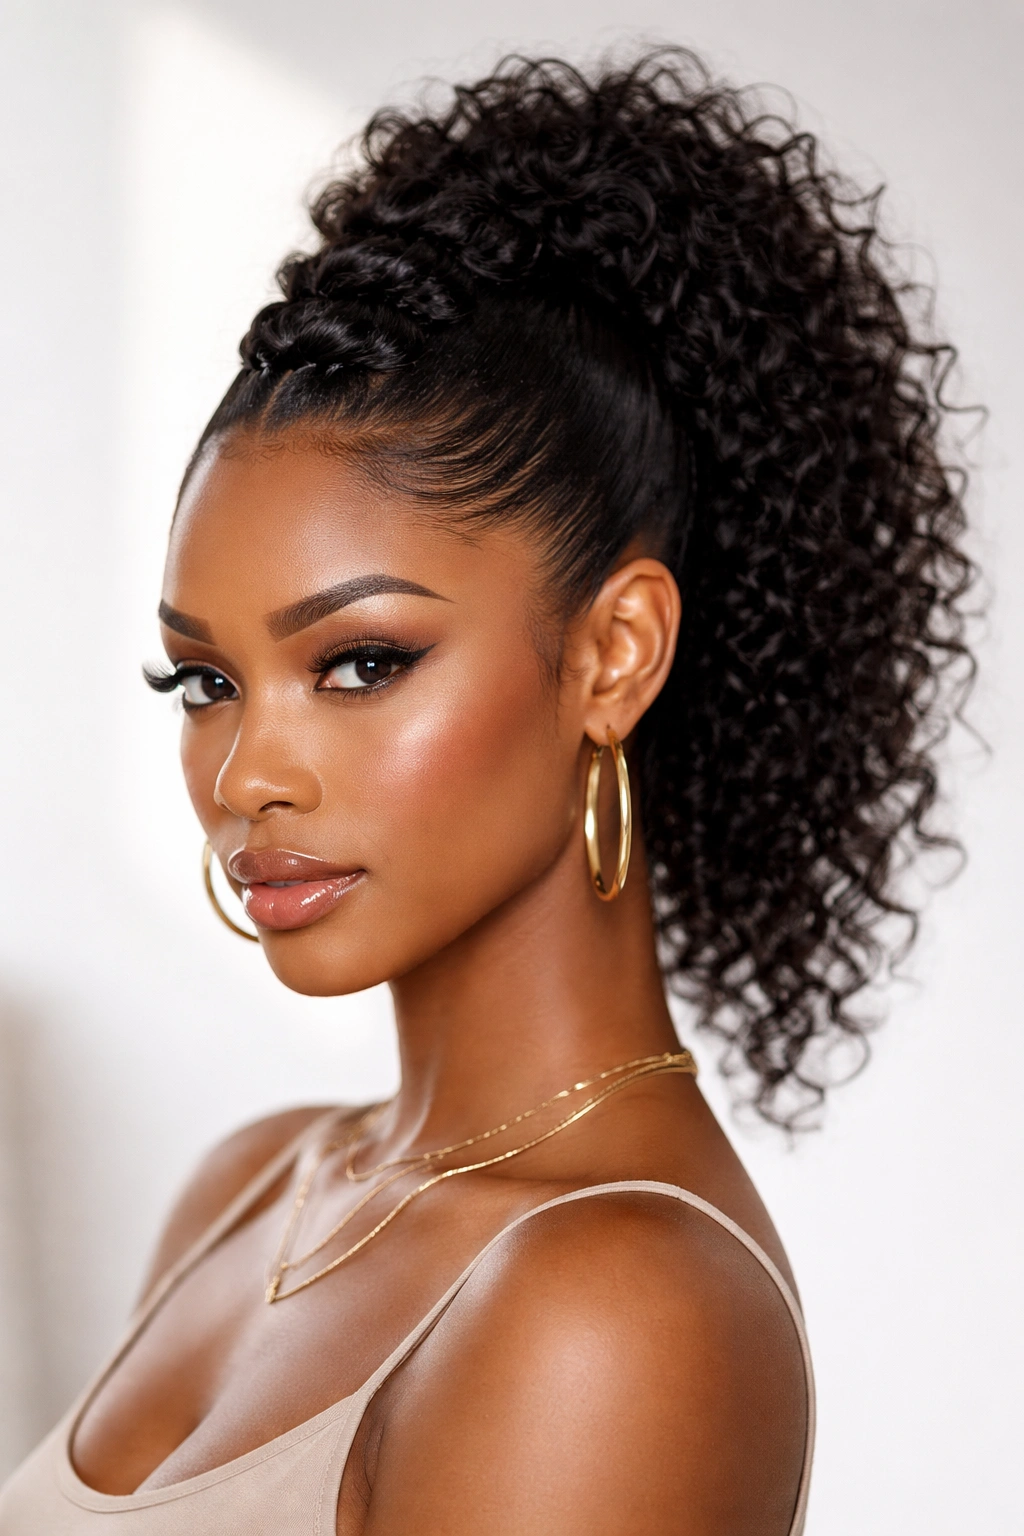
6. Braided Base Mid Pony
Adding a braid at the base of your ponytail is a simple way to elevate the look from basic to intricate. It serves as a decorative element, but it also helps to reinforce the strength of the ponytail, keeping it from sagging throughout the day.
The Technique
Before you pull all your hair into the ponytail, section off a small portion at the nape of your neck or along the side. Braid this section—a basic three-strand braid or a flat twist works well. Once your main ponytail is secured, wrap the braid around the base to hide your hair tie. Pin it securely with a bobby pin that matches your hair color.
Why This Style Lasts
The braid provides a physical anchor. It essentially acts as a secondary tie, which keeps the weight of the ponytail from dragging down on your hair. This is particularly useful if your hair is thick and heavy, as it distributes the tension more evenly across the hairline.
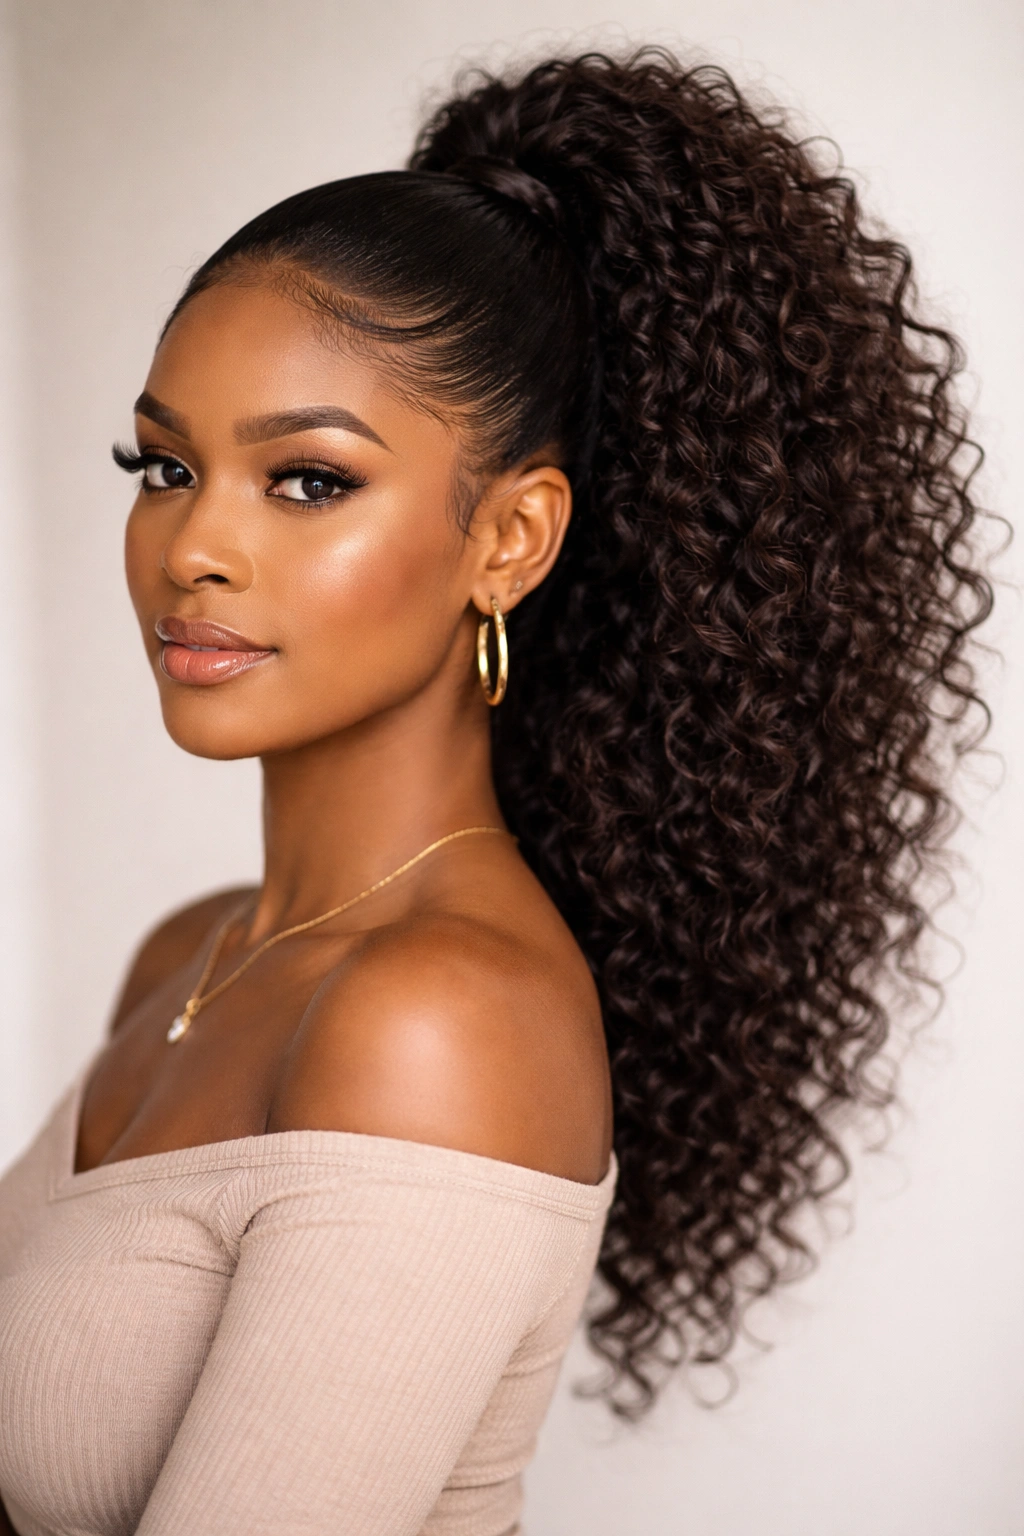
7. The Deep Side Part Sleek Pony
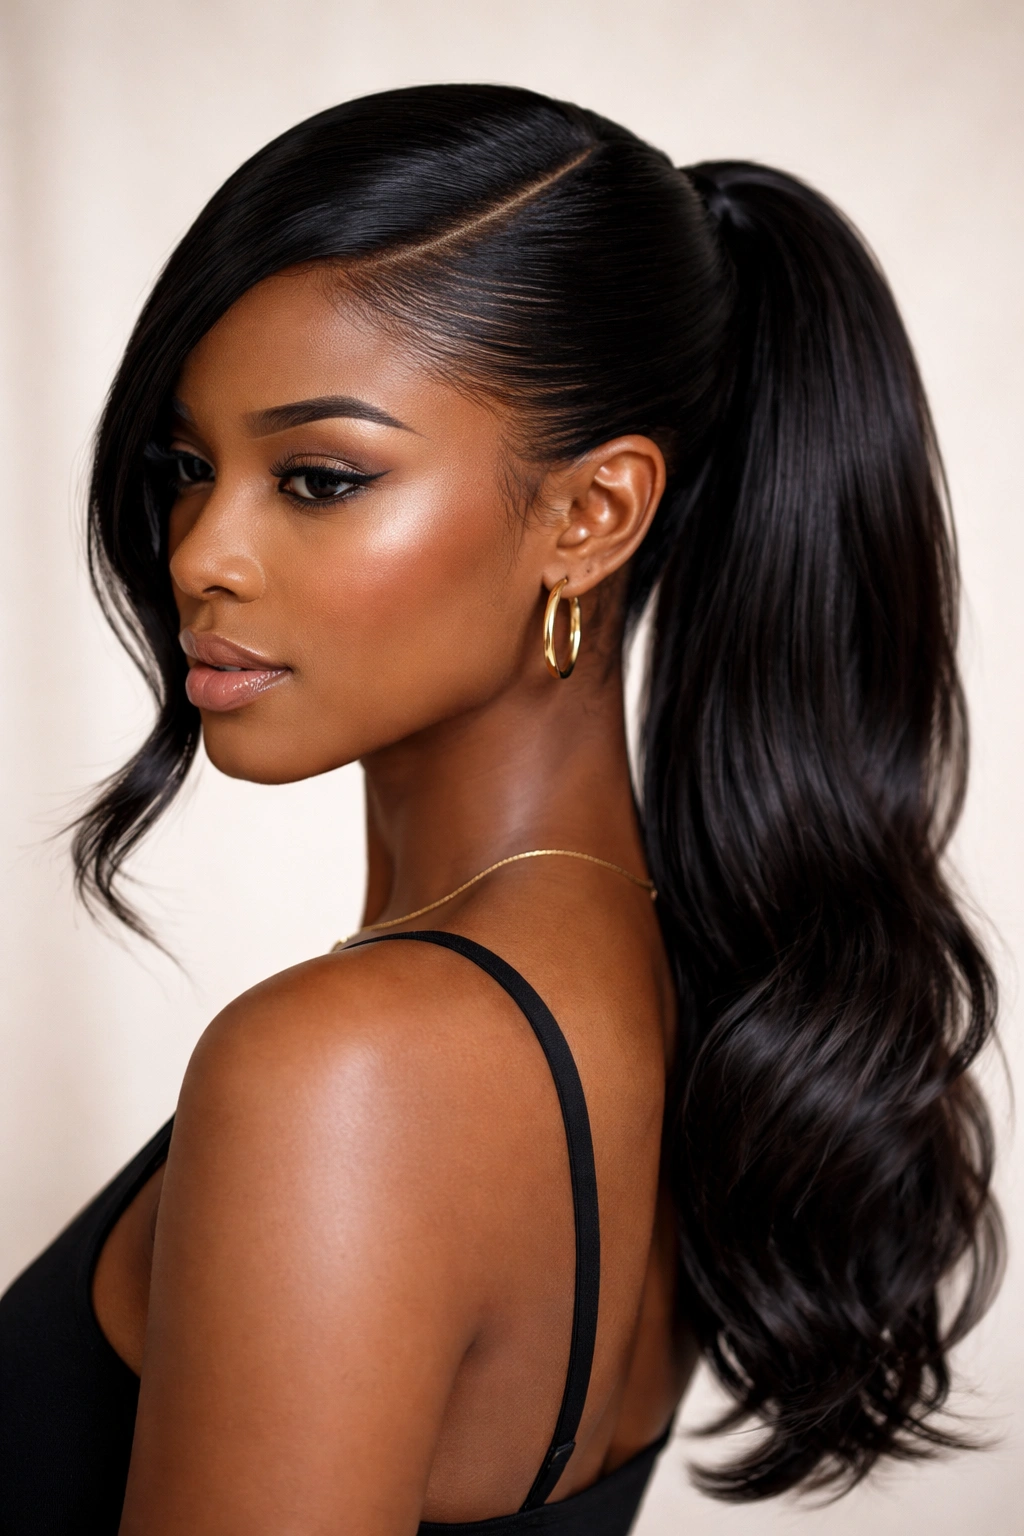
The side part is arguably more flattering than the center part for many face shapes because it creates an asymmetrical line that draws the eye upward. It feels slightly more grown-up and sophisticated than the center-parted look.
Achieving the Precision
Use the arch of your eyebrow as a guide for where to start your deep side part. The key to this style is the “sweep.” You don’t want the hair to just fall flat; you want to create a smooth, rounded shape that transitions seamlessly into the ponytail. Brush the hair back with a boar bristle brush, maintaining the tension all the way to the crown.
Finishing the Ends
Because of the deep side part, your ponytail will naturally sit slightly off-center. Embrace this. If you are wearing your natural hair in the pony, make sure the curls are well-defined. If you are using a straight texture, ensure the hair is flat-ironed to a high gloss to match the sleekness of the roots.
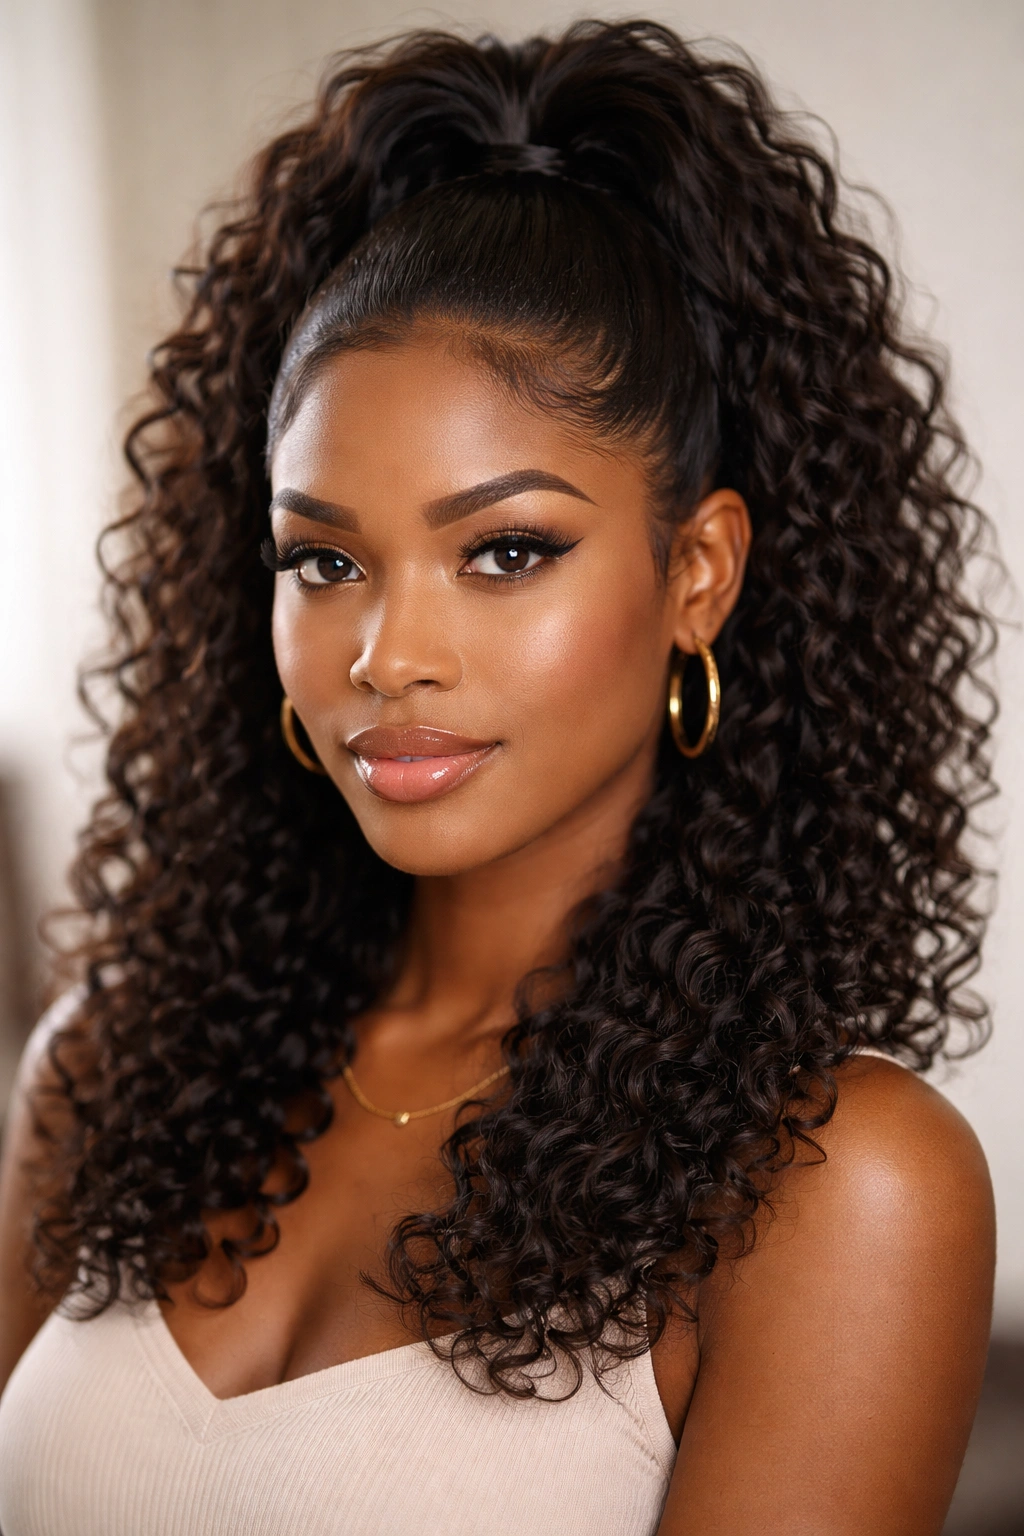
8. Top-Knot Hybrid Mid Pony
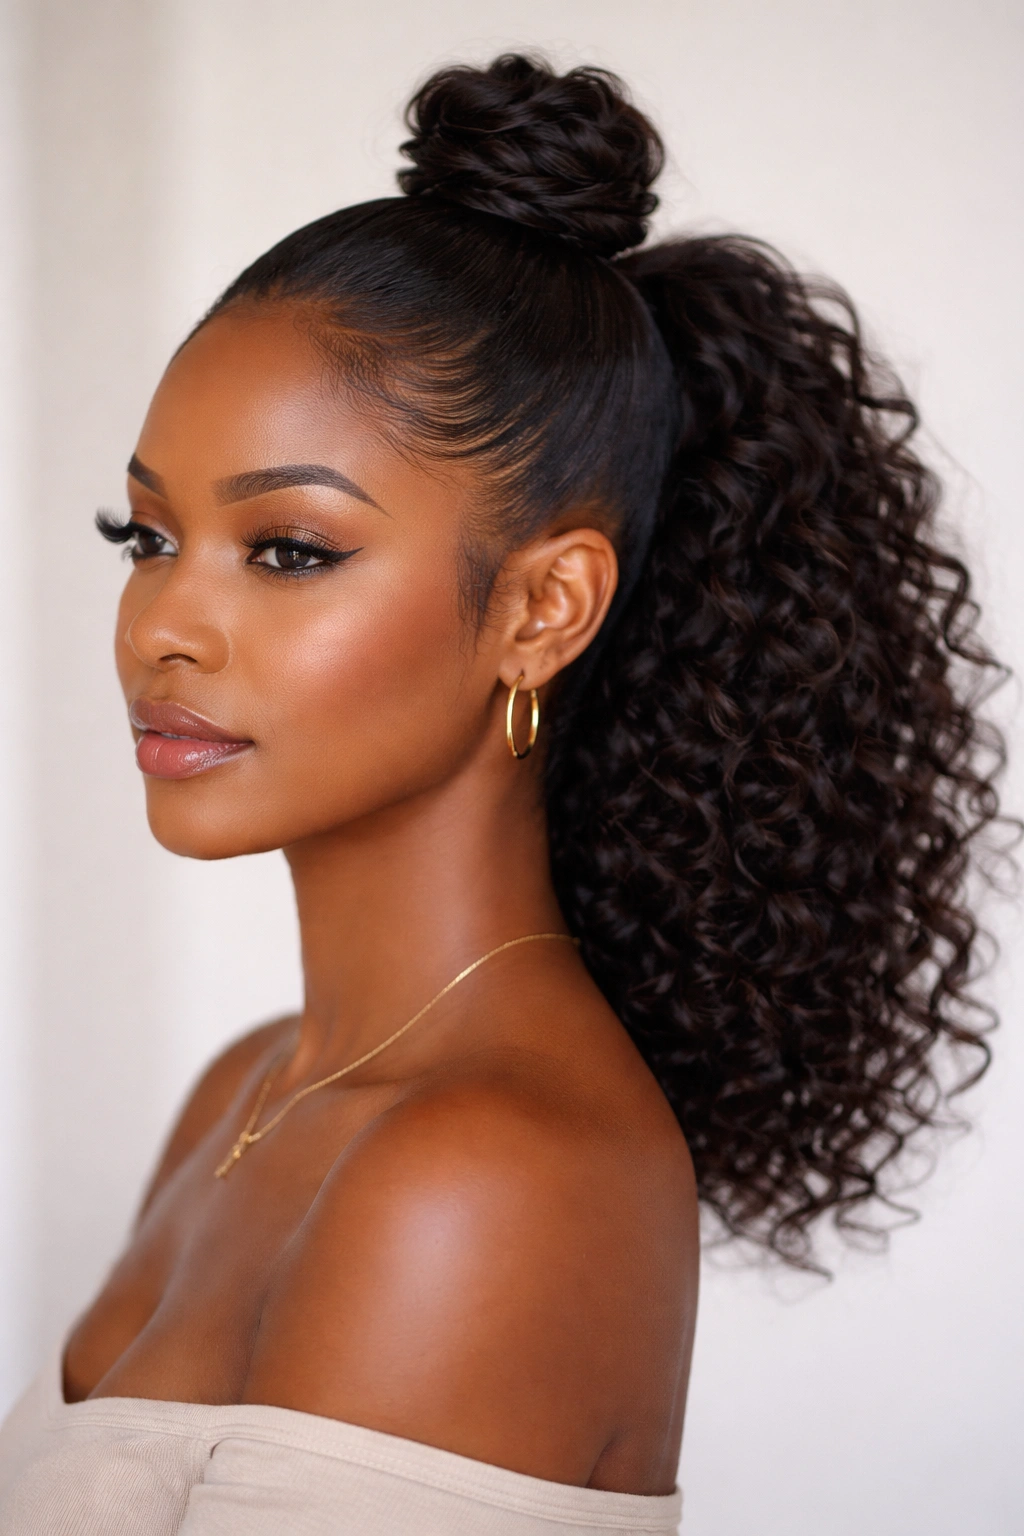
This is a playful, creative take on the classic pony. It essentially splits the hair into two sections: a small bun or knot at the crown, and the remaining hair flowing into a mid-length ponytail. It is fantastic for adding height and dimension.
The Construction
Gather the top third of your hair and secure it into a small bun or knot at the crown. Take the remaining hair—from the temples back—and gather it along with the base of that bun into your main mid-ponytail. This style gives you the vertical volume of a top knot while retaining the length and movement of a ponytail.
Styling Tip
This style looks best when the transition between the knot and the pony is clean. Make sure the hair gathered into the pony is smoothed back securely so the separation between the top section and the bottom section looks intentional. It is a great way to manage hair that might be too thick to fit comfortably in a single ponytail holder.
9. Flat-Twist Detail Mid Pony
Flat twists are a beautiful protective style element that adds texture and interest to the scalp area before the hair reaches the ponytail. They are faster than cornrows but offer a similar, structured look.
The Process
Section your hair into clean lines leading toward the crown. Perform flat twists on each section. Once you reach the crown, gather all the ends of the twists along with the rest of your hair into the ponytail. You can twist them all the way back or just down to the crown, depending on the look you prefer.
Why It Works
This style is incredible for preserving your hair. It keeps the hair at the scalp protected and organized, which reduces friction and tangling. Plus, when you take the style out at the end of the day, your hair will have a beautiful, uniform crimp pattern that you can rock for days afterward.
10. The Wrapped Ponytail Base
Sometimes, the simplest detail makes the biggest difference. Wrapping a piece of hair around your ponytail base is the hallmark of a professional-looking style. It hides the elastic and makes the ponytail look like it’s floating out of your head.
The Execution
Take a small piece of hair from the underside of your ponytail—about a half-inch wide. Wrap it tightly around the base where the elastic is visible. Secure the very end of the strand with a bobby pin tucked under the ponytail, so it is invisible from the outside.
Troubleshooting the Wrap
If your hair is too short to wrap, don’t worry. Use a small, high-quality synthetic hair extension piece that matches your color. You can attach it to the elastic before you even put the ponytail in, or wrap it around once the ponytail is secure. It instantly elevates a basic mid-pony into something that looks like it belongs on a runway.
11. Mid Ponytail with Face-Framing Tendrils
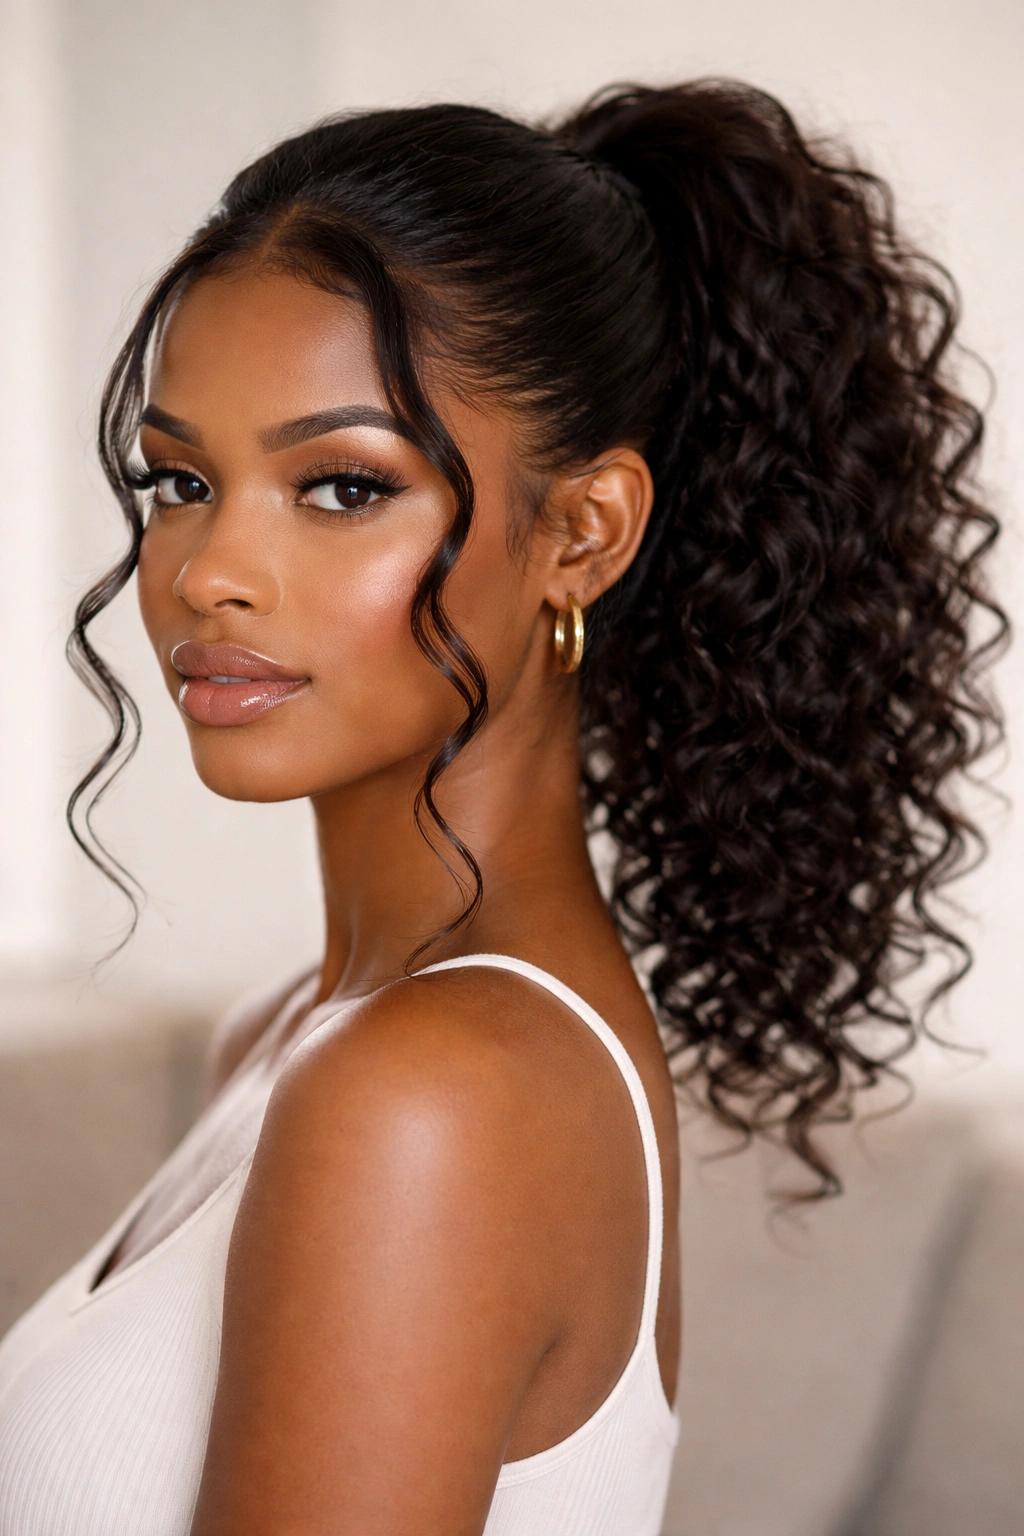
If you feel that pulling all your hair back makes your face look too severe, leave-out is your best friend. Leaving a few pieces around the face softens the entire aesthetic and gives you a relaxed, “undone” elegance.
Choosing the Tendrils
You have two options: small, wispy tendrils or thicker, face-framing curls. If you want a 90s-inspired look, go for the thinner, wispier pieces. If you want something more modern and romantic, leave out a thicker section on each side and curl it away from your face with a curling wand.
Maintaining the Style
Because these tendrils are outside the ponytail, they are subject to humidity and movement. Apply a light-hold cream or a dab of gel to them while they are damp to ensure they stay defined throughout the day. Avoid running your fingers through them constantly, as this can turn a defined curl into a frizzy flyaway.
12. Rope Twist Mid Pony
A rope twist ponytail is a stunning way to display your length and add a sophisticated, braided element to your ponytail. It looks incredibly complex, but the technique is surprisingly straightforward.
How to Build the Rope
Once your hair is gathered into the ponytail, split the ponytail into two equal sections. Twist each section individually in the same direction (e.g., clockwise). Then, twist the two sections around each other in the opposite direction (counter-clockwise). Secure the end with a small clear elastic.
The Visual Effect
The counter-twist creates a rope-like, spiral effect that is visually striking. If your hair is on the thinner side, you can gently pull at the twists to “pancake” them, which makes the rope look thicker and more voluminous. This style works best with hair that has been blown out or is naturally straight/wavy; if your hair is very tight and coily, you might need to straighten the ponytail section first to get that clean rope definition.
13. Half-Up, Half-Down Mid Pony
This is technically a variation on the ponytail, but it serves a unique purpose. It allows you to keep hair off your face while still enjoying the drama of having your hair down.
Balancing the Volumes
The trick here is to ensure the “up” portion has enough volume to hold its own. Pull the section from the crown, but don’t just pull it straight back. Give it a little lift or “bump” at the front to add height. Secure it at the mid-point of your head.
Styling the Down Section
Make sure the section left down is well-moisturized and defined. Since the hair is divided, both sections should be polished. This style is excellent for highlighting your curl pattern, as it allows the curls to fall freely around your shoulders while keeping the hair at the nape of your neck loose.
14. The Messy Textured Mid Pony
Perfection isn’t always the goal. Sometimes, the most flattering look is one that looks like you didn’t try too hard. The key to a good “messy” pony is that it’s controlled messiness, not actual disarray.
Creating the Texture
Use a dry texture spray or a bit of sea salt spray on the ponytail itself. If your hair is freshly washed, it might be too slippery for this look. A day-old style often works better. Tease the roots of the ponytail slightly to give it grit and volume, then use your fingers—not a brush—to gather the hair.
The “Intentional” Look
Pull out some random pieces around your ears and the nape of your neck. The goal is to make it look like a ponytail you could have pulled together in the back of a taxi, but with enough structure that it still frames your face beautifully.
15. Double-Bounded Pony
If you like the idea of the bubble ponytail but want something less “segmented” and more structural, the double-bound ponytail is a great alternative. It uses two distinct elastics, placed closely together, to create a strong, clean base.
Why Two Elastics?
Using two elastics creates a tighter, more secure hold, which is essential if you have heavy hair. It also allows you to push the hair upward slightly, creating a “fan” effect at the base of the ponytail.
Styling Variation
After you secure the ponytail with two elastics, take a piece of hair and wrap it around the entire double-bound section. It makes the base of the ponytail look wider and more intentional, almost like a piece of structural hardware.
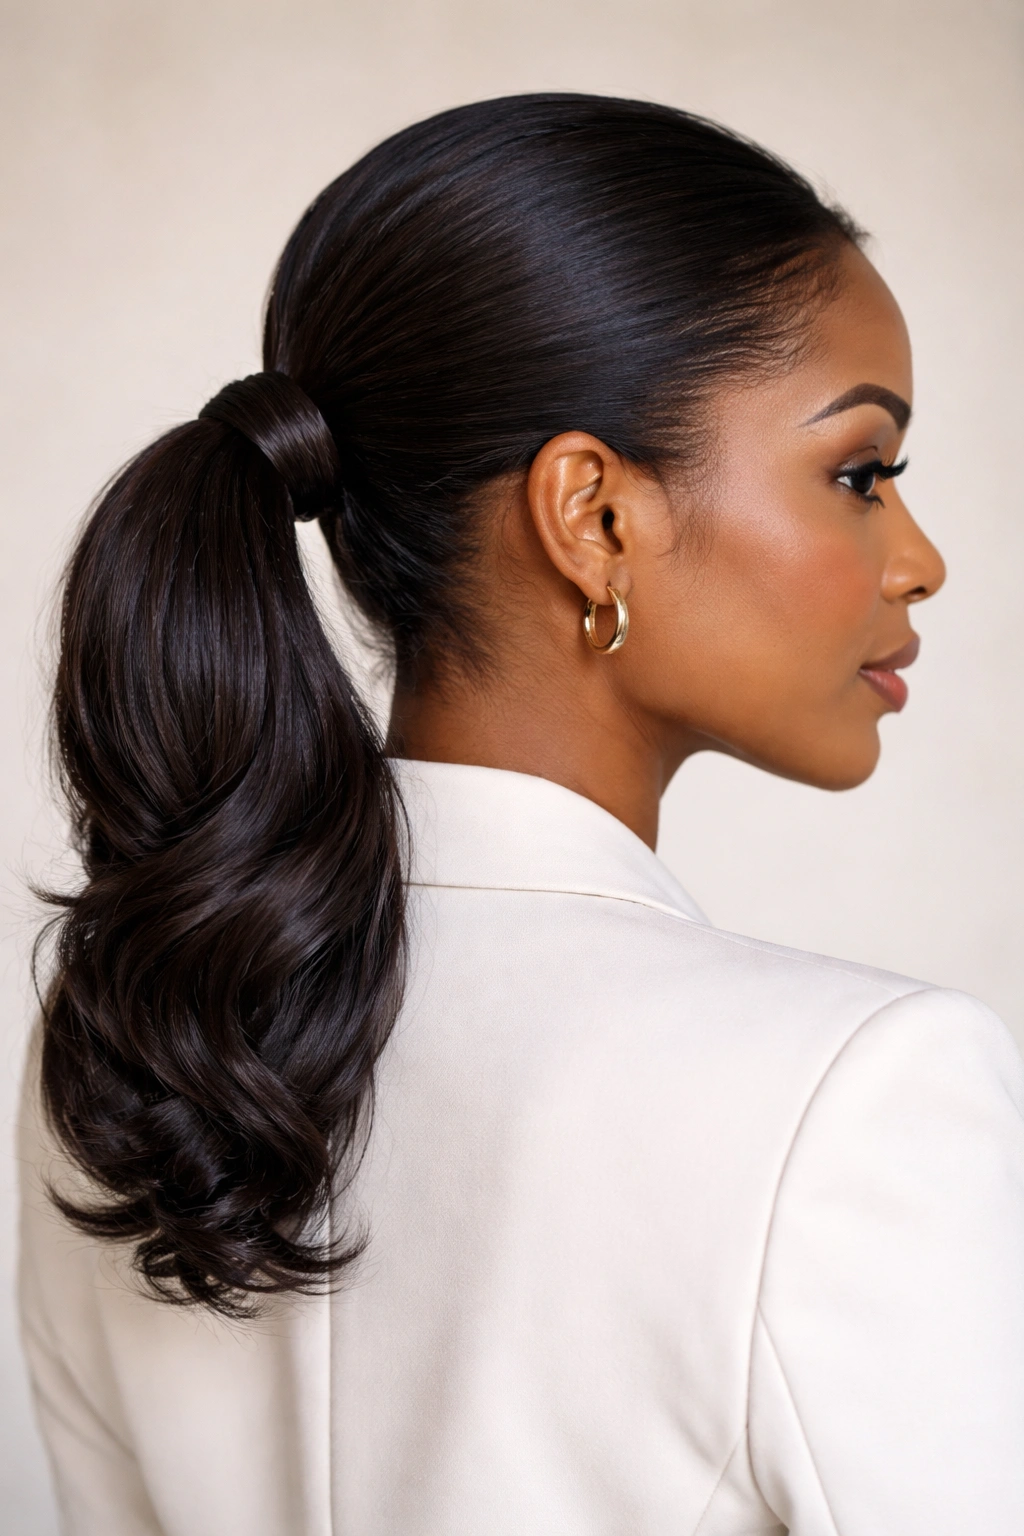
16. Sleek Low-Mid Pony
This is the “barely mid” ponytail. It sits just above the nape of the neck but isn’t a true low pony. It offers the neck-clearing benefits of a higher pony but maintains the ease of a low one.
The Geometry
The angle is critical here. You are pulling the hair straight back, perhaps with a slight upward tilt at the base. It’s incredibly flattering for people with strong jawlines, as it directs attention to the neck and shoulders.
Product Selection
Since this style sits low, it can easily get caught on clothing, collars, or scarves. Use a firm-hold spray or a light gel to keep the ponytail itself from moving around too much. It looks particularly stunning with a crisp, straight texture.
17. Embellished Mid Pony
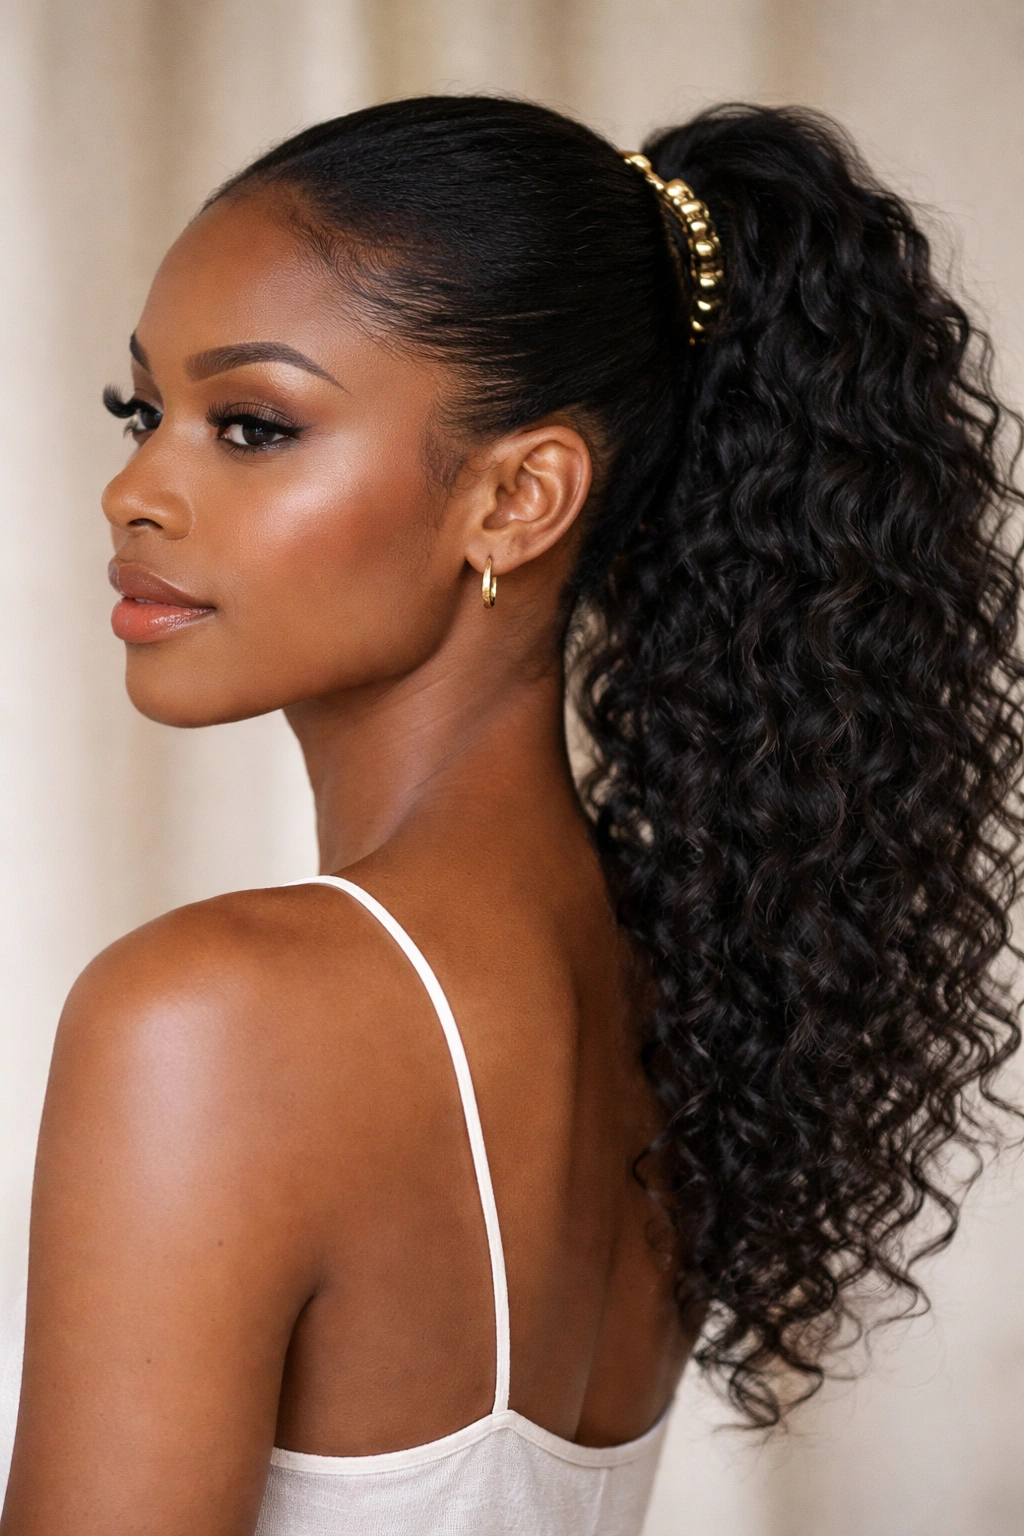
Jewelry isn’t just for your ears or neck—it’s for your hair, too. Adding accessories to your ponytail is the fastest way to turn a standard style into a “look.”
Types of Accessories
Think about gold hair rings, metallic cuffs, or even small charms that you can thread onto individual braids before gathering them into the ponytail. You can also use a decorative hair comb inserted at the base of the ponytail.
Keeping It Balanced
The rule of thumb here is: if the accessories are heavy, don’t use too many. You don’t want the weight of the hair jewelry to pull on your hair strands. Stick to one or two well-placed items that complement the overall vibe of your outfit.
18. The Pineapple Mid Pony
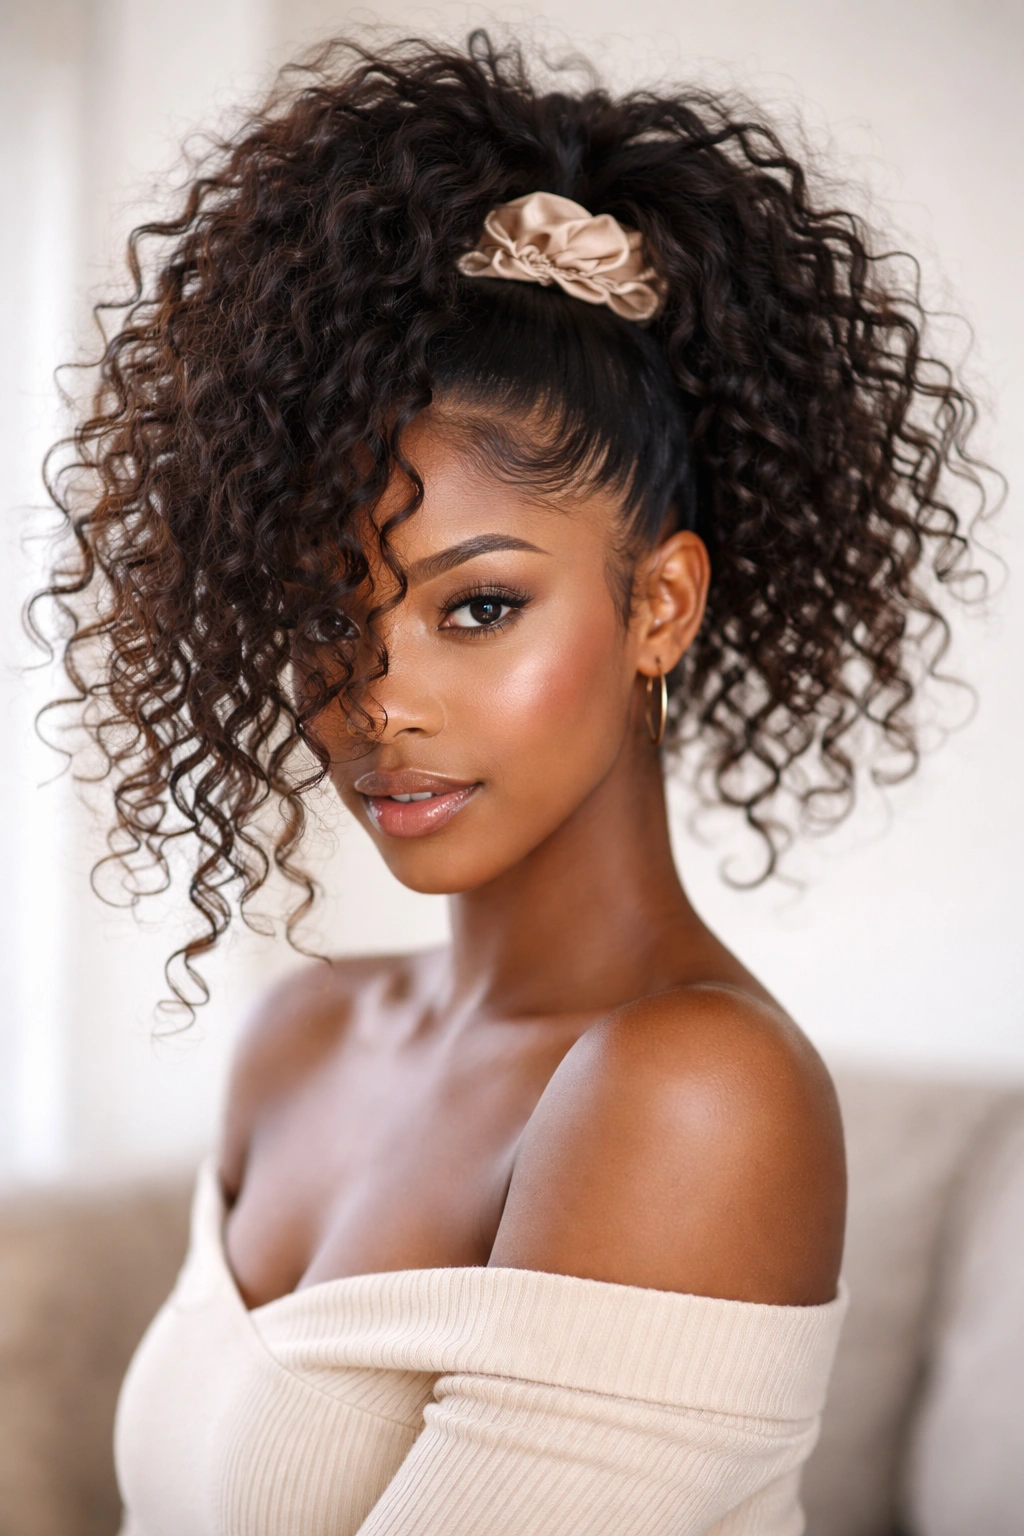
Usually, the “pineapple” is reserved for sleeping to protect curls, but it makes for a fantastic, high-volume day style, too. It’s essentially a very high-placed, loose ponytail that lets your curls spill over the front of your face.
The Execution
Instead of pulling your hair tight, use a loose silk scrunchie. Position the ponytail higher than a standard mid-pony—almost near the hairline. The goal is to allow your natural curls to cascade forward.
Adjusting for Daywear
To make it look like a deliberate style rather than a protective measure, smooth your edges. Use an edge brush and a bit of cream to lay your baby hairs down perfectly. This contrast between the sleek hairline and the wild, cascading curls is the definition of “effortless chic.”
19. The Tuck-In Ponytail
This is a sophisticated, minimalist style that feels very modern. It involves taking the ends of your ponytail and tucking them back into the elastic, creating a loop.
How to Create the Loop
Gather your hair into a mid-ponytail. When pulling the hair through the elastic for the final loop, don’t pull it all the way through. Leave the ends tucked inside the elastic or pinned beneath the loop. It creates a sleek, rounded shape that looks like a simplified, inverted bun.
Why It Works
It is clean, it protects your ends from the elements, and it keeps your hair completely out of your face. It is an ideal look for a professional setting or a formal event where you want to look put-together without excessive styling.
20. Volume-Boosted Mid Pony
If your hair is on the finer side, the ponytail can sometimes look a bit limp. Adding volume is all about the “stacking” technique.
The Two-Pony Trick
Split your hair horizontally into two sections—a top half and a bottom half. Secure the top half in a ponytail. Then, secure the bottom half in a ponytail, positioning it right underneath the first one. Because the bottom ponytail is hidden by the top one, it acts as a “pillar,” giving the overall style significantly more volume and length.
Blending
Once you have the two ponytails, blend them together by wrapping a piece of hair around both elastics simultaneously. No one will know you have two ponytails, but they will definitely notice the volume.
21. Sleek Pony with Crimped Ends
Texture contrasts are very modern. Combining a super-sleek, gelled-down root with a crimped or wavy ponytail creates an interesting, textured look that stands out.
The Crimping Process
After you have your ponytail secured and the roots are sleek, use a crimping iron on the length of the ponytail. You don’t need to crimp every single strand; just doing random sections creates a beautiful, wavy, multi-dimensional texture.
Styling Tip
This style works exceptionally well with hair extensions. If you are adding a ponytail piece, crimp it before attaching it to your natural hair, so you don’t risk heat damage to your own hair.
22. The Faux-Hawk Mid Pony
If you like the idea of a mohawk but aren’t ready to break out the clippers, the faux-hawk mid-pony is your best friend. It creates a vertical line of volume along the center of the head.
Creating the Hawk
Section the center of your hair from the front hairline to the crown and secure it into small, individual puffs or ponytails. Then, gather the sides and the top sections together into one main mid-pony at the back. It creates a seamless “hawk” effect that looks intentional and edgy.
Emphasizing the Line
Use a bit of pomade on the sides to ensure they are slicked down tightly against the scalp. The tighter the sides, the more dramatic the “hawk” center will appear.
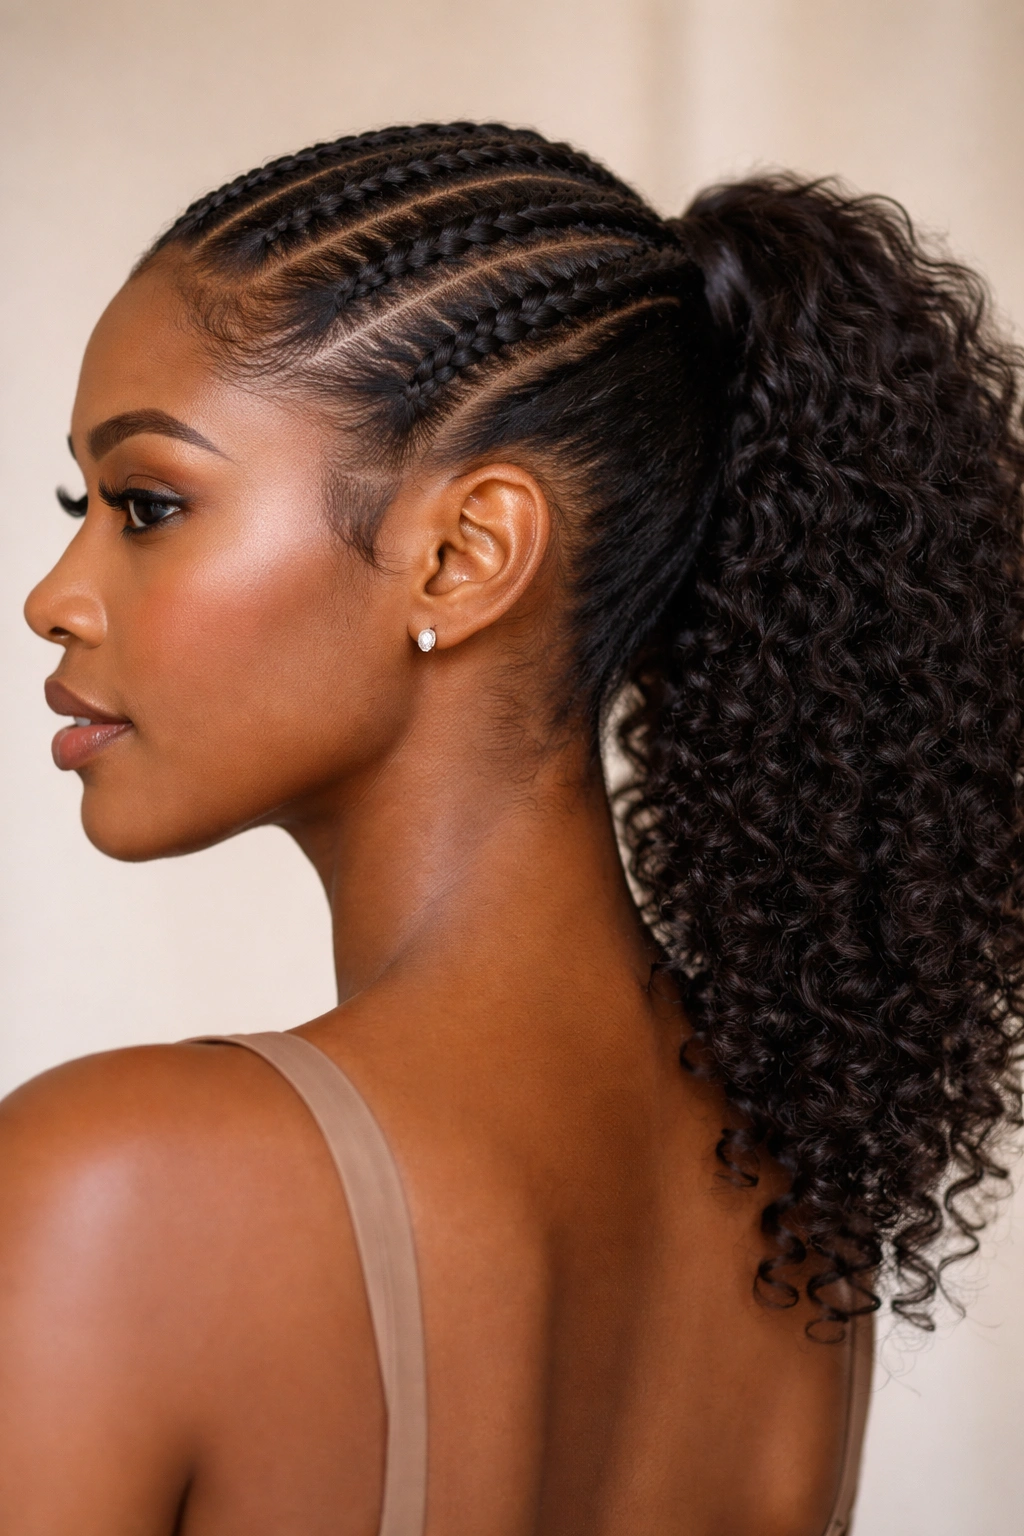
23. Cornrow-Backed Mid Pony
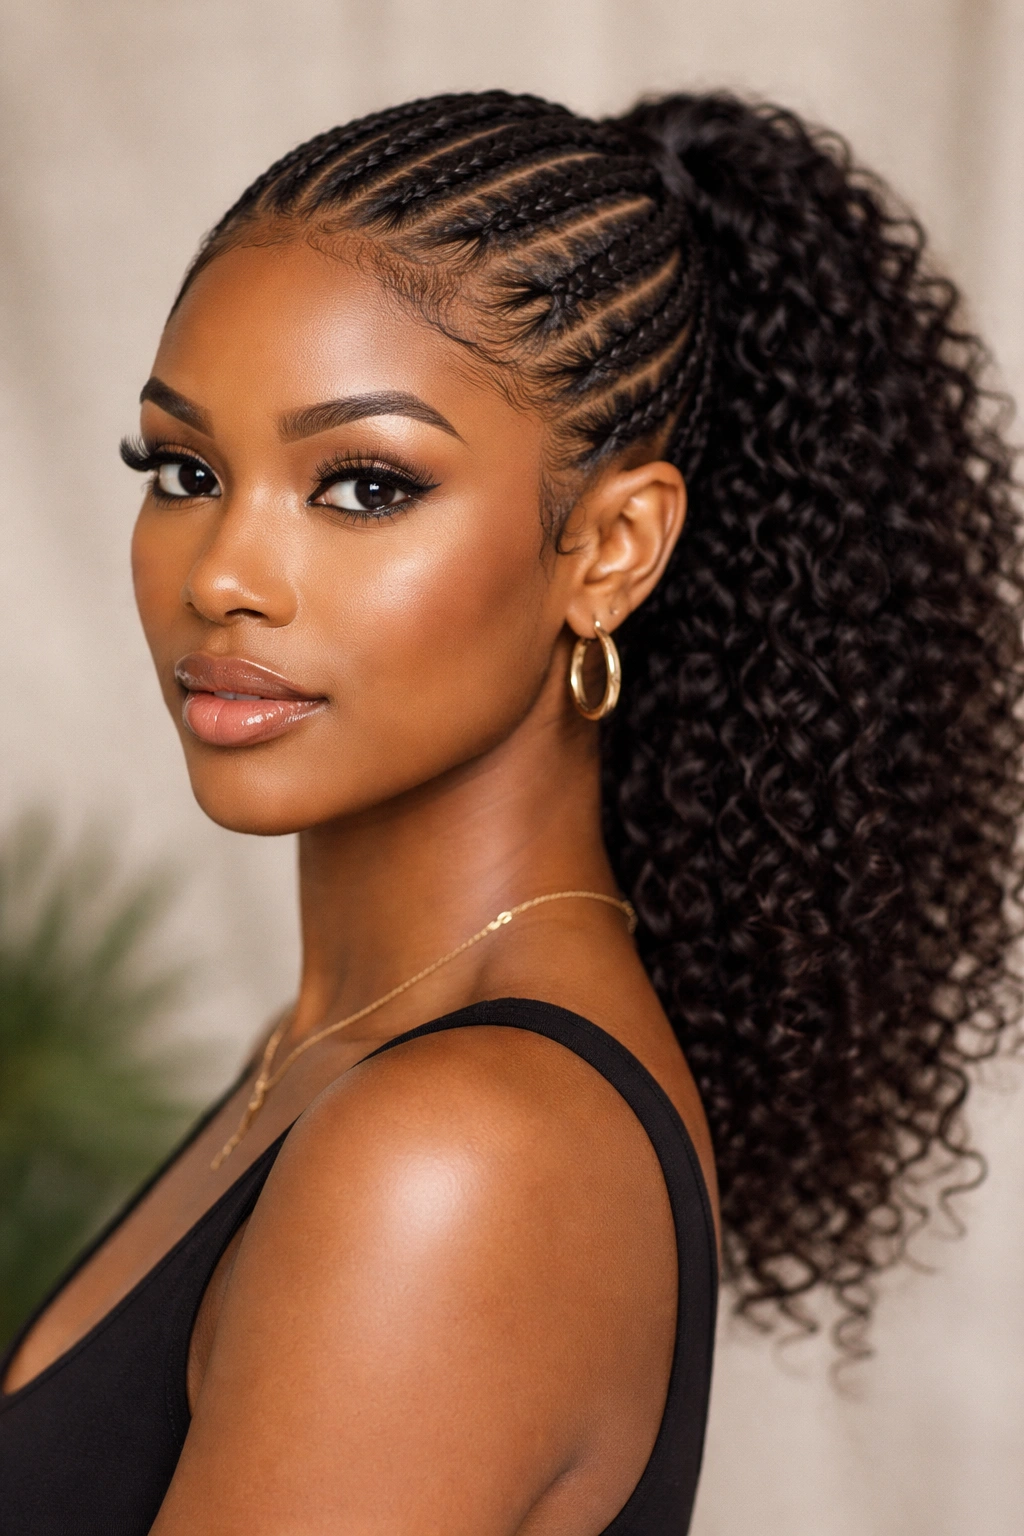
This is a classic protective style that never goes out of style. It involves cornrowing the hair from the hairline toward the crown, where they all converge into a ponytail.
The Pattern
You can do straight-back cornrows, or get creative with a “starburst” or “swirl” pattern that meets at the center. Once the braids are done, you can leave the ends loose as a curly ponytail, or braid the ponytail itself.
Maintenance
This style is incredible because it can last for weeks. Just ensure you are wrapping your head at night with a silk scarf to keep the braids frizz-free, and moisturize your scalp regularly to prevent dryness.
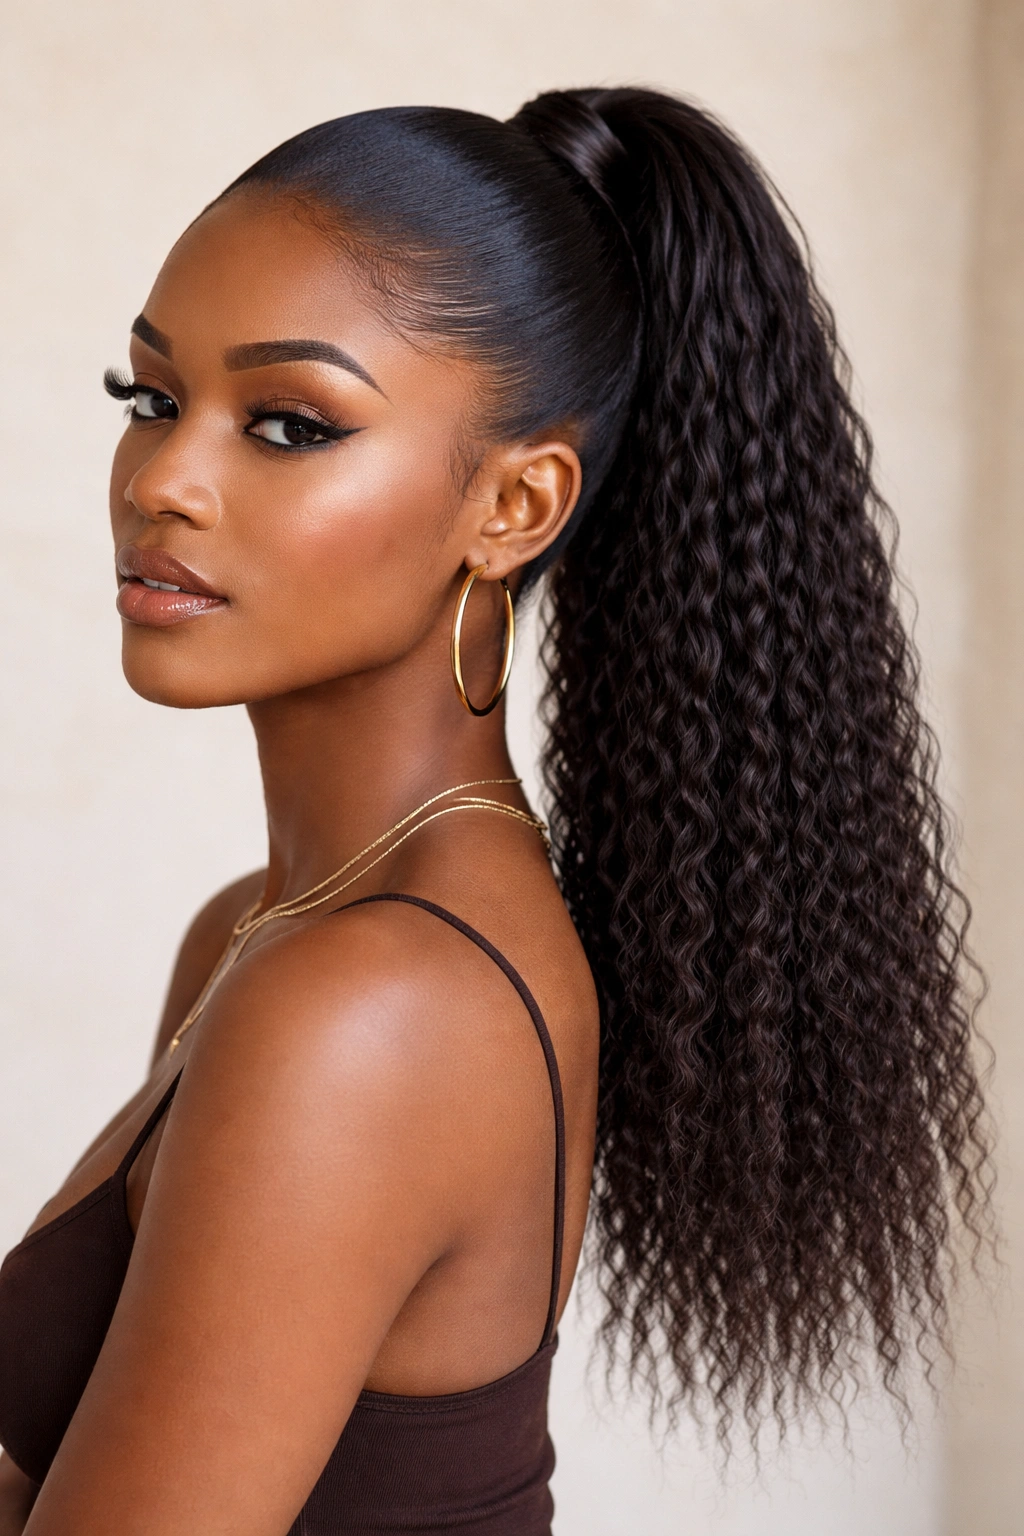
24. The High-Volume Afro Mid Pony
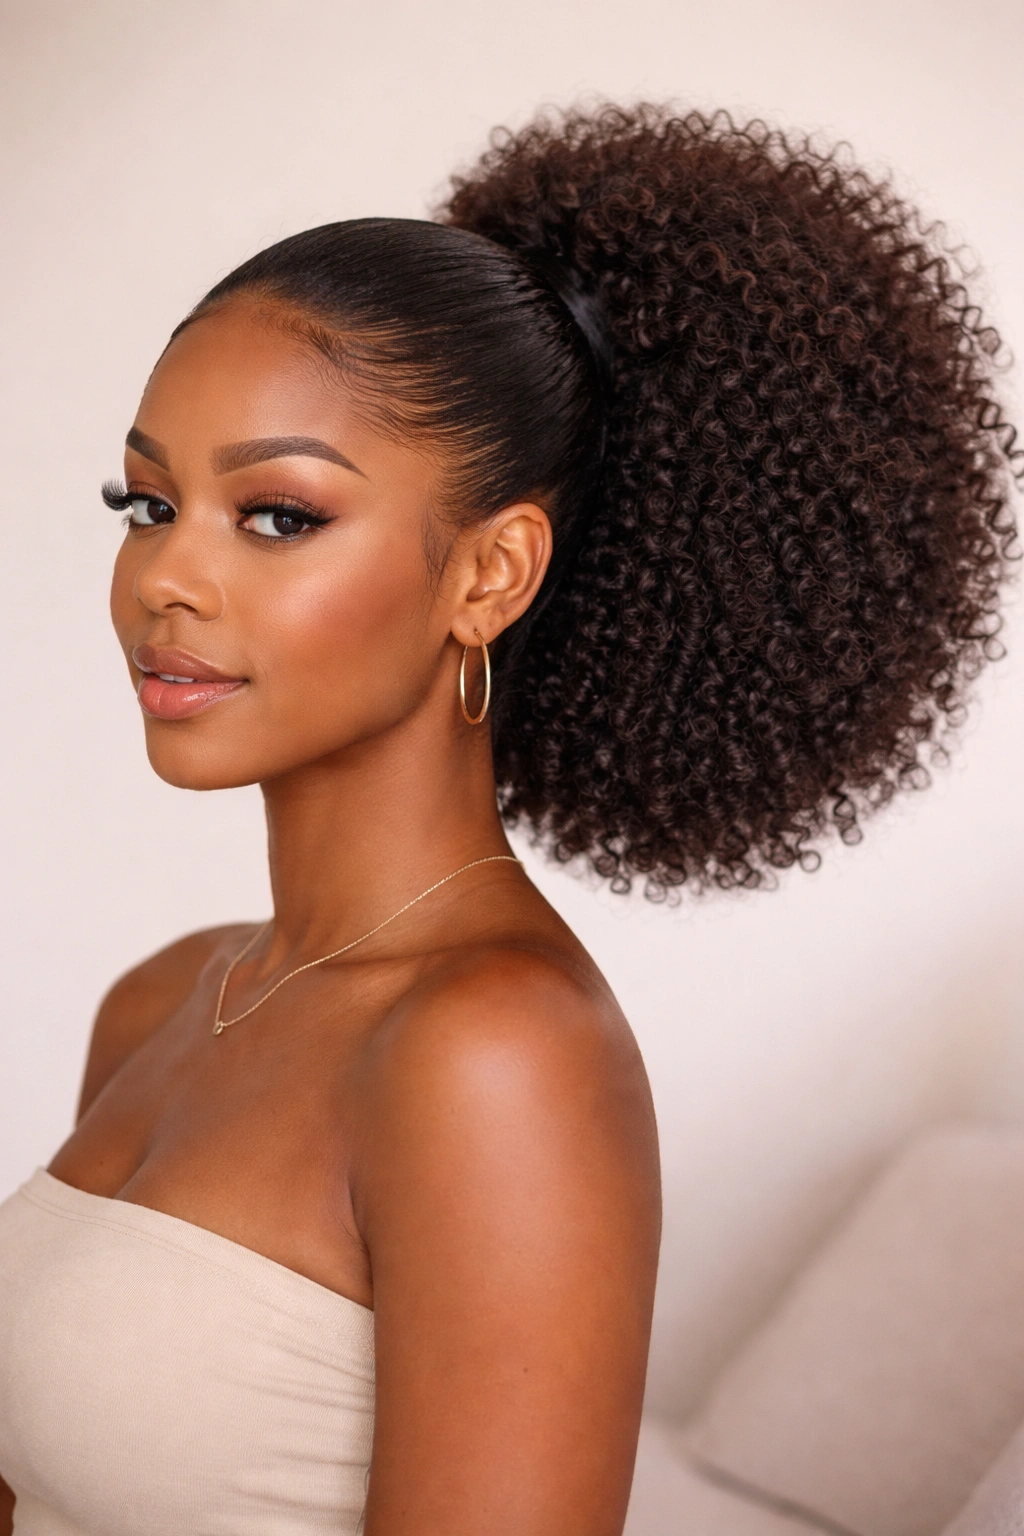
Sometimes, you just want to let the natural texture be the star. This style focuses on pulling the hair into a mid-ponytail but leaving the ponytail itself in a massive, defined Afro.
The Prep
You’ll need a lot of moisture and a good setting cream for this. Focus on defining the roots of the curls at the ponytail base so they don’t look tangled, but let the body of the Afro be loose and free.
The Shape
Use your hands to gently push the curls upward and outward. If you want a more rounded shape, you can lightly trim the ends of the ponytail to create a uniform, circular silhouette.
25. The Halo Braid Mid Pony
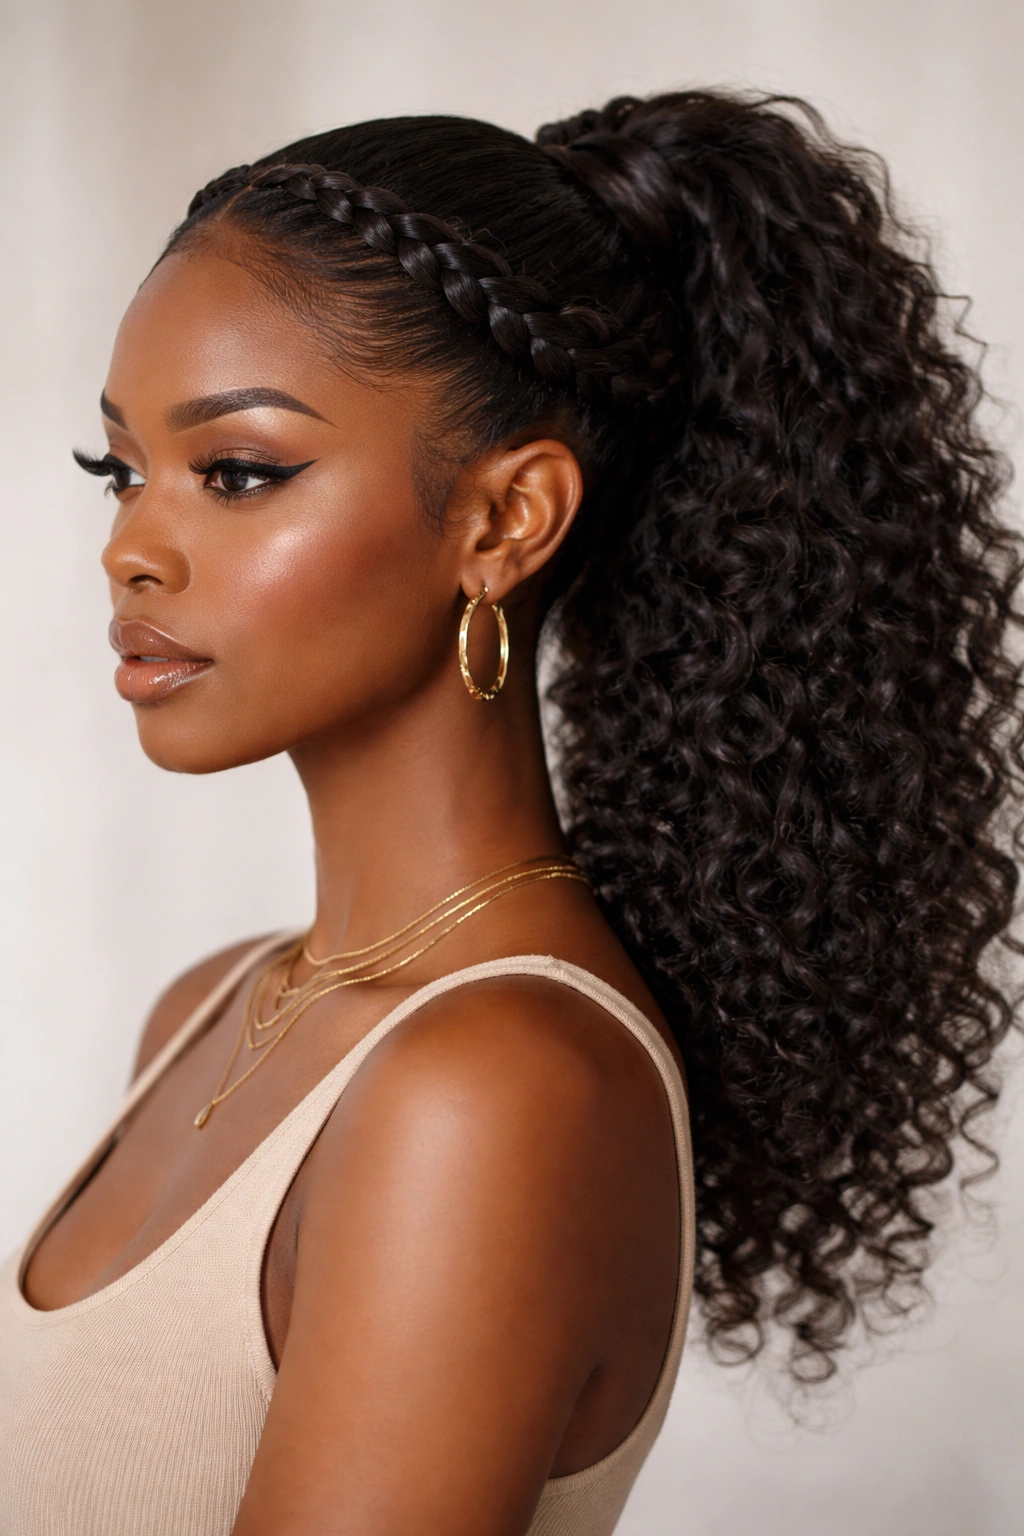
A halo braid around the base of the ponytail is the ultimate sophisticated finish. It looks like a crown, making the style feel regal and deliberate.
The Braid
Take a section of hair from the nape or the side, braid it, and wrap it around the ponytail base—not just once, but twice if you have the length. It creates a thick, braid-like collar that looks like a piece of custom jewelry.
Styling
This style is best when the braids are very neat. Use a little bit of edge control on the braid itself to lay down any flyaways, so the braid looks smooth and uniform. It’s a bit more time-consuming, but the result is a style that looks like it took hours, even if you’ve mastered the technique to do it in ten minutes.
Essential Care for Ponytail Longevity
We often think about the ponytail as a one-day style, but with the right care, you can make these looks last far longer. The most common mistake people make is not considering the “bedtime routine.” When you go to sleep, your pillowcase is the enemy of your smooth edges. If you have a sleek ponytail style, sleeping on a cotton pillowcase will cause frizz and breakage overnight. You absolutely must invest in a silk or satin bonnet, or at the very least, a silk pillowcase. It sounds basic, but the difference in how your hair looks the next morning is massive.
Another point to consider is the health of your edges. We love a sleek, snatched look, but the tension is real. If you find yourself doing high-tension, gelled-down styles every single day, you are going to see traction alopecia eventually. You need to rotate your styles. Give your hairline a break for at least two days a week by choosing styles that don’t require heavy tension or gel. If you feel like your hair needs a boost, try a light scalp oil massage in the evenings, focusing on the perimeter of your hairline to keep the skin hydrated and the follicles healthy.
Finally, do not underestimate the power of your product rotation. A gel that works in the winter when the air is dry might not hold up during the humid summer months. Have two “teams” of products: one for high-humidity days that offers maximum hold and moisture resistance, and one for dry, cooler days that offers a softer, more flexible hold. Paying attention to these small environmental factors is how you go from struggling to get a ponytail to look right, to having it stay perfect from morning until night.