Messy braided ponytails have a funny kind of charm. They look easy, but not careless. That’s the sweet spot most ponytail hairstyles are trying to hit and missing by a mile.
The braid gives the style shape. The loosened sections, the imperfect part, the little bit of flyaway texture at the crown—that’s what keeps it from looking too fixed or too sweet. A clean braid can feel strict. A messy braid with a ponytail attached feels alive.
The trick is not making it messy everywhere. You want one strong line in the hair, then a few softer pieces around it. That balance matters more than perfect sectioning, and it matters even more if your hair is layered, silky, thick, or stubborn about holding shape.
Some of these styles need only a clear elastic and five minutes. Others look better after a quick pass with texturizing spray or a bit of light backcombing near the crown. Either way, the goal is the same: hair that looks pulled together without looking pinned down.
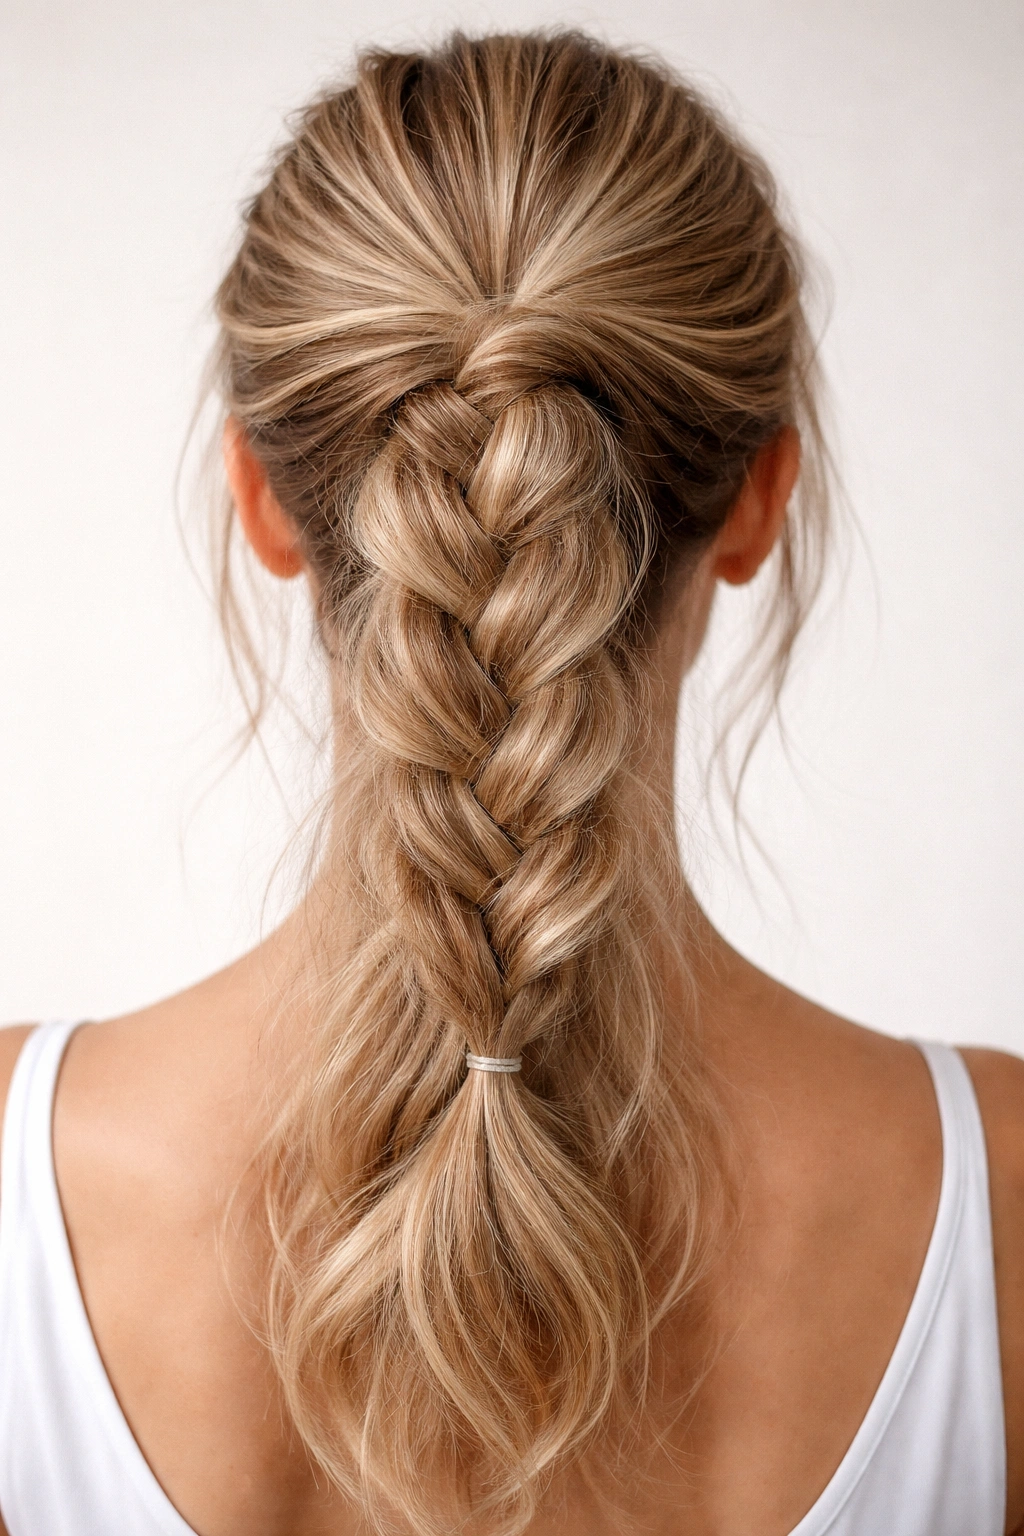
1. Loose French-Braid Ponytail
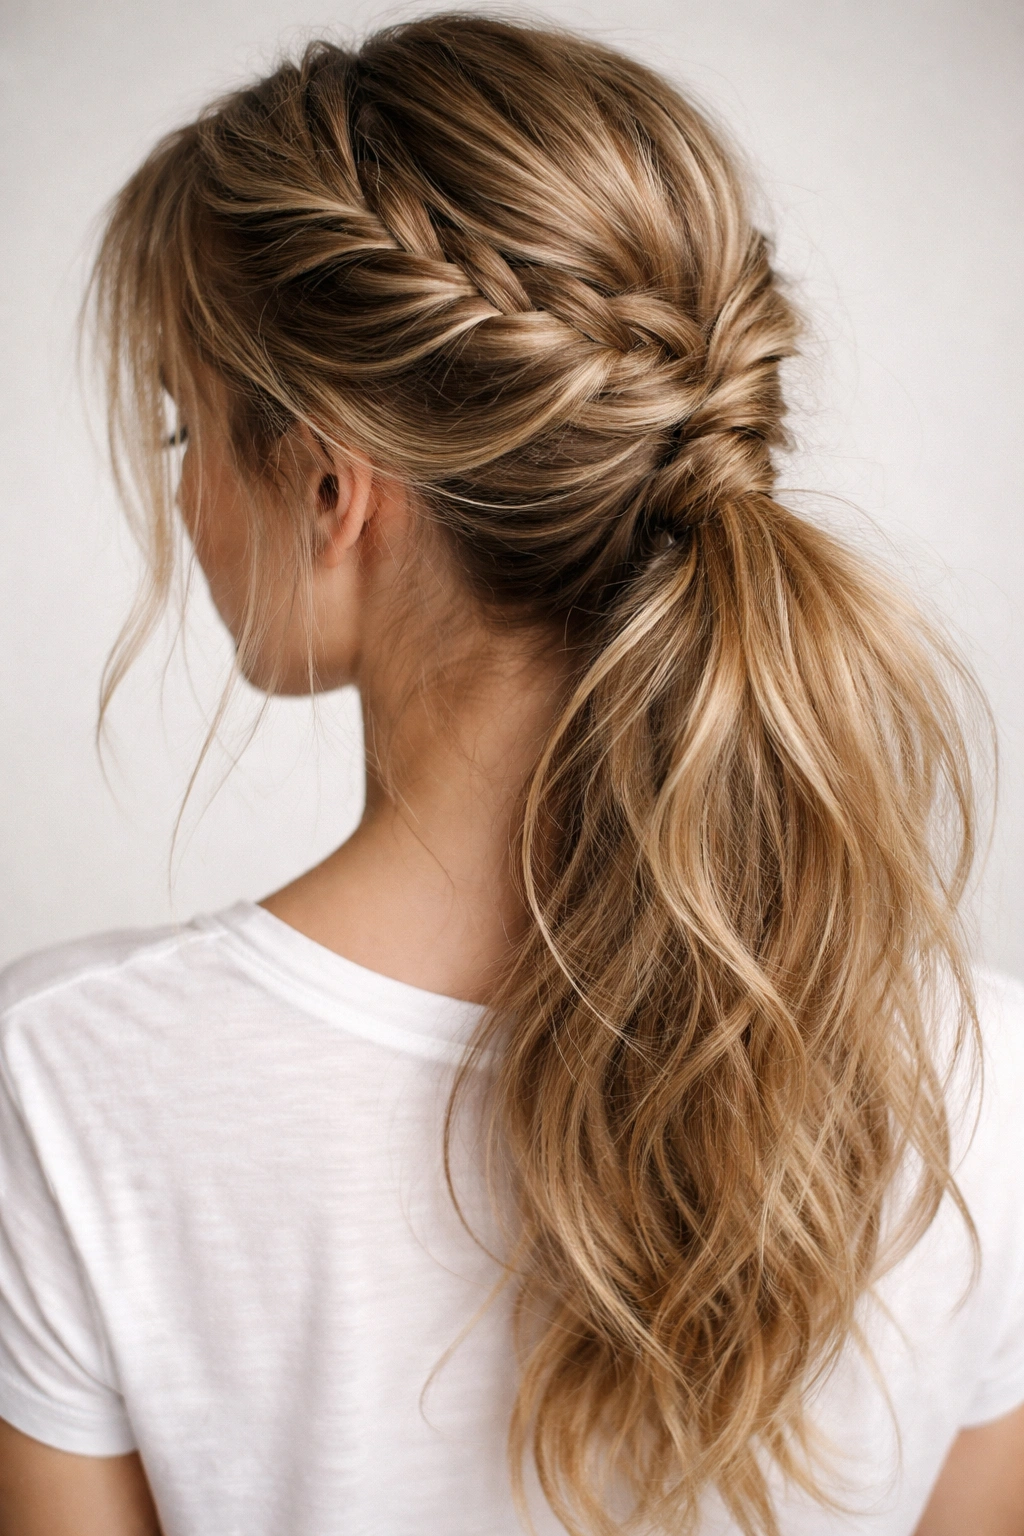
A loose French-braid ponytail is the one I reach for when hair needs structure but not stiffness. Start at the crown with 1-inch sections, braid straight back, and stop once you hit the point where you want the ponytail to sit. The upper half stays controlled. The rest gets to move.
Why It Stays Soft
- Mist the roots with texturizing spray before you start.
- Keep the first three braid passes snug, then relax your grip as you move down.
- Secure the ponytail with a 1-inch elastic and wrap a thin strand around it.
Tiny fix: tug the braid loops outward with your thumbs, not your fingertips. Fingertips pull too hard and leave gaps you do not want.
This is one of those braided ponytail hairstyles that looks more finished than it really is. If your layers tend to pop out, a light mist of flexible hairspray and a 30-second wait before pulling the braid apart makes a noticeable difference.
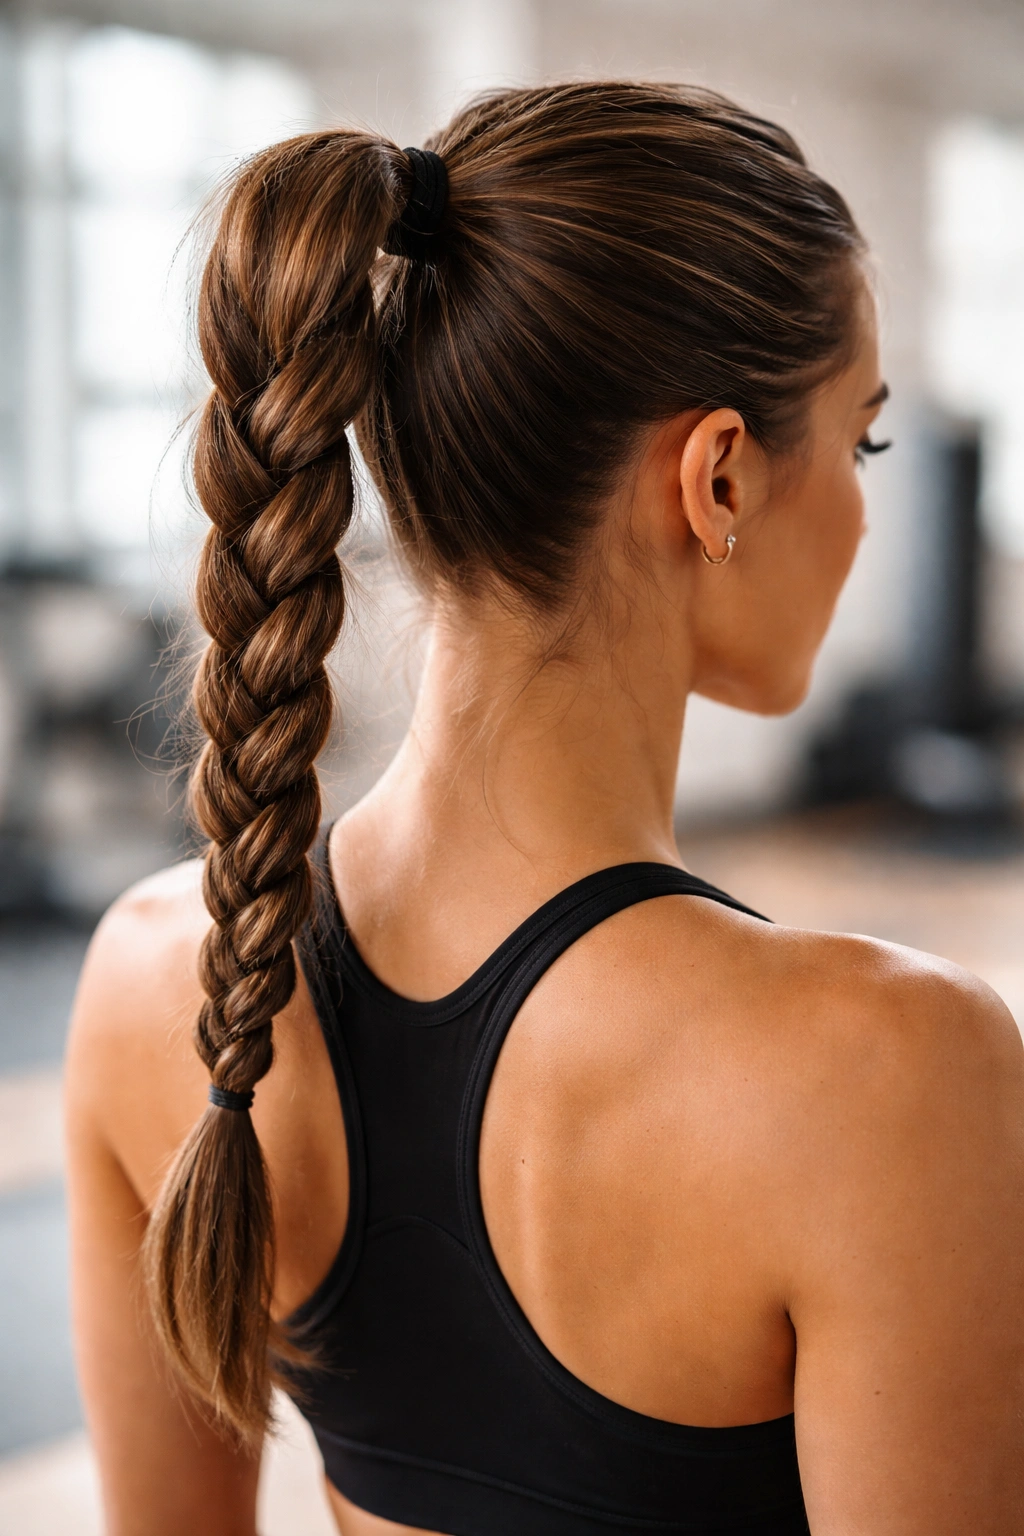
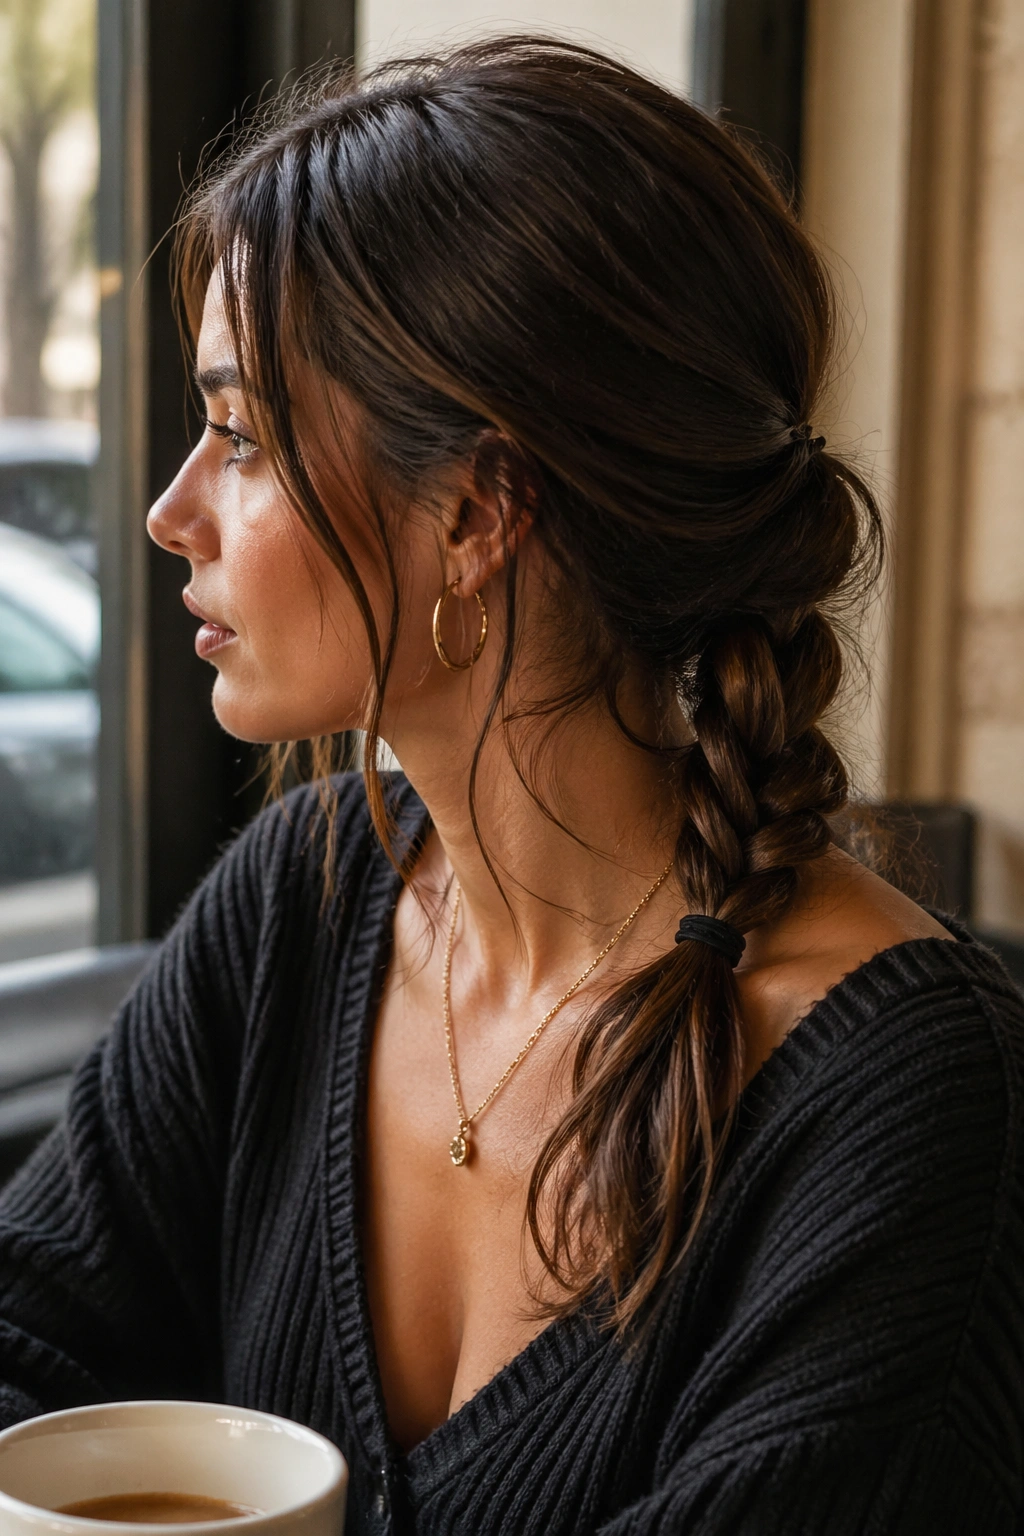
2. Side Rope-Braid Ponytail
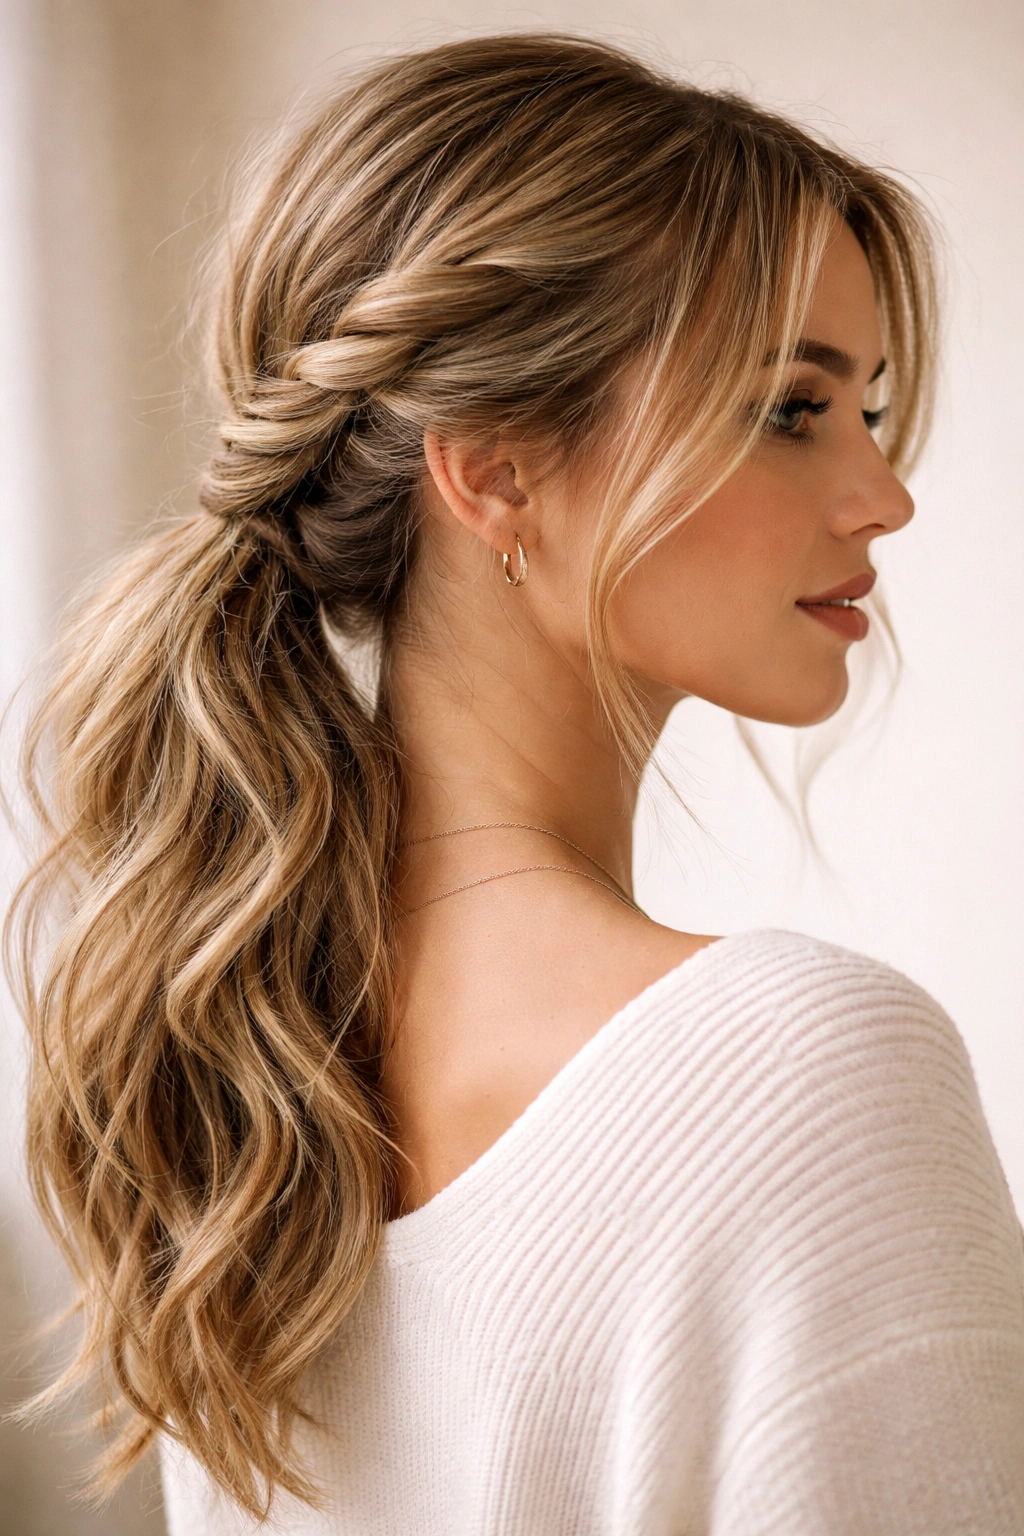
A side rope-braid ponytail looks richer than a basic low ponytail because the twist creates a thicker line across the head. It’s also fast. Split a front section into two strands, twist both clockwise, then wrap them counterclockwise around each other until you reach the nape.
The best version sits low and a little off-center. That small shift keeps the style from feeling too formal. Leave the ends a bit rough instead of curling them tightly, and the whole thing reads relaxed without sliding into sloppy.
Use it when your hair feels flat at the roots and you want more shape without a full braid. A 2-inch side part and a dab of smoothing cream at the hairline are enough. Seriously. The style does most of the work on its own.
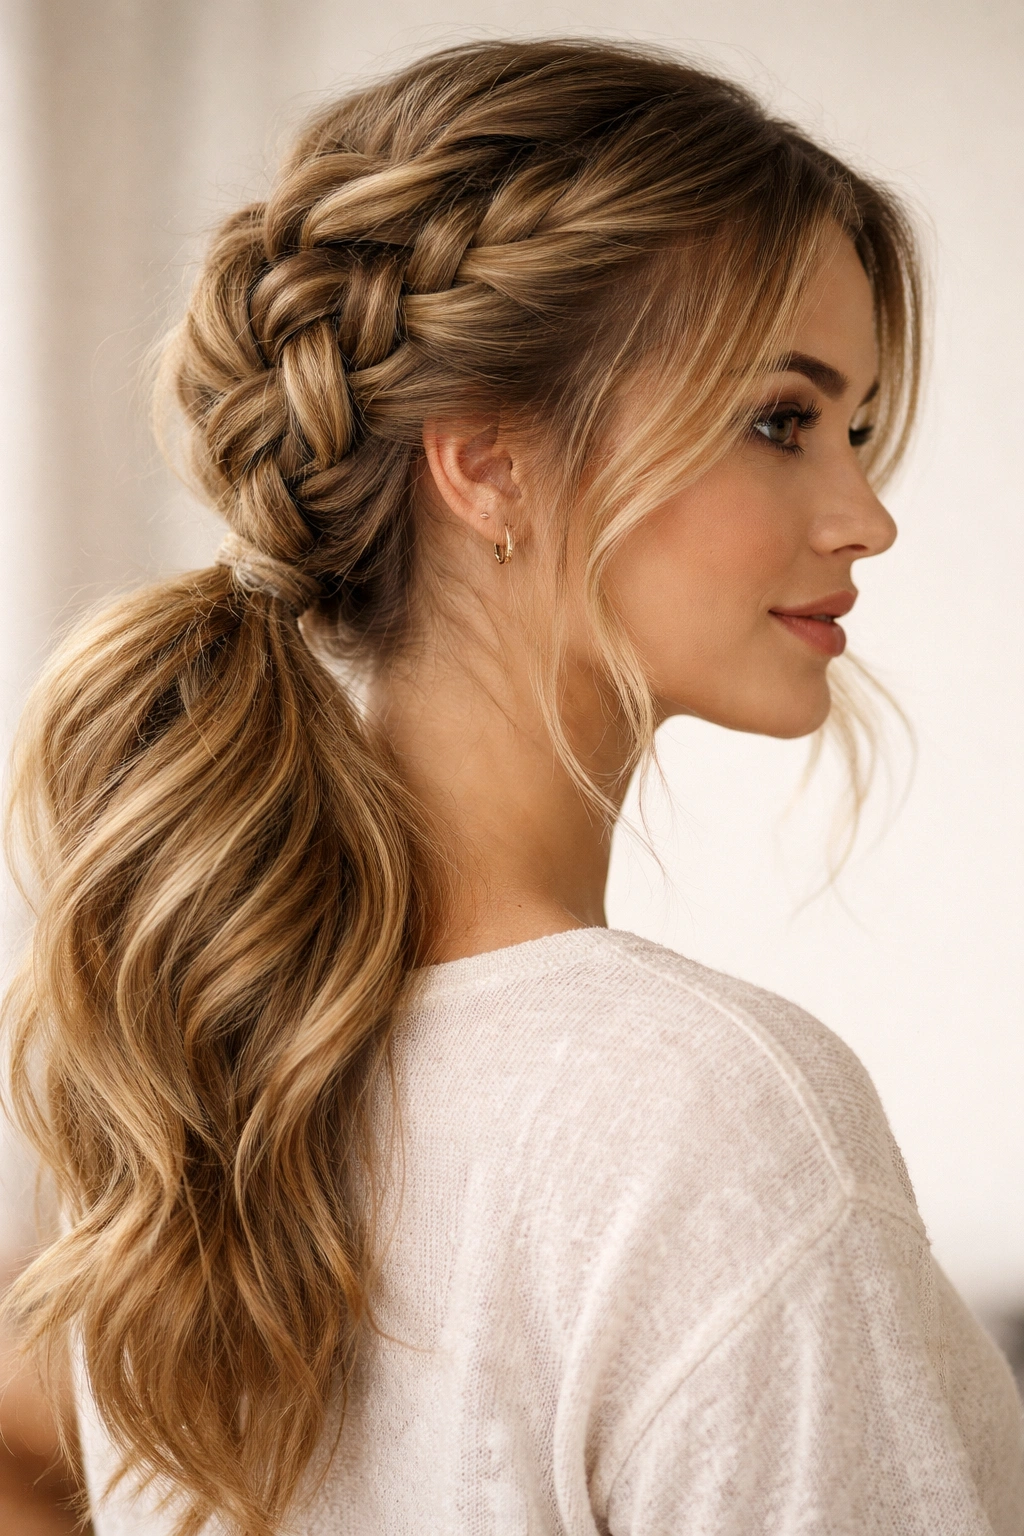
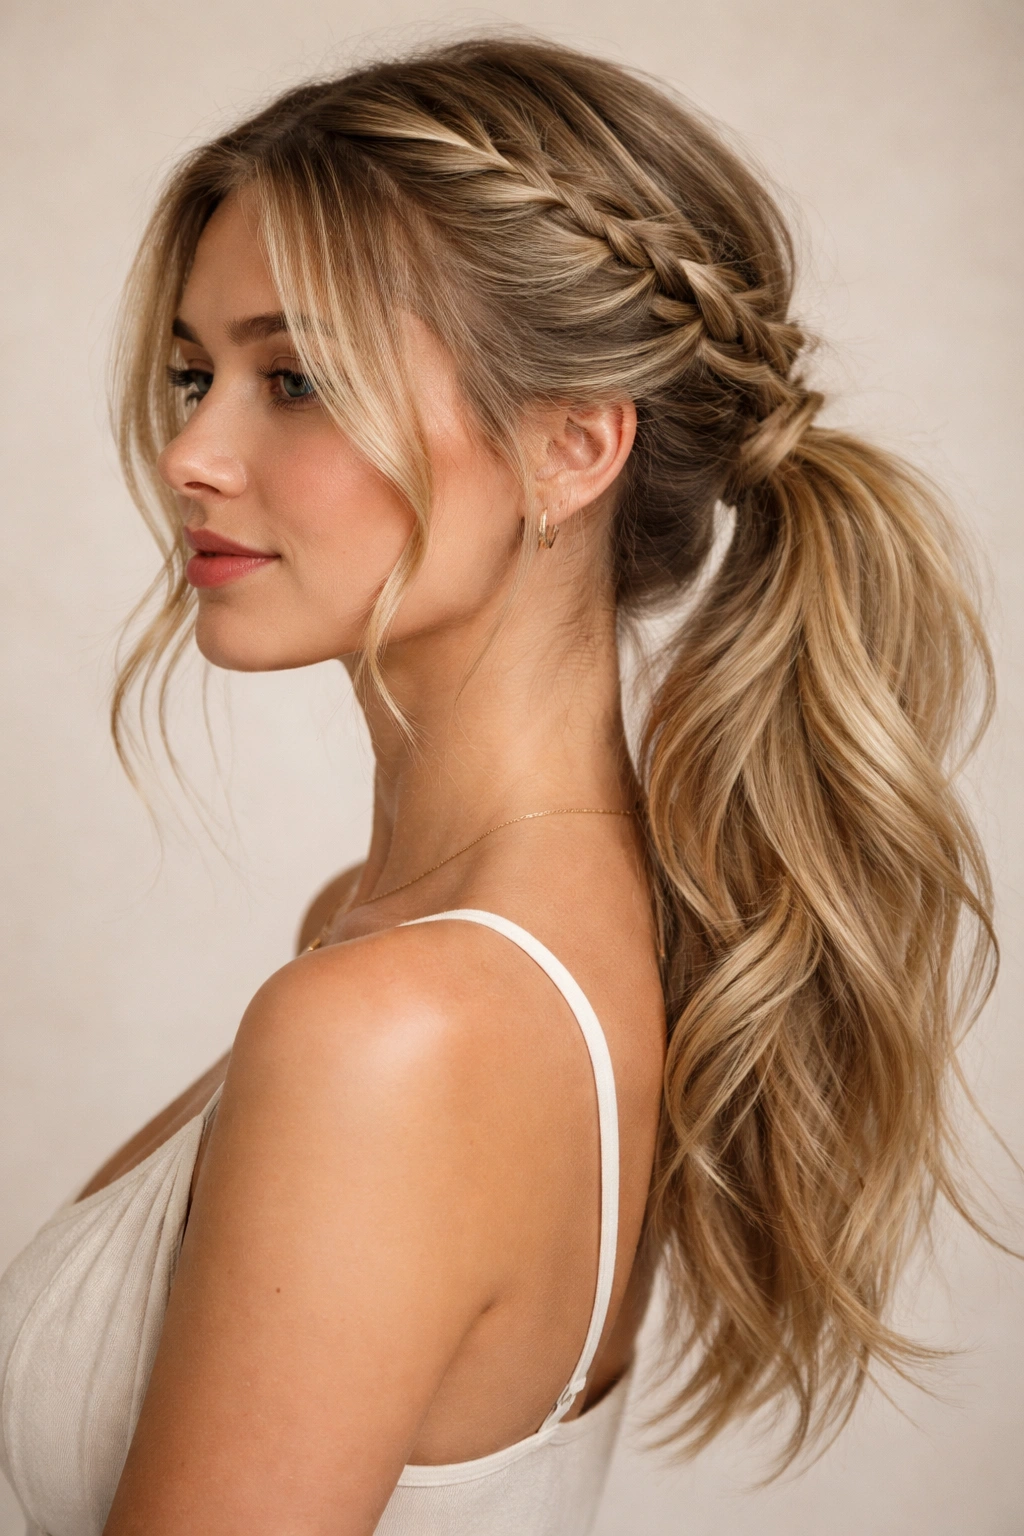
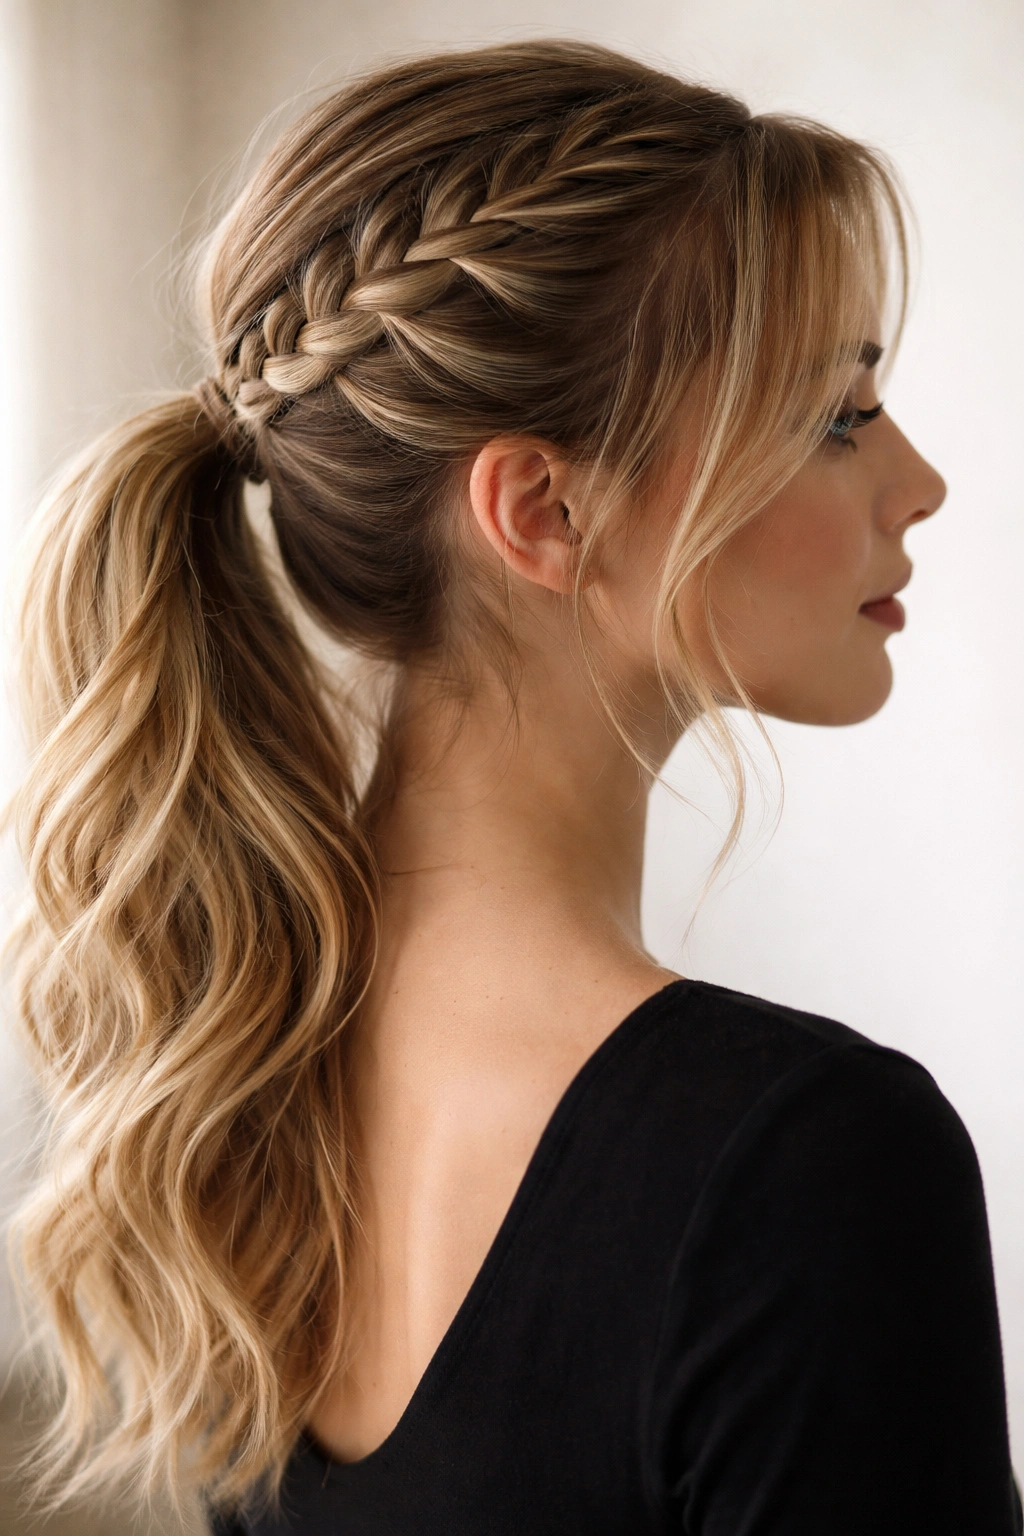
3. Crown Braid Into a Low Ponytail
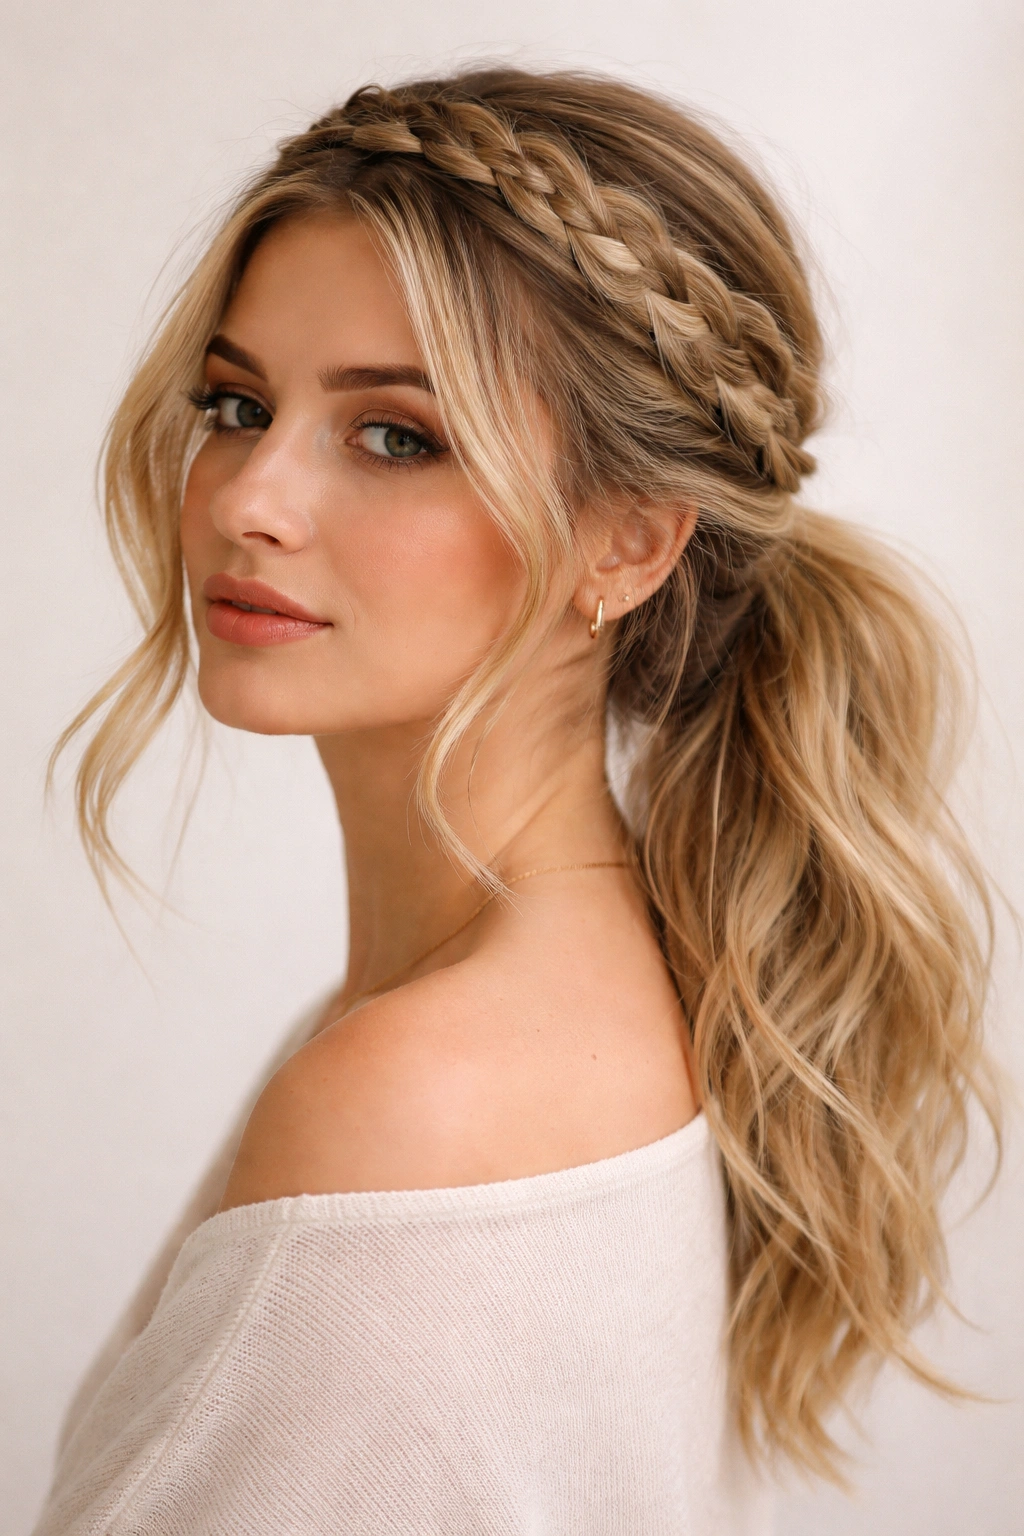
Why does a crown braid into a low ponytail look so polished even when the braid is a little uneven? Because the braid acts like a built-in headband. It frames the face, controls the top section, and leaves the ponytail free to stay soft.
How to Wear It
Start the braid just behind one temple and follow the hairline around the crown. Keep the braid close to the scalp, but not tight enough to flatten everything. Stop near the opposite ear, then gather the rest into a low ponytail at the nape.
A few loose pieces around the ears help a lot. One or two wisps is enough. If you pull out too many, the braid gets lost and the style loses its shape. Add a small pin or two under the braid if your hair is slippery, then let the ponytail fall naturally. No need to overwork it.
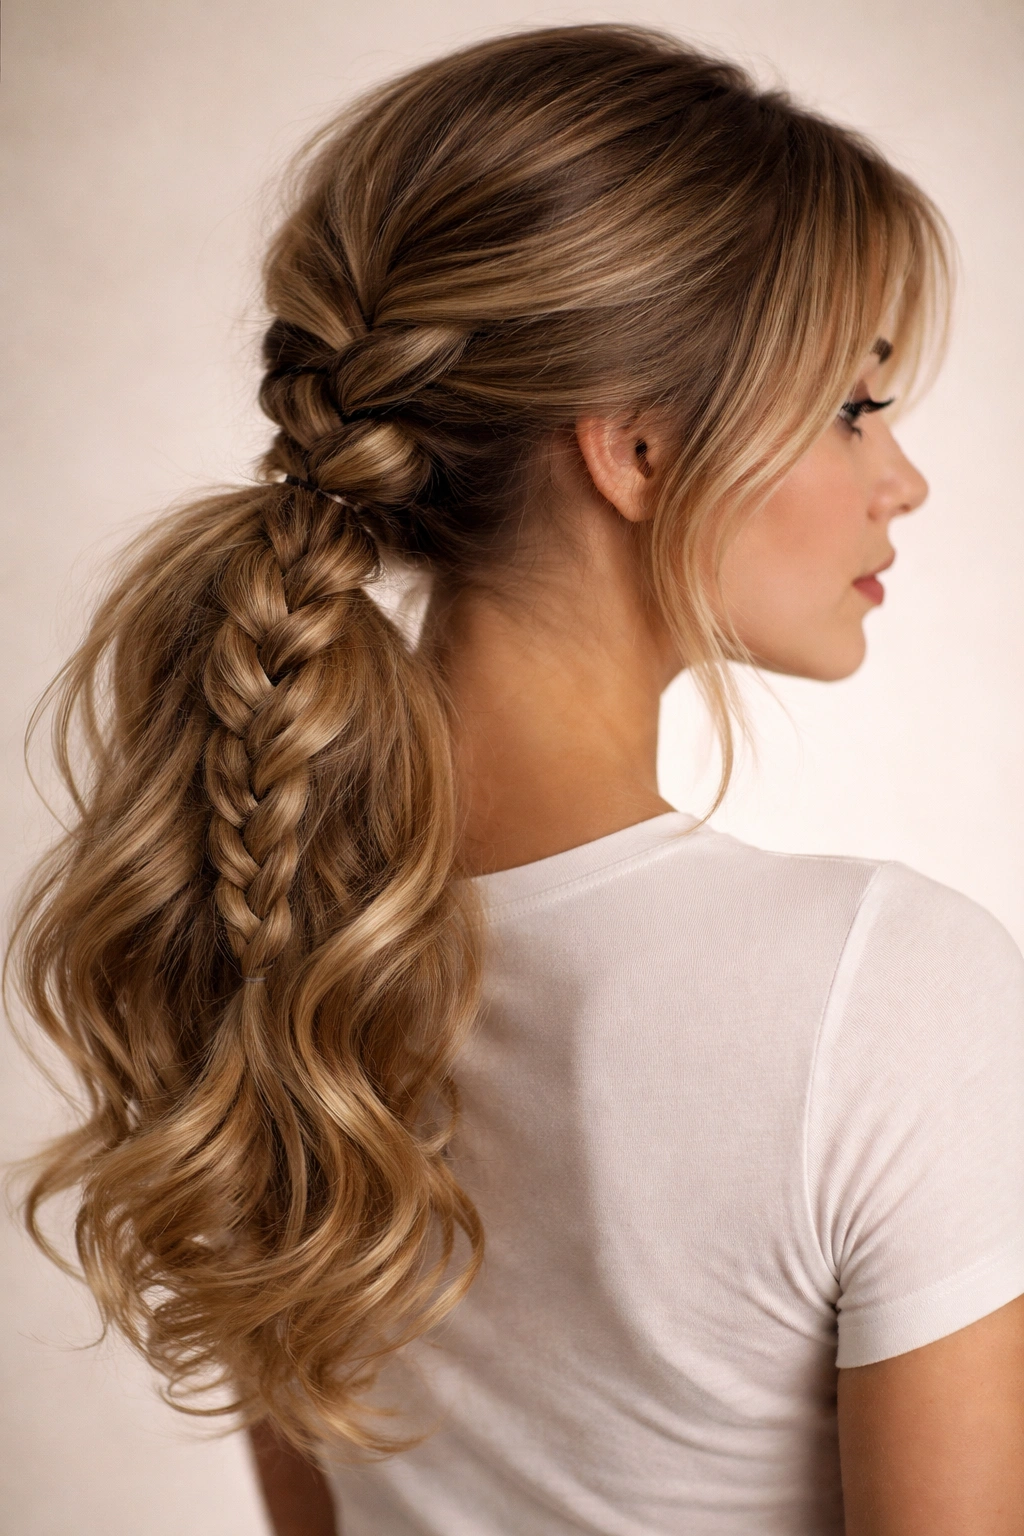
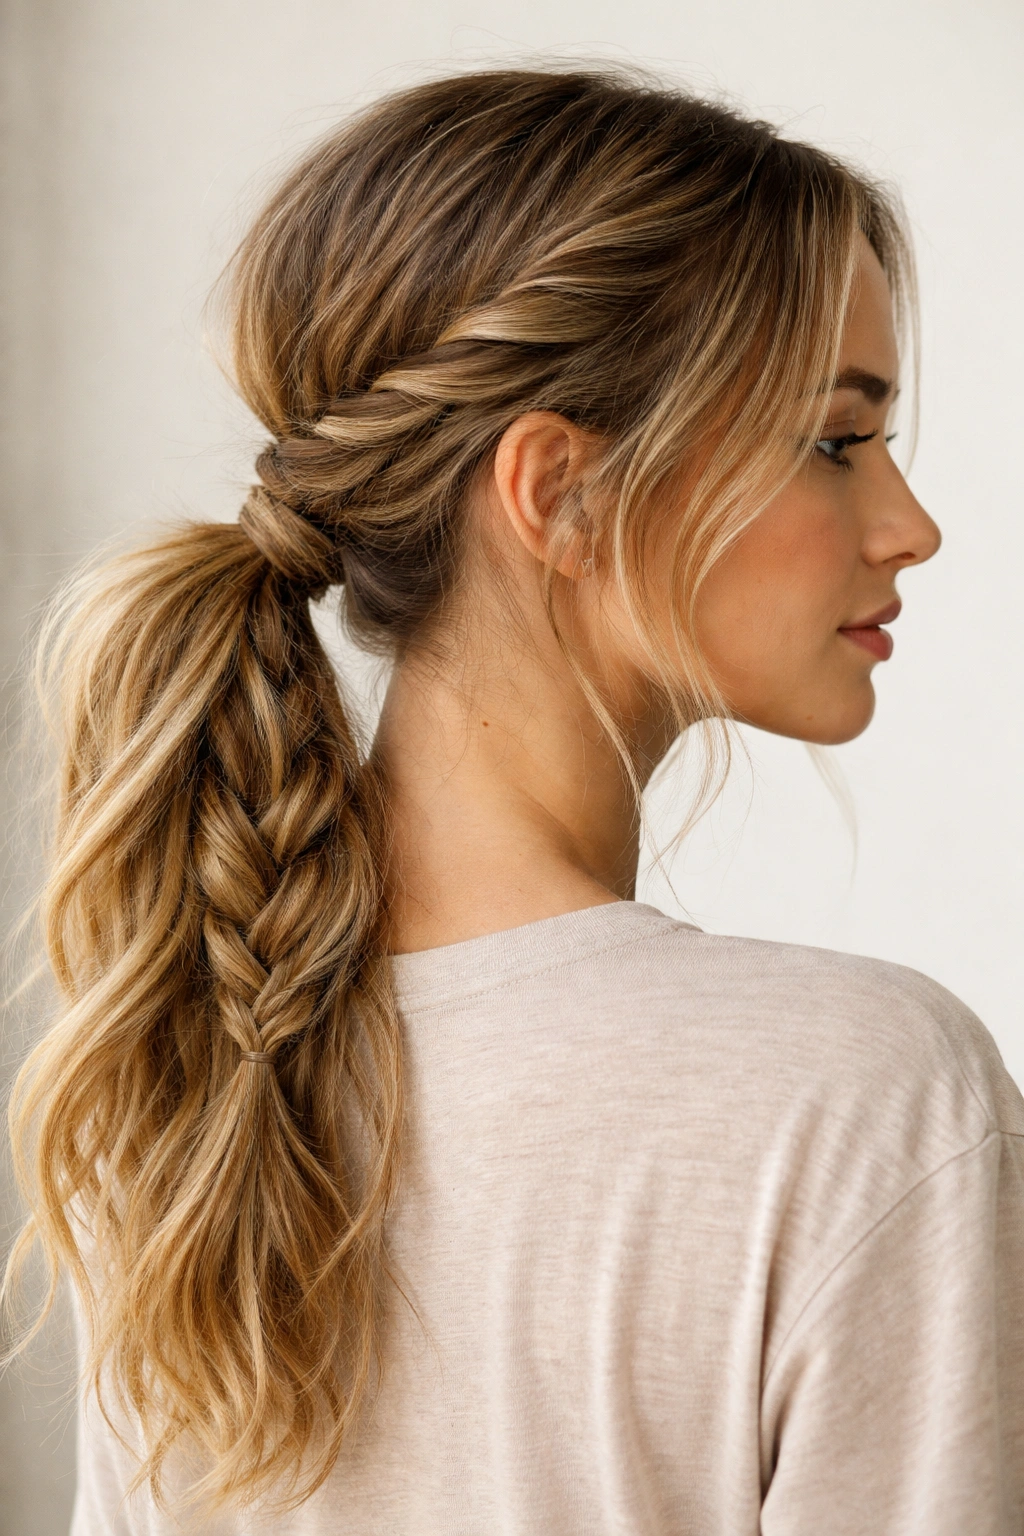
4. Fishtail Ponytail With Soft Ends
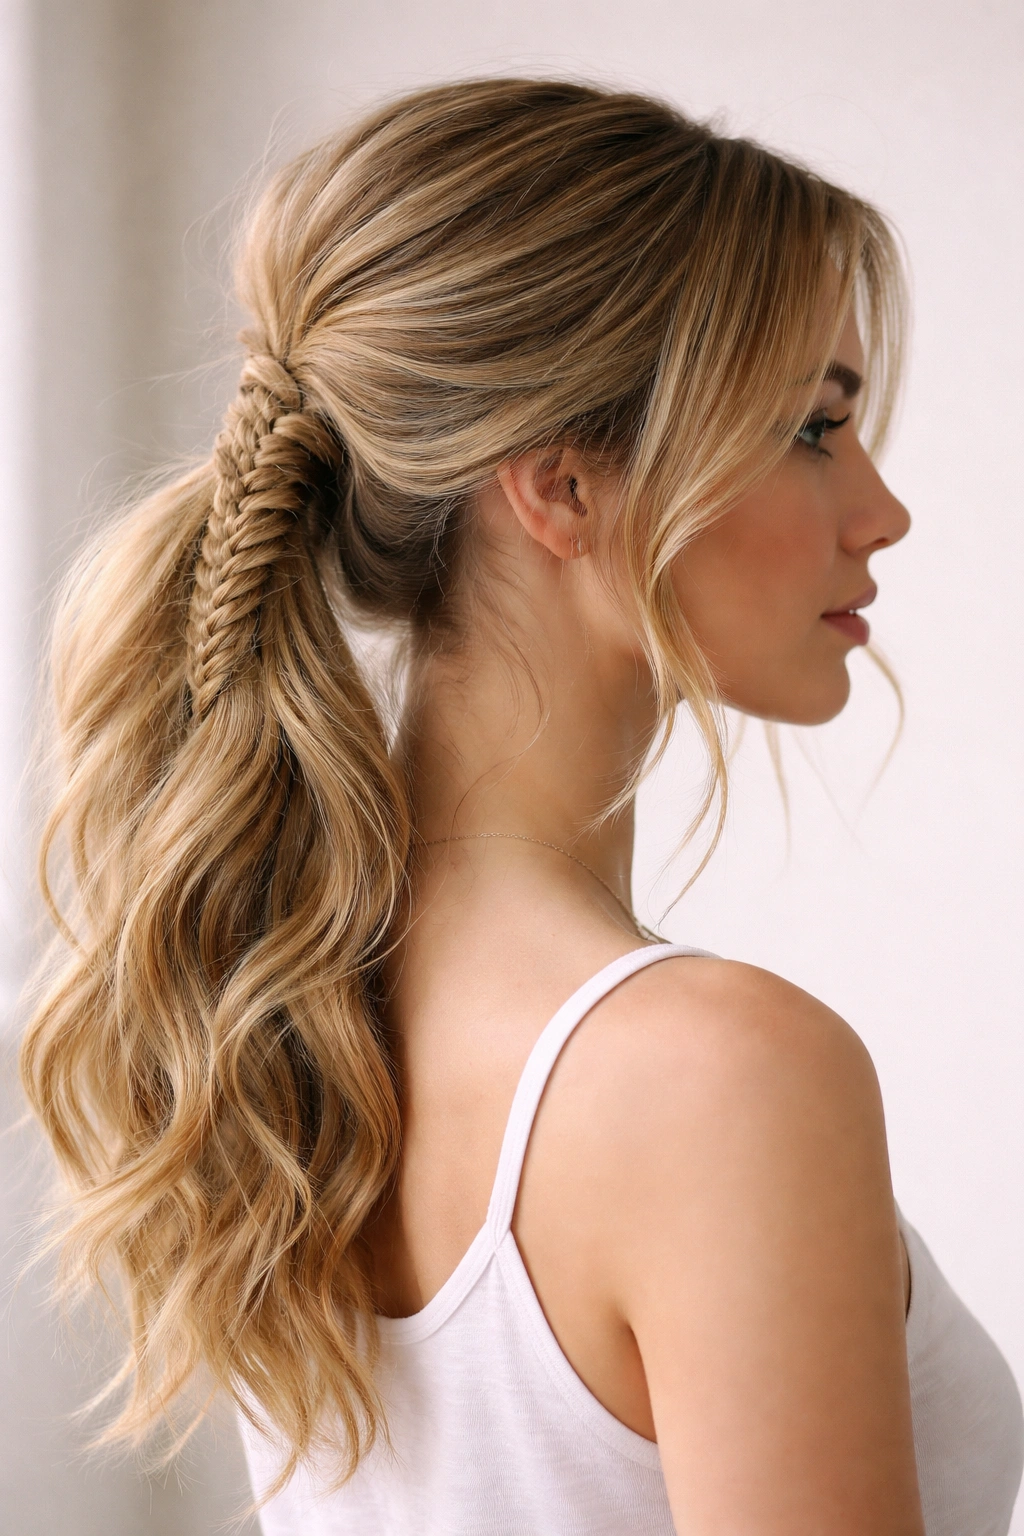
If a regular three-strand braid feels too plain, a fishtail ponytail gives you more texture without more fuss. It’s especially good on thicker hair, where the woven pattern has room to show. Start the fishtail about halfway down the head, then gather the rest into a ponytail and leave the ends loose or lightly curled.
A fishtail looks best when the sections are small and a little uneven. That is the point. Keep each grab about the width of a pencil, not a chunk, and pull the outer edges of the braid apart after tying it off. The braid will widen fast.
Quick read:
- Best on second-day hair.
- Works with 1-inch curling iron bends at the ends.
- Needs a clear elastic that disappears into the braid.
One blunt truth: if you try to make the fishtail perfect, it can look fussy. Let it breathe.
5. Bubble-Braid Ponytail
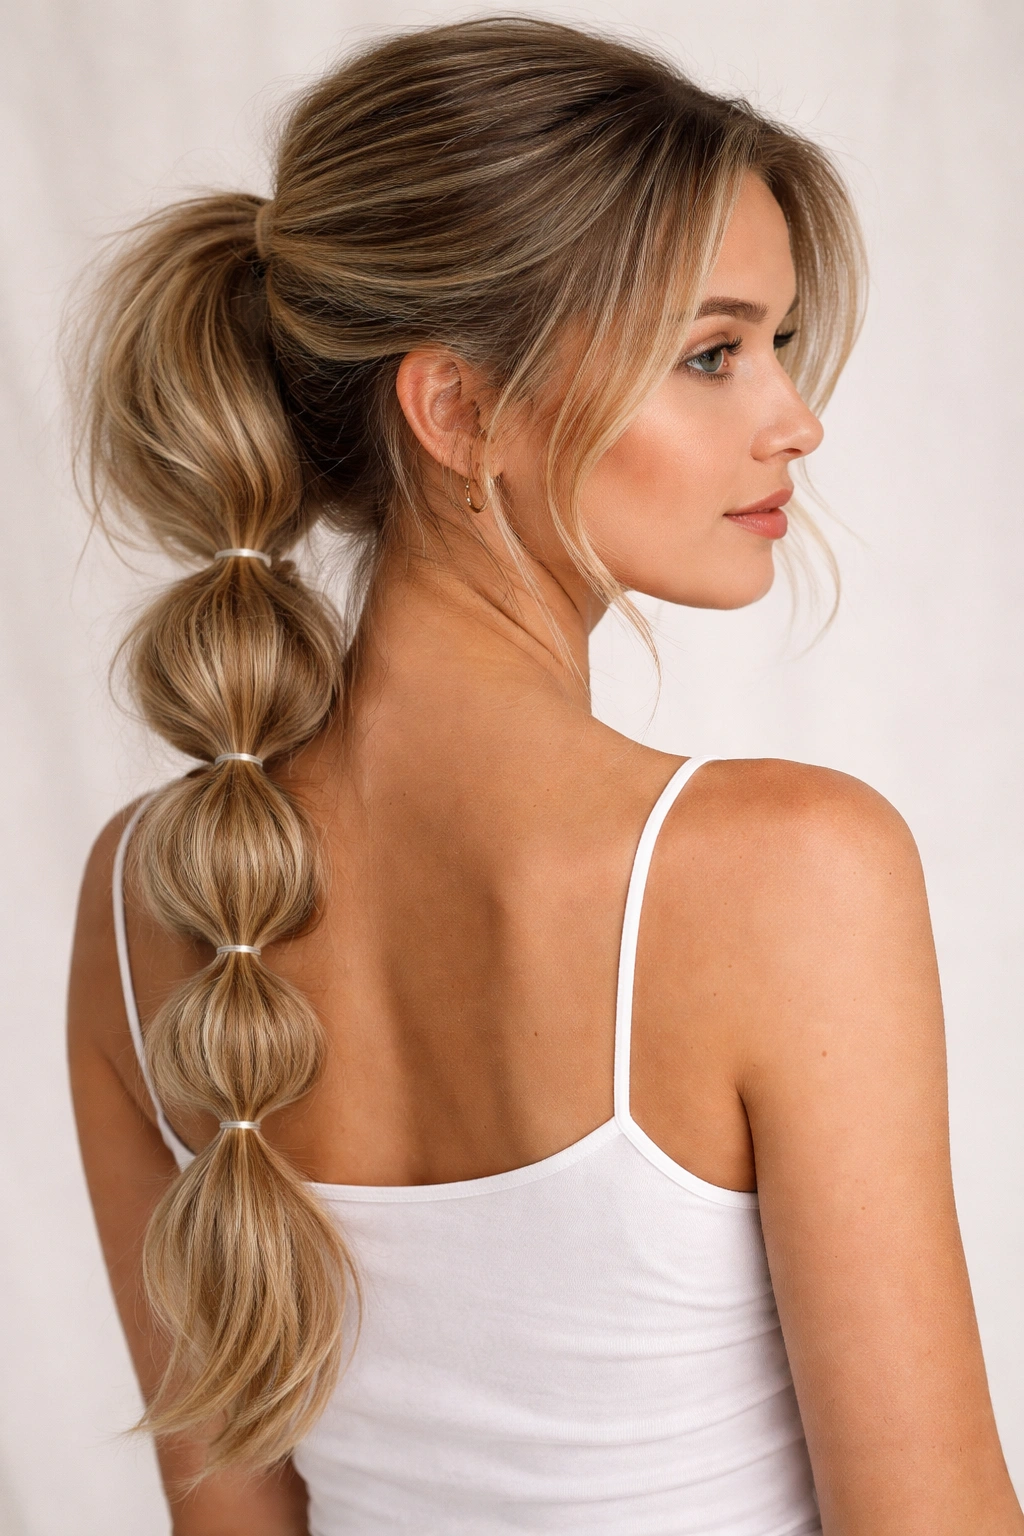
A bubble-braid ponytail looks playful, but it can still read neat if you control the spacing. Tie the ponytail first, then add small elastics every 2 to 3 inches down the length. Gently pull each section outward until it puffs into a rounded bubble.
The best part is that the bubbles do not need to match exactly. Slightly uneven sections make the style look softer and less rigid. If you want more grip, dust the hair with a little dry shampoo before you start. If your hair is very long, use four or five elastics so the bubbles stay visible all the way down.
This style is useful when your hair is clean but too slippery for a regular braid to hold. It keeps the length contained, and it looks deliberate even when the crown is a bit undone.
6. Dutch Braid Mohawk Ponytail
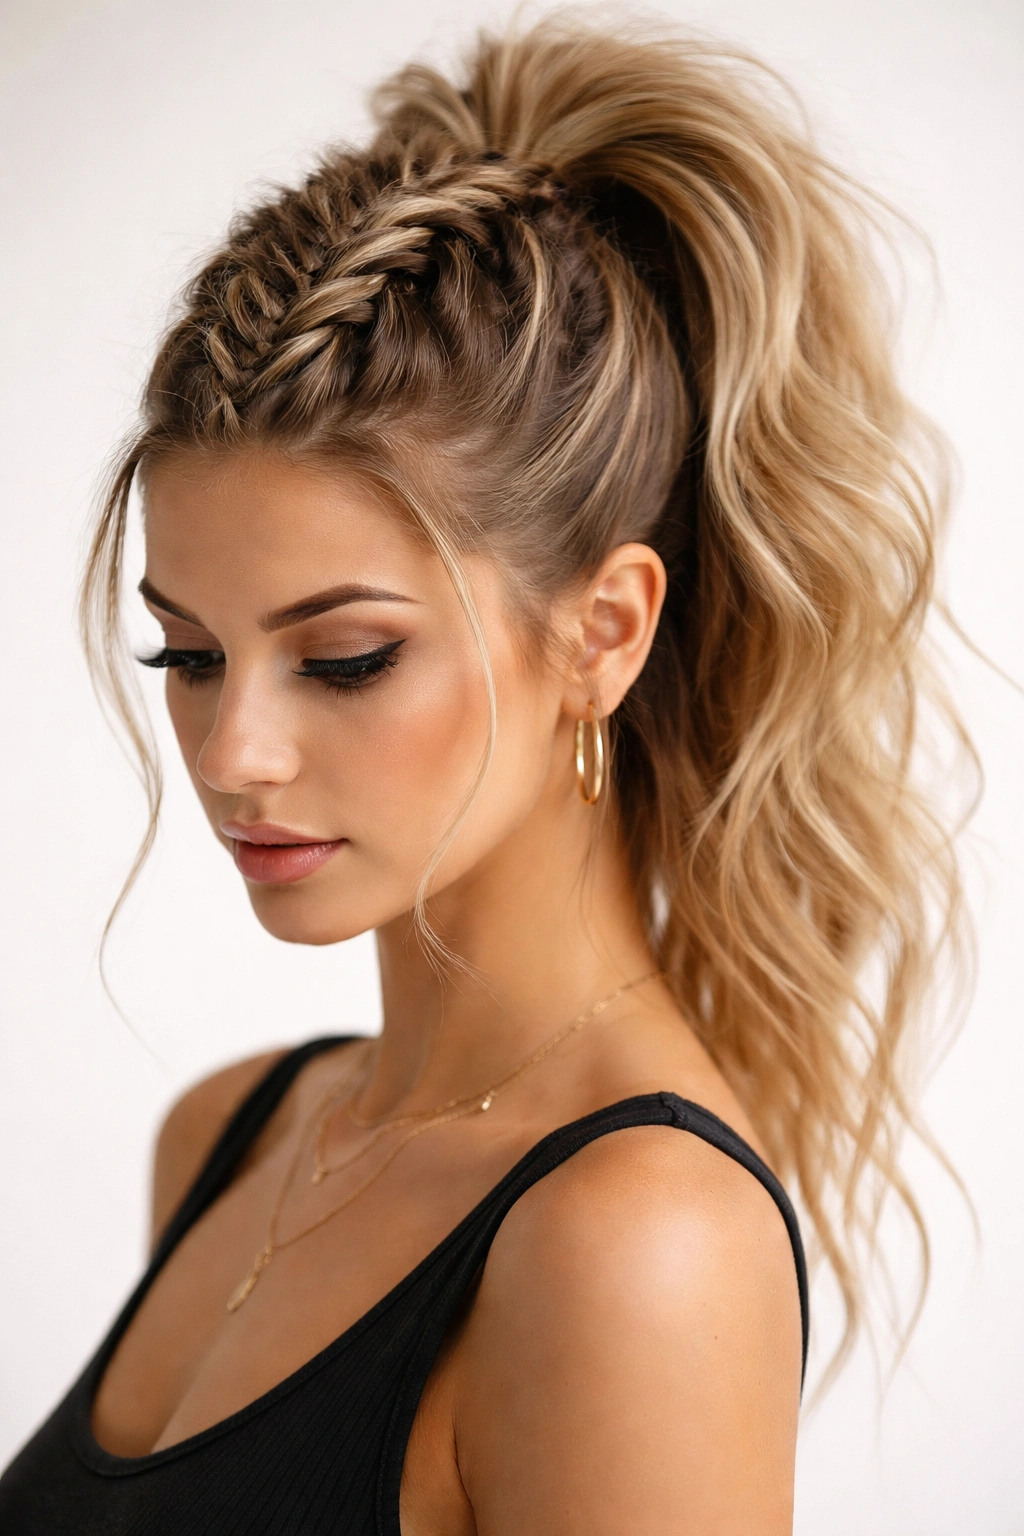
Unlike a French braid, a Dutch braid sits on top of the hair, which gives a Dutch braid mohawk ponytail a sharper outline. That raised shape is what makes it look bold. The braid runs down the center of the head, then ends in a high ponytail that can be left smooth or roughened up by hand.
This style is best when you want the top of the head to have height. Thick hair handles it well, but fine hair can work too if you lightly backcomb the roots at the crown before braiding. Keep the side sections tight enough to stay in place, then loosen the braid itself with your fingers once it’s tied off.
I like this one for days when a low ponytail feels too plain. It has edge, but not in a try-hard way.
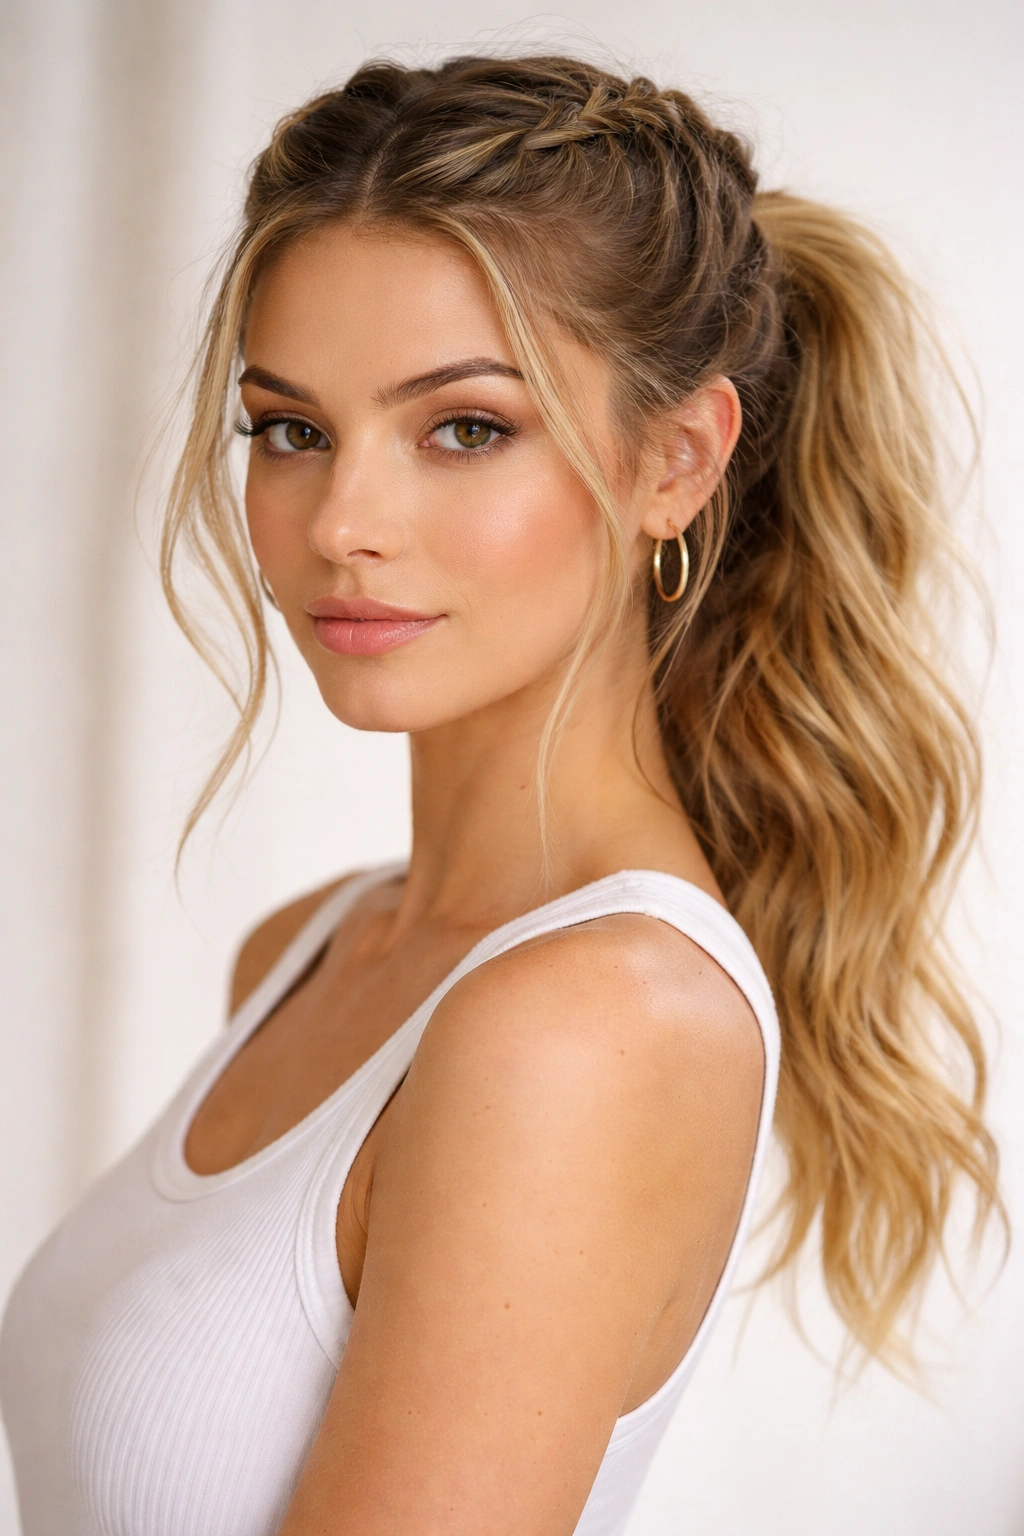
7. Double Mini Braids Into a High Ponytail
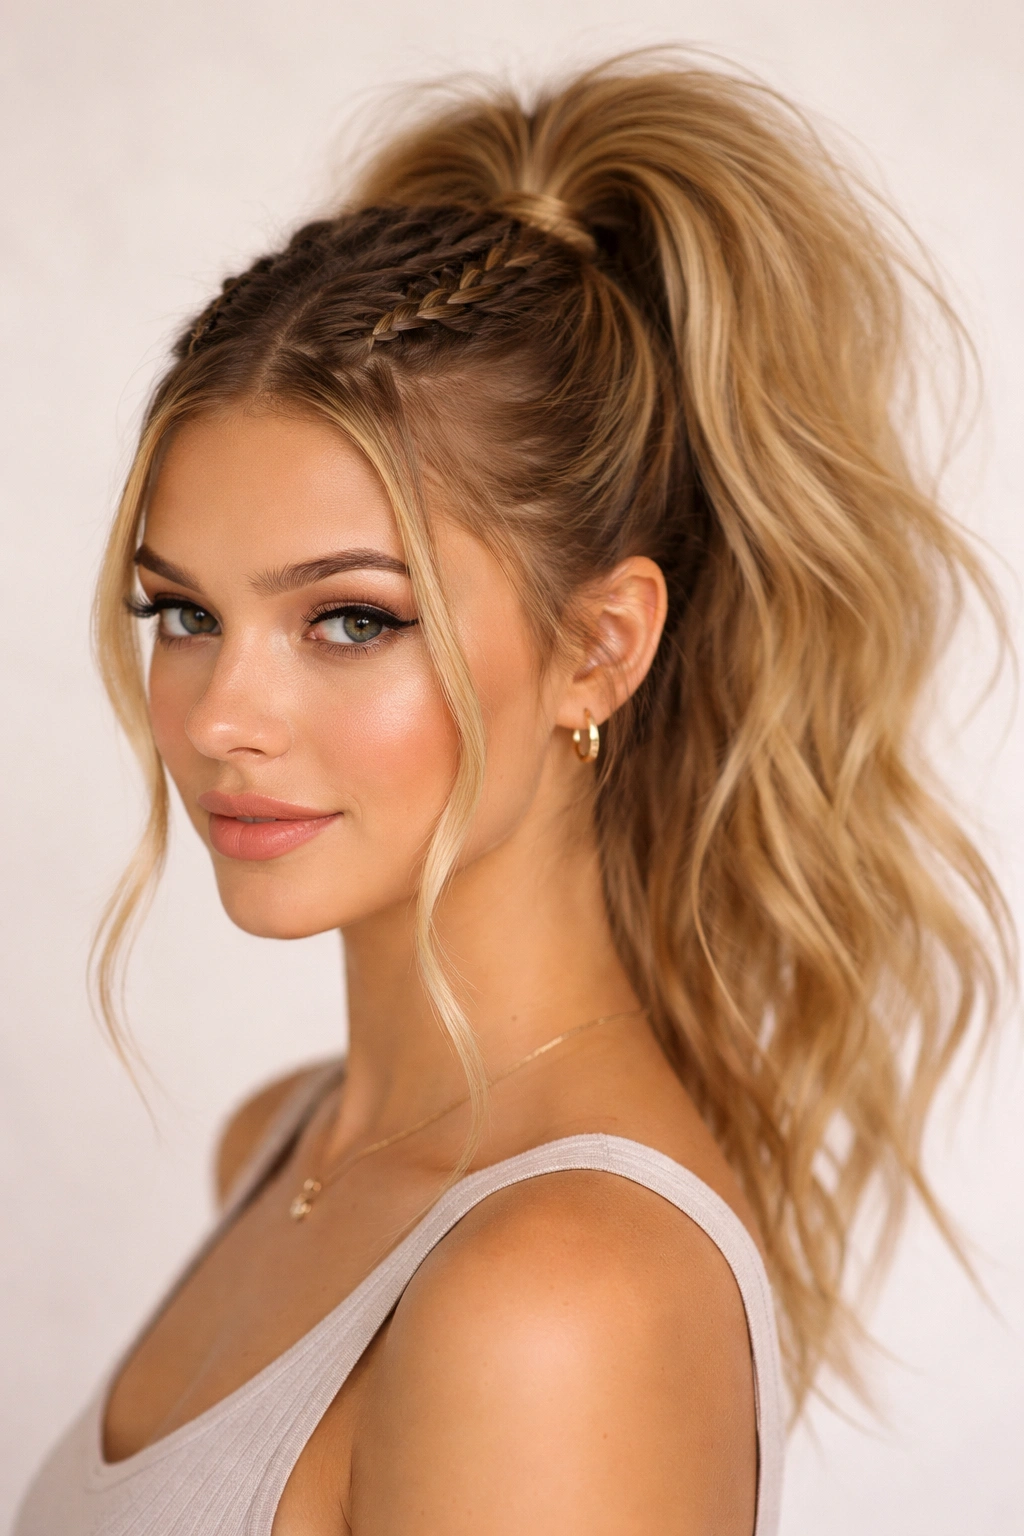
Two tiny braids at the front can change the whole mood of a high ponytail. They keep the hairline from looking too smooth, and they give the style that slightly lived-in finish people spend too long trying to fake.
Why the Small Braids Matter
Braid two narrow sections from the temples, each about half an inch wide, then bring them back into a high ponytail. Leave the rest of the hair loose and a little fluffy at the crown. The mini braids act like accents, not the main event.
- Use a rat-tail comb for clean parting.
- Mist the front sections with light spray so they do not slip.
- Keep the ponytail high, around the crown, for the best lift.
Pro tip: braid one side slightly tighter than the other. The small asymmetry makes the style look more natural.
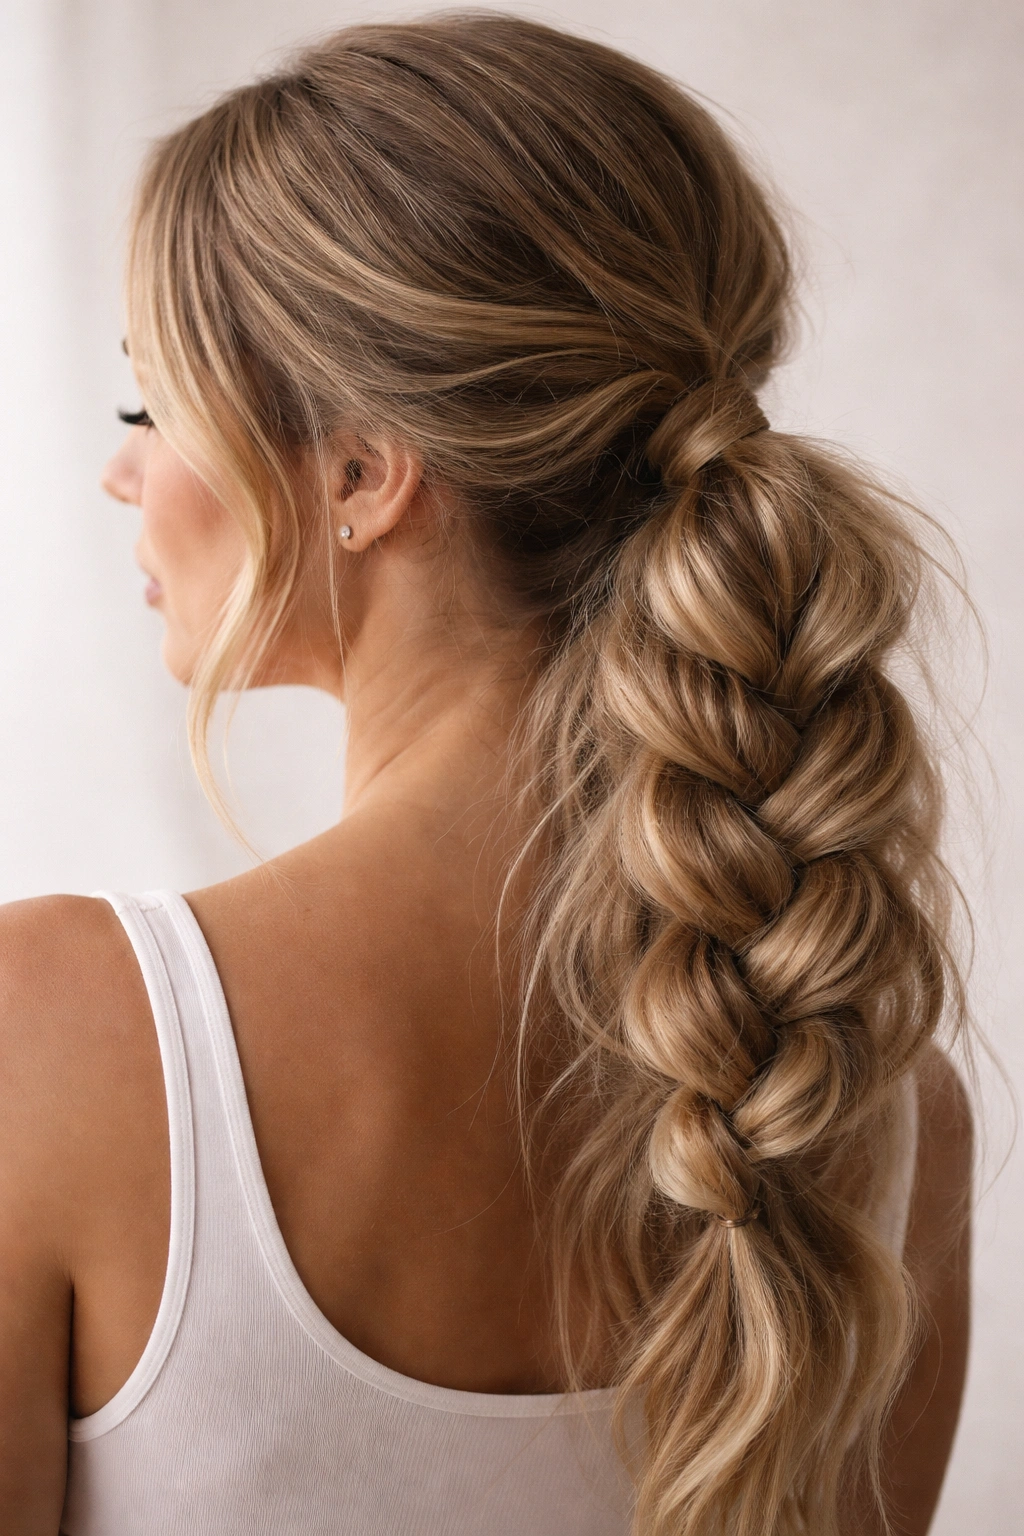
8. Pull-Through Braided Ponytail
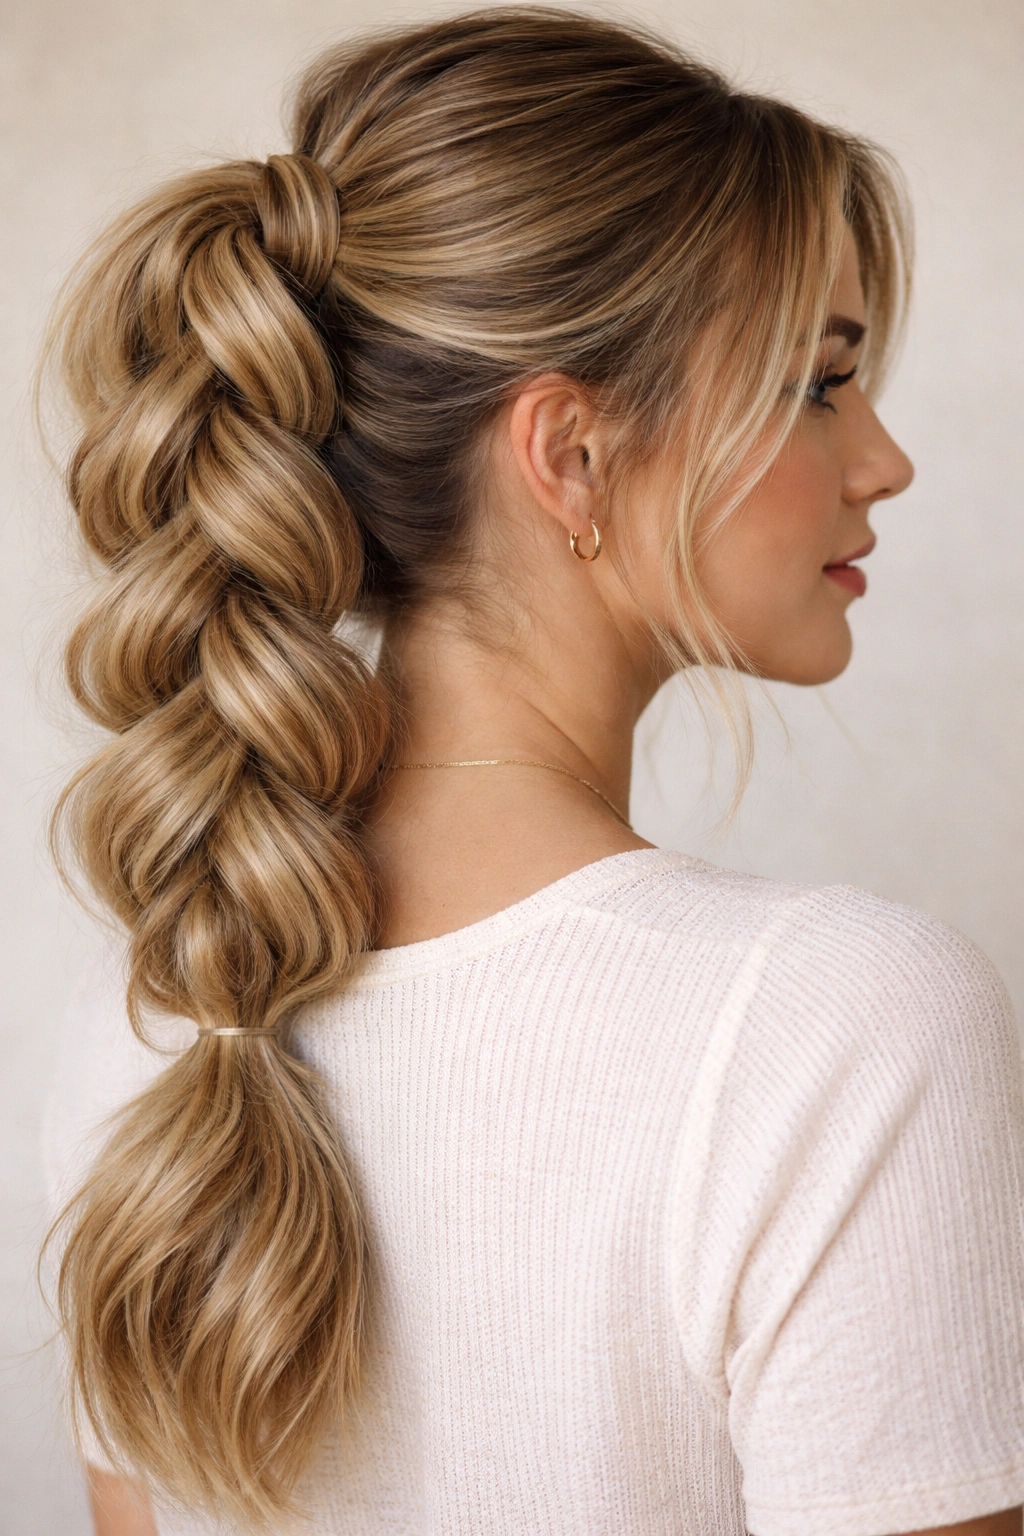
A pull-through braided ponytail is the style I recommend when someone wants braid volume but does not want to fight with their hands for twenty minutes. It looks like a thick, woven braid, but it’s built from ponytail sections stacked one after another.
Tie the hair into several small ponytails down the center line, then split and tuck each section to mimic braid links. Use clear elastics every 2 inches or so. Once the shape is built, tug the sides outward just a bit so the braid looks full rather than tight.
This is a smart choice for thick hair that usually turns regular braids into bulky ropes. It also helps if the hair is layered, because the pull-through structure keeps shorter pieces from slipping out quite as badly.
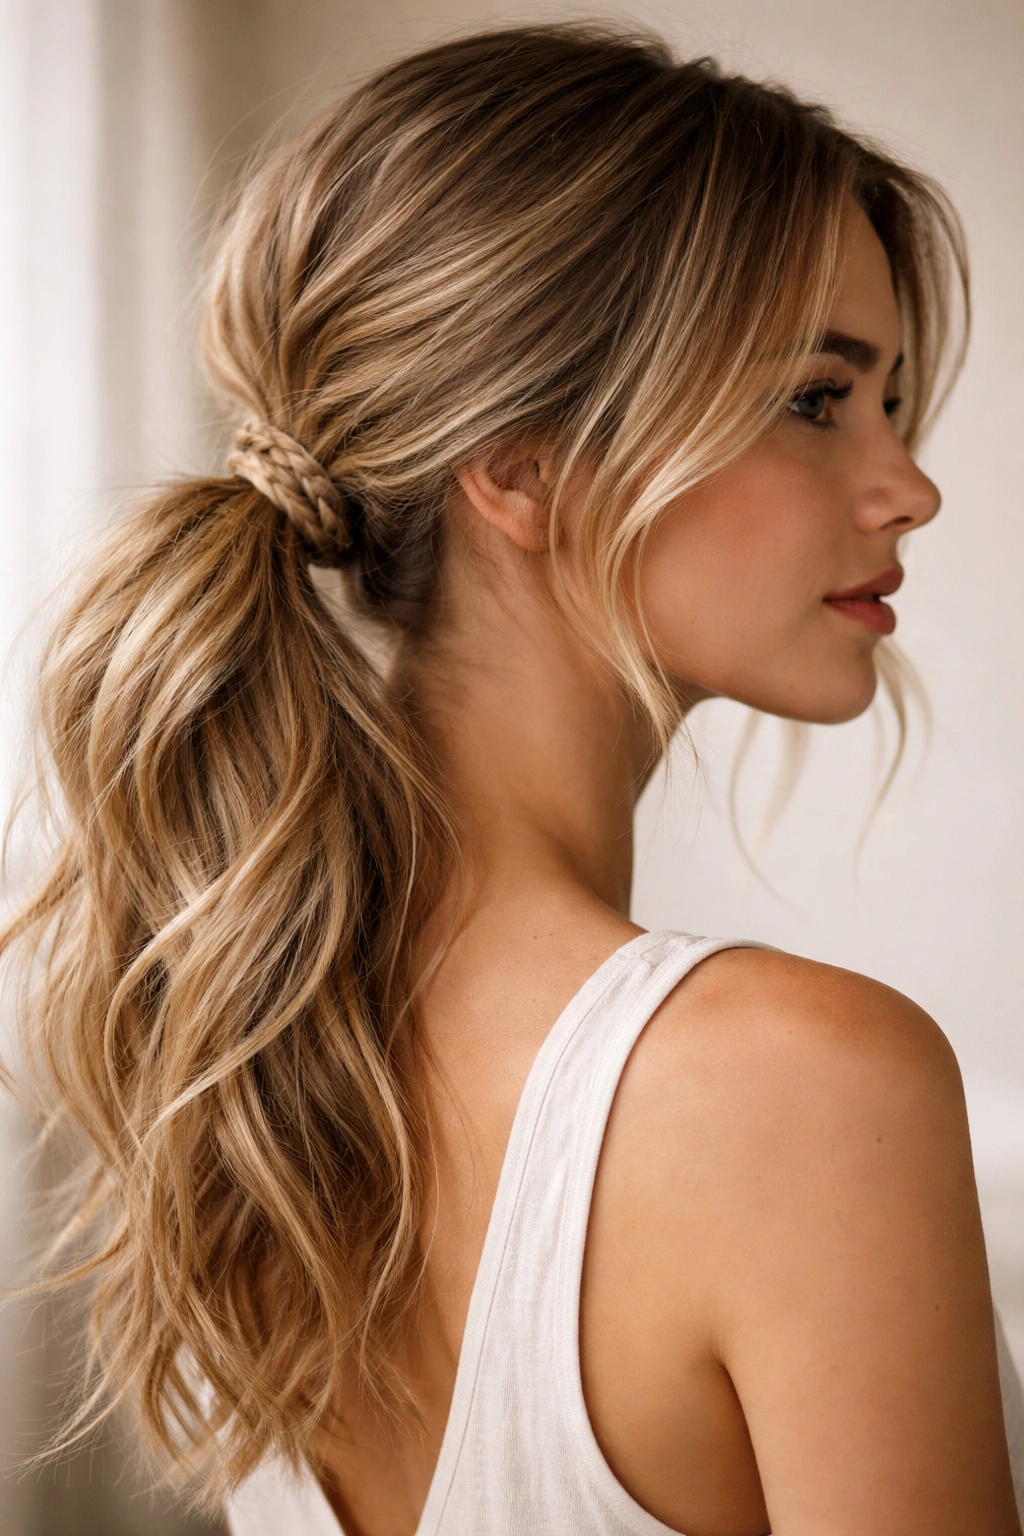
9. Wrapped Elastic Low Ponytail
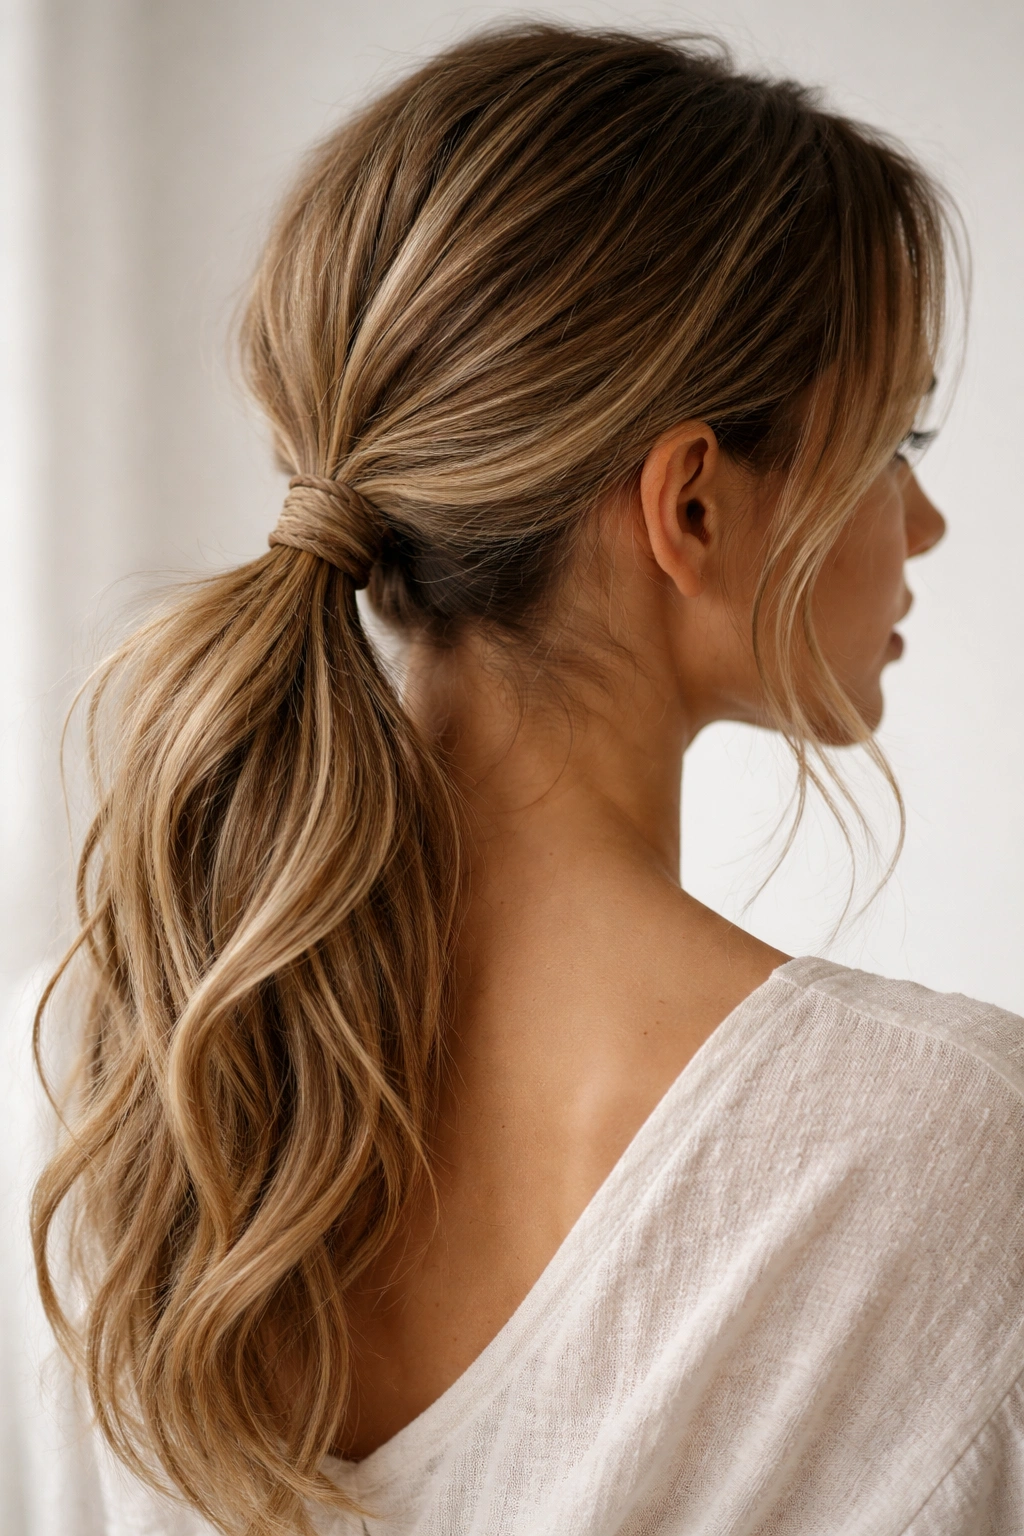
A wrapped elastic low ponytail is the quiet overachiever of braided ponytail hairstyles. The base stays simple, but a thin braid wrapped around the elastic makes the whole look feel finished. It is small detail, big payoff.
Gather the hair low at the nape, secure it, then braid a slim 1/2-inch section from underneath. Wrap that braid around the base and pin it under the ponytail with a bobby pin. Leave the rest of the tail loose and a little bent, not poker straight.
This style works especially well if your hair has a few bends already. If it’s too flat, add one soft wave with a curling iron before tying it back. The braid at the base does not need to be perfect. In fact, a slightly rough wrap looks better.
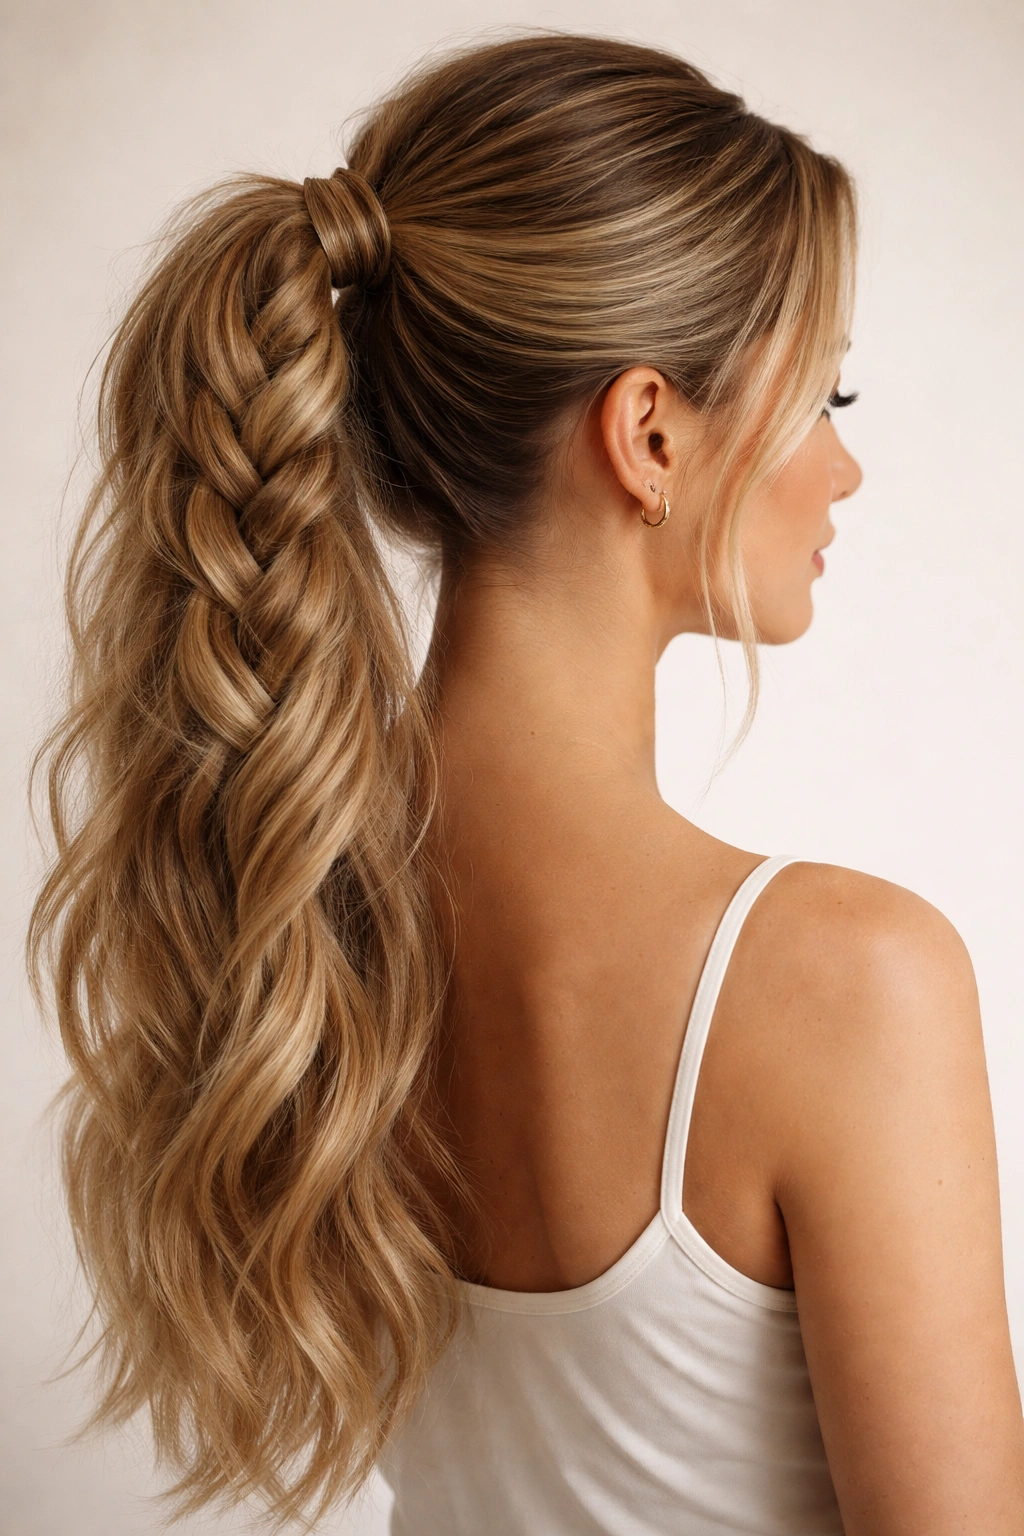
10. Chunky Side Braid Ponytail
A chunky side braid ponytail feels casual in a good way. The braid starts low and to one side, which keeps it from looking too dressed-up. The trick is to make the braid big enough to show its pattern, then stop before the tail gets overworked.
Braid a wide section from just above one ear back toward the nape, then pull the rest into a side ponytail. Keep the braid thick by using larger sections, roughly 1 to 1.5 inches at a time. Once it’s tied off, widen it gently with both hands.
This is one of the better styles for layered hair because the side placement helps disguise shorter ends. If the hair slips, a little matte pomade at the roots solves the problem fast.
11. Boxer-Braid Ponytail With Loosened Seams
Boxer braids are usually tight and athletic, but loosen them and pull them into a ponytail, and they get a softer, easier look. The seams still show. The scalp stays neat. The finish just stops feeling so locked in.
Braid two Dutch braids from the front hairline back toward the crown, then combine the lengths into one ponytail. After the braids are secured, tug the outer edges outward so each braid gets wider and a little flatter. That softened shape is what changes the mood.
Use this when you want the practical hold of boxer braids without the hard-edged look. It is especially good for active days, but it still looks tidy enough for dinner after. That rare overlap is why people keep coming back to it.
12. Braided Ponytail With Curled Ends
A braided ponytail with curled ends is a simple fix when you want the braid to feel softer at the bottom. The braid keeps the length controlled, and the curled ends add movement where the hair might otherwise hang straight and heavy.
Start the braid at mid-length or lower, depending on how much hair you want to show. Secure the tail, then use a 1-inch curling iron on the last 3 to 4 inches only. The contrast matters. Straight roots into a loose braid into soft ends looks more intentional than curling the entire head.
Watch for this: if you curl the ends before braiding, the pattern can disappear. Braid first, curl second. That order keeps the braid visible and stops the finish from going frizzy at the tips.
13. Twist-Into-Braid Ponytail
A twist-into-braid ponytail is a good answer for hair that refuses to hold a clean woven braid all day. Start with two flat twists from the front, bring them together, then finish the length with a simple three-strand braid or a tied ponytail, depending on how much texture you want.
The front twists create a smooth frame without needing a center part. After that, the braid down the tail gives the style its structure. It is a nice middle ground between polished and messy, which is probably why it works on so many hair types.
Keep the twists shallow if your hair is fine. Deep twists can eat up too much length. A little dry texture at the roots helps the whole style stay in place, especially near the temples where hair likes to escape.
14. Pancaked Braid Ponytail
A pancaked braid ponytail is about one thing: making the braid look fuller by pulling it wider after it’s done. The technique works on almost any braid, but it is especially useful if your hair is not naturally thick.
What Makes It Different
Braid the hair into a low or mid ponytail, then pinch each outer loop and pull it apart by a few millimeters. Keep going down the braid, widening each section a little at a time. Do not yank. A slow, steady pull keeps the shape intact.
- Best with slightly textured hair.
- Use small clear elastics if the braid is very long.
- Stop widening once the braid looks soft but not stretched thin.
This style is one of the easiest ways to make a modest braid feel bigger without adding product overload. That alone makes it worth knowing.
15. Bandana-Woven Braided Ponytail
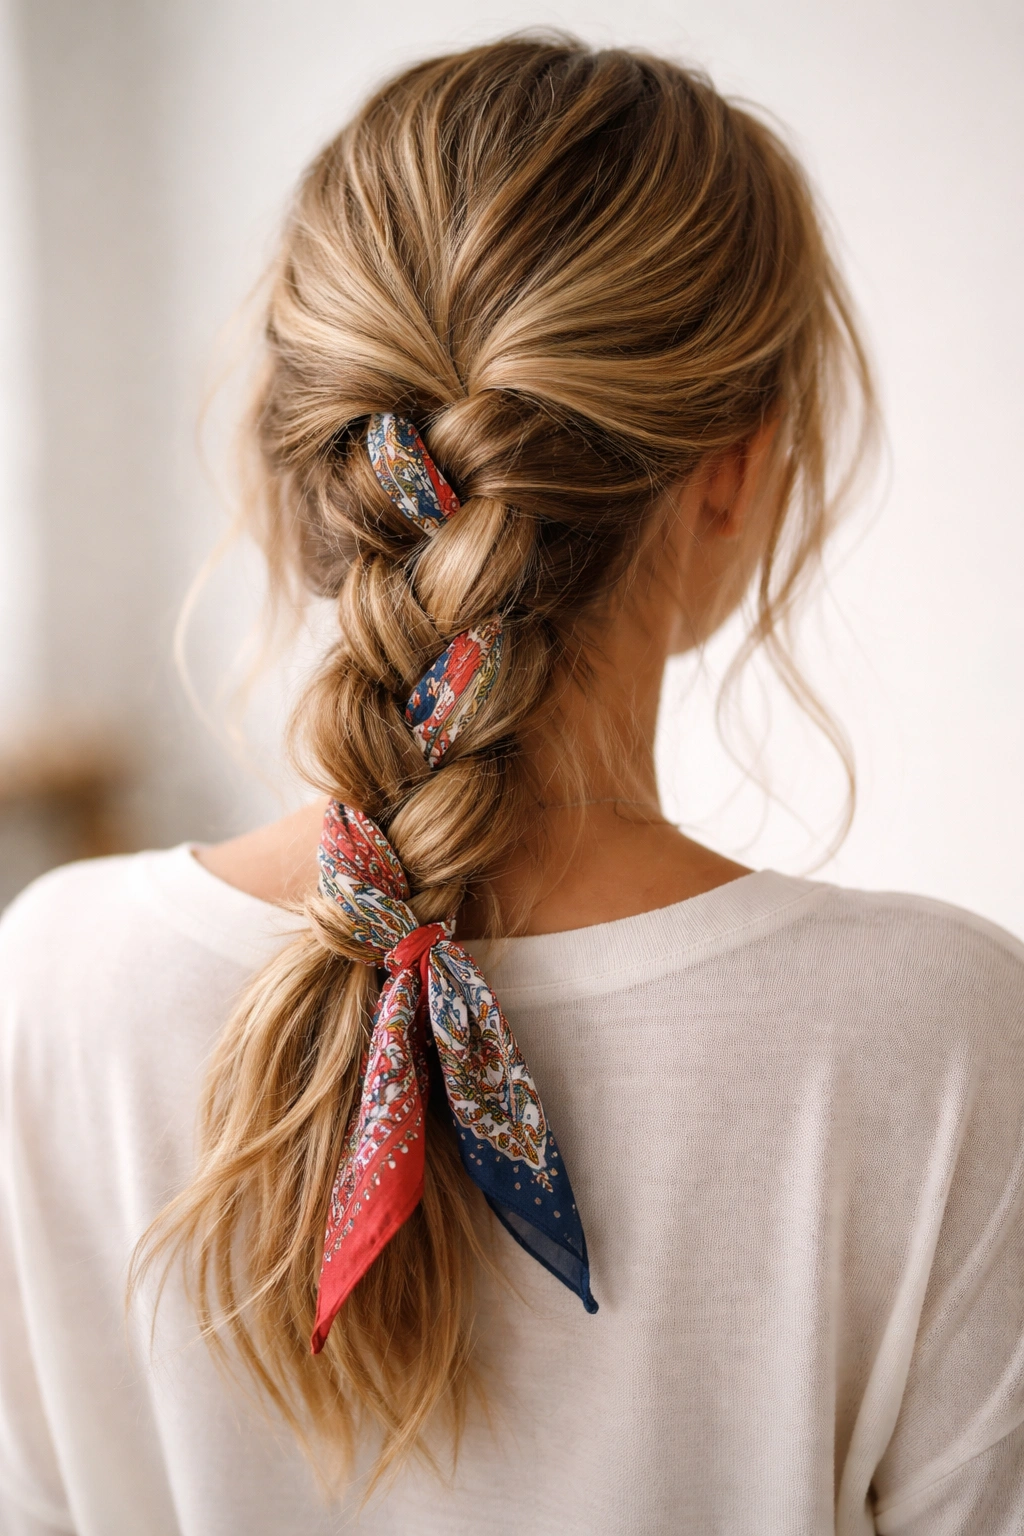
A bandana-woven braided ponytail gets a lot of mileage from one simple piece of fabric. Thread a skinny bandana or scarf through the braid, or wrap it around the ponytail base and let the ends peek out. The braid does not have to be fancy if the fabric adds color and shape.
Keep the braid low and loose so the scarf can stand out. A 1-inch scarf strip is enough; anything wider can start to overpower the hair. If your hair is a little frizzy, even better. The texture helps the fabric feel like part of the style instead of an afterthought.
This is the sort of look that feels done without feeling precious. It works on days when hair needs help, but you do not want to spend half an hour pretending otherwise.
16. Braided Ponytail for Short Hair
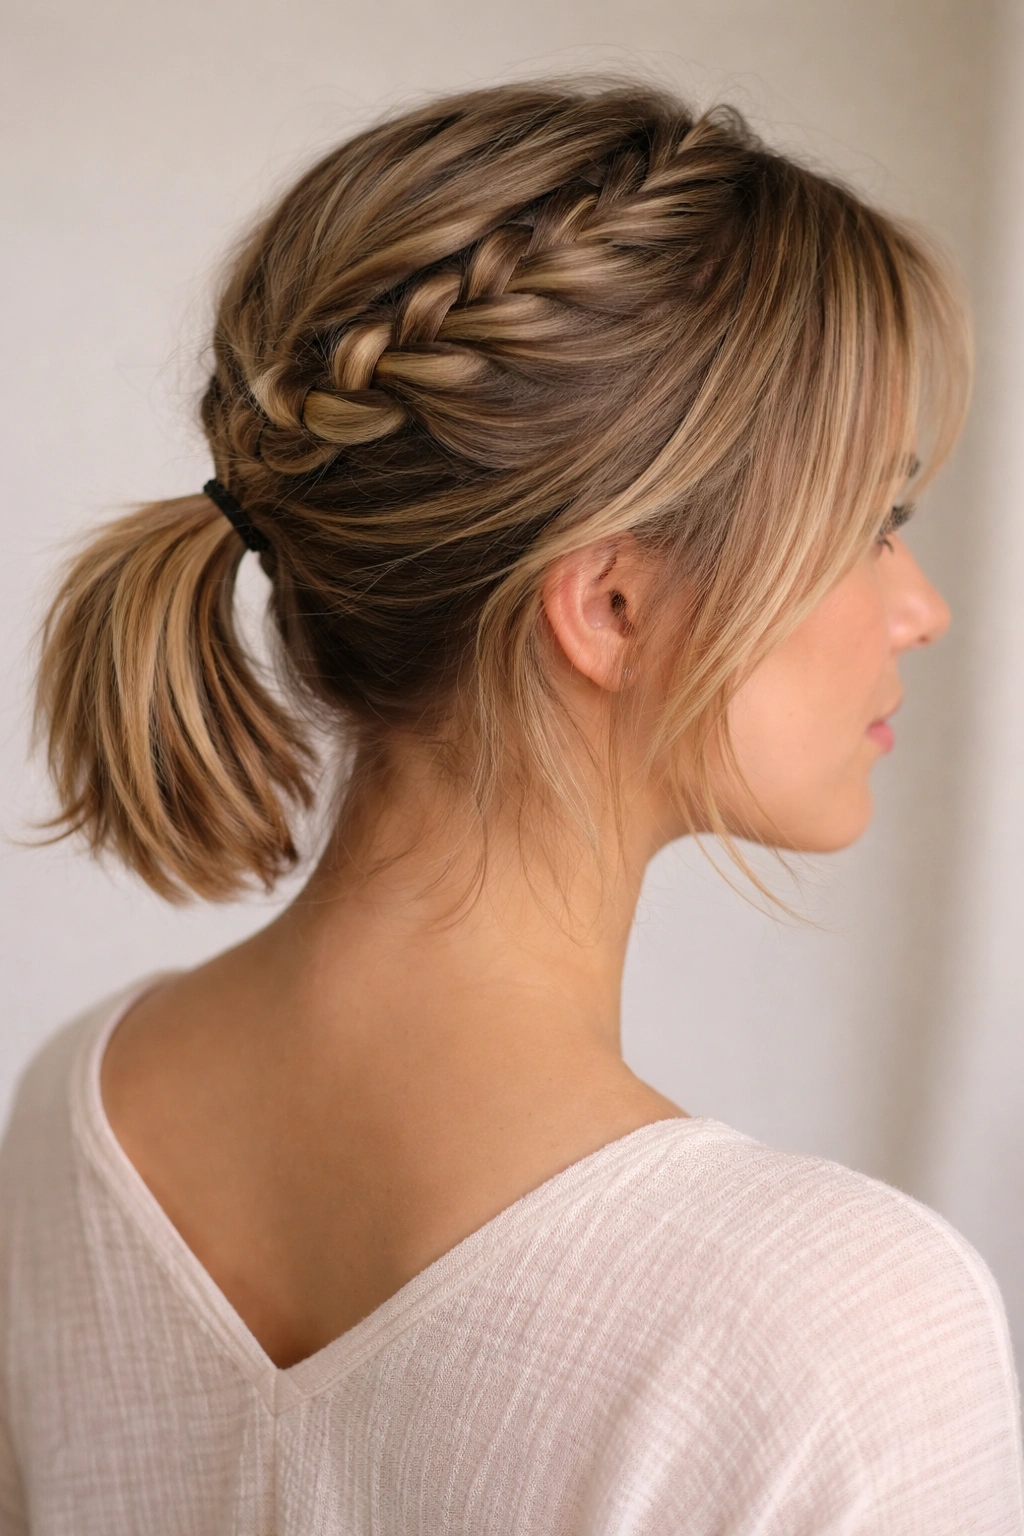
Short hair can absolutely handle a braided ponytail, as long as you stop trying to force it into a long, trailing shape. Shoulder-length hair often looks better with a braid at the crown and a small ponytail at the nape than with a braid that is pulled too tight and made to pretend it is longer than it is.
Braid just the top section, usually 2 to 3 inches from the hairline back, then gather the rest with the braid into a low ponytail. Use tiny elastics if the ends are too short to grip cleanly. A little hairspray on a toothbrush helps tame the fringe without plastering everything flat.
This style is good when layers keep falling out of a regular ponytail. It gives those shorter pieces a job to do instead of fighting them all day.
17. Sporty High Braided Ponytail
A sporty high braided ponytail is the one that survives the most movement. It starts with a high ponytail at the crown, then uses a braid down the tail to keep the length contained. The result is neat enough for errands and secure enough for a long walk or gym session.
The crown should be snug, not painful. That’s the line. Use a firm elastic, braid the tail in medium sections, and keep the tension even all the way down. If you want more lift, tip your head forward while gathering the ponytail so the base sits higher.
A little gel or cream around the hairline helps if you have flyaways. Keep it light. Heavy product can make the style look greasy, and that is not the point here.
18. Asymmetrical Braid Ponytail
An asymmetrical braid ponytail is what happens when you stop centering everything and let the hair fall a little to one side. The braid begins off-center, sweeps across the head, and ends in a ponytail that sits just left or right of the nape.
That offset is the whole trick. Centered braids can feel neat in a way that sometimes looks flat. An asymmetrical placement adds movement without needing more height, more teasing, or more product.
This style works well on round, oval, and heart-shaped faces because the side sweep softens the front. Keep one side smooth and leave the other a touch looser. The imbalance should feel intentional, not accidental.
19. Low Ponytail With Face-Framing Braids
Two thin braids around the face can make the simplest low ponytail feel finished. They act like tiny rails, guiding the eye back toward the ponytail and keeping shorter front pieces from falling into your mouth every five minutes.
Where the Braids Should Stop
Start each braid about an inch back from the hairline and stop once they reach the ear or just below it. That length is enough to show the detail without turning the whole head into a braid project. Gather the rest into a low ponytail and leave the braids visible at the sides.
- Keep the front braids narrow, about 1/4 to 1/2 inch wide.
- Use matching elastics if the ends will show.
- Pin the braids under the ponytail if you want a cleaner finish.
This style is a quiet fix for hair that always wants to fall forward. Simple, but not boring.
20. Mohawk Fishtail Ponytail
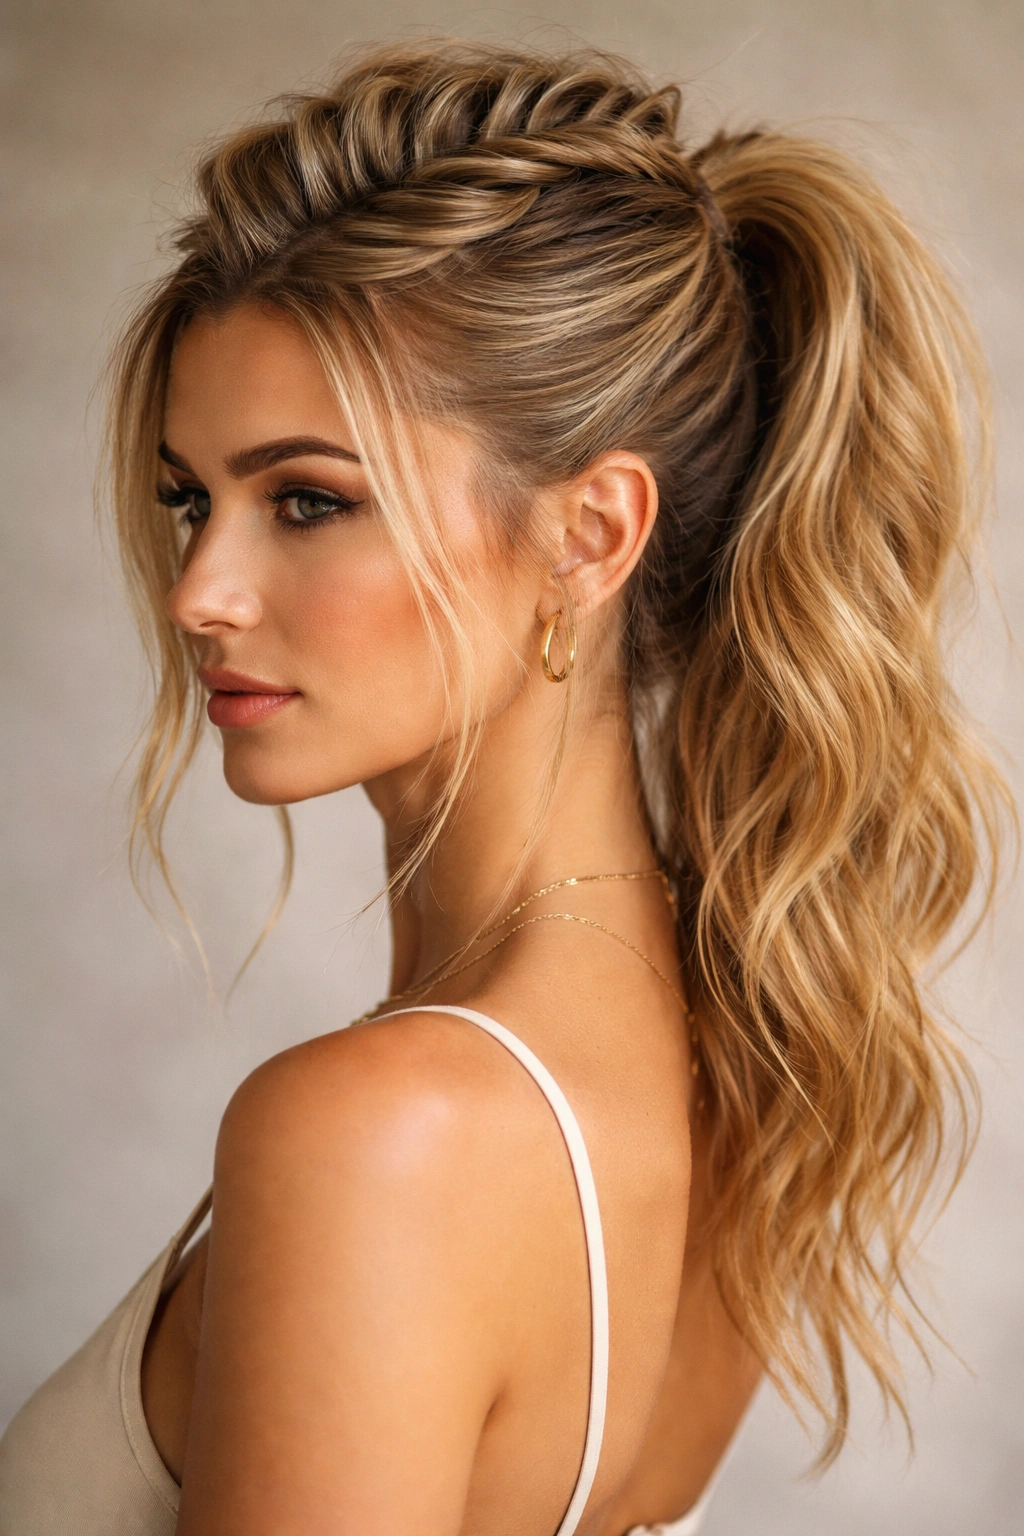
A mohawk fishtail ponytail has a sharper shape than a standard fishtail, and that makes it feel a little more deliberate. The center braid runs from the forehead back toward the crown, with the sides kept smooth so the braid stands out.
Because fishtail braiding takes more small sections, it gives a beautiful texture when the hair is thick enough to show it. Keep the side hair tight and the center braid slightly lifted. Once the braid reaches the crown, tie it into a ponytail and let the tail stay loose.
This is a good style when you want contrast. Tight at the sides, textured in the middle, soft at the end. That mix is what makes it look complete instead of overdone.
21. Multi-Braid Ponytail

A multi-braid ponytail gives you three little decisions instead of one big one, and that’s what makes it look interesting. One braid can be a regular three-strand, another a rope twist, and the third a tiny fishtail. Bring all three into the same ponytail and let them mingle.
The key is not making every braid the same thickness. If all three match perfectly, the style can start to look engineered. A mix of 1/2-inch, 3/4-inch, and skinny sections feels more natural. Keep the ponytail low or mid-height so the different braid textures can actually be seen.
This one is great when you have a lot of hair and want to use it instead of fighting it. The smaller braids keep the shape tidy, and the mix keeps it from looking flat.
22. Braided Ponytail With Extensions
A braided ponytail with extensions is the move when you want length or fullness that your own hair will not give you on its own. The trick is not hiding the added hair completely. It’s matching the blend well enough that the style looks like one shape instead of two separate textures.
Clip in the extensions first, then braid the natural hair and the added lengths together. Keep the roots smooth and the braid slightly loose so the join disappears. If the color match is off, match the ends first; roots matter less once the braid starts.
This is one of those styles that looks expensive even when the method is plain. It does need decent anchoring, though. A strong set of hidden pins near the base saves you from a ponytail that sags by lunch.
23. Sleek-Root Messy-Length Ponytail
A sleek-root messy-length ponytail is built on contrast. The crown gets smoothed down, the braid or twisted sections stay soft, and the ends are left with movement instead of being ironed into obedience. That sharp top and relaxed length is what makes the style work.
Use a pea-sized amount of smoothing cream at the roots, then comb the hair back in small sections. Keep the braid or twisted detail near the back loose enough to see texture. The tail can stay wavy, crimped, or slightly bent from a blow-dry. Clean roots, messy ends. Simple formula.
This look is useful when your hair is frizzy near the top but still has nice body through the length. It lets each part do what it’s already good at, which is honestly smarter than trying to control everything.
24. Lace Braid Ponytail
A lace braid ponytail gives you decoration without a full head of braids. Hair is added only from one side of the braid, so the braid seems to float across the head before dropping into the ponytail. It feels lighter than a French braid and a little more delicate.
The braid usually starts at the temple or just above the ear, then moves back in a clean diagonal. Keep the added sections small so the pattern stays visible. When you reach the back, gather the rest into a ponytail and loosen the braid just enough to soften the line.
How to Get the Most From It
A tail comb helps here more than people expect. So does a mirror that lets you check the angle before you commit. If the braid drifts too low, the whole style loses its shape. Keep the line deliberate, even if the finish is messy.
25. Rope-Twist Wrapped Ponytail
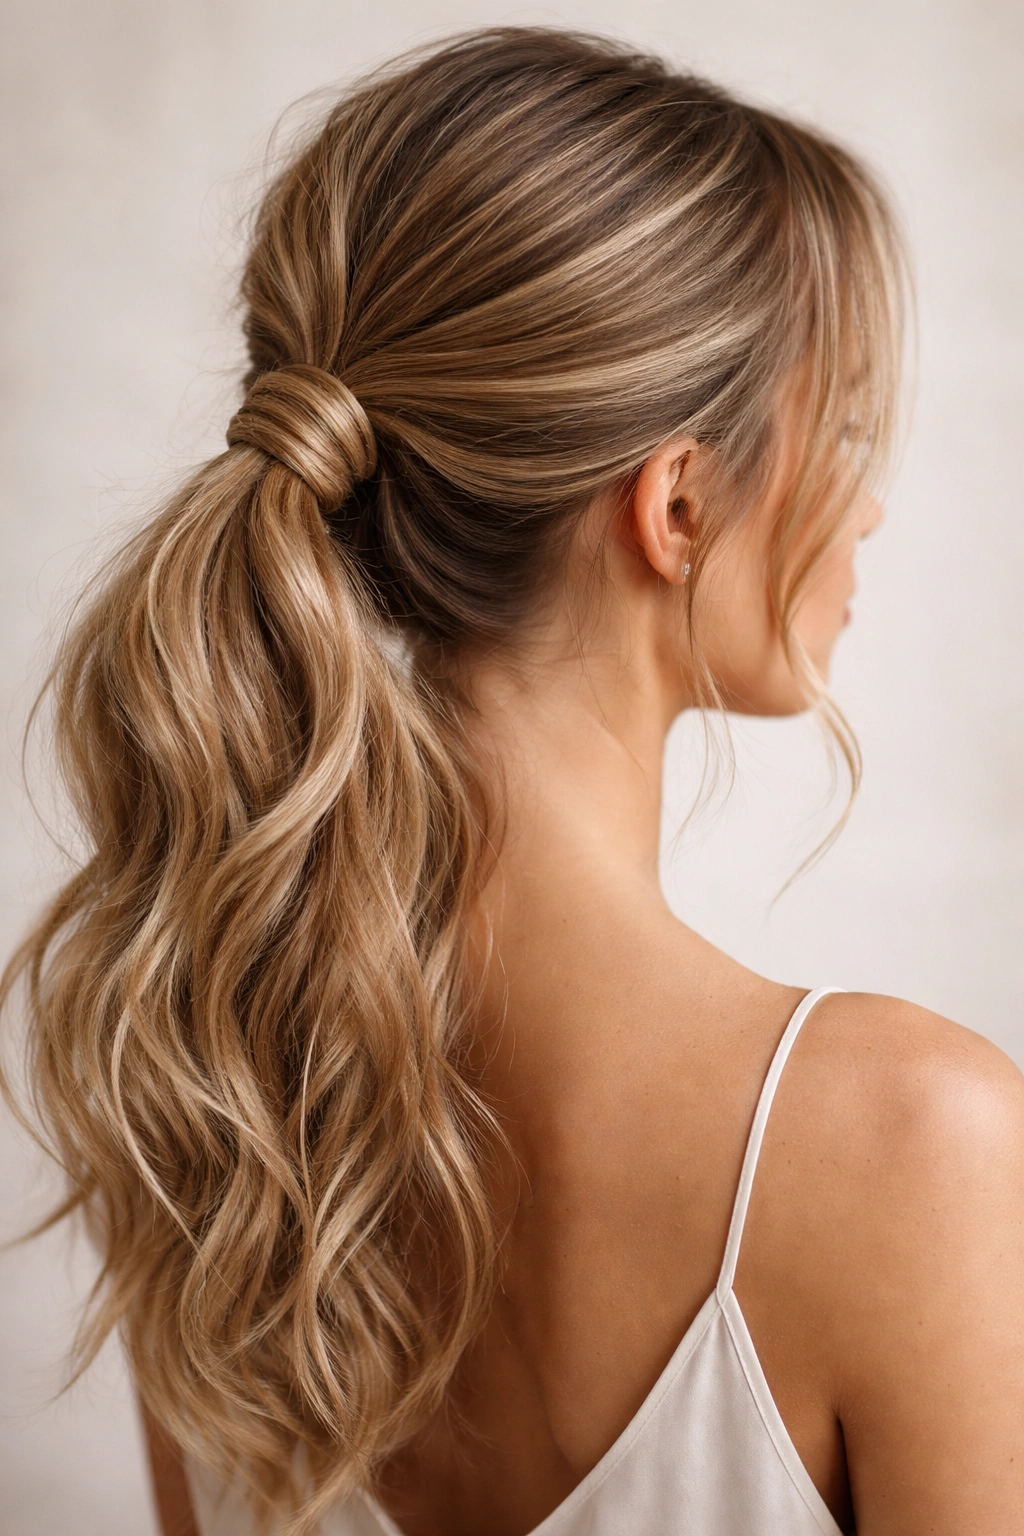
A rope-twist wrapped ponytail is a small style with a big payoff. Twist two sections tightly, wrap them around the base of the ponytail, and let the rest of the hair fall in loose waves or a soft braid. The twist hides the elastic and makes the ponytail look deliberate.
The rope wrap should sit flat against the head before it curves around the base. If it is too loose, the whole thing looks like it is slipping. If it is too tight, it can start to look stiff. The sweet spot is somewhere in between, with just enough tension to stay put.
This is a nice choice for slippery hair that hates regular wrapping techniques. The twist grips better than a plain strand, and it still looks understated enough to wear all day.
26. Side Ponytail With Braided Wrap
A side ponytail with a braided wrap has a little more personality than a center-back ponytail, and that’s usually the point. The pony sits low and to one side, then a thin braid wraps the elastic or crosses over the base to make it feel finished.
The side part does a lot of the visual work. It gives the hair an easier, less symmetrical shape, which helps the braid feel relaxed instead of rigid. Keep the braid slim and let the ponytail body be a bit loose. A soft bend through the lengths keeps the whole look from collapsing into one flat line.
I like this style when hair has no desire to cooperate. It hides a lot, it moves well, and it does not ask for perfect parting.
27. Curly Hair Braided Ponytail
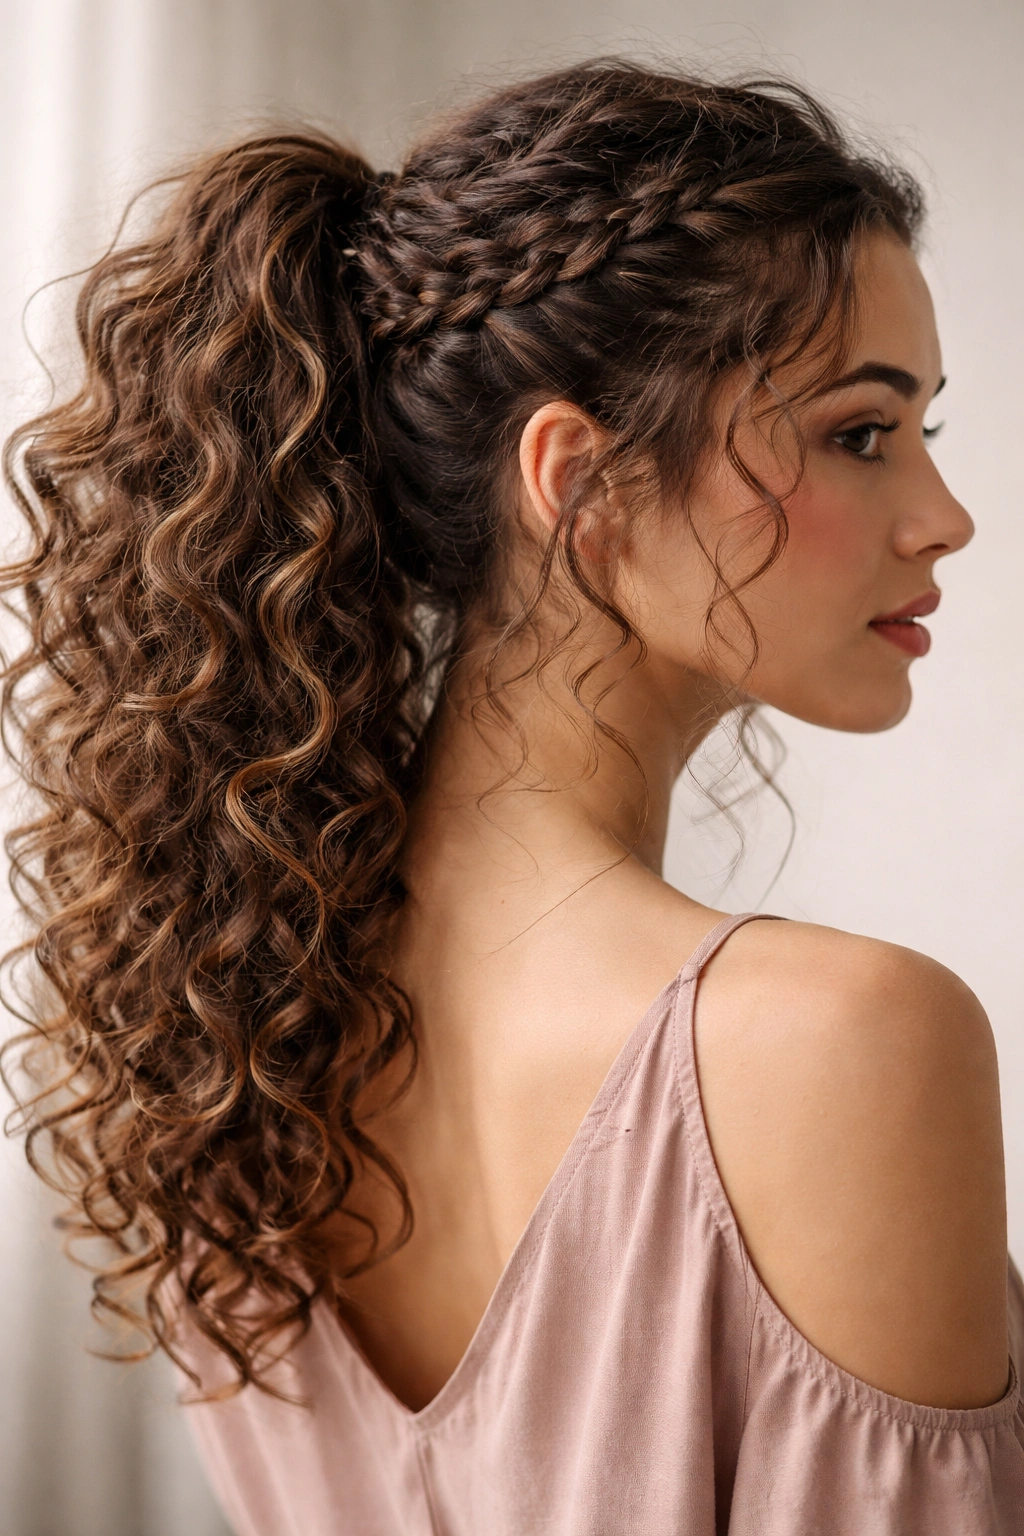
Curly hair and braided ponytails make a good pair when you leave the curl pattern alone. The braid should help guide the hair, not crush it. Start with a braid near the front or along one side, then gather the curls into a ponytail and let the texture show.
Use leave-in conditioner or curl cream first so the hair stays soft while you braid. Keep the braid loose enough that it does not stretch the curls out. A satin-covered elastic can be a better choice than a basic rubber tie because it pulls less at the strands.
The best part is the shape. Curls give the ponytail body, and the braid gives it direction. You do not need much else.
28. Fine-Hair Braided Ponytail
Fine hair usually needs a little help to keep a braid from disappearing. A fine-hair braided ponytail works best when the crown gets a touch of lift and the braid stays loose enough to look full. Think shape, not control.
Backcomb a 1-inch strip at the crown if the hair is very flat, then smooth the top layer over it. Keep the braid broad and slightly pancaked so the sections look thicker. One skinny braid can vanish. A wider braid gives the eye something to read.
What to Watch For
- Use lightweight mousse before blow-drying if you have it.
- Avoid heavy oils near the roots.
- Secure the ponytail with a small elastic so the base does not droop.
This style is less about fake volume and more about making the volume you have show up better.
29. Wet-Look Braided Ponytail
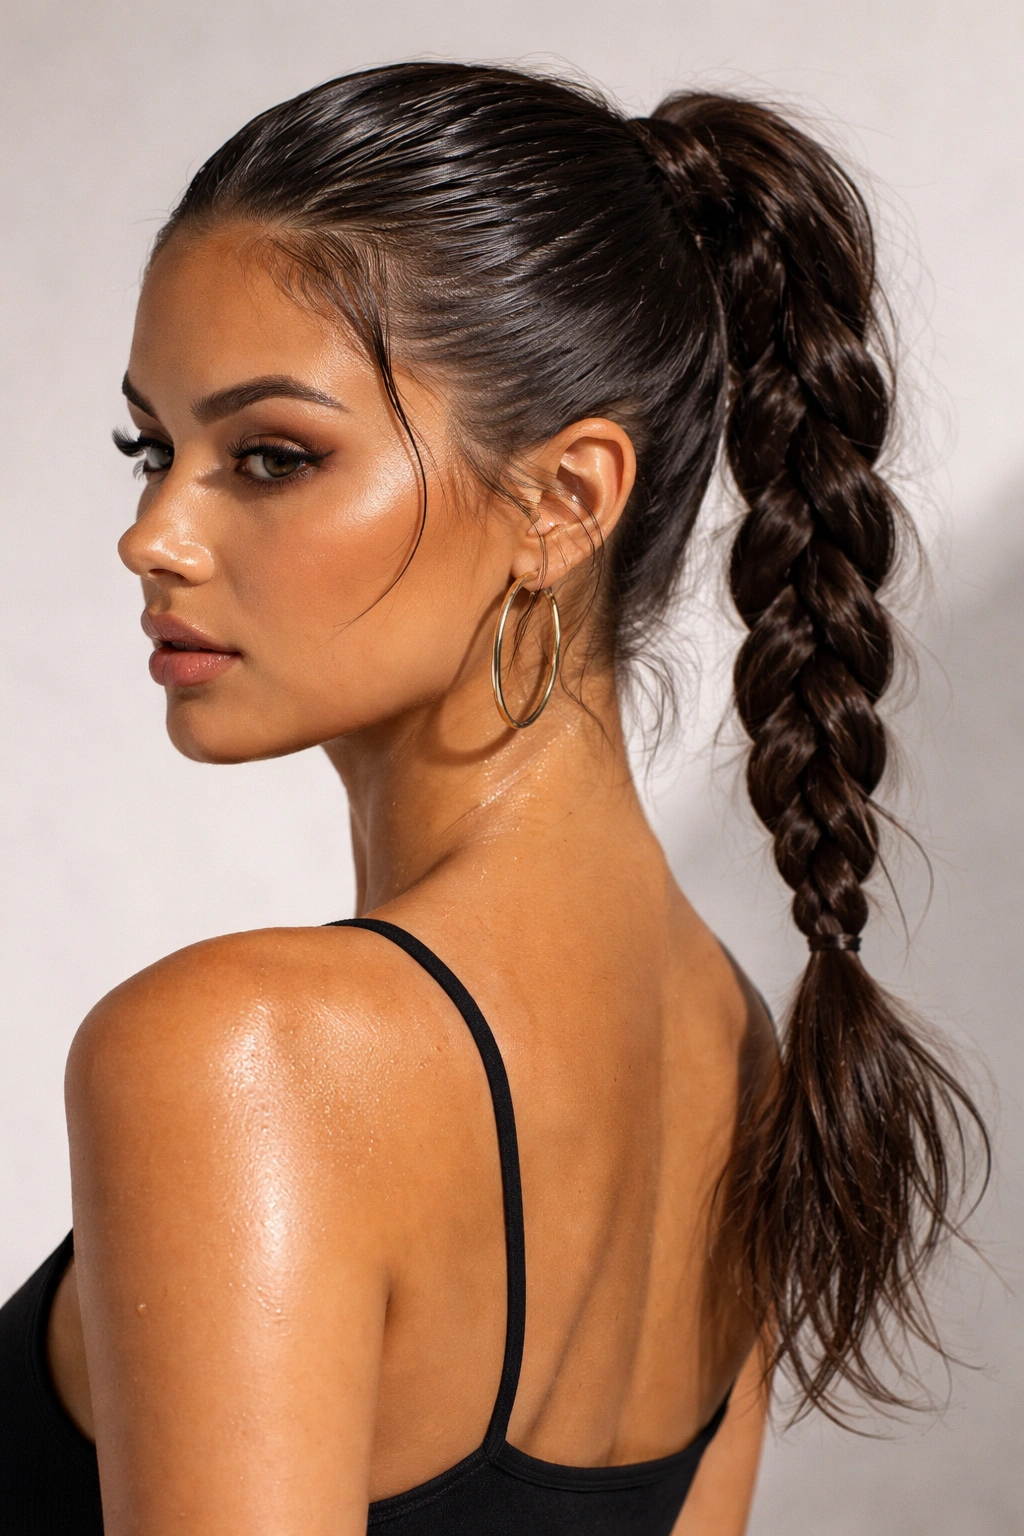
A wet-look braided ponytail sounds dramatic, but it can be restrained if you keep the shine concentrated at the roots. Smooth gel through the hairline and crown, braid the length, then leave the tail a touch undone so the style does not turn into a helmet.
The wet finish works because it creates contrast. The top reads sleek and controlled; the braid and tail bring texture back in. Use a wide-tooth comb for the product so the gel does not clump, and stop short of saturating the entire head unless you want the style to feel more editorial than wearable.
This one is for days when you want the hair to look intentional from the first glance. It has edge, but it still plays nicely with a plain outfit.
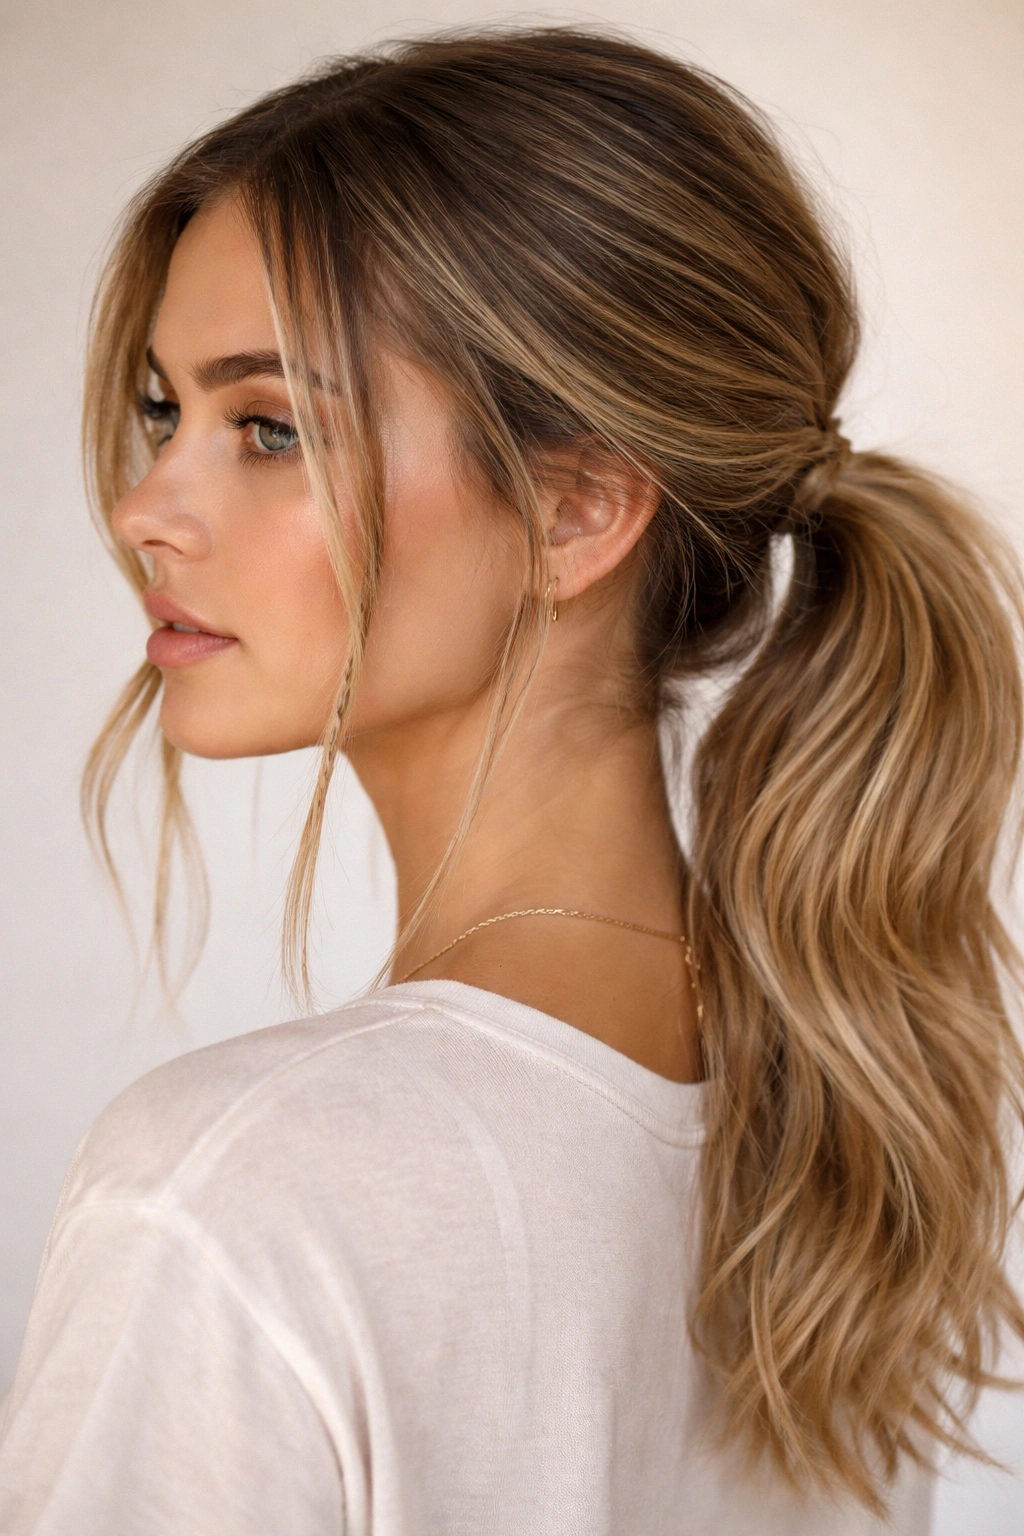
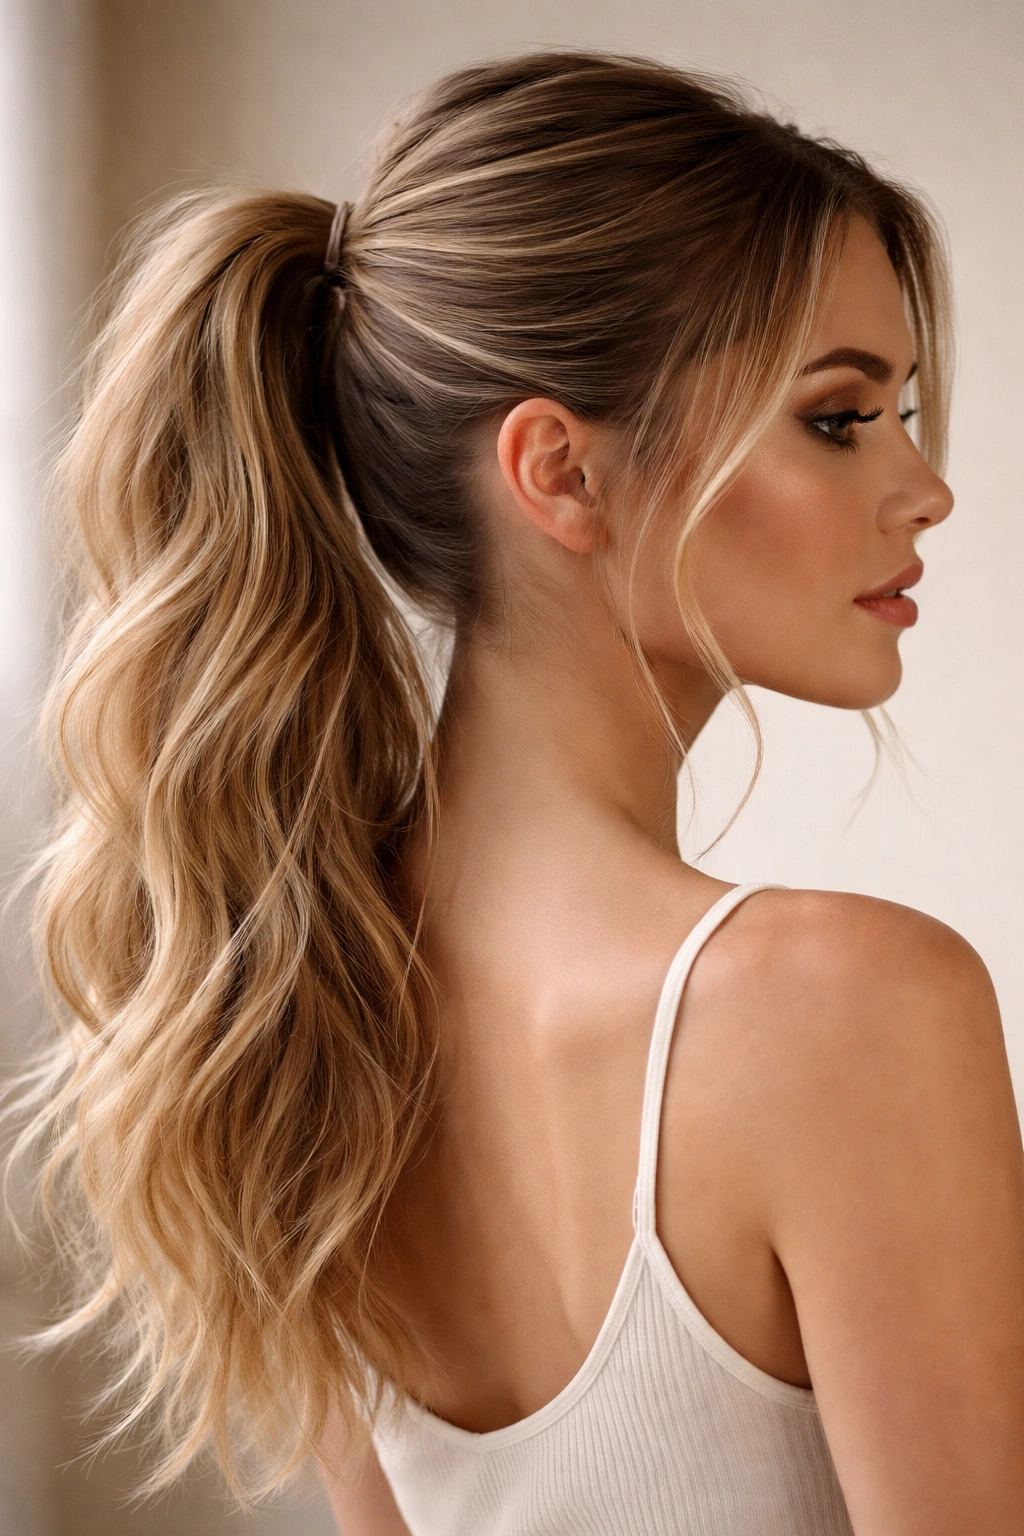
30. Soft Low Weekend Braided Ponytail
A soft low weekend braided ponytail is the easiest style to wear when you want your hair to look cared for without spending ages on it. The braid sits low, the part stays a little loose, and the lengths are left with movement instead of being ironed into submission.
The whole point is to stop before the style feels too planned. Gather the hair at the nape, braid only partway down, then secure the tail and gently pull apart the braid with your fingers. A few loose strands around the temples are enough. More than that, and the look starts to lose its shape.
This is the braided ponytail I’d hand to someone who wants one style they can wear with a sweatshirt, a blazer, or a dress and not think about again. Keep it soft. Keep it low. Keep the finish a little imperfect, because that is usually the part that makes it work.