Messy ponytail buns for Black women work because they respect texture instead of fighting it. A little height at the crown, a few loose curls around the face, and a bun that does not pretend to be perfect can look sharper than a style that took twice as long.
The best versions never feel stiff. They hold shape, but they still move when you turn your head, and they leave enough softness at the hairline so the style reads as intentional rather than pulled too tight. That matters on coily hair, where shrinkage, density, and the way your ends sit can change the whole silhouette before lunch.
A satin scrunchie, a few pins, and a calm hand with edge control usually beat a drawer full of products. Too much gel can flake. Too much tension can leave your scalp sore. The sweet spot is a bun that looks like you knew exactly where every piece should go, even if you tossed it up in ten minutes.
The shape you choose changes everything.
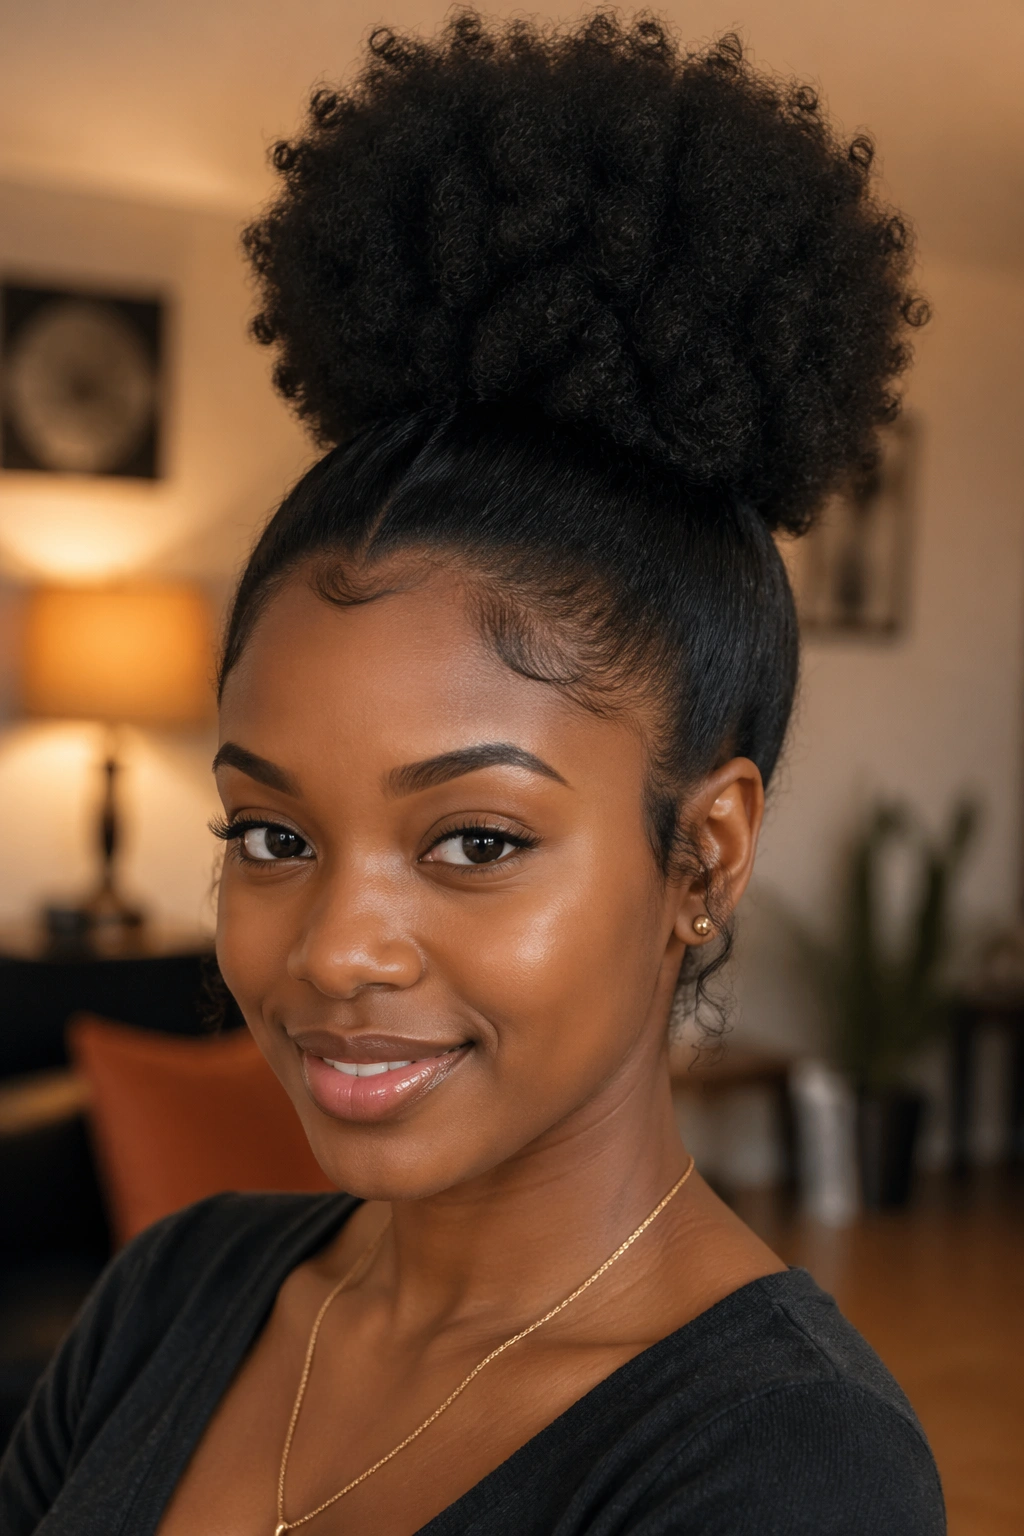
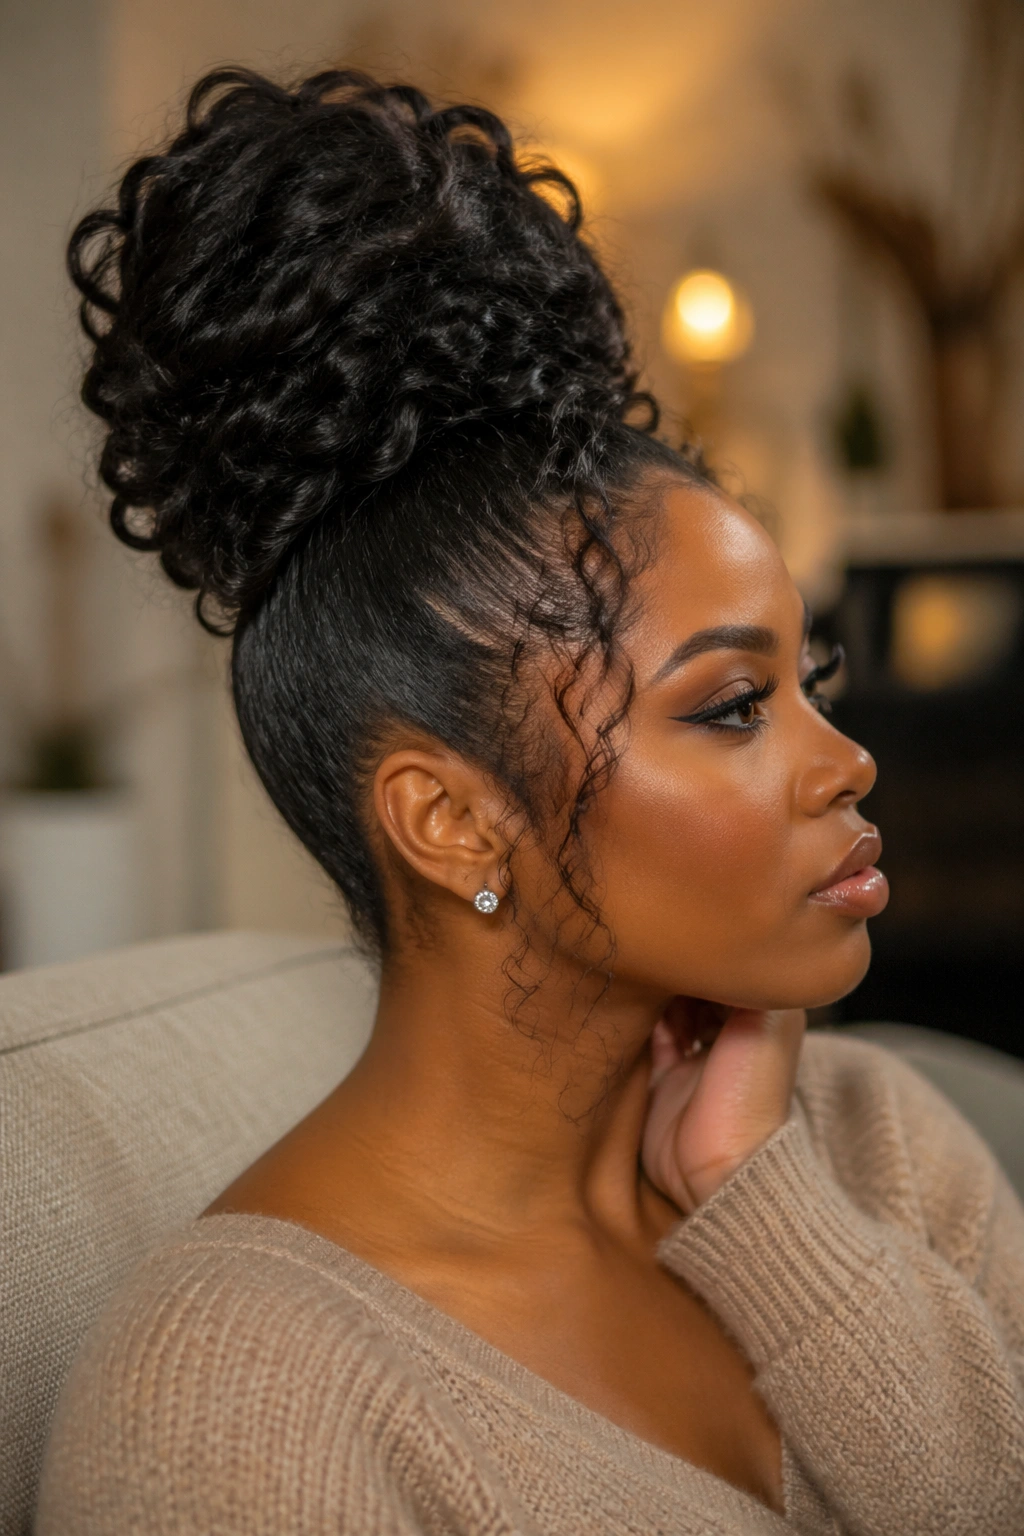
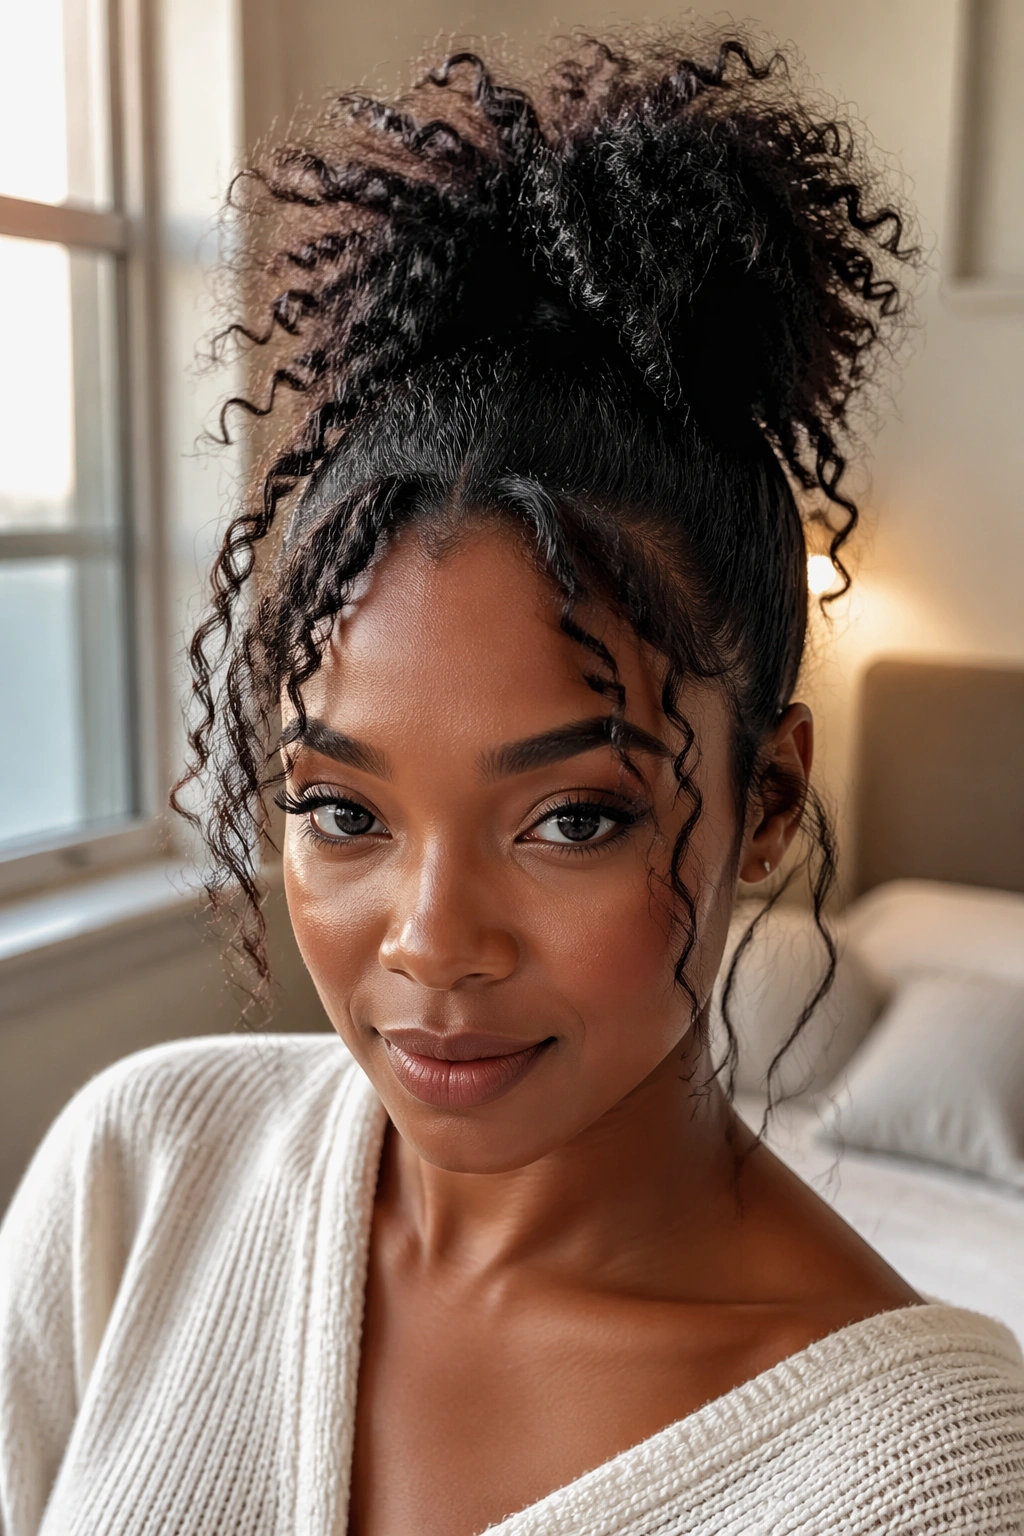
1. High Puff Ponytail Bun With Soft Free Ends
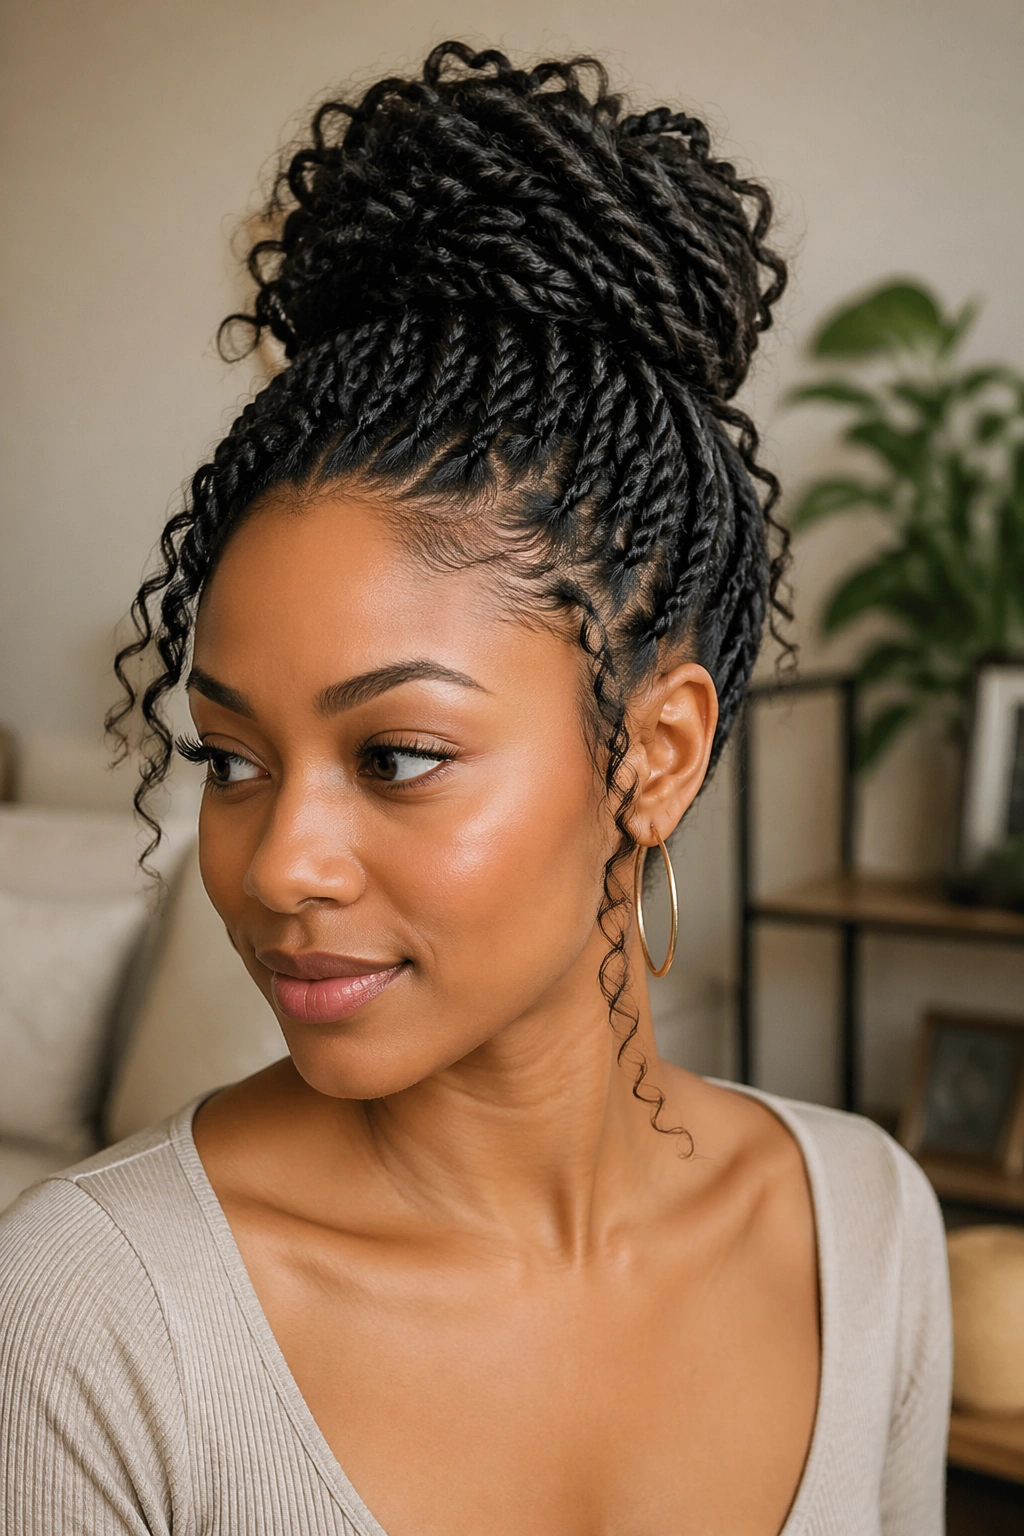
This is the style for the days when you want height without the hard shell. A high puff ponytail bun keeps the crown lifted, lets your texture stay visible, and gives you that soft, slightly undone finish that works with coils instead of flattening them.
Why it works on coily hair
Stretch the roots first if your hair shrinks fast. A little banding, a low-heat blow-dry, or an old twist-out makes the puff sit higher and keeps the bun from collapsing into the crown.
A medium satin scrunchie is the friend here. Pull the ponytail up, loop the ends loosely, and let a few inches stay free so the bun doesn’t look packed. Do not tug the base too tight; the lift should come from shape, not pain.
- Best for 4B to 4C textures that need height.
- Works nicely with leave-in, a soft brush, and a little sheen spray.
- Keep the ends loose and finger-coiled for a softer finish.
Pro tip: Pinch the puff at the sides before you secure it. That tiny move gives the bun a rounder shape and keeps it from looking flat from the front.
2. Low Nape Ponytail Bun With a Side Part
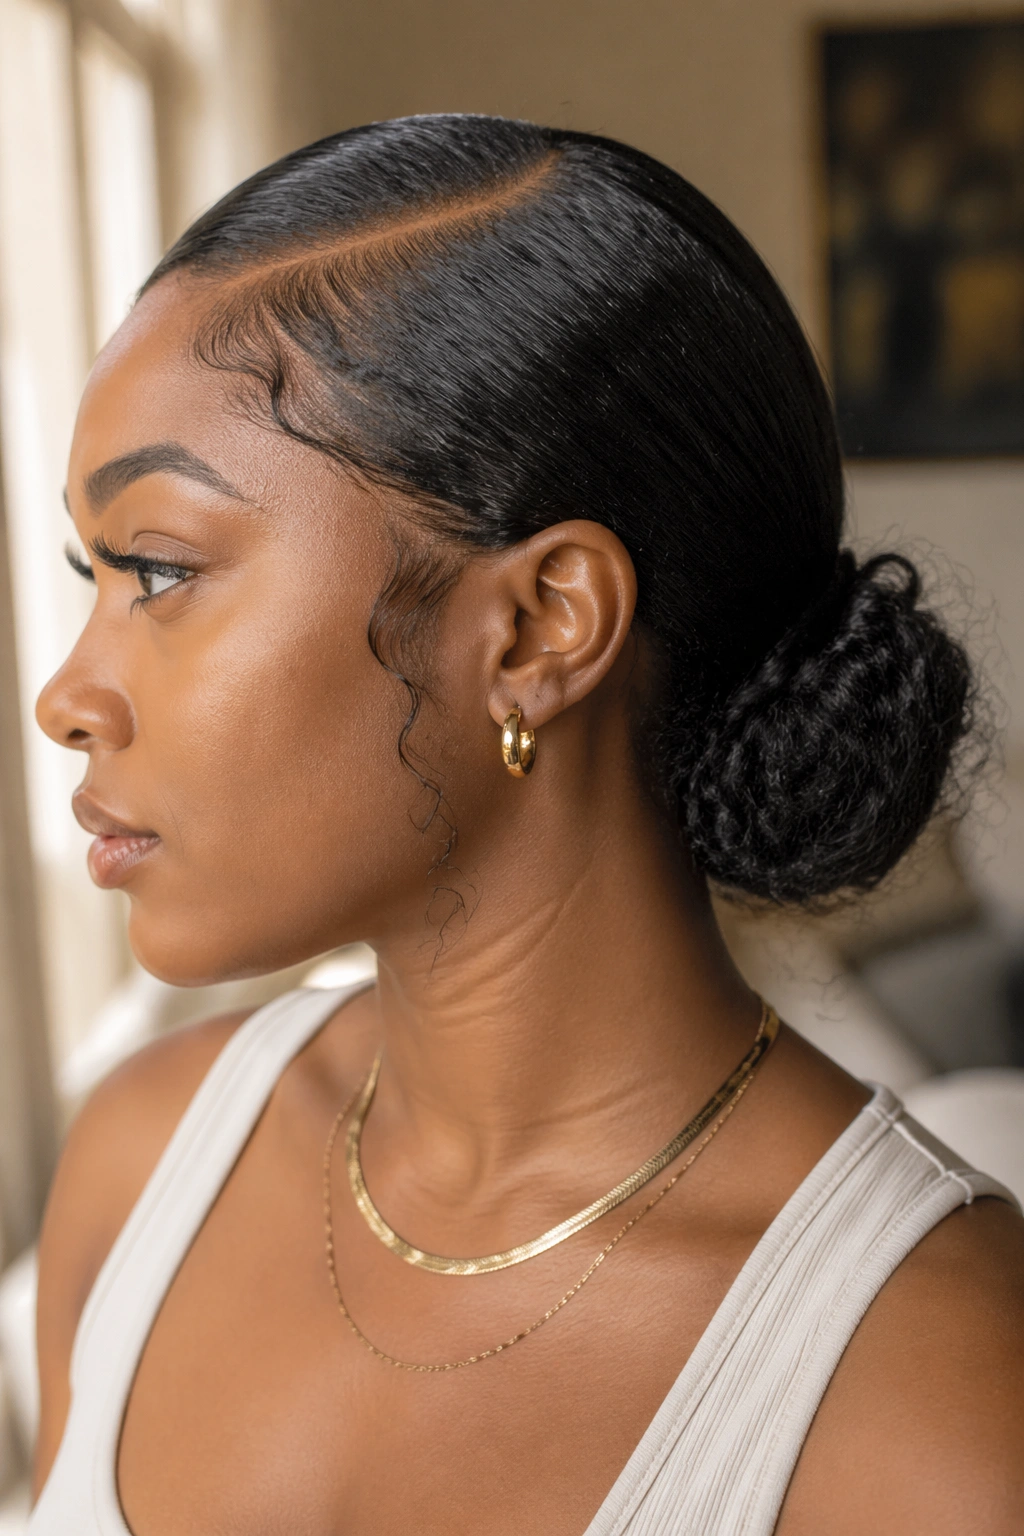
A low bun at the nape can be far more flattering than a high one, especially when you want your earrings, collar, or makeup to do some of the talking. The side part gives the style a softer line, and the low placement keeps the whole look calm instead of fussy.
This is the bun I reach for when the day calls for clean but not severe. Brush the top smooth, but leave the back a little cushioned so the bun has some body. If your hair is thick, split the ponytail in two before tucking it under; that keeps the shape compact and stops one giant lump from forming at the base.
One small detail makes a big difference. Leave a few wisps near the temples, then shape them lightly with your fingers. That’s enough.
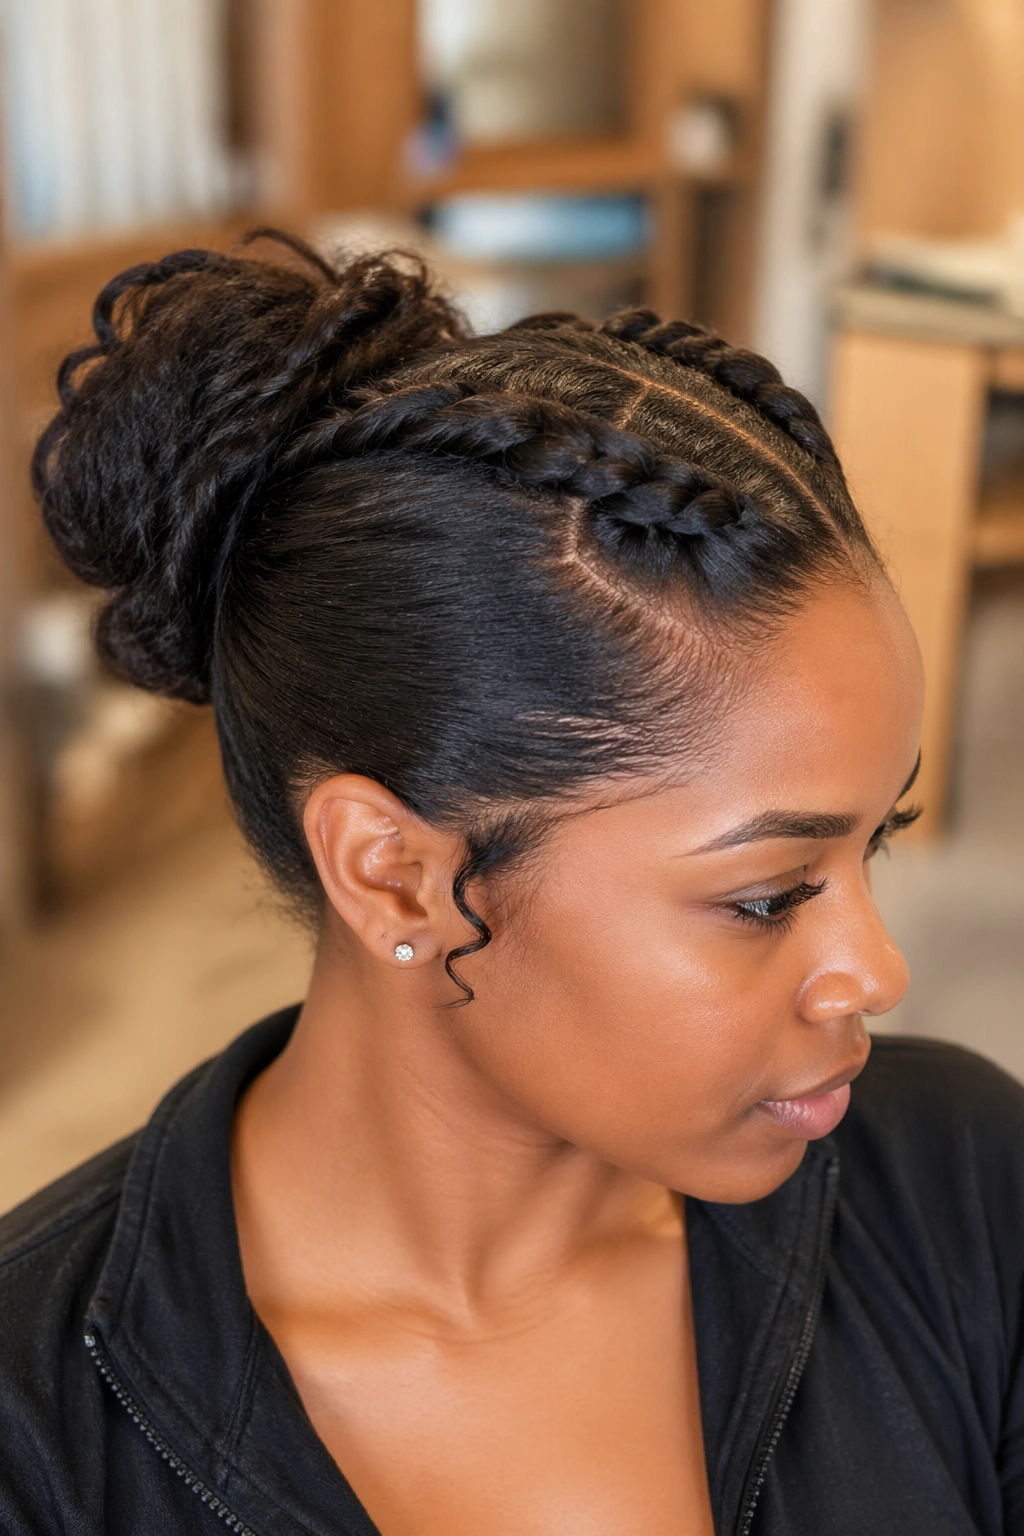
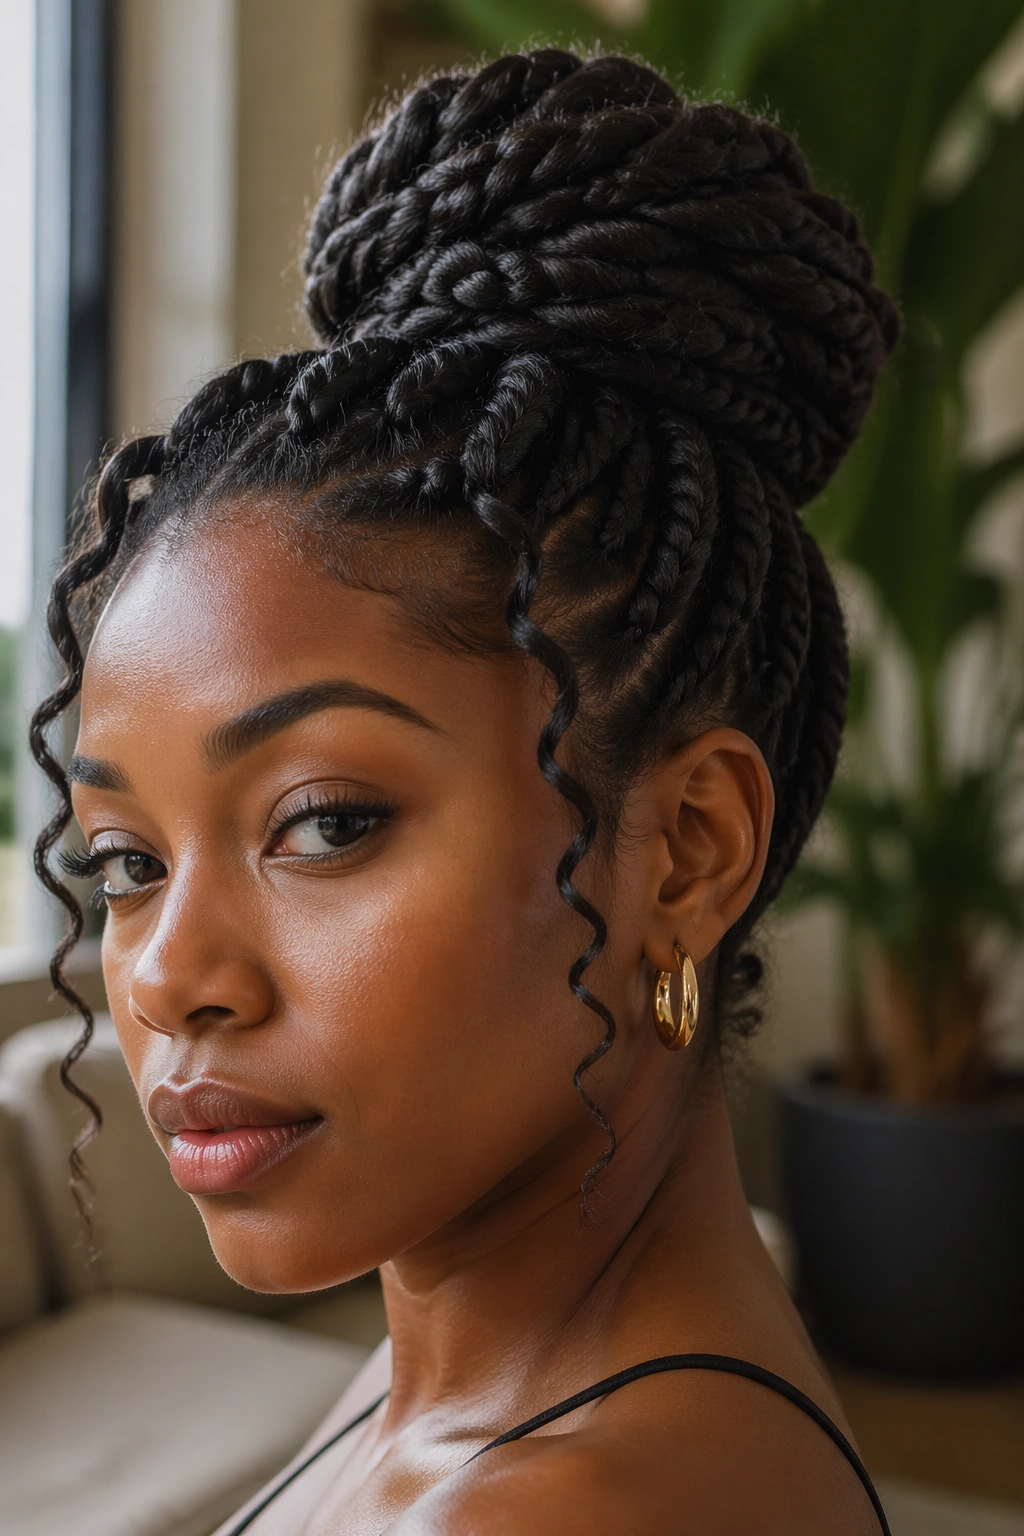
3. Braided Base Bun That Keeps Its Shape
If your ponytail buns fall apart halfway through the day, braid the ponytail first. A braided base gives the bun a spine, which means the style stays neat even when your hair is dense or your curls keep springing back.
What makes it hold so well
Start with a ponytail, braid it down to the ends, then wrap the braid into a coil around its own base. Use two or three bobby pins to lock it in place, crossing them instead of pushing them in straight. That little crisscross matters.
This version is especially handy when you need the style to survive a long day, humidity, or a few hours under a jacket hood. It also keeps the bun from puffing out in weird places. If your hair is very thick, braid it in two sections first so the finished coil sits flatter.
The look is structured, but the finish can still be messy. Pull one or two braid loops loose with your fingertips, and the whole thing softens up fast.
4. Claw-Clip Ponytail Bun for Busy Days
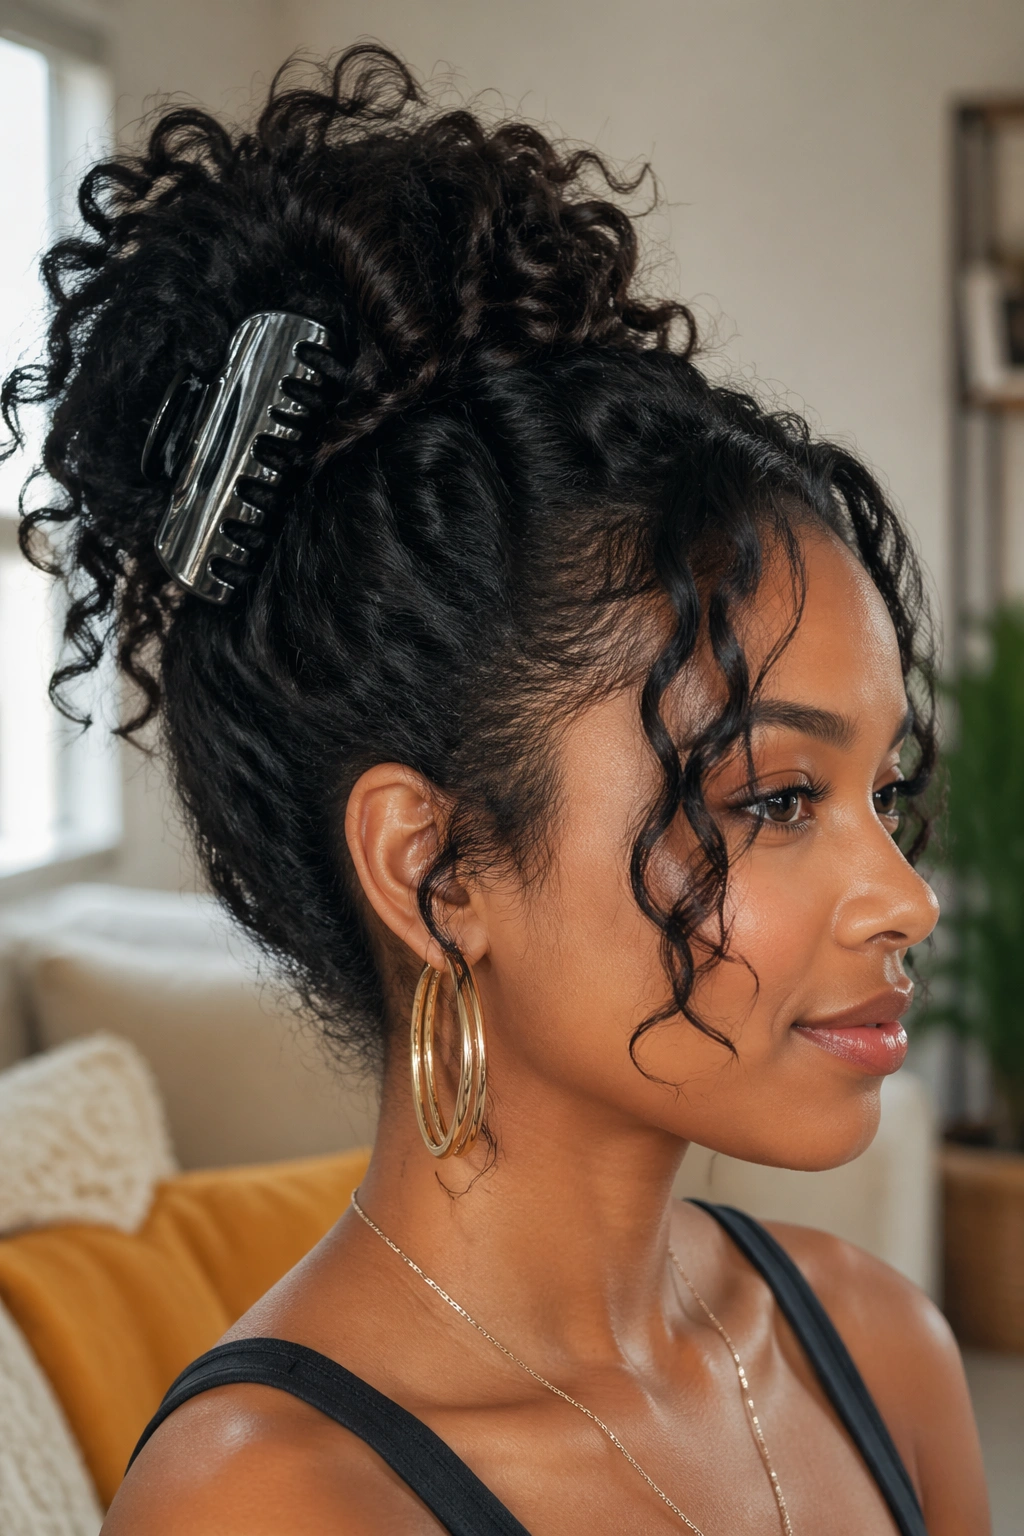
Need a bun that comes down in one move? A claw clip is your shortcut. It works best when the hair has a little stretch and the clip is wide enough to hold real density, not just a small handful of hair.
Gather the ponytail, twist it once or twice, and fold the length upward before clipping it at the base. Let the ends fan out a little. That looseness is what gives the style its messy feel instead of making it look stiff and overdone.
How to make the clip disappear
Choose a clip with teeth that grip, not just decorate. A matte finish usually slips less than slick plastic, especially on natural hair. If the clip keeps popping open, the ponytail is too heavy for it. Use a bigger one.
A few loose pieces around the face help a lot here. So does a light mist of water on the ends before you twist. Not soaked. Just damp enough to keep the curls from looking frayed.
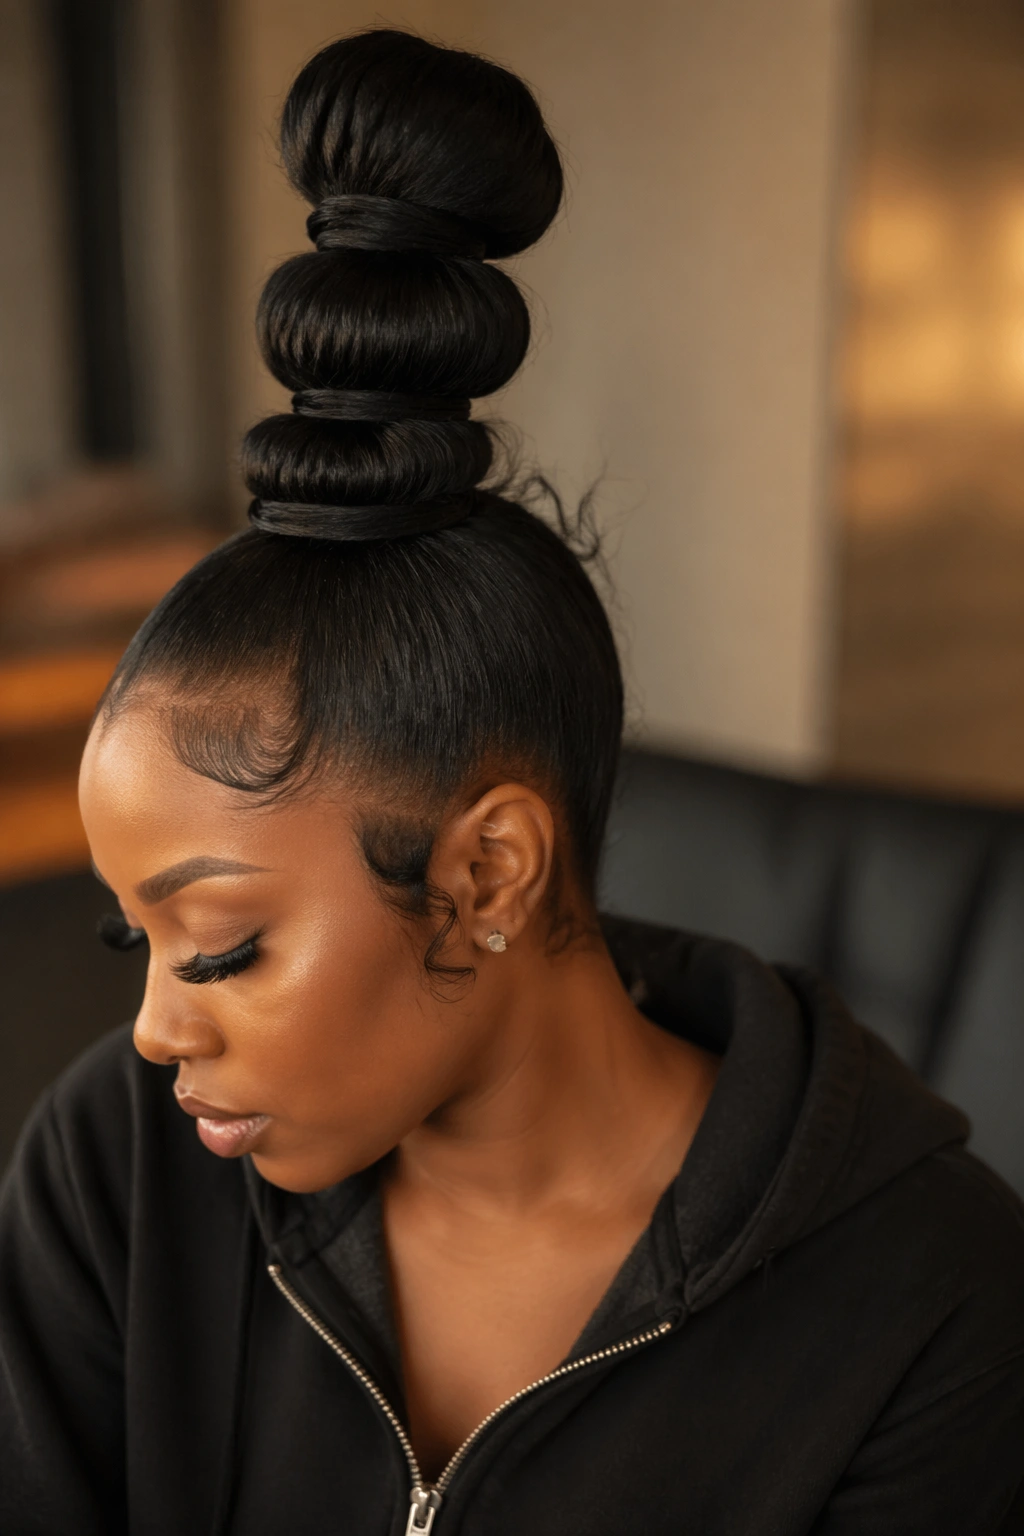
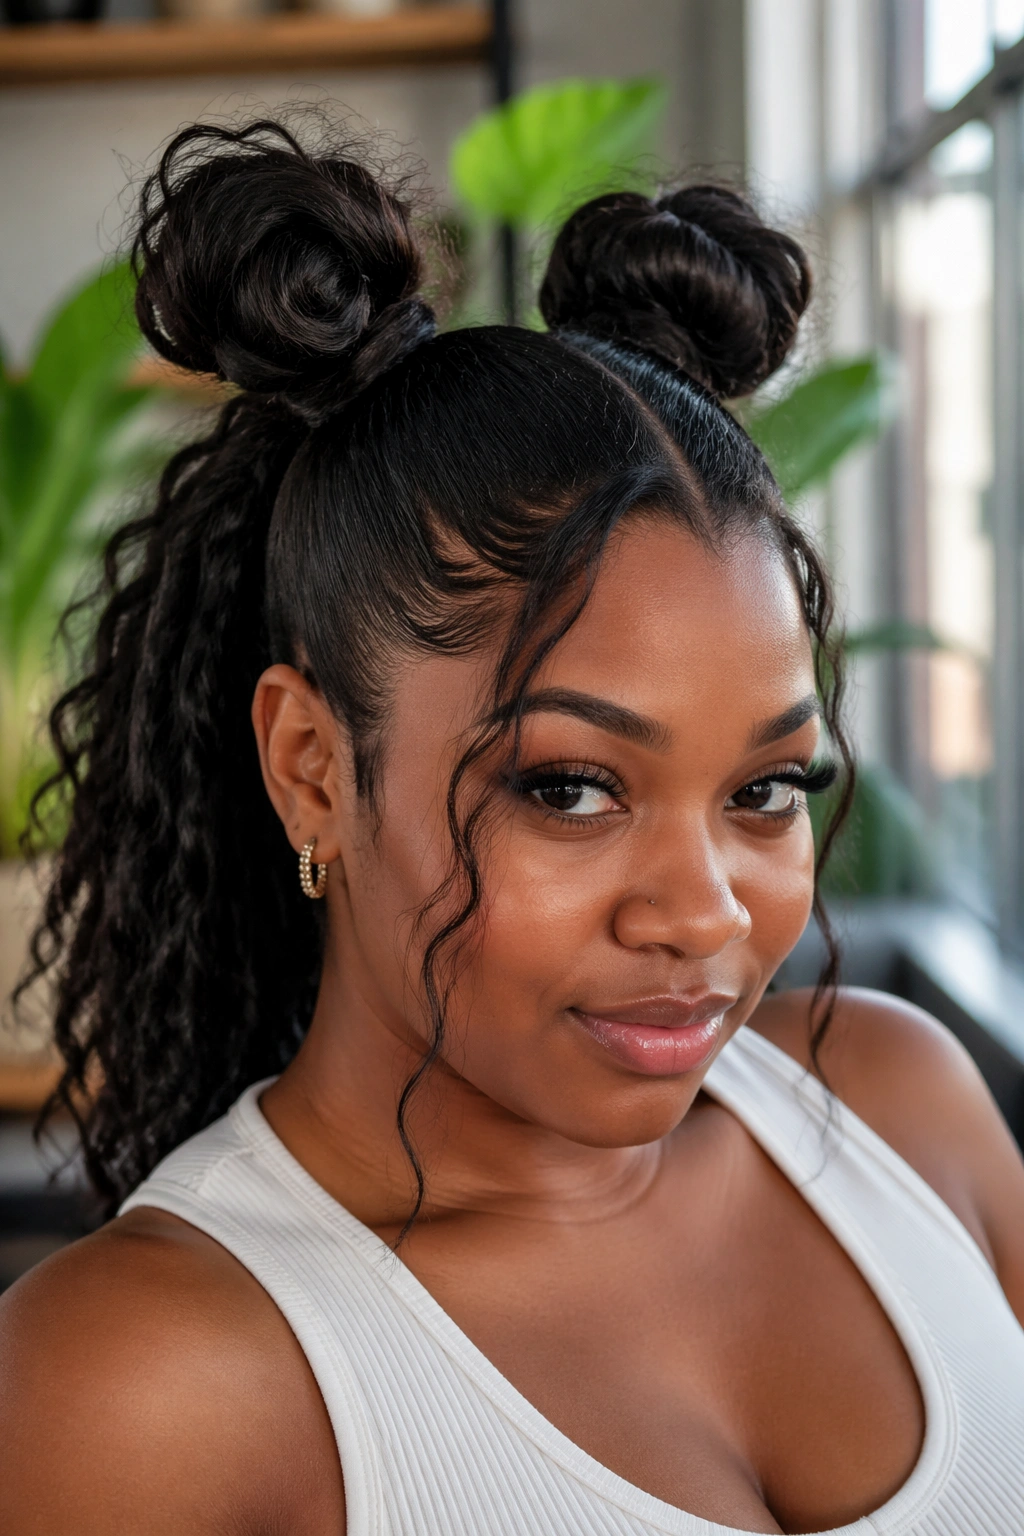
5. Two-Tone Textured Top Knot Bun

Messy does not have to mean random. A top knot with two textures—smooth at the front and fluffy at the bun—looks polished because the contrast does the work for you.
This style shines on stretched hair, twist-outs, and blowouts that still have movement. Smooth the crown and temples, then let the bun itself stay soft and full. If your ends are curly, even better. The difference between sleek roots and textured ends gives the bun a richer shape, almost like you meant to create that contrast from the start.
I like this one because it doesn’t ask for perfect symmetry. It asks for balance. The front can be neat, the bun can be loose, and the style still feels finished.
If your hair is long enough, wrap the bun once and stop. Leave the tail peeking out. That small break in the line keeps it from looking too polished.
6. Bubble Ponytail Bun With Wrapped Sections
A bubble ponytail bun looks like you spent longer on your hair than you did. That is the charm. It gives you little sections of volume down the ponytail, then ends in a bun that still feels playful and soft.
Use small snag-free elastics about 2 to 3 inches apart, then gently pull each section outward to create the bubbles. Once you reach the end, tuck or wrap the remaining length into a bun and pin it at the base. The whole style depends on texture, so don’t press the bubbles flat.
- Use 4 to 6 elastics, depending on length.
- Fluff each bubble with your fingertips, not a brush.
- A little oil on the hands helps reduce frizz where the sections are pulled apart.
This one is especially good when you want something lively but not loud. The rhythm of the bubbles gives the hair movement all the way down.
7. Side-Swept Messy Bun With a Deep Part
A deep side part changes the mood fast. Instead of the bun sitting dead center, everything shifts a little off balance, and that makes the whole style look softer and more face-framing.
Brush the hair toward one side first, then gather it low or mid-height depending on your face shape. The bun can sit slightly behind the ear or closer to the nape. Let a few curls drop along the heavy side of the part. That is where the style gets its charm. Too much symmetry would kill it.
Soft. But not sweet.
This look works especially well when you want your cheekbones, lipstick, or earrings to get attention. It also plays nicely with natural texture because the loose pieces around the part can stay curly while the back stays controlled. If you use gel, keep it light at the front and nearly invisible at the ends.
8. Feed-In Braid Ponytail Bun
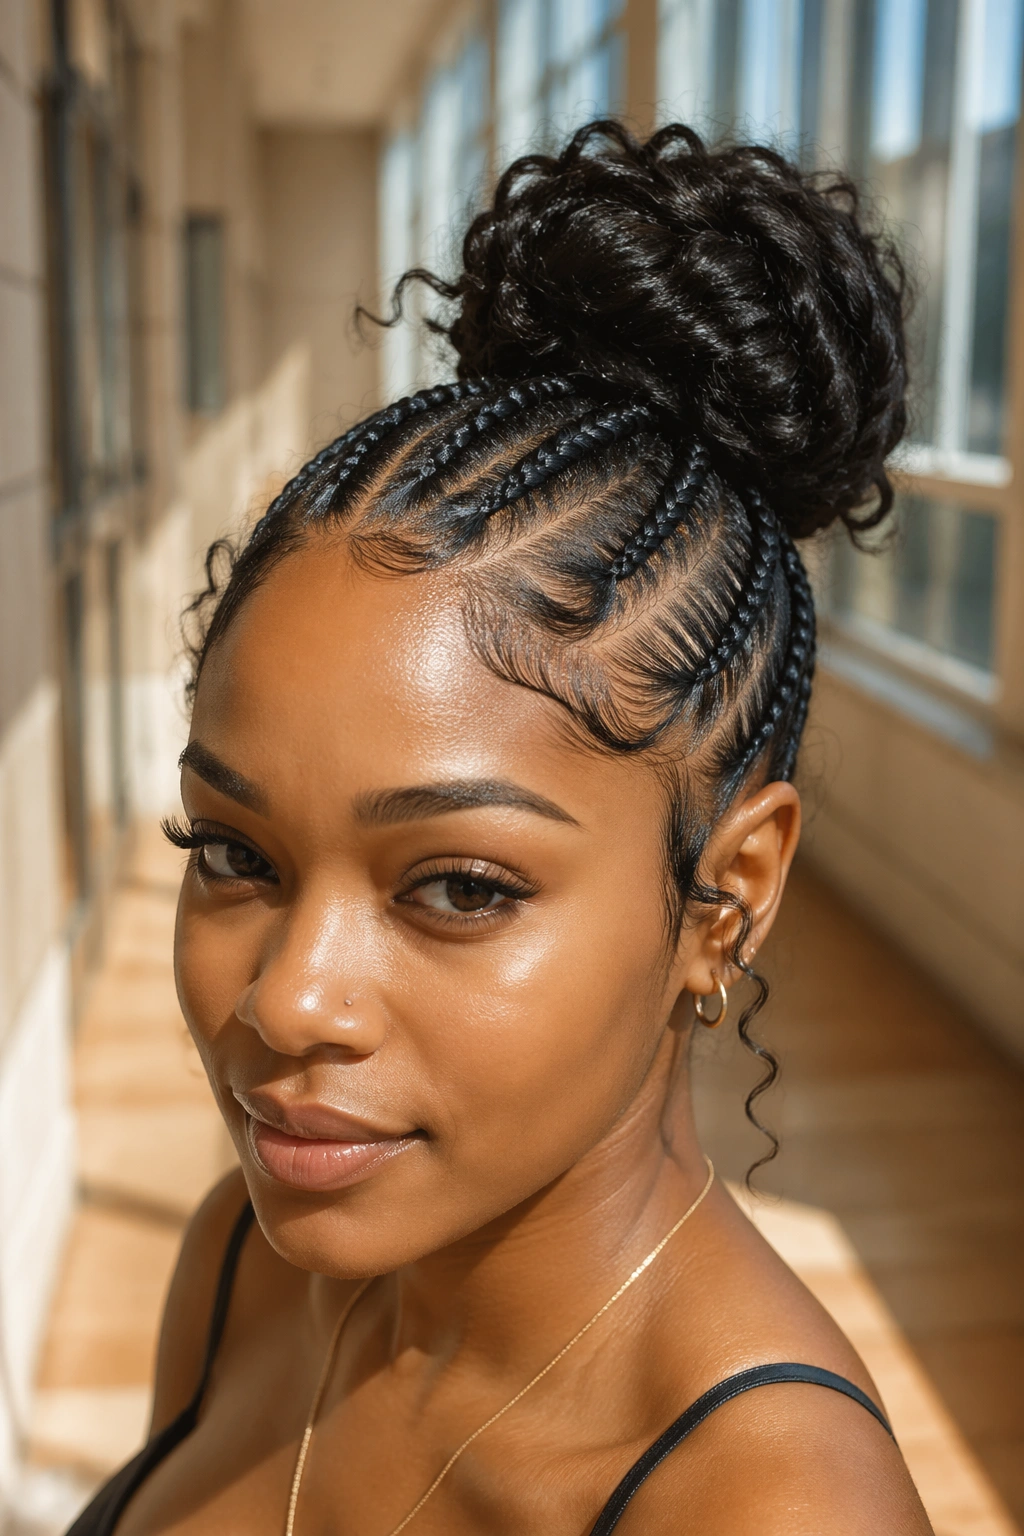
A feed-in braid base gives the ponytail a cleaner start and a lot more staying power. Instead of a bulky line at the hairline, the braids taper in, which makes the bun sit flatter and look more refined from the front.
Why the braid matters
Use two to four feed-in braids from the front hairline into the ponytail, depending on how much detail you want. The thinner the feed-in section, the more seamless the start looks. Once the ponytail is secured, twist or wrap the length into a bun and pin it down.
This is a smart choice for active days, travel, or any week when you need the style to last a while. The braids keep the front neat, and the bun can be as loose as you want. A satin wrap at night keeps the braid lines crisp and stops the edges from puffing up too soon.
If you like a little drama, leave the bun curly instead of tucked. That keeps the style from feeling too formal.
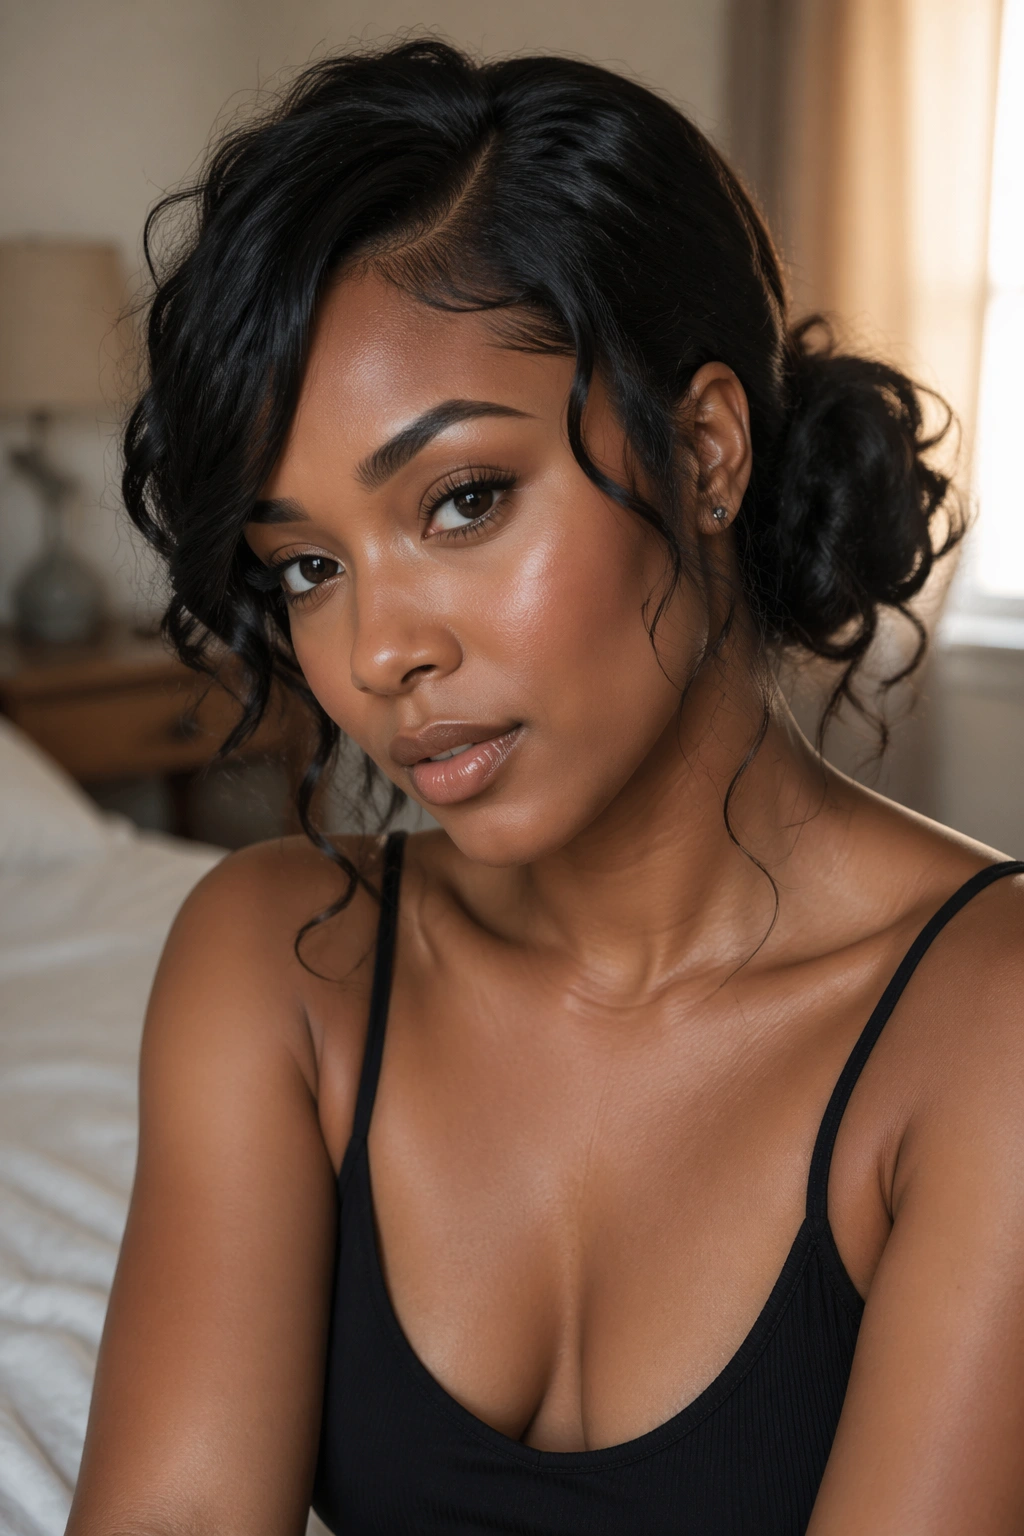
9. Stretchy Afro Puff Bun With Lift at Crown
Some styles need a lot of product. This one needs lift. Stretch the roots first, then let the puff do the talking. The high crown gives the bun volume before you even start shaping it.
That lift can come from banding overnight, a quick blow-dry on low heat, or a stretched twist-out that has cooled all the way down. Once the hair has some length, gather it high and let the puff form naturally around the base. Use your fingers to shape it into a rounded bun instead of pressing it flat.
The point is volume, not control.
A pick at the roots can help if the crown looks too tight, but use it gently. You want the bun to sit airy, not frizzy. A soft satin scrunchie works well because it keeps tension even across thick hair.
10. Twisted Crown Ponytail Bun
If you want the front to look neat and the back to stay soft, twist the crown before you make the ponytail. Two chunky twists from each side of the head are enough to change the whole shape.
Pull the twists back toward the center, gather the remaining hair into a ponytail, then build the bun from there. The front looks guided and intentional. The bun can still stay a little loose so it does not feel too formal.
Where the shape comes from
The magic is in the lines. The twists pull the eye backward, which makes the bun feel taller without needing extra bulk. If your hair is thick, keep the twists broad and close to the scalp. If it is finer, make them tighter so the crown holds shape.
This style is good when you want one part of the look polished and one part relaxed. That mix feels modern without trying too hard.
11. Rope-Twist Bun With a Fanned-Out Finish
A rope-twist bun has a softer edge than a braid bun. The twist creates a rounder rope-like texture, and when you fan the ends a little, the bun gets that airy, lived-in look that many plain buns miss.
Two-strand twist the ponytail all the way down, then coil it into a bun and pin it in place. Once it’s secure, gently pull at the outer loops of the twist so the texture opens up. You do not need much. A small amount of spreading makes the whole bun look fuller.
Unlike a three-strand braid, a rope twist feels lighter and a bit more casual. That makes it a good pick if you want texture without sharp lines. It also works well on hair that has been stretched but not blown straight.
A little curl cream on the final inch helps the ends sit nicely instead of fraying.
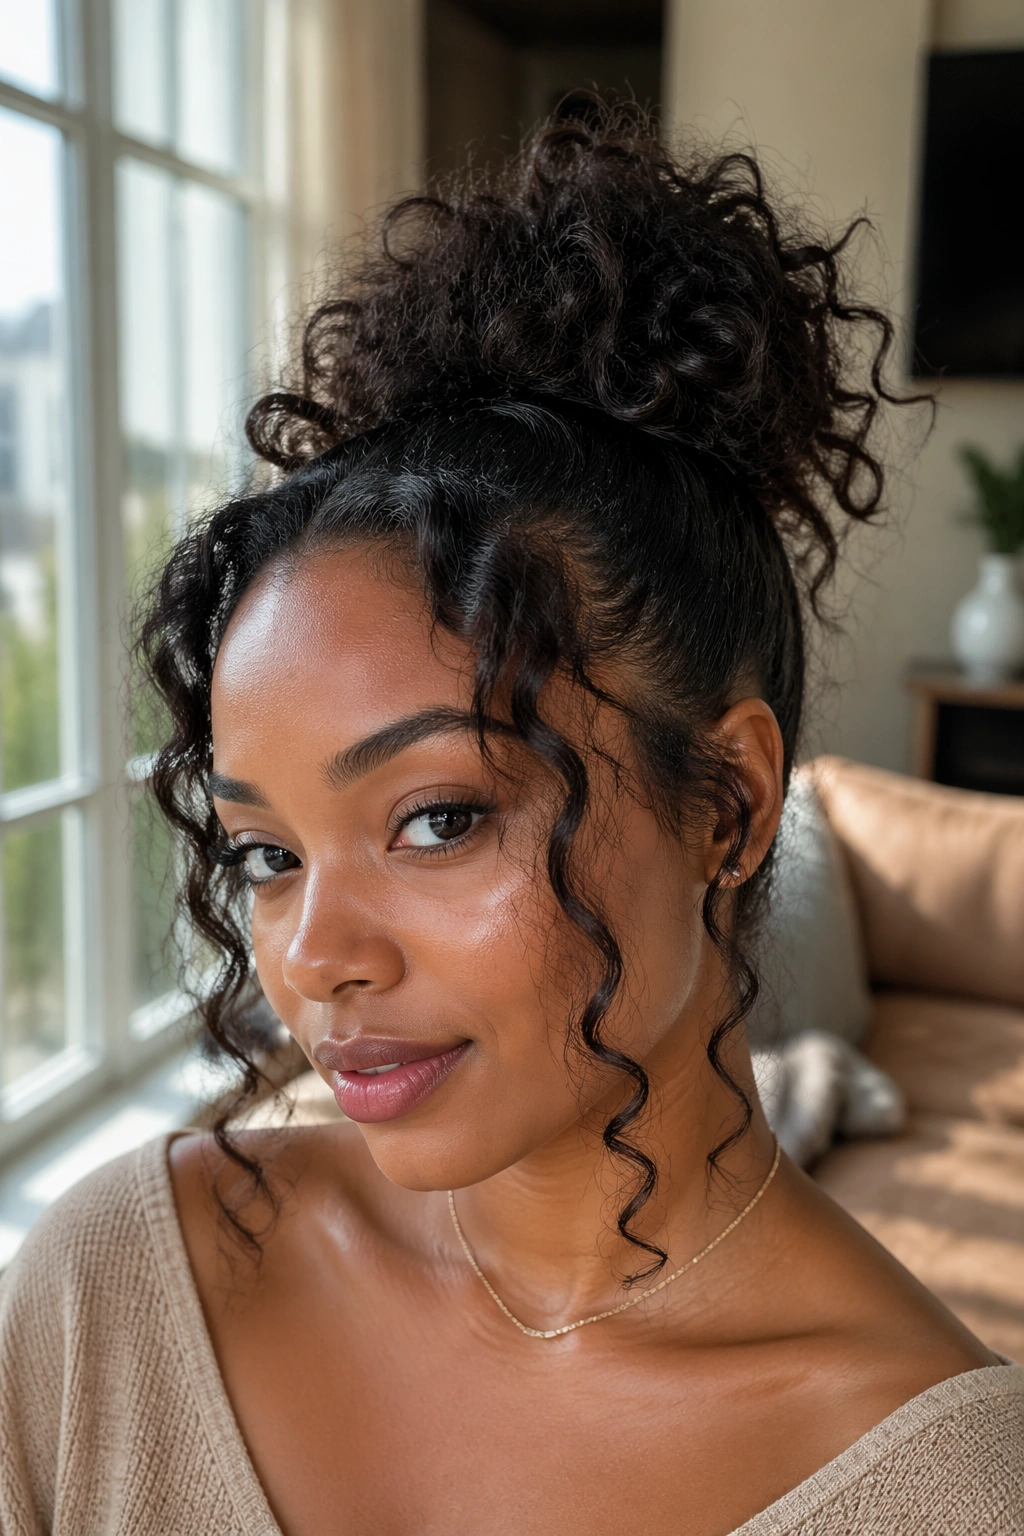
12. Pineapple Ponytail Bun for Curly Hair
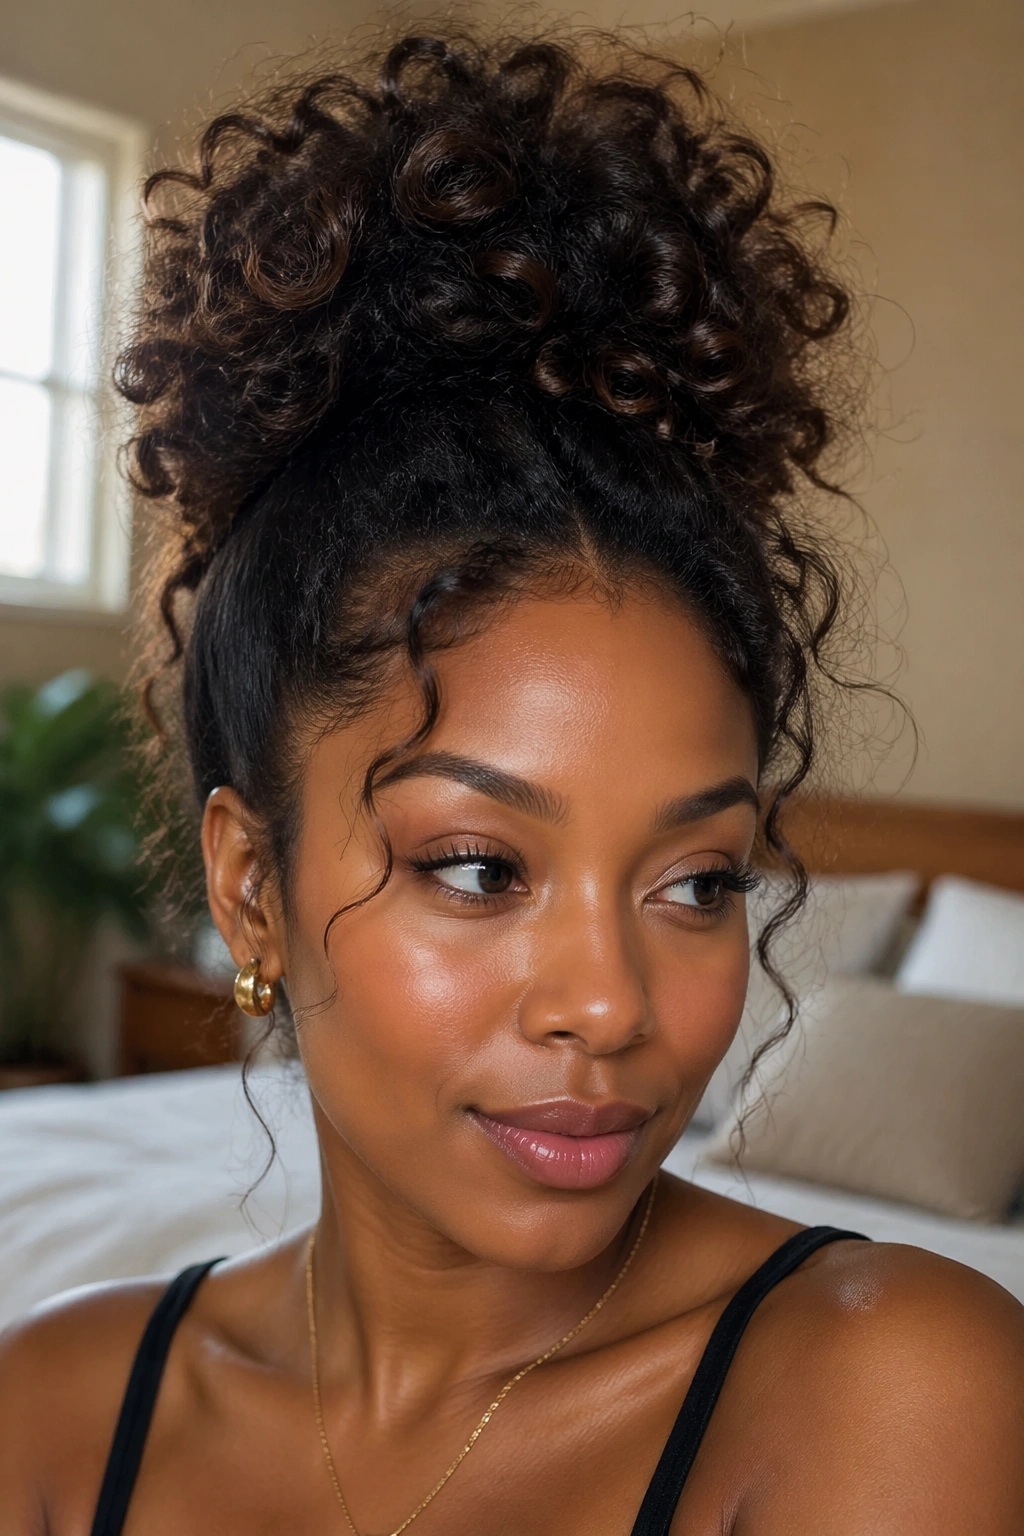
Why fight curl volume when you can let it shape the bun for you? A pineapple ponytail bun keeps the curls piled high, loose, and visible, which is exactly what makes it work on wash-and-go hair or defined curls.
Gather the curls at the crown with a satin scrunchie, leave some height at the base, and let the lengths spill and tuck into a soft bun. Do not comb the curls out first. That would flatten the whole point. Your fingers are enough.
This style has a nice lazy elegance to it, even though it still needs a little planning. The curls around the bun should look bouncy, not crushed. If you want more polish, smooth only the very top layer at the crown and leave the rest alone.
A little leave-in on the ends can keep the curls from drying into little wisps by midday.
13. Half-Braided, Half-Bun Ponytail Style
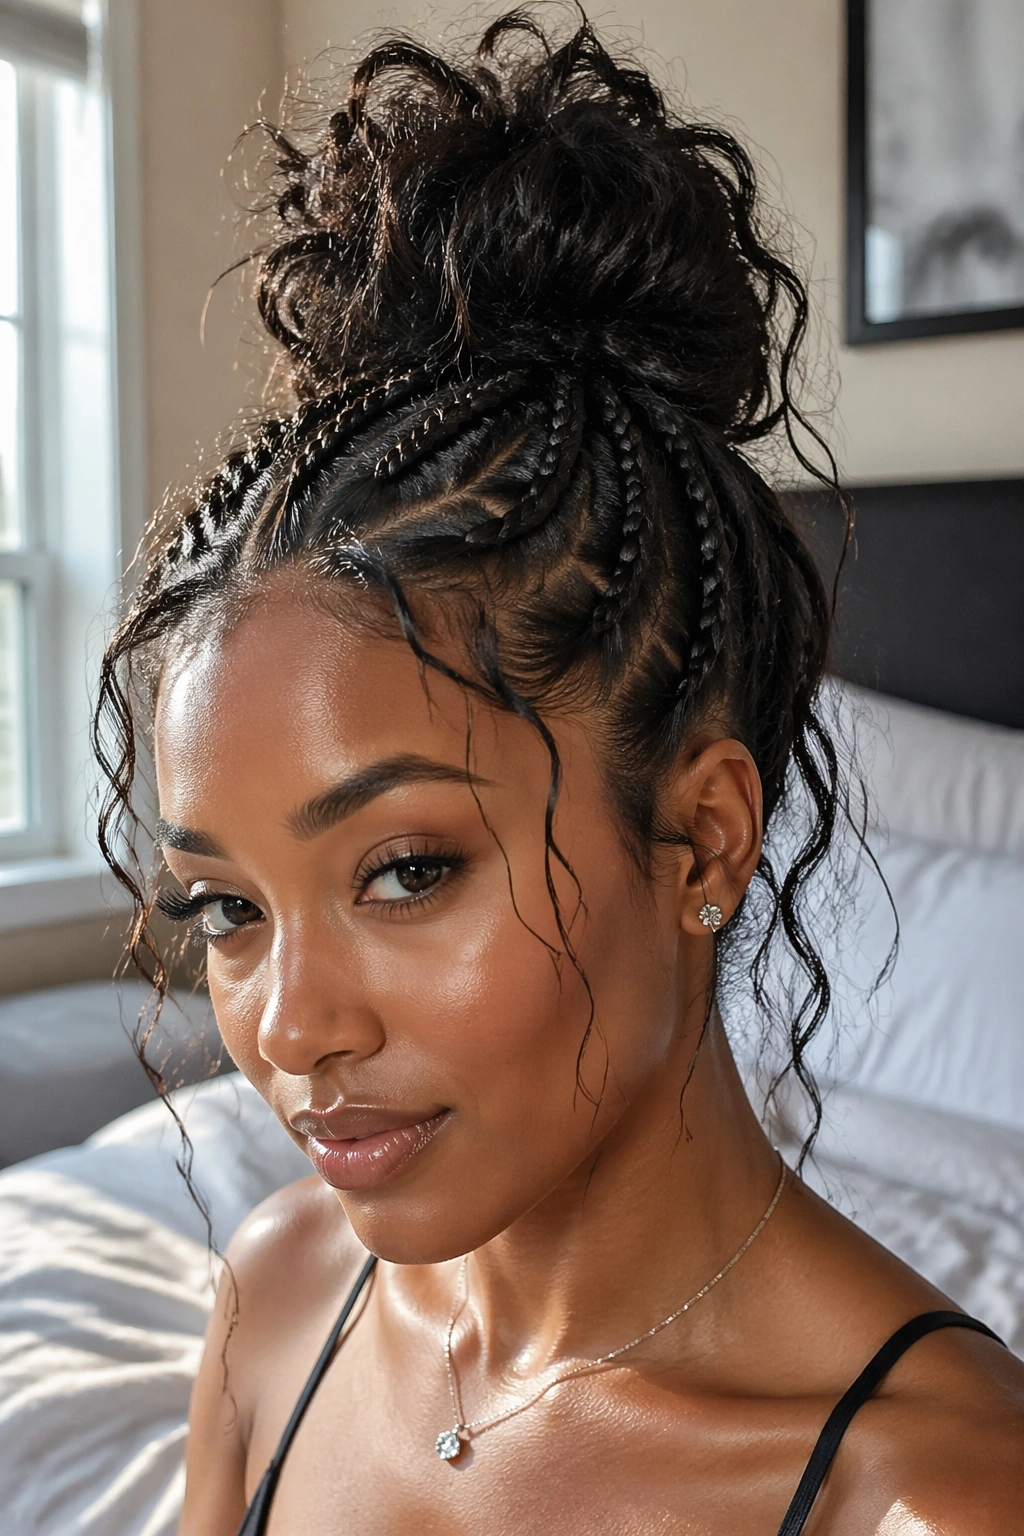
This one is for the days when your roots want order and your ends want freedom. Start with the top or front section braided, then pull the rest into a ponytail and wrap it into a bun. The mix gives you structure without losing softness.
I like this style because it solves a common problem on textured hair: the front can get frizzy long before the ends do. Braiding the top section keeps that area tidy, while the bun stays loose enough to feel relaxed. You get control where you need it and movement where you want it.
If you want to keep it more casual, leave a thin section out around the face. If you want it cleaner, tuck every loose strand into the bun and let the braid do all the work. Either way, the contrast is the point.
14. Sleek Wrapped Bun With a Braided Tail
A sleek front with a braided tail wrapped around the bun gives you a cleaner outline, which is useful when you want the style to look sharp from every angle. It works especially well for evening plans, office days, and any outfit that needs a little structure.
- Smooth the crown with a soft brush and a thin layer of gel.
- Pull the hair into a ponytail, then braid the length down.
- Wrap the braid around its base and pin it in 3 or 4 spots.
- Keep the edges neat, but not scraped tight.
The braided tail gives the bun a tidy finish, while the little bit of looseness at the crown keeps it from looking severe. If your hair is coarse or dry, put a drop of oil on the braid before wrapping it. That stops flyaways without making the style greasy.
15. Chunky Two-Strand Twist Bun
Chunky two-strand twists give you shape without a lot of fuss. They are bold enough to stand on their own, but when you gather them into a bun, the texture gets even better. The result feels full, soft, and a little undone in the right way.
Start with two or three large twists from the ponytail instead of many tiny ones. That keeps the bun from looking busy. Wrap the twists around each other and secure them underneath with crossed pins. If one twist starts to slip, tuck the end under the next twist instead of fighting it flat.
This style works well on twist-outs because it preserves the pattern instead of hiding it. It also gives shorter natural hair a chance to look fuller without needing extra hair pieces. One loose twist end hanging out can make the bun feel less rigid.
16. Curly Ponytail Bun With Leave-Out at the Front
A few curly pieces at the front can change the whole mood of a bun. Instead of pulling every strand back, leave one or two face-framing sections out, then gather the rest into a ponytail and wrap it into a bun.
This is the style I’d pick when the outfit feels a little plain and the hair needs to do some lifting. The leave-out brings motion around the face, which keeps the bun from reading too strict. If your curls are tight, define the front pieces with cream and finger-coil them before you pin the rest up.
Keep the leave-out small. Too much loose hair around the face starts to feel messy in a bad way. A couple of curls is enough. That little bit of softness is usually all the style needs.
A satin scarf overnight helps the front pieces keep their shape.
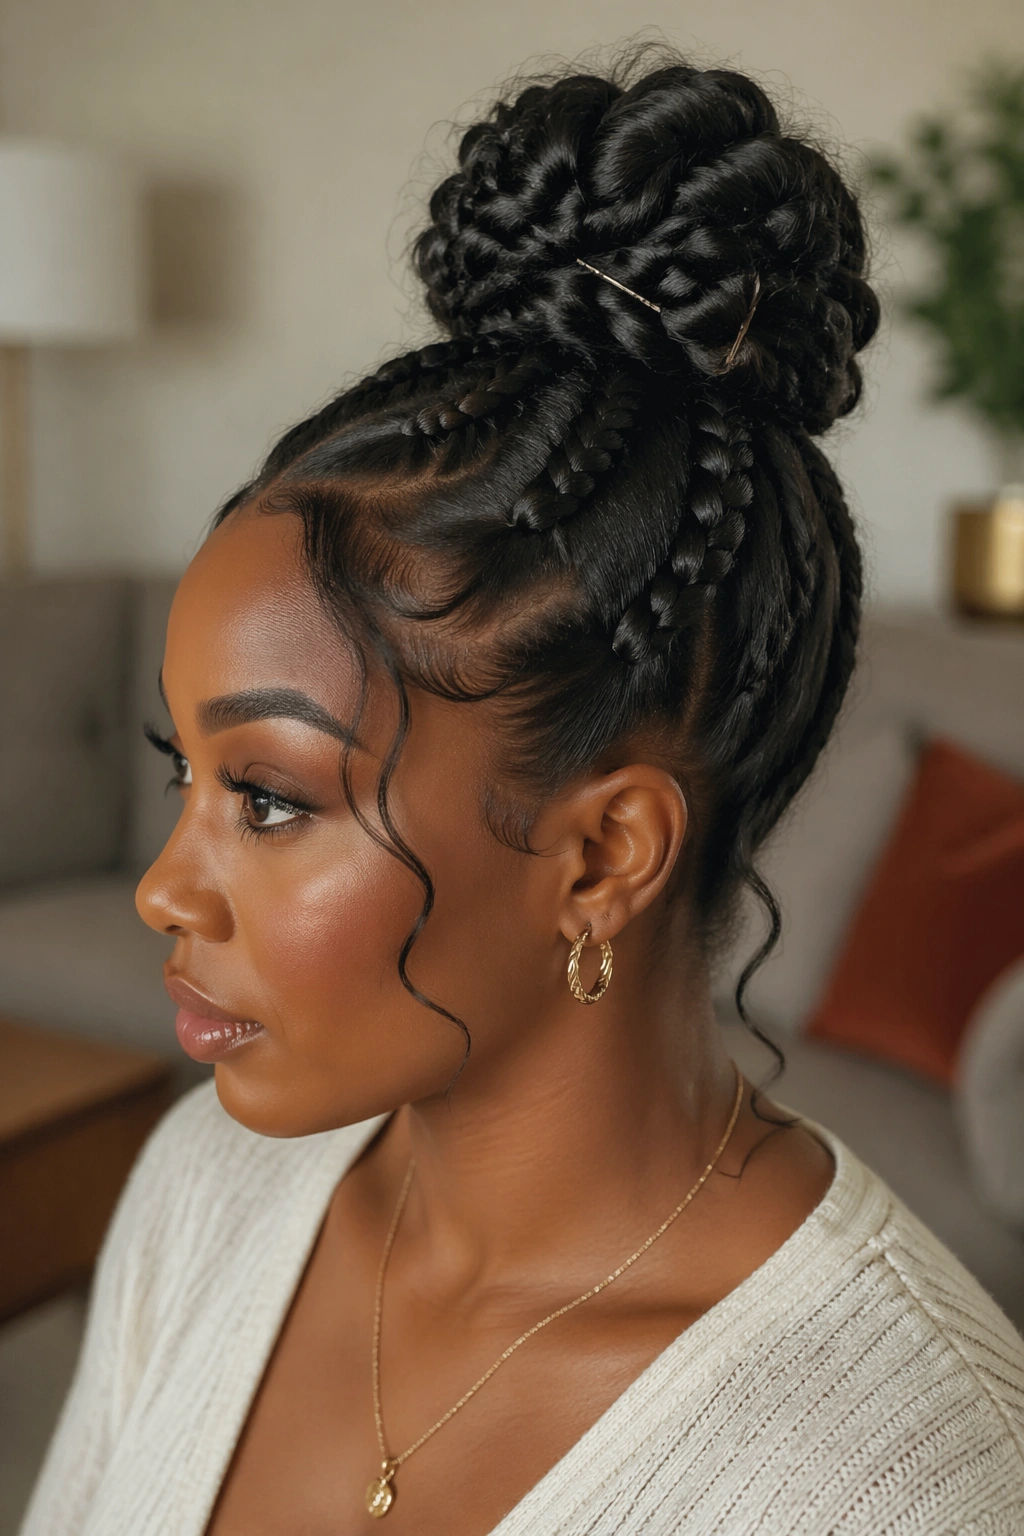
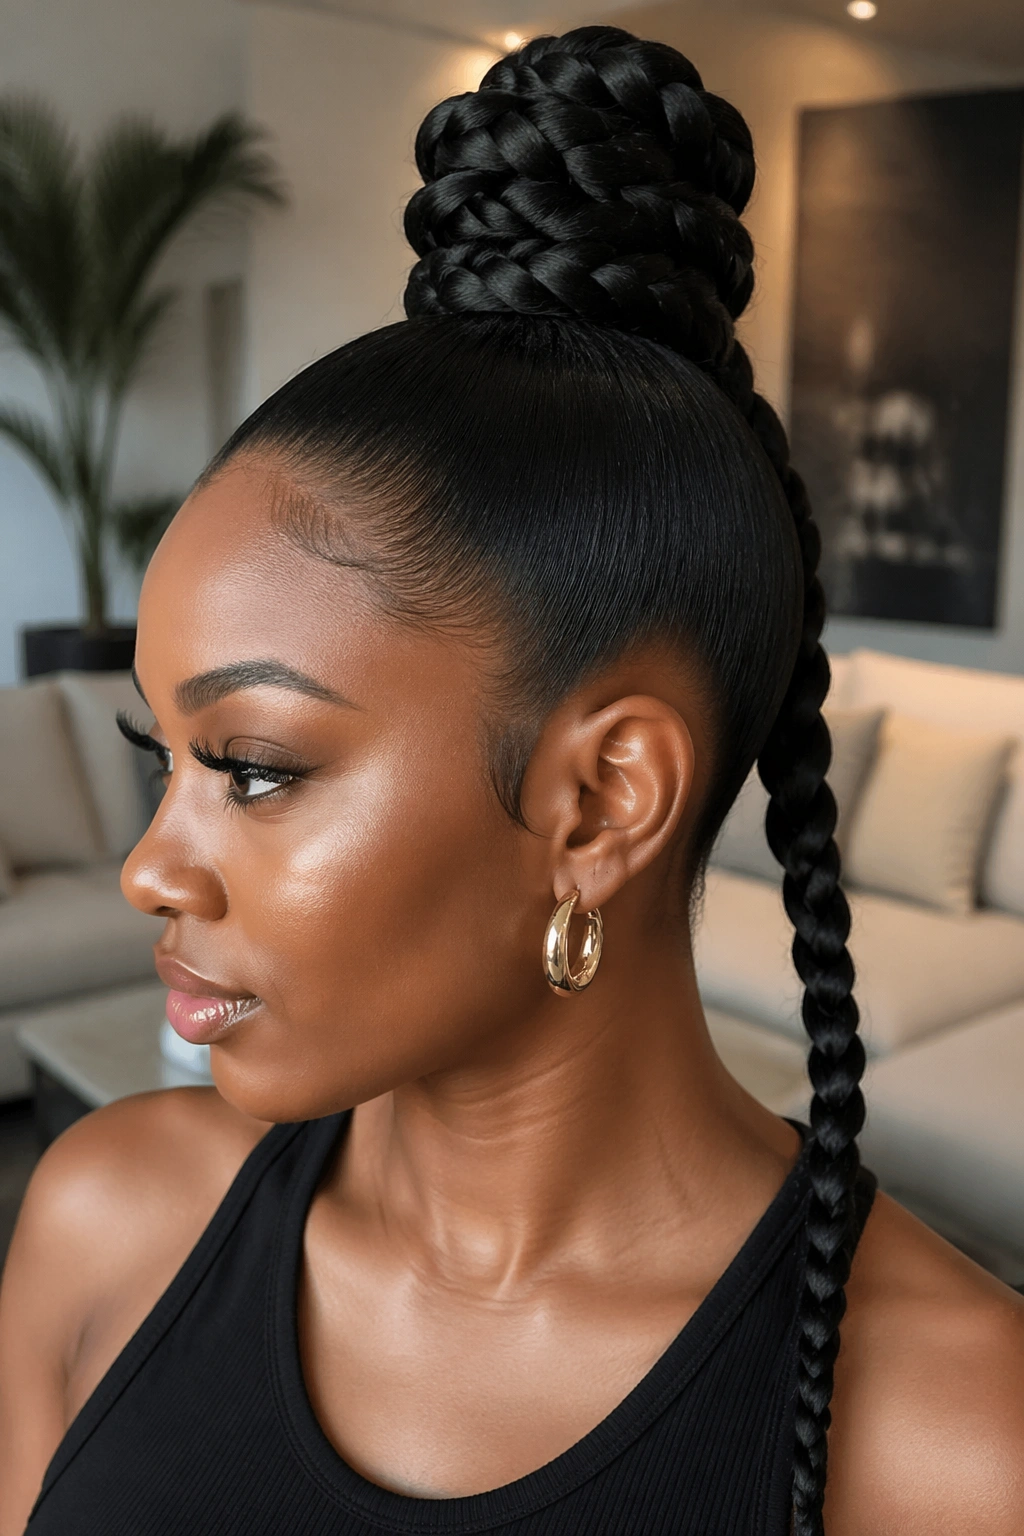
17. Braided Ponytail Into a Top Knot
Braiding the ponytail before turning it into a top knot gives the bun a strong shape and a little more height. The braid acts like a built-in handle, which makes the wrap easier and keeps the bun from sagging as the day goes on.
How to keep it from drooping
Braid the ponytail all the way to the ends, then fold it upward into a compact knot. Use five to seven bobby pins if your hair is thick. Fewer pins usually means the bun will start slipping once the hair gets heavier.
A small hairnet can help if the braid is long. It keeps the layers tight without making the bun feel stiff. If you want the knot messier, pull at the sides of the braid before pinning it.
This style is strong on texture and shape. It gives you that lifted look that plays well with bold earrings or a clean neckline.
18. Low Messy Bun With Swooped Baby Hairs
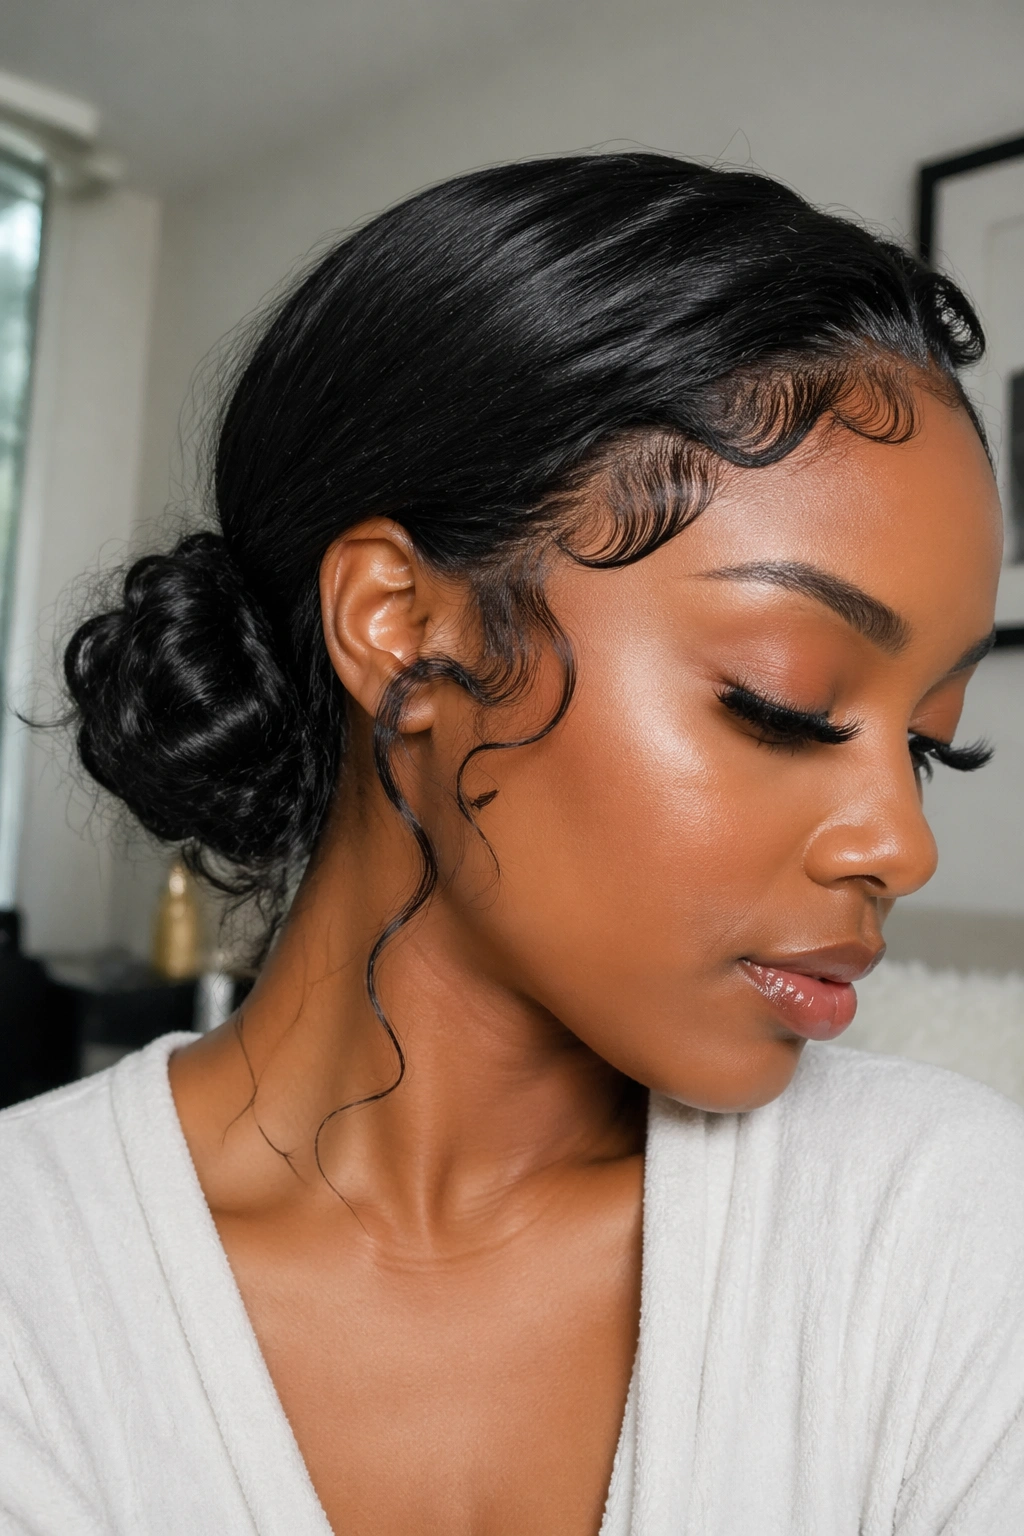
A low messy bun gets a lot of its personality from the hairline. Swooped baby hairs can soften the front fast, especially when the bun itself sits low and loose at the nape.
Use a small edge brush and a light touch of gel. Draw two simple swoops on each side if you like the look, or keep it even softer with one curve near the temples. Then gather the rest of the hair into a loose bun and stop before it gets too tight. The goal is shape, not slickness.
Keep the baby hairs neat, but don’t drag gel across the whole hairline. That tends to look heavy once it dries. The bun should still feel relaxed. The swoops are just the frame.
A little shine on the bun itself can make the style look fresh even when it’s meant to be messy.
19. Braided Mohawk Ponytail Bun
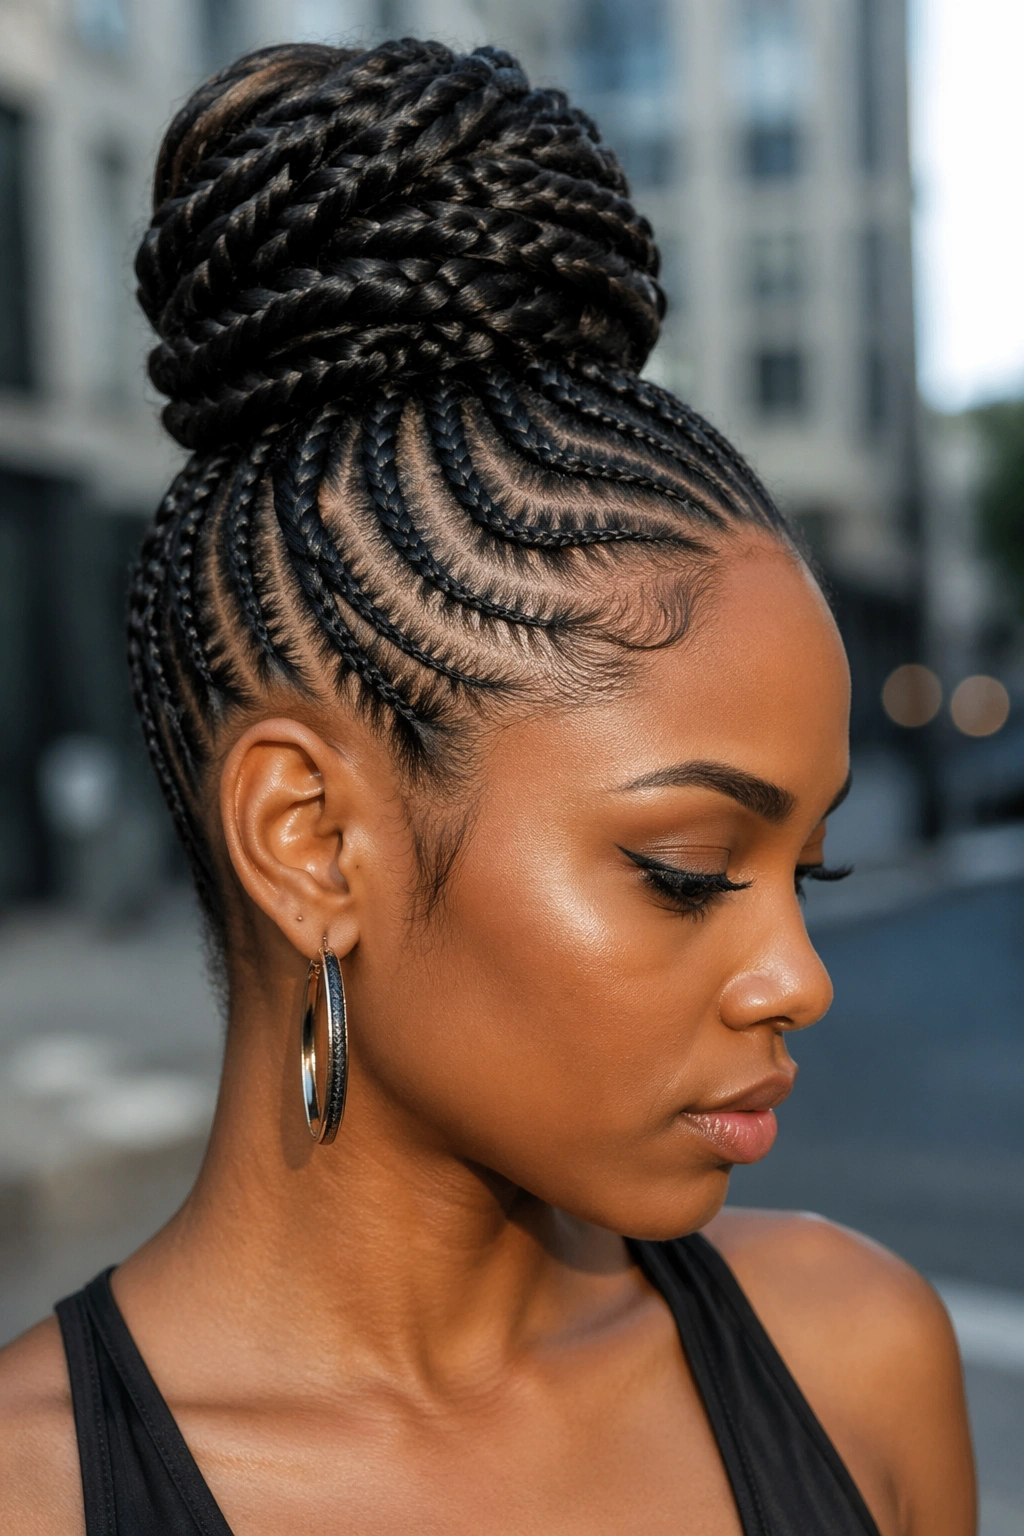
If you want the face to look lifted and the style to feel a little bolder, the braided mohawk version does the job. The sides stay controlled, the center gets the attention, and the bun sits high enough to show off the shape of your head.
Cornrows or feed-in braids along the sides guide everything into the middle. From there, build the ponytail and wrap it into a bun. The mohawk line gives the style energy without adding extra bulk at the temples. That matters if you don’t like heavy hair around the sides.
Use this one when you want your cheekbones doing some of the talking.
It also works nicely with protective styling, since the sides stay tucked away. If you want a softer finish, leave the bun a little loose and let a few braids or coils peek out at the top.
20. Voluminous Drawstring Ponytail Bun
A drawstring ponytail bun is the move when you want fullness fast or when your own hair is short and you still want a bigger shape. The key is matching texture. If your hair is coily, choose a kinky-curly ponytail piece rather than something too smooth.
Blend your own hair into a small base ponytail first, then attach the drawstring piece and wrap its length into a bun. Hide the track with a small strand if you can. That small cover-up makes the style look cleaner. Two pins are often enough at the base, but thicker pieces may need four.
- Pick a texture that sits close to your own curl pattern.
- Keep the base flat so the bun doesn’t wobble.
- Use a scrunchie or pins that can handle weight.
This is one of those styles that can read casual or dressed-up depending on how tight you wrap the bun.
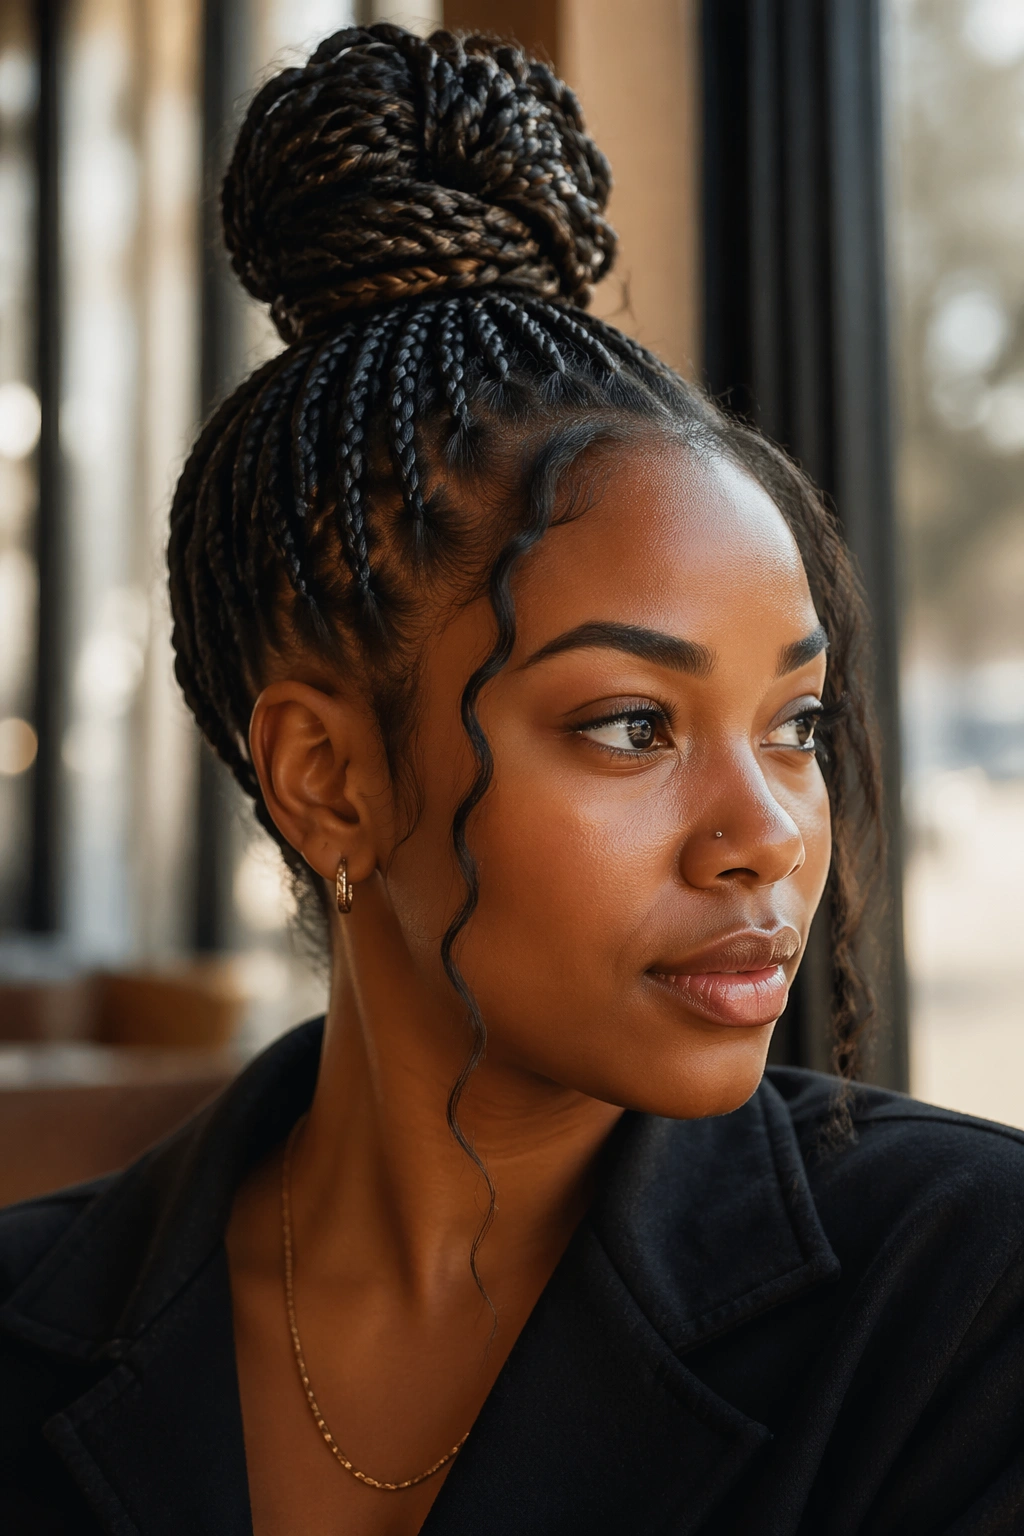
21. Knotless Braid Ponytail Bun
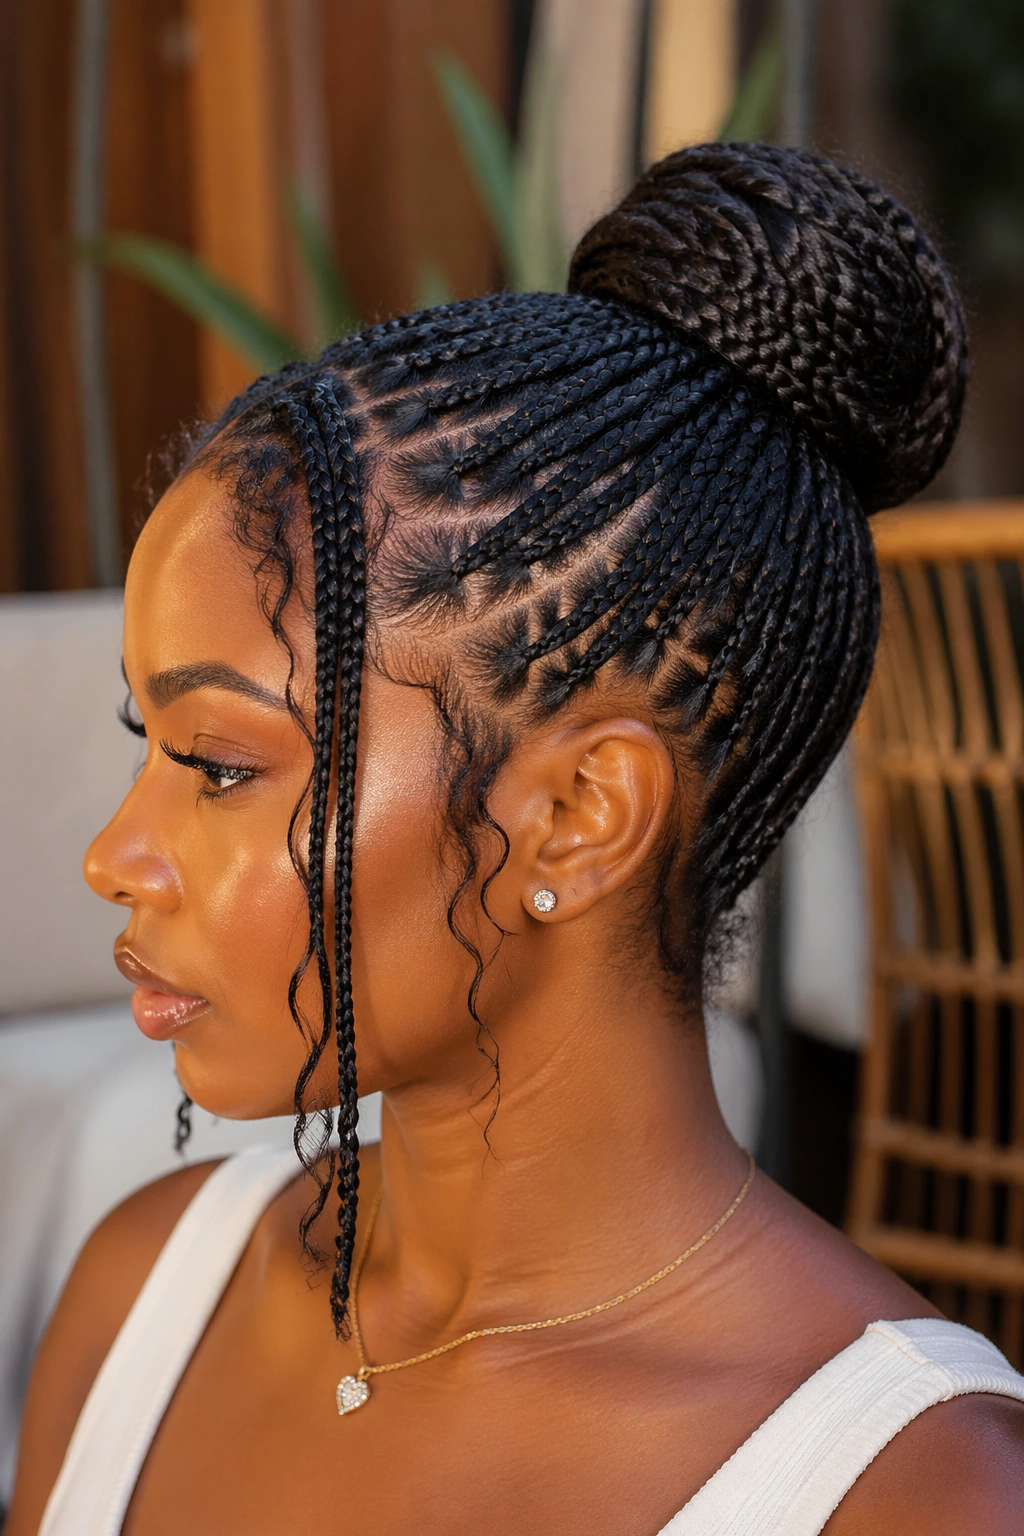
Why do knotless braid ponytail buns feel easier on the scalp than tighter braid styles? Because the braid starts thin at the root instead of with a bulky knot, the base sits flatter and the whole ponytail feels lighter.
That makes this style a smart pick when you want a bun that lasts and still feels comfortable. Gather the knotless braids into a ponytail, then wrap them into a bun or fold them under if the braids are long. If the braid lengths are waist-long, wrap twice rather than trying to jam everything into one thick loop.
The clean base is the real win here. It keeps the head from looking crowded, especially around the crown. You can keep the bun neat or let a few braids hang loose for a messier finish.
It is one of those styles that looks calm even when the weather is not.
22. Roll-and-Tuck Ponytail Bun for Natural Hair
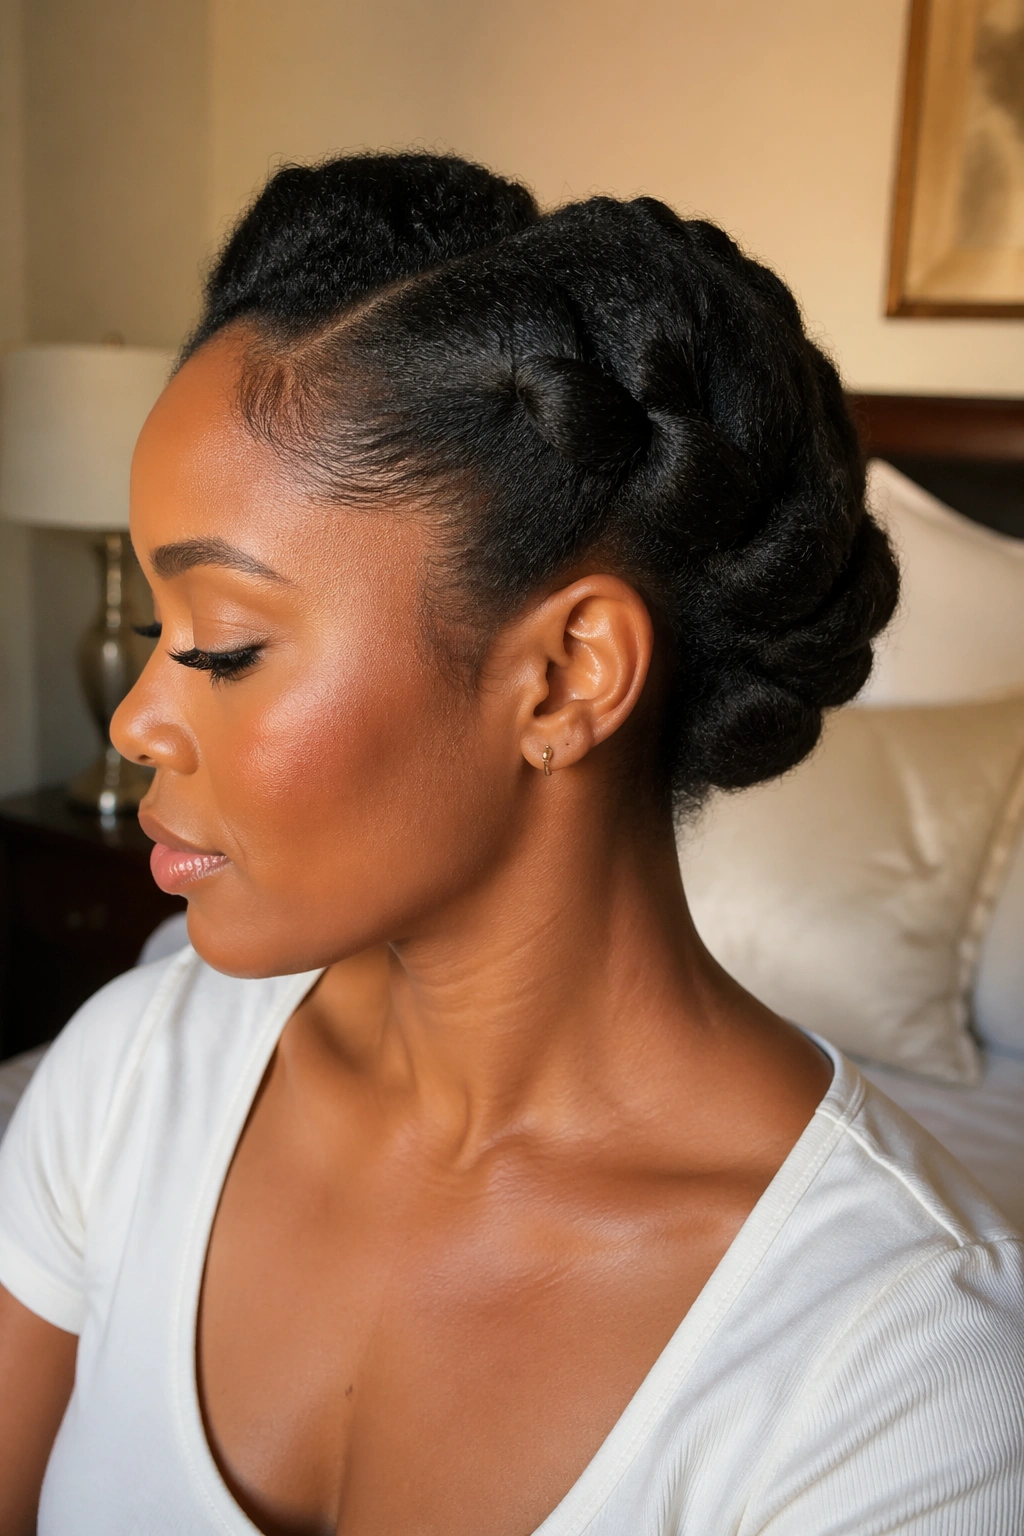
The roll-and-tuck bun is one of the easiest ways to work with shorter natural hair or stretched hair that doesn’t want to stay in a neat loop. Section the hair into two to four parts, roll each piece toward the center, and tuck it under itself.
It sounds fussy. It isn’t.
Use bobby pins to lock each tuck in place, especially near the nape and the sides. If your hair is dense, pin in an X pattern so the pieces stay put. A little bit of cream on the hands helps the rolled sections stay smooth, but keep it light or the hair will slip.
This style sits nicely under scarves, hats, and headbands too. If you sleep in a satin scarf, the shape usually holds better the next day than most people expect.
23. Space-Bun Ponytail Blend
This is the playful one. Instead of two separate buns from scratch, start with a single ponytail, split it into two smaller sections, and wrap each one into its own mini bun. You still get that messy ponytail energy, just with a little extra attitude.
The style looks good on stretched hair, twist-outs, and even braids that have been gathered into a center ponytail first. Leave a few strands loose so it doesn’t tip into costume territory. That small bit of mess keeps it grown.
I like this option when the rest of the outfit is simple and the hair needs to carry more of the personality. It also gives you a nice side view, which matters more than people think. A style that looks flat from the side usually needs more work than you’d guess.
Use pins lightly so the buns keep their soft shape.
24. Tucked Scarf Bun With Satin Detail
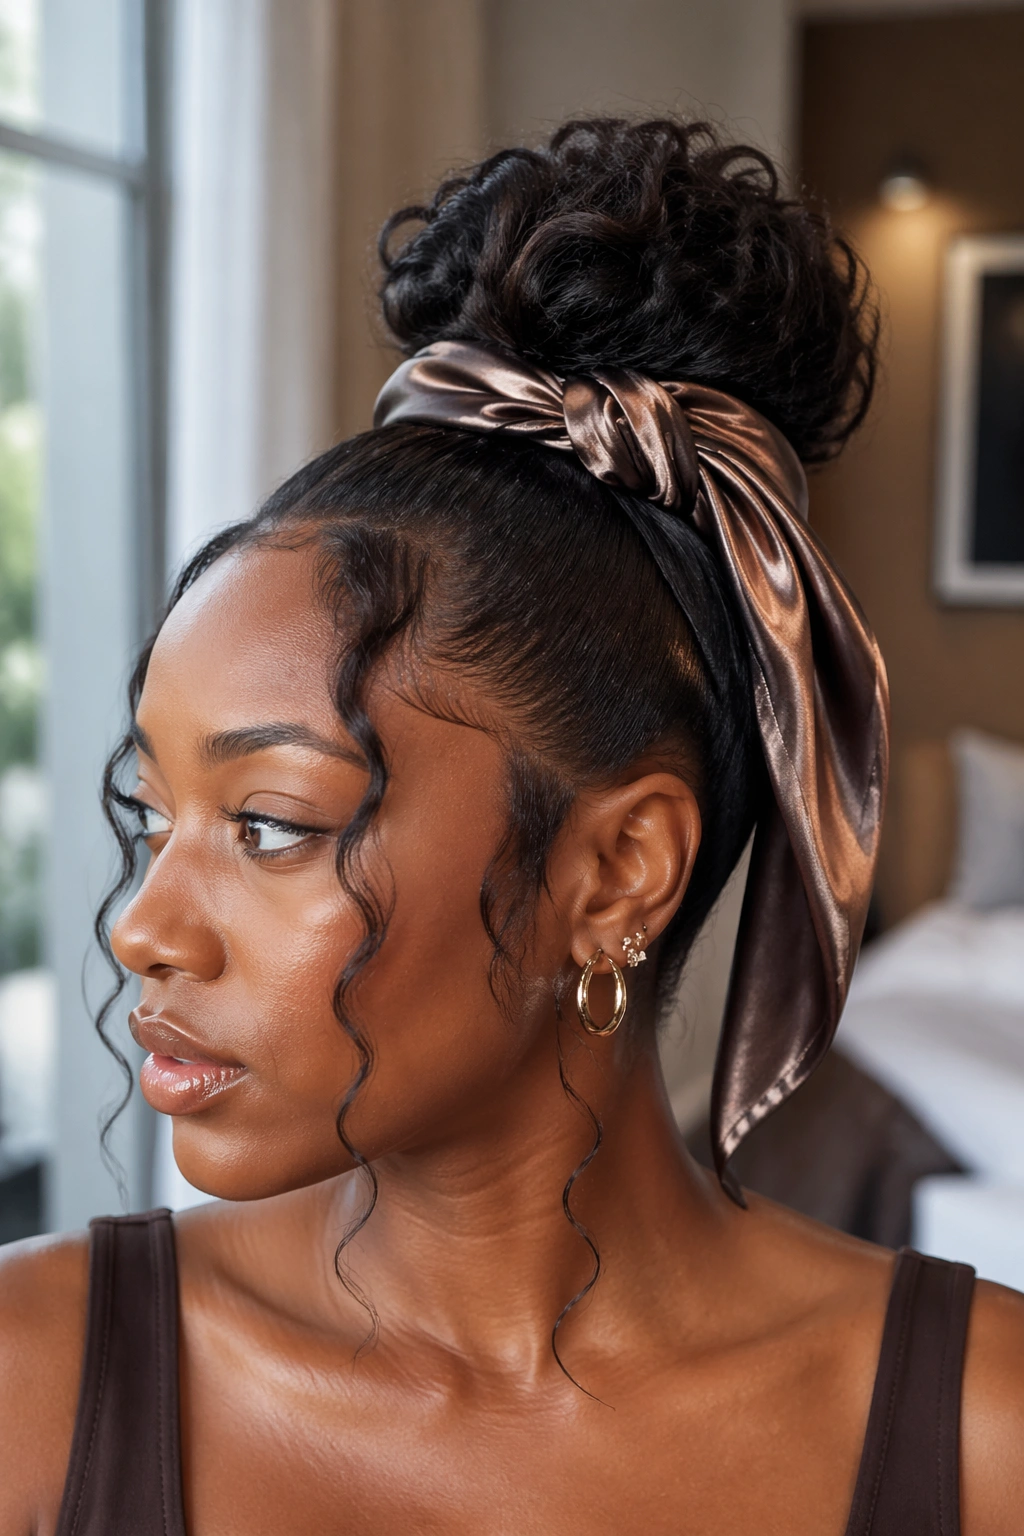
A scarf can save a bun that feels too plain, and it can also help protect the hair around the base. Use a satin scarf folded into a band, wrap it around the bun, and knot it off-center so the style feels deliberate instead of wrapped for the sake of it.
This works especially well on day-three hair. The scarf hides pins, smooths the transition from ponytail to bun, and keeps the style from looking dry. Cotton scarves can rough up the hair a bit. Satin stays kinder to curls and edges.
The best part is how much control you have over the mood. A bold print can make the bun feel dressed up. A plain black satin scarf keeps it crisp. Either way, the scarf turns a basic bun into something more finished.
25. Faux Loc Ponytail Bun
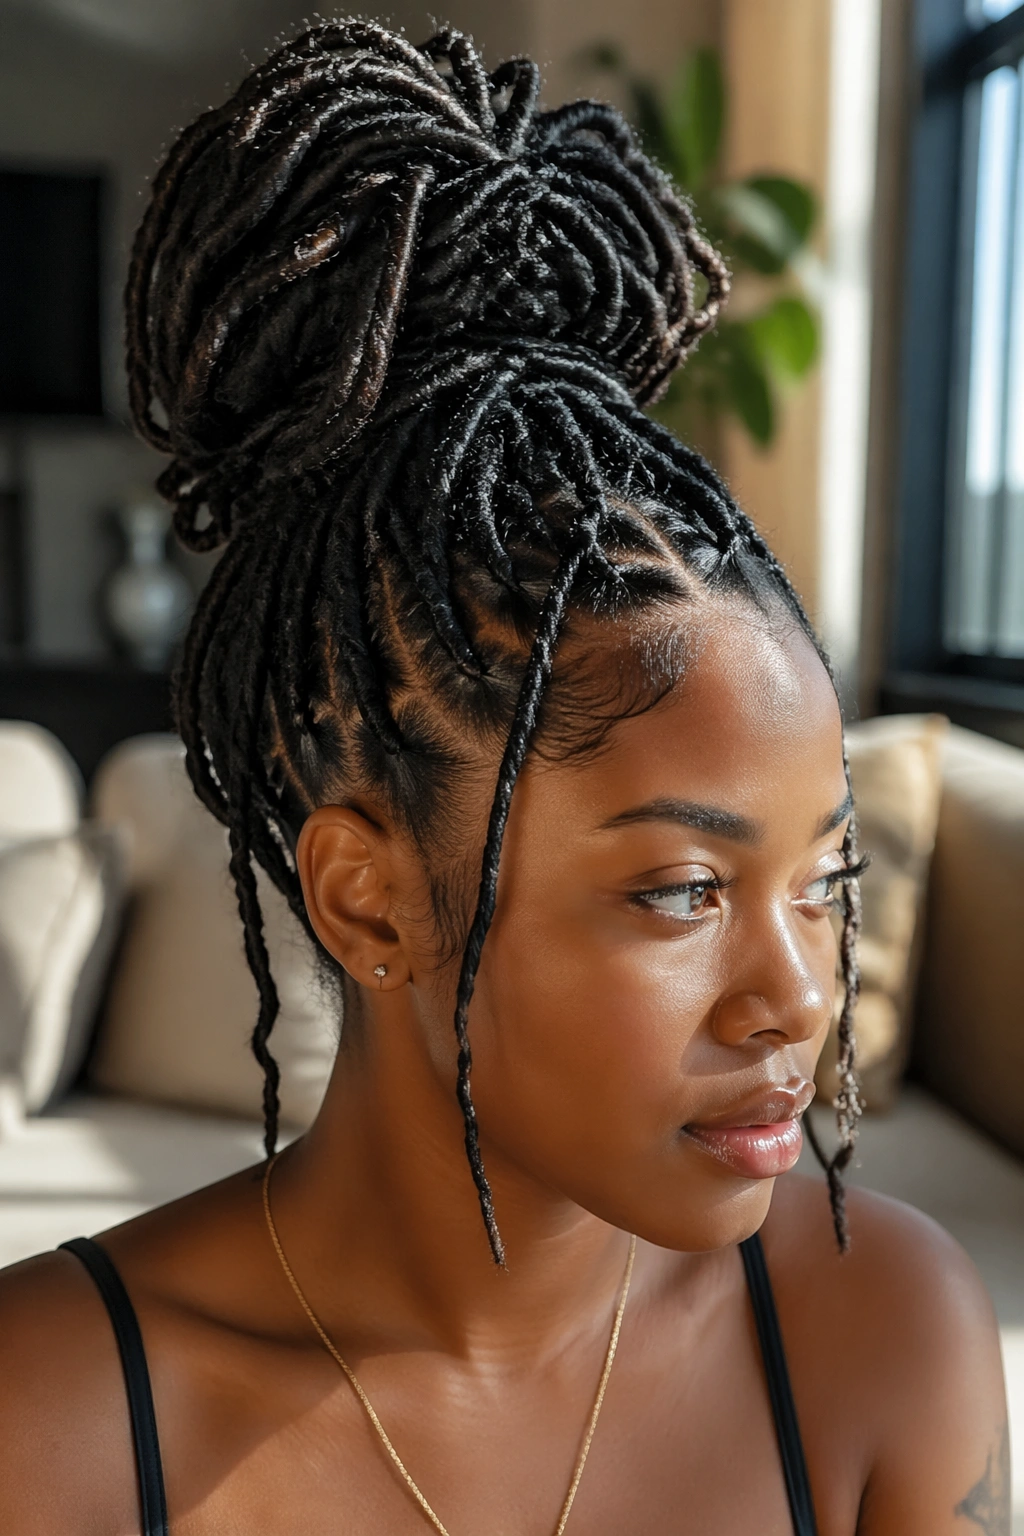
Faux locs are made for ponytail buns because the bulk gives the style natural shape right away. Gather the locs into a loose ponytail, wrap them into a bun, and let a few pieces hang for movement. That loose finish keeps the style from feeling too heavy.
If the locs are long, use two hair ties at the base instead of one. That spreads the weight and helps the ponytail sit more comfortably. A single tie on a heavy set of locs can drag the roots down faster than you’d expect.
This is a low-manipulation style that still looks intentional. It works well for busy weeks, travel, and days when you want your hair out of the way without losing texture. The bun can be high and energetic or low and calm. Both read well.
26. Short Hair Puff Bun With Hidden Pins
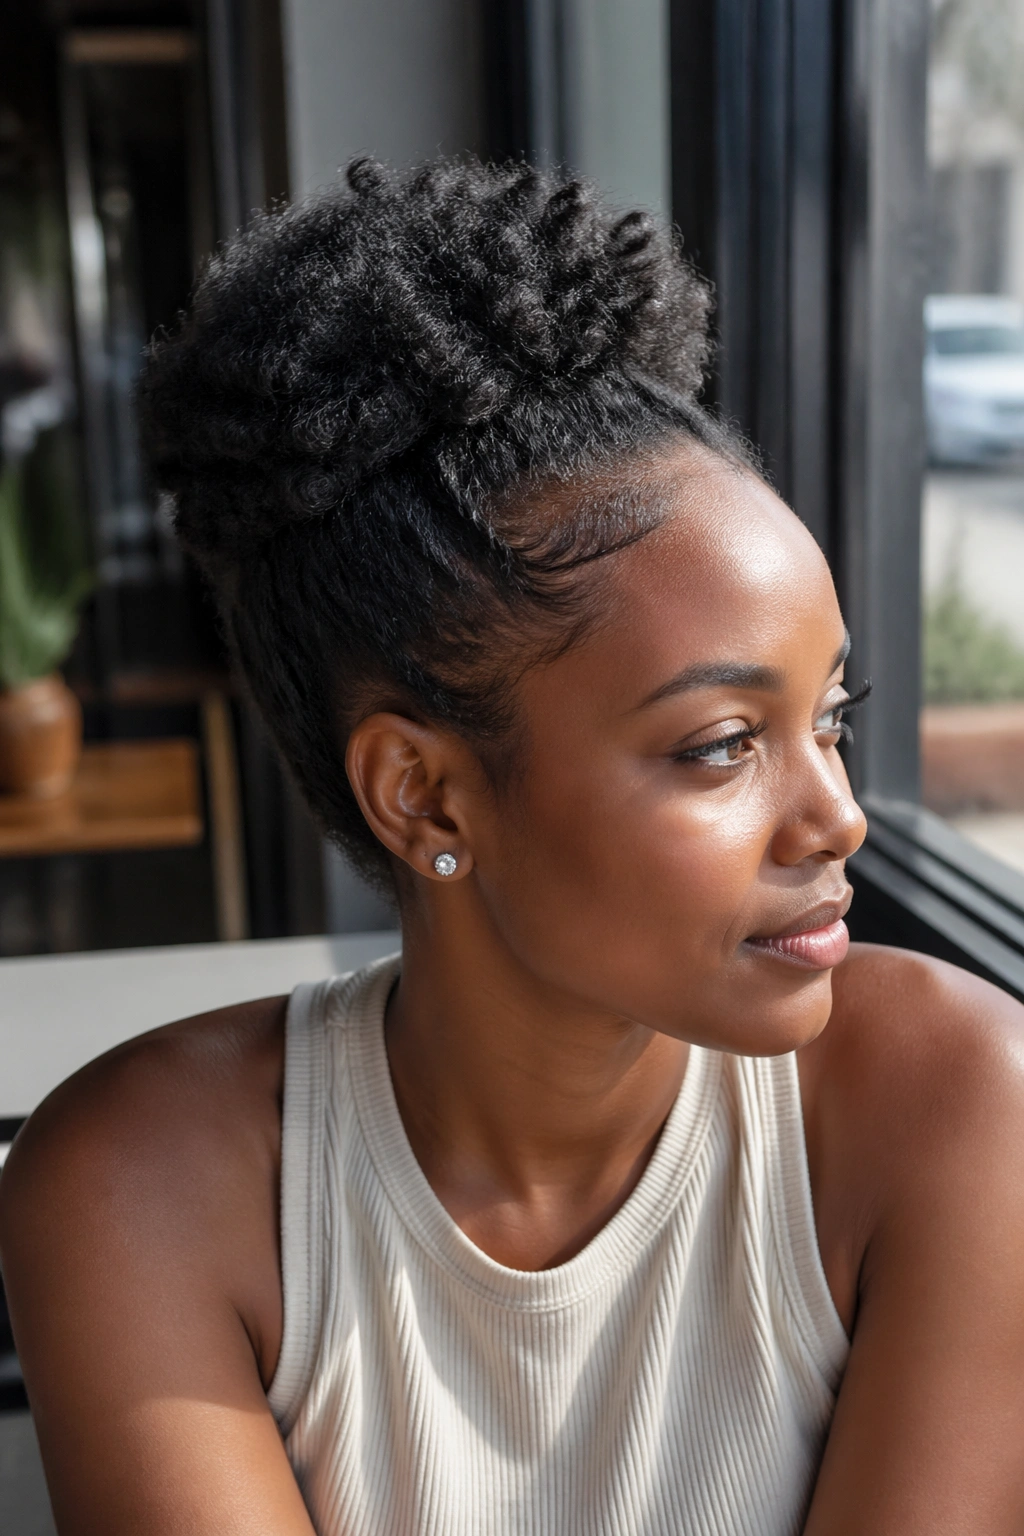
Short natural hair can still give you a ponytail bun with shape. The trick is building the bun in layers and hiding the pins underneath instead of trying to force the hair into one big loop.
How to fake more length
Start with a small puff at the crown, then tuck the ends under and pin them in an X pattern. Use six to eight bobby pins if the hair is thick or if the sides keep slipping. A small bun donut can help, but only if you want extra height. If you want the style to stay close to the head, skip it.
Stretch the hair first if you can. Even a light blow-dry on low heat makes the bun sit neater. The shape should look full, not strained. If the scalp feels tight, stop and reset it.
This style proves that short hair doesn’t need to sit out of the ponytail-bun conversation.
27. Editorial Messy Bun With Defined Curl Pieces
This is the one that looks styled and still feels lived in. Smooth the crown, build a loose bun, then leave three to five defined curl pieces around the face and near the nape so the shape has motion.
Use a small amount of curl cream or foam on those loose pieces and finger-coil them if they need help. The rest of the bun can stay loose and soft. A little frizz is fine here. A little frizz is the point. If every strand is forced into place, the style loses the energy that makes it work.
This version is a good choice when you want your hair to look finished without looking fixed. It reads clean in photos, soft in person, and easy in motion. Messy, but on purpose. That’s the whole trick.