Getting ready for school often feels like a race against the clock. When you have ten minutes before the bus arrives, you do not want to spend half of that time fighting with a complicated hairstyle that refuses to cooperate. The goal is simple: you want a style that looks polished, stays in place through gym class, locker slams, and lunch, and, most importantly, takes almost no time to create.
A ponytail is the universal fallback for a reason. It clears your hair from your face, it is easy to maintain, and it works with almost every hair texture. However, the standard “pull it all back and tie it” routine can get boring. You have thirty-three options here that are anything but boring, designed to help you get out the door fast without sacrificing your personal style.
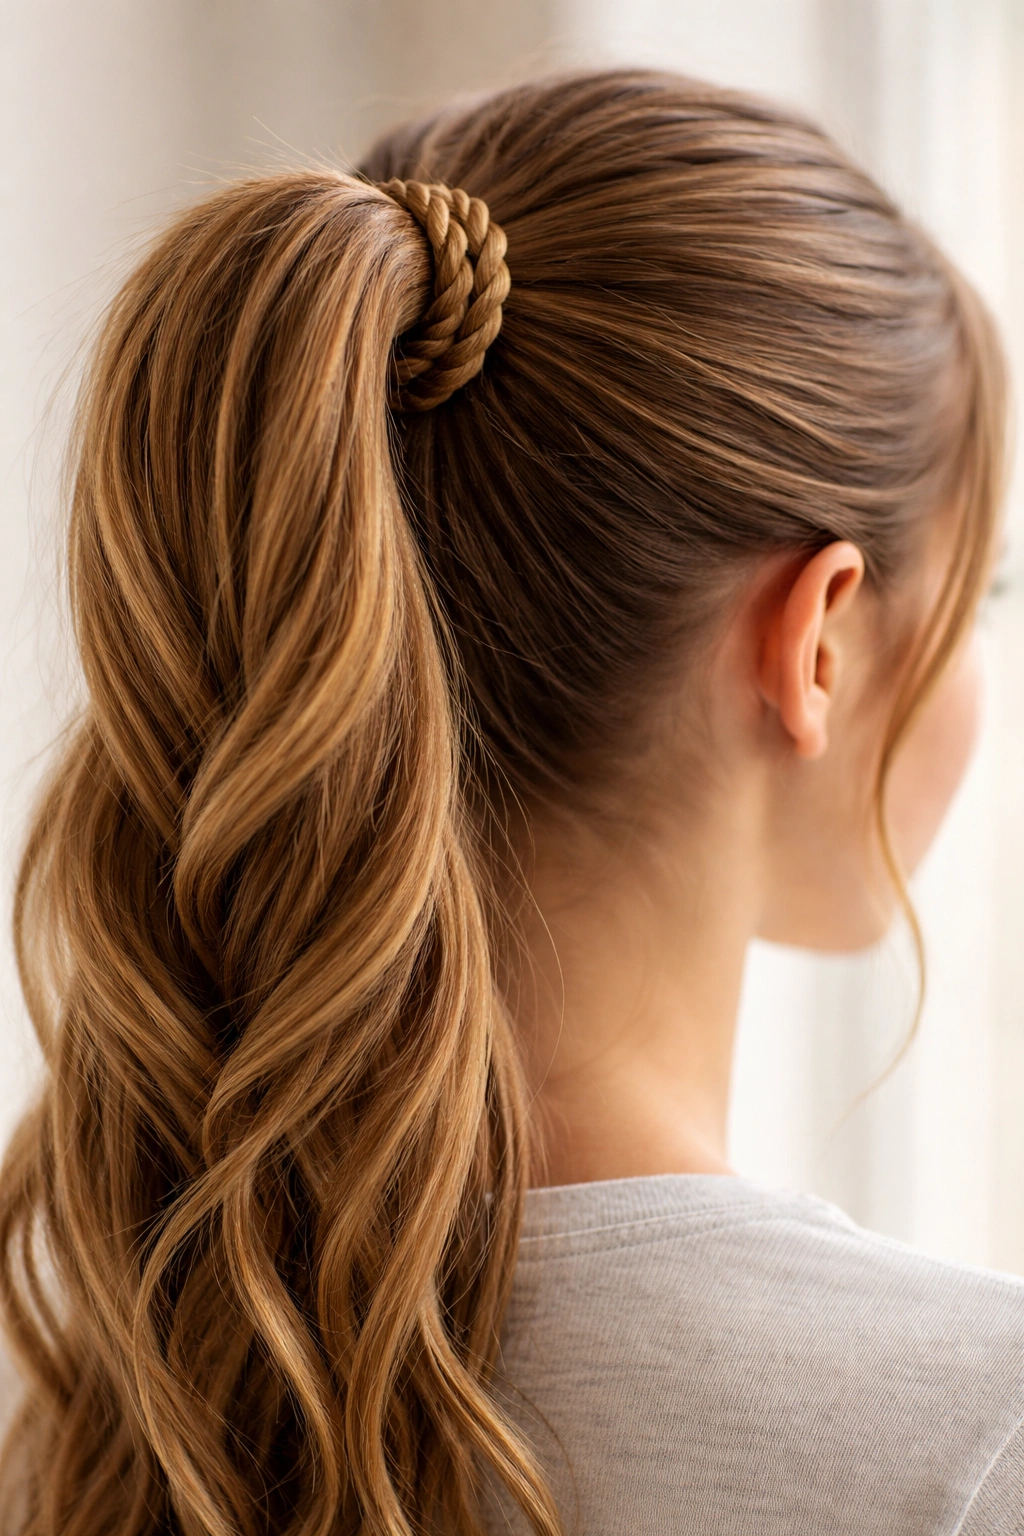
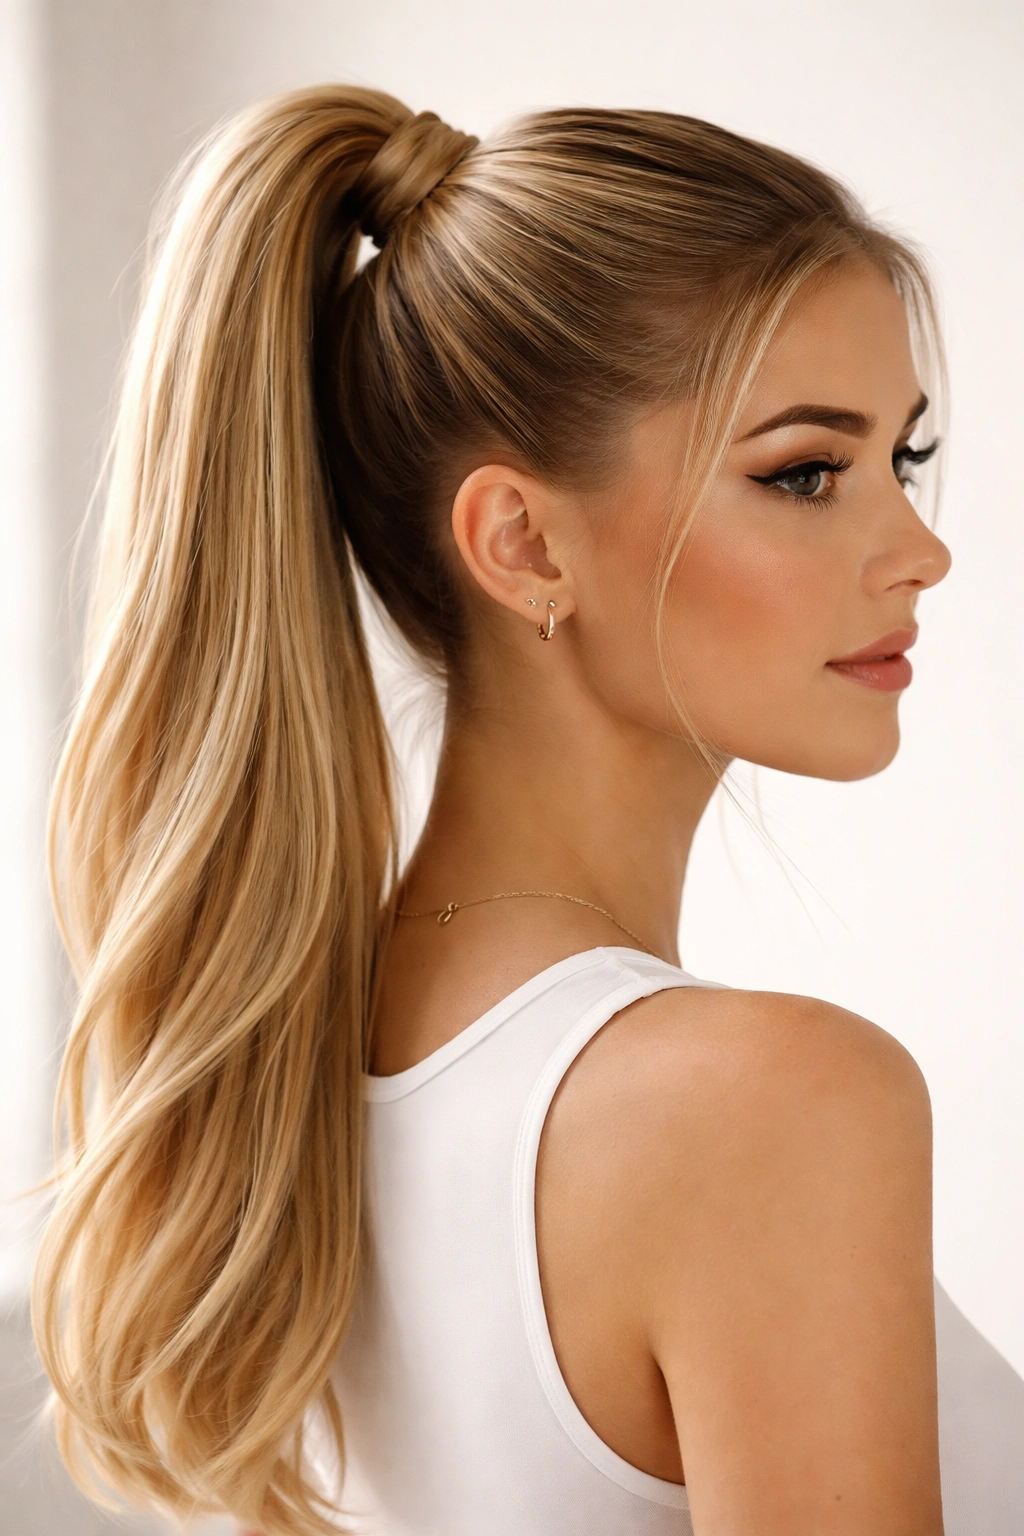
1. The Classic High Pony
There is a specific art to the perfect high ponytail. You want it sitting right on the crown of your head to create that sharp, lifted angle. If you pull it too low, it sags; too high, and it looks like a fountain. Aim for a diagonal line from your cheekbones up to the crown.
How to Get the Angle Right
Flip your head upside down to gather all your hair. This uses gravity to smooth out the bumps on the back of your head before you even pick up a brush. Once you have it gathered, stand up straight and secure the elastic tightly. If you have thick hair, use two elastics to prevent the heavy weight from dragging the pony down by second period.
Pro tip: Take a tiny strand from the underside of your ponytail, wrap it around the base to hide the hair tie, and pin it underneath with a bobby pin. This one, thirty-second step makes the whole style look expensive and intentionally done.
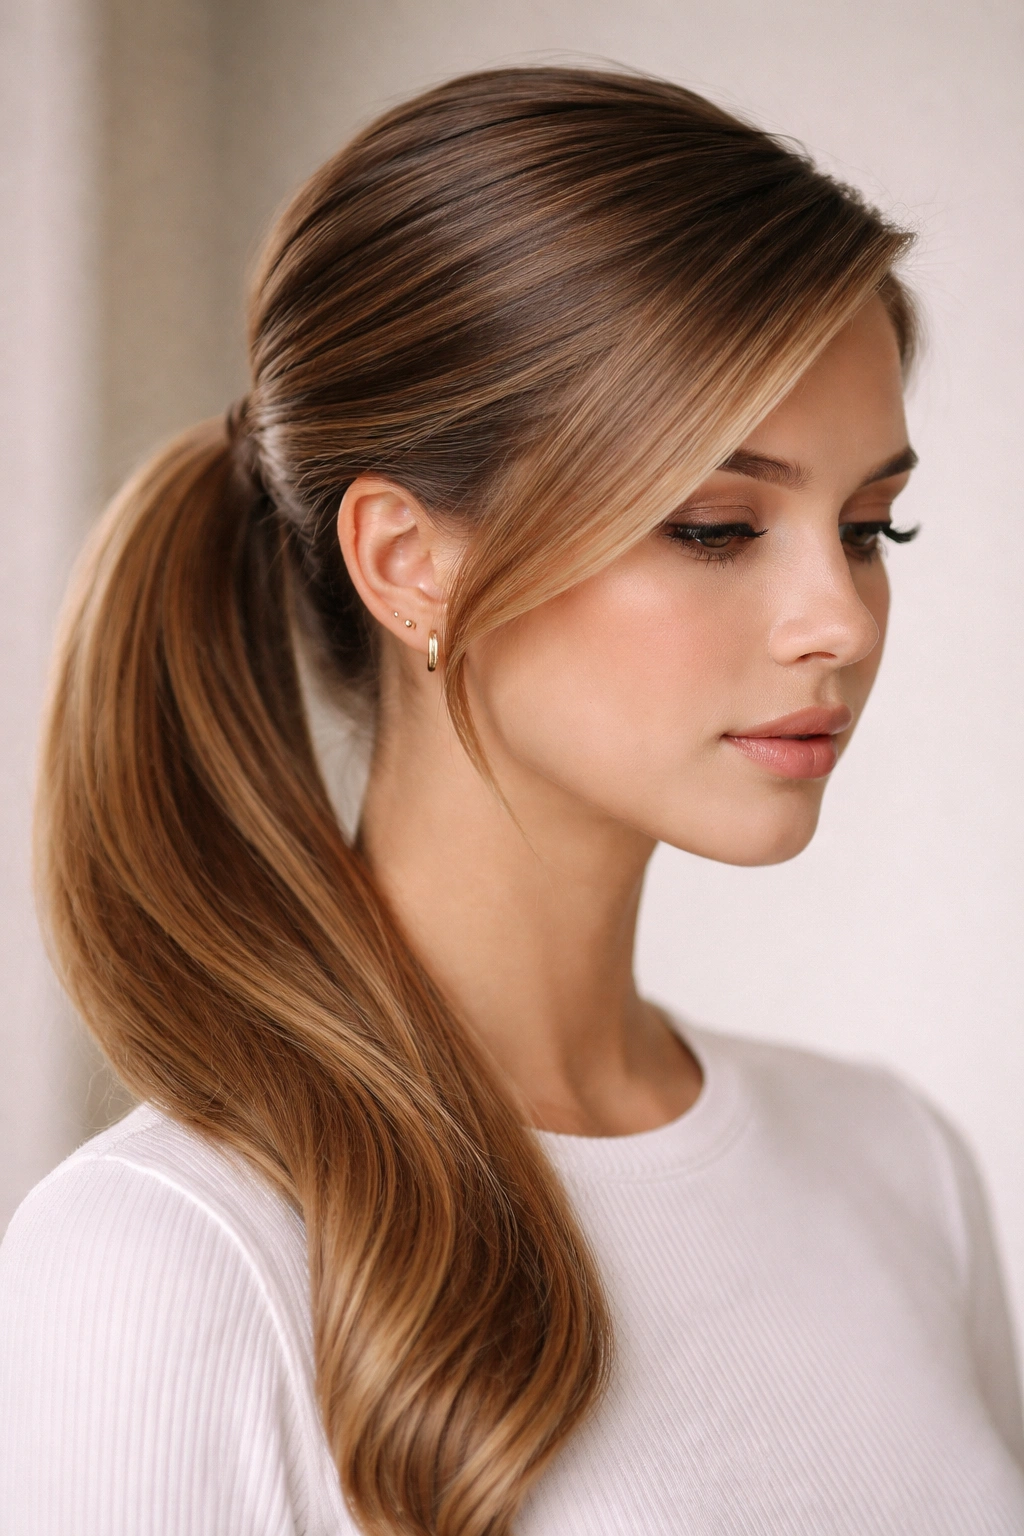
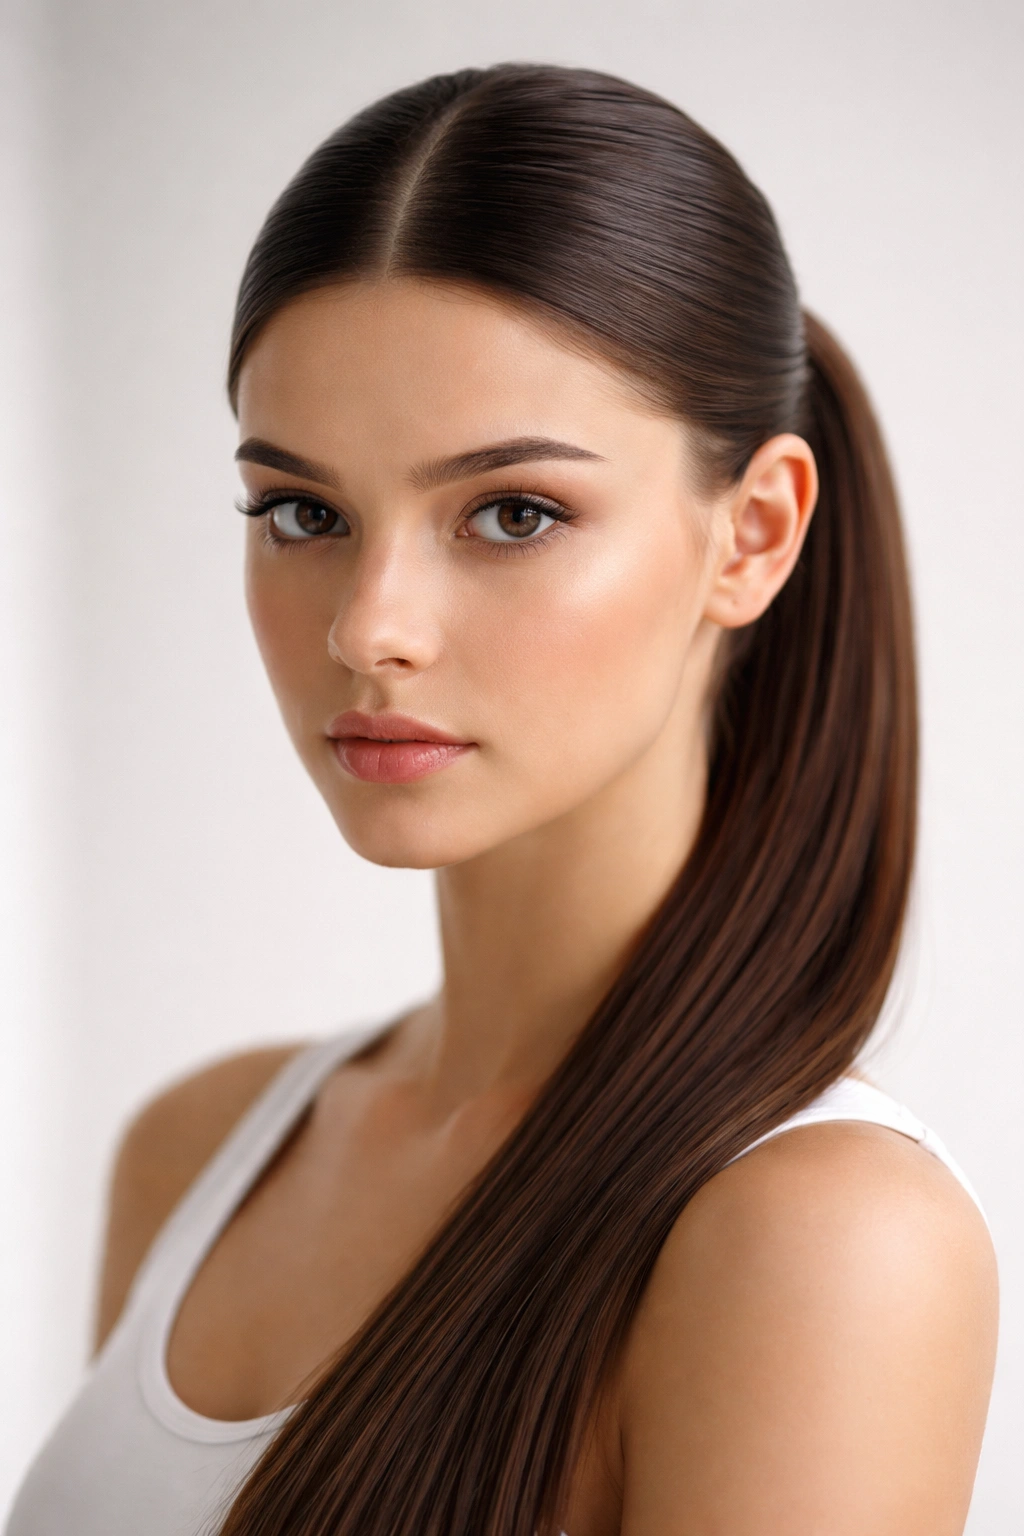
2. The Slicked-Back Low Pony
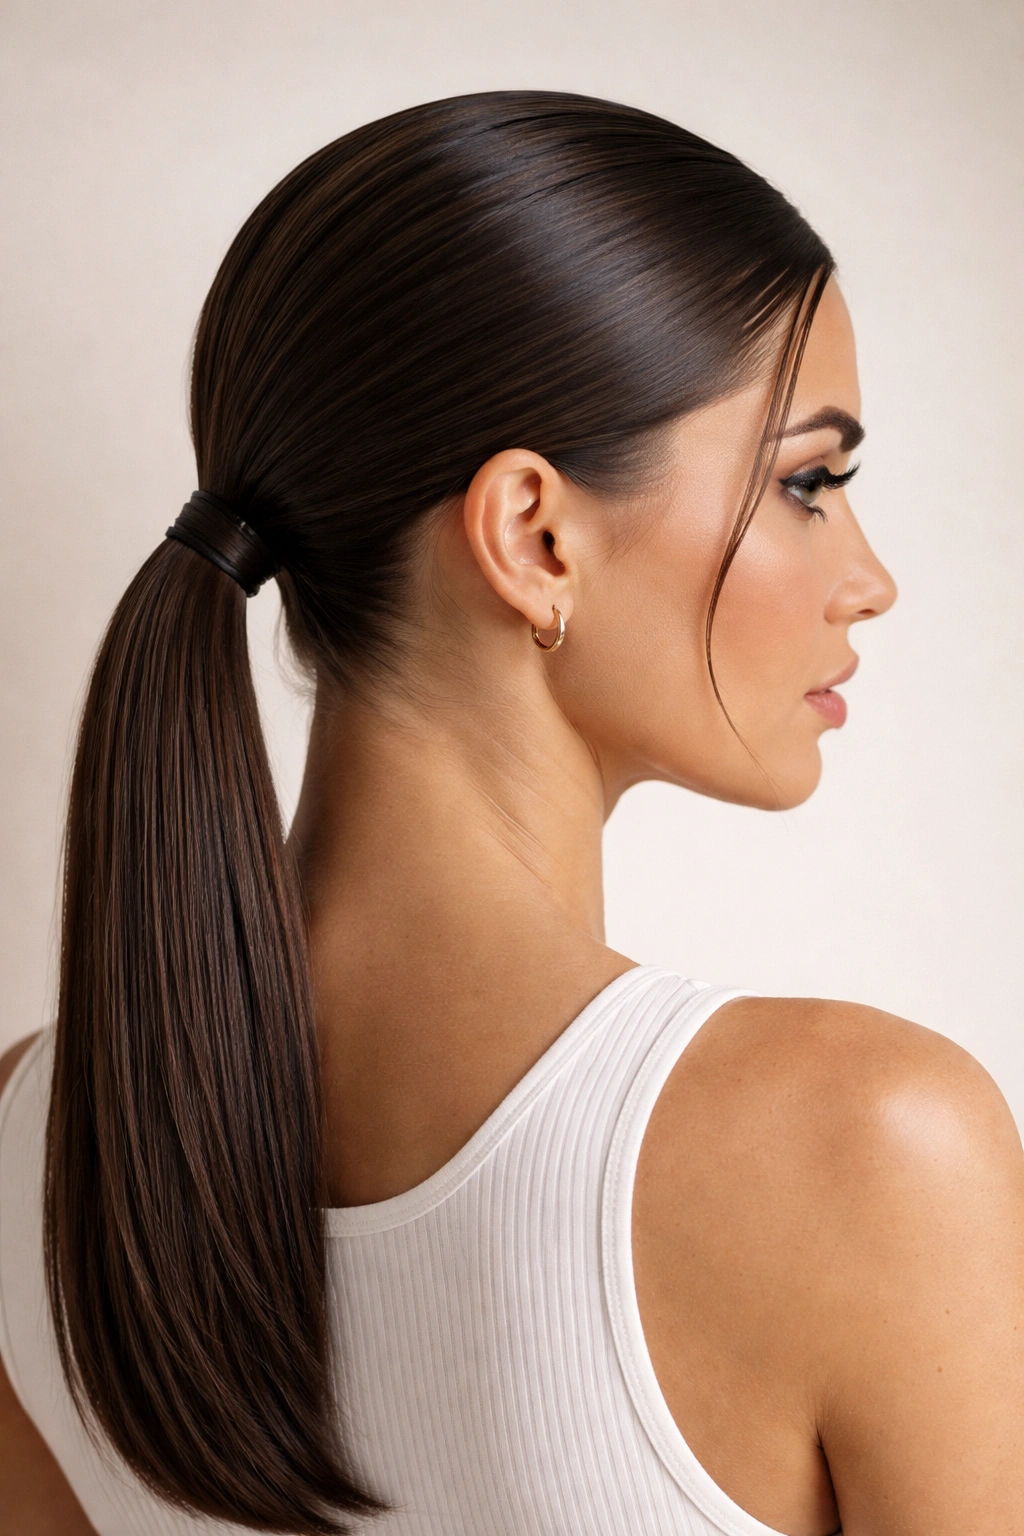
This style works best on days when your hair is not quite fresh but not quite dirty enough to wash. The secret is the part. A clean, sharp center part gives this look an intentional, edgy feel, while a side part makes it look a bit more polished and professional.
You will need a boar bristle brush or a fine-tooth comb and a little bit of product. A tiny dab of hair oil or a light-hold gel helps keep the flyaways at the nape of your neck from escaping. Brush your hair tight against your scalp, secure it at the nape, and smooth the top with your palms.
3. The Textured Messy Pony
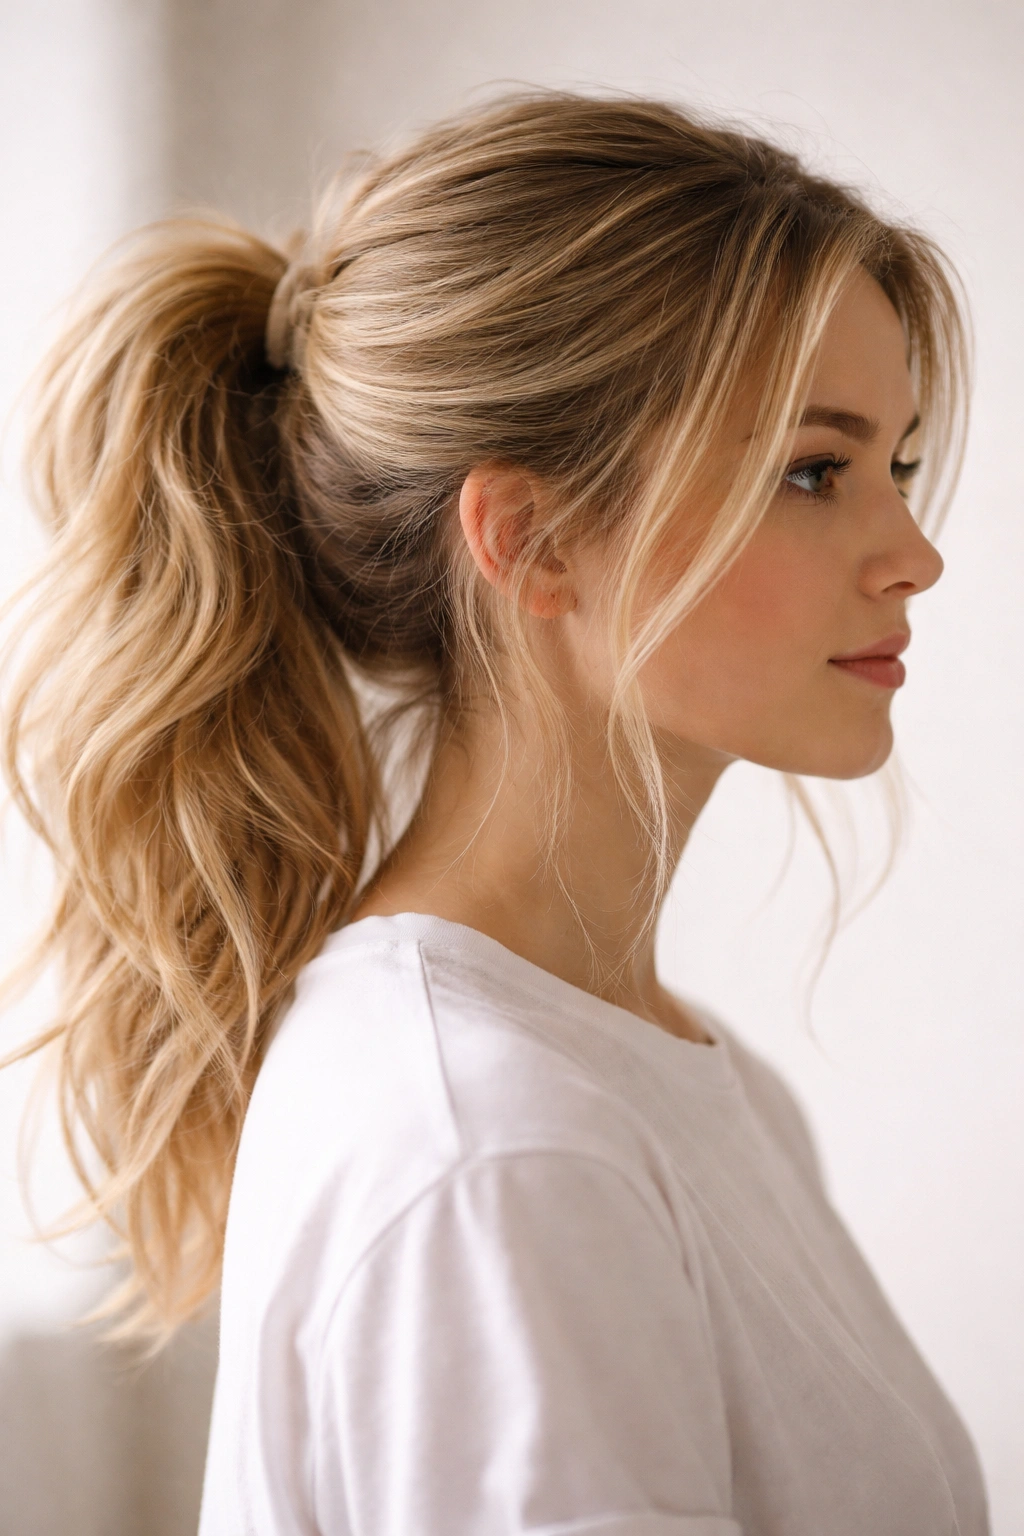
Sometimes, you do not want sleek; you want volume. If your hair is straight, this requires a little bit of grit to hold the style. Use a texturizing spray or dry shampoo on your roots and mid-lengths before you start. You are not looking for perfection here; you are looking for lived-in texture.
Gather your hair loosely with your fingers, not a brush. Leave a few wisps around your ears and temples to soften the look. Secure it with a fabric-covered elastic that will not snag your hair. If the ponytail looks too flat, take the tail itself and tease it gently with your fingers to build some internal structure.
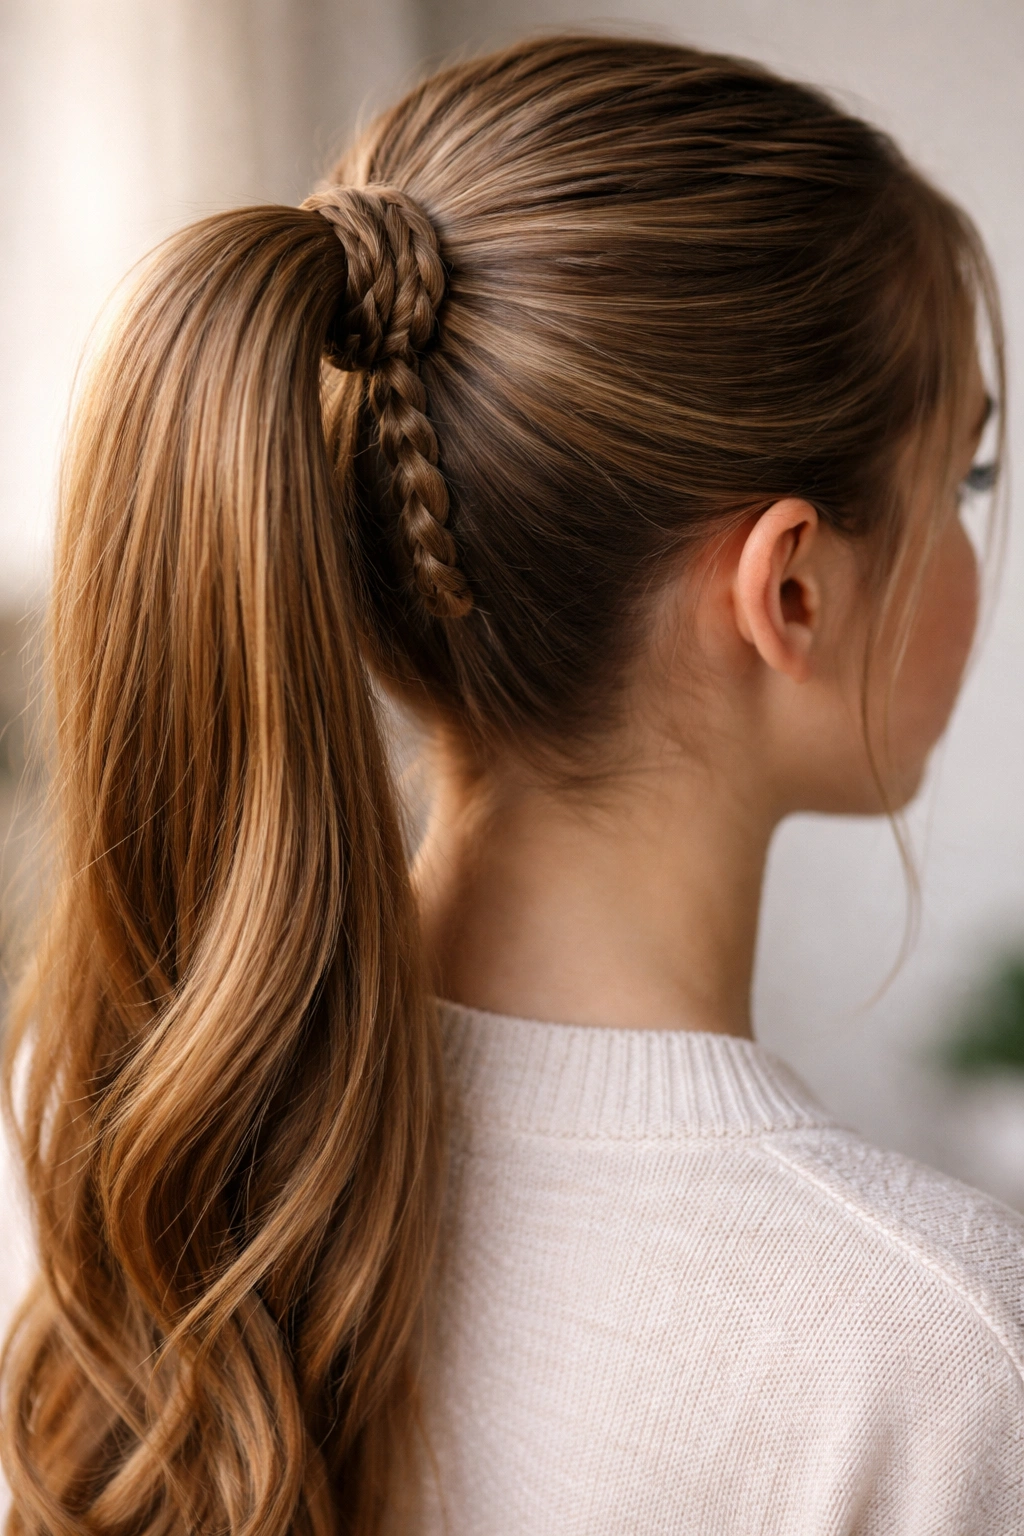
4. The Wrapped Elastic Ponytail
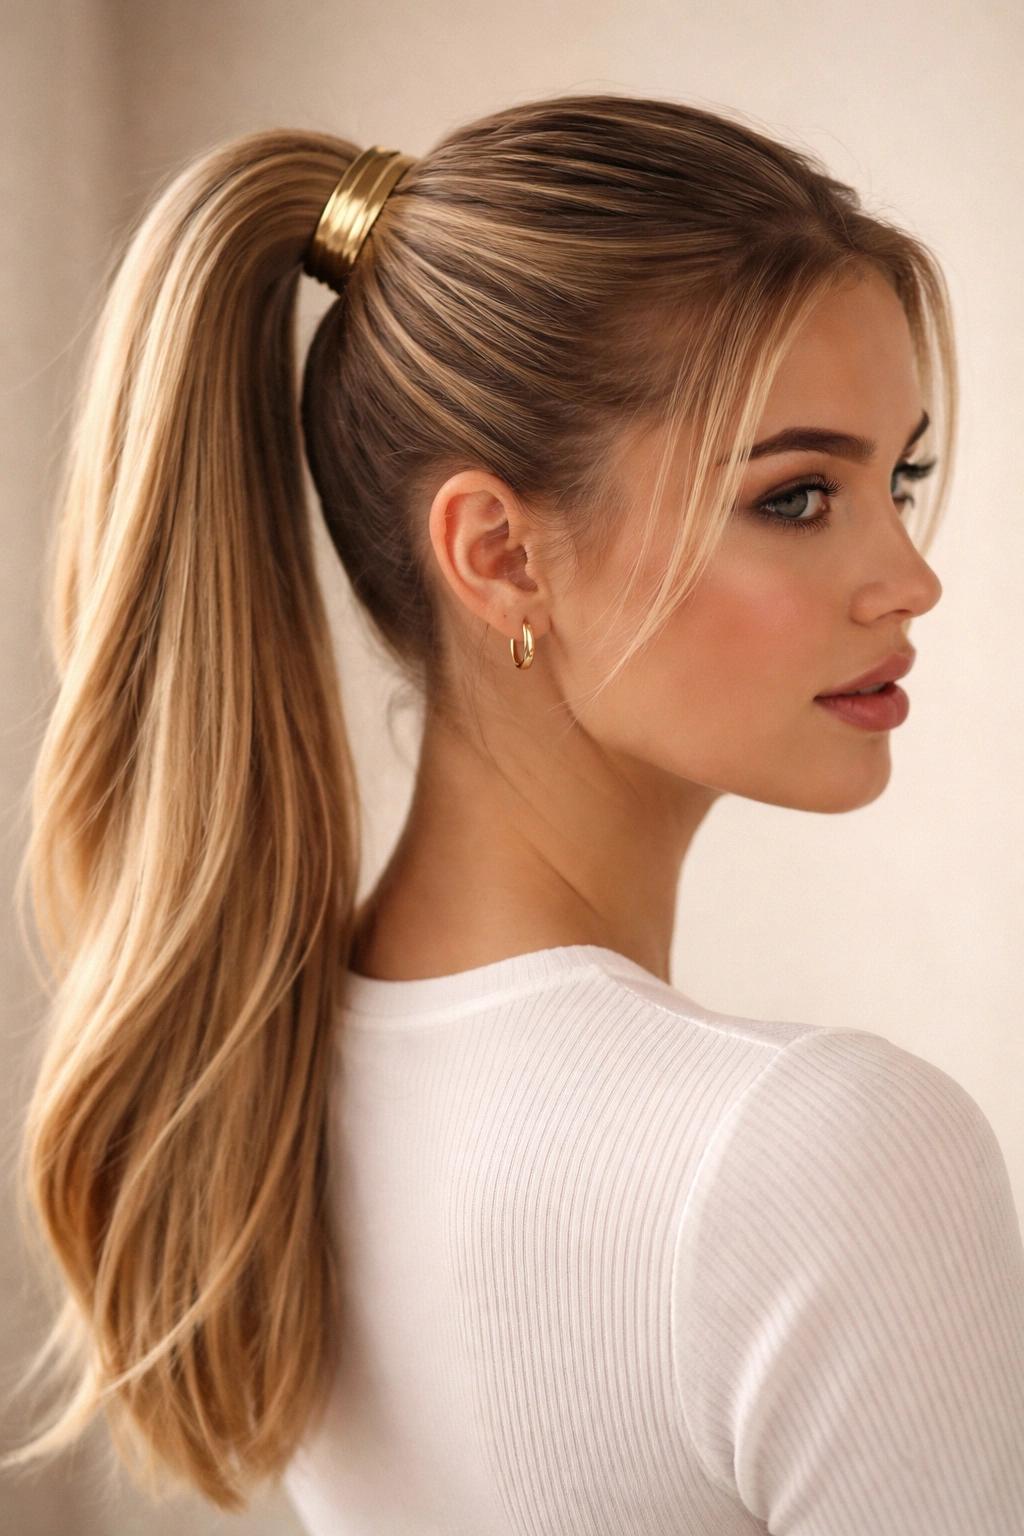
This is the standard ponytail, but with a bit of extra detail. It is perfect for when you want to wear a simple pony but feel like it needs a little “something” to look finished. Instead of a basic black plastic band, choose a ponytail holder that has a decorative detail—like a metal cuff, a leather wrap, or a ribbon attachment.
The key to this style is the base. If the ponytail is loose or droopy, the accessory will just slide down and look messy. Make sure your base elastic is tight and secure. You want the decorative element to sit flush against your head, acting as a focal point rather than an afterthought.
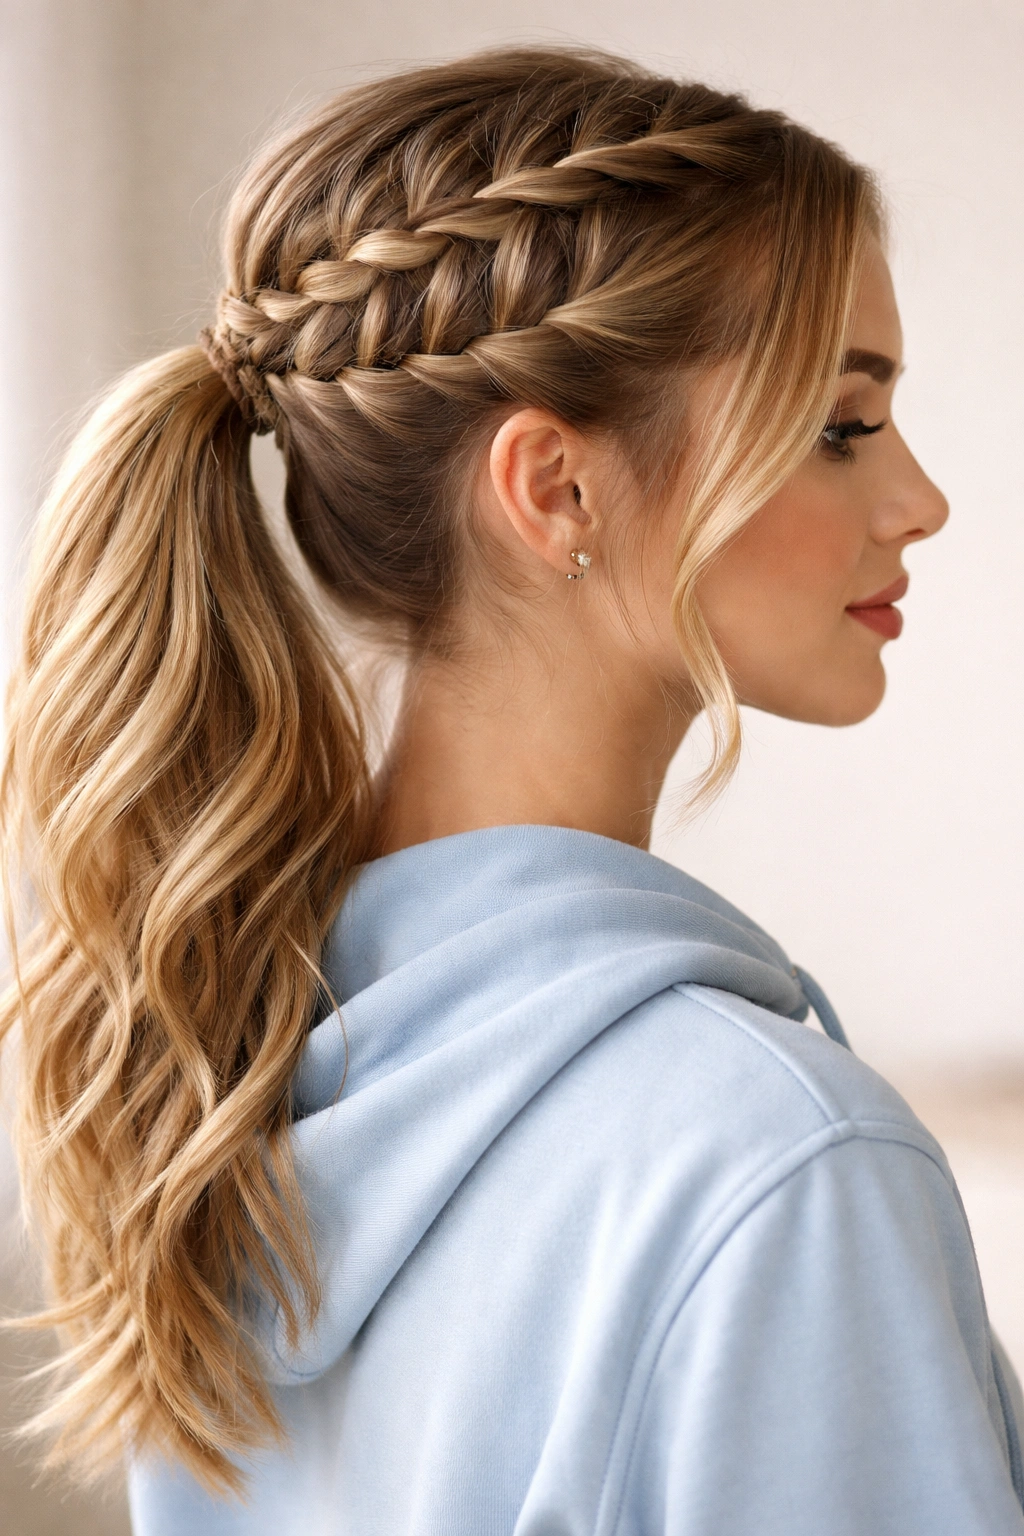
5. The Braided Side Pony
Braids can be intimidating, but a basic three-strand braid is something you can do with your eyes closed. Start by pulling all your hair to one side, just below your ear. Secure it with a small clear elastic. Then, split the ponytail into three equal sections and braid to the ends.
Why This Style Lasts
The braid keeps the length of your hair contained, which means it will not get tangled on the back of your chair or caught in your bag straps. It is a functional style that looks like you put in effort, even if you did it in under two minutes. If you want a softer look, pull gently on the outer edges of the braid loops to “pancake” it and make it look wider and more relaxed.
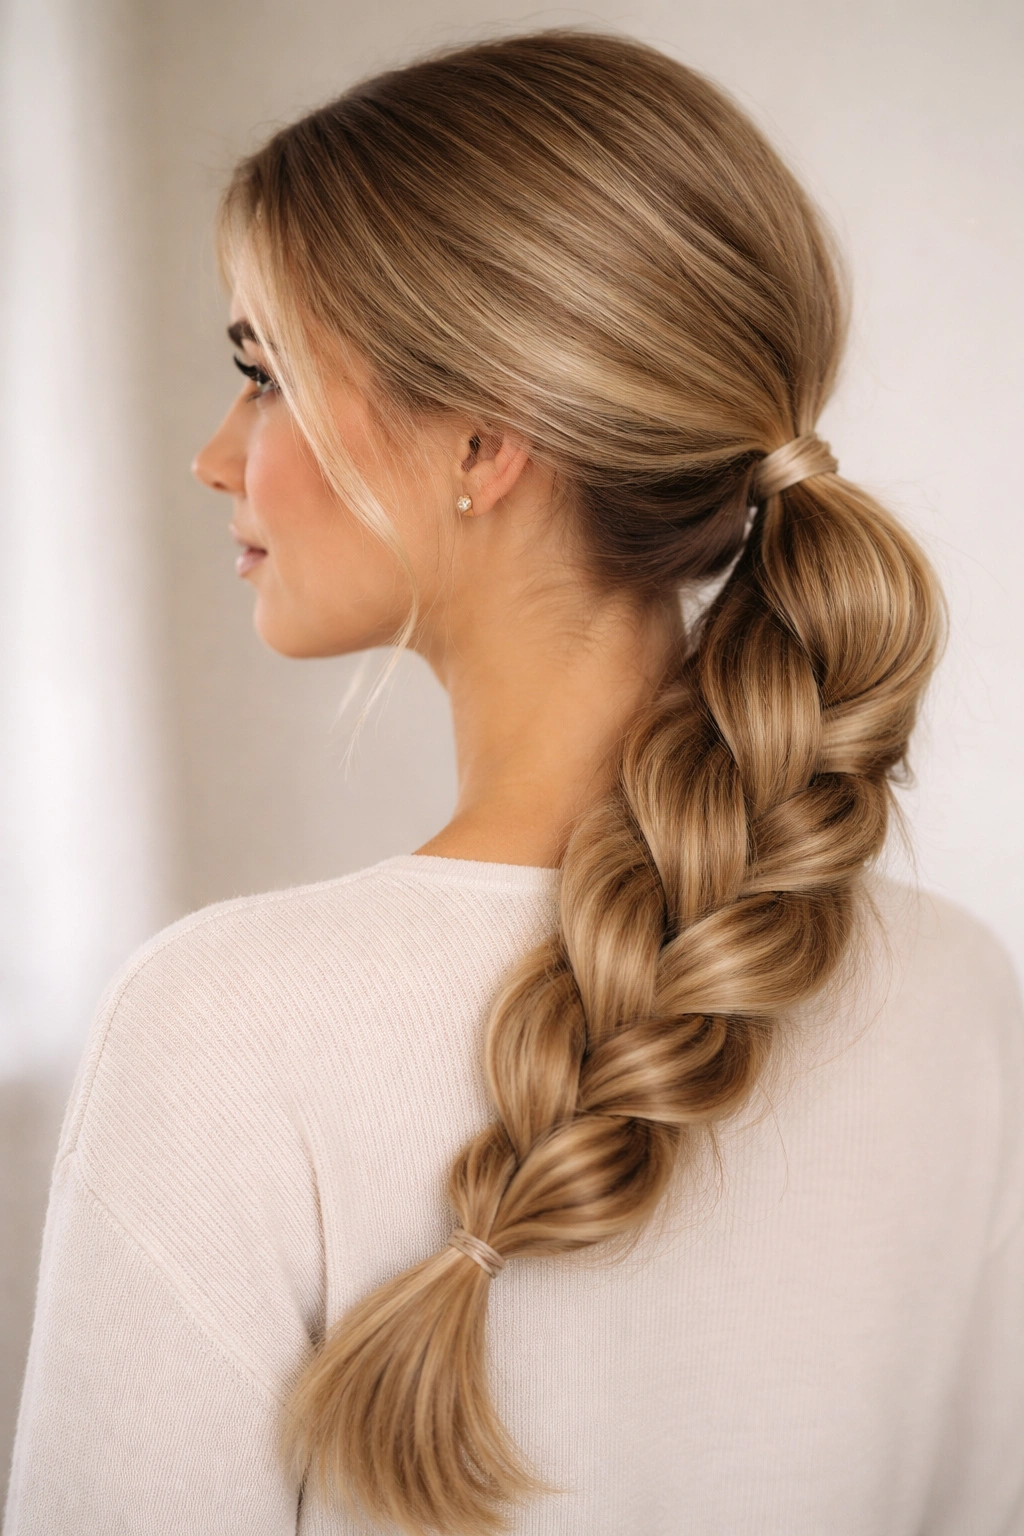
6. The Double Bubble Pony
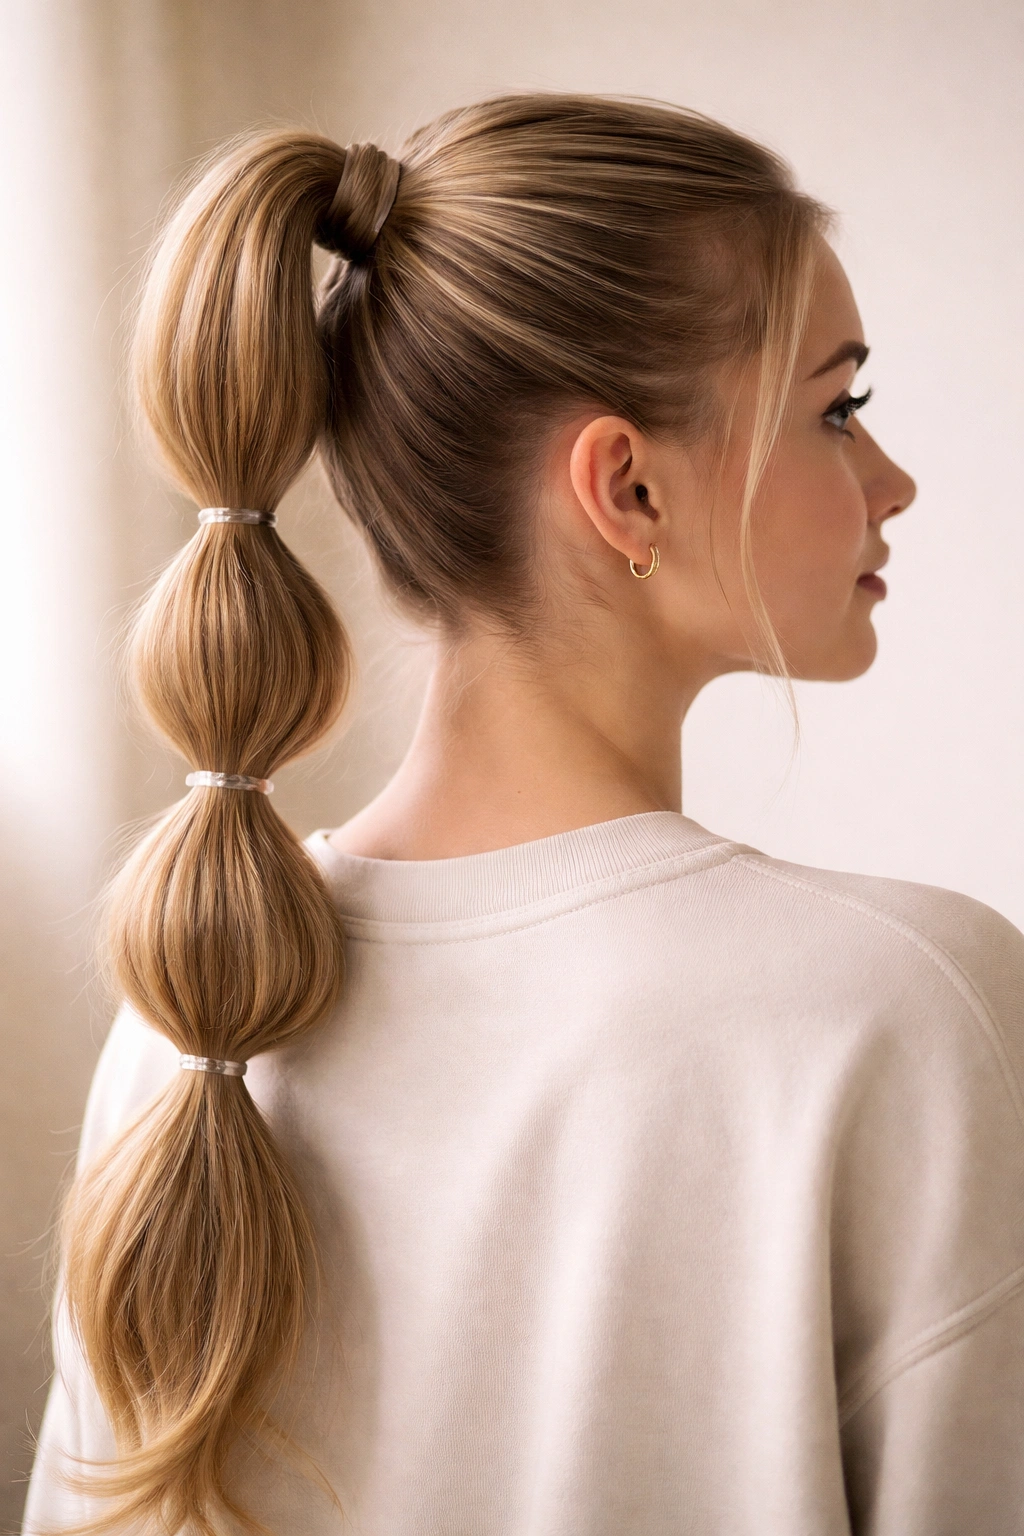
This look is fun, bouncy, and surprisingly simple. Start by making a standard high ponytail. Then, place a second elastic about three inches down the length of the pony. Once that is secured, gently pull on the hair between the two elastics to puff it out into a “bubble.”
Repeat this process all the way down to the ends. You can adjust the size of the bubbles by how much you pull. For a uniform look, keep the distance between elastics even. If you prefer a more chaotic vibe, vary the lengths. It is an excellent way to handle long hair that feels heavy or gets in the way during sports.
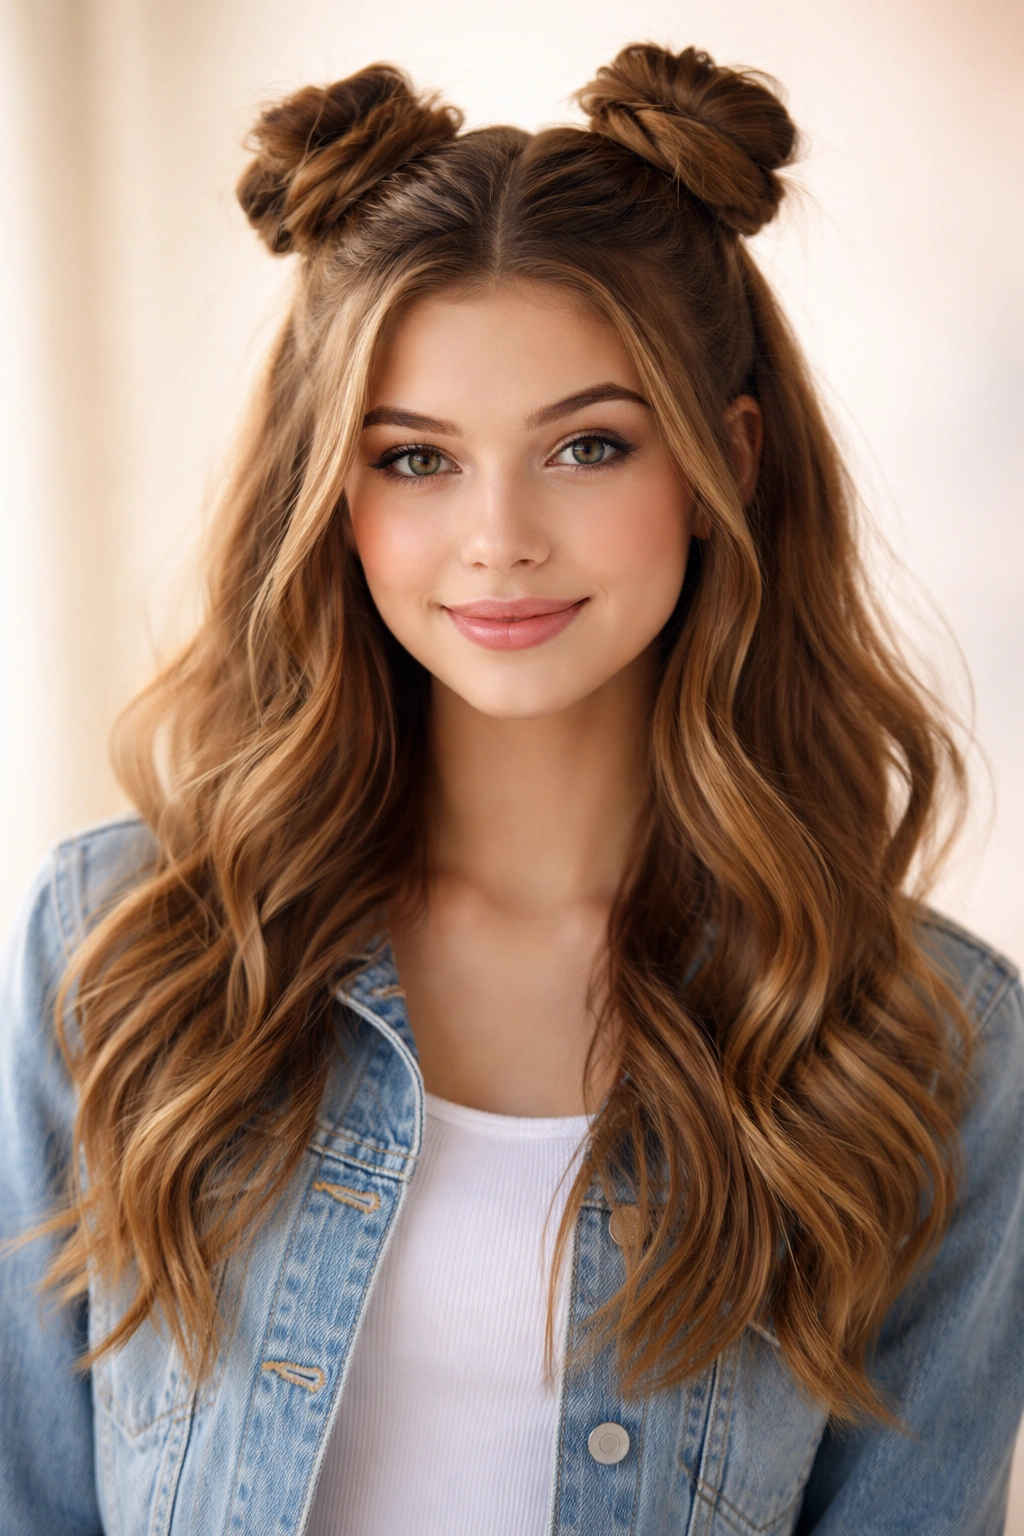
7. The Half-Up Top Knot Pony
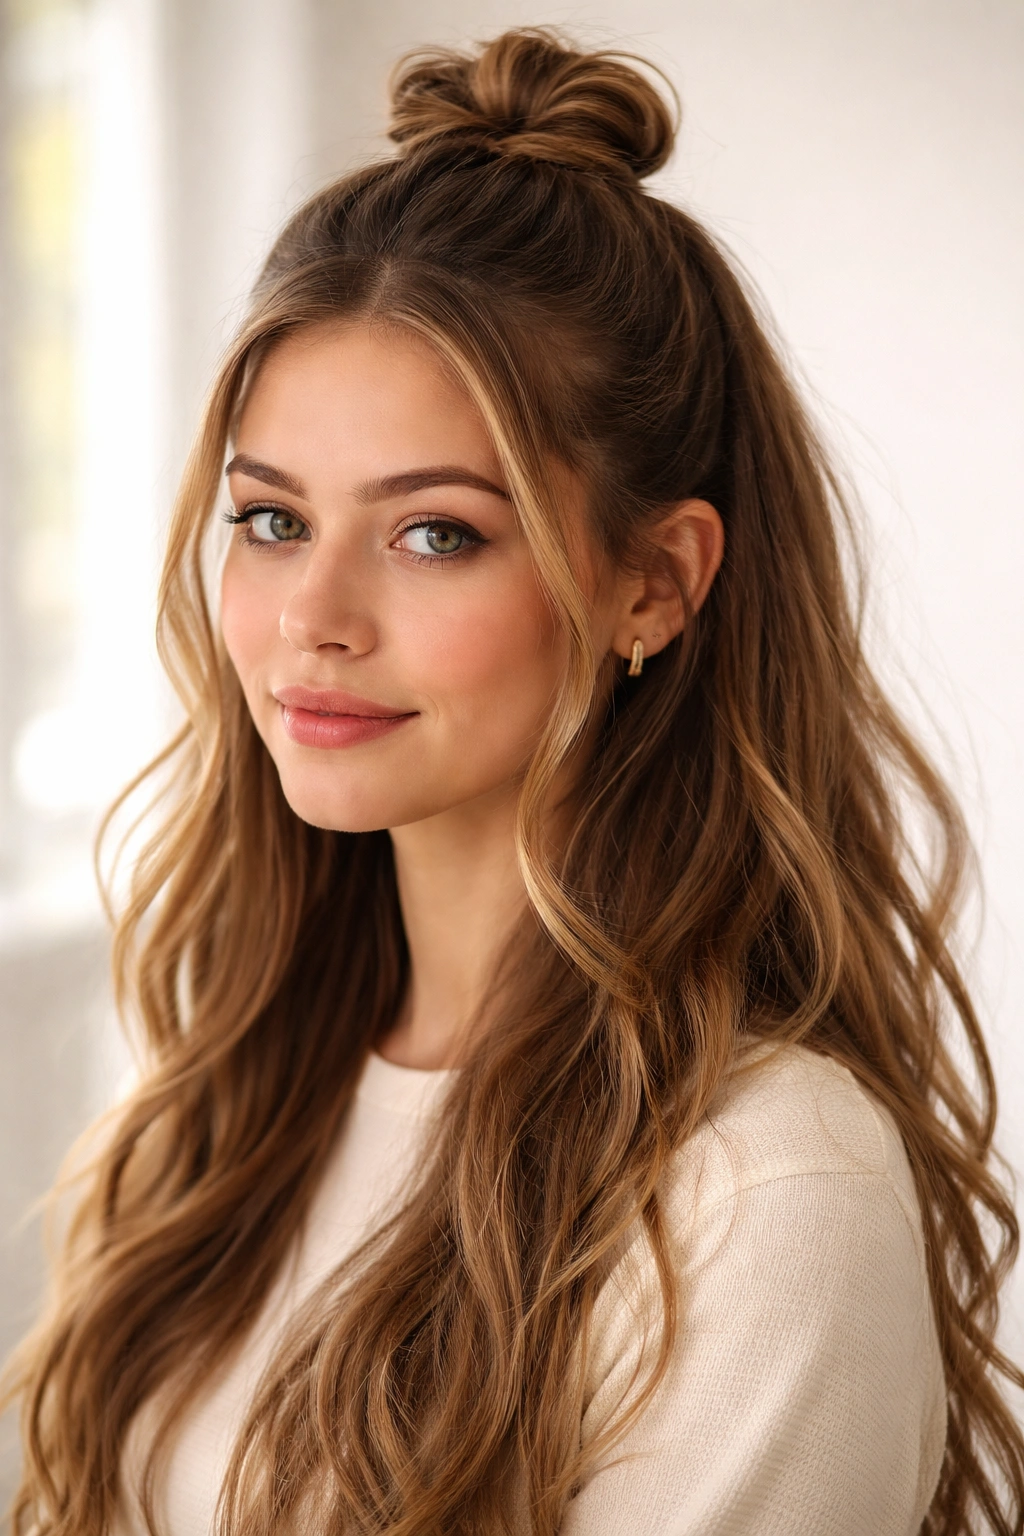
This is technically a half-up style, but it functions like a ponytail. Section off the top half of your hair, from the temples up to the crown. Pull this section into a ponytail, but on the last loop of the elastic, do not pull your hair all the way through.
Leave a loop of hair creating a small bun. You can either leave it as a messy bun or wrap the loose ends around the base to hide the elastic. The bottom half of your hair hangs down loose, giving you the best of both worlds: hair off your face, but the length is still visible.
8. The Twisted Side Pony
If you want something a bit more interesting than a regular side pony, add a twist at the base. Gather your hair to one side, but instead of tying it immediately, leave out a small section of hair near your hairline.
Twist the main section of hair once or twice toward the center, then bring the remaining hair into the ponytail. Secure it tightly. Take that small, leftover section, twist it, and wrap it over your elastic to create a seamless, elegant finish. It feels much more sophisticated than a standard side-swept style.
9. The Messy Bun-Pony Hybrid
Some mornings, you cannot decide between a bun and a ponytail. This style lets you keep both. Put your hair into a ponytail, but pull it through the elastic halfway, creating a loop.
Now, take the loose ends of the hair—the tail—and wrap them around the base of the loop. Tuck the ends into the elastic. You will be left with a loose, messy bun that is secured by the structural integrity of the ponytail. It is much more stable than a traditional bun that relies on pins to stay up.
10. The Space Buns Ponytail
This is a playful, energetic look that is great for spirit days or weekends. Divide your hair down the center into two equal sections. Instead of doing full space buns, do half-up space buns.
Gather the top section of each side into a high pigtail. Twist the hair around to form a small bun on each side, securing with thin elastics. The rest of your hair remains down. It is surprisingly secure, and because the buns are only using half the volume of your hair, they do not feel too heavy or pull on your scalp.
11. The Dutch Braid Into Pony
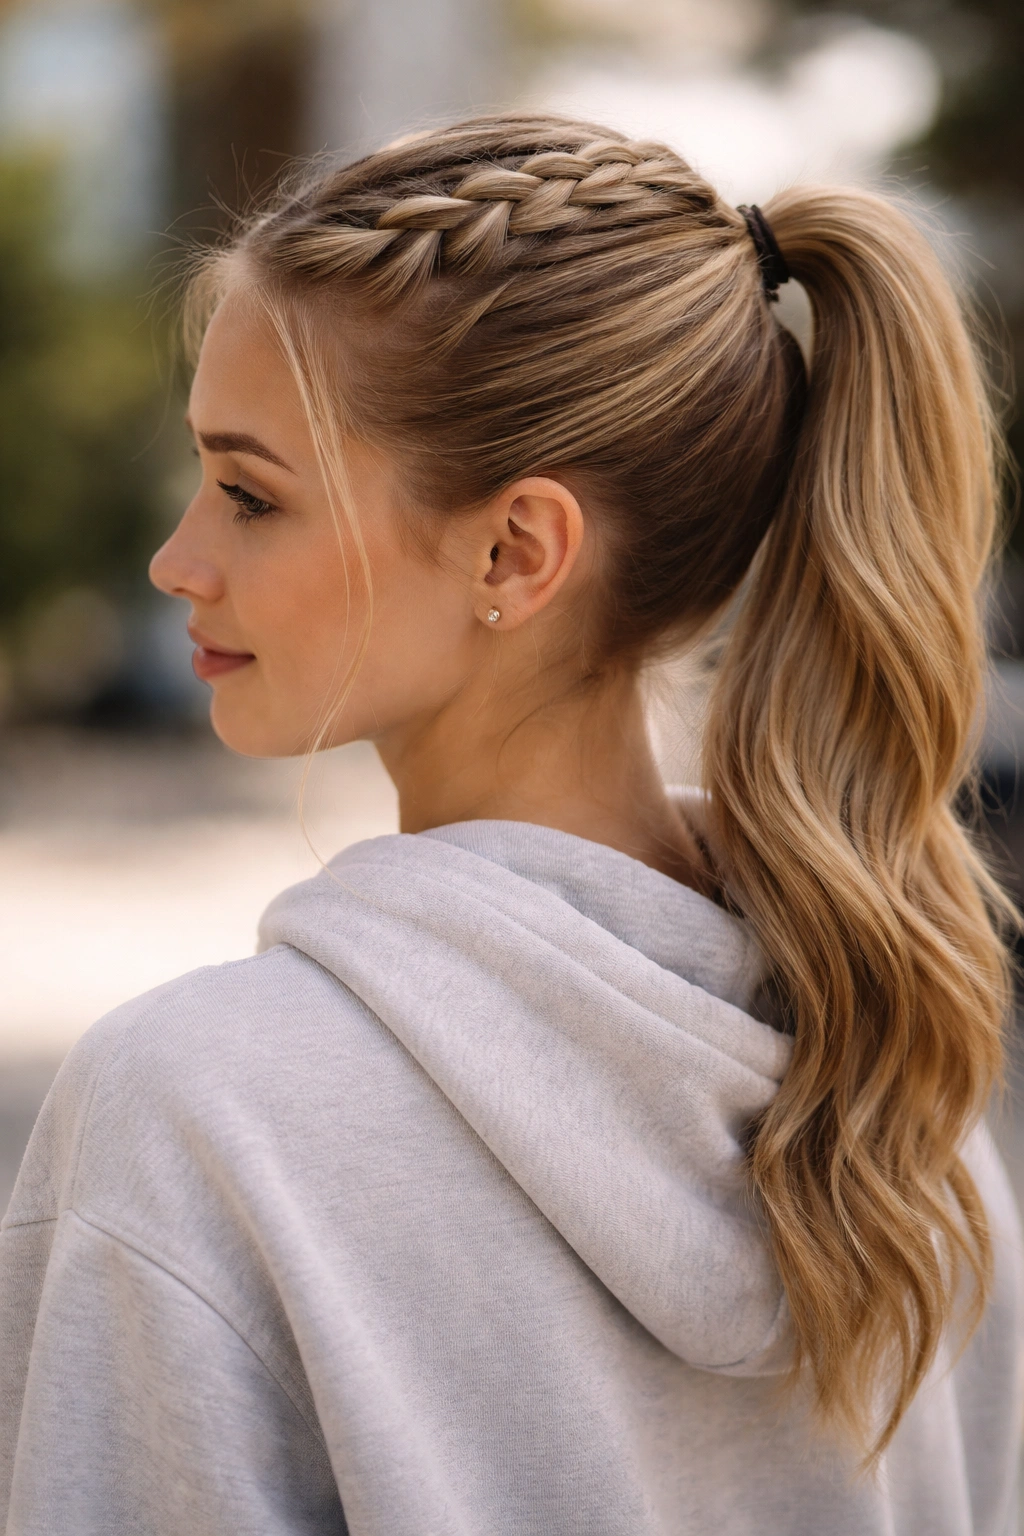
This requires a little more skill, but once you learn the technique, it is fast. A Dutch braid is essentially an inside-out French braid; the hair goes under instead of over, which makes the braid pop off the surface of the head.
Start the braid at your hairline and work it back toward the crown. Stop when you hit the crown, gather the rest of your hair into a ponytail, and secure everything together. The braid adds immediate texture and interest to the top of your head, making a simple pony look like a complex, styled updo.
12. The Multi-Elastic Segmented Pony
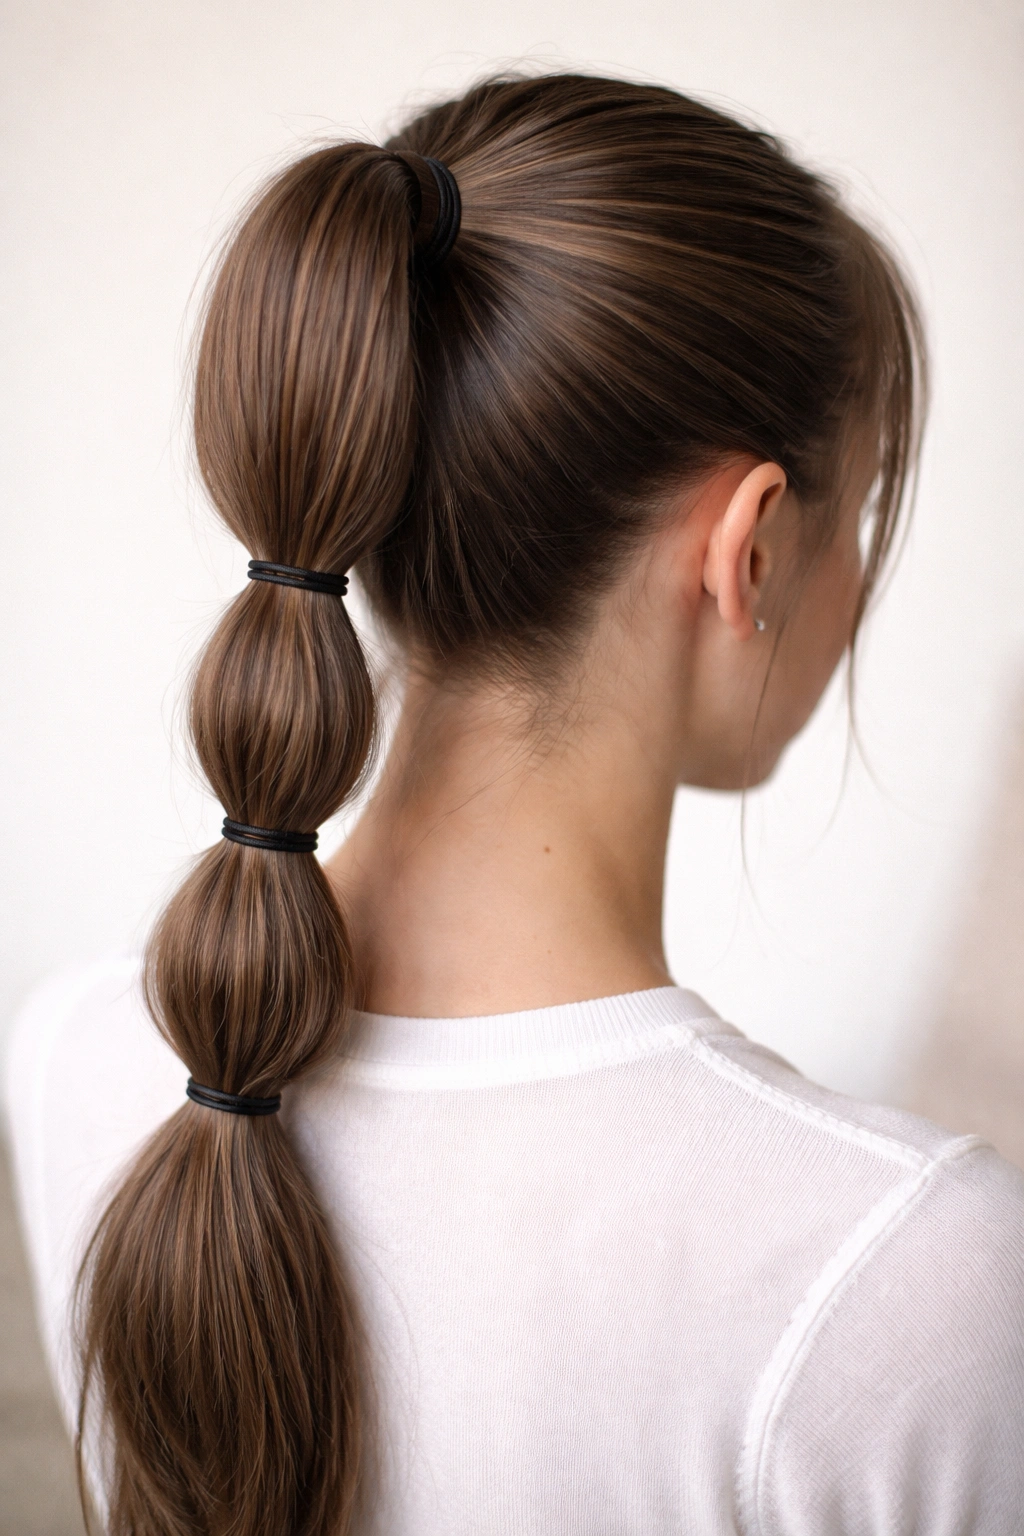
If you like the bubble pony but want it to look more structured, use a lot of elastics. Pull your hair into a high, sleek ponytail. Place another elastic about an inch down, then another one an inch down from that.
The key here is to keep the hair smooth between the bands. It looks almost like a beaded necklace for your hair. This is particularly striking if you use colored elastics that match your outfit. It keeps your hair completely immobile, which is ideal for active days.
13. The Knotted Low Pony
This one looks much more complicated than it actually is. Pull your hair into a low ponytail and split it into two equal sections. Tie those two sections into a simple overhand knot.
Tighten the knot against the base of your head, then use a tiny clear elastic just below the knot to keep it from unraveling. Let the remaining hair hang loose. It looks like you have tied your hair into a bow or a knot, adding a unique architectural element to a low-slung style.
14. The Scarf-Wrapped Pony
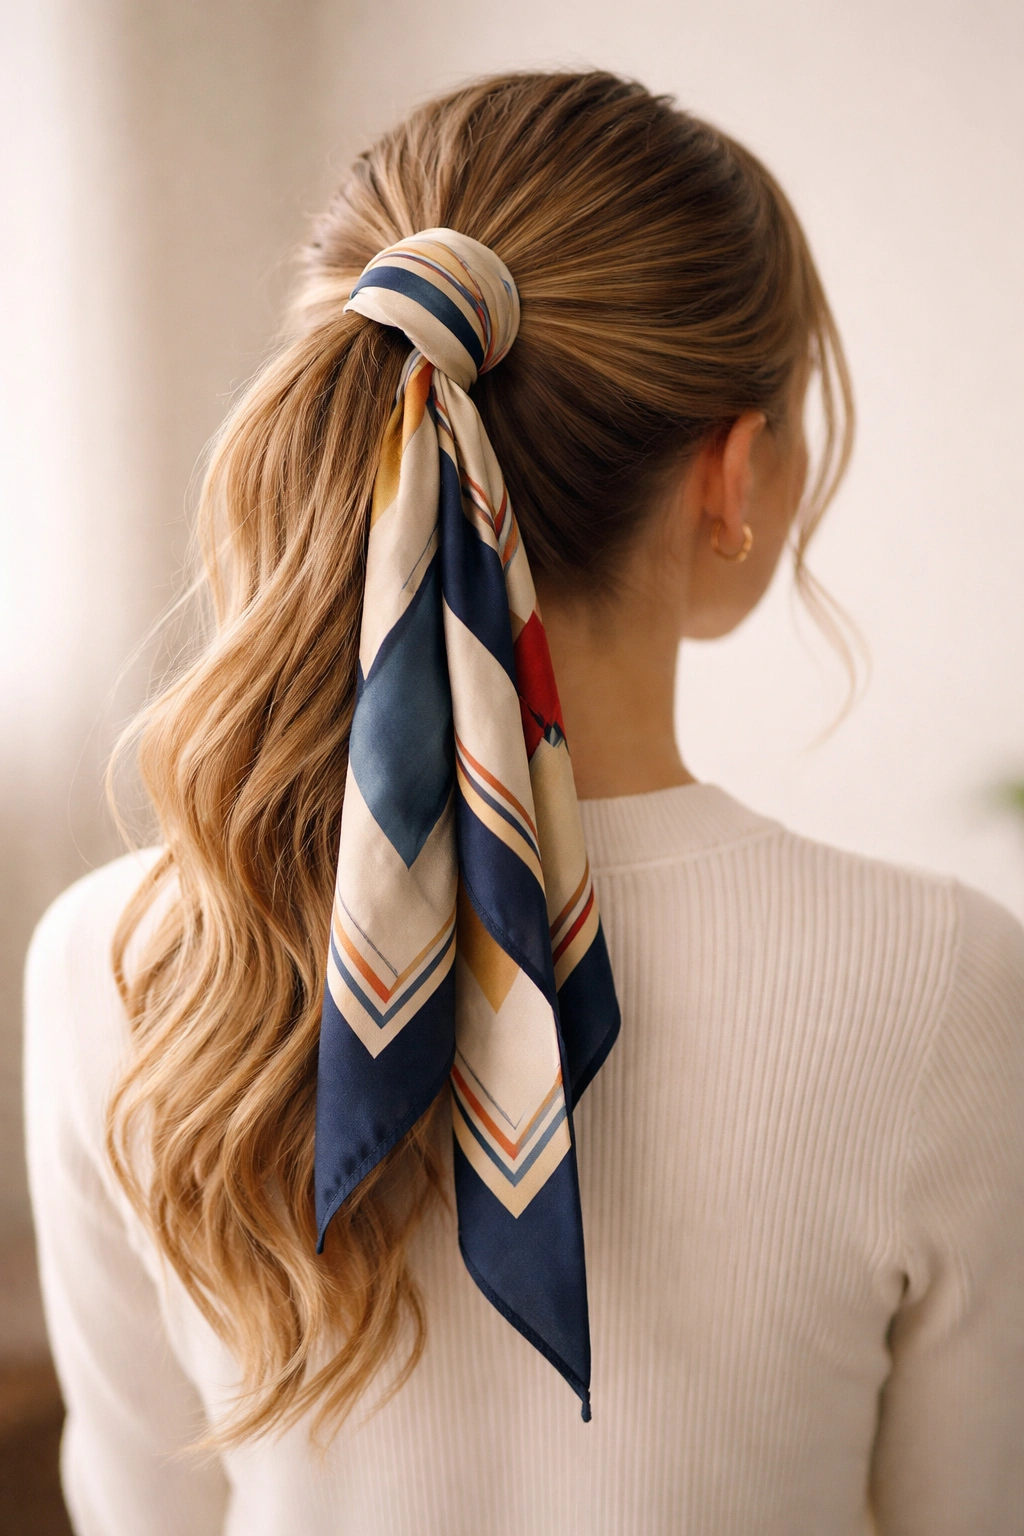
When your hair is having a bad day, accessories are your best friend. A simple silk or cotton scarf can hide a multitude of sins—greasy roots, messy ends, or just general laziness.
Gather your hair into a ponytail first, using a basic elastic to get the height and tightness right. Then, take a long, thin scarf and wrap it around the base of the ponytail. You can either let the ends hang down long, mixed in with your hair, or tie them into a bow at the top for a preppy, classic look.
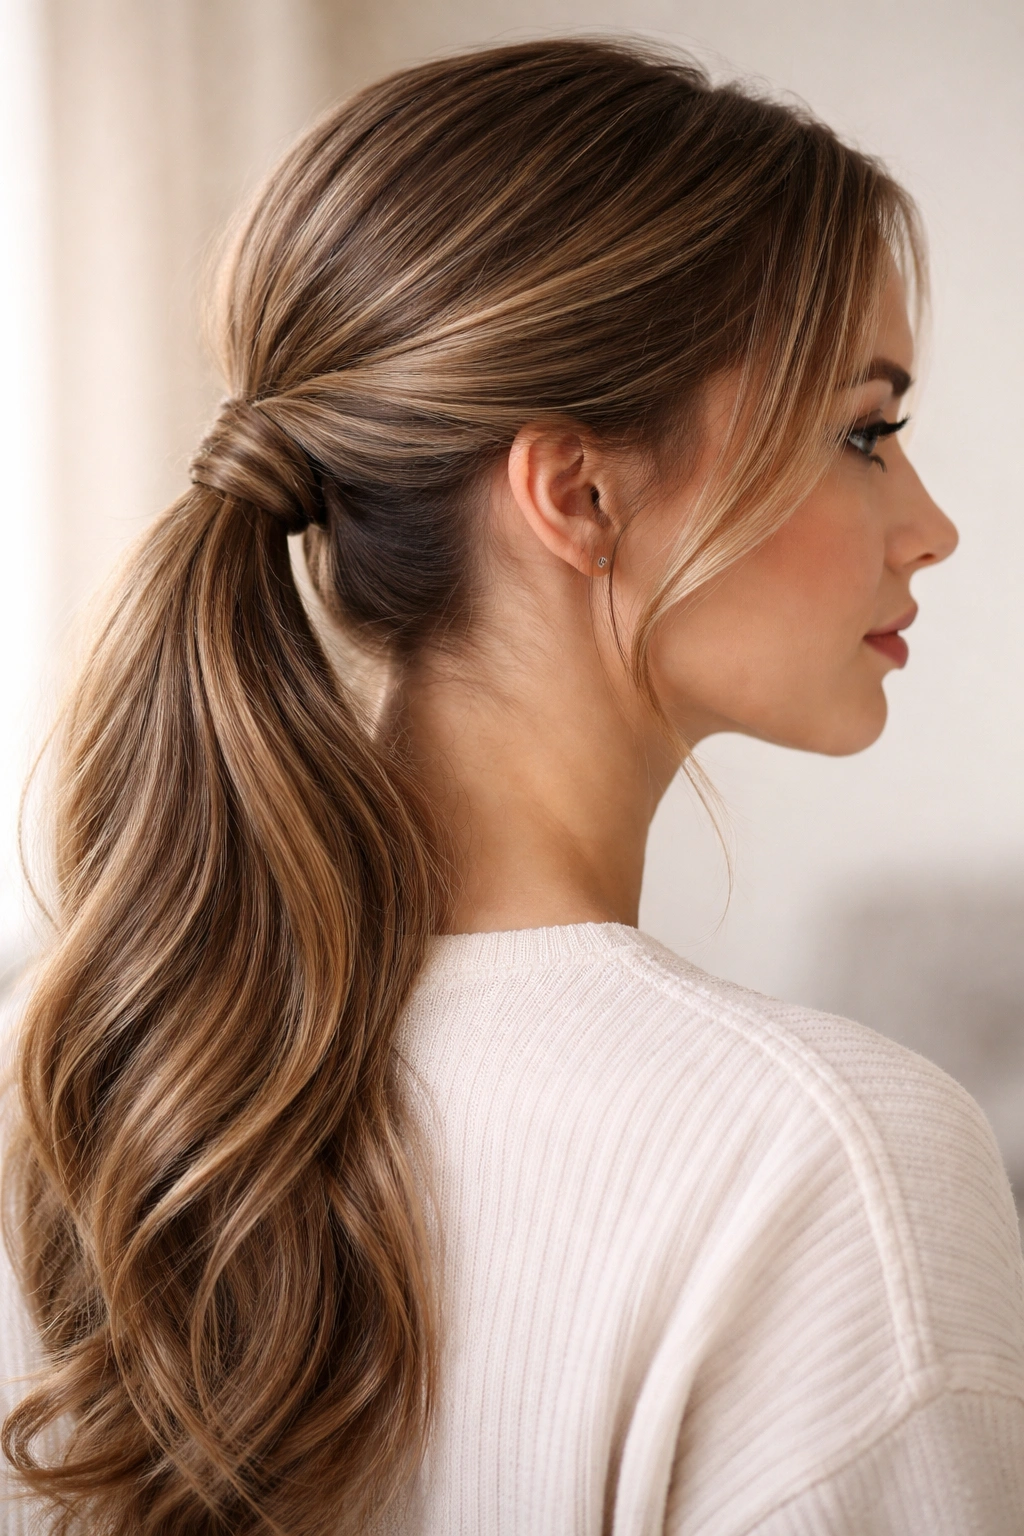
15. The Deep Side Part Pony
Sometimes, changing the placement of your part is the only styling change you need to transform your look. A deep side part creates a dramatic sweep across your forehead, which adds a bit of mystery and frames the face differently than a center part.
Brush all your hair to the side of the part, keeping it tight and flat. Secure it low at the nape of the neck on the side opposite the part. This creates a diagonal flow that looks elegant and intentional. It is a fantastic option for days when you want to look a little more put-together without spending extra time.
16. The French Braid Pony

Similar to the Dutch braid, but smoother. A French braid sits flat against the scalp, creating a seamless transition from your hairline to your ponytail.
Start by French braiding from the front of your head toward the back. Once you reach the nape of your neck, stop braiding and combine the remaining hair into a ponytail. Secure it with an elastic. This style is excellent for keeping bangs or shorter layers out of your eyes, as they get woven into the braid as you move backward.
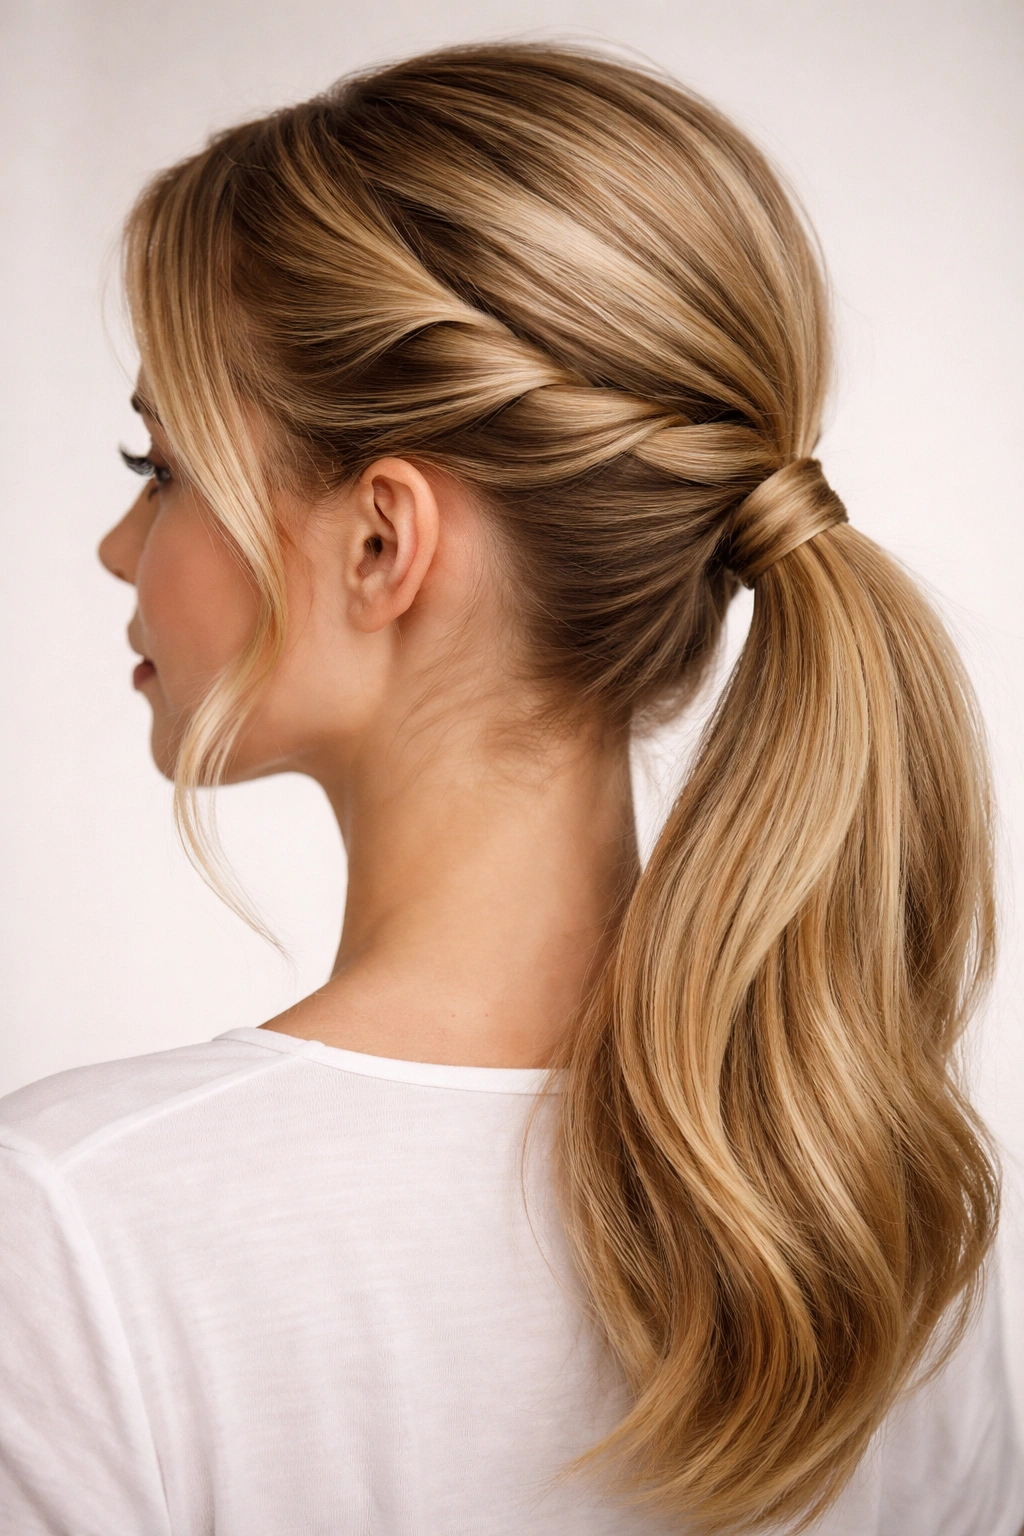
17. The Twisted Crown Pony
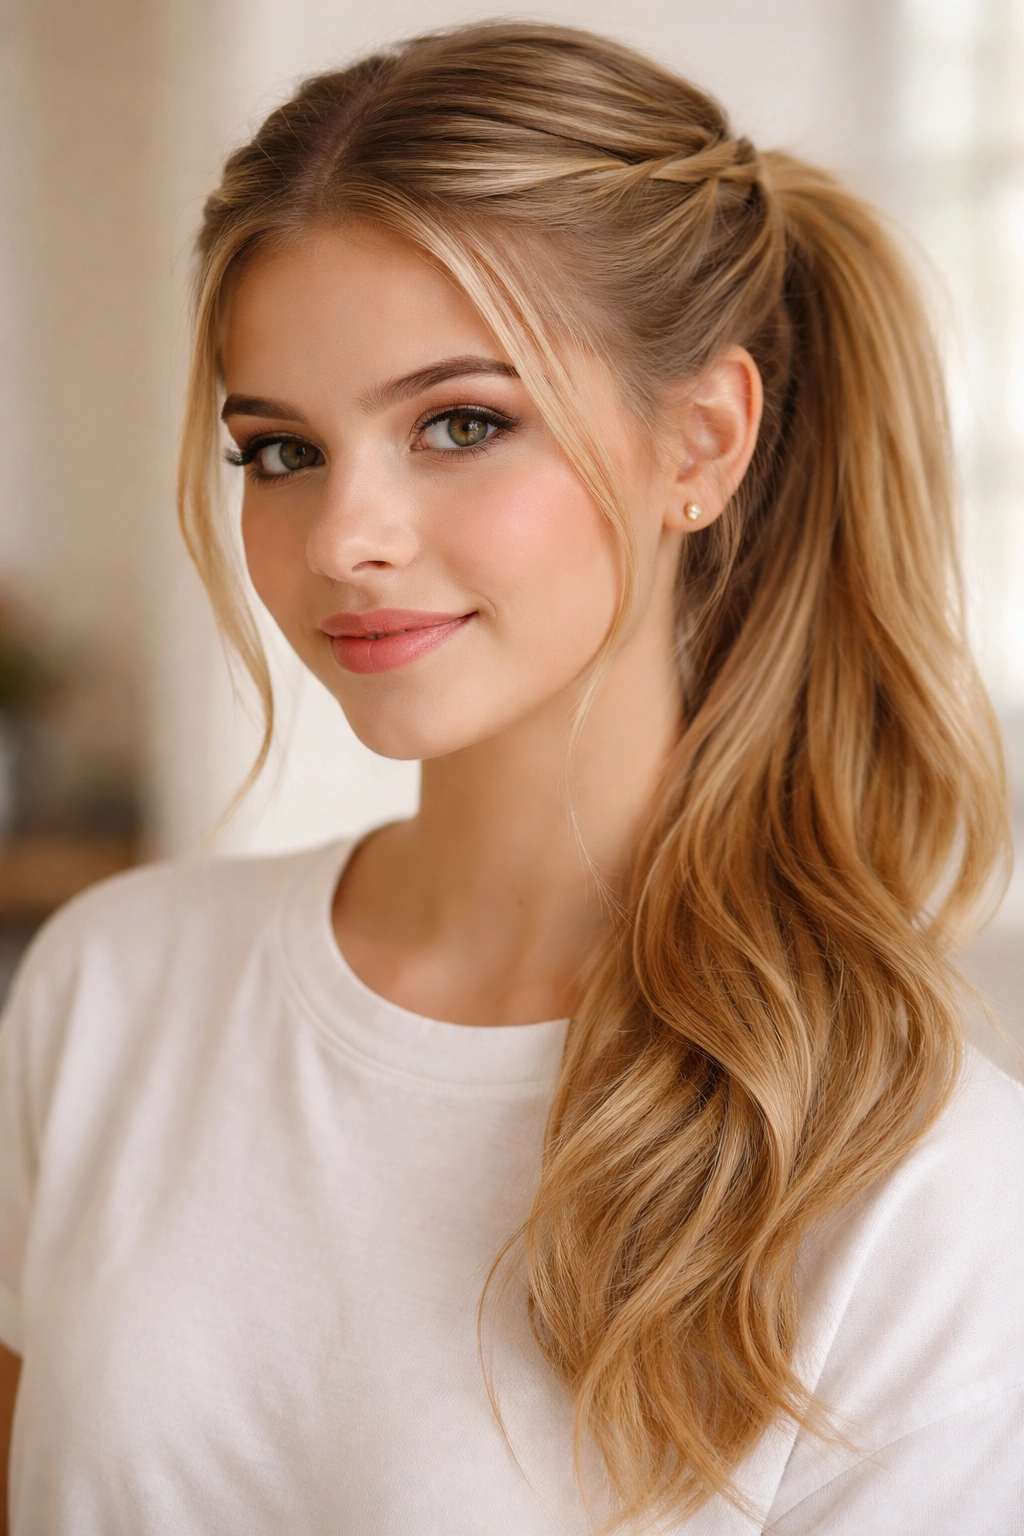
This style adds a bit of volume at the front of your head, which can be very flattering. Section off the hair at the very front of your hairline—the “bangs” area or the front few inches.
Twist this section away from your face and pin it back temporarily. Do this on both sides of your part. Gather all your hair, including the twisted sections, into a ponytail at the back. It creates a soft, romantic crown effect that feels much more polished than a standard ponytail, but it takes less than two minutes to execute.
18. The Waterfall Braid Pony
This looks complex, but it is just a series of dropping sections. You start a braid at your temple, and as you work across the back of your head, you drop one strand of the braid and pick up a new one from underneath.
Once you have worked your way across, collect the ends of the braid and the rest of your hair into a side ponytail. It creates this beautiful, cascading effect of hair woven through itself. It is definitely more of a “style” than just a way to hold hair back, but it is a great one for days when you want to look nice.
19. The Scrunchie Statement Pony

Scrunchies have made a massive comeback, and for good reason. They are much gentler on your hair than thin plastic elastics, and they add a pop of color or texture to any outfit.
The key to a good scrunchie pony is the volume. Because the scrunchie is thicker, it can sometimes pull the ponytail down if your hair is heavy. Use a thin, clear elastic to secure your ponytail first, and then wrap the scrunchie over it. This gives you the secure base you need with the aesthetic benefit of the scrunchie on top.
20. The Fishtail Braid Pony
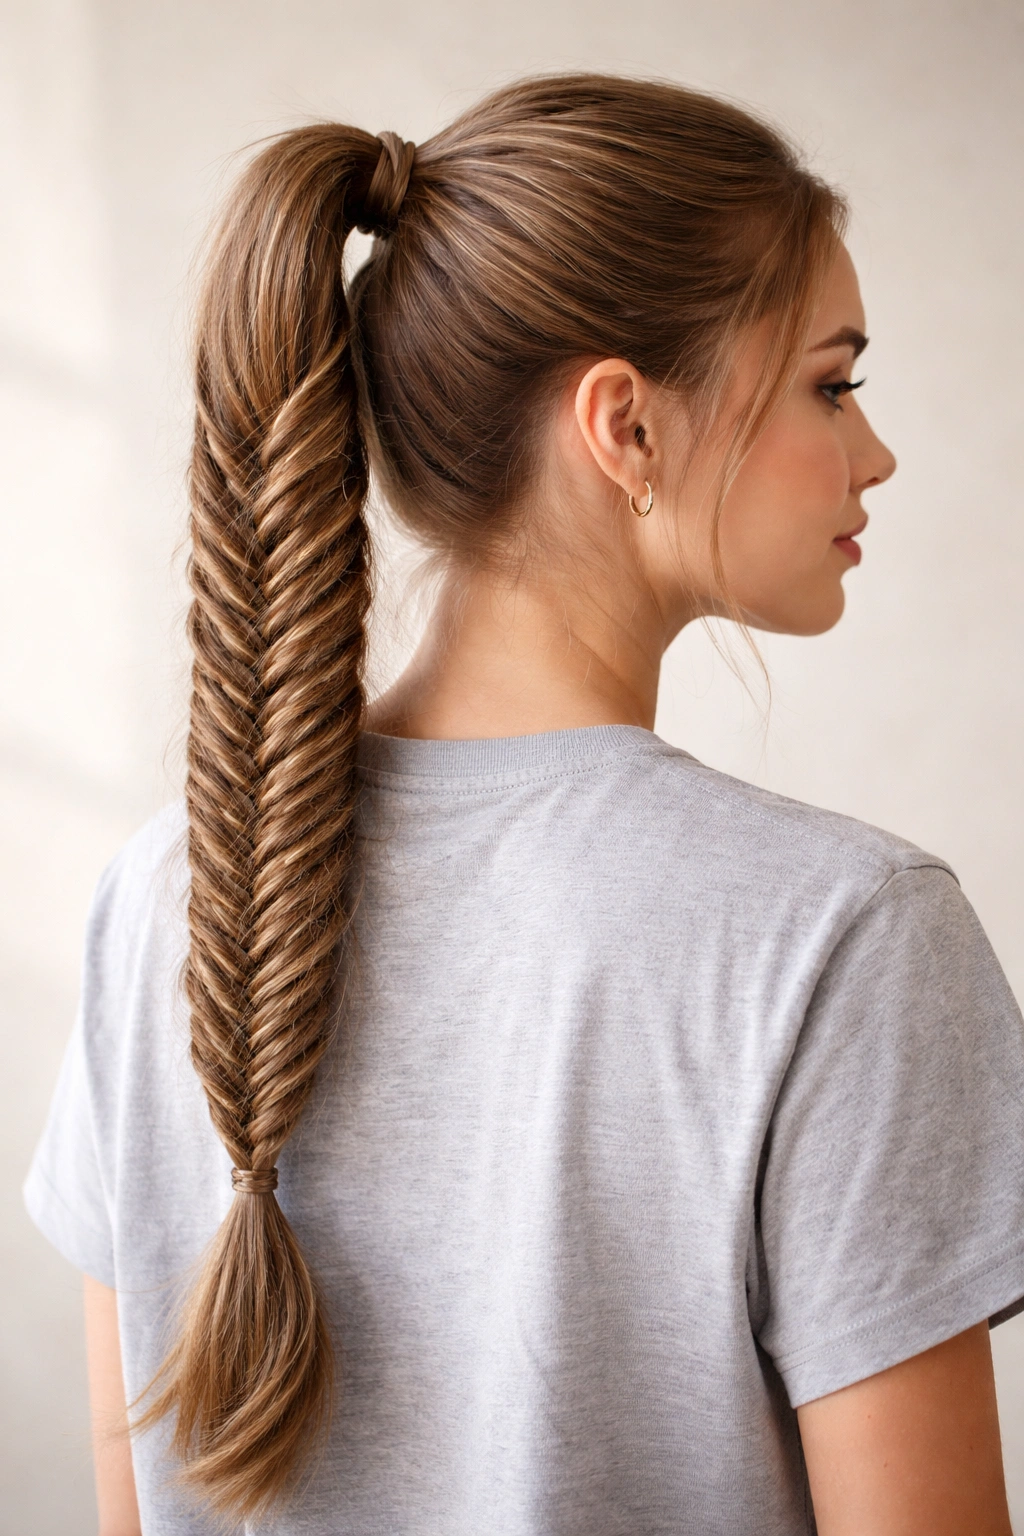
A fishtail braid is more time-consuming than a standard three-strand braid, but the result is intricate and unique. Start with a high ponytail, then split the pony into two sections.
Take a thin piece from the outside of the left section and cross it over to the right. Then take a thin piece from the outside of the right section and cross it over to the left. Keep doing this all the way down. The finished look is tight and very detailed, which makes it look like you spent twenty minutes on your hair when it actually only takes a few.
21. The Low Pony with Face-Framing Pieces
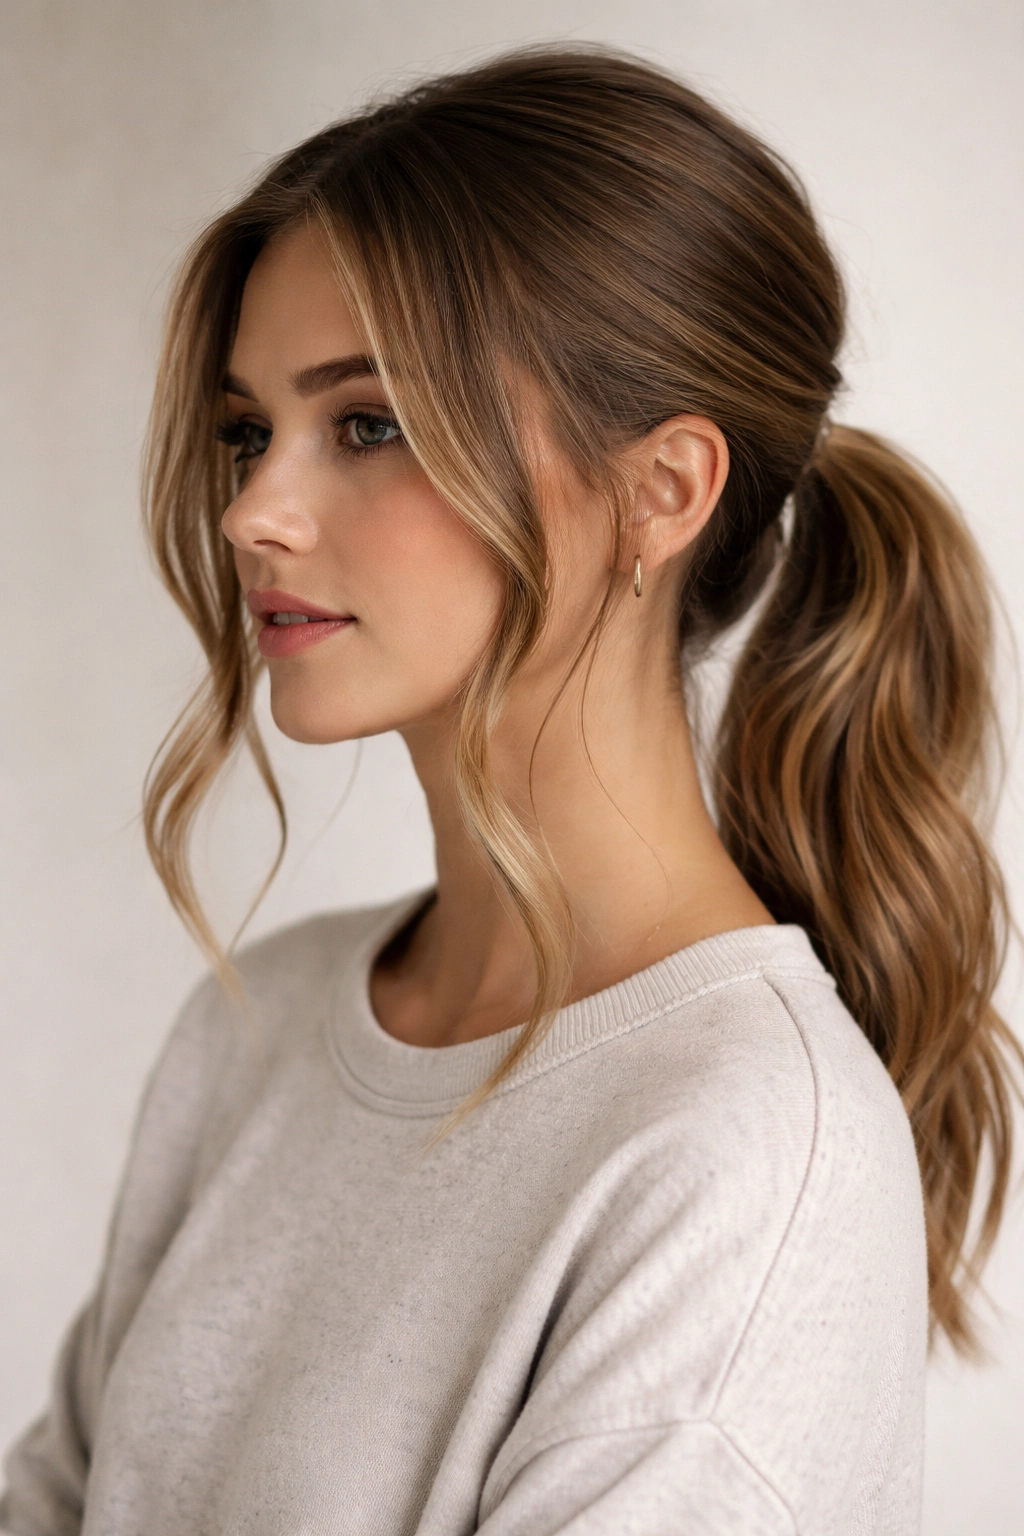
This is the “model off-duty” look. It is effortless, slightly messy, and very easy to achieve. Pull your hair back into a low ponytail, but before you secure it, pull out a few strands around your face.
Keep them fairly long—usually starting at the cheekbone or jawline. These pieces soften the harshness of a pulled-back style. If you have a hair straightener, give these loose pieces a slight wave or a bend; it adds movement and makes the whole look feel styled rather than just undone.
22. The High-Volume Teased Pony
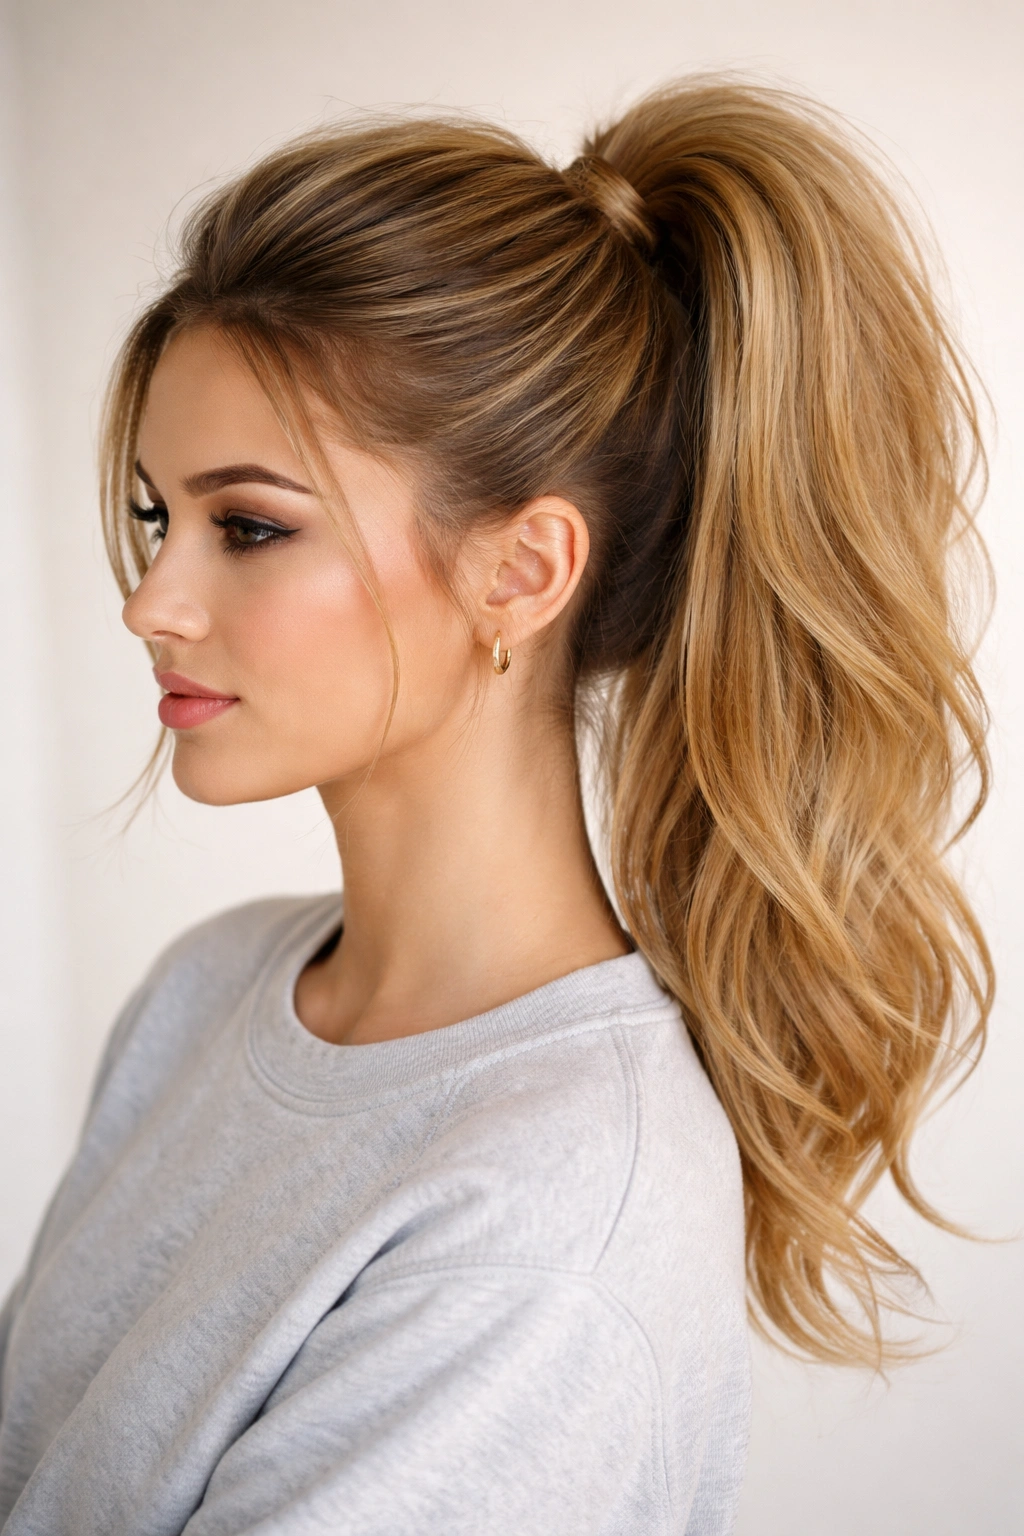
If you have fine hair and struggle with your ponytail looking flat, this is the solution. You need to create a base of volume before you even tie it.
Take the top section of hair at the crown—the area that will be on top of the ponytail—and tease it gently with a fine-tooth comb. You are backcombing the roots to create a cushion. Smooth the very top layer so it doesn’t look frizzy, then gather your hair into a ponytail. The tease gives you that “lift” that usually takes professional styling to achieve.
23. The Bow-Accessorized Pony
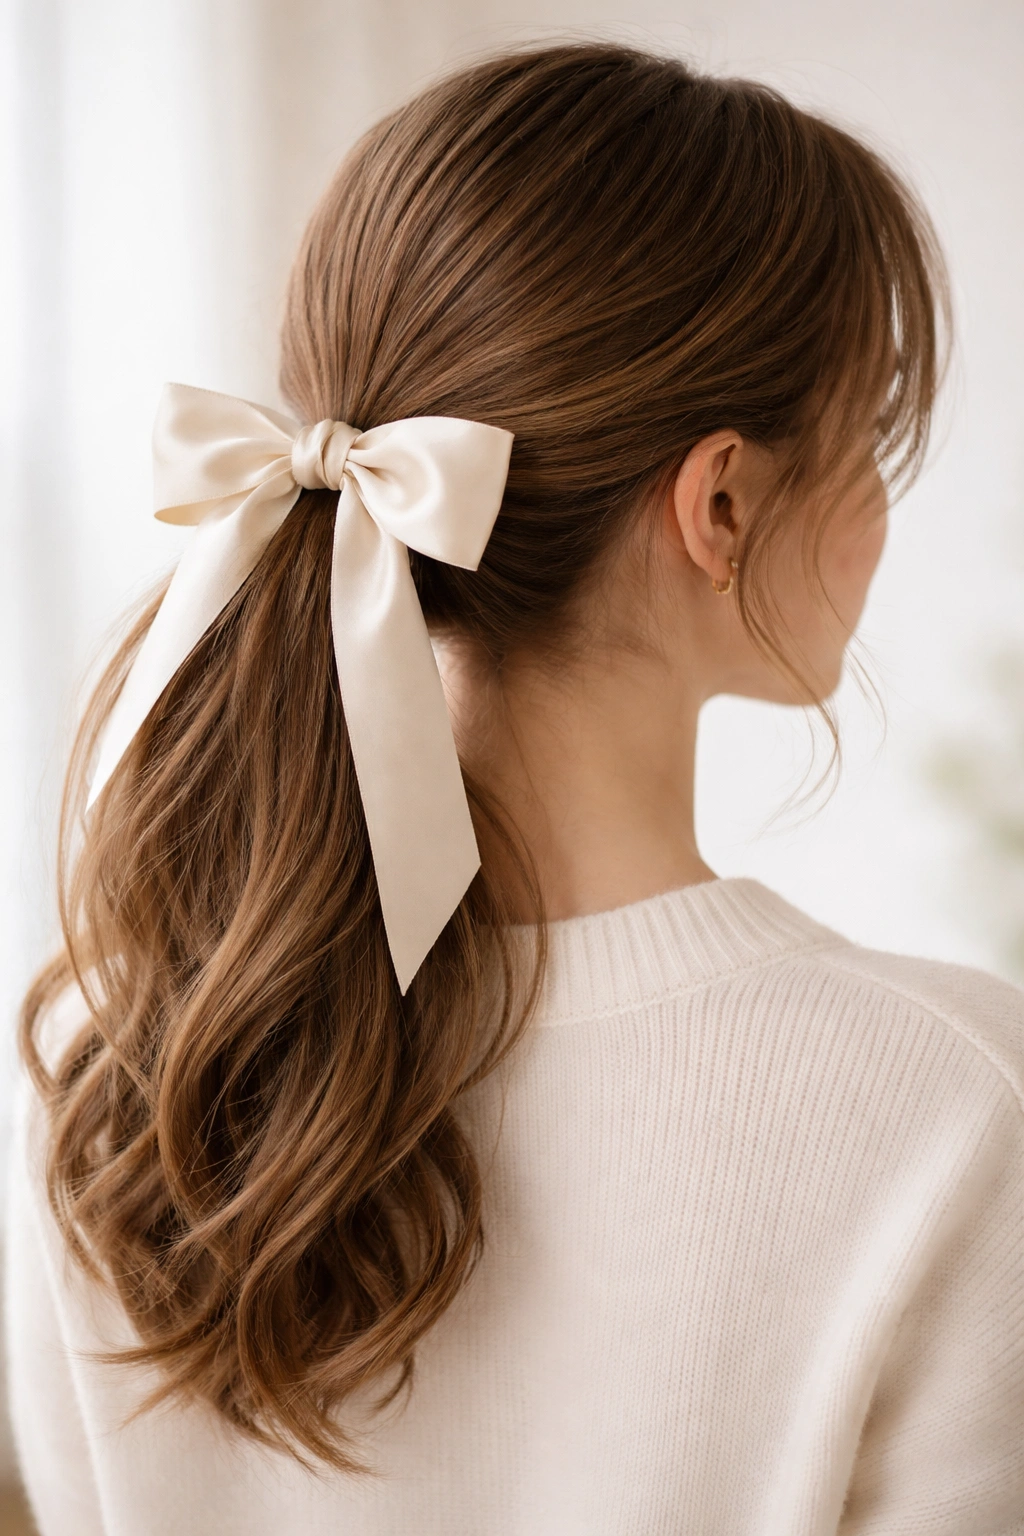
Bows are a classic hair accessory that immediately dresses up a plain ponytail. You can buy pre-attached bow elastics, or you can use a strip of ribbon.
If you are using a ribbon, tie it around your hair tie in a simple knot, or if you are skilled with ribbon, tie it into a proper bow. It looks best on a mid-height or low ponytail. It is a simple, feminine touch that works perfectly with school outfits and adds a bit of personality without requiring any complex braiding or twisting.
24. The Wrapped Braid Pony
This combines two classic techniques: a wrap and a braid. Pull your hair into a standard ponytail and secure it. Separate a small section from the ponytail itself and braid that section all the way to the end.
Wrap that finished braid around the base of the ponytail to cover the elastic, and pin it in place with a bobby pin. It is a more detailed version of the standard “wrap a piece of hair” trick. The braid adds texture and makes the base of the ponytail look like it is woven from your own hair.
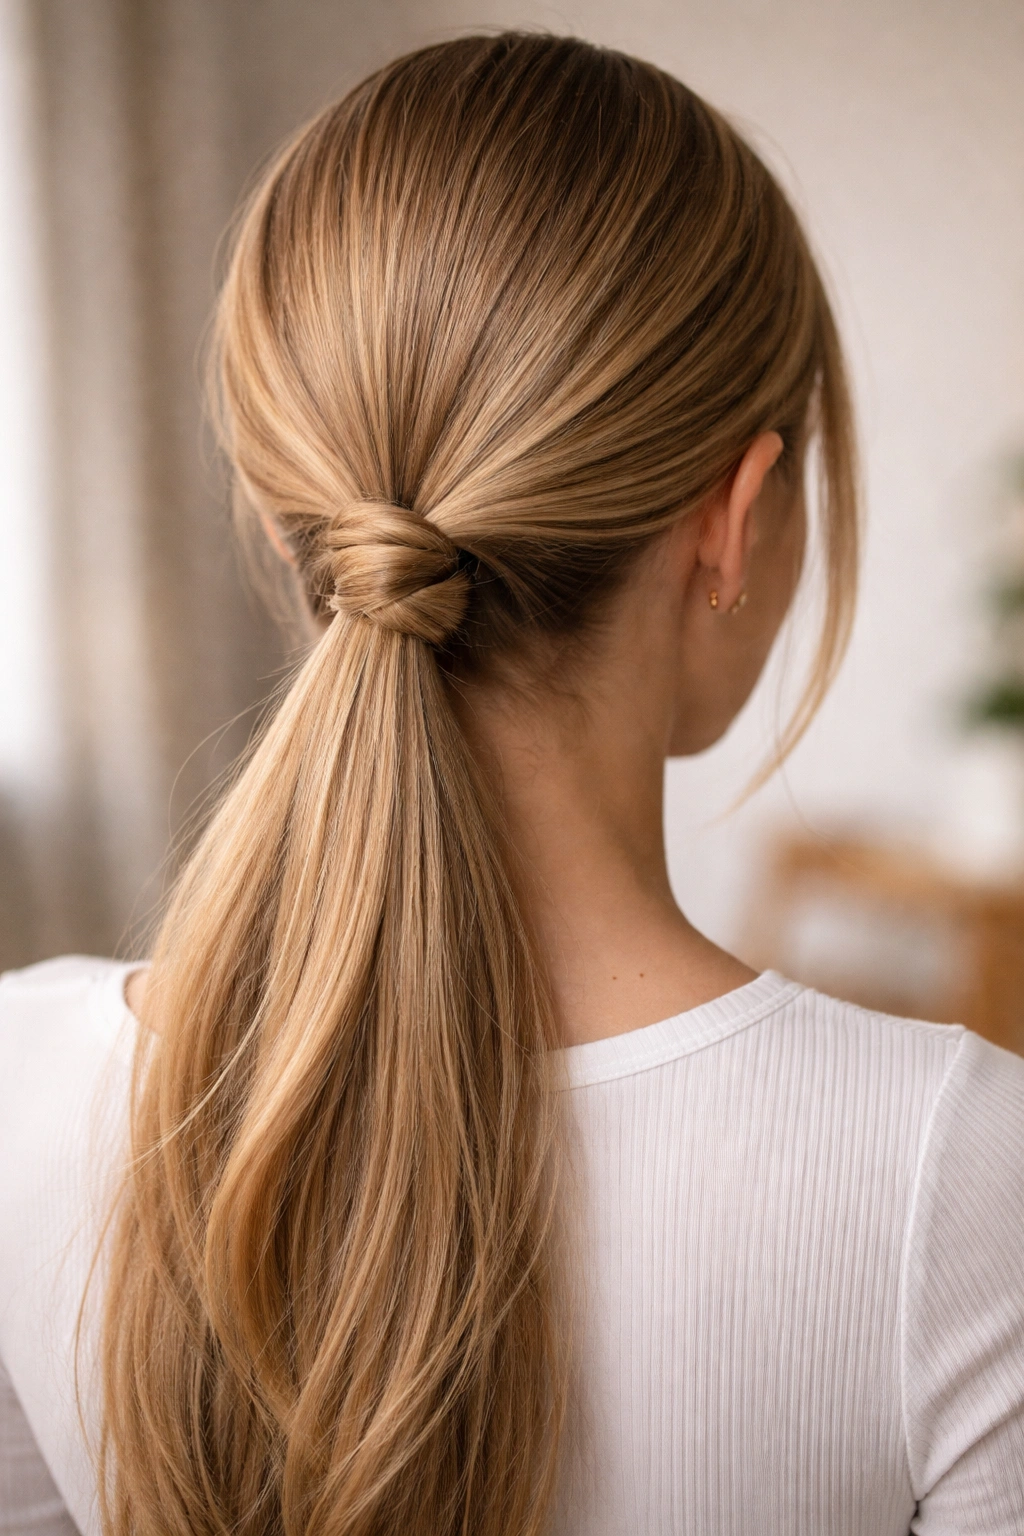
25. The Inverted Loop Pony
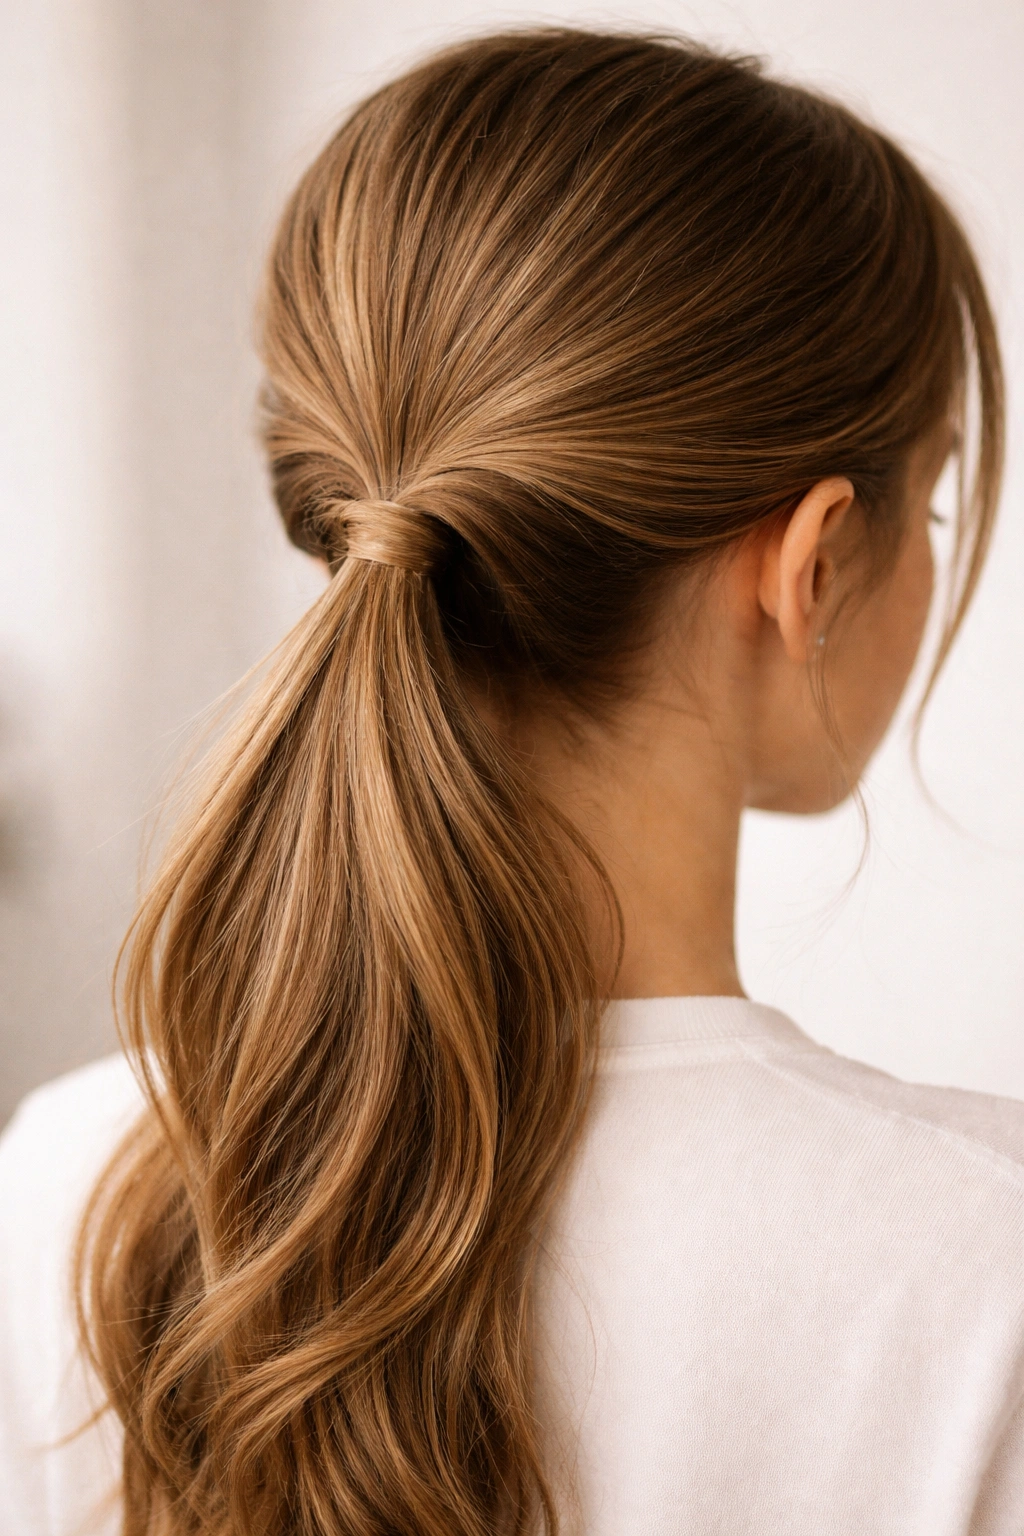
This is a classic “hack” that creates a fancy look from a basic base. Put your hair in a low ponytail, but do not pull it tight against your scalp.
With your fingers, create a small hole in the hair just above the elastic. Grab the ponytail and flip it up, over, and through that hole. Pull the tail down through the center. It creates this beautiful, twisted effect on both sides of the base. It is elegant, quick, and looks like a sophisticated hairstyle that took much longer than thirty seconds.
26. The Rope Braid Pony
A rope braid is just two strands twisted together. It is much easier to manage than a three-strand braid. Gather your hair into a high ponytail.
Split the ponytail into two equal parts. Twist each part tightly to the right. Then, cross the two twisted parts over each other to the left. Secure the end with a small clear elastic. The two twists will naturally wind around each other, creating a rope-like texture that is very clean and structured.
27. The Messy Top-Knot Pony

Sometimes a bun is too much, and a pony is too little. This is the middle ground. Put your hair into a high ponytail, but don’t pull the hair all the way through the elastic on the final loop.
Instead of hiding the ends, let them stick out of the top of the bun loop. Pull the loop apart to make it messy and wide. It is a “top knot” that is basically just a bun that has been allowed to stay a little bit wild. It is the quintessential “I rolled out of bed and still look cute” style.
28. The Pulled-Through Side Pony
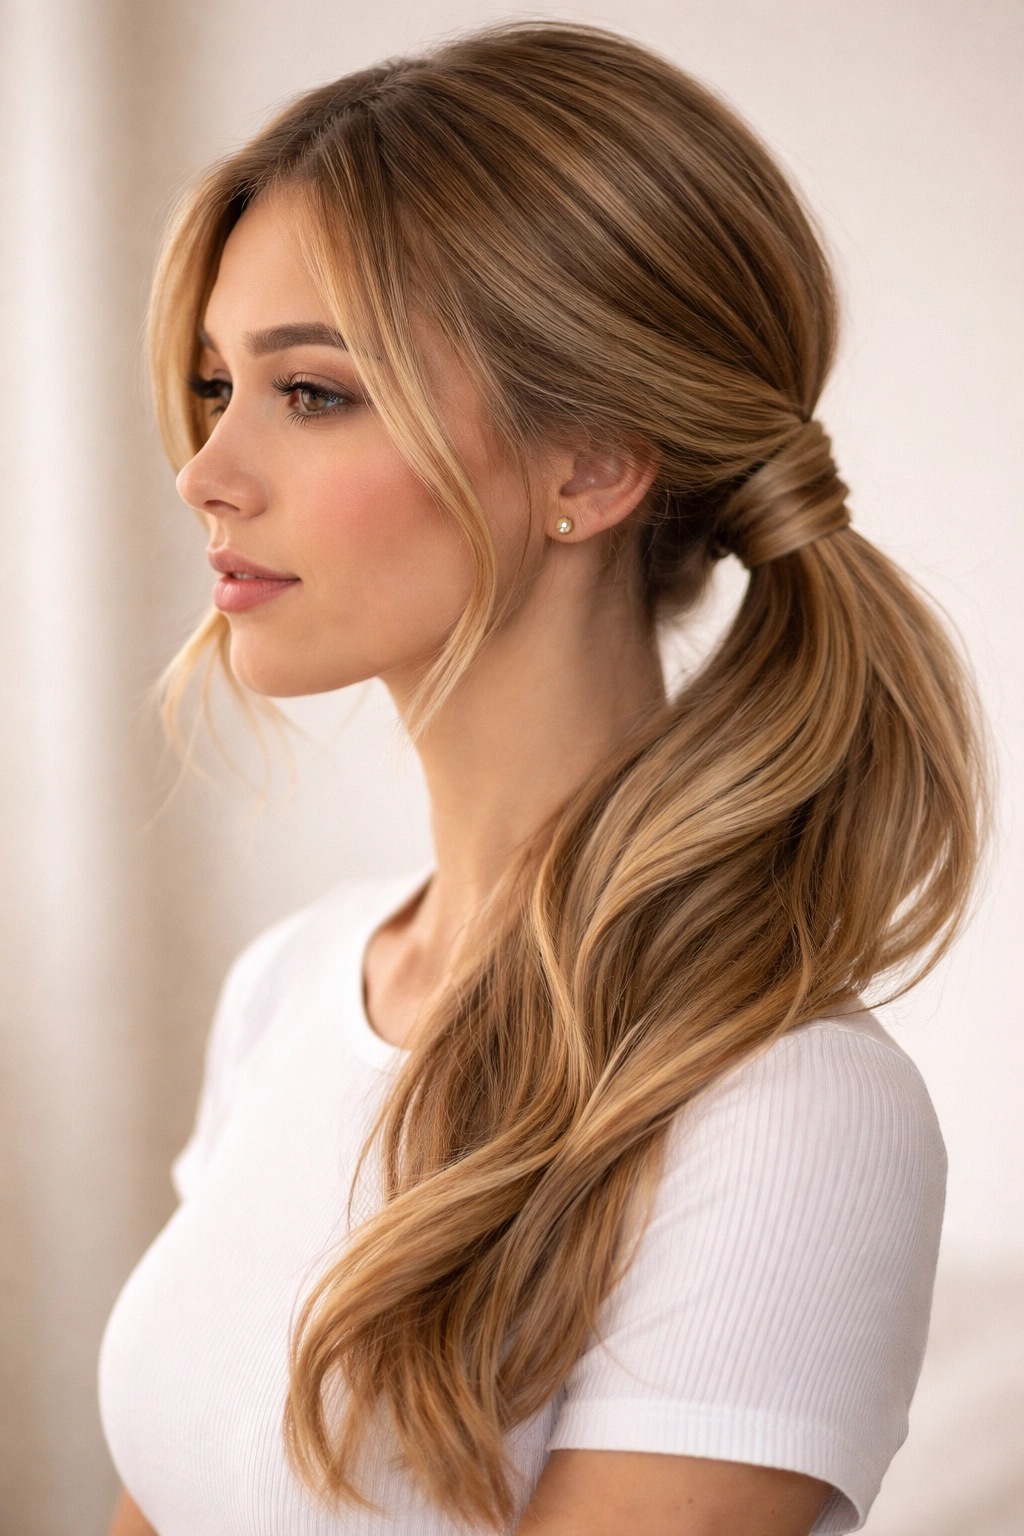
This is a variation of the inverted loop, but done on the side. Gather all your hair to one side and secure it with an elastic.
Again, create a gap above the elastic and pull the tail through. The result is a twisted, elegant side-swept look. It removes the hair from the back of your neck (which is great for warmer days) while still keeping the length visible over your shoulder.
29. The Sleek Center-Part Pony
This is minimalist styling at its finest. It requires patience and a good brush. Use a tail comb to draw a dead-straight part down the center of your head, from your forehead to the crown.
Brush both sides of the hair flat and tight, gathering them at the nape of the neck. You want zero volume at the roots here. This is a very sharp, clean look. If you have some light hair oil, use just a drop to smooth down any flyaways along the part. It looks polished, modern, and very put-together.
30. The Triple-Twist Pony
This adds dimension to the side of the head. Section off three small horizontal strips of hair on one side of your head, starting near your hairline and moving toward the back.
Twist each one of these strips back toward the center. Once you have three twists, pull them all back and incorporate them into a low ponytail. The twists create a decorative pattern on the side of your head that makes the ponytail look like it is held by something more complex than just a band.
31. The Ribbon-Tie Pony
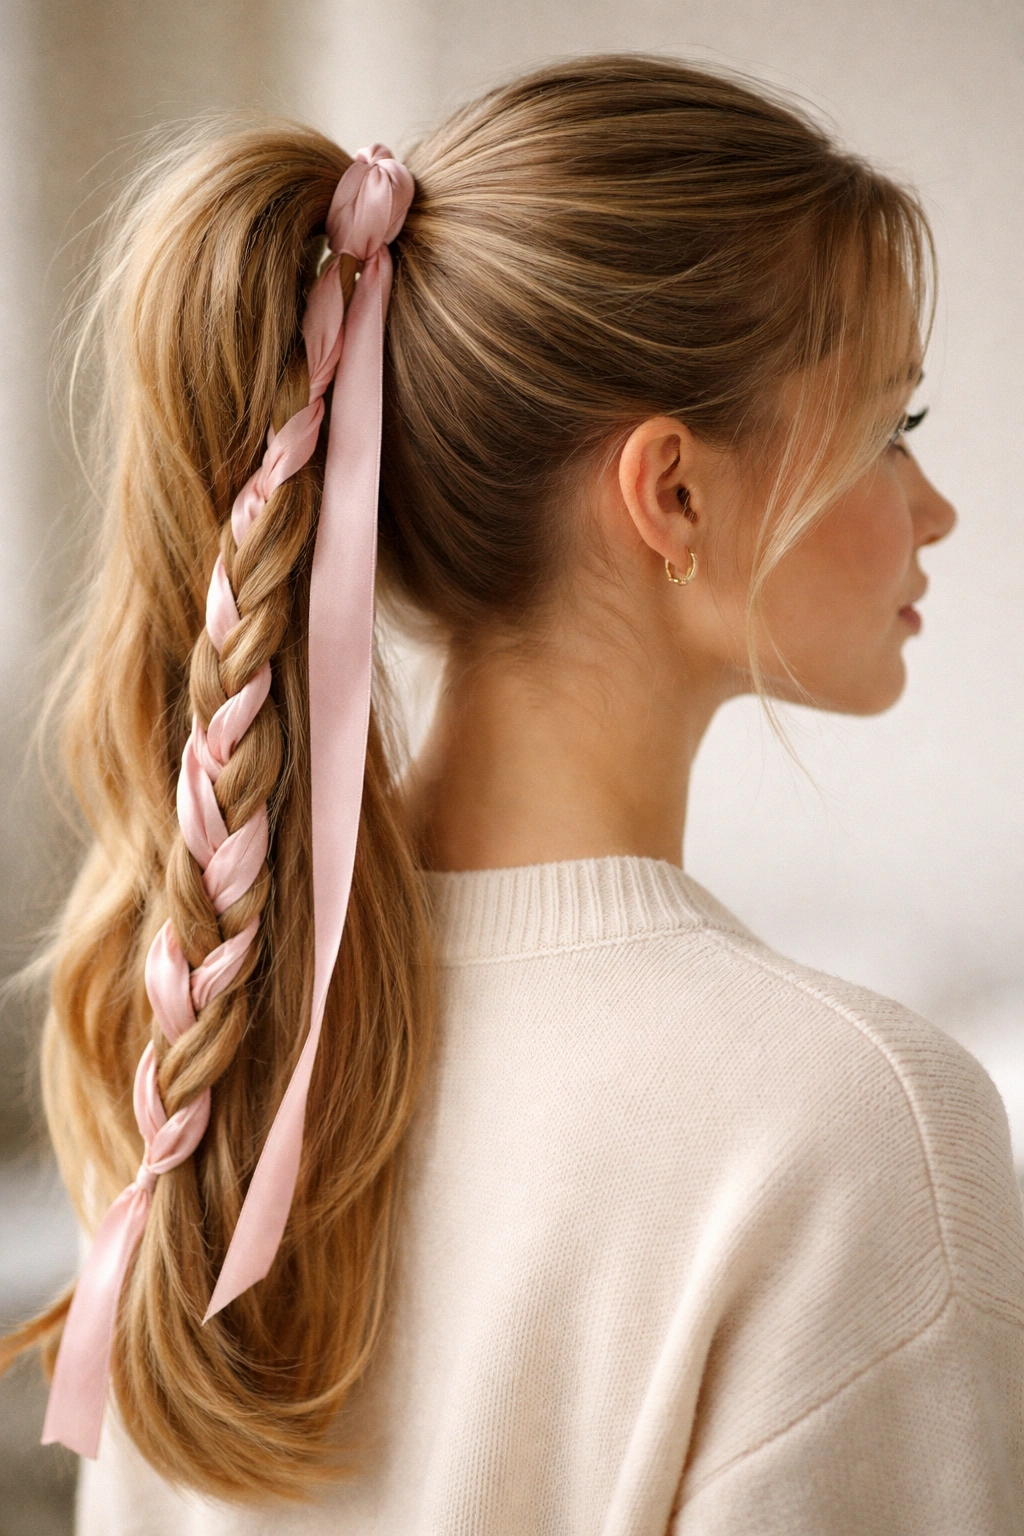
If you have a longer piece of ribbon, you can weave it into your ponytail. Secure a high ponytail with a simple elastic first. Then, tie a long, thin ribbon around the base.
You can let the ribbon hang with your hair, or—if you are feeling fancy—you can braid the ribbon into the hair as you do a three-strand braid. It adds color and texture without needing any heat styling or complex tools.
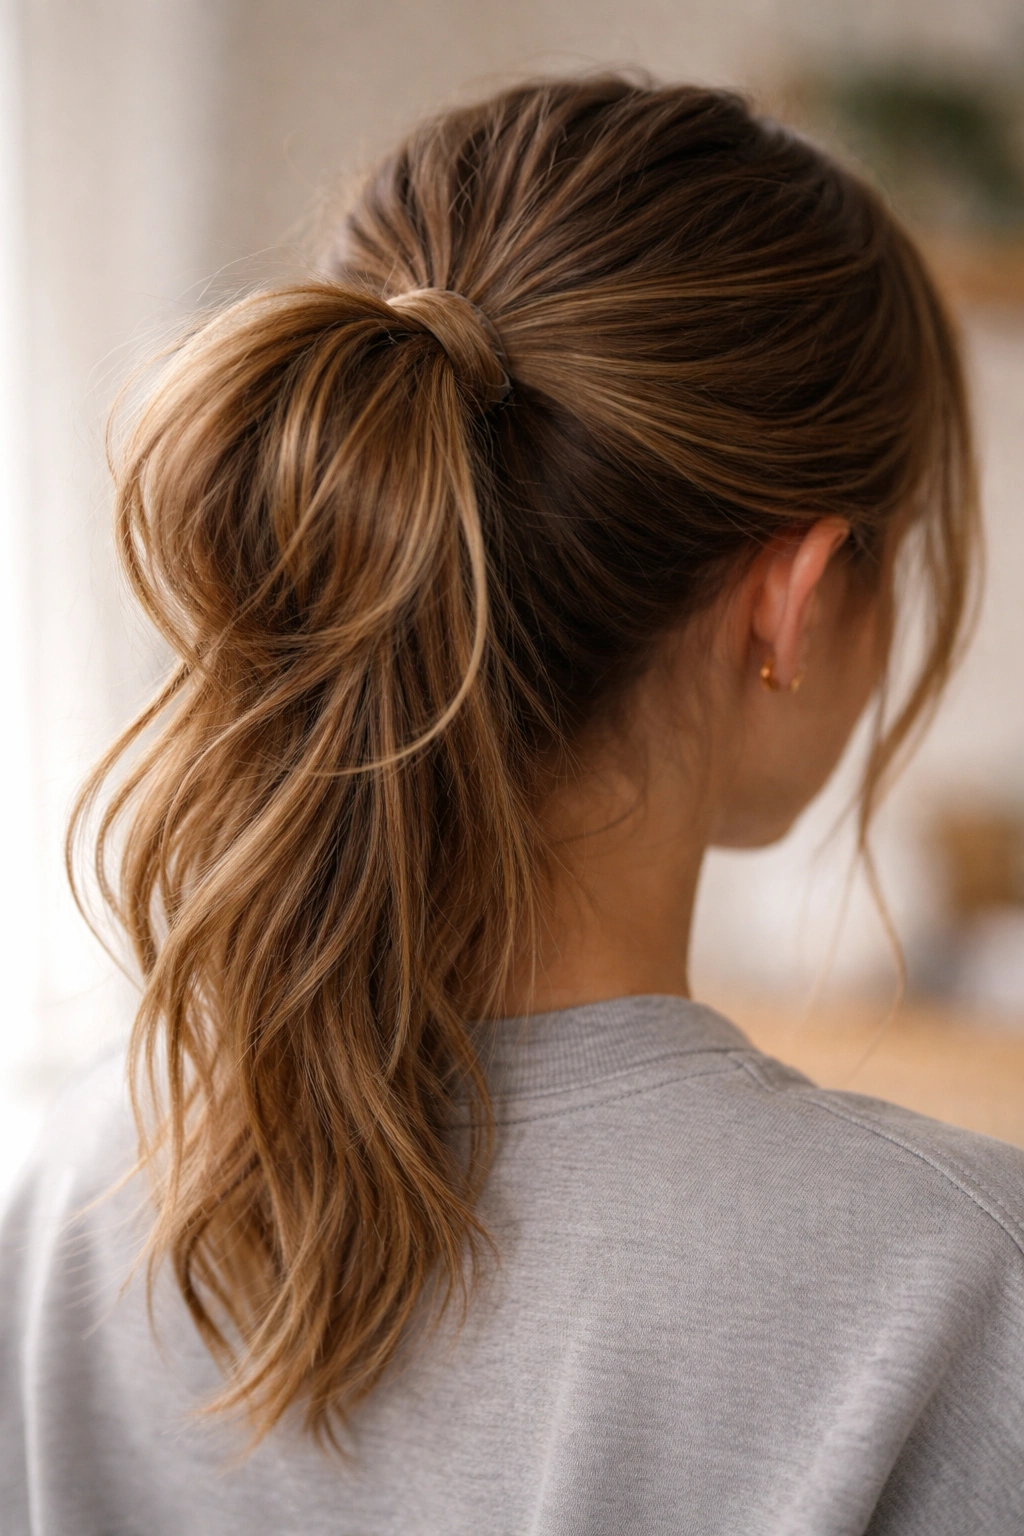
32. The Low-Messy Ponytail with Texture
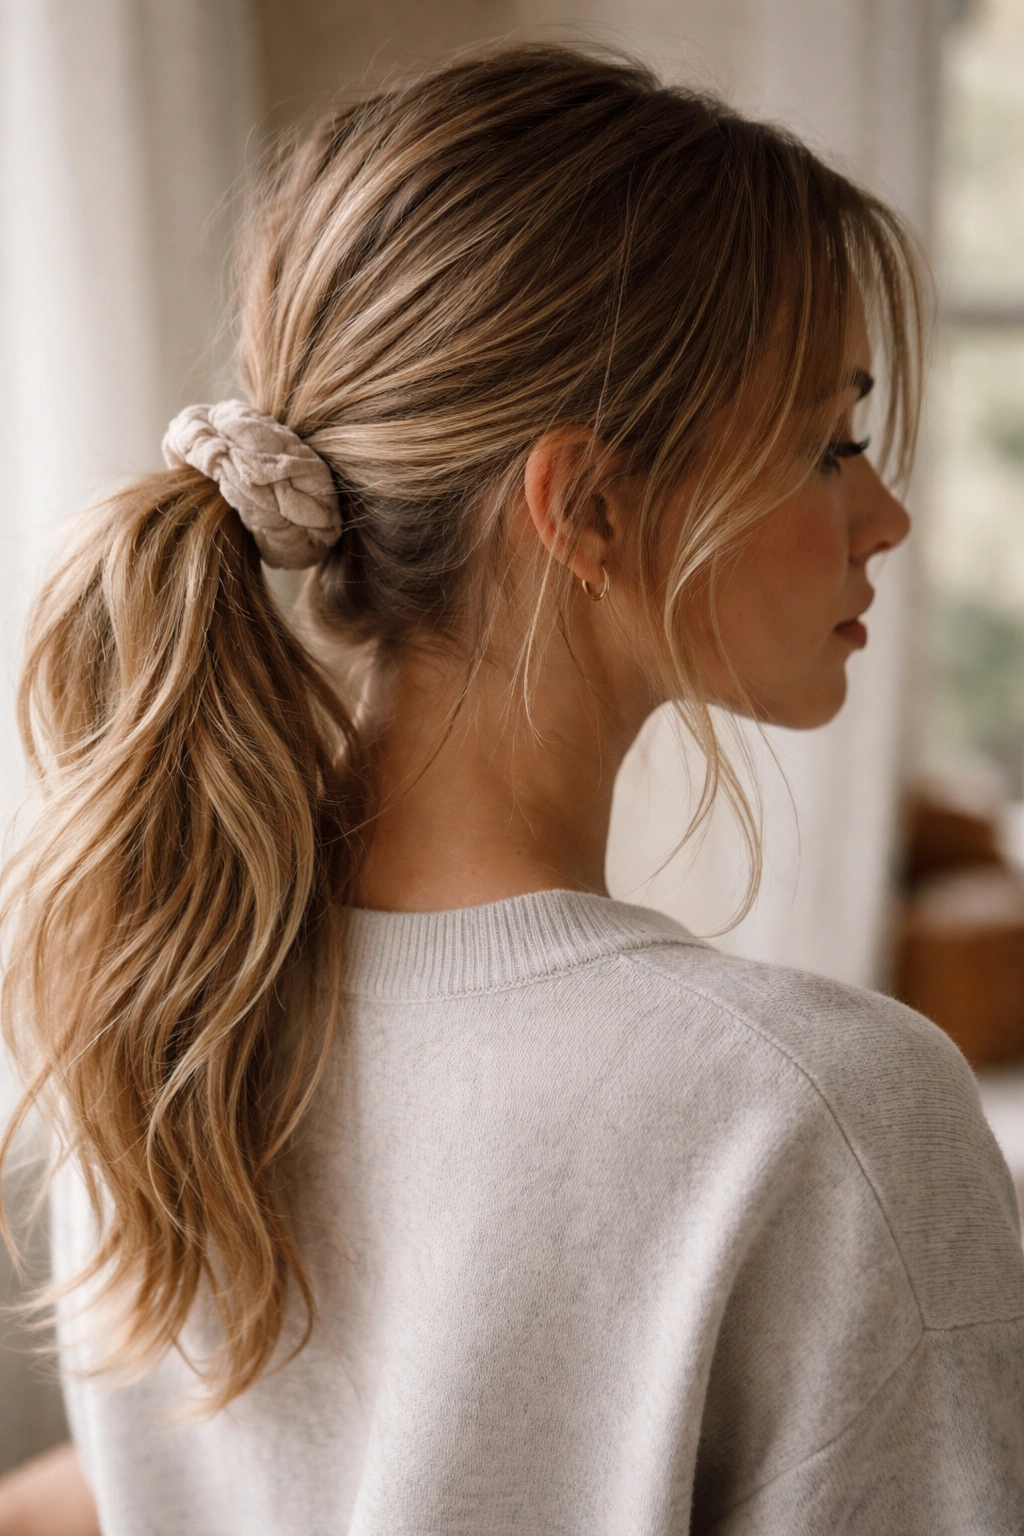
This is the ultimate “weekend” or “relaxed school day” look. It’s all about the mess. Do not brush your hair before you put it up; use your hands to rake it back.
Keep it loose at the base—do not pull it tight against your scalp. Secure it with a soft fabric scrunchie. The key to making this look good rather than just “lazy” is to pull a few thicker, chunkier sections of hair loose around your face and the crown of your head. It should look like it was done quickly, because it was.
33. The Bubble-Braid High Pony
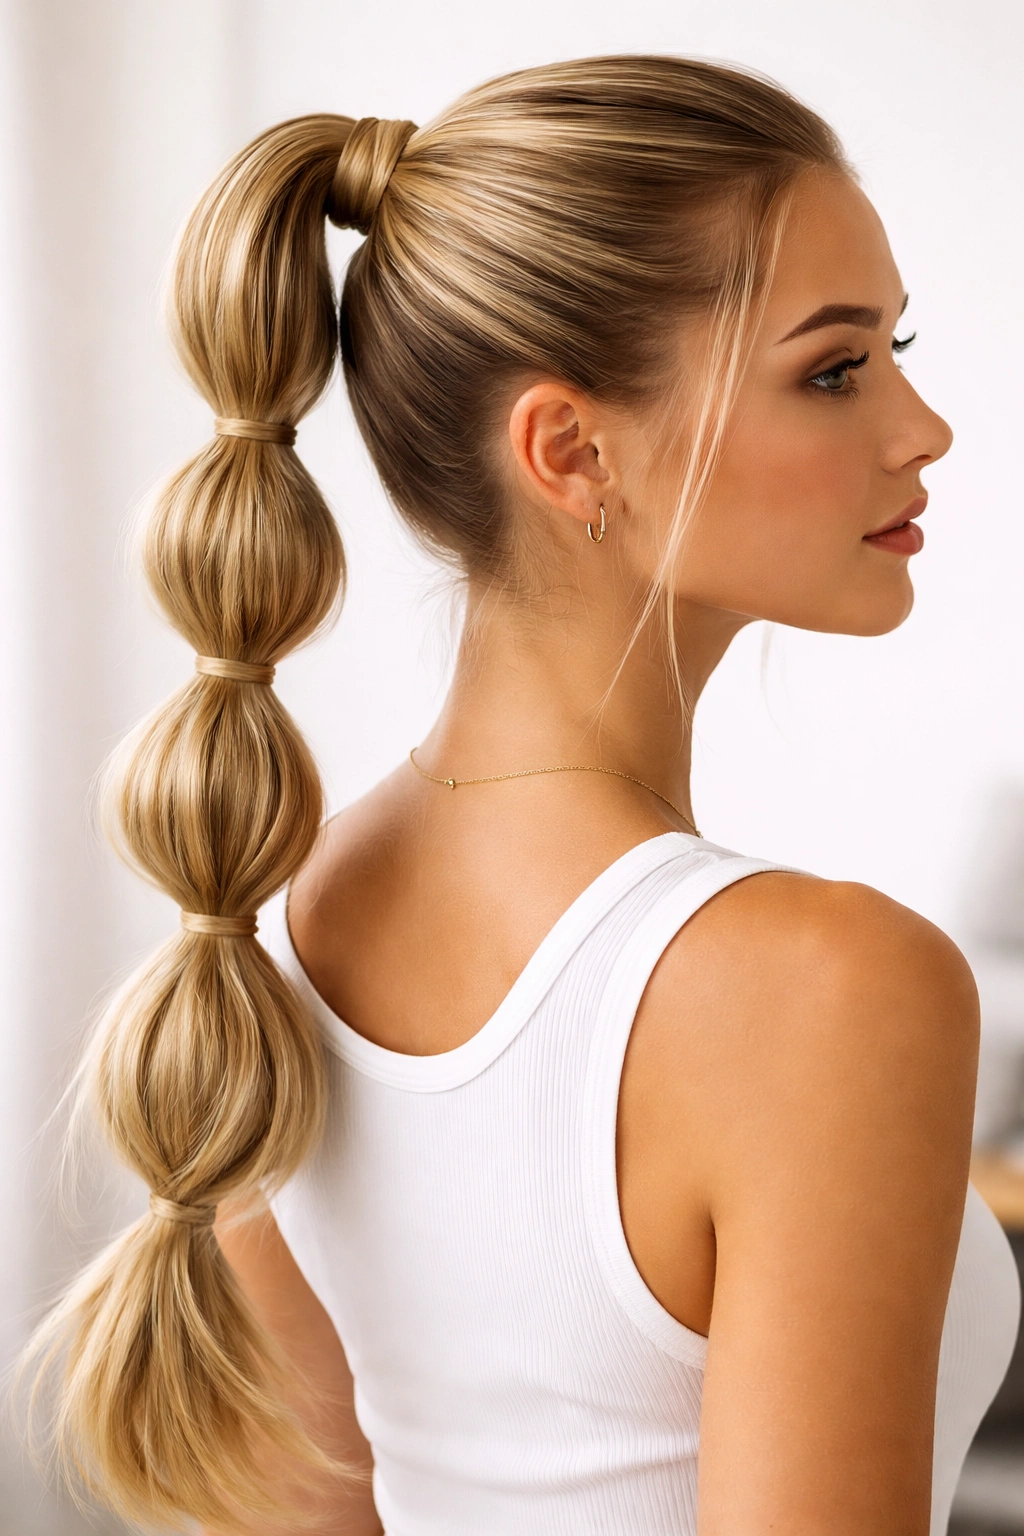
This is the “showstopper” version of the bubble pony. Start with a high, sleek ponytail that is pulled very tight. Use clear elastics to segment the ponytail into bubbles, pulling on the edges of each section to make them large and rounded.
If you want to go the extra mile, you can wrap a small piece of hair around each elastic to hide them. It takes a bit more time than the basic bubble pony, but it looks incredibly intentional and keeps very long hair from whipping around and getting tangled during the day.
Final Thoughts
The beauty of the ponytail is that it is a blank canvas. You can keep it as simple as a single elastic or spend a few minutes turning it into something intricate with twists and braids. None of these styles require heat tools, and most of them can be done in under five minutes.
Stop stressing about your morning routine. Pick one of these styles, practice it once or twice in front of the mirror, and you will find that getting ready for school becomes one of the easiest parts of your day. Keep your elastics and a brush handy, and you will always have an option that looks great.