Gymnastics hairstyles for curly hair have to do three jobs at once: stay tight, stay neat, and still let your curls breathe. That sounds simple until you try it on a head full of texture that shrinks, puffs, and changes shape the second it gets warm.
If you’ve ever watched a slick ponytail start slipping halfway through warm-ups, or seen a perfectly decent braid explode into frizz after a few cartwheels, you know the problem. Curly hair doesn’t fail because it’s difficult. It fails because the style was built for straight hair and borrowed confidence.
The good styles are the ones that anchor at the scalp first, then manage the length second. That usually means clean parting, firm elastics, and a shape that keeps hair off the face without yanking the hairline raw. A little gel at the roots goes farther than a mountain of spray on the ends. So does choosing a style that respects shrinkage instead of fighting it.
Some of these looks are quick practice fixes. Some are polished enough for a meet. A few work best on tighter coils, a few on looser curls, and a few are just plain useful when you need a style that can survive bars, beam, and a sweaty floor routine without constant adjustment.
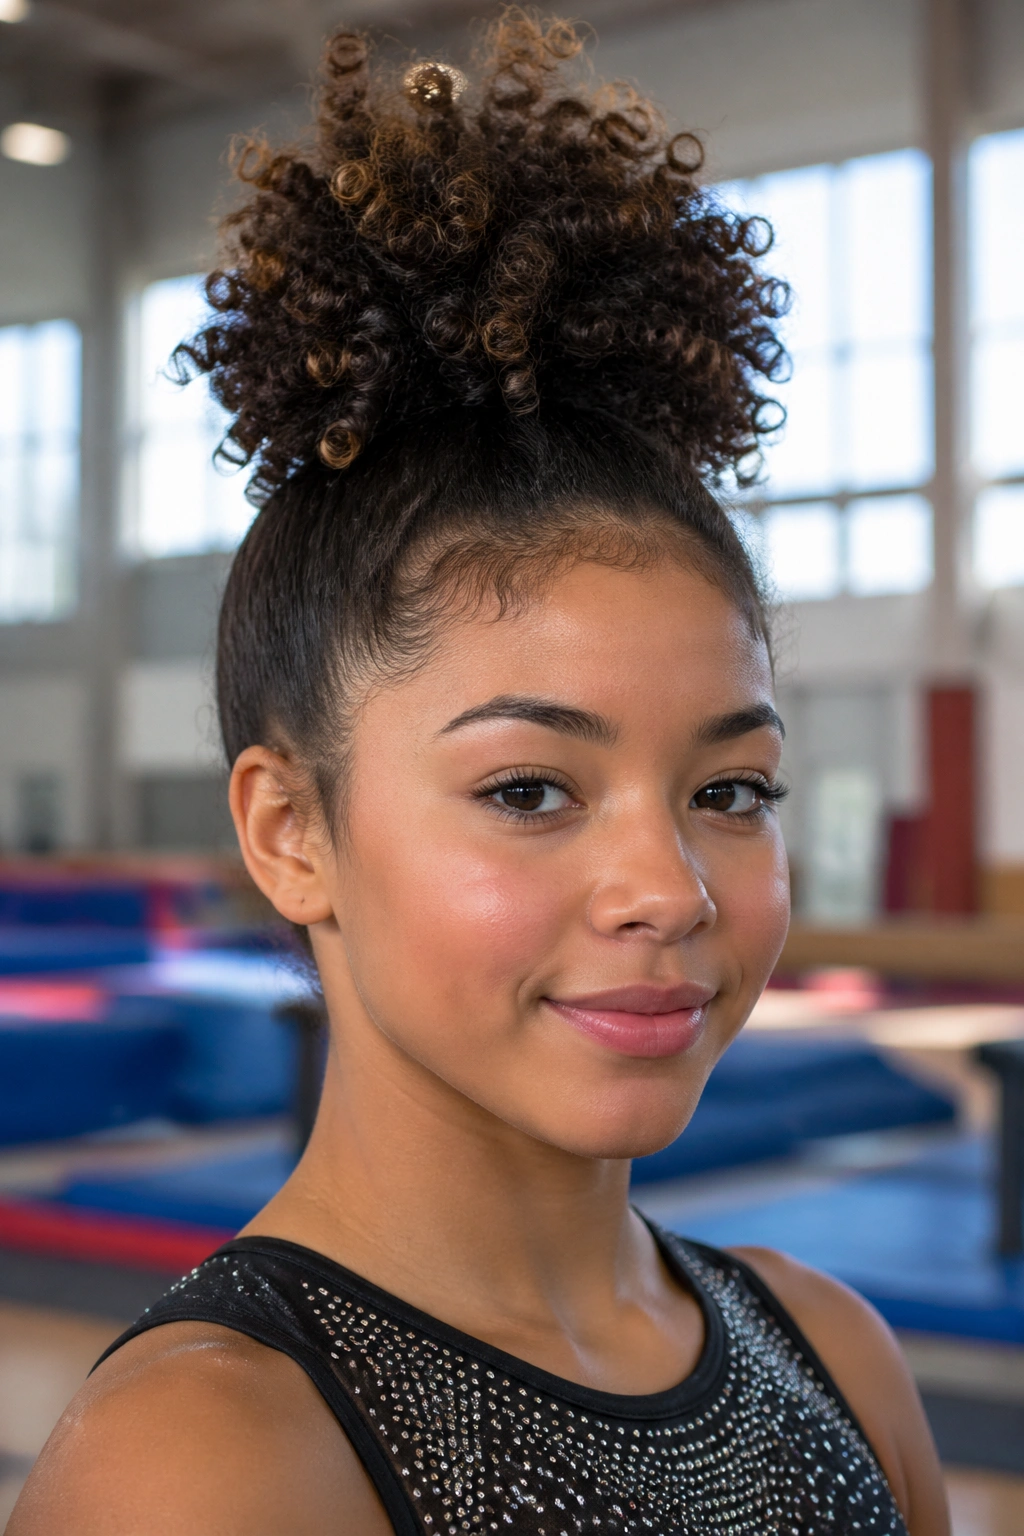
1. High Pineapple Puff for Fast Practice Days
The high pineapple puff is one of those styles that looks simple because it is simple, and that’s part of why it works so well for curly hair in gymnastics. You gather the hair high on the crown, let the curls stack upward, and keep the face clear without flattening the texture into something it never wanted to be. For a lot of curl patterns, that matters more than people admit.
This style is especially good for thick curls and long coils that need room to move. The base should feel snug, not tight. If you pull the elastic too hard, the puff gets a stretched, sore look that tends to sag once practice starts. A wide satin scrunchie or a soft coil elastic is usually better than a thin tie that digs in.
Why it holds better than a low ponytail
A high placement keeps the bulk above the neck, which means less rubbing against collars, less sweat sitting at the nape, and fewer flyaways during tumbling. It also avoids that awkward midpoint where a low ponytail bounces around and keeps hitting the shoulders.
- Use a small amount of gel or edge control at the hairline.
- Smooth the crown with a brush, but do not brush the puff itself flat.
- Secure the base with one strong elastic, then add a scrunchie on top if you want extra grip.
- Pin the sides near the temples if shorter layers keep escaping.
Best for: thick curls, medium-to-long hair, and practice days when speed matters more than polish.
2. Double Dutch Braids into a Low Bun
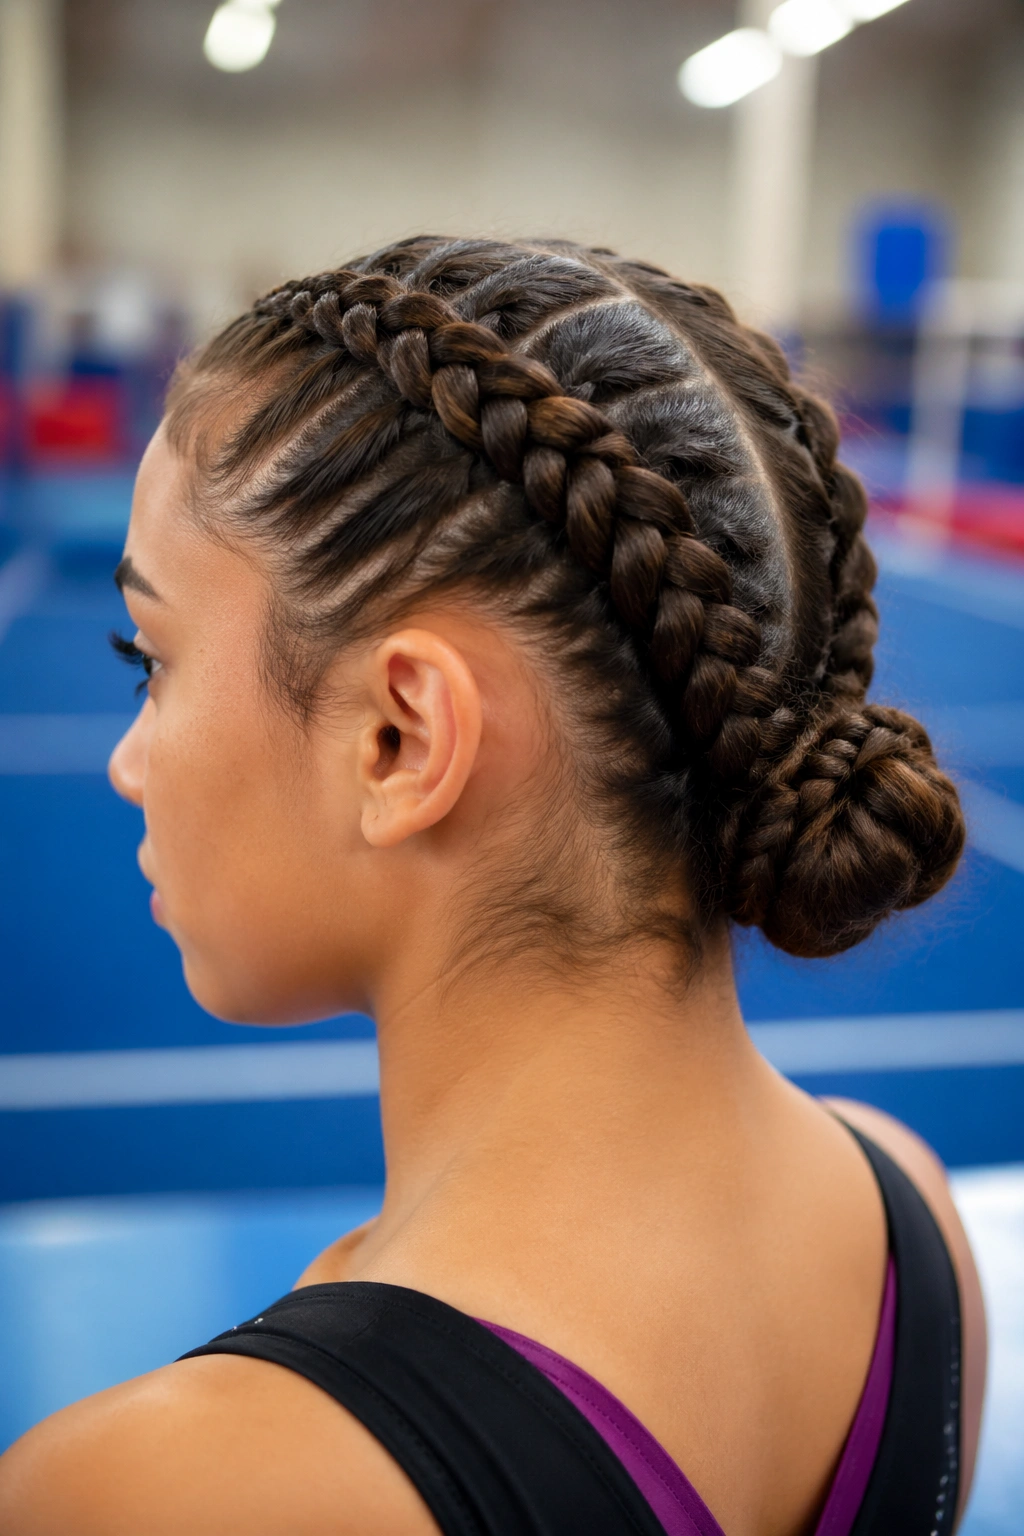
Double Dutch braids are the workhorse style I reach for when the hair needs to stay locked down through flips, handstands, and anything involving a lot of head movement. The braids sit on top of the scalp instead of floating over it, which gives them more grip than a loose French braid and less bounce than a ponytail. Once the lengths are braided, twisting them into a low bun takes the whole style from practical to genuinely secure.
The trick is tension. Not pain. Not slack, either. Each braid should feel firm along the scalp, with even sections all the way down. If one side is tighter than the other, the bun ends up lopsided and the whole thing starts to lean by the end of warm-up. That’s annoying, and on gym day, annoying is enough reason to redo it.
Where this style shines
- Works well for medium to long curly hair.
- Keeps the neckline clear for leotards with higher backs.
- Gives shorter front layers less chance to escape.
- Looks neat enough for meets without needing much touch-up.
A low bun made from the braided ends should sit flat against the head. If it sticks out like a small nest, use two or three bobby pins in an X pattern rather than shoving in more and more pins. Too many pins make the bun stiff in the wrong way. A hair net can help if the curls are especially dense.
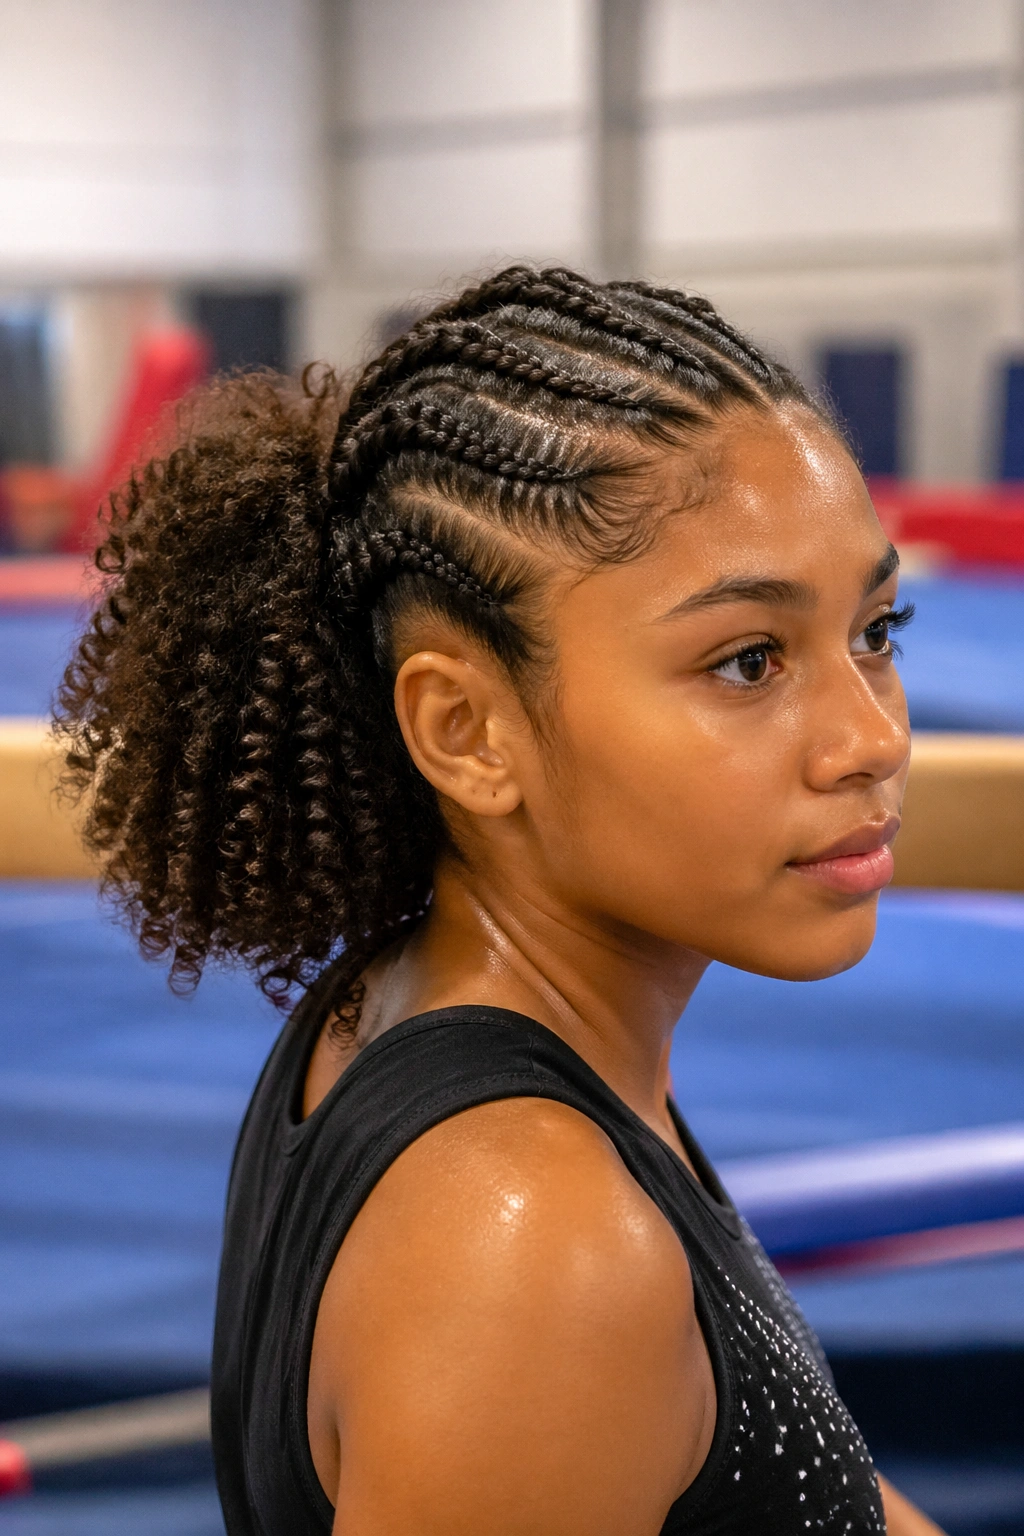
3. Cornrow Fronts with a Curly Puff Back
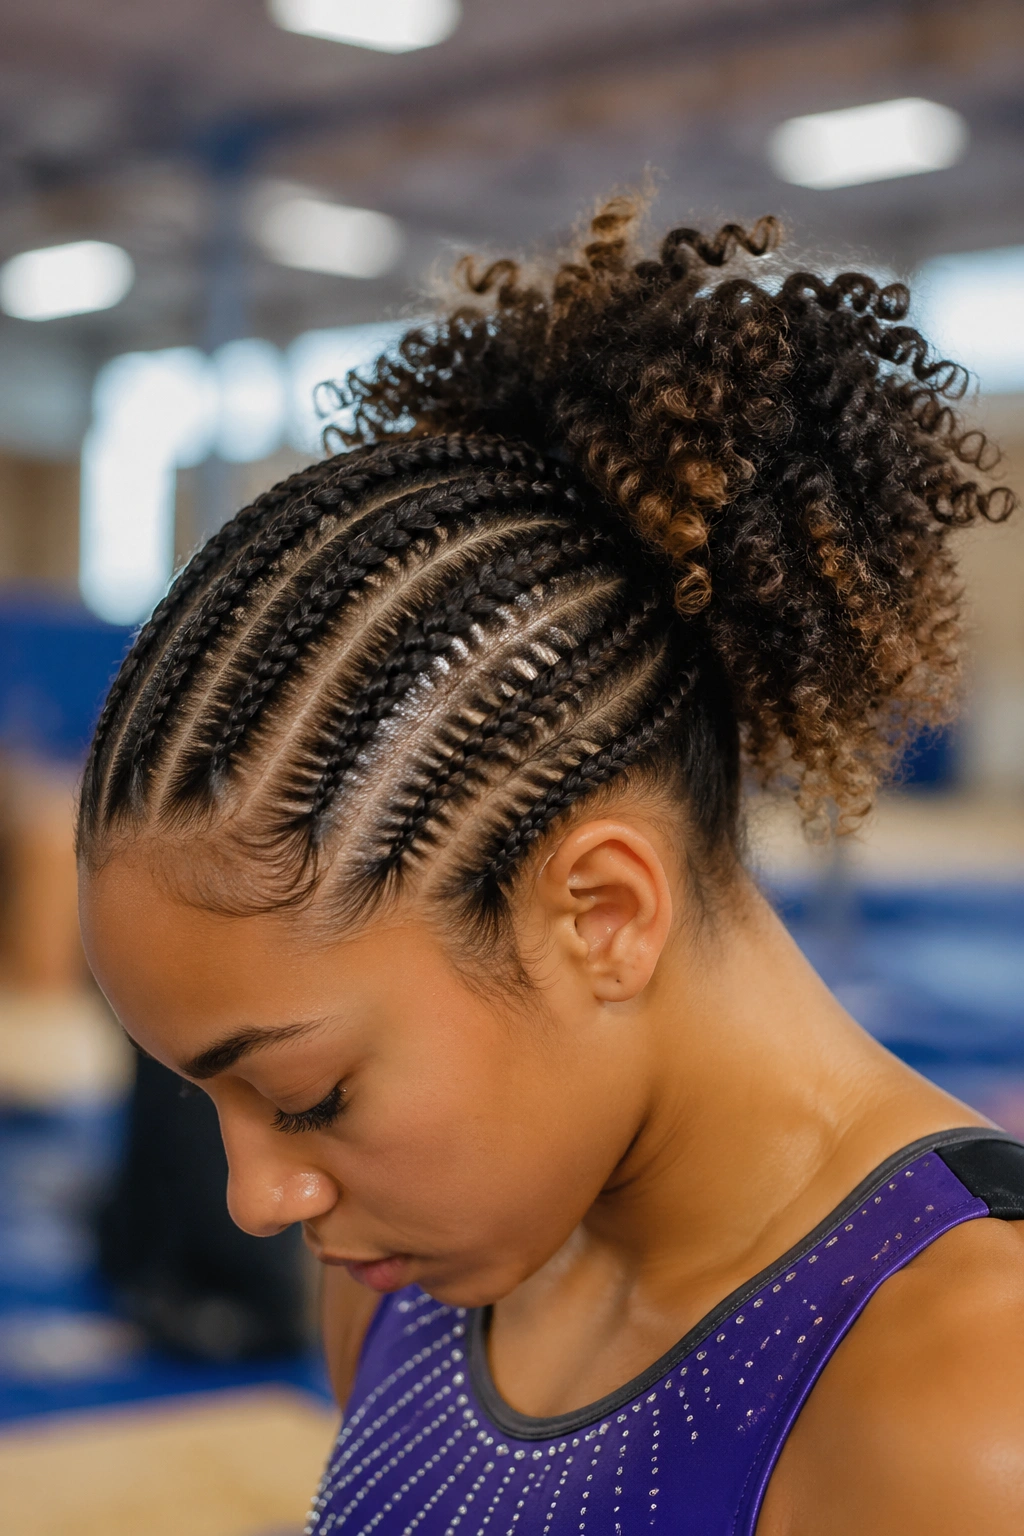
This is one of the smartest gymnastics hairstyles for curly hair if the front of the head is where things usually go wrong. Cornrows at the hairline keep short pieces, baby hairs, and that stubborn front layer from sneaking into the eyes. The back stays curly, so the whole look still feels like hair, not a helmet.
What I like about this style is the balance. It gives structure where gymnastics needs structure, then leaves enough texture in the back so the style doesn’t look overly stiff. That helps with younger athletes too, especially when they hate the feeling of having every strand pulled flat.
A few narrow cornrows across the front or sides are usually enough. You do not need to braid the entire scalp unless that’s your preference or your hair length demands it. Pull the back into a puff or a puff ponytail, and keep the attachment point low enough that the crown doesn’t feel overloaded.
Small details that make a big difference
- Start the cornrows on freshly detangled, lightly damp hair.
- Keep the parts clean so the style looks deliberate, not rushed.
- Use a light oil or leave-in on the braid lengths, not the roots.
- Tie the back with a covered elastic so it doesn’t snag the curls.
The result is tidy, secure, and a little more forgiving than a fully slicked style. That forgiveness matters when practice runs long.
4. Bubble Ponytail with Satin Ties
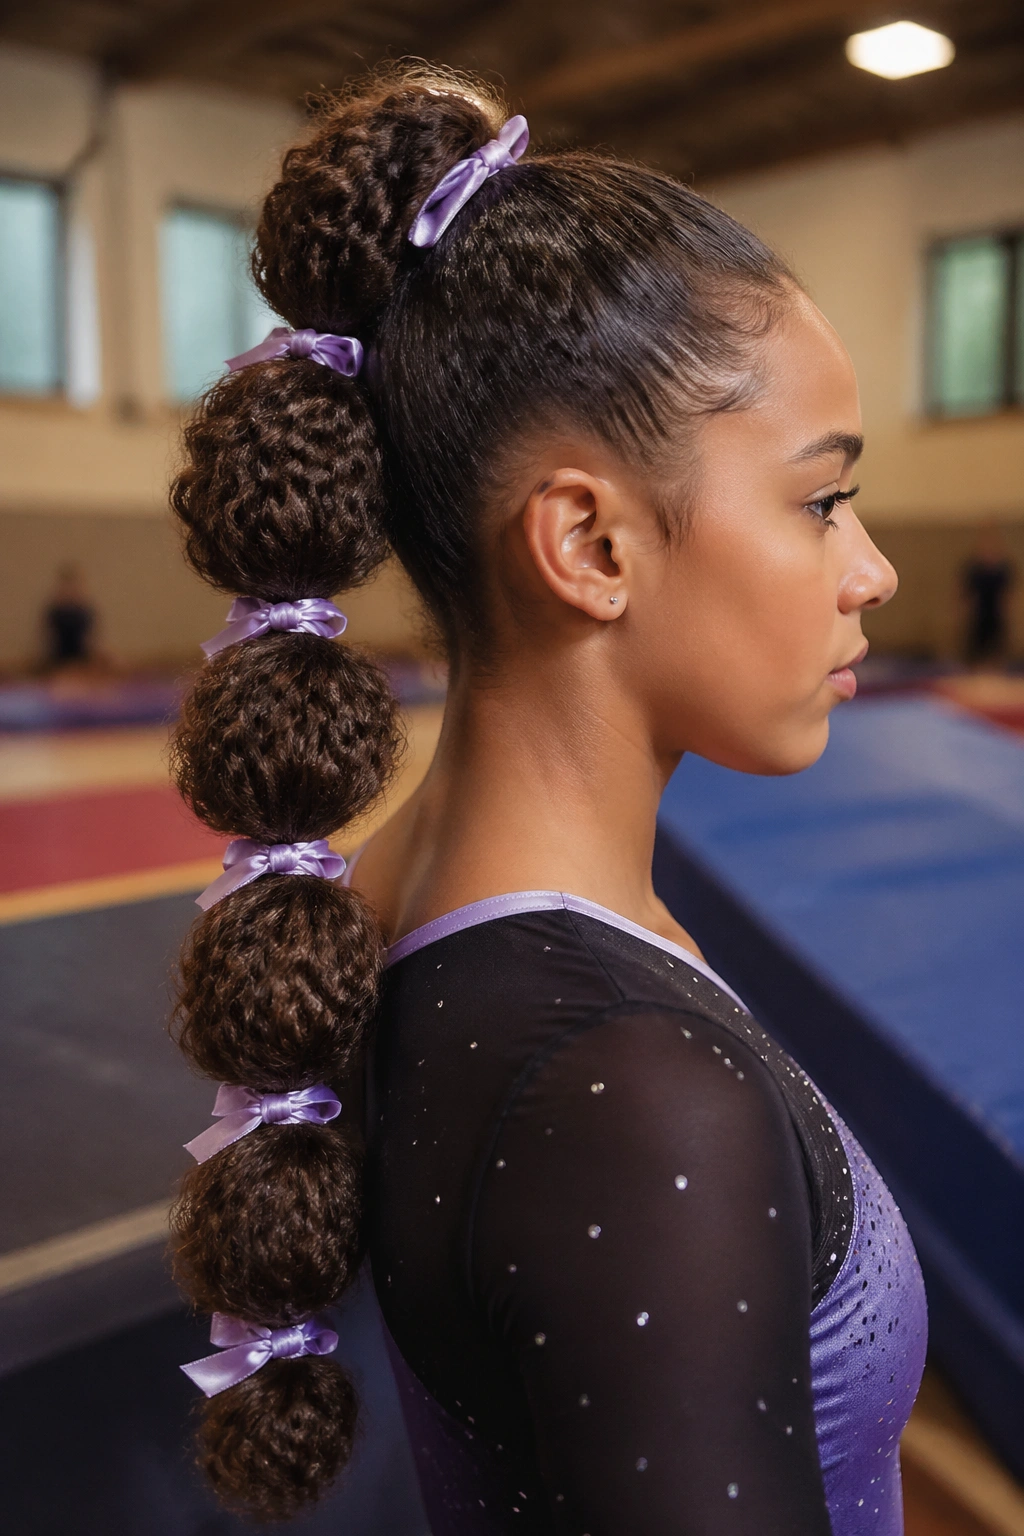
Bubble ponytails are playful, yes, but they’re also practical when curly hair wants to expand in every direction. The style starts with a single ponytail, then gets broken into rounded sections with elastics spaced down the length. Each section puffs slightly, which works with curly hair instead of against it.
The spacing matters. Put the elastics about 2 to 3 inches apart on medium-length hair, a little closer on shorter hair, and a little farther apart if the curls are very dense. If the sections are too big, the bubbles collapse. Too small, and the ponytail starts to look stiff and overworked.
A bubble ponytail is especially good for long practice sessions because it redistributes weight. One giant ponytail swings around. Three or four neat bubbles keep the length more controlled. That makes a difference on floor, where hair bouncing in the face gets old fast.
A few things bubble ponytails need
- Covered elastics or soft minis so the curls don’t snag.
- A brush only at the base; don’t over-smooth the length.
- A quick pinch and tug on each section to make the bubble shape obvious.
- A light mist of water if the hair needs help gathering cleanly.
This style looks best when the bubbles are rounded, not squeezed flat. If the hair is fresh and defined, you barely need any extra product. If the curls are puffy, a little gel at the roots helps the whole line stay clean through the first round of skills.
5. Rope Twists into a Low Bun
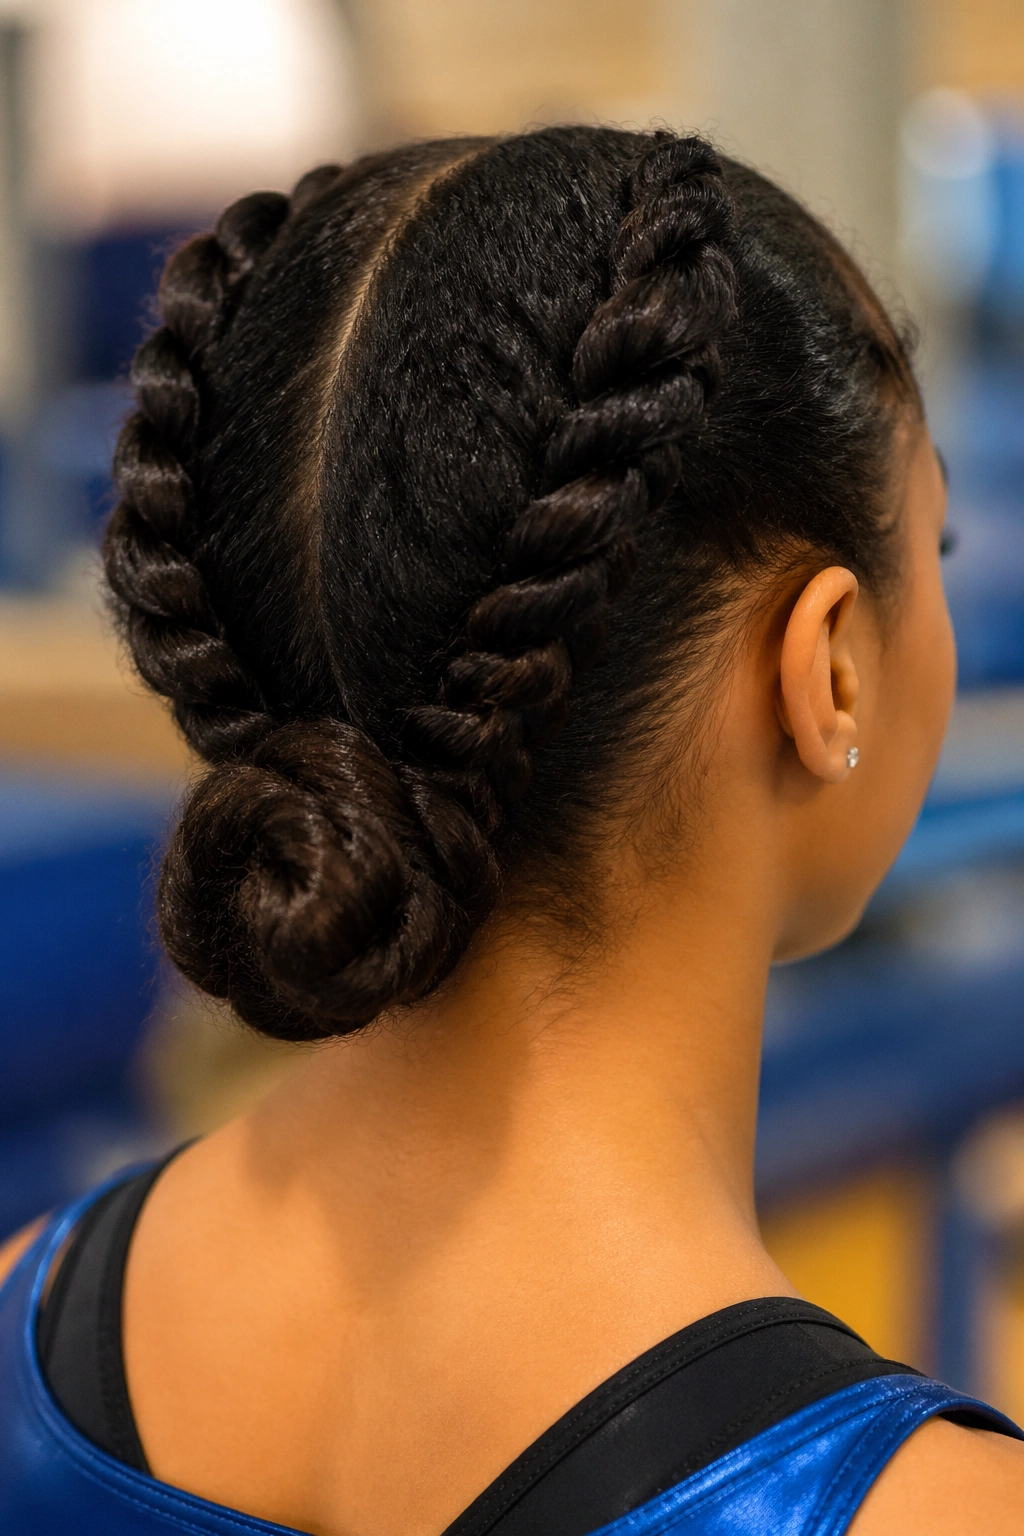
Rope twists are underrated for curly hair because they’re gentle in a way tight braids are not always gentle. Two sections get twisted around each other, then wrapped into a low bun or tucked coil at the nape. The finish is neat, but the process puts less stress on delicate edges and less friction on the curl pattern.
This style is especially good for tighter coils and hair that frizzes fast when it’s braided. Rope twists hold shape with less tension, which makes them a good choice if the scalp gets sore from repeated braiding. They’re also quick once you get the hand motion right. A few practice runs in front of a mirror help more than any trick product.
What makes rope twists stay put
The sections need to be even. If one side is thicker, the twist starts to unravel on the weaker side and the bun loses its grip. Keep each section about the width of a finger for shorter hair, a little wider for long hair with more density. Twist in the same direction, then wrap the two strands in the opposite direction. That’s the bit people miss.
A clean bun made from rope twists looks polished without being fussy. Pin the ends under the coil, not across the top, and use pins that match the hair color if possible. Small details. Big payoff.
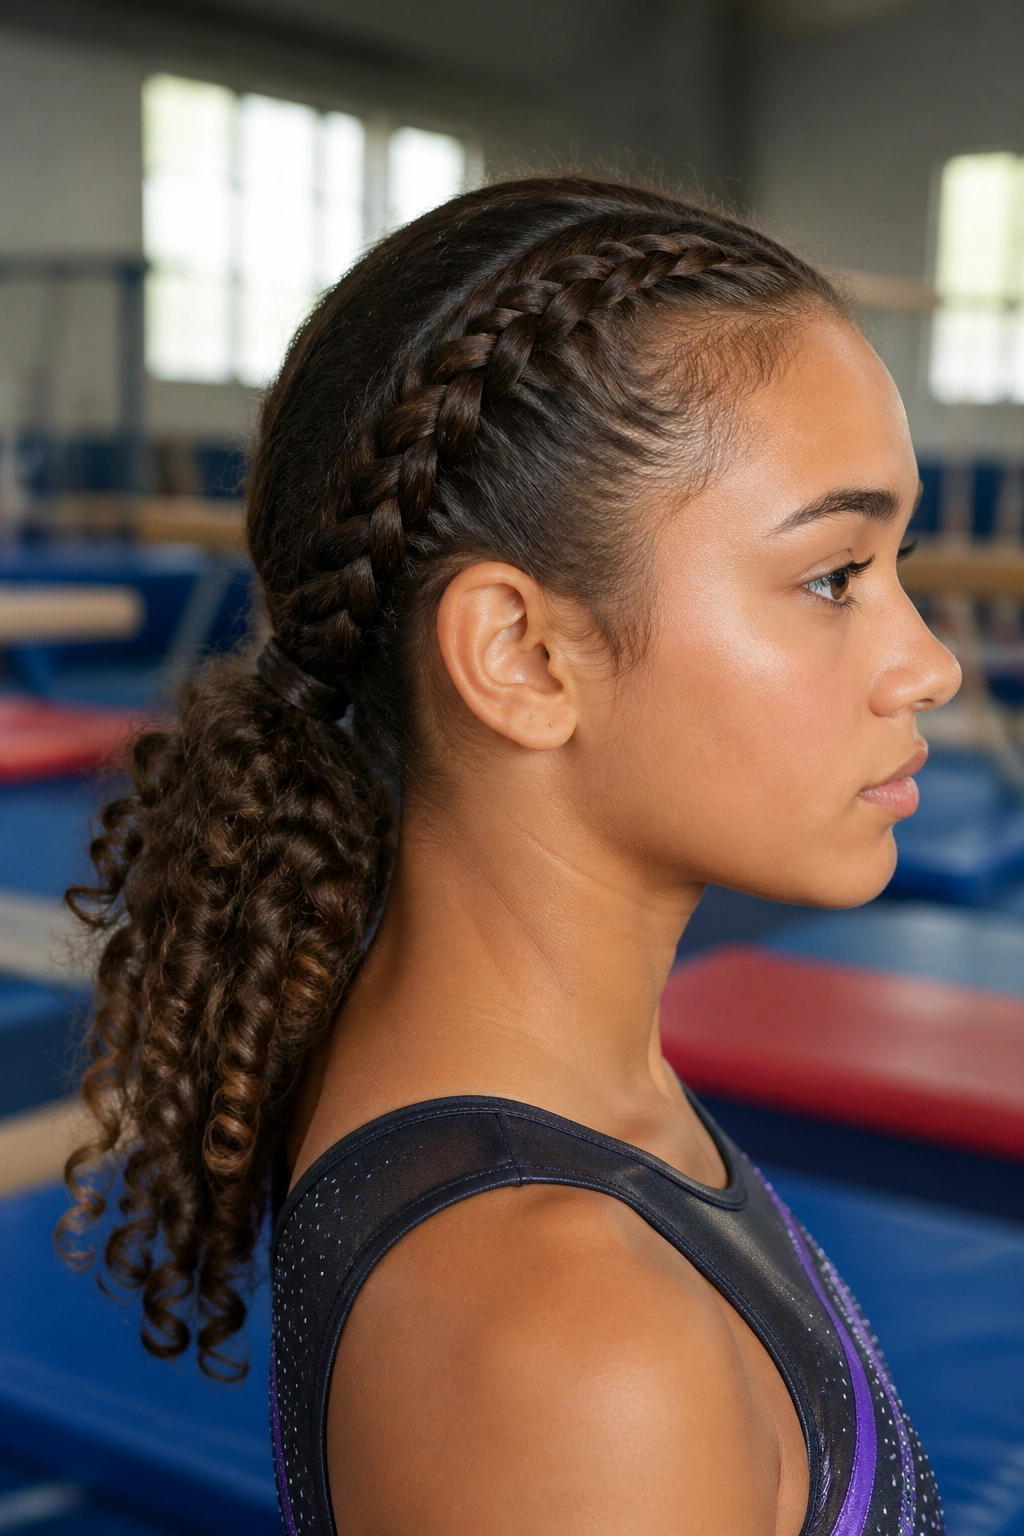
6. Side Cornrow into a High Ponytail
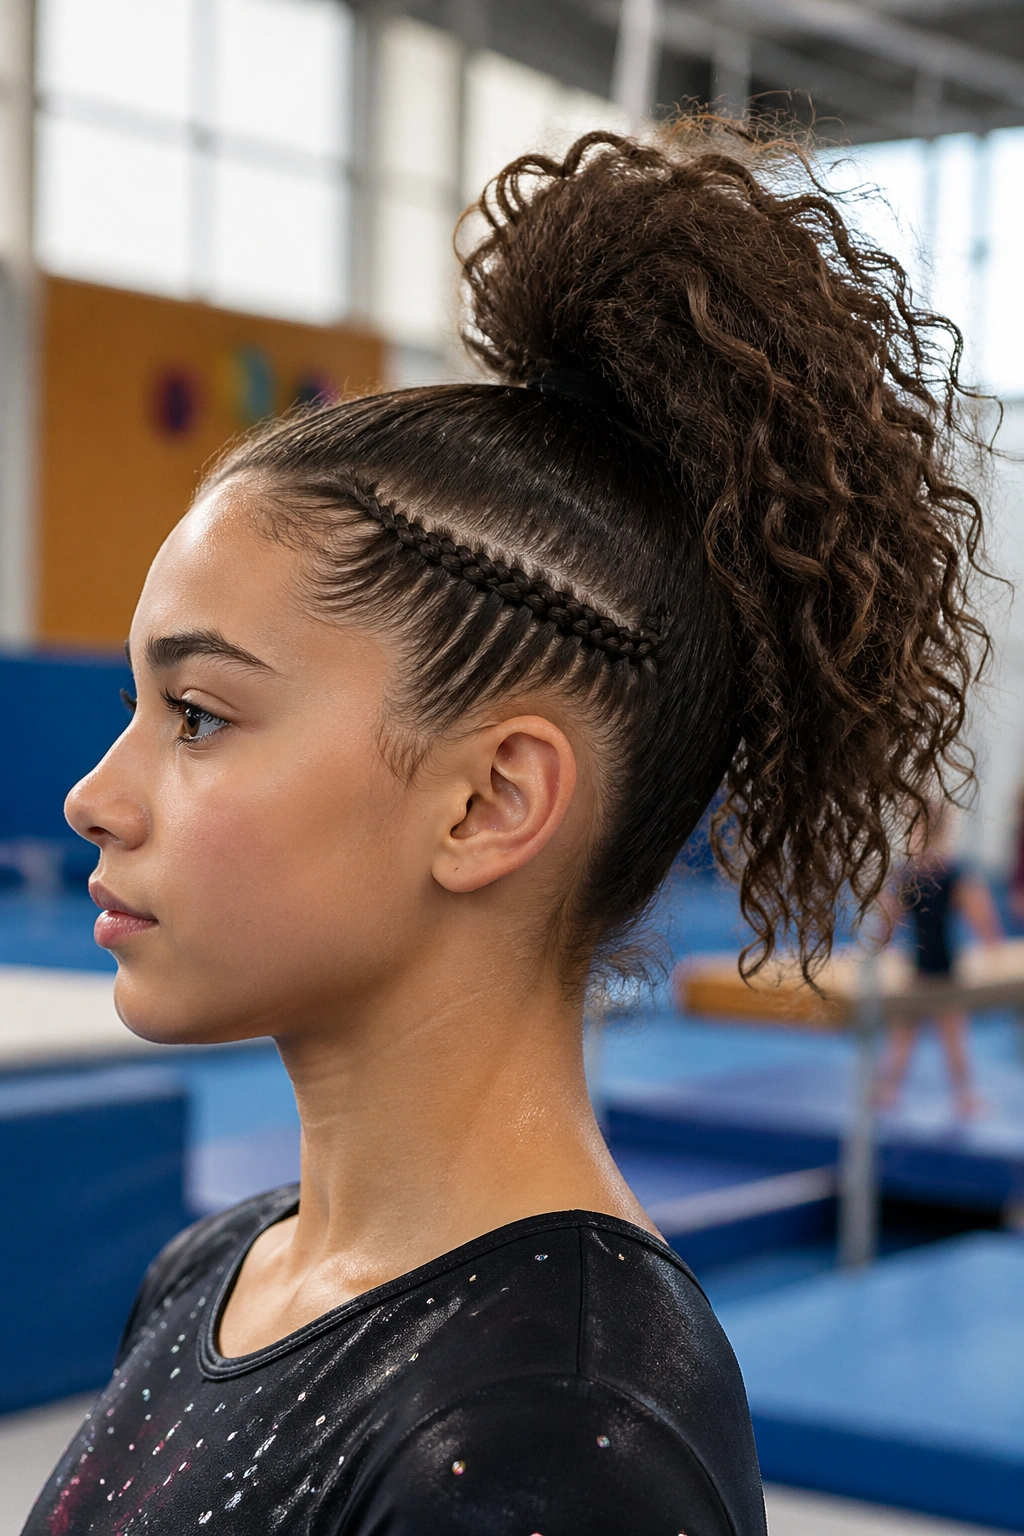
A side cornrow into a high ponytail gives you the best part of both worlds: a sculpted line near the temple and a high, athletic ponytail that stays off the neck. It’s a strong choice when the hairline tends to frizz first, because the side braid acts like an anchor and a barrier at the same time.
The style works well for layered curly hair, especially if the front pieces are short enough to escape a normal ponytail. Starting the braid a little behind the hairline keeps it from feeling too tight at the edge. That tiny shift can save a lot of discomfort later.
I like this one for athletes who need a quick reset between events. The braid keeps the structure intact, and the ponytail can be re-smoothed in a minute with wet hands and a touch of gel. No drama. No full redo.
How to keep the top smooth
- Brush the ponytail base upward before tying it off.
- Wrap a small strand of hair around the elastic if you want a cleaner finish.
- Use one or two bobby pins where the braid meets the ponytail.
- Leave the ponytail curly, not stretched flat, so it keeps its shape.
A high ponytail with one side braid is tidy without feeling severe. That’s the sweet spot for a lot of gym looks.
7. Space Buns with a Braided Part Line
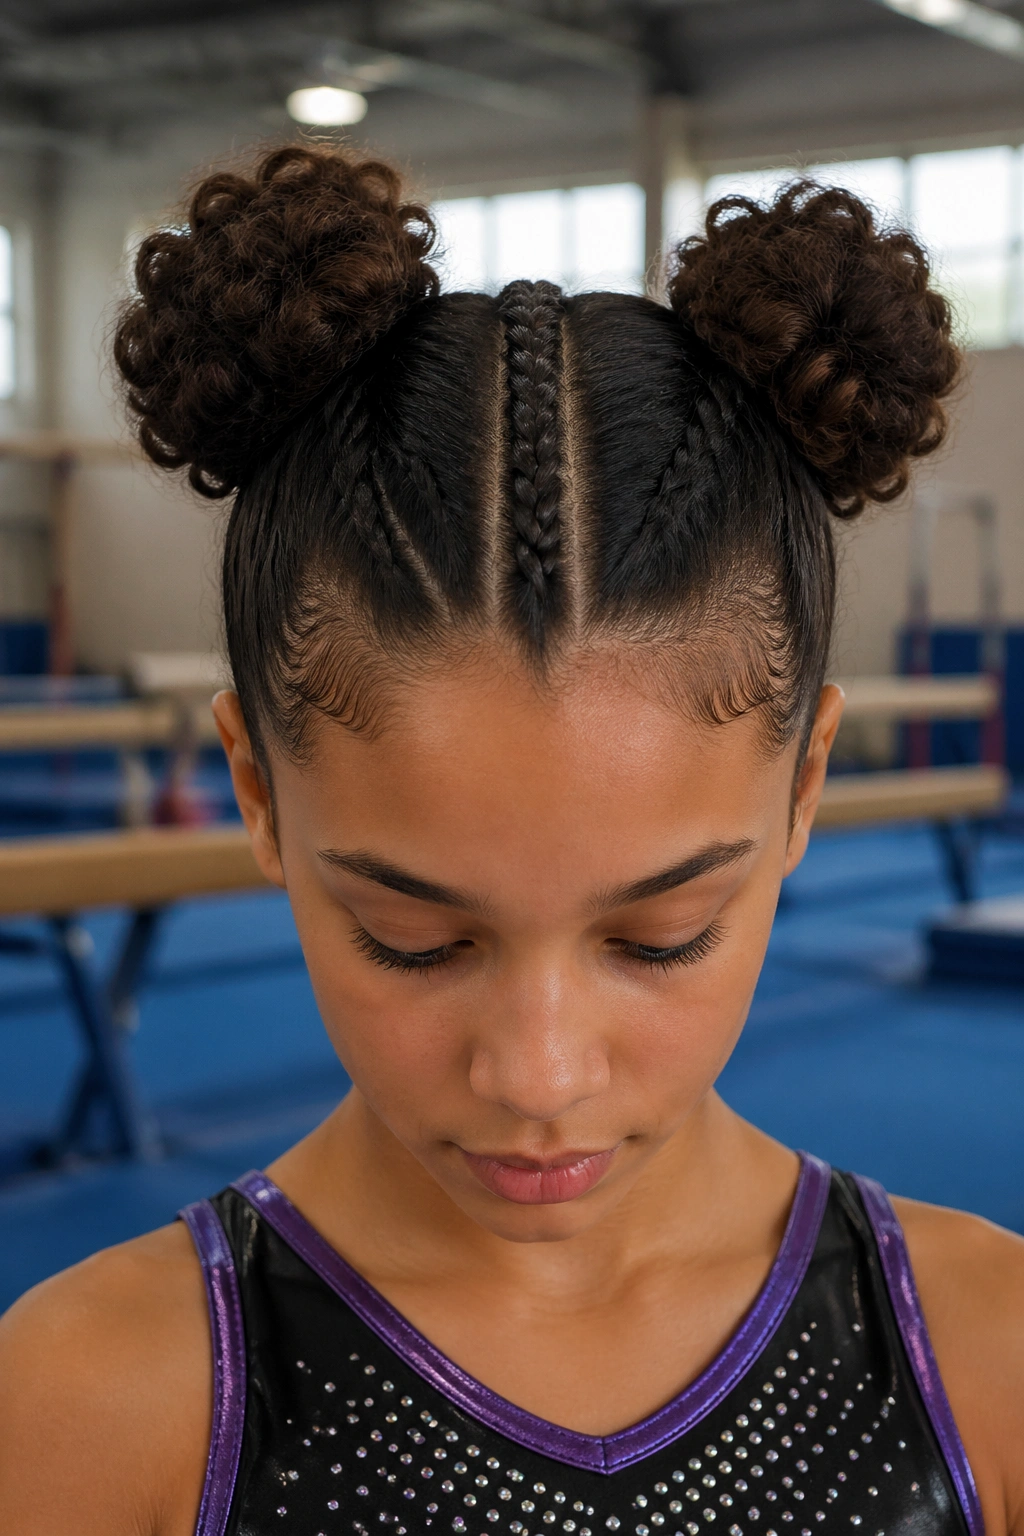
Space buns can look cute, sure, but they’re also a smart answer when curly hair needs even weight distribution. Two buns mean the hair is split across both sides of the head, which keeps one heavy ponytail from dragging everything backward. Add a braided part line between them, and the whole style gets more grip and a lot less chaos.
This style suits short-to-medium curls especially well. On very long hair, the buns get bulkier, which can be fine if that’s the look you want, but sometimes the weight sits too high. In that case, keep the buns smaller and flatter, then pin the tails underneath instead of letting them sprawl.
The part braid is the quiet hero here. It stops the center line from puffing up and gives the style a sharper shape. That matters in gymnastics, where hair that looks neat from the front can still collapse in the back if the part is left loose.
Quick shape guide
- Use a clean center part.
- Braid the part line first, then split the rest.
- Twist each side into a bun at roughly ear height or slightly above.
- Pin the ends flat so nothing pokes outward.
Space buns are not the most formal look, and that’s fine. For practice, they’re fun, secure, and far more stable than they look at first glance.
8. French Braid into a Tucked Curl Roll
A French braid into a tucked roll is one of those styles that looks more complicated than it is, which is useful when you want something neat without spending forever on hair. The braid starts near the forehead or crown, gathers the hair as it moves back, and ends at the nape where the rest is rolled under and pinned into a compact shape.
This is a strong meet-day option because it keeps the hairline smooth and the length controlled at the same time. It also suits longer curls that need a bit of polish without being forced into a flat bun. If the braid is tight enough, the tucked roll doesn’t need much else besides a few pins and maybe a hair net.
Why this style is so steady
The braid acts like a spine. Once the braid is secure, the roll has a built-in anchor, and that makes the whole style less likely to shift during floor passes or beam work. It’s one of the few styles that can look elegant and still take a fair amount of motion.
A fine hair net can make this style hold even better, especially on dense curls. Use it only after the roll is pinned in place, and tuck the net under rather than stretching it over the top like a basketball hoop. That sounds obvious. People still do it wrong.
9. Low Twisted Puff with a Flat Headband
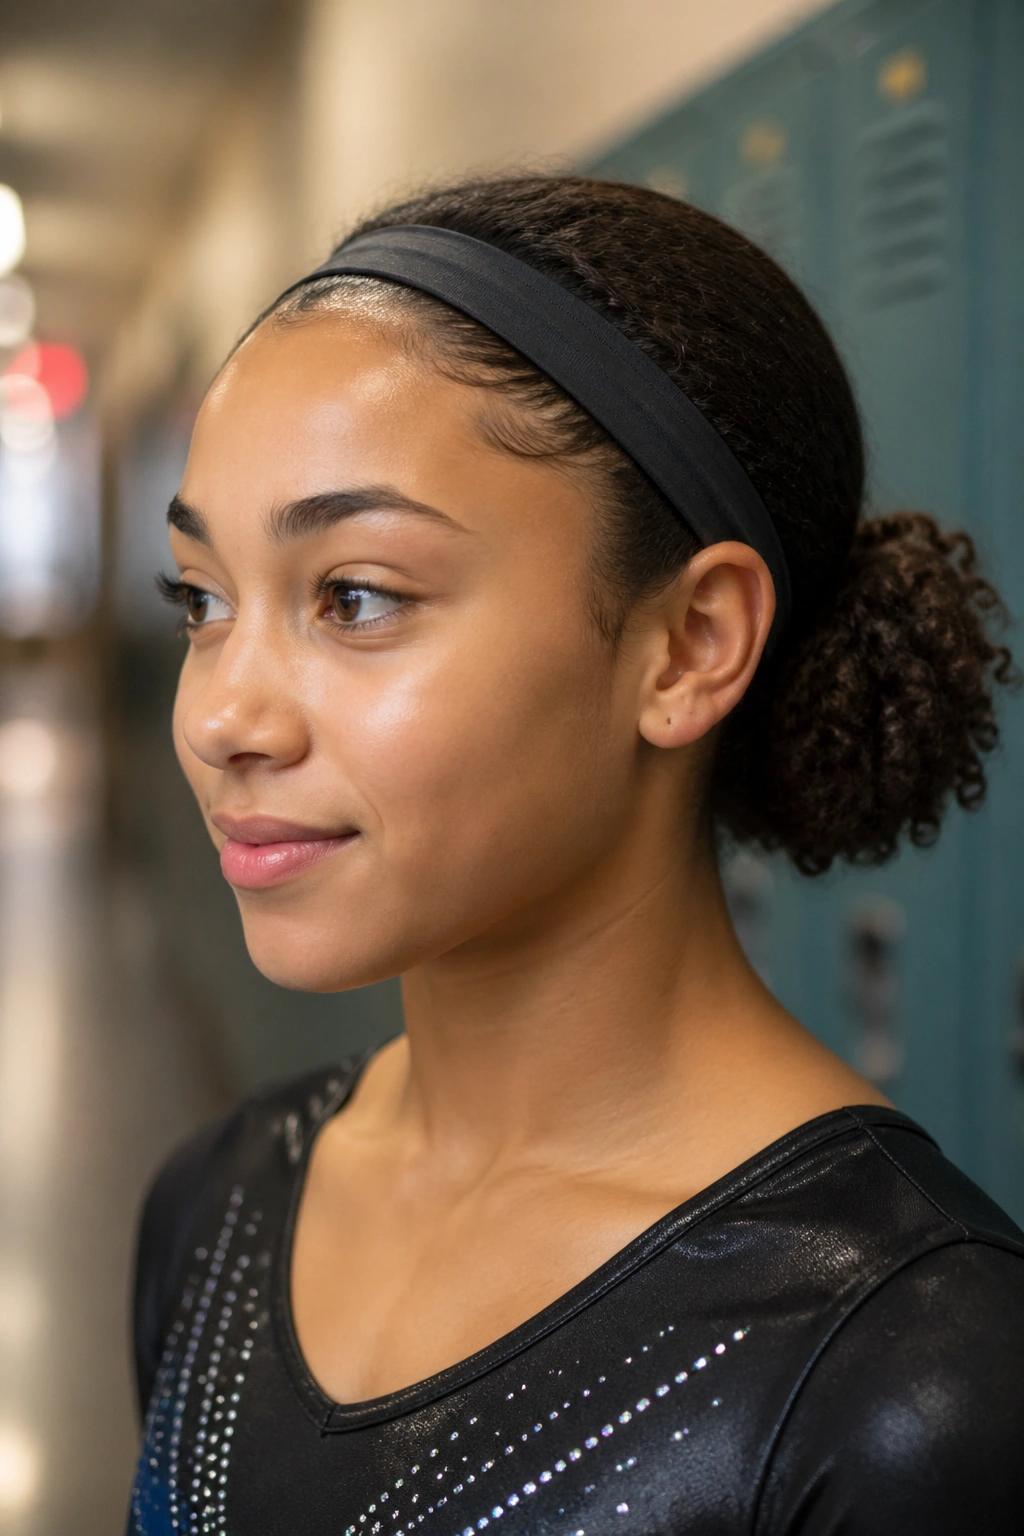
A low twisted puff is the kind of style that saves a practice day when you do not want a full braid session but still need the hair out of the way. The curls gather low at the back, the sides get twisted back toward the nape, and a flat headband keeps the front pieces from creeping forward during movement.
What makes this style work is the clean frame at the front. Curly hair loves to flirt with the face, especially once sweat shows up. A snug headband helps, but it needs to be flat and soft, not bulky. Thick padded bands tend to move, and once they move, they stay moving.
This one feels easier on the scalp than some tighter braid styles. That’s a real benefit if the hair has already had a few gym days in a row and the roots need a break. You still get control, just with less tension.
Best way to set it up
- Put the headband on first.
- Twist each side back before gathering the puff.
- Secure the puff low and centered, not off to one side.
- Pin any loose curls that sit right at the temples.
If you want the look to last longer, tuck the ends of the twists under the puff itself. It makes the whole back section feel more anchored.
10. Headband Braid into a Secure Low Ponytail
A headband braid is one of my favorite answers for shorter curly pieces that refuse to stay down. The braid runs across the hairline like a built-in band, and the rest of the hair gets pulled into a low ponytail at the base of the neck. It’s a clean, honest style. Nothing fancy. A lot effective.
This is especially useful for mixed curl lengths, where the front layers are shorter than the back and need extra control. The braid catches those front pieces before they become a problem. The low ponytail then keeps the rest in one place without tugging the crown.
What to watch for
The braid should sit close enough to the face to do its job, but not so tight that it leaves a headache behind. The low ponytail should feel settled, not yanked. If the base of the ponytail points upward, the style tends to shift when the head moves back and forth on tumbling passes.
Use a small elastic at the end of the braid and a second covered elastic on the ponytail. That’s usually enough. If the ponytail is thick, wrap a small strand around the base or add one pin where the braid ends meet the ponytail so the join looks neat.
A style like this is practical in the best way. It does the job and keeps doing it.
11. Half Cornrow, Half Puff Training Style
Half cornrow, half puff is the style I reach for when the hair is long, dense, and slightly fed up with being handled. The top section gets braided down in neat rows or a few chunky braids, while the lower section stays in a puff or loose curly tie-back. That split keeps the crown controlled without forcing every curl into the same shape.
Why does this work so well? Because not every part of the head needs the same amount of control. The hairline and crown usually need the most help during gymnastics. The lengths below can have a little more freedom as long as they’re anchored well.
How to think about the balance
The front section should feel neat enough that nothing drops into the eyes. The back should be contained enough that it doesn’t bounce all over the place. If the braids take up too much of the head, the style starts to feel heavy. If the puff is too loose, it eats the balance the braids created.
- Use 3 to 6 braids in the top half, depending on density.
- Keep the lower puff centered.
- Smooth the ends of the braids into the puff so the join doesn’t stick out.
- Pick elastics that can handle thick hair without snapping.
This is one of the most forgiving gymnastics hairstyles for curly hair. It grows out gracefully, survives a long practice, and gives you a little breathing room between wash days.
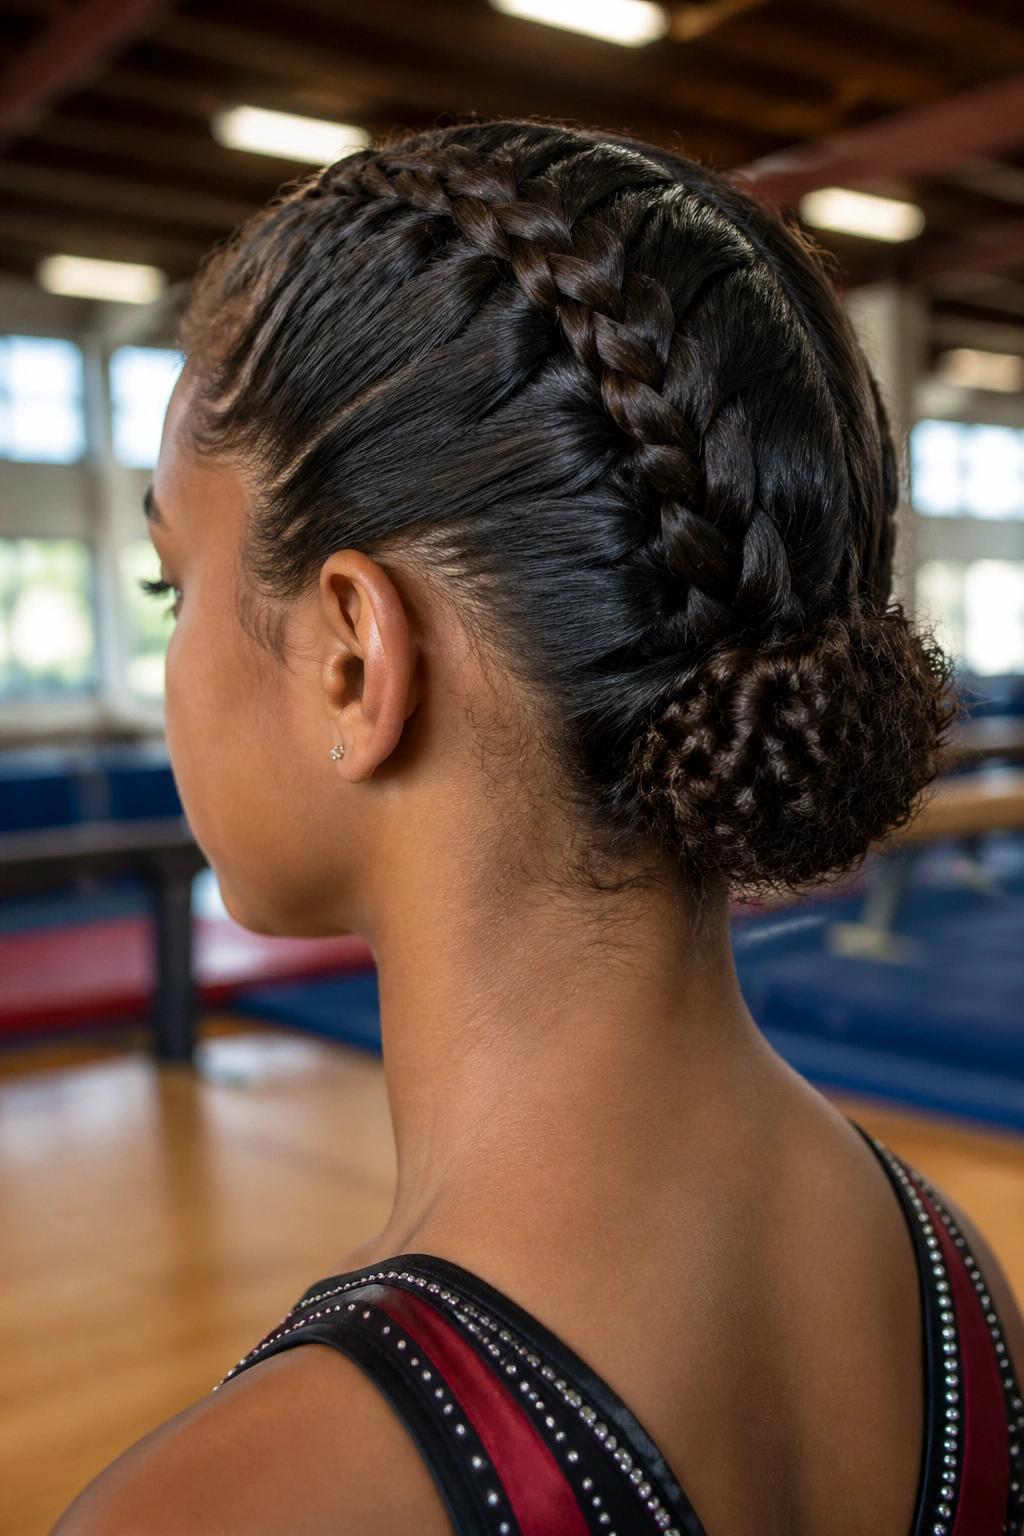
12. Braided Crown Bun for Meet Day
The braided crown bun is the style I’d pick when the hair needs to look finished from every angle and stay that way through the whole session. A braid traces the perimeter of the head like a crown, which pulls the outer layers into place, and the remaining hair gets wrapped into a compact bun at the back or slightly off-center. It’s neat, secure, and the sort of style that makes sense the second you see it.
This one suits thicker curls especially well because the braid gives the bun a real anchor. Without that anchor, dense hair can start to sag under its own weight, and no one wants to deal with a bun that slowly droops lower every time they jump. The crown braid spreads the tension out instead of loading one spot.
A little detail goes a long way here. Smooth the braid with a small amount of gel while it’s being made, then pin the bun in a crisscross pattern so it stays flat. If the curls are very full, a hair net over the bun can help keep flyaways contained without making the whole style look stiff.
For me, this is the style that earns its place when the rest of the day matters more than convenience. It takes longer than a puff or a simple braid, but it also holds up better when the routine gets serious. And that’s the real test, isn’t it? The style has to survive the warm-up, the waiting, the movement, the sweat, and the moment you stop thinking about your hair at all. That’s when you know it’s doing its job.