Curly hair and Renaissance Faire styles belong together more naturally than most people think. A braid doesn’t have to be tight to look intentional, and a bun does not need to be slicked into submission to feel dressed up. The best faire hair usually looks a little windblown, a little lived in, and ready to survive a long walk past food stalls, lanterns, musicians, and the occasional rogue gust of air.
Renaissance faire styles for curly hair work because curls bring shape on their own. They give a crown braid grip, make ribbons sit with some body, and turn a plain twist into something that feels like it has a story. The trick is not to flatten the curl pattern into obedience. Let the shape do half the work.
That matters more than people admit. A style that looks gorgeous in a mirror can fall apart fast if it depends on pin-straight hair, heavy heat, or a smooth finish that curls naturally refuse to hold. Curly hair tends to do better with loose anchors, crossed pins, and a little room to expand. A style that can breathe usually lasts longer.
So these 12 looks lean into texture, not against it. Some are soft and romantic. Some are dramatic. A few are sturdy enough for a long day outdoors and still look like you meant to be there.
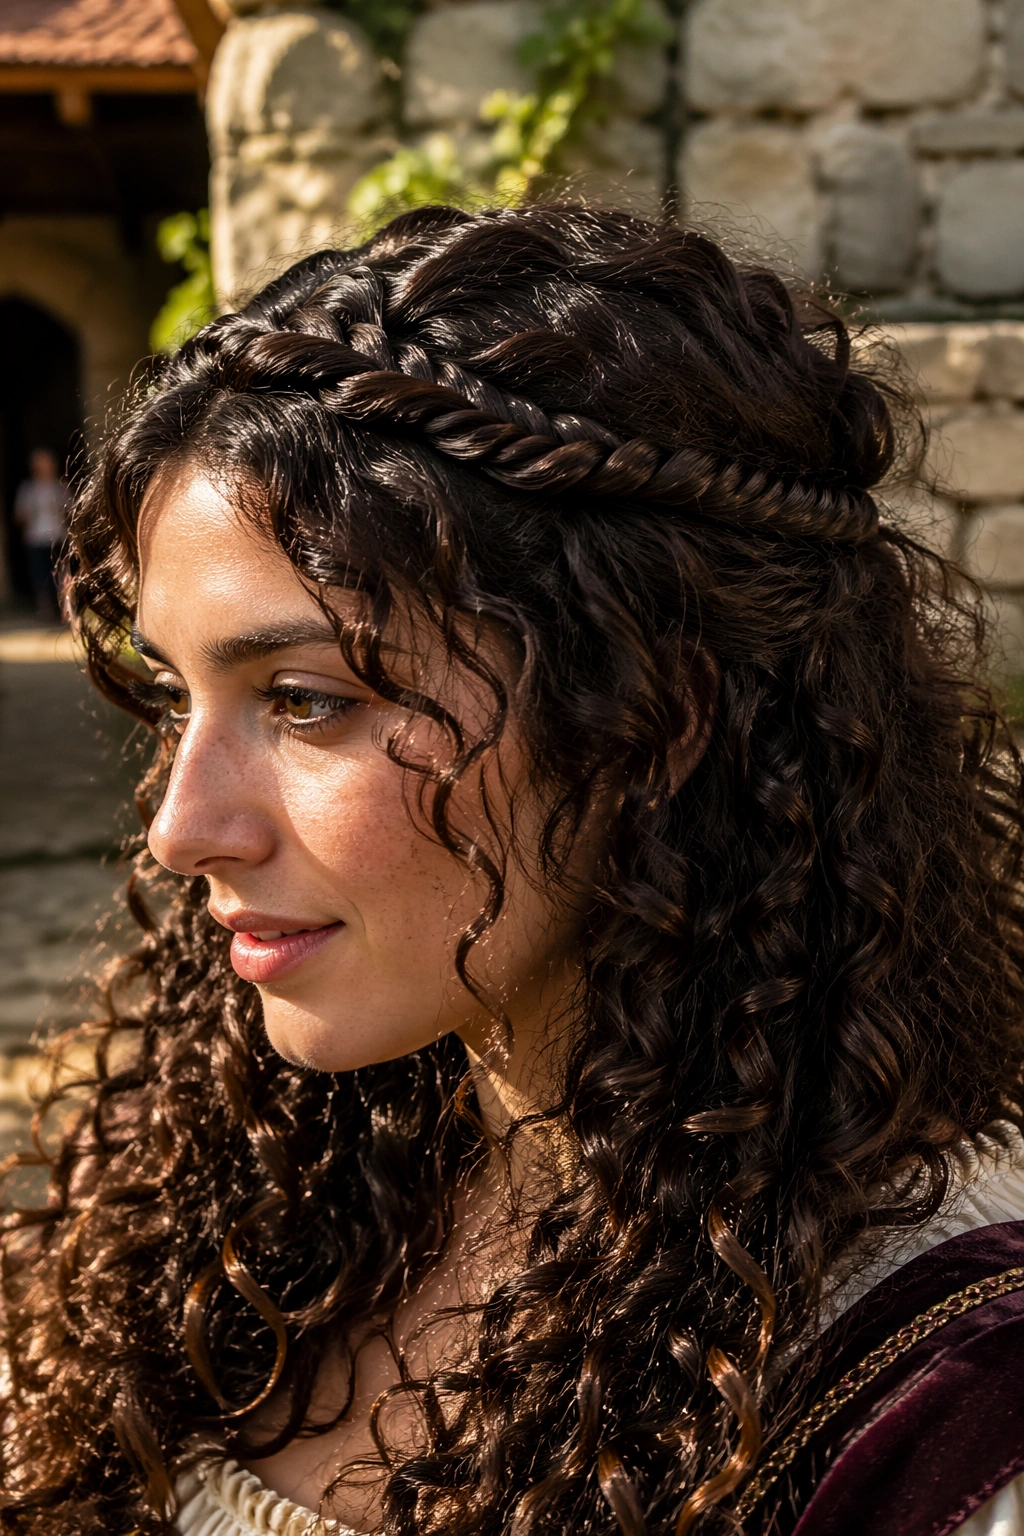
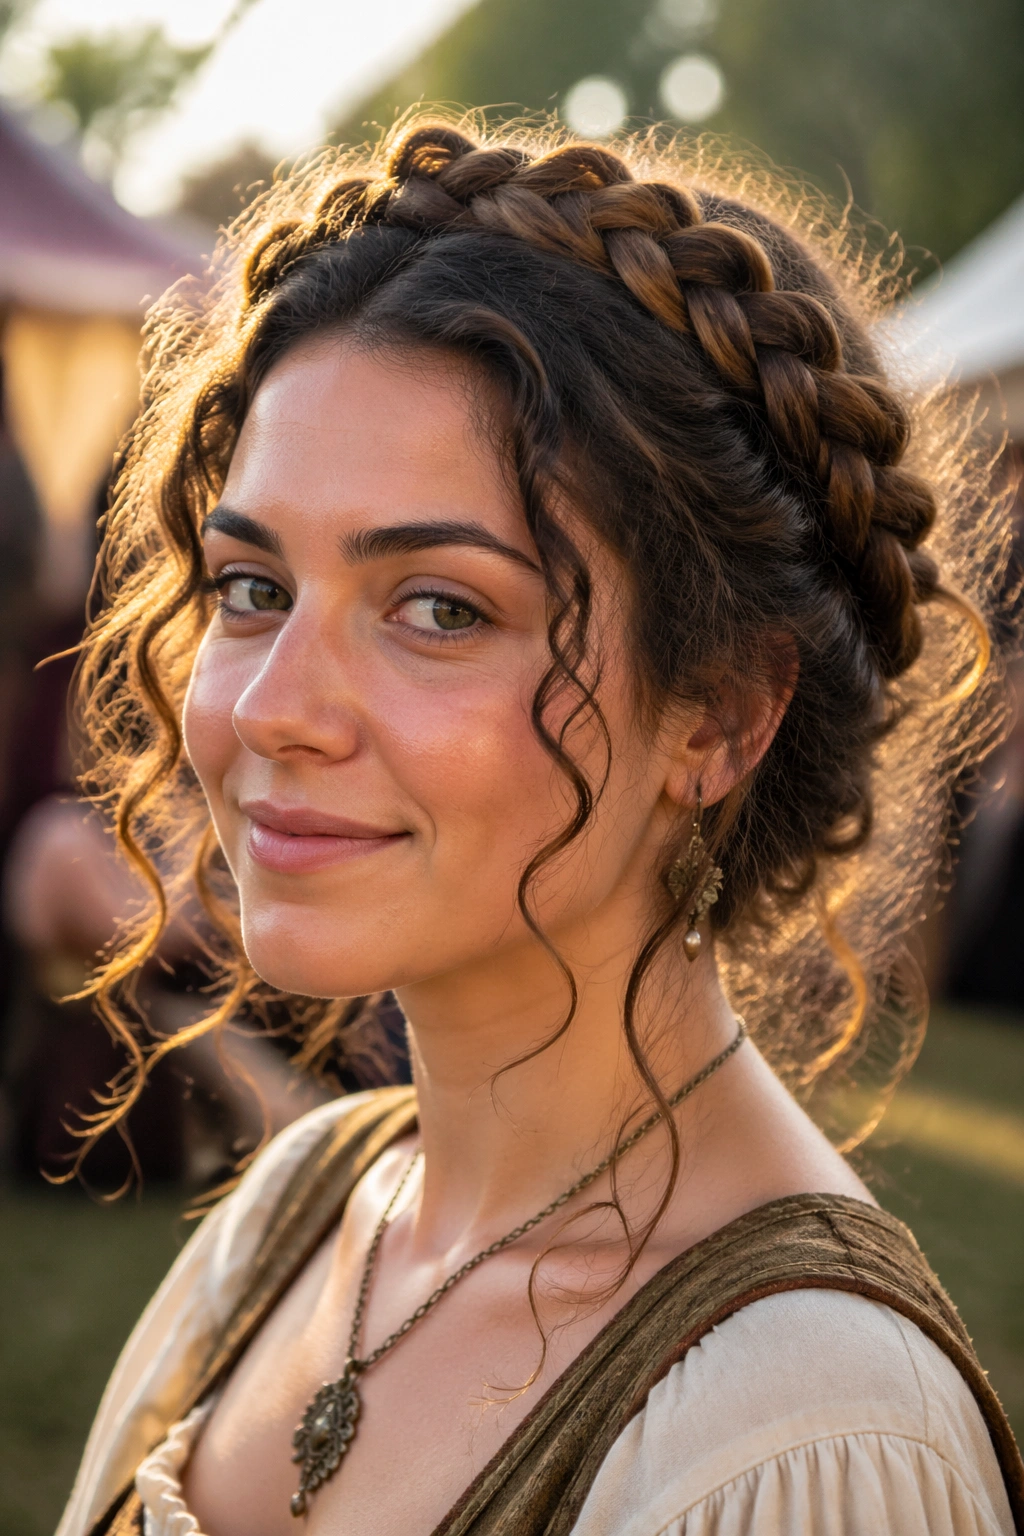
1. Crown Braid Halo for Curly Hair
A crown braid halo is the easiest style to reach for when you want your curls to look purposeful without losing their shape. It frames the face, clears the neck, and gives that fair-ground, storybook feel without turning stiff.
The version that works best on curls is loose, not tiny and overworked. Start with a side part or a center part, then braid from one temple around the head, picking up small sections as you go. Don’t pull the braid so hard that the curl pattern disappears at the roots. That soft lift is part of the charm. If your hair is dense, one thick braid around the head can look strong and regal. If your curls are finer, two smaller braids meeting at the back often sit better.
I like this style because it gives you room to breathe. Leave a few curl spirals near the ears, or pull out a thin tendril on each side before you pin anything down. Those little pieces soften the whole look, and they also keep the style from reading too severe. A metal circlet, a narrow ribbon, or a few tiny flowers tucked into the braid can take it from “pretty” to “faire-ready” fast.
One thing people get wrong: they make the braid too perfect. Don’t. A halo braid with a little texture looks richer than a braid that’s been smoothed until it loses all character. Curly hair likes a bit of looseness. So does this style.
2. Half-Up Ribbon Lacing
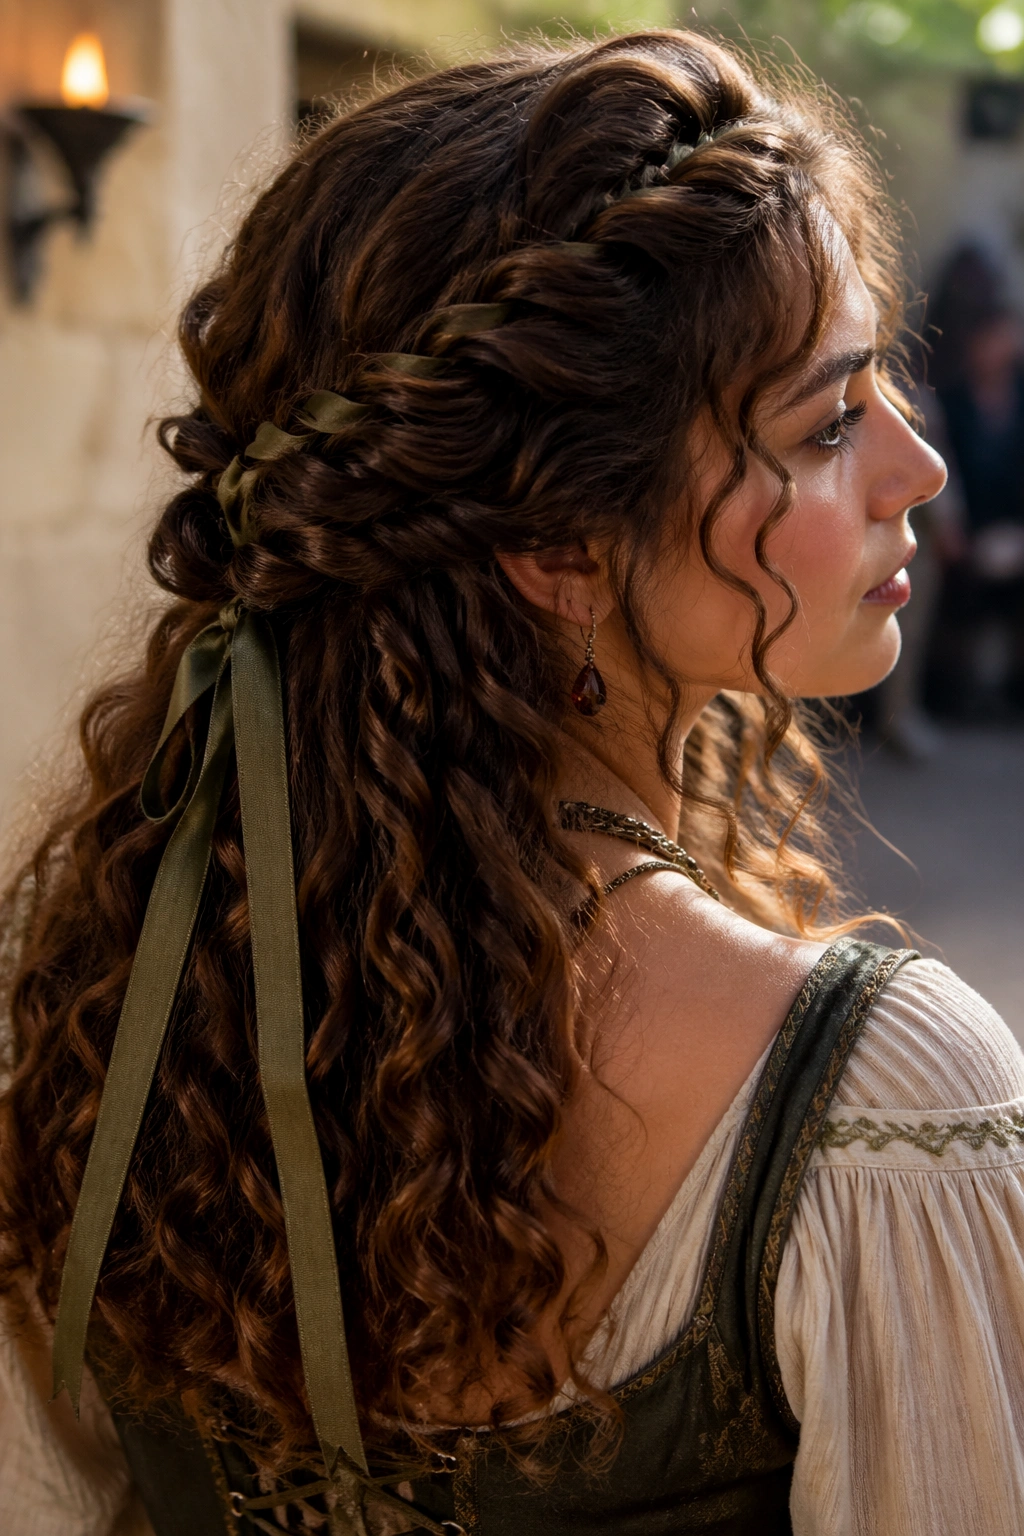
Half-up ribbon lacing has a playful, old-world feel that curly hair wears surprisingly well. The top stays controlled, the length stays full, and the ribbon gives you a clear faire detail without asking for a lot of fuss.
What Makes the Ribbon Work
The ribbon is doing more than decoration here. It acts like a visual line through the hair, which is useful when curls are big and lively and you want one strong detail to tie the style together. A 1 to 1.5-inch ribbon usually reads best; anything thinner gets lost in dense curls, and anything much wider can look clunky unless your hair is very full.
Use a ribbon with a little grip. Velvet, grosgrain, or matte cotton ribbon tends to stay put better than slippery satin. Satin can still work, but it slides easier on fine curls and straightens out the whole mood of the style. That’s fine if you want shine. Less fine if you want the ribbon to stay where you placed it.
How I’d Set It Up
Pull back the top half of your hair into two soft sections, then twist or braid each side loosely before tying them together with ribbon. Leave the lower curls free. If your layers are short, pin the twists first and add the ribbon second so it does not creep down the shaft.
- Best on shoulder-length hair and longer
- Works with a center part or a soft side part
- Use two small elastics before adding ribbon if your curls are slippery
- Hide the elastic under one wrap of ribbon for a cleaner finish
Tip: If the ribbon keeps slipping, rough up the first inch of hair at the crown with a touch of styling cream before you start. Just that little bit.
3. Braided Low Bun with Face-Framing Spirals
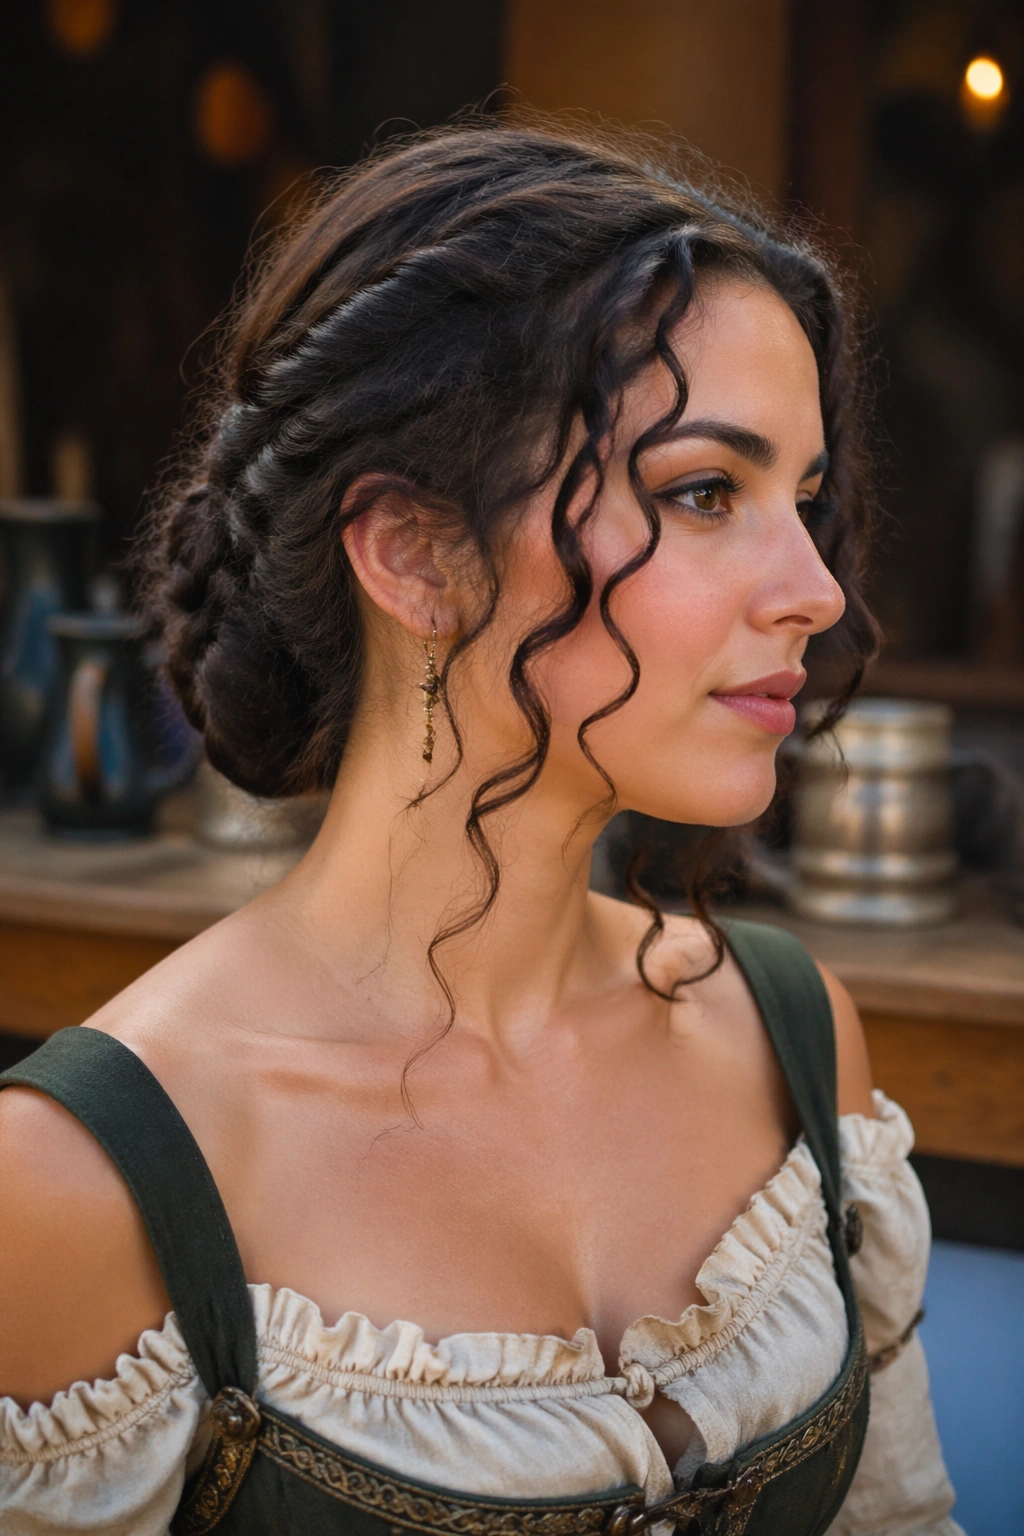
Need one style that stays calm through a crowded lane and still looks romantic under a bonnet or circlet? This is the one I’d pick first. A braided low bun gives structure, and curly tendrils at the front keep it from feeling too severe.
The shape is the whole point. Gather the hair low at the nape, braid or twist the length, then coil it into a bun that sits just above the collar line. On curly hair, the bun should not be pinned flat against the head like a ballet knot. Let it have a little thickness. That extra body makes it feel right for a Renaissance faire instead of a gym locker room.
How to Keep the Bun from Collapsing
The secret is anchor points, not brute force. Use a small elastic at the base, then pin the coil in two directions so the bun can’t slide. Cross two bobby pins in an X at the lowest part of the bun, then add a few more around the perimeter if the hair is heavy. If you have thick curls, a U-pin tucked through the braid before you coil it can make a huge difference.
Pull out two or four slim pieces at the front. Keep them curled. Don’t brush them straight. Those spirals are the soft part that keeps the style from reading too formal.
This look also handles accessories well. A small velvet bow, a comb with brass details, or a tiny veil can sit above the bun without flattening it. Heavy hair pieces are a mistake here. You want the bun to look anchored, not weighed down.
4. Side-Swept Fishtail with Loose Ends

A fishtail braid does not have to be sleek to work. That’s the whole reason it belongs on curly hair. The slightly rough, chunky texture makes the braid look fuller and less fussy, which is exactly where I want a faire style to land.
Sweep the hair over one shoulder and start the braid a few inches below the crown. Don’t fight the frizz at the top too hard. A little lift at the root helps the braid look intentional rather than flattened. As you braid, keep the sections broad. Thin fishtails can vanish into dense curls. Broad sections hold their shape better, and when you gently pull the braid apart at the end, the pattern reads more clearly from a distance.
The finish matters. Leave the last 3 to 6 inches of hair loose and curly, or tie the end with a ribbon and let the curls spill below it. That contrast is what gives the style its charm. Clean braid on top, soft texture below. Easy to understand. Easy to wear.
I also like this style because it works with layered curls in a way that many braided looks do not. The loose face pieces can be pulled forward if you want softness, or tucked back with a decorative pin if you’d rather keep the shape more structured. Either way, it feels like something you could wear while walking through a market and still look good in a quick, accidental photograph.
5. Twin Braids with Loose Curls
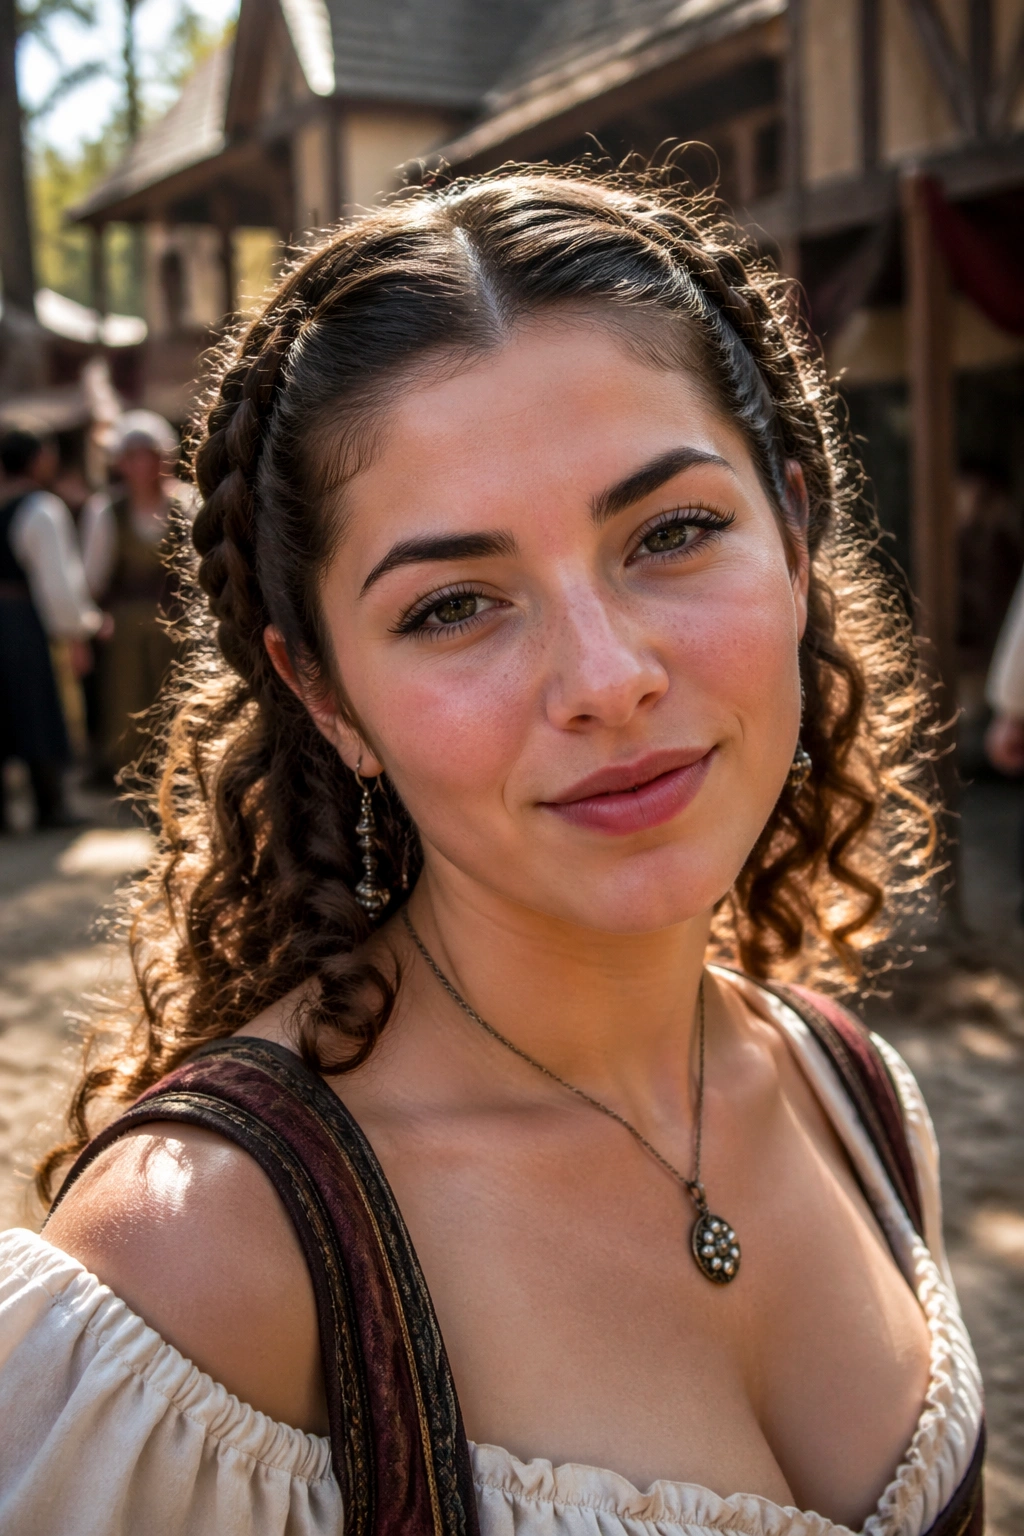
If your curls start to feel heavy by midday, split the weight. Twin braids are practical, yes, but they also carry a very fair-friendly energy that feels a little bold and a little playful.
They work especially well when the front of the hair needs control and the length needs room. A center part gives the most balanced look, though a slight off-center part can soften the face if you like asymmetry. Braid each side from the temple down to just below the ear, then let the rest of the curls hang free. You get a tidy frame around the face and all the volume in back where it belongs.
Best Details to Keep in Mind
- Medium to long curls hold this shape best
- A dab of curl cream on damp hair helps the braids stay neat
- Ribbon ties at the ends give the style a more dressed-up feel
- If the curls puff fast, braid a little lower and leave less loose hair at the top
The nicest part is how adaptable this is. Two simple braids can read rustic, romantic, or slightly warrior-like depending on what you add. Leave them plain for a sturdy, practical look. Thread in narrow ribbons if you want color. Clip in a few tiny metal flowers if you want the style to lean more fantasy.
And if your hair has a mind of its own, that actually helps here. A little frizz around the braids makes the style feel fuller instead of messy.
6. Waterfall Braid Over Defined Curls
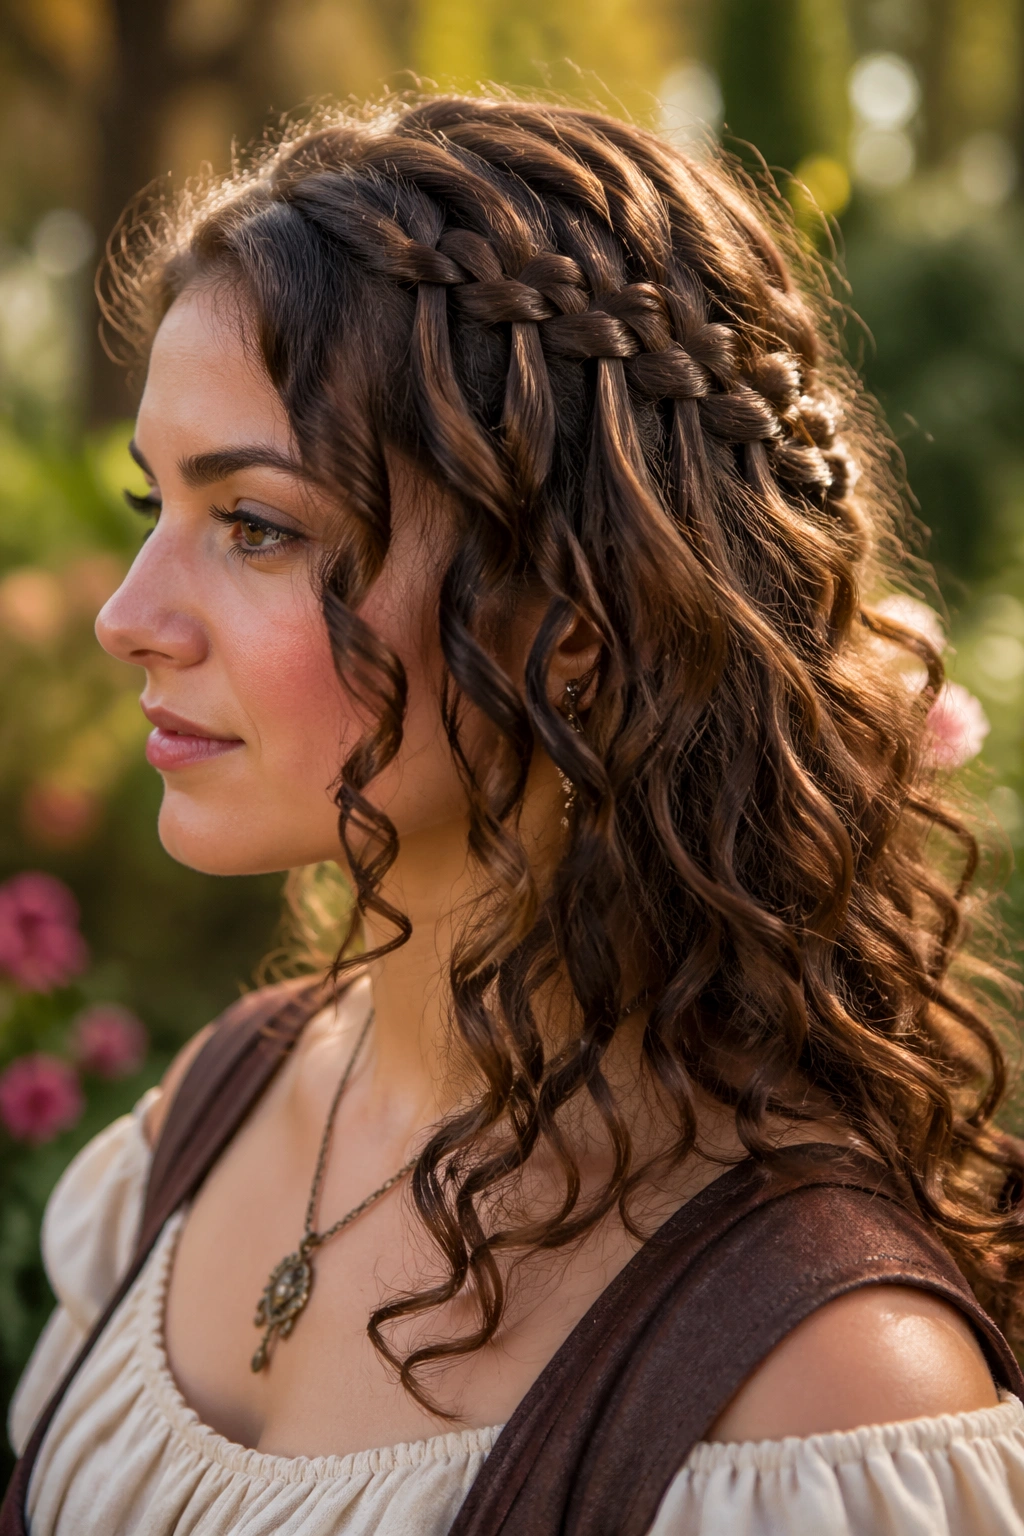
Waterfall braids are one of the easiest ways to show off curls without giving up the faire mood. The braid acts like a little decorative band, while the loose pieces fall through it in a way that keeps the curl pattern on display.
This style is especially nice when the curls are defined and not overbrushed. You want the loose strands to hold their shape as they drop, so don’t overdo the detangling. A soft side part works well, and the braid itself should stay close to the head. The goal is not a hard line. It’s a floating band that lets the rest of the hair do its thing.
Where This Style Shines
It’s strongest on medium-length hair and longer, especially when the front layers are long enough to blend into the braid. The waterfall effect can get lost on very short layers, and on extremely tight curls it may read more as a decorative twist than a true waterfall. That’s fine. It still looks good.
What To Watch For
The loose strands can frizz if you keep touching them. Don’t. Let the curls settle, then pin the braid with tiny crossed bobby pins where needed. If you want extra staying power, a light mist of flexible-hold spray on the braid only will help. Keep it off the ends if you want the curls to stay springy.
A small flower comb tucked above the braid can make the whole look feel finished without stealing the spotlight from the curls themselves. That’s the sweet spot here. Decoration, not domination.
7. Twisted Rope Crown with Tucked Ends
Unlike a traditional three-strand crown braid, a rope crown is faster to create and often sits better on thicker curls. The twist pattern gives you a cleaner visual line, and the texture of curly hair makes the ropes look full almost instantly.
This is one of my favorite styles for coarse or high-density hair because it uses the natural body of the curls instead of trying to compress them. You split the hair into two sections on each side, twist them tightly in one direction, then wrap them around each other in the opposite direction. That opposite twist is what locks the rope in place. It sounds fussy. It isn’t, once your hands get used to it.
If your curls puff at the roots, this style hides that better than a standard braid. The rope twist has enough structure to look polished, but it still has a little irregularity, which keeps it from looking too formal for a faire outfit. I also like it for people who don’t want a lot of exposed pins. Once the ends are tucked, the style can hold with a few well-placed pins under the crown.
A small amount of wax or pomade on the first two inches of hair can help the twist stay neat, especially around the hairline. Don’t drag product through the ends. That weighs curls down fast, and the whole point is to keep the shape alive.
8. High Curly Puff with Braided Base
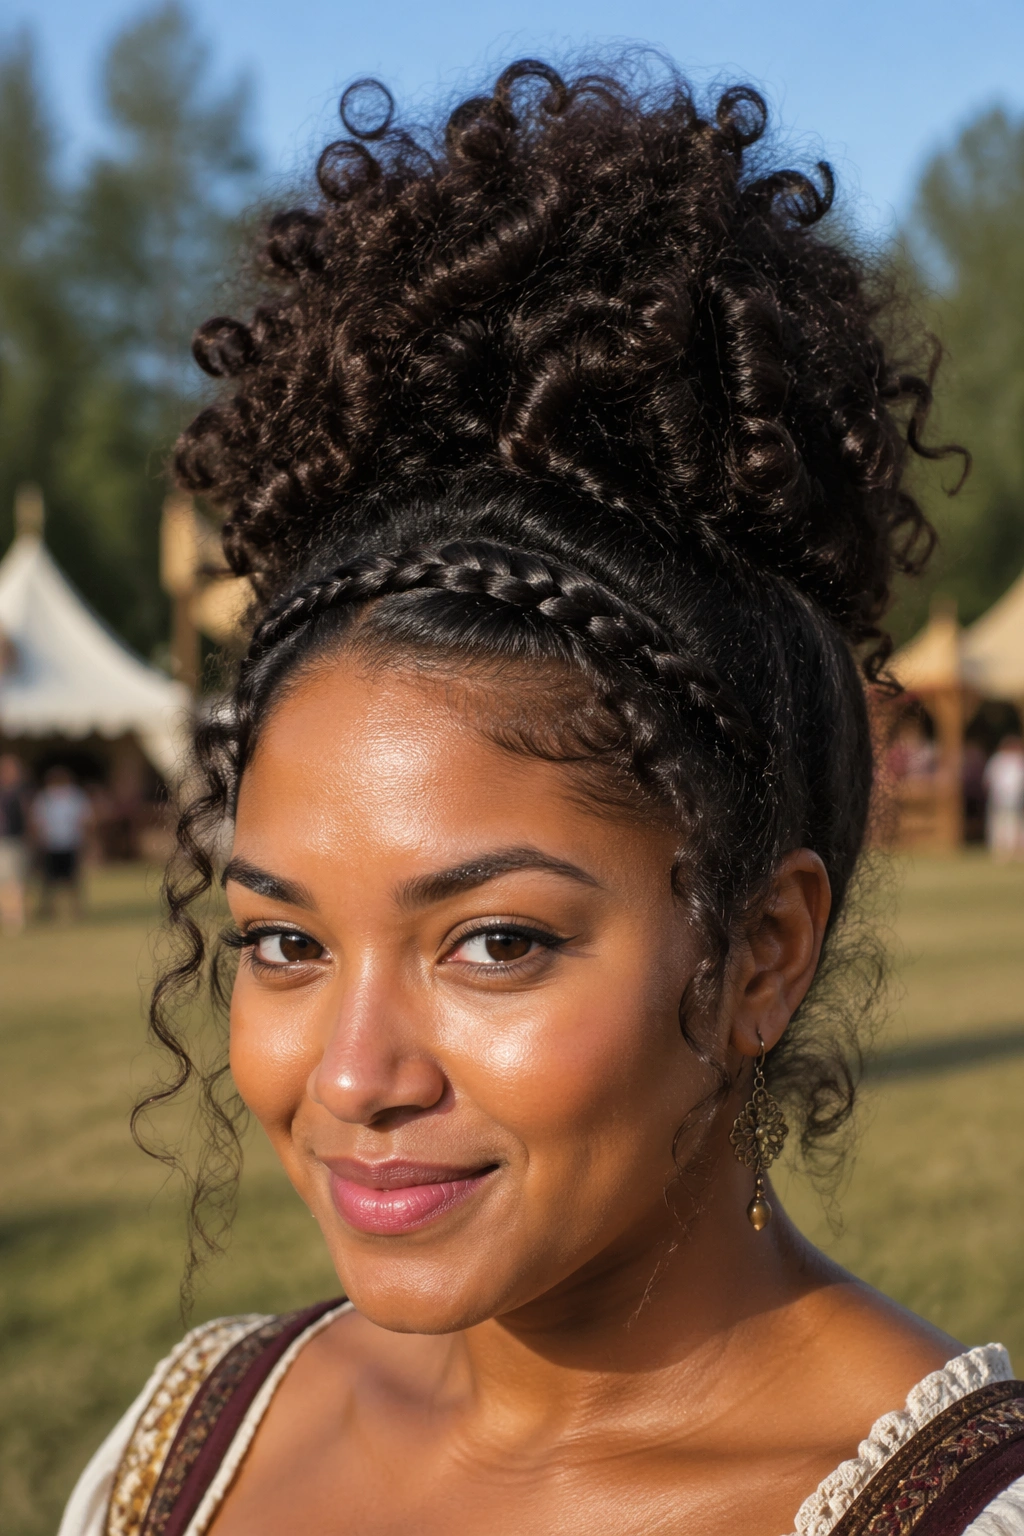
If you want height, this is the one.
A high curly puff turns the crown into the main event, which is useful if your curls naturally make a lot of volume and you want to keep that energy instead of hiding it. Add a braided base or flat twist at the front, and it suddenly feels more dressed up than a standard puff. The look becomes a fair style, not just a quick pull-back.
Quick Facts
- Best for 3b to 4c curls, though looser curls can work too
- A braided or twisted front helps the puff feel anchored
- A satin or silk scarf can protect the base while you style
- A small decorative comb sits nicely just above the puff
- Works well with hoop earrings, circlets, or a short veil
The shape is strongest when you don’t flatten the crown too much. Gather the hair high, secure it where the head naturally wants to lift, and let the curls expand outward. If you try to force the puff too tight, it loses the shape that makes it interesting. That is the mistake. Not enough people say that plainly.
I also like this style for hot days because it keeps hair off the neck while still giving you big texture. It reads bold from across a field, and it photographs well in the only way that matters here: it still looks like hair, not a helmet.
9. Lace-Up Corset Braid Ponytail
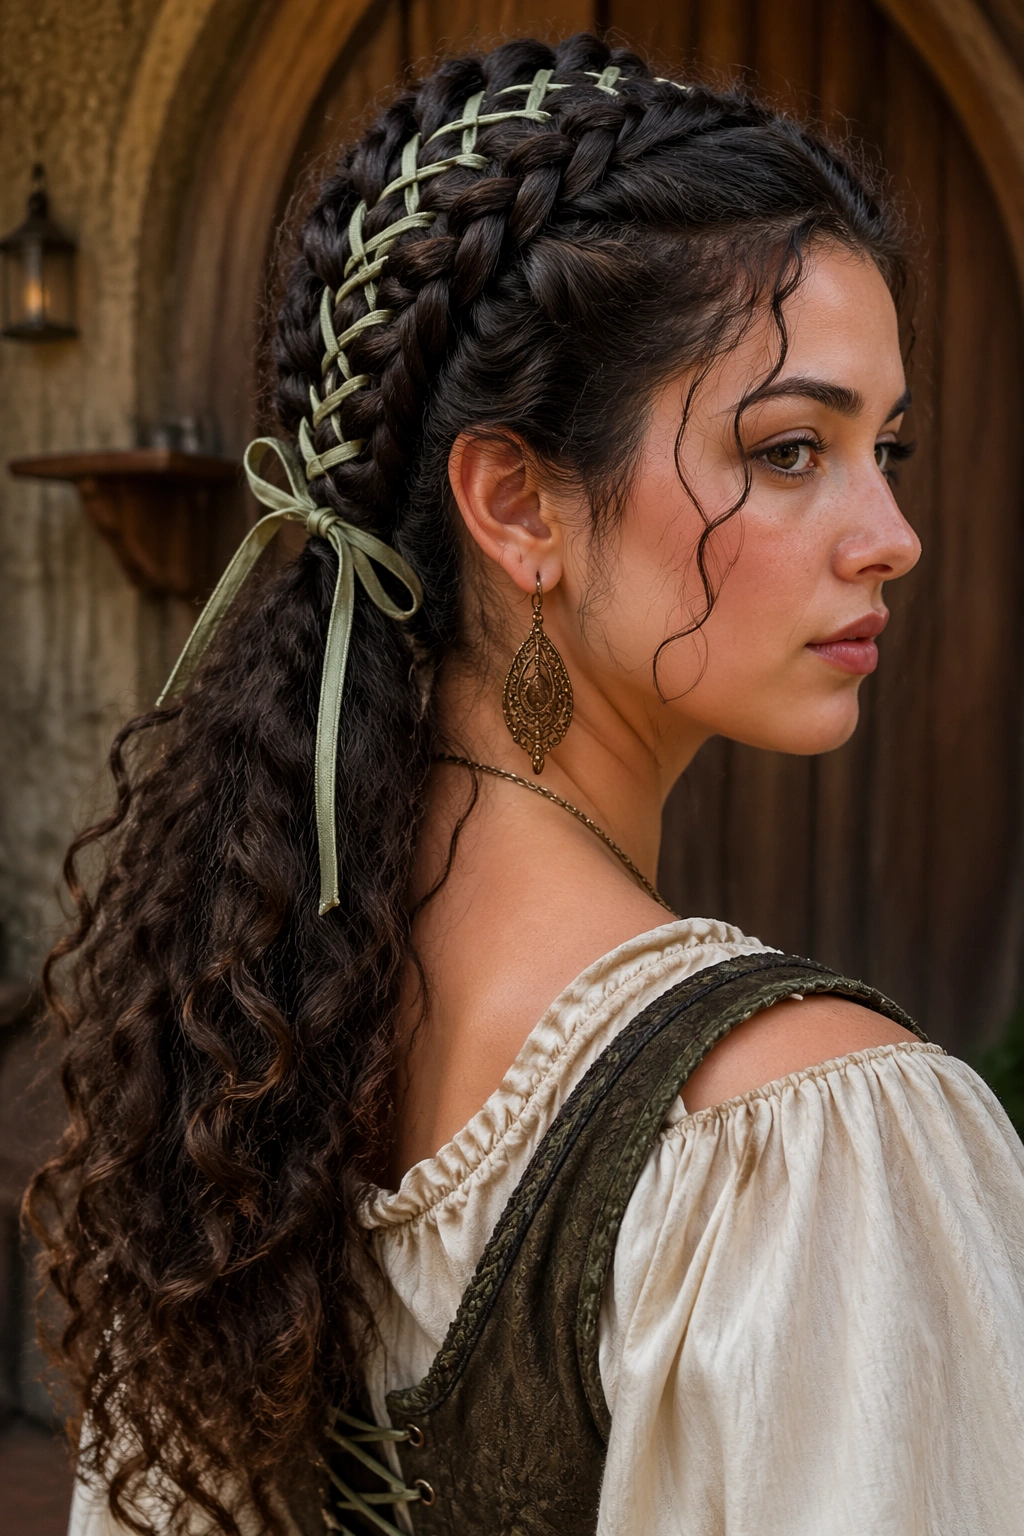
Want something dramatic that still takes a ribbon beautifully? A lace-up corset braid ponytail gives you that. It has structure, it has movement, and it feels a bit theatrical without becoming costume-y.
Start with two narrow braids or rope twists running from the crown toward the back of the head. Gather the rest of the curls into a ponytail, then thread a ribbon through the braids like lacing a bodice. The visual line is what sells it. The curls at the ponytail end keep the whole thing from looking too rigid.
How the Lacing Works
Use a thin ribbon, about 1/4 to 1/2 inch wide, so the lacing stays visible. Matte ribbon usually holds the shape better than glossy ribbon, especially if your curls are dense or your hair is a little slippery. Lace it snugly, but not so tight that the braid pulls flat. You want the eye to read the pattern, not strain to find it.
A middle part gives the corset look the most symmetry. A side part makes it softer. Both work. What matters is that the top sections are neat enough for the ribbon to stand out. If the crown gets too fuzzy, the whole effect muddies.
This style is a good one for people who like accessories but don’t want flowers everywhere. The ribbon does enough. Maybe one tiny barrette at the end. Maybe nothing else. Sometimes that restraint is what makes a style look smarter.
10. Soft Gibson Tuck with Curly Tendrils
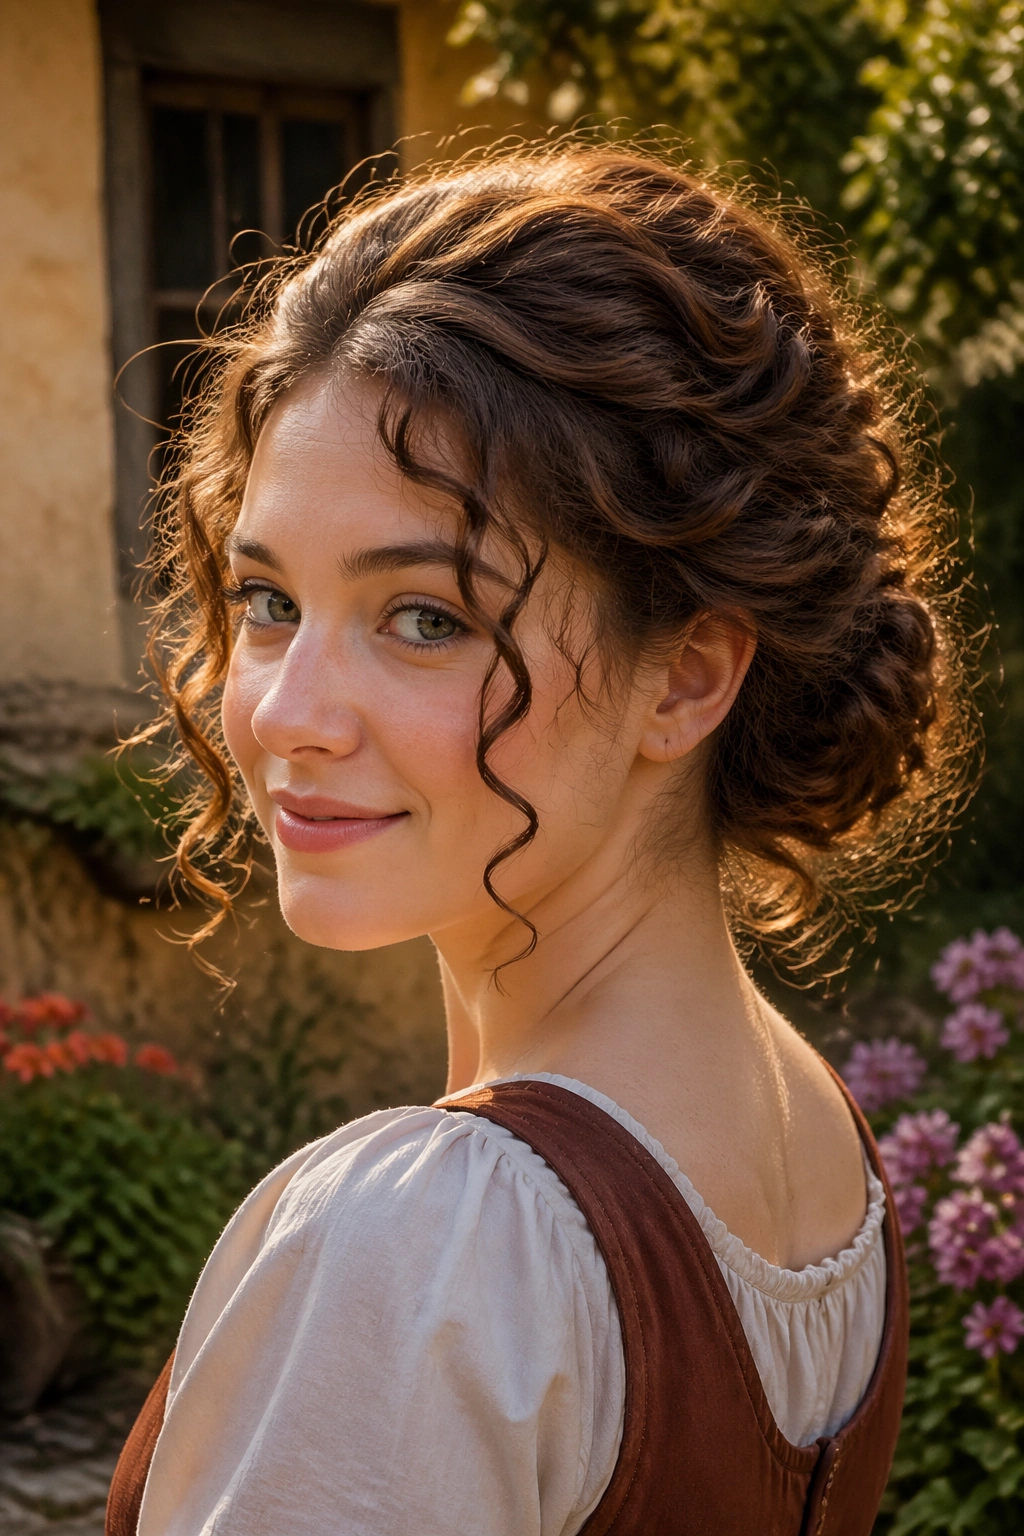
A Gibson tuck sounds fussy until you do it once. Then it starts to make sense. The hair rolls inward at the nape, the curls create a soft shell of texture, and the front stays open just enough to show your face.
This style suits medium-length curls especially well. If the hair is too short, the tuck can feel cramped. If it’s very long, you’ll need more pins and a little patience. Still, the payoff is worth it. The shape feels old-fashioned in the best way, like something borrowed from a portrait but loosened just enough to wear comfortably.
Leave a few tendrils at the temples and around the ears. They keep the tuck from looking severe. Then gather the lower half of the hair, roll it upward toward the center, and pin the roll into itself. The curls naturally create bulk, so you do not need much teasing. You need pinning. Lots of small pins, placed in different directions.
This is one of those styles that looks better from the side than people expect. The tucked roll gives a clean line, while the loose curls around the face keep it human. A tiny comb, a pearl pin, or even a narrow velvet band can finish it off without crowding the shape. If you like a quieter kind of drama, this is a strong choice.
11. Floral Half-Crown with Loose Ringlets
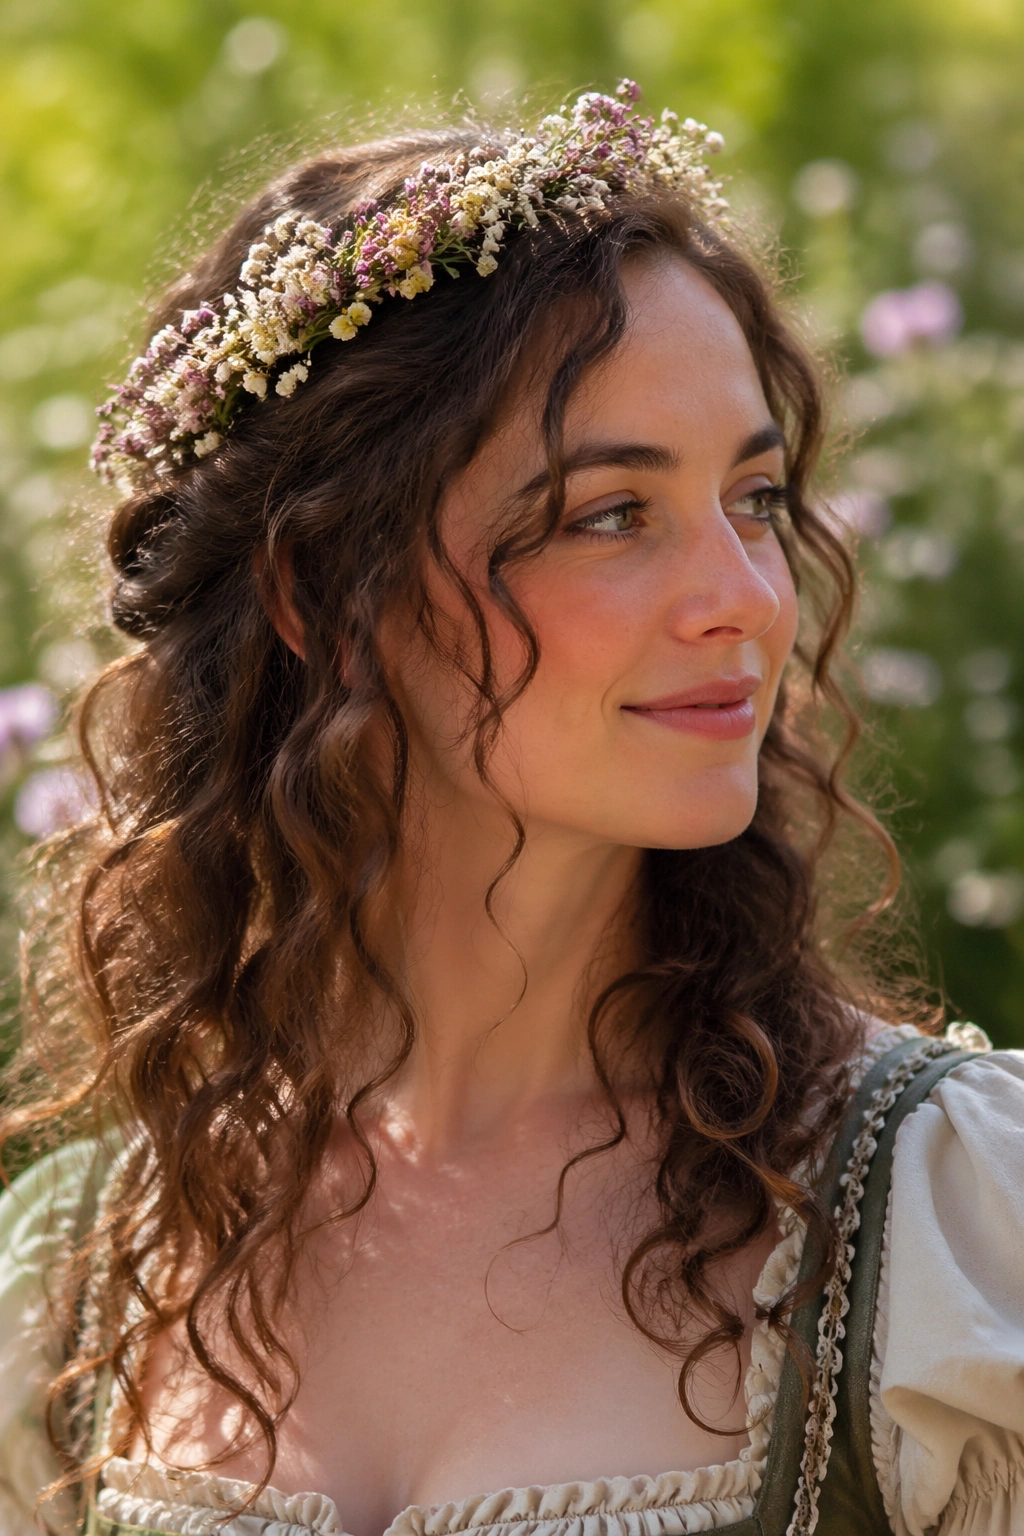
Fresh flowers smell lovely. They also droop faster than people like to admit.
That’s why this style works best when you choose blooms with small heads and sturdy stems. A floral half-crown sits across the top of the head like a soft arc, while the rest of the curls stay loose underneath. It gives you that romantic faire look without forcing every strand into a braid.
I like using small roses, waxflower, rosemary sprigs, or faux blossoms with wire stems. Big flowers can overwhelm curly hair, especially if the curls already have a lot of width. Smaller pieces sit more naturally along the braid or twist. If you’re using fresh flowers, keep them in water until the last minute, then secure them with floral wire or hidden pins. If you’re using faux flowers, wrap the wire ends with floral tape so they don’t snag the hair.
A Few Small Rules That Help
- Keep the flowers near the temples and crown, not low on the loose curls
- Use U-pins for stems that need extra support
- Mix one or two green sprigs with the blooms so the crown doesn’t feel too dense
- Pick flowers that match the size of your curl pattern; tiny blooms suit tight curls better
The style works because the flowers and curls share the load. Neither one has to do all the visual work. That balance is what makes it feel easy instead of overloaded.
12. Faux Bob with Hidden Pins and Mini Braids
A faux bob gives long curls a completely different silhouette without cutting a single strand. That alone makes it worth knowing.
This is the style I’d pick when someone wants to look a little more courtly, a little more vintage, and maybe a little more mysterious than a standard braid allows. The trick is to build a hidden base first. Small inner braids or twists anchor the lower length, then the curls are tucked upward at the nape and pinned into a rounded shape that sits just under the chin line or around the jaw.
The best version leaves a few curls loose near the cheeks. A fake bob with no movement can feel too fixed. You want a little softness around the face so the shape does not turn harsh. If your hair is thick, use more pins than you think you need. Eight to twelve bobby pins is not excessive here. It’s normal. Thick curls need support.
This style also loves accessories. A narrow headband, a small comb, or a veil pinned at the back can make the fake bob feel deliberate rather than clever. And that is the key: it should look like a choice, not a trick.
If you want the simplest way to choose among these styles, think about two things — how much hold your curls need, and how much hair you want to leave visible. Curls with a lot of volume do well in styles that use shape instead of pressure. Fine curls usually need more pins and a lighter accessory load. Heavy curls can carry braids, ropes, and buns that would collapse on silkier hair.
Bring a few spare pins in your pocket. A travel spray is smart too. So is a small ribbon, because one extra tie can rescue a style that’s started to slip near the temples. Small fixes beat full restarts every time, and that matters when you’d rather be walking past a stage with roasted nuts in one hand and your hair still in place.