Curly hair and the Regency era get along better than most people think. Those soft portraits with ringlets at the temples, low knots, and ribboned bands were not built for dead-straight hair. They were built for movement, shine, and a little controlled looseness. That is exactly why curls fit so well.
The mistake people make is trying to force Regency hair into a hard, shellacked shape. That kind of stiffness fights the whole look. Regency styling wants a center part, a touch of height, curls that fall near the face, and an updo that feels light rather than packed down. On curly hair, that can look even better than on straight hair because the texture already brings the softness the era likes.
If your curls spring, coil, frizz, or clump, good. You already have the raw material. The trick is deciding what to polish and what to leave alone. A smooth part matters. So does a clean line at the crown. But the curls around the cheeks, ears, and nape should still look like curls, not broom bristles forced into submission.
The styles below lean into that balance. Some are airy and simple. Some are dressed up enough for a formal gown, a portrait session, or any excuse to wear a ribbon that makes you happier than it should. Start with the most classic shape, then work outward from there.
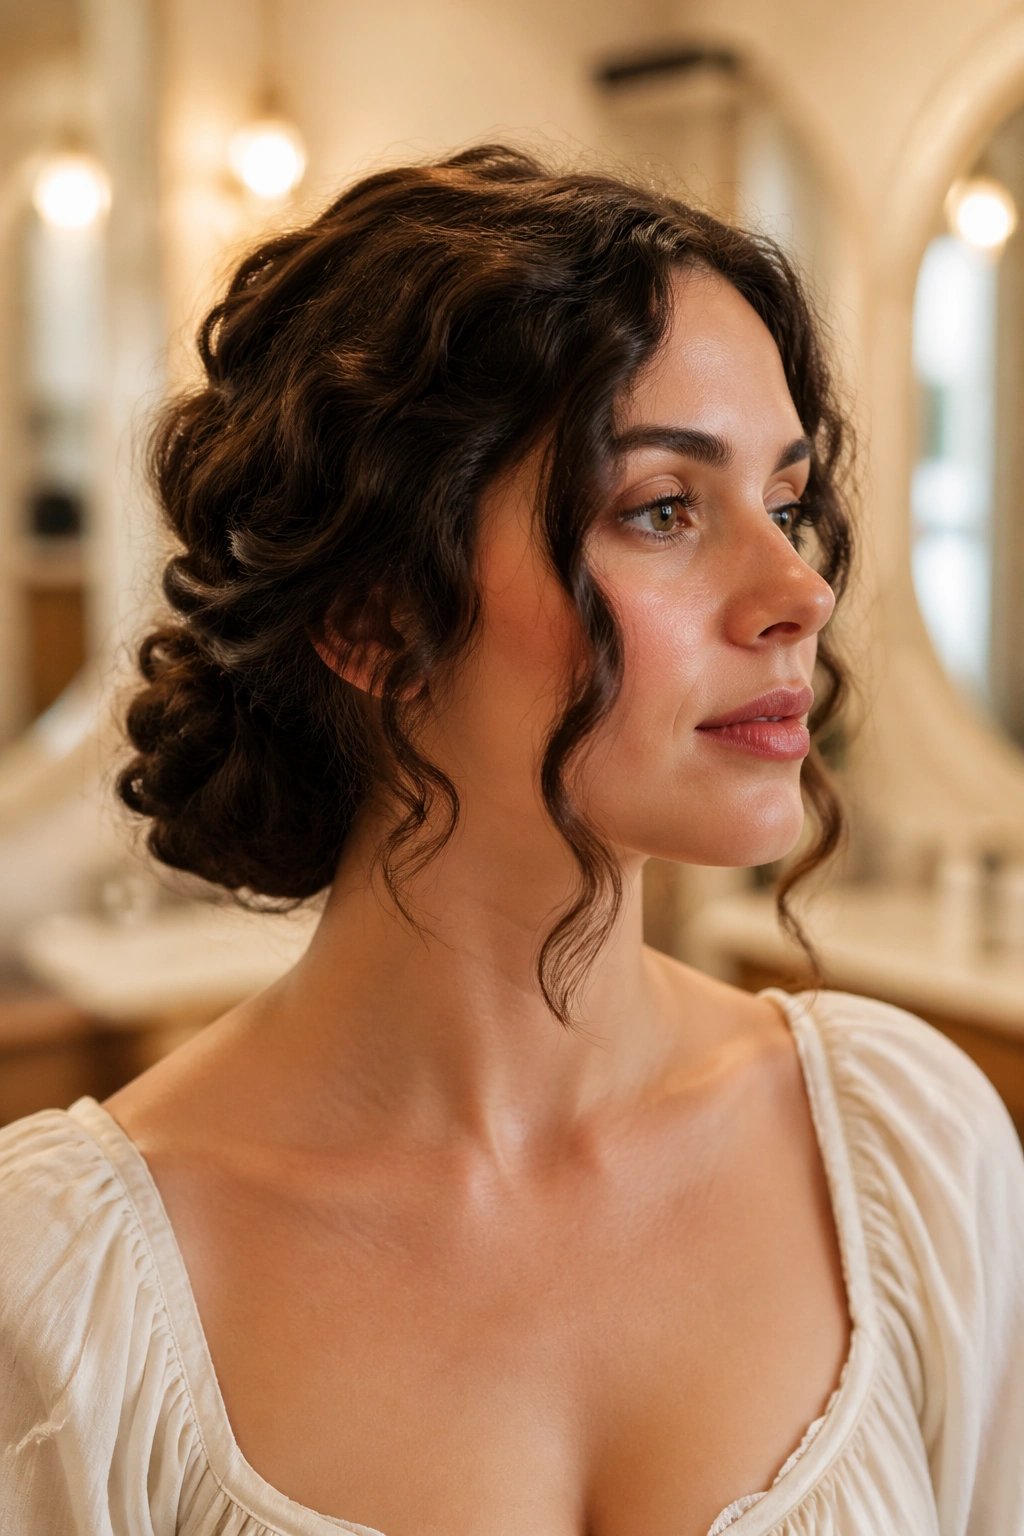
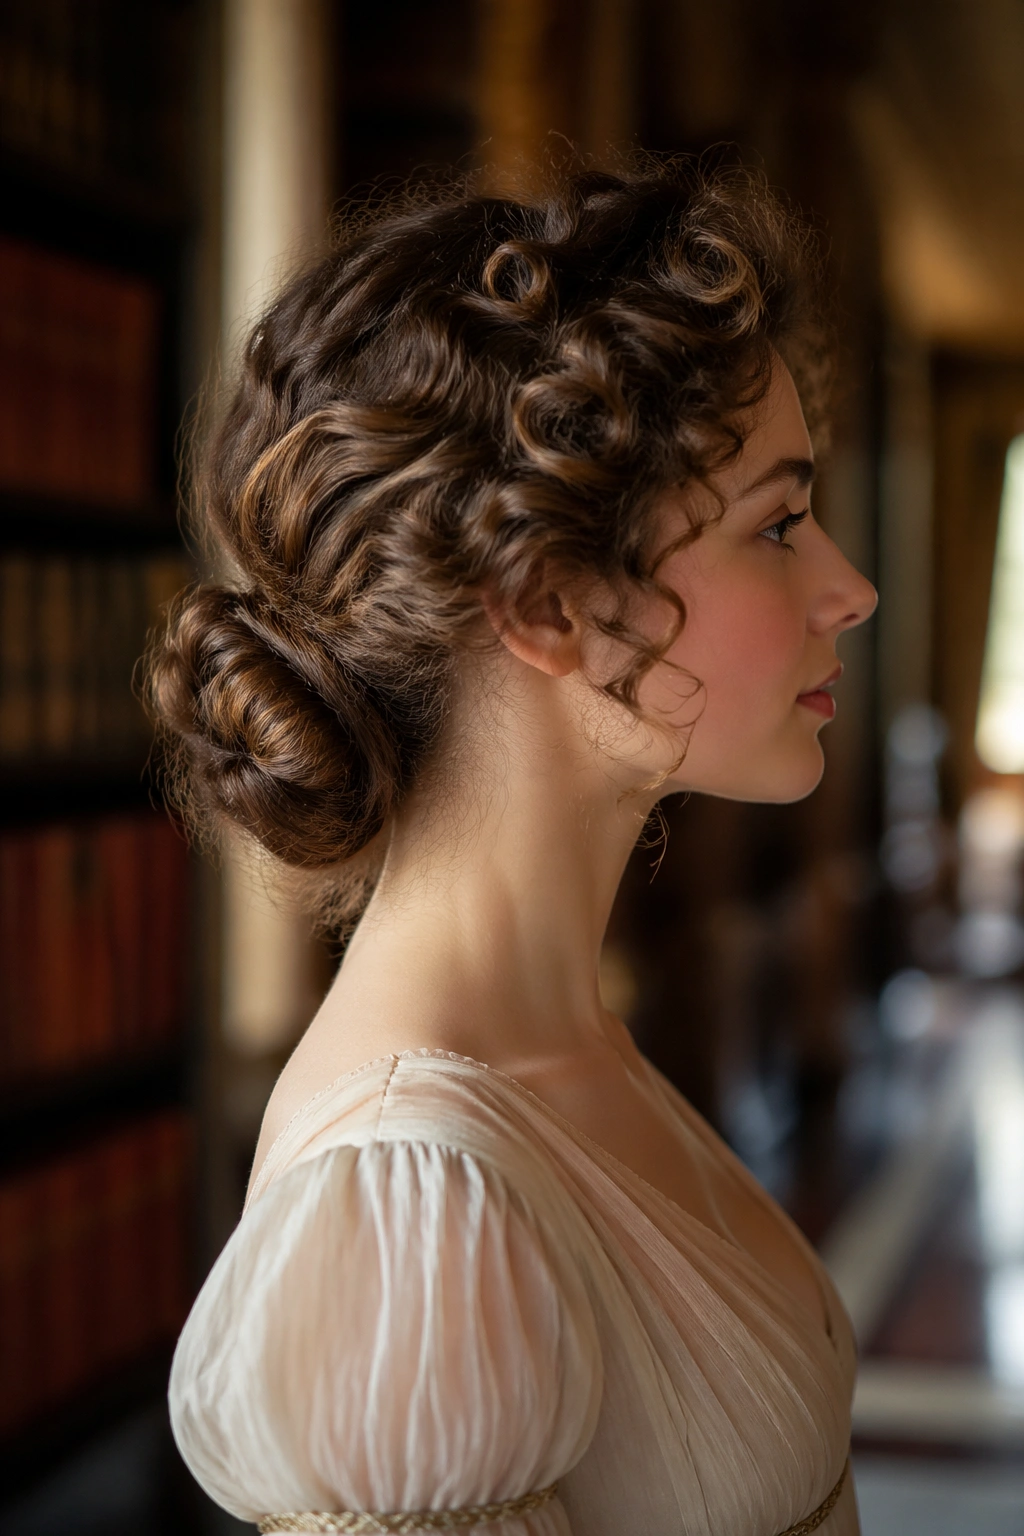
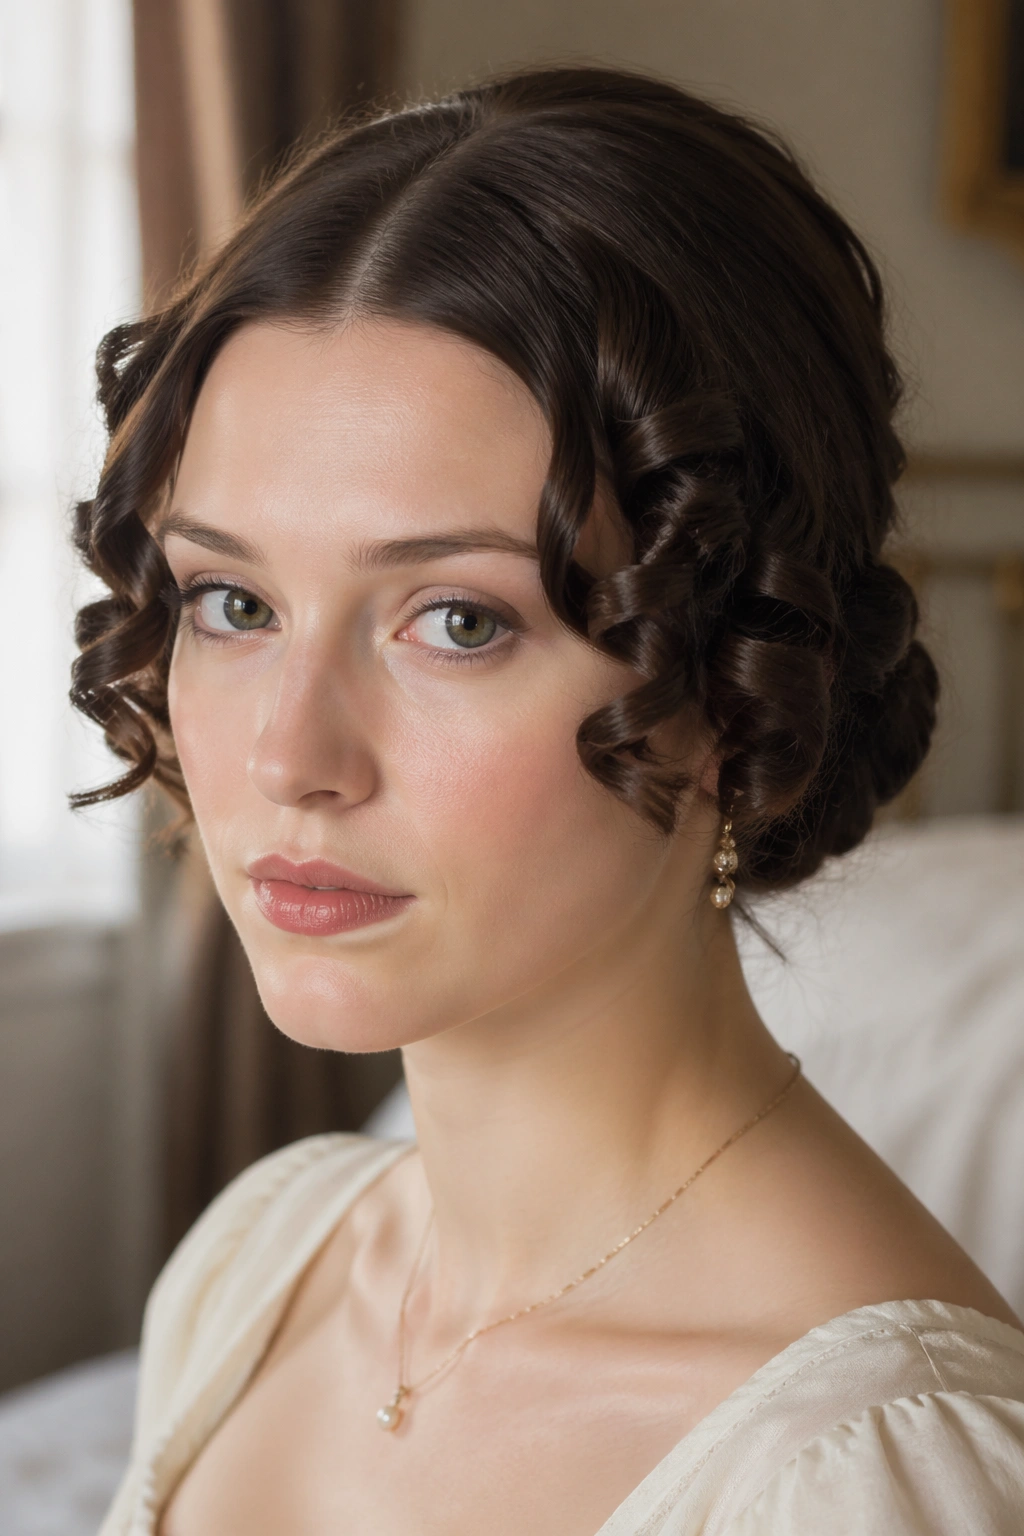
1. Center-Parted Ringlets at the Temples
This is the image most people carry in their head when they think of Regency era hairstyles for curly hair. Clean center part. Soft ringlets at the temples. A low swept-back shape behind them. It’s plain in the best way.
Why It Works on Curly Hair
Curly hair already wants to frame the face, so this style barely has to persuade it. You just guide the roots into a neat line and let the front pieces do what they naturally do. That keeps the whole look from feeling overworked.
A fine-tooth comb can be a disaster here. Use fingers or a wide-tooth comb near the ends, then stop before you drag the curl pattern flat. The goal is a polished top and lively sides, not a helmet.
How to Shape It
- Make a precise center part while the hair is slightly damp or lightly misted.
- Smooth the crown with a small brush, brushing only enough to tame flyaways.
- Leave two curls on each side free, starting around the temple and ending near the jaw.
- Pin the rest into a low roll, a small bun, or a tucked knot at the nape.
- Finish with a narrow ribbon or simple comb if you want more period feel.
Best tip: don’t over-separate the front curls. One or two strong ringlets look better than six thin pieces that feel fussy and scattered.
2. Low Knot With Two Soft Side Curls
Want something that looks period-correct without taking an hour? This is the one I reach for first. The shape is simple: a low knot at the back, two curls left out to soften the face, and a crown that stays neat but not stiff.
The side curls should not be identical twins. One can sit a little higher, one can hang a little longer. That tiny irregularity keeps the style from looking too engineered, and curly hair usually benefits from that anyway. A little asymmetry reads as natural, not sloppy.
The knot belongs low, right at the nape where the head starts to slope. If it sits too high, the style starts drifting away from Regency and into something more theatrical. Keep the base compact. Let the texture live in the two curls that frame the cheeks.
A few U-pins and one or two crisscrossed hairpins will hold this better than a single large clip. Curly hair has memory; if you pin a curl in the direction it already wants to go, it usually behaves. Fight it, and it pushes back all day.
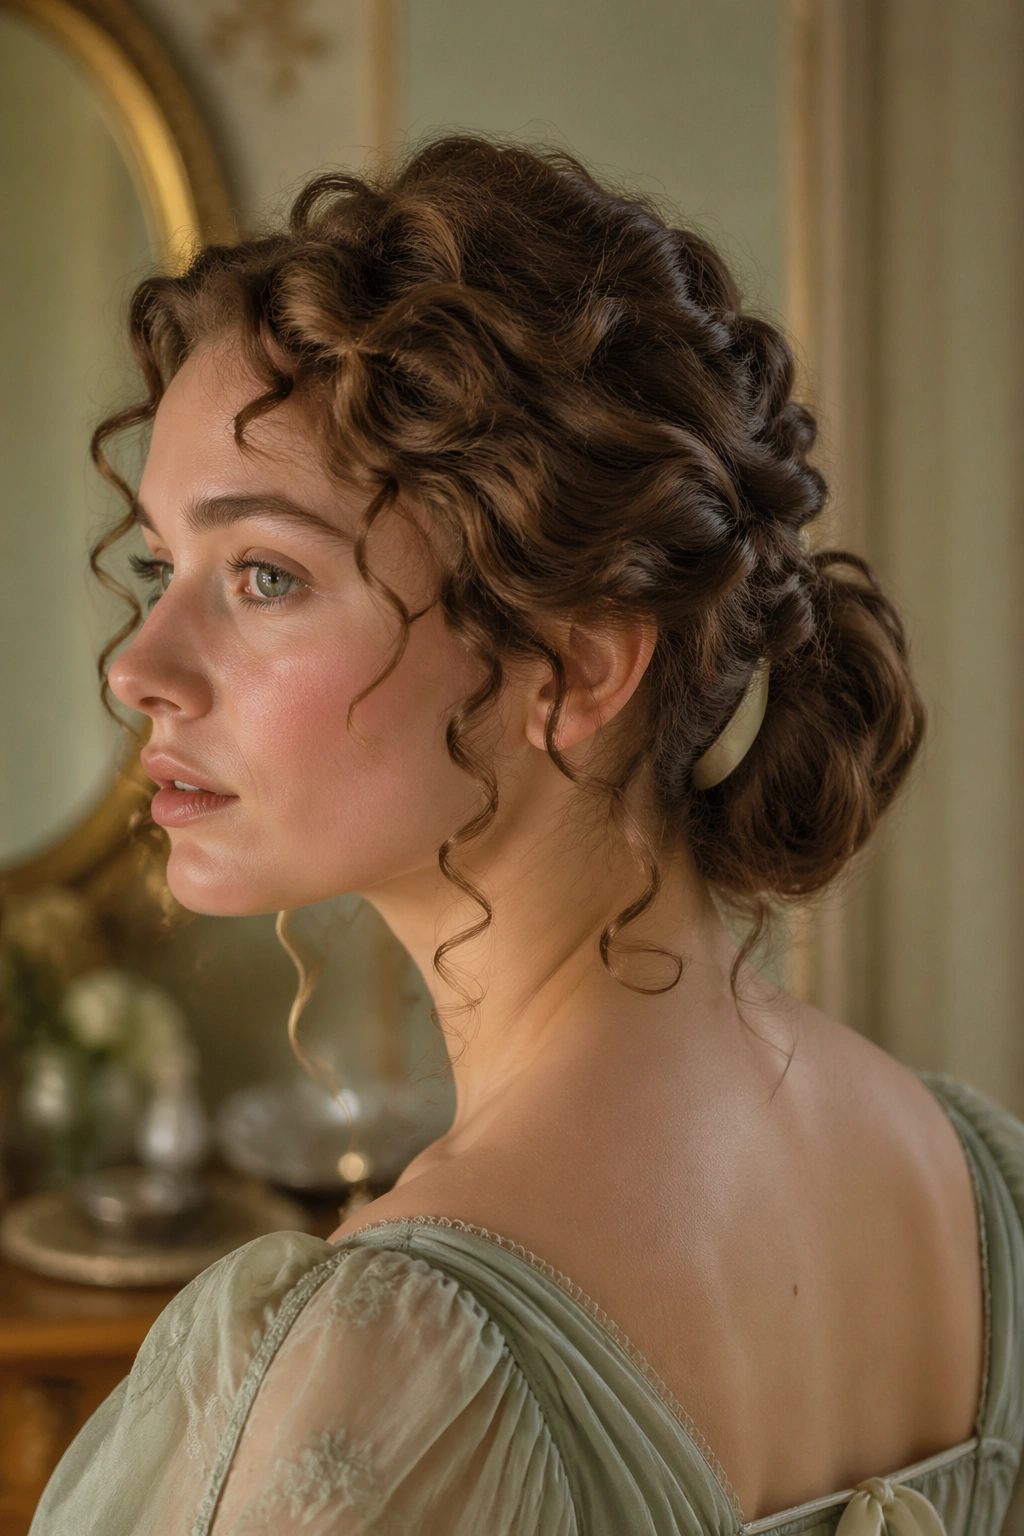
3. High Classical Knot With Curly Volume
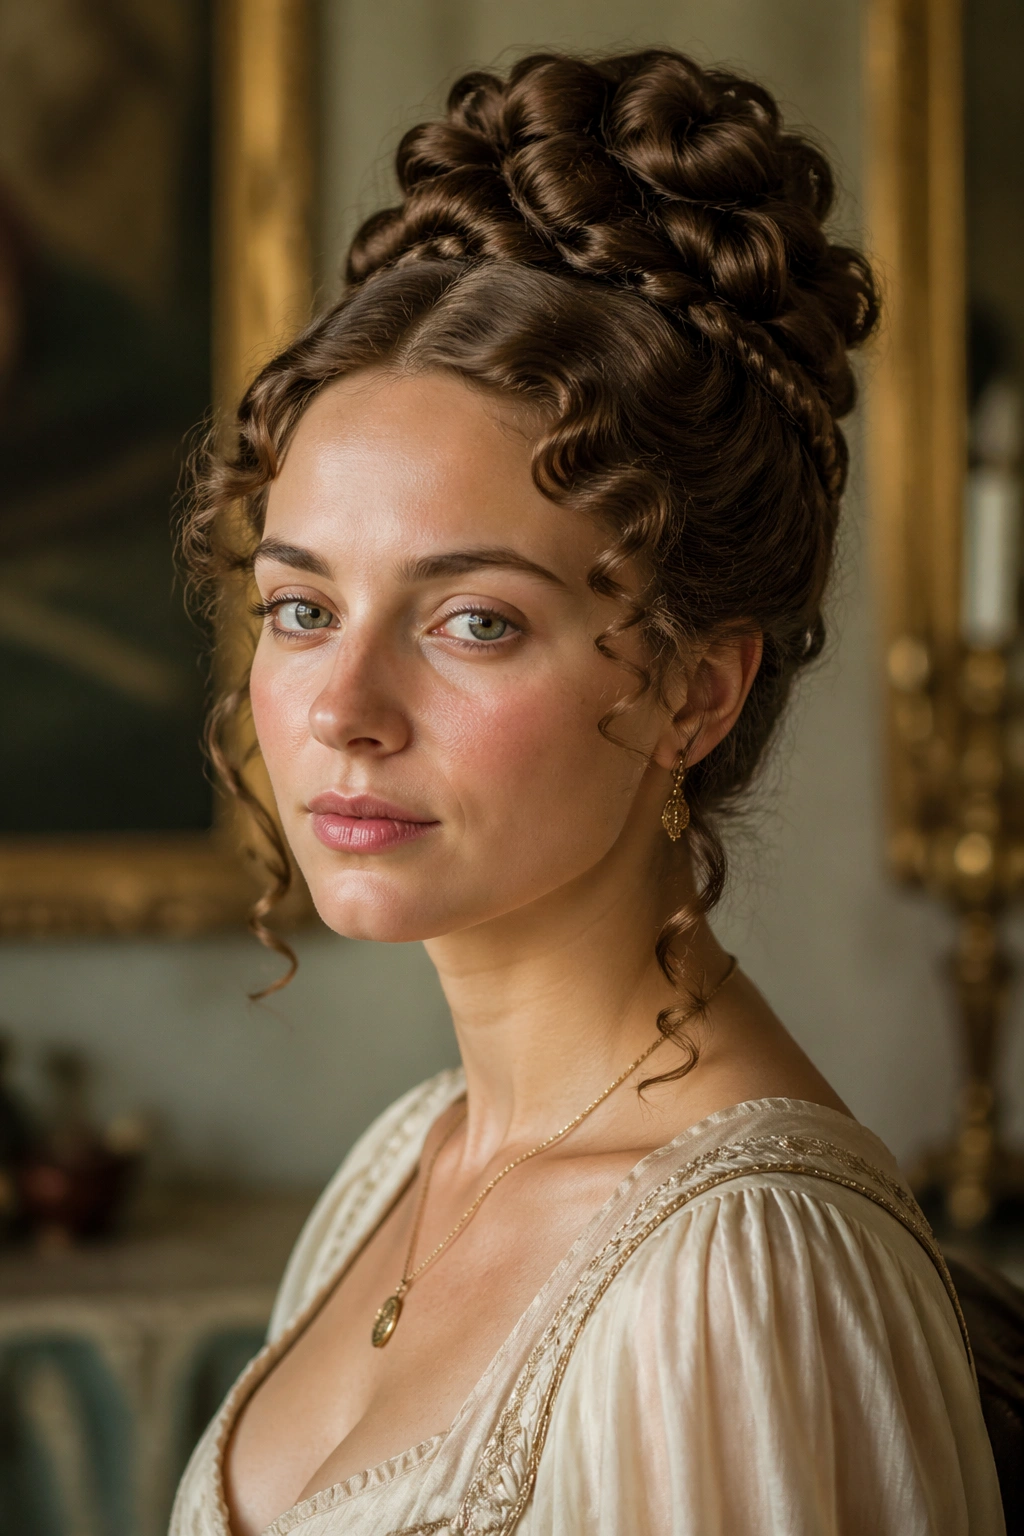
The high classical knot is the Regency style that actually likes curls. Straight hair can look flat in it. Curly hair gives the knot shape, lift, and a little shadow around the crown that makes the whole thing look alive.
Placement Matters
The knot should sit on the upper back of the head, not dead center like a modern sock bun. Think of it as a compact twist with height, then a few softened curls around the temples and ears. That placement matters more than people realize.
If your curls are thick, gather them loosely first and twist only once or twice before pinning. Over-twisting can flatten the pattern and make the bun look tight in a bad way. You want a coil, not a knotty rope.
What Not to Do
- Do not smooth every curl into submission.
- Do not place the bun so low it disappears.
- Do not leave the crown flat and wide.
- Do not use a huge ornament unless the rest of the hair is restrained.
A narrow ribbon looped around the base or a small comb tucked just above one ear gives this style enough finish. I like it with medium-length curls because the shape stays visible from the front, which is half the point.
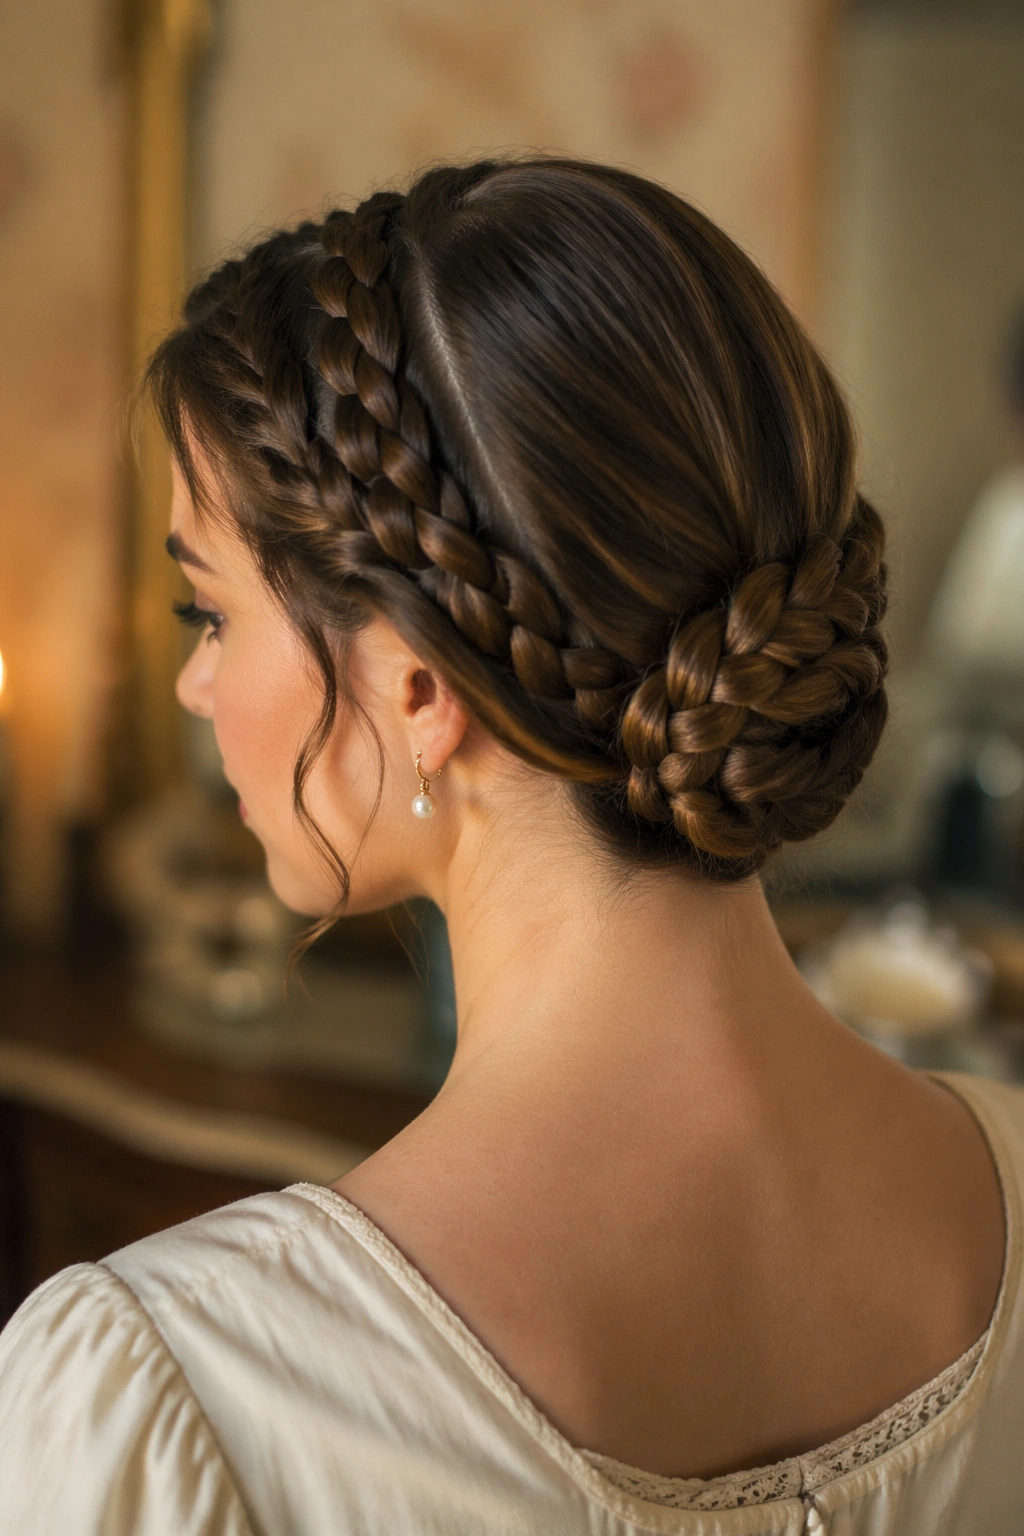
4. Braided Crown With a Tucked Nape
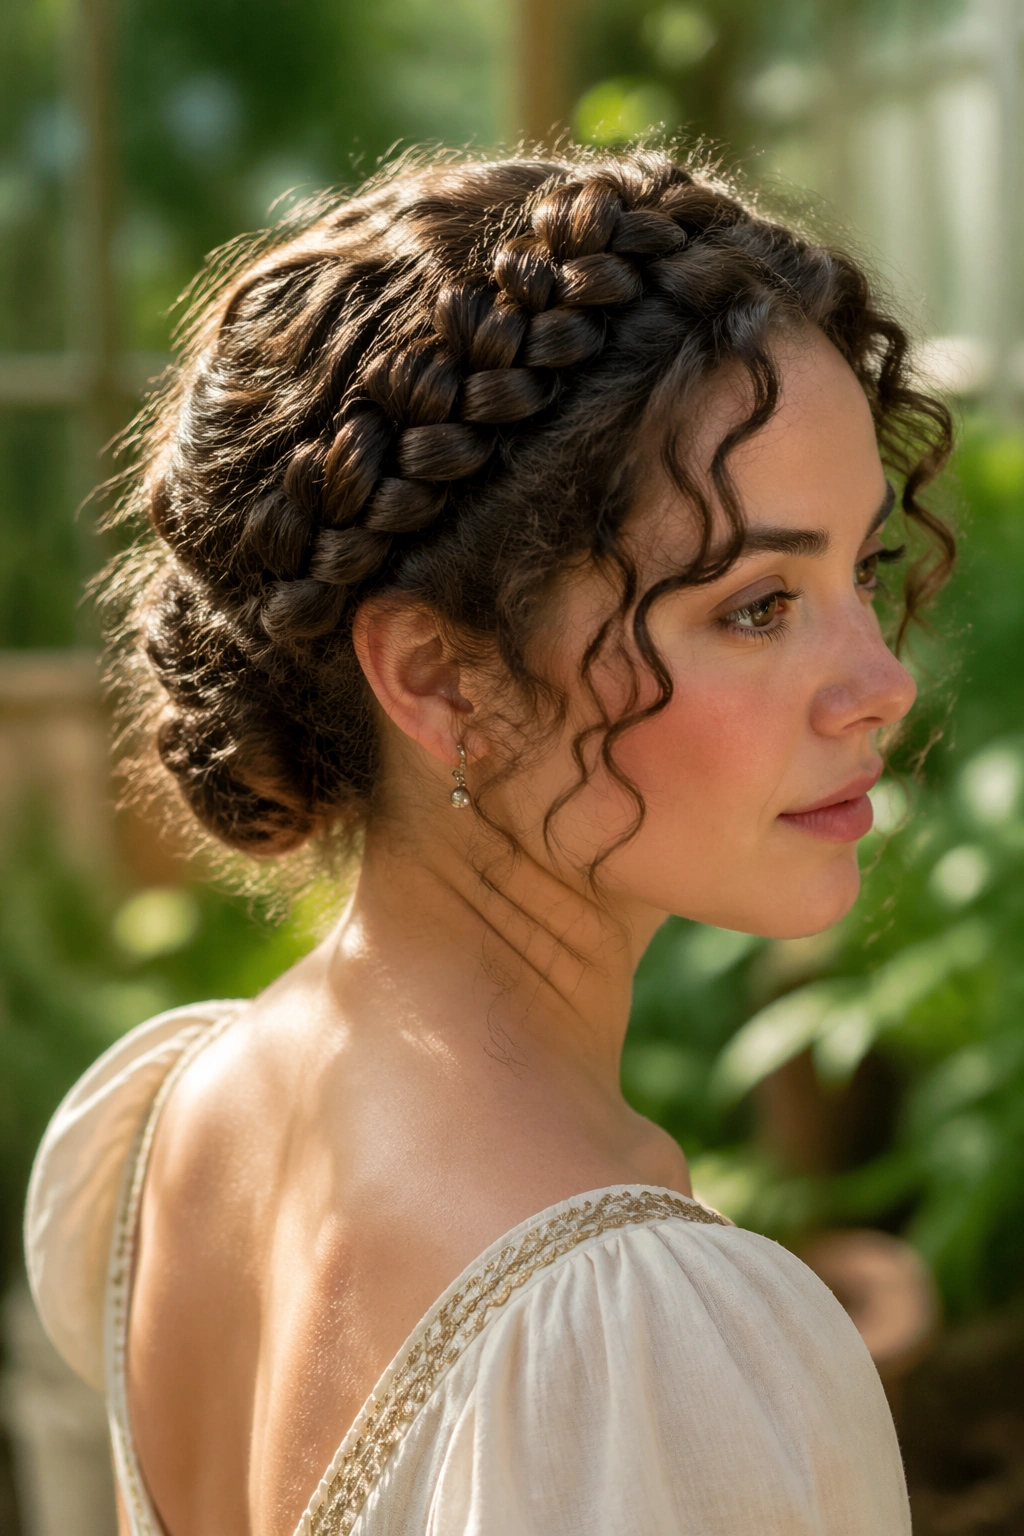
If your curls are thick and a low knot starts to feel too simple, the braided crown gives you structure without smothering texture. It looks more detailed from the front, and that detail suits Regency dress beautifully.
Start with a center part or a shallow off-center part. Braid each side from the temple back toward the crown, then pin the braids across the top so they meet or overlap. The remaining hair can be tucked into a small nape coil or left in a soft rolled twist.
The braid does a useful job here. It keeps the hairline tidy, controls bulk, and creates a clean frame around the face. Meanwhile the curls in the back still do their own thing. That contrast is what makes the style work. Too polished in front and too fluffy in back, and you miss the point. Too tight everywhere, and it loses the period softness.
A braided crown also holds better on curly hair than people expect because the texture helps the braid stay put. If your hair is layered, braid a little looser so shorter pieces can be tucked under with pins instead of breaking loose halfway through the day.
5. Ribbon-Banded Half-Up Curls
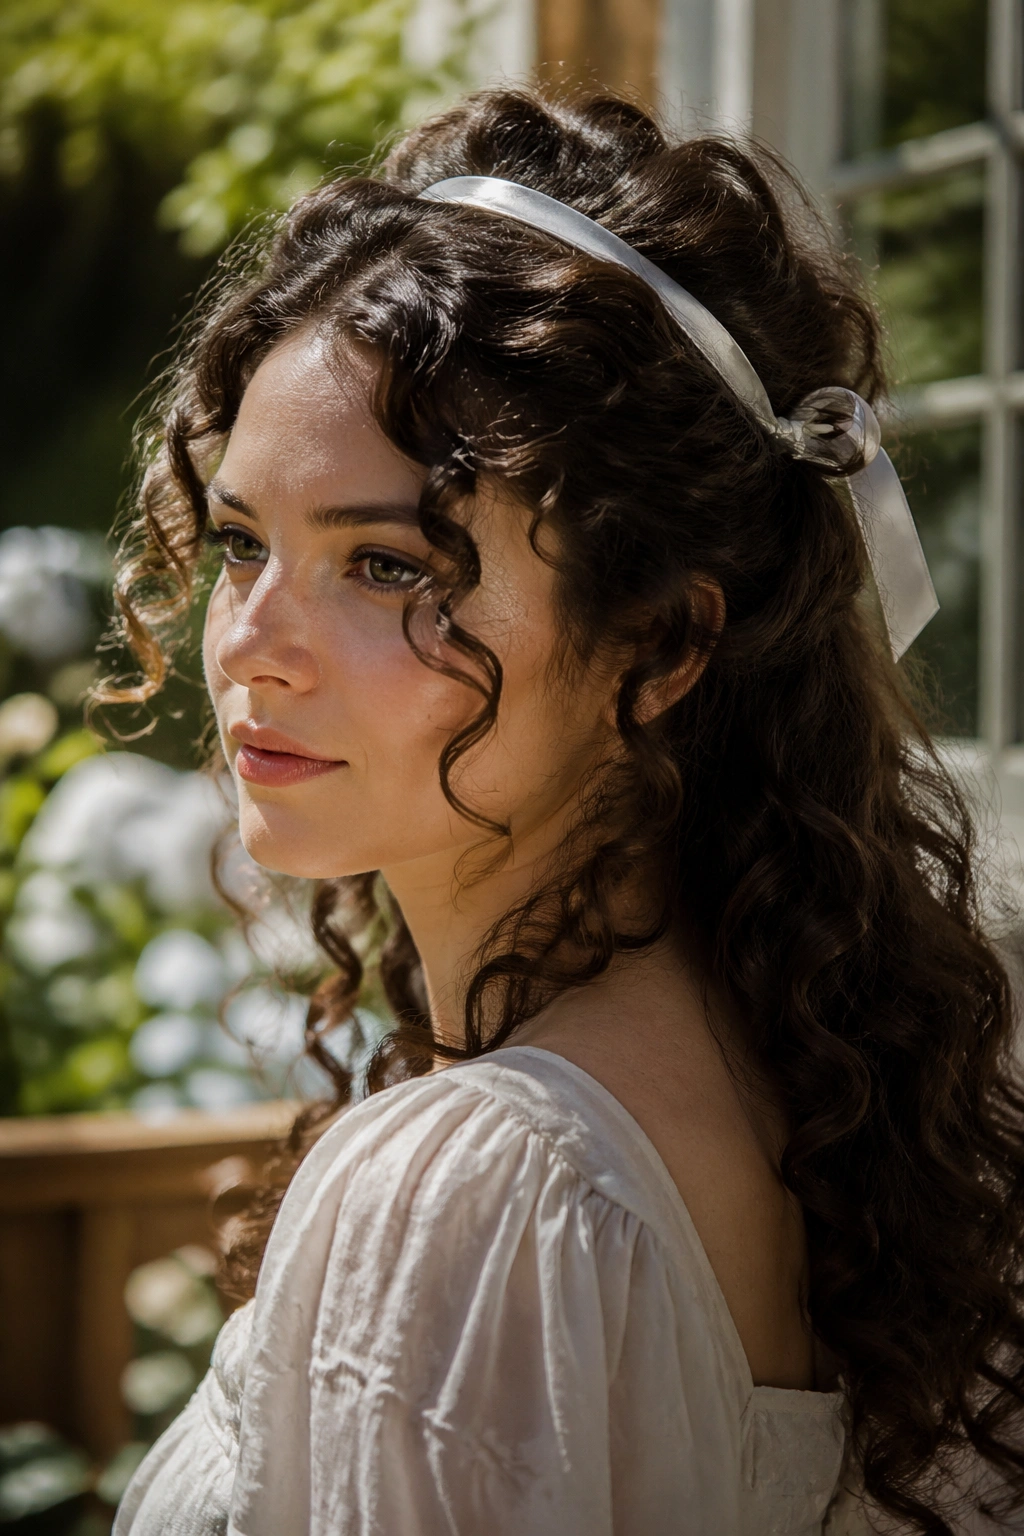
Not every Regency hairstyle has to be fully pinned. This half-up version keeps the curl pattern visible, which is smart if you actually like your hair and do not want to hide all of it under a knot.
The ribbon sits across the crown or just behind the hairline, like a soft band. The top section gets gathered and secured at the back, while the lengths below stay loose. On curly hair, that usually means the back falls in layered spirals, ringlets, or soft corkscrews that move when you turn your head.
What to Keep Loose
- The lower half of the curls.
- A few face-framing pieces near the temples.
- The ends around the neckline, if your hair is long enough.
- Any texture that gives the style lift without looking messy.
A ribbon about half an inch to one inch wide works well. Satin feels dressier, but matte silk or grosgrain can look more believable if you want a softer finish. Tie it flat or knot it under the hair rather than making a giant bow. Giant bows belong to other looks.
This is the style I’d choose for a daytime dress, a garden visit, or any situation where the hair should look finished but not trapped.
6. Side-Swept Profile Bun
Stand sideways in a mirror and this style suddenly makes sense. From the front, it looks relaxed and elegant. From the side, it has shape, which is where it really earns its keep.
A deep side part shifts the visual weight, and then the hair gets gathered toward one side at the nape or just behind the ear. That creates a low bun or roll with one cheek side more open than the other. Curly hair helps because the lifted front section keeps a little airy volume instead of collapsing into a slick plane.
This is a good choice if your face is long, if you like one statement earring, or if you want a hairstyle that feels a touch less symmetrical than the standard center-part formula. Regency looks can handle that. They were not all rigidly balanced.
Keep one or two curls near the lighter side and let them curve toward the jaw. The bun itself should stay compact. If it gets too wide, the whole effect starts looking modern and too “done.” A tight base with soft texture around it is the sweet spot.
7. Short Curly Crop With a Narrow Band
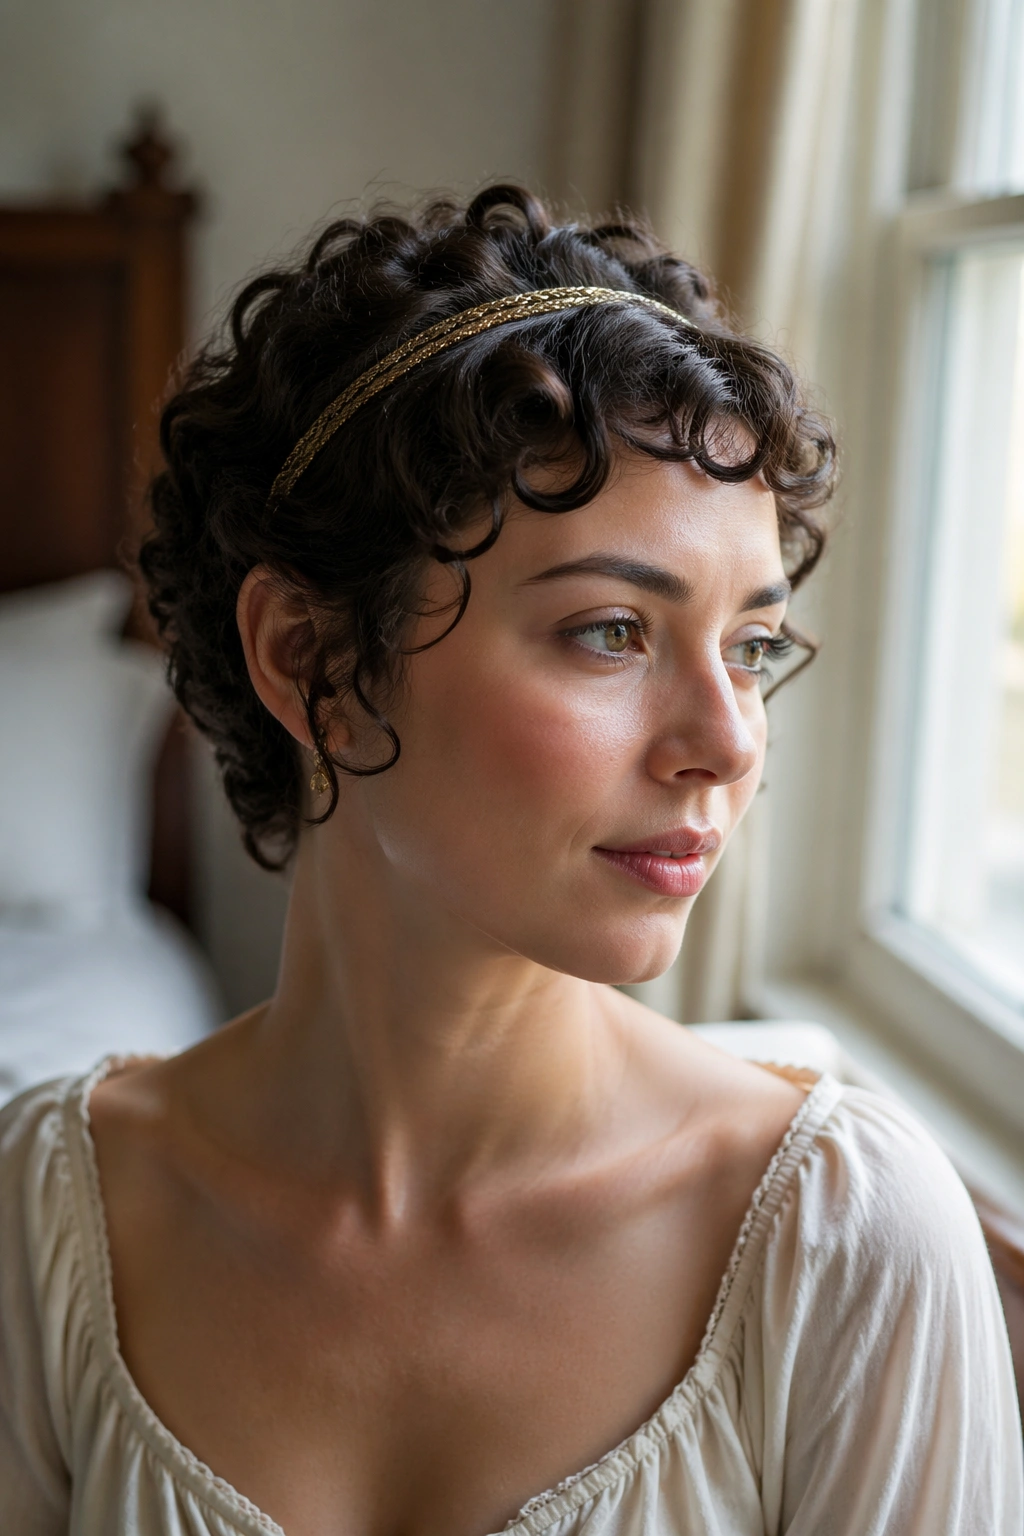
What if your hair barely reaches the nape? Good. You can still do a Regency style that looks intentional instead of improvised.
Shorter curly hair often looks best when the front curls are given space and the rest is shaped close to the head with a band, ribbon, or slim comb. The old portraits do show short and layered styling around the face, especially when the hair is dressed with a neat part and decorated simply. You do not need a long bun to read as period-inspired.
A narrow band keeps the crown tidy while the curls around the ears and neck stay visible. That visibility matters. If you hide all the curl, the look loses its charm. If you leave it everywhere, it can drift away from the era and land in costume territory.
Use a small amount of styling cream on damp hair, then let the curls set before you arrange them. Pin only the sections that truly need pinning. The rest can stay in place naturally. Short curly hair looks best when it is allowed to breathe a little.
8. Low Chignon With Escaped Tendrils
This is the forgiving style. If your curls refuse to lie flat, if one side keeps springing loose, if the back never looks identical from left to right, this one works with you instead of against you.
A low chignon is simply a neat knot or coil at the nape. The trick is to leave a few tendrils out on purpose. Not random frizz. Intentional tendrils. Around the ears, at the temples, and maybe one curl near the neck, the soft ends should escape just enough to frame the face and soften the line of the bun.
Pin the Base, Not the Ends
That small shift makes all the difference. Secure the body of the chignon first, then stop trying to capture every last curl. If the ends are left free, they keep the style from feeling too rigid. On curly hair, they often curl right back into shape anyway, which is a pleasant bit of help.
I like this version with a plain ribbon tucked under the coil or a small comb placed slightly off-center. It does not need much. The hairstyle already has enough motion.
One warning: don’t make the escaped pieces too long. Two or three inches of loose curl is enough. More than that and the style starts to look like it lost a battle with a windy carriage ride.
9. Twisted Side Roll and Nape Coil
A side roll gives the front of the hair a proper Regency line, and the nape coil keeps the back neat. Together, they make a style that feels controlled without feeling fussy.
Take a front section from one side, twist it back along the hairline, and pin it into the center or slightly off-center. Then do the same from the other side, keeping one twist a touch fuller if you want a more profile-heavy look. The rest of the hair gathers into a small coil at the nape.
Unlike a full crown braid, this style leaves more of the curl pattern visible. That is a good thing if your curls are thick, springy, or layered in a way that makes braiding a little awkward. The twist also keeps shorter front pieces from slipping forward too much.
A side roll like this looks especially good when the curls near the temples stay soft and the roll itself has a bit of height. Don’t pull the hair so tight that the head loses its roundness. Regency hair likes that gentle lift. Flat roots make it look harder than it should.
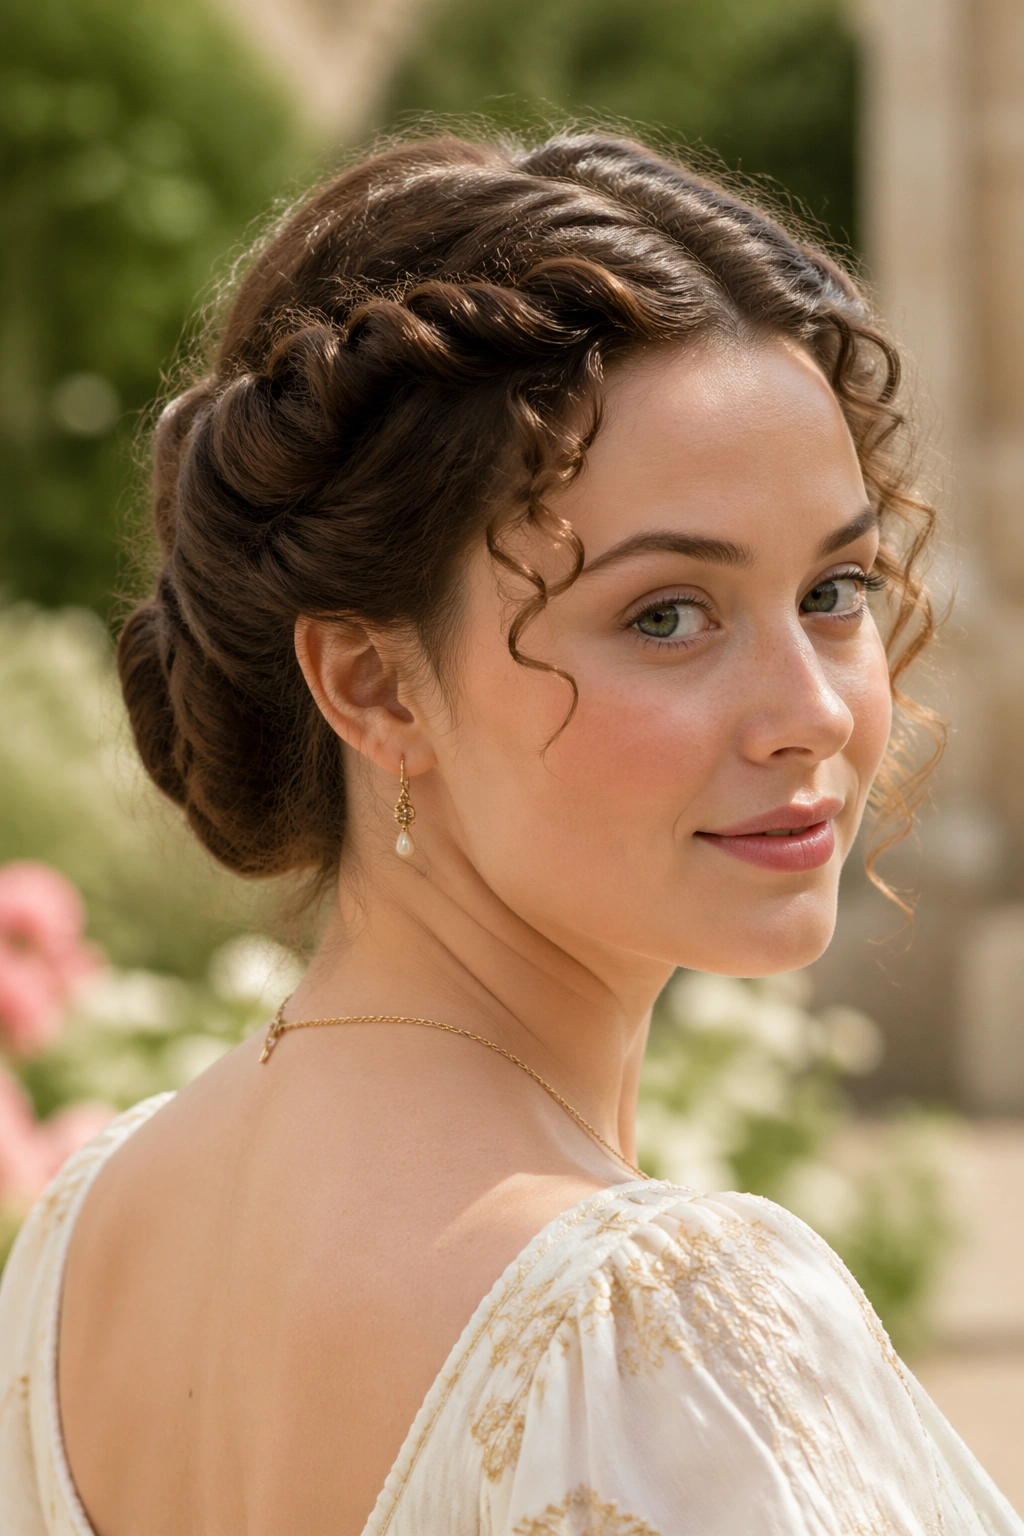
10. Braided Bun With a Clean Center Part
Two braids. One bun. A very Regency center part.
This style is useful when you want something more dressed up than a simple knot but less elaborate than a heavily ornamented evening coiffure. The center part keeps it period-friendly, the braids add detail, and the bun gives the shape enough weight to hold curly hair securely.
How the Structure Comes Together
- Make a clean center part from forehead to crown.
- Braid each side back toward the nape or just behind the ears.
- Gather the braid ends with the remaining hair into a low bun.
- Pin the bun close to the head so it stays neat from the side.
- Add a comb, pearl pin, or slim ribbon if the outfit calls for it.
The braids help with thick hair because they create control where curls might otherwise puff out too much. If your hair is very layered, braid a little looser and pin the shorter pieces underneath. That keeps the bun from looking patchy.
This is a good choice for evening wear or any dress with a higher neckline. It has enough order to support a formal outfit, but it still lets the curls show through at the edges.
11. Profile Curls With a Bandeau or Ribbon

A narrow band across the head changes everything. It draws the eye to the center part, keeps the crown tidy, and gives the curls at the sides a clear frame to sit inside.
This is one of the most portrait-like looks in the bunch. Think of a slim bandeau, a ribbon, or a soft band resting just behind the hairline. Under it, the curls can be gathered low or left partly loose. The key is that the accessory sits as part of the hairstyle, not as an afterthought pinned on top of it.
Silk ribbon feels delicate. Velvet reads richer. A matte band can be kinder if your hair is very textured and you do not want the accessory to slide all day. Pick one focal point and stop there. A band, a bun, and a feather all at once can tip the look into costume-shop excess.
The Best Parts to Leave Visible
- The center part.
- One or two curls at the temples.
- The curve of the bun or coil underneath.
- The sides of the hair near the ears.
This style is especially good if you want the hair to support a necklace, a fitted bodice, or a very clean neckline. It keeps the face open and the profile sharp, which is exactly what a good Regency silhouette should do.
12. Formal Evening Knot With Veil or Plume
When the dress is fancier, the hair can be, too. This is the version I’d save for a formal dinner, a portrait-style event, or any moment when the rest of the outfit asks for a little more presence.
The base is still familiar: a low or mid-height knot, a smooth part, and curls left near the face or ears. The difference is in the finish. A sheer veil, a small plume, a jeweled comb, or a tucked ribbon can shift the whole thing from daytime softness to evening drama. The trick is to choose one ornament and let it lead.
Keep One Focal Point
If the veil is in place, keep the comb simple. If the comb is ornate, let the ribbon stay quiet. Too many pieces fighting for attention makes the style heavier than it should be.
Curly hair handles this look well because the texture gives the knot body. A straight style often needs padding or extra teasing to reach the same richness, but curls come with their own volume. That means the ornament can sit lightly on top instead of dragging the whole shape down.
The hairstyle should still feel airy when you turn your head. That is the part people miss. Regency evening hair was polished, yes, but it was rarely hard. A little softness around the edges keeps it elegant instead of overbuilt.
If you want one rule to keep in mind, it is this: shape first, ornament second. Get the knot right, let the curls sit where they want to sit, and then add the final piece that makes the outfit feel finished. That order saves you from a lot of fiddling, and fiddling is usually where a good style goes sideways.