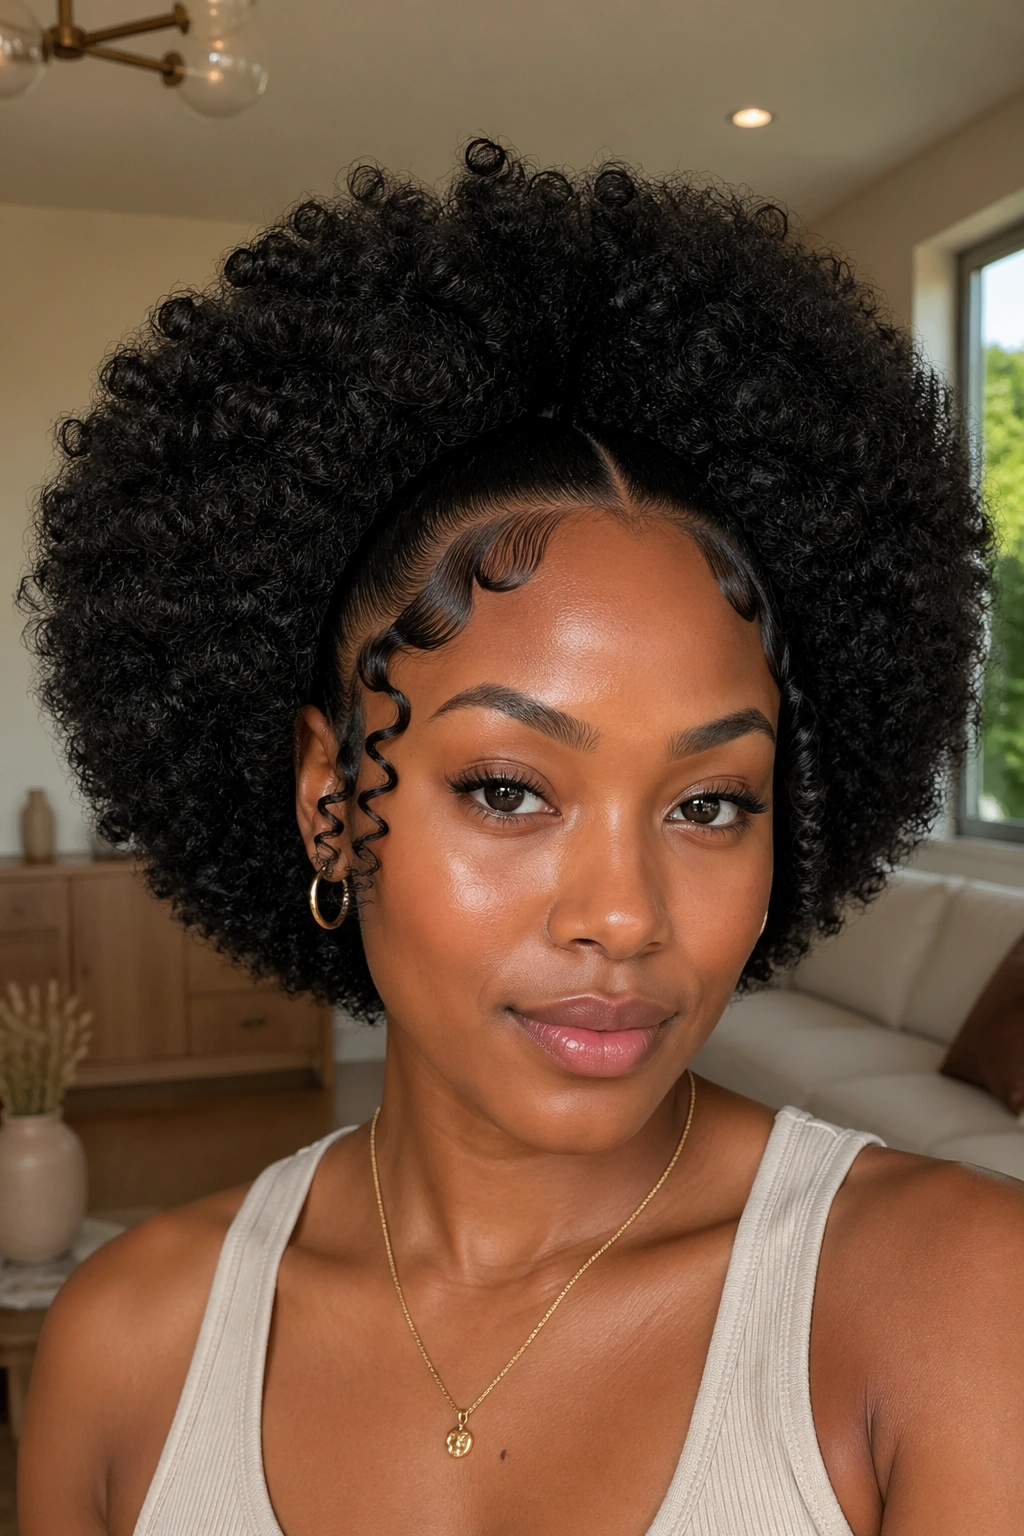
Medium-length afro hair sits in that sweet spot most people either love or quietly resent. Long enough to do something interesting, short enough that gravity isn’t working against you all day. Afro curl styles for medium length hair get a lot of attention for exactly that reason — you have real options without needing a yard of hair to pull them off. The shrinkage that drives some women absolutely mad is actually working in your favor here, giving your styles dimension and volume that longer hair sometimes loses.
The medium range — roughly shoulder to just below collarbone when stretched — opens up styles that wouldn’t survive on shorter hair and wouldn’t sit right on longer. Twist-outs bloom wider. Frohawks stand taller. Protective styles frame the face without swallowing it. Getting here requires understanding what your curl pattern is actually doing versus what you want it to do.
What “Medium Length” Actually Means for Afro Hair
Here’s the thing nobody says clearly: medium length looks wildly different depending on your shrinkage factor. A woman with 4C hair might have eight inches of stretched length that sits as a tight three-inch puff. A woman with 3B curls might have seven inches that falls to just past her shoulders. Both are technically medium-length. Both require completely different approaches.
Before you decide which styles work for you, spend five minutes with a stretched strand and a ruler. Know your actual stretched length. Know your shrinkage percentage — it’s usually somewhere between 40 and 75 percent for 4A through 4C hair. That number tells you what to expect when a style is wet versus dry, and it saves you from chasing looks that will shrink four inches shorter than you planned.
Defining Your Curl Pattern Before Anything Else
Most naturals are a blend. You might have 3C at your nape, 4A at your crown, and 4B everywhere in between. Styling for the tightest section protects the whole head. If your 4C patches are dry, your 3C sections won’t look their best no matter what product you throw at them.
Moisture is the foundation. Not oil — moisture. Water first, then a leave-in, then a styler, then oil to seal. Every style on this list works better when that order is honored.
Tools and Products That Make Medium-Length Styles Work
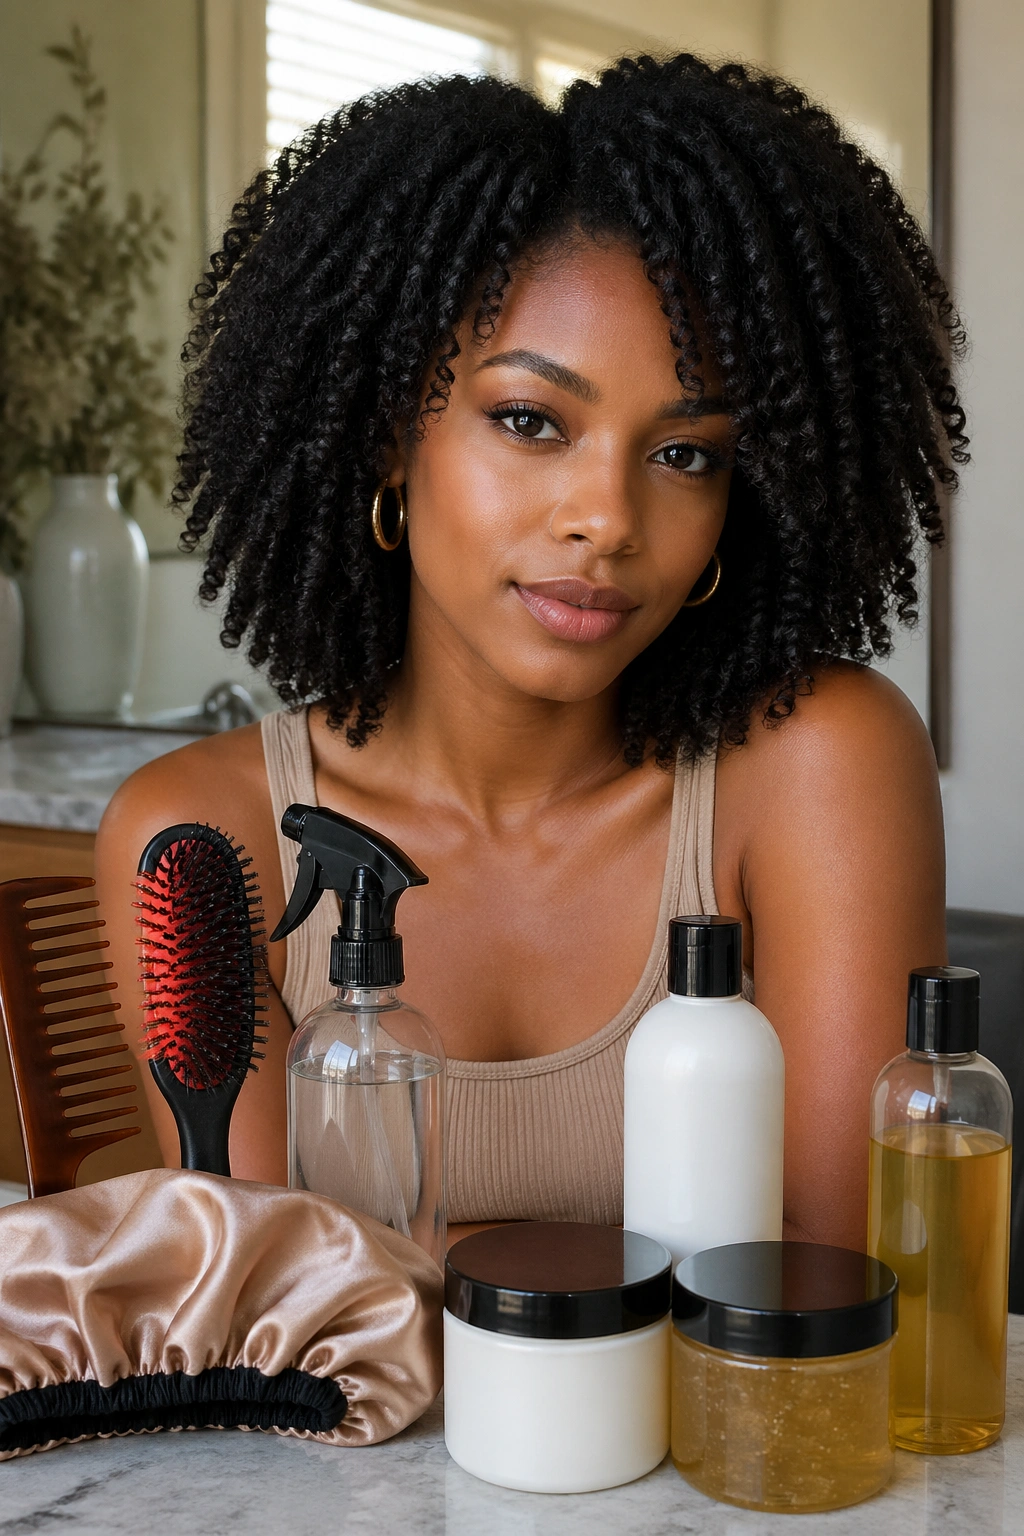
You do not need a lot. But you do need the right things.
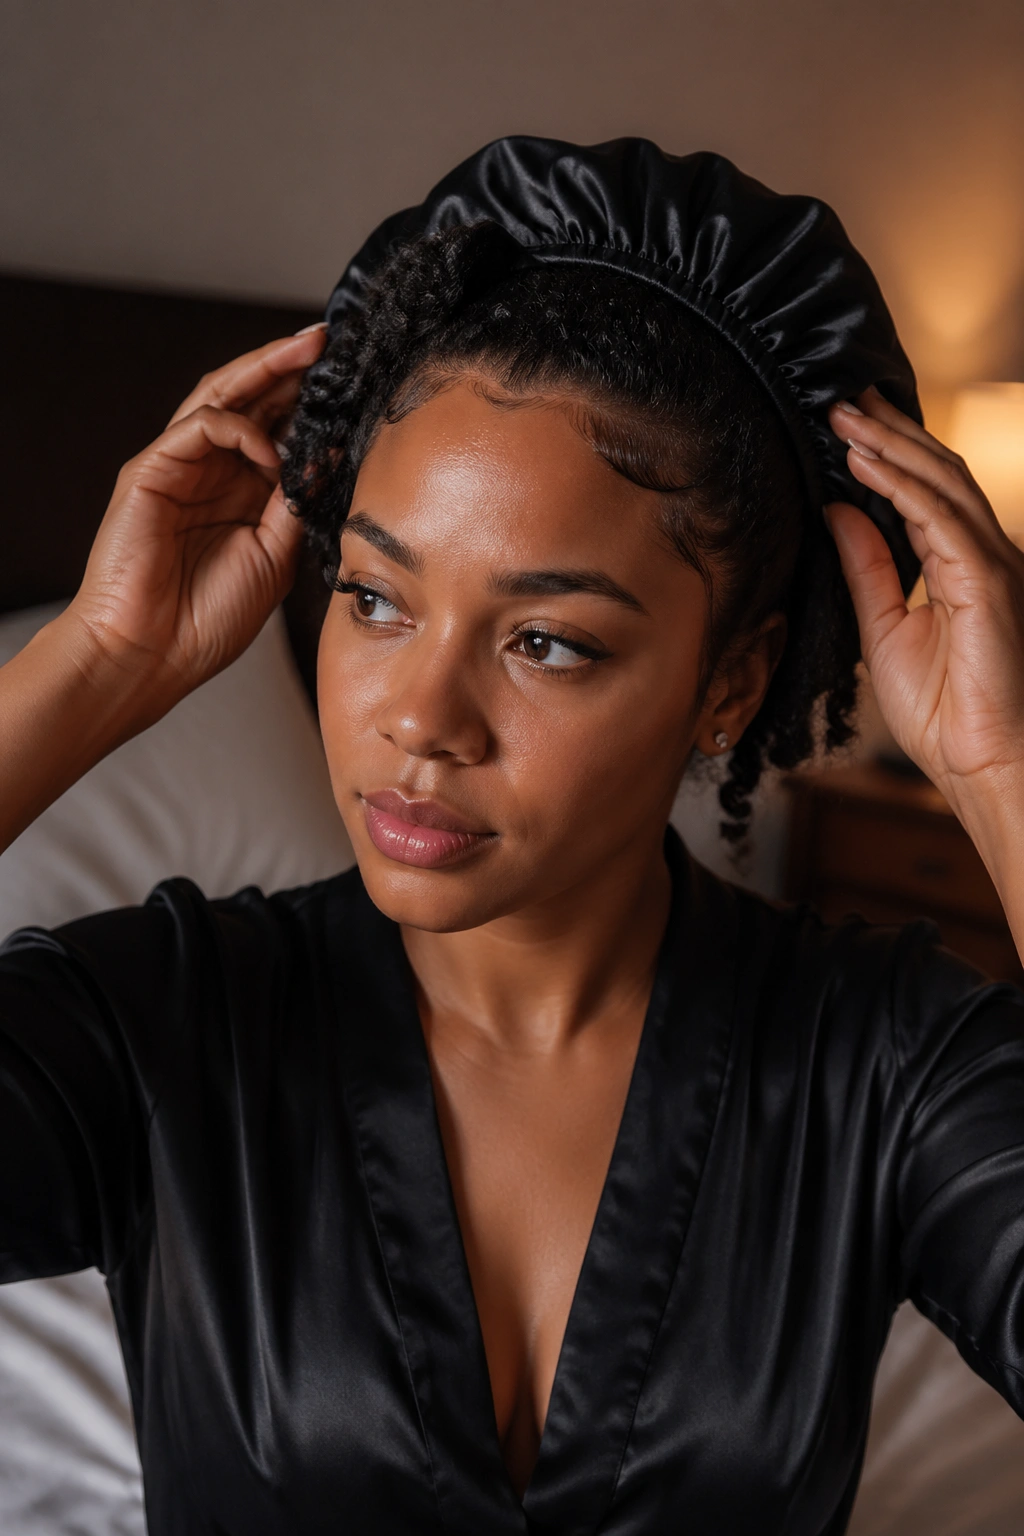
A wide-tooth comb and a Denman brush cover most detangling and curl-defining work. A spray bottle with plain water — or water mixed with a few drops of aloe vera juice — gives you the control to dampen small sections without soaking everything. A satin or microfiber bonnet handles overnight protection.
For products, a lightweight leave-in (something that doesn’t feel sticky or heavy after it dries) pairs with a curl cream or pudding for definition work, and a light gel for hold when you need it. The gel should be thick enough to hold its shape in the jar — if it pours like water, it won’t give you the hold medium-length hair needs without going stiff and crunchy.
Avoid anything with heavy mineral oil near the top of the ingredient list. It coats rather than penetrates, builds up fast, and dulls curl definition within a couple of days.
The Shrinkage Factor: Working With It, Not Against It
Shrinkage is not the enemy. It is a sign that your hair is healthy and properly moisturized. Dry hair stretches out. Moisturized hair coils tight.
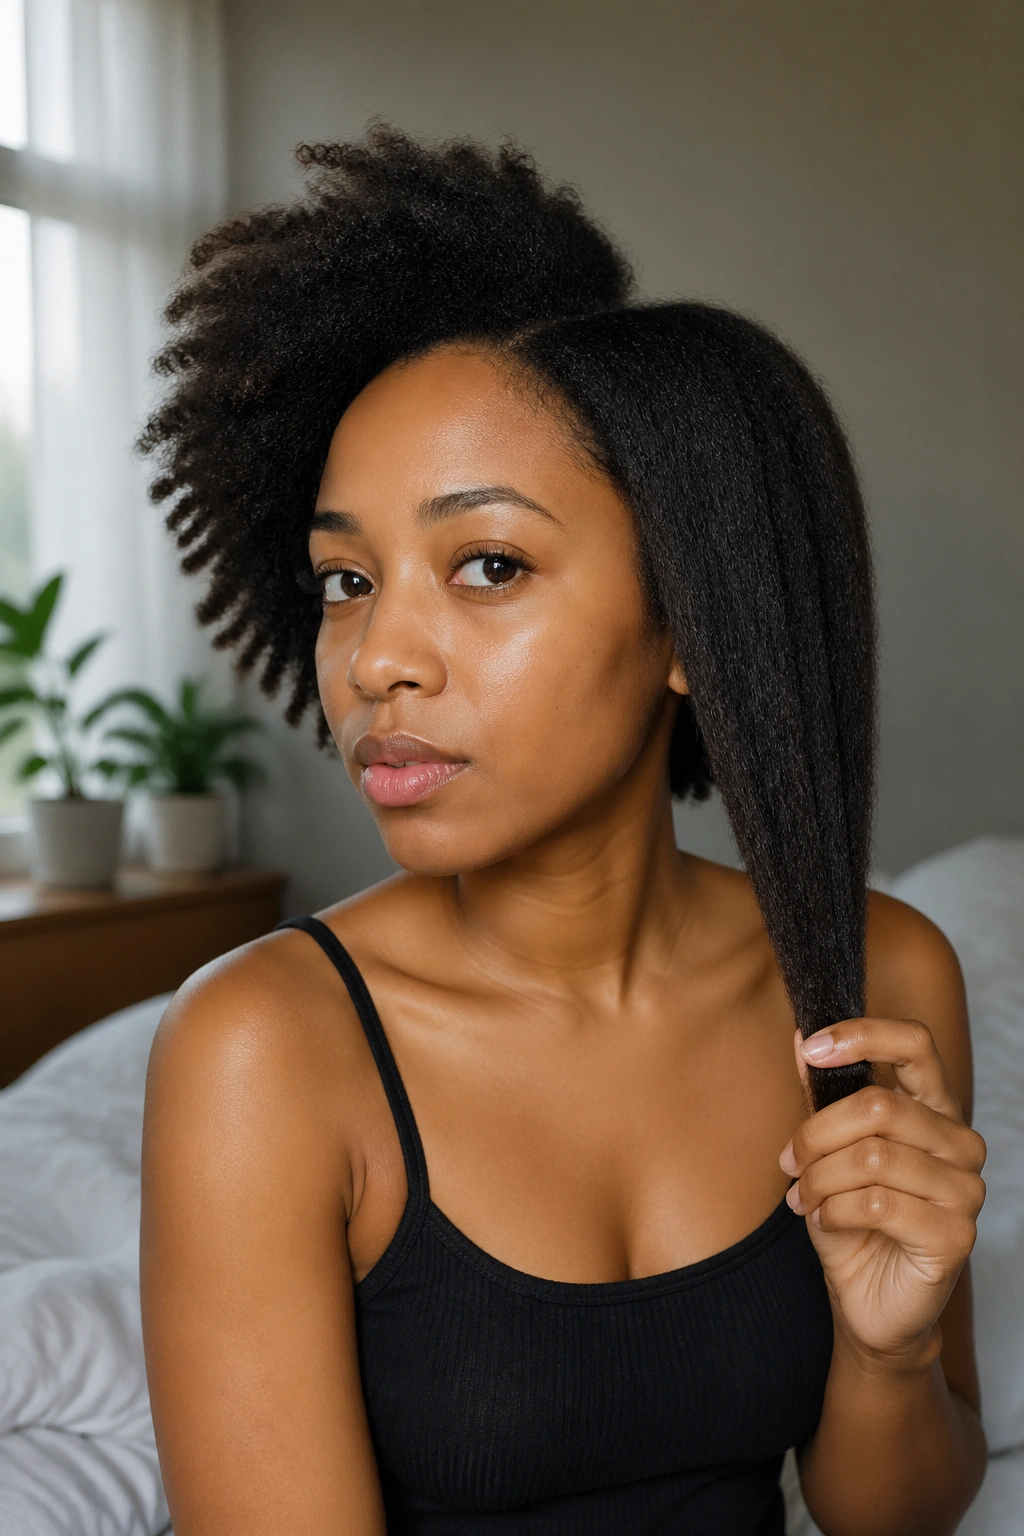
That said, there are times you want length to show — maybe for a job interview, maybe for a wedding, maybe just because you’re tired of looking like you have four inches of hair when you actually have ten. Stretching methods like banding, threading, or a loose braid-out give length without heat. They’re slower than a flat iron but they preserve your curl pattern.
When you’re working with styles that benefit from shrinkage, embrace it. A shrunken wash-and-go on medium-length 4C hair gives you a puff that looks lush and full. That same hair stretched would look thinner, flatter. Know what the style needs.
How Curl Definition Affects Which Styles Are Possible
Defined curls and undefined volume serve different purposes. Some styles depend on clean curl separation — every coil visible, the pattern uniform and consistent. Others work best when the hair is allowed to puff and merge, creating texture without distinct curl lines.
Curl definition comes from how you apply and distribute your products. Section work matters. Applying cream in large handfuls to unsectioned hair gets you volume but not definition. Applying it palm by palm through two-inch sections, finger-raking from root to end, gets you actual curl clumping. The difference is obvious once you’ve done it both ways.
Definition-heavy styles require more product and more time. Volume-based styles are faster. Know which you’re going for before you start — changing course mid-style usually just means starting over.
Before You Start: Prep That Actually Changes the Outcome
Wash day prep isn’t glamorous but it’s the thing most people shortcut. A detangling session before you shampoo — not after — removes shed hairs and loosens knots when there’s still some natural oil present. Detangling after shampoo, when hair is maximally swollen and rough at the cuticle, causes more breakage.
Pre-poo with a cup of conditioner or a few tablespoons of coconut oil applied to dry hair an hour before washing. It smooths the cuticle before the shampoo opens it, and the difference in softness after washing is real.
Deep condition every wash day. Not every other wash day. Every time. Medium-length hair that’s well-conditioned holds styles longer and starts the week at a higher moisture baseline. Skimping on this step costs you two or three days of good hair at the end of the week.
Now, into the styles.
1. Classic Wash-and-Go
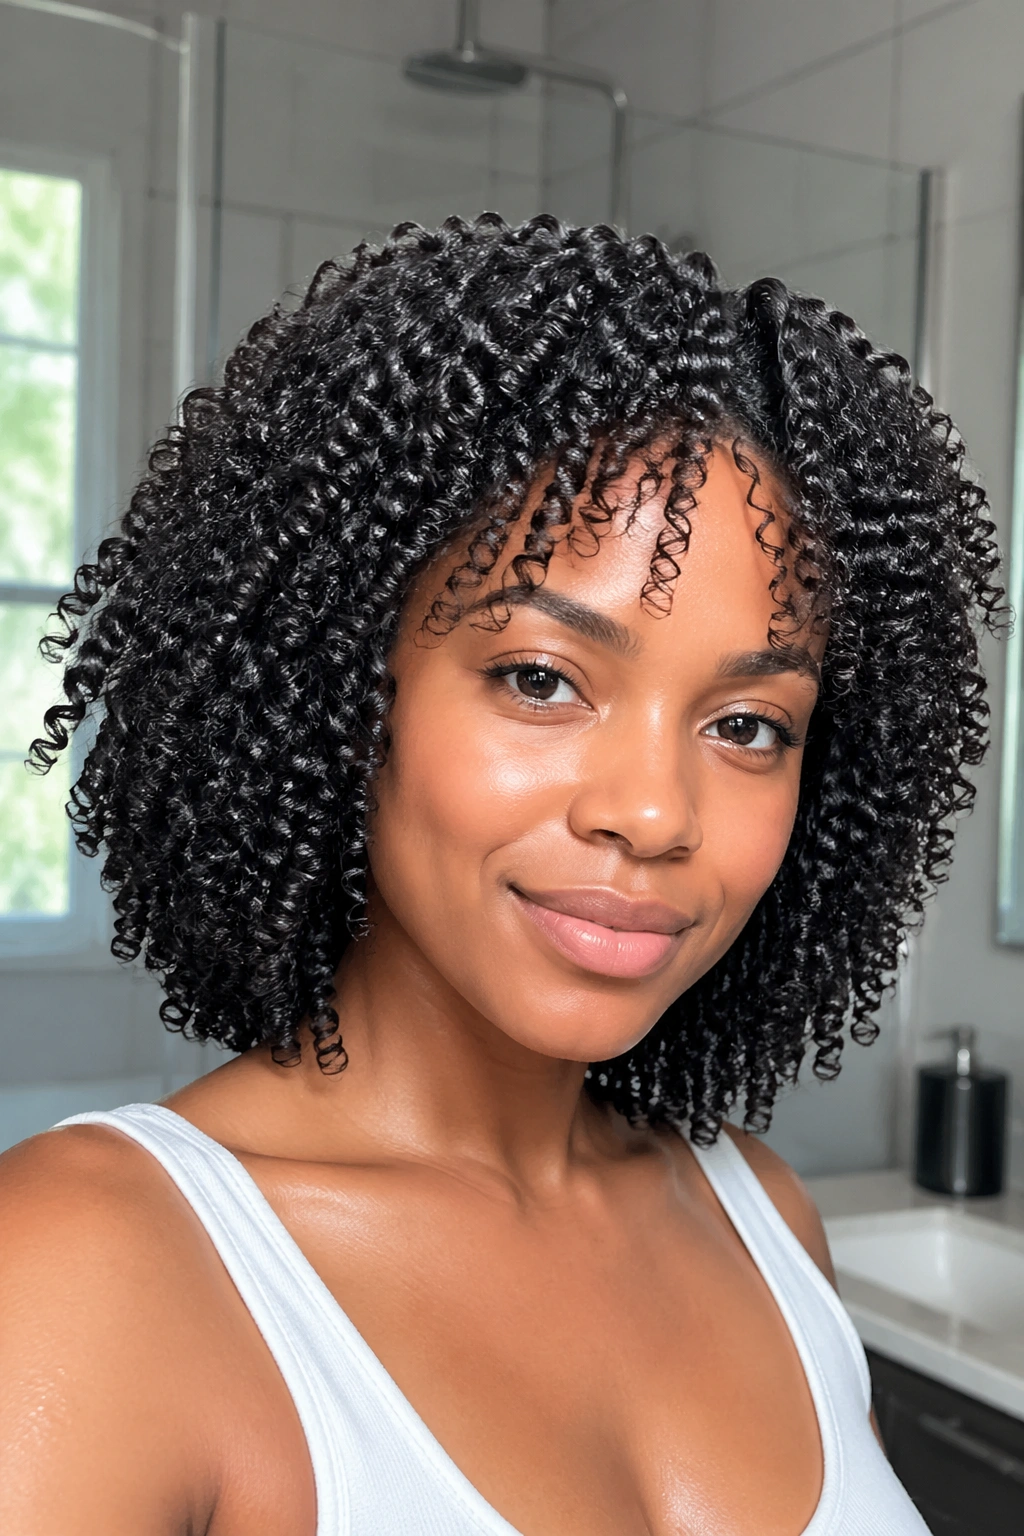
Few things feel as satisfying as a wash-and-go done right. It sounds simple — wash, apply product, go — but the execution separates the frizzy mess from the defined, bouncy result most people are chasing.
The key is applying your styler while the hair is absolutely soaking wet. Not damp. Dripping. Dry your hands on a towel, then rake a generous amount of curl cream or gel through a two-inch section, smoothing downward from root to tip. The water already in the hair thins the product just enough to distribute it evenly without you adding more.
Why It Works
Medium-length hair has enough weight to elongate the curls slightly during the drying process, which means less frizz from shrinkage pulling at the curl shape. Longer hair can weigh itself flat. Shorter hair doesn’t have enough product surface area for real clumping. Medium hits the middle.
Dry under a diffuser on low heat, or let it air dry if you have time. Don’t touch it until it’s fully dry — not 90 percent, fully. Touching too early disrupts the gel cast and lets frizz in.
The tip most people skip: Once it’s completely dry, scrunch the hair gently with a small amount of hair oil to break the cast without losing definition.
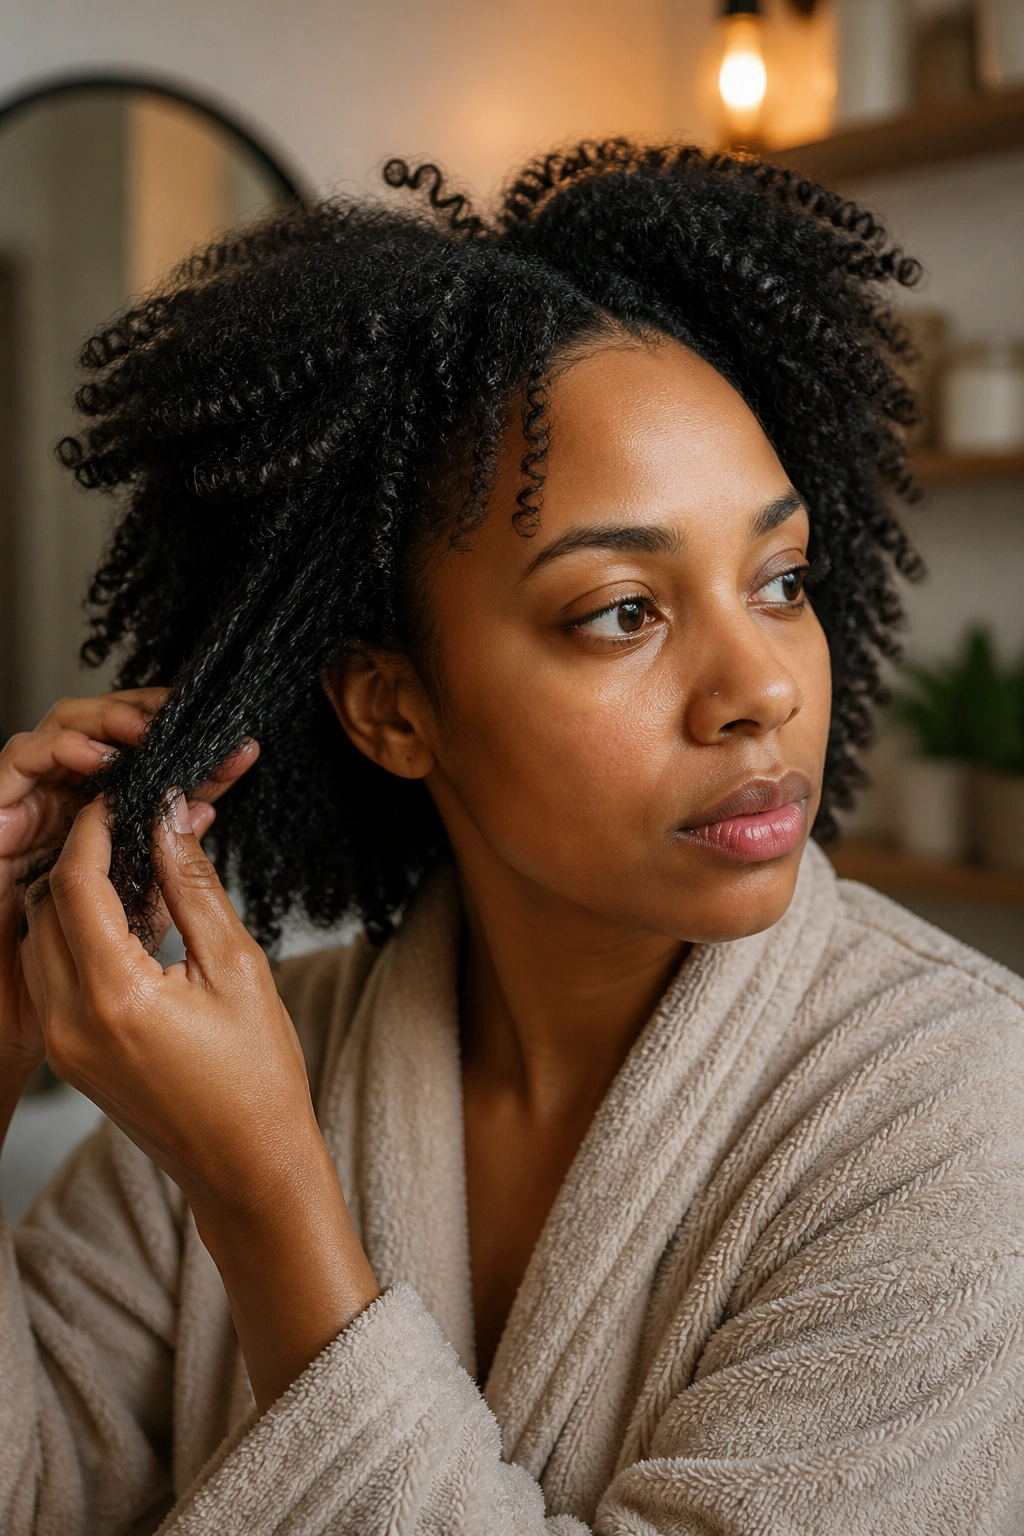
2. Two-Strand Twist-Out
The twist-out is one of the most reliably beautiful things you can do with afro curl hair, and it rewards patience. This is a style that genuinely looks better if you leave it overnight.
Start on freshly washed, conditioned hair — still damp, not wet. Apply a creamy leave-in, then a curl cream or butter. Part into sections. Twist each section tightly, spiraling the two strands around each other right down to the ends. Secure if needed.
Leave it alone. Overnight minimum. Two nights is better if you want the pattern really set. Untwist each section slowly, separating from the ends upward. Use a tiny bit of oil on your fingers to prevent frizz as you pull them apart. Fluff at the roots only — not through the length.
What Makes It Different
The twist-out pattern on medium-length hair has a wave to it that you don’t get on short hair (not enough length for the pattern to form) or very long hair (the weight collapses the wave). You’re in the sweet spot here.
Bold fact: If your twist-out is frizzy the first day, a misting of water and a tiny bit of cream can refresh it — but the days-two-and-three results are often cleaner than day one.
3. Braid-Out on Natural Hair
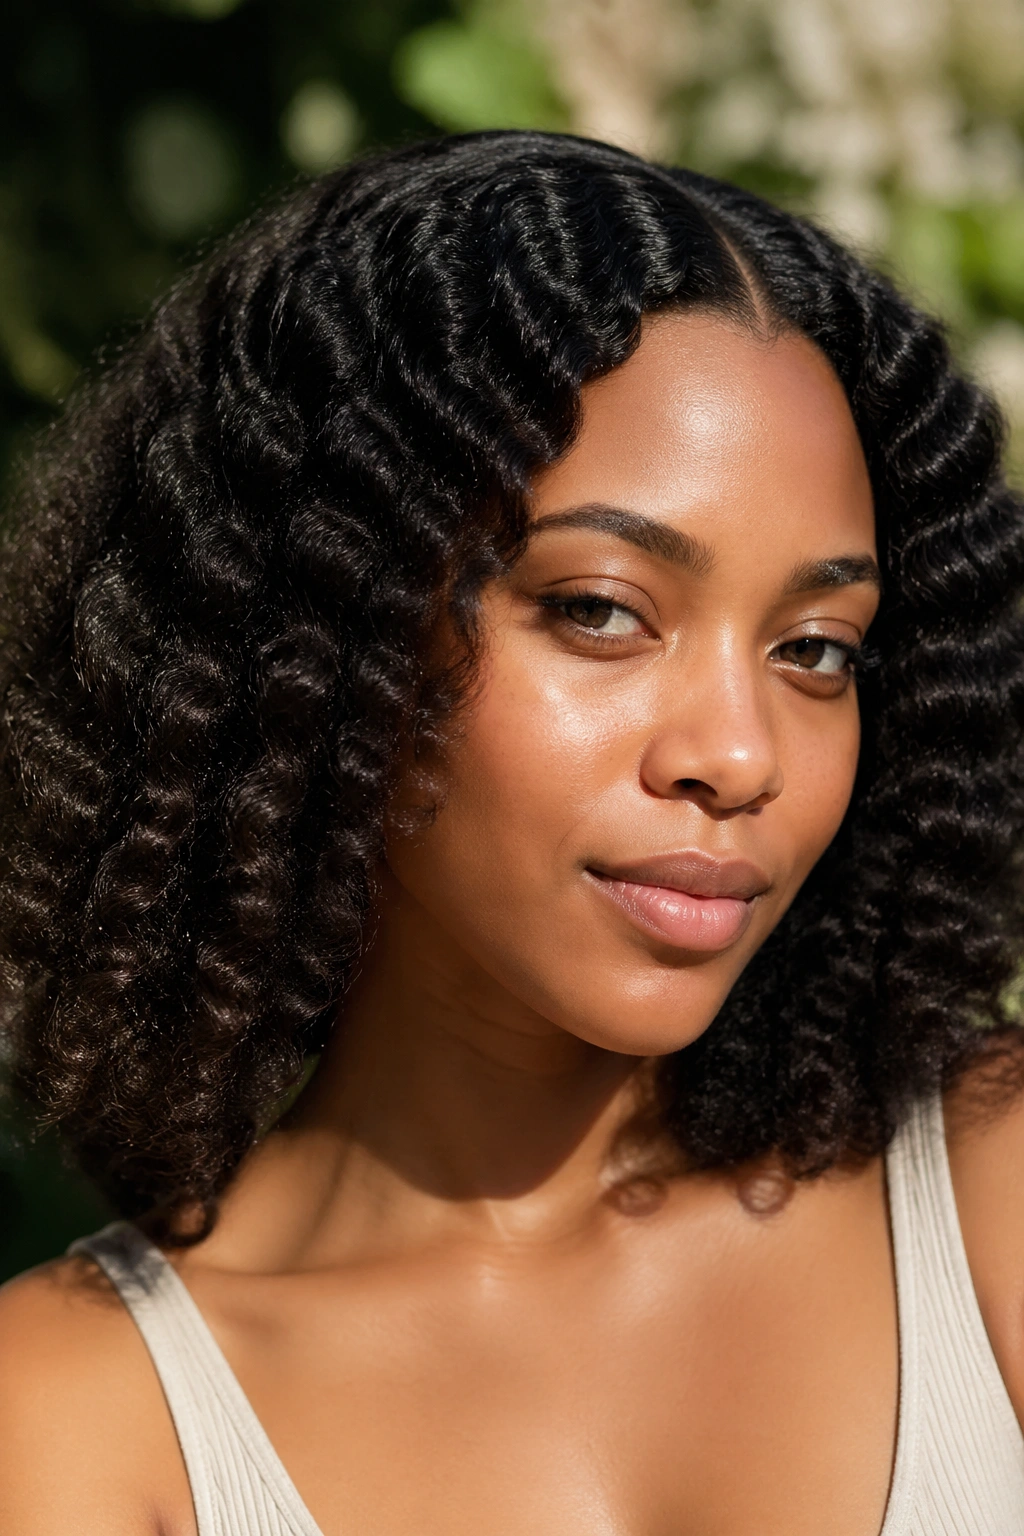
Braid-outs give a looser, more elongated wave than twist-outs. The three-strand braid creates a crimp pattern rather than a spiral, which makes the resulting style feel bigger and more open. If you want volume without as much definition, this is often the better call.
The prep is identical to a twist-out: damp hair, leave-in, styler. The difference is that you braid instead of twist. The size of the braid determines the size of the wave — thicker braids, bigger looser waves; smaller braids, tighter more defined crimps. On medium-length hair, braids about the thickness of your thumb usually give the most flattering result.
Unravel the same way — slowly, from the ends upward, with a tiny bit of oil on your fingertips. Separate just a little, then fluff the roots with your fingers.
This works beautifully on 3C through 4C hair. The stretchier your curl pattern, the more braid elongation you’ll get. A 4B braid-out won’t look exactly like a 3C braid-out, but both versions are excellent.
4. Flat Twist-Out
The flat twist is the cousin of the cornrow and the regular twist, sitting somewhere between both. Flat twists lie against the scalp in a pattern — you guide them during the twisting — which means the style you create while the hair is wet becomes the base for the style you wear when it’s dry.
For a flat twist-out, decide on your parting pattern first. Diagonal sections from forehead to nape? Side sweeping sections? The parts become visible when the style is done, so they matter. Once the hair is damp and product-loaded, flat twist each section, keeping tension consistent. Allow to dry completely.
How to Get the Most From It
Flat twist-outs on medium-length hair can last three to four days if you wrap in a satin scarf at night and spritz lightly in the morning. The pattern compresses a bit by day two, but often looks more polished then than it did on day one. The wild flyaways from day one settle.
The edges benefit from a little extra attention here — a firm edge gel applied with an edge brush right after you finish the twists, before everything dries, gives you a clean perimeter without effort.
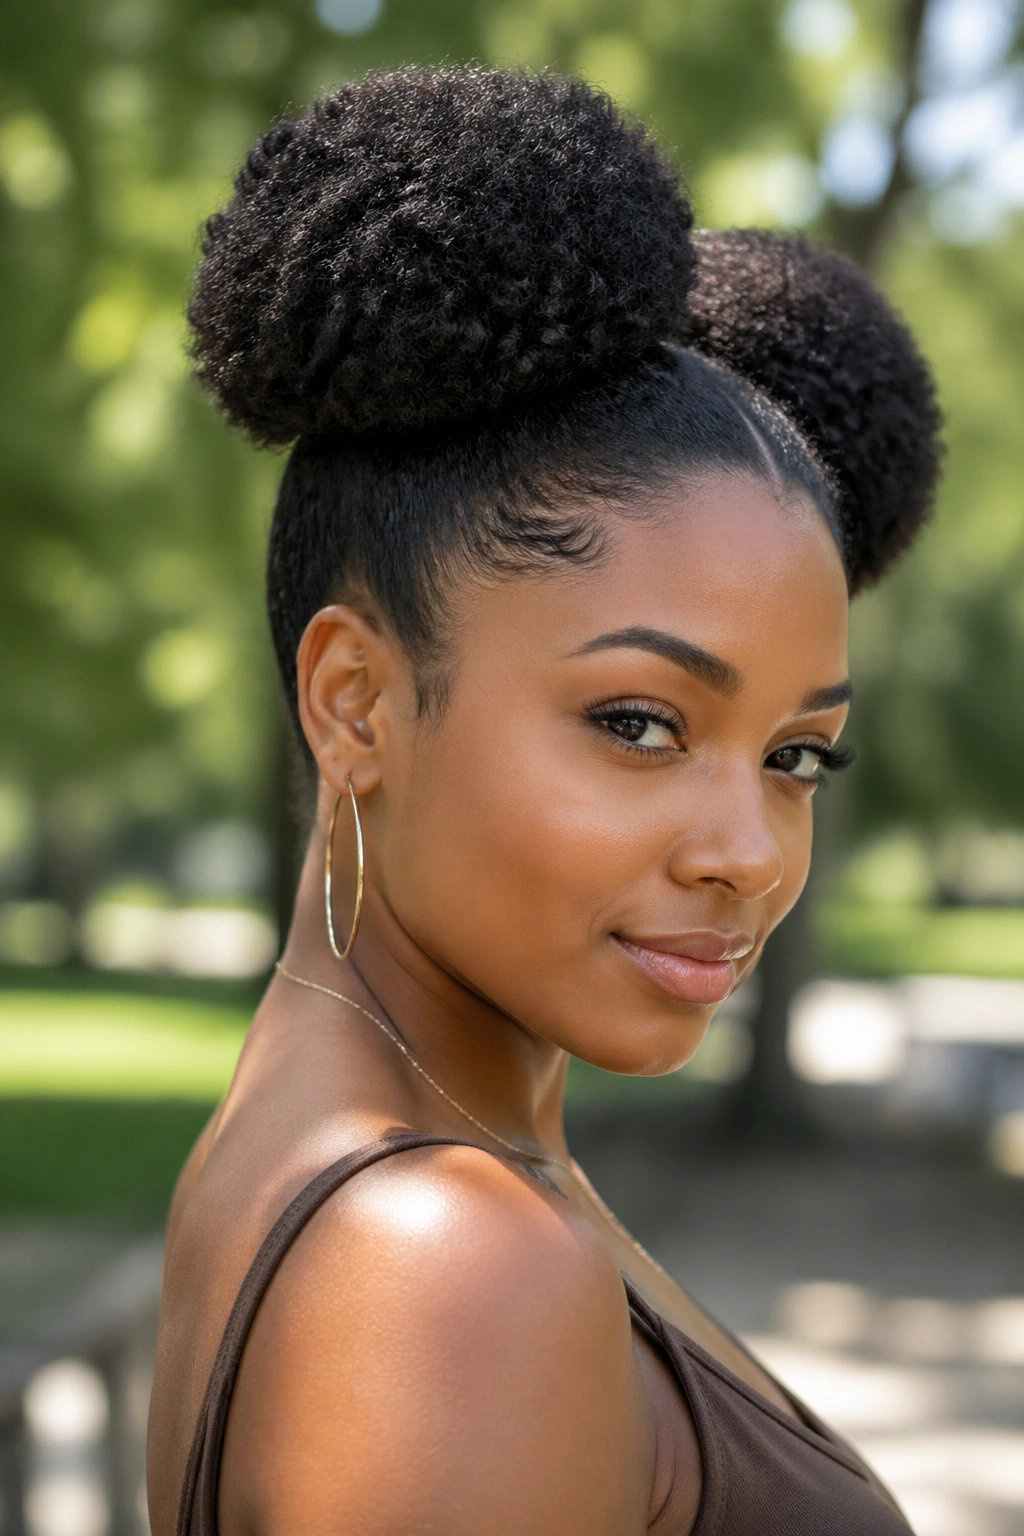
5. High Puff
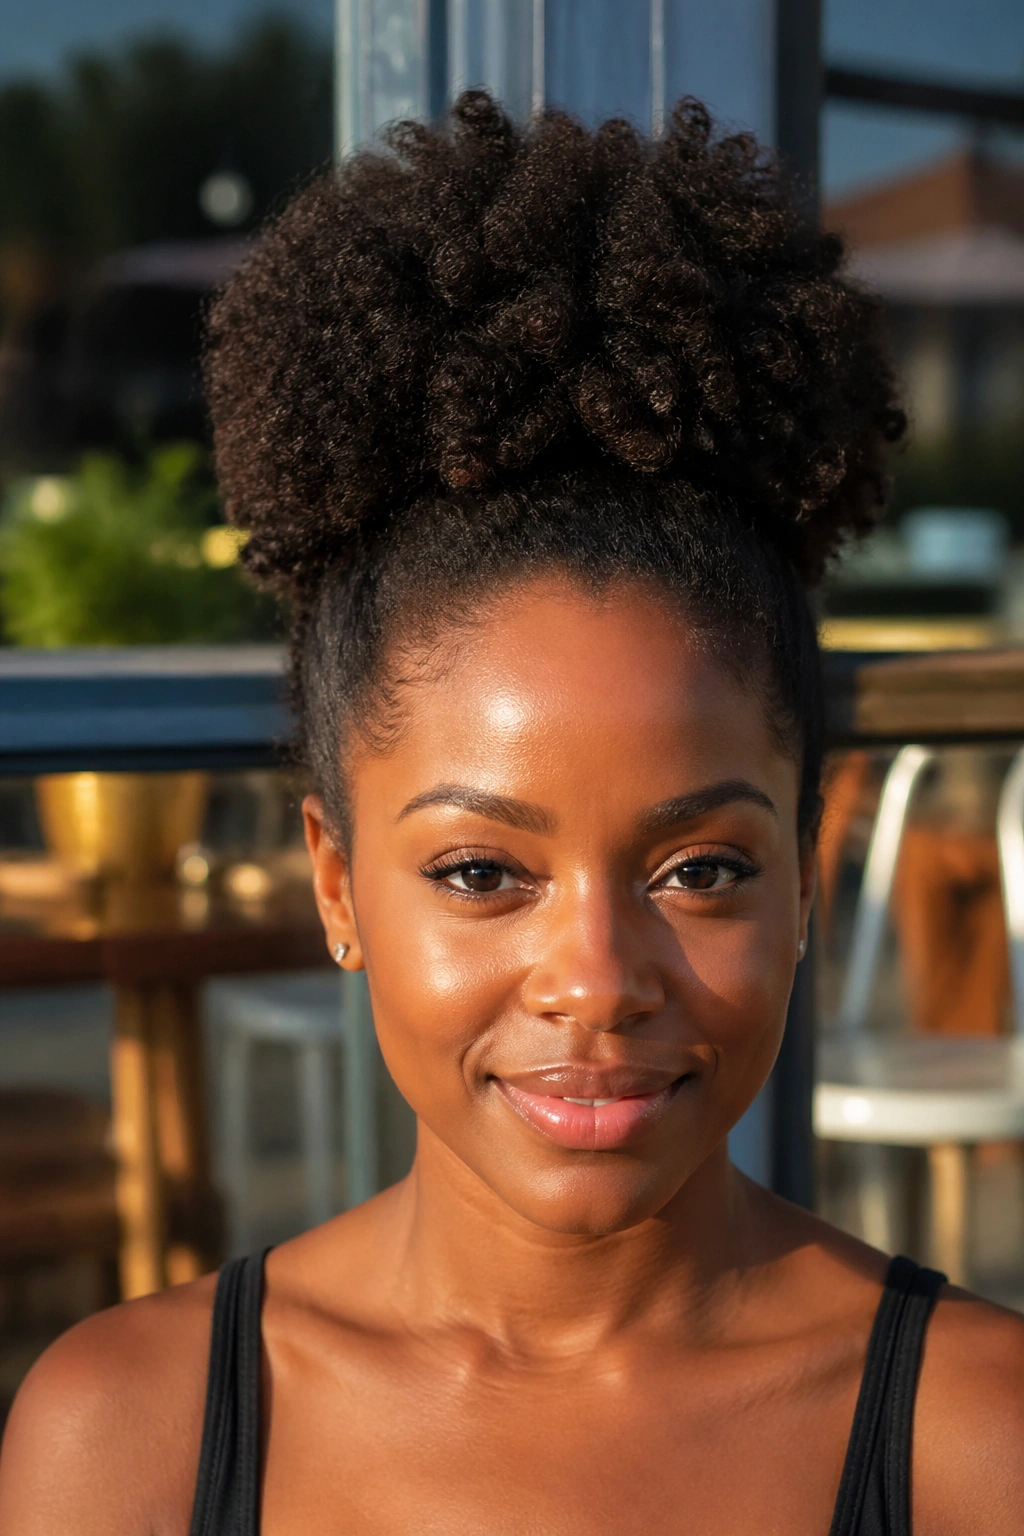
This is the workhorse style. Dirty hair day, running late, nothing is working — the high puff saves you every time. And on medium-length hair, it looks intentional rather than desperate.
Gather all the hair toward the crown. A satin-lined hair tie works better than a regular elastic — less breakage at the nape where hair is often thinner. You don’t need to brush it smooth; the texture is the point. Smooth the edges with a small amount of edge gel and an edge brush, let them dry, and you’re done.
Four variations worth knowing: the high puff centered at the crown, the side puff (gathered above one ear), the doubled puff (two puffs side by side, which works better than it sounds), and the puff with a scarf — wrap a satin or silk scarf around the base of the puff and tie at the front. Instantly dressier.
The medium-length puff hits just above the top of the head, which is proportionally flattering for most face shapes. Very long puffs can look heavy. Very short puffs look more like a pom-pom. Medium is the flattering middle.
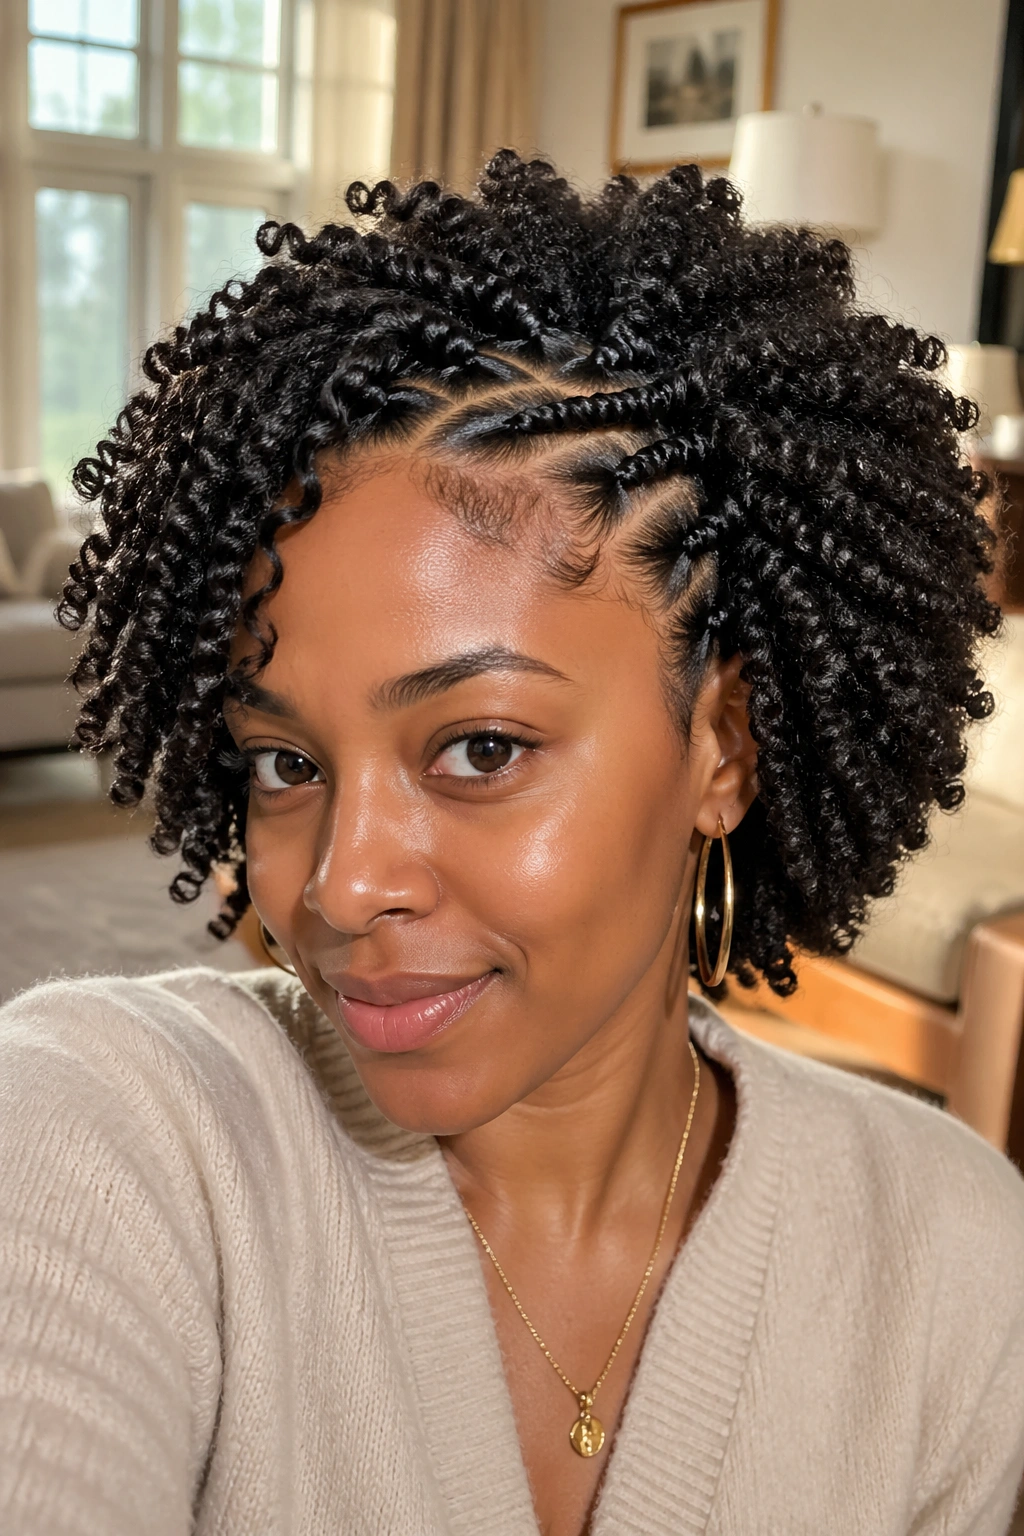
6. Bantu Knot-Out
Bantu knots as a style on their own get their own moment — tight, sculptural, bold. But the knot-out is the versatile workhorse. You wear the knots overnight, unwrap them the next morning, and have spiral-defined sections that don’t look anything like a twist-out or braid-out.
On medium-length hair, you’ll get maybe eight to twelve knots depending on how thick you part each section. Thicker sections create wider, more dramatic spirals. Thinner sections create tight, defined ringlets. Both are beautiful. The choice depends on the density of your hair — denser hair may not dry fully in the center of a very thick knot, which leaves the style damp and undefined at the core.
After unwrapping each knot, resist the urge to separate aggressively. Gentle separation from the bottom, a tiny bit of oil, and then a single fluff at the roots. Over-separating breaks up the curl definition you worked overnight to create.
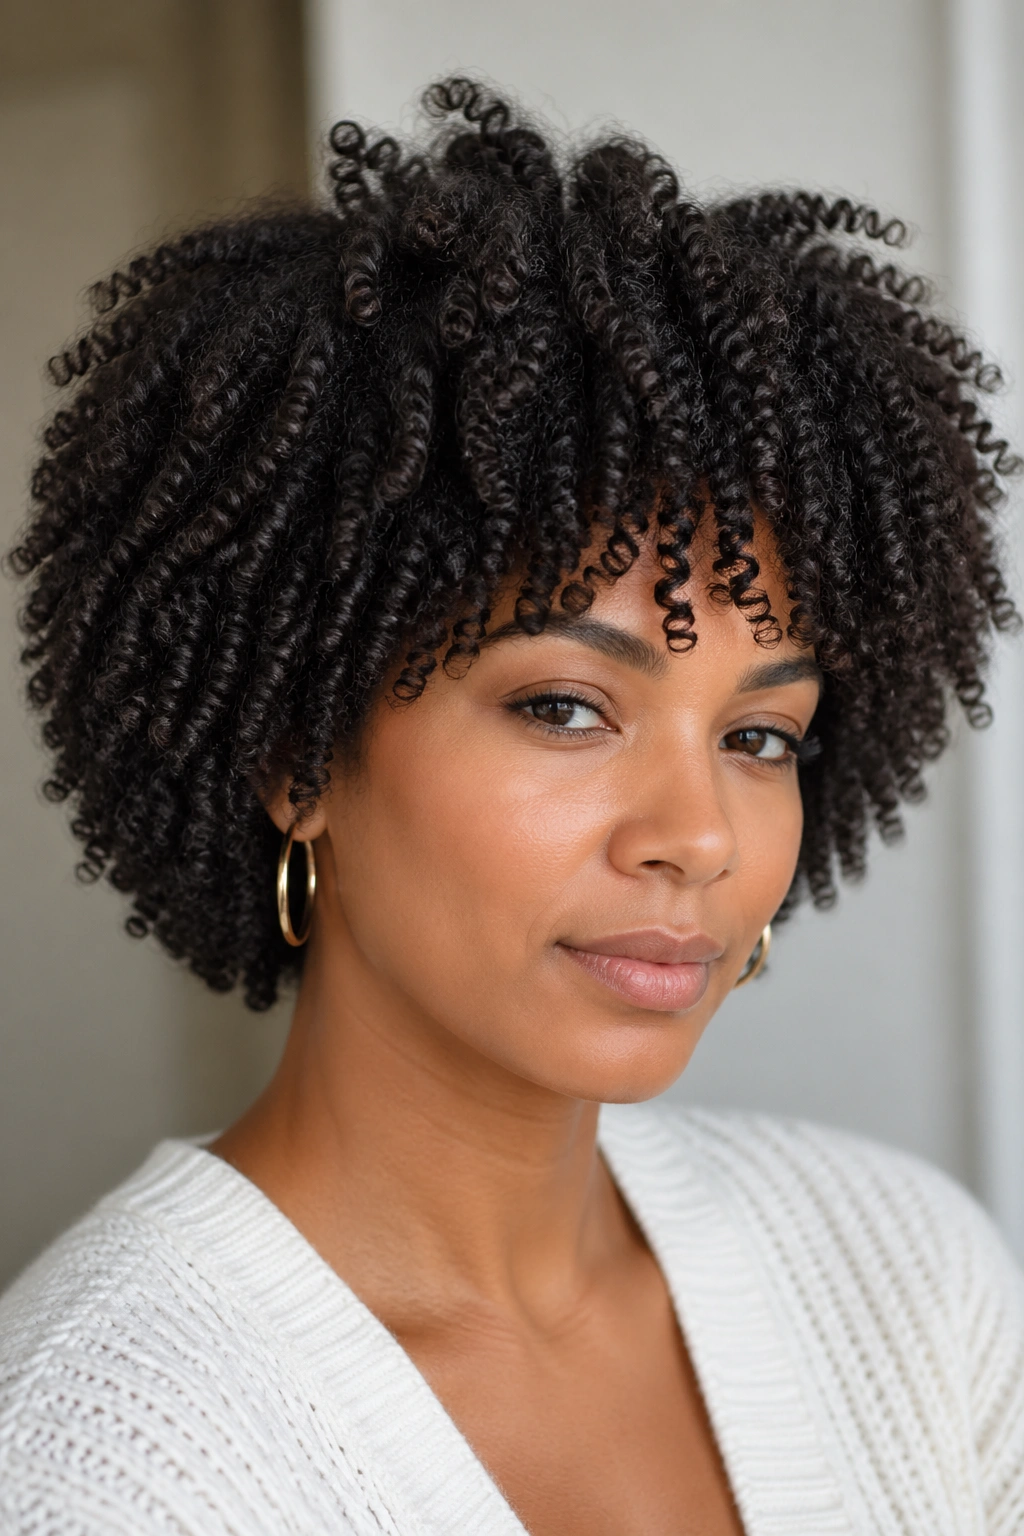
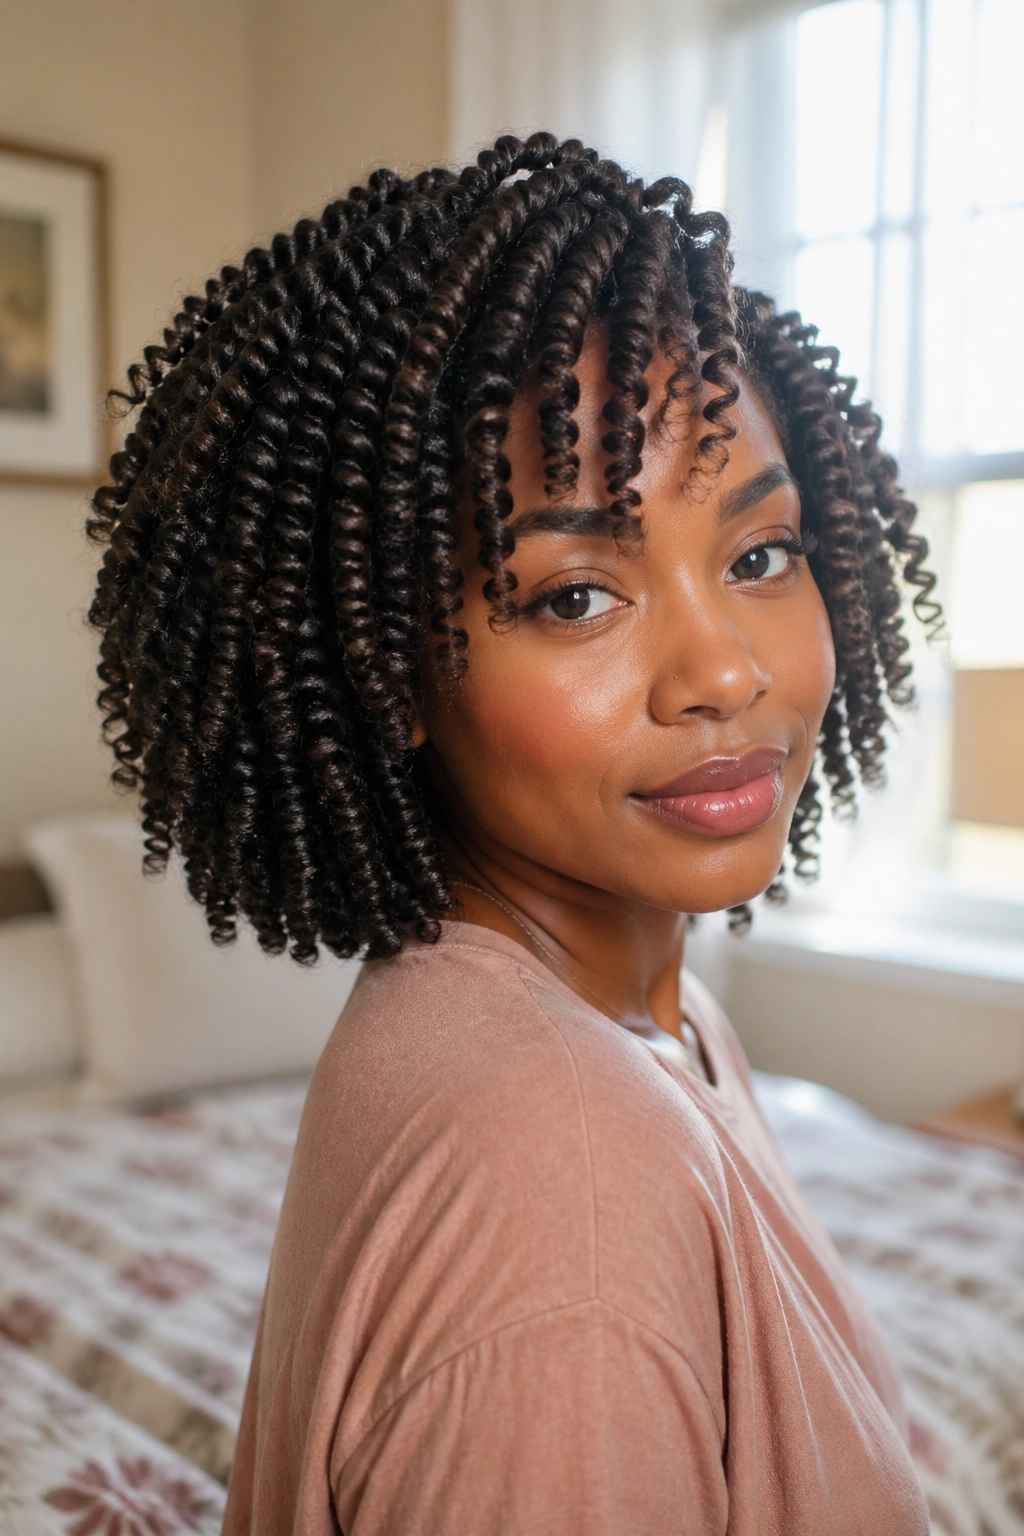
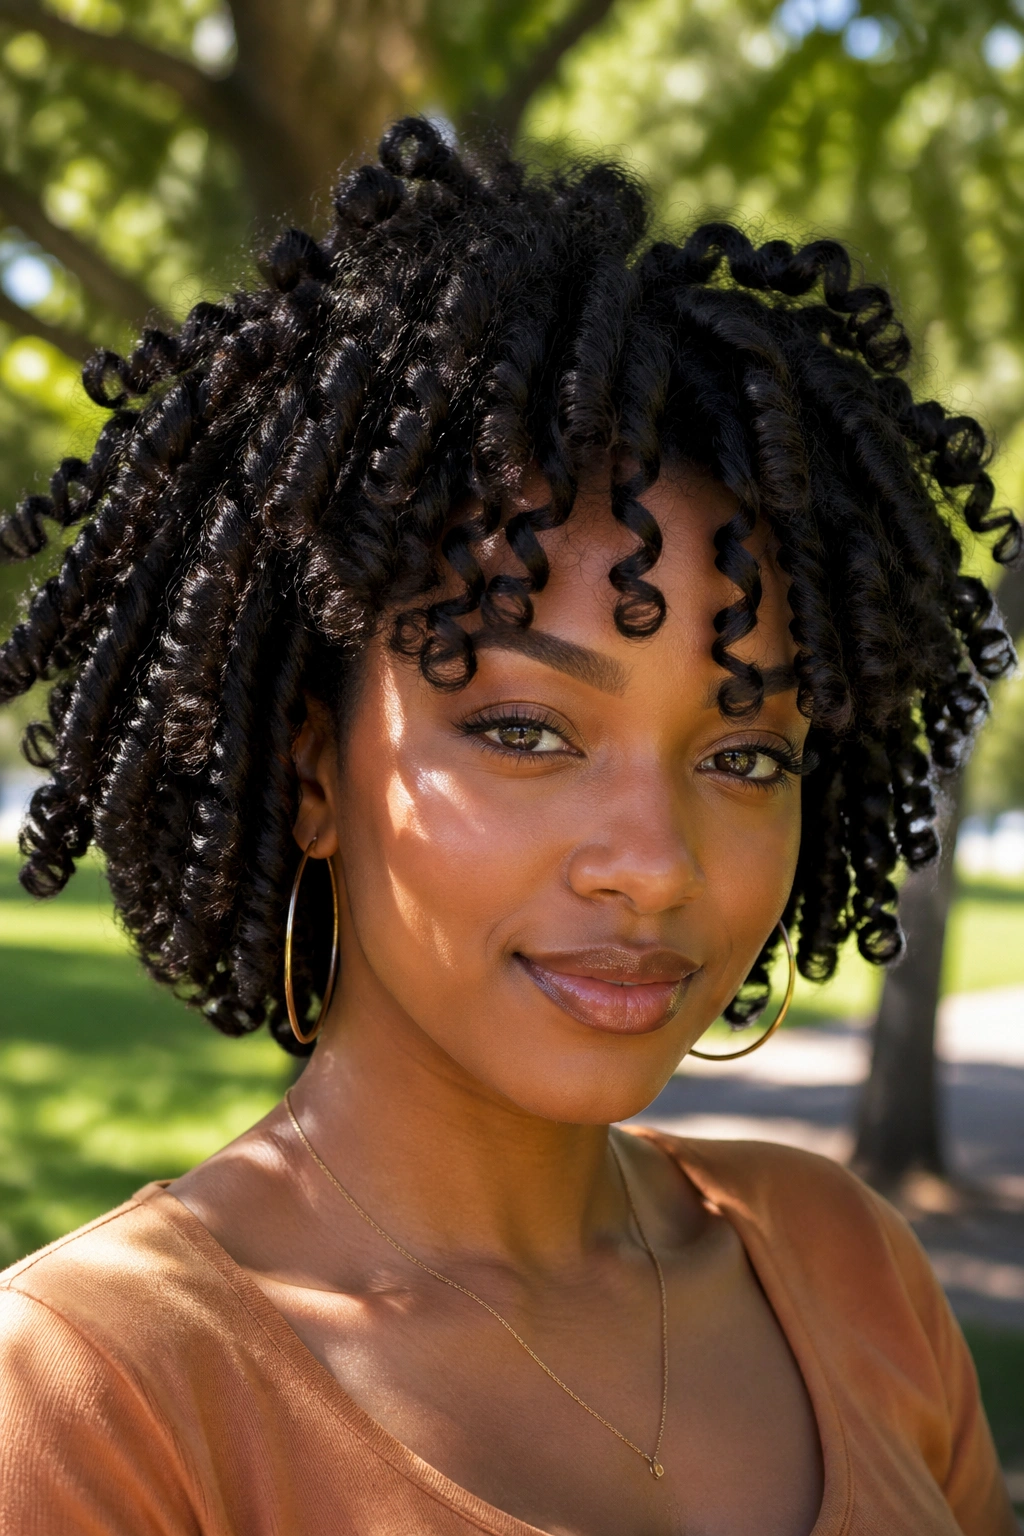
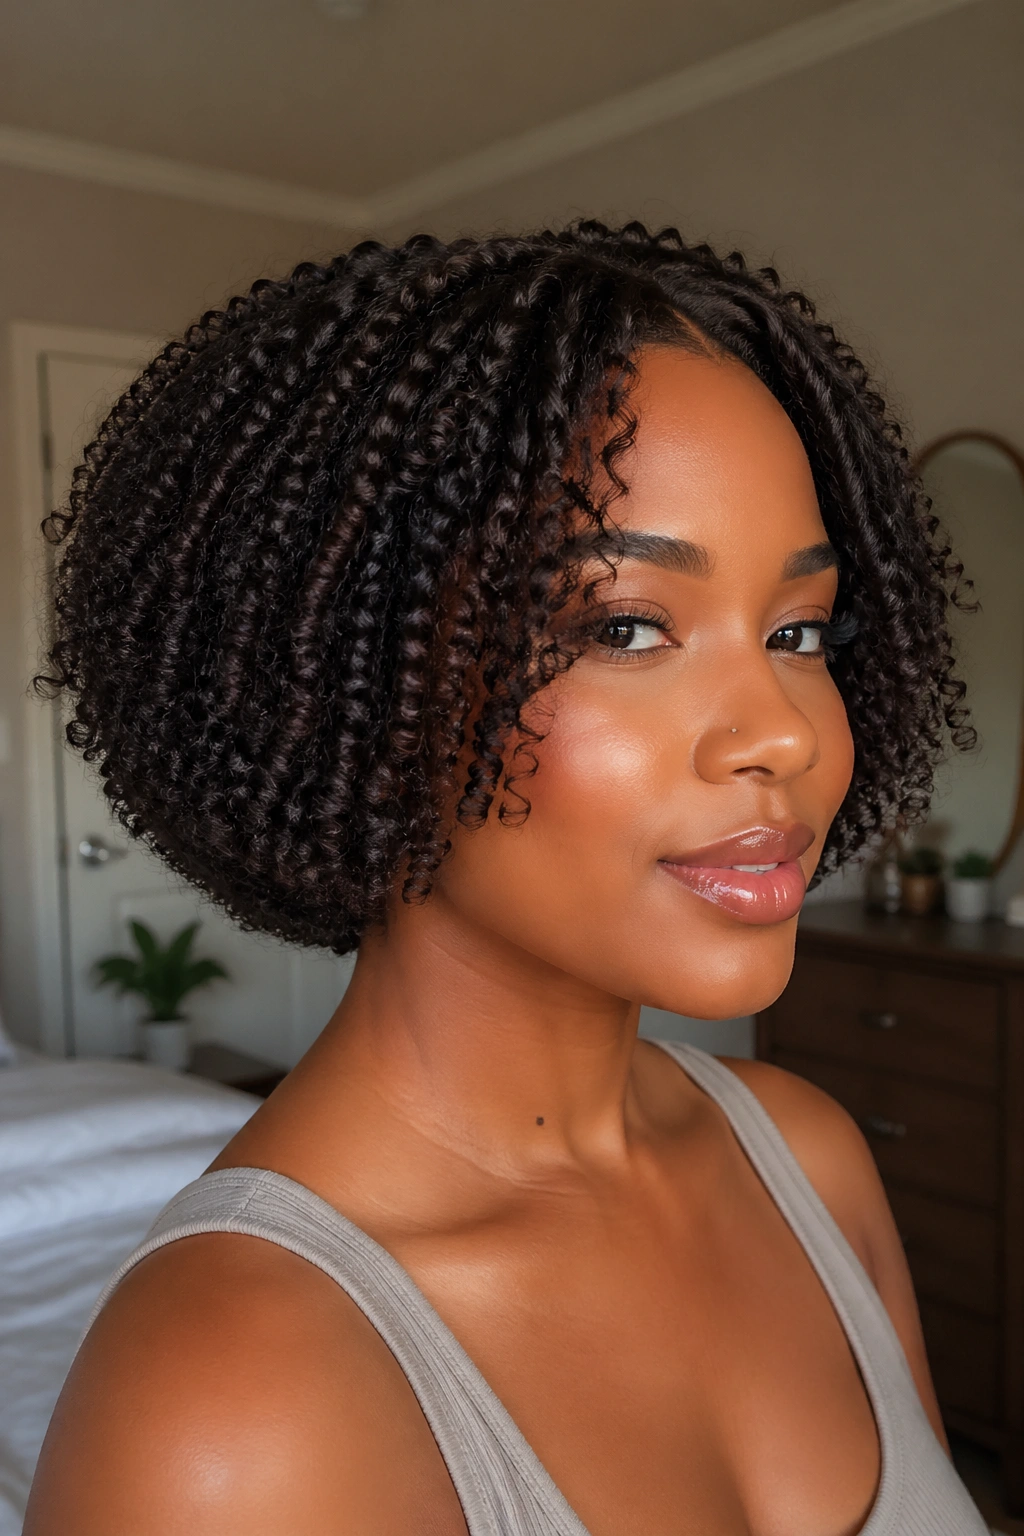
7. Finger Coils
Finger coils are time-consuming. Let’s just say that upfront. But the result — clean, uniform spirals that catch light like nothing else — is worth the hour it takes on medium-length hair.
Working on wet, fully product-coated hair, take a thin section and wrap it around one finger, spiraling downward from root to tip. Release slowly. Move to the next section. The spiral holds because the product (a gel or thick cream) is locking the hair into that shape as it dries.
The Catch
Medium-length hair has enough weight that the coils may stretch slightly as they dry, which is generally a good thing — it prevents that overly uniform, wig-like look. But if your hair is very fine or low-density, use a lighter product so the coils don’t weigh down too much.
Allow to air dry completely — diffusing can disrupt the coil structure if you’re not careful. Two to four hours, depending on thickness. The patience is the whole technique.
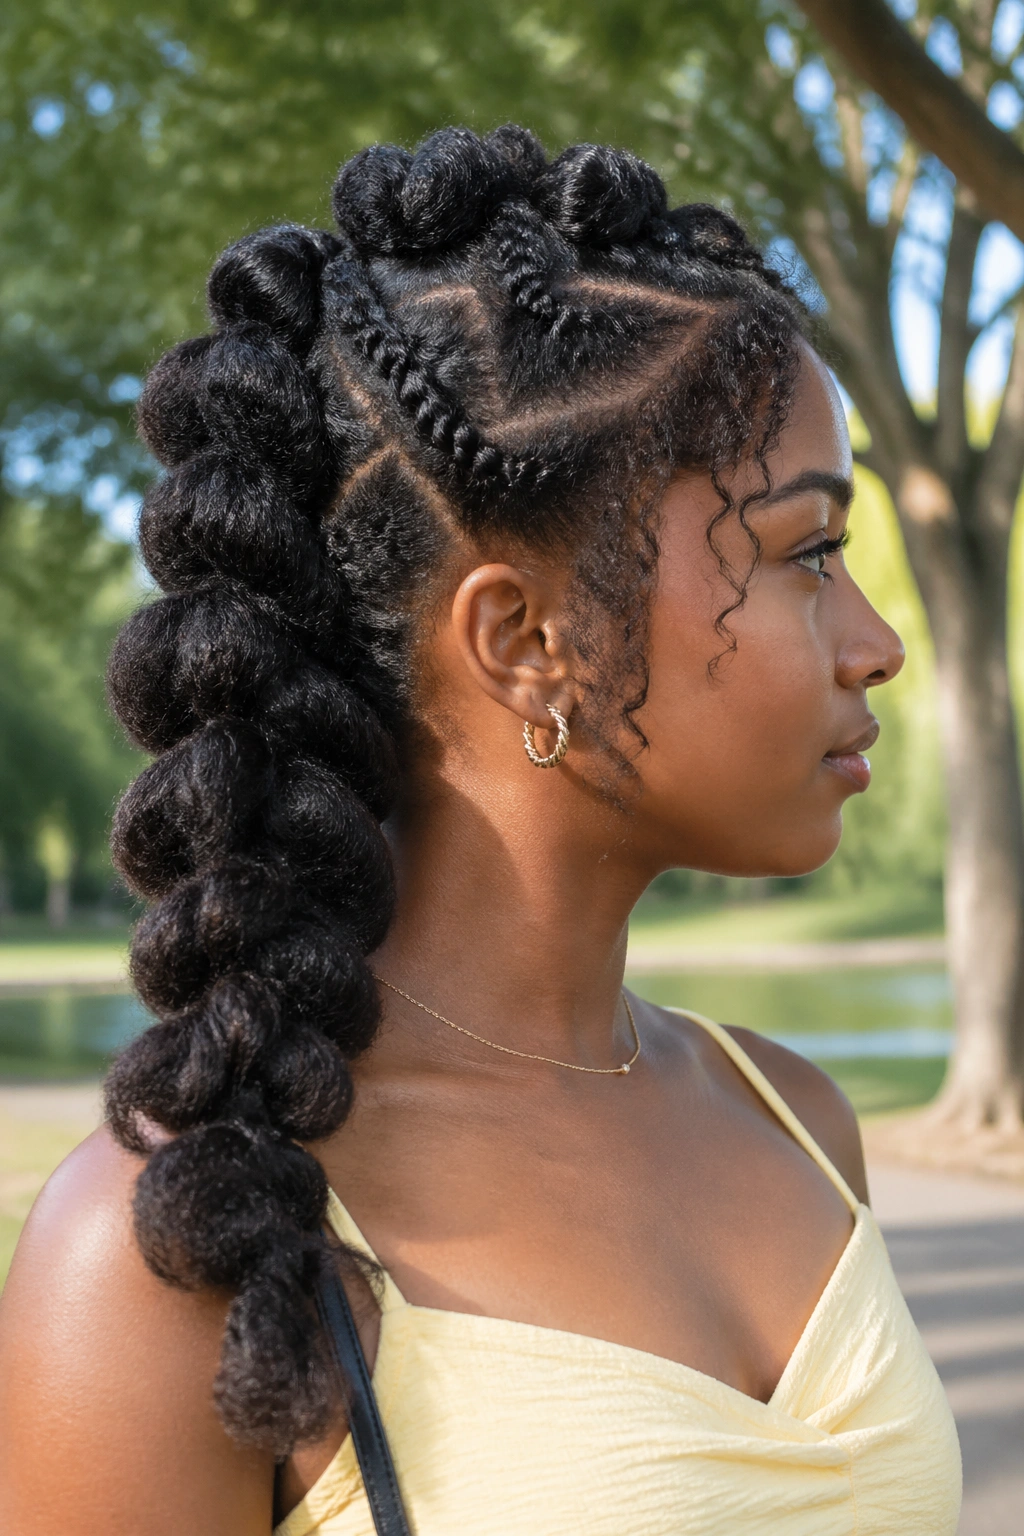
8. Frohawk on Natural Hair
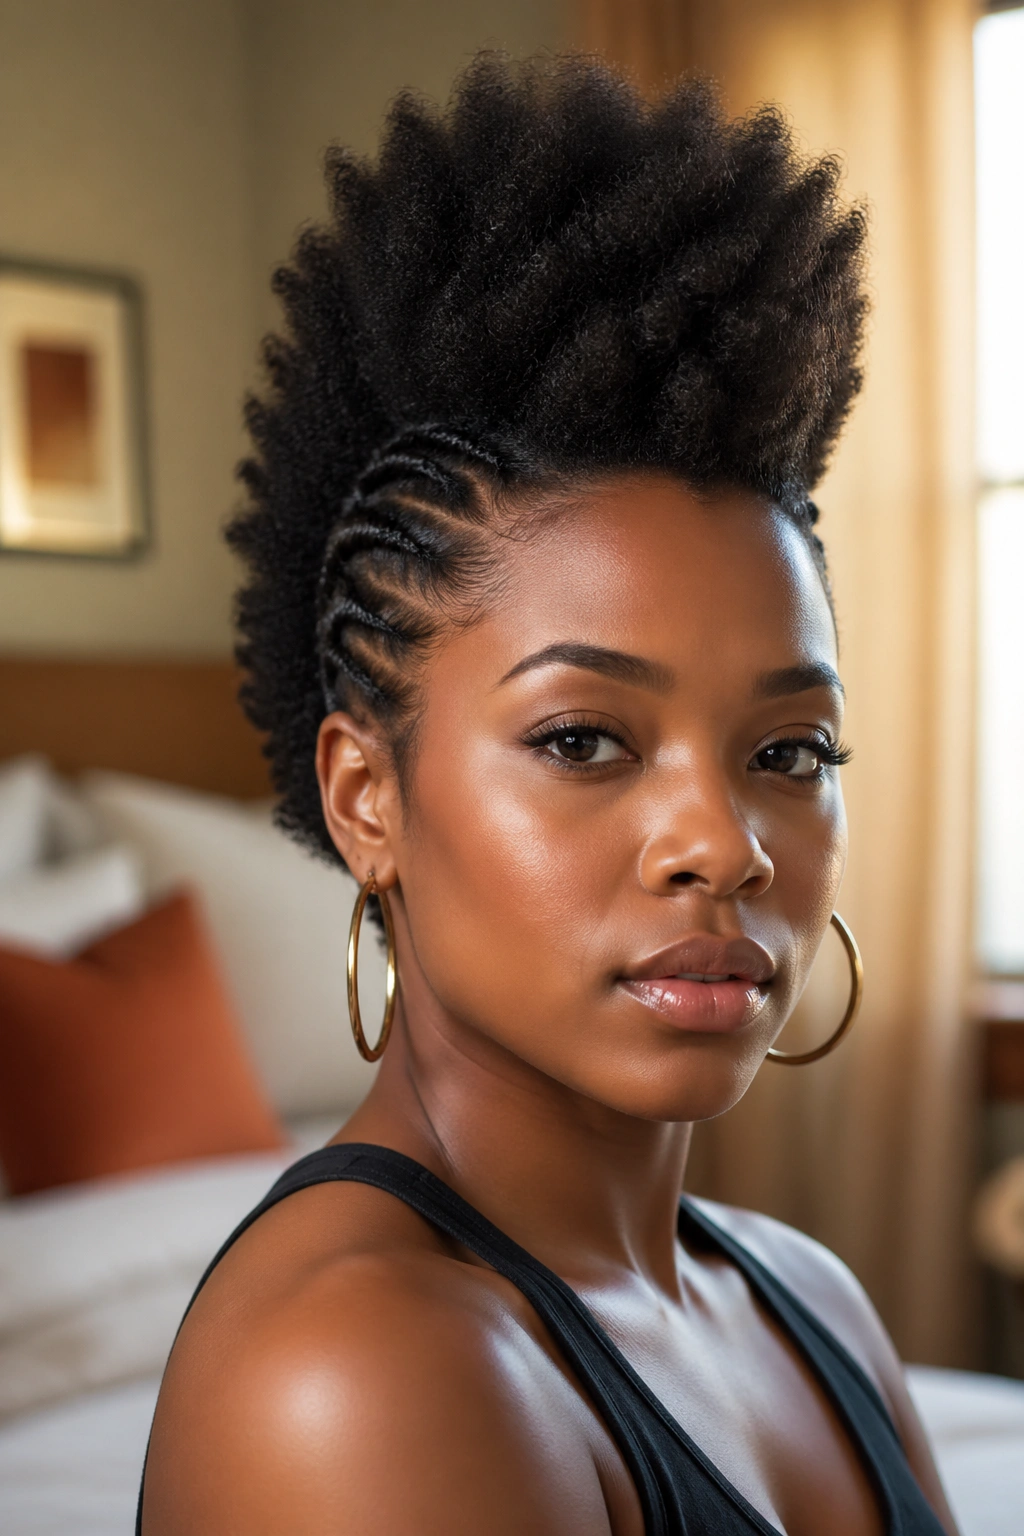
The frohawk is exactly what it sounds like: the silhouette of a mohawk, achieved without cutting. You’re creating height through the center and gathering or pinning the sides flat, which gives a dramatic line that reads edgy without the commitment.
On medium-length hair, the center section — when gathered upward — creates a fan of volume that’s proportional. Very long hair can make the hawk look too heavy. Short hair doesn’t have enough for the center strip to read clearly. Medium is the natural sweet spot.
Gather each side section with bobby pins or small hair ties, flat against the head. Smooth toward the back. Leave the center section free, then fluff or pick for height. Edge gel along the gathered sides keeps it looking clean and intentional.
Unlike some styles, the frohawk holds up well through a full day. The sides don’t need to be perfectly flat — a little texture on the pinned sections looks natural, not messy.
9. Box Braids (Mid-Back Stopping Point)
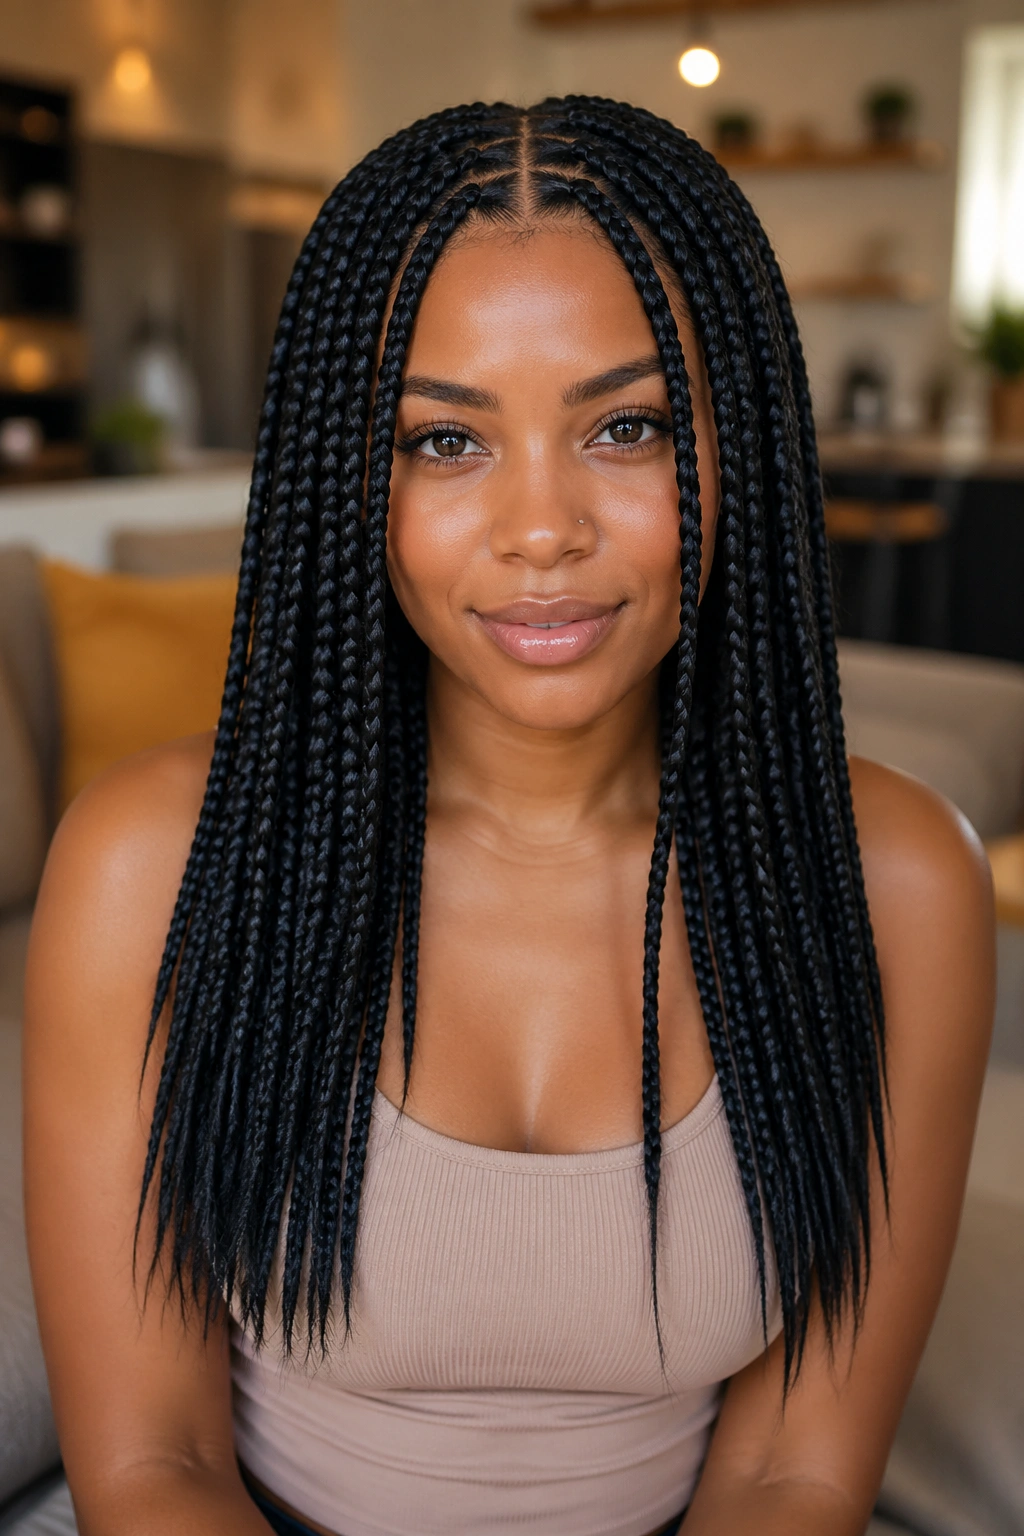
Box braids at medium length — meaning you’re braiding your natural hair without extensions, just the hair that’s actually there — land at a shorter finished length than most people expect because of stretch. The braid will show most of your natural length. Expect it to land around chin to shoulder.
Part into clean square sections. Each section’s size determines the braid’s width. Braid tightly but not so tight that you feel tension at the roots. Medium-sized braids — about the width of a pencil — wear the most comfortably on the scalp without looking too chunky.
Who This Is For
Best for hair that has enough length to manipulate easily — at least four inches stretched. If your natural hair is on the shorter end of medium, very small sections may be difficult to maintain. Consider slightly larger sections for easier braiding and better hold.
The style lasts about two weeks on natural hair without extensions before the new growth makes rebraiding necessary.
10. Cornrow Styles in Afro Hair
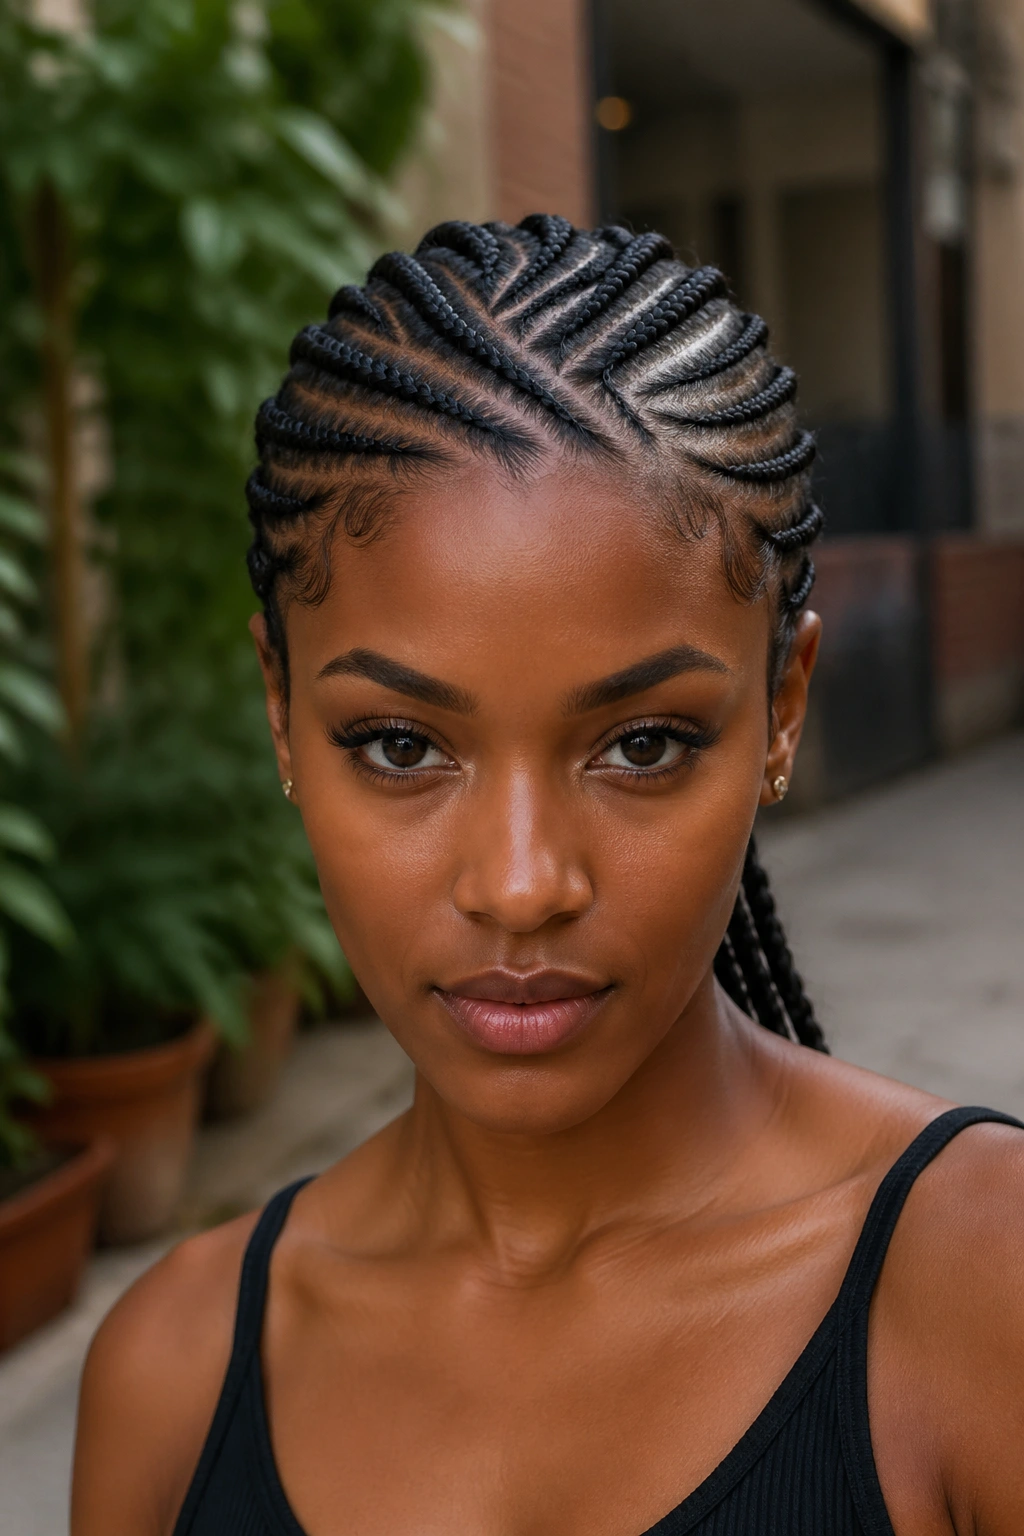
Cornrows don’t get enough credit as a standalone style rather than just a base for other things. The pattern you create in the cornrows is the style — and there’s enormous range within that single concept.
Simple straight backs are the classic. But diagonal cornrows that sweep from the temple, curved cornrows that arc around the crown, or combined patterns that use straight sections in some places and curved in others — all completely different looks from the same basic technique.
What to Watch For
The tension matters more than the pattern. Too tight at the roots causes breakage at the hairline, which is the most visible and the hardest place to regrow. You should be able to slide a fingernail under the first two or three stitches at the root without resistance. If you can’t, the braid is too tight.
Medium-length cornrows benefit from a light braid spray or oil after installation to keep the exposed hair between the braids moisturized.
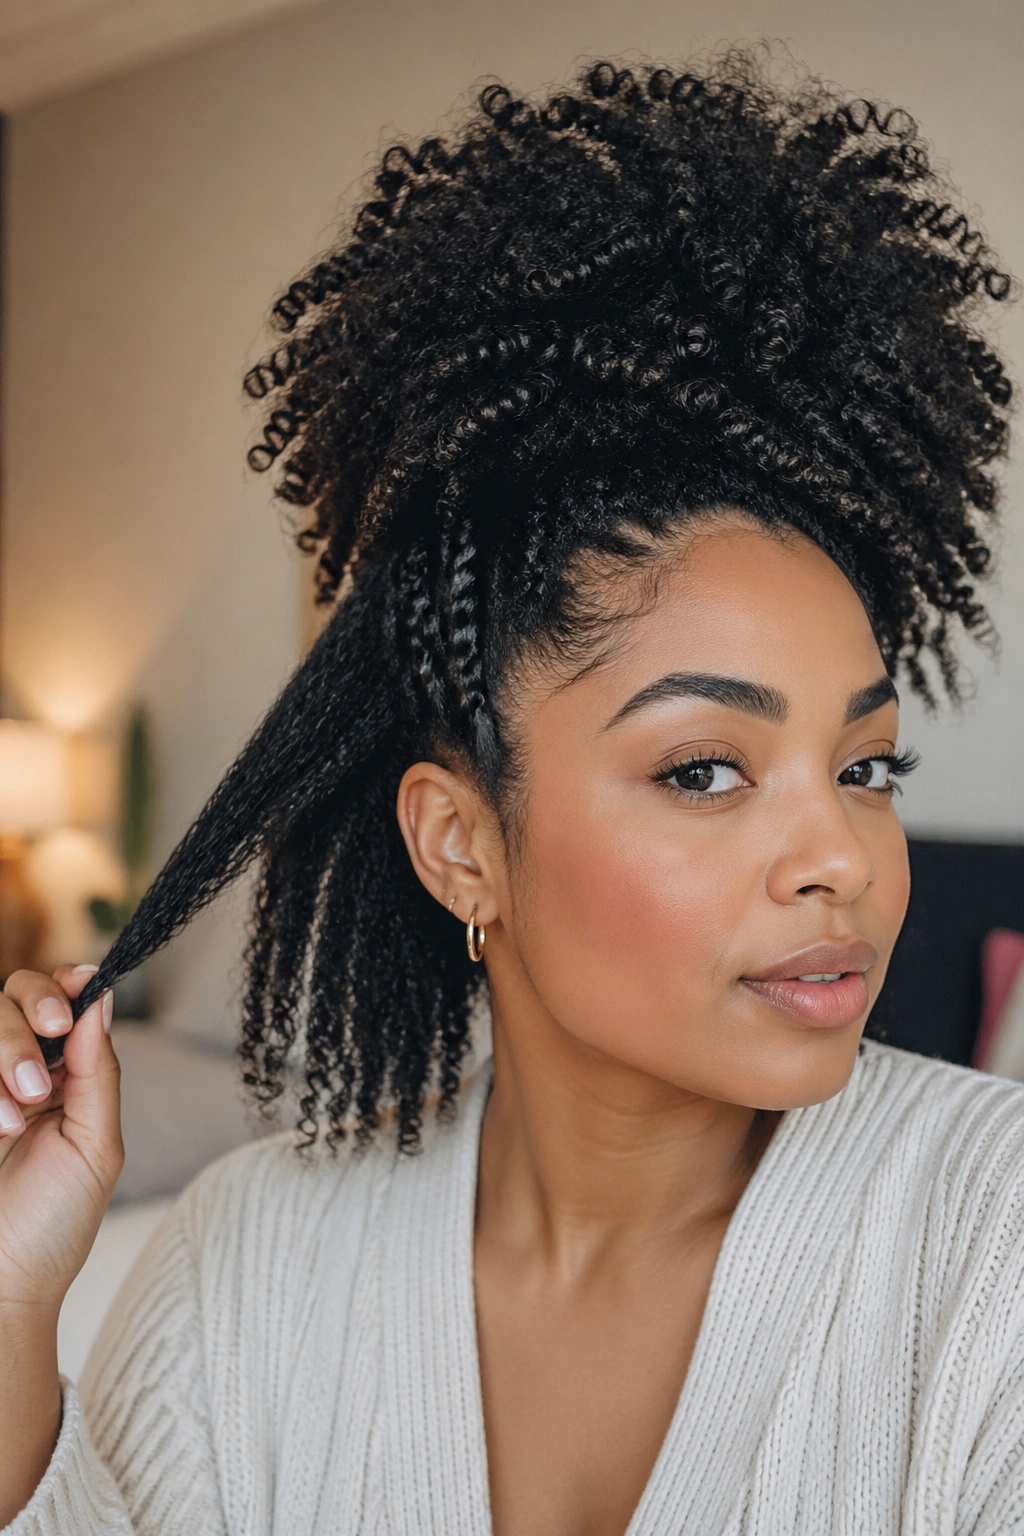
11. Pineapple Updo Variation
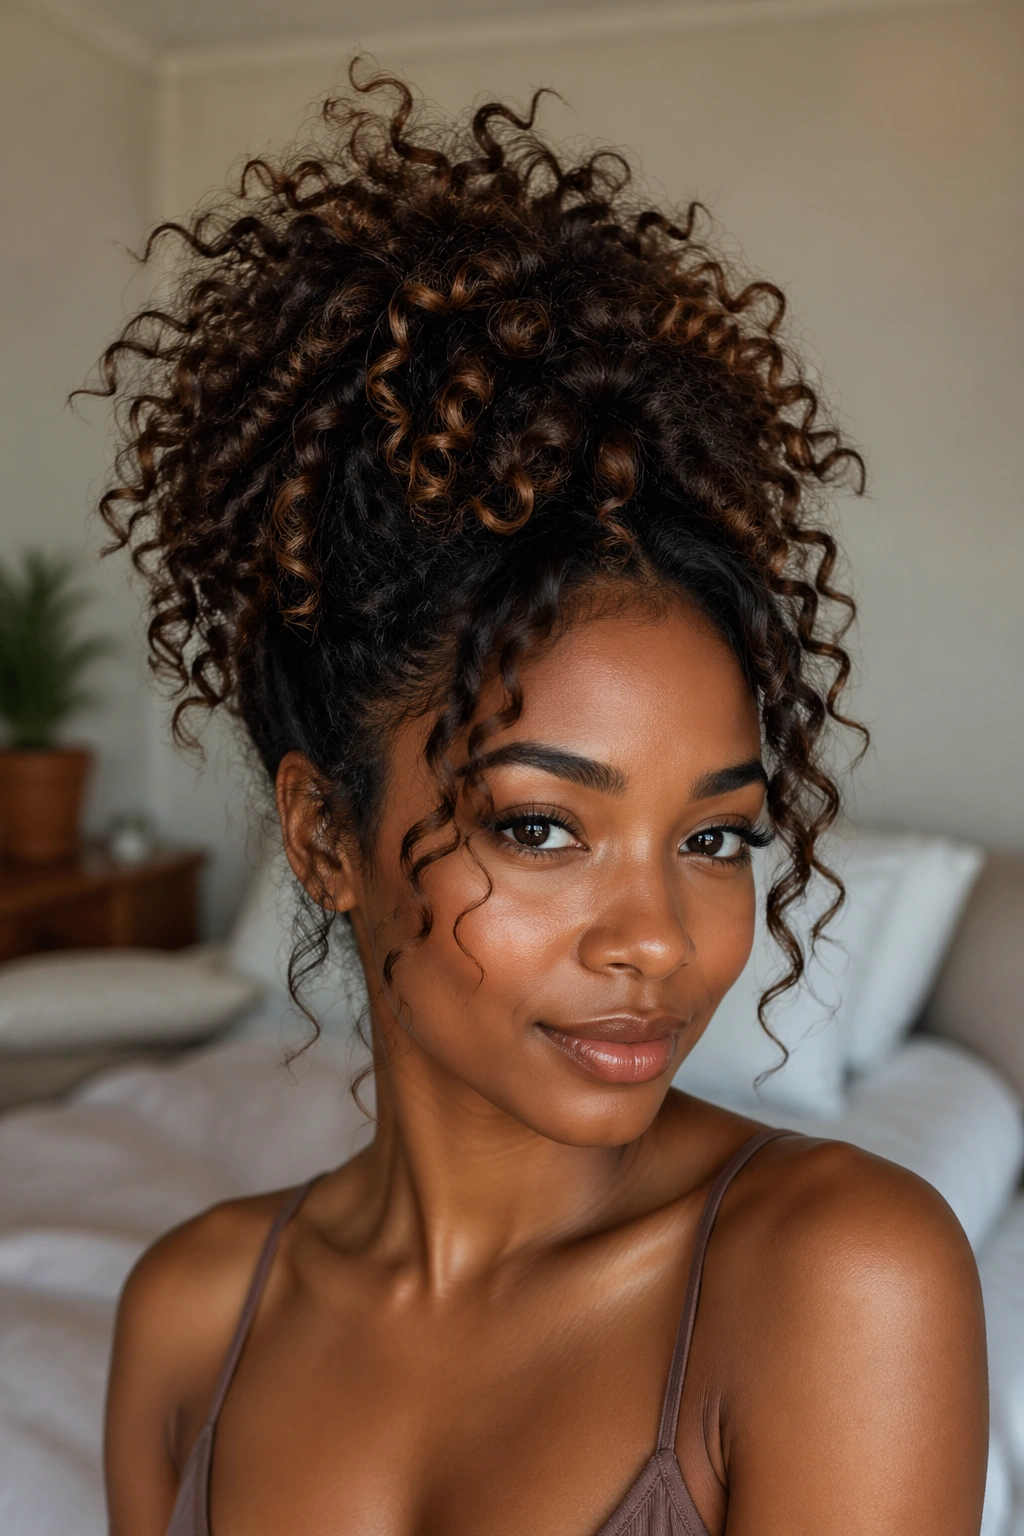
The pineapple is the overnight hair-saving technique most naturals know — gather everything loosely at the top, secure with a satin tie, go to sleep. But the daytime pineapple is a distinct style worth wearing intentionally.
On medium-length hair, the pineapple creates a tall, loose gathering at the crown — not as compact as a high puff, more voluminous and relaxed-looking. The difference is in the intention: you’re not smoothing it into shape, you’re deliberately arranging the volume in a loose fan.
Add a few bobby pins at the sides to shape the silhouette if some sections want to fall forward. A wrap or headband at the base turns it formal. Without accessories, it reads effortless.
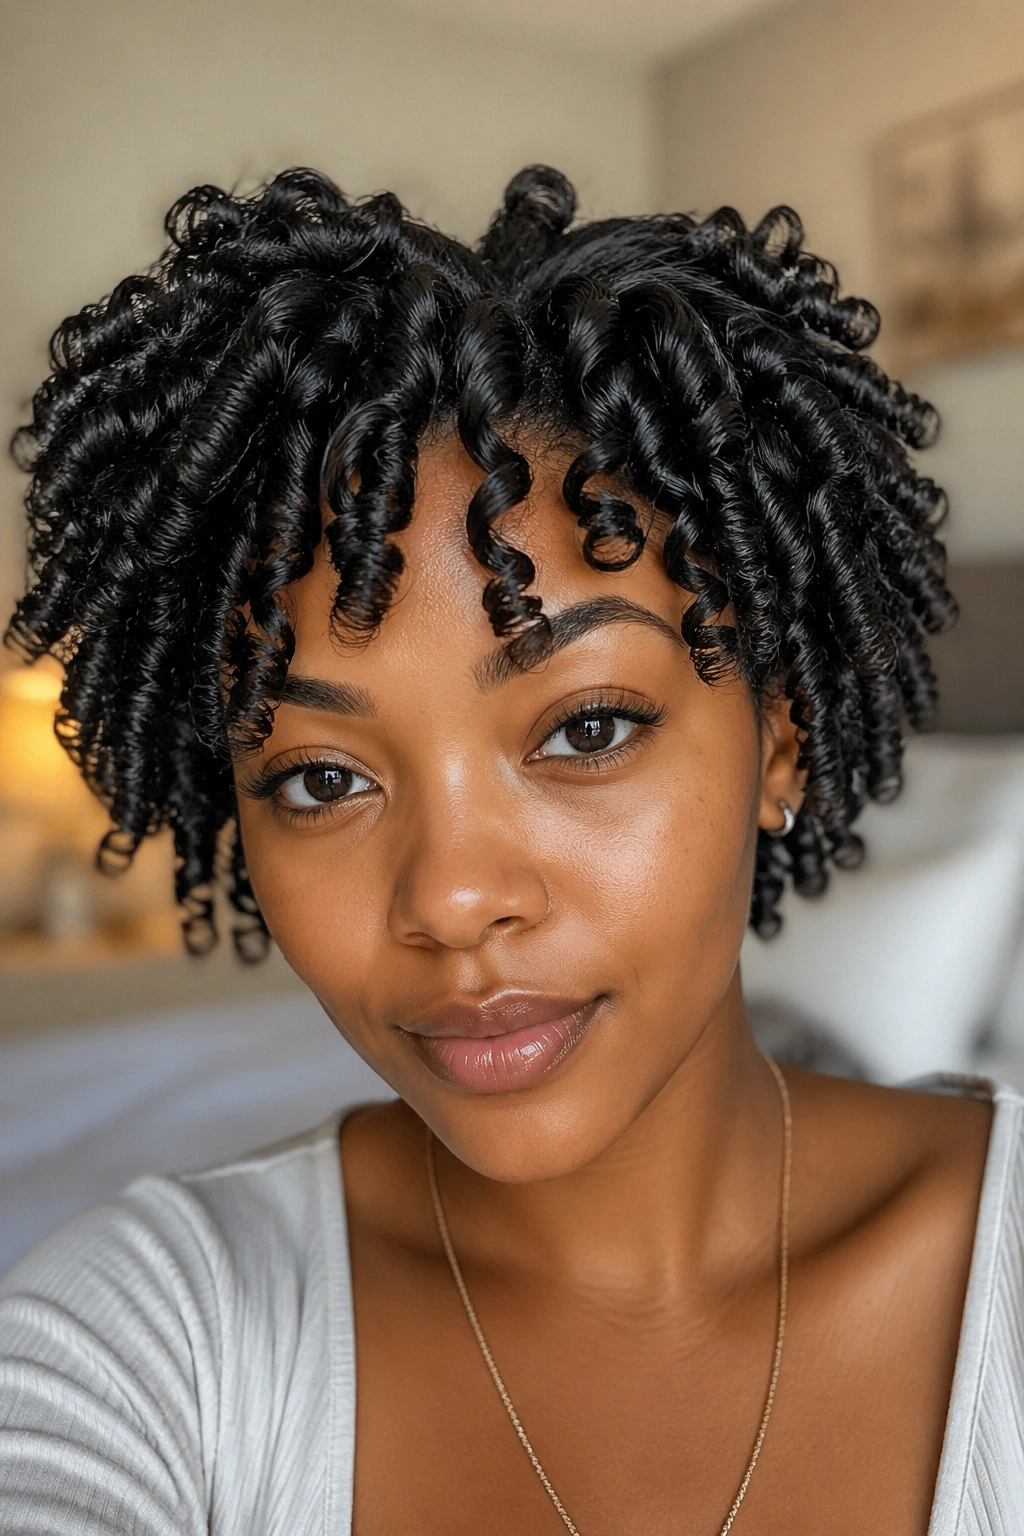
12. Flexi Rod Set
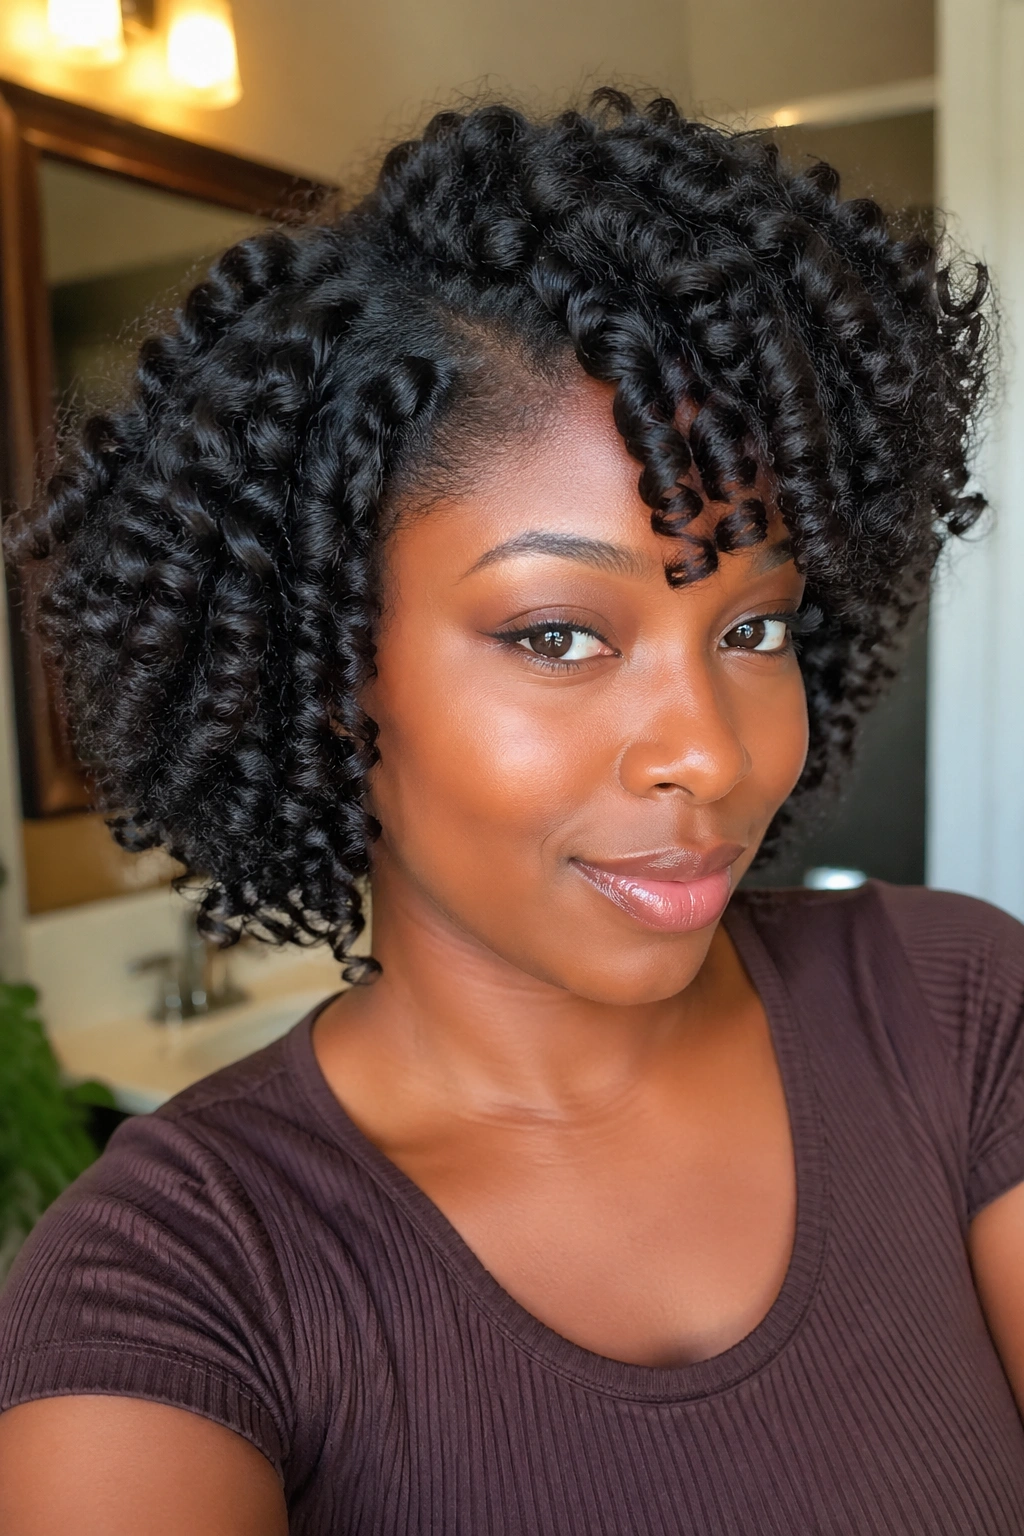
Flexi rods give bouncy, defined curls without heat. The size of the rod determines the curl size — thinner rods create tighter, bouncier curls; thicker rods make more relaxed waves. On medium-length afro hair, medium-sized flexi rods (about the diameter of a marker) usually give the most balanced result.
Apply your product to damp hair, then wrap each section around a rod starting from the ends and rolling upward toward the root. Secure the rod by bending both ends toward each other. The whole set dries while you sleep.
Unroll each rod in the morning, starting from the root downward. Separate gently. The result is uniform, springy curls that last three to four days with proper nighttime wrapping.
This is one of the more forgiving styles for beginners — the rods do the shaping work for you. Hard to mess up if the hair is product-loaded and fully dry before you unroll.
13. Havana Twist with Natural Hair Length
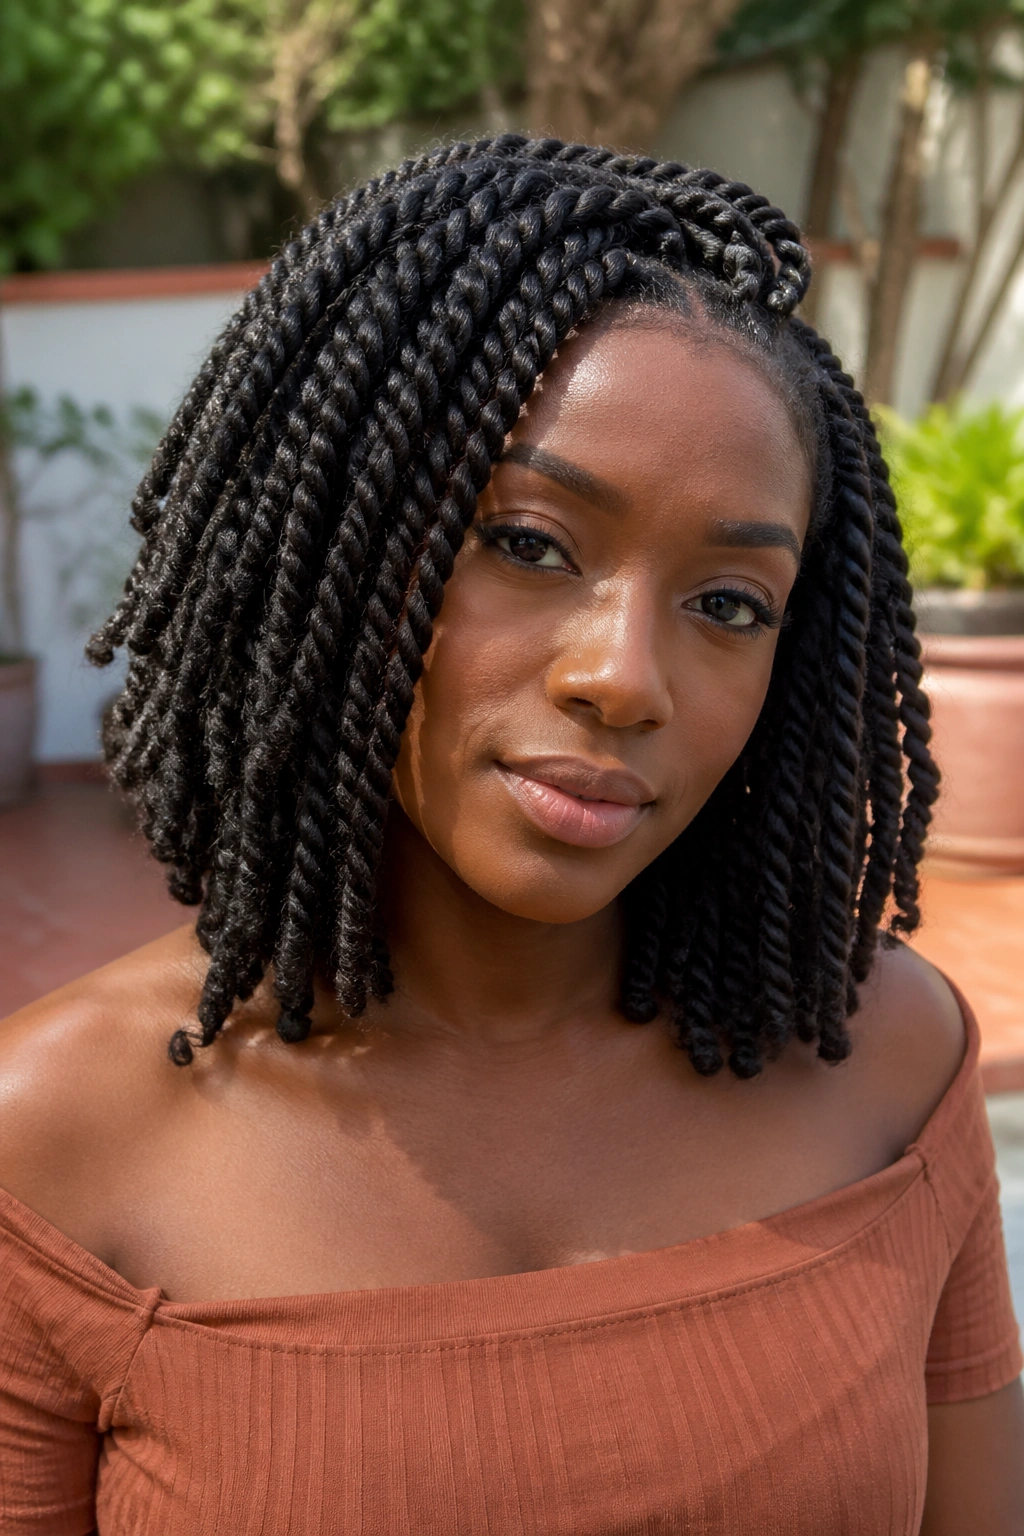
Havana twists use a thicker, chunkier rope of hair than Senegalese twists and have a more textured, matte finish. With extension hair, they’re large statement pieces. With your natural hair only, the size comes from how much hair you gather per section.
Without extensions, Havana-style twists on medium-length hair end up being a natural-length protective style. They’re thicker than regular two-strand twists but don’t hang as long. Think of them as a more textured version of a chunky twist-out.
The matte texture of Havana-style twisting actually makes this style read as more natural than a Senegalese-style twist, which tends to look more polished. If your aesthetic is earthy and relaxed, this direction suits it.
14. Crochet Style with Natural Afro Texture
Crochet hair attached to cornrowed bases has been a game-changer for protective styling. The key for this list — choosing afro-textured crochet hair that blends with your natural texture so the installed hair doesn’t look separate from what’s growing out of your head.
For medium-length natural hair, braiding your own hair into the base cornrows actually works to your advantage. The shorter base braids stay flat more easily, which means the crochet installation lies flatter and looks more natural. Longer natural hair sometimes creates bulk at the roots that makes the style look lumpy.
This is one of the few styles on this list that requires another person, or at minimum a LOT of practice. The crochet needle technique for installing each bundle is learnable but takes some time to get fast at.
15. Natural Hair Updo with Twisted Crown
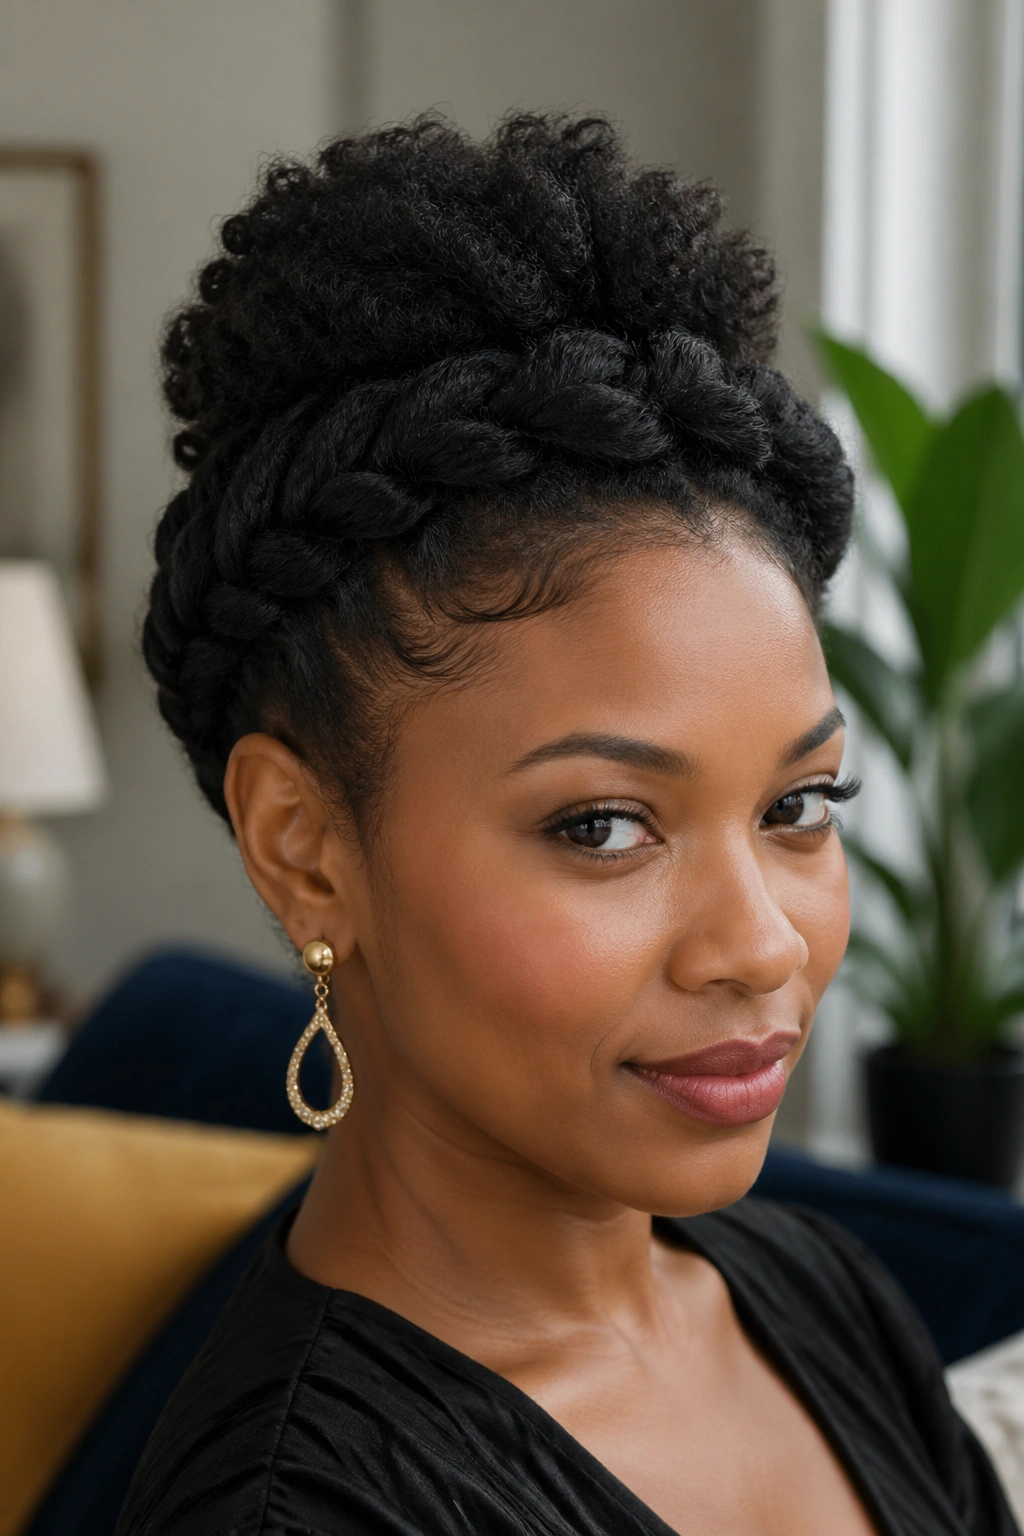
A twisted crown updo uses the length you have on medium afro hair to create something that reads formal enough for events without being stiff or overdone. You’re twisting small sections around the perimeter of the head and gathering the center section into a high puff or shaped bun.
Start with clean, moisturized hair. Divide into two zones — the perimeter (the outer two inches all around) and the center. Twist the perimeter sections individually, directing them toward the back of the crown. Pin each twist as you go. Gather the center section last and shape it into a puff, bun, or fan above the gathered twists.
How to Use It
The finished style depends almost entirely on your parting pattern during the twist phase. Wide, loose sections give a relaxed bohemian updo. Thin, precise sections give something more structured and intentional. Decide before you start.
This style holds well through an evening event with bobby pins and a light mist of holding spray over the finished look.
16. Side-Swept Afro
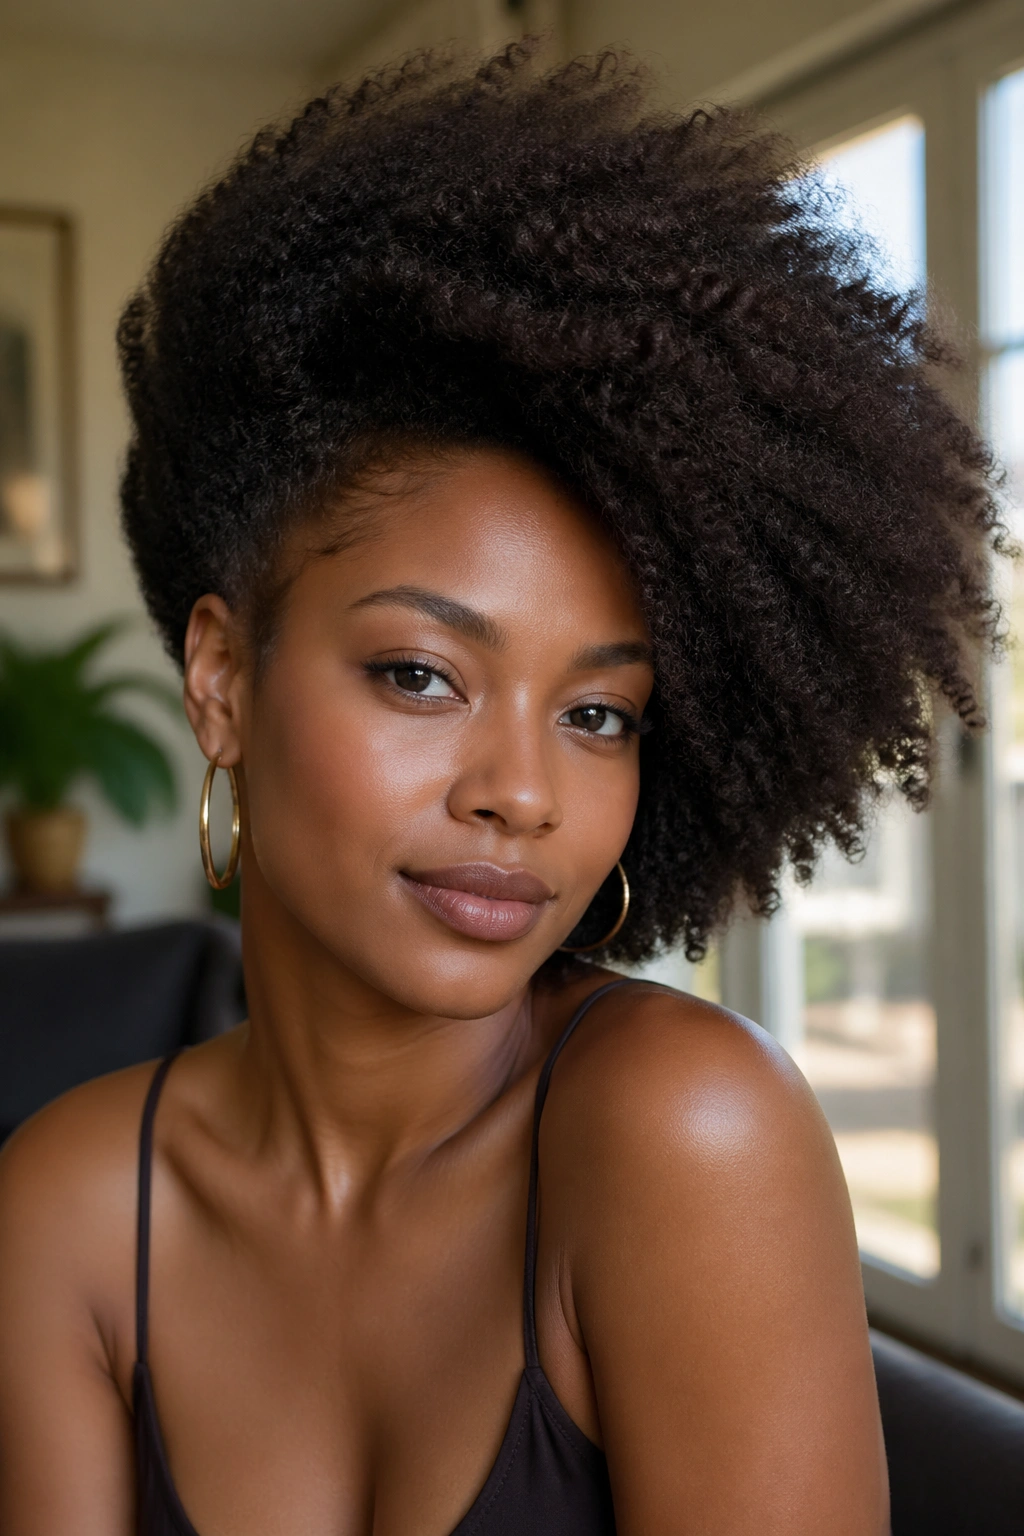
Gravity does the work here. A side-swept afro is a regular afro, shaped — using a pick or your hands — to have more volume on one side than the other. The weight shifts, the silhouette tilts, and it reads asymmetric without any cutting or heavy manipulation.
After your usual wash and style, pick your hair out evenly first to establish the full silhouette. Then, with the pick starting on one side, gently redirect volume from that side across toward the opposite side. Smooth lightly, don’t flatten. The goal is a lean, not a hard angle.
Edge gel along the lower side — where the hair sweeps away from the face — keeps the lean looking clean rather than messy. A satin scarf worn on the fuller side while you sleep, if you want to exaggerate the lean over time, can train the hair to cooperate.
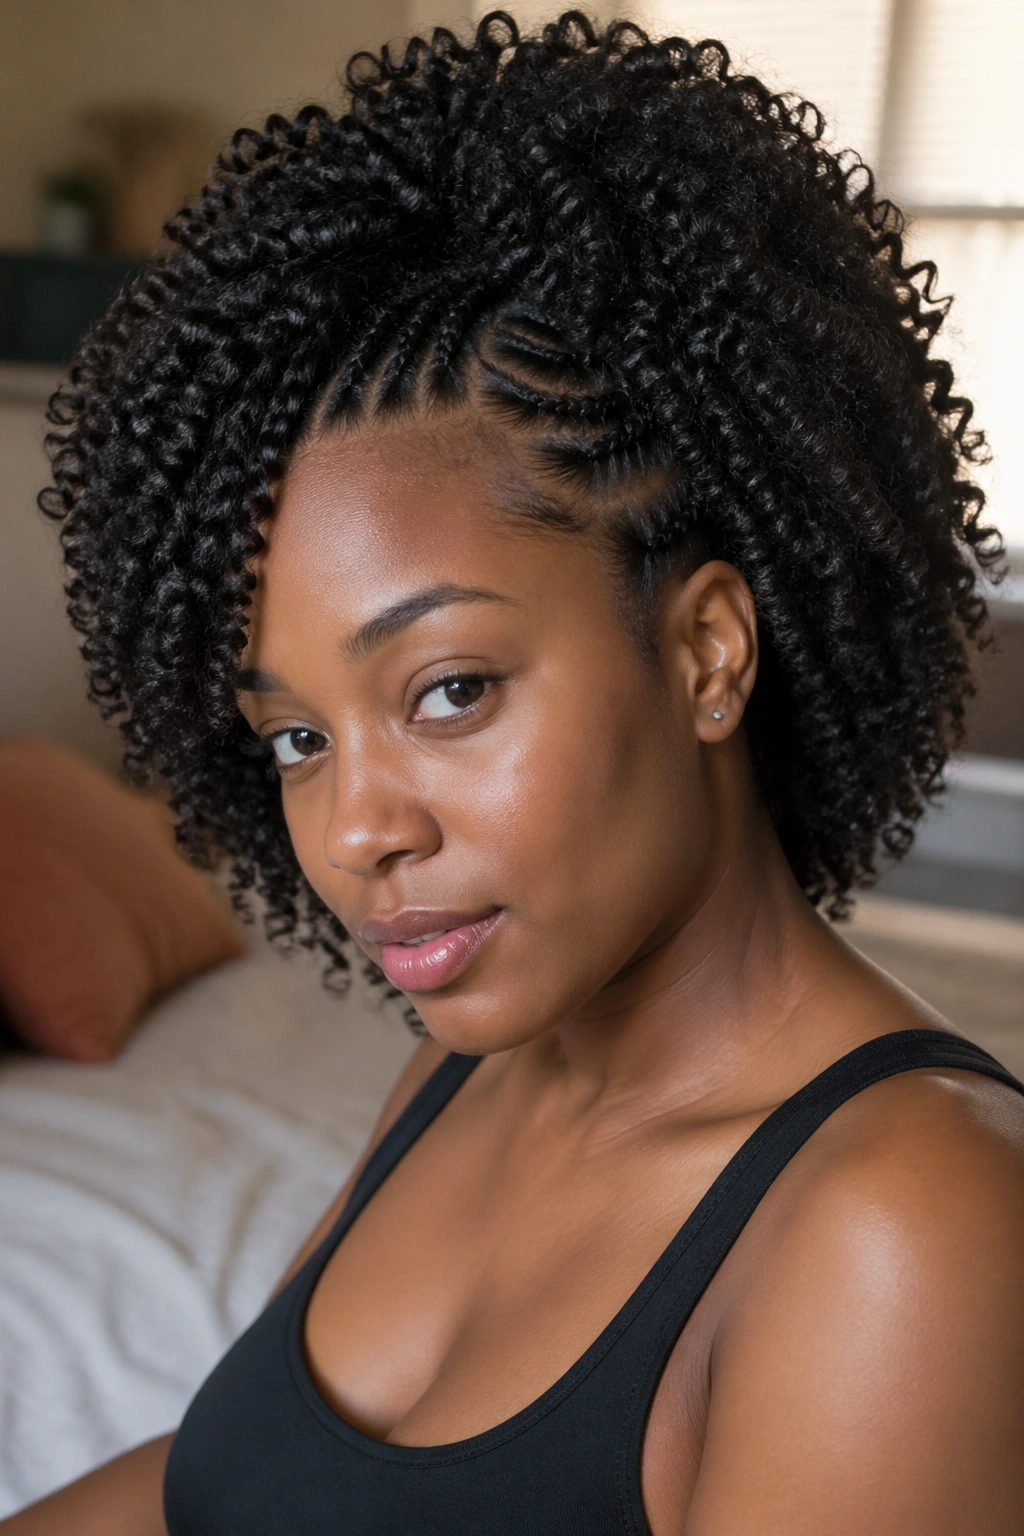
17. Puff with Braided Crown
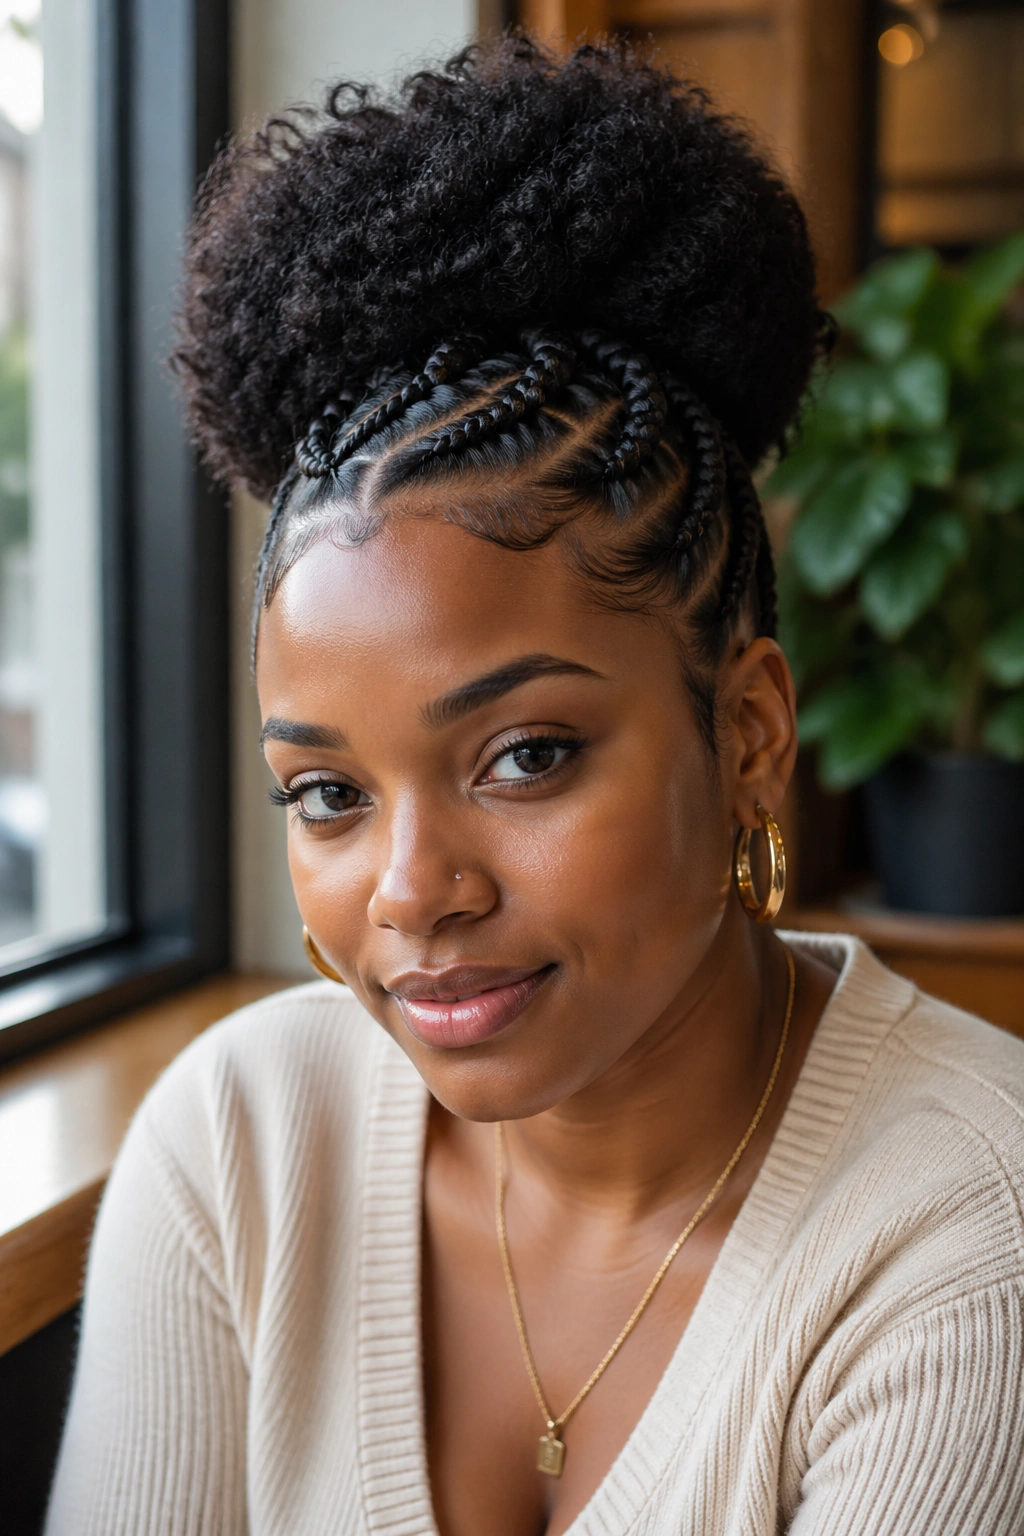
Add cornrow braids across the front section of the hair — from temple to temple — and then gather the remaining back section into a high puff. The braids frame the face and add structure to what might otherwise be a very casual style.
The braid pattern can be simple — two or three straight cornrows going from front to back — or more elaborate, with diagonal or curved braids meeting at the crown. On medium-length hair, the puff above the braids sits at a flattering height without looking exaggerated.
This style bridges casual and dressed-up. The braided front reads more intentional; the puff keeps it natural and relaxed. It photographs extremely well because of the textural contrast.
18. Knot-Out with Volume Pick

We touched on knot-outs earlier, but there’s a variation worth naming separately: the fully picked-out knot-out. Rather than leaving each unraveled section as a spiral and gently separating, you use a pick at the roots — aggressively — to build maximum volume once the spirals are out.
The result is a full afro with visible spiral texture throughout rather than a clean defined look. It’s bigger, bolder, and has more of a halo effect than a conventional afro or a clean knot-out.
The technique needs well-moisturized hair to survive the picking without frizzing into a cloud. Work from the roots upward, picking only an inch or two at a time. The spirals in the mid-length and ends survive if you leave them alone and only agitate the roots.
19. Pull-Through Style with Natural Texture
A pull-through is a braid alternative that creates a similar flowing silhouette without actually braiding. You’re using hair ties to create sections that fold over each other, giving the appearance of a braid from behind without the tension of braiding.
On medium-length natural hair, the pull-through creates a cascading effect where each section shows texture — the natural curl pattern is visible in every loop rather than being braided flat. It’s more textural and dimensional than a pulled-back braid.
Start with a ponytail at the crown. Take a new section below it, split the original ponytail in two, push the new section up through the middle, then secure the new section. Repeat down to the nape. The “braid” forms itself.
20. Faux Bob on Natural Hair
The faux bob is one of those styles that looks like it requires scissors but doesn’t. You’re tucking and pinning your medium-length hair to create the appearance of a bob — all the chin-length visual impact without any length lost.
After styling your hair with your usual wash-and-go or twist-out method, divide the hair into sections. Working from the bottom up, roll each section under and pin it close to the scalp with bobby pins. The outer sections of hair cover the pins. The ends are hidden underneath.
What Makes It Different
The natural afro texture of the tucked sections creates interesting volume under the visible outer layer, which gives the faux bob a fullness that a real bob often lacks. The silhouette is round and full in a way that suits afro hair particularly well.
Takes about fifteen minutes to set up once you know the mechanics. It looks deliberate and styled in a way that reads very polished.
21. Double Puffs (Space Puffs)
Two puffs instead of one. Simple concept, completely different silhouette. Part the hair horizontally across the crown — roughly ear to ear. Gather the front section into one puff above the part line; gather the back section into a second puff below it. Both puffs sit close together and create a doubled volume effect that’s playful and full.
On medium-length hair, both puffs end up roughly the same size, which looks balanced. If one section of your hair is longer or denser than the other, work with it rather than against it — a slightly asymmetric pair of puffs still looks intentional.
This style is often called space puffs, bubble puffs, or just twin puffs depending on where you learned it. All the same idea. Great for casual days, school, and anything where you want volume without a lot of setup time.
22. Afro with Defined Edges and Face-Framing Pieces
The afro itself is a style — not a base for something else. A picked-out, shaped afro with defined edges and deliberate face-framing pieces of hair left out at the temples is a complete look that requires skill and intention.
Pick the main body of hair first for even volume. Shape the perimeter using your hands and the pick, creating a clean round silhouette. Then apply edge gel at the hairline and lay the edges in your preferred pattern — curved waves, small swirls, or simple smoothed edges all work depending on your texture and preference.
The face-framing pieces at the temples — left out as small defined curls or coils rather than slicked back — soften the overall look and give it a more romantic, less structured feel. It’s the one small decision that changes the whole energy of the afro from bold statement to approachable-and-beautiful.
Maintaining Your Styles Through the Week
Whatever style you chose, the end of day one is not the end of the style. Most of these looks can last three to five days with the right nighttime routine and morning refresh.
Every night: satin bonnet or scarf. This is not optional. Cotton pillowcases pull moisture out of your hair overnight and create friction that breaks down any defined style. A satin bonnet takes ten seconds to put on.
Morning refresh: a light spritz of water — just enough to dampen the surface, not soak the hair — followed by a small amount of the same cream or product you used to style. Smooth it in, scrunch upward, let it dry. Most styles bounce back to 80 to 90 percent of day-one quality this way.
Common Styling Mistakes for Medium-Length Afro Hair
Too much product is the most common mistake. Medium-length afro hair doesn’t need the volume of product that very long hair does. If your hair is crunchy after it dries, if it’s heavy and dropping when it should be bouncy, you’ve used too much. Start with a quarter-sized amount for your whole head, add if needed — never the other way around.
Rushing the drying process is the second. Half-dry hair that you touch, pick, or fluff too early breaks the style structure before it’s set. Sit under a hooded dryer if you’re in a hurry. Diffuse on low and cool. Or just wait.
Skipping a moisture refresh mid-week is the third. Hair that went in well-moisturized on day one but didn’t get any hydration added by day three is going to frizz and dry out regardless of how well you protected it at night.
Choosing the Right Style for Your Hair Density and Texture
Not every style works equally well across all textures. Here’s the honest breakdown:
Wash-and-gos, finger coils, and flexi rod sets tend to look their best on 3C through 4A hair where the curl pattern already has visible structure. On tighter 4B and 4C patterns, these styles still work but require more product and more deliberate sectioning to get definition.
Twist-outs, braid-outs, and bantu knot-outs work beautifully across the full natural hair spectrum — 3C through 4C all get a clean pattern, just with different amounts of elongation. These are the most texture-versatile styles on this list.
Updo styles — twisted crown, faux bob, puff with braided crown — work for everyone but are most successful when the hair is well-moisturized and has some natural slip to it. Dry, brittle hair is harder to manipulate for updos without breakage.
Pick styles based on your texture, not just based on what looks beautiful on someone else’s head. The style that suits your actual curl pattern and density will always look better than the one you’re chasing.