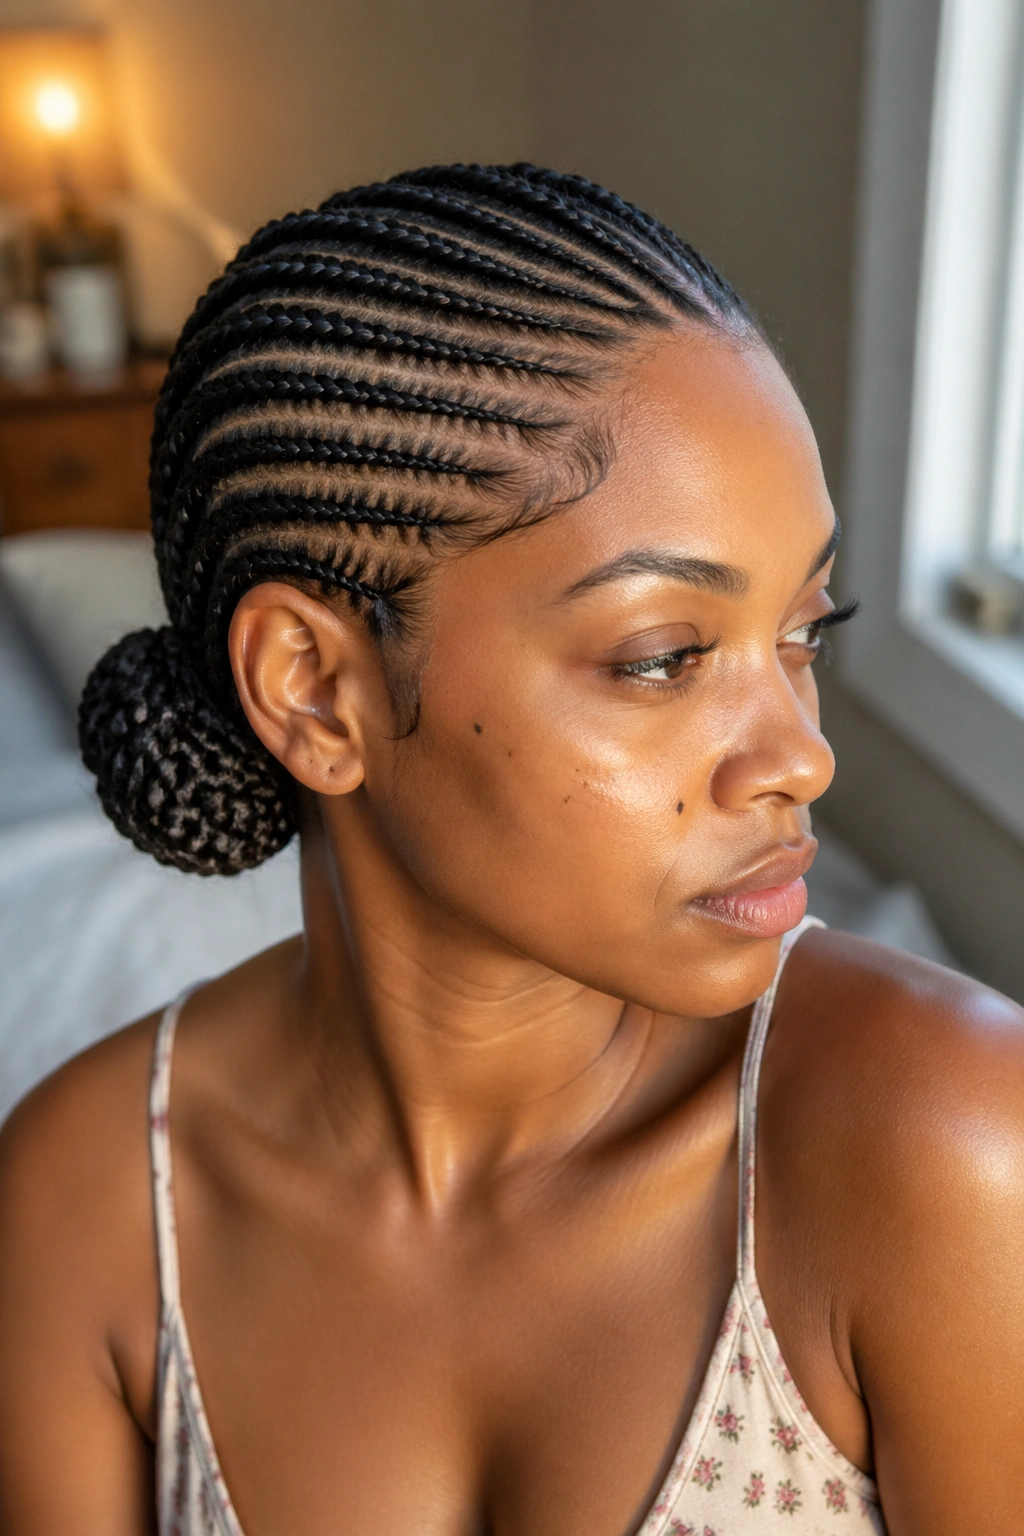
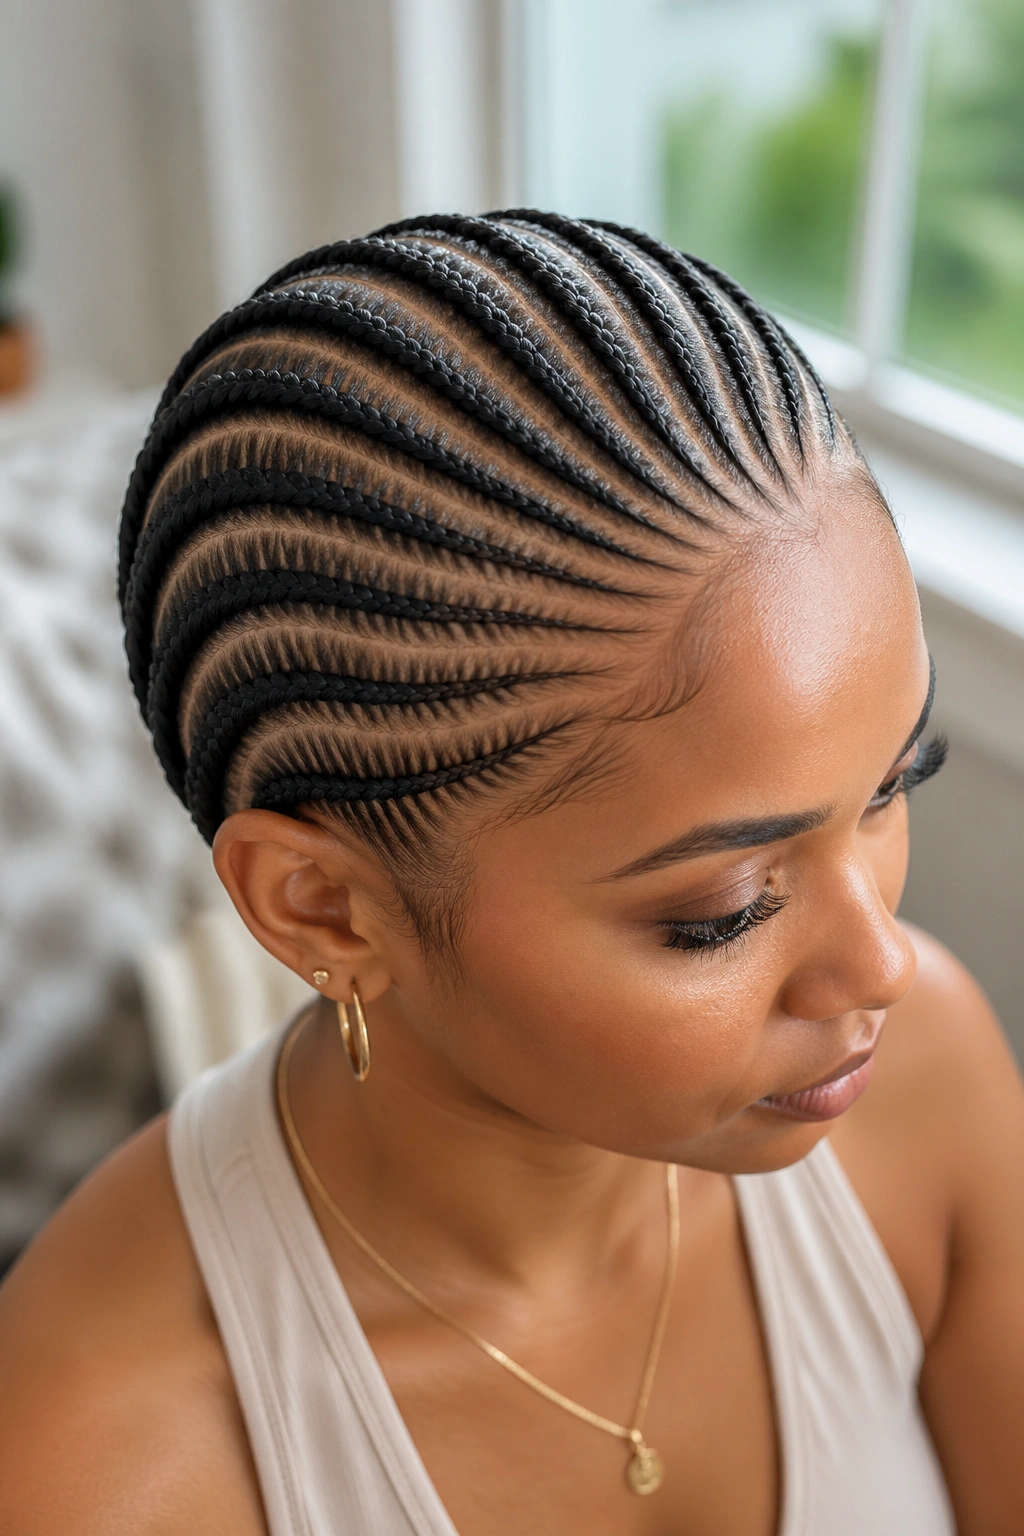
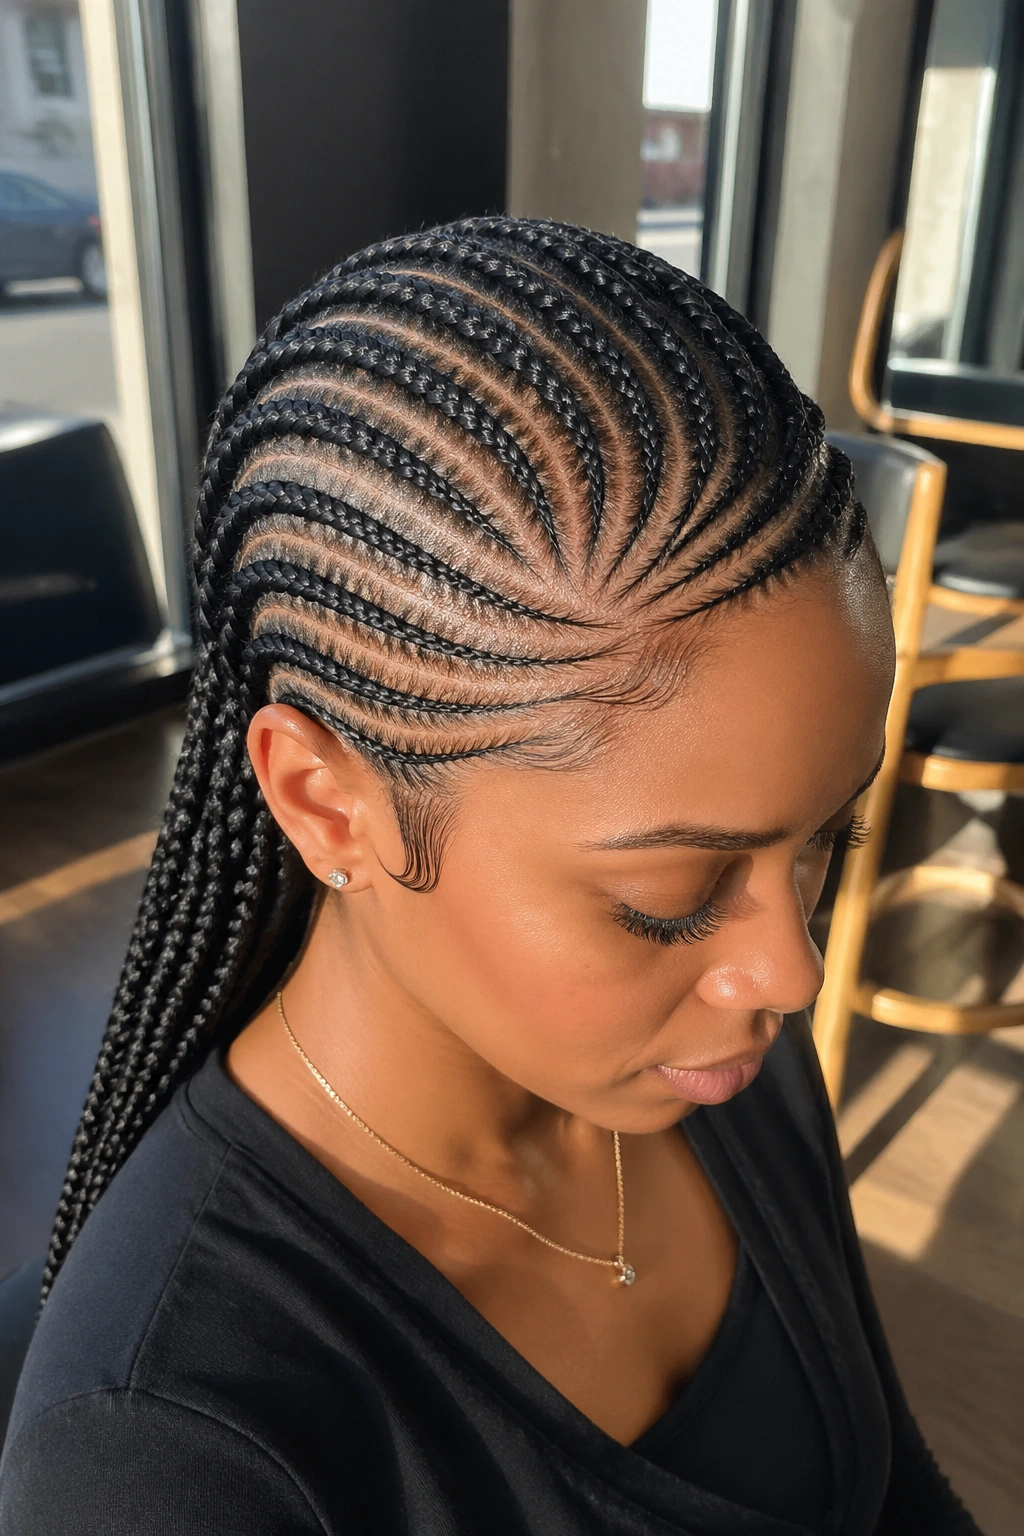
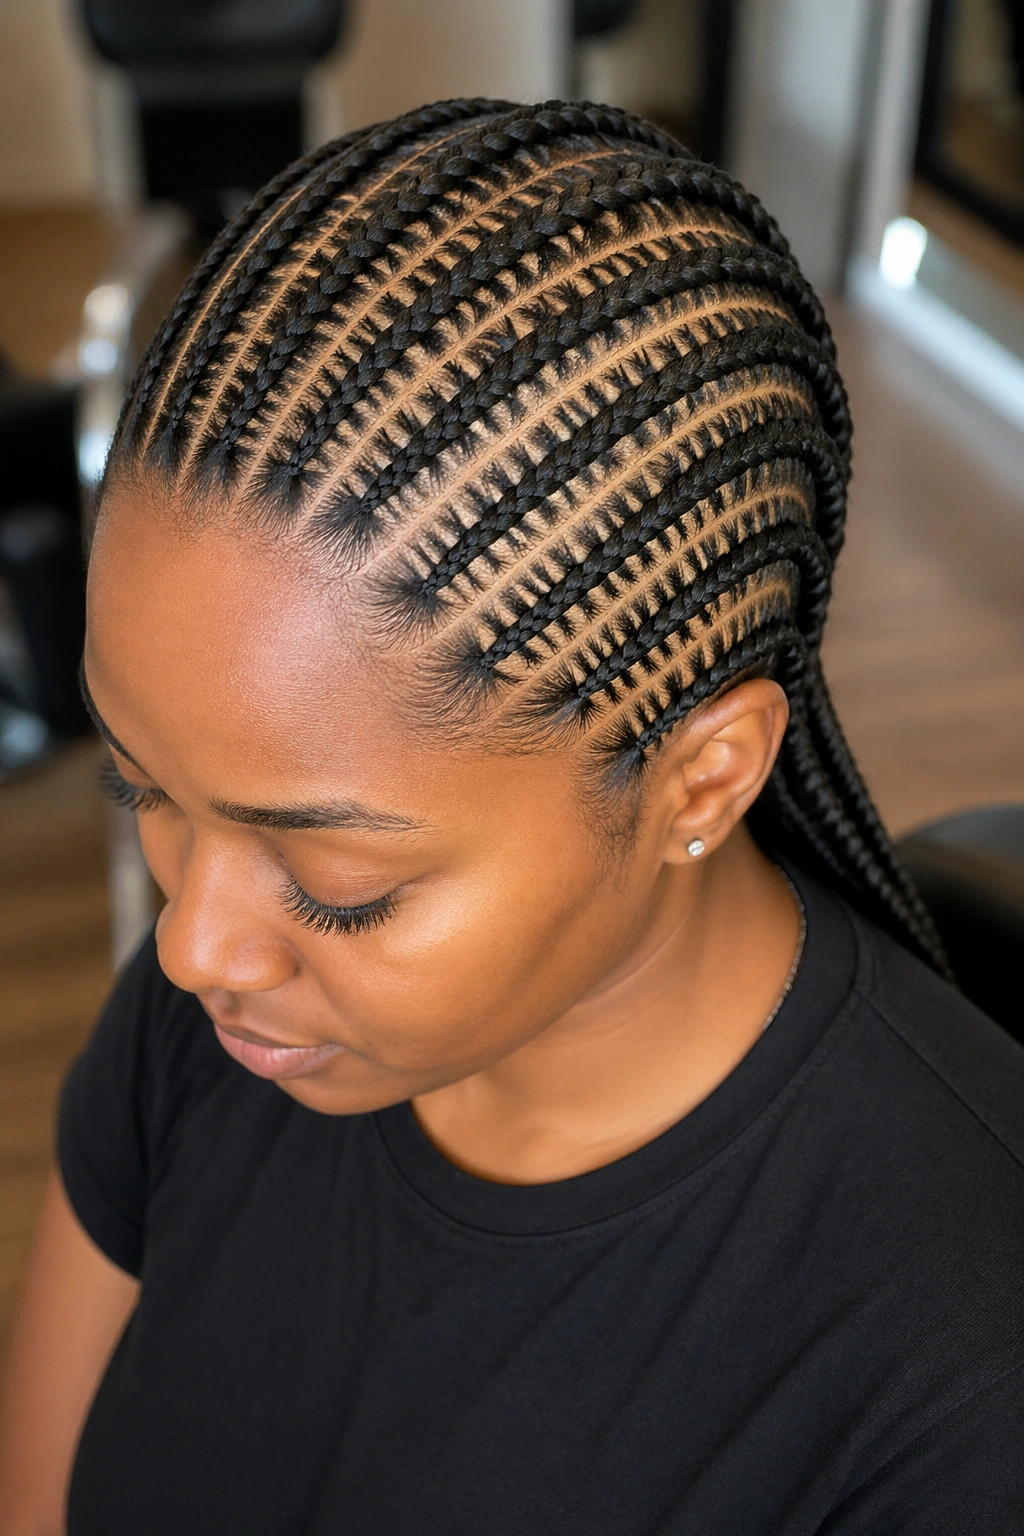
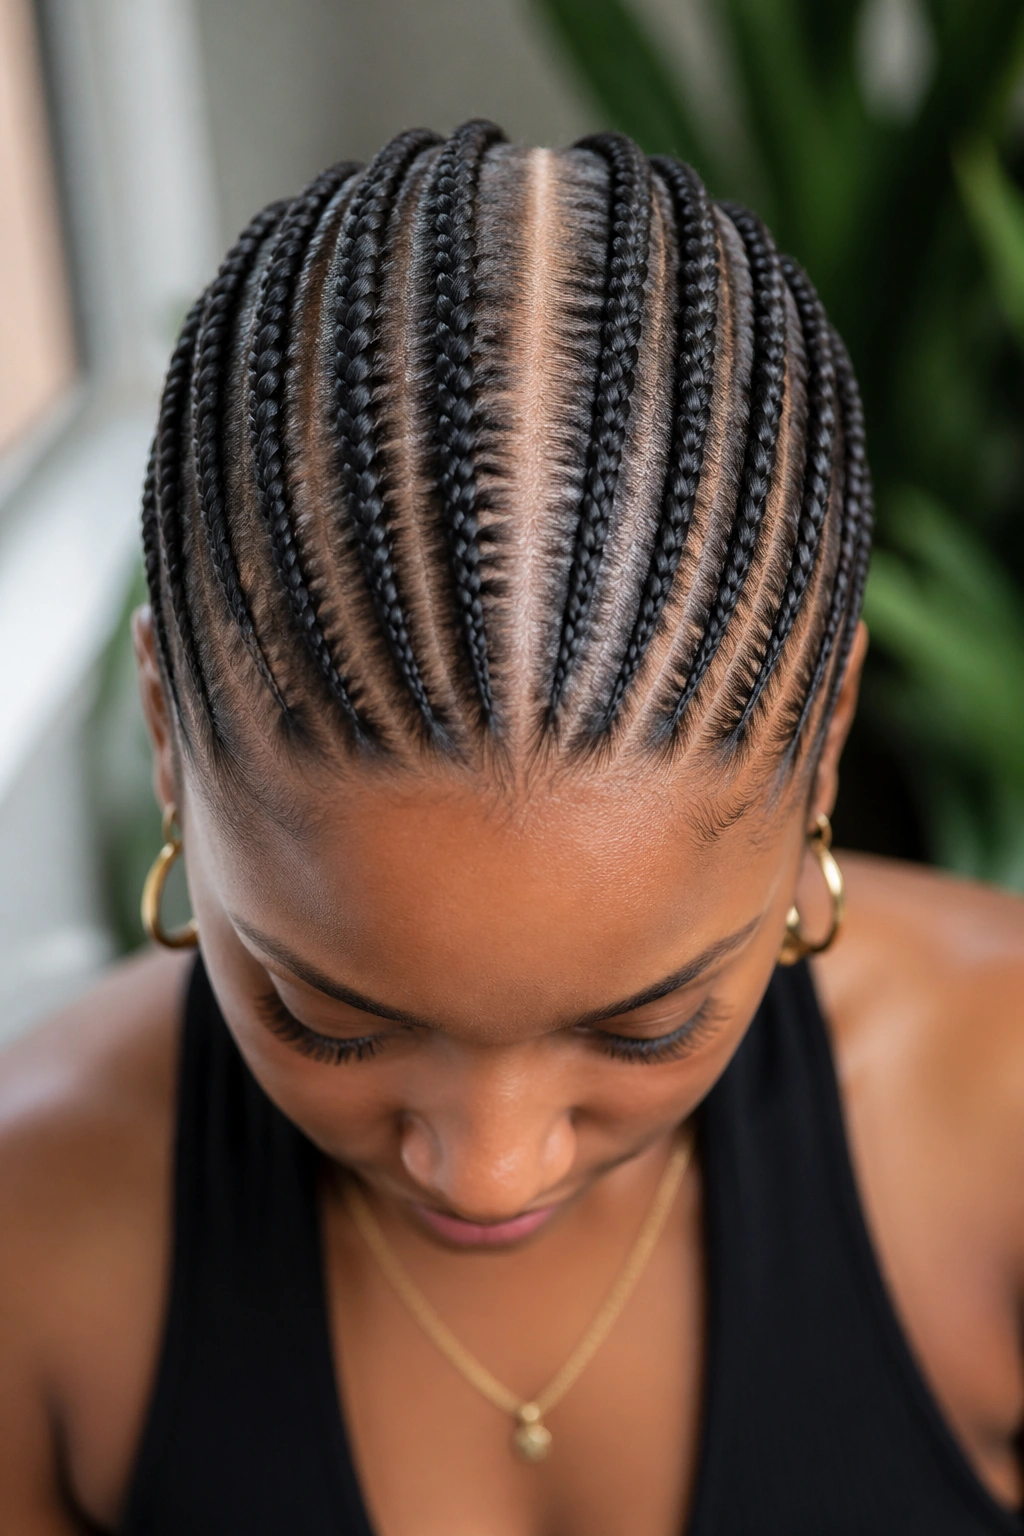
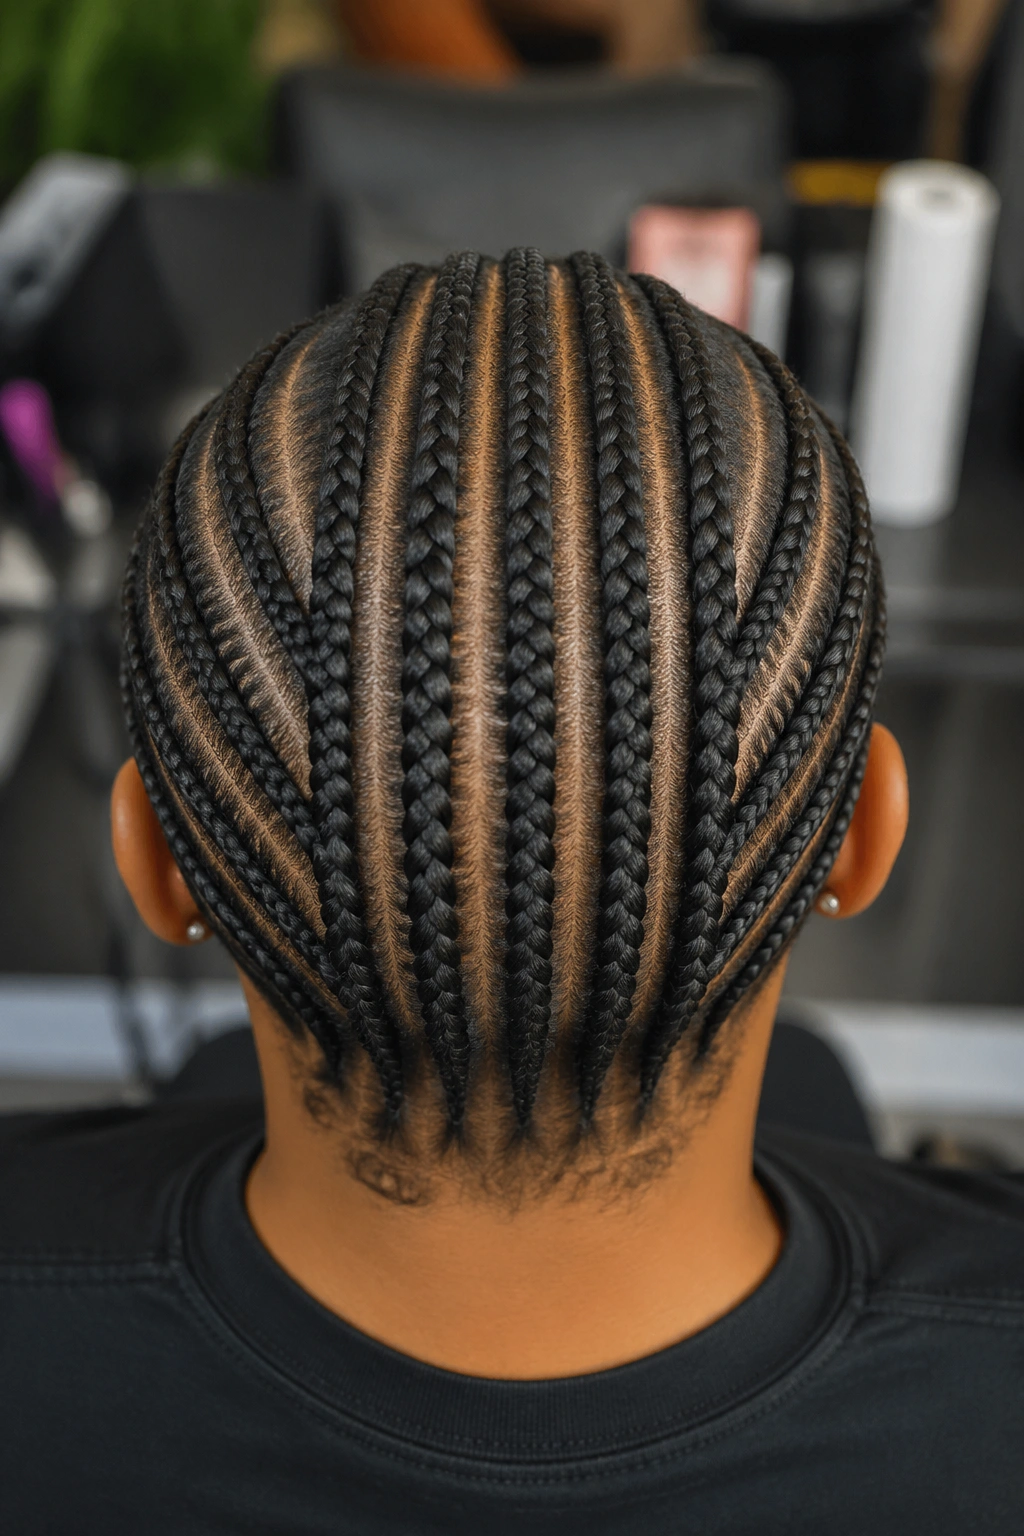
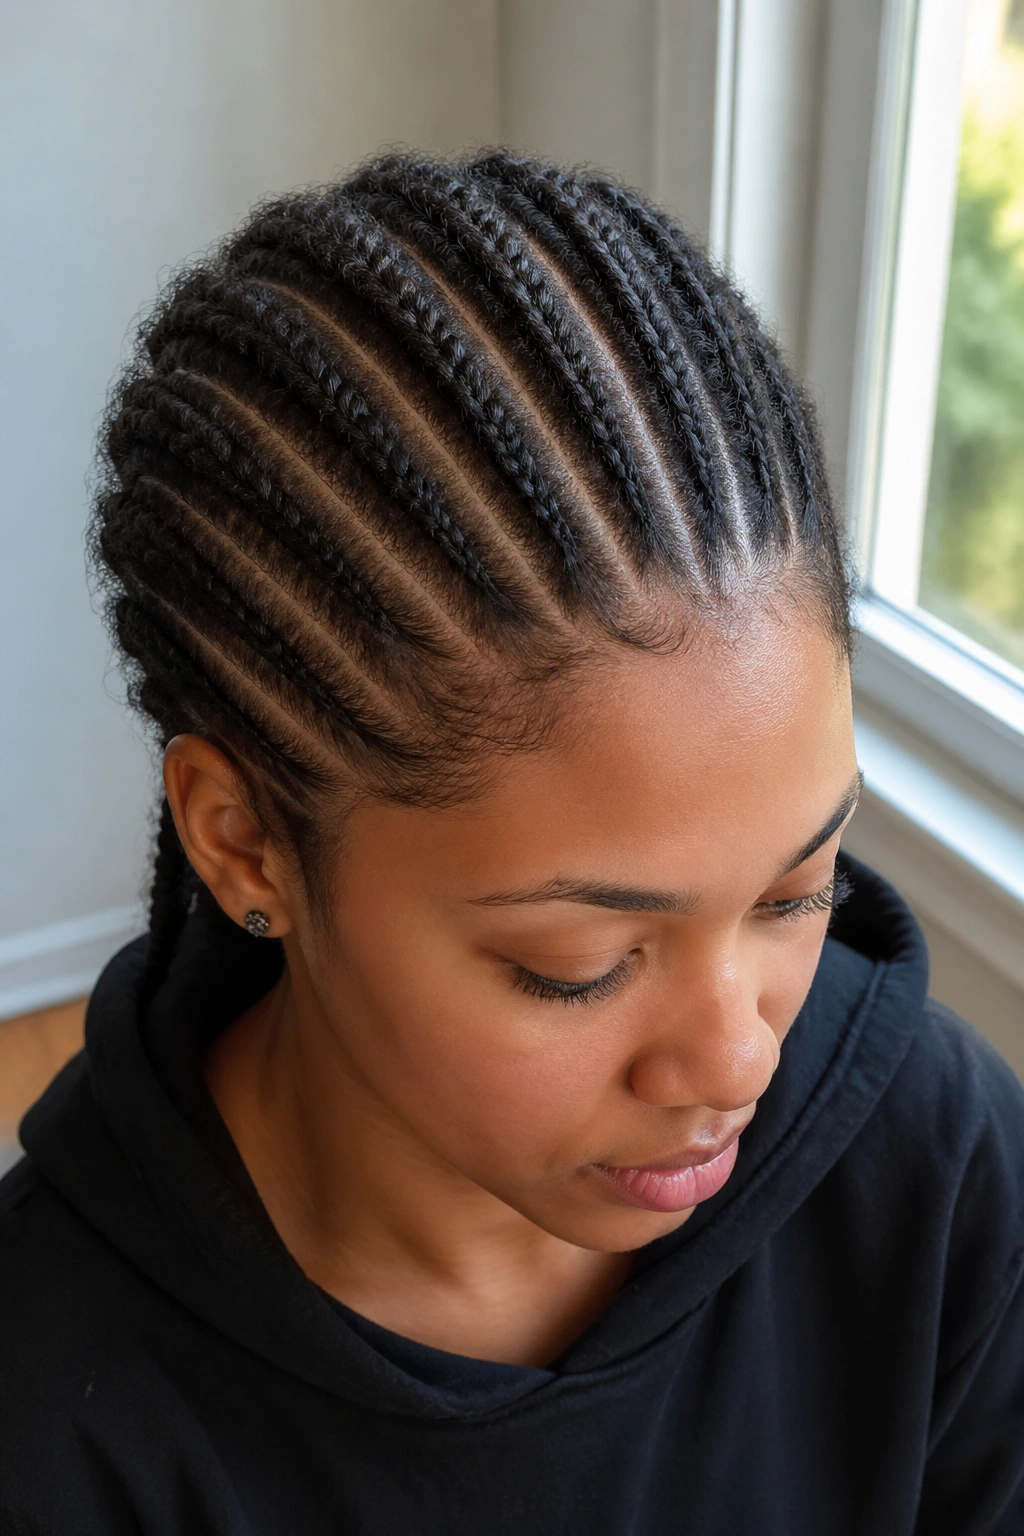
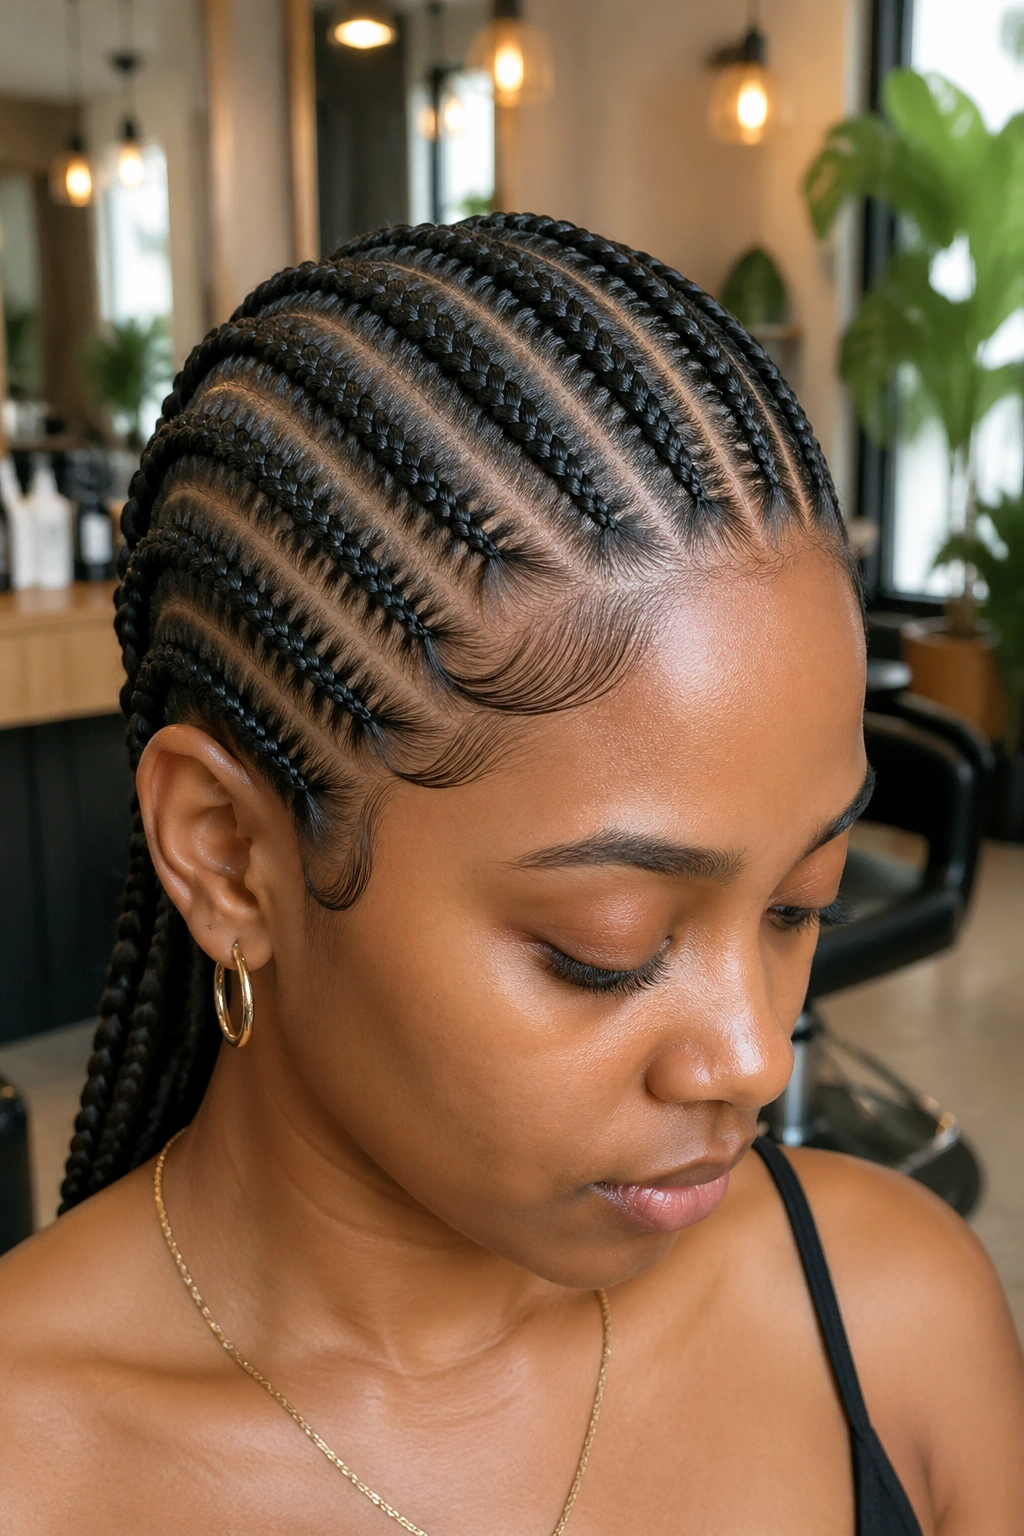
Twelve is the number most braiders land on when they want coverage without crowding the scalp. It’s enough rows to create real pattern work, but not so many that each braid becomes thin and stringy. Cornrow styles with 12 braids hit that middle ground where the parting feels deliberate, the tension sits evenly across the head, and the finished look reads as polished rather than rushed. You can wear them straight back for simplicity or push the pattern into curves, swirls, and asymmetric layouts that turn the count into something sculptural.
The count matters more than people think. Six braids look sparse on most head sizes. Twenty or more starts to crowd the hairline. Twelve gives you balance — room to breathe at the parts, enough weight per braid to hold shape, and a finished style that photographs cleanly from every angle.
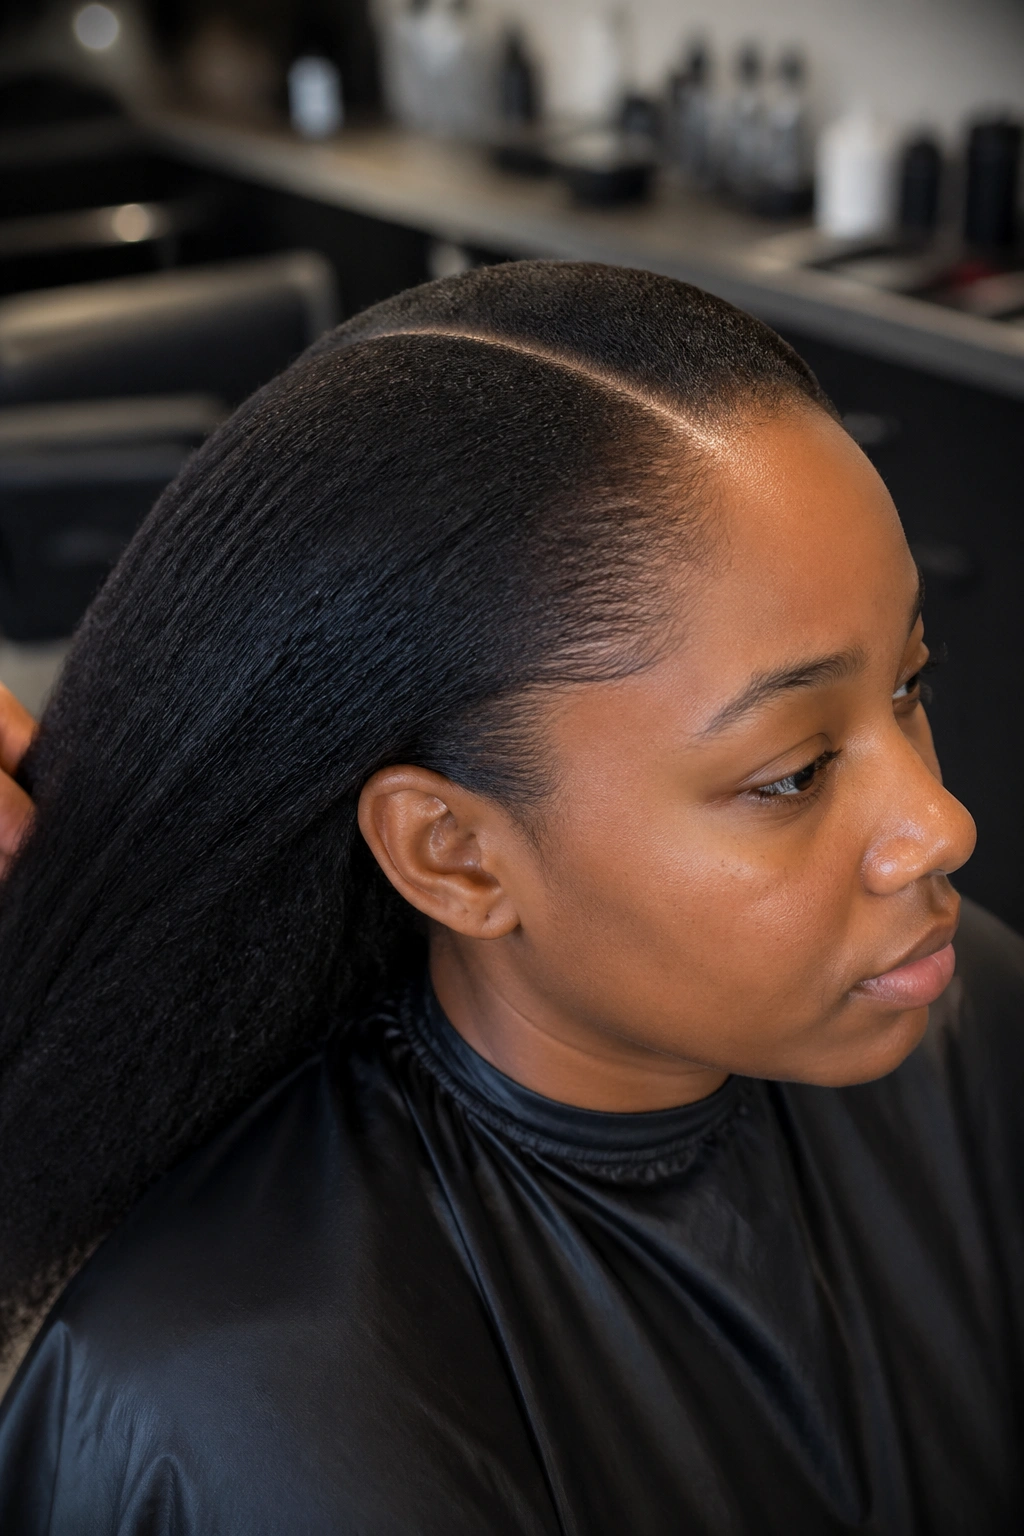
Hair that’s been hydrated, detangled, and lightly stretched holds the count best. Damp hair with a leave-in and a light oil gives the braider something workable without being slippery. The goal is a scalp that feels soft under the comb but not soaked.
Why 12 Is the Sweet Spot for Cornrow Counts
Twelve braids land in a range where scalp tension distributes across a wide enough area to avoid pressure points. When you braid eight rows into a full head of hair, each braid pulls on a larger chunk of follicles and the weight concentrates at a few anchor spots. Sixteen or more rows force each section to be narrow, which can look delicate but often strains the edges.
With twelve, you get roughly equal spacing between parts — usually about an inch or slightly more on an average head. That gap is wide enough to show scalp without revealing bare stripes, and it gives the finished rows a clean, architectural feel. Most scalps feel lighter after a twelve-braid install than after a tighter count, and takedown is faster by a noticeable margin.
The count also scales well across hair textures. 4C hair holds a twelve-row install for three weeks easily with basic care. Looser curl patterns keep the shape for about two weeks before fuzz starts to dominate. Either way, twelve is a count that doesn’t fight your natural texture.
Prep Work That Makes 12 Braids Lie Flat
Start with a clarifying wash if the scalp has buildup from previous products. Follow with a moisturizing conditioner and leave it on for fifteen minutes under a plastic cap. This lifts the cuticle just enough to accept moisture without leaving the hair so soft it can’t hold tension.
Detangle in four sections using a wide-tooth comb and a slip cream. Work from ends up to roots, section by section. Knots caught during braiding create lumps under the rows and force the braider to backtrack.
Blow-dry on low heat with a comb attachment until the hair is stretched but not bone-dry. Stretched-but-moist is the texture that grips best. Apply a light edge control along the hairline before the first part is drawn — waiting until after the rows are in means the edges are already set in whatever direction they wanted to go.
Tools Worth Having Before You Start
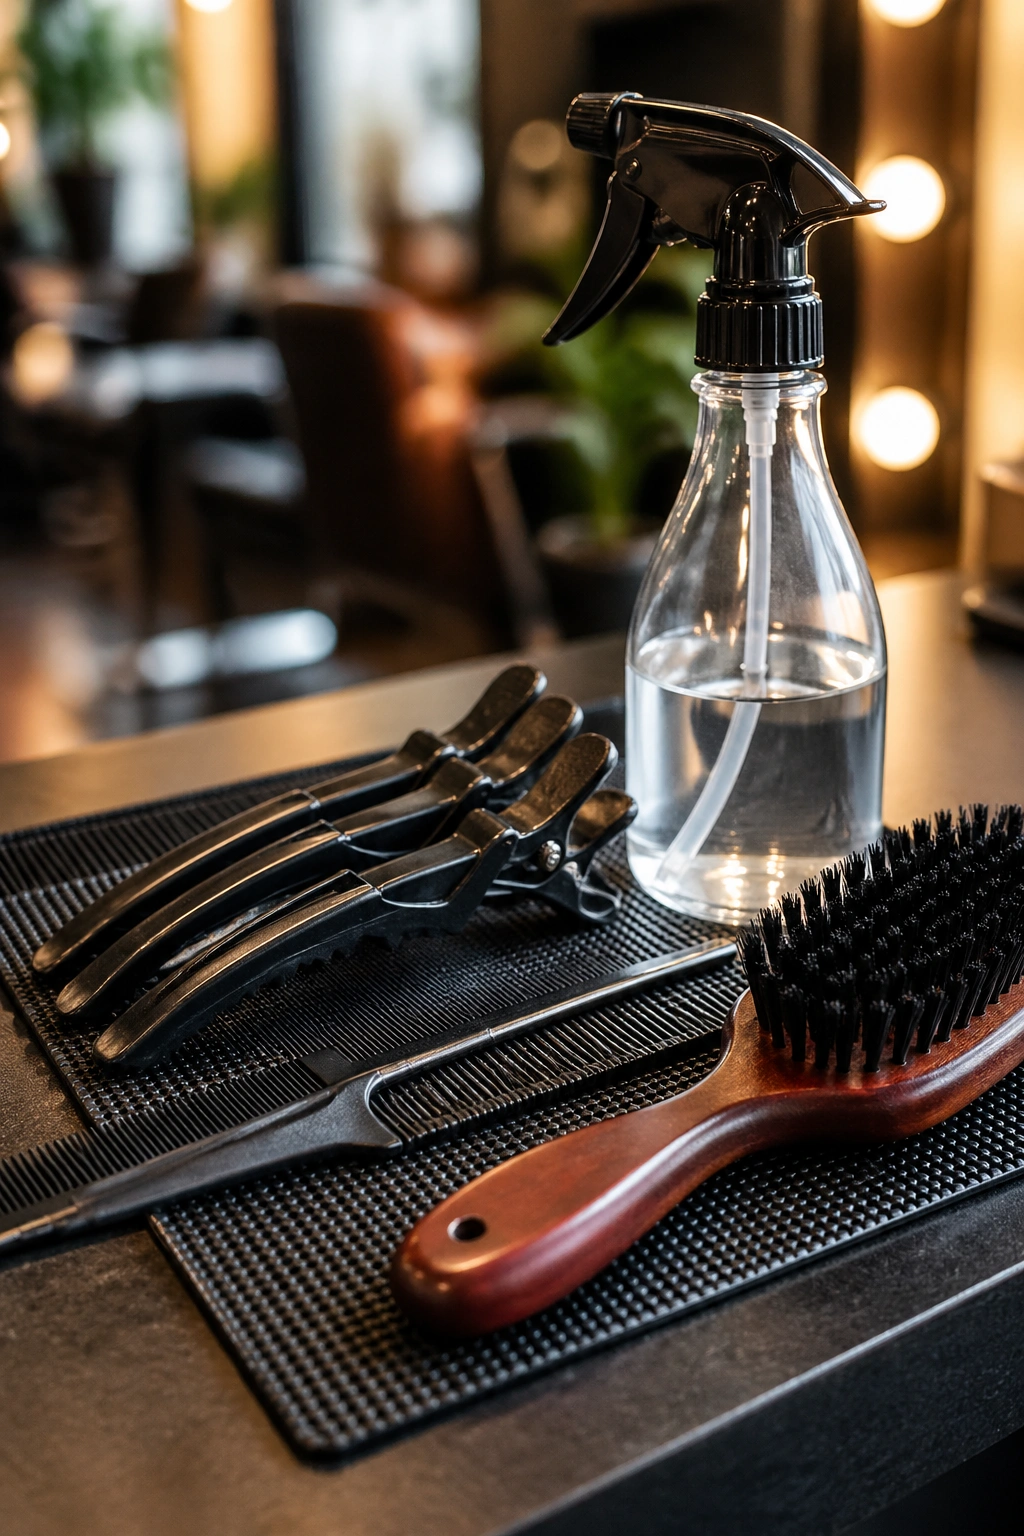
A rat-tail comb with a metal pin end draws the cleanest parts. Plastic pin ends drag on damp hair and distort the line. A spray bottle filled with water and a few drops of jojoba oil keeps the hair pliable without making it slippery.
Clips that hold thick sections matter more than most people realize. Thin duckbill clips slide out of 4C hair when the section is dense. Jumbo alligator clips or sectioning butterflies stay put.
You’ll also want a fine-tooth comb for smoothing the front edge of each braid and a soft boar-bristle brush for the final polish along the hairline.
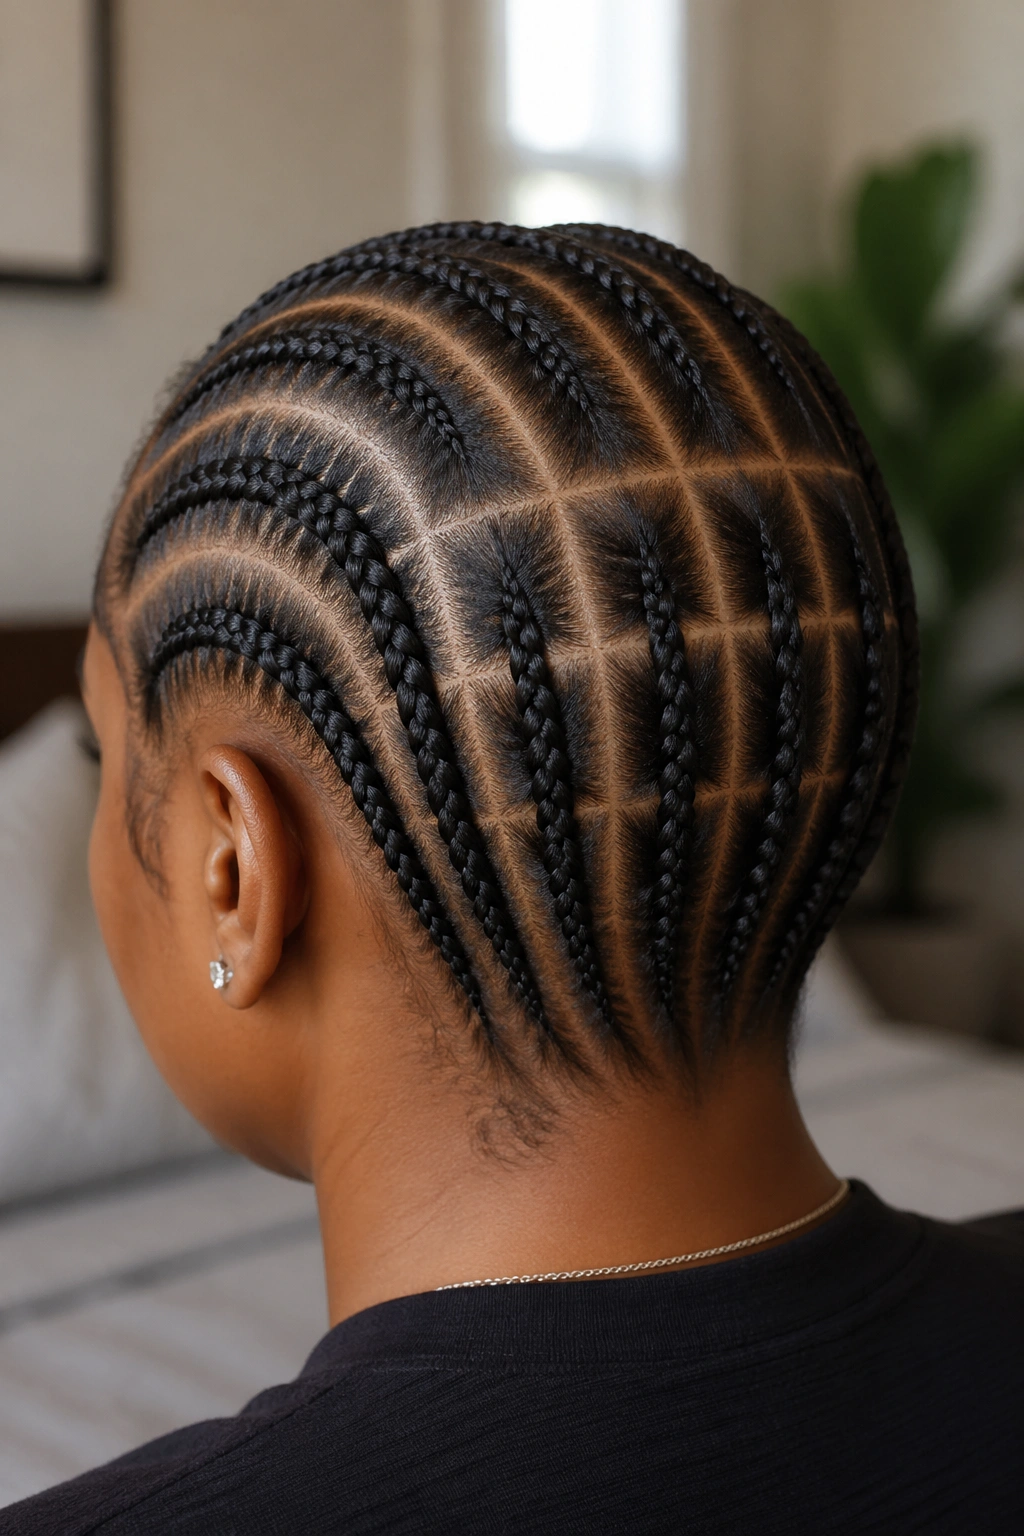
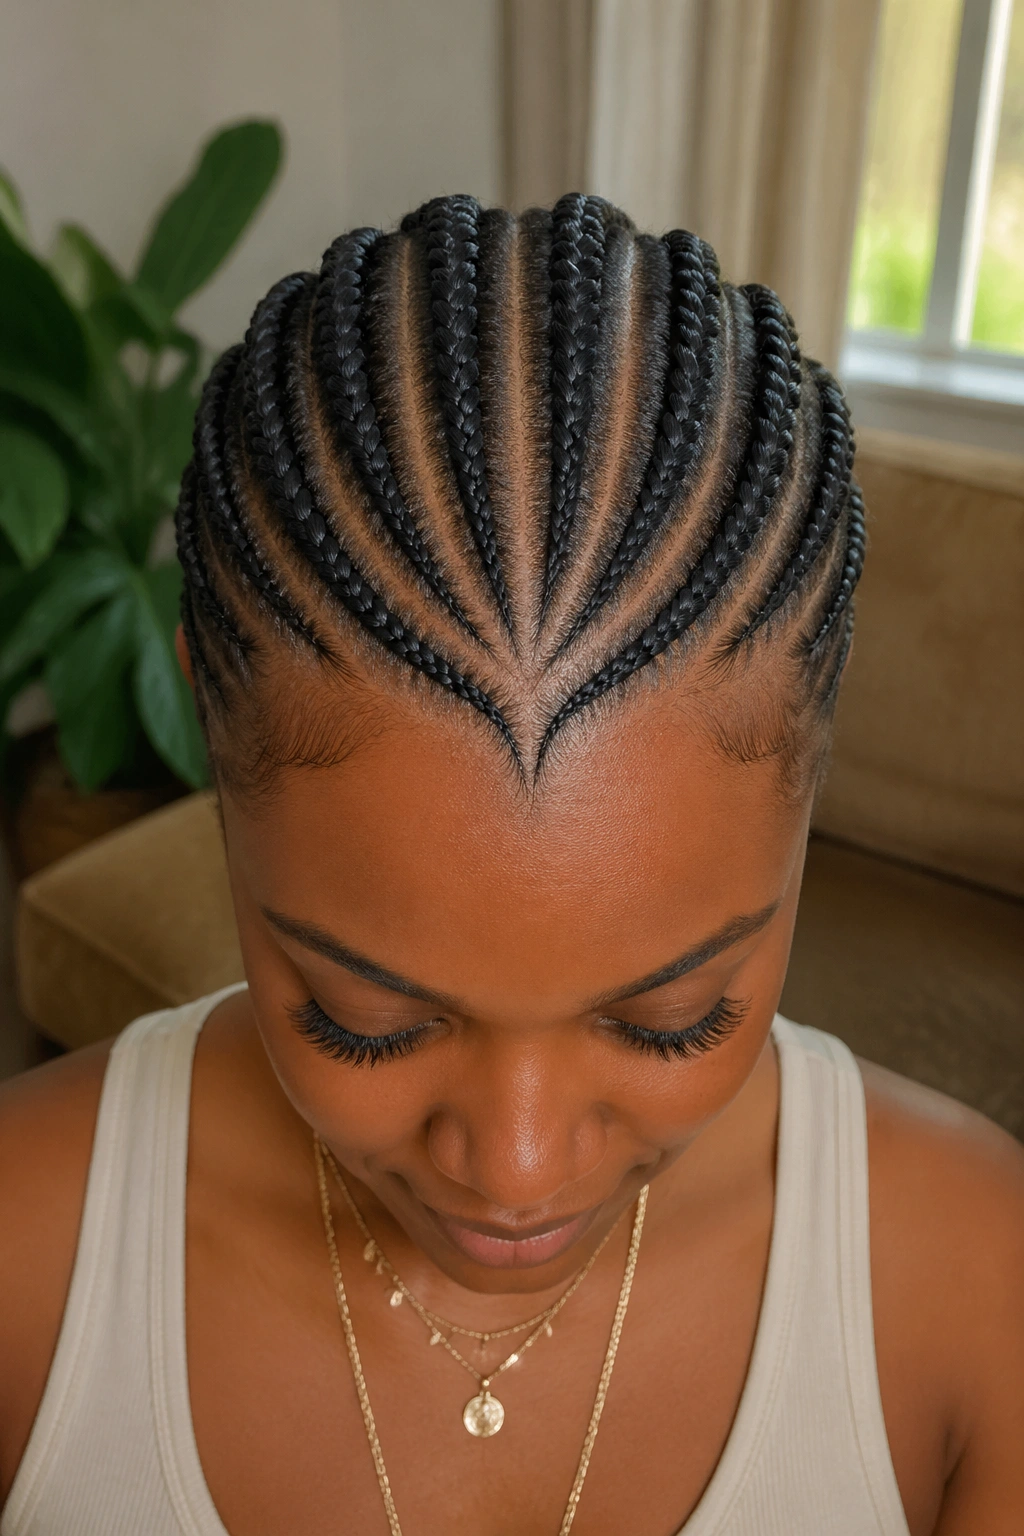
The Parting Grid That Produces 12 Even Braids

Draw a center part from forehead to nape. Then split each half into six equal sections running front to back. The first section on each side starts about a thumb-width from the center part. Spacing the six lines evenly across each half is the only fiddly part of the whole process.
Measure by eye but check by feel. Run a fingertip along the crown to confirm each parting line sits at roughly the same distance from its neighbors. On a typical adult head, the spacing lands somewhere between 3/4 inch and 1 1/4 inches depending on head size.
If you want the rows to curve instead of running straight back, draw the curves after the grid is set. Curved cornrows still start from the same twelve parting lines — the curve happens in the braiding direction, not the parts themselves.
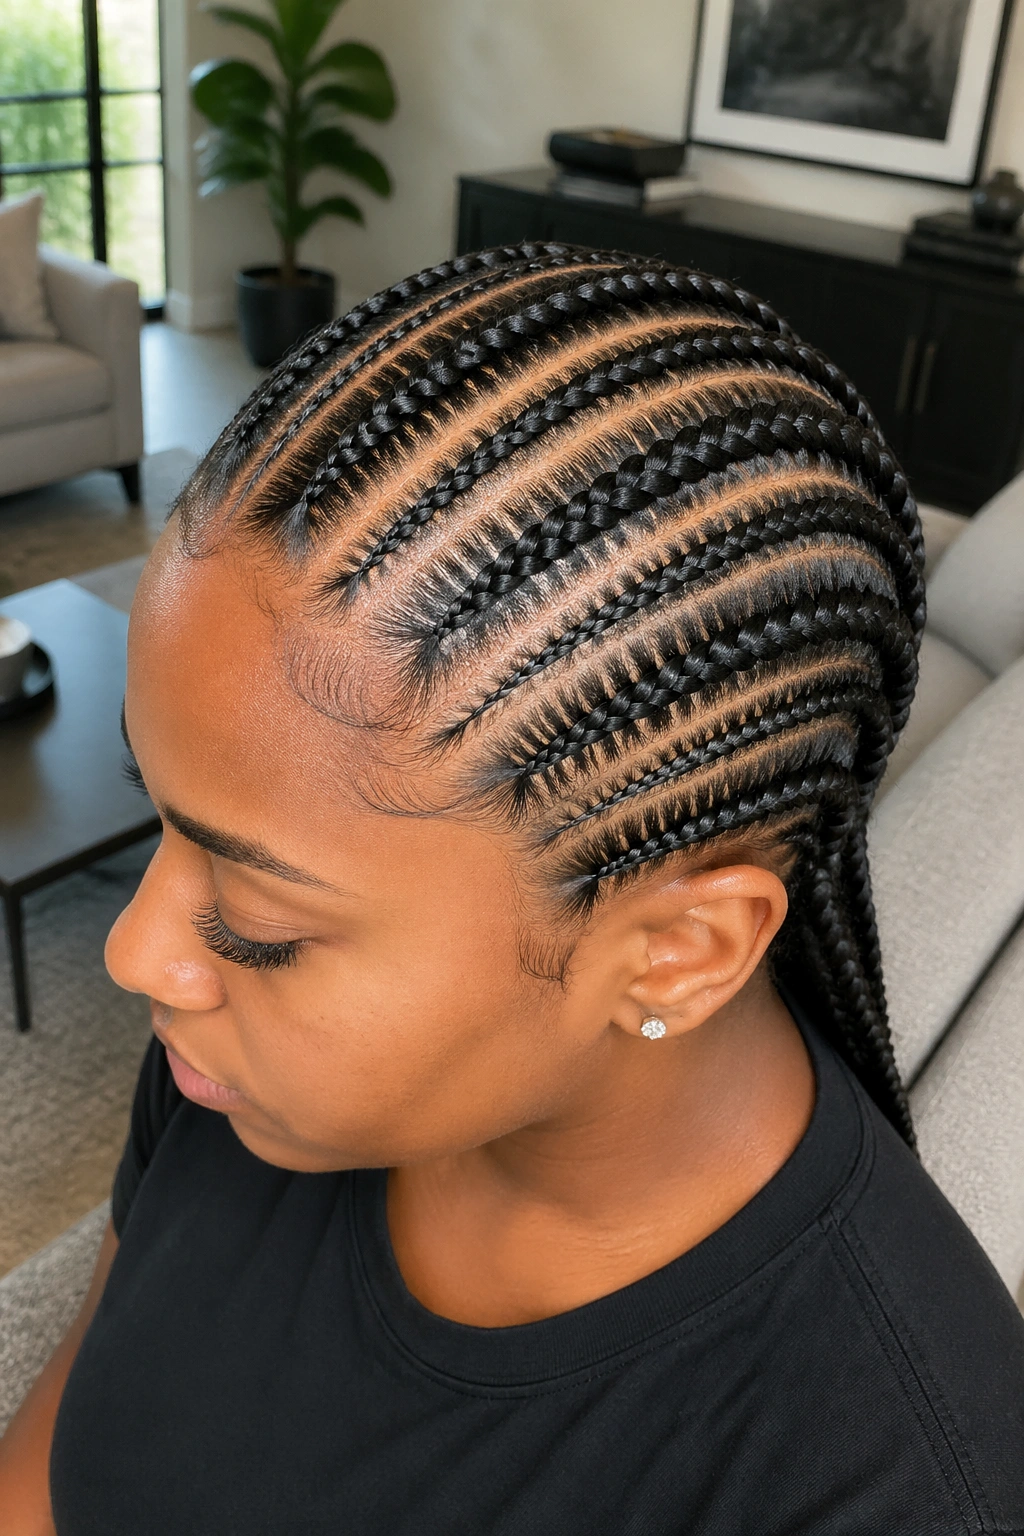
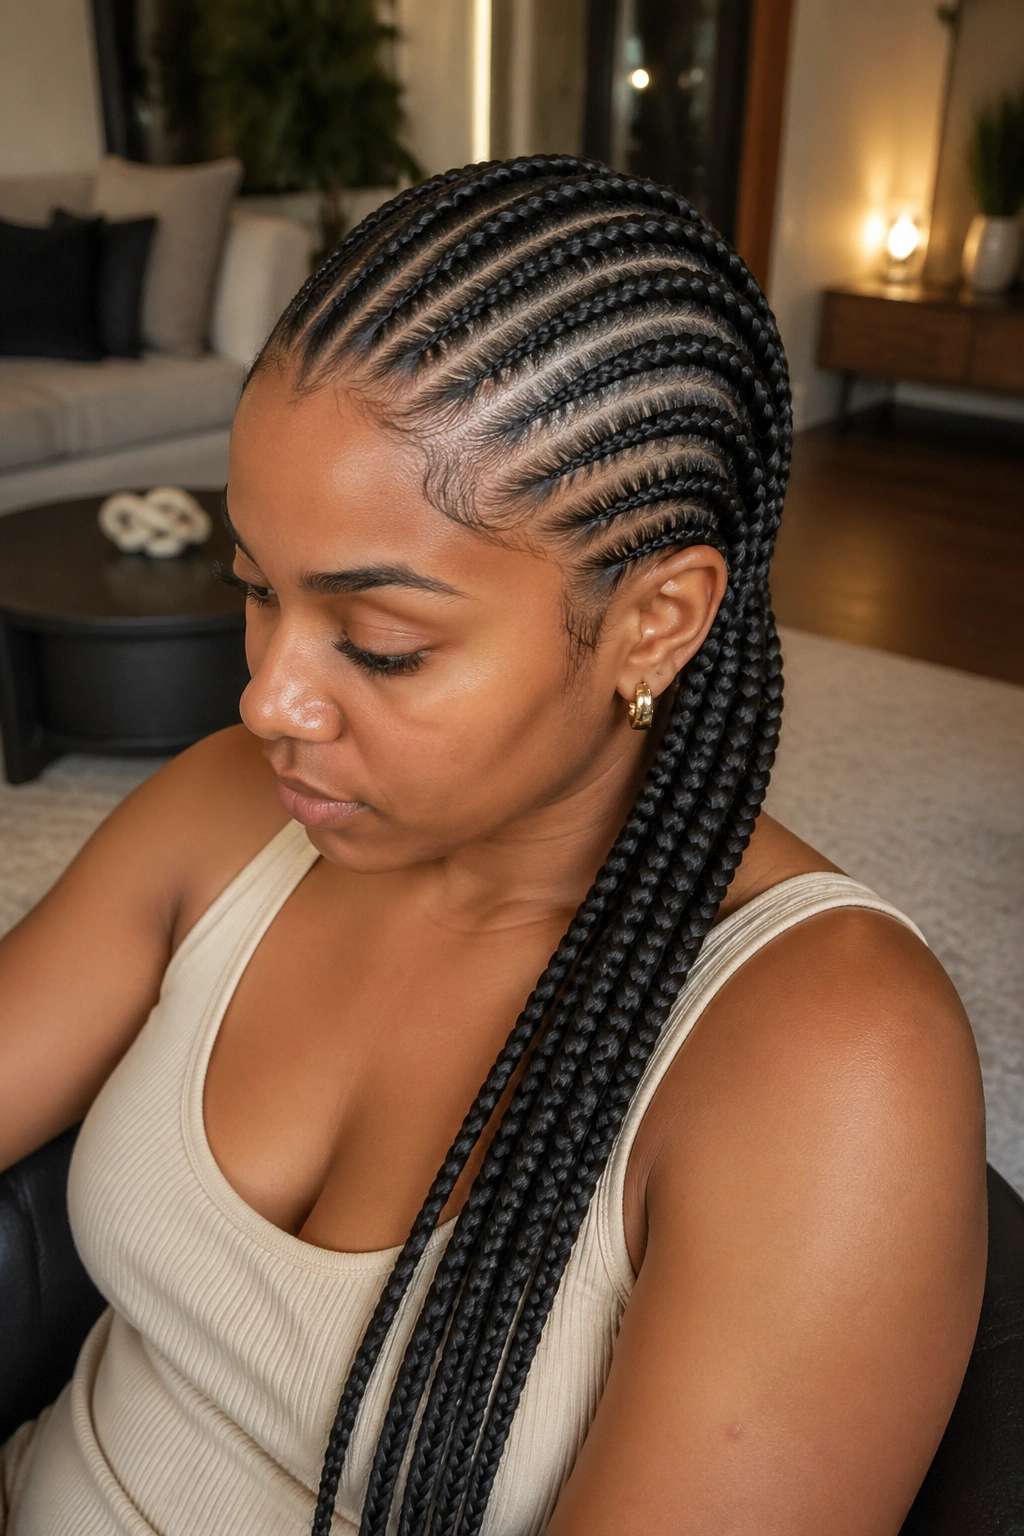
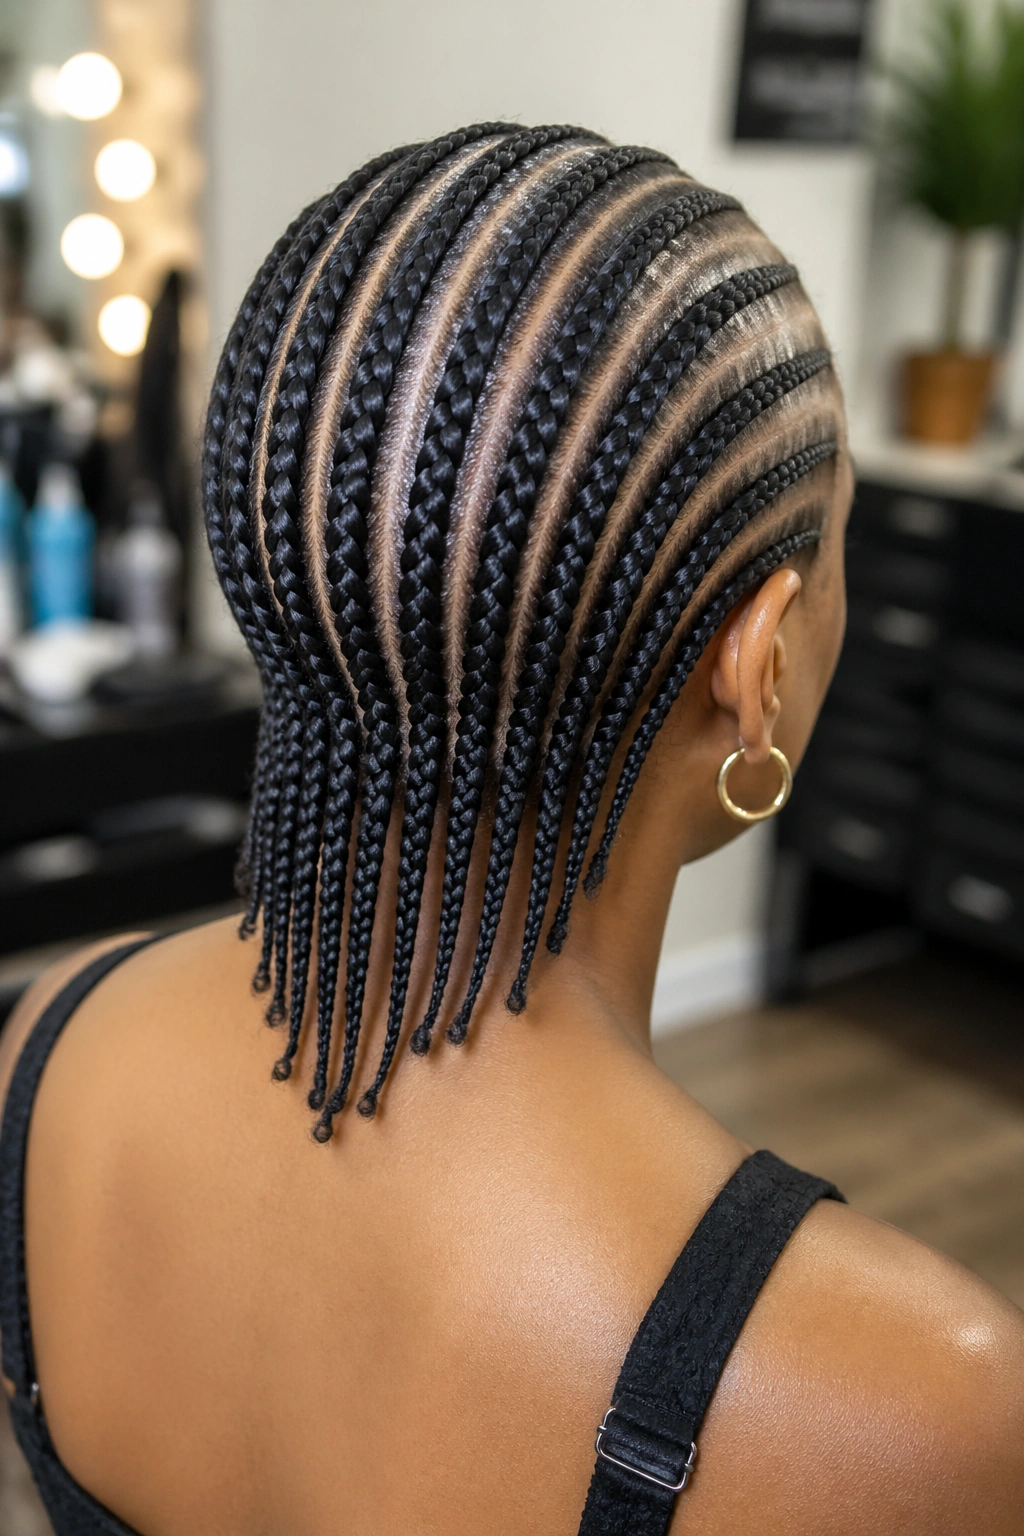
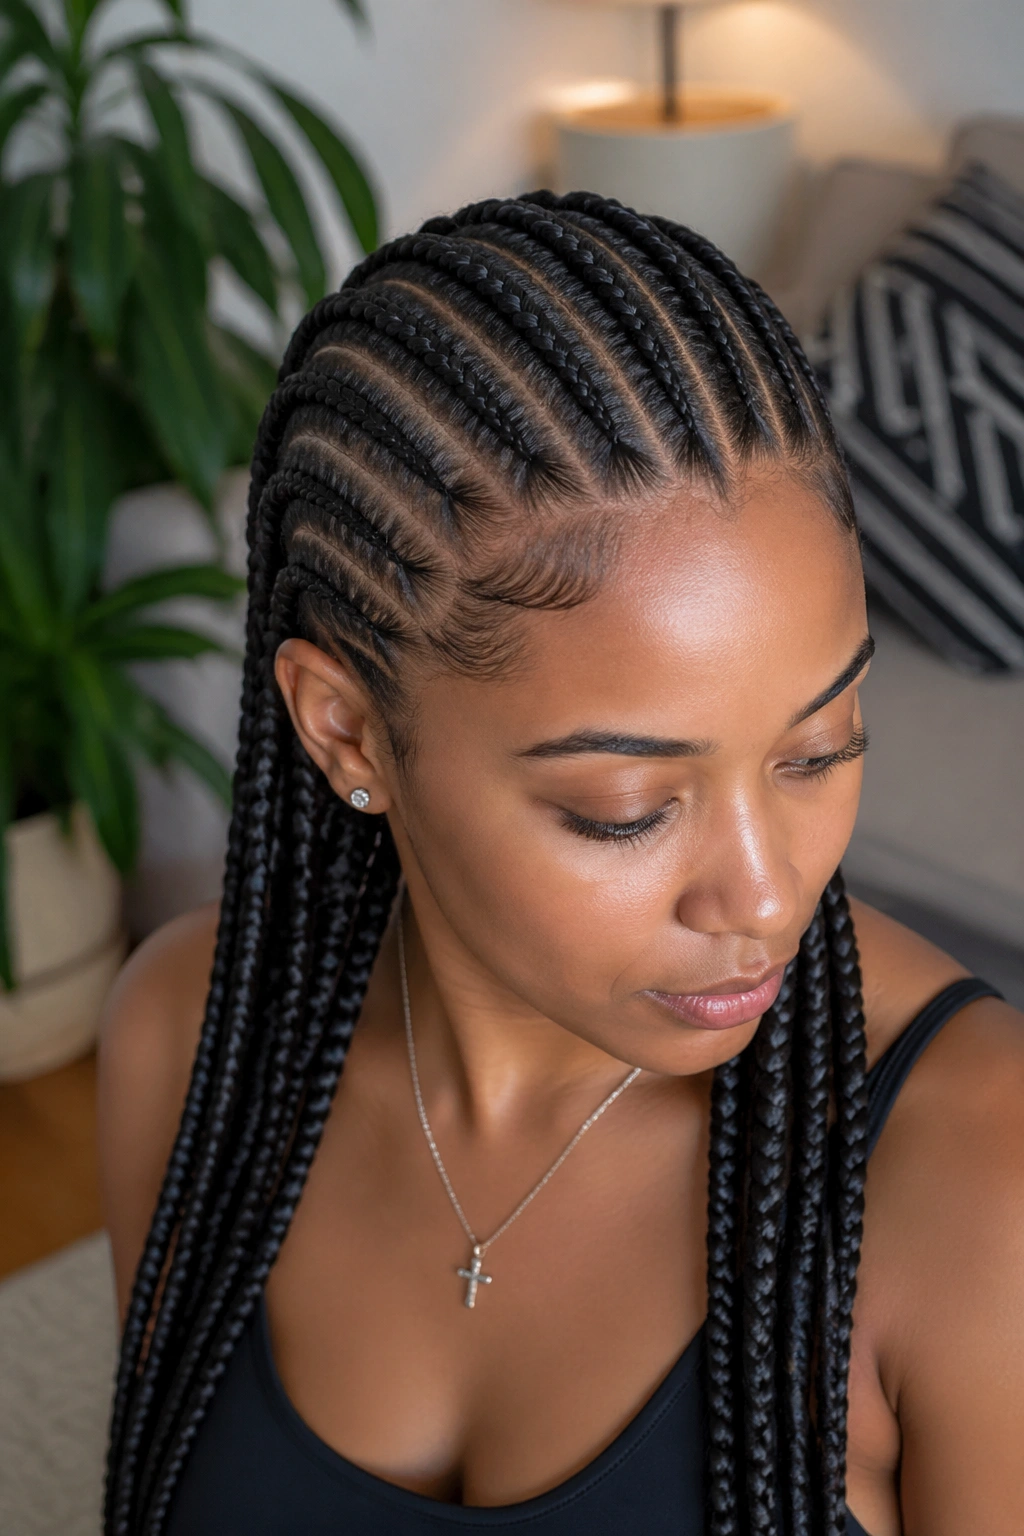
1. Twelve Straight-Back Rows
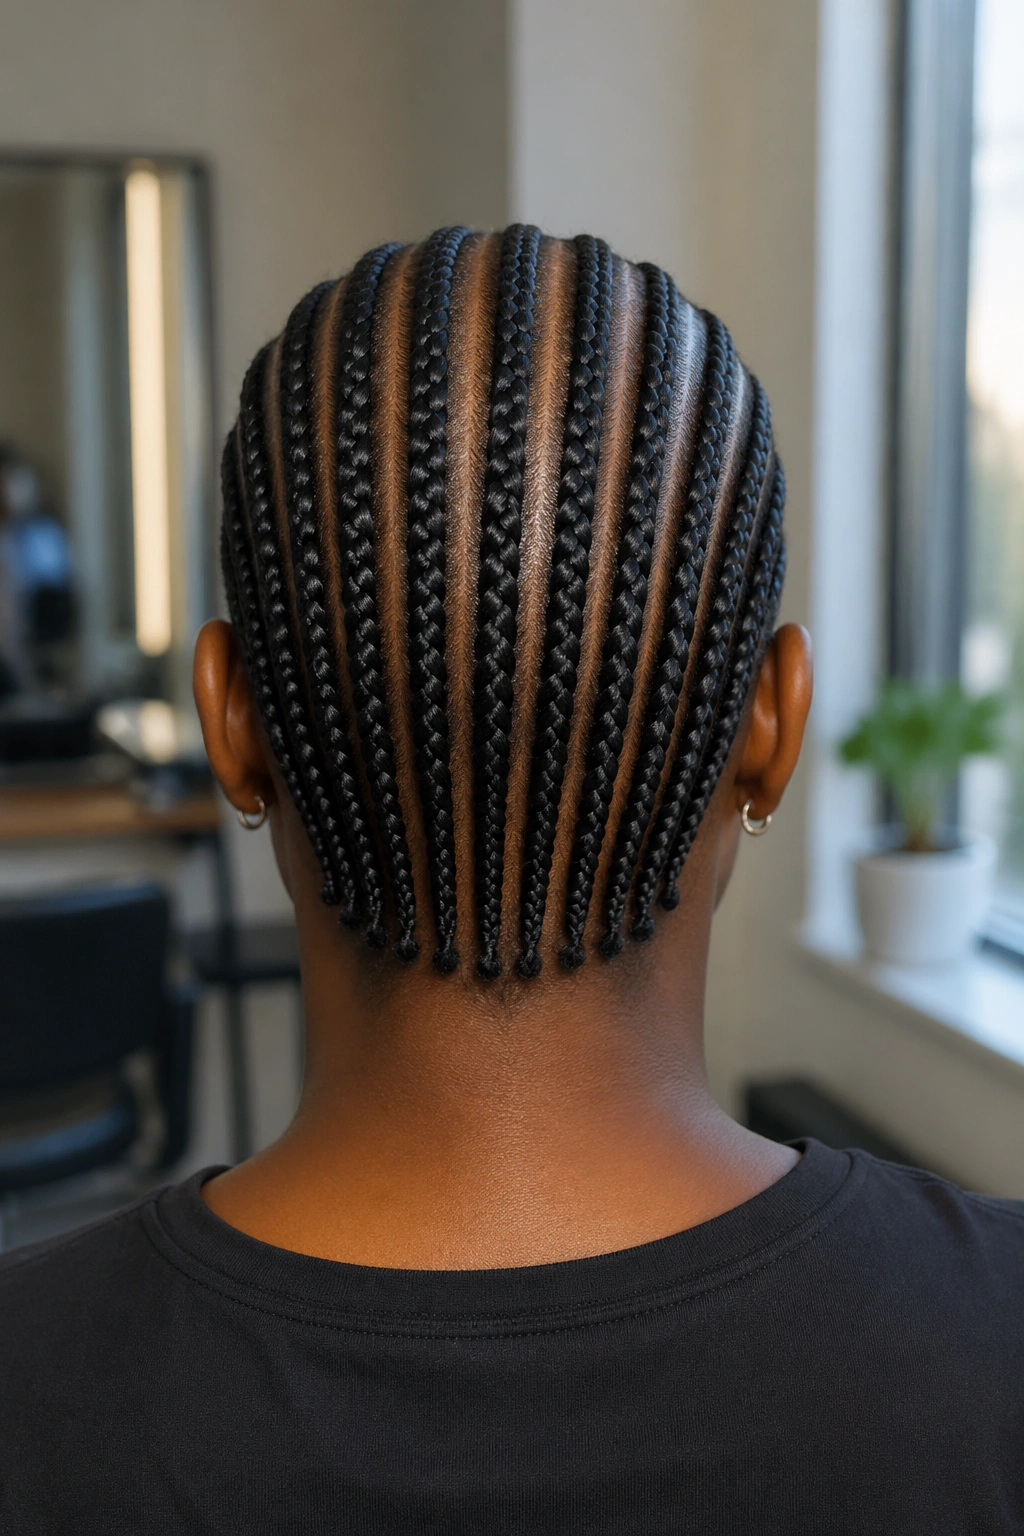
The cleanest version of the count. Six braids per side running from the hairline to the nape in parallel lines. Each row sits about an inch from the next, and the ends gather into a low ponytail or tuck under at the nape.
Why It Works
- Shows off clean parting without any distracting shapes
- Scalp tension stays even from front to back
- Easy to maintain — nightly satin scarf is all it needs
Tip: If your hairline dips lower in the middle, start the two center braids about half an inch behind the others so the front line still looks straight when finished.
2. Twelve Rows With a Zigzag Hairline
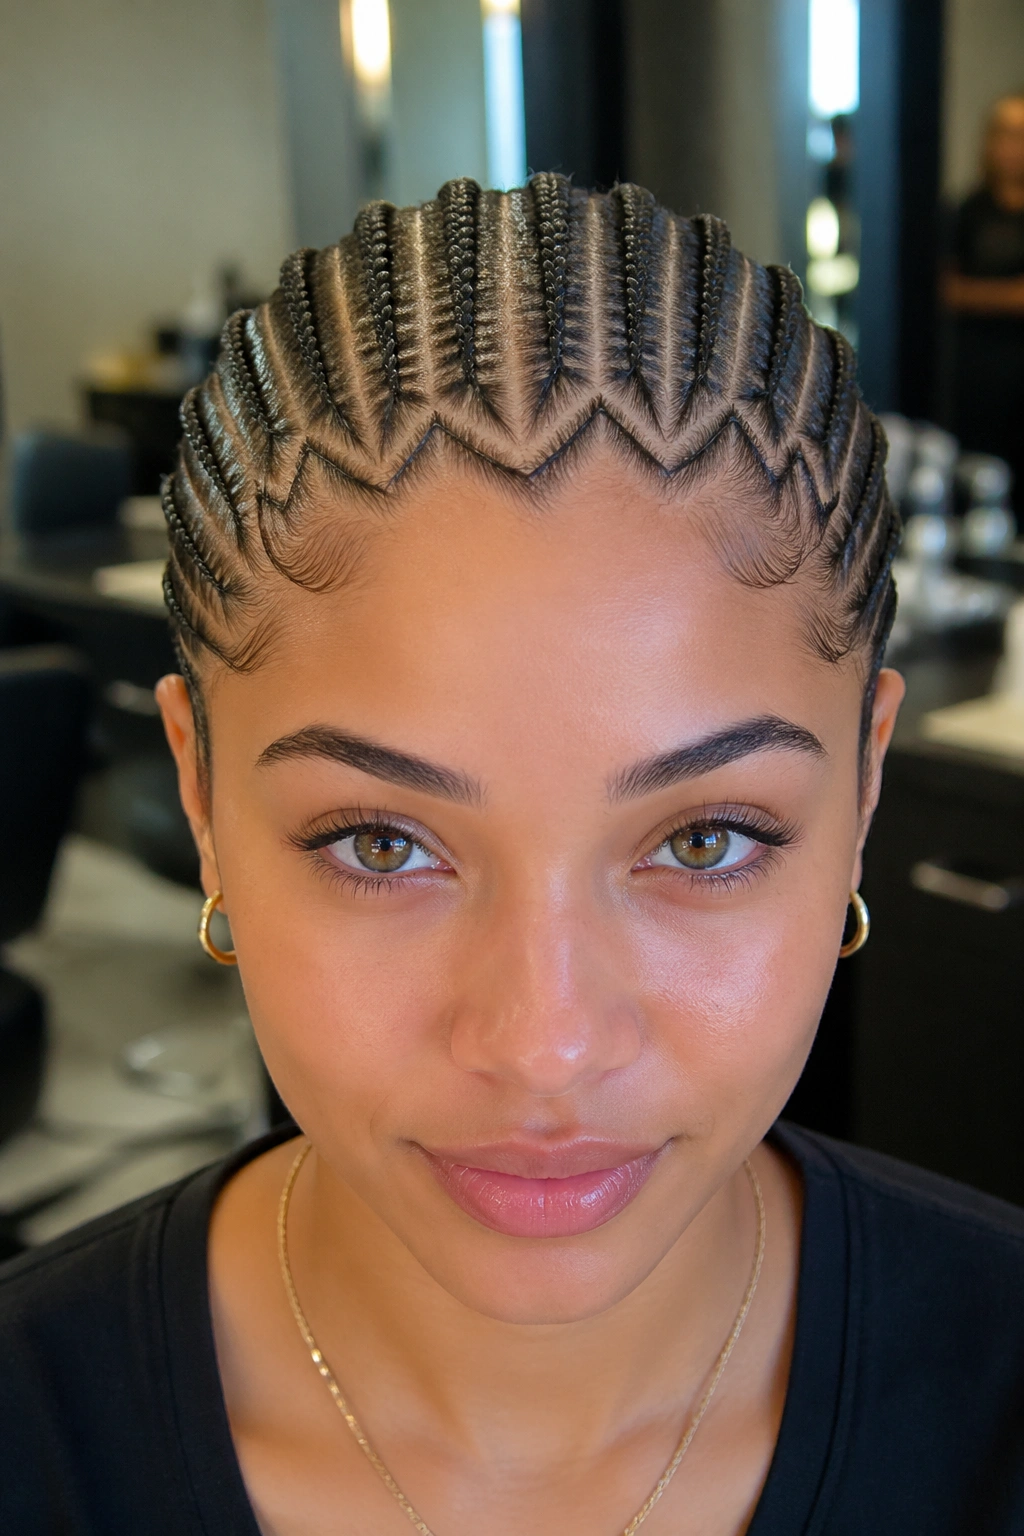
You take the same twelve-row base and reshape the front edge into a zigzag. The parting lines still run straight back — only the leading edge of each braid along the forehead bends into small peaks.
That zigzag adds visual rhythm at the face without changing the structure behind it. The braids themselves stay clean and parallel, so daily maintenance is no different from a standard straight-back install. What changes is how the style reads in photos and from the front. The zigzag catches attention at eye level while keeping the rest of the head simple.
The peaks should be about an inch apart. Any closer and they look busy. Any wider and the zigzag reads as a mistake rather than a deliberate shape.
Best for: anyone who wants pattern work without committing to complex curves through the whole head.
3. Twelve Rows Pulled Into a Side Bun
What happens when twelve straight-back rows meet at a gathered point on one side instead of the nape?
You get a finished style that reads as both protective and styled. The six braids on one side angle gently toward the meeting point, while the other six take a slightly longer path. The ends get wrapped into a low bun that sits just behind the ear.
How to Style It
Braid the twelve rows as normal, but angle the direction toward your chosen side as you work. The angle should be subtle — about fifteen degrees — so the rows don’t crowd each other near the bun. Gather the ends and twist them around themselves, pinning with U-shaped bobby pins. A small touch of gel smooths any flyaways where the braids converge.
4. Twelve Rows With Alternating Thickness
Six thick braids alternating with six thinner ones, all running straight back. The thicker rows anchor the style while the thinner rows add fine detail between them.
This layout uses the same twelve count but plays with density. A thick row takes about 1.5 inches of hair at the part. A thin row takes less than an inch. The visual effect is almost like woven ribbon — rhythm and texture built into a simple straight-back structure.
Stagger which rows are thick and which are thin. Alternating strictly reads as mechanical. Clustering two thick together, then two thin, then one thick, creates the kind of irregularity that looks intentional.
5. Twelve Rows In a Crown Pattern
The twelve braids form a crown by curving around the top of the head. Six rows start at the front and sweep backward in a semicircle. The other six mirror them, meeting at the crown where all twelve ends either hang down or get tucked under.
This is the style worth trying if you want cornrows that frame the face without covering it. The front hairline stays exposed, the curves draw the eye up and around, and the finished look reads as regal without being fussy.
Cornrows that curve require tighter grip than straight rows because the angle fights the hair’s natural fall direction. A good braider keeps the tension steady through each curve rather than pulling harder mid-row.
Sleep in a satin bonnet every night. The curved shape loses definition faster than straight rows if the braids rub against cotton.
6. Twelve Rows With Invisible Feed-Ins
Start with your real hair at the hairline. Feed in small pieces of kanekalon along the way so that by the time you reach the midpoint of each braid, the row is thicker than it would be with natural hair alone.
The word “invisible” refers to the feed technique — done correctly, no one can see where the extension hair enters. The base of each braid looks like the root of a thick natural cornrow.
What Makes It Different
Standard feed-ins can show the addition hair clearly if the feeder rushes the process. Invisible feed-ins use smaller pieces fed at closer intervals, which blends the transition. The trade-off is time — an invisible feed-in takes about 25% longer than a standard feed-in.
Best length for added hair: 14-16 inches. Shorter feeds look stubby. Longer ones add too much weight for a twelve-row count.
7. Twelve Rows Styled Into Box Shapes at the Back
The twelve rows run front to back in the usual way, but at the crown, each row gets sectioned off into a small squared-off shape before continuing. It looks like a quilt pattern sitting on top of the braid grid.
That squared section is created by adding short perpendicular parts between each long row at the crown. The braids continue through the squares uninterrupted — the boxes are decorative outlines rather than actual breaks in the rows.
The effect is architectural and shows off the braider’s parting skill. This is not a style to attempt on your own unless you’ve practiced precise geometric parting.
8. Twelve Fulani-Inspired Rows With Accents
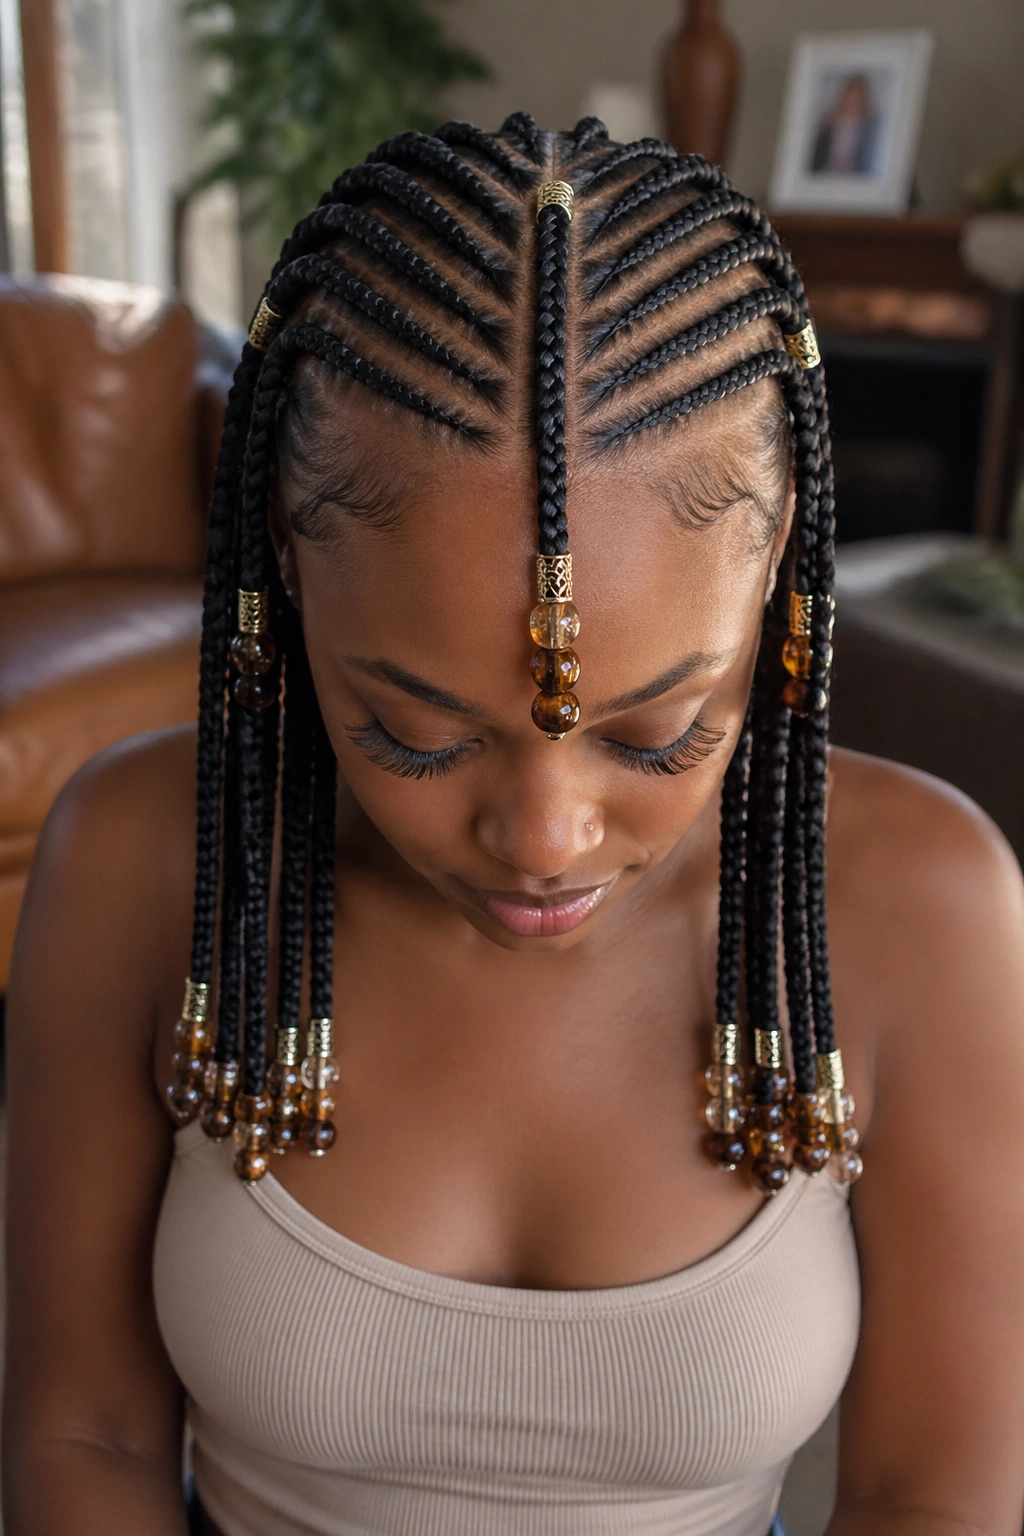
Cornrow rows: 12. Beads: roughly 20-30. Cuffs: 2-4. Those are the numbers for a Fulani-style install on this count.
Fulani braiding traditions place value on the interplay between the braid itself and the metal or beaded accents along its length. With twelve rows, you have enough surface area to add accents without the head looking cluttered. Beads cluster near the ends of four or five selected rows. Small cuffs slide onto a couple of the longer ones.
Don’t add beads to all twelve — the weight pulls the whole style downward. Pick specific braids for the accent work and leave the rest clean.
The traditional Fulani layout also tends to include one wider row down the center, framed by the other eleven running alongside it. That center row becomes the focal point and often carries the heaviest accents.
9. Twelve Rows With a Side-Swept Front
Can a cornrow style feel as sculpted as a pressed-out hairstyle? With twelve rows styled into a side sweep at the front, yes.
Three or four of the front rows curve sharply across the forehead from one side to the other before joining the rest running backward. The result is a style that has pronounced movement at the face but settles into straight-back rows from the crown onward.
How to Wear It
The side sweep works best when one side of the face is fully exposed and the other is slightly covered by the curve. Wear earrings on the exposed side to emphasize the asymmetry. The covered side can feel heavier, so check in the mirror that the braids aren’t pulling visibly across the forehead — they should rest, not drag.
10. Twelve Rows With Stitch Braids Throughout
Stitch braids use a technique where the braider creates thin horizontal lines across each cornrow as it’s being plaited. Each stitch looks like a small embossed stripe across the row, spaced about half an inch apart.
Applied across all twelve rows, the stitches create a ridged, textured surface that catches light differently than a standard smooth cornrow. The look is clean, geometric, and modern in a way that feels precise without being flashy.
Stitch braids take longer than smooth ones — add about an hour to a twelve-row install. The finished product holds up well for 2-3 weeks if treated gently.
11. Twelve Rows With a Bold Center Part
The twelve braids split six-and-six along a bold center part that’s been widened to about half an inch. That widened part becomes a visual feature in itself — a clear line of exposed scalp running from forehead to nape that frames the twelve rows cleanly.
Widened parts require careful edge work. Apply a small amount of gel along the center line and press it flat with a soft brush. The scalp shows, but the surrounding hair should still look groomed rather than unfinished.
12. Twelve Rows Curving Into a Heart Shape
The front four rows on each side curve inward toward the center forehead, meeting at a point that forms the bottom of a heart shape. The remaining four rows fan out toward the sides and back.
This is a statement style. It works best on people with medium to high hairlines because the heart point needs space to sit without crowding the brows. A low hairline will compress the shape.
Maintenance note: the heart point collects more product buildup than the rest of the style. Rinse it with a damp cloth every few days to keep it looking clean.
13. Twelve Rows With an Undercut
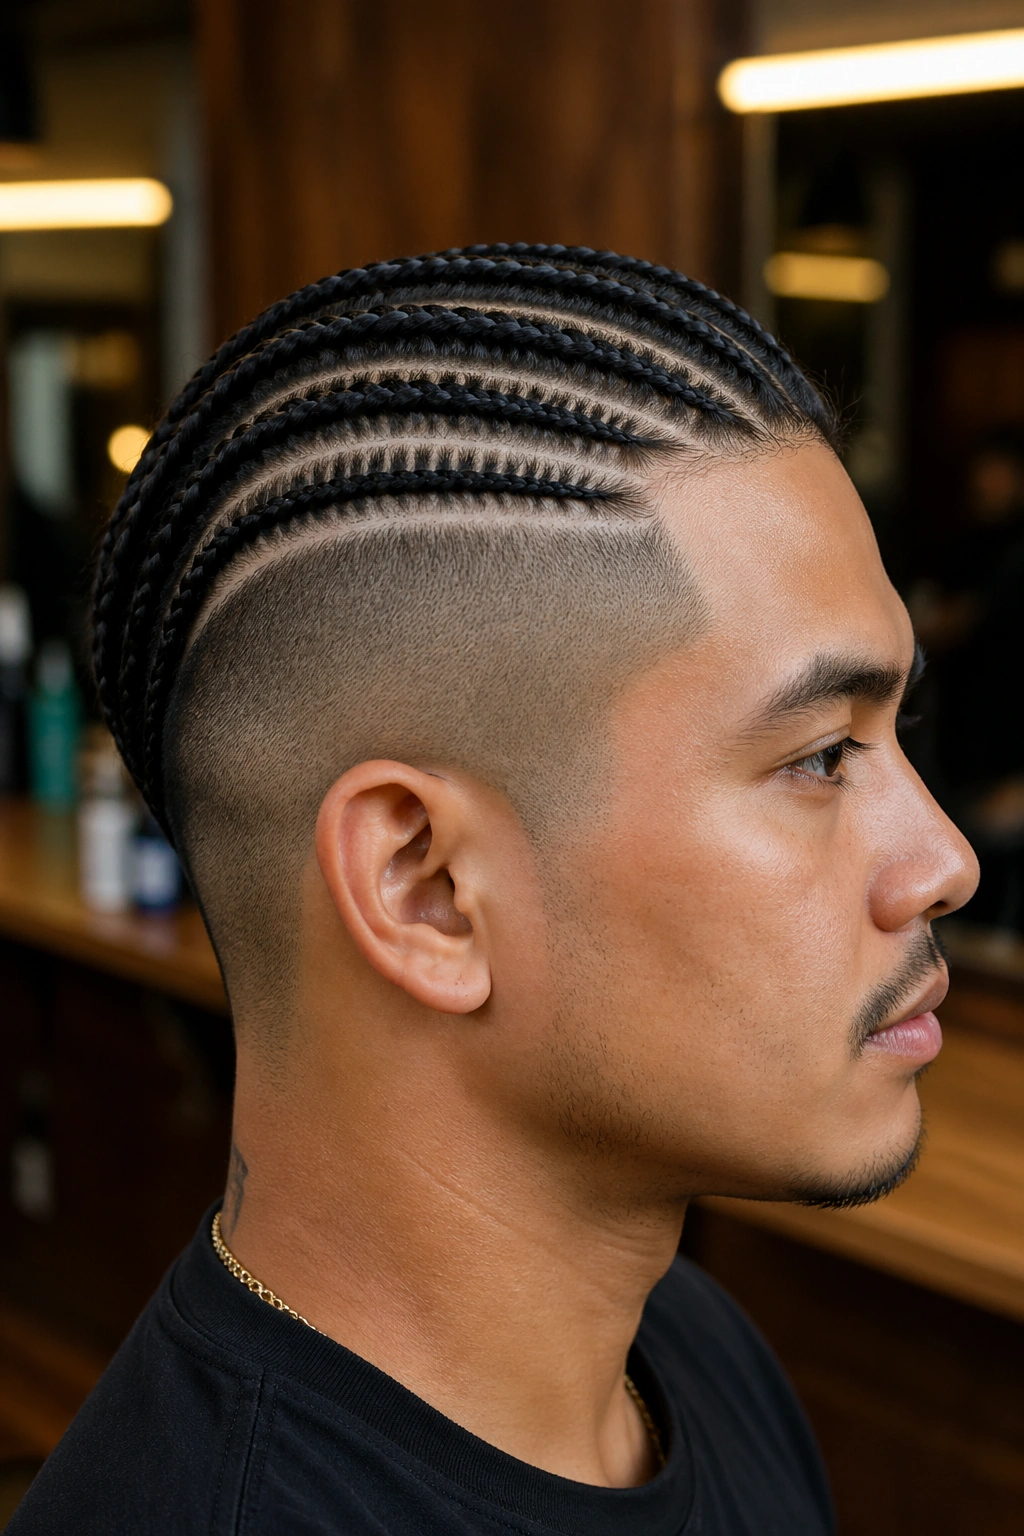
Unlike traditional cornrow styles that cover the whole head, this version shaves or closely trims the sides below a defined line. The twelve braids sit on top and run backward across the crown only, with the shaved sides creating a sharp contrast.
This style reads as edgy and modern. It’s not for everyone — the undercut commitment means you’ll need to shave or trim every 2-3 weeks to keep the contrast clean.
Who This Is For
Someone comfortable with a more pronounced style and with time to maintain the shaved portion. The braids themselves need the standard 2-3 week refresh, but the undercut needs weekly touch-ups between full re-braids.
14. Twelve Rows Interwoven Front to Back
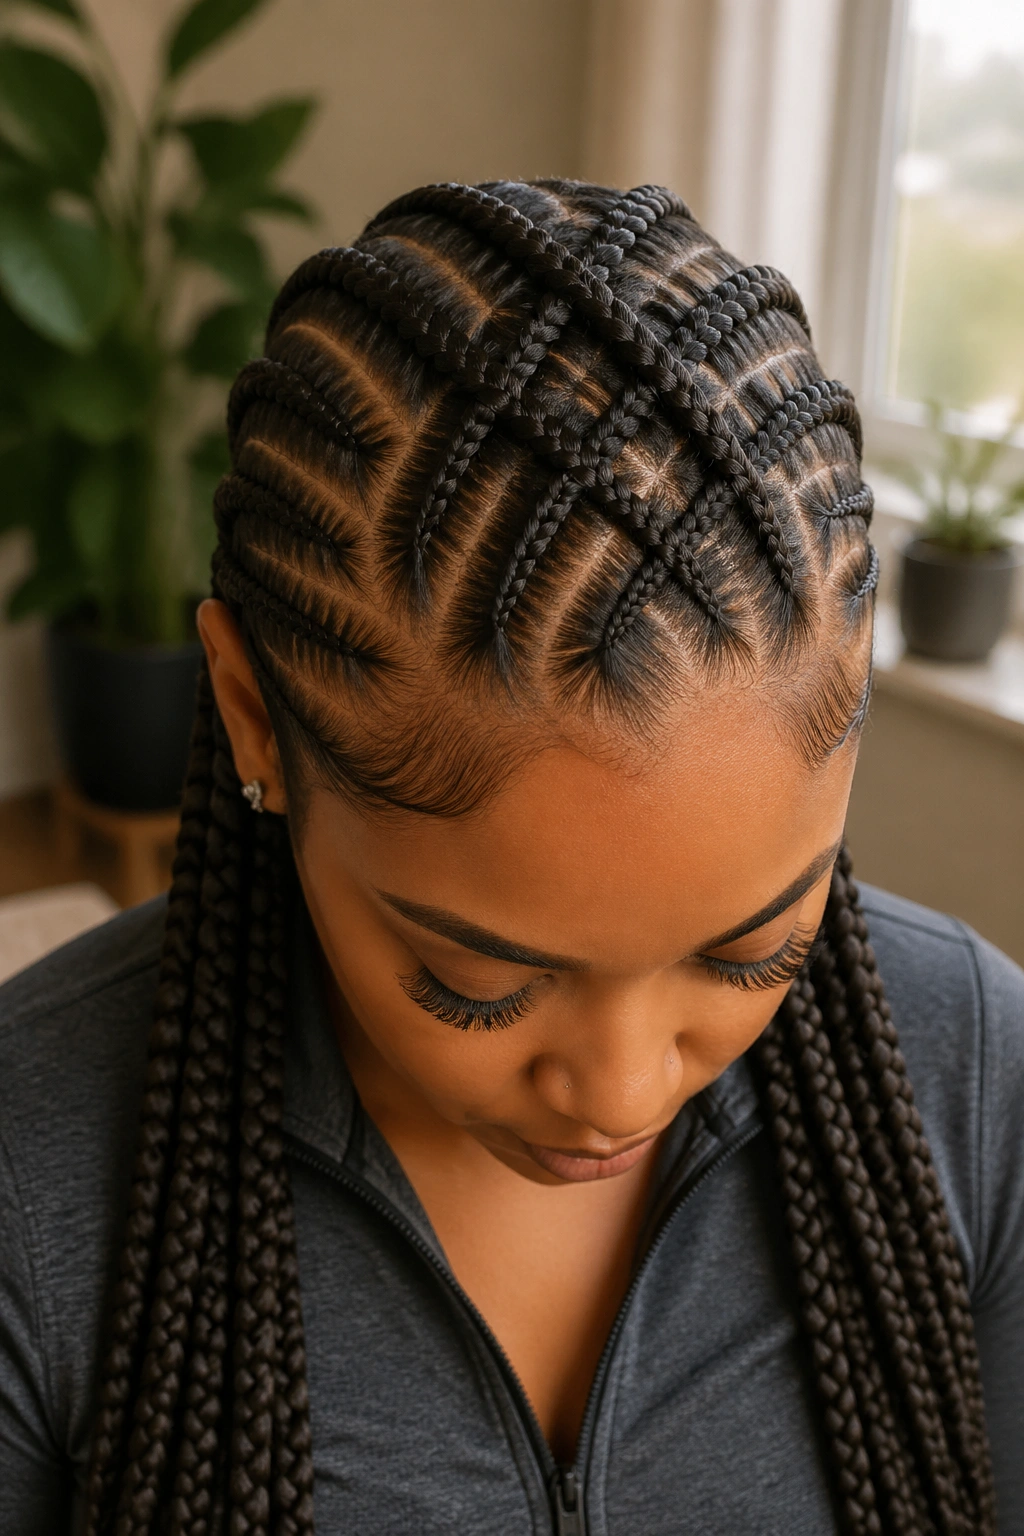
Cornrows typically run in parallel lines. This variation weaves certain rows over and under each other near the crown. Two braids cross at a specific point, then continue on their original path.
It’s hard to describe without seeing it, but the effect is almost like a basket weave visible at the top of the head. The interweaving happens only at one or two points — doing it across the whole style would be overkill.
This takes a skilled braider. The interweaving requires each row to be braided loosely at the crossing point, then tightened again as it continues. A braider who doesn’t understand the technique will create lumps.
15. Twelve Rows With Two Bold Stripes
Take the standard twelve-row straight-back style and use clear hair tape or colored extension pieces to add two bold horizontal stripes across the rows — one across the crown, one across the back of the head.
The stripes are decorative only. They can be removed without disturbing the braids underneath. Some people use them for a single event, others leave them in for a couple of weeks before removing.
Avoid anything adhesive that sticks to the braid itself. The stripes should rest on top of the rows and be secured at the ends only.
16. Twelve Rows With a Tapered Finish
Not every cornrow style needs braids of uniform length. With a tapered finish, each of the twelve braids ends at a slightly different point. The outer rows on the sides are shortest, the center rows are longest, and the transition creates a rounded silhouette at the back of the head.
A skilled braider creates the taper by stopping each row at a planned length rather than braiding every strand to the full extent of the hair. Excess length gets trimmed at the end.
This style flatters round face shapes especially well because the rounded silhouette at the back balances the face visually.
17. Twelve Rows Gathered Into a High Bun
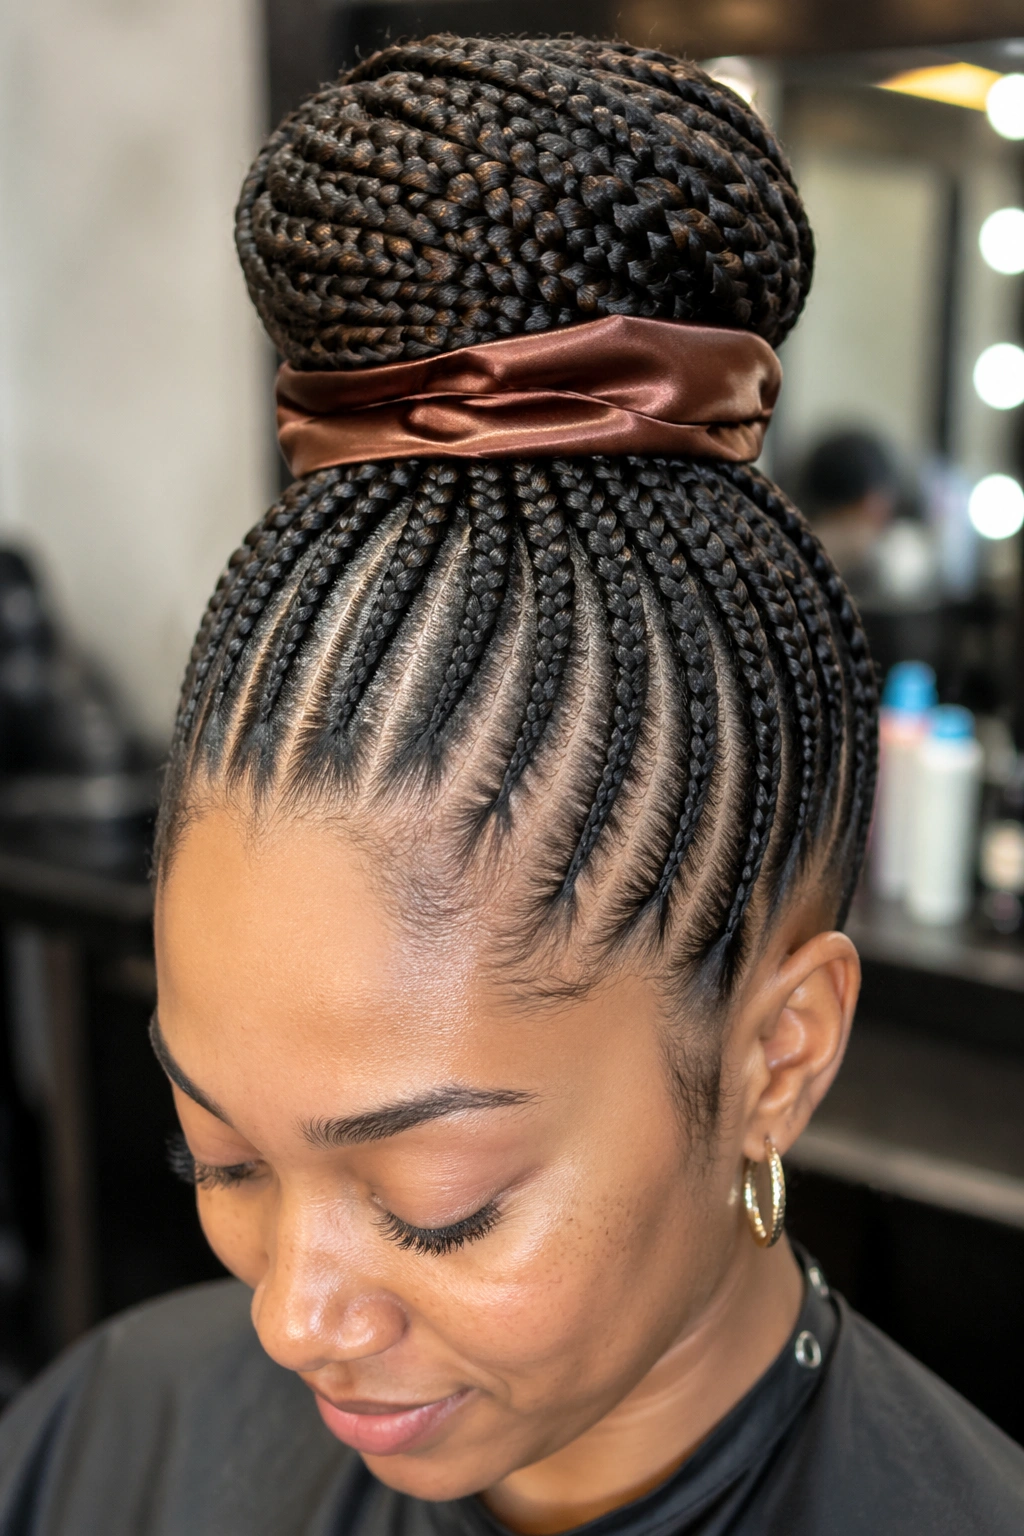
Six braids from each side sweep upward and meet at the crown, where they twist together into a high bun. This is a style for days when you want cornrows out of your face and off your neck entirely.
The upward angle changes the tension distribution. Front rows feel the pull more than back rows. If your hairline is sensitive, ask the braider to keep the front braids slightly looser than the rest. The bun itself supports enough tension to hold the style without needing tight roots.
A satin scarf tied at the base of the bun protects it overnight without flattening the shape.
18. Twelve Rows With Thread Wrapping
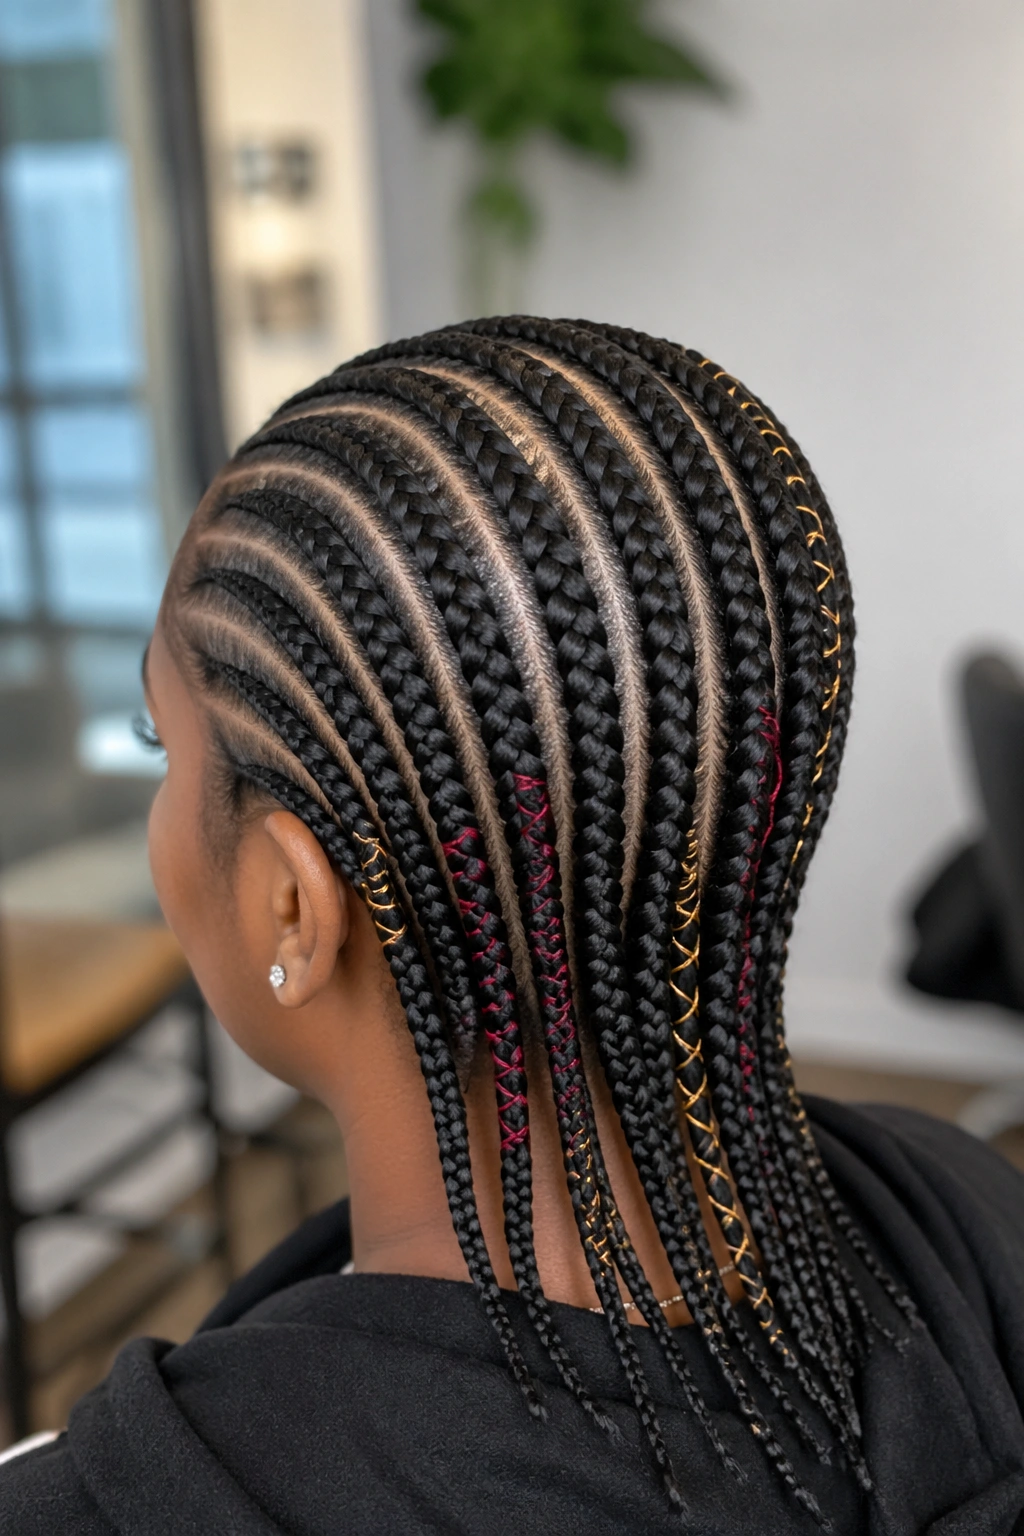
African thread wrapping is a traditional technique where colored thread is wound around sections of braided hair. Applied to a twelve-row cornrow install, thread wrapping adds color, texture, and cultural depth.
The thread wraps partway down each braid — usually on four or five selected rows rather than all twelve. Common thread colors are red, yellow, black, gold, and deep green, often chosen to complement the skin tone or match an outfit.
Maintenance Notes
Thread wrapping stays in place for about a week before the thread starts to loosen. You can either re-wrap or remove the thread while keeping the cornrows intact underneath. Unwinding takes patience — start from the bottom and work up.
19. Twelve Rows With Partial Curves
Some of the twelve rows are straight, others curve. The effect is dynamic without being chaotic. A common layout is four straight center rows flanked by four curved rows on each side, where the curves sweep outward from the center part like ripples.
This is the style I’d recommend to someone braiding their first non-parallel cornrow design. The mix of straight and curved rows is more forgiving than a full curved pattern — mistakes in the curves hide next to the clean straight center.
20. Twelve Rows With a Low Ponytail Finish
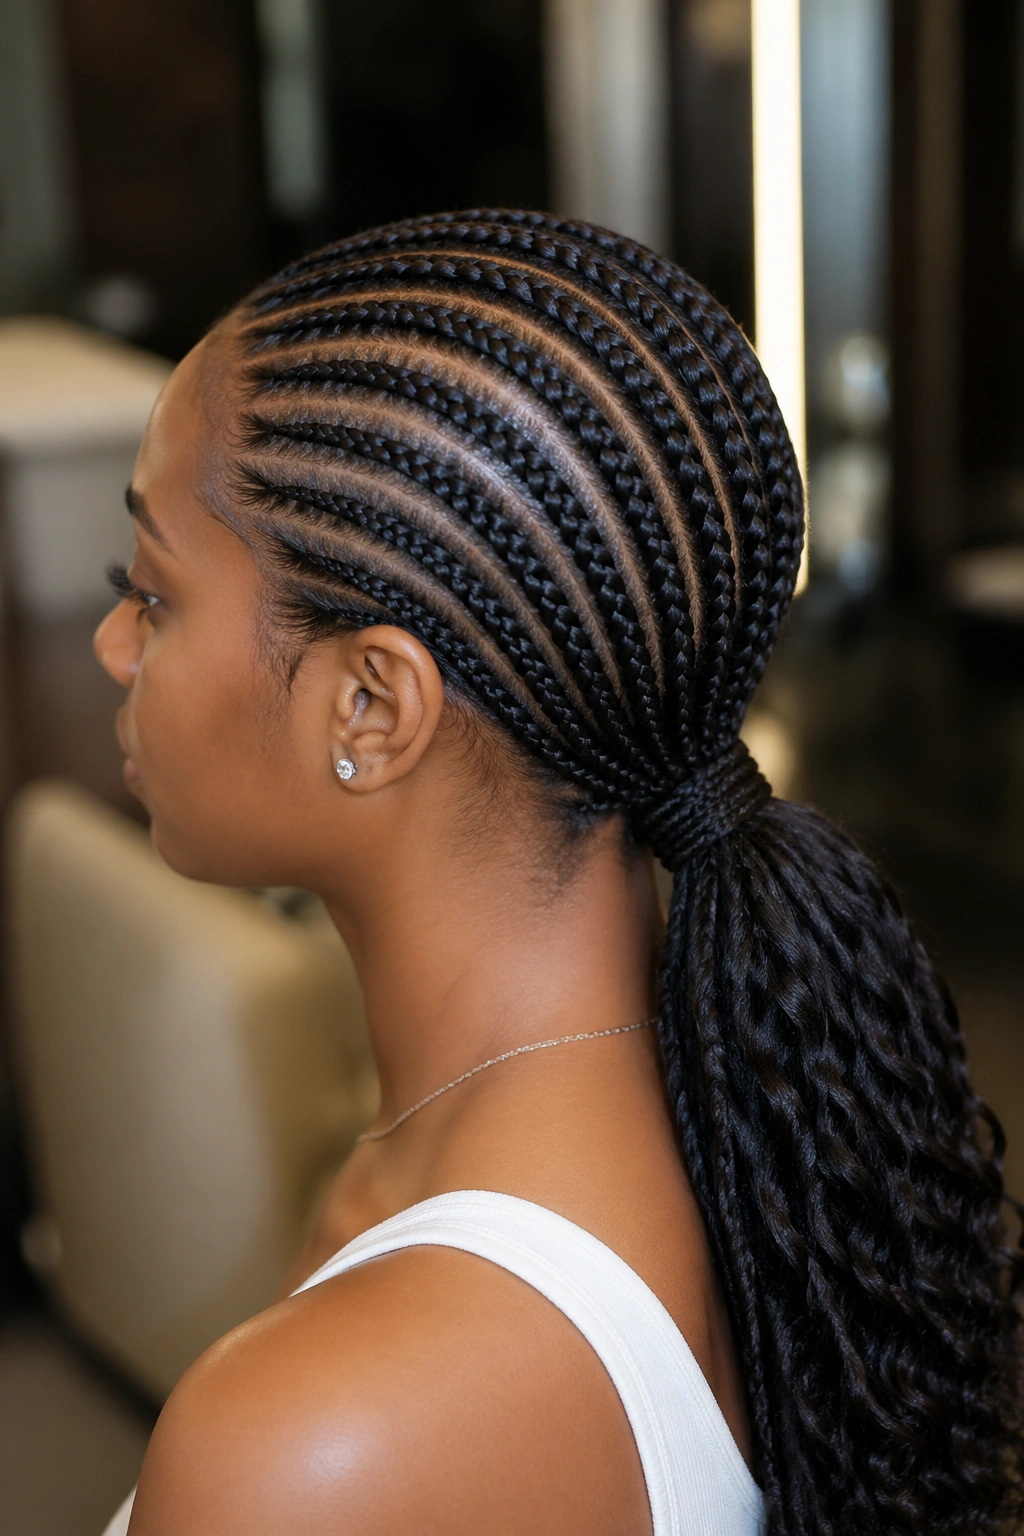
After the twelve rows reach the nape, the ends are gathered into a low ponytail that sits just above the shoulders. Added hair can be blended into the ponytail for extra length and weight.
The ponytail finish is one of the most practical ways to wear a twelve-row install. It keeps the braid ends contained, prevents them from fraying against clothing or jackets, and makes the style look polished even after a couple of weeks of wear.
Secure the ponytail with a soft elastic, not a rubber band. Rubber bands cut into braided hair and damage it over time.
21. Twelve Rows With Accent Colors at the Ends
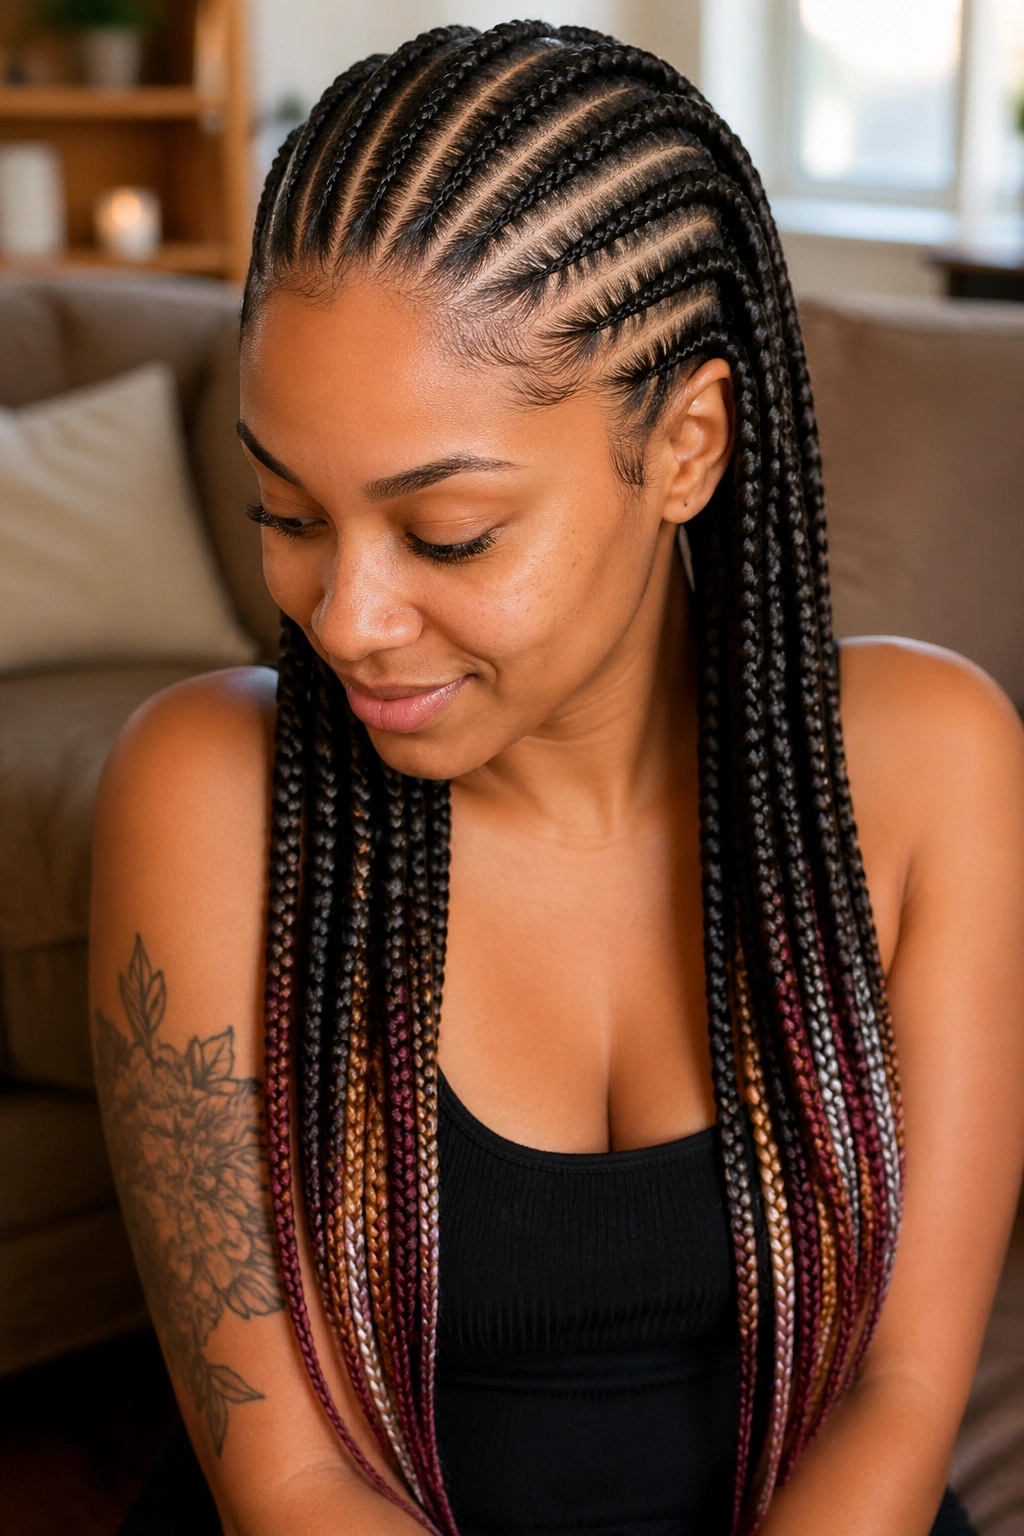
The main rows stay natural. The last few inches of each braid are transitioned into a different color using small amounts of colored kanekalon fed in near the ends. Popular accent colors include burgundy, honey blonde, copper, and smoky gray.
The color is concentrated at the ends rather than running through the whole braid. This keeps the roots looking clean and natural while still giving the finished style a dose of color.
Feed-in placement matters here. The color should start at roughly the same length on every braid — otherwise the style looks uneven. Measure from the nape up about 8-10 inches and that’s where the transition should begin.
22. Twelve Rows With a Textured Natural Finish
Not every cornrow style needs to be sleek. This version leaves the hair less stretched than usual, which gives each braid a slightly fluffy, textured appearance. The rows are still defined, but the surface has a soft-looking quality instead of the glass-smooth finish of a tightly braided cornrow.
The technique is actually simpler than a sleek finish — skip the aggressive stretching during prep, use less edge gel, and let the natural texture show through. The finished look feels organic and suits people who want cornrows that don’t read as overly polished.
This style photographs beautifully against natural lighting. Harsh overhead lights can flatten the texture — better to show it off in window light.
Maintaining 12-Braid Cornrows Through the First Week
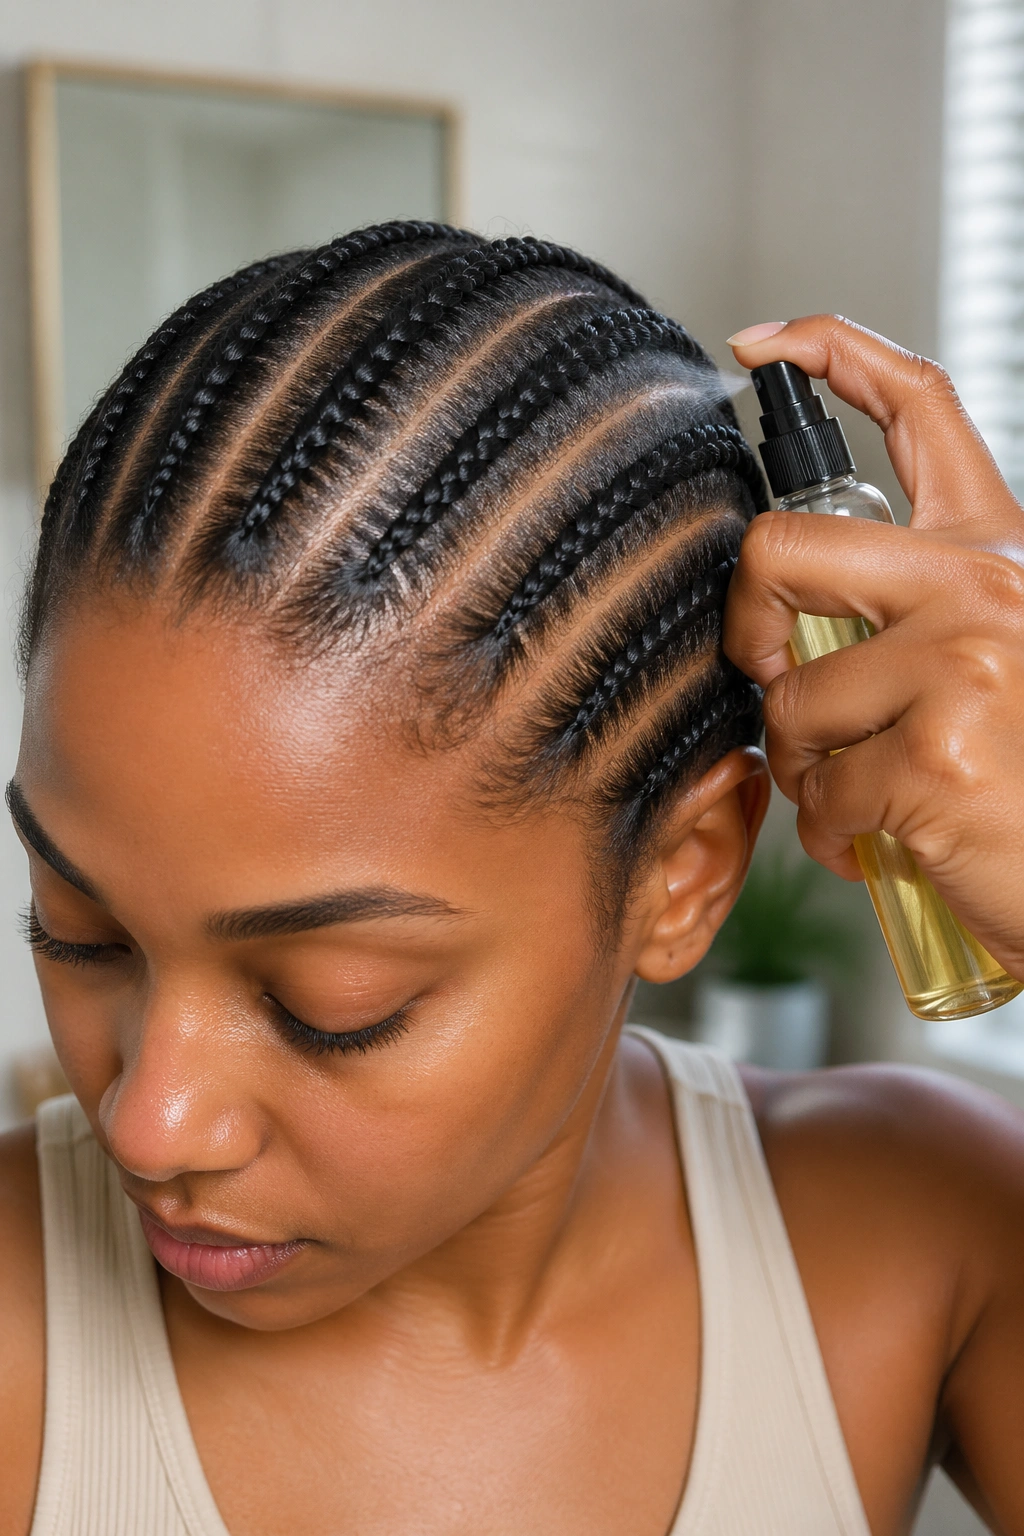
The first three days are when the style is most vulnerable. The braids haven’t settled, the scalp is still adjusting to the tension, and every movement can loosen the rows slightly. Don’t wash, rinse, or apply heavy products during this window.
From day four onward, moisturize the scalp with a light oil spray every other morning. Focus on the scalp between the parts rather than the braids themselves. The braids don’t need product — the scalp does.
A silk or satin pillowcase works if you can’t commit to a bonnet every night. Cotton pulls moisture from braided hair and creates friction that fuzzes the rows.
When to Refresh and When to Take Them Down
A twelve-row install looks its best for 2-3 weeks. By week four, the roots have grown in noticeably and the parts start to blur. You can either have the front refreshed — re-braiding just the first two inches of each row — or take the whole install out and start fresh.
Refreshing costs less time and money than a full re-install. It works best when the rest of the braids are still smooth. If fuzz has taken over the lengths, a refresh won’t rescue the look.
Signs it’s time for full takedown: itching that doesn’t respond to oil, visible buildup along the parts that washing can’t reach, or braids that feel loose at the roots but tight elsewhere.
Taking Down 12 Braids Without Damage

Start from the ends and work upward. Never pull down through a braid — the friction tears cuticles. Use a tail comb or your fingers to loosen each braid’s pattern from the tail up.
Work in sections. Take down one or two braids, detangle with a moisturizing spray, then move to the next. Trying to take all twelve down before starting detangling results in a massive tangled shedding pile that takes hours to work through.
After all twelve are out, soak the hair with a conditioning spray and let it sit for ten minutes before combing. This softens the shed hair that’s been trapped in the braids and makes detangling faster.
Common Mistakes to Avoid With This Count
Going too thin. Some people try to braid twelve tiny rows for a delicate look, but the braids end up fragile and lift at the roots within a week. Aim for medium-width rows that actually have weight to them.
Ignoring the edges. A twelve-row install lives or dies by how the front edge looks. Spend the extra five minutes smoothing the edges with gel and a soft brush before declaring the style finished.
Over-moisturizing. People hear that braided hair needs moisture and then drench the rows in heavy creams. The result is buildup, soft rows that lose definition, and premature fuzz. Light moisture is better than heavy moisture.
Wearing them too long. Four weeks is the outer limit. Beyond that, matting develops at the roots and takedown becomes painful. If life gets busy and you can’t make it to a takedown appointment, schedule a refresh to buy another week of cleanliness.
Choosing the Right 12-Braid Style for Your Face
Oval faces work with almost any pattern from this list. Round faces benefit from styles with vertical emphasis — straight-back rows, high buns, tapered finishes — because the upward lines lengthen the silhouette.
Square faces soften with curved styles like the crown pattern or heart shape. The curves contrast with the jaw angles and create balance.
Heart-shaped faces handle bold center parts and side-swept fronts well. The parting or sweep draws attention upward from the narrower chin.
Long faces avoid high buns or tall finishes that add vertical length. Side buns, low ponytails, and horizontal accents look better.
Think about your daily life too. If you work out five times a week, pick a style that tolerates sweat well — straight-back rows or a low ponytail. If you’re in front of a camera often, pick something with sharp parts and a polished finish.