Cornrow styles for Black women carry something deeper than a look. They’re a language passed down through aunties, grandmothers, salon chairs, and kitchen-floor braiding sessions. The pattern on your head can tell a story, mark an occasion, or just get you through a rough week when you can’t deal with your hair. And the range is wider than most people think.
You can wear cornrows tight against the scalp with no extensions. You can thicken them with kanekalon hair until they swing past your waist. You can part them into swirls, zigzags, diamonds, or straight back. Each method feels different, lasts different lengths of time, and asks for different prep.
What follows is a practical run-through of 30 distinct cornrow styles worth trying. No filler, no repeats disguised with new names. Each one has a specific pattern, technique, or finishing detail that sets it apart.
The Roots of Cornrows in Black Culture
Cornrows aren’t a trend. They’re documented on African sculptures dating back thousands of years, and the name itself comes from the resemblance of the braid rows to furrows in a cornfield. Different regions of West and Central Africa developed distinct braid patterns tied to tribe, age, marital status, and social rank.
When enslaved Africans were brought to the Americas, cornrows became more than style. They held coded maps, stored rice grains for survival, and preserved a thread of cultural memory that couldn’t be stripped away. That history lives in every part, every feed-in, every finished row.
Knowing this changes how you wear them. The style on your head is the same style your great-great-grandmother knew by heart.
How Cornrows Protect Natural Hair
A well-done cornrow locks your strands in place for 2-6 weeks depending on the style. That means less daily manipulation, less friction, less breakage. The ends tuck inside the braid where they stay moisturized instead of fraying against cotton pillowcases.
Length retention speeds up when your hair isn’t getting combed, detangled, and heat-styled every day. Measurable growth shows up after a few rounds of protective styling, especially for 4B and 4C textures that struggle with tension-induced thinning.
But here’s the thing. Cornrows only protect if they’re done right. Too tight, they pull out your edges. Too loose, they frizz and slip within days. Finding the sweet spot matters more than any specific pattern.
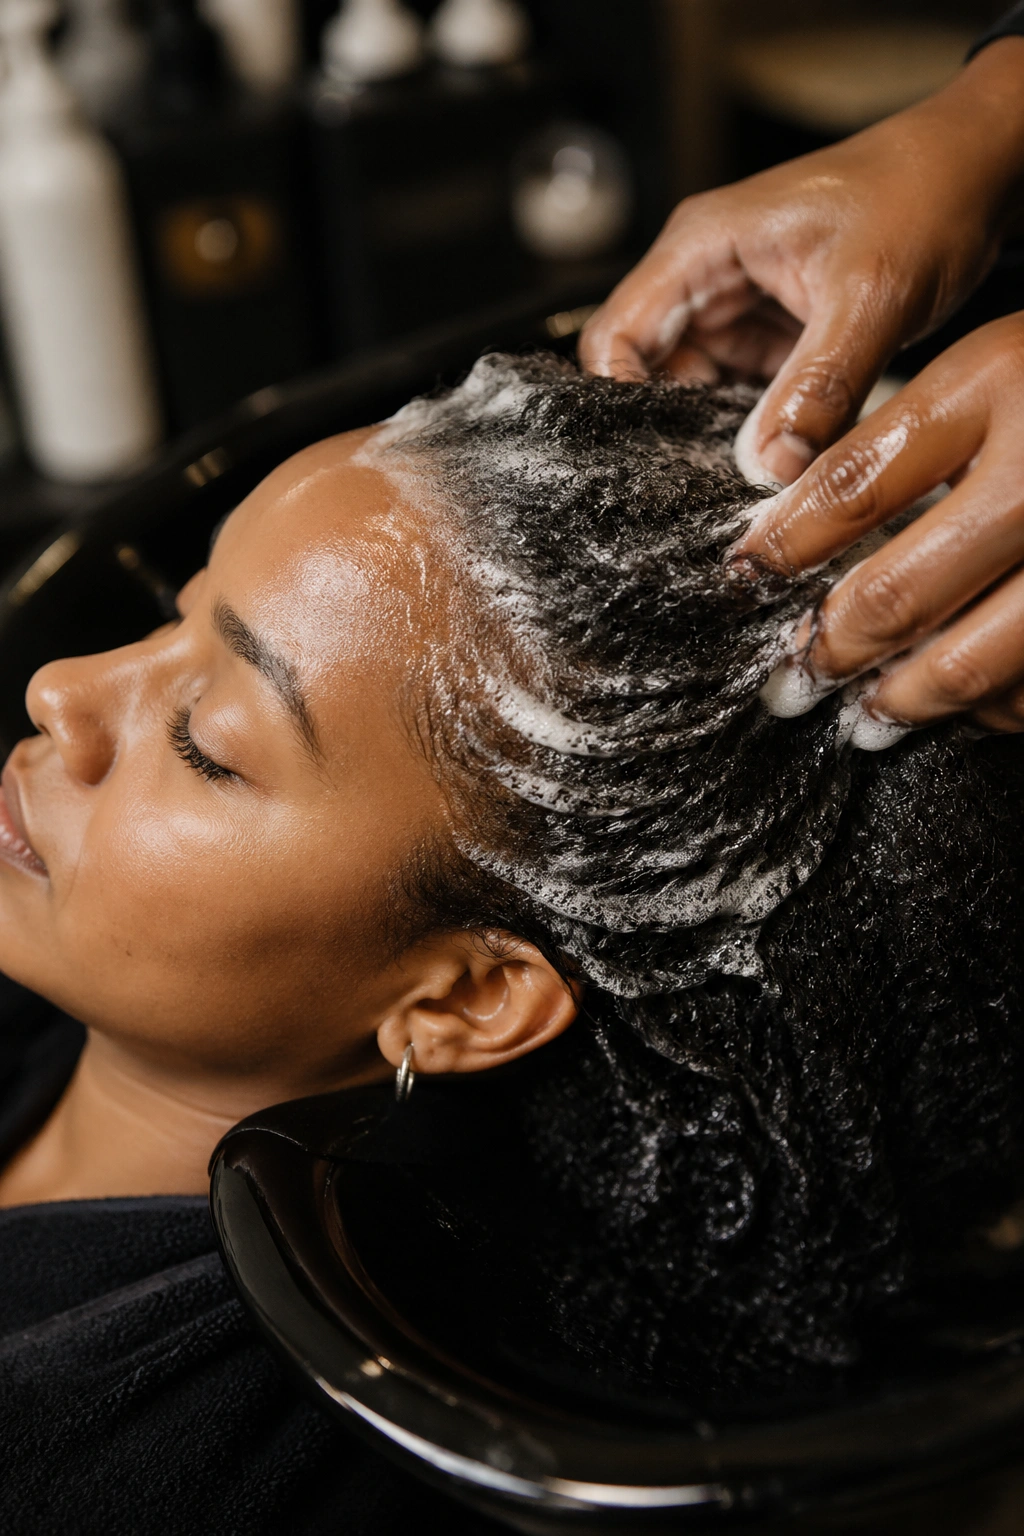
Prep Work Before the First Part
Clean hair braids better. Period. A clarifying wash removes buildup that makes strands slip out of the braider’s hands, and a deep condition afterward restores the moisture you’ll need to lock in for weeks.
Stretch the hair before braiding — blow-dry on low heat with a paddle brush, or do overnight banding if you want zero heat. Shrunken coils fight against parts and make the scalp look patchy under the braids.
Tools matter too. A rat-tail comb for precise parts. A denman brush for smoothing. Edge gel with real hold — Eco Styler, Kuza, or Aunt Jackie’s are trusted picks. A spray bottle filled with water and leave-in for re-moistening as you work.
Don’t skip the scalp oil. A light drop of jojoba or peppermint-infused oil along each part line soothes tension and keeps itch away during week two.
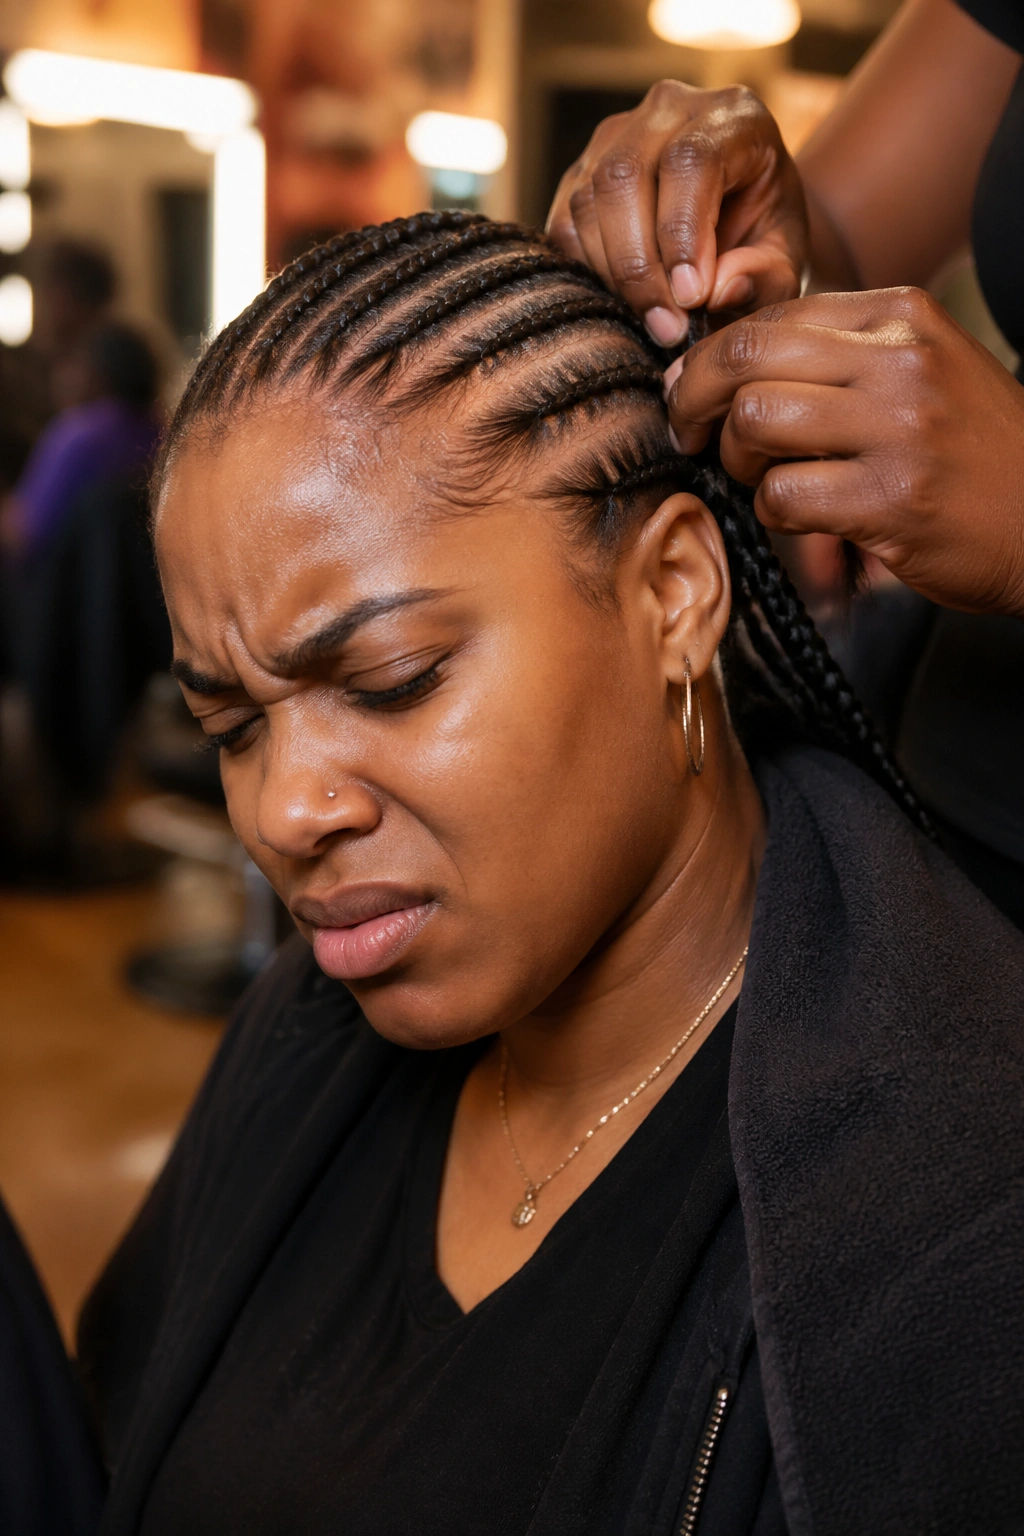
Tension, Pain, and Knowing When It’s Too Tight
A cornrow should feel snug, not sharp. If your eyes water when the braider tightens a row, that’s damage starting. The little white bumps you sometimes see along the part line the next morning? Those are stressed follicles. Keep going like that and you’ll end up with traction alopecia at your temples.
Good braiders ease tension at the hairline, where skin is thinnest. Your edges need gentle hands. If you feel a sting at your nape or behind your ears, speak up right then — not after the whole head is done.
You can also take aspirin before a long session to help with swelling. A warm shower afterward softens the scalp. Pain that lasts beyond day two is a signal something’s wrong.
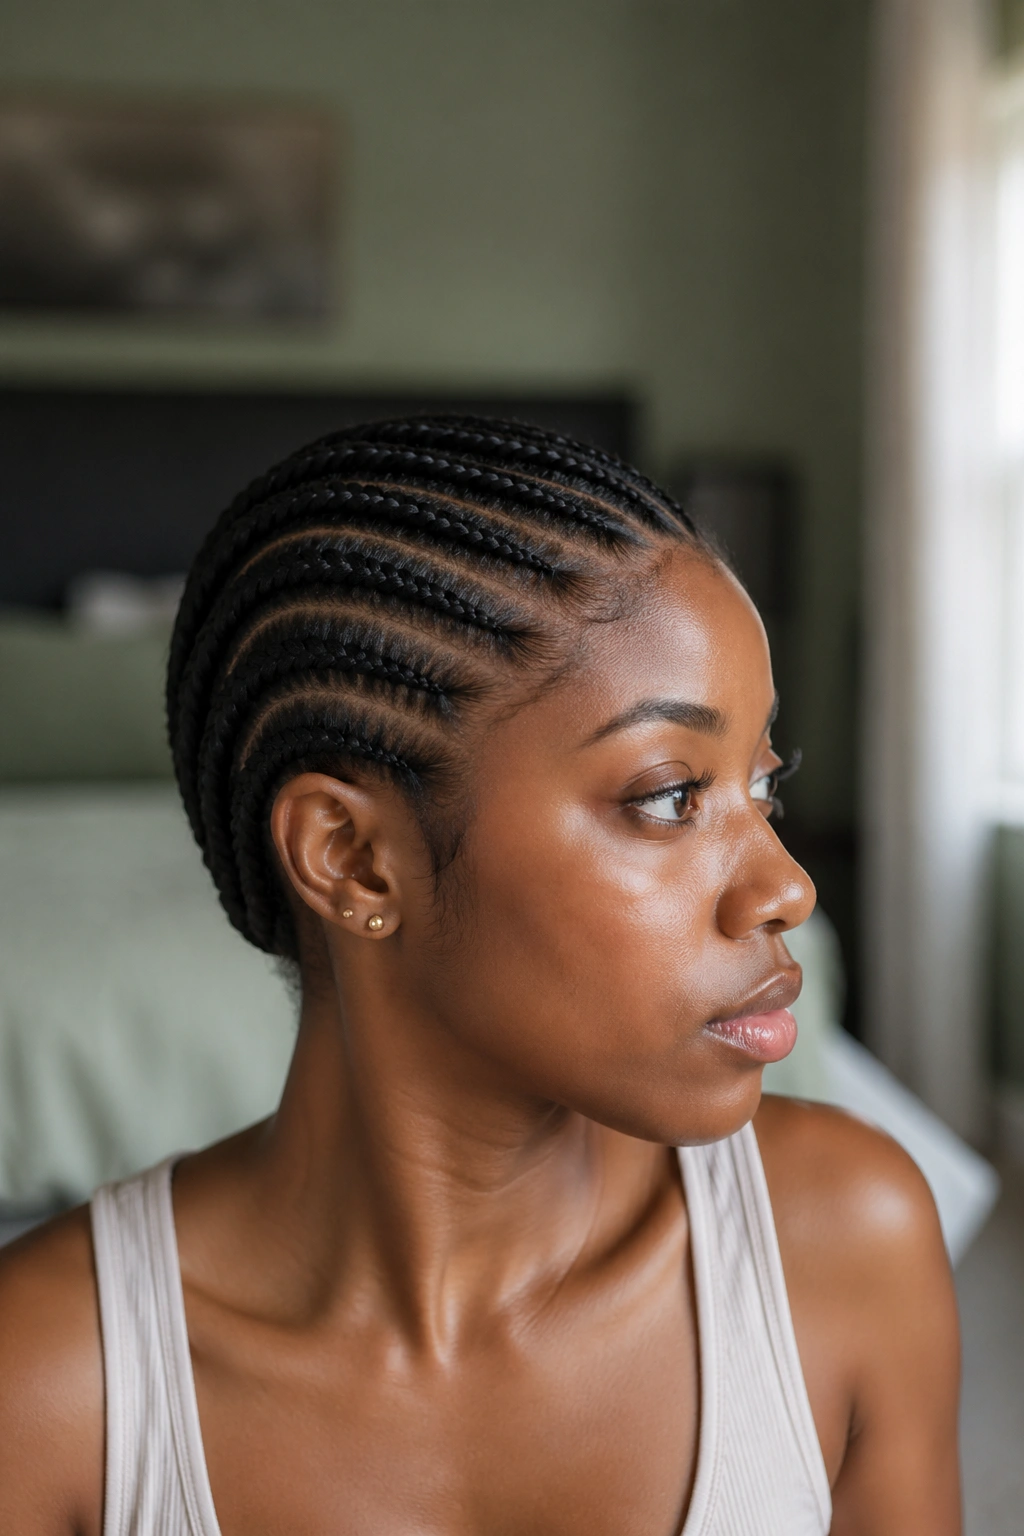
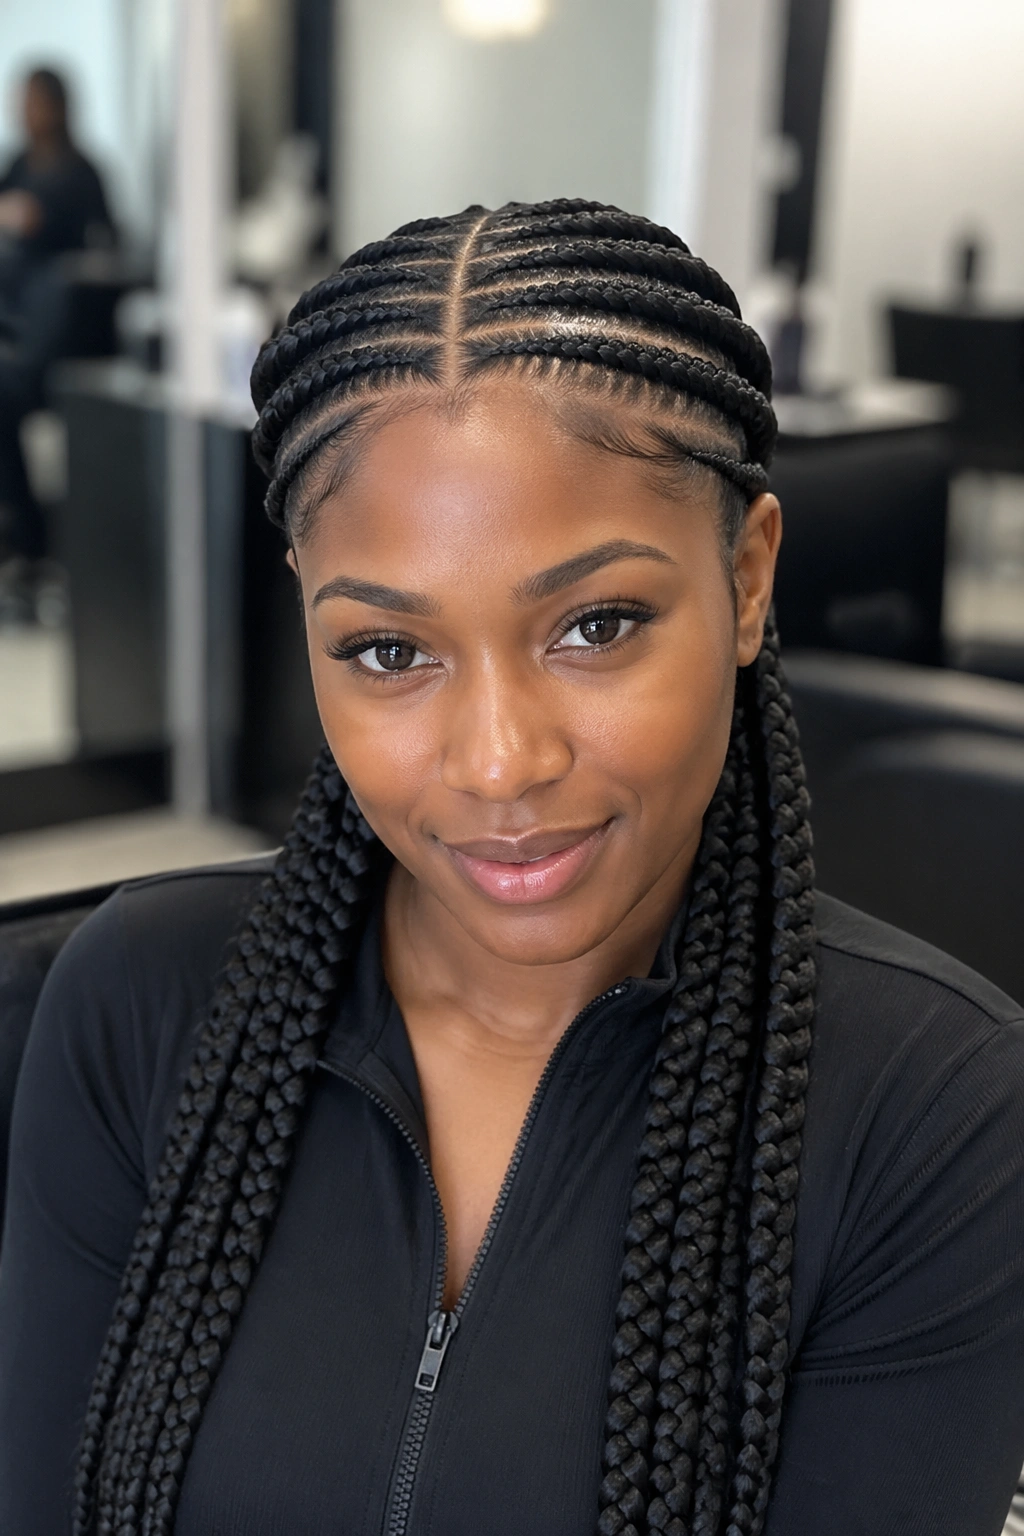
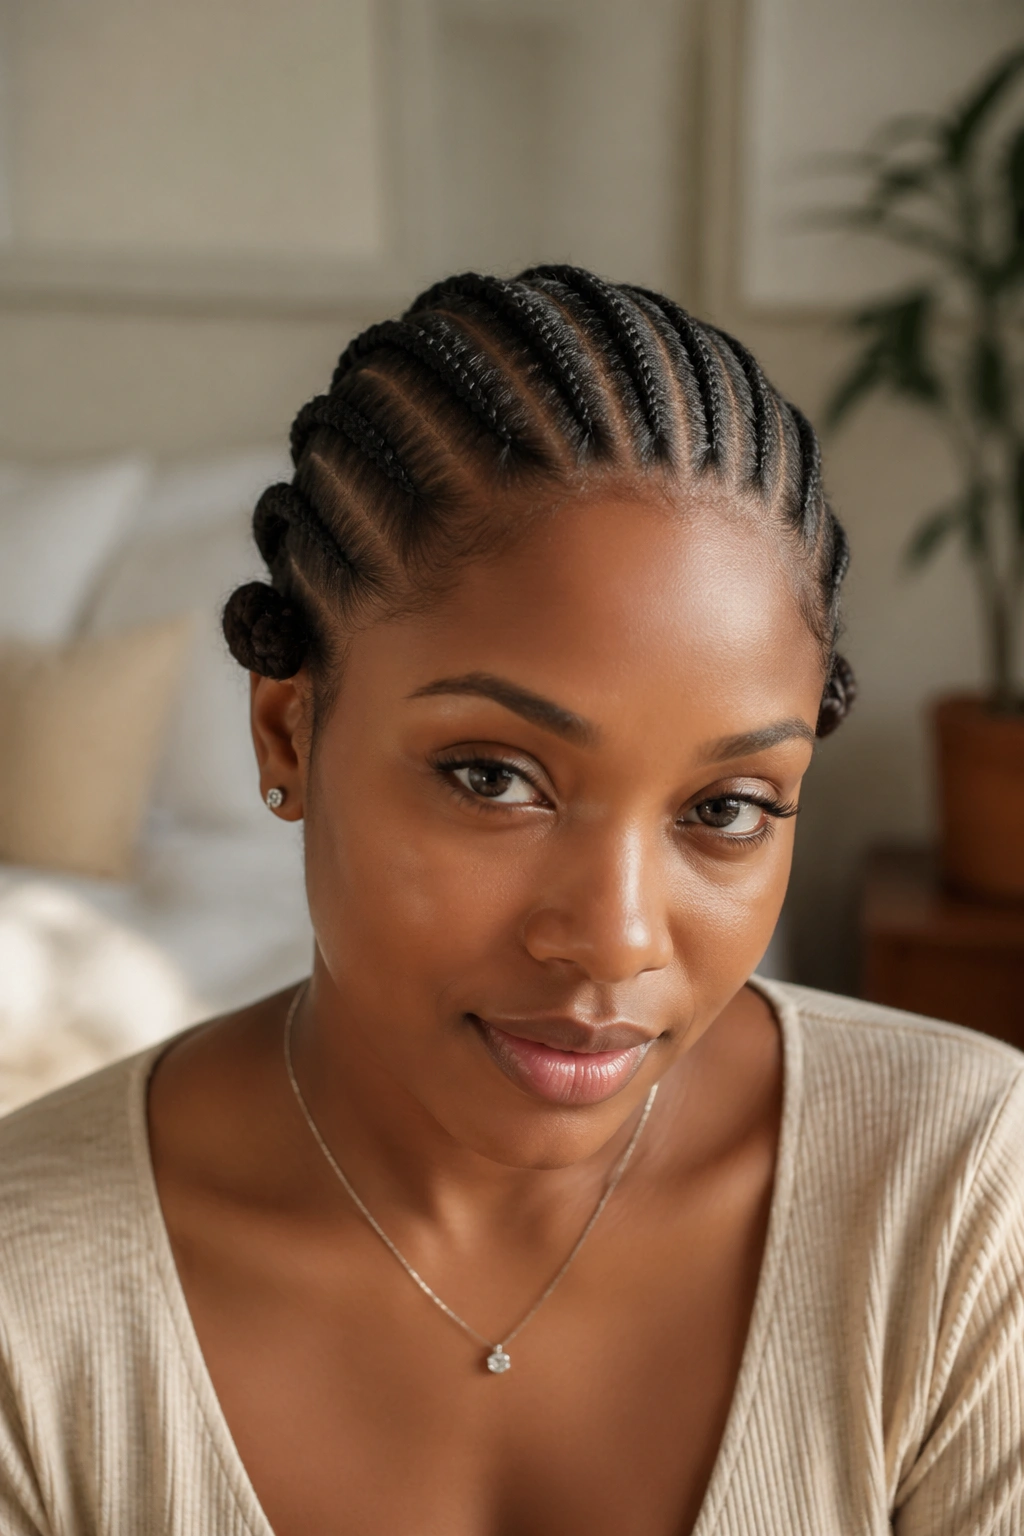
1. Classic Straight Back Cornrows
The foundation style. Eight to twelve rows going from hairline to nape, each part crisp and parallel. No extensions needed, though you can add a tiny bit of kanekalon at the ends for length.
Why It Works
- Takes 1-2 hours depending on hair thickness
- Lasts 2-3 weeks with proper care
- Works for almost any face shape
- Low-profile enough for offices and schools
Bold tip: Ask for rows slightly thinner at the hairline and thicker toward the crown. It gives the final look more dimension and prevents the front from looking stark.
2. Jumbo Cornrows with Side Part
Four to six thick cornrows with a deep side part. Huge difference from the classic version — these rows read as bold statement braids rather than subtle protection.
The side part does heavy lifting here. It softens the face, adds asymmetry, and lets you tuck one side behind the ear for a cleaner profile. Kanekalon hair gets woven in from the second stitch so the thickness stays consistent from root to tip.
This style photographs well because the large rows create strong visual lines. Event hair, in other words. Good for weddings, shoots, or any moment you want your hair to do the talking.
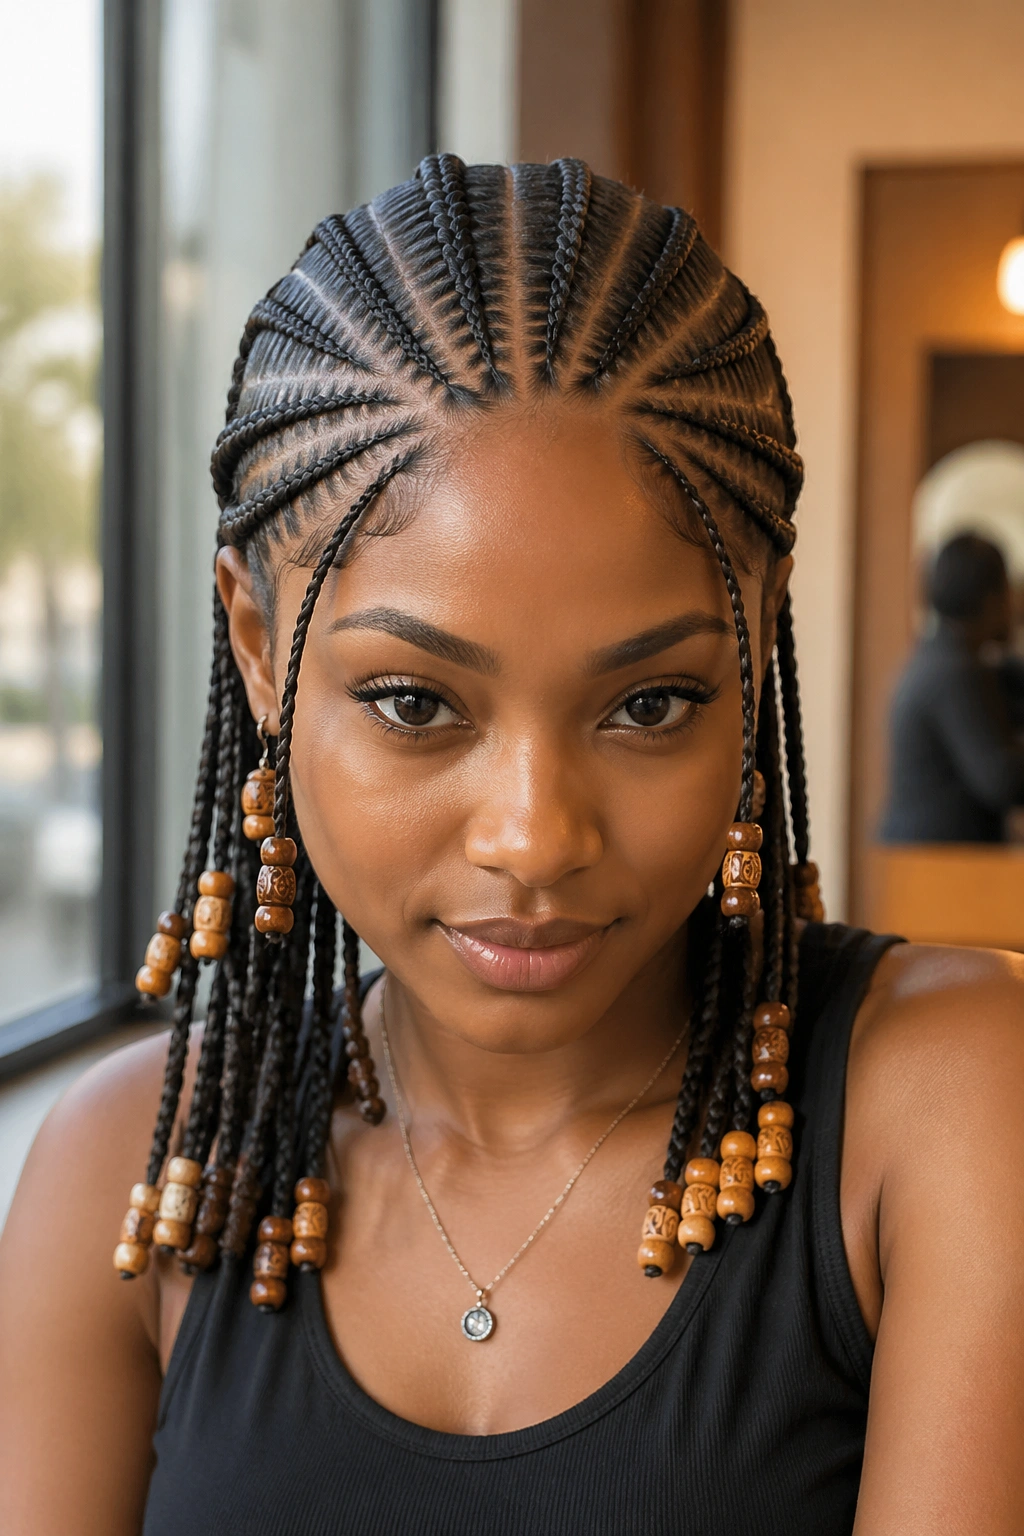
3. Fulani-Inspired Cornrows with Beads
What sets Fulani braids apart from standard cornrows? It’s the combination of one braided path running from forehead to nape down the center, with side cornrows going outward, often finished with cowrie shells or gold beads.
The look honors the Fulani people of West Africa, whose traditional style inspired this pattern. A middle row creates the focal point, while thinner rows flanking it give the style its distinctive symmetry.
How to Style It
Part a clean line down the middle of your head. Cornrow a single row along that center line, keeping it slightly raised. Then work outward from that spine, creating 3-4 rows on each side that angle slightly back. Finish with beads threaded onto select braid ends — a brass bead on every third braid tends to look balanced without going overboard.
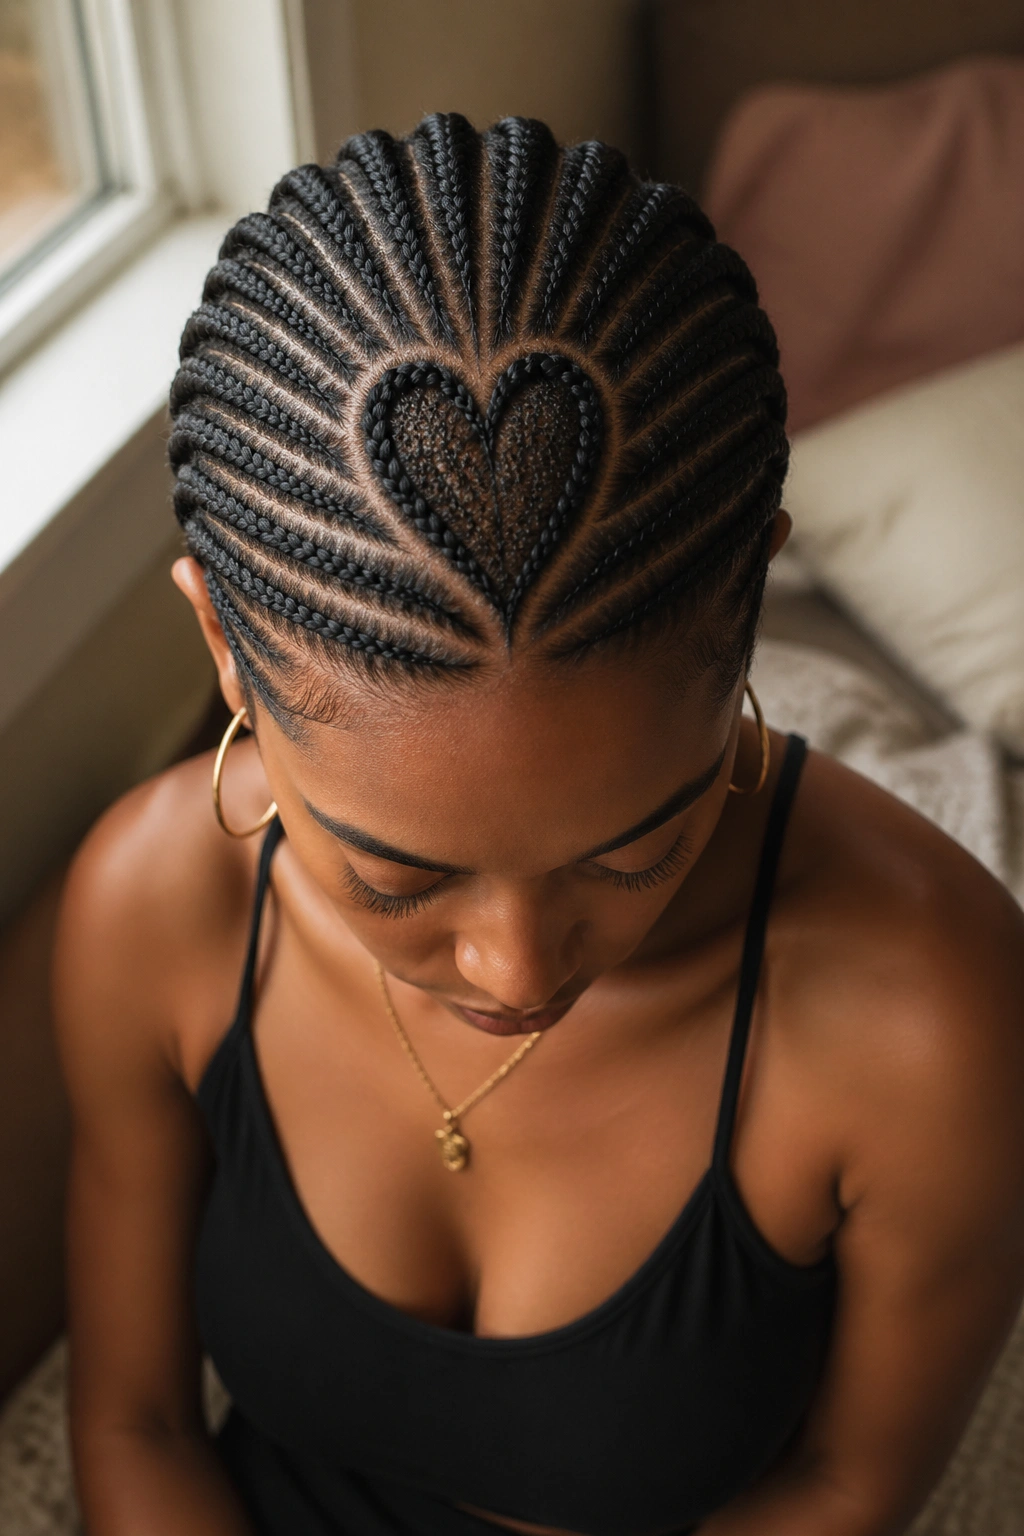
4. Heart-Shaped Cornrow Part
Picture this. You sit down, your braider traces a heart right on top of your head, and the rows flow outward from that shape. Sounds gimmicky until you see it done well.
Done right, the heart sits on the crown area, with cornrows radiating outward like spokes. The inside of the heart can be filled with smaller box braids or left flat. It’s playful, and it photographs beautifully from the top-down angle.
Best for: date nights, anniversaries, birthdays. Anywhere the heart part becomes a conversation starter.
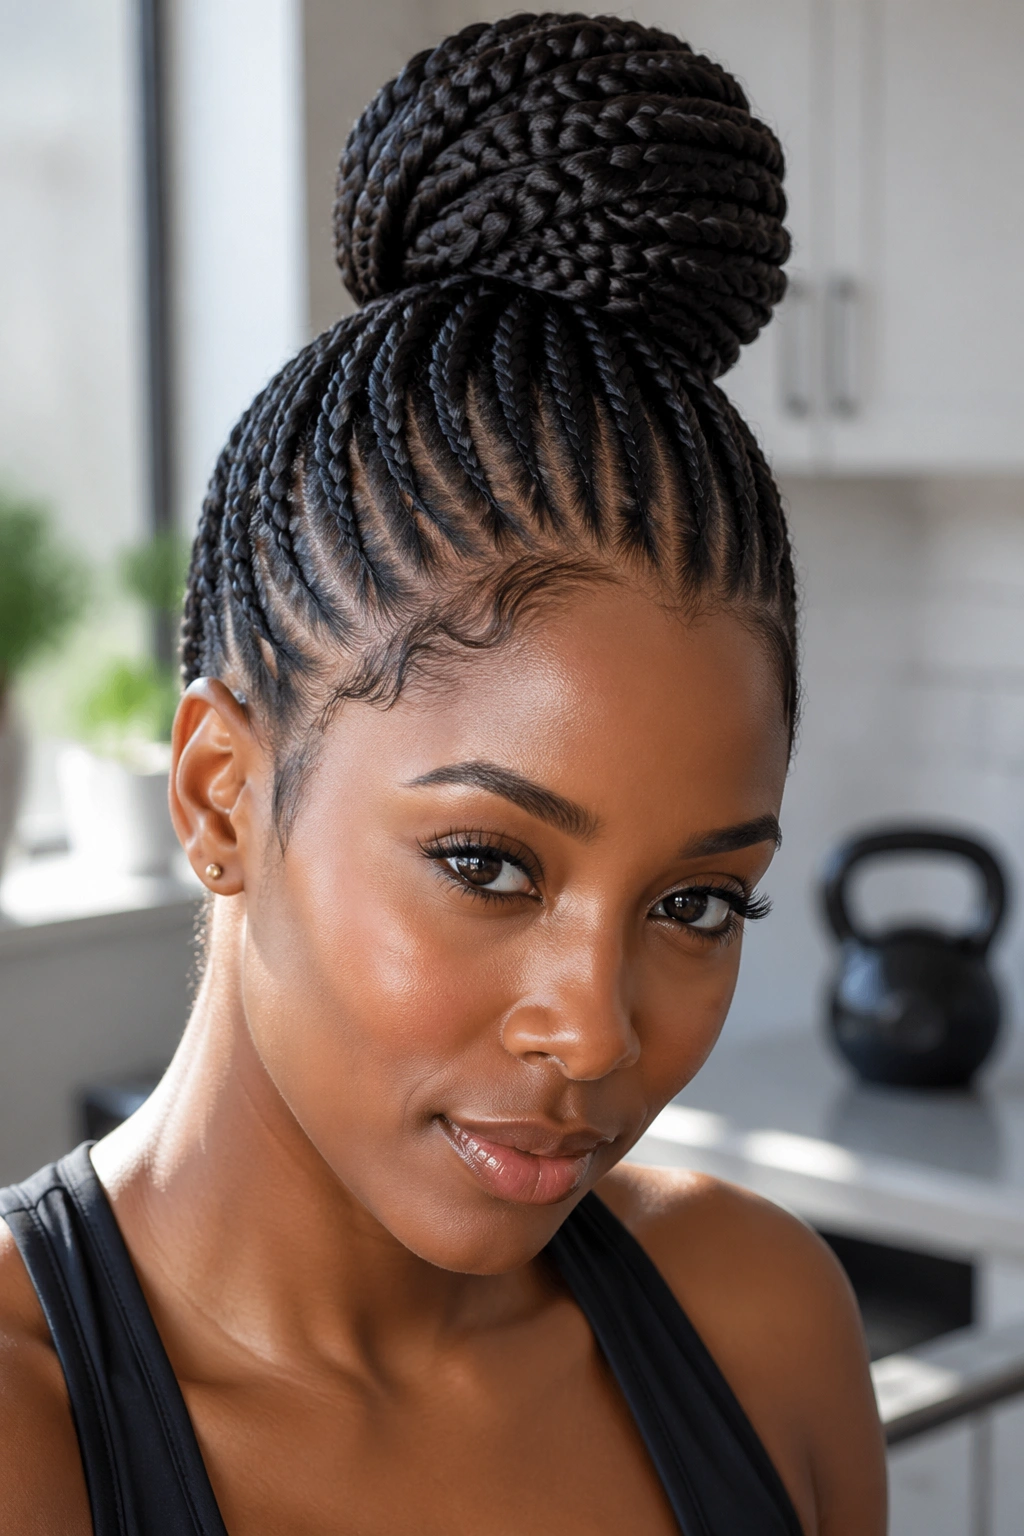
5. Cornrows into a High Bun
All cornrows lead up, toward the crown. Once they reach the top, your braider gathers the ends into a bun — either using your own braided length or adding a kanekalon puff for volume.
Your neck stays cool. Your edges stay laid. The bun lifts the whole face and draws attention upward, making cheekbones pop.
A high cornrow bun is what I reach for when I’m working out regularly. Zero hair in my face, no sweat-soaked ponytail dragging down my scalp, and it still looks polished enough for a quick grocery run.
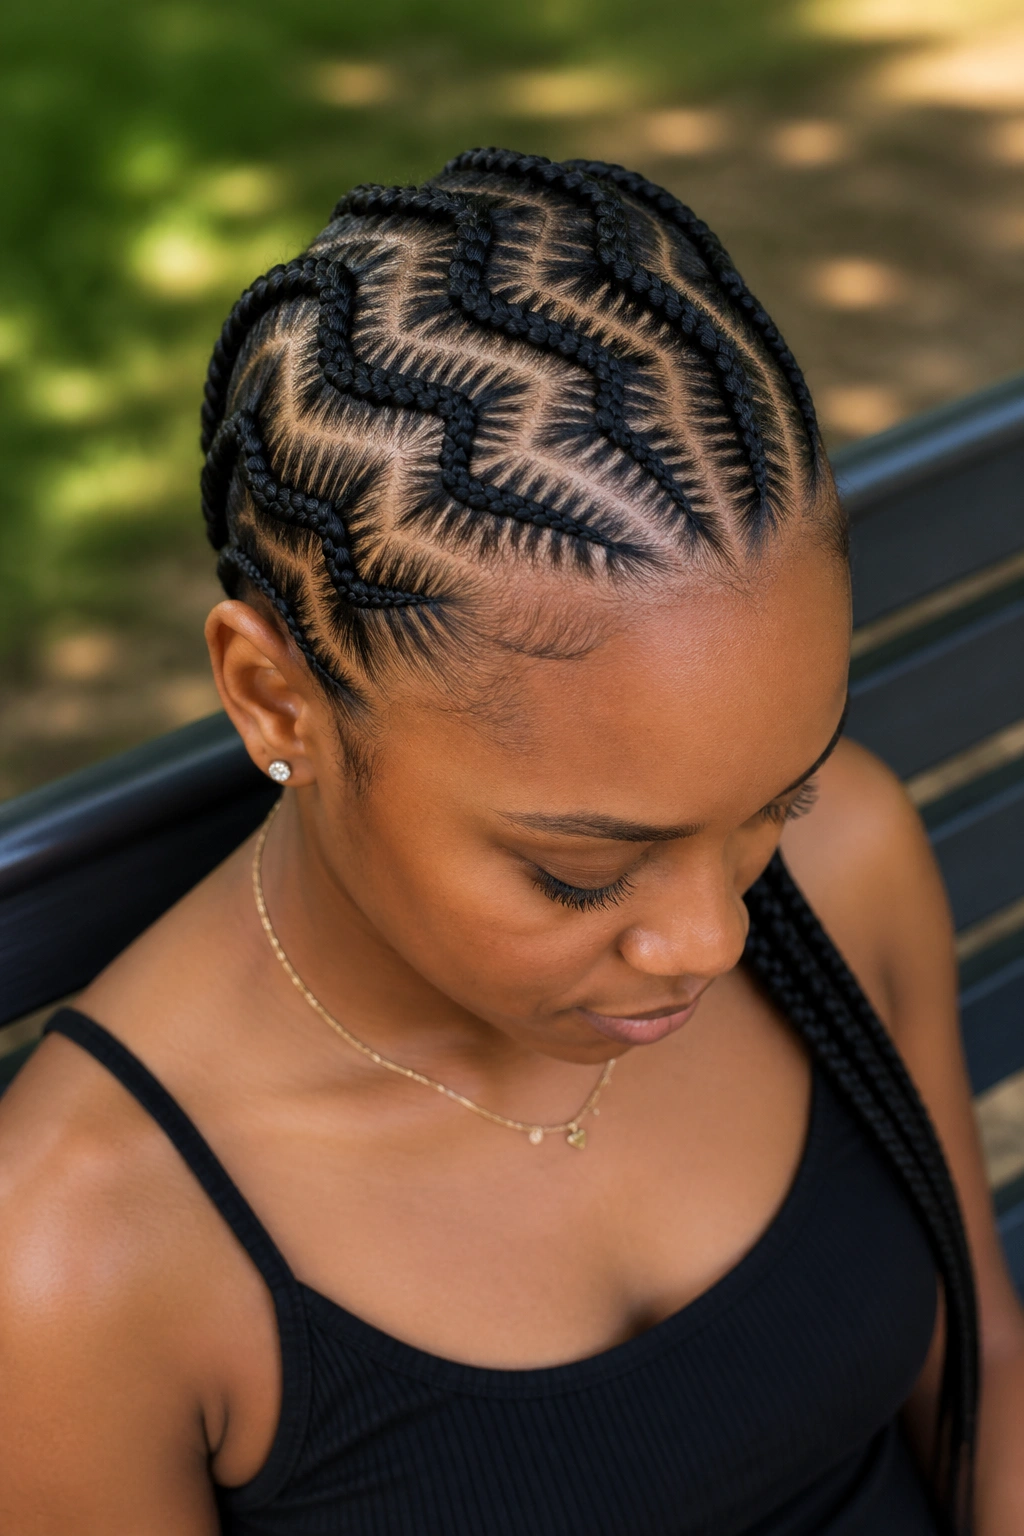
6. Zigzag Cornrow Parts
Straight parts are the default. Zigzag parts flip that expectation on its head. Instead of rows traveling in straight lines from front to back, the parts snake side to side, creating Z-patterns across the scalp.
What Makes It Different
- The parting takes longer (add 30-45 minutes)
- The zigzags show between rows, so the scalp itself becomes part of the design
- The style stands out in photos without needing extensions
The technique: your braider uses the pointed end of a rat-tail comb to trace Z-shapes freehand, then braids along each curved path. Precision matters — wobbly zigzags look sloppy rather than intentional.
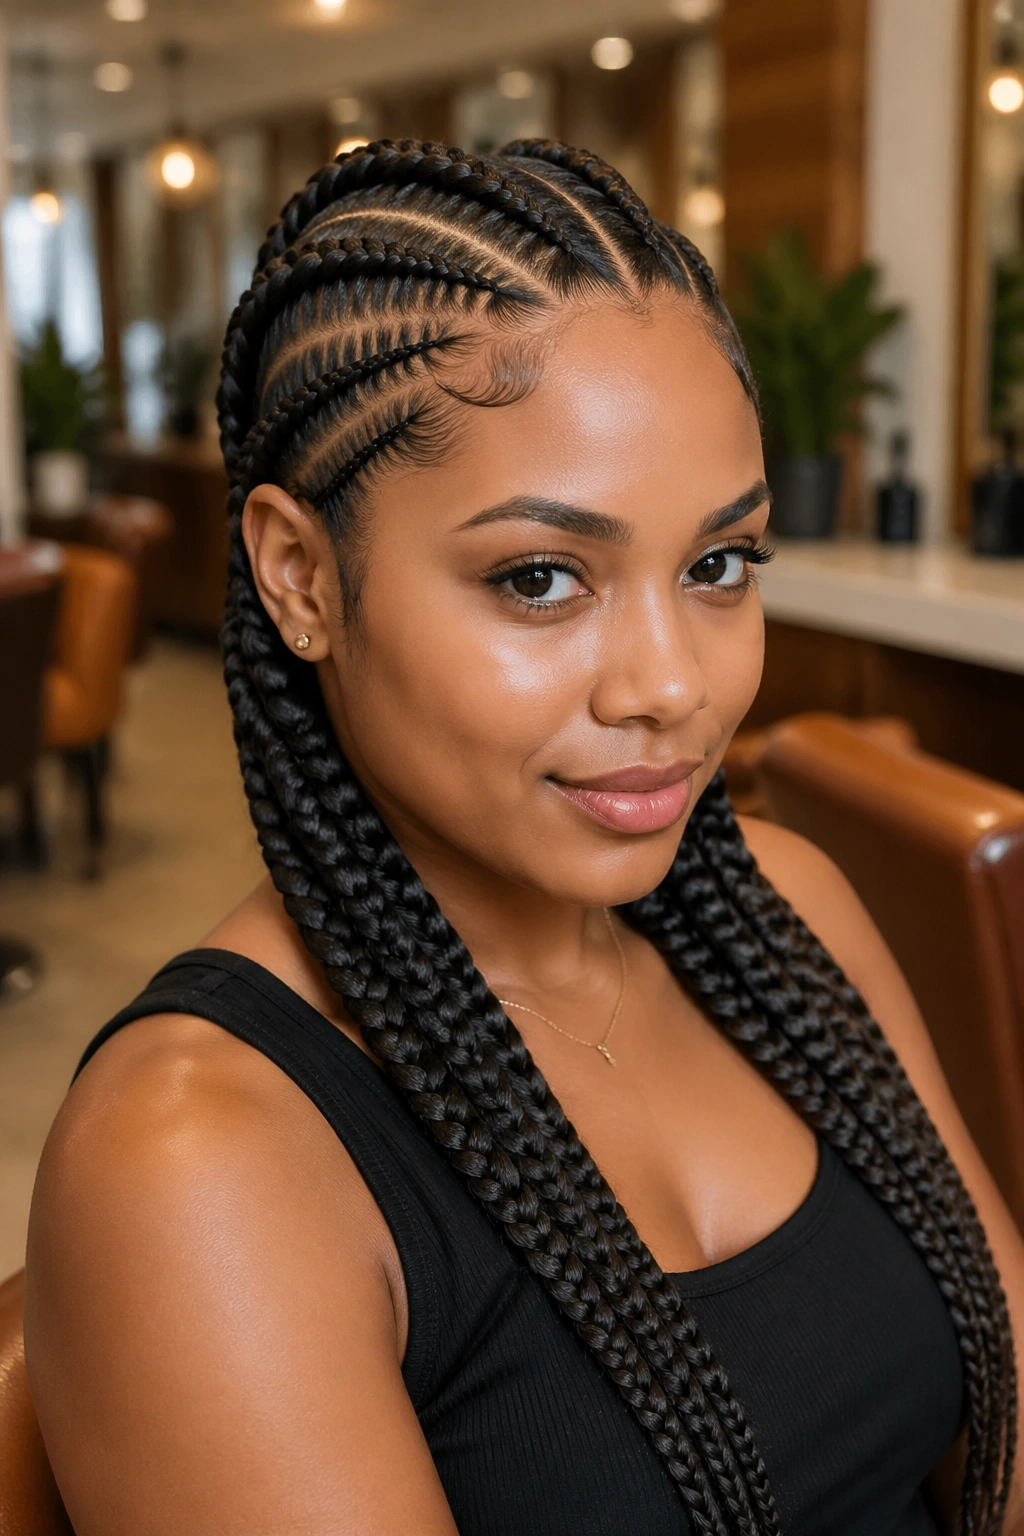
7. Stitch Cornrows with Feed-In Extensions
Stitch braiders use a special technique where each added section of extension hair shows as a visible horizontal “stitch” along the braid. Paired with feed-in method — where hair is added gradually rather than all at the base — you get rows that look like ladders of tiny stitches.
Super clean finish. The scalp looks neat, the braids look full, and there’s no chunky base where extensions typically bulk up.
A full head of stitch feed-in cornrows can take 4-6 hours. Worth every minute if you want a style that looks salon-fresh for 3-4 weeks straight.
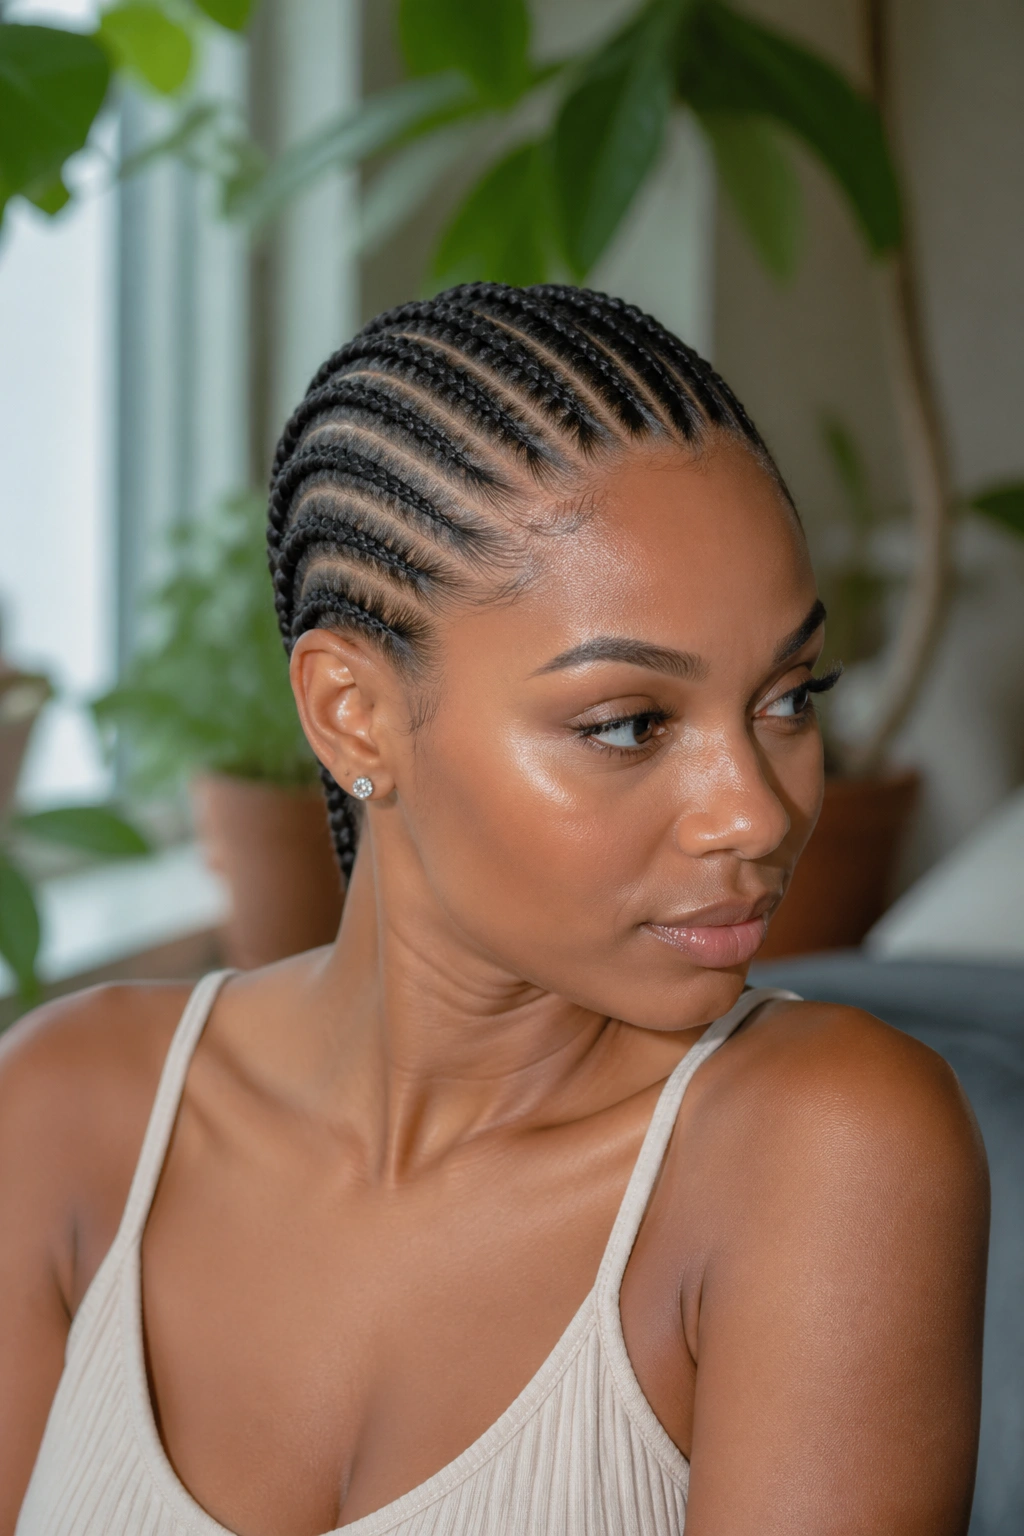
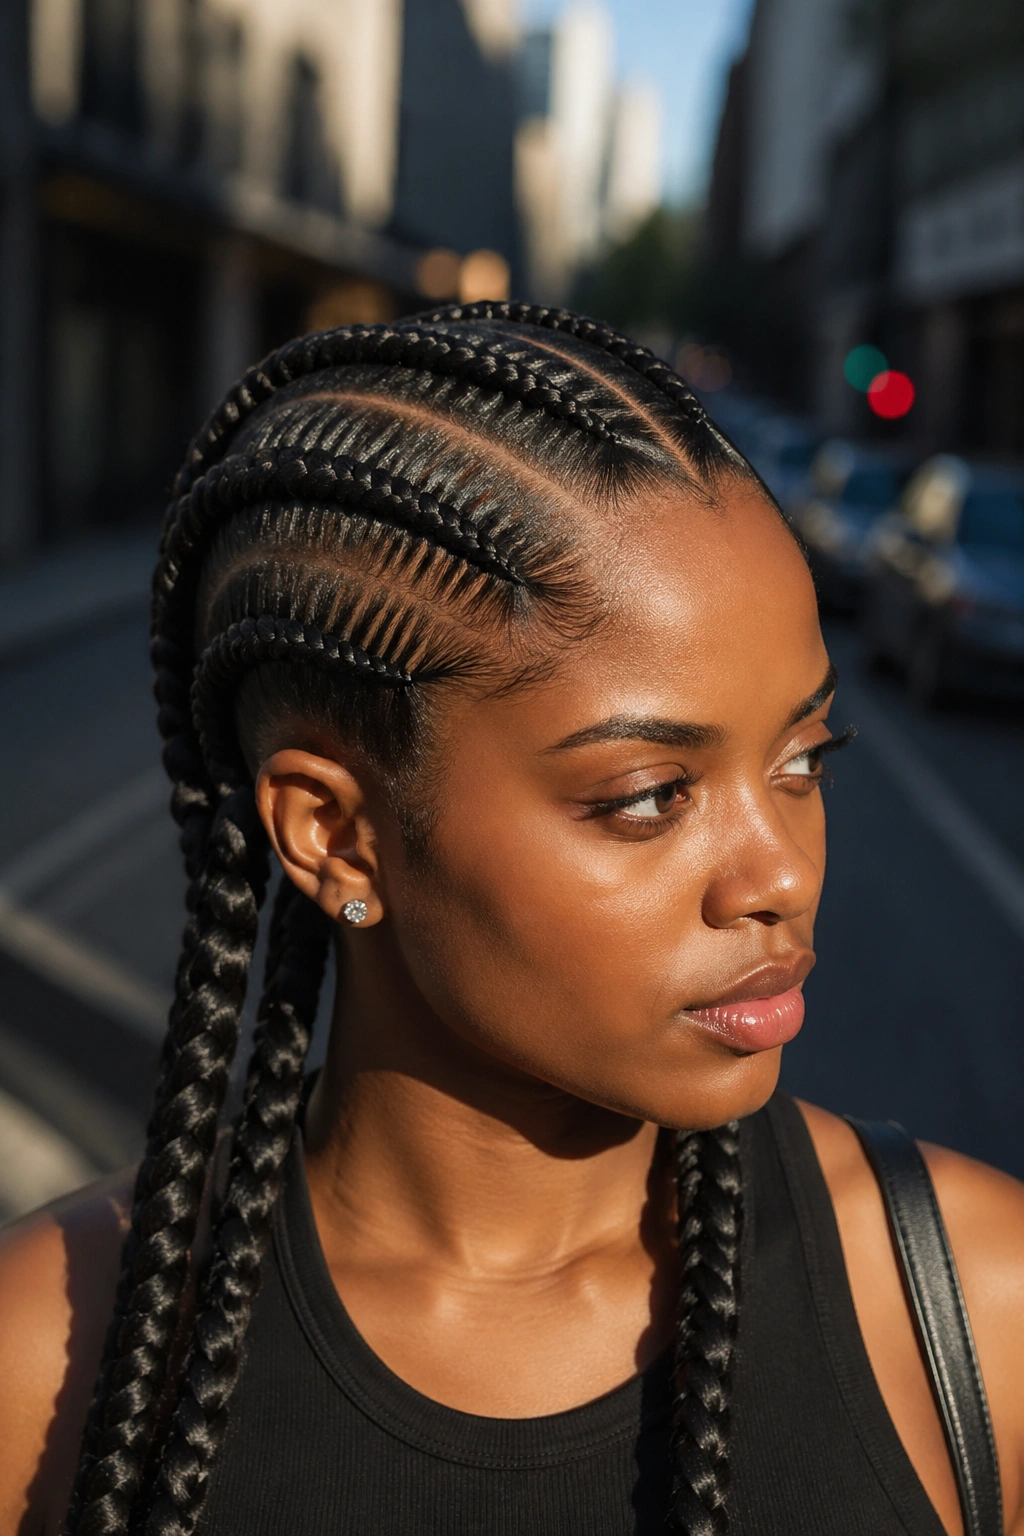
8. Side-Swept Cornrows
Unlike straight-back cornrows that travel straight from front to back, side-swept cornrows angle diagonally. All rows lean toward one side of the head, gathering at the opposite ear or shoulder.
What’s different: the asymmetry forces every braid to curve, which takes more skill than straight parallel parts. Rows travel at different angles — the ones near the part line barely bend, the ones on the opposite side curve dramatically.
Who this is for: anyone with a strong jawline or sharp profile. The diagonal draw flatters angular faces more than round ones.
My recommendation — pair side-swept cornrows with one large accent cornrow along the hairline for extra definition.
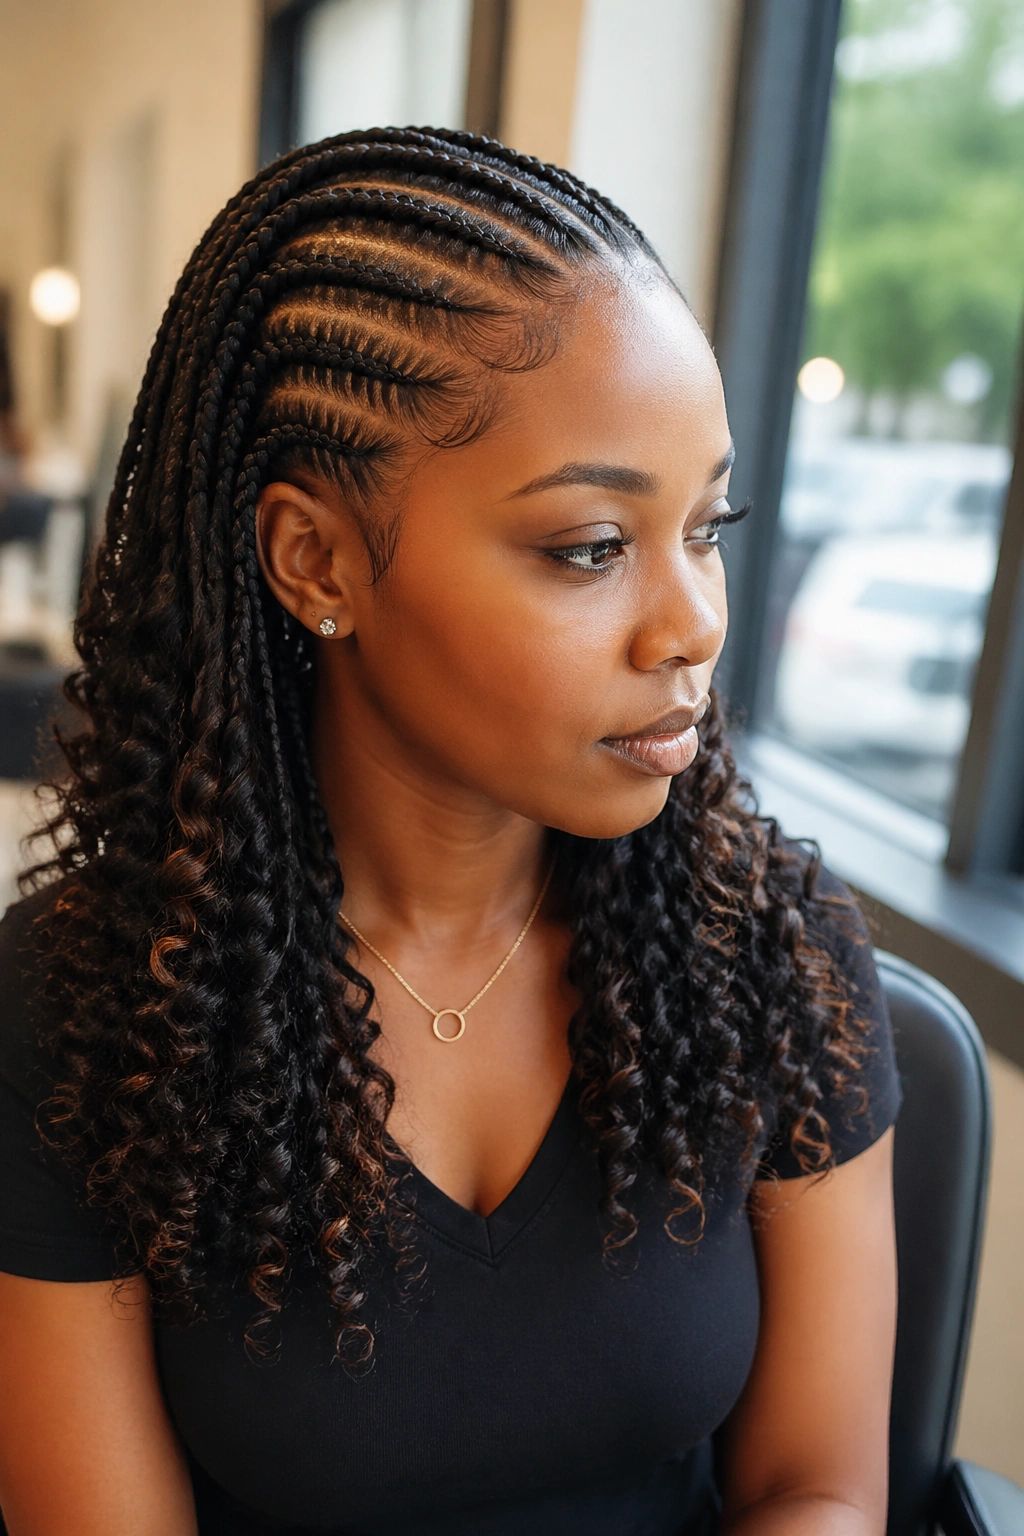
9. Cornrows with Curly Ends Left Out
Cornrow the full length of your hair to within 3-4 inches of the ends. Leave the ends out. Dip those ends in hot water to set a spiral, or use curling wands to create defined coils.
The contrast is what sells it. Tight, flat braids meeting a cloud of curls at the tip creates visual interest without needing extensions or accessories.
For 4C hair, the natural curl pattern comes back as soon as the ends are released from the braid tension. Mist with water and finger-coil for extra definition.
10. Ghana Braids with Cornrow Accents
Big deal here. Ghana braids themselves are a thicker, denser cornrow variation with extensions built in from the start. When smaller cornrow accents run alongside the main Ghana braids, the contrast between chunky and delicate creates a layered look.
Picture three large Ghana braids down the center of your head, with tiny cornrows lining each side of the main braids. The eye moves between the thick and thin lines, giving the style a custom, high-effort feel.
Duration: 5-7 hours in the chair. This isn’t a quick style. But it holds for up to 6 weeks if you sleep right.
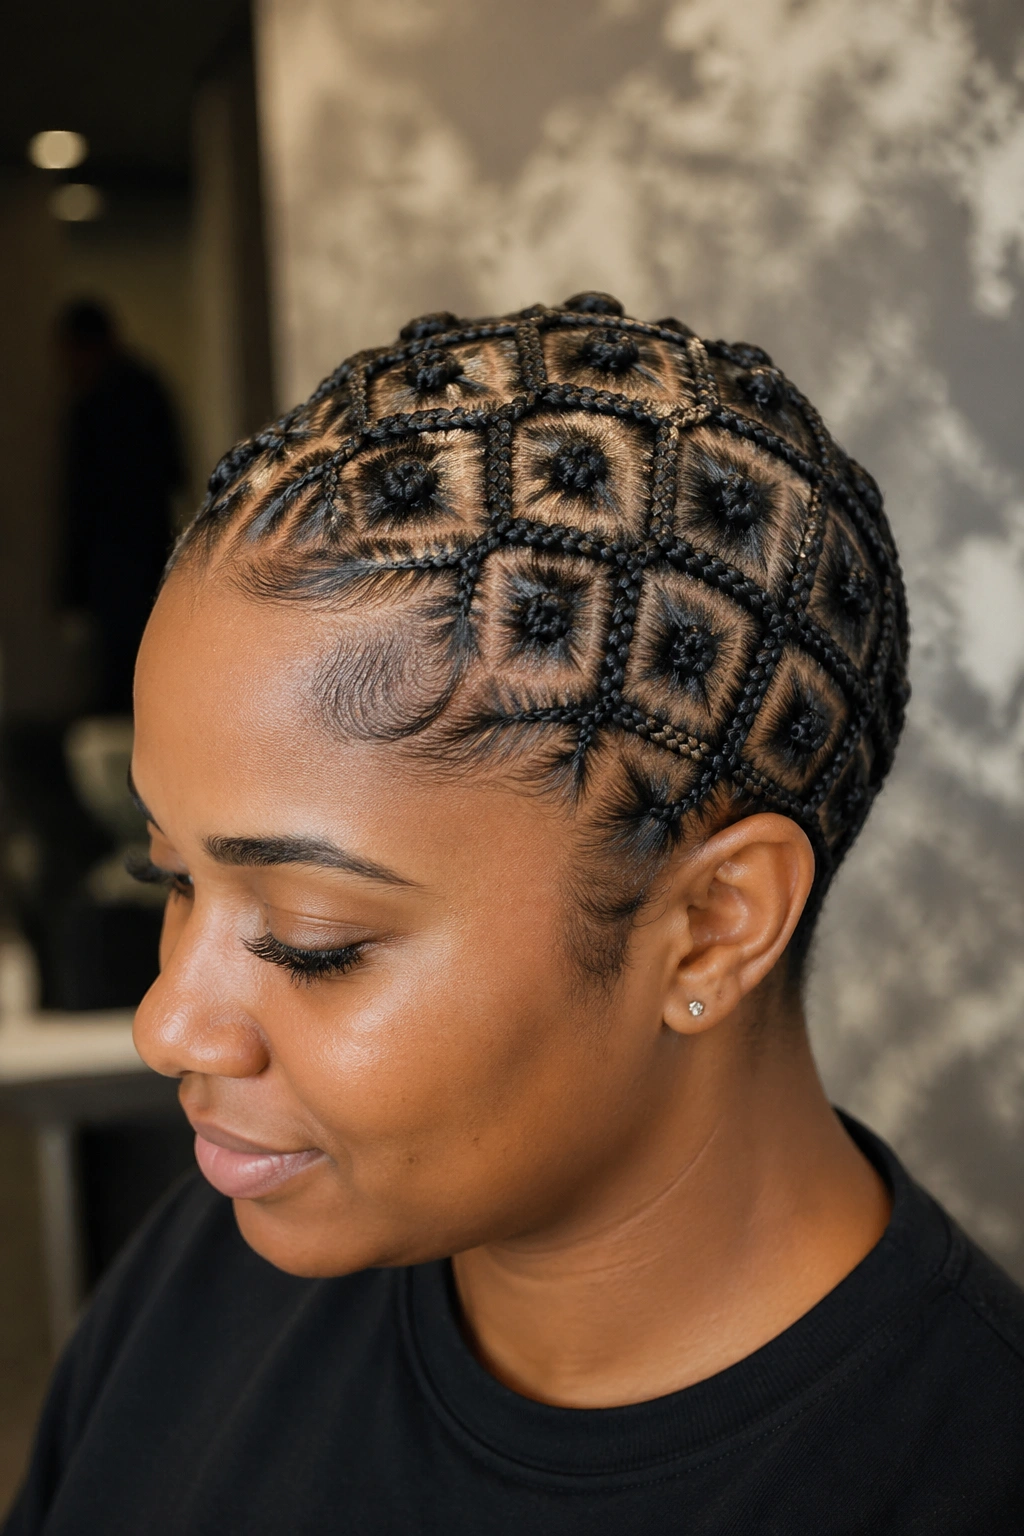
11. Cornrows in a Diamond Grid
Scalp-level geometry. Instead of parallel rows, parts form interlocking diamond shapes across the head. Each diamond is cornrowed around its perimeter, with a smaller braid or bun inside.
Styling Tips
- Mark the grid first with a rat-tail comb before any braiding starts
- Use edge gel along each part line to keep diamonds sharp
- Works best on hair with enough length to braid each diamond’s perimeter
The geometric precision makes this style look almost architectural. It’s the kind of cornrow pattern you see at braiding competitions and on magazine covers.
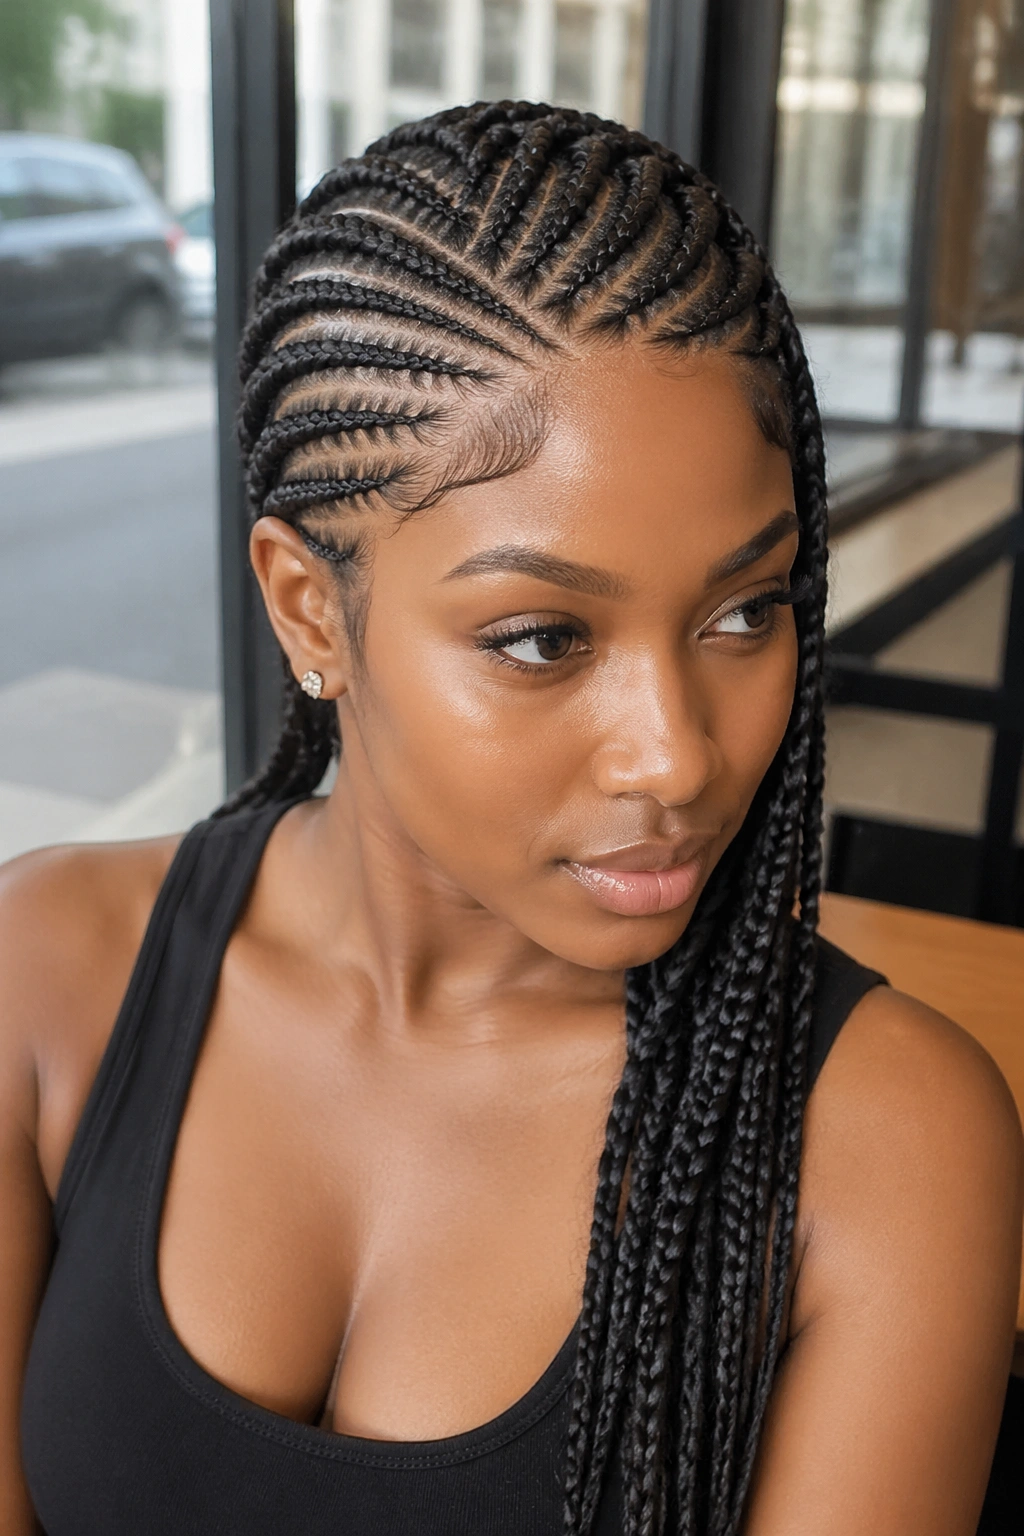
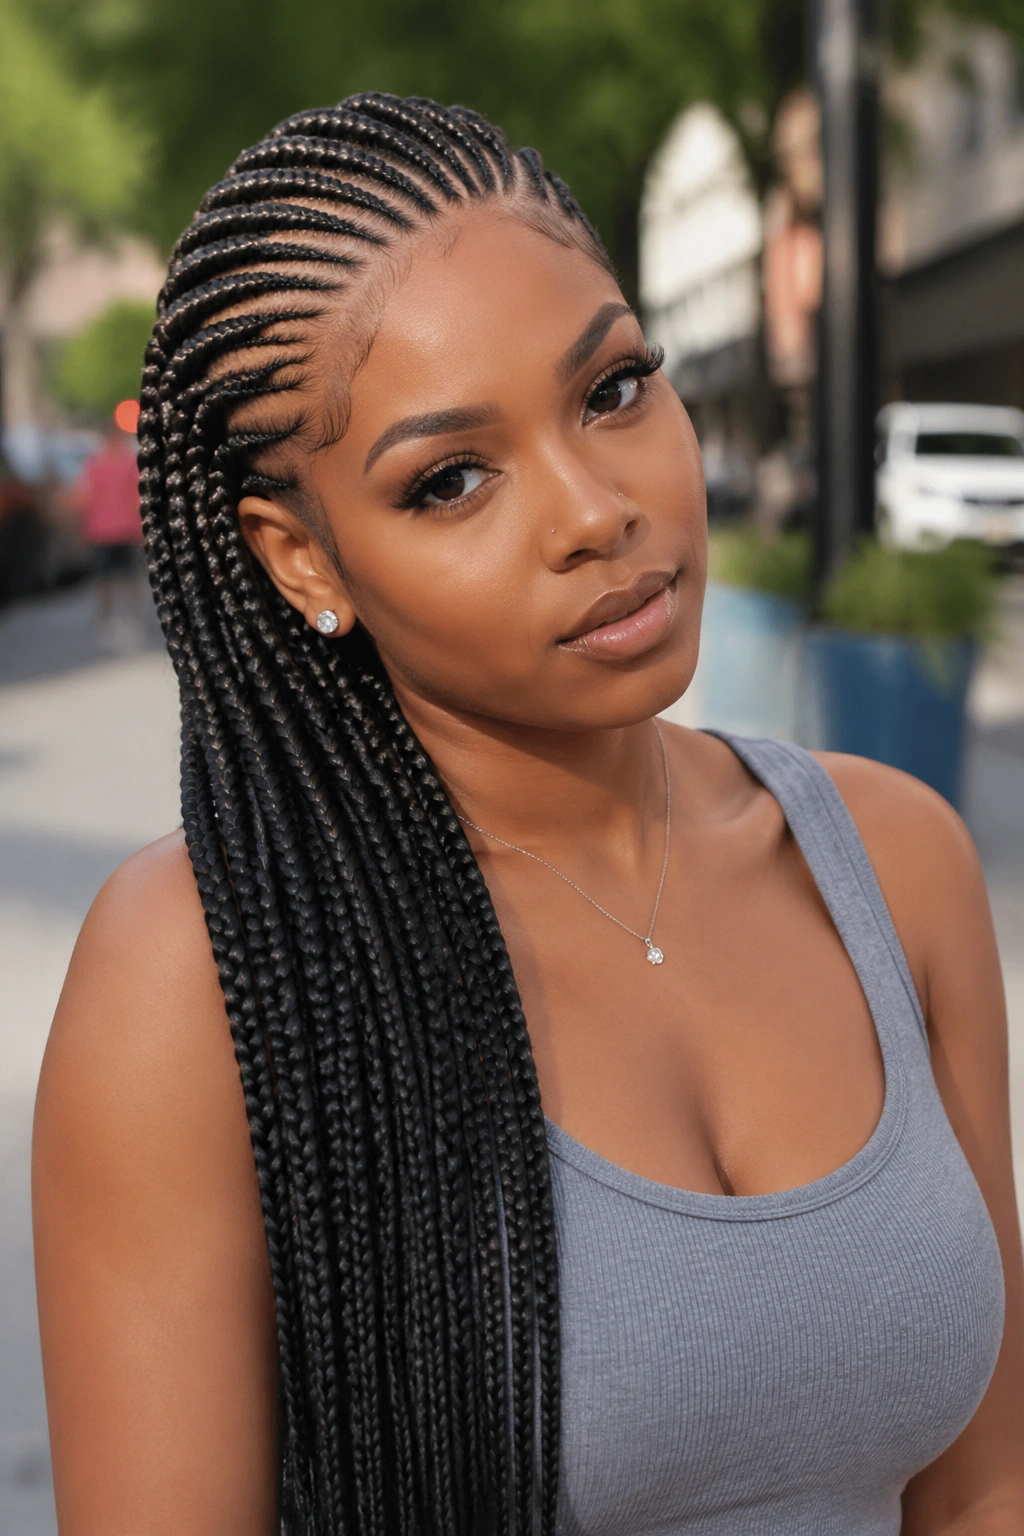
12. Lemonade Braids
Named after Beyoncé’s Lemonade album visuals, these are side-swept cornrows where all rows flow to one side and hang down past the shoulders. Extensions are almost always added — kanekalon for weight, length, and drama.
The rows closest to the part are thinnest. As they move across the scalp, each row thickens, creating a gradient of sizes. Ends are usually dipped in hot water to seal.
What makes this work is the tension at the part combined with the loose flow on the opposite side. Tight at the scalp, flowing at the ends.
13. Cornrows with a Middle Twist Detail
Take any cornrow pattern. In the middle of 2-3 rows, stop the braid briefly, twist the section on itself, then continue cornrowing. The twist creates a small raised knot in the braid line.
It’s the subtle details like this that separate a standard style from a signature one. The twist can be placed at the temple, behind the ear, or at the back of the crown. Anywhere you want the eye to land.
My preferred placement: right behind each ear, on both sides. Symmetrical accents without overwhelming the full pattern.
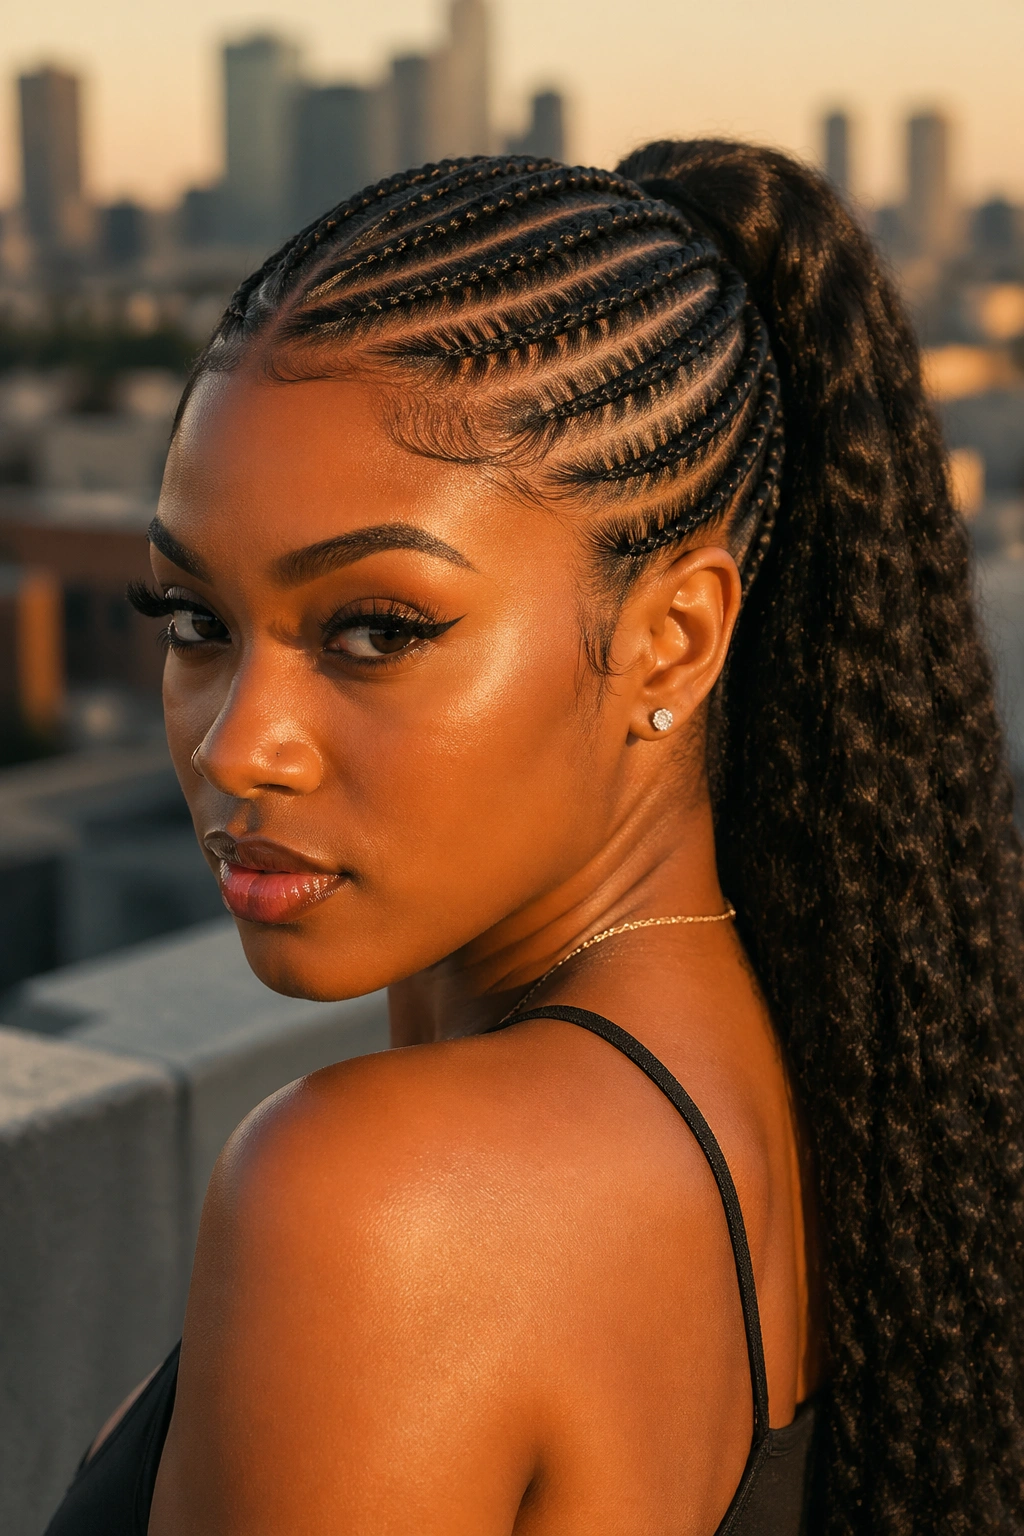
14. Cornrow Ponytail
All rows converge at the nape of the neck, where they’re gathered into a single high or low ponytail. The ponytail can be your own hair or a kanekalon drawstring piece for extra length.
Five to eight cornrows lead into the pony. The angle of each row matters — they all need to curve naturally toward the gathering point, not pull awkwardly.
A low cornrow ponytail reads professional. A high one reads athletic or edgy. Same base style, different vibe depending on placement.
15. Cornrows with Curly Fringe

Cornrow the back and crown, but leave the front hairline out as a short natural curly fringe. The contrast of tight scalp braids and a softening curl around the face works for anyone who wants protection without losing softness.
Why it flatters most faces: the fringe breaks up the severity of tight braids, particularly good for round or heart-shaped face shapes where a hard hairline can feel stark.
Keep the fringe curls hydrated separately — a small amount of leave-in conditioner every other day, finger-coiled for definition.
16. Iverson-Style Cornrows
Named after Allen Iverson, these cornrows go straight back in neat, tight rows — often with tight tension and clean parts. The style became iconic in the late ’90s and early 2000s and has never really gone out of style among Black men and women alike.
The Technique
Thicker rows (6-8 total), minimal extensions, deep crisp parts. The braider works fast and firm. Sometimes the rows end at the nape without extensions, sometimes they’re finished with small kanekalon tips.
Durability: 2-3 weeks. Not a style that holds forever, but one that looks sharp for its runtime.
17. Cornrows with Accent Color Extensions
Full head of cornrows with one or two rows using colored kanekalon — burgundy, copper, honey blonde, or even vivid pink. The colored rows sit among the natural-colored ones, creating pops of color without fully dyeing the style.
The placement matters. A single color streak near the part looks intentional. Scattered colored rows throughout look chaotic. Pick 1-3 rows in strategic spots.
Color-treated kanekalon tends to dry faster than virgin hair, so the color rows might frizz sooner than the rest. Braid spray helps.
18. Spider Cornrows
A radiating pattern — all cornrows start from a single central point on the crown and flow outward like legs of a spider. Eight or more rows, each traveling in a different direction.
Ever wondered how braiders keep the parts even? It’s all done from that center point out, using the rat-tail comb to measure degree-angles around the crown. Takes experience to get right.
The style reads bold and sculptural. Best saved for occasions where you want a clear head-turner.
19. Cornrows with a Side Shave
Cornrow pattern on one side, a fade or undercut on the other side. The asymmetry pushes the style into edgier territory. Most commonly, the shaved side is the one closest to the parting.
How the contrast works: the eye is drawn to the exposed scalp, then pulled across the head to the braided side. It’s a fashion-forward cornrow variation, often seen on musicians and athletes.
If you commit to this look, upkeep includes touching up the shave every 1-2 weeks to keep the contrast sharp.
20. Box Cornrows (Square Grid)
Instead of rows going front-to-back or side-to-side, parts create perfect square boxes across the scalp. Each box is cornrowed separately — either as a single row within the box or with a mini bun inside.
A box cornrow layout looks mathematical from above. Overhead photos really show off the grid precision.
Who this is for: people who love geometric looks and don’t mind the 6-8 hour install. Also great for anyone with thick hair that can handle the density.
21. Cornrows to Box Braids Transition
The front half of your head is cornrowed in clean rows. The back half transitions into single box braids. The shift happens along the crown, where cornrows stop and box braids begin.
Who This Is For
- People who want the look of both styles without committing fully to either
- Anyone with long hair wanting to show off length in the back
- Those who want a protected scalp at the front and flowing ends behind
Maintenance note: The transition point can loosen over time. Check it in the mirror every few days and tuck in any stray pieces.
22. Cornrows with Cowrie Shells
Cowrie shells are West African in origin — they were once used as currency across parts of Africa and the shells carry cultural weight. Threading them onto cornrow ends or weaving them into the braid bodies honors that history.
The placement varies. Some braiders slide cowries onto the braid ends, others weave them into the middle of the braid so they sit against the scalp. Either way, the shells catch natural light and add soft rattle as you move.
Only use real cowries if possible — plastic versions look cheap and won’t hold as well.
23. Mohawk Cornrow Pattern
Sides cornrowed tight and flat, the center section left raised or braided into a higher puff. The mohawk look without shaving anything.
How to get it: your braider works the side rows toward the center strip, leaving a 2-3 inch wide section down the middle. That center section gets braided separately, often into a single thick cornrow or left as a natural puff.
A cornrow mohawk stays polished for formal events and edgy for concerts. One style, two audiences.
24. Cornrows with a Low Side Bun
All rows angle toward one side, gathering into a low chignon-style bun behind one ear. The bun sits lower than a standard ponytail, giving the whole look a romantic, soft finish.
What makes this work is the directionality. Every cornrow has to flow toward the bun location — no straight-back rows can be forced to join the side bun without looking awkward.
Best for: bridesmaids, work events, dinners. Formal without being stiff.
25. Cornrows with Braiding Cuffs and Rings
Metal cuffs and rings threaded onto select cornrows. Brass, gold, silver, or copper-toned cuffs slide over the braid body and clip shut. Rings can be placed at the ends or along the braid length.
Unlike beads, which hang freely, cuffs stay put where they’re placed. That lets you use them as design elements — a row of small cuffs near the crown, or a single large cuff at the nape.
Pick cuffs that match your skin undertone. Warm skin takes gold and brass better. Cool skin takes silver.
26. Cornrows with a Swirl Pattern
Parts swirl across the head in a spiral, usually starting from one temple and winding around to the opposite side. Each cornrow follows the curve of the swirl.
The hardest cornrow pattern to braid well, honestly. The curved paths mean every row has to be parted and braided along an arc, which takes precision most braiders need extra time for.
What to Watch For
- Wobbly swirls read as mistakes, not design
- The swirl needs a clear starting point and ending point
- Extensions can pull the swirl out of shape if added too aggressively
Worth the extra cost if your braider is skilled. Not worth it if they hesitate when you describe the pattern.
27. Cornrows with a Raised Center Braid
Most cornrows sit flat against the scalp. This style raises one central braid — usually the middle row — higher than the others, creating a ridge down the middle of the head.
The effect: the center braid looks three-dimensional while the side braids stay flat. Striking in profile, dramatic in photos.
Technique-wise, the raised braid uses more hair than the surrounding rows and is braided with slightly less tension, letting it puff up. Tricky to pull off without the braid looking lopsided.
28. Cornrows with Crown Accents
Small decorative elements — tiny metal flowers, gold threads, crystal beads — placed only along the crown cornrows. The rest of the braids stay clean.
This placement works because the crown is where your hair naturally catches light. Decoration there reads as a halo effect rather than random adornment.
Less is more with this style. Three to five accent pieces across the crown, not twenty.
29. Cornrows Braided Downward Toward the Face
Rare and striking. Instead of rows going back or to the side, all cornrows start from the crown and flow forward toward the face. Ends can hang as bangs or be tucked and twisted.
The technique challenges most braiders because the natural hair growth direction fights against forward braiding. Extra prep with stretched hair and strong edge gel keeps the roots from lifting.
Best for: hair art photoshoots, music videos, runway looks. Not a style for everyday wear.
30. Tribal Cornrows with Multiple Techniques
A mashup style. Parts of the head use feed-in cornrows, other parts use stitch technique, and some sections use freehand cornrows — all within the same head of hair. Traditional African tribal hairstyles inspired this kind of multi-technique approach.
Combining Techniques Well
- Keep the different techniques visually balanced (one side stitch, one side feed-in)
- Use a single cohesive theme (beads, color, or accessories) to unify the look
- Don’t exceed three techniques in one head — it starts looking chaotic
The finished style reads as high-craft, high-effort, and deeply personal. No two tribal cornrow installs look alike.
How Long Cornrows Should Last
With good install and care, cornrows hold 4-6 weeks. Anything past 8 weeks starts damaging the hair — matting at the roots, excessive shedding when you take them out, and potential tension issues at the hairline.
Signs it’s time to take them out: buildup you can’t wash away, frizz that won’t smooth, itch that won’t stop, or roots that have grown in more than an inch. Don’t push past the mark trying to stretch more weeks out of a style.
Fresh cornrows look best in the first two weeks. Weeks three and four are maintenance territory. Beyond that, you’re borrowing against next month’s hair health.
Scalp Care While Wearing Cornrows
Your scalp still needs attention under braids. A dry scalp under cornrows means itch, flakes, and potential bacterial growth along the parts.
Weekly scalp routine: lightly spritz with diluted witch hazel (2 parts water to 1 part witch hazel) to clean without stripping. Follow with a drop of jojoba or tea tree oil massaged along each part with your fingertips.
Avoid heavy oils. Coconut and castor oil sound good but they attract lint and buildup that’s nearly impossible to remove mid-install. Stick to lightweight, non-comedogenic options.
Wash night before the takedown. A diluted shampoo applied with a squeeze bottle along each part, followed by a thorough rinse. Helps ease the takedown process and reveals cleaner strands underneath.
Taking Cornrows Out Without Damage
Sit down with patience. Takedown done fast is takedown done with damage.
Start at the ends, work up. Use the pointed end of a rat-tail comb to gently loosen each stitch, or just unravel by hand if the braid’s loose enough. For feed-in rows, slide extensions out carefully — yanking causes breakage where the extensions grip.
Once the braids are out, don’t brush immediately. Shedded hair builds up during weeks of wear, and running a brush through tangles it all. Instead, finger-detangle with conditioner-slicked hands in the shower. Work in sections. Rinse, deep condition, then brush only after everything’s slippery and loose.
Expect to lose a lot of shed hair. That’s not breakage — it’s normal shedding that couldn’t fall out while the hair was braided.
Picking the Right Cornrow Style for Your Face
Round faces benefit from vertical lines — straight back, side-swept, anything that adds visual length. Oval faces work with almost any pattern. Heart-shaped faces soften with fringe or swirl patterns that add width at the jaw. Square faces look good with curved patterns that soften angles.
Don’t pick purely based on what looked cute on someone else. Pattern + face shape + lifestyle all play a role. A jumbo Fulani braid with beads won’t survive a daily gym routine. A tight classic set won’t photograph as well for your wedding.
Ask your braider what works on your head shape. Good braiders will push back if your choice doesn’t flatter your features. That honesty saves regret later.