



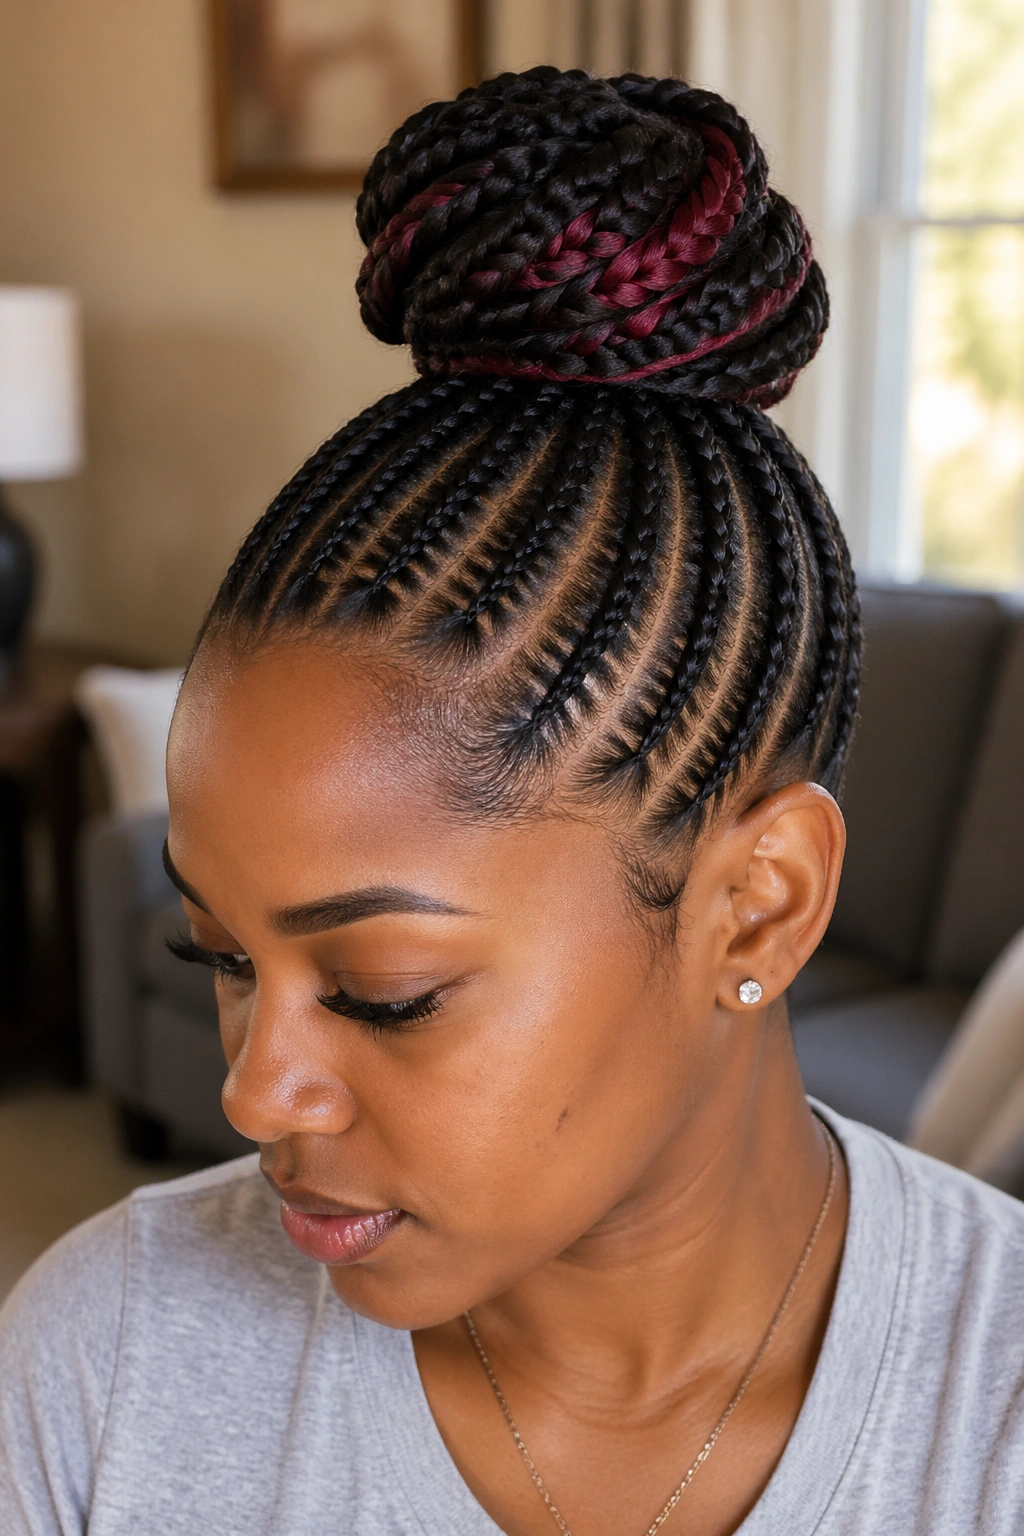
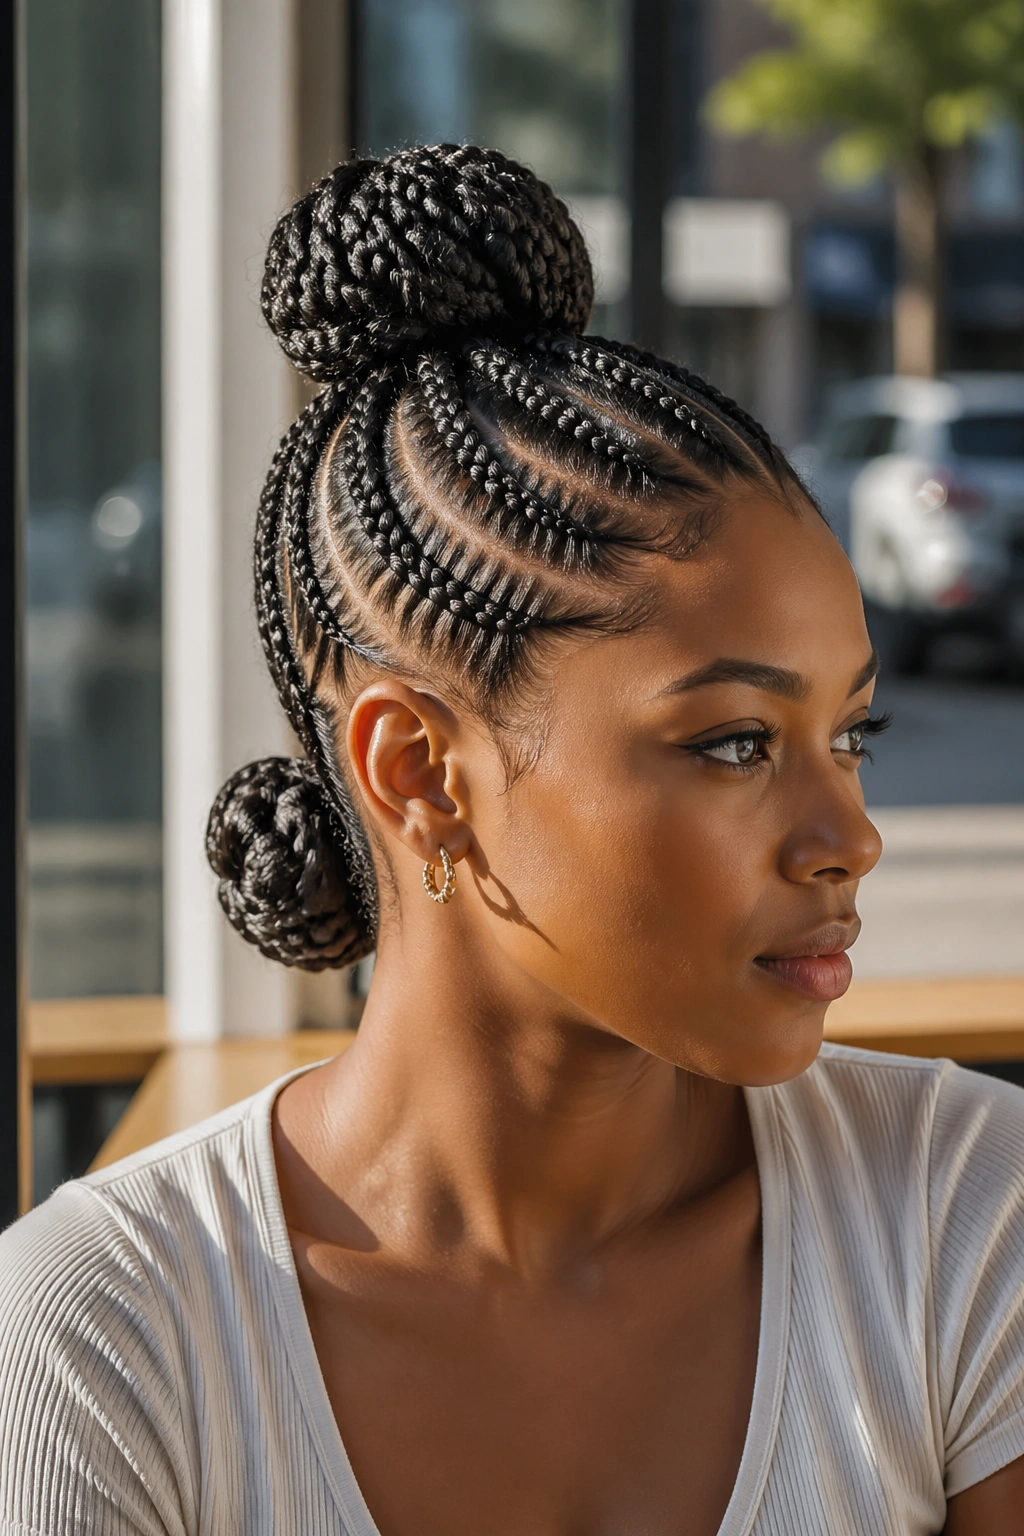
Stitch cornrow bun styles are the formal cousins of the basic cornrow updo. The stitch part of the name refers to a specific technique — segmented sections within each braid that create visible ridges down the length of the cornrow, like rows of stitching on fabric. When those stitch cornrows feed into a bun, the finished style reads as one of the most photogenic, refined protective looks Black women can wear. Sculptural. Architectural. Wedding-worthy on the right day.
Stitch cornrows take longer than standard cornrows to install. Each ridge has to be created deliberately as the braid progresses — small sections clipped off above the working portion, then released into the braid one at a time as the cornrow descends. The result is a braid that looks ribbed or notched along its length. Light catches the ridges. Photos show texture that flat cornrows simply can’t produce.
When that ridged texture combines with a bun finish, the style takes on a complete sculptural identity. The 22 stitch cornrow bun styles below cover the practical range — high buns, low buns, side buns, decorated buns, sleek buns, and the more elaborate variations stylists charge premium for.
What Makes Stitch Cornrows Different
Standard cornrows look smooth from a distance. Stitch cornrows look segmented. Each “stitch” is created by sectioning off a small amount of hair above the active braid, then releasing it into the braid as a fresh ridge. The technique creates visible horizontal lines crossing each braid every quarter to half inch.
The visual effect is that of stacked sections — almost like the braid is made up of small linked rings rather than one continuous strand. From across a room, you see texture. Up close, you see precision.
Stitch cornrows also hold longer than standard cornrows in many cases. The segmented structure distributes tension across each stitch independently, which means a single weak point doesn’t cause the whole braid to loosen.
Bun Placement Decides the Whole Look
The same stitch cornrows can look entirely different depending on where the bun lands. High bun reads regal. Low bun reads sophisticated. Side bun reads styled. Center bun reads classic.
Pick the bun position before you part for the cornrows. The cornrow direction has to lead to the bun location, so bun placement has to be settled first.
For face shape compatibility: long face shapes flatter under low buns. Round face shapes flatter under high buns. Square face shapes flatter under side buns. Heart-shaped face shapes flatter under low or side buns.
Prep for Stitch Quality
Stitch quality depends on prep almost more than on technique.
- Clarifying wash to remove buildup.
- Deep condition for 30-45 minutes.
- Stretch fully — air-dry stretched, blow-dry on low, or band-stretch overnight.
- A small amount of styling foam in each section before braiding gives the stitch the tackiness it needs to hold its segmented shape.
Skip heavy oils and butters. They reduce the friction the stitch technique relies on.
Tools That Make Stitches Cleaner
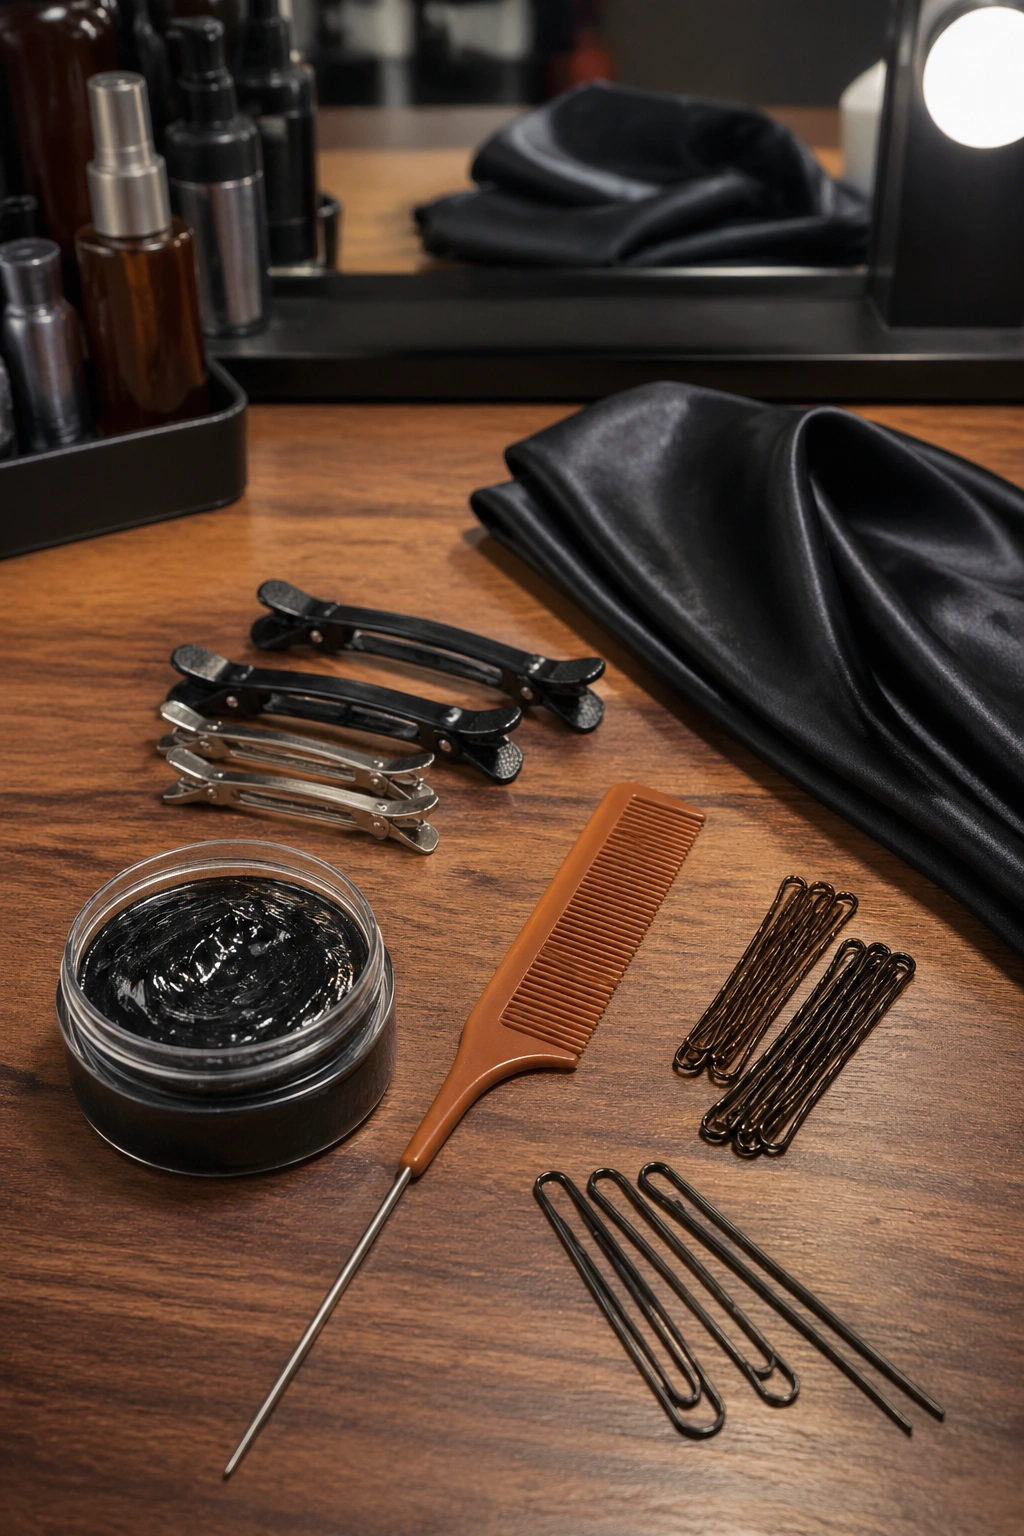
A pintail comb with a fine, sharp pin. The stitches are created by lifting tiny, precise sections — a thick comb tine can’t make those clean.
Small clips for holding sections off the working area as you create each stitch.
A bright lamp positioned over your work area. Stitch cornrowing requires seeing every section clearly. Dim light leads to uneven stitch spacing.
Edge gel for the front. Bobby pins (color-matched) and hairpins (U-shaped) for the bun finishing.
A satin scarf for setting edges and laying baby hairs after install.
Stitch Spacing Standards
Stitch spacing — the distance between each visible ridge — varies by style intent. Three standard spacings:
Tight stitches at quarter-inch spacing produce the most ribbed, structured look. Best for formal events and statement installs.
Medium stitches at half-inch spacing produce a balanced look — visible ridges without overwhelming density. Best for everyday and most mid-range occasions.
Loose stitches at three-quarter-inch spacing produce a softer, more natural look that still reads as stitch cornrowing but with less visual density. Best for daily wear when subtle definition is the goal.
Pick spacing based on the occasion. Mixing spacings within a single install reads as inconsistency.
1. High Stitch Bun With Small Cornrows
Twelve to fifteen small stitch cornrows running upward to a high bun positioned at the crown.
Why This Combination Works
- The high bun lifts the silhouette and elongates the neck.
- Small cornrows contribute to a refined overall look.
- The stitches catch light at the high position where photos see them best.
Stylist note: For shorter natural hair, kanekalon feed-in at the ends provides enough length to coil into a meaningful high bun.
2. Low Stitch Bun With Medium Cornrows
Eight to ten medium stitch cornrows running back to a low chignon at the nape. Sophisticated. Restrained. Wedding-guest-perfect.
The low bun is the more conservative position. Pairs well with formal wear because it doesn’t compete with collars, necklines, or jewelry. The stitch detail still provides texture without making the style read overly elaborate.
Best on long necks, scoop necklines, and any setting where the back of the head needs to read polished but not flashy.
3. Side Stitch Bun With Asymmetric Cornrows
Stitch cornrows in an asymmetric layout — heavier on one side of a deep side part — feeding into a side bun positioned above the ear opposite the heavier section.
The asymmetric format is the styling decision. Symmetric stitch cornrows with side buns look slightly off-balance. Asymmetric layouts make the side bun feel intentional.
Pick the bun side that flatters your preferred photo angle.
4. Stitch Cornrow Crown Bun With Halo Wrap
Stitch cornrows feed into a high bun, then a single thick stitch braid wraps around the base of the bun to disguise the elastic and create a halo effect.
The wrap braid is the decorative flourish. Without it, a high stitch bun can read as just a coiled tail. With it, the style reads as one continuous architectural piece.
Hard to self-install. The wrap braid requires planning during the initial cornrow phase — one braid is reserved long for the wrap purpose.
5. Stitch Bun With Beaded Accent
Standard stitch cornrow bun (high or low) finished with a small cluster of beads at the bun base — three to five beads attached to braid ends pulled out from the bun for decorative effect.
The bead cluster sits at the visual focal point of the style. Wooden beads work well for everyday and casual events. Brass or silver beads suit more formal occasions.
Don’t bead all braid ends — only the few that create the cluster effect at the bun base.
6. Stitch Cornrow Bun With Side Sweep
Stitch cornrows that all sweep dramatically to one side before gathering into a low side bun. The sweep direction is the dominant visual line.
Different from the side bun with asymmetric cornrows. The side sweep version uses straight-direction cornrows that all run the same way, while the asymmetric version uses different cornrow distributions on each side of a part.
The unified sweep direction reads more dramatic and more theatrical.
7. Stitch Cornrow Pompadour Bun
Front stitch cornrows lift up and over a small filler to create a pompadour shape. Back stitch cornrows feed into a low bun. Two distinct elements: the pompadour at the front, the bun at the back.
This is one of the more architectural stitch cornrow bun combinations. The pompadour adds vertical drama. The bun adds back-of-head structure. Together they read as a styled, deliberate look.
Pompadour requires filler — a small hair donut or rolled section. Without filler, the lift collapses within hours.
8. Stitch Cornrow Bun With Curly Bangs
Stitch cornrows installed everywhere except a 2-inch section at the front hairline, which is left loose and curled into defined curls that fall across the forehead.
The curly bangs soften the precise stitch cornrow lines exactly where they would be most severe — right at the face frame.
This style flatters people who don’t love bare-forehead looks. The curly bangs provide a face-frame without compromising the protective styling of the rest of the install.
9. Stitch Cornrow Bun With Color Highlights
Stitch cornrow bun installed with one or two cornrows featuring pre-colored kanekalon — auburn, copper, or honey blonde — that show in the bun rather than along the cornrow rows themselves.
The color appears at the bun, where the colored braids coil into visibility. The cornrow rows themselves stay natural-toned.
The technique is subtle — color as a finishing detail rather than as a dominant element.
10. Double Stitch Cornrow Bun
Two buns instead of one. Stitch cornrows divide along a horizontal part — top half feeds into a high bun, bottom half feeds into a low bun.
The two-bun layout is a youthful, playful styling choice. Reads more festival than formal. Best on people who want personality more than polish.
The top and bottom buns should be similar in size. Mismatched proportions read as a mistake rather than a style.
11. Stitch Cornrow Bun With Cuffs
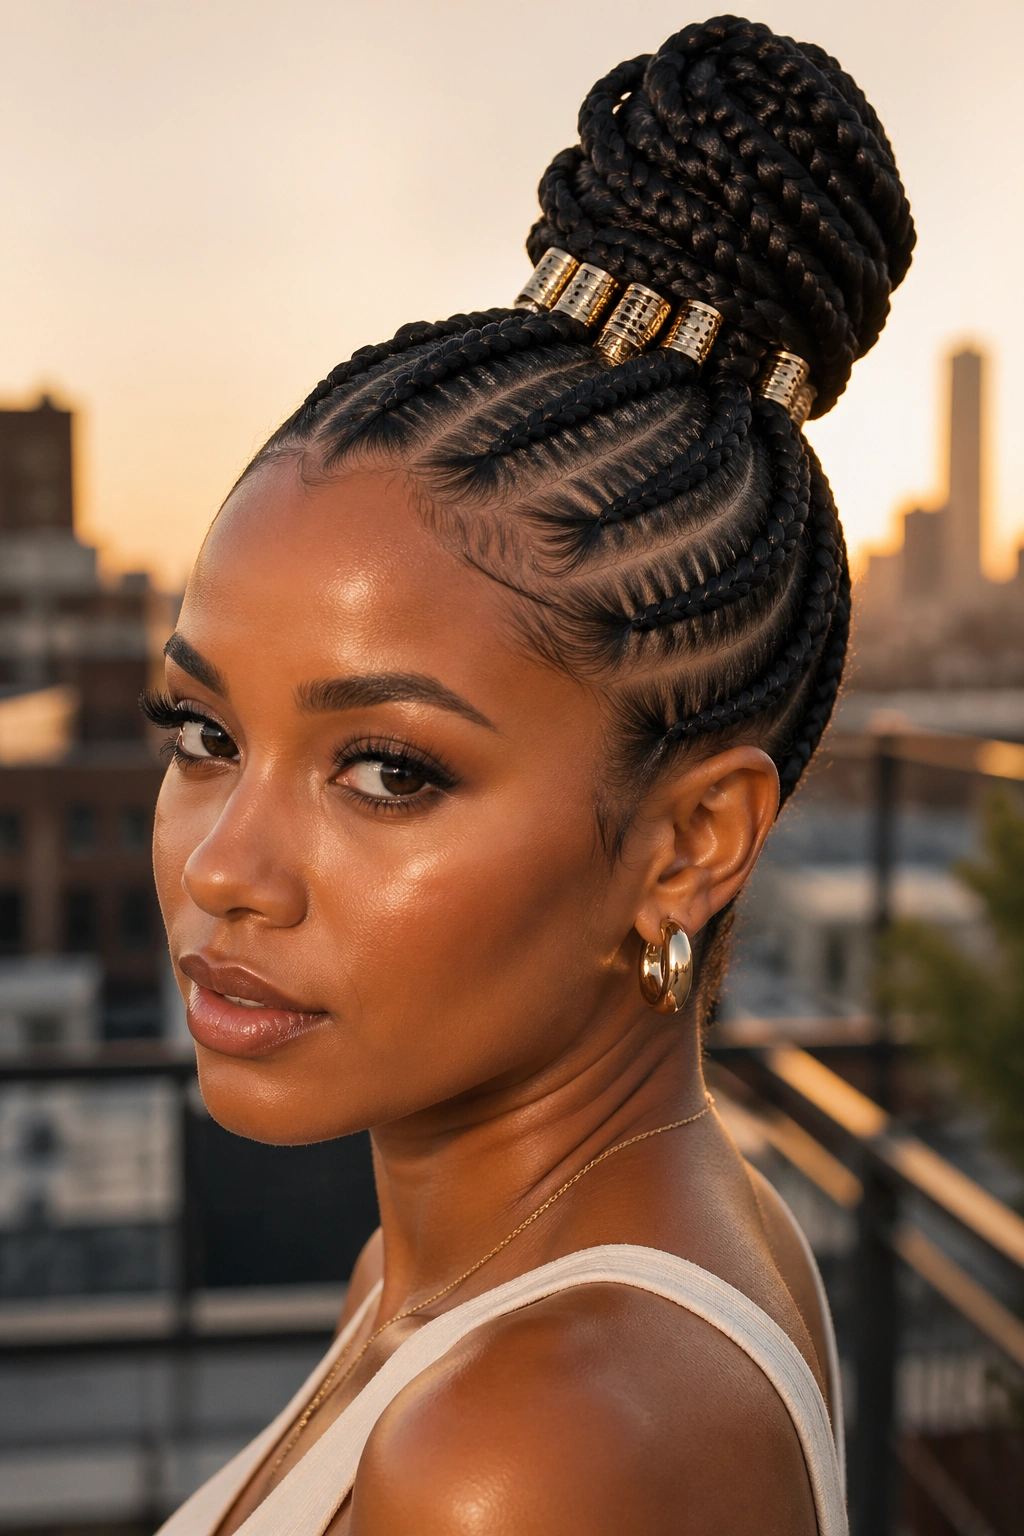
Stitch cornrow bun in any position (high, low, or side) with metal cuffs (gold, silver, or brass) clipped onto specific braids before they enter the bun. Three to five cuffs total.
Cuff placement matters. Cuffs near the bun base catch light at the photo focal point. Cuffs along the cornrow length distribute attention across the head.
Easier to swap and reposition than beads.
12. Stitch Cornrow Bun With Wrapped Tail
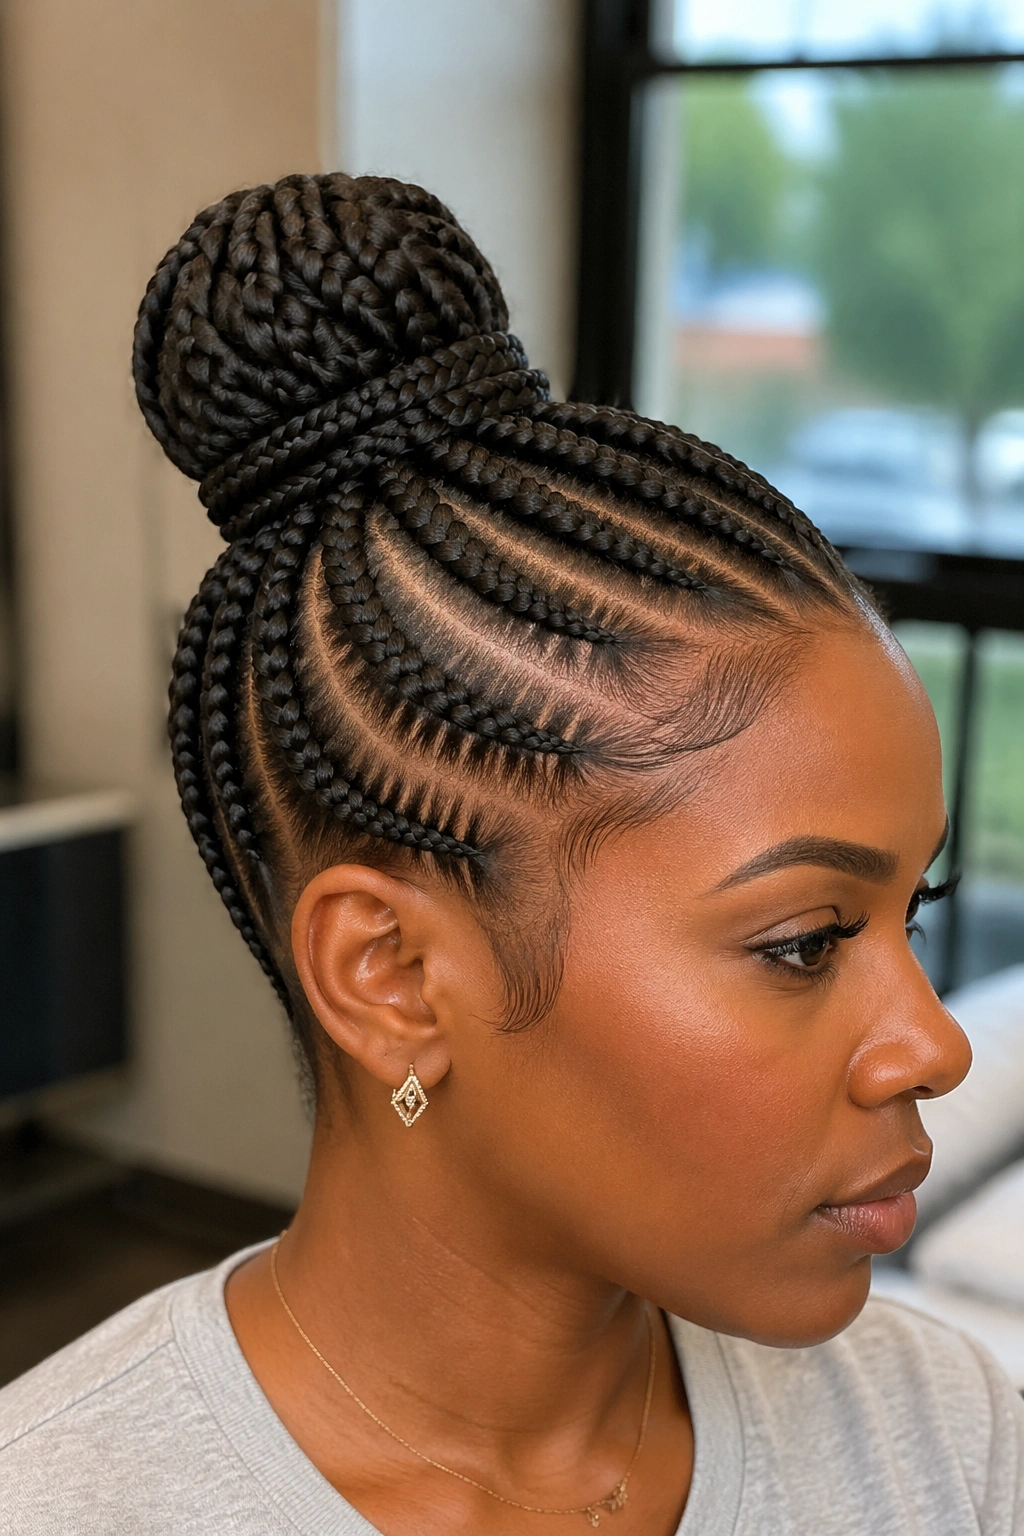
Stitch cornrow bun with a single braid (or two) pulled out from the bun and wrapped around the base of the bun before tucking back in. The wrap braid is decorative and structural — it disguises the elastic and adds visible braid texture at the focal point.
The wrap technique is a stylist trick. Adds 5-10 minutes to install. Adds significant polish to the finished look.
13. Stitch Cornrow Low Chignon With Center Detail
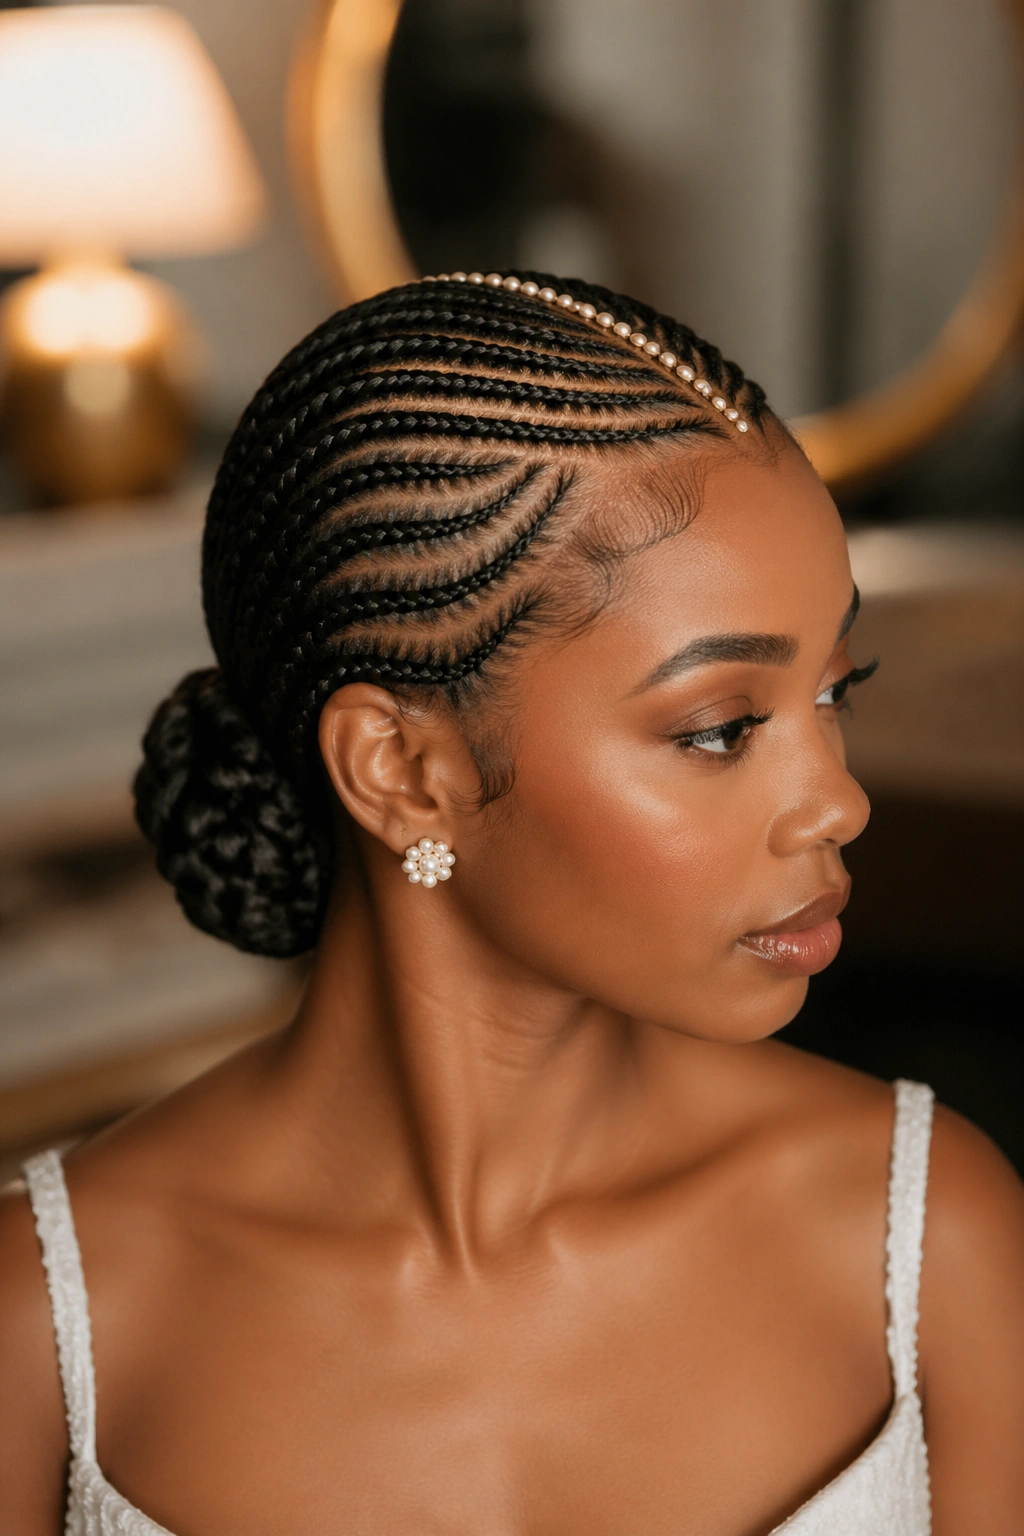
Stitch cornrows feeding into a low chignon, with a small decorative detail at the center of the chignon — a pearl pin, a small flower, a vintage clip, or a decorative comb.
The chignon is the form. The center detail is the styling choice. Detail should match the occasion — pearls for formal, flowers for weddings, vintage clips for editorial.
14. Stitch Cornrow Bun With Edge Design
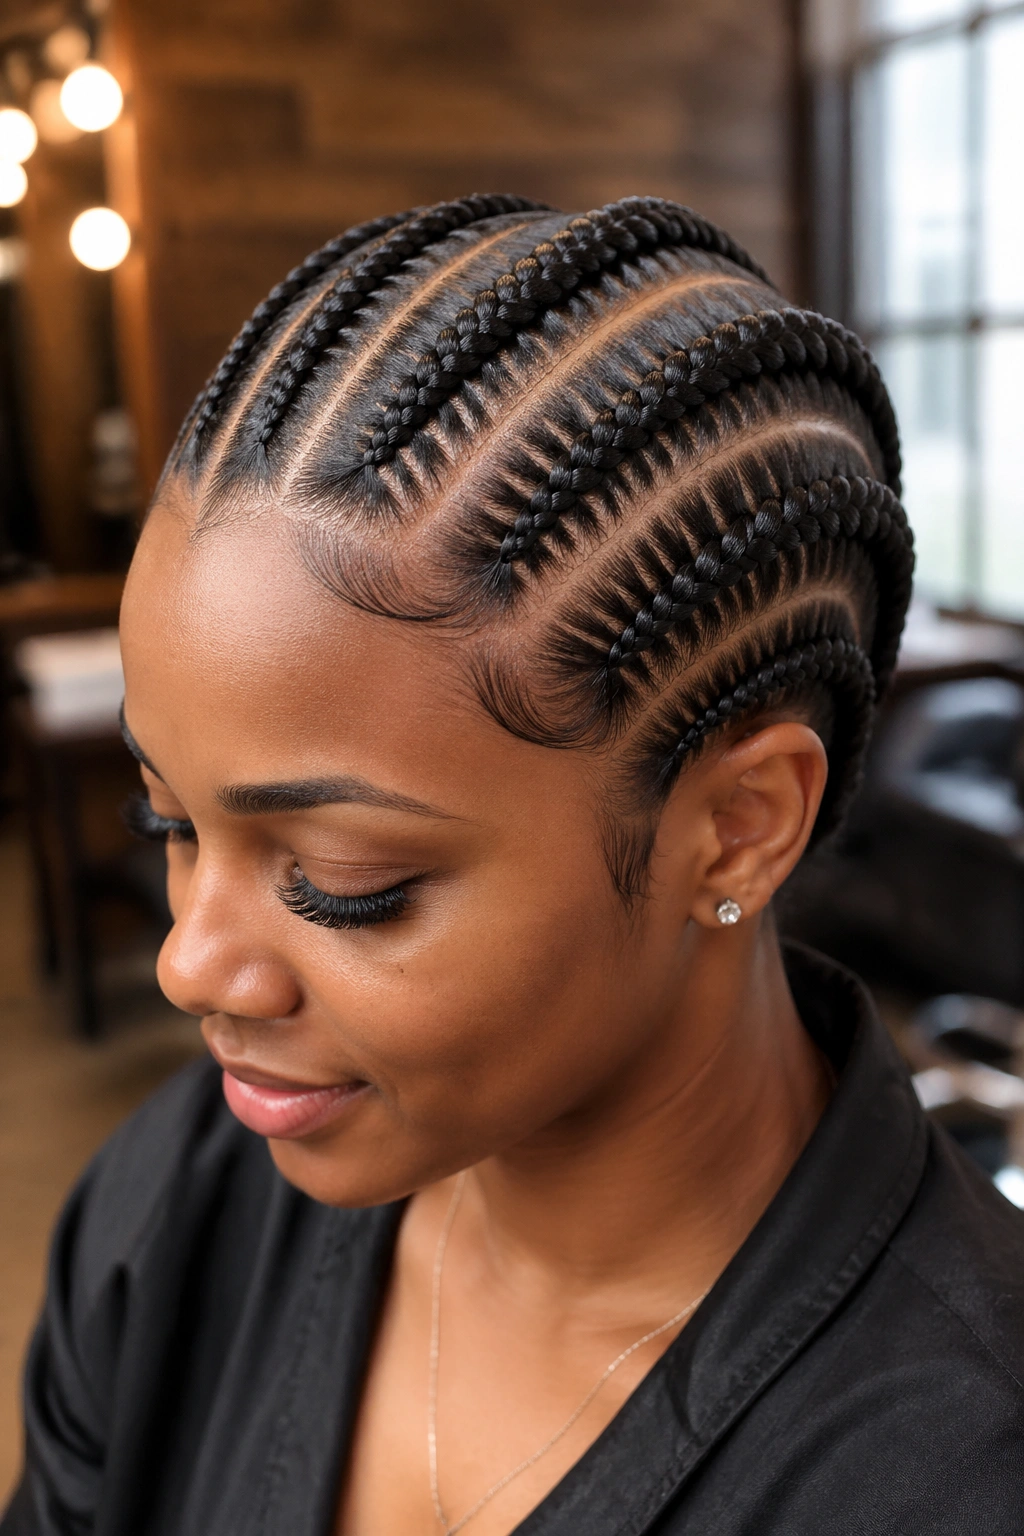
Stitch cornrow bun in any standard configuration with elaborate baby hair styling at the front hairline — swirls, swoops, curls drawn with edge gel and a small detail brush.
The edges are a separate art form. Some people excel at edge work; some don’t. If edges are your strength, the stitch cornrow bun is a good canvas for them.
Good edge work elevates almost any cornrow style to event-ready level.
15. Stitch Cornrow High Bun With Embellished Wrap
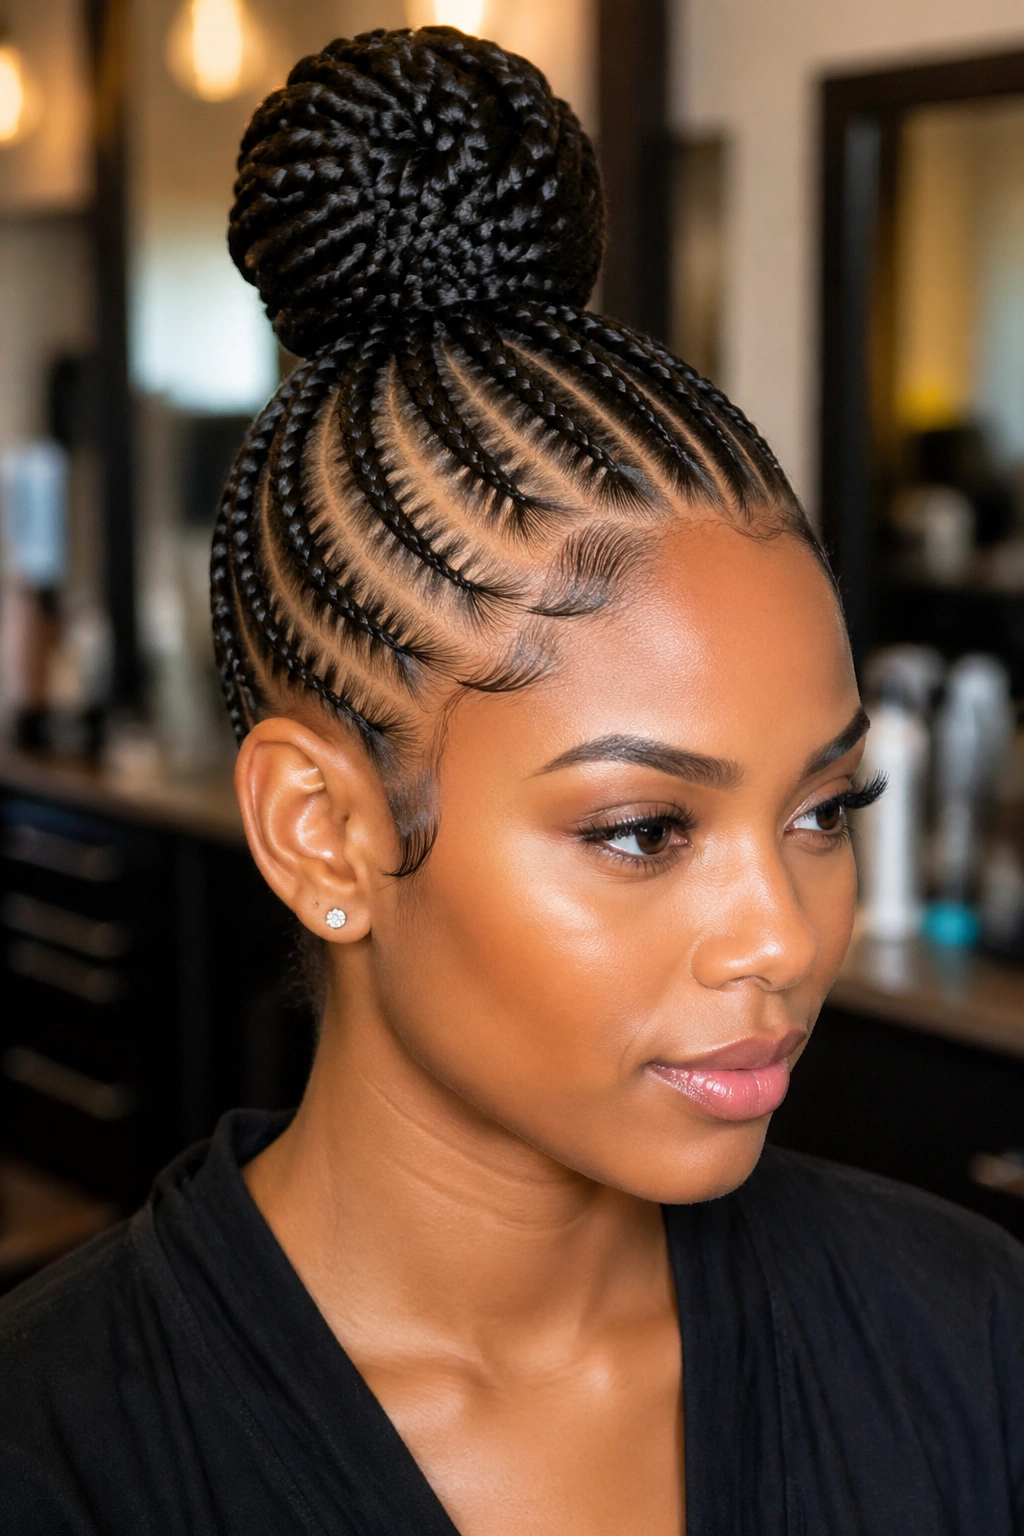
Stitch cornrow bun at the crown with a satin or velvet ribbon wrapped around the base. The ribbon replaces the elastic visually and adds color and texture.
Ribbon colors should be deliberate — burgundy with auburn highlights, gold with natural-toned cornrows, deep emerald for jewel-tone events. Random ribbon colors read accidental.
Ribbon wrap is a quick swap. Different ribbons for different events with the same underlying install.
16. Stitch Cornrow Bun With Loose Side Tendrils
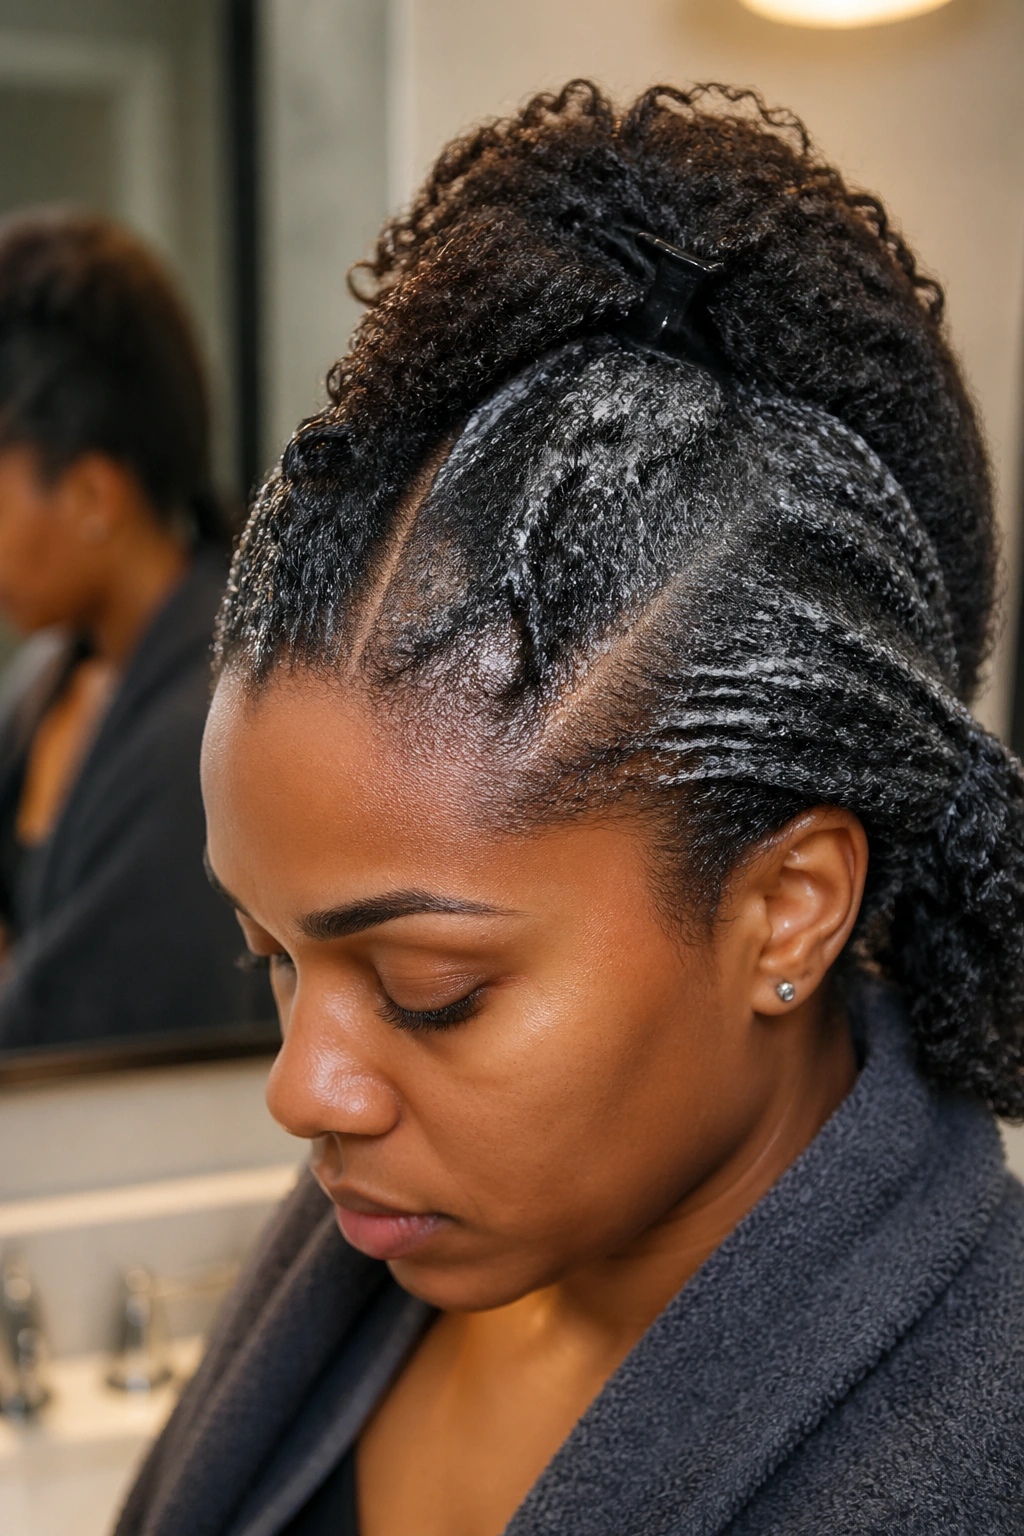
Stitch cornrows feeding into a bun, with a small section of natural hair left loose at one or both temples and styled into soft tendrils that frame the face.
The tendrils soften an otherwise precise install. Best for romantic, soft-focus events — weddings, formal dinners, photoshoots.
The tendrils should be intentional — defined with curl cream or gel, not just frizzy escape pieces.
17. Stitch Cornrow Bun With Mini Bun Detail
A primary stitch cornrow bun (high or low) with a smaller, secondary bun positioned nearby — typically just behind the primary bun or to one side.
The dual-bun arrangement reads as architectural rather than as a mistake. The secondary bun should be roughly half the size of the primary bun for proper proportion.
This is a technique-heavy finishing detail. Best done by stylists or by experienced self-installers.
18. Stitch Cornrow Bun With Geometric Parting
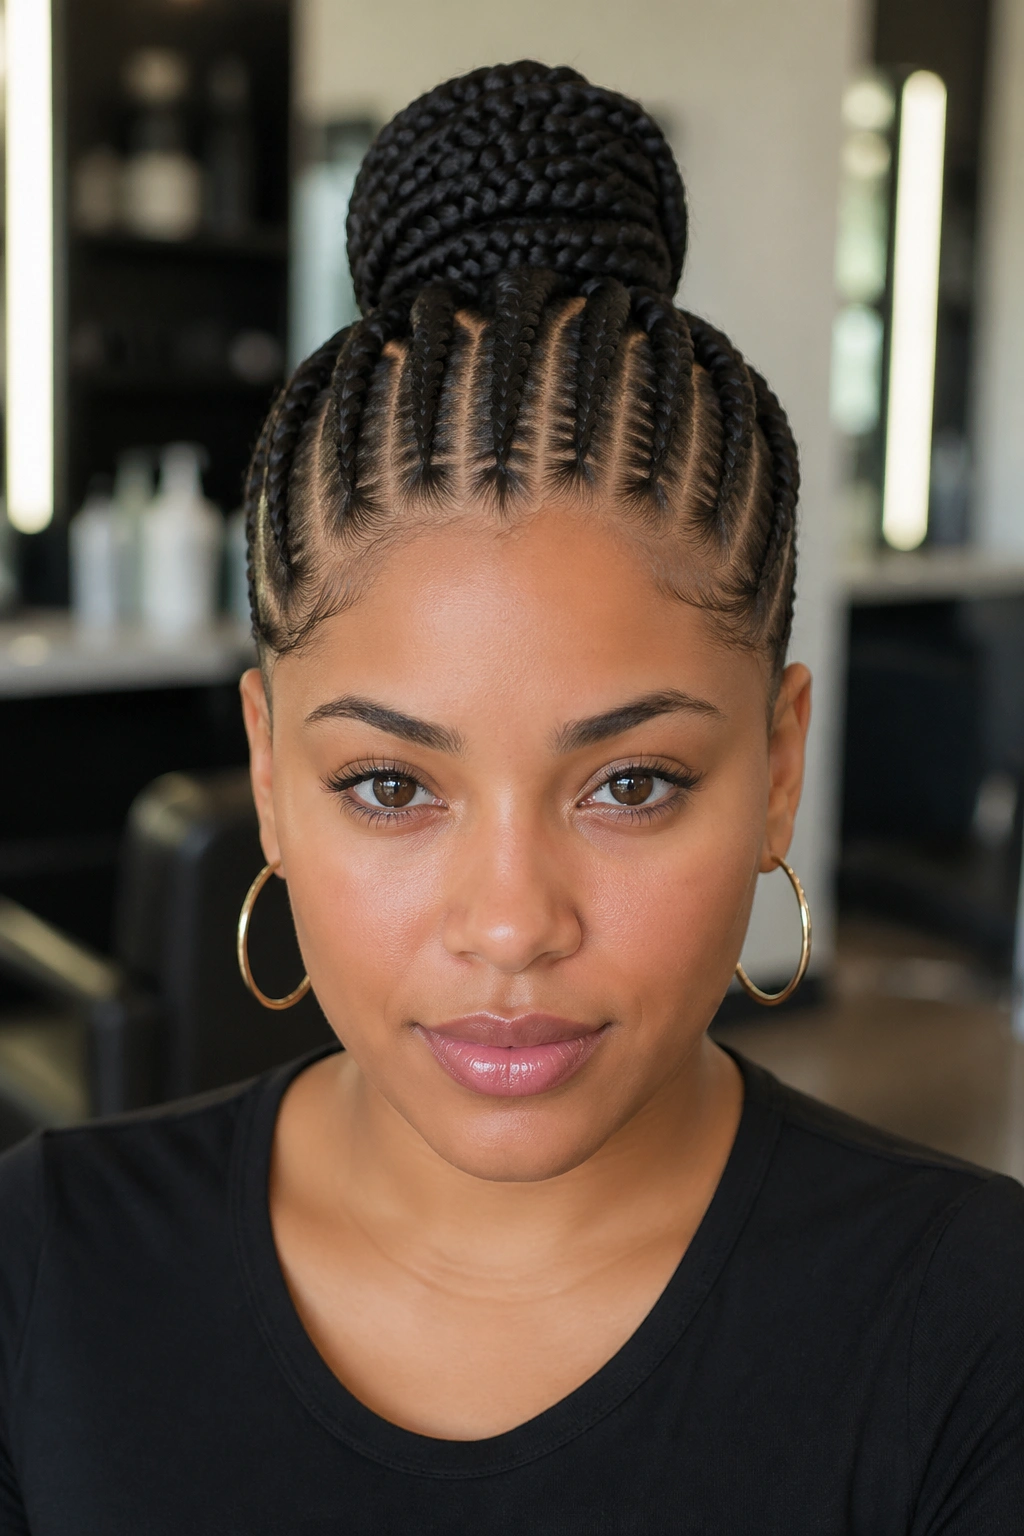
Stitch cornrows installed with geometric parting patterns — triangles, diamonds, or chevrons — at the front hairline before transitioning to standard parts toward the bun.
The geometric front section is the visual feature. The standard back keeps install time manageable.
Best for occasions where you want statement front-of-head styling combined with bun finishing.
19. Stitch Cornrow Bun With Beaded Sections
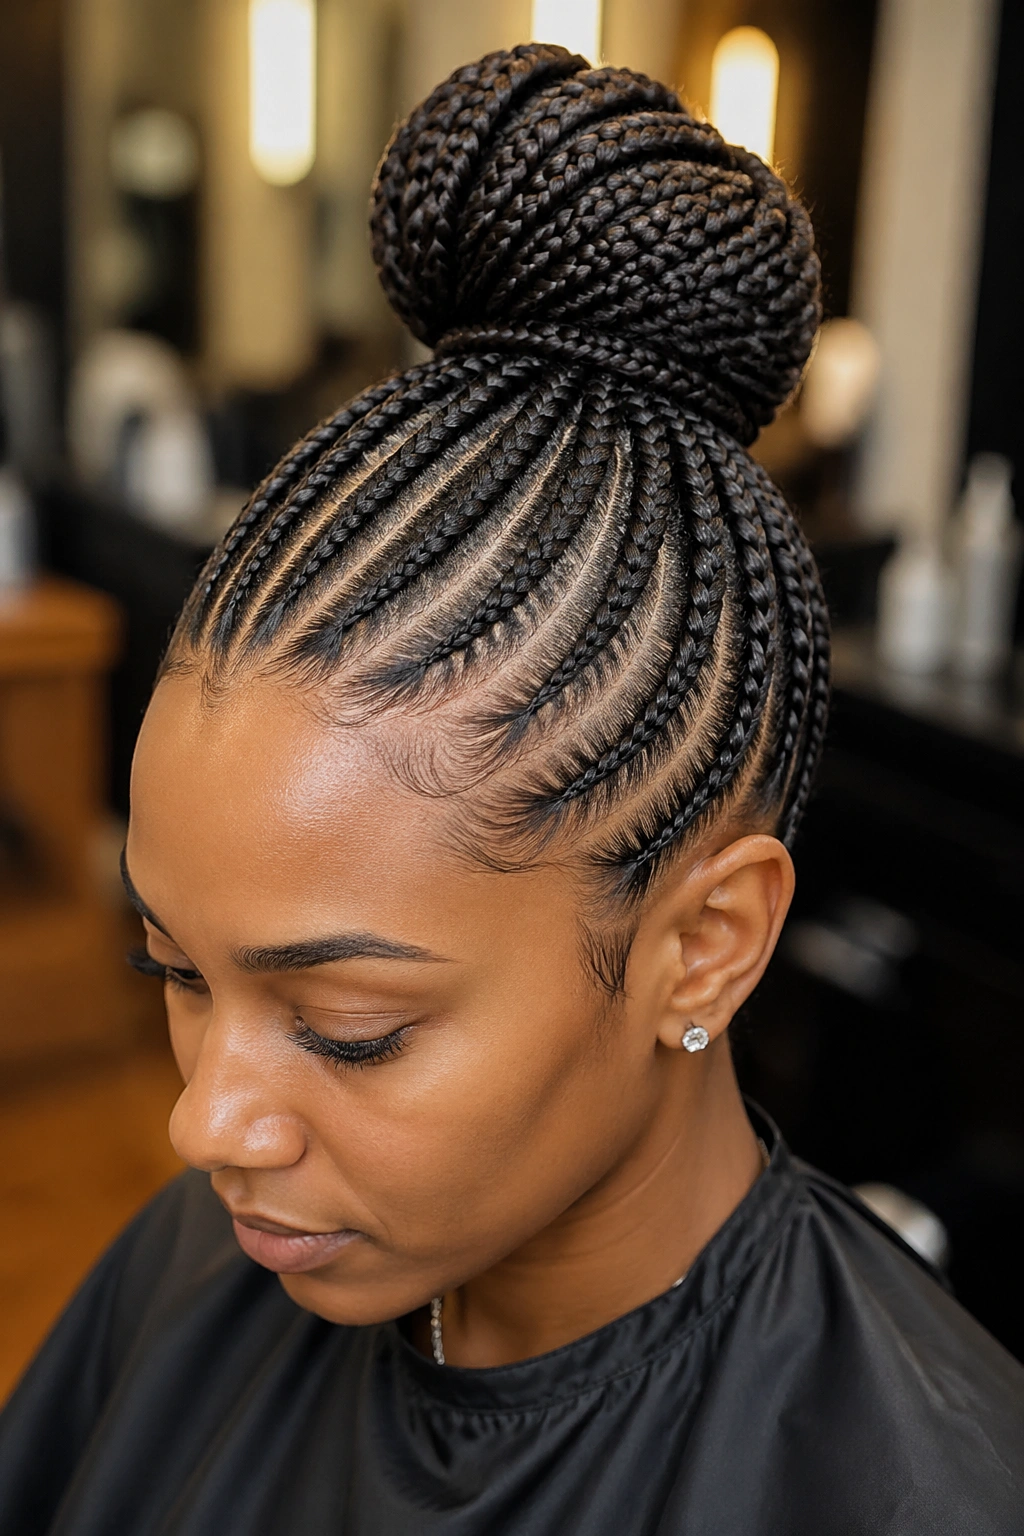
Stitch cornrow bun where several braids are threaded with beads along their length (not just at the ends) before they reach the bun. The beaded sections provide visual interest along the cornrow rows themselves, with the bun as the structural finish.
Bead spacing should be deliberate — every inch or two — not random. Beaded sections work best on three or four cornrows out of the total install.
20. Stitch Cornrow Bun With Cuffs at Bun Base
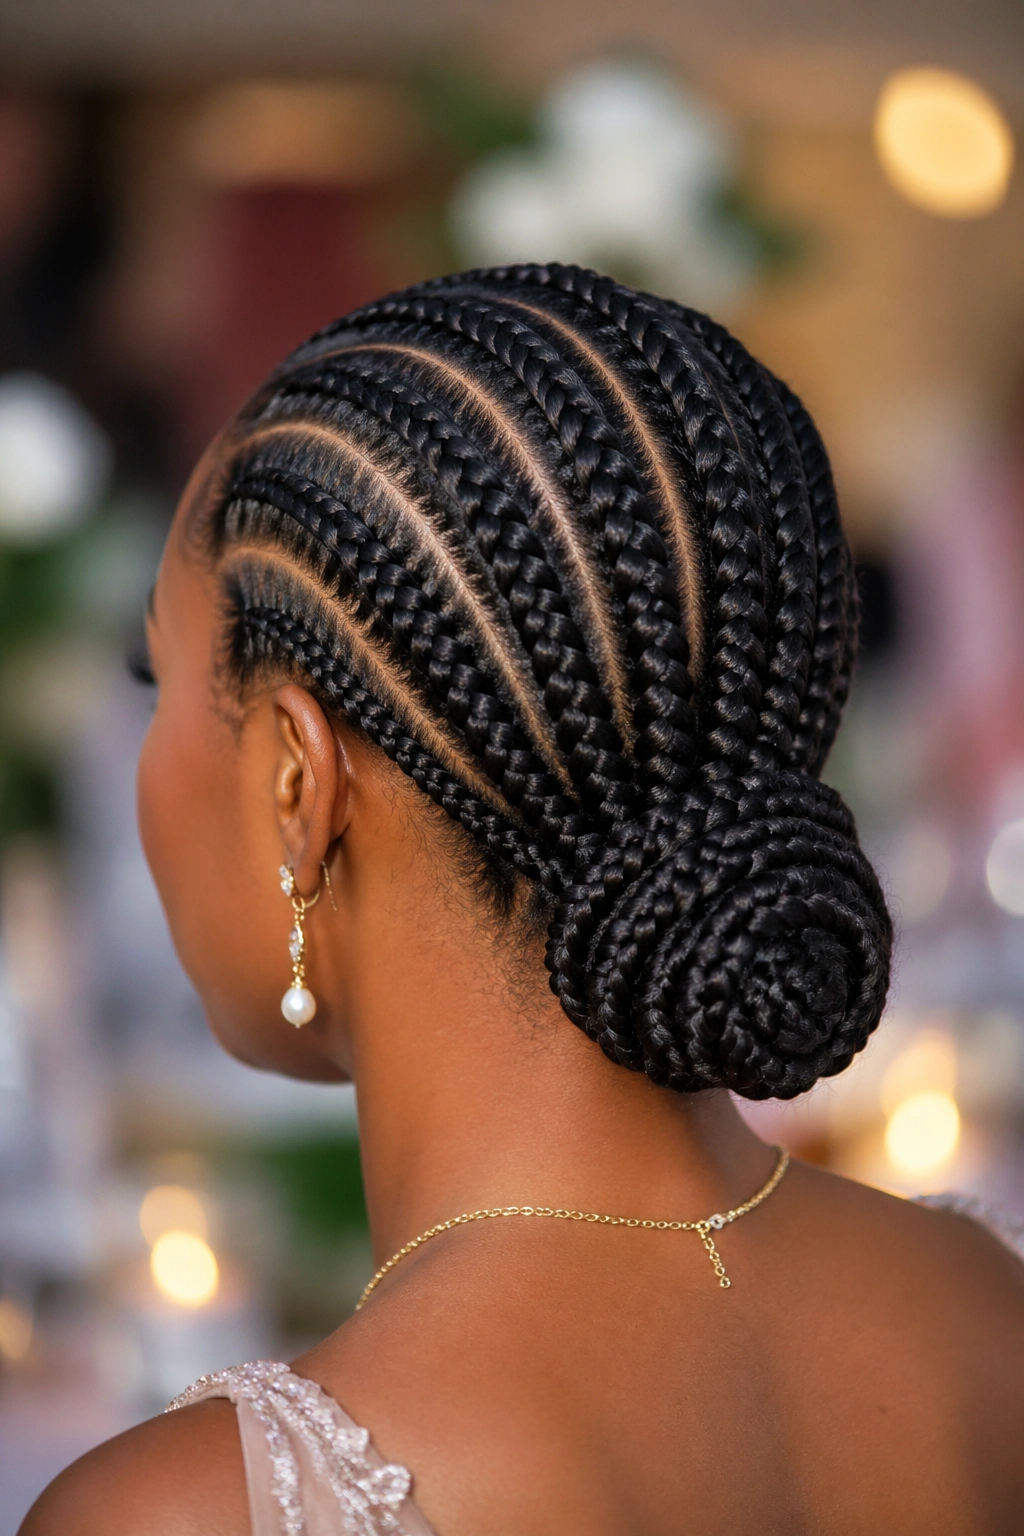
Stitch cornrow bun with metal cuffs clipped specifically at the point where each cornrow enters the bun. The cuffs create a metallic ring effect around the bun base.
This is the maximum cuff density at the bun. The visual effect is jewelry-like — cuffs forming a ring of metal around the focal point of the style.
All same-color cuffs (all gold or all silver) for cleanest visual.
21. Stitch Cornrow Bun With Floral Accent
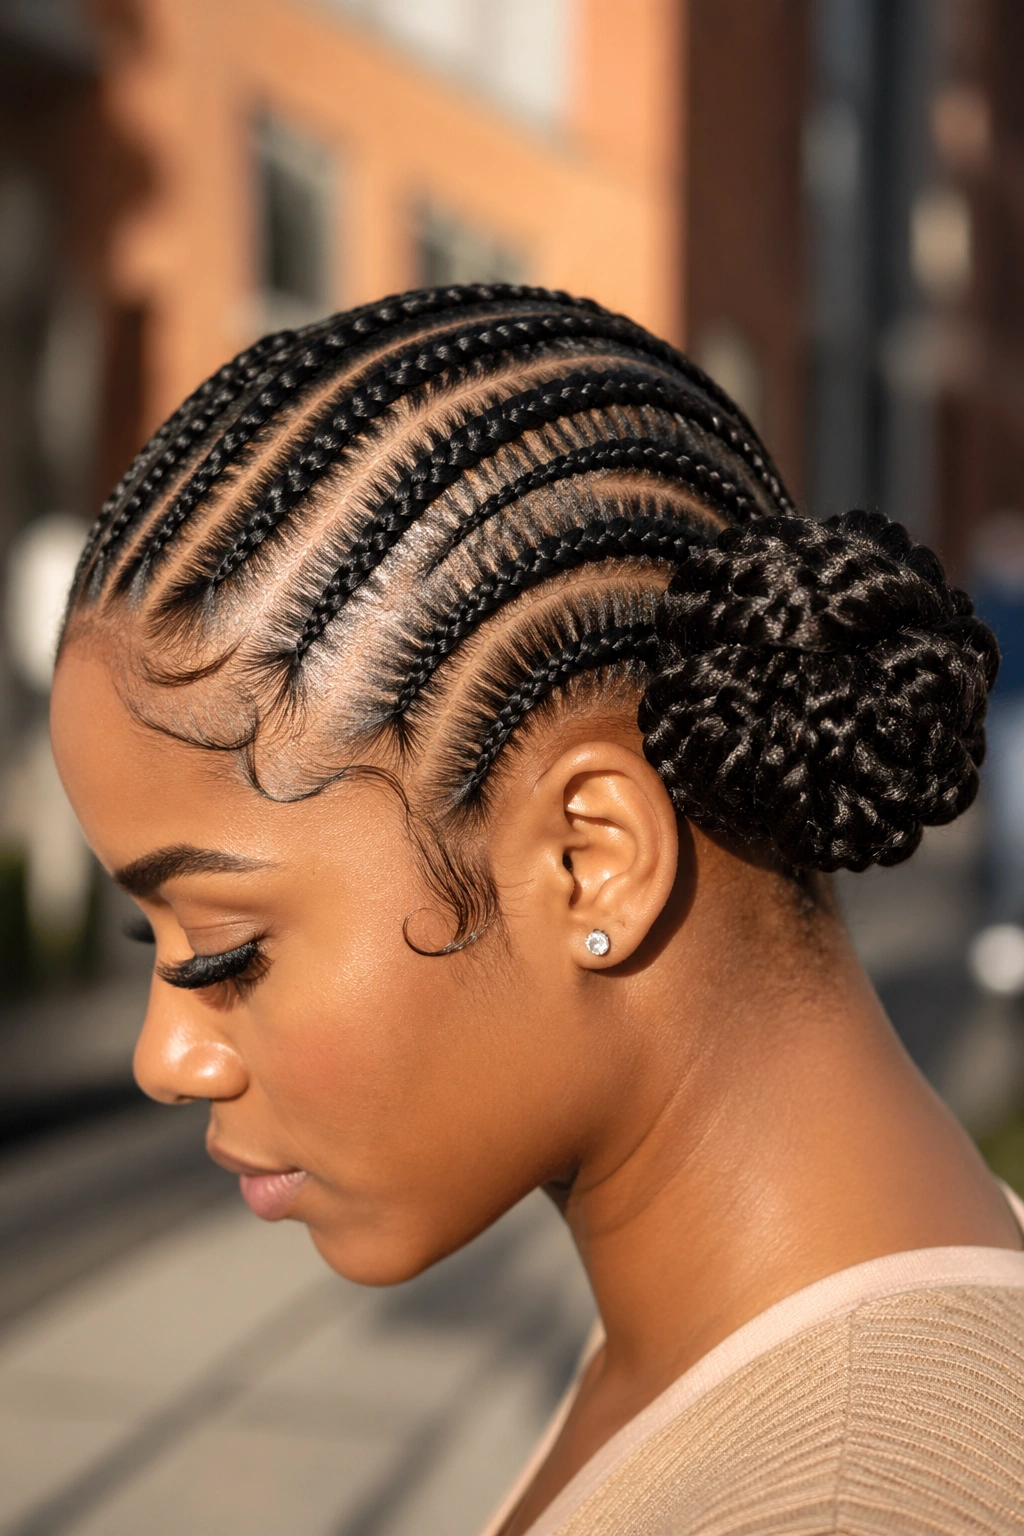
Stitch cornrow bun in any configuration with a real or silk flower placed at the base of the bun or at one side of the bun. Small flowers in tonal colors (cream, blush, deep red) work best.
Floral accents are wedding-territory styling. They mark an occasion. Wear with intention; not for daily wear.
Real flowers don’t last past the day. Silk flowers can be stored and reused.
22. Stitch Cornrow Bun With Hair Wrap Veil
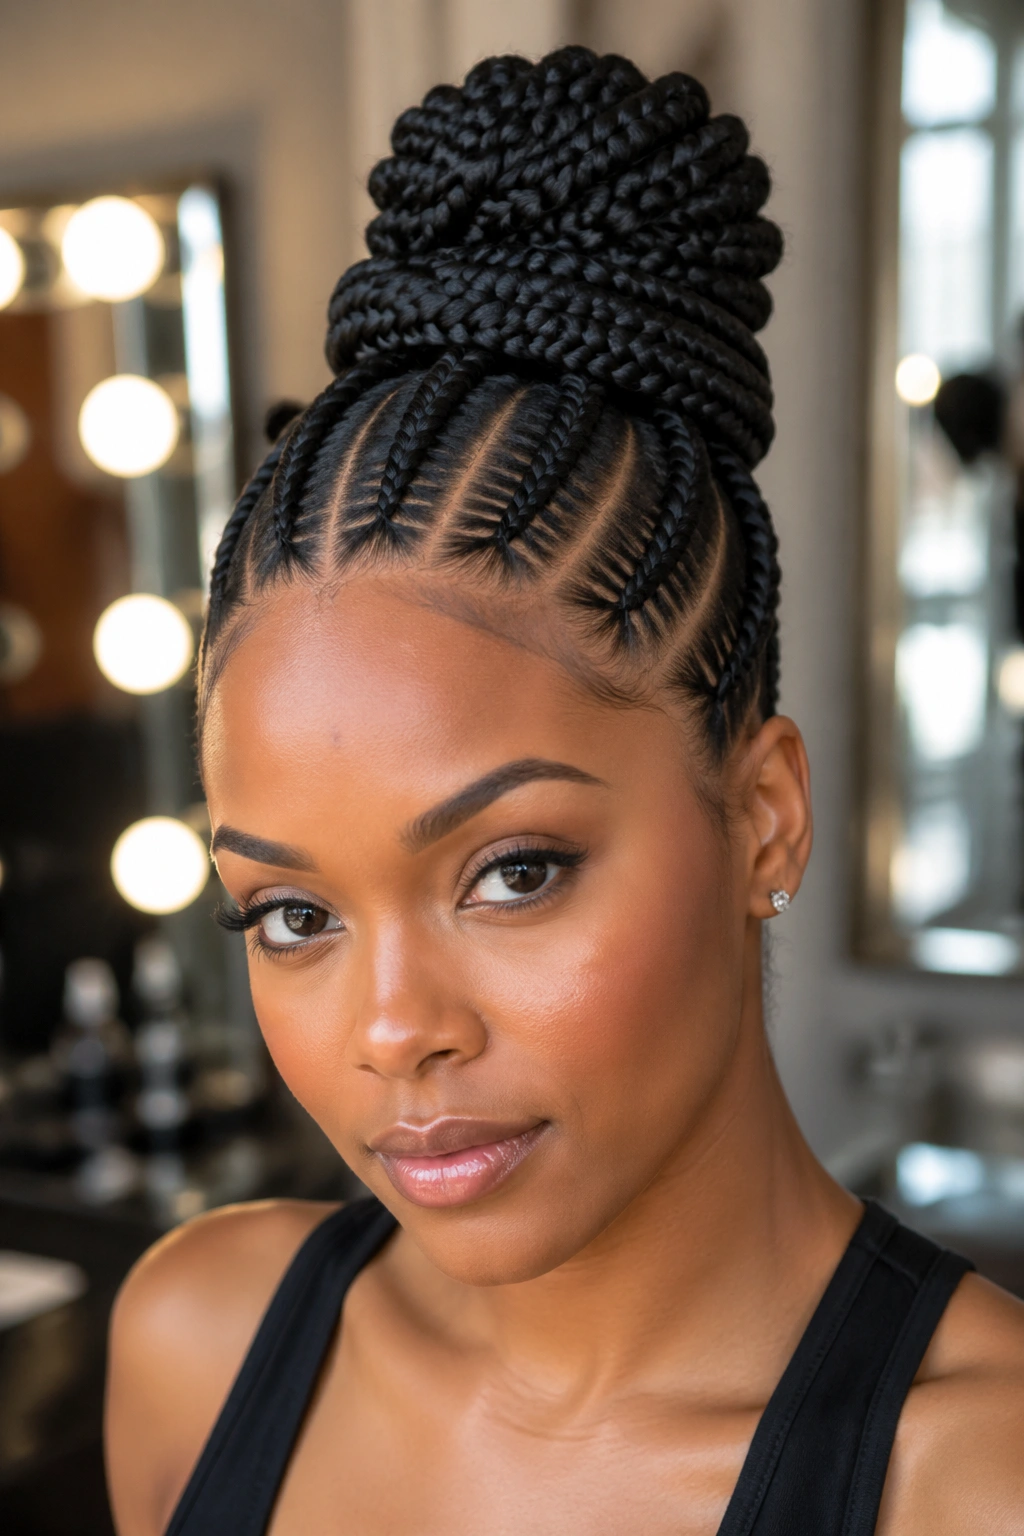
Stitch cornrow bun finished with a long fabric wrap that drapes from the bun across the back like a veil. African wax print fabric, silk, or chiffon — the wrap is the dramatic finishing element.
This is the most occasion-specific style on the list. The wrap-as-veil reads as cultural styling for naming ceremonies, weddings, religious events, and high-profile photo shoots.
The wrap should be secured invisibly with bobby pins at the bun base, then allowed to drape naturally down the back.
Maintenance That Holds the Stitch Definition
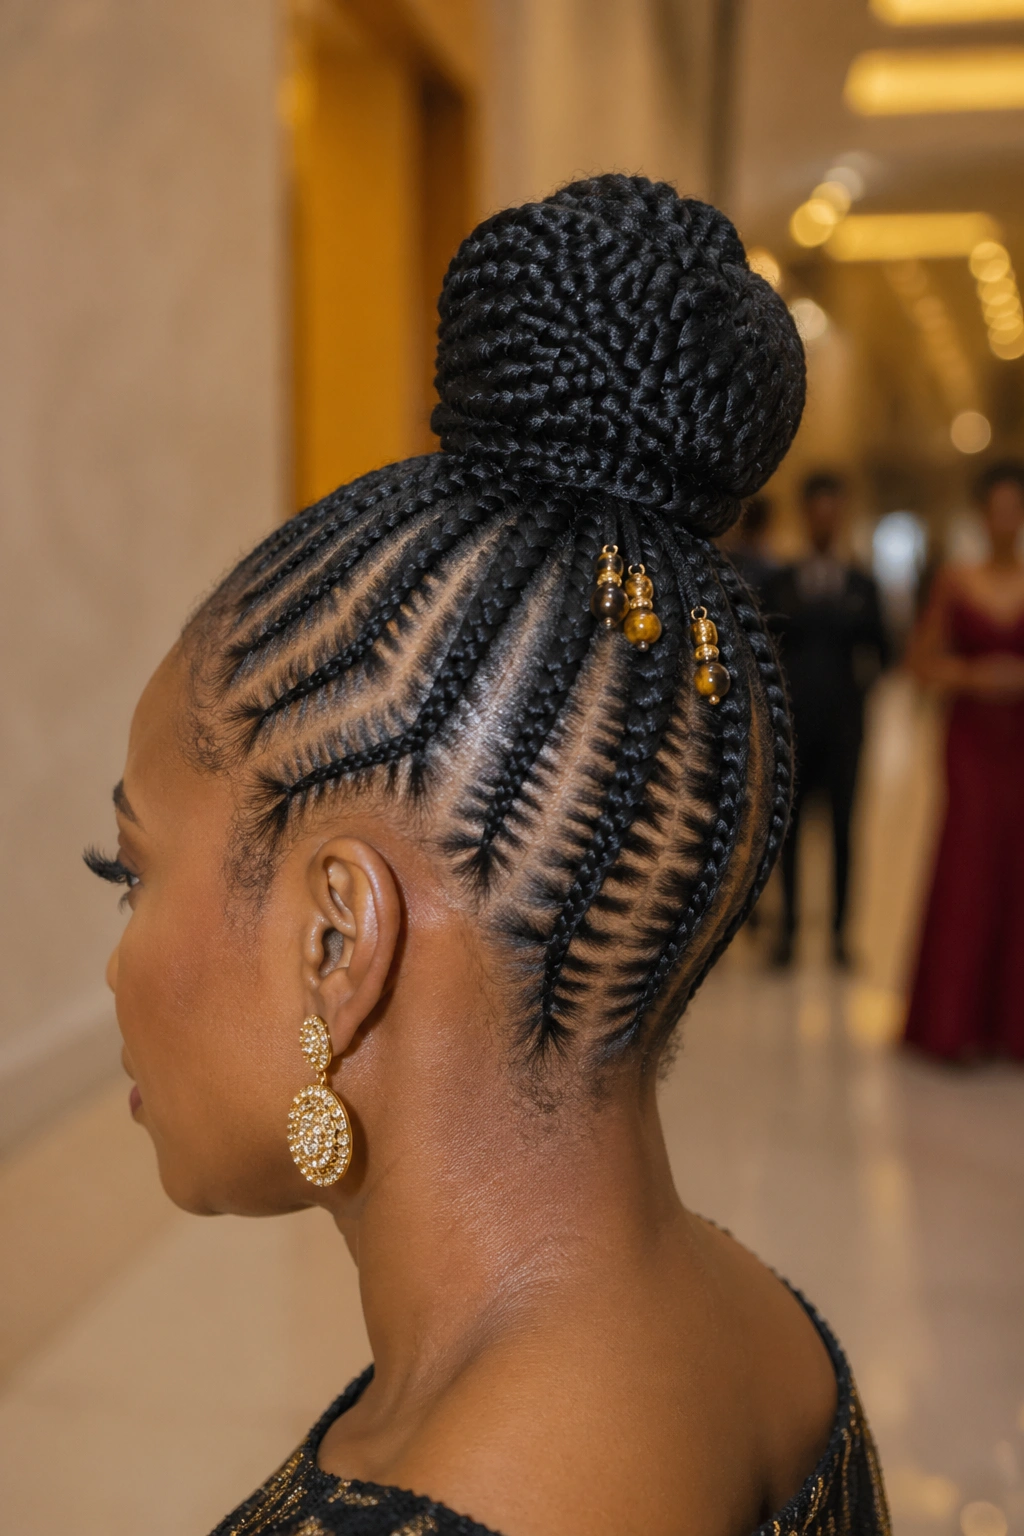
Stitch cornrows lose their stitch definition faster than they lose their cornrow integrity. Protecting the stitch ridges overnight is the priority.
Satin bonnet sized to accommodate the bun without compression. A standard bonnet that crushes the bun also crushes the stitch ridges underneath.
A silk pillowcase as backup. Lower friction protects both the stitches and the bun shape.
Avoid touching the cornrow surface. Hands smooth the stitches flat over time. Frequent bun adjustment also stretches the cornrow attachment to the scalp.
Refreshing Stitch Cornrow Buns
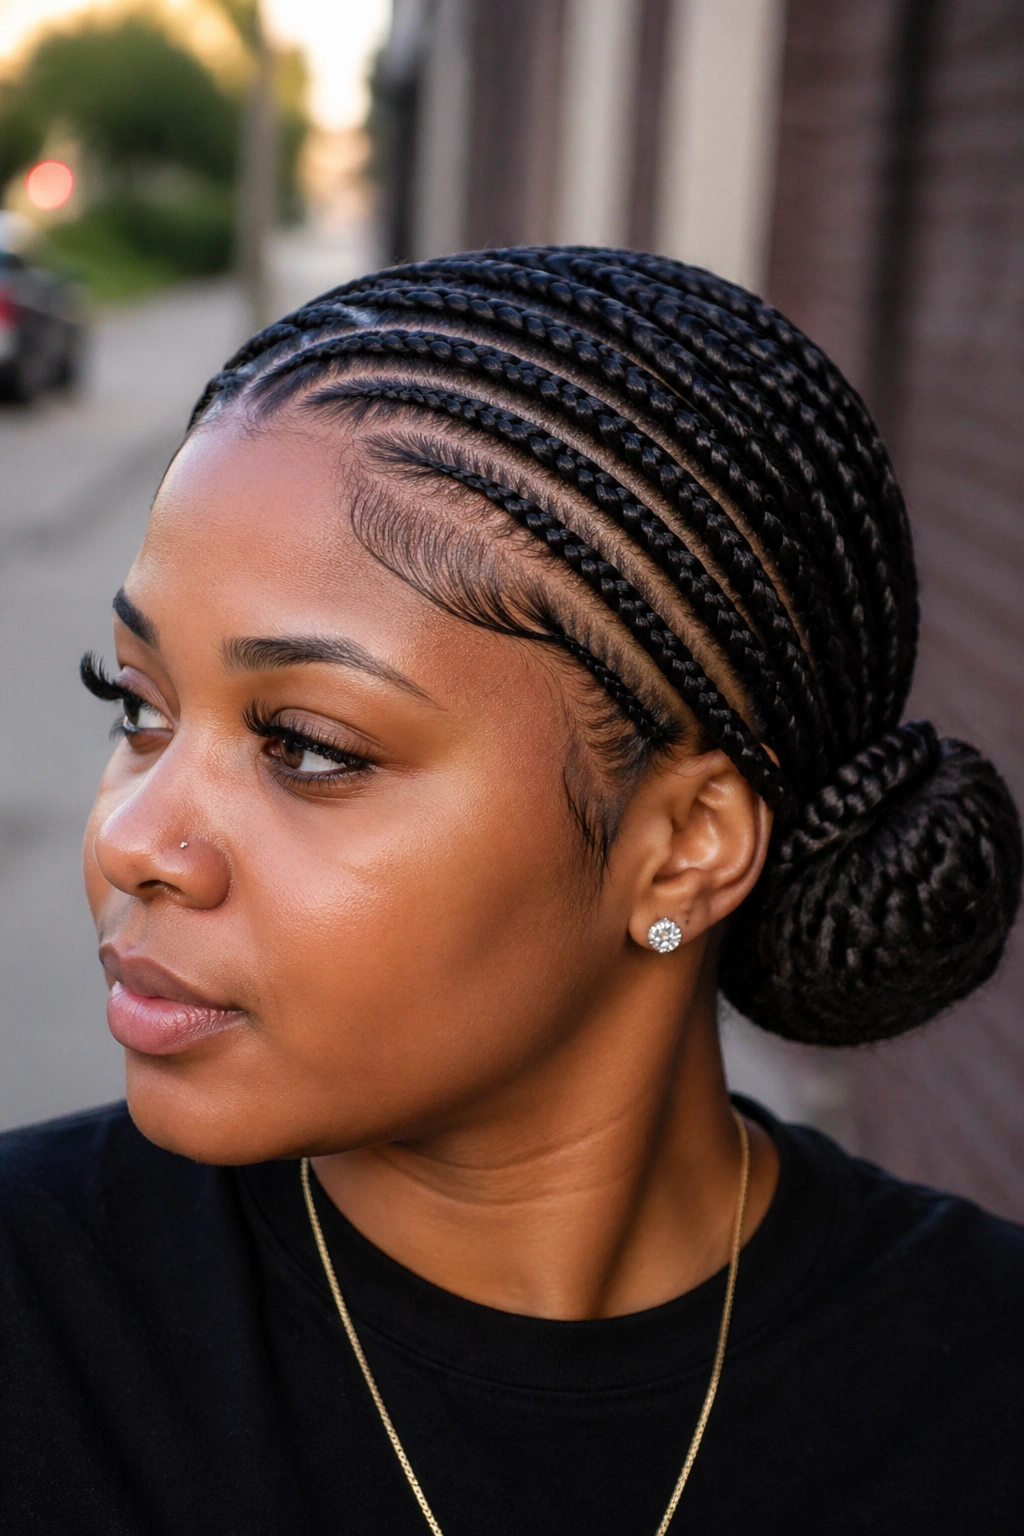
By day 5-7, the stitches begin to soften and the bun starts to release from its initial tightness. Refresh tactics:
A small flat-iron set to low heat can re-define stitch ridges. Pinch each stitch with the iron for a moment to re-press the segmented look. Use heat protectant. Sparingly.
Re-pinning the bun every few days. The bun will loosen as the cornrows settle. Adding bobby pins as needed maintains the original shape.
Fresh edge gel application along the hairline. Edges define the front of the style. Fresh edges make the whole install read renewed.
Scalp Care Under Stitch Bun Styles
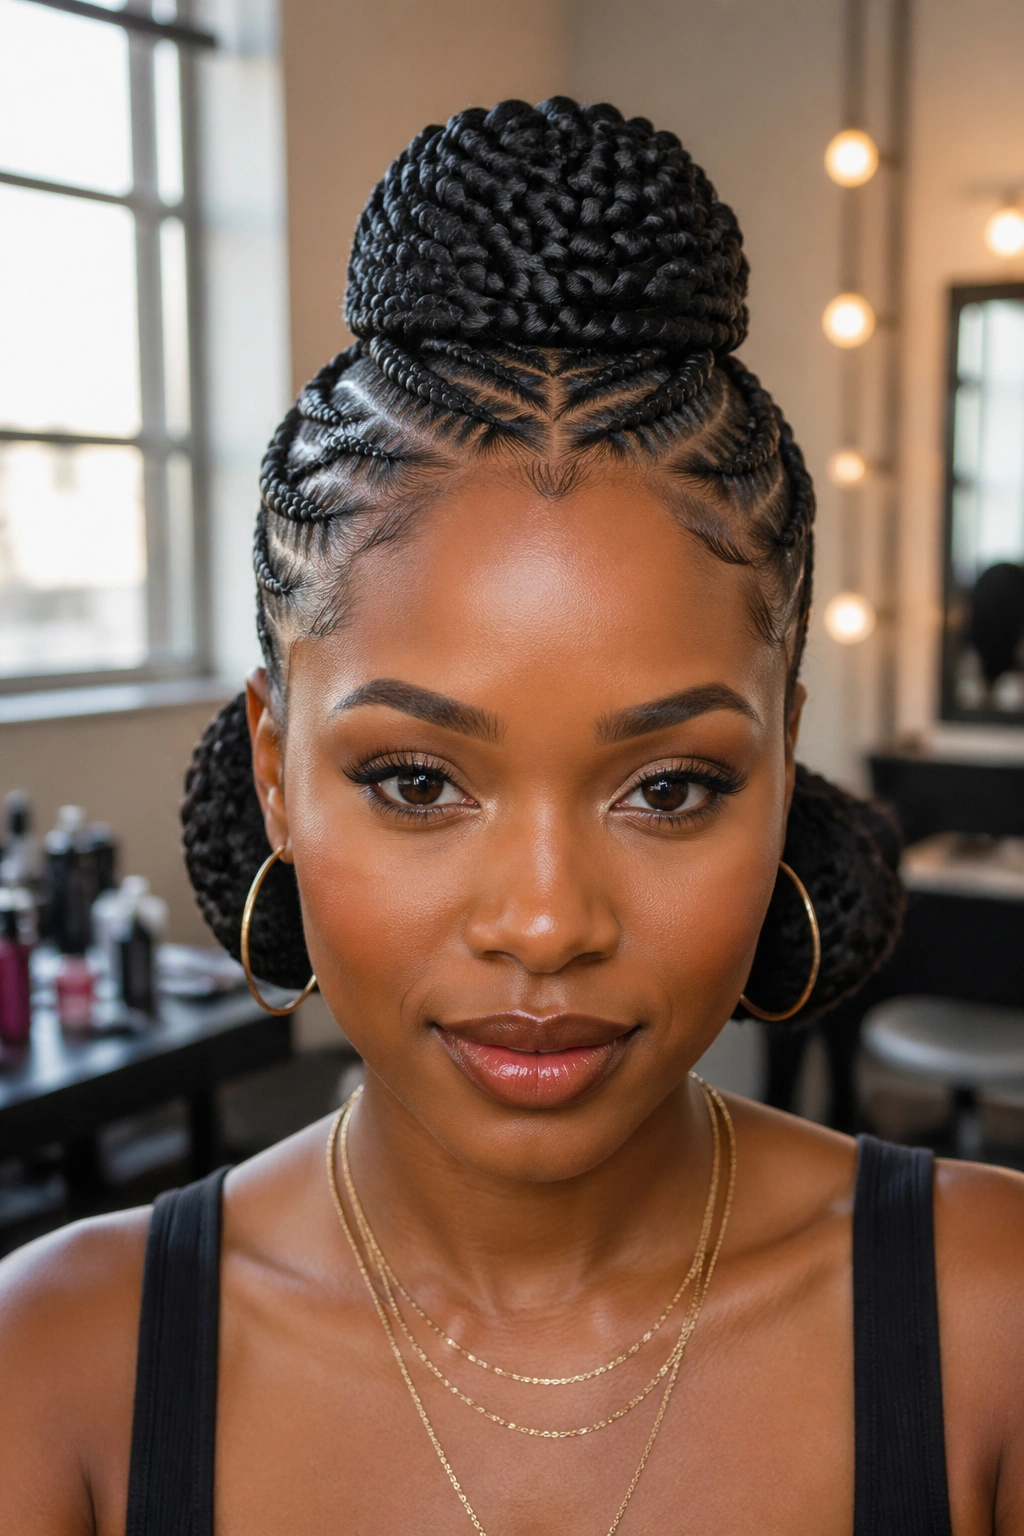
The bun puts concentrated weight at the gathering point — usually the crown, nape, or side. That concentrated weight can create scalp pressure if the bun is too heavy or too tight.
Listen to the scalp. If you feel pulling at the bun base after the first 24 hours, the bun may be too tight. Loosen the elastic or re-position.
Lightweight scalp oil applied every 3-4 days with a dropper. Avoid the bun area itself — focus on the cornrow rows.
For bun-base discomfort: warm compresses on the gathering point can ease tension without disturbing the install.
Takedown of Stitch Cornrow Buns
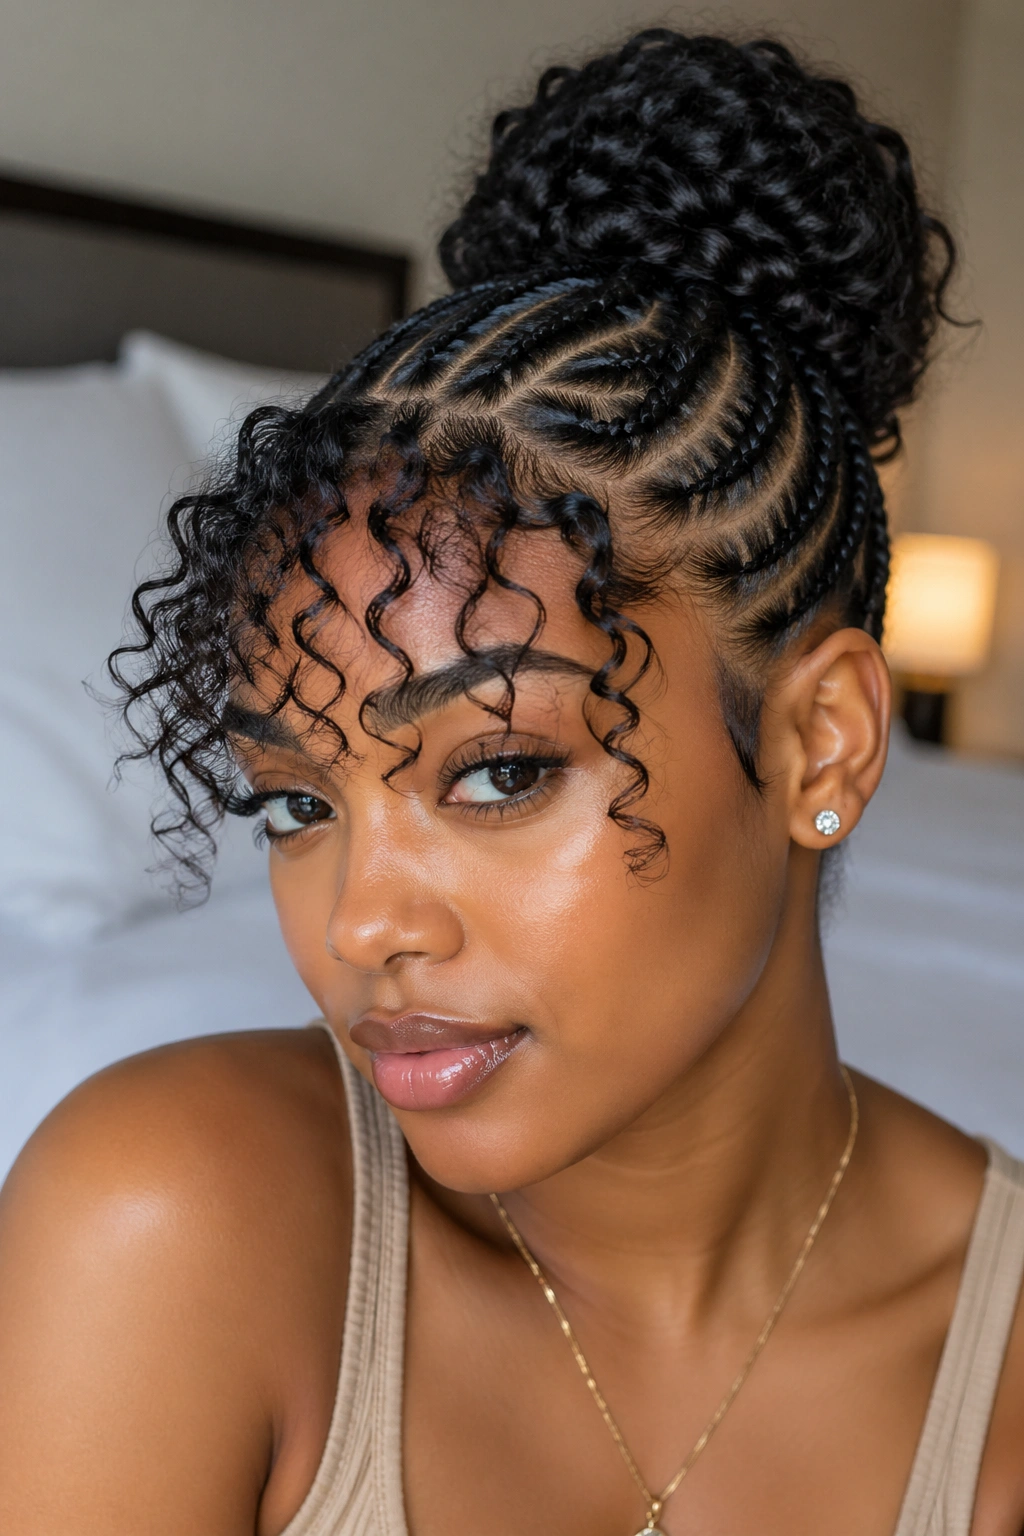
Stitch cornrows take longer to unbraid than standard cornrows. The stitch segments interlock more tightly.
Plan 90 minutes to 2 hours for a full takedown.
Unpin the bun first. Lay the cornrows flat. Saturate with conditioner or oil. Unravel from tip to root, slowly.
Each stitch segment has to release individually. Rushing breaks hair at the segment junction points.
Wet detangle after takedown. Deep condition for 30-45 minutes. Let the hair rest 48 hours before the next install.
Picking the Right Stitch Cornrow Bun for the Occasion
Daily and work: low stitch bun with medium cornrows or high stitch bun with small cornrows.
Weddings (as guest): stitch cornrow low chignon with center detail, stitch cornrow bun with floral accent, or stitch cornrow bun with curly bangs.
Editorial and photoshoots: stitch cornrow pompadour bun, double stitch cornrow bun, or stitch cornrow bun with hair wrap veil.
Cultural and ceremonial: stitch cornrow bun with hair wrap veil or stitch cornrow bun with beaded sections.
Statement events: stitch cornrow bun with cuffs at bun base, stitch cornrow bun with wrapped tail, or stitch cornrow bun with mini bun detail.
Common Mistakes to Avoid
Inconsistent stitch spacing. Stitches at quarter-inch in the front and half-inch in the back read as inconsistency rather than as variety.
Bun placement that doesn’t suit face shape. A high bun on a long face elongates the face further. A low bun on a round face emphasizes the roundness. Pick the bun position based on flattering geometry.
Skipping the bun protection at night. Crushed buns lose shape and require complete re-styling rather than simple refresh.
Over-product application. Stitch cornrows show product buildup faster than standard cornrows because the segmented surface has more hiding spots for residue.
Excessive wear time. Stitch cornrow buns hold for 2-4 weeks reliably. Past four weeks, the bun base loosens and the stitch definition fades. Take down on schedule.
Stitch cornrow buns reward careful prep, careful install, and careful maintenance with weeks of one of the most photogenic protective styles available — the kind of look that translates from work meeting to formal event without requiring restyling.
