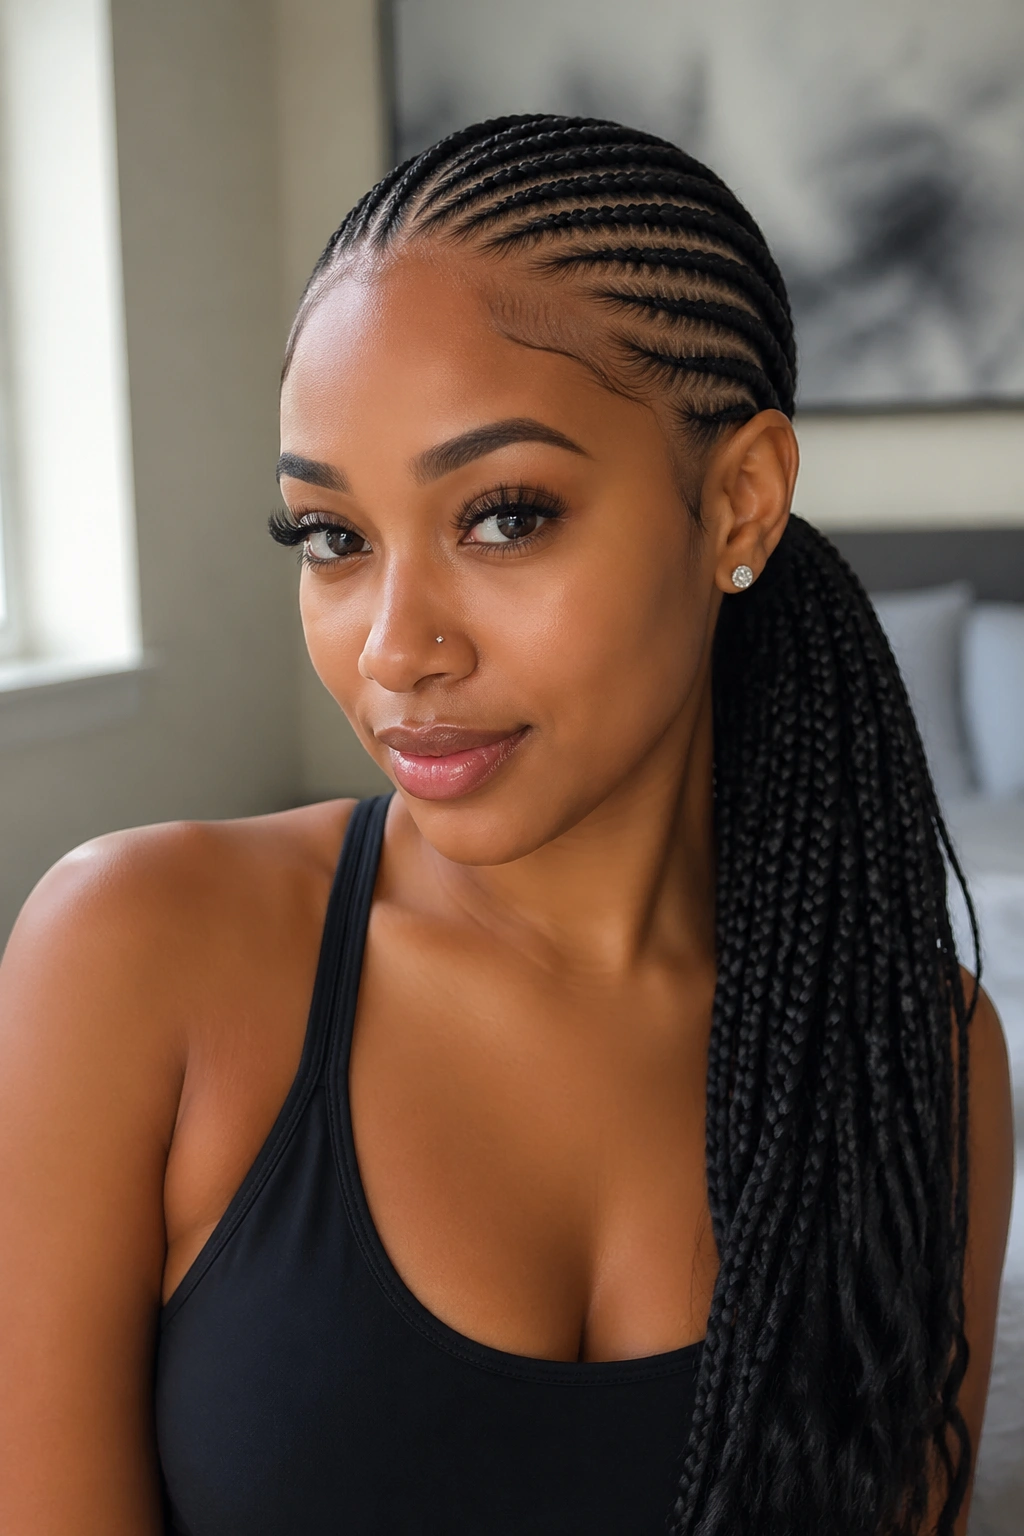
A feed-in cornrow ponytail gives you the weight and swing of long hair without the tension of a full set of extensions braided into your scalp. The feed-in technique adds kanekalon hair gradually along the length of each cornrow, so the roots stay close to your natural thickness and the ends fall into a gathered ponytail that can sit high, low, or anywhere in between. It’s become one of the most requested styles in salons for a reason — the look is sleek, the install is faster than other extension methods, and the finished style works for gym days, brunches, weddings, and everything between.
Feed-in cornrow ponytails pull double duty. The rows themselves act as a protective style, keeping your natural hair tucked and tension-controlled. The ponytail adds drama — whether it’s a sleek low pony skimming the shoulders or a tall, high pony that swings when you walk.
Length options change the mood completely. A short feed-in pony at collarbone length feels clean and athletic. A waist-length pony feels elevated and ready for an event.
What a Feed-In Cornrow Ponytail Really Is
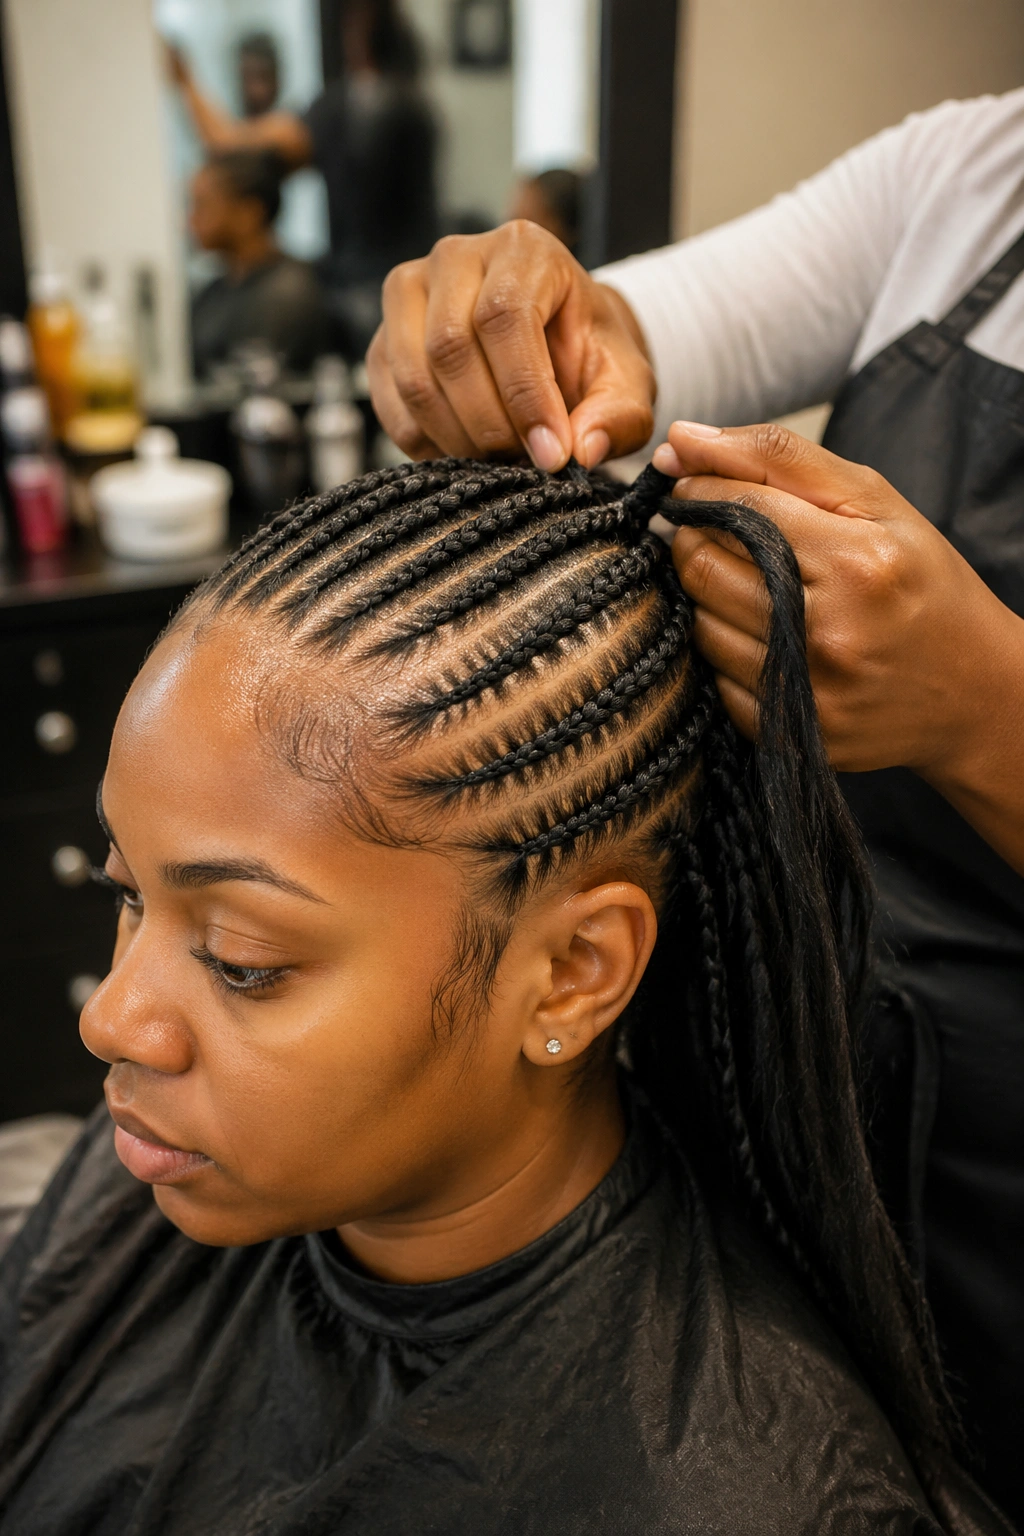
The base is a set of cornrows braided toward a gathering point. Along the way, small pieces of synthetic hair get fed into each braid to add thickness and length. When all the cornrows reach the gathering point, the ends — now mostly extension hair — form a ponytail that hangs free.
The feed-in part is what separates this style from a standard cornrow pony. In a basic install, your natural hair is braided to the gathering point and the ponytail is your own length only. Feed-ins extend that length without adding stress at the root, because the extensions get introduced gradually rather than all at once.
That gradual addition is the secret to a natural-looking base. Done well, feed-ins blend into your roots and no one can tell where your hair ends and the kanekalon begins.
The Hair You Need and How Much
Pre-stretched kanekalon is the standard. A single pack is usually enough for most feed-in ponytails, though denser styles or longer lengths might require a pack and a half. The standard pack length is around 26 inches.
Color matching your roots is important. The first 2-3 inches of each braid should match your natural color closely. If the ponytail itself is dyed a different color, that’s fine — the transition can happen further down the braid where it reads as intentional rather than mismatched.
Look for kanekalon that feels smooth but not plasticky. Cheap synthetic hair has a rubbery texture and reflects light in a way that looks obviously fake. Better quality hair has a slight matte finish and moves more like real hair.
How Long a Feed-In Pony Takes to Install
Plan for 2-4 hours depending on the style. A simple low pony with six straight-back rows takes about two hours with a skilled braider. Twelve rows with feed-ins fed at multiple intervals can stretch to four hours.
Sit with a good audiobook or podcast. Rushing the braider means rushed feed-ins, and rushed feed-ins show — they create lumps where the extension hair gets bunched rather than blended smoothly.
The braider should work on damp, stretched hair. Fully dry hair is too frizzy for clean feed-ins, and soaking wet hair is too slippery for the extension hair to grip. The texture should feel almost like a dried towel — damp but not dripping.
Caring for a Feed-In Pony in the First 48 Hours
Your scalp needs to settle. The new tension can feel sharp for the first day or so, especially near the hairline. Sleep in a silk bonnet that covers both the rows and the ponytail — the ponytail tangles against cotton pillowcases.
Don’t wash the rows during this window. The synthetic hair absorbs water and takes a long time to dry. Wet extension hair trapped against your scalp for hours can cause mildew odor. Wait at least 3 days before the first rinse, and even then keep the water flow light.
If the tension feels genuinely painful beyond day two, the install may be too tight. Loosening specific rows by hand rarely works — better to have the braider redo the tight sections than try to push through the discomfort.
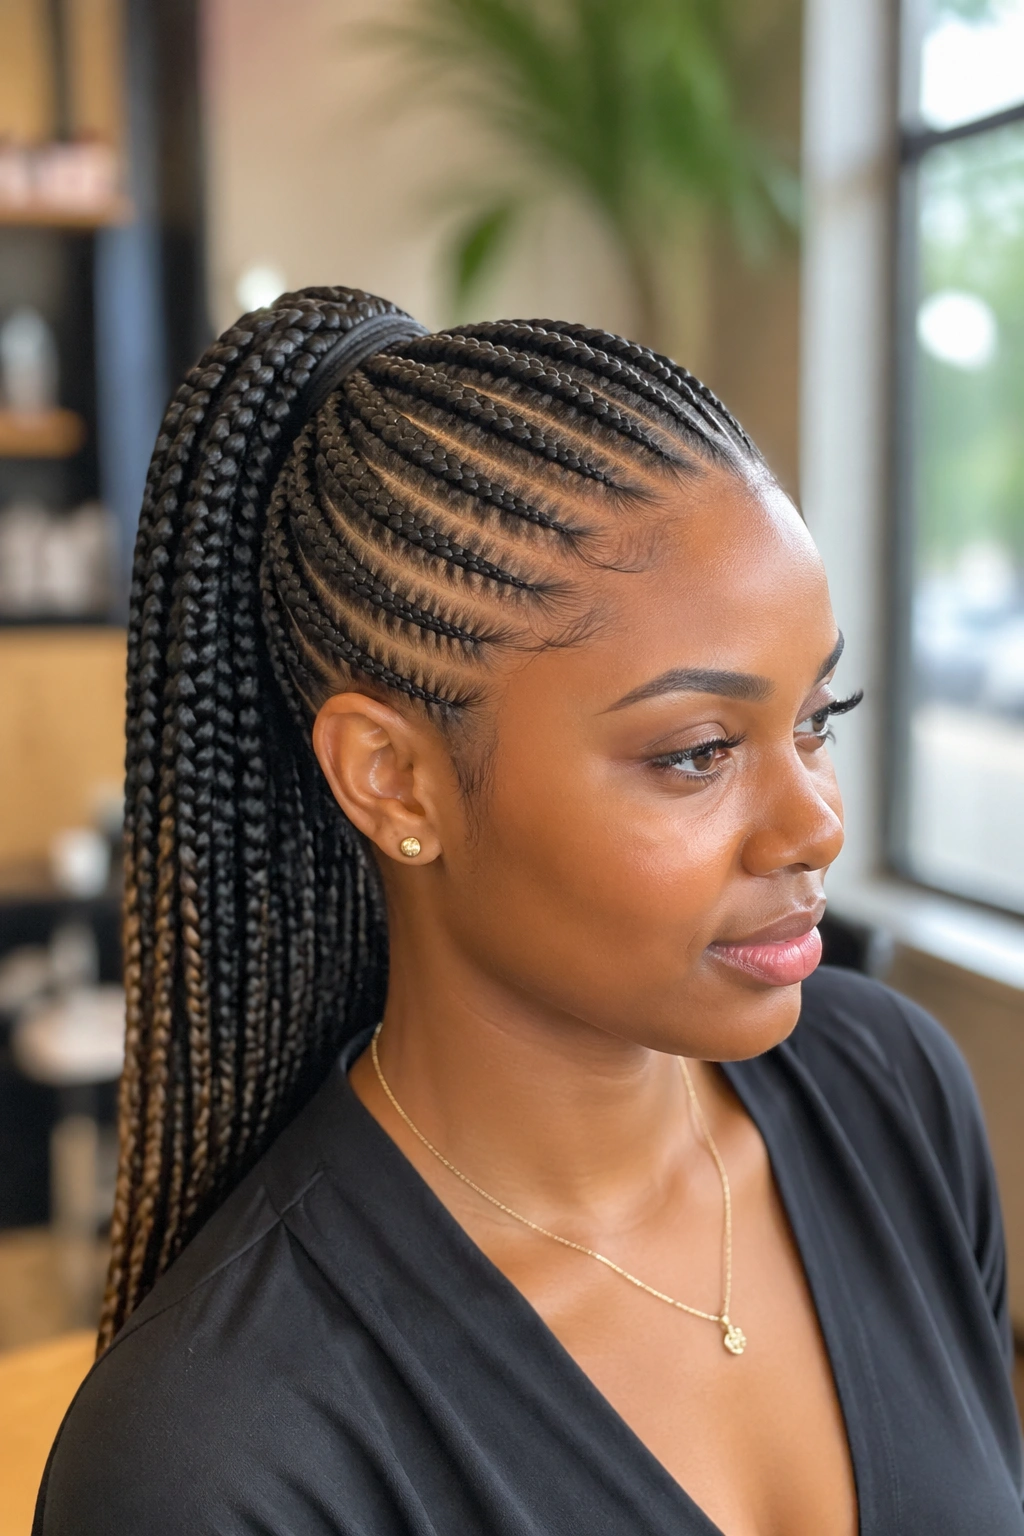
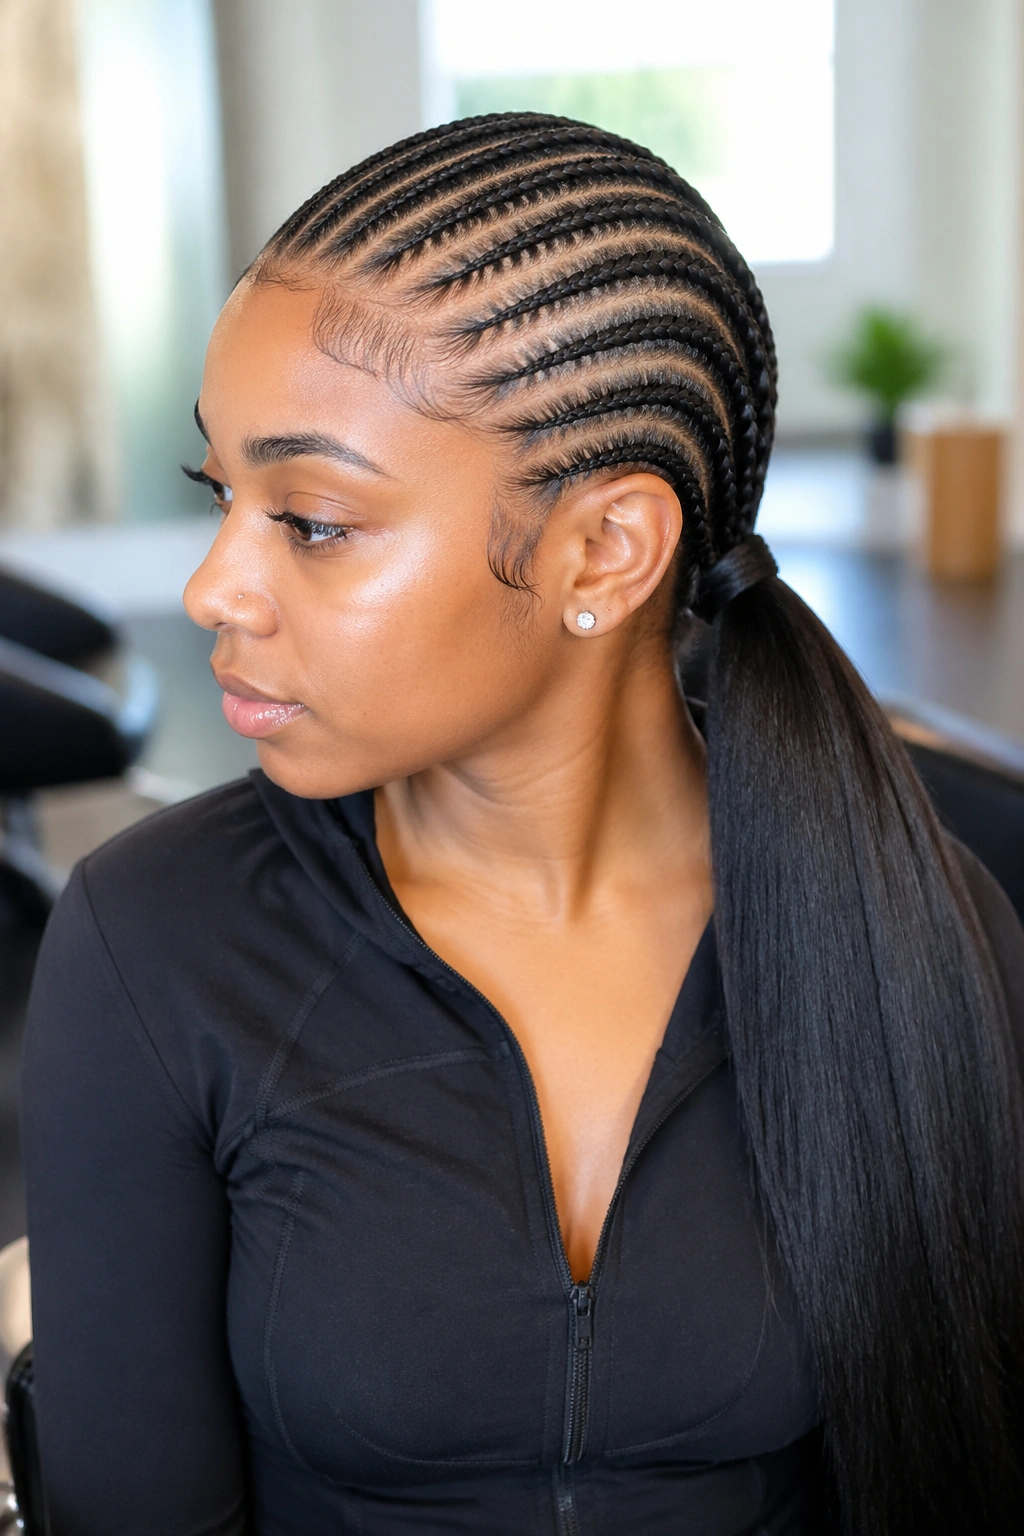
1. Classic Low Straight-Back Feed-In
The default option and the one that works for the widest range of occasions. Six or seven rows run straight back from the hairline to a gathering point at the nape, where the feed-in ends form a thick, smooth ponytail hanging down the back.
Why It Works
- Simple enough to wear anywhere — work, casual events, weekend errands
- Keeps the neck cool because the hair is lifted off the back
- Takes less time to install than more complex patterns
Tip: Ask for the ponytail to be wrapped at the base with a small piece of the same kanekalon to hide the elastic or tie underneath.
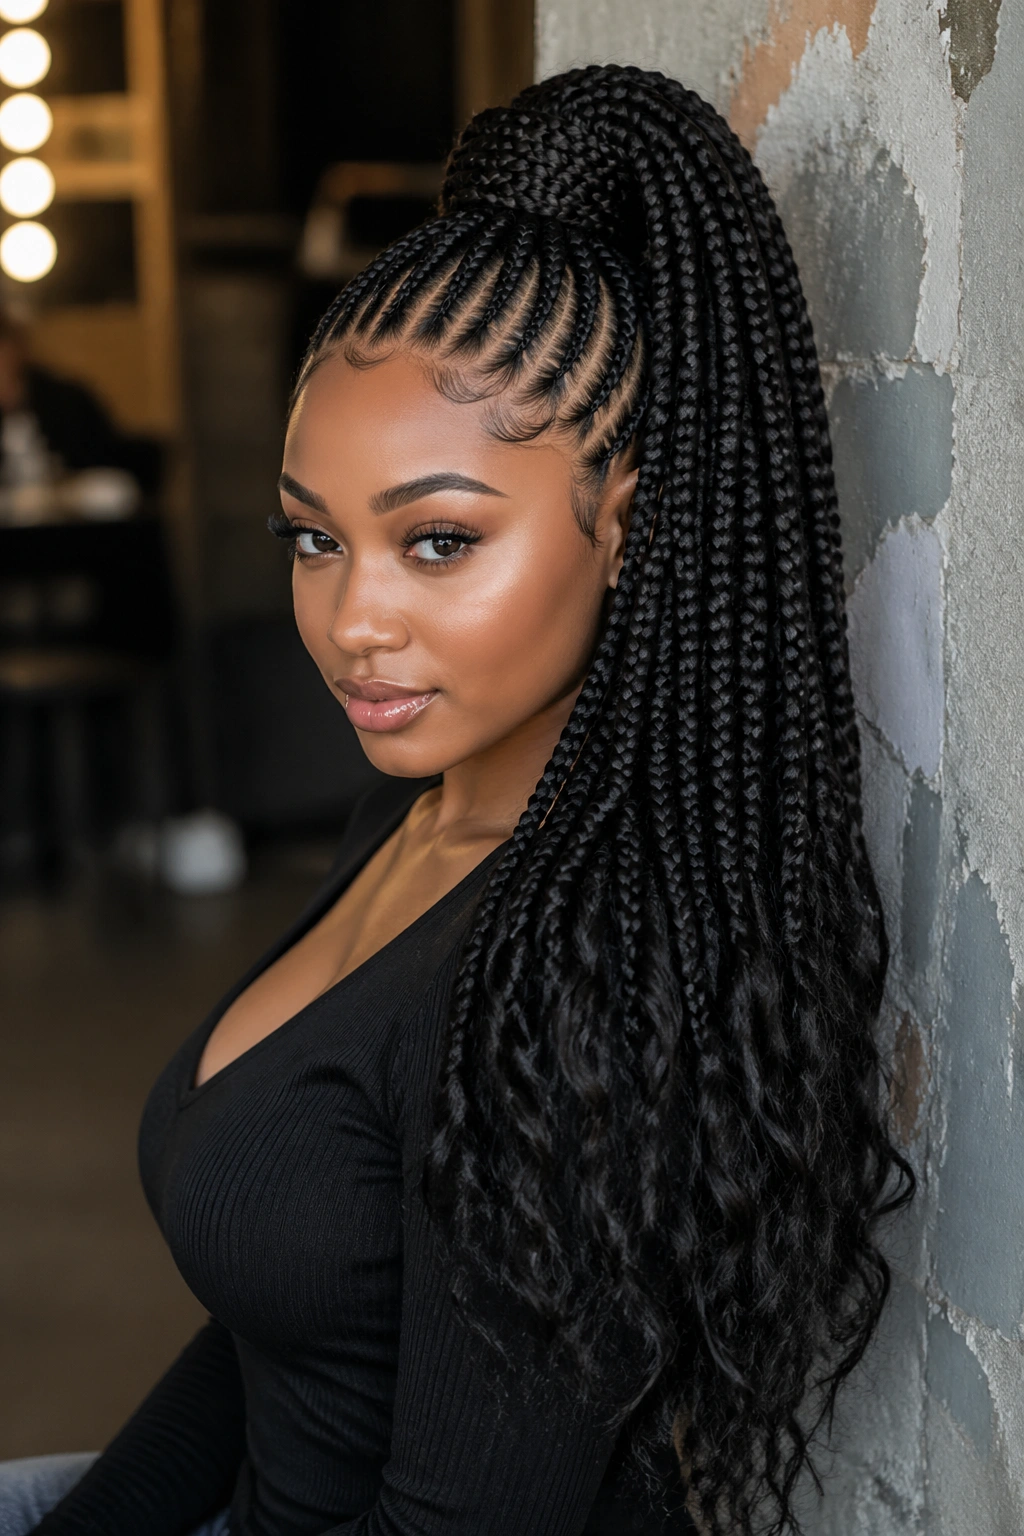
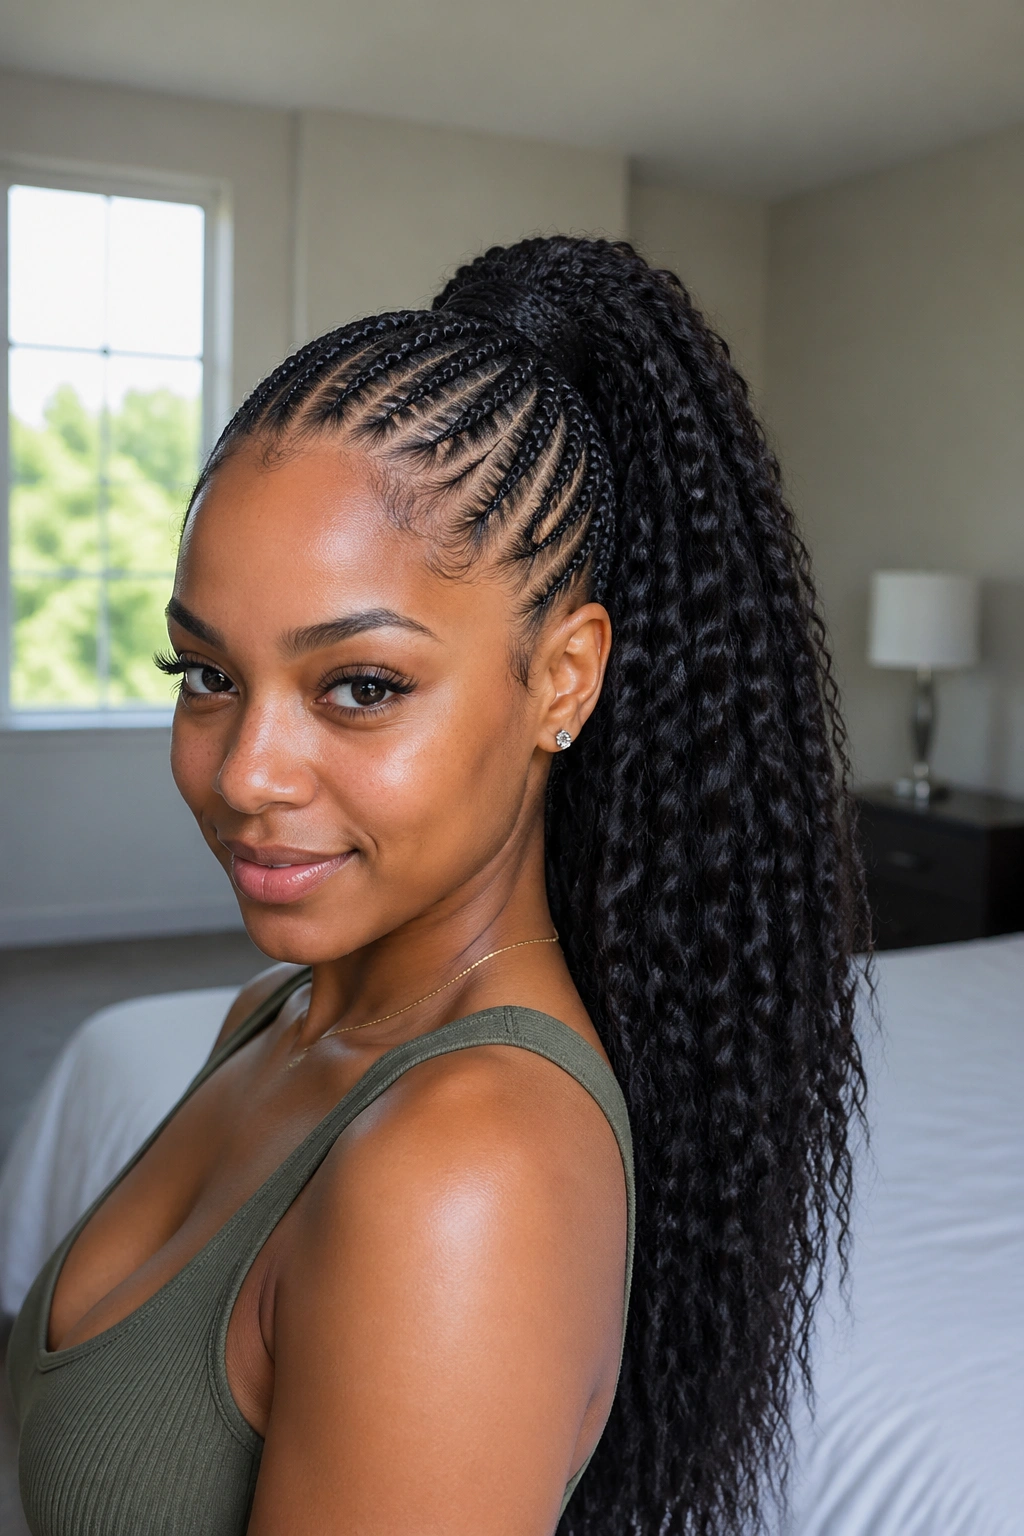
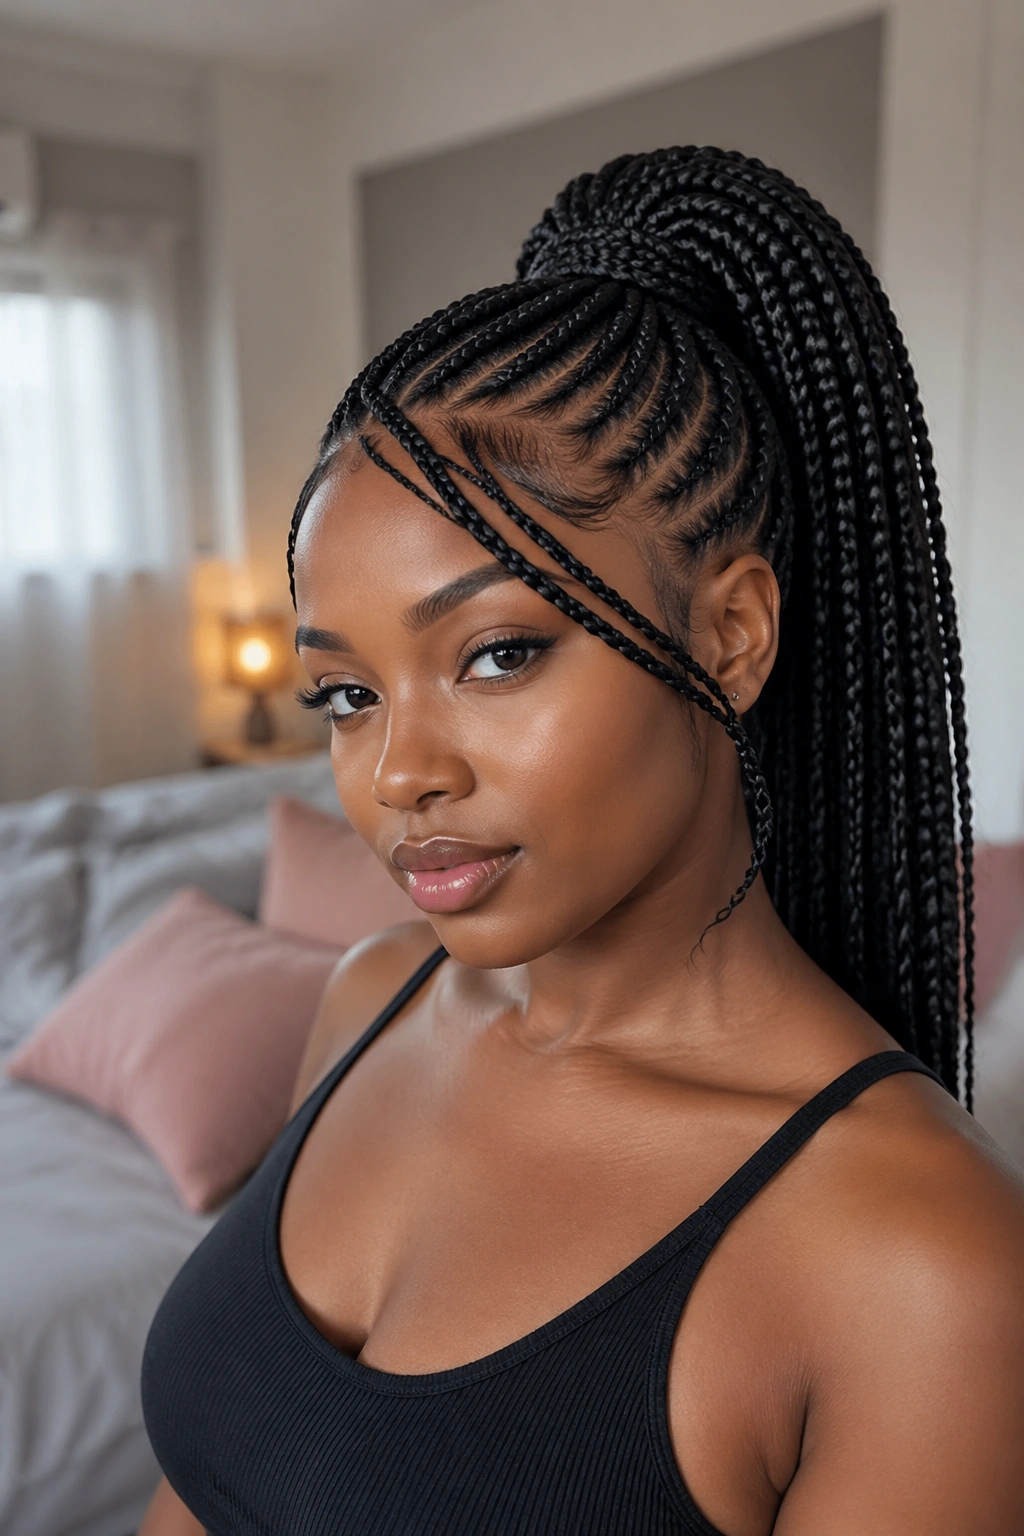
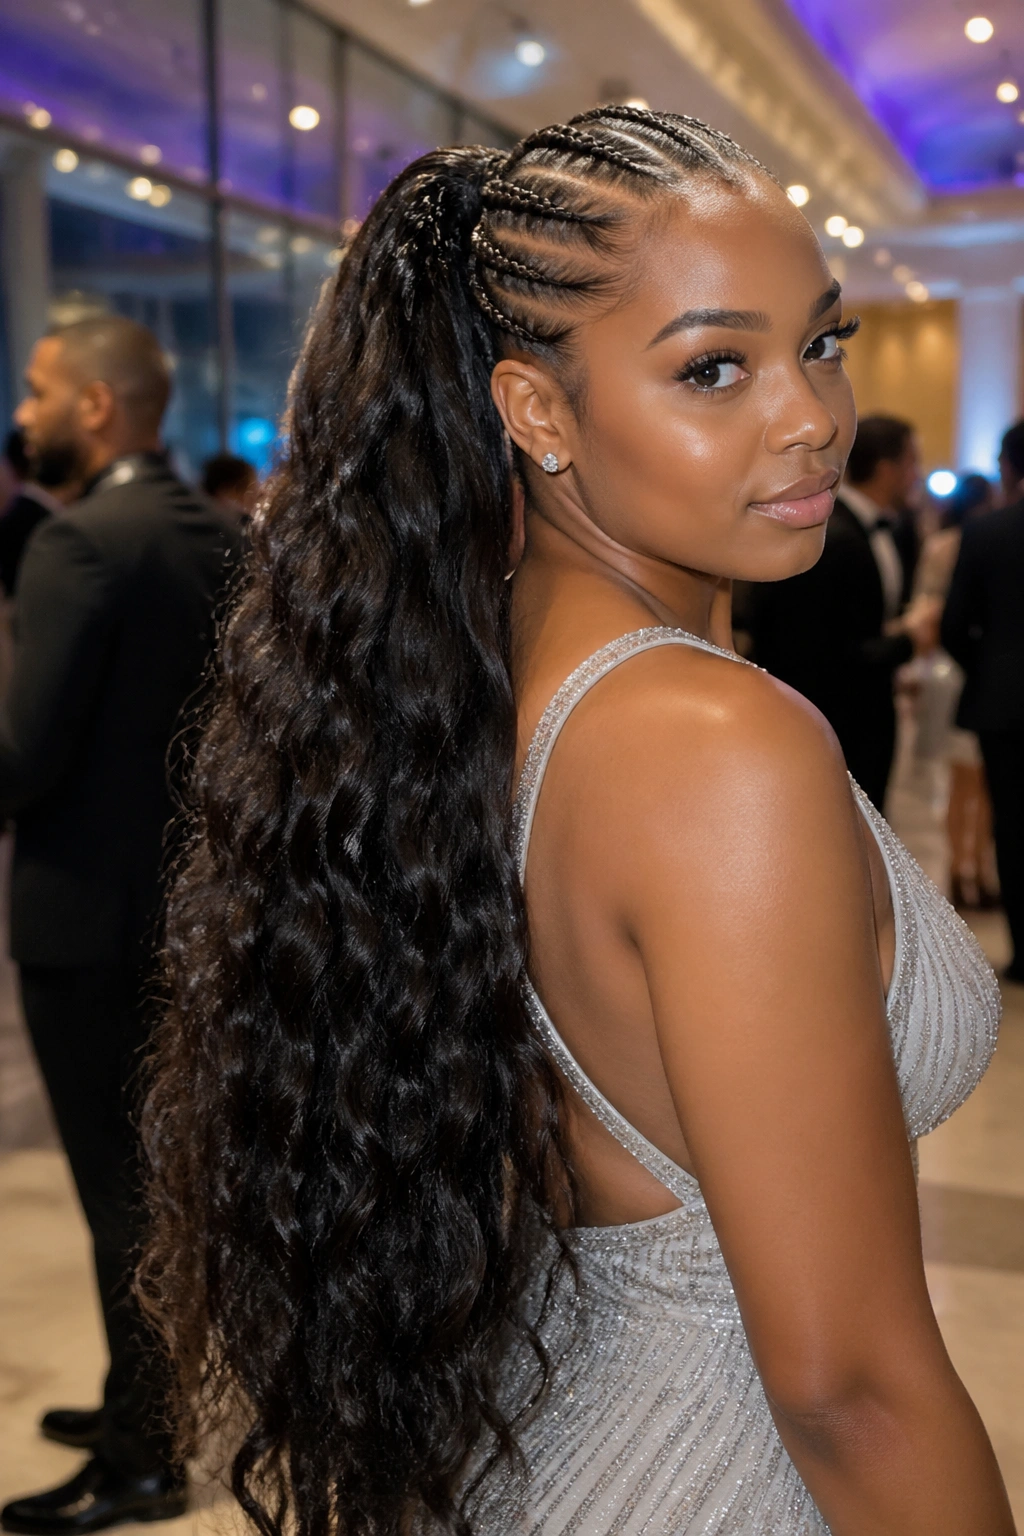
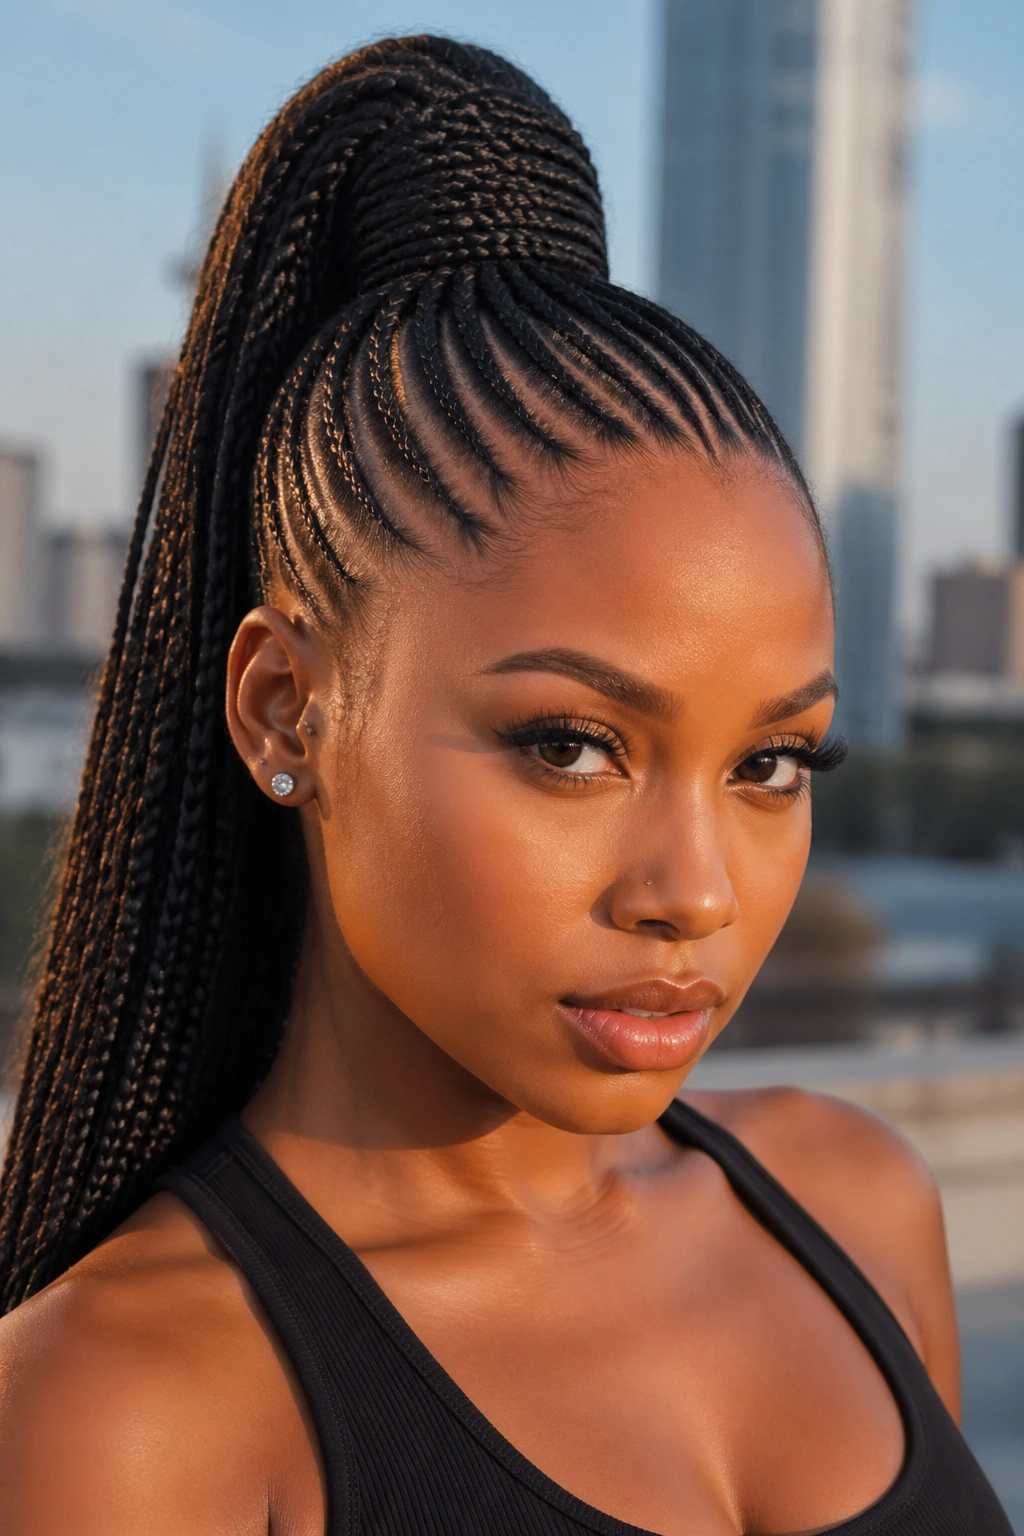
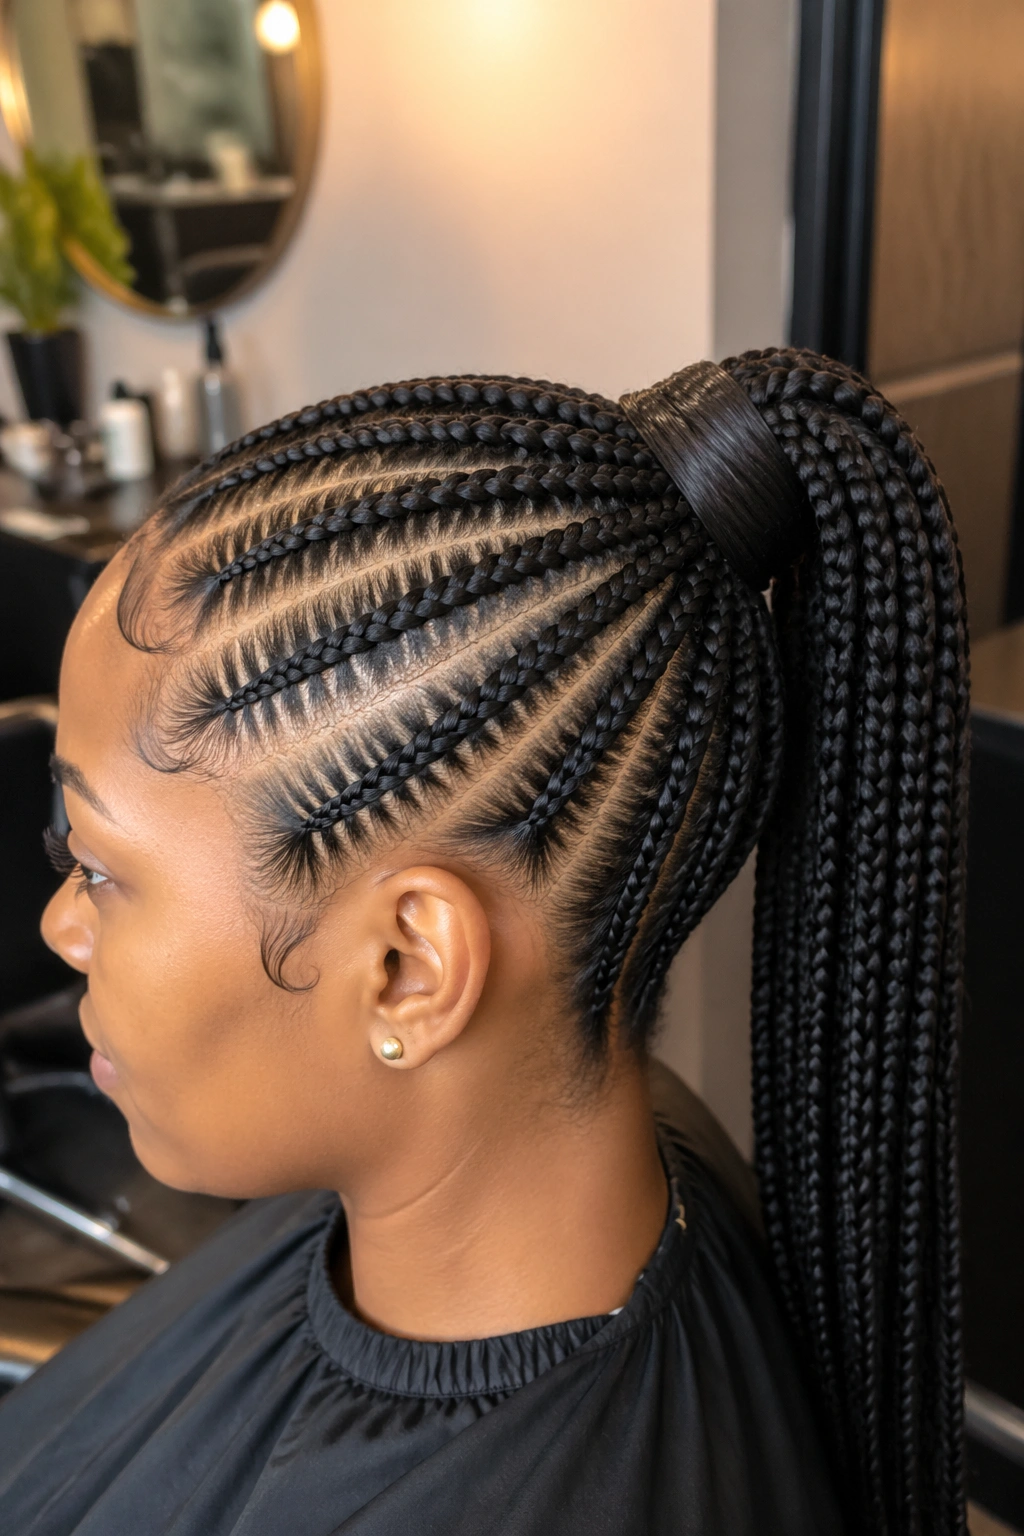
2. High Ponytail With Feed-In Rows
The rows sweep upward from the hairline and meet at a gathering point at the crown. The resulting ponytail sits high on the head and swings dramatically with movement.
This style has presence. It reads as athletic, youthful, and confident. The tension sits higher on the scalp than a low pony, which some people find more comfortable and others find more tiring through the day.
A high pony demands a smooth foundation. Any fuzz or lift in the rows is visible from every angle when the style sits this high. The braider should take extra care to keep each row tight and clean all the way to the gathering point.
3. Side Swept Feed-In Ponytail
The rows curve across the head on a diagonal and gather at a point just behind one ear. The ponytail drapes over the shoulder on that side, making the style feel romantic and asymmetric.
A side swept pony flatters photographs where the subject faces the camera slightly turned. The diagonal line of the rows draws the eye across the face rather than straight down.
How to Style It
Wear larger earrings on the exposed side and a simple stud — or nothing — on the covered side. Clothing with an open neckline on the exposed shoulder amplifies the diagonal line.
4. Feed-In Pony With a Wrapped Base
The base of the ponytail gets wrapped with a section of the extension hair to hide any bands or elastics underneath. This gives the gathering point a clean, seamless appearance instead of showing a rubber band or clear elastic.
The wrapped section is usually about 2-3 inches long and sits at the transition between the rows and the hanging ponytail. Some braiders add a small cross-stitched pattern to the wrapped section to turn it into a decorative element.
That wrap does real work. It smooths the base, protects the elastic from showing through, and gives the ponytail structure so it doesn’t splay out at the gather point.
5. Feed-In Pony With Curled Ends
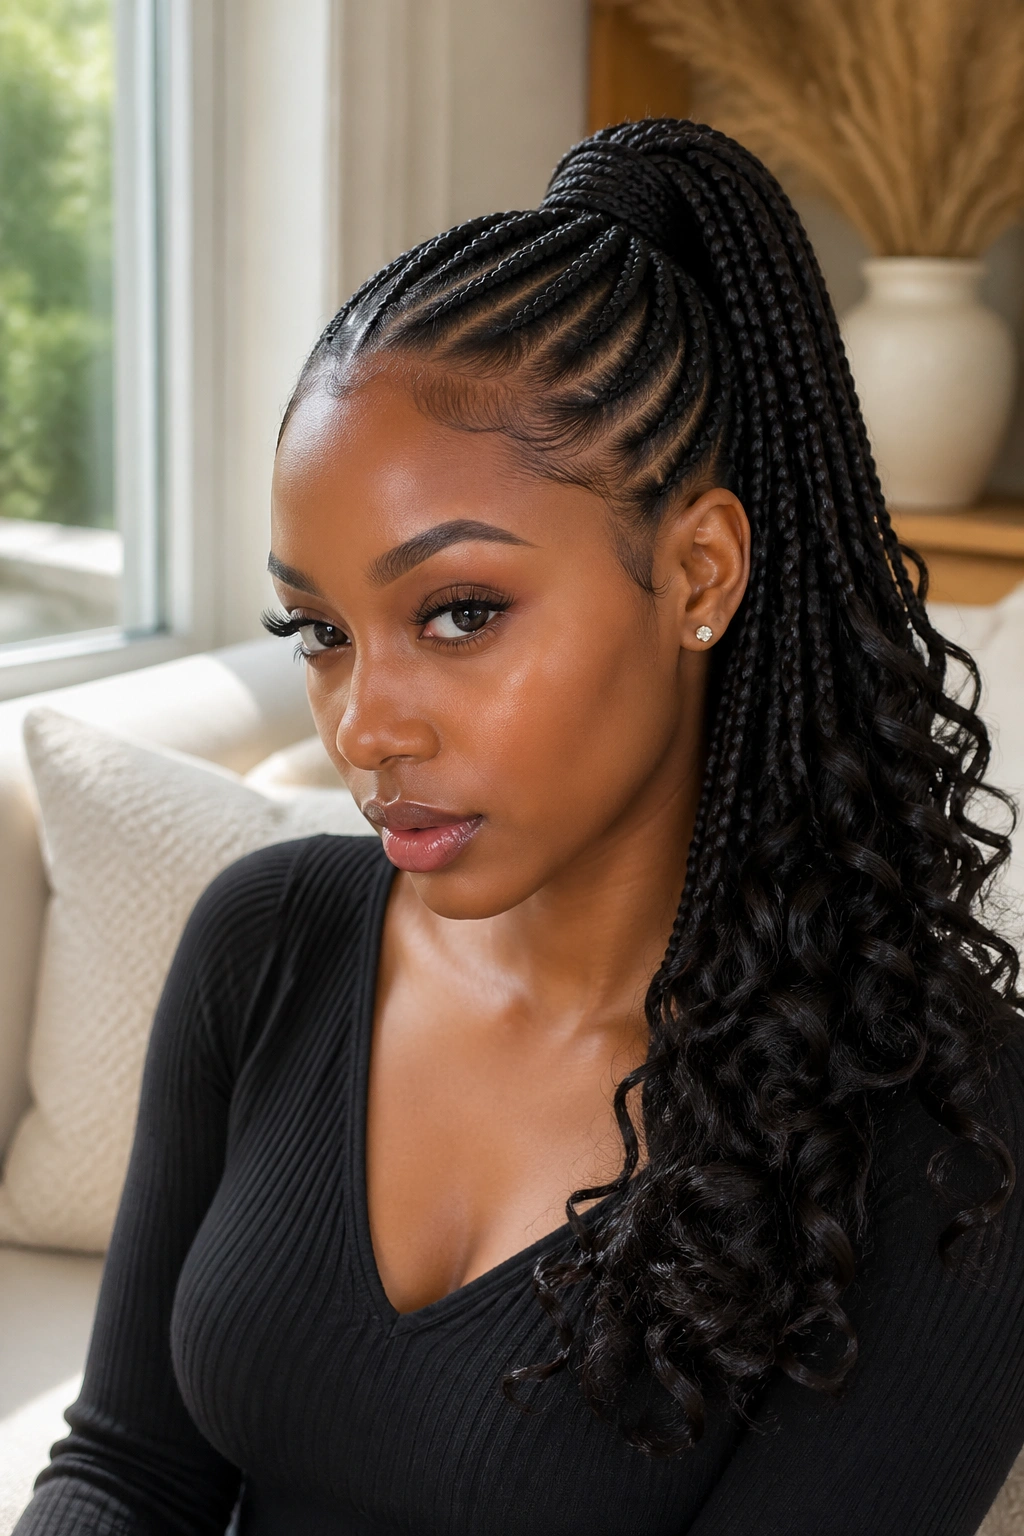
Would a straight feed-in pony look different if you curled the ends? Yes — dramatically.
Standard kanekalon ponytails hang straight by default. Adding loose curls to the ends — achieved by dipping the extension hair in hot water or using a curling wand rated for synthetic hair — transforms the look. The hang shifts from sleek and architectural to soft and voluminous.
How to Use It
Curl only the bottom third of the ponytail for a pop of curl at the ends. Curl from halfway down for a more voluminous look. Fully curled ponytails can look frizzy unless you use outre-quality synthetic that tolerates heat well.
Check the kanekalon label before applying any heat. Some cheap versions melt at temperatures lower than a curling wand.
6. Double-Layer Feed-In Pony
The feed-in process happens in two waves. The first layer of kanekalon gets fed in partway down the braid for base thickness. The second layer gets added closer to the ends for extra volume in the ponytail itself.
The result is a ponytail with more drama at the bottom than at the top. It’s a technique often used for photo shoots and events where the hanging hair is the focal point.
This is a more advanced install — not every braider does double-layer feeds. Ask specifically when booking if you want this effect.
7. Low Feed-In Pony With Curved Rows
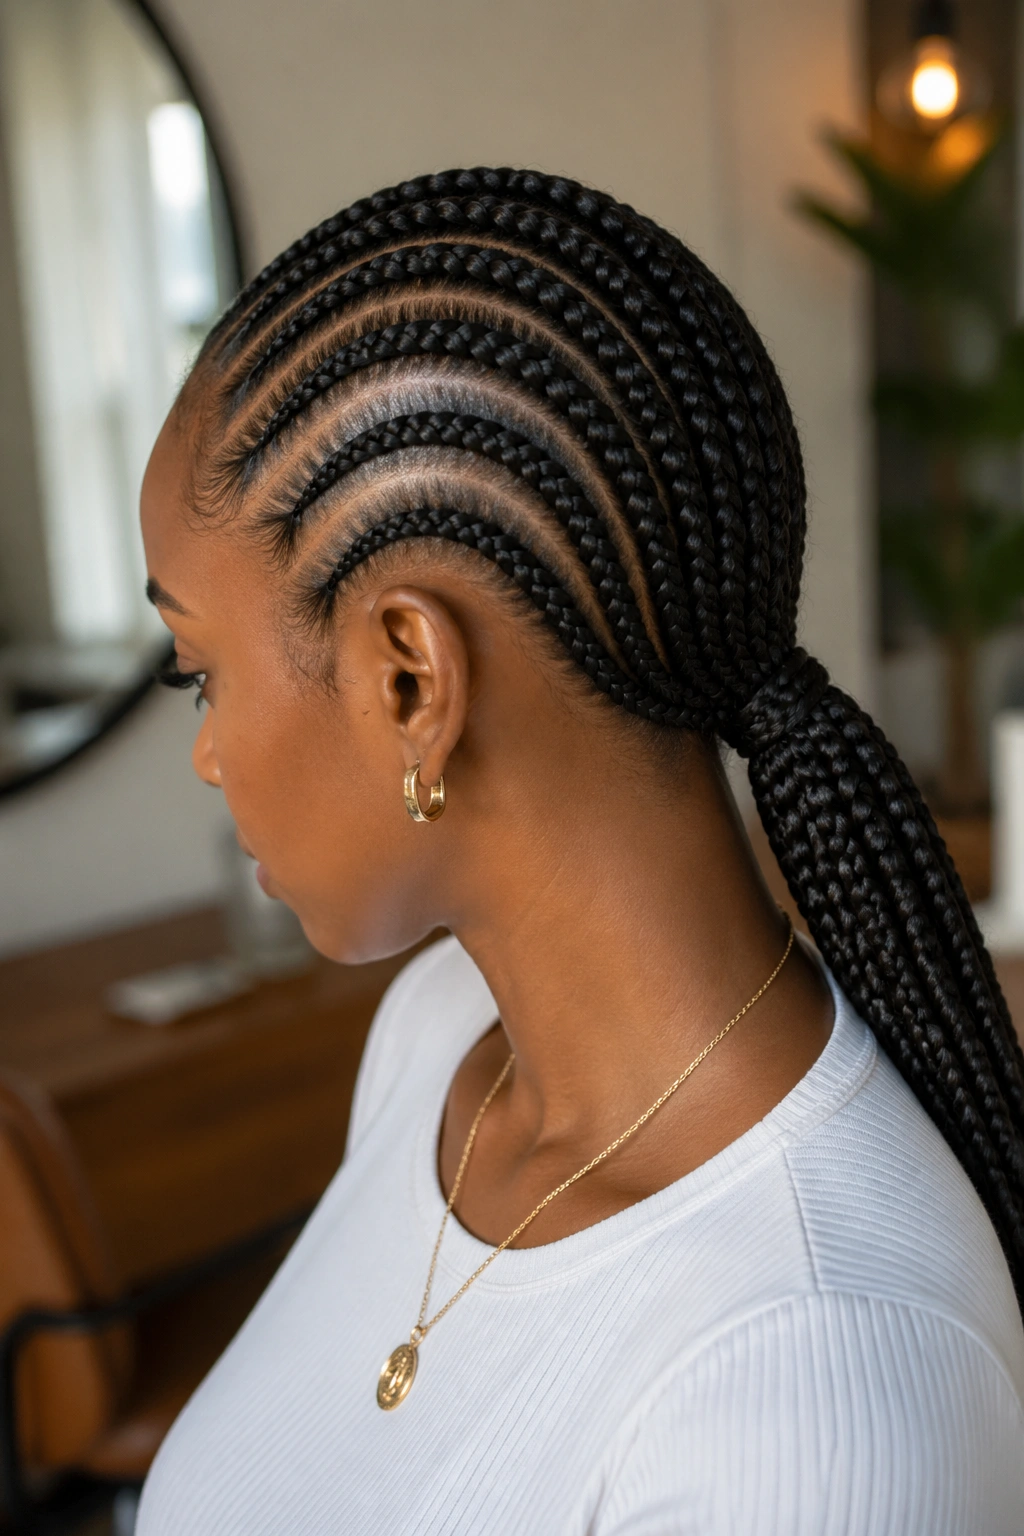
Instead of straight-back rows, the cornrows curve gently from the hairline to the nape. The curves add dimension to the base before the ponytail even starts.
The curves can be subtle S-shapes or more pronounced swoops. Subtle curves look sophisticated and work well for professional environments. Pronounced curves read as more creative and show off the braider’s skill.
Timing note: curved feed-ins take longer than straight ones — usually an extra 30-45 minutes for a full head. The braider has to work against the hair’s natural fall direction throughout.
8. Thin Front With Thick Ponytail
The rows at the front of the head are kept thin — sometimes just a few fine rows around the hairline — while the rows further back are thicker. The ponytail gets the full volume of the feed-ins, so it hangs thick and heavy from a deceptively delicate-looking base.
This balance creates an hourglass effect at the head. The thin front frames the face cleanly. The thick ponytail provides the dramatic length and weight.
The challenge is tension distribution. Thin front rows can feel more sensitive because each row holds less hair. If you have tender edges, ask the braider to keep the front tension especially light.
9. Feed-In Pony With a Fringe
A section of hair at the front gets separated from the main rows and left out as a fringe. The fringe is braided into a thin cornrow or left as a loose piece that falls across the forehead.
This style is for someone who wants the security of a feed-in base but doesn’t want their full forehead exposed. The fringe softens the front and adds a youthful element.
What to Watch For
A fringe braided too tightly pulls at the edges more than a standard row because it’s positioned at the most sensitive part of the hairline. If you’ve had edge thinning before, consider a loose fringe or skip the fringe entirely.
10. Feed-In Pony With Thread Wrap
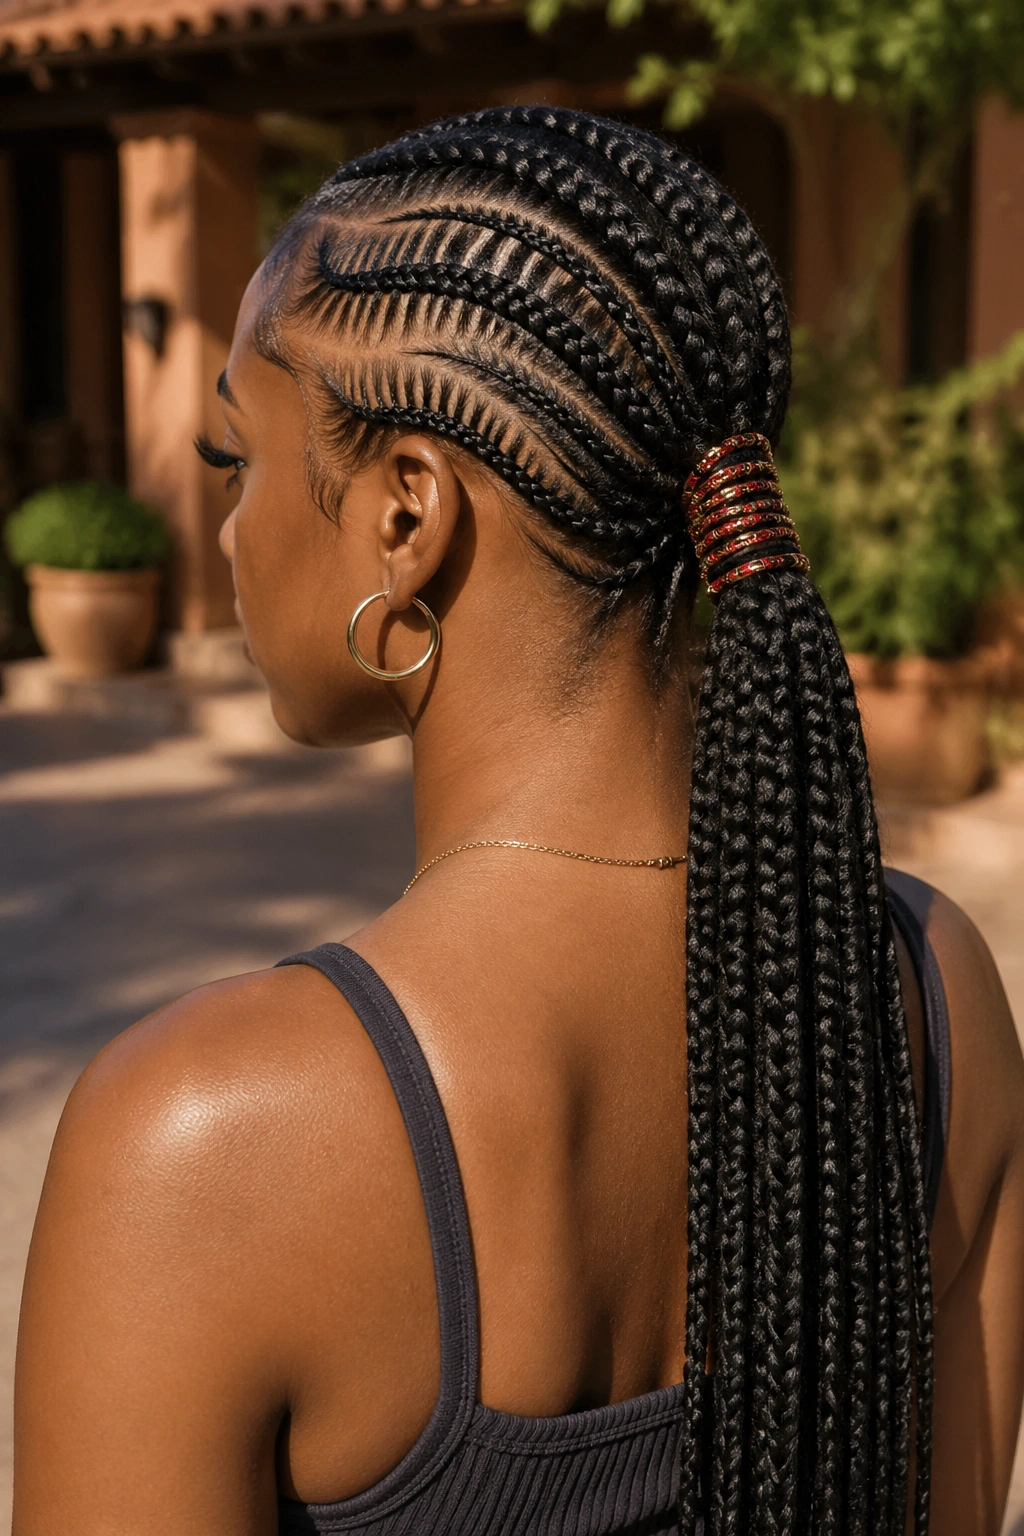
One section of the ponytail — usually about 4-6 inches down from the base — gets wrapped with decorative thread in red, gold, or another accent color. The thread wrap turns the ponytail into a piece of wearable art.
Thread color choices matter. Bright colors look festive and suit event styles. Deeper tones like maroon or navy look sophisticated for office environments.
The wrap stays in place for about a week before the thread starts to loosen. You can unwind and re-wrap it without disturbing the rest of the style.
11. Feed-In Pony With a Deep Side Part

The style is mostly a low pony with straight-back rows, but the front parting is moved dramatically to one side. The deep part creates an asymmetric framing of the face that reads as sleek and intentional.
A deep side part shows off the shape of one eyebrow and one cheekbone. It works particularly well for oval and heart-shaped faces.
The part should be drawn cleanly with a rat-tail comb and held in place with a light edge gel. If the part looks fuzzy, the whole style reads as less polished.
12. Mid-Length Feed-In Pony
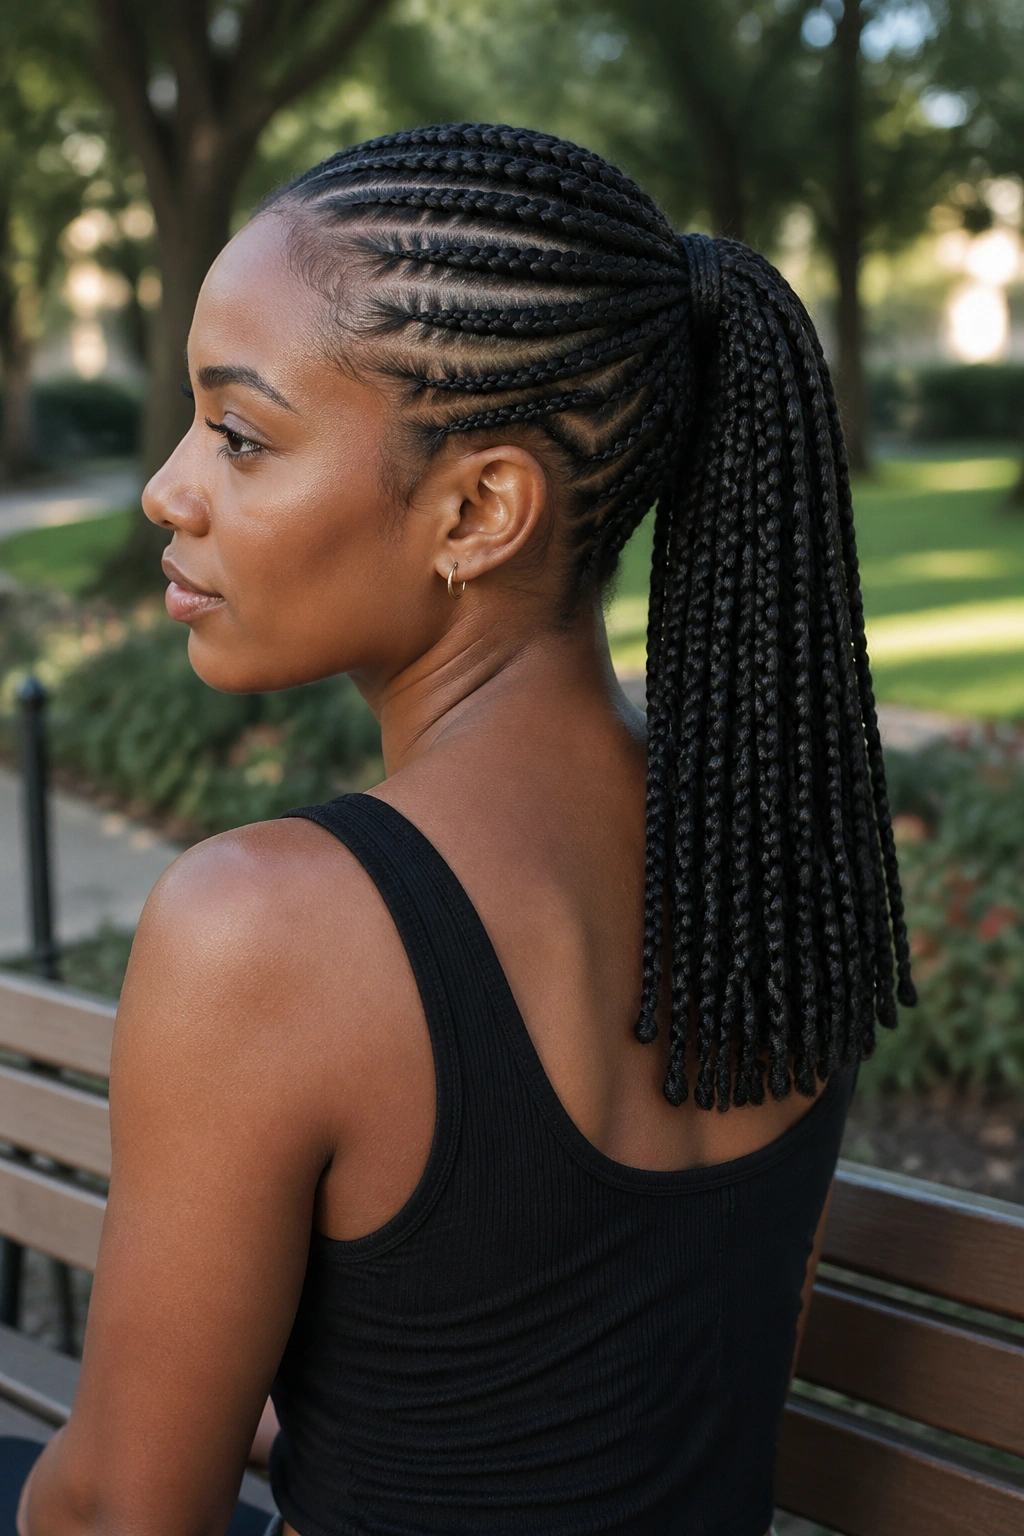
Not every feed-in pony needs to be waist-length. A mid-length version stops at the shoulder blades — long enough to have presence, short enough to be practical.
The shorter length costs less in extension hair. One pack of kanekalon is usually plenty. The install time also drops, often by 30 minutes or more.
Mid-length ponies work for people who don’t want to deal with hair hanging past the waist. They’re easier to sleep in, easier to manage during exercise, and easier to wear under jackets and coats.
13. Half-Up Feed-In Style
The feed-in rows only cover the top half of the head. The bottom half is left as your natural hair, often in a curly or straightened finish.
This is a blended style. The feed-ins create a polished top section while the natural hair at the bottom adds texture and movement.
The transition line between feed-in and natural hair must be clean. A sloppy transition looks like an accident. A clean transition — usually hidden by a small piece of extension hair wrapped around the gather point — looks intentional.
14. Feed-In Pony With Ombre Fade
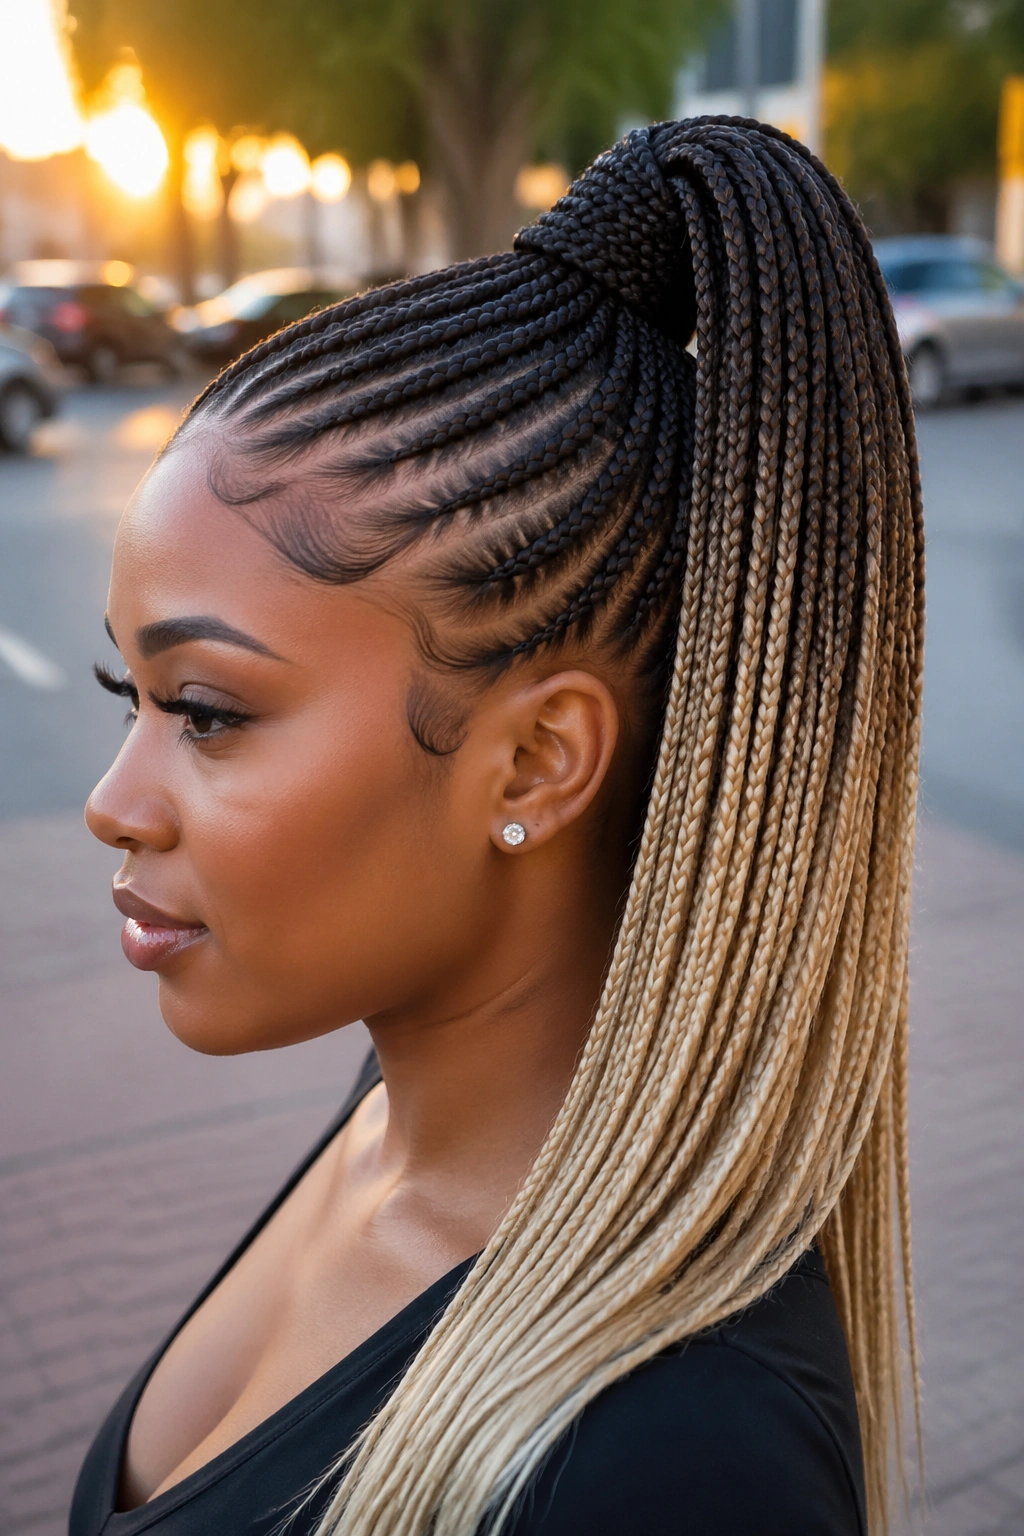
The feed-ins transition from your natural color at the roots to a lighter or brighter color at the ends. Common fades include dark brown to honey blonde, black to copper, and black to gray.
The ombre happens in the kanekalon itself — pre-dyed extension hair is fed in gradually. The effect gets more pronounced toward the ends where the color is most saturated.
Best for
Anyone who wants color without committing to dyeing their natural hair. The synthetic takes color predictably and the effect lasts as long as the install.
15. Sleek Low Pony With Zigzag Part
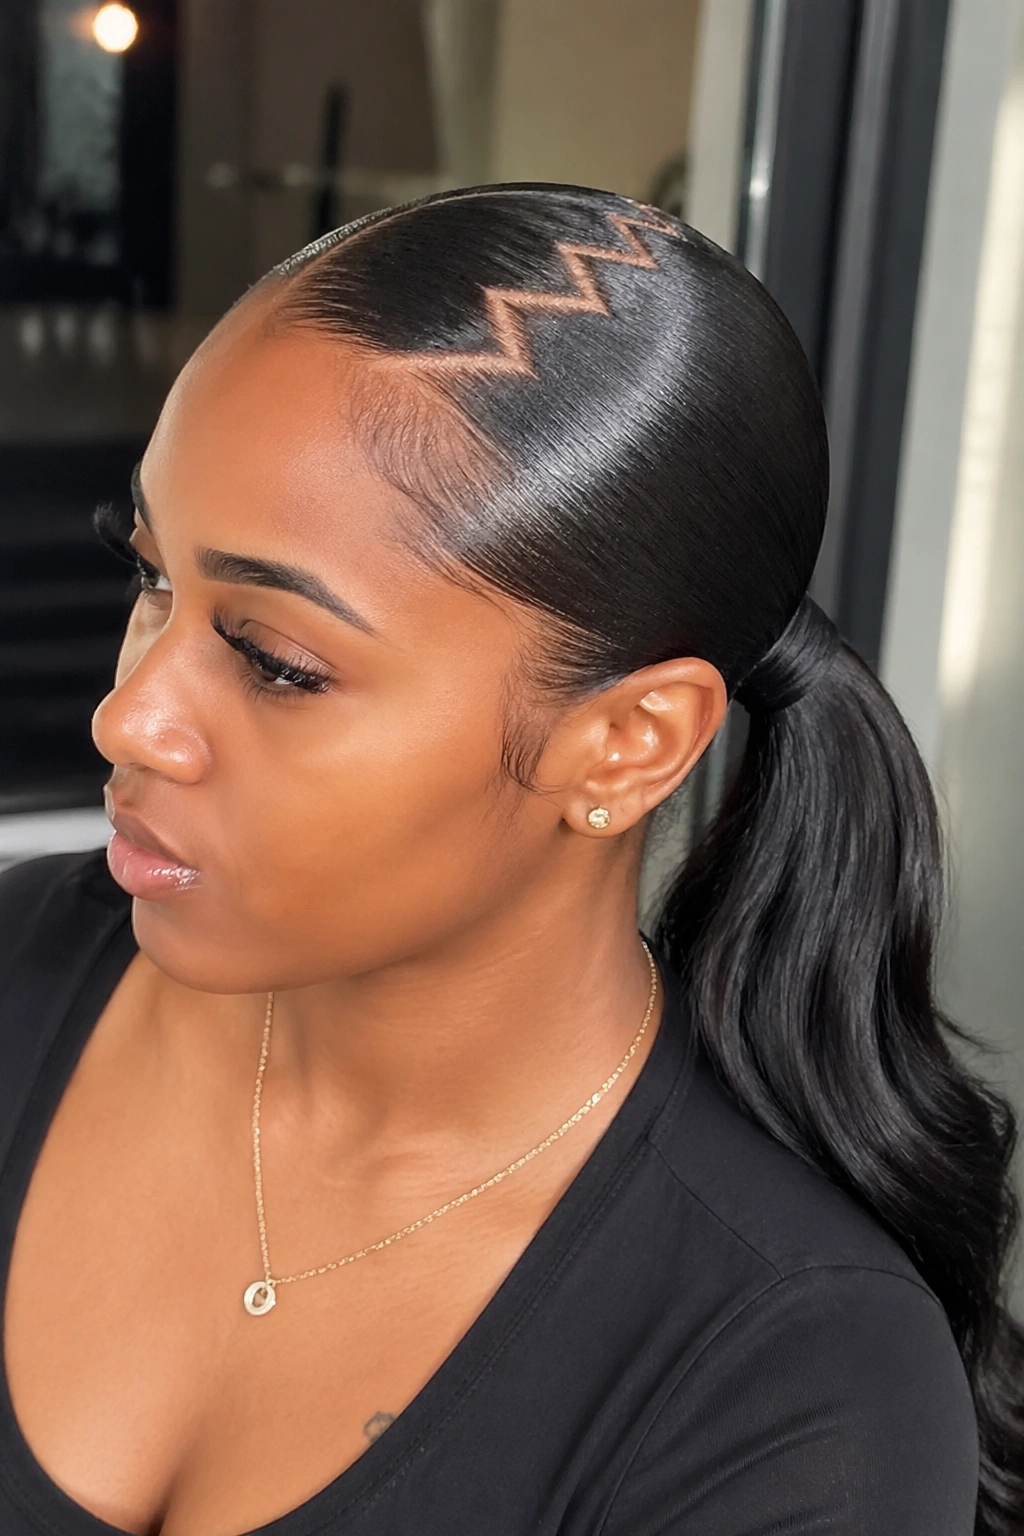
The rows run straight back to a low gathering point, but the front parting line zigzags rather than following a straight line. The zigzag adds interest to an otherwise simple style.
Zigzags can be sharp or soft. Sharp zigzags with defined peaks read as bold. Soft zigzags with gentle curves read as playful.
Only the front part zigzags — the rows behind it run straight. This keeps the style clean overall while adding one focal point at the front.
16. Feed-In Pony With Gold Cuffs
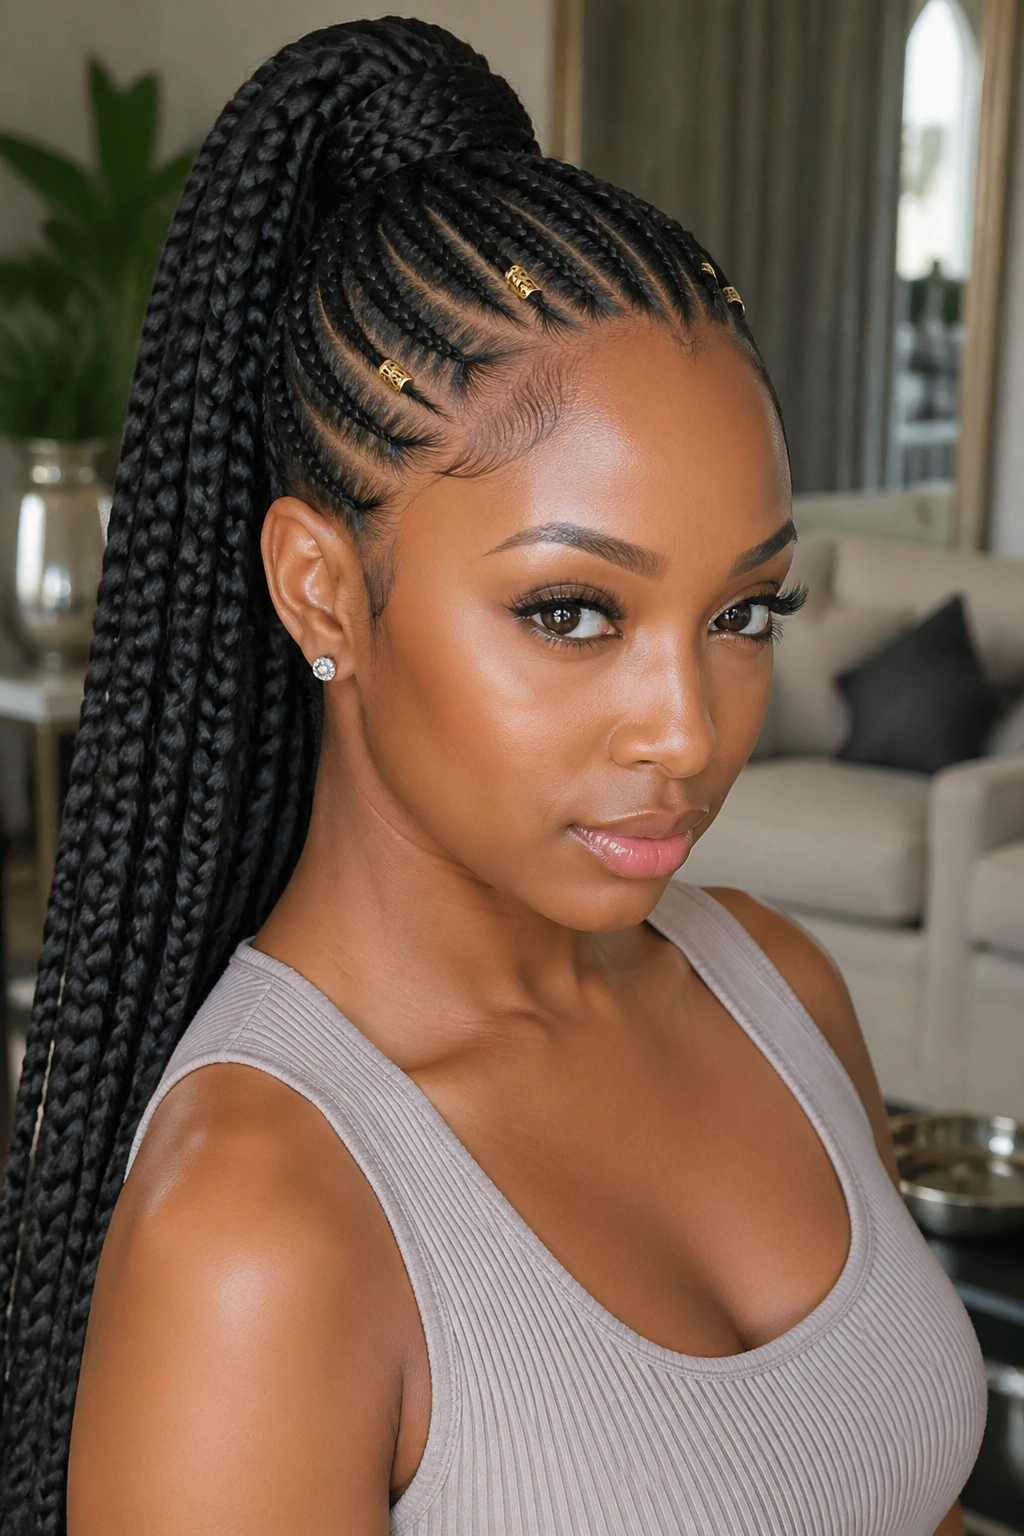
Small metal cuffs slide onto selected rows before the feed-ins enter the gathering point. The cuffs catch light and add shine to the style without requiring color changes.
Cuff placement matters. Too many cuffs weigh the rows down visually. Two or three cuffs per side, placed asymmetrically, looks curated rather than cluttered.
Gold cuffs pair well with warm skin tones. Silver works for cool tones. Rose gold sits in between and flatters most skin tones.
17. Feed-In Pony With a Bang
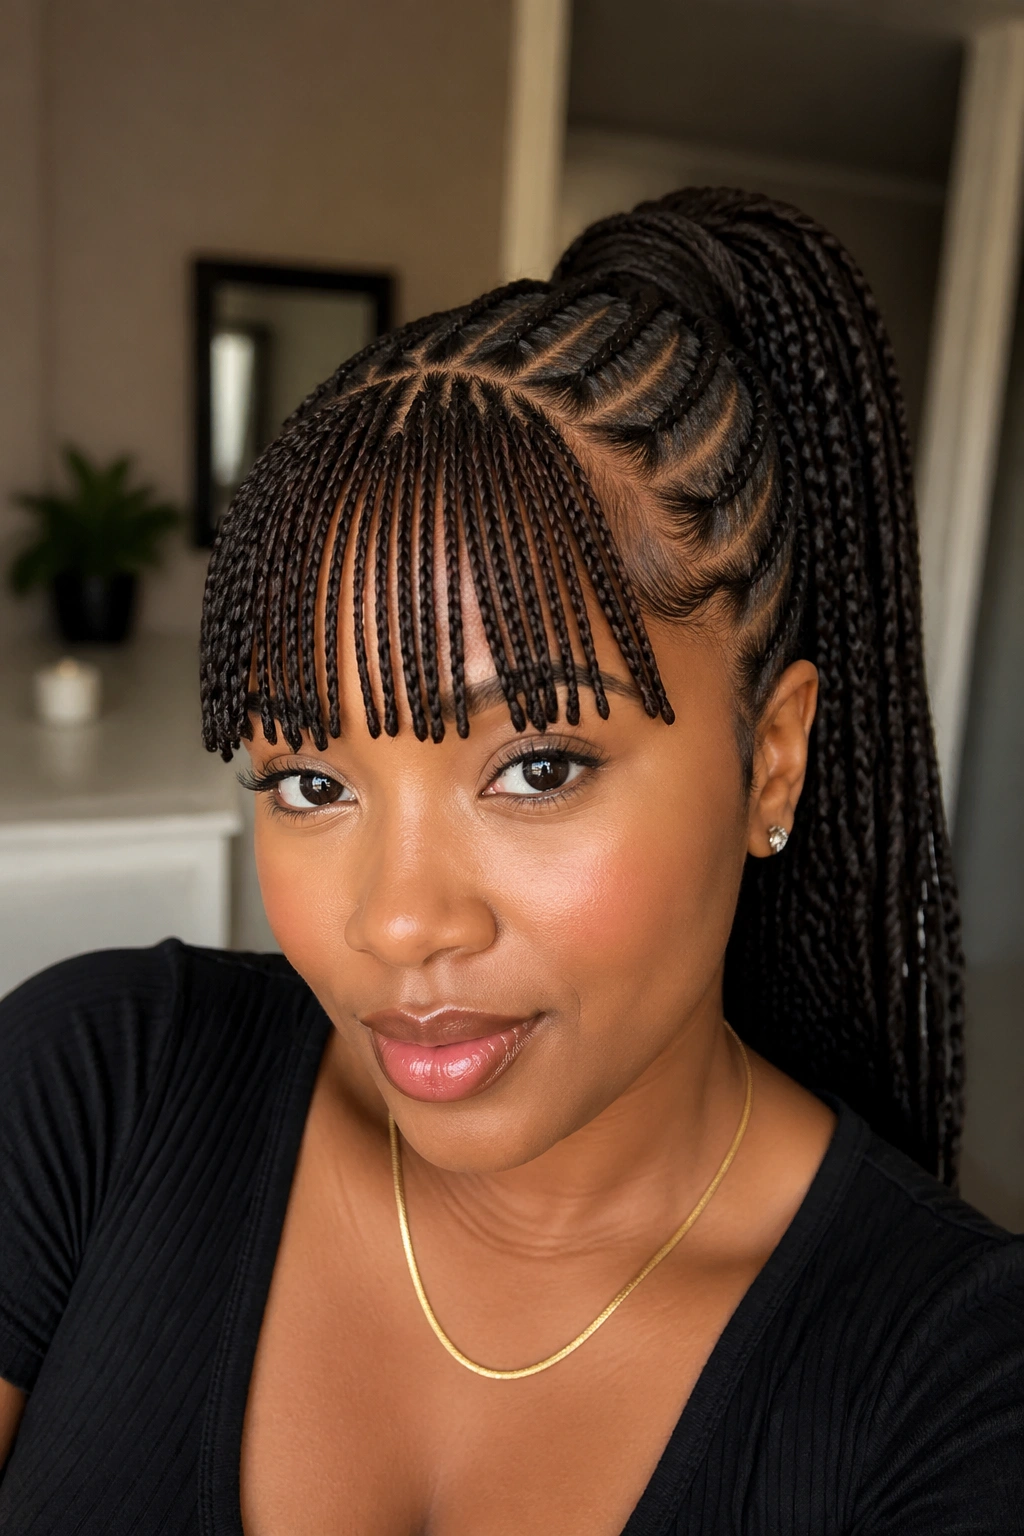
A full or side-swept bang is created from a portion of the front feed-in hair. The bang covers part or all of the forehead, creating a different face-framing effect than a bangless style.
Full bangs suit faces with strong jawlines — they balance the angularity. Side-swept bangs soften rounder faces. Curtain bangs that part in the middle and sweep outward flatter almost any face shape.
The bang length should hit either just above the eyebrows or right at the chin. Anywhere in between tends to look awkward.
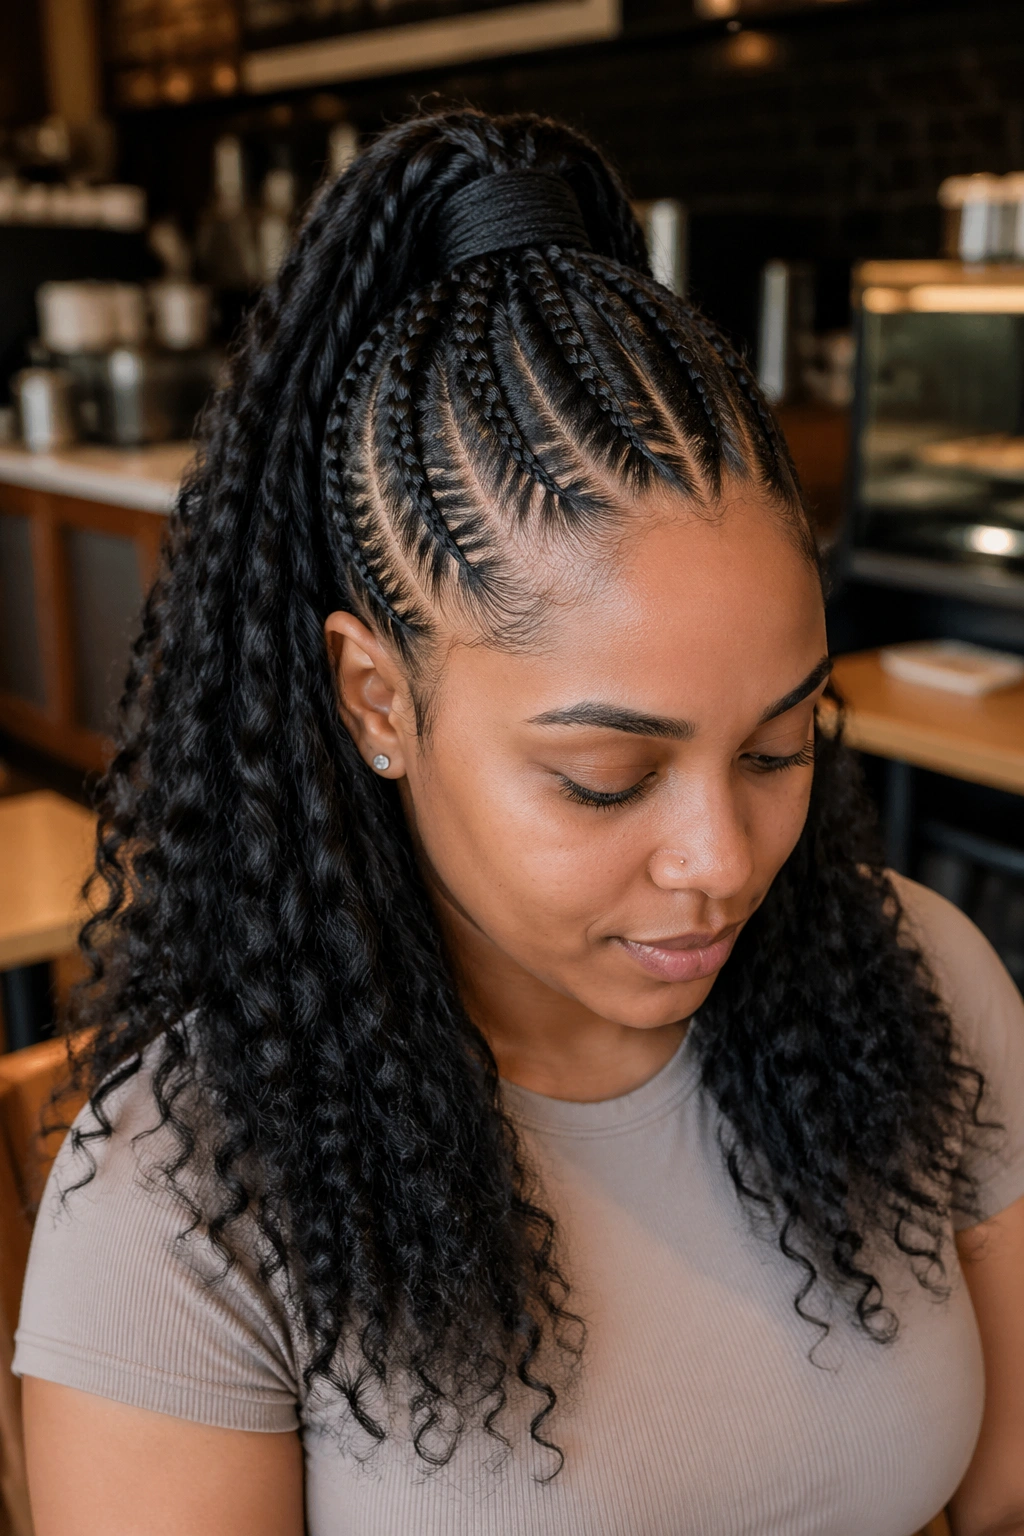
18. Long Feed-In Pony With Loose Waves
Length: 28-30 inches. Texture: loose waves throughout. Statement factor: high.
This is the pony for events — weddings, galas, photo shoots. The length commands attention and the waves add the kind of softness that balances the sleek base.
Waves in synthetic hair are created by wrapping damp kanekalon around flexi rods and letting it set overnight. The braider can do this before the install, or you can do it yourself after the install using a wand rated for synthetic heat.
Keep the rows sleek even when the ponytail has texture. The contrast between smooth roots and wavy ends is what makes the style work.
19. Messy Low Feed-In Pony
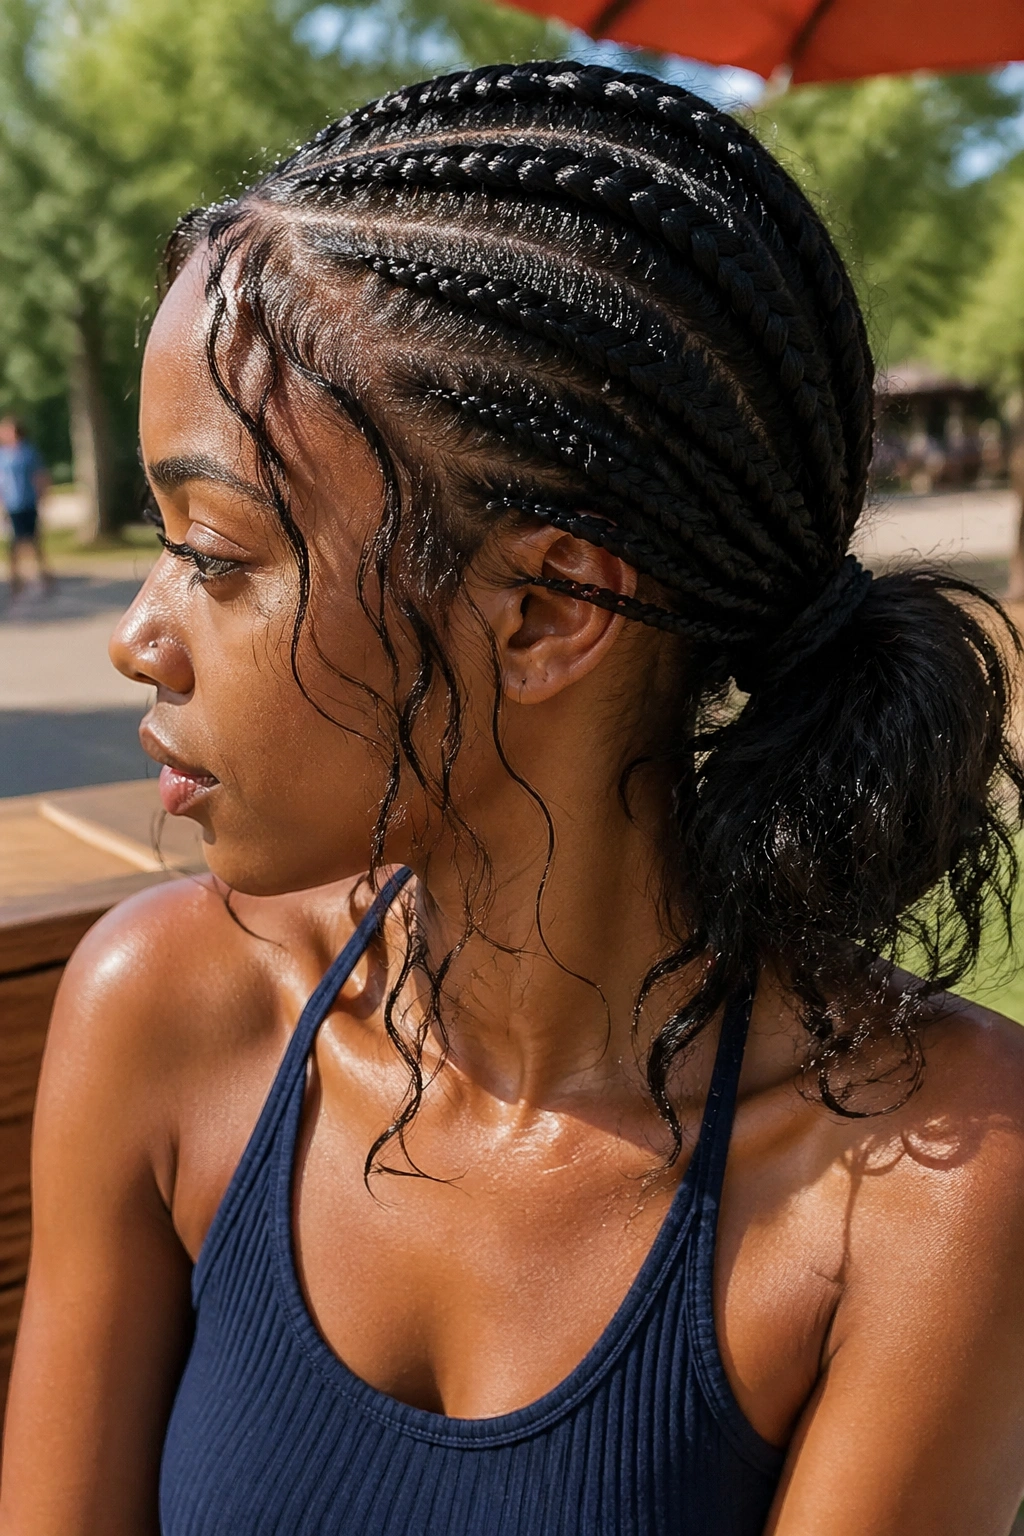
Not every feed-in pony needs to look polished. A messy version deliberately leaves some hair loose around the face, softens the base with pulled-out pieces, and gives the ponytail an undone, lived-in quality.
This style reads as casual and effortless. It’s good for weekends, picnics, beach days — anywhere formal polish would feel out of place.
The key is intentional messiness. Random stray hairs look unfinished. Deliberately pulled pieces look styled.
20. Feed-In Pony With Beaded Ends
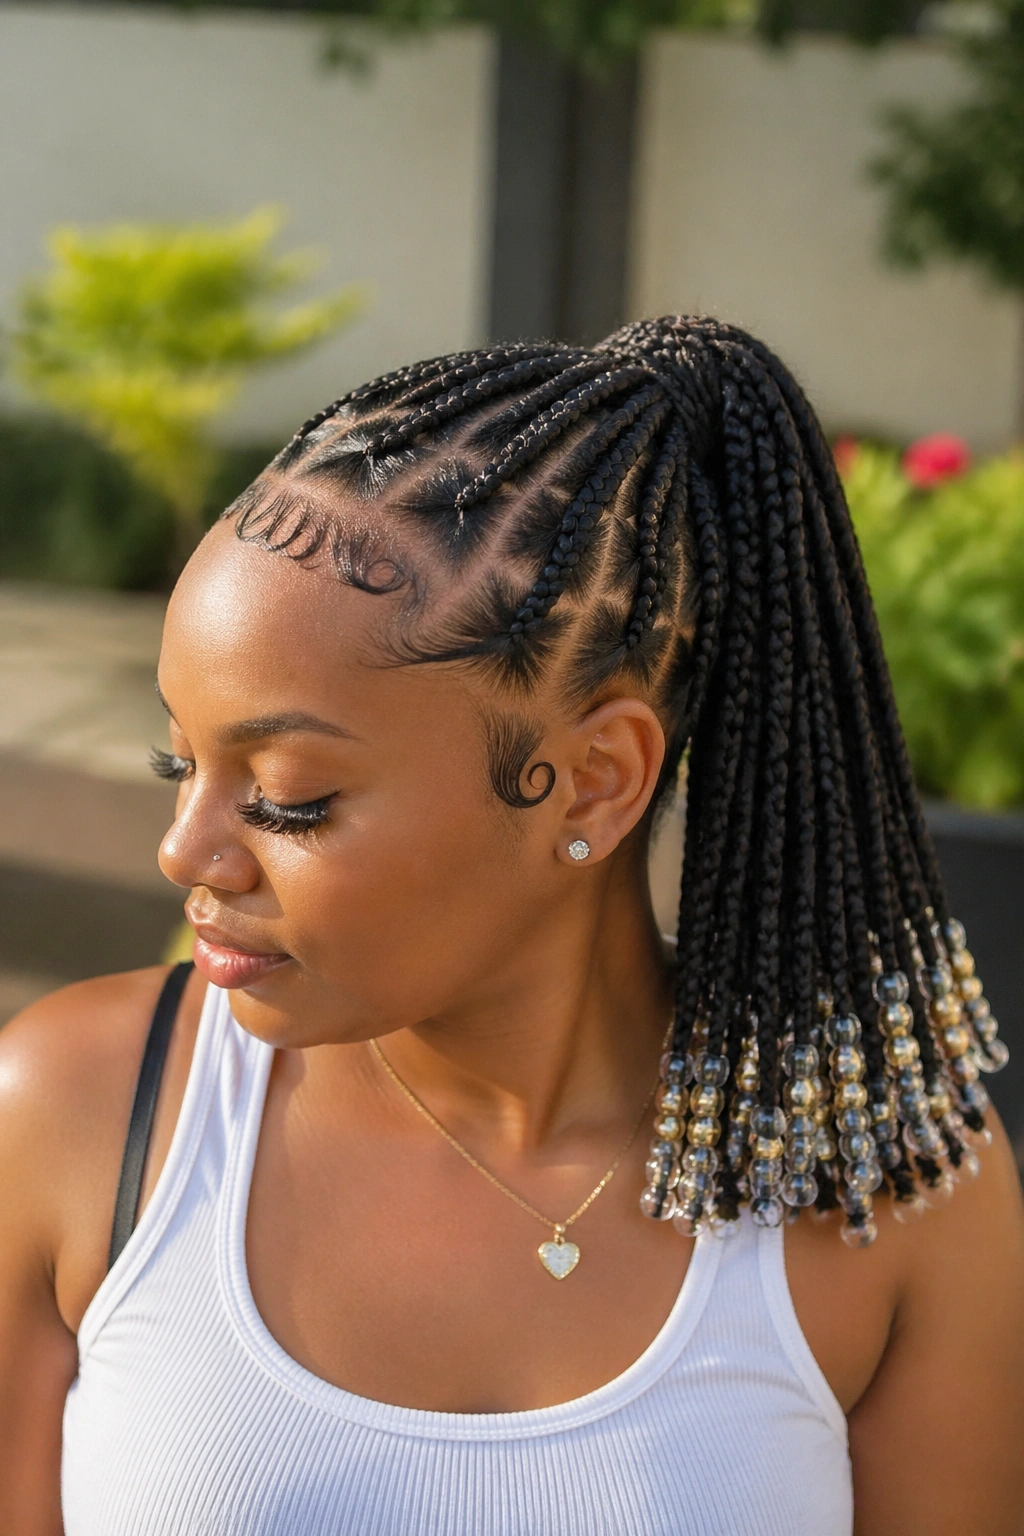
The ends of the ponytail get finished with wooden, glass, or plastic beads. The beads can be clustered at the very tips or scattered along the bottom few inches of the ponytail.
Bead choice affects the overall feel. Wooden beads read as natural and earthy. Glass beads add glimmer and sparkle. Plastic beads in bright colors feel festive.
Beaded ends need extra care when sleeping. A bonnet prevents the beads from pressing against the pillow and leaving marks on your face.
21. Feed-In Pony With a Curled-Under Finish
The ponytail itself gets styled so the ends curl under instead of hanging straight or flipping out. The curled-under finish creates a blunt, polished look at the bottom of the pony.
This style feels sophisticated and works well for professional environments. It’s the feed-in pony equivalent of a blowout finish — clean lines, deliberate shape.
Create the curl by dipping the bottom 3-4 inches of the ponytail in hot water for 30 seconds, then wrapping it around a large rod and holding it there until cool.
22. Heavy Feed-In Pony With Cascading Volume

The maximum feed-in style. Two or even three packs of kanekalon fed gradually throughout the rows so the ponytail is thick from root to tip. The result is a cascading waterfall of hair that makes a strong visual statement.
This isn’t an everyday style. The weight pulls on the scalp noticeably and can cause tension headaches if worn for long periods. Save it for special events where the impact is worth the discomfort.
The gathering point needs extra reinforcement to hold the weight. Ask the braider to use a double elastic and secure it with strategic pins.
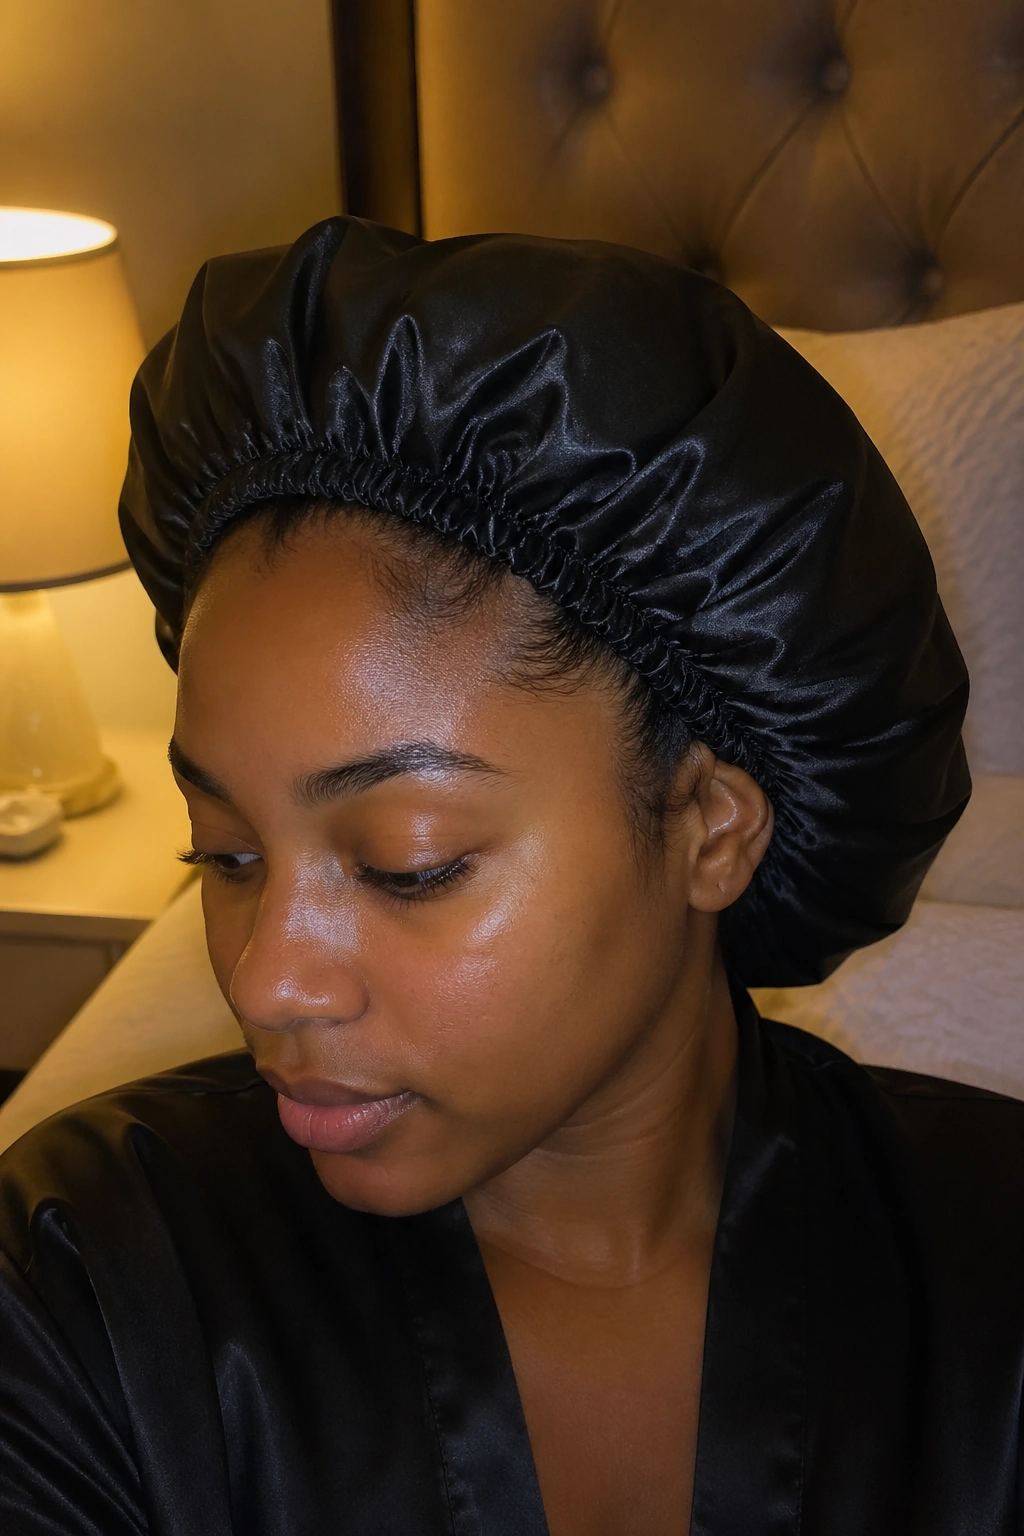
Sleeping in a Feed-In Pony Without Ruining It
The ponytail itself is the biggest nighttime concern. A silk bonnet large enough to hold both the rows and the ponytail is ideal. If you don’t have one, twist the ponytail into a loose bun at the back of your head and cover with a regular satin bonnet.
Never sleep with the ponytail hanging free. The friction against the pillow tangles the ends and loosens the base over time.
A silk pillowcase as a backup reduces friction if the bonnet shifts during the night. But a bonnet is always the better primary solution.
Washing and Refreshing a Feed-In Pony
Diluted shampoo applied to the scalp only — not the ponytail — is the standard approach. Dilute one part shampoo with three parts water in a squeeze bottle. Apply directly to the scalp between the rows.
Rinse gently with the showerhead aimed at the roots. Let water flow down the rows naturally rather than scrubbing them.
The ponytail can be lightly rinsed with clean water if it’s gotten sweaty or dusty, but avoid shampoo on the synthetic hair. Synthetic hair doesn’t need cleansing the way natural hair does, and shampoo can dry it out.
After washing, let everything air dry. Towel-drying the rows causes frizz. Blow-drying risks melting the kanekalon.
How Long a Feed-In Pony Lasts
Most installs hold up well for 2-3 weeks. Past that, the roots grow in, the base starts to loosen, and the overall look becomes fuzzy.
Some people push to four weeks by refreshing the edges and wrapping the base more carefully each day. Past four weeks, matting becomes a real concern and takedown gets painful.
Signs It’s Time to Take It Out
- Rows feel loose at the roots but tight everywhere else
- Scalp itches despite regular moisturizing
- The ponytail has become noticeably frizzy even after conditioning
- Visible product buildup that rinsing doesn’t remove
Taking Down a Feed-In Pony Safely
Start by separating the ponytail from the rows. Cut the base elastic carefully with small scissors — not into the hair, just into the elastic itself.
Remove the feed-in extensions by unraveling each braid from the end upward. The kanekalon should slide out as the braid loosens. Don’t yank or pull — the goal is to separate the extension hair from your natural hair without ripping either.
After all the feed-ins are out, detangle your natural hair with a moisturizing spray and wide-tooth comb. Expect to see a pile of shed hair — that’s normal. Over 2-3 weeks your scalp sheds about 100 hairs daily, and they’ve all been trapped in the braids.
A deep conditioning treatment after takedown is worth the time. Your hair has been tucked away for weeks and benefits from a reset.
Common Problems and How to Solve Them
Fuzz at the front of the rows. Fix it with a small amount of edge gel applied with a soft brush along the hairline. Don’t over-apply — the gel should smooth the hair, not coat it.
Ponytail becoming frizzy. Dip it in a bowl of warm water for 60 seconds to reset the cuticle of the synthetic hair. Let it air dry. This brings back most of the original smoothness.
Tension headache on day one. This usually resolves by day two or three. A warm compress on the scalp helps. If it persists, some rows may be too tight and should be redone.
Smelly scalp. Happens from buildup or from washing without fully drying. A dry scalp scrub with witch hazel on a cotton pad addresses the smell without needing a full wash.
Choosing Between High, Low, and Side Pony Options
High pony: dramatic, youthful, great for workouts or events where you want the hair off your neck. The tension sits higher, which can be more comfortable for some scalps and less comfortable for others.
Low pony: classic, professional, works for almost any occasion. The tension sits lower on the scalp and distributes evenly.
Side pony: asymmetric, romantic, photo-friendly. The tension sits mostly on one side, which some people find uncomfortable over long wear.
Test each style with your lifestyle before committing. If you work out daily, a high pony that swings freely might become annoying. If you wear collared shirts often, a low pony might bump against the collar constantly.