Curly side updos have a way of making any look feel intentional. They’re the styles that sit somewhere between effortless and polished — the kind that turn heads without looking like you tried too hard. For Black women with natural hair, a side updo isn’t just a hairstyle. It’s a statement about texture, creativity, and the beauty of curls doing exactly what they were made to do.
Why Curly Side Updos Work So Well for Natural Hair
There’s a reason curly side updos keep showing up everywhere — on wedding days, at brunches, in office hallways, and on red carpets. They’re asymmetrical by nature, which means they automatically draw the eye and create visual interest. That asymmetry works especially well with natural curls because no two curl patterns are the same. Your curls bring their own shape, volume, and personality to the style.
Side updos are also incredibly flattering across face shapes. The sweep to one side elongates the neck, lifts the profile, and creates a kind of softness that straight-back updos don’t always achieve. For women with rounder faces, a side updo can add the illusion of length. For those with longer faces, the sideways sweep balances things out.
And the versatility? Unmatched. A curly side updo can be pinned tight and sleek for a formal event, or loose and piecey for a casual afternoon. You can dress it up with accessories or leave it completely bare. The style adapts to your mood and your occasion.
Understanding Your Curl Pattern Before You Style
Not every curly side updo will look the same on every curl type, and that’s a good thing. Knowing your curl pattern helps you choose styles that actually work with your texture instead of fighting it.
Type 3a and 3b curls — the loose to medium spirals — tend to have enough natural definition to hold a curly side updo without too much product. These curl types also have enough weight to drape beautifully when pinned to the side, creating that romantic, flowing look that makes side updos so appealing.
Type 3c and 4a curls sit in a middle zone. They’re coily enough to have serious volume and spring, but defined enough to show curl clusters. For side updos on these curl types, a little extra moisture and a medium-hold gel or cream goes a long way. You want the curls clumped and defined before you start pinning.
Type 4b and 4c textures bring the most volume and the tightest coil patterns. Side updos on these textures look absolutely regal — full, cloud-like, and dramatic. The key is working with moisture-rich products that keep the hair from looking dry or frizzy once it’s pinned. A light-hold edge gel helps tame the perimeter without making things feel stiff.
How to Prep Natural Hair for a Curly Side Updo
Prep is everything. A style is only as good as the foundation it’s built on, and that foundation starts before you ever pick up a bobby pin.
Start with clean, moisturized hair. Dirty or product-buildup-heavy hair will resist styling and lose hold faster. Wash with a moisturizing shampoo, follow with a deep conditioner, and rinse with cool water to seal the cuticle. If you’re not washing on style day, refresh your curls with a water and conditioner mix in a spray bottle.
Apply your leave-in conditioner while hair is still dripping wet. Section your hair and work the product through each section, smoothing it from root to tip. This is where moisture gets locked in, and it makes the difference between curls that stay defined for hours and curls that frizz out within the first thirty minutes.
Next, apply your styling product. For side updos, you want something with enough hold to keep the style in place without making curls crunchy. A light-hold gel layered over a curl cream is a winning combination for most textures. Scrunch it in, don’t rake — raking separates curl clumps and creates frizz.
Let your hair dry at least 80% before styling into a side updo. Trying to pin wet hair leads to mildew smell and styles that collapse as the hair dries. If you’re in a rush, use a diffuser on low heat.
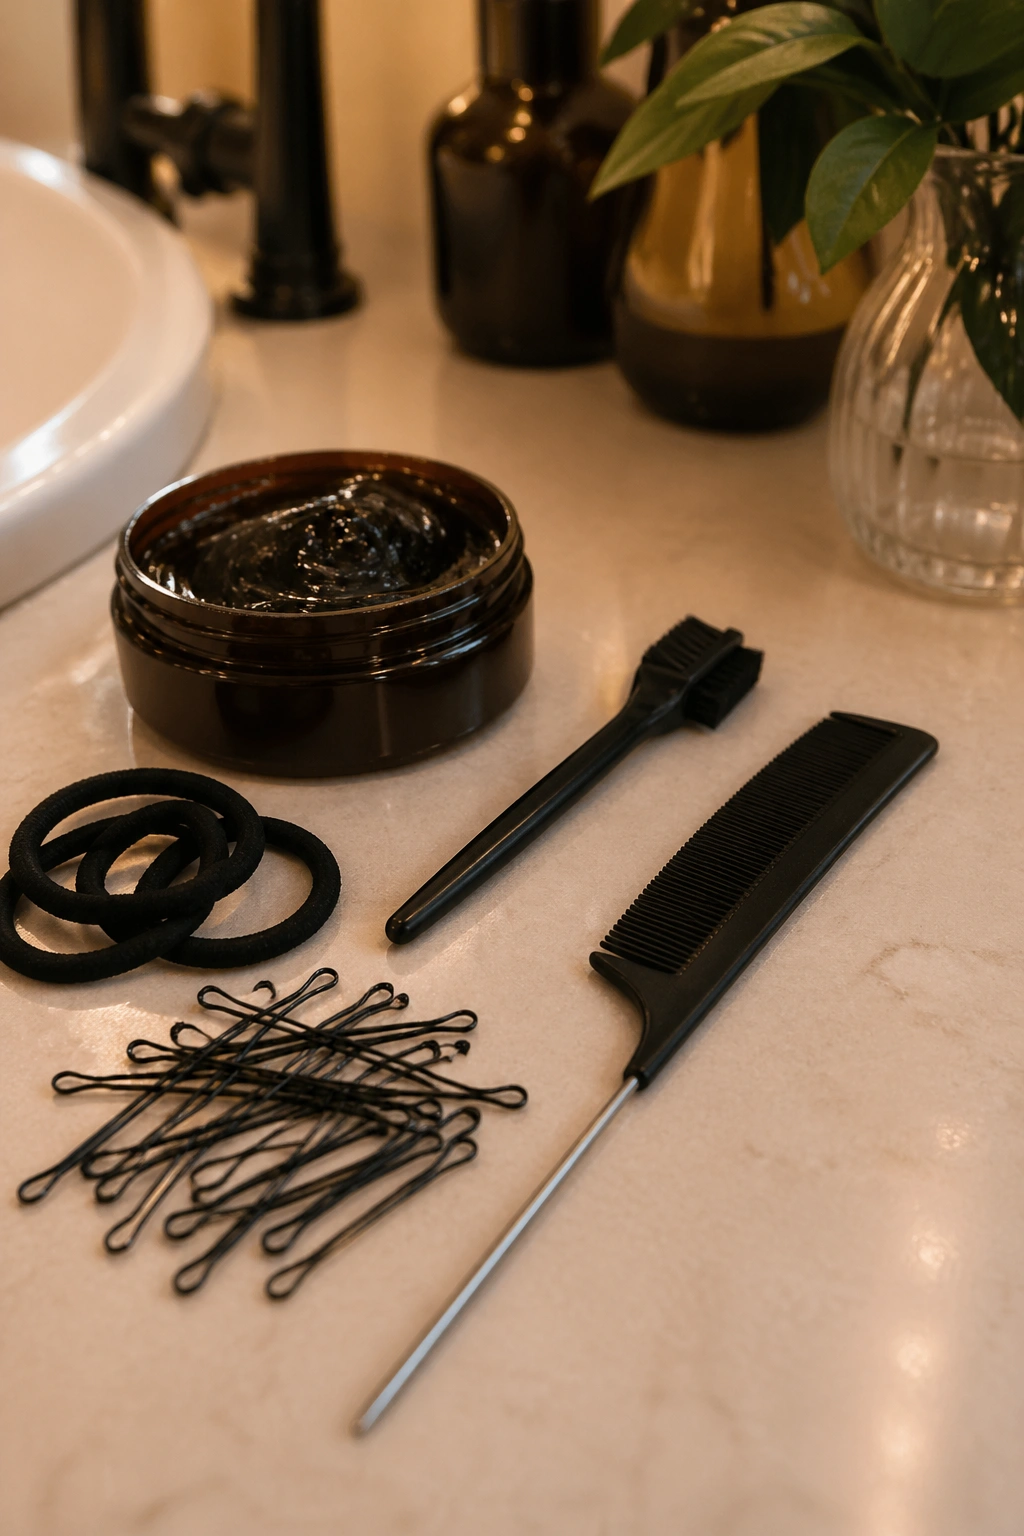
Tools You’ll Need
The right tools make the difference between a side updo that stays put and one that falls apart by noon.
- Bobby pins — Get them in your hair color. You’ll need at least 15-20 for most styles. For thicker textures, get the extra-long or jumbo versions.
- Hair ties — Fabric-covered or spiral ties are gentler on natural hair than standard elastics. Avoid anything with a metal clasp.
- Fine-tooth rat tail comb — For parting and sectioning. You don’t need this for every style, but it’s handy for precise placements.
- Edge brush or toothbrush — For smoothing baby hairs and edges.
- Edge control or edge gel — A small amount goes a long way. Apply to the hairline and smooth with the brush.
- Hairspray or curl refresher spray — A light mist to set the final look and control any stray strands.
- Decorative accessories — Pins, clips, flowers, scarves. Optional but transformative.
The Technique Behind Curly Side Updos
The basic structure of any curly side updo involves three things: a side part (or the illusion of one), gathered hair on one side, and secured hair on the other. From there, the variations are endless.
The most common approach is to gather most of the hair to one side and pin it at the nape or behind the ear, letting curls spill out in a controlled cluster. Some styles take this further by twisting the gathered section before pinning, creating a rope-like base that holds better and looks more intentional. Others go full updo — gathering all hair to one side and securing it in a bun or roll.
Pinning technique matters. Crisscross your bobby pins for maximum hold — push one pin in, then cross a second pin over it in the opposite direction. This creates an X-pattern grip that’s far more secure than pins placed in parallel. For thicker or heavier hair, this is non-negotiable.
The front section of hair — the part that gets swept over — is where most of the style’s character lives. A deep, dramatic sweep gives a more formal feel. A softer, looser sweep reads as relaxed and romantic. Decide on the look you want before you start, and work the front section accordingly.
1. Swept-Side Low Bun With Loose Curls
There’s something timeless about a low bun swept dramatically to one side. The contrast between the neat bun and the loose, falling curls creates a balanced tension that feels both intentional and effortless.
To get this look, start by creating a deep side part on whichever side you want the bun to sit. Gather all your hair — or most of it — to that side and loosely twist it into a low bun at the nape. Don’t over-tighten. The key is keeping the bun soft so it doesn’t look too severe. Secure with bobby pins placed in an X-pattern.
How to Finish It
Pull a few curls loose from the bun to soften the look. These loose pieces should frame the face and add movement. On the opposite side, let a small section of hair hang free or sweep it behind the ear. Add a pearl pin or gold cuff to the bun for polish.
Pro tip: If your curls are losing definition by the time you get to styling, spritz with water mixed with a few drops of your favorite curl cream, then scrunch to reactivate.
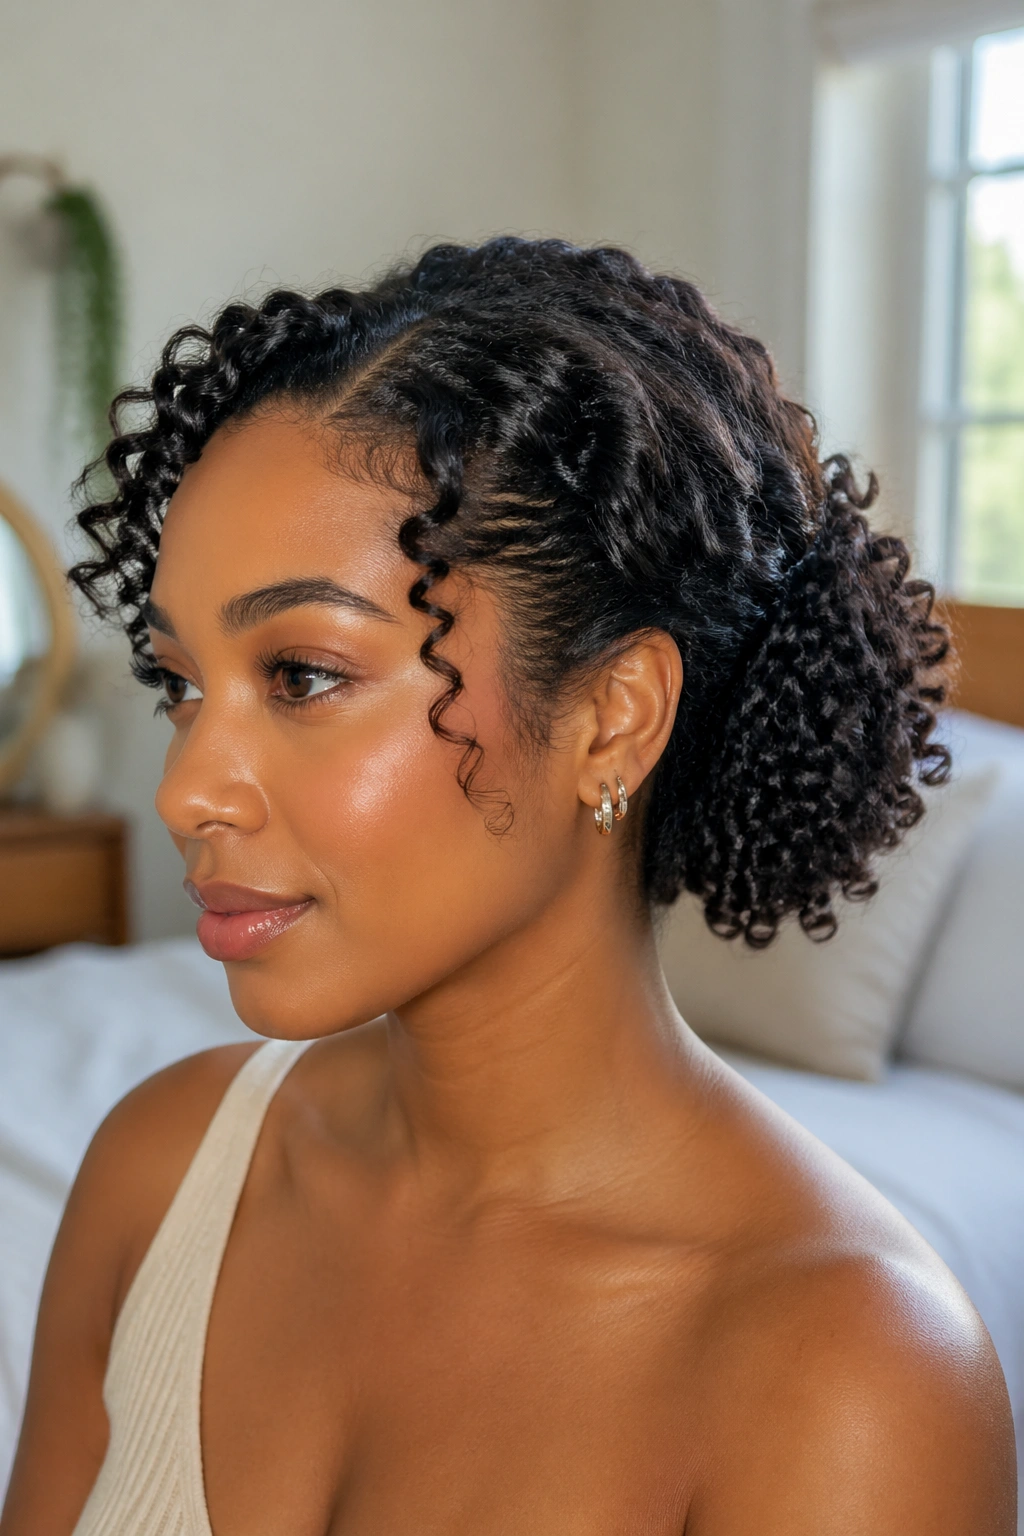
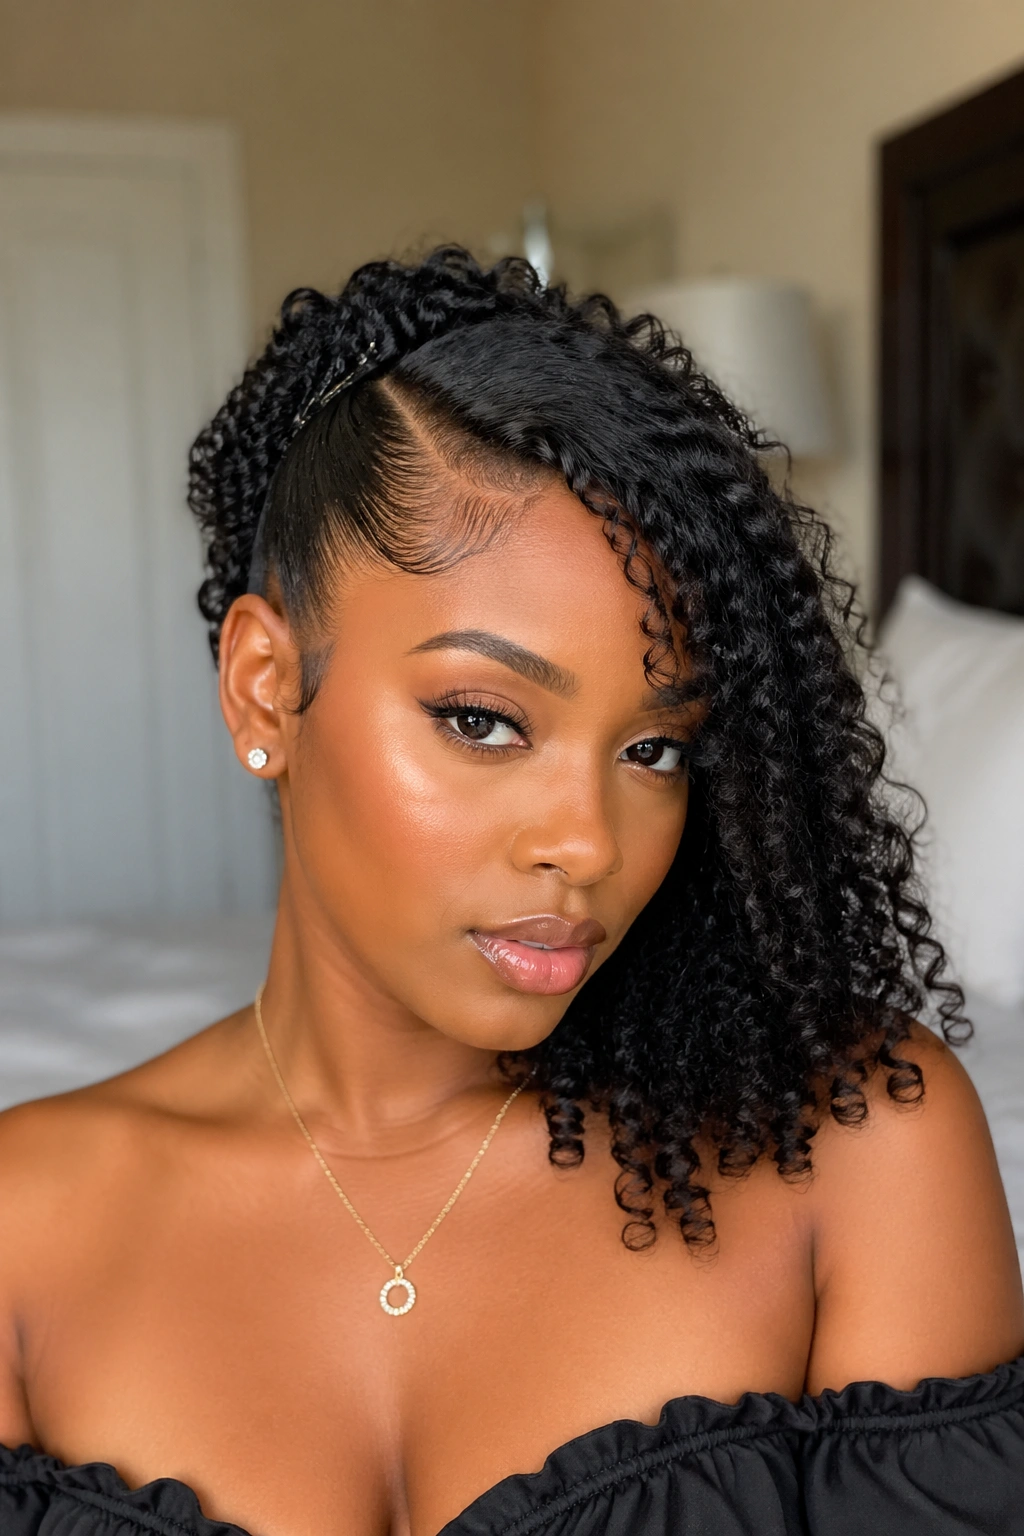
2. Half-Pinned Side Updo With Voluminous Crown
Most naturals underestimate how powerful a half-pinned style can be. This one keeps the crown section completely free — all its volume, all its glory — while pinning the sides and back up and to one side.
The result is a look that reads “big hair, done with purpose.” The volume stays on top while the pinned section creates structure underneath and to the side. It’s the kind of style that photographs incredibly well because the silhouette is dramatic and defined.
Work styling cream through the crown section to define curl clusters and add shine. Let that section sit while you gather the sides and back. Twist the gathered hair loosely and pin it at the nape on one side. Then bring the crown section forward and over slightly — this is what creates the side tilt that makes the style distinctive.
Don’t over-pin the crown. One or two strategically placed pins at the temple keep the shape without collapsing the volume.
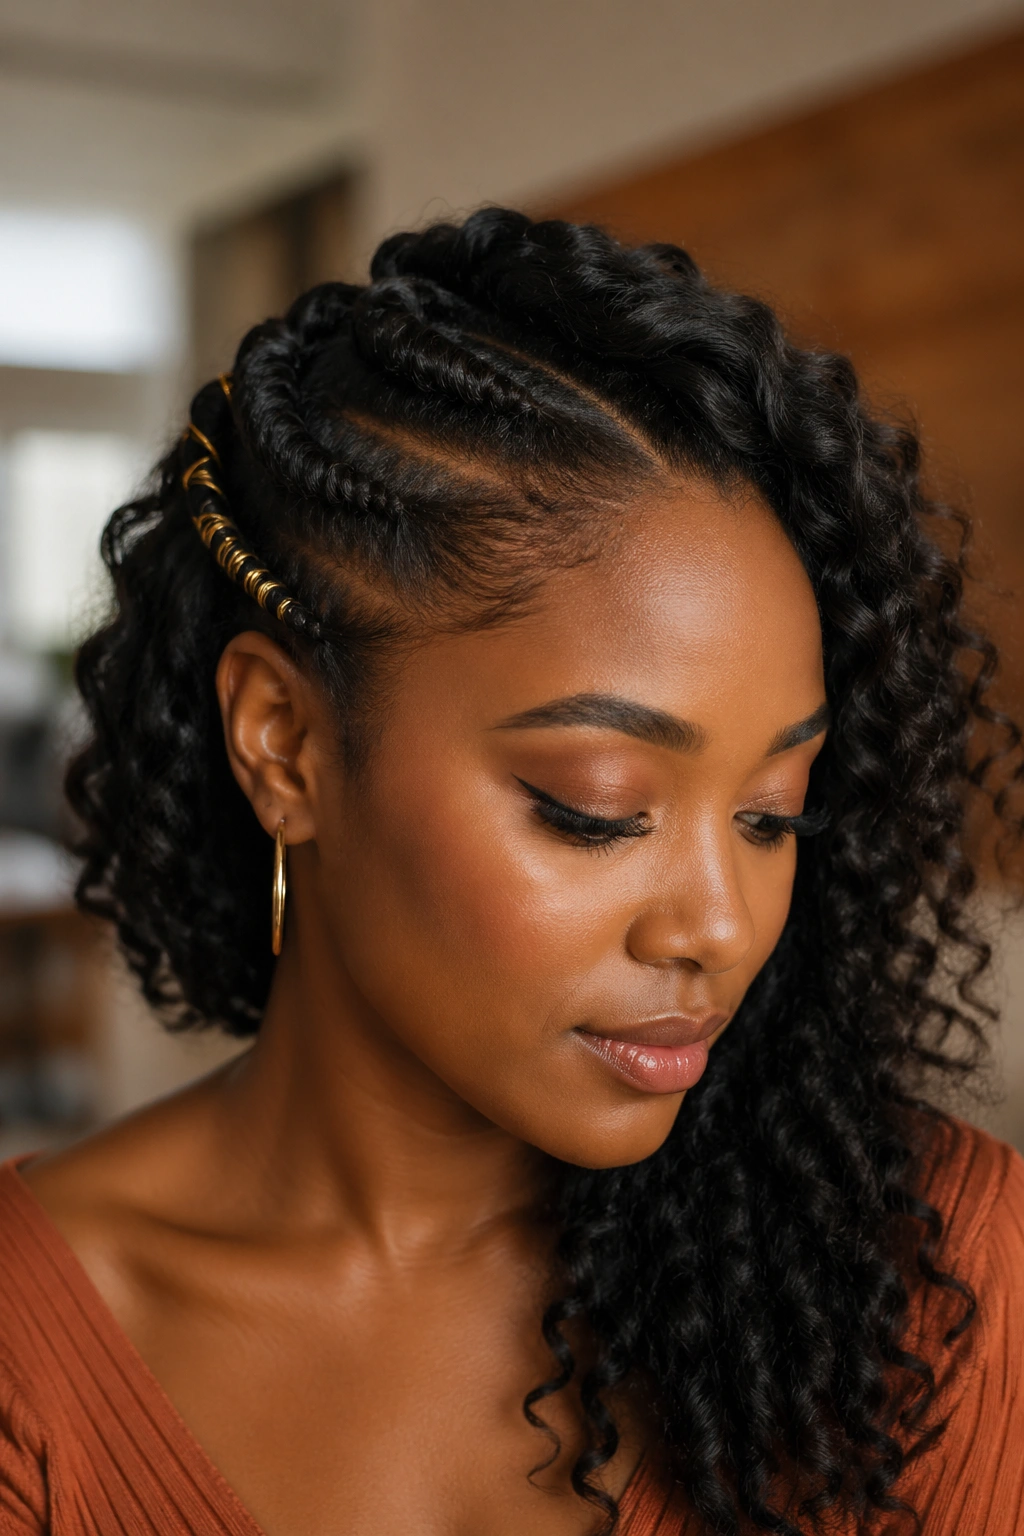
3. Side Rope Twist Into Curls
Imagine your curls held in a twisted braid-like section that wraps around to one side of your head, releasing into a cascade of defined coils. That’s the rope twist side updo — and it’s one of the most striking styles on this list.
Divide your hair into two large sections. Take the front section and divide it into two smaller pieces. Twist each piece in the same direction, then twist them around each other in the opposite direction — this is the rope twist. Bring it around to one side and pin it just above the ear or at the nape, letting the end of the twist blend into the loose curls.
How to Get This Look
The rest of your hair should be left out and defined with a curl cream or gel. The loose curls spill out from where the rope twist meets them, creating a half-up effect that looks more complex than it actually is. The contrast between the twisted section and the loose curls is what makes this style so visually interesting.
Bold tip: Wrap the twist with thin gold thread for an elevated finish.
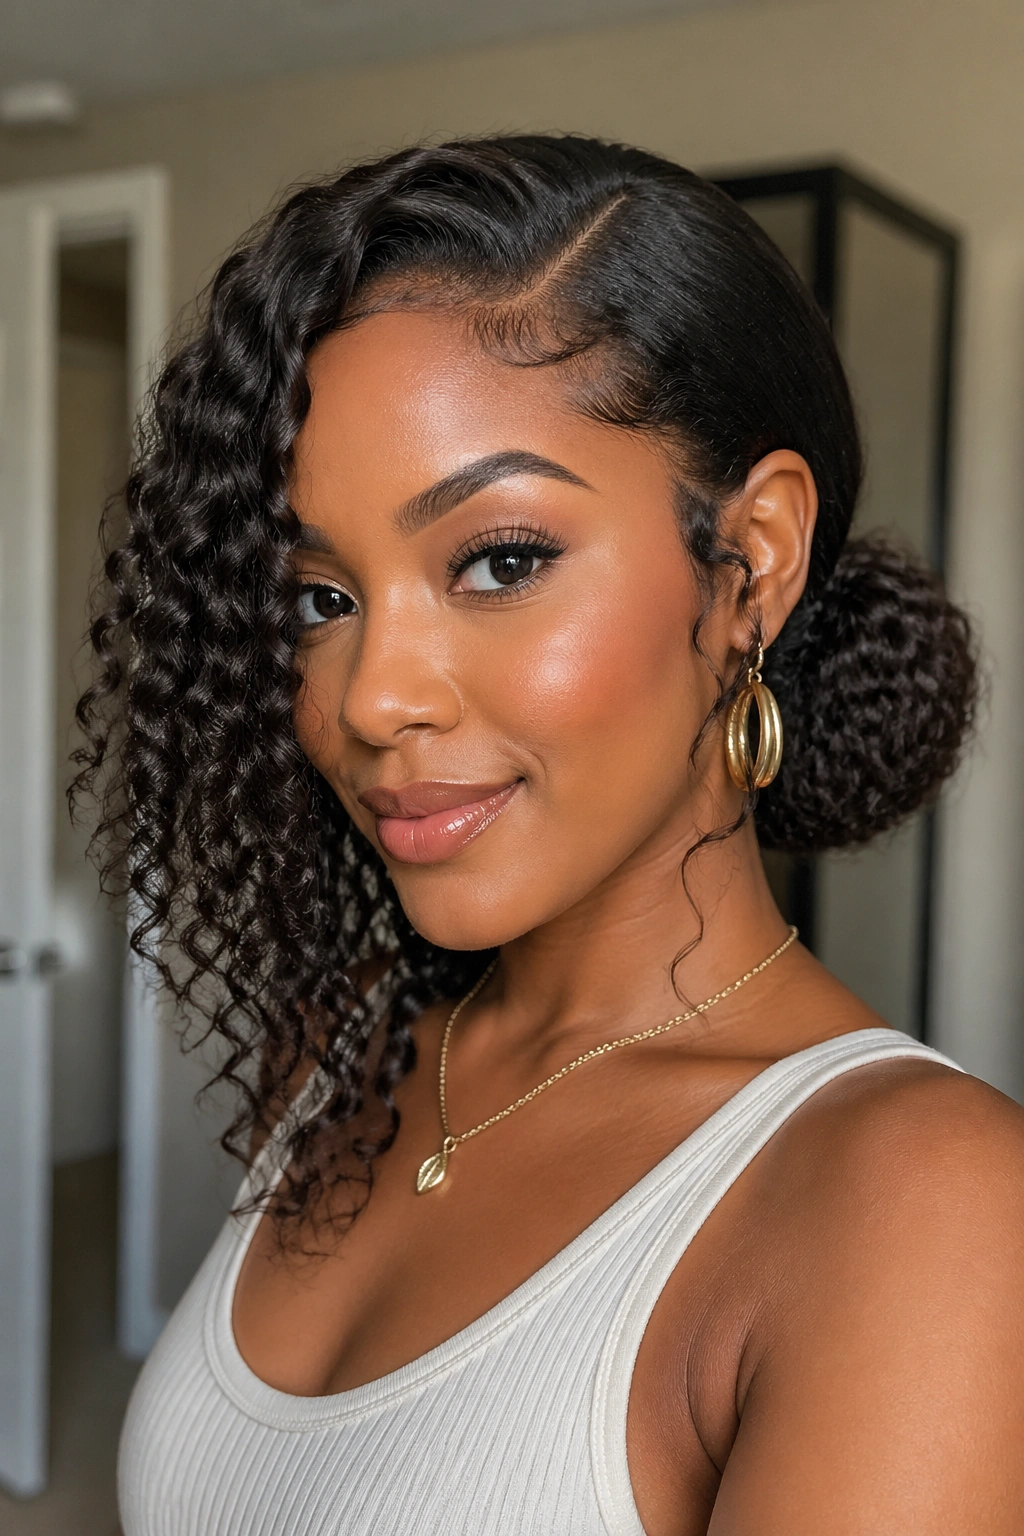
4. Deep Side Part With Pinned Crown
Picture this: you’re getting ready for an event, your curls are fresh and defined, and you want something that feels elegant without taking two hours. A deep side part with a pinned crown is exactly that.
Part your hair at a dramatically off-center position — much further to one side than a typical part. Take the smaller front section and sweep it across your forehead toward the opposite side, pinning it at the temple or slightly behind the ear. The larger section falls freely on the other side of the part.
This style works because the sweeping motion of the front section does all the heavy lifting. It creates direction, movement, and asymmetry — all the things that make a curly side updo interesting. The pinned section should sit flat against the head on one side, giving a sleek contrast to the free-falling curls on the other.
- Use a small amount of edge control along the hairline of the swept section
- Smooth gently with an edge brush — no scraping
- Mist with light-hold spray to lock the swept section in place
- Finish with a decorative pin where the hair meets the temple
5. Twisted Front Into Side Bun
This style takes the classic French twist and moves it completely to one side, incorporating curls instead of straight hair. The result is something that feels rooted in tradition but looks entirely fresh.
Begin at the front of your hair on the side you want the bun to sit. Take a section from the temple and start a flat twist going backward toward the crown. Keep adding hair as you move back, similar to a French braid but with two sections instead of three. Once you reach the back of your head, gather everything into a loose, low bun and pin it.
The flat twist section sits flat against the scalp and transitions seamlessly into the bun — a clean, graphic line that contrasts beautifully with the texture of natural curls. Any curls that didn’t make it into the twist can hang freely for a romantic finish.
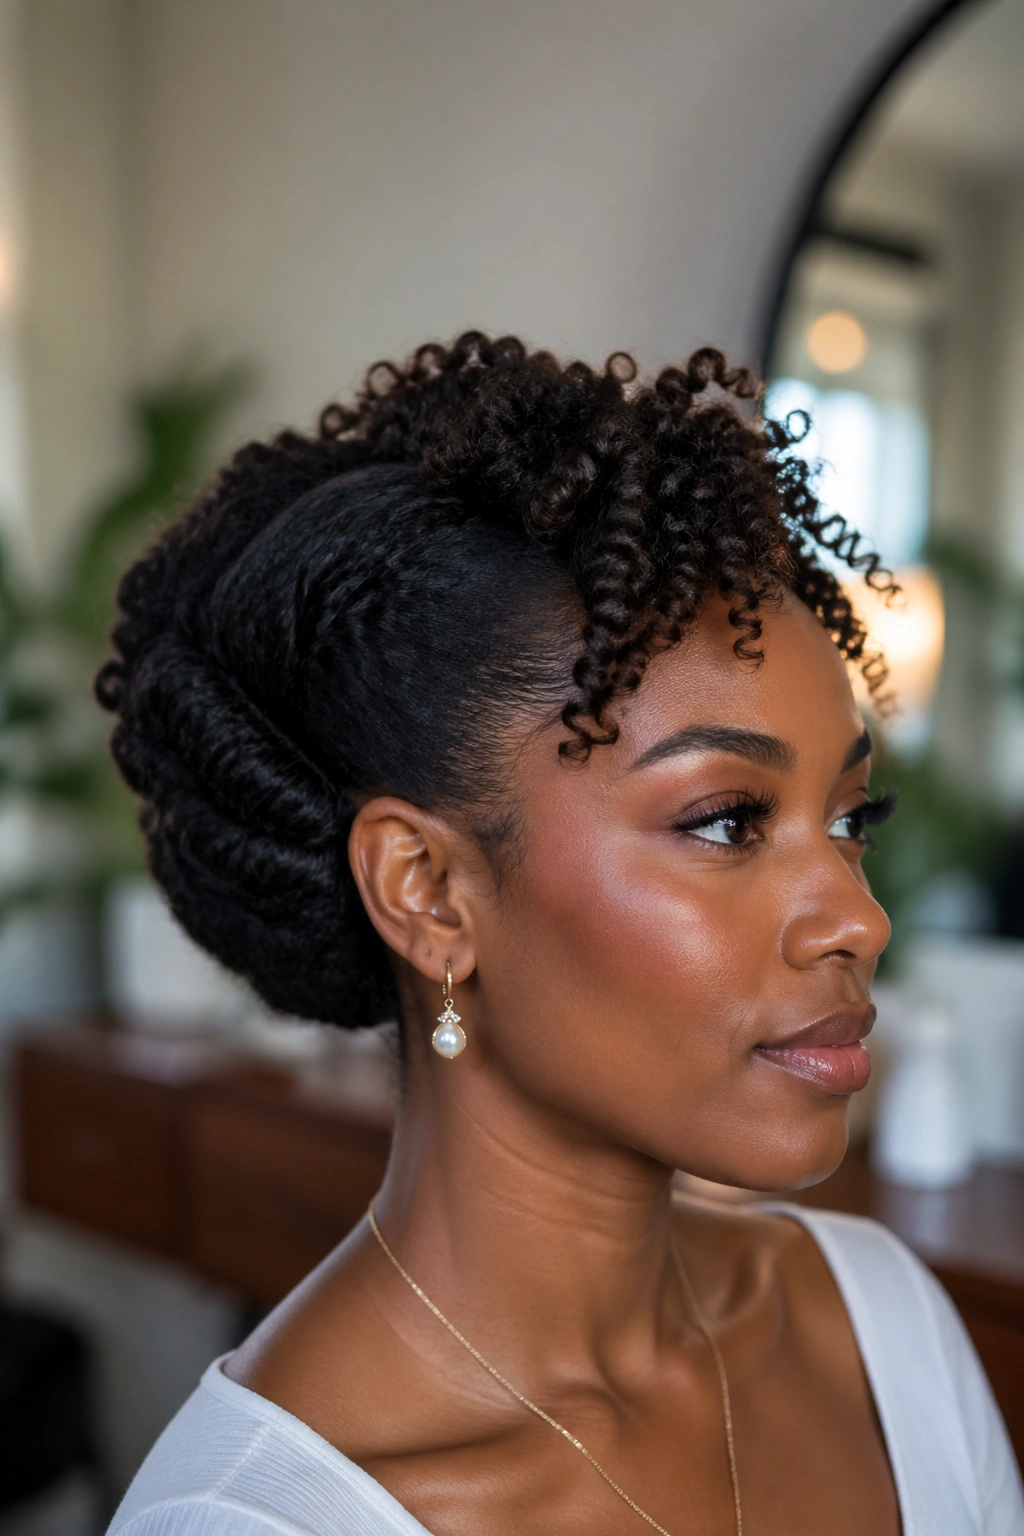
6. Side-Swept Curly Chignon
A chignon doesn’t have to mean sleek and flat. A curly chignon — especially one positioned to the side — can be full, textured, and completely natural-hair-friendly.
The trick is building the chignon with your natural curl shape intact. Gather your hair to one side as if you’re making a low ponytail, but don’t pull it all the way through the elastic on the last pass. Leave the loop of hair (the “bun” portion) folded back on itself. Fan out the looped section and pin the ends underneath, hiding them against the nape.
The chignon should look full and slightly messy — not too polished. Pull a few curls from the perimeter to soften the edges. This style photographs beautifully from every angle because the curly texture catches light differently depending on the direction.
Who This Suits
This works on every curl type, but it’s especially gorgeous on 3c and 4a textures where the curls are defined enough to show their spiral shape even when gathered. For 4b and 4c textures, stretching the hair slightly before gathering prevents the chignon from looking too compact.
7. Side Pin-Up With Braided Section
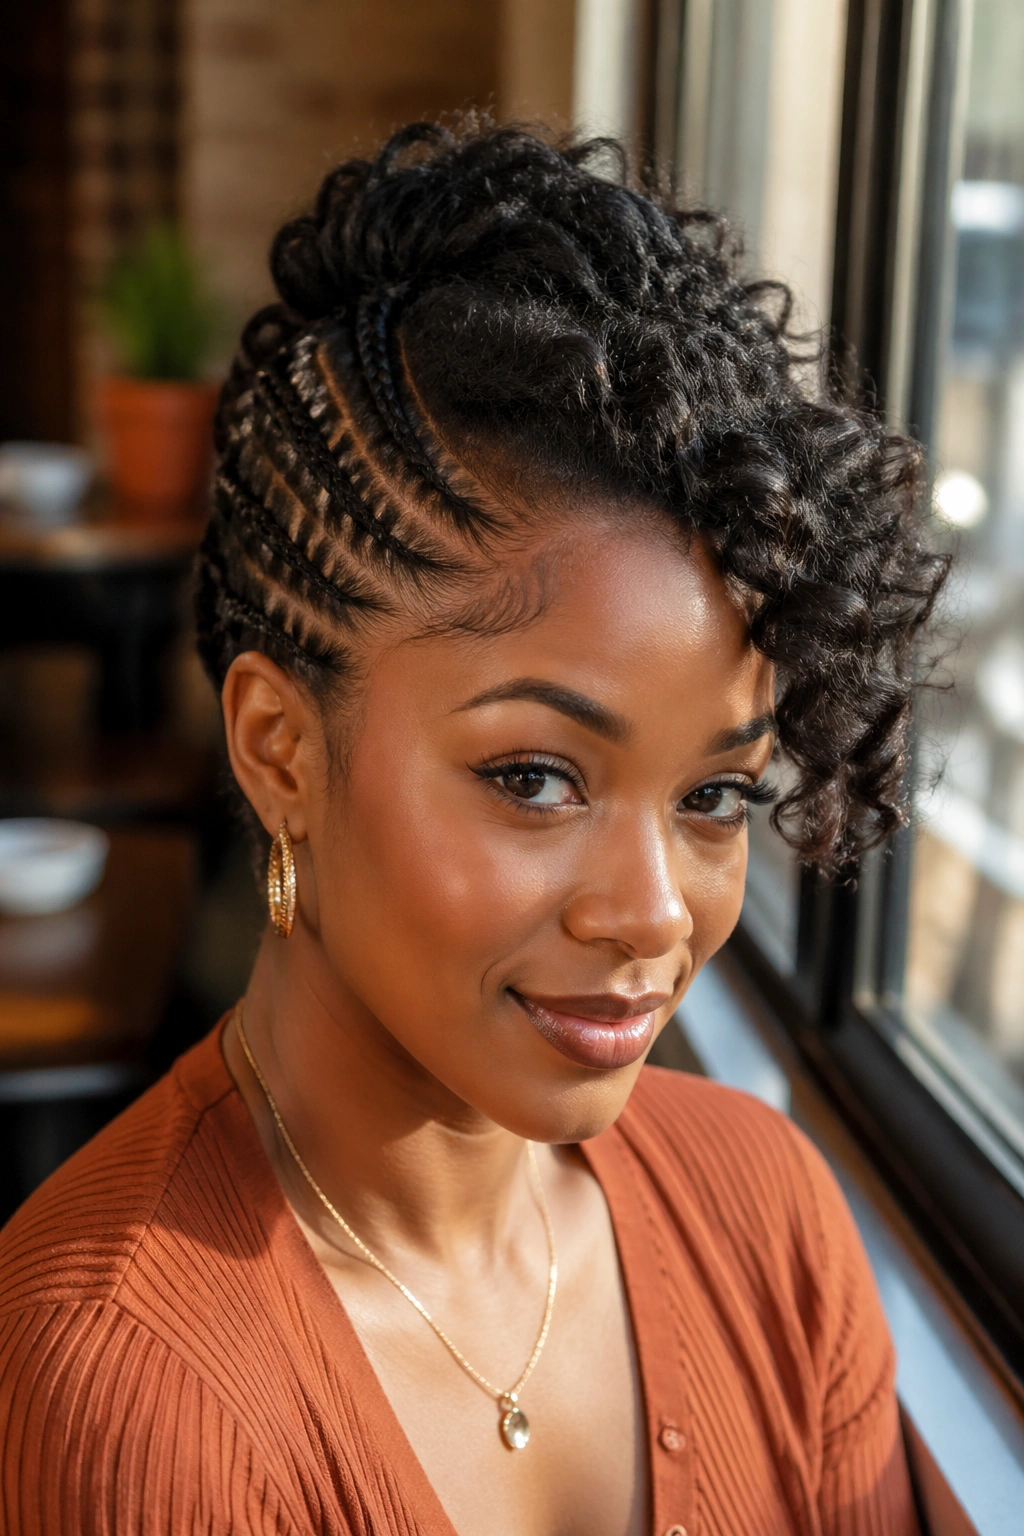
Mixing braids into a curly side updo creates texture contrast that’s visually compelling. This style uses a small braided section at the front — just one or two cornrows along the hairline — that sweep across to one side before releasing into the curly body of the updo.
The braided section adds structure without making the whole style feel rigid. It draws the eye along a clear line from one side of the head to the other, which creates a sense of flow and intentionality. The rest of the hair, pinned and curled on one side, gets to be as voluminous and textured as your natural curl pattern allows.
This style stays put significantly better than all-curly versions because the braided section anchors everything to the scalp. It’s a great choice if you’re wearing your updo all day or dancing at an event.
8. Curly Side Ponytail With Wrapped Base
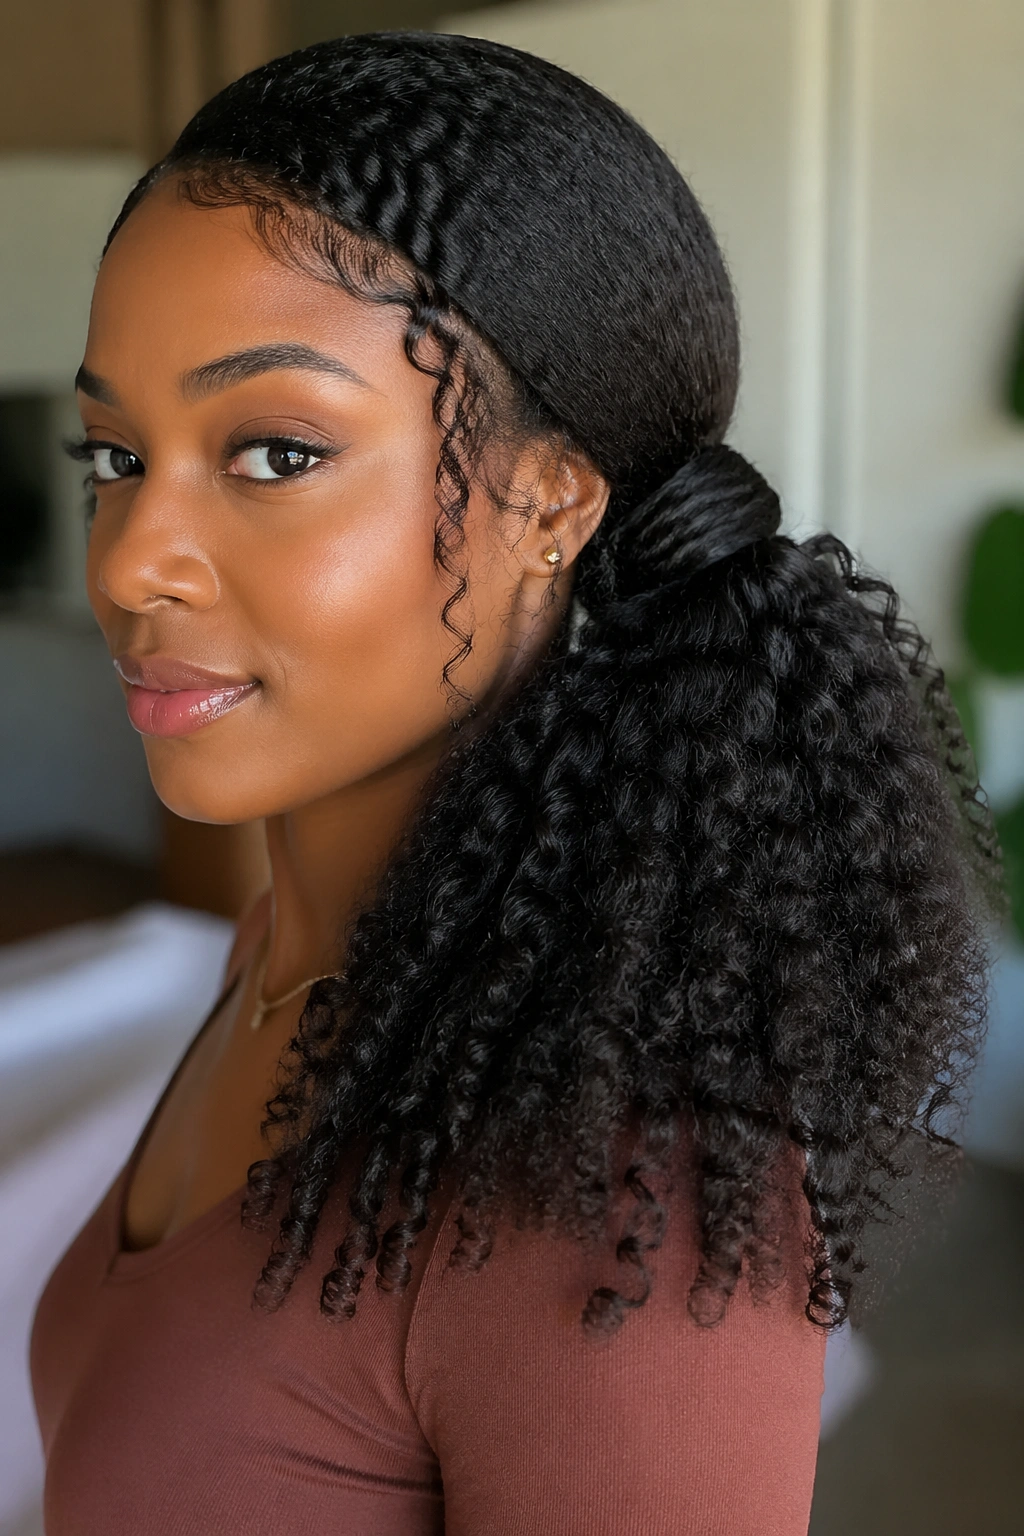
A side ponytail sounds simple — and it is — but with natural curls and a few extra steps, it becomes genuinely striking. The wrapped base is what elevates it from casual to intentional.
Pull all your hair to one side, low at the nape or mid-height at the ear. Secure with a fabric-covered elastic. Take a small section of hair from underneath the ponytail and wrap it around the elastic, hiding it completely. Pin the end of the wrapped section underneath the ponytail.
Now let those curls do what they do. The ponytail itself should be big, defined, and full — not slicked down. If your curls need a refresh, spritz them before pulling everything to the side. A curly side ponytail on natural hair looks completely different from the straight-haired version, and that difference is what makes it so gorgeous.
Bold tip: For extra volume, gently separate your curl clusters with your fingers after securing the ponytail. Don’t use a comb — it creates frizz.
9. Asymmetric Curly Updo With Side Tendril
Tendrils — those deliberate, face-framing pieces left out of an updo — are one of the most flattering finishing touches you can add to any style. An asymmetric updo that releases a single corkscrew tendril on one side is especially gorgeous on naturally curly hair.
Pin most of your hair up and to one side, leaving a single small section free at the temple or in front of one ear. Encourage that section to curl with a curling cream and let it spiral naturally, or wrap it around your finger to define the curl. This tendril becomes the focal point of the style — the detail that pulls everything together.
The asymmetry of one free tendril on one side (with the other side completely pinned) creates a deliberate imbalance that reads as artful rather than accidental.
10. French Twist Adapted for Curls — Side Tilted
The French twist is typically a center-back style, but shift it to one side and you get something entirely different. A side-tilted French twist on natural curly hair is dramatic and architectural — it looks like it took much longer than it did.
Gather your hair to one side. Fold the hair upward and inward, tucking the ends into the fold. The fold should sit vertically along one side of the head rather than at the center back. Secure with long bobby pins placed horizontally through the fold.
For curly hair, this style works best with hair that’s been stretched slightly — either blow-dried on low or banded overnight. A small amount of curl cream keeps the surface looking moisturized and defined rather than dry and fluffy. Let a few curls escape at the top of the twist for a relaxed finish.
11. Side Flower Bun
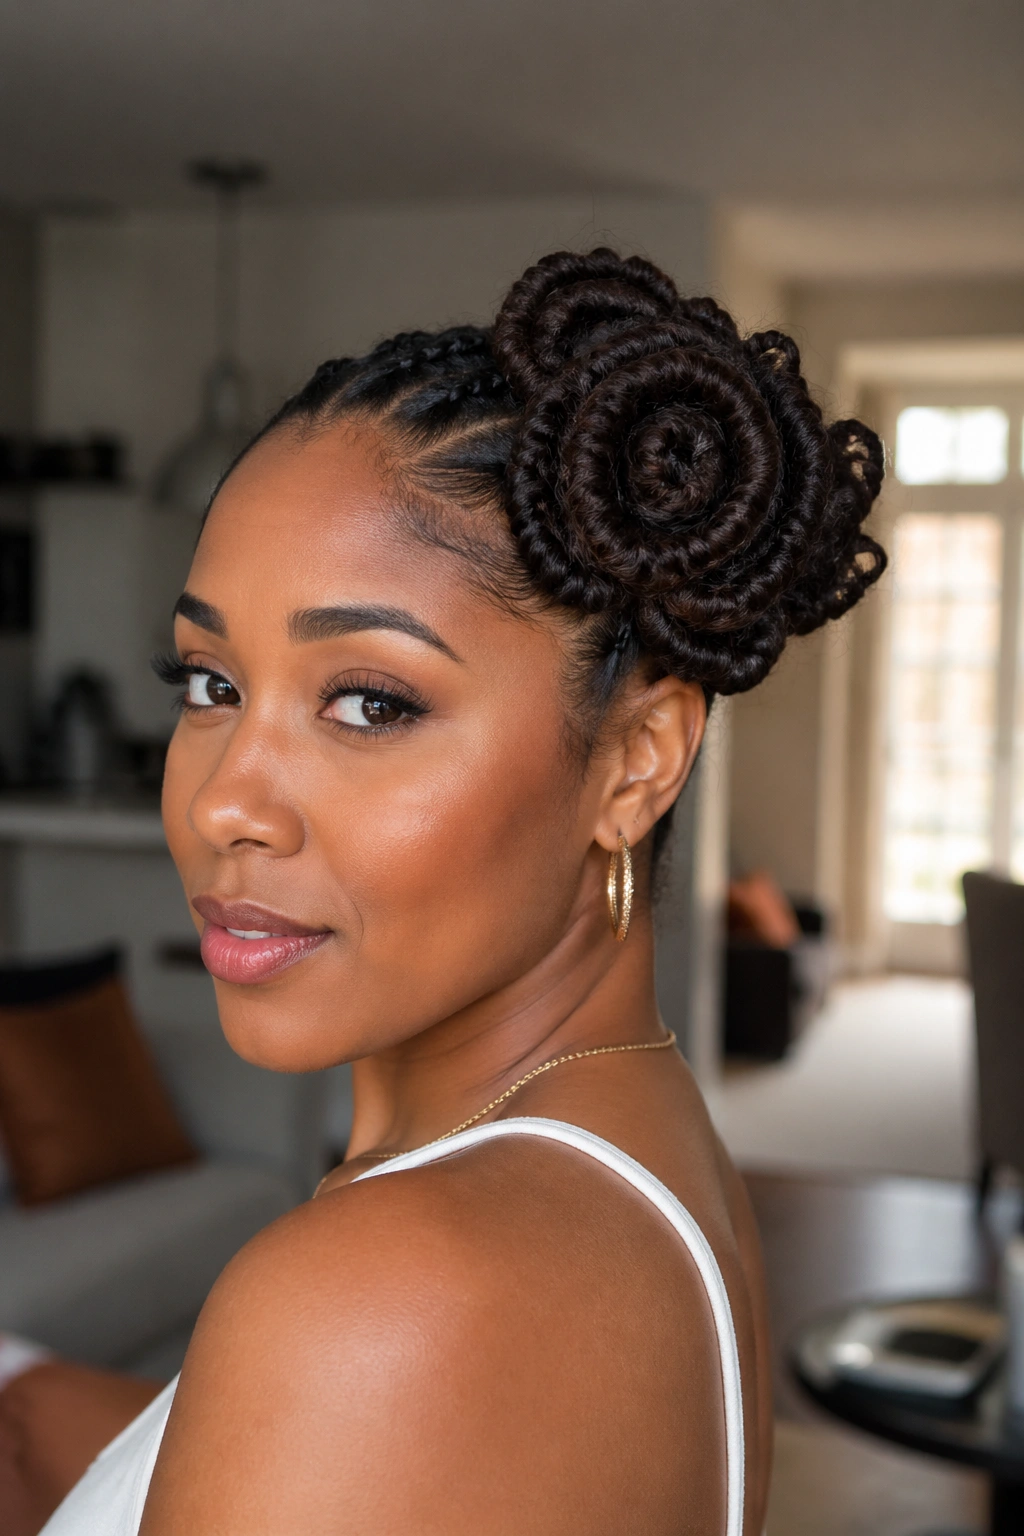
This one’s for the romantics. A flower bun is created by pinning individual sections of hair in a spiral pattern, with each section folding back on itself like a petal. Done on one side, it creates a floral shape that’s as beautiful up close as it is from across the room.
How to Get This Look
Divide your hair into six to eight sections. Working from the outside of where you want the bun to sit, take each section, twist it lightly, curl it into a loop, and pin the loop in place. Arrange the sections so they overlap slightly, like flower petals. The more sections you use, the more detailed the flower effect.
Tuck the ends of each section under the pinned loops so nothing sticks out. Finish with a light mist of hairspray to keep the shape intact. This style holds well overnight with a satin bonnet.
12. Low Side Updo With Knotted Sections
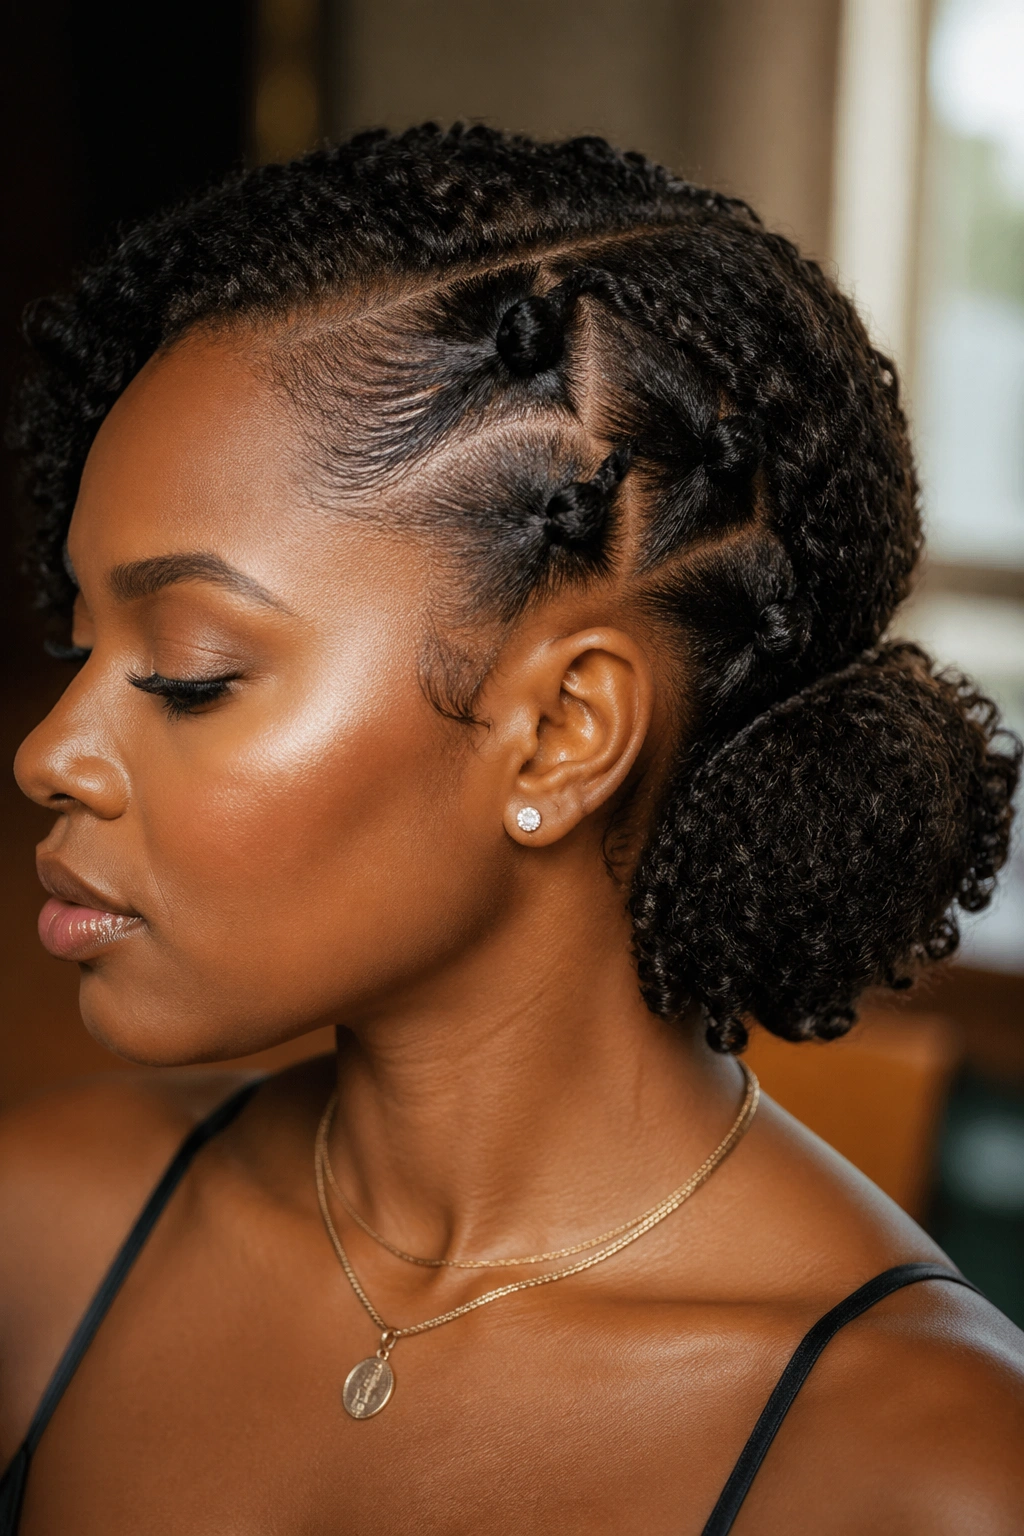
Knots add visual interest without requiring any braiding skill. This style takes several sections of hair, ties each into a simple knot, and pins them overlapping each other on one side of the head.
The texture of natural curls makes knots look especially beautiful — the coiled surface of each knotted section has a sculptural quality that flat, straight hair doesn’t achieve. Start at the nape and work your way up, stacking knots as you go.
Leave the ends of each section free or tuck them under for a cleaner look. The loose ends that stick out around the knotted section add to the artisanal, handcrafted feel of the style. It’s one of those looks that gets better the more casually it’s executed.
13. Side Swept Updo With Headband
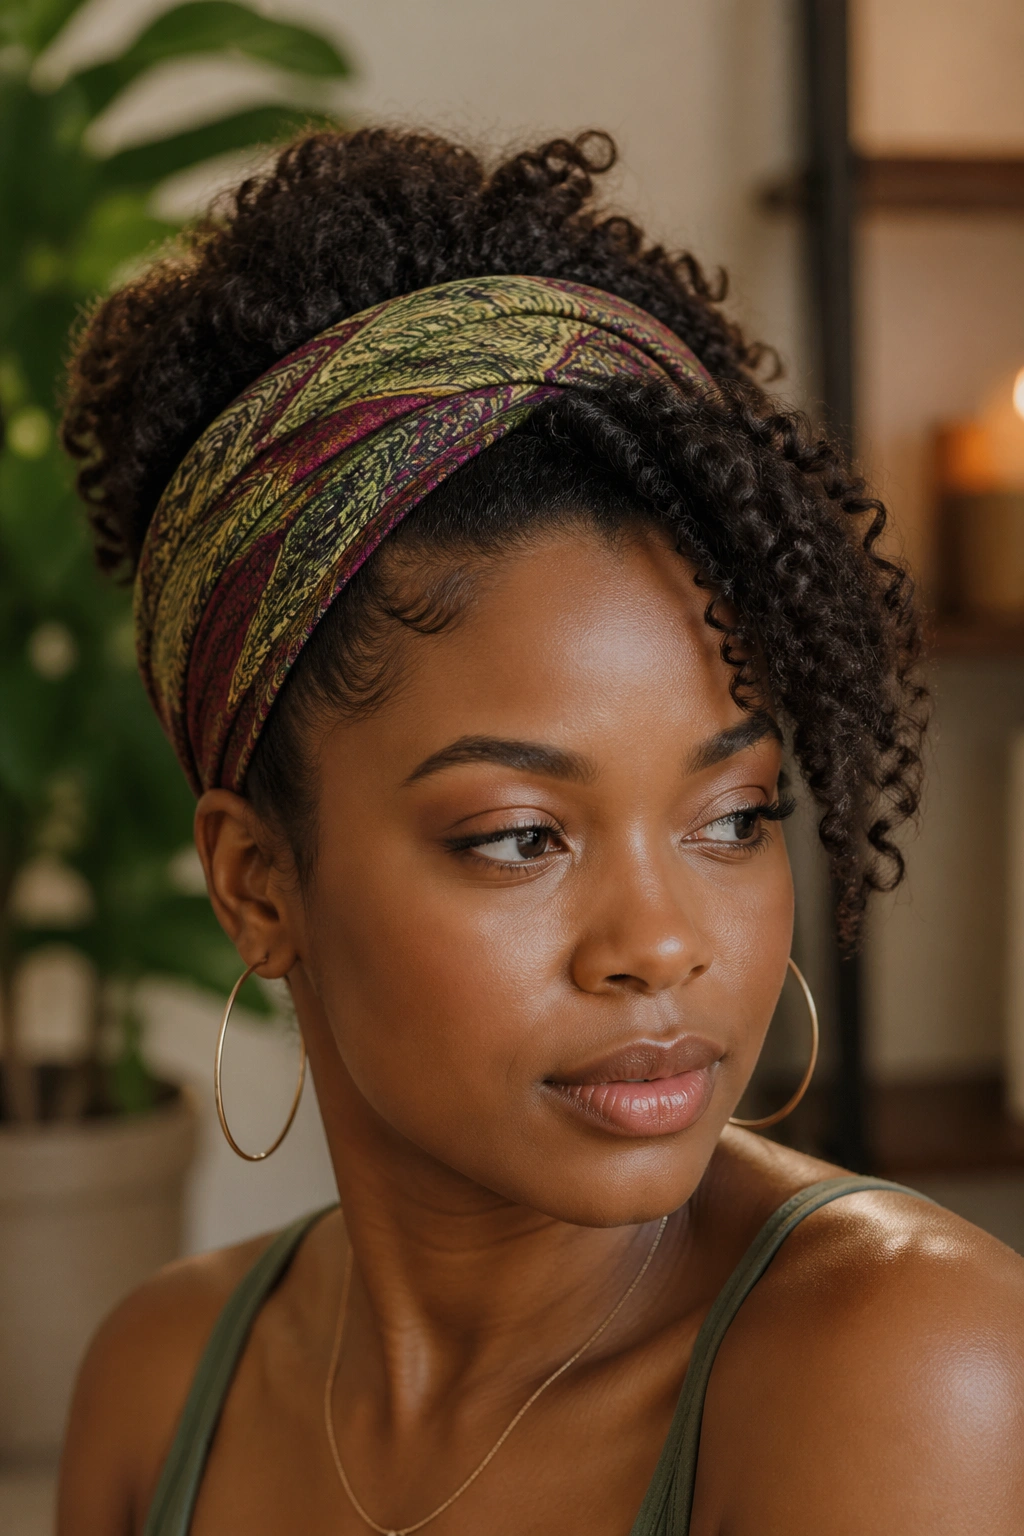
A wide fabric headband can completely transform a simple curly side updo. Place the headband across your head, then push sections of hair up into it, tucking and folding until all or most of your hair is secured behind the band.
The headband acts as both tool and accessory — it does the heavy lifting of keeping hair off the face and neck while adding color, pattern, or texture to the look. For natural hair, choose a wide, stretchy band that accommodates volume. A thin band will just slide off.
Position the style so more hair sits on one side of the headband than the other. This small adjustment creates the asymmetry that makes a headband updo look like a deliberate curly side updo rather than just hair stuffed into a band.
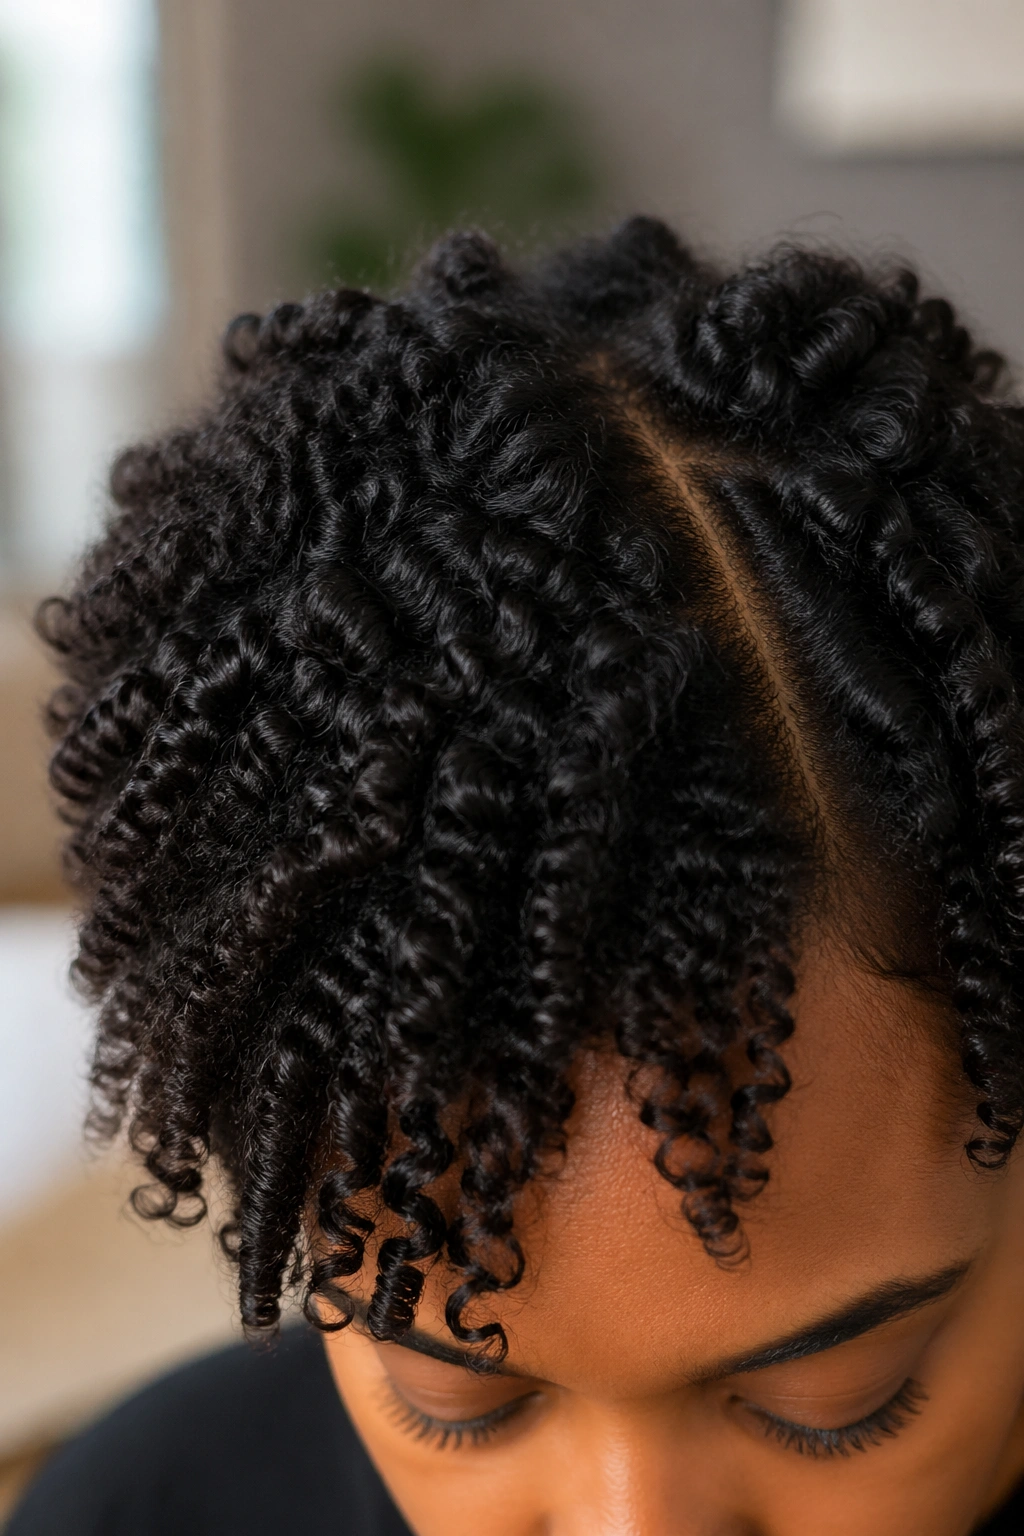
14. Side Pin-Up With Defined Curl Clusters
Sometimes the best style is the one that showcases your natural curl pattern exactly as it grows. This updo keeps the texture front and center — pin the back and sides up on one side, but spend real time defining each curl cluster before you start pinning.
Use a good curl defining cream and a denman brush (or your fingers) to smooth each curl cluster, working from root to tip. Let the hair dry completely — this is not optional. Once dry, gently gather sections from the back and sides and pin them at one side of the nape, keeping the curl clusters intact and visible.
The result looks like you carefully placed each curl — because in a way, you did.
15. Curly Side Updo With Gold Cuffs and Pins
Accessories aren’t just decoration — they’re architecture. Gold cuffs placed along a rope twist or braid, and gold pins scattered through a curly updo, create a kind of jewelry-for-hair effect that’s stunning against dark hair.
This style is more about how you accessorize than a specific shape. Take any of the basic curly side updo structures and layer in gold elements. A rope twist with gold cuffs every inch or so. A pinned bun with three or four gold pins placed at different angles. Edge control smoothed with a gold edge brush to make even the baby hairs feel intentional.
The accessories do the heavy lifting here. The curls are the backdrop, and the gold brings everything forward.
16. Side Updo With Scarf Wrap
A silk or satin scarf wrapped into a curly side updo is one of the most versatile and culturally rich styling choices in the natural hair playbook. The scarf can function as a headband, a tie, a bow, or a full wrap — and all of those approaches work in a side updo context.
The most popular version: gather your curls to one side and secure loosely. Take a long silk scarf, fold it into a wide band, and wrap it around your head from the nape forward. Tie it at the side (the same side as your updo) with a bow or a simple knot. The ends of the scarf can hang loose among your curls for a bohemian finish.
This style is quick, it protects the edges, and it adds serious color and pattern to the look.
17. Cornrow Base Side Updo
Starting with cornrows as the foundation of a side updo creates incredible structure and longevity. Cornrow two or three rows along the nape and sides, then pin the free curl section into an updo on one side.
The cornrowed base keeps everything flat and secure at the roots, which means the updo on top doesn’t need as much product or as many pins to stay in place. This style works well on 4b and 4c hair, where all-curly updos can be hard to pin down — literally.
Leave a generous curl section free above the cornrows and let it cascade to one side. The transition from flat cornrows to free curls is a beautiful contrast of textures.
18. Curly Waterfall Side Updo

A waterfall effect in a curly side updo means the pinned section appears to “pour” out into free curls on one side — like water cascading over a ledge. It’s achieved by pinning the hair at intervals along the side of the head, releasing a small section between each pin, so the curls seem to flow continuously downward.
Start at the top of one side and pin a small section flat against the head. Move down an inch or two, gather a bit more hair, and pin again — releasing a few curls from between. Repeat this cascade motion down to the nape. The released curls at each interval create the waterfall effect.
This style photographs beautifully from the side and is one of the more creative curly side updo options on this list.
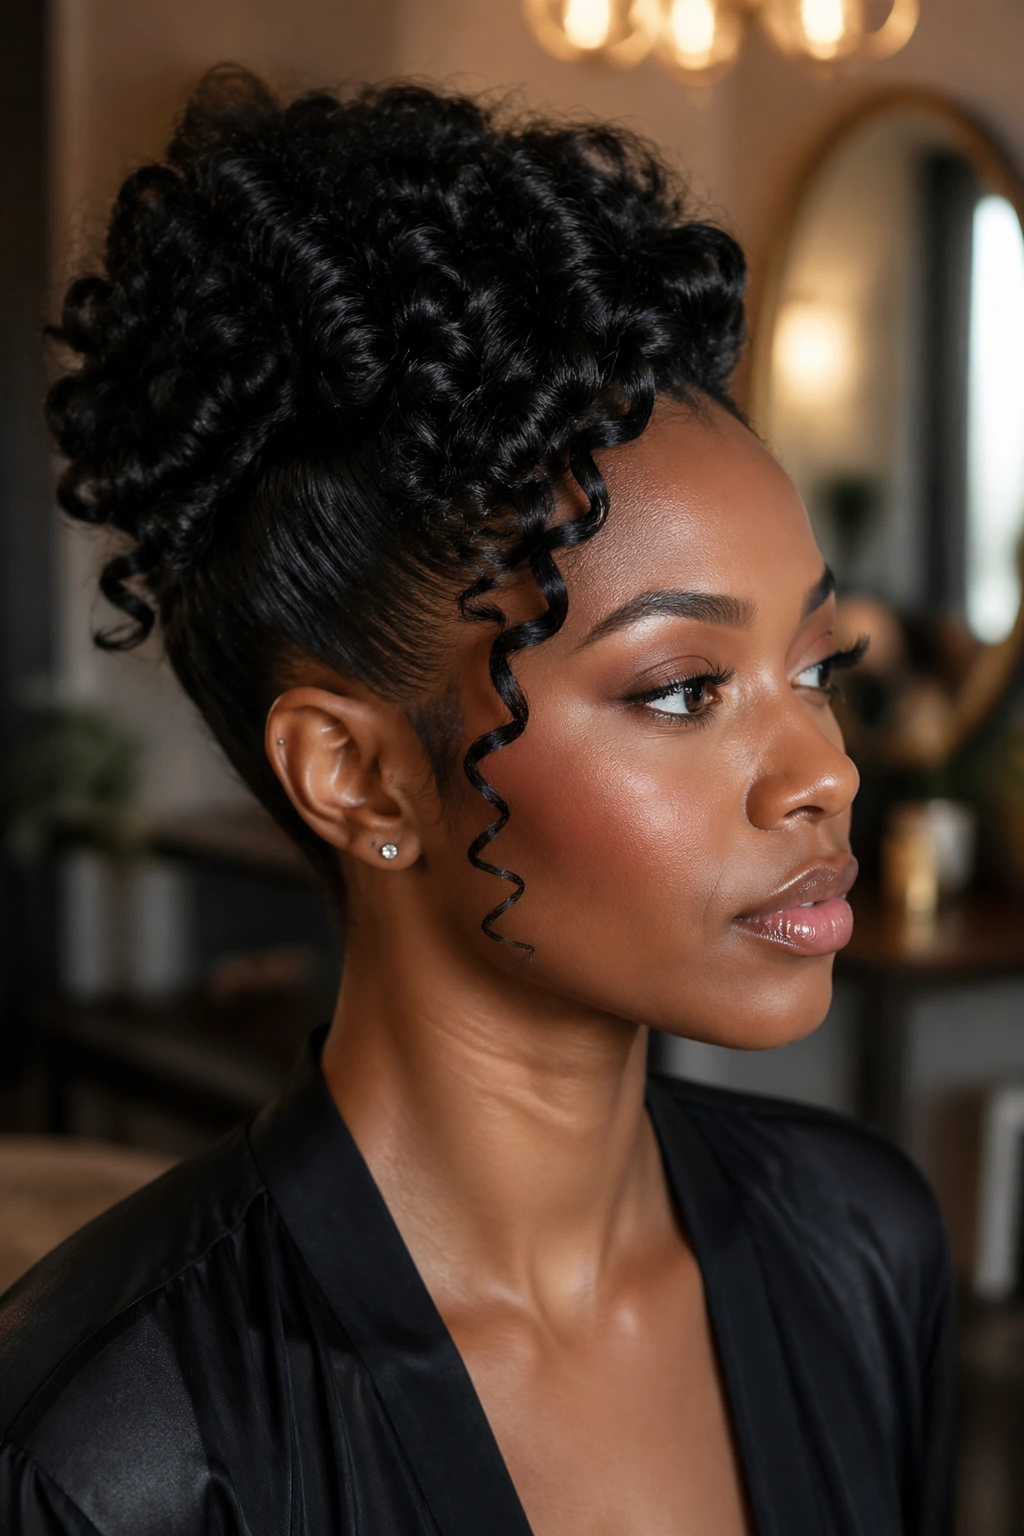
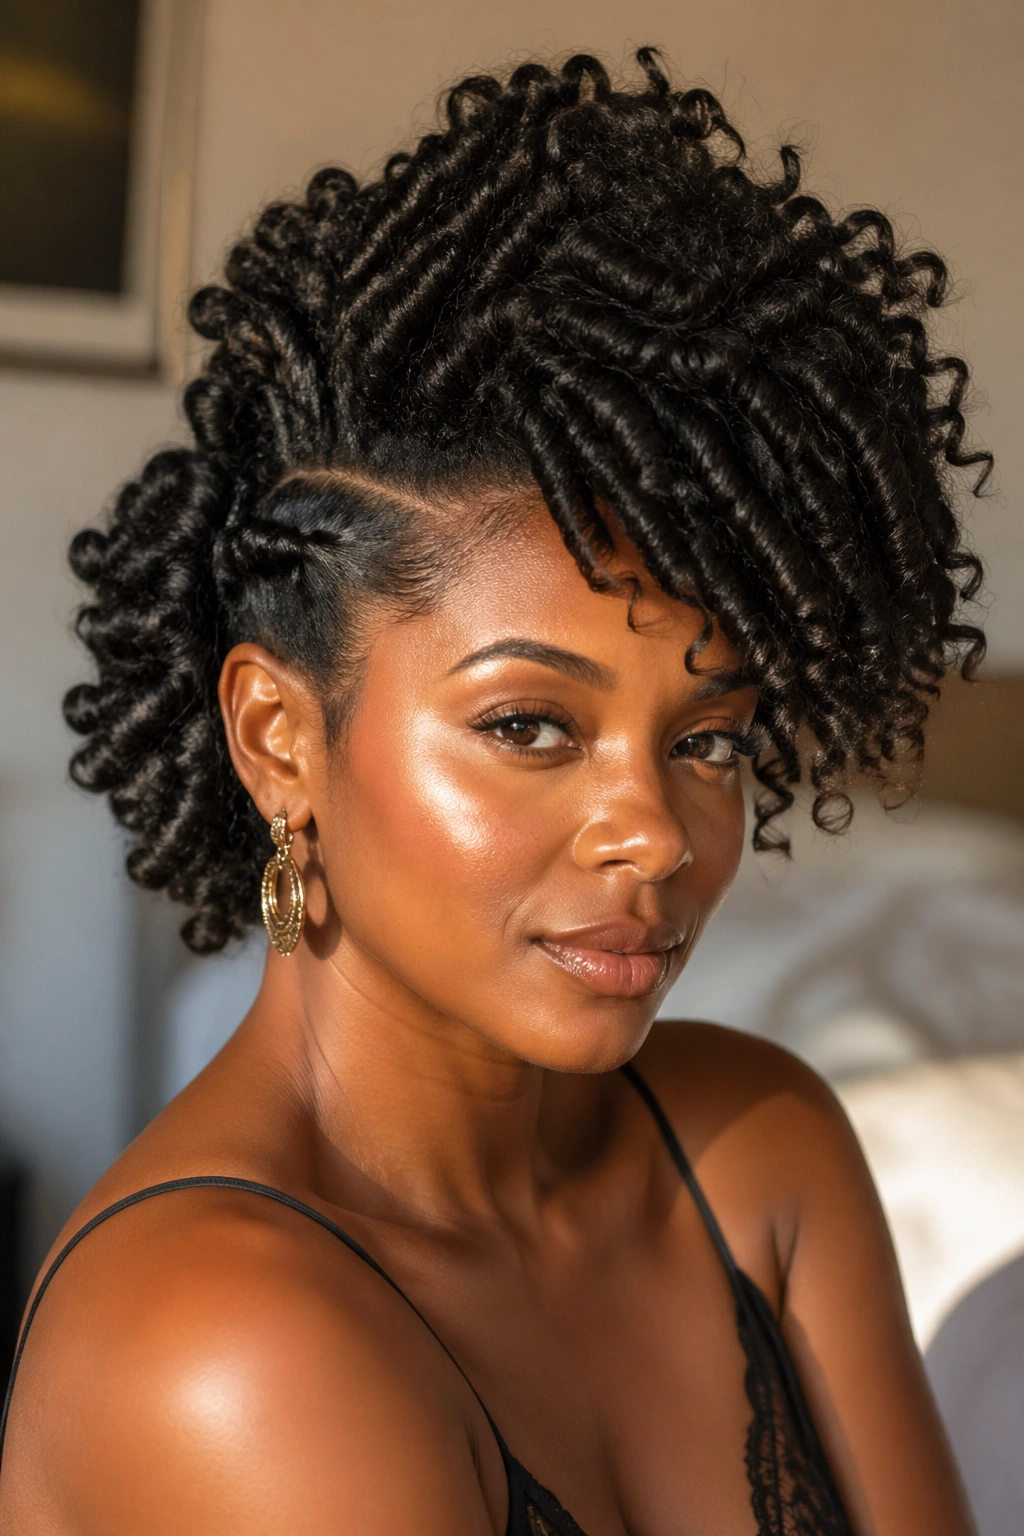
19. High Side Updo With Towering Curls
Everything about this style is big. A high side updo positions the hair at the top of the head on one side, creating a towering stack of curls that adds serious height. It’s a style that commands attention — best for special occasions, performances, or any day you want to walk into a room first.
Pull all your hair to one side and upward, gathering it at the top of your head but tilted toward one temple. Secure the base tightly with a fabric elastic. The curl cluster at the top should be voluminous, well-defined, and full of life. Fan it out and separate the clusters gently to maximize the size.
The height is the whole point. Don’t fight it — celebrate it.
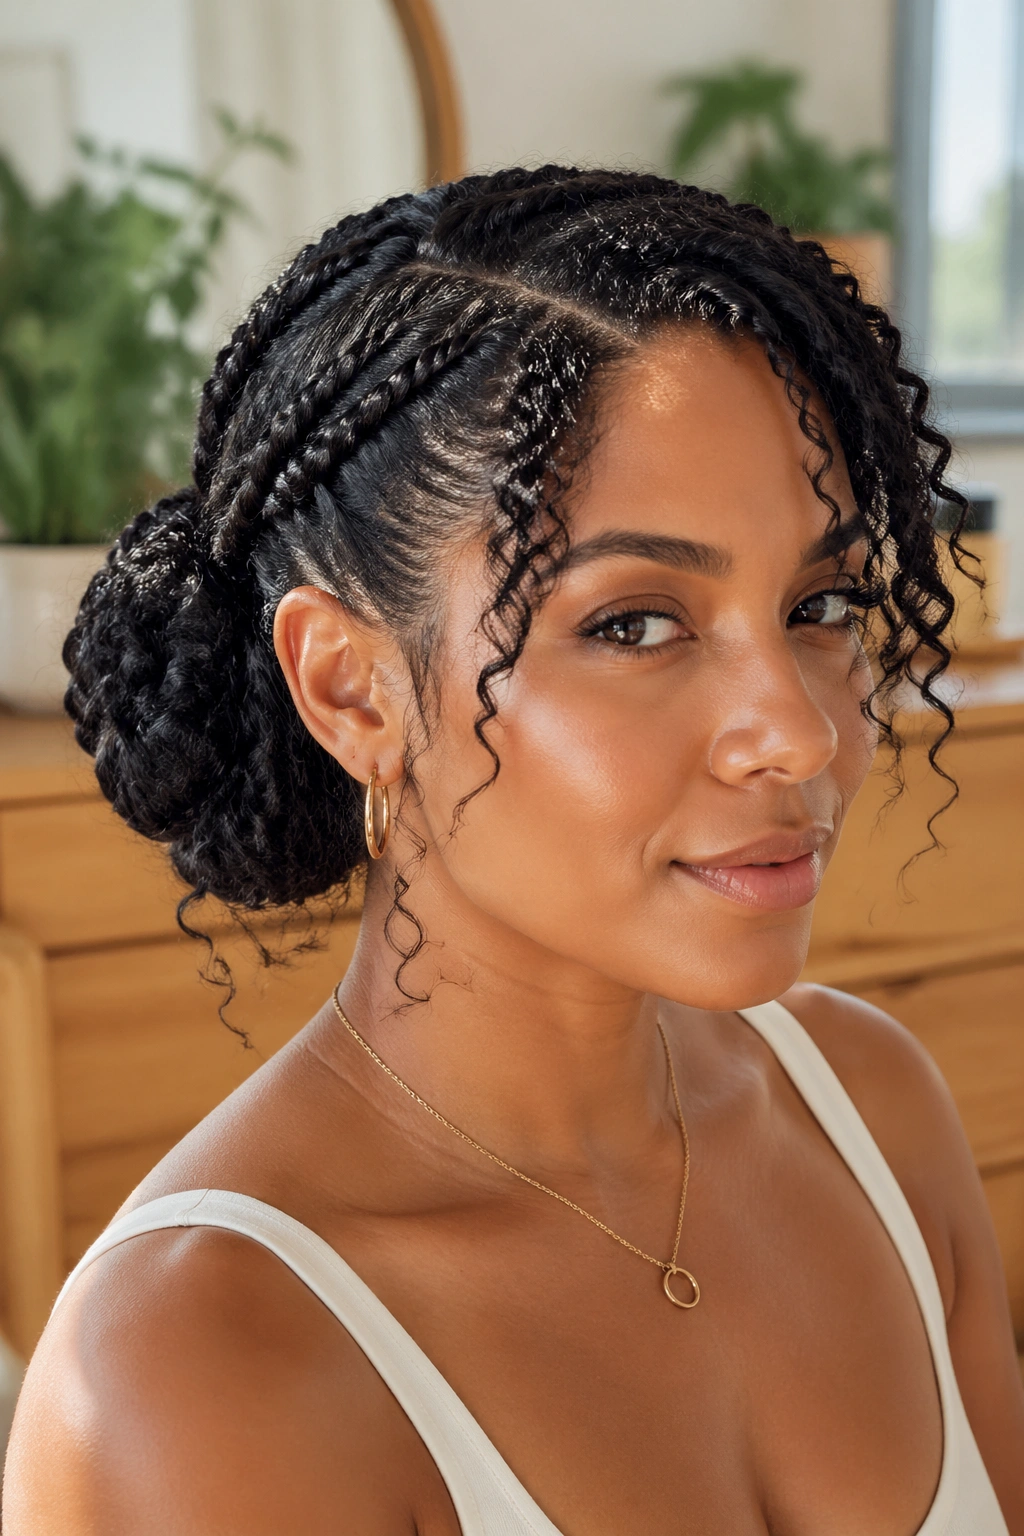
20. Flat Twist Into Side Bun
Two flat twists running parallel from the front of the head, merging into a single bun at the nape on one side — that’s the structure of this style. It’s clean, graphic, and works beautifully on both short and long natural hair.
The flat twists lie flat against the scalp (hence the name) and create two defined lines of texture before blending into the curly bun. The bun can be smooth and tight or loose and piecey, depending on the look you want. Either way, the contrast between the flat twists and the curly bun creates visual interest that a single-texture style doesn’t have.
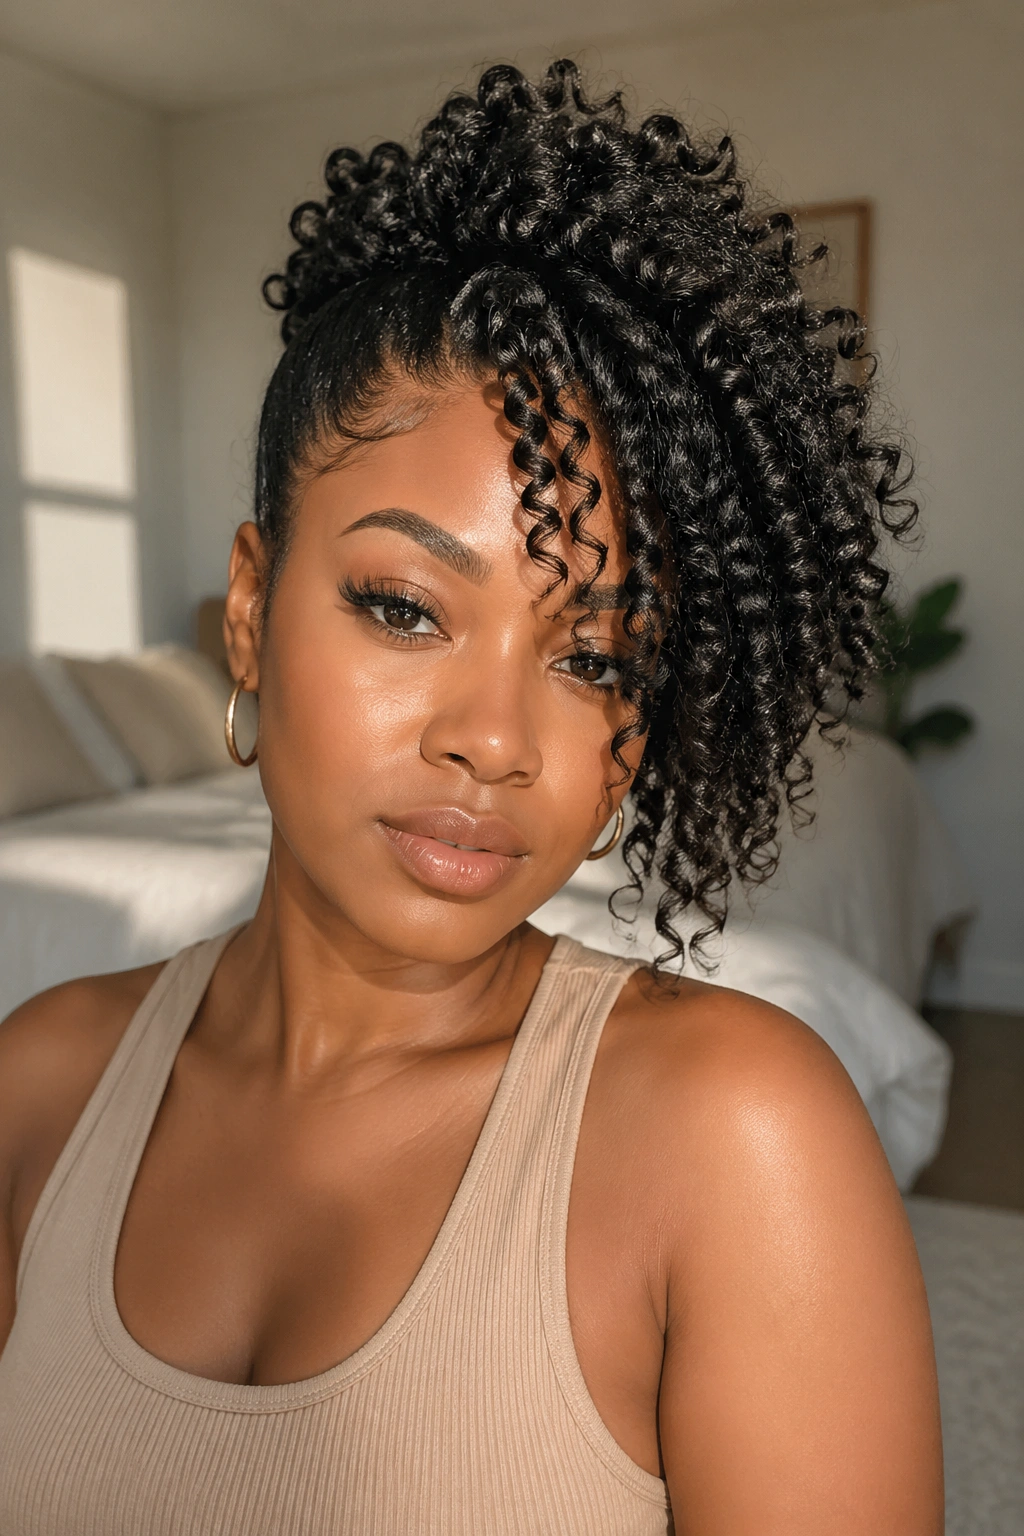
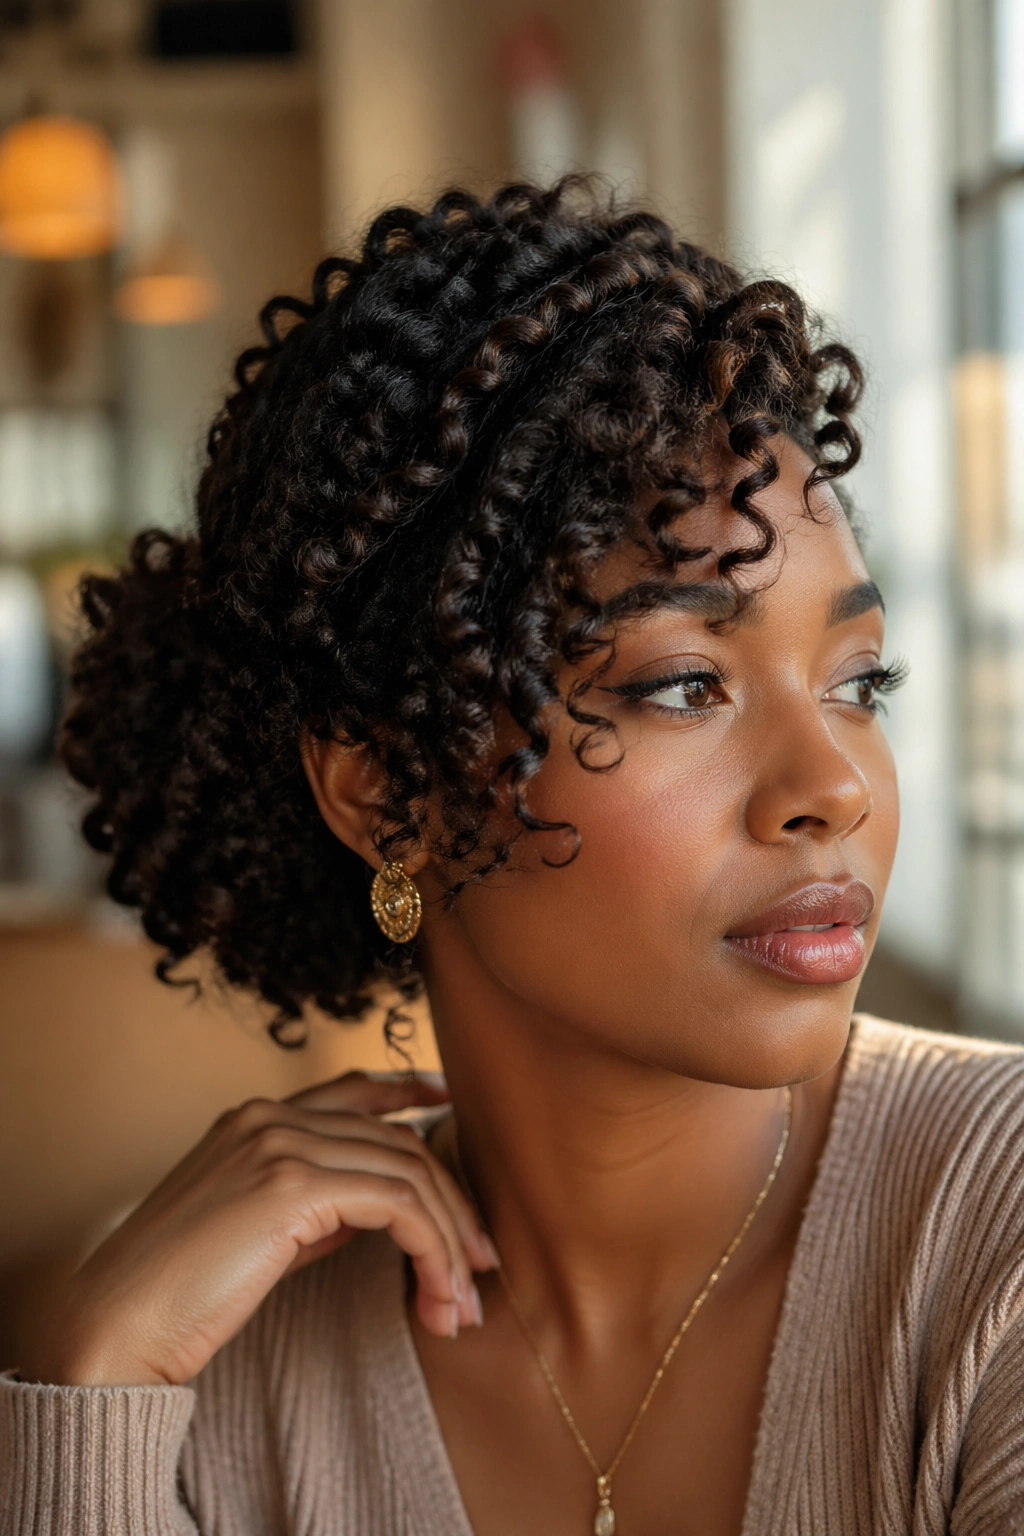
21. Pinned Side Puff
The puff is one of the most iconic natural hair styles — full, round, and unapologetic. When you pin it to one side, it transforms into something more intentional and styled.
Gather your hair to one side as if making a high side ponytail. Instead of pulling it all the way through, leave the curl cluster loose and full — a puff rather than a ponytail. Pin the base on one side with bobby pins placed underneath the elastic.
The puff should be big. Separate the curl clusters gently from the inside to maximize volume. Smooth your edges with edge control and an edge brush. That contrast — tight edges, wild puff — is everything.
22. Side Updo With Braided Halo
A halo braid that sweeps to one side combines braiding and curls in the most dramatic possible way. Start with a single cornrow or Dutch braid at the front hairline, working it across the top of the head from one temple to the other. Let it angle slightly downward on the second side, ending behind the ear. Pin the end of the braid against the nape, and let your remaining curls cascade from where the braid releases them.
How to Get This Look
The braid acts as a crown that sits across the entire top of the head, creating a defined structure above the free curls below. On natural hair, this style looks regal — the texture of the braid and the texture of the curls complement each other beautifully. Finish with a light-hold spray and a few pearl pins placed along the braid line.
This is the kind of curly side updo that people notice from across the room.
Maintenance Tips for Curly Side Updos
A well-executed curly side updo can last several days with the right care. The goal is preserving the style without disturbing the curl pattern or the pins.
At night, cover with a large satin or silk bonnet that doesn’t press the style flat. If your bonnet is too small for the volume of the updo, use a satin-lined cap or a silk scarf tied loosely over the style. Avoid cotton — it dries out the hair and disrupts the curl pattern.
In the morning, spritz lightly with water or a diluted curl refresher and gently scrunch to revive any curls that flattened overnight. Don’t add too much product — a single product added to day-two hair tends to create buildup that weighs the curls down.
Check your bobby pins and re-pin anything that has slipped. Add a fresh mist of light-hold hairspray for day-two confidence.
Common Mistakes to Avoid
Pinning wet hair is the number one mistake. Let your hair dry at least 80% before pinning into any updo. Wet hair pinned up leads to mildew and a style that collapses as it dries.
Over-pinning is the second biggest issue. More pins don’t always mean better hold — and too many pins create unnecessary tension on the scalp, which can cause breakage along the hairline. Use the minimum number of pins needed to secure the style, and crisscross each pair for better grip.
Using the wrong product for your texture is also common. Heavy butters on fine curls weigh them down and prevent the style from holding. Light creams and gels on 4c hair don’t provide enough hold. Match your product weight to your texture.
Finally — don’t neglect your edges. Edges are the frame of any updo. Five minutes spent smoothing your baby hairs with a good edge control product transforms a style from casual to polished.
Choosing the Right Curly Side Updo for Your Occasion
The occasion matters as much as the style itself. A high, towering side puff works for a performance or party — but might feel like too much for a job interview. A simple swept-side chignon reads as professional without being stiff.
For weddings and formal events, opt for the more structured styles: the French twist, the flower bun, the braided halo. These hold their shape for hours and photograph beautifully.
For casual outings, the looser interpretations work better: the wrapped scarf, the cornrow base updo, the side ponytail. These feel intentional without being fussy.
For everyday wear, stick to styles you can execute in under twenty minutes — the half-pinned side updo, the deep side part with pinned crown, or the classic swept-side low bun. These become go-to looks once you’ve practiced them a few times.
Whatever you choose, the best curly side updo is always the one that works with your natural texture — not against it.