Type 3 curls have a way of looking happiest when they’re allowed to breathe. Pin them too tight, and they start to look stiff. Leave them completely loose, and the shape can swell into frizz before you’ve even had your second cup of coffee.
With type 3 curly hair, the real trick is not forcing the curl pattern into one single mold. You’re usually working with springy spirals, visible ringlets, and enough natural volume to make a style look alive the moment it’s arranged with a little intention. A 3A head of curls will behave differently from dense 3C ringlets, but both respond well to shapes that respect their bounce instead of flattening it.
The styles that make the biggest difference are often the simple ones. A side part can shift weight in a flattering way. A high puff can turn a rough root area into a style on purpose. A twist-out can stretch the curl enough to change the silhouette without stealing its texture. Small changes. Big payoff.
So I keep coming back to the same idea: work with the curl, not against it. The styles below do exactly that, and they’re the ones I reach for when I want type 3 curls to look intentional, not over-managed.
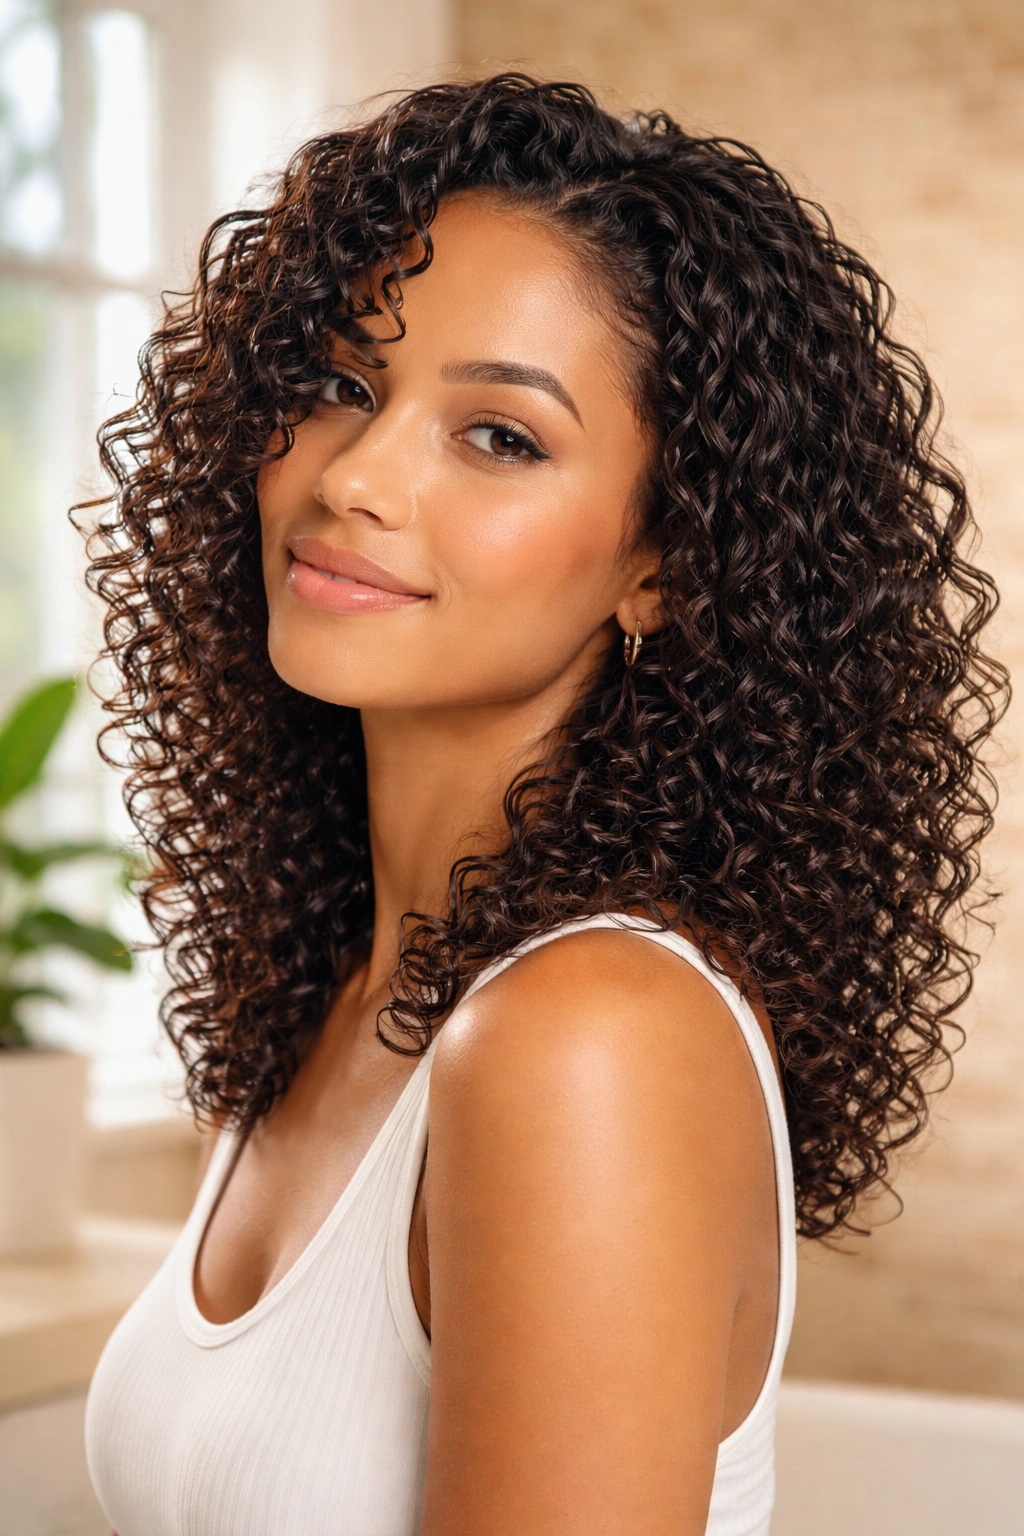
1. The Wash-and-Go That Flatters Type 3 Curly Hair
A good wash-and-go is still the cleanest answer when your curls already know what they want to do. It gives type 3 hair room to form clumps, keeps the pattern visible, and lets the hair look like itself instead of a softened version of itself.
Why It Works
Type 3 curls usually like water, a light leave-in, and enough hold to keep the spiral from expanding into fuzz as it dries. That’s the whole game. If the hair is fine, a lighter cream and a stronger gel usually win. If the hair is dense, you may need a touch more product on the ends so the curl doesn’t puff out halfway down the shaft.
The best wash-and-go starts on soaking wet hair. Section it into four to six parts, smooth product down the strand, then scrunch upward once the curls are coated. After that, stop touching it. Seriously. The more you keep separating curls while they dry, the more you break the clumps that give the style its shape.
- Use a leave-in conditioner first if your curls feel thirsty.
- Follow with a gel that dries with a soft cast.
- Diffuse on low or medium-low if you want faster drying.
- Break the cast only after the hair is fully dry.
My take: This is the style that shows whether your product mix is helping or fighting your curl pattern.
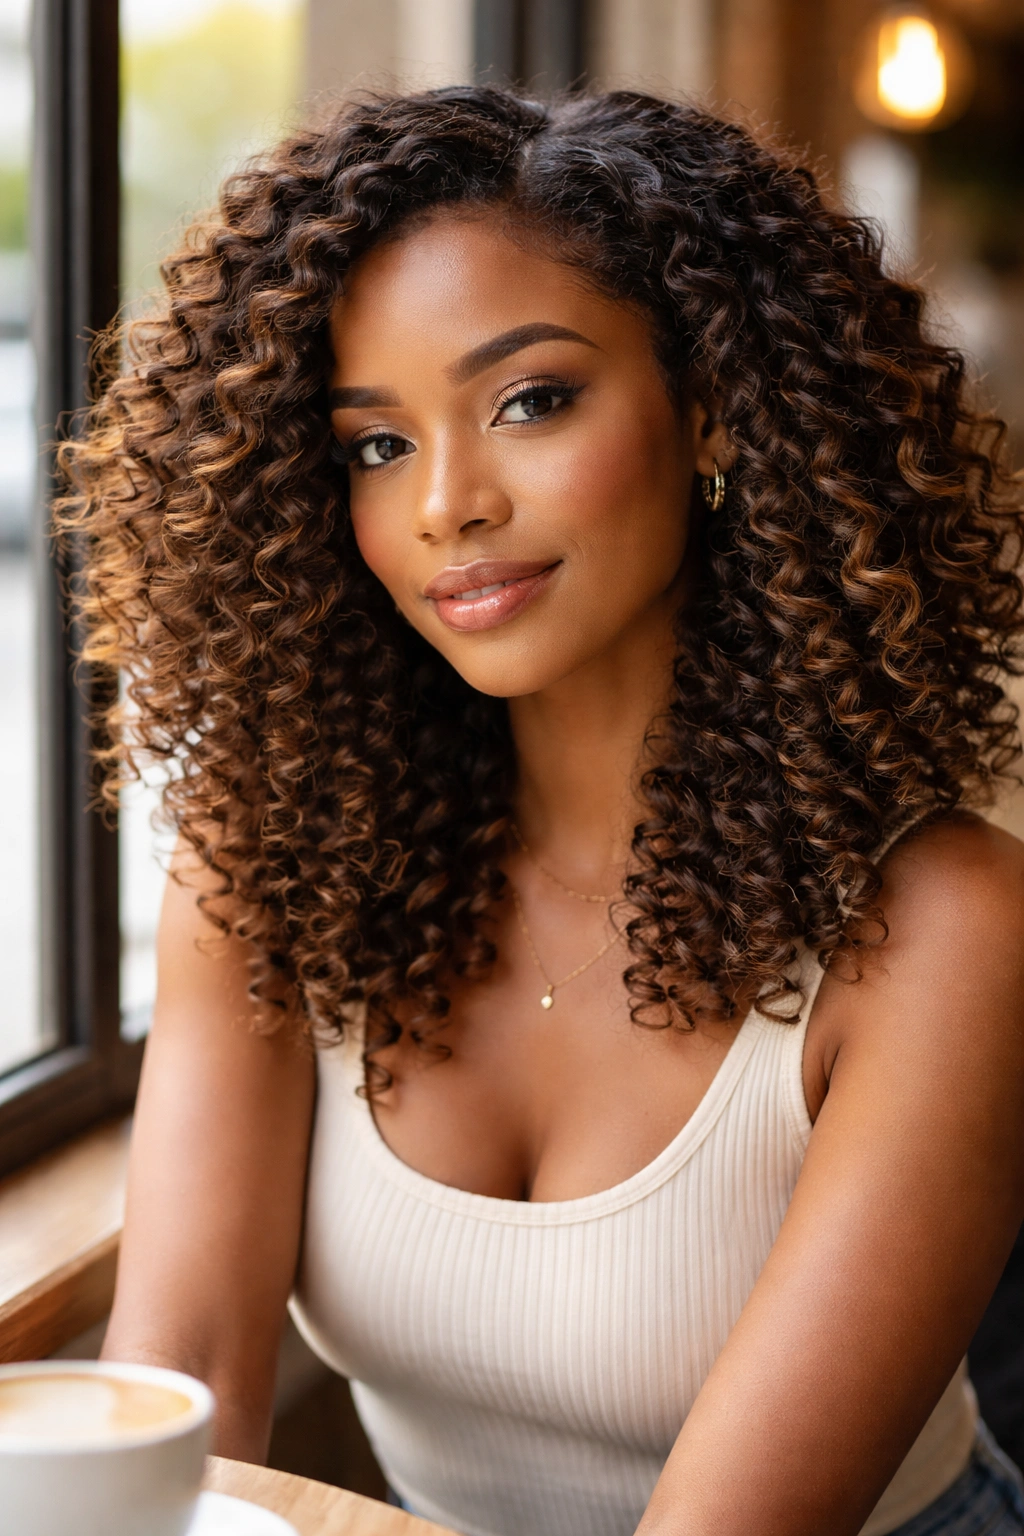
2. The Deep Side Part That Opens Up the Face

A deep side part can make type 3 curls look fuller without adding a single extra product. That’s why it’s one of the easiest styling tricks to keep in your pocket.
The part changes the way the hair falls, which changes the whole mood. More curls land on one side, the root lift looks bigger, and the front of the style gets a little drama without feeling fussy. On a round face, that angled line can sharpen the look. On a longer face, it can soften the length and keep the curls from hanging too straight down.
Use a tail comb on damp hair and draw the part from the arch of one eyebrow toward the crown. Then clip the smaller side back for ten minutes while the roots set in the new direction. That tiny bit of restraint matters. If you create the part after the hair is dry, the curls usually push back in the old shape and the line looks messy instead of deliberate.
3. The Half-Up Half-Down Style That Keeps the Curl Pattern Visible
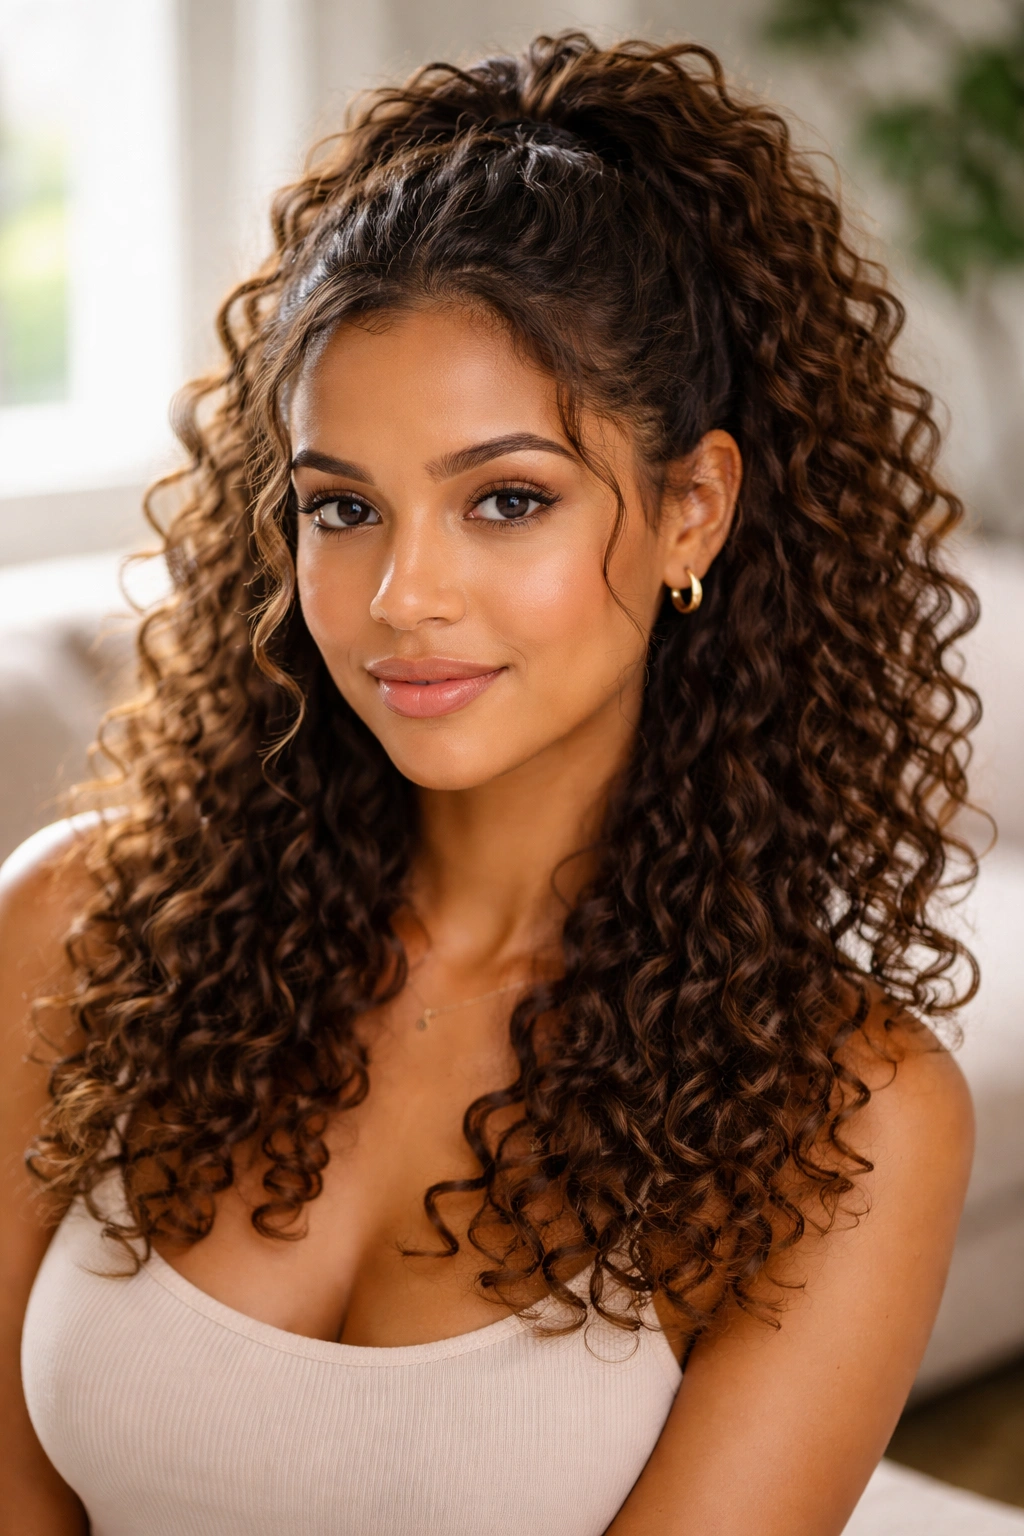
This is the style I reach for when the top layer has gone a little flat but the ends still look excellent. The half-up half-down shape gives you control where you need it and lets the rest of the curls keep doing their thing.
It works especially well on type 3 hair that has a mix of curl sizes. The top can look smoother, while the lower layers stay full and springy. That contrast is part of the appeal. You’re not pretending the curls are identical from root to tip, which is often where people go wrong with curly styling in the first place.
Gather the top section from temple to temple, then tie it with a satin scrunchie or a small claw clip. Leave two or three face-framing curls out if you want the style to feel softer. If your hair is shoulder-length or longer, keep the top section loose enough that the crown doesn’t flatten into a hard ridge. A little lift is nice. A tight pull-back is not.
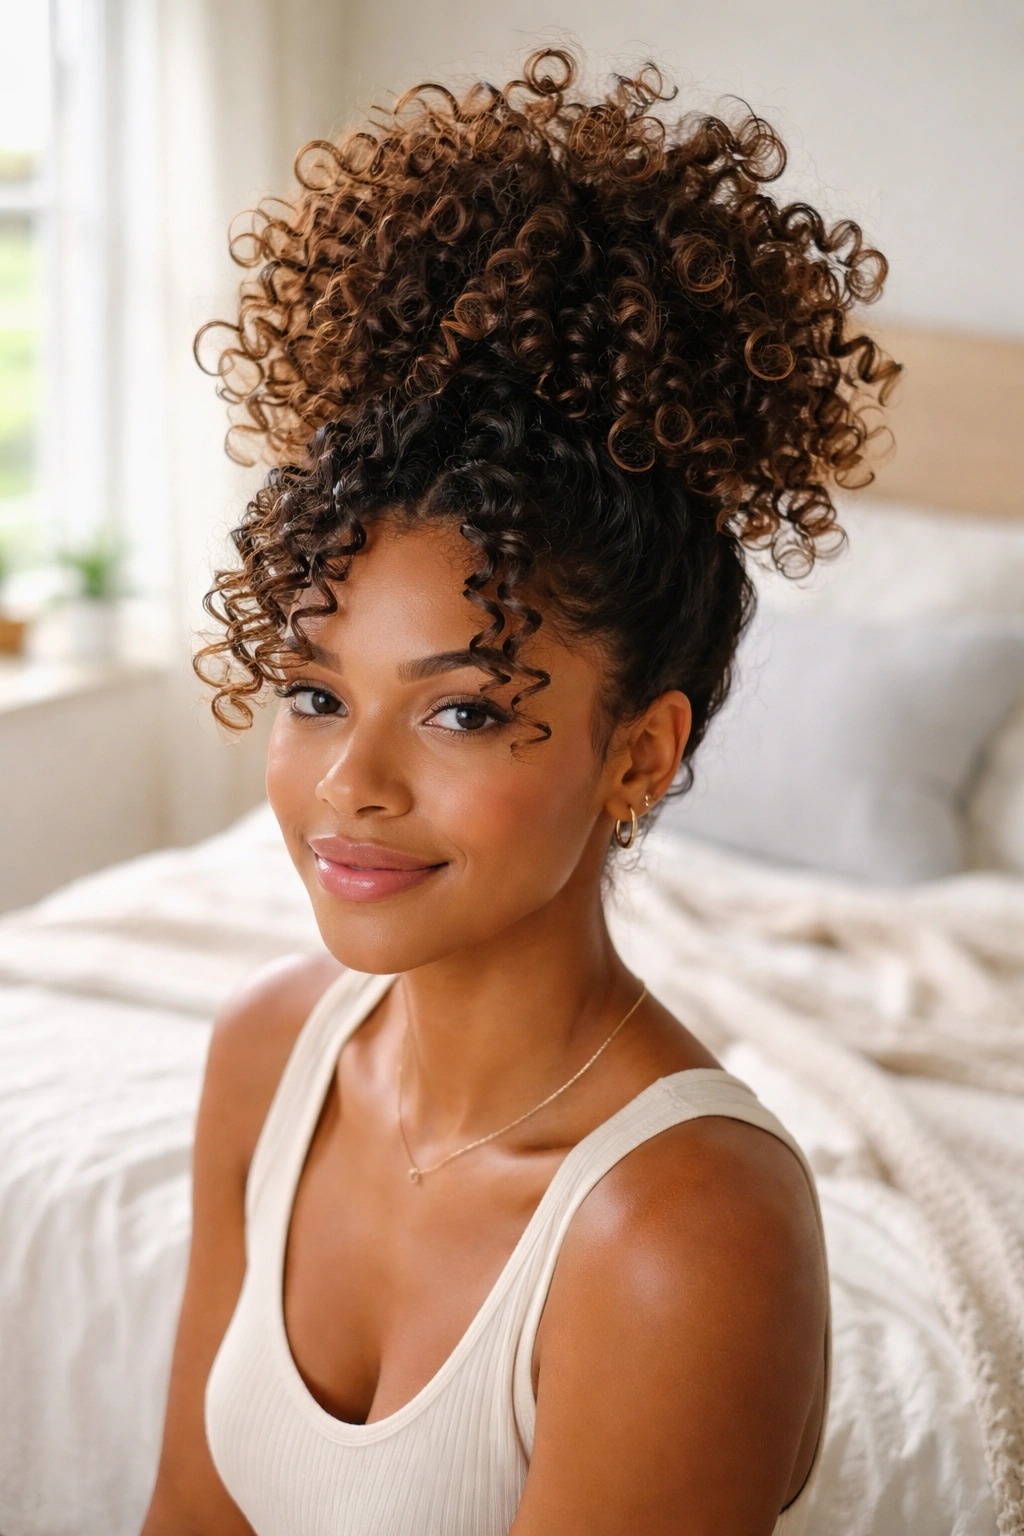
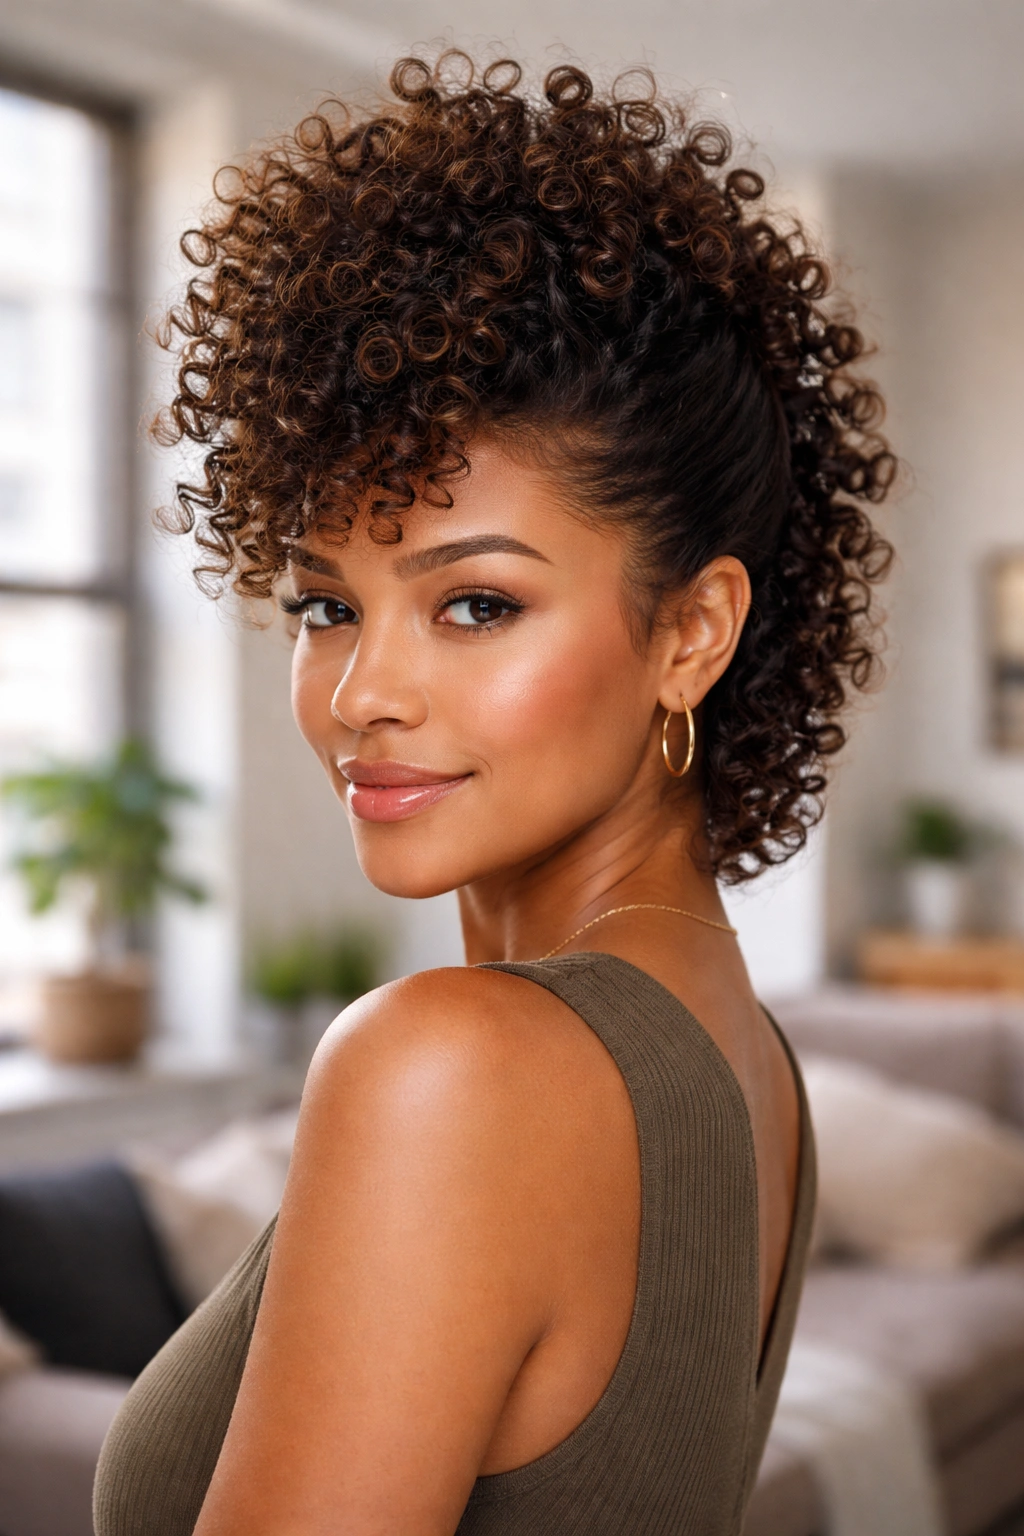
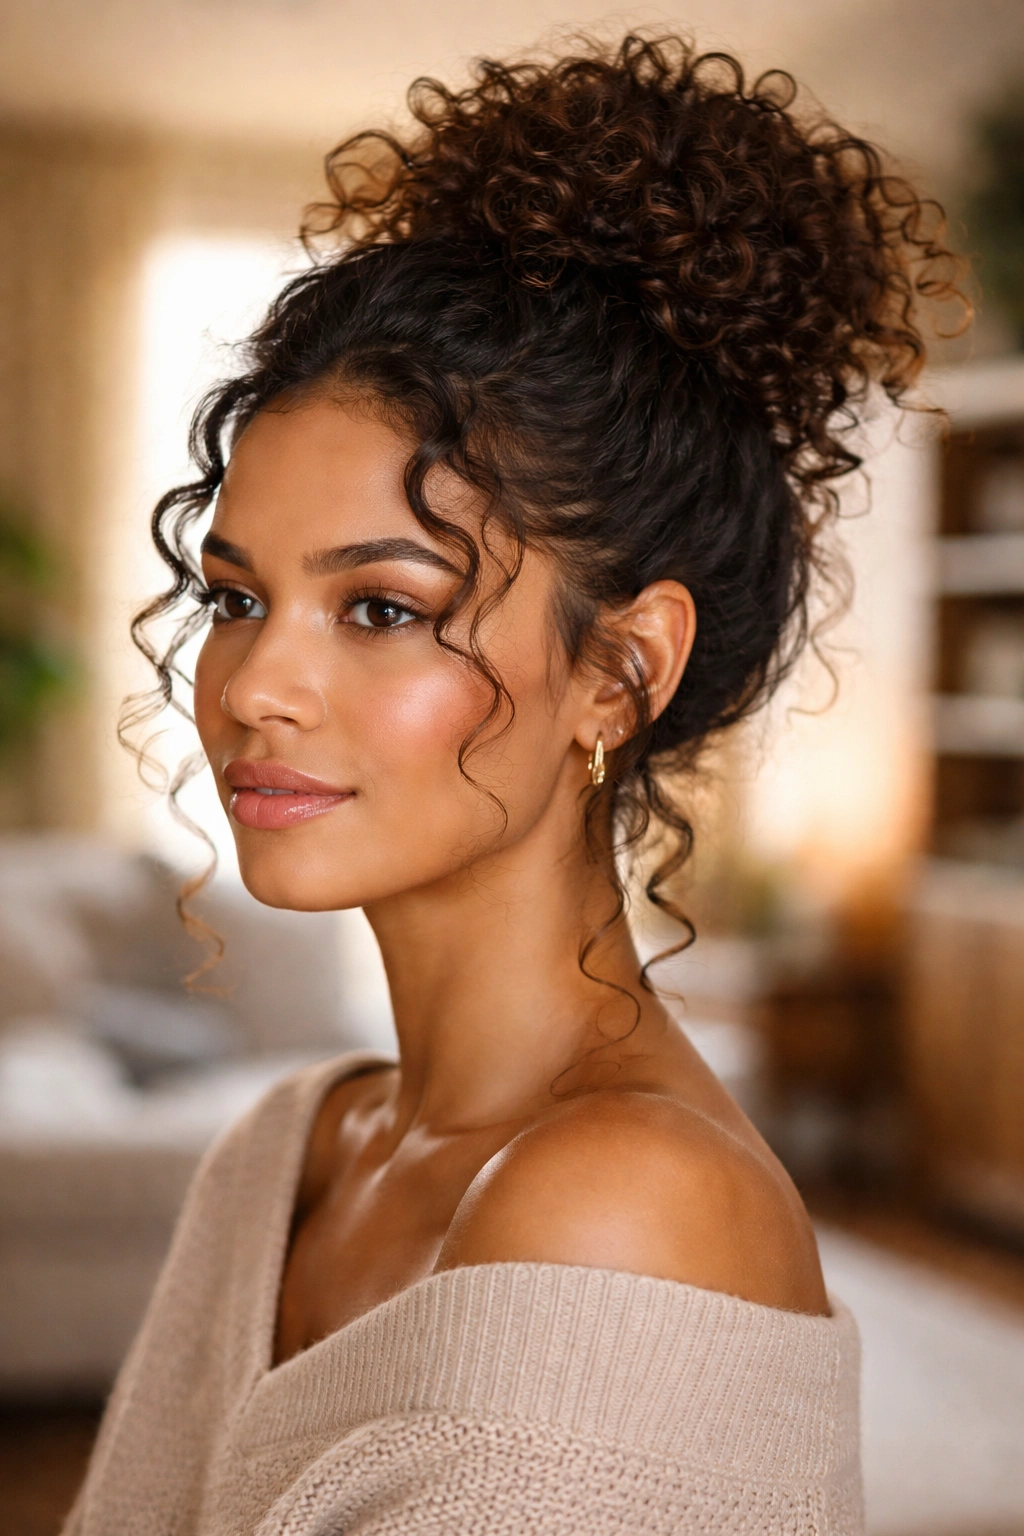
4. The High Puff That Gives Type 3 Curly Hair Instant Shape
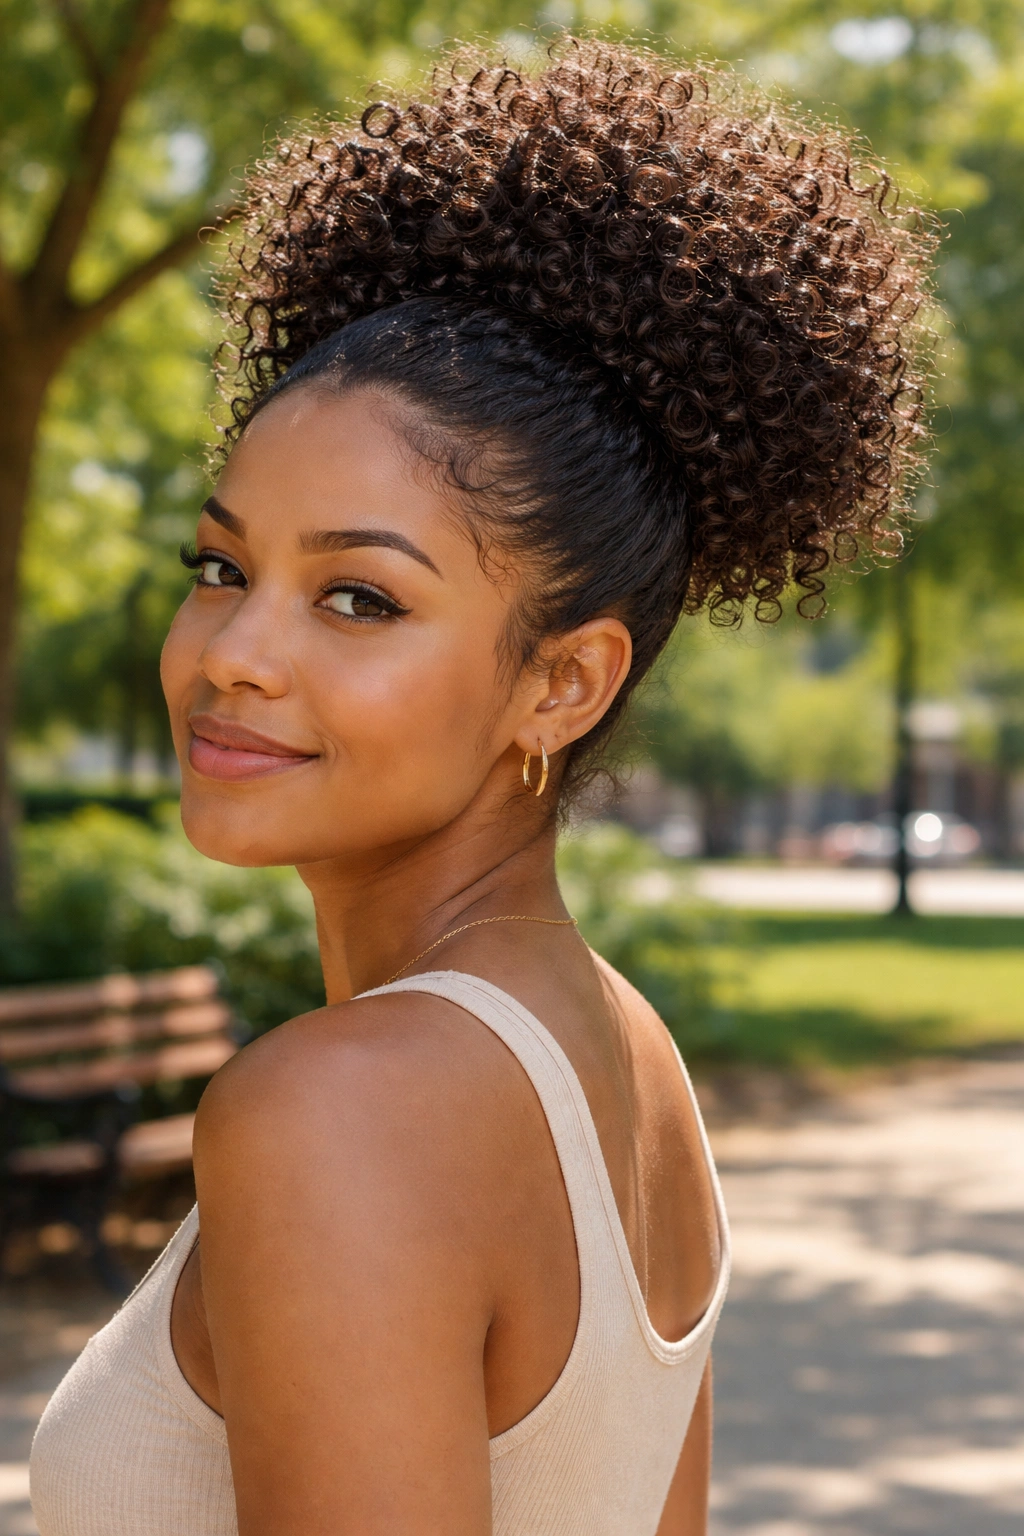
The high puff is the closest thing type 3 curls have to instant structure. It pulls the eye upward, shows off the texture, and makes even a simple outfit look considered.
Getting the Base Right
The base matters more than the puff itself. Smooth the sides with a light gel, a little water, and a soft brush, then gather the hair high on the crown with a stretchy band or puff cuff. The band should hold the hair, not squeeze it into a headache. If you can feel it digging in after five minutes, it’s too tight.
A lot of people overdo the edge control here. You do not need a shellacked hairline. You need a clean line, a little shine, and enough softness that the style still looks like curls, not a sculpture.
- Place the puff where the crown naturally lifts.
- Keep the sides sleek, not wet-looking.
- Fluff the puff from the outside with your fingers.
- Leave a few curls loose at the nape if the hair is too short for one full puff.
Best for: second-day curls, hot rooms, and the kind of mornings when you want your hair out of your face fast.
5. Pineapple Curls That Keep the Volume Up
Need your curls to survive sleep and still look decent the next morning? The pineapple is the move. It’s simple, and that’s why it works.
Pull the curls loosely to the top of the head with a satin scrunchie, then let the ends spill forward or to the side. The goal is to keep the curl clumps stacked on top of each other instead of pressed flat against the pillow. That’s where the shape comes from. Not magic. Just less friction.
How to Wear It Beyond Bedtime
During the day, the pineapple can become a soft casual style if you leave a few curls out around the hairline and don’t cinch the ponytail too hard. It looks especially nice on medium-length type 3 hair, where the length gives the style some height without making it unstable. If your hair is very long, you may want to split the ponytail into two loose sections so the weight doesn’t drag the top down.
A pineapple is one of those styles that sounds too basic until you see it on curls that still have definition and bounce at 4 p.m.
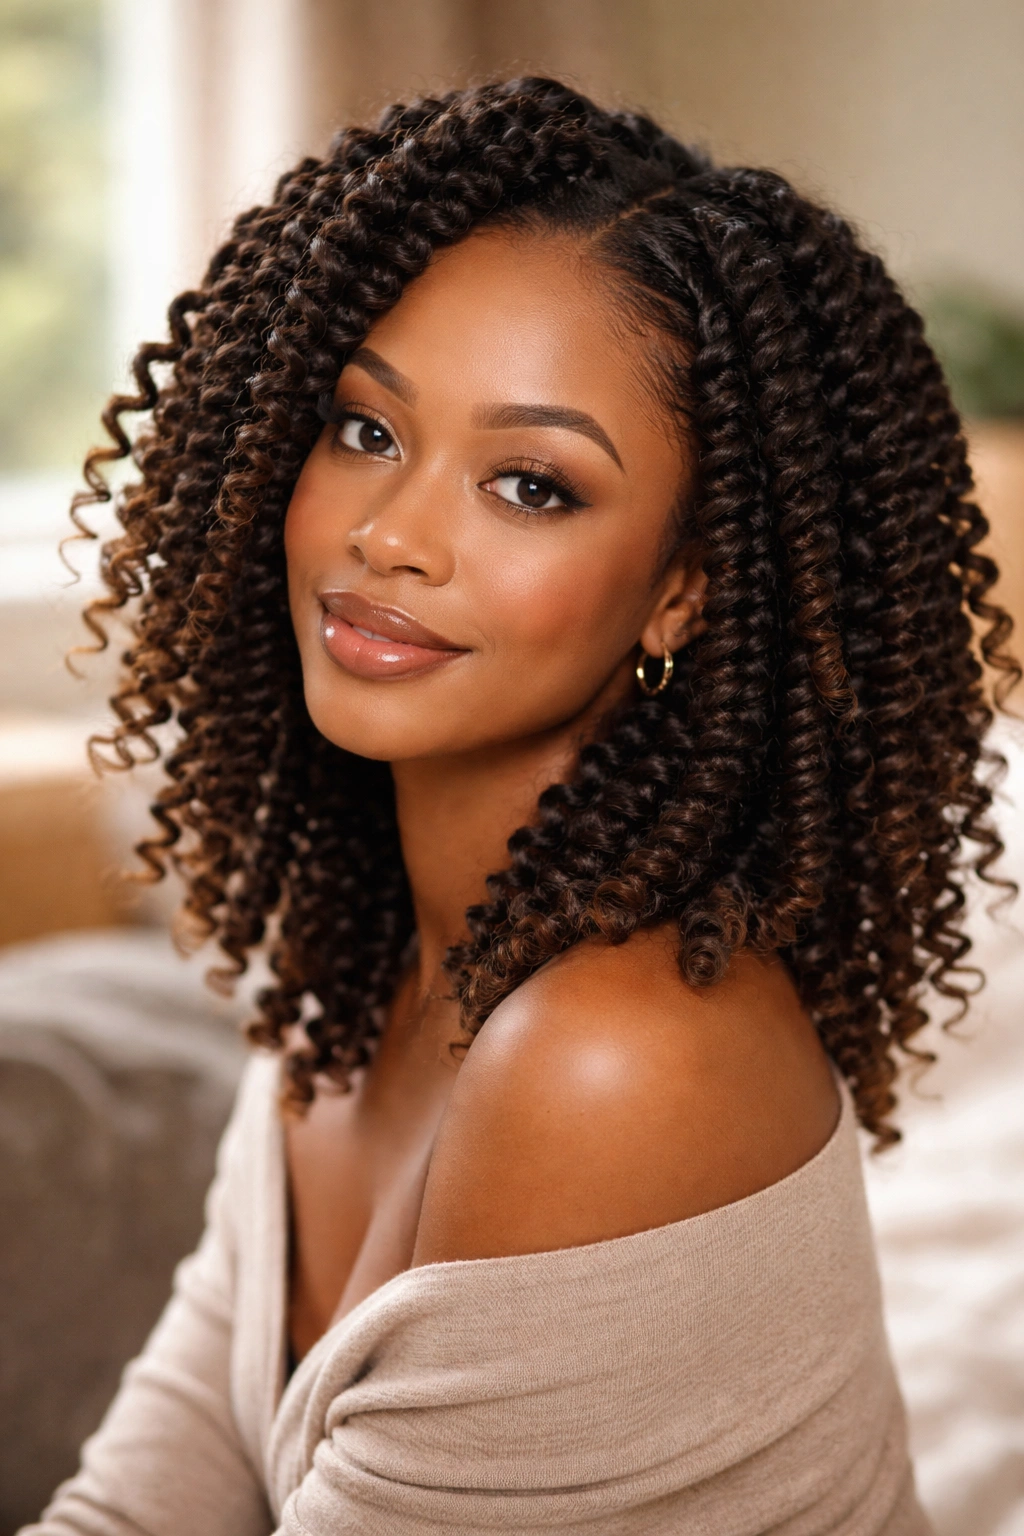
6. Two-Strand Twists That Stretch and Define

If your hair gets too big too fast, two-strand twists can be a sanity saver. They calm the volume down, stretch the length a bit, and give you a style that can be worn as-is or taken down later for another look.
The neat thing about twists is that they don’t ask for perfect curl consistency. You can twist 3A hair next to 3C hair and still end up with a shape that makes sense. Section the hair into eight to twelve parts, depending on thickness, and work with small pieces so the twist stays tidy from root to end. A dime-size amount of leave-in and a pea-size bit of gel per section is usually enough. More than that, and the twists can stay damp forever.
- Twist on damp, not dripping, hair.
- Keep the section tension even from root to tip.
- Seal the ends with a tiny bit of cream.
- Sleep in a satin bonnet if you want the parts to stay crisp.
7. The Twist-Out With Soft, Springy Ends
A twist-out is what you wear when you want stretch, definition, and a little less width than your bare curls give you. It sits in that nice middle ground between polished and fluffy.
Unlike a braid-out, a twist-out usually gives you a more rounded, rope-like curl pattern. The result feels springier, less zigzagged, and a little more lifted at the ends. That can be a good thing if your hair has density and you want to show it off without letting it explode.
How to Get the Most From It
Let the twists dry all the way before unraveling. Not mostly dry. Fully dry. If the inside of the twist is still cool to the touch, wait longer. Then coat your fingers with a drop or two of oil and separate each twist gently, starting at the ends. Pulling too hard creates frizz at the roots, and that frizz tends to travel.
A twist-out likes restraint at the start and a little fluff at the finish. That balance is what makes the style last.
8. The Braid-Out That Gives Curl Pattern a Softer Shape
Braids create a different texture from twists, and that difference matters. A braid-out gives type 3 curls a softer wave with more grip and a slightly wider finish.
It’s a smart pick for hair that likes definition but not a ton of separation. You’ll usually see the best result on 3B and 3C curls, especially if the hair has enough length for the braids to hang naturally. Six to ten braids are enough for medium-density hair. Smaller braids give you more definition; larger ones give you a chunkier, looser finish.
Use a cream with medium hold or a lightweight foam before braiding. If the product is too heavy, the braids can dry with a sticky feel that never quite shakes out. If the product is too light, the pattern may vanish by noon. That narrow middle is where braid-outs live.
One thing I like about braid-outs is the way they make the hair look fuller without making every strand fight for attention.
9. The Curly Bob That Shapes Type 3 Curly Hair Around the Jawline
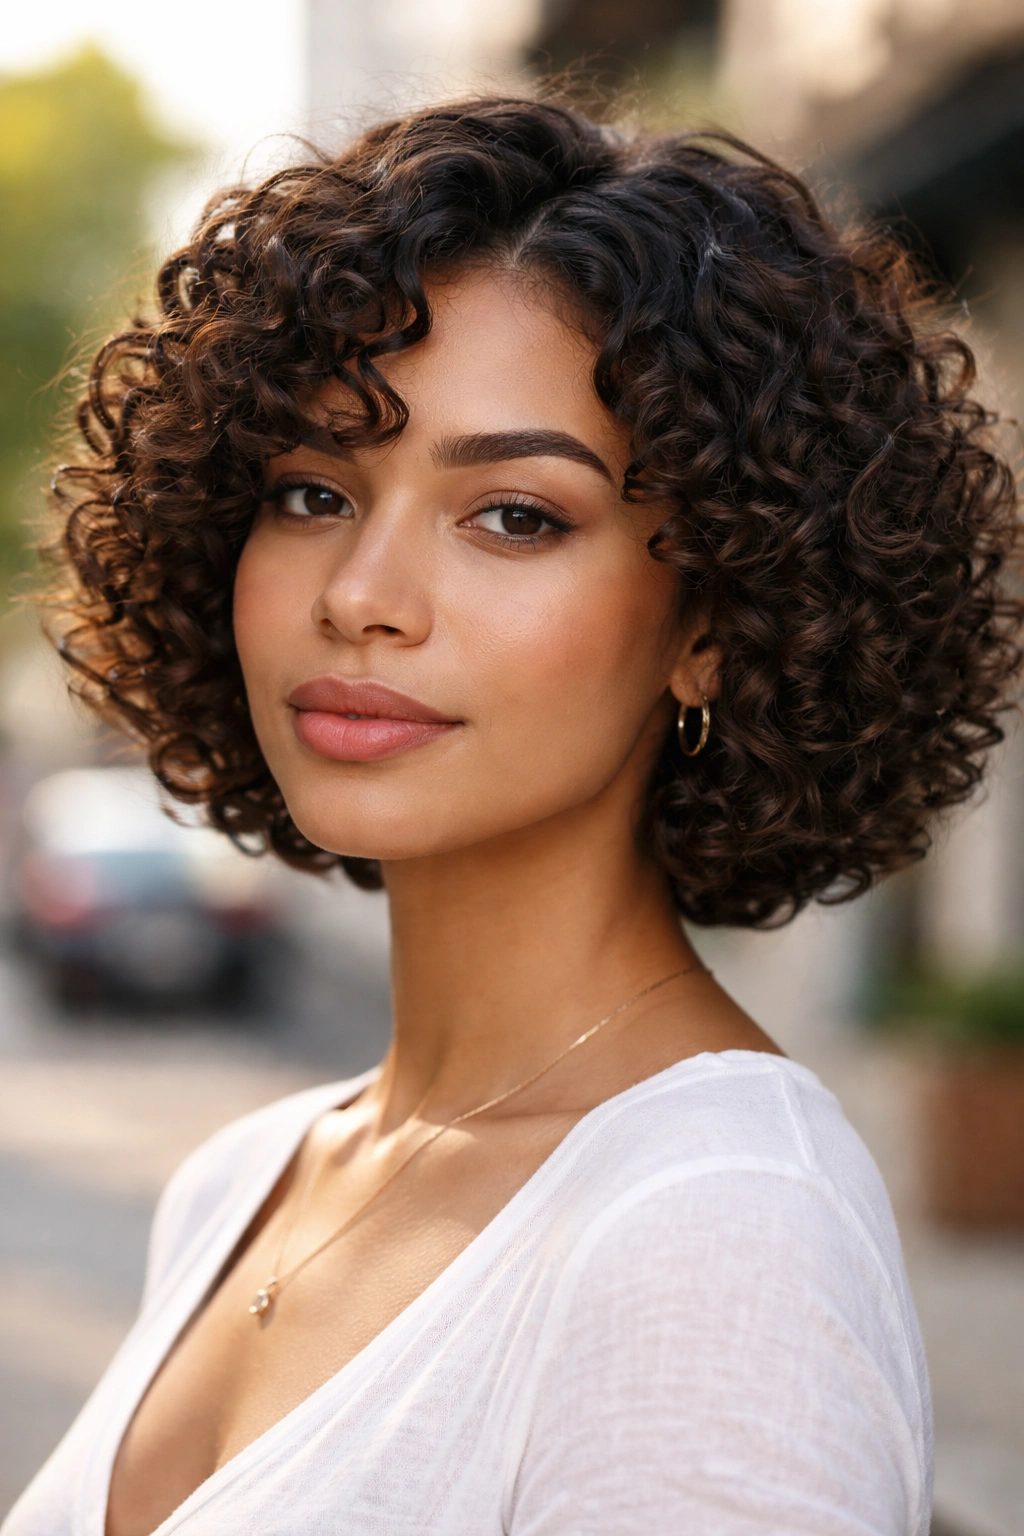
A curly bob sits right where the jawline and cheekbones matter most. That’s why it can look so flattering on type 3 curls without needing a lot of styling drama.
What Makes the Shape Work
The best curly bob has a rounded outline and enough interior layers to keep the bottom from turning into a triangle. Too blunt, and the cut can look heavy. Too many short layers, and the top puffs up while the ends disappear. The sweet spot is usually somewhere in the middle, where the curls can stack but still move.
If your hair is chin-length, a diffuser helps keep the curl from stretching while it dries. If it reaches the shoulders, a bob can still work, but the shape needs to stay tidy around the neck so the style doesn’t lose its clean edge. A tiny bit of oil on the ends keeps the outline from looking dry and jagged.
I’m fond of a bob that doesn’t try too hard. It just sits there, full and springy, and lets the texture do the talking.
10. Space Buns That Keep Type 3 Curls Playful
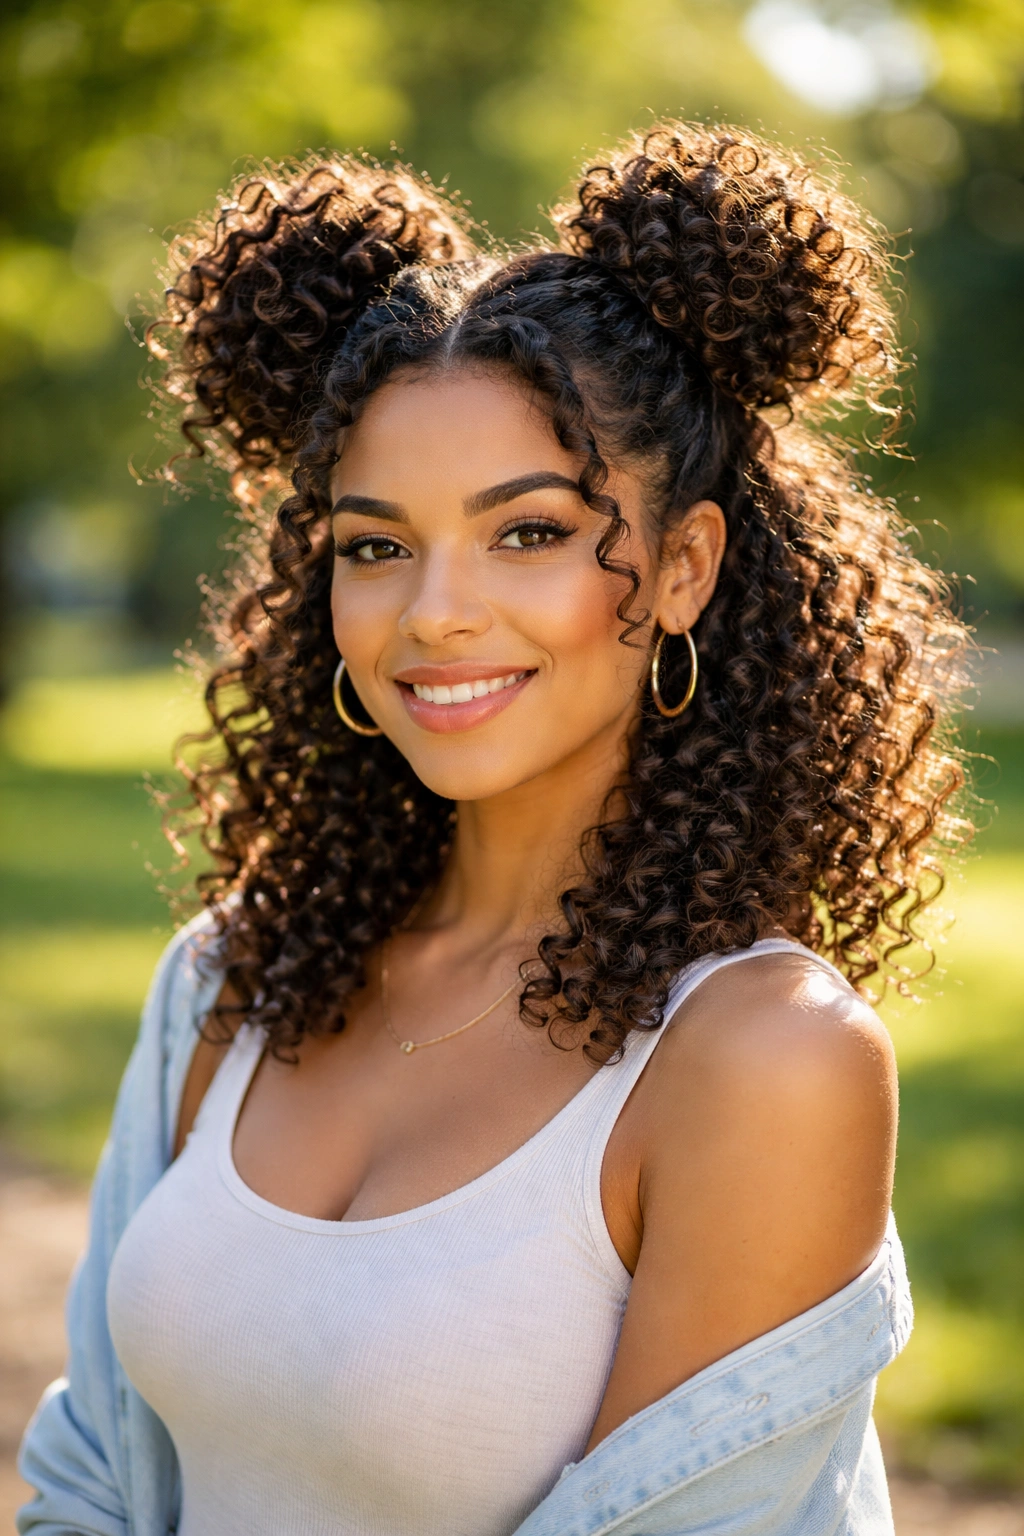
Space buns save a lot of bad-hair mornings, and they don’t have to look childish. On type 3 curls, they can look structured, fun, and surprisingly neat.
Split the hair down the center, then gather each half high or mid-height depending on how much volume you want at the crown. Wrap each side loosely into a bun and let the ends poke out a little if the curl pattern is nice enough to show off. If you want a cleaner finish, tuck the ends under and pin them flat. Both versions work. They just give different energy.
The style is especially useful when the roots are frizzy but the mids and ends still look good. That’s a common curly-hair situation, by the way, and there’s no shame in using a bun to save the day.
- Use small, snag-free elastics.
- Keep the part as straight as you can if you want symmetry.
- Leave a few curls out near the temples for softness.
- Don’t twist the buns too tightly or they turn small and stiff.
11. The Claw Clip French Twist for Fast Curl Control
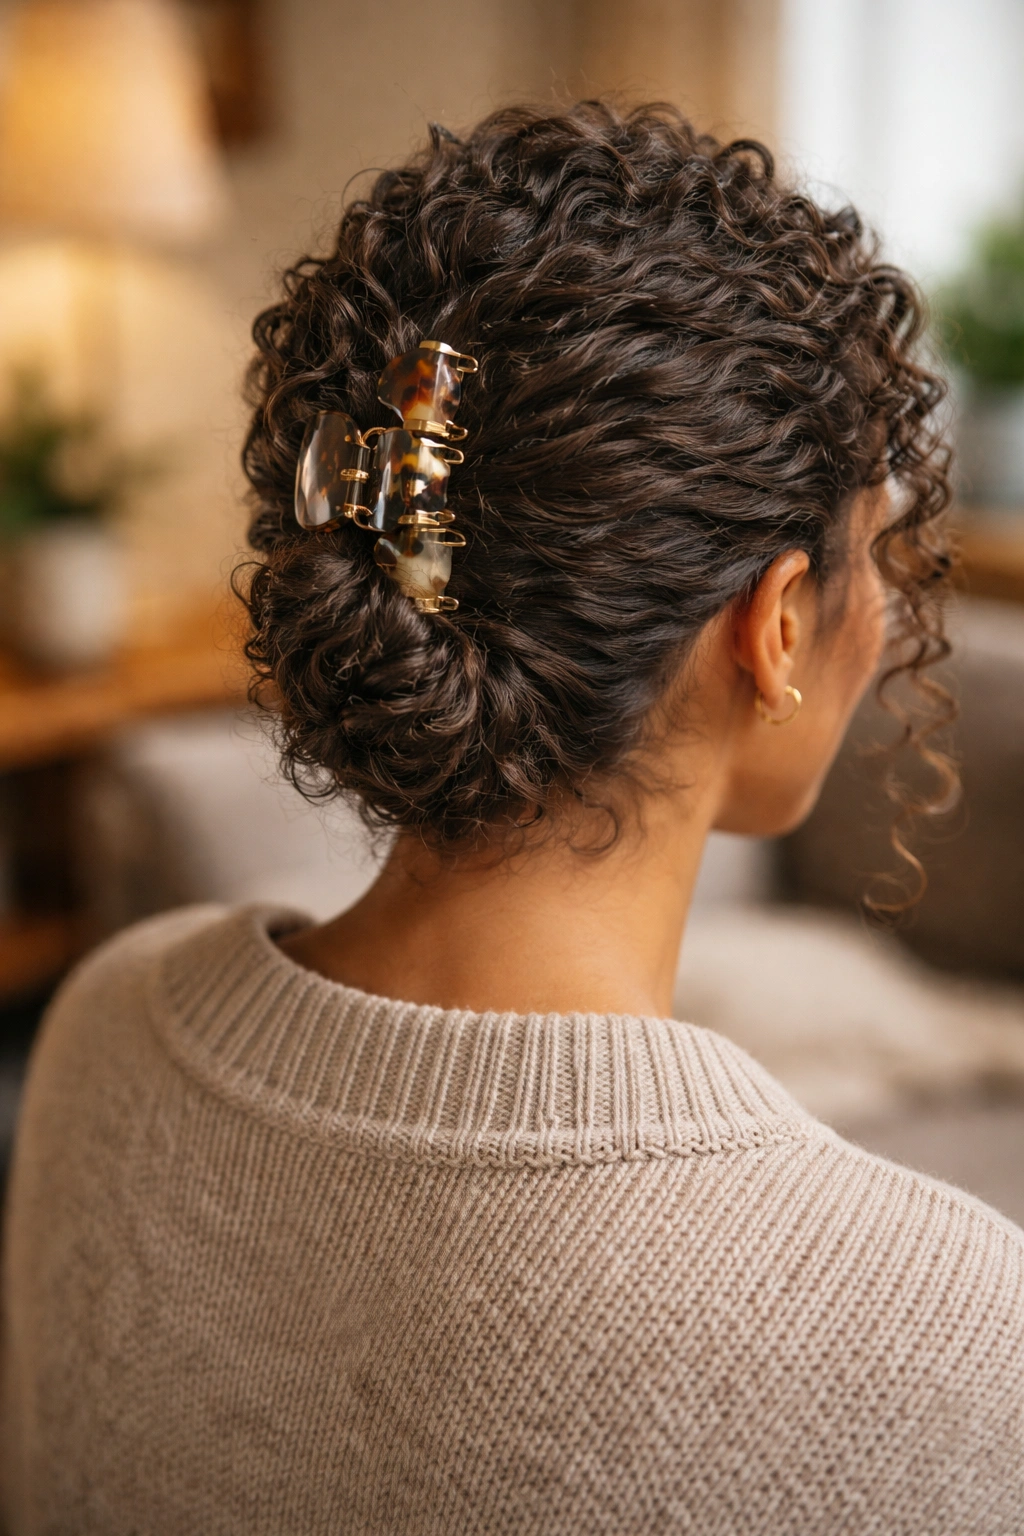
One claw clip and a minute of patience can turn a frizzy mid-day situation into something neat enough to leave the house in. That’s the appeal.
Gather the curls low at the back, twist upward once, and fold the twist against the head. Clip the middle of the twist, not the very top, so the clip grips both the base and the fold. If the hair is thick, use a larger claw clip with strong teeth. Tiny clips slide out of dense type 3 curls, and that gets annoying fast.
What I like here is the shape. It keeps the curls pinned up without forcing every strand into the same direction. A few ends can spill out at the top or bottom, and the style still reads as intentional. If the front is too puffy, smooth just the top section with a little water and gel before twisting. That small prep step makes a bigger difference than people expect.
12. The Low Curly Ponytail That Lets Texture Stay Visible
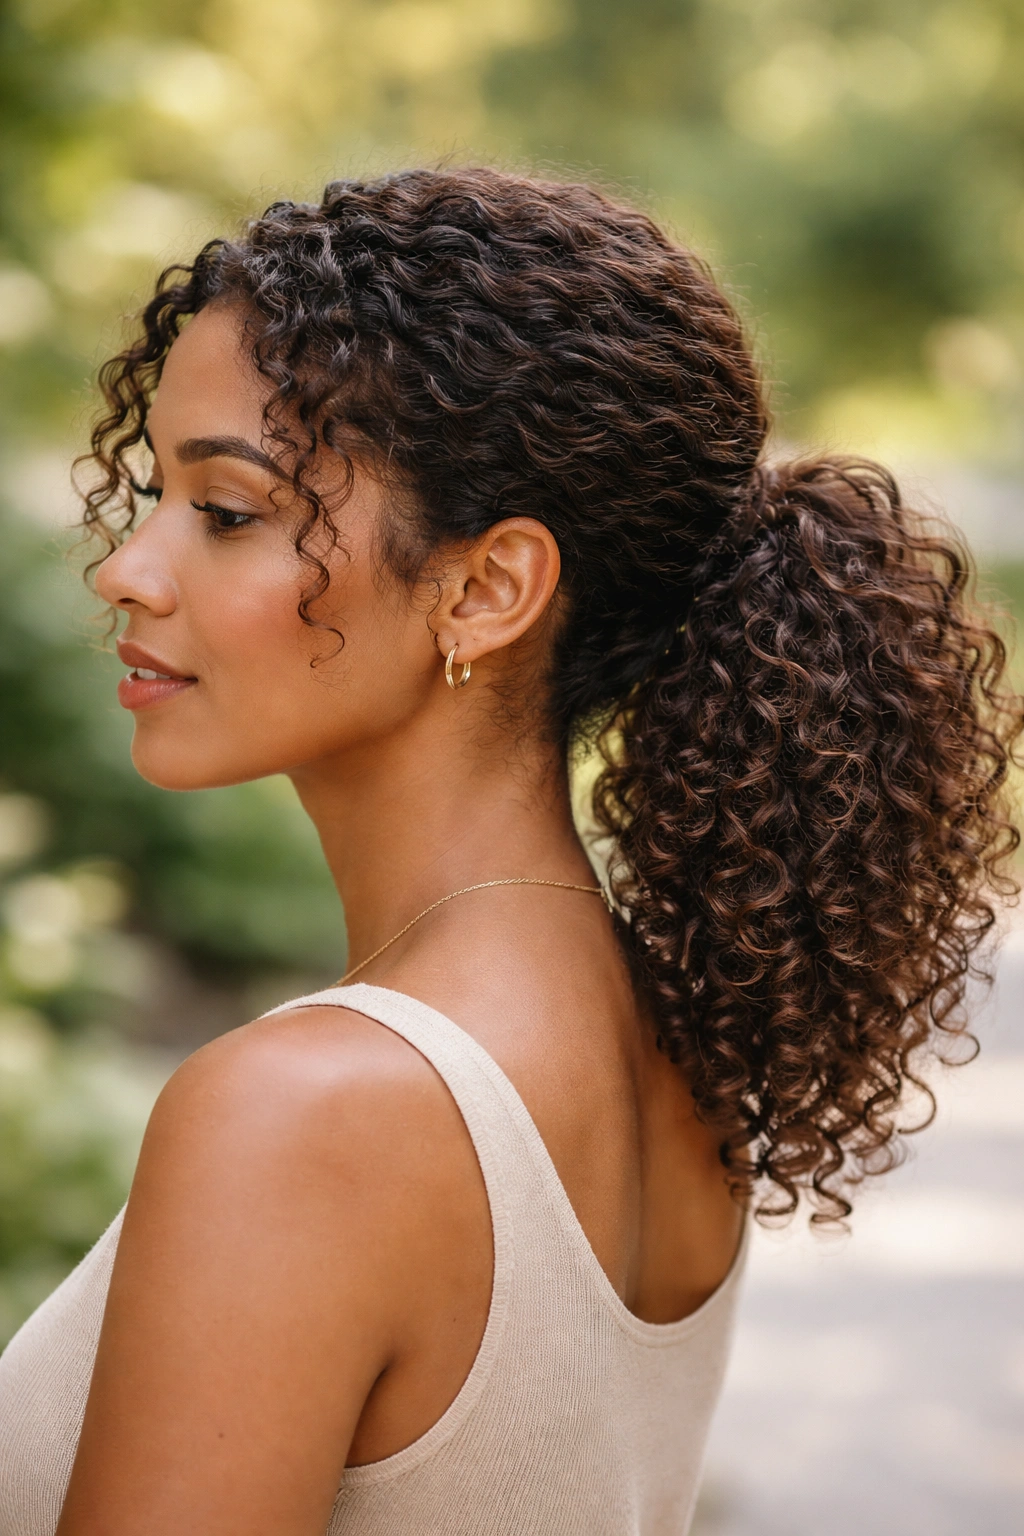
Why does a low ponytail work so well on type 3 curls? Because it keeps the curl pattern in view while taking the weight off the crown.
A center part makes the style look more polished, while a soft side part gives it more movement. Either way, the ponytail should sit at the nape, not halfway up the back of the head. Higher than that and the curls can start to fan out in a way that feels bulky instead of sleek. Use a fabric-covered elastic, then wrap one curl around the base to hide the tie.
Where to Place the Elastic
Place the elastic just below the occipital bone, which is the bumpy part at the back of the head. That spot gives you a nice line and keeps the ponytail from sagging. If the hair is freshly styled, keep the front a little loose. If it’s day-three curls, smooth the edges and leave the ponytail itself fluffy.
A low ponytail is one of those styles that can look plain in a flat photo and excellent in motion. That matters.
13. Curly Bangs That Soften the Forehead
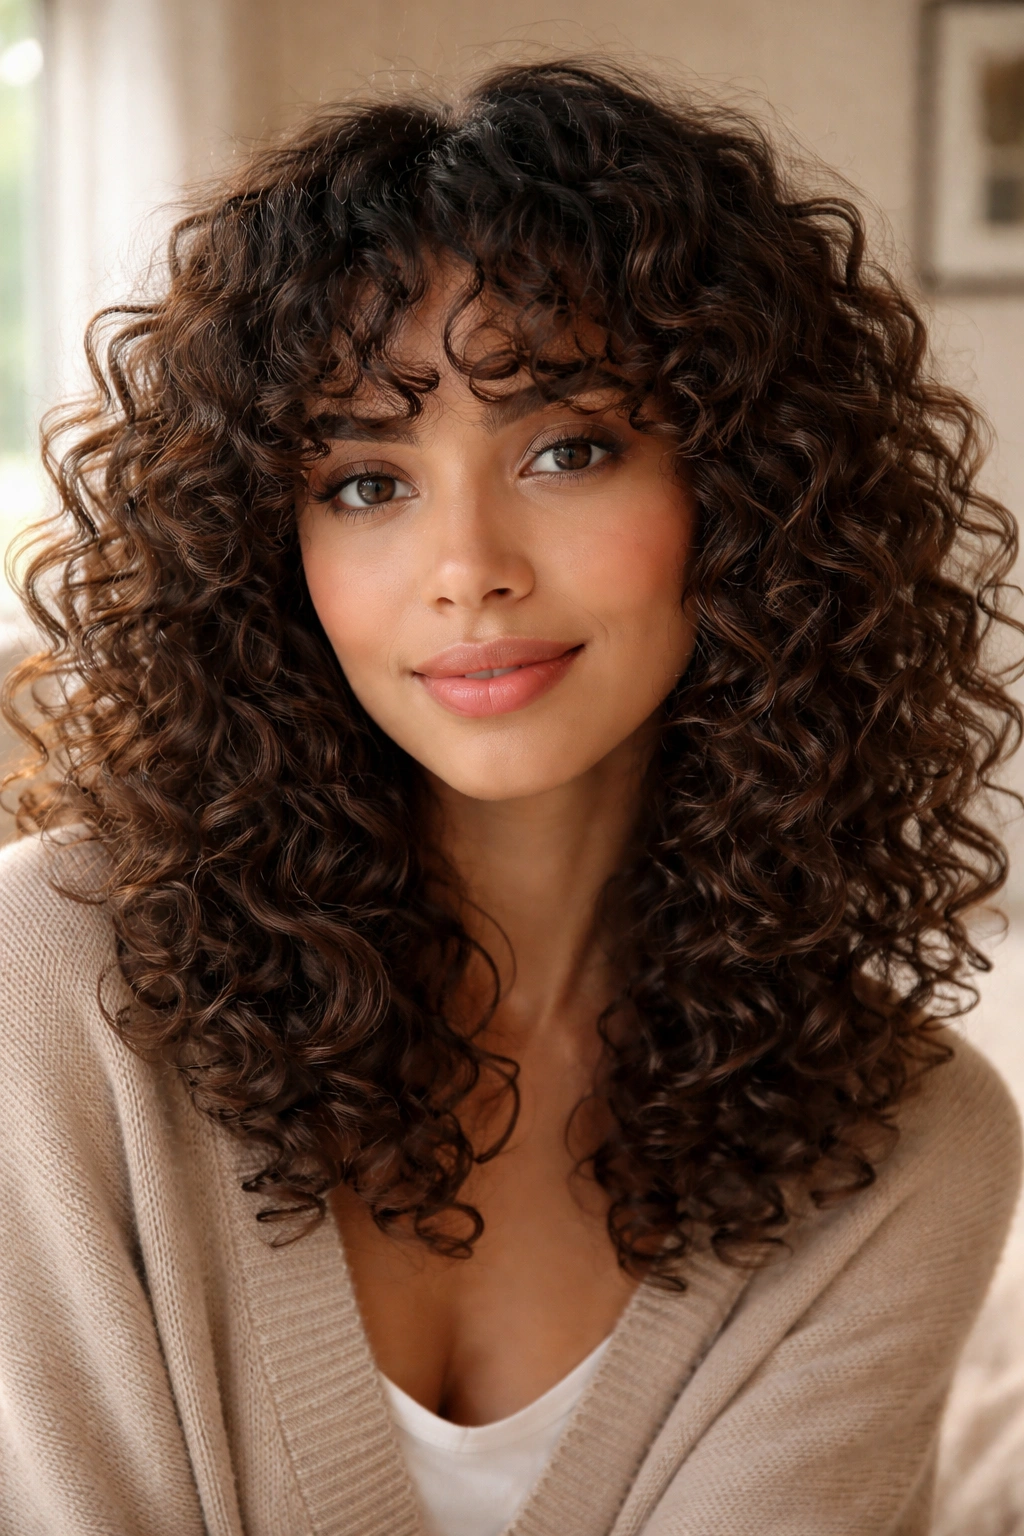
Curly bangs can be lovely, but they need room. Tight, short bangs on type 3 hair often spring up higher than expected and end up feeling more nervous than chic.
The better move is to cut them longer than you think, then let the curl shrink where it wants to. That usually means a starting length around the cheekbone or just below it, depending on the curl size. The fringe can then settle into a soft arc instead of a hard bar across the forehead. If you wear glasses, that extra length becomes even more useful.
A lot of people worry bangs will make their face look crowded. Sometimes they do, if the curls are cut too bluntly. But when the bangs are shaped with a little space at the temples, they can make the rest of the hair look more balanced and keep a bob or lob from feeling too broad.
Curly bangs are not low-maintenance, but they are worth the effort when the shape is right.
14. Side-Swept Curls That Feel Polished Without Going Flat
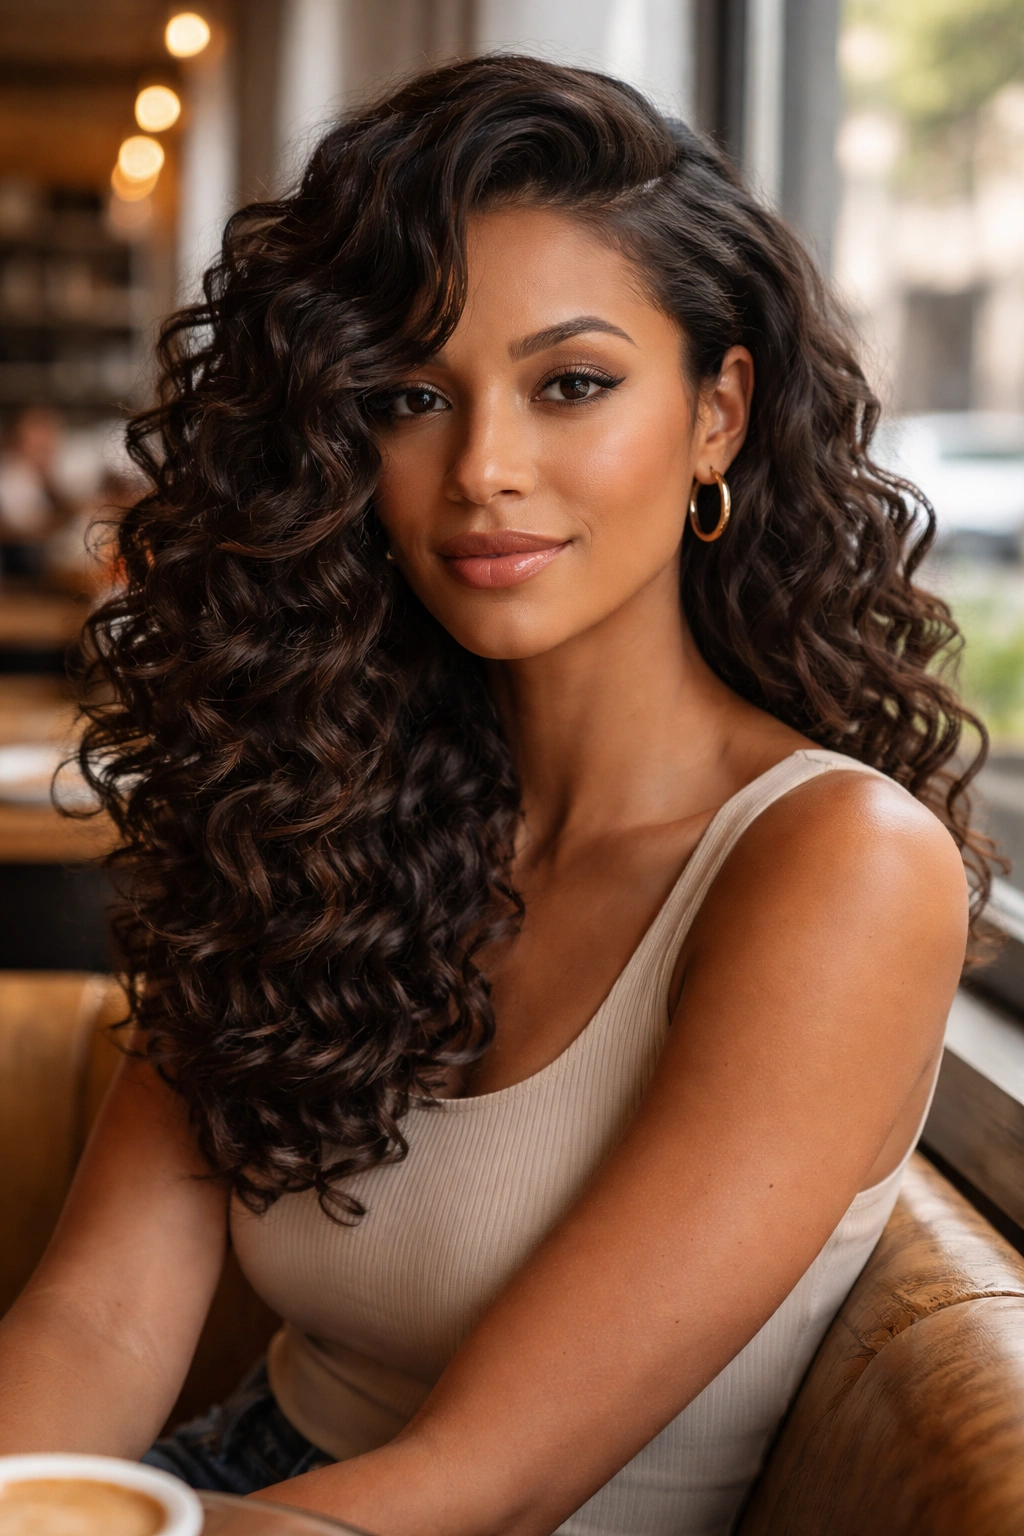
Perfect symmetry can make curls look stiff. Side-swept curls avoid that problem by giving the hair a direction and a little movement.
Shift the part, then let the heavier side fall forward while pinning the other side behind the ear with two bobby pins crossed like an X. That little pin trick keeps the style in place better than one lone pin, which tends to slide out of type 3 texture. If you want the front to feel softer, pull one curl loose near the temple and let it rest against the cheek.
This style works especially well when the hair is mid-length and you want the curls to look styled without appearing overly arranged. It’s a useful one for dinners, interviews, or any day you want to look like you made an effort but didn’t spend an hour doing it.
A side sweep also hides the little flat spots that curls sometimes get near the part. Handy. Very handy.
15. The Crown Braid That Frames the Hairline
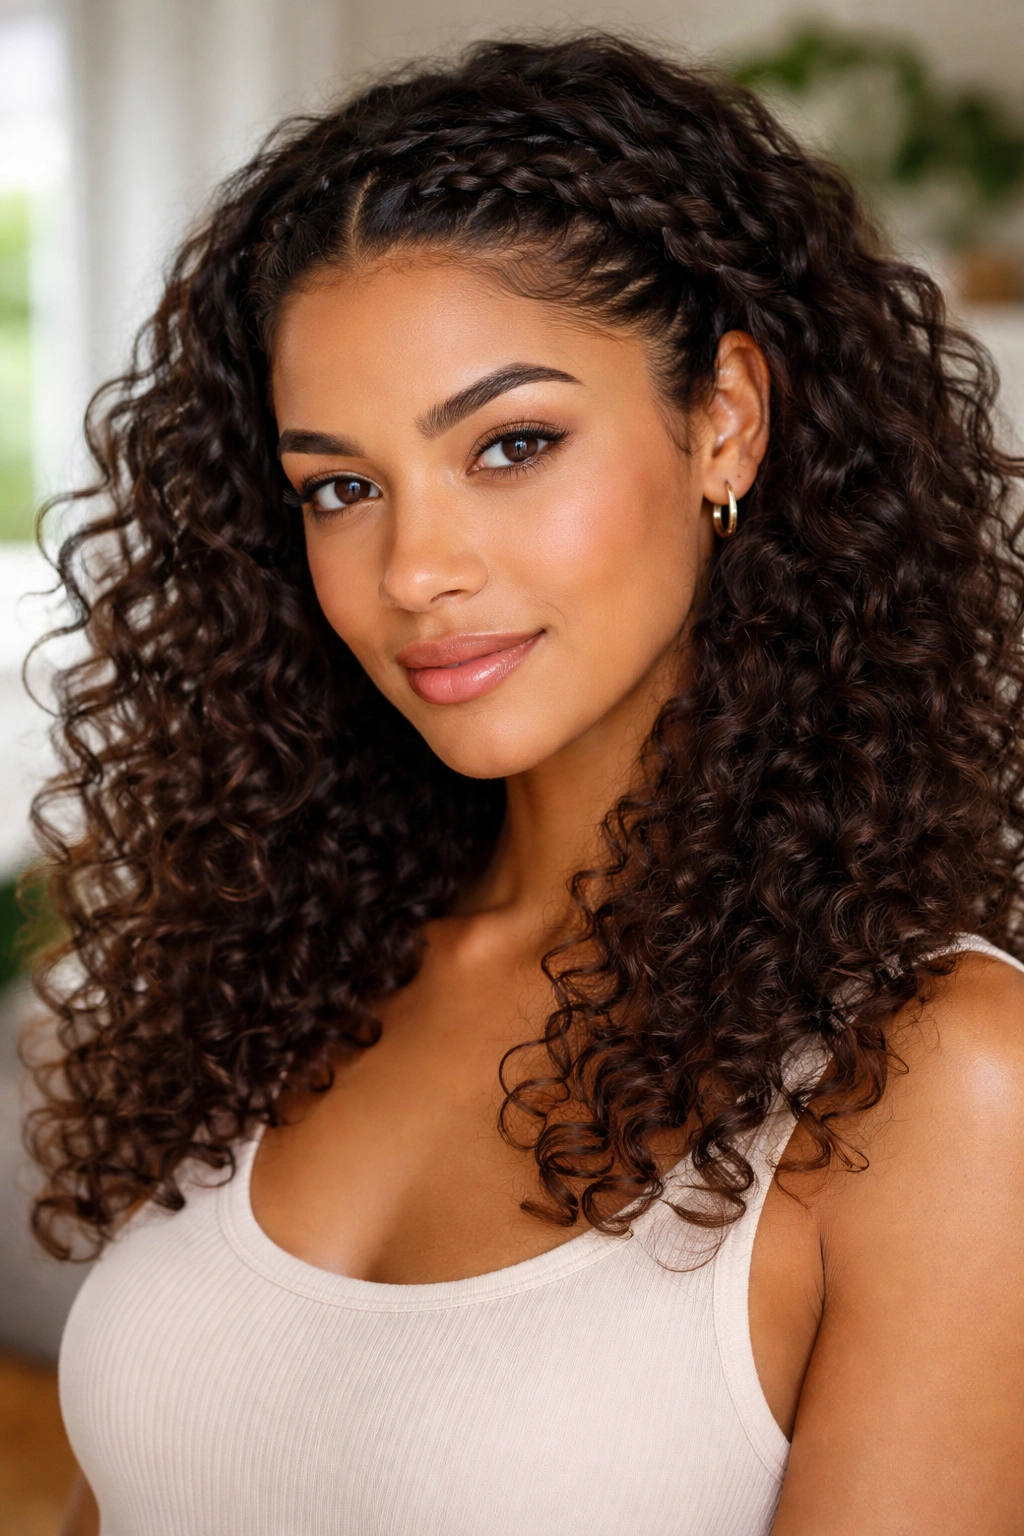
A braid sitting close to the hairline changes the whole face shape. That’s the main reason the crown braid keeps showing up on curly heads.
On type 3 hair, you can braid just the front sections and leave the back loose, which keeps the style from feeling heavy. Start at one temple, braid or flat-braid along the hairline, and pin the end behind the opposite ear. The back can stay full and curly, which gives you control up front and volume everywhere else.
What to Watch For
The braid should sit snug enough to hold, but not so tight that it flattens the front curls into a thin strip. If the roots are slippery, prep them with a little mousse or styling foam first. That gives the braid more grip without making the hair crunchy.
- Great for oily roots and dry ends.
- Good with shoulder-length or longer curls.
- Looks cleaner when the part is made on damp hair.
- Works even better if the braid is a little imperfect.
That last bit matters. A crown braid does not need to look machine-made to work.
16. The Faux Hawk That Brings Out Curl Volume
The faux hawk is the style for people who want their curls to look a little fierce. Not messy. Not random. Intentional.
Smooth the sides upward with gel, then pin them in place so all the height stays focused through the middle of the head. The center section can be a puff, a cluster of curls, or a series of loose twists depending on length. What matters is the ridge through the center. That shape creates lift where you want it and keeps the sides from stealing the show.
If your hair is shorter on the sides, the style gets easier. If the hair is thick all over, you may need extra pins hidden under the center section to keep the shape from drooping. A faux hawk works best when the crown is full and the sides are neat, not plastered flat against the scalp.
I like this one because it takes curl volume and turns it into a feature instead of treating it like a problem to tame.
17. The Headband Tuck That Feels Easy and Soft
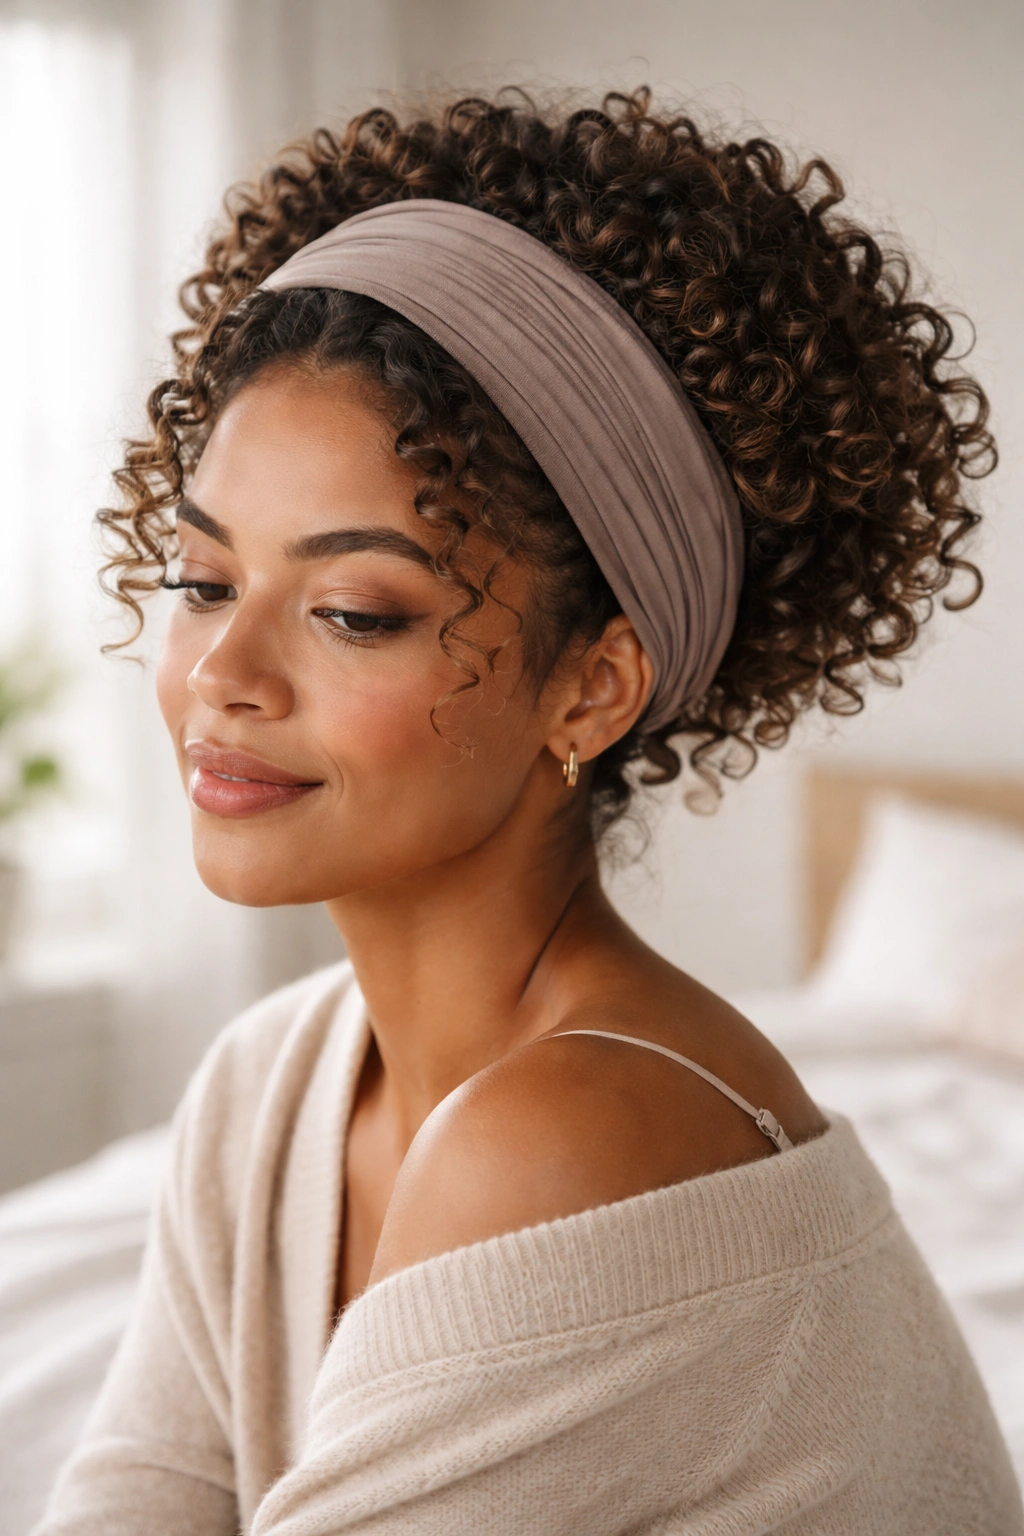
Some mornings need a style that does not argue with your hair. The headband tuck is exactly that.
Slip on a stretchy headband over the curls, then tuck the front and side sections into the band so they fold back in small loops. Leave the back loose if the hair is long enough, or tuck that too if you want a fully pinned look. The result is soft, a little romantic, and surprisingly secure if the band is tight enough to stay in place.
This style shines on medium-length type 3 curls because the curl pattern still shows through the tucked sections. It also hides frizz around the hairline without the sharp look of a slicked-back style. If your hair gets puffier at the crown, place the band just behind the front hairline instead of right on it. That creates a little lift and keeps the top from looking compressed.
It’s one of those styles that looks more complicated than it is. Good. That’s the sweet spot.
18. The Silk Scarf Wrap With Curls Left Out
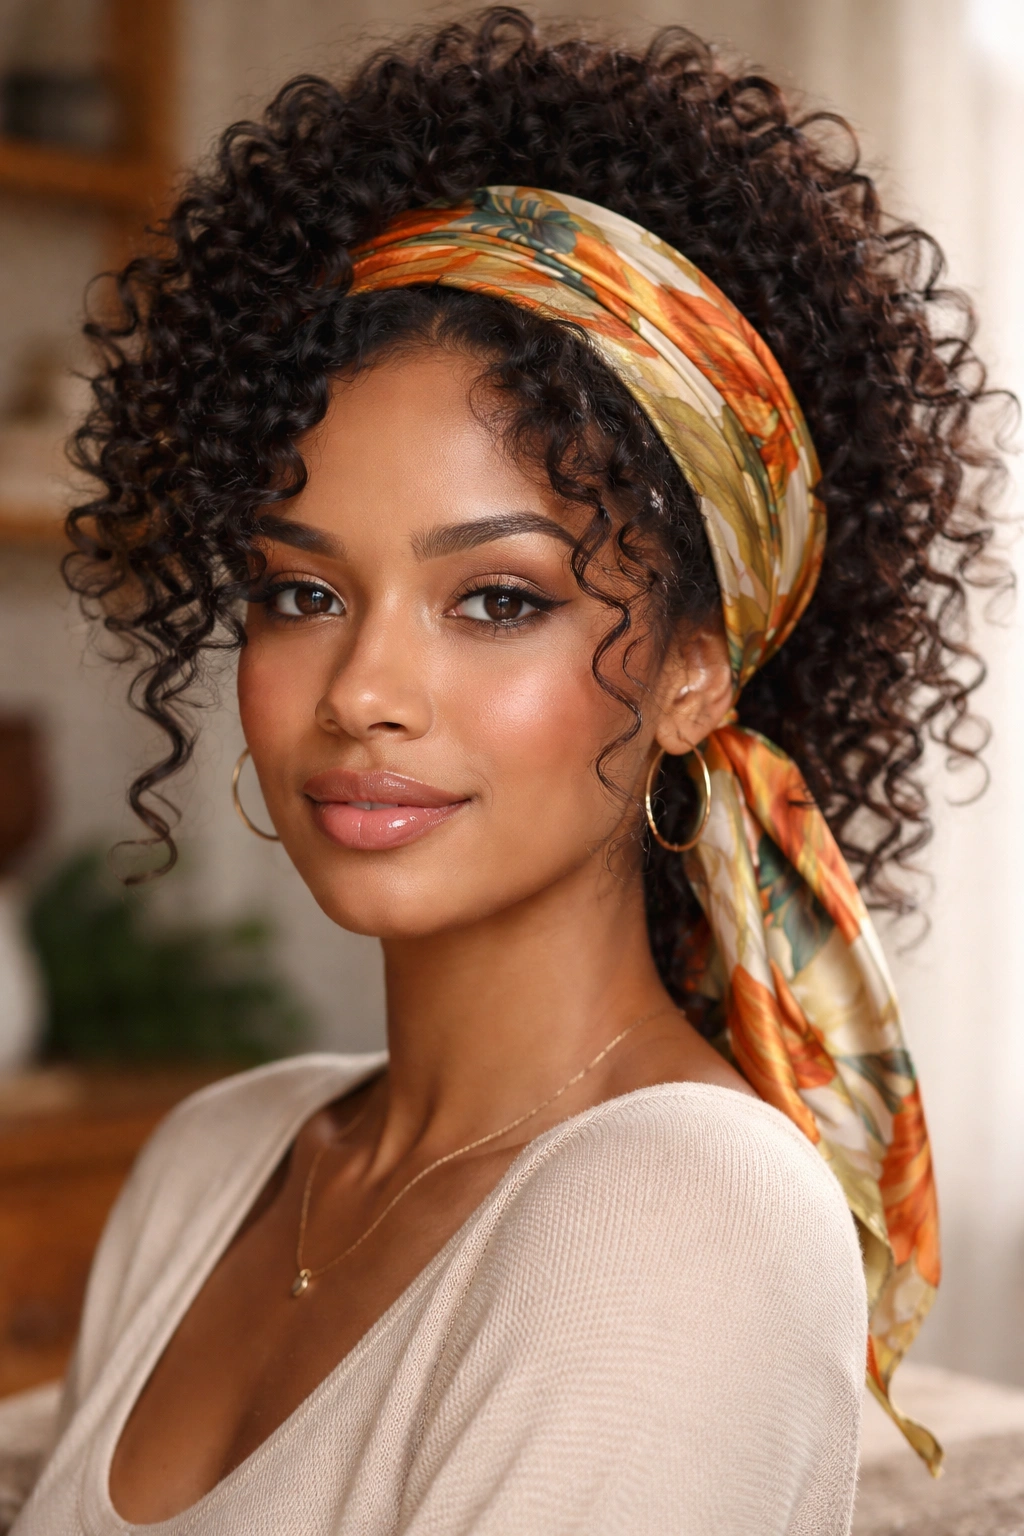
A scarf isn’t a cheat. It’s a smart way to steer attention where you want it.
Wrap a silk or satin scarf around the hairline, then tie it at the crown or nape depending on the shape you want. Leave a few curls out at the front if you want softness, or tuck everything under and let the scarf carry the look. This is a strong option on days when the roots are puffing up and you don’t feel like fighting them.
The scarf also helps type 3 curls stay stretched a little longer if you’ve just done a twist-out or braid-out. The smooth fabric cuts down on friction, which is why the style works for both protecting the hair and styling it. Pick a scarf wide enough to cover the line where the frizz starts. Tiny scarves look cute, but they don’t always solve the problem.
A wrap like this can make the whole style feel cleaner in five seconds, which is a pretty good deal.
19. The Flat-Twist Half Crown That Keeps the Back Loose
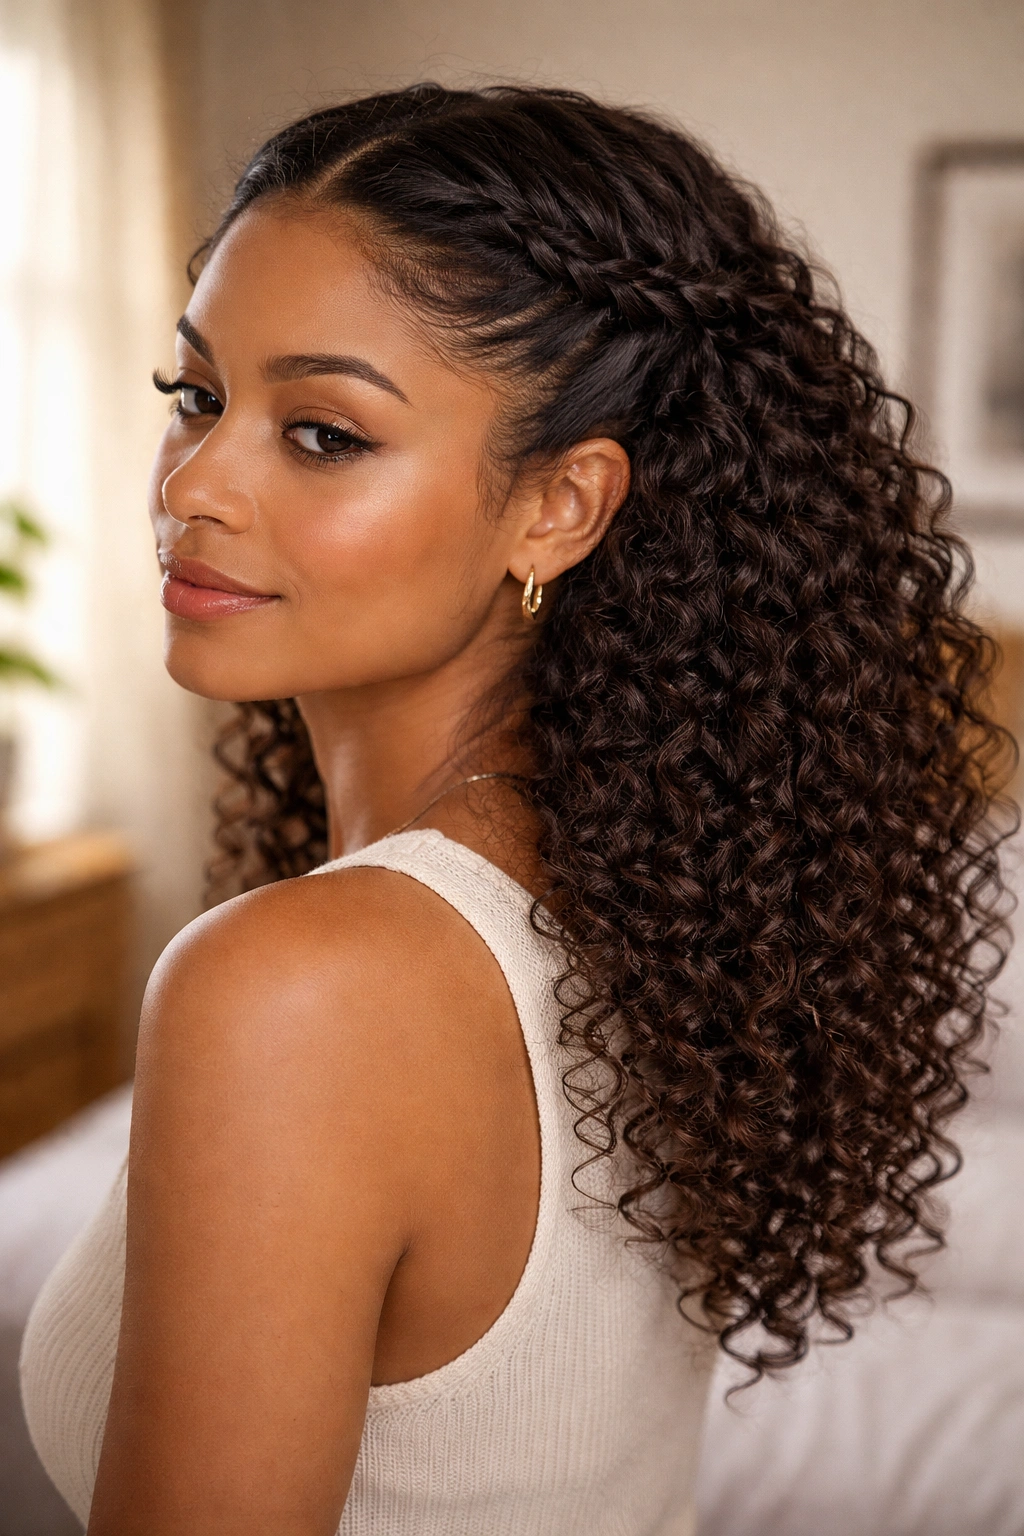
Want the control of braids without flattening the whole head? A flat-twist half crown is a solid answer.
Start with two flat twists at the temples and carry them back toward the crown. Pin them where they meet, then let the rest of the hair fall loose. That keeps the front off the face and leaves the back with all the curl volume intact. On type 3 curls, that contrast can look better than trying to slick everything into one shape.
How to Keep the Crown From Puffing Up
The root area needs a little moisture and a little grip. Work in a light leave-in and a small amount of gel before twisting, then smooth the surface with your fingers after each twist is done. If the twists are too dry, they fray. If they’re too wet, they sag.
- Use clean sections about 2 to 3 inches wide.
- Twist close to the scalp, not above it.
- Pin the ends flat so they disappear.
- Let the loose curls frame the shoulders.
That’s the whole trick: structure in front, freedom in back.
20. The Messy Bun With Intentional Tendrils
The messy bun is only bad when it looks accidental. On type 3 curls, it can be one of the prettiest ways to show off texture without wearing the whole length down.
Pull the hair into a mid-height or high bun, but don’t smooth every strand into submission. Leave a few curls out around the face, maybe one or two at the nape, and let the bun itself stay a little loose. Those tendrils matter. They keep the style from feeling like a gym holdover and give the curl pattern a chance to show near the face.
If the bun keeps collapsing, your hair may need a bit more support at the base. A second elastic or a couple of hidden pins can fix that. If the bun feels too wide, gather the hair lower and twist more tightly before pinning. Small adjustments like that change the silhouette fast.
Some days, a messy bun is the right amount of effort. No more.
21. The Bubble Ponytail That Makes Long Curls Look Fuller
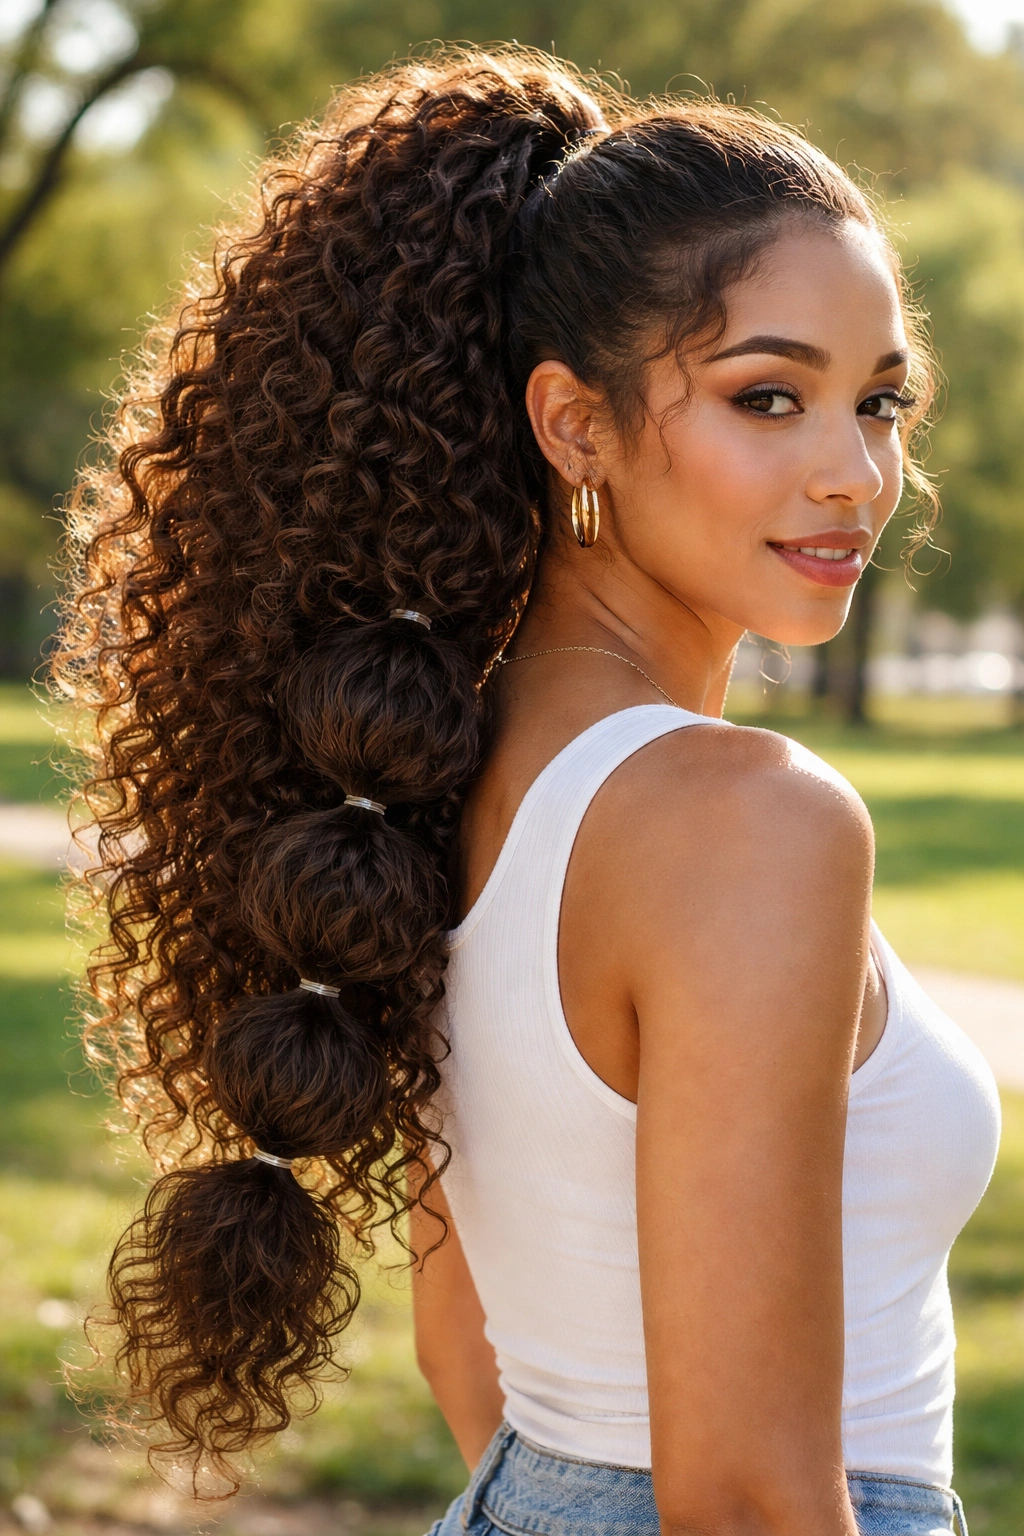
Long type 3 curls can make a bubble ponytail look fuller than straight hair ever could. That’s part of the charm. Each section turns into its own puff, which makes the style feel bold without needing a lot of extra work.
Secure the hair into one ponytail first, then add clear elastics every 2 to 3 inches down the length. Gently pull each section outward to create the bubble shape. If the hair is very dense, use your fingers to widen the bubbles from the sides as well, not just the front. That keeps the shape round instead of lopsided.
The Small Details That Matter
Use elastics that won’t snag curl ends, because tugging through dry curls is where a style starts to fray. A little leave-in on the lengths before tying can help if the hair feels rough. And if the root area is already good, leave it alone. There’s no prize for over-smoothing.
A bubble ponytail is playful, but it also looks polished when the sections are even and the bubbles are spaced with intention.
22. The Sleek Low Bun That Still Shows Off the Curl Ends
If you want one style that looks polished without erasing texture, this is the one. A sleek low bun gives you control at the roots and lets the curl pattern stay visible at the ends.
Smooth the top and sides with a bit of gel, gather the hair low at the nape, and twist it into a bun or coil it into a tucked knot. Leave the ends a little loose if you want a softer finish. If you want more structure, tuck the ends fully under and pin them flat. Both versions work. The first reads more relaxed; the second looks sharper.
Type 3 curls usually do well here because the contrast feels intentional. Sleek roots, textured ends. Clean shape, still curly. That mix is what keeps the style from looking severe. If the bun starts to puff out after an hour, smooth only the top layer again. Don’t restart the whole thing. That’s how you waste time and irritate your scalp for no reason.
When the shape is right, a low bun can make type 3 curls look calm, tidy, and still unmistakably curly.